
Introduction
COH3 official maps now use a different style, which you need to make in an image editor. I am not aware of a template, so this will show the steps needed to achieve a similar style in your maps.
For this guide, I am using GIMP, which is free. You can also use Photoshop but I will refer to GIMP in this guide.
I am writing this as I make the minimap image for my map ‘Glider 404’, and so I will be showing my method, which may differ from other people’s.
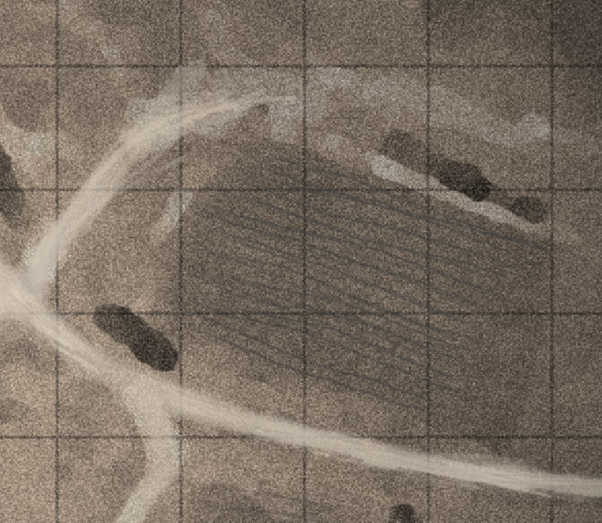
It is important to understand the new style of minimap reduces noise and makes it easier to quickly see important details. Backgrounds are washed out, but key features are highlighted with high black/white contrast. Colours are reduced to one or two tones (land and water).
Starting
Once you have finished making your map, go to the map’s folder and locate the image file for your generated minimap. This is the image it is using in your map right now and so it will be the correct size. The file is in the folder your project is saved in, and then under “assets\scenarios\multiplayer\”. It is a TGA file, with the name ending in "_mm_generated”.
Copy this TGA file to a new location so you can work on it without affecting the original. Rename the copy to your map name, followed by “_mm_handmade.tga”
Open the file in your image editor, e.g. GIMP, and go to File>Save As, and save it as the GIMP file format. You now have an image ready to edit which is the correct resolution.
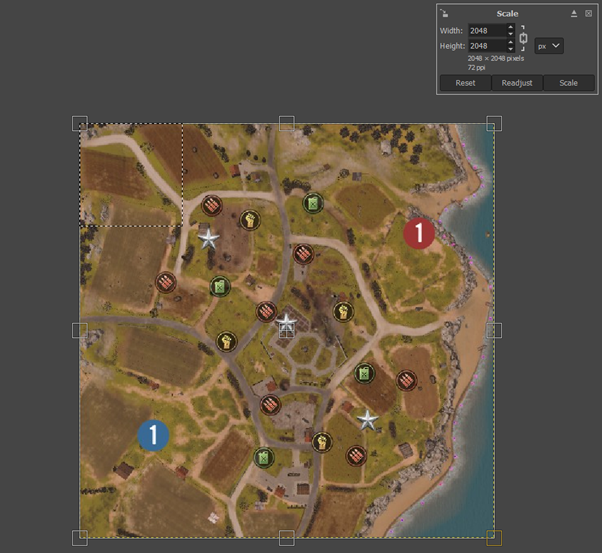
For my map, I will increase the canvas size before I start to 2448x2448 (instead of 2048x2048), just so I can nudge the map around left/right at the end if it does not line up correctly. If you do this, just remember to crop the final image down to the correct size when you export.
Lining It Up
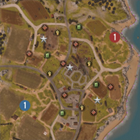
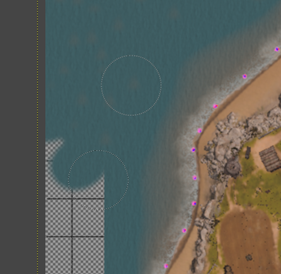
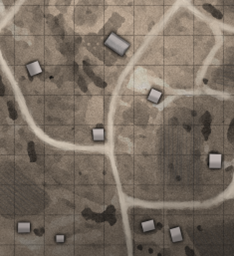
Your minimap image needs to be sized correctly, so that everything appears in the correct location on the map during gameplay e.g. victory point/start locations. The way I do this is a little strange but doesn’t require anything difficult. Build your map so that it appears in game, and then go to it on the menu and grab a screenshot from there. I use software called ‘Lightshot’ but you can also use the Windows snipping tools, print screen or the Steam screenshot feature.
This image is cropped exactly so that I have the entire image shown on the menu. The terrain textures aren’t important in the above image, I just wanted the icons of where the resources/starting points are. I can use these landmarks to make sure my minimap image is scaled correctly. Our final image will be put under these icons on the final version, and so if we line it up with these icons, it will line up in the game. Strangely, I find the minimap shown in-game is not the entire minimap provided, and crops out the bottom right corner slightly.
Paste this screengrab (cropped down to just the image) as a new layer in GIMP and then resize it up to fill the entire canvas (don’t worry it will go blurry, we just need it for the locations of landmarks.
For my map, I frustratingly created my map upside down, and so the minimap image will display the map upside down on the menus from what I see in-game. Just make sure you line up your minimap with the resource icons and you will be okay.
Getting Reference
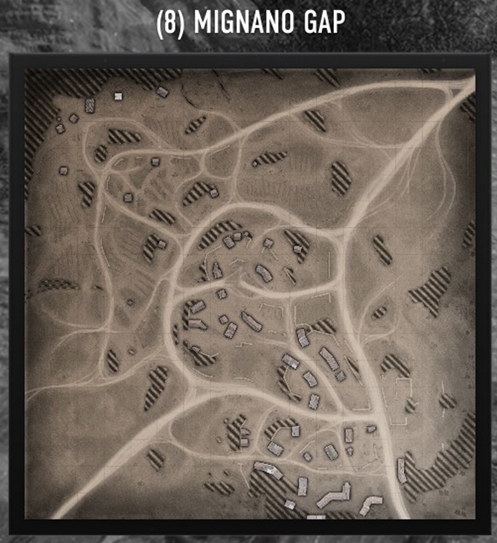
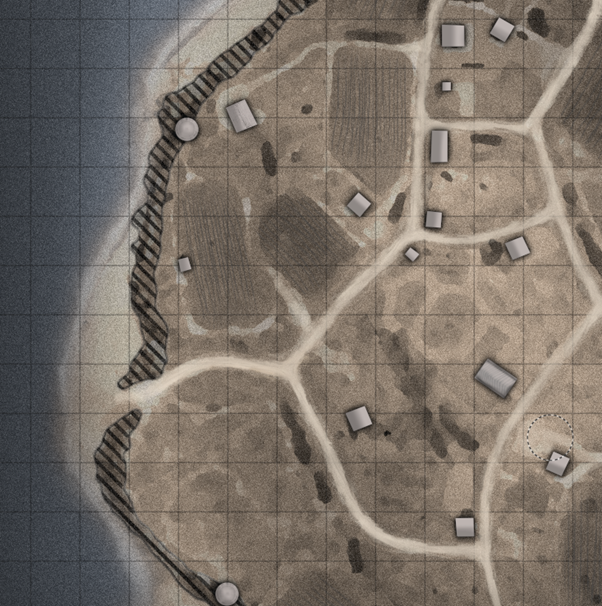
Our goal is to make a minimap image which matches the existing images, and so get a similar map from the game and take a screenshot of their minimap image:
Put your reference image on another layer and flip back/forth to it to make sure your image is going to fit in. One good trick is to cut your reference image in half, so that half of the image is reference and half is your image, so you can see how they differ along the seam.
Basic Elements
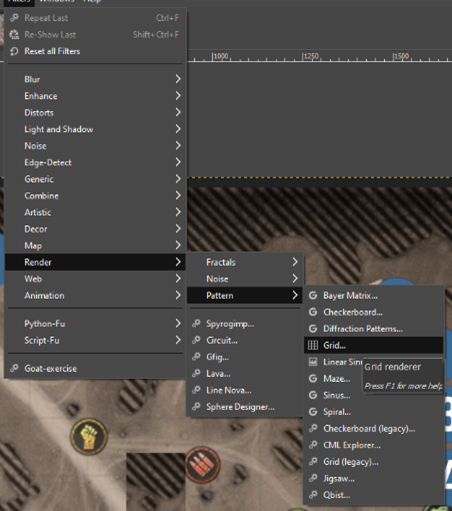
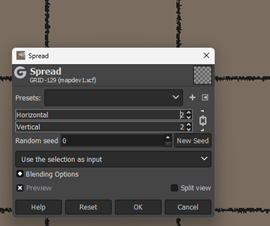
You will notice the reference image features a grainy texture, and a grid pattern across the entire image. We start by creating a grid to match the grid in the reference. Make a new layer called ‘GRID’ and in GIMP, go to Filter>Render>Pattern>Grid. For my map I selected 120 width/height and line width/height of 3. Select a slightly off-black colour.
I like to make it look a little rougher than a perfect grid, and so I copied the grid, and then used Filter>Noise>Spread and with a value of 2 on the grid. I then pasted the old grid back over the new rough grid, and set the opacity of the pasted old grid to about 50%. The result is a messier looking grid. You can also experiment with a bit of blur but try not to go overboard with it.
Make another new layer at the back for the background and fill it with a grey/brown colour to match the reference.
Right now we have a brown blank image with a grid on it, and some reference images on other layers.
The Big Shortcut
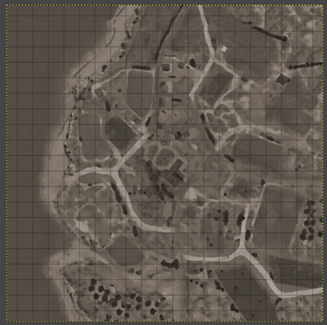
If we were to manually draw the entire map it would take a while. The big shortcut is getting a screenshot of your map from above, and then applying some filters to it. We then blend this image in with the grid/colour. This will get some vague terrain details onto the image, we will reinforce the landmarks such as buildings, water and roads later.
Get a screenshot of your map from above, using the orthographic view. (this is done in the worldbuilder editor, using the view settings). Rotate and resize the image as a new layer, so that it aligns with the strategic points/victory points/start locations from the reference image of your map which we started with. Save this as a new layer once it is lined up with the reference image.
Then, extend the image using the stamp tool, so that it fills the entire canvas. Ctrl+click an area and the click another area to copy areas over. Don’t worry about it being too accurate as we will apply filters next, and it is going to be barely visible.
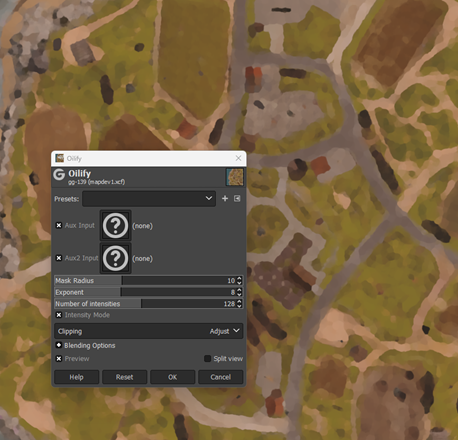
Once your image lines up with the reference image of where the VPs/strategic points are, it is time to apply the filters. Before you do this (as it can go wrong) duplicate the layer and save it as a backup in a new layer group.
I like to use filter>Artistic>Oilify. Fiddle with the values, I use 10,8,128. Then go to Colour>Desaturate>Desaturate. Put the final layer at the back, it will serve as the background. Get our old background layer with the colour and drag it on top of the new background. Set the colour layer to ‘Overlay’ with 85 opacity.
Tweaks
If your lighting isn’t matching the official map reference, try adjusting the colour of the background colour layer. The official minimaps seem to have patches of brightly lit areas. Add an overlay layer on top of the colour layer, and draw patches of white, to highlight areas (a big blob in the middle covering about half the map). Use Filter>Blur>Gaussian Blur to make the white areas very blurry and set the layer to 50 opacity and overlay (just over the background colour layer). You can also go to Colours>Layers and fiddle with the sliders to try and match brightness, just remember to backup layers beforehand in case you need to go back.
Film Grain
Adding film grain can help add texture to our currently pretty smooth looking image. Create a new layer and fill the entire layer with grey. Go to Filters>Noise>RGB Noise and set it to 0.4 on all values. Then go to Colour>Desaturate>Desaturate. Set the layer to ‘Grain Merge’ and about .5 opacity. Position the layer on top of all other layers and tweak it again until it looks okay.
Vignette
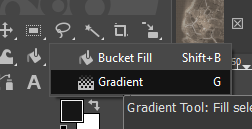
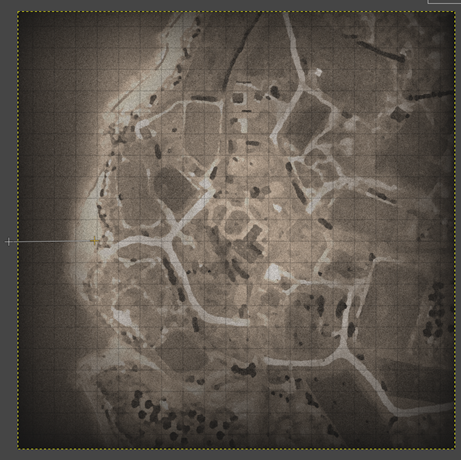
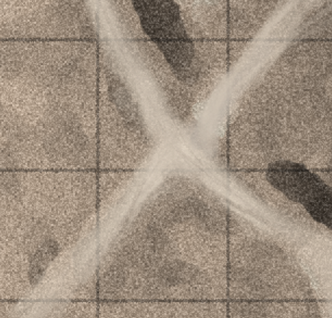
It can help make the image look nicer if you add a little vignette (a border – in this case, a black faded border which darkens the edges). I don’t recommend too much as the image is already dark. Make a new layer and then click/hold on the bucket fill tool to get the Gradient tool. Set it to FG to transparent and the colour to slightly off-black. Click and drag the edges of the screen and drag a few grid squares towards the middle so that you get a fade to black around the edges (see image). Drag the opacity slider on this layer until you get a nice effect.
Impasse
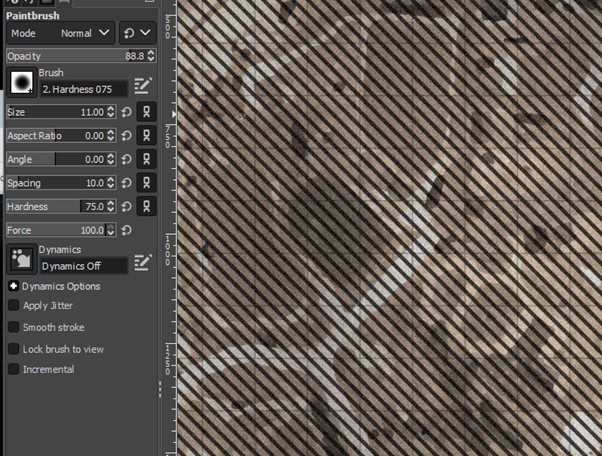
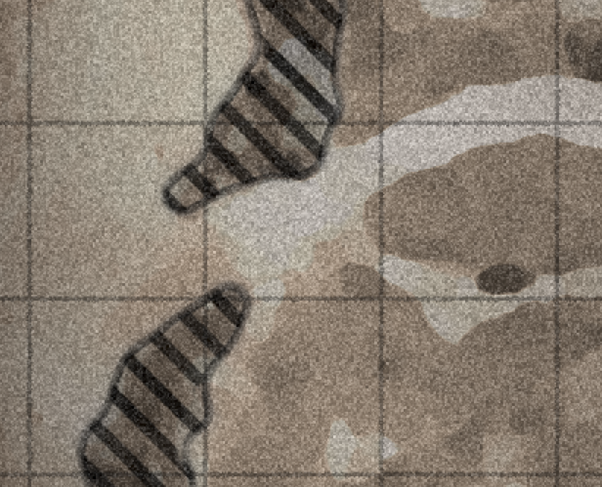
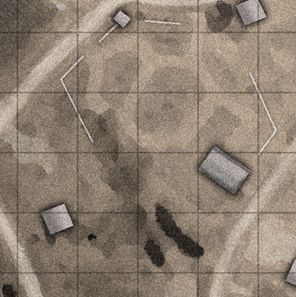
Areas of impassable terrain have black stripes over them in the official minimaps. To achieve this, create a big diagonal line on your map in a new layer, and duplicate it across the entire map with copy and paste using the Shift/Arrow keys to keep spacing consistent. The line I made was painted using the paintbrush tool, set to 11 width. Fill the entire map with stripes to match the spacing on the reference official image.
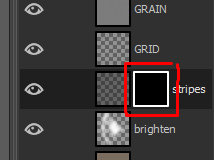
Now right-click on the layer and select ‘Add Layer Mask’ and select black to make it entirely transparent. A layer mask is a black and white image which tells an image to render the underlying image in white areas, and leave black areas transparent according to the mask we will draw.
Select the layer mask by clicking the box to the right of the original preview image on the layer menu:
Then use a white paintbrush tool to draw areas you want stripes visible. Think about where impasse is on the map, but also add some around the edges (see official maps for an example).
I also did a few more steps to achieve the below image. I made a new layer under the stripes and copied the black and white image from the layer mask into it. I set the layer to 'darken only' and inverted the image so that it makes dark patches under the stripes. I also added an outline by copying this layer and cutting out the inner portion of it. I don't think this is in the official images though so it is not necessary.
Details
I have approached this image in the same way I approach maps: quickly get to a ‘working’ state and then add detail. You should now have something which passes as a finished product, but the details aren’t there.
We need to detail the most important features. These are: water, roads and buildings. They will require drawing with the paint tool.
Roads
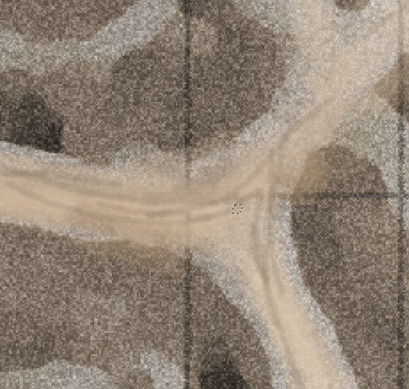
Currently roads don’t stand out, and darker roads won’t be visible. Get a new layer and the paintbrush tool. Select a white colour with a tint of yellow. Draw first a blurry path for the road, and then overlay some darker lines. Finish the road by getting the smudge tool and smearing it along. Use the eraser to clean up the edges.
Reducing Noise On Your Background Image
You will notice the screenshot from your map used as a background might have a lot of detail which results in a black and white patchy texture. Reducing noise in the image will help your details appear better. This means removing black splotches where there are craters, white splotches where there might be cobblestone, etc.
For example, once your roads are drawn, use the stamp tool to remove the background’s roads. The goal is to reduce the detail you see on your blurry background image, and let the drawn road provide the detail. Get a blurry empty area of your background map sampled in the stamp tool with ctrl+click and paint it over the roads with low opacity. Remember to backup the layer in case you want to revert.
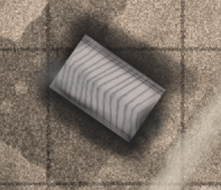
Farm Lines
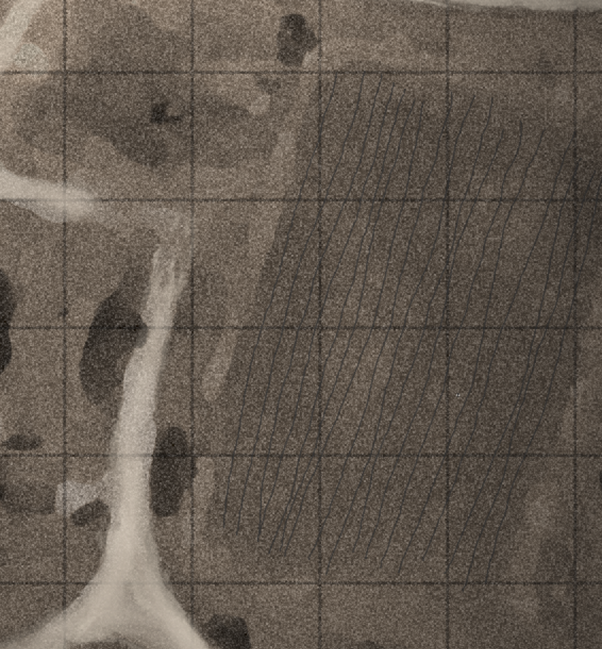
Tilled farms have a grain to them, it helps to draw them into your map in a simplified way to make them recognisable as farms. Have the effect be light so that it does not make the image too noisy (too much black white contrast).
To do this, make a new layer and draw some thin lines with the paintbrush tool. Make them dark, and then smudge/blur them after. Lower the opacity of the layer and apply a 1 pixel spread effect from the filter>noise menu.
Adjust opacity and use the stamp tool to messy it up a bit.
Building
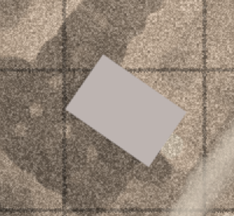
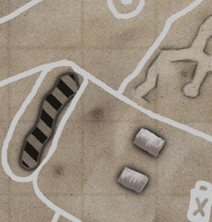
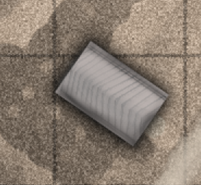
Start marking buildings by creating little boxes for them all. Just highlight a box with either the box select tool or the lasso tool. Fill with a very light grey colour. Do all the buildings in this way on a new layer. Include buildings which are out of bounds, and any large impassable man-made structures like bunkers and sheds.
Now add detail to this to make it look less like a random square. Add a drop-shadow effect by duplicating the layer, inverting to a dark colour, and applying a blur effect. Depending on the type of building, draw different details on top. E.g. for a metal shack I put white lines to make it look reflective, and an arch type line to make it look like a curved roof. Use different layers so you can tweak opacity.
You can do this any way you want, I just draw details over the top, and then erase around the edges:
Repeat for all buildings, for most you can leave blank. Look at the official maps for guidance. It is a good effect if you put a shadow on all the buildings, pick a direction the light is coming from and make it the same for all buildings
Water
Water uses the following blue: R:30.2 G:32.5 B: 35.7 (4d535b). Fill an area around any water and apply a blur. It should be the only thing with any colour besides the brownish tint.
You can add a slightly blurry white line with low opacity along the shore if it doesn't look right, but I didn't do much here. The earlier blur will make the edges fade to white as they blend with the background anyway.
Final Bits
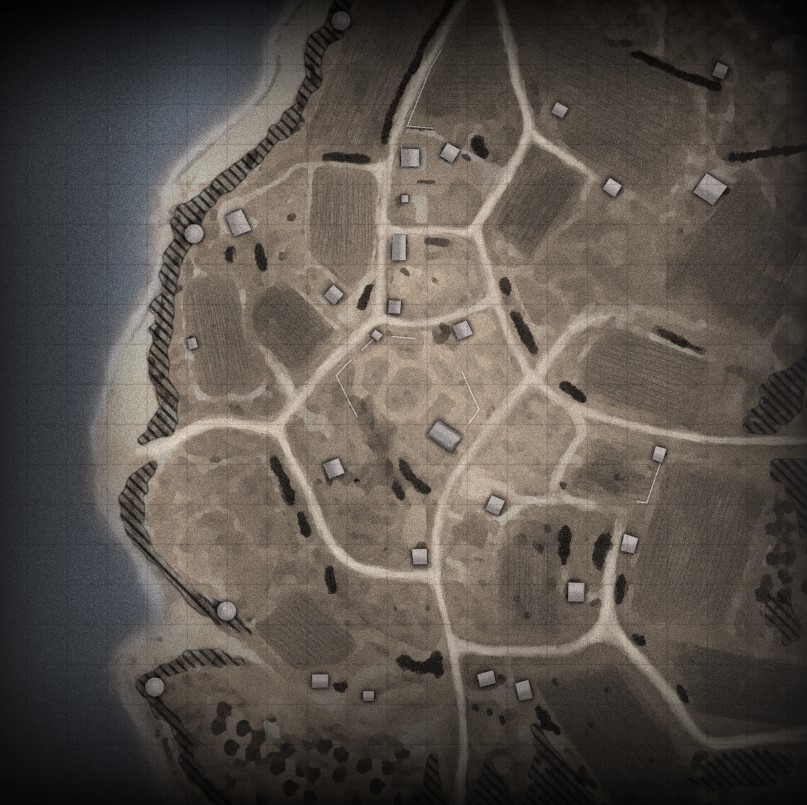
Final details will depend on your map. I decided to highlight hedgerows in black by drawing over them with a black paintbrush. I also marked tall walls as they are important in this map around the middle:
To get your minimap image appearing in game, Crop the image to the correct size (in my case 2048x2048) and export the image as “mapname_mm_handmade.tga” in the map’s folder (the one with the _generated.tga file in it). Build your map and it will use your image. Check it all lines up, and if not, go back to the xcf file in GIMP and adjust accordingly. If you made the canvas size slightly larger, you should be able to nudge however you want because you have detailed a bit of the area outside of the used minimap space.
I like to post my mini map image on the workshop. It encourages people to try your map if you show you put some effort into the minimap. I like to decorate it with some extra elements, such as the territory layout! You can do it however you want, and I like to mark the resource layout and player start points.
Source: https://steamcommunity.com/sharedfiles/filedetails/?id=3154625953
More Company of Heroes 3 guilds
- All Guilds
- All COH 3 Accolade Challenges
- How to win matches more frequently? [COH3]
- Company of Heroes 3 Multiplayer Guide Part 1: Overview
- Erfolg - Die Vertuschung
- Gua y Datos de DAK
- Gua y Datos de la Wehrmacht
- Company of Heroes 3 Guide 327
- British Standard build order and general strategy
- Gua y Datos de la UKF
- Guide for new players on how to play team games