Introduction
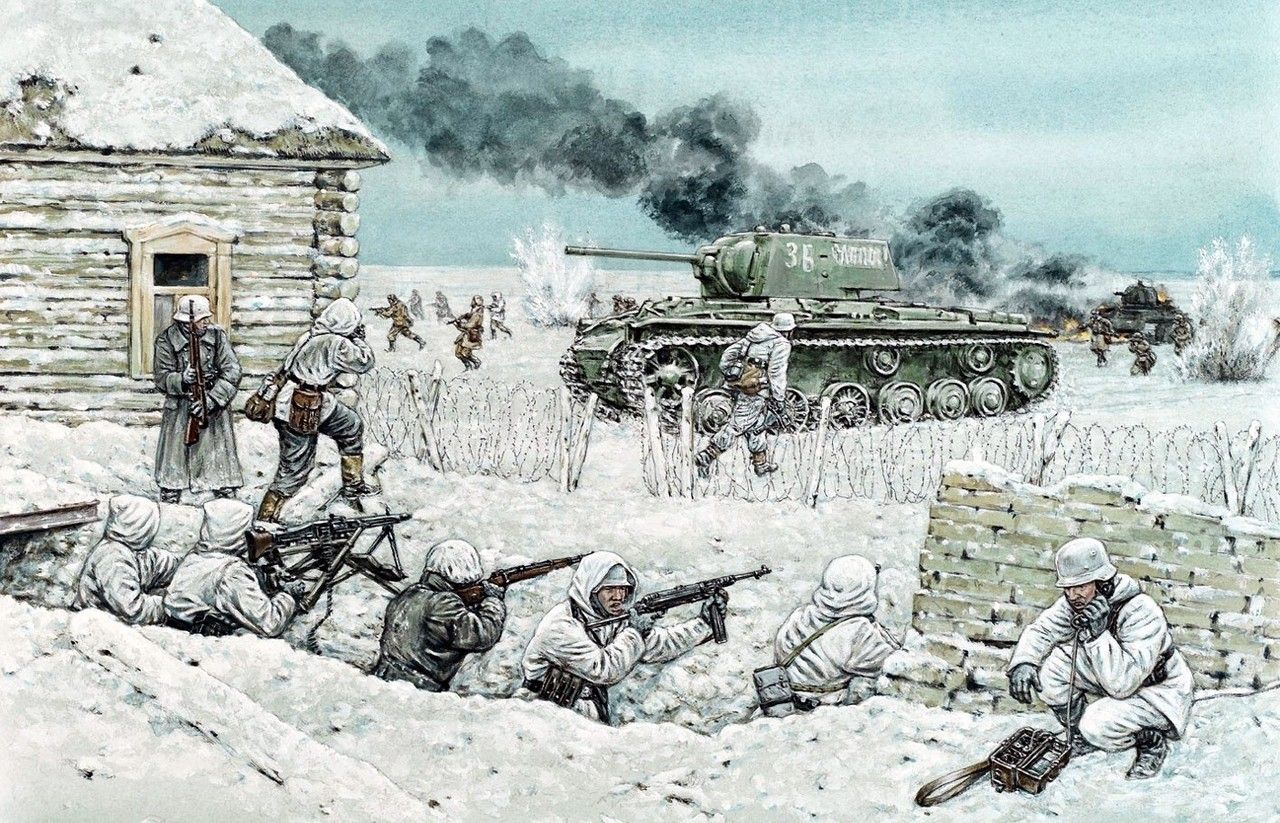
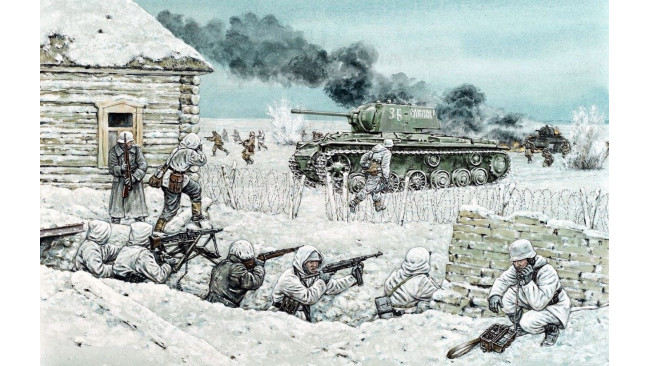
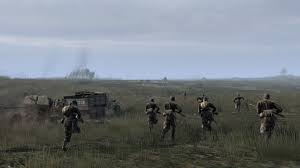
We've all been there - whether it's our first mission upon buying Gates of Hell, or a campaign mission spanning kilometers of trench lines and bunkers. The enemy seems too numerous, your positions are falling one by one, you have no more reserves to stop the enemy advance, and everything comes down to one squad's heroic defense of a farm house.
Unfortunately, this is not a Hollywood movie, and without plot armor, eventually an enemy tank will roll up, and, blasting the house to smithereens, take the objective.
What could have been done to prevent this disaster?
Before The Battle: Unit Selection (mostly Applies To Conquest)
One of the most important, in fact, the most important aspect of defense is having the right units for it - you might be able to take a village with a platoon of artillery, but it will be tricky to hold said village against an assault if you forgot to bring additional ammunition. This section will focus on unit selection before the battle.
Now, the first thing to consider is what type of map you'll be fighting on. You can ascertain that by clicking on the name of the map (in Conquest, lower right, in Multiplayer right in the center). In the realm of defense, there are really only 3 main types to worry about: Congested, Semi-Open and Open.
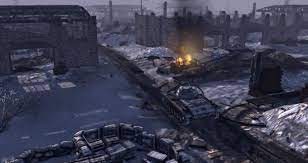
Congested refers to maps who are mainly city-based. The only routes of easy advance (at least for vehicles) are all flanked by buildings. These types of maps favor a more infantry-focused approach, since artillery won't have clear lines of fire and tanks will have trouble advancing without fear of ambush. The terrain will likely contain obstacles such as rivers, large hills or large, indestructible buildings.
Semi-Open refers to maps who have a mixture of, say, forest, open ground, and village. Different places fit different units better, but there is no defined type of doctrine which will fit the terrain the best. A mixture of the above and below doctrines is recommended.
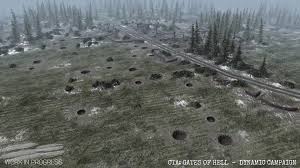
Open refers to maps such as Kursk or Airfield, where there are few (if any) forests, obstacles or major terrain obstacles. These maps favor tanks, ranged weapons such as AT guns or artillery, and infantry performs best safely ensconced in a bunker or trench.
So, firstly: Congested maps. Tanks and armored personnel carriers (APC's) are certainly useful in some situations, but they are extremely vulnerable to infantry due to the close-in nature of the fighting. Artillery is mostly useless (with the exception of mortars), for buildings can absorb its shots, and tripod-mounted machine guns are useful only when placed in a commanding position in defense of a capture zone. Logistics vehicles such as fuel or supply trucks are best kept out of these battles, but at least half as many transport vehicles as you have infantry squads will serve you well. You may, of course, commit armor if you must, but lower-level, non-veteran units are better utilized. It would be silly to lose your precious Tiger to a Soviet hiding behind a fence with a Molotov. Infantry must be the primary weight of your deployment. They are the finest tool at your disposal for clearing buildings and combatting infantry. If need be, they usually have at least one anti-tank grenade-armed soldier to destroy obstacles or eliminate enemy tanks. Armored cars can be extremely useful, if used with skill, for they can outflank enemy positions and inflict heavy casualties while the main force moves up. Transport trucks are usually less than necessary.
Secondly, semi-open maps. With a few exceptions, a heathy mixture of armored units, infantry units and ranged units is recommended. Having an all-infantry force may work well for capturing the first point through a village, but once you come to the open field between you and the last cap, you will have wished you'd brought a tank.
Artillery is optional. Larger maps will definitely suit an infantry gun or SPG, particularly if the points are susceptible to bombardment. Bringing more than 2 medics is recommended. Bringing an ammo crate / fuel truck is optional. Transport trucks will help get your troops into position with maximum speed.
Thirdly, open maps. These are the cream of the crop in terms of defensive, and you should feel lucky that the game has blessed you with such an opportunity. Literally any unit, from mortars, basic riflemen, AT guns, artillery, mounted machine guns to flamethrowers will work on these maps. Okay, maybe not flamethrowers. Mostly. So, these maps favor tanks, ranged weapons like artillery / tripod mounted machine guns, and riflemen squads in particular. Jagers are not a good pick for an infantry squad (they have only MP40 submachine guns). An ammo crate / supply truck is absolutely essential, as your units will expend large amounts of ammunition almost continuously at longer ranges. Armored personnel carriers, half-tracks, trucks, really anything that can carry soldiers will be indispensable in getting to your capture zones with haste.
Those are the basic guidelines for picking units at the start of the battle.
Before The Storm - Pre-Attack Preparations


In Gates of Hell, you always spawn in defensive missions on the opposite side of the map from your capture zones, as if you are rushing reinforcements to a beleaguered position. The following are arranged in chronological order from the start of the battle to the finish.
Your first task must be to get your units to the objective. If you're playing Co-op, assign some units to your friend. They can help micromanage them into position, and focus on one point while you focus on the other.
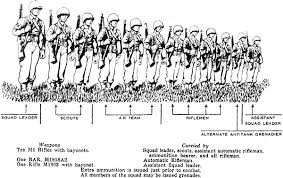
Once your units have arrived at the objective, you must split them up. They all must dig in in different ways.
Infantry must begin digging foxholes, preferably on the highest ground available, and providing overwatch over routes of attack.
If you have engineers, they should be making trenches, laying mines, setting up barbed wire and making anti-tank obstacles along likely routes of enemy advance.
Tanks can be ready for action the moment their treads touch the zone, so they must be moved to the front to keep watch for any enemy attack before the defenses are ready.
Your medics must build medical tents close enough to the frontline positions that they can be reached easily, but not so close that they are at risk of enemy fire. Medics should stay back at all times. They are the most valuable specialist unit you have.
After your infantry has finished digging foxholes, make sure that every man is in the best cover available. You will not get another chance once the attack starts. Here is a diagram of what the best types of cover are:
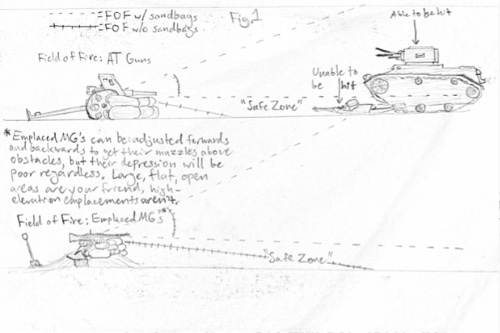
Tanks are not invincible. They are best used in the defense as a 'cork', particularly in some areas where the ferocity of the enemy assault is too harsh for infantry to withstand. For example, a forest. A tank has multiple machine guns, and is fairly well protected; an infantryman could fail to spot a sniper in the bushes. Here is a diagram of how your tanks should be positioned.
Note in the last panel the parentheses. The Three F's. They show the three essential rules of how the land around your capture zone should look:
Flat, Featureless and de-Foliaged.
Bushes can hide enemy infantry. Fences, houses, trees, logs, rocks and the like can all provide cover behind which the enemy can shelter. Since Engineer units do not have a bulldozer (yet), a truck will suffice. Drive it through any fences in front of houses manned by your troops, so they have clear lines of fire. Knock down every tree in a forest if they restrict your spotting ability. Is there a house the enemy could hide in? Drive a tank through it. Gates of Hell is not a game about preserving the landscape - it is a game about killing your enemy.
One last thing about fields of fire; when looking down at a battlefield from above, you see none of the minor terrain deformations, and can even miss the fact that one of your set-piece weapons that is the lynchpin of your entire defense... is blocked by a sandbag.
Apologies for the poor quality, but the gist of this is that you will want to make sure every one of your weapons can target each piece of ground that the enemy might cross.
Weathering The Storm - During The Attack
*picture of someone looking out of bunker slit*
Unfortunately, Gates of Hell: Ostfront is not a game which will allow you to sit back, relax and let your troops mow down enemies for 20 minutes. For one thing, they don't carry nearly enough ammo!
Also, the enemy is rarely so compliant as to rush over and over through the same avenues of attack.
It is likely that during every defensive mission, you will have a major emergency at least once; some unforeseen dip in the landscape shielding attackers, a unit whose ammo you forgot to refill, a rocket truck that the enemy is using to bombard you, your medics getting killed accidentally... I could go on and on. But the essential thing is this: dig deep and hold your forward positions lightly.
This is the lesson that Germany paid for in blood during the First World War; any initial attack on one, heavily entrenched position would, after horrific hand-to-hand fighting, eventually be held.
Later on in the war, when the first trench was more of a ditch in the ground, with the heavily entrenched positions behind, any infantry in the first line could take a few potshots at the advancing enemy, but then withdraw behind the heavier positions, drawing the Allied troops into the killing field.
During a battle, you must not hold your front lines tightly. You have a very limited number of troops, while the enemy has nearly bottomless reserves of infantry. Once you begin to lose troops, you begin to lose your ability to defend your position!
The one other thing which will preserve the lives of your troops is medics.
Medics are, ironically, the most valuable units in your entire army - regardless of the fact that they only carry a pistol. They are the only units who
a.) Can revive downed troops
b.) Can build medical tents
c.) Start each battle carrying a shipping container's worth of bandages
These three things, in concert, will do more to keep your troops alive than the troops themselves.
Picture this: A single tripod-mounted MG and 2 riflemen are the last line of defense between an entire enemy infantry rush and your last capture point. You have 1 medic left... and your tank is out of ammo. Suddenly, an enemy sniper appears, just 20m away! He gets a headshot on one of your MG gunners before one of the riflemen gets him. But he threw a grenade right before he died! The last MG gunner was in the reloading animation, and so he couldn't get away in time. Both riflemen are reduced to half their HP, and they have no bandages left.
Without a medic, this battle would be lost. However, the medic has been waiting for this moment the entire match, and, drawing in a deep breath, he sprints to the MG position and revives both of the gunners, just at the time when the enemies begin to cross the open ground. As the MG opens up, the medic dives into the slit trench where the two riflemen are crouching. He drops off six bandages, which the riflemen eagerly grab and use. After a few minutes more of fighting, no more soldiers attempt to reach your position. The enemy have exhausted their reserves, and you have won the day.
Medics are of paramount importance, and, as such, must not be used as combat units. The best place for them is behind a house or other obstacle, a good number of meters away from the frontline. Their moment will come once the enemy has downed one of your soldiers or once they require a refill of bandages. The medic now must proceed with maximum possible haste to the trench, where he can revive the downed man and drop a bucketful of bandages on the ground, before sprinting off again.
Besides the medics, keep an eye out on the ammo levels of your riflemen in particular. They are the second most important part of your defense, at least until Barbed Wire adds a squad composed of solely MG gunners. For this, an ammo box is recommended; not only can soldiers simply run over and ammo appears mysteriously in their inventories, it comes with two bonus riflemen! For no extra cost. This is the reason why I prefer the ammo box to the ammo Supply Truck.
So, you've positioned your troops & your medics, dug your trenches, and have just beaten back the first wave of enemies. The next step is to check whether any vehicles you destroyed can be immediately entered by one of your troops; if it is, then make one guy run forward in between waves and grab it. Even if it can't move, it likely still has weapons you can use.
The Aftermath
Congratulations!
Hopefully, you've made it through the waves and waves of enemies, tanks and accompanying dramatic music. If you have, you're in the clear. Unfortunately, there is no after-battle salvaging phase; so you had better have at least crewed one or two enemy vehicles before you reached 1000 points.
All that is left is to pat yourself on the back, restock your units in the Conquest Menu, and go on the offensive.
But, wait - one last thing. What went wrong? Devote a few seconds of thought to this, because it will determine how well you do next time. Did you need more AT potential? Consider getting some more tanks or AT guns. Need more medics? Add another to your squads. You get the point.
Thanks for reading!
-Jeb T. Firefly
Habitual Ranged Combat Enjoyer
Source: https://steamcommunity.com/sharedfiles/filedetails/?id=2649529809
More Call to Arms - Gates of Hell: Ostfront guilds
- All Guilds
- How to play the game
- Guide for new players to ease into GOH in 2024
- / Fire range & Armor Penetration of USSR guns
- How to restrict units for player/AI in dynamic campaign
- Directory of vehicles and its weapons 1943-1945 in tables
- Tac maps 3vs3
- Tac maps 4v4
- Gates Of Hell: Ostfront tips
- Call to Arms - Gates of Hell: Ostfront Guide 872
- Artillery Ranges in MACE