
INTRO
Hi there! At the time of writing this guide I almost have 1000 hours played in VHS with about 2500+ matches on Teen and 2000+ on Monster! 80% of the time I'm playing; I'm also live over at www.Twitch.tv/bunbunHD! This guide also features some videos that can might help! Any videos are over at my YouTube channel www.Youtube.com/bunbunHD, as well as some general game-play videos! I've played 1700 hours of DBD and countless others in FPS and games as a whole. Feel free to stop by or comment with any questions or just to say hi!
INDEX Check the chapters on the side of the guide to jump around to sections you're looking for!
ULTRA FAST QUICKSTART
Why Does Monster Feel So Difficult To Play/weak? Don't Sweat The Early GamesUNDERSTAND THE MAPSUSE THE WEAPONS And Abilities IN THE TRAINING MODEPlay With Friends If You Can!This Game Is More Sound Based Than Most.
 Dude this guide is LOOOOOONG. So here's a super quick condensed run-through of all the MUST know tips
Again, if you have ANY question, I'm usually playing monster over at my Twitch, so come and ask any questions!! [www.twitch.tv]
This is probably one of the most asked questions/points of debate. It comes down to a few things.
1. If you have questions during a game, you have to figure it out yourself. Teens have 3 other people who can help them out. I've had the pleasure of having a TON of questions answered while I'm in the middle of a match as teen but as a monster I had to either play a few dozen matches, watch streams/YouTube videos, and look up guides. I've spent dozens of hours in the training areas alone so I can fully understand this game and help other people learn.
2.The skill ranges can be inaccurate currently. Everyone's account has been reset, so any experience or MMR they had during the beta has been wiped. This means there are skilled players scattered around, getting into matches with new players. THIS is an issue for the beginning of Early Access ONLY. As more people play, the skill disparity will slowly disappear. I've seen players scream that the game is broken and abilities only work half the time; when in reality they didn't understand how WART's armour works.
3.Teens aren't pushovers. Unlike some other Asyms, Teens are weak for the first 42~ seconds (the fastest weapon that can be crafted to kill you is the 1 shot Slingshot in 31.5 seconds). After that, it's truly a fight for your life. You can die to ambushes, coordinated teams, or by a simple mistake. Taking the time to understand how teens play and their limitations, will greatly increase your chances of winning.
4.This is unlike most other Asyms. Yes, there is some looping and hiding during the match but the main draw is weapons and fights. Aside from 1 other Asym, I can't think of a successful Asymmetrical game where you can actually fight the monster(and even that one you can choose to just escape). You have to take the time to learn and not become frustrated that your skills aren't super transferable. Some ARE (see section about coming from other Asym games) but you can't be stubborn and refuse to learn.
Seriously. This is a different game than you're used to, regardless of your background. You'll get better with time. Every game has a learning curve and this one can be steep. The fact that you're reading a guide means you have a far better chance at success than someone who just queues and learns by themselves. It's rare for even the most professional eSports players to consistently get above a 55% winrate (T1 Faker, probably the BEST League of Legends player, has a 68.1%) Focusing on Movie challenges is great when you're still getting used to the hang of things.
This will come as you play but trying to learn and understand callouts/loops early on is going to make a big difference. Healing stations and Vending machines are always in the same spot. Crafting stations will be in the same general area but won't be in the same exact spot every game. Knowing where the kill stations are at any given time is important for both sides.
It also doesn't feel good to run into a dead end or a teammate by accident! Like any game you'll naturally learn the more you play but remember to look in the bottom left to see which room you're in, as well as where your teammates are(as a teen!
When you're more comfortable with the game, you'll be able to know exactly where every station is, which stigma your teammates are working on, and where an ambush is being set up all without anyone saying a word
ESPECIALLY IF YOU'RE MAINLY INTERESTED IN THE MONSTER ROLE
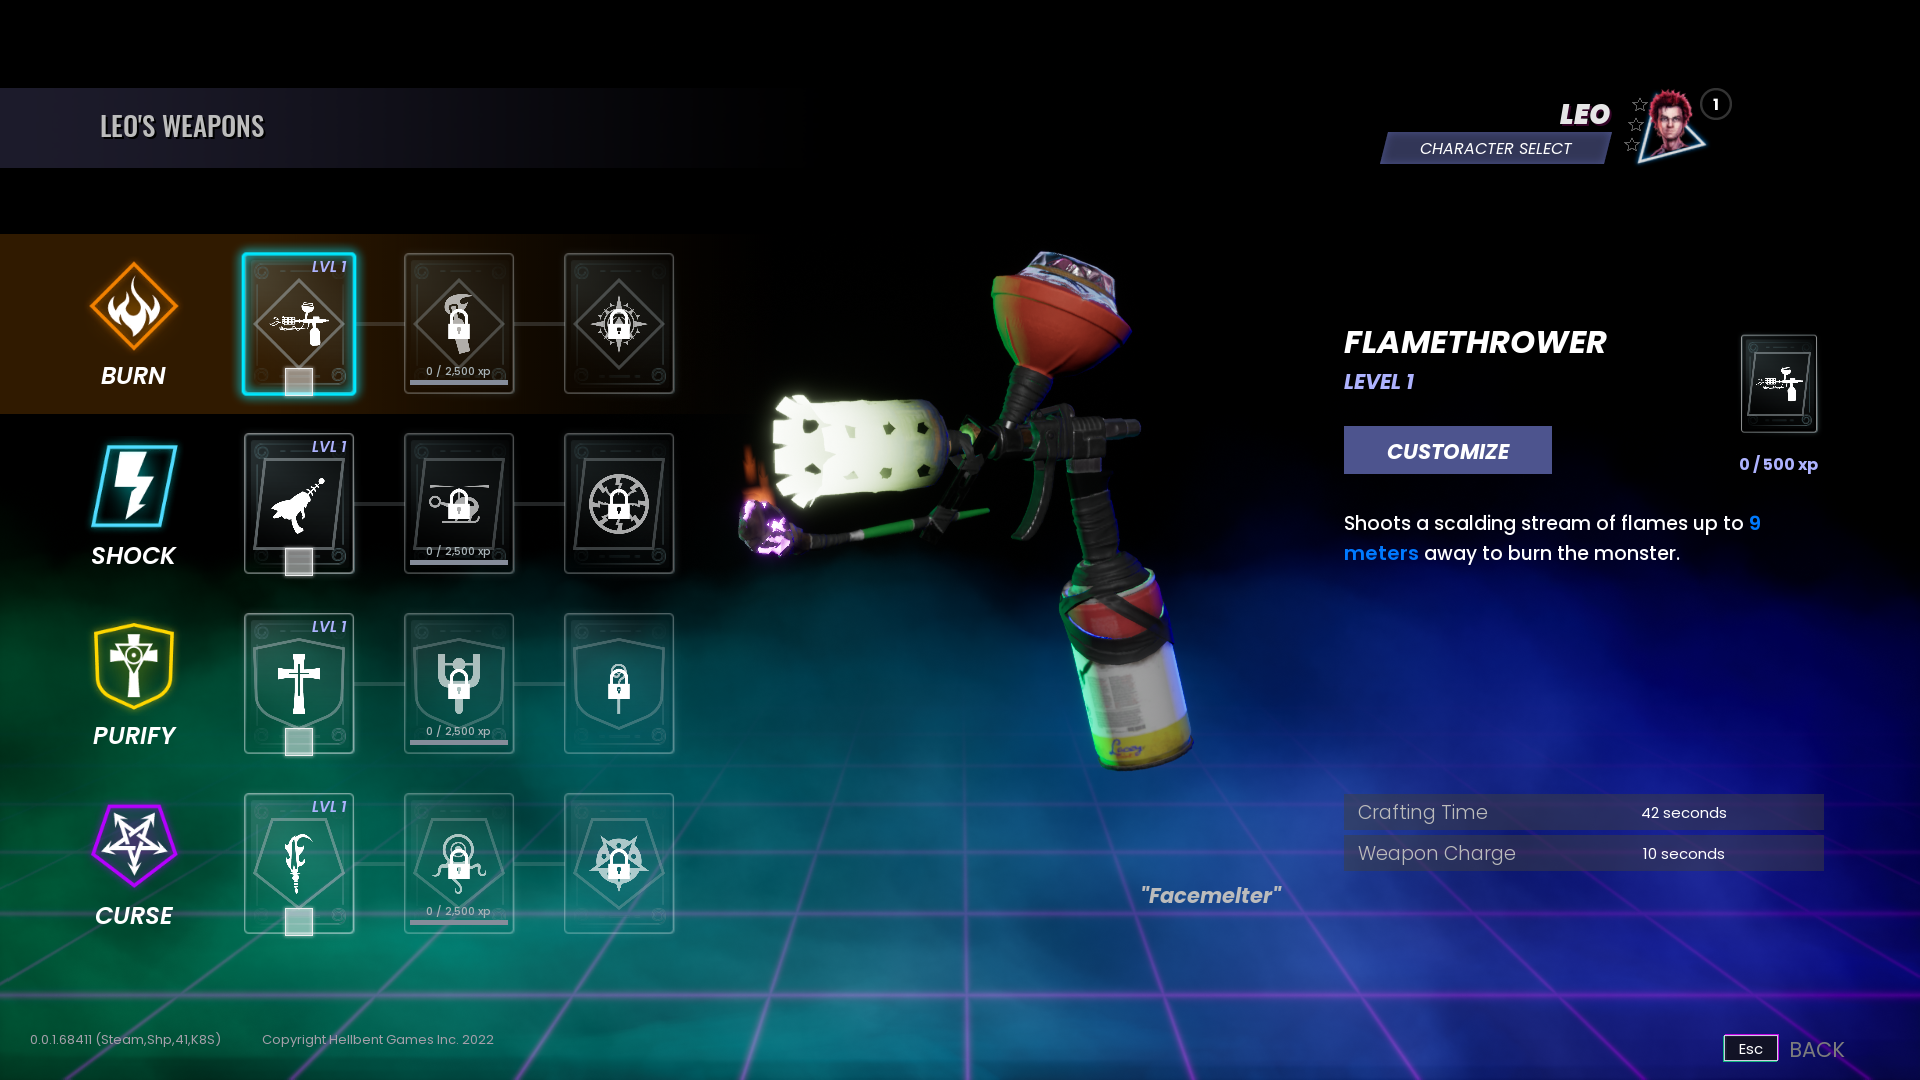
Every weapon is immediately able to be used in the Training room. Each weapon is unique as they have different travel times, ranges, ready times, and uses! Teens start with 4 unlocked, and unlock a total of 12 to use at any time during a match. BOTH sides need to understand how the weapons can be used to successfully use or counter them. Mods will eventually
playing with random people can be fun, but also stressful. If you find someone you enjoyed playing with, add them and try to play with them again! Having dependable people to play with can make your entire experience much more enjoyable. Meeting people over at the official Discord is a great idea too! You can find players on both sides that can be really cool!
Listening to foot steps, the Tension Track, Crafting Stations, Resurrections, Weapon sounds, etc. There are a LOT of things to hear and it can be difficult to distinguish between them. Different rooms may sound metallic or carpeted and sounds are difficult to pin down sometimes. This is further discussed in the Sounds section but just know you'll get better at pinpointing where things are happening as you play more games.
Check out the video below for more info on how sound works, as well as the SOUND section of the guide!
QUICK GAME OVERVIEW - Not Done
VHS is a 4 v 1 Asymetrical, battle to the death. The game ends when 1 team dies, either the monster gets hit 1 time from each of the 4 weapon categories, or the teens' health bars deplete or they're all downed on the ground.
Teens focus on working on crafting tables that spawn around the map, 2 per damage type for a total of 8 tables. Fully wounding a monster with your weapon will deplete its Stigma and move you 1 step closer to killing it. For example, if you use a flamethrower against the monster successfully, the BURN stigma is depleted and you need to use shock, curse, or purify next. If you use another BURN type weapon on the monster, instead of taking away the STIGMA it will stun the Monster for a few seconds. This can still be really useful in protecting your allies or setting up for another weapon to get the wound.
Queue up as either human or Monster. The monster is solo and the humans are in a team of 4.
The main objective for either side is to be the last ones breathing. The monster achieves this goal by hunting down Teens and smacking them. The first hit injures, causing the teens to be a bit louder and leave a trail making them easier to hunt down. If they're hit in the injured state they go prone, lose any weapon they were carrying, and require the help of another person to come pick them up to continue fighting. Each time someone gets hit, they lose a portion of their overall health. When that hits 0, they die and are out of the fight unless brought back with a single use item hidden somewhere in the map. If all the teens are prone or dead, the Monster wins.
The Monster however, is vulnerable only to weapons. If the teens successfully hit the Monster with 1 of each of the 4 different elemental damage types, the monster will die! Weapons can be crafted at tables found among the maps. Each map has 2 of each element type, so 8 crafting tables in total. Once you've crafted your weapon, meet up with your other teammates to ambush the monster and win.
Character Progression


Playing a character will let you level them up and unlock them further! Experience is earned every match and unlocks aura points which you can ONLY spend on that specific character!
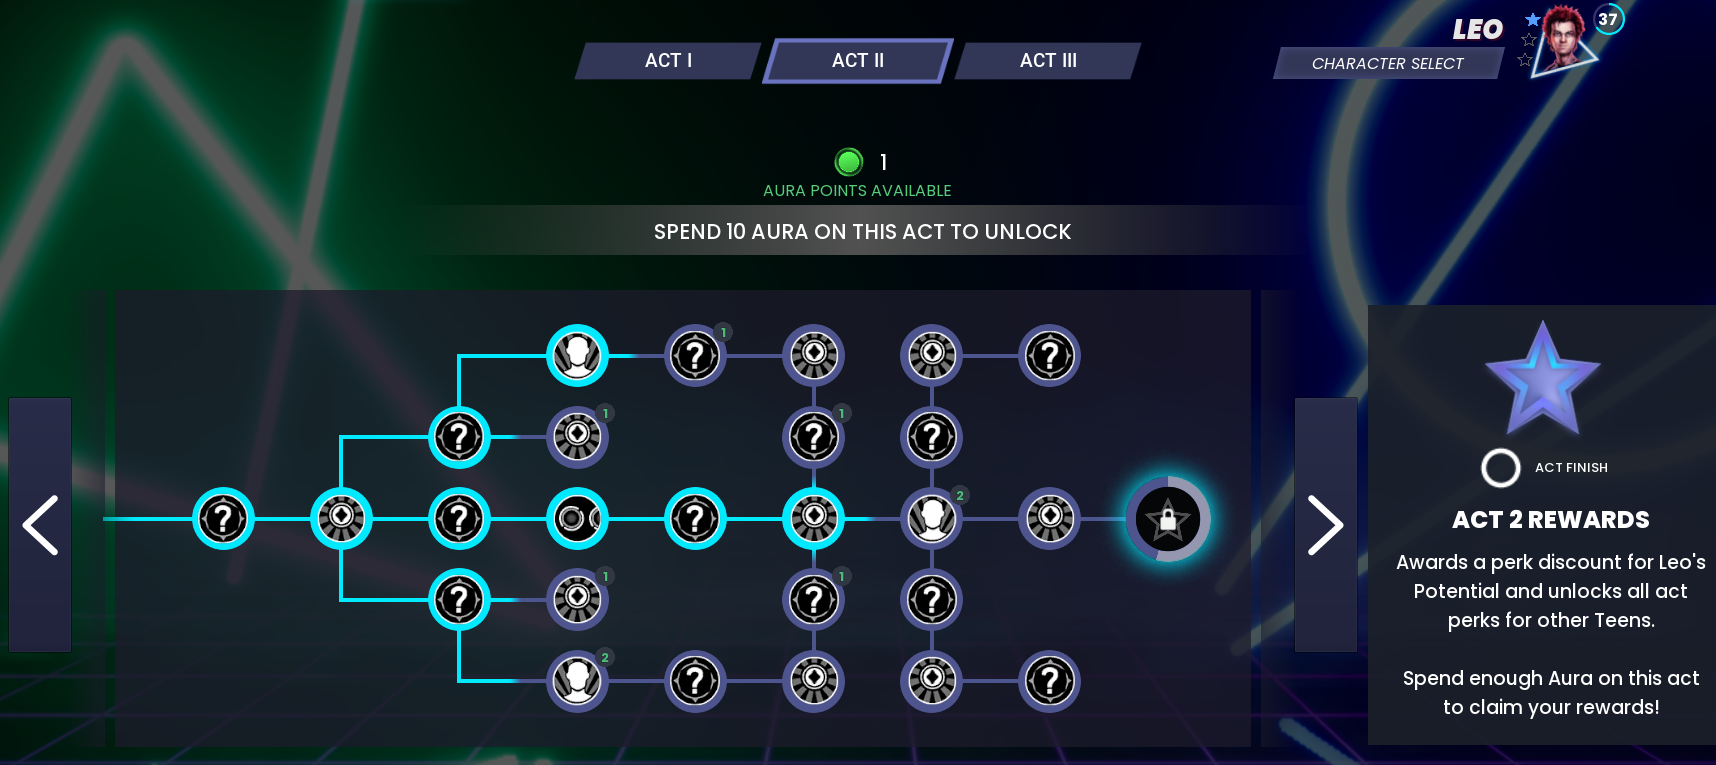
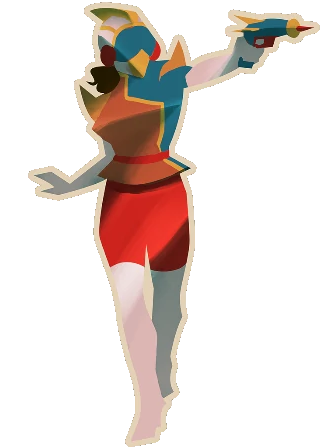
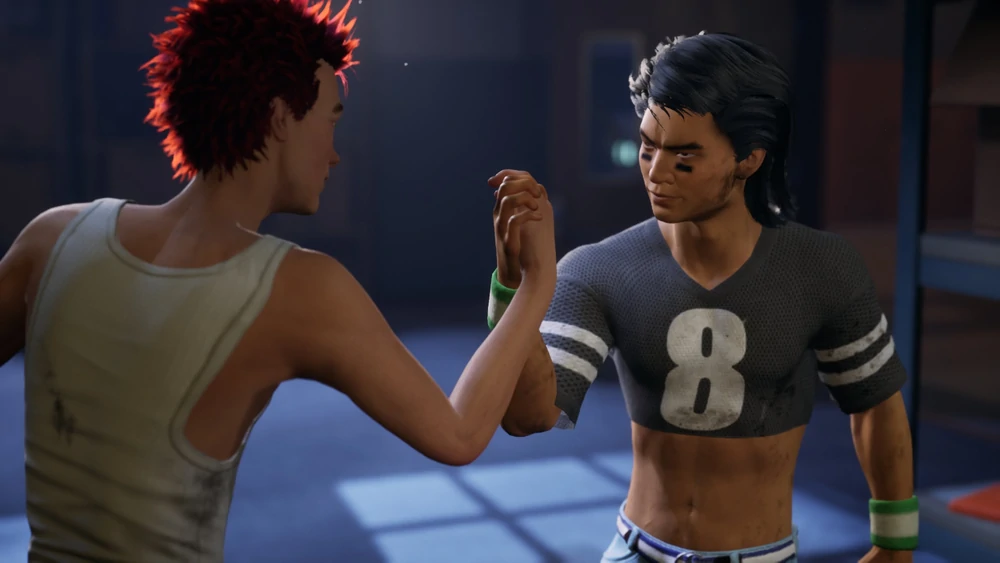
A level 37 Leo
You unlock PERKS, PERK SLOTS, PERK POINTS, FLUX, and COSMETICS by playing games and completing movies!
(Act 2 of a Teen's Progression Tree)
At the end of the game, your experience is applied to whichever character you were playing. Every time you level up, you'll gain an AURA POINT. With those, you can unlock nodes in the journey to learn stronger versions of that character's personal perks, unlock addition slots to equip those perks, and gain perk points for your loadout.
Acts with a symbol can unlock character specific cosmetics, flux, or prizes that you can use in a match!
________________________________________________________________________________
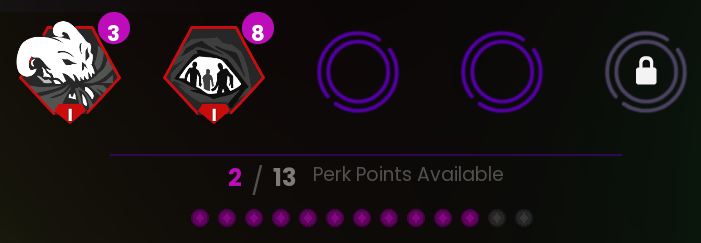
At max level you'll have 5 slots for perks and 30 perk points to spend on your build.
(A perk loadout with 4 slots unlocked and 13 Perk Points available.)
Once you put enough points into an act other teens automatically learn and can equip whichever perks you had learned!
UNLOCKING MORE WEAPONS!
Weapon progression is a big thing for teens. While Monsters unlock their mutations in their journey, teens unlock addition weapons and weapon mods by using them in game and gaining experience. See the WEAPONS section for more details!
Teen Role
 HEALTHY --------- INJURED --------- PRONE --------- CRITICAL

 MOVEMENT SPEED
The Teens are a team of 4 that have to work together to kill the Monster. Your goal is to craft weapons and attempt to destroy the Monster's "Stigmas" to win the game! Every game ends with 1 team dying, so there's no escape. Utilizing communication, items, cunning and guile will ensure you come out on top!
You win the game as a teen by hitting the monster fully with each 1 of the 4 stigma types: Shock, Curse, Burn, and Purify. There are tables that spawn in somewhere in the map that you have to locate and start working at to craft weapons. Each table has a specific type associated with it and gives you the option to craft 1 of the 3 weapons. It takes 42 seconds on average to craft a weapon and each table generates a unique sound in a 35m radius. The monster's terror Track is also 35m, so if you can hear it, the Monster can hear you crafting.
Teen Health States
Teens all start Healthy. They make slight breathing sounds while standing, so they CAN still be found if they're hiding close to the monster.
After being hit with a Monster's attack, they become injured. Injured teens make more verbal noises while injured (whimpers and gasps) which make them easier to track. They also leave a trail of Chromatic Aberration that disappear after 3 seconds
If a teen is hit while they're injured they become prone. In the prone state, they can move around but require the help of another teen to come over and pick them up. While prone, you can release a spectral which let's you fly around and collect "LUMA". Each luma pick up will increase the progress of your prone bar, allowing for teens to pick you up quicker. If you need to crawl around while prone, you can sometimes getting a skill check that can increase or decrease your movement speed shortly, depending on if you're successful.
Teen Health BarEach hit from the monster will remove 22% of your maximum health. the perk Lethal weapon, as well as WART's mutation Toxic can increase the amount of health removed per hit. Each second you're on the ground reduces your remaining health by around .2% per second. on average, going prone after your 5th hit will kill you. A purple skull will appear by your character's portrait to indicate that your health is low enough for you to die.
DEAD TEEN
The book of the dead is a 1 time use item that spawns in a random area in the map. Which room it spawns in is random but the spot in the room is always the same. It takes 4 minigame puzzles to open and the sound of the box being opened travels 30m. Resurrecting a teen is similar to healing them and also can be heard about 35m away.
Zombie teen brough back with the book of the dead.
Zombies make additional grunting noises, making them VERY easy to find if they're hiding.
Teens can communicate effectively with each other through the use of voice communication, and a ping system.
TEEN Running: 5m/s (100%)
Walking: 50%
Crouching: 25%
Monsters:WART, Dollmaster, Doll: 112% (5.6m/s)
Werewolf: 116% (5.8m/s)
Communication
Ping and communication system
Communication is very important in VHS. using voice communication is recommended but SAFETY is more important than anything. If anyone is making you feel uncomfortable, do NOT hesitate to mute them immediately. A free game with voice comms means that any number of idiots can join and try to troll.
Try to stick to important information and avoid telling people how to play the game. It's not fun for them and you very rarely actually help the situation by ordering people around. Try to have fun, and make friends! Voice comms are just another tool to help you win and enjoy the game but they aren't needed.
You can simply turn off all other voice communications as well, relying soley on pings, items, perks, and the HUD.
a simple ping will mark a location and the distance you area from the ping. Double pinging quickly will make an exclamation point which is a "Danger" ping. This is normally reserved for the monster's location. Single pinging the monster directly will automatically show a danger ping.
You can ping any number of items, containers, and healing stations. Pinging a non-active doll will highlight its aura for a short time as well.
Self pinging is defaulted to "C" on the keyboard. This will show people how much progress you have on your crafting table, if you're currently working on one. It will also show when you're injured or healing. If you're being chased by the monster, it will show a chase symbol. Being careful not to over ping with irrelevant information is important, but don't be afraid to use it.
MUTE AND REPORT ANYONE IF THEY DON'T MAKE YOU FEEL SAFE
It's unavoidable but with VHS being a free game and having voice comms, people will be absolutely awful for no reason. Either they're a garbage person or
https://www.youtube.com/watch?v=yHu-Kjg1a3M&ab_channel=bunbunHD
TEEN GUIDE
Step 1. Craft Weapons Step 2. Use Weapons Step 3. Repeat Steps 1-3
This section will slowly be filled. I'm more focused on teaching people how to play monster currently!
You want to win? Follow these simple steps
When you load into a match, you'll notice your portrait, as well as your teammates' portraits in the bottom left of your screen. This is a constant source of important information, so being able to interpret it is step 1!
The picture above shows that exactly where everyone is, their health bars, their health status, and which weapons are available. It also shows which ones will stun and which will banish.
Below is an example of a typical game I had as teen! I'm playing with random players I don't know and I get 3 Stigma wounds!
WEAPONS


 - Eventually This Will Be A Weapon Guide But Currently It's Just A Video Where I Use The Raygun, Slingshot, And Fire Bomb To Get 3 Stigmas Vs A Really Good Monster -
Weapons are the #1 resource teens have in the game. Running will only get you so far, you'll have to fight back if you want a chance to survive. When you first start playing, You only have 1 weapon in each category unlocked. You will gain Experience by crafting the weapon(200xp per craft) and damaging the monster! (about 600~ for a strike).
To unlock the next weapon, craft that type of weapon! For example, crafting a Flamethrower in game will eventually unlock the Firebomb! You can then craft either the Firebomb OR Flamethrower in a match to unlock the Solar Flare! Once a weapon is unlocked, it's always available as a choice to craft in a match.
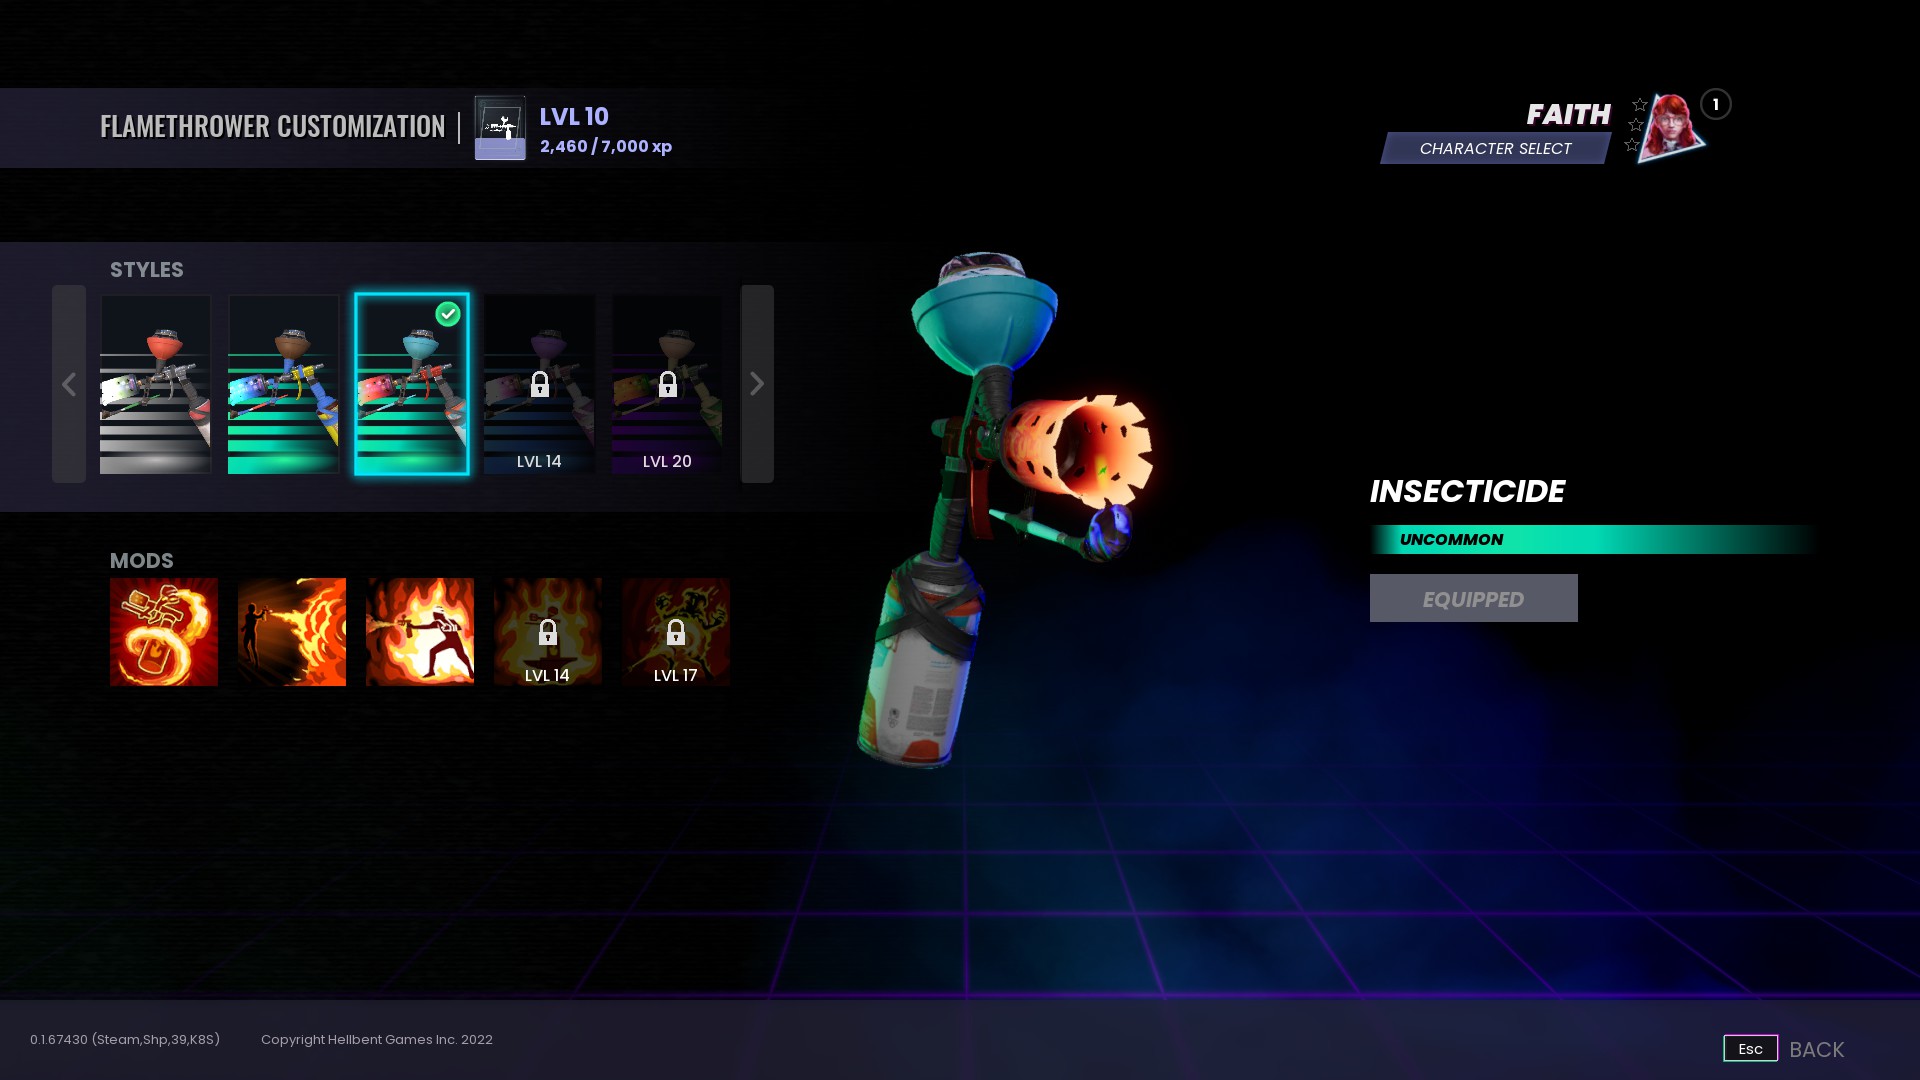
Earning experience with specific weapons will also level up that weapon. This unlocks mods that change how that weapon functions in game! They normally have a
There are 4 damage types, each with 3 weapons that can be crafted. The average crafting speed is 42 seconds; while some base weapons can be required faster but needing extra charging away from a crafting table. These will be marked with a 💫 symbol below!
NAME RANGE CRAFTING TIME LETHAL AMMO CROSS 7m 42 Sec 28 SLINGSHOT infinite 42 Sec 1 shot SACRED STAFF 💫 12m 27 Sec 28 💫 Sacred staff requires about 1 full heal and 1/3rd of another teen's HP to become charged (based on % healed and not time spent healing). If there aren't any teens in need of healing, the charge will automatically start to charge at a rate of 3.3% per second. Reviving a downed teen will not fill the charge meter, only healing from injured to healthy. You can heal yourself 15% faster with a staff, anywhere on the map.
NAME RANGE CRAFTING TIME LETHAL AMMO Flamethrower 9m 42 Sec 22 Fire Bomb 0-50m 35 Sec 1 bottle is 9 sec burn Solar Flare* 8.2m 42 Sec 25 *The Solar flare is placed in a spot and stays in one spot. You can shoot it remotely from anywhere on the map.
NAME RANGE CRAFTING TIME LETHAL AMMO Raygun 40m 42 Sec 9 RC Flyer 9m beam 42 Sec 28 Shock Sphere💫 0m 27 Sec Instant on contact
20 second flight
8 charge minumum 💫 Shock Sphere requires running to 3 different spots on the map and channeling for 5~ seconds each on a charging station. Stations recharge slowly so moving to a new one is recommended. Takes 3.5 weapon charges before you're flying, and slowly increases your speed over 5 seconds until you're faster than any monster.
NAME RANGE CRAFTING TIME LETHAL AMMO Cursed Sword Forever 42 Sec 2 swings Enigma💫 12m 37 Sec 28 shot Evil Eye 0m 42 Sec Instant on Contact
25 sec flighttime 💫Enigma requires you to be within the Monster's Tension loop(35m) to begin charging. It charges faster depending on how close you are to the monster, as quick as 7 second if you have direct line of sight and are within 12m of the monster but can take up to 40 if you're at the edge. It emits a noise within 10m while charging.
Weapons can be difficult to use. The hitboxes are really accurate, but also fair. Wart is long so the Devs snipped part of his tail so make it more fair for Monster players. Understanding where you can hit will make the difference in getting the strike, or letting them wiggle out.
Weapon Modifications
deres a lot of them
Teen Items
Chompie BarsCrash ColasWalkie TalkiesNoisemakersBook Of The DeadTeen can utilize additional items to help them in their fight to survive!
They can be found spawned in around the map, grabbed out of containers, or brought in to the map with you by using a Prize!
allow you to heal 1 hit worth of HP(22% of max HP)
When you eat a Chompie, you gain the "FED" status effect. The FED status effect lasts for 7 seconds. For the first 4 seconds, your health doesn't change. During the last 3 seconds, you gain health over time. Taking damage during those 7 seconds will immediately cancel the effect. Be aware that eating a chompie while healthy doesn't benefit you, unless the monster is enraged. It's best used if you're injured but want to push a weapon, giving you more time on the ground; or after you've been hit in chase while critical and healthy.
give you a movement speed increase for a short while. The movement speed applies over 1 seconds once you drink it, giving you about a 30% movementspeed increase for 4 seconds. You run as fast as a berserking Werewolf, but not for long.
Walkie talkies allow all the teens to see each others' static aura.
You can spend a second setting up a noisemaker on the ground. If the monster gets within 4m of the Noisemaker, it triggers: showing the teens the Monster's aura for 5 seconds. it emits a noise while set up, so putting it in high traveled spots will force the monster to walk in to it.
The book of the Dead is a 1 time use item that will bring a dead teen back to life. The book will spawn in a random room each match. Which room is unknown game to game, but the exact spot IN the room will always be the same. This lets you quickly check a spot without needing to look in every single corner. The more you play/find the book the more you'll remember the spots.
Monster Role
 Beginning Advice
It's you against a team of 4 teens. While the Teens' gameplay doesn't change much depending on their character choice, The monsters' does.
Currently there are 3 Monsters to choose from! Each one will have their own section going over their powers, perks and mutations below! This section will explain basic strategies you can use with any of them!
Although you appear as a teen in the lobby and for the first 17 seconds of a match, this is not a reliable way to fool the teens. With the amount of communication available, there's a good chance they won't be fooled by you running up to them. If you don't want to immediately change to start setting down dolls, you can take advantage of your lack of a 35 meter Terror Track by checking crafting stations. A running Teen's footsteps can be heard 20 meters away, so you can get close to a crafting table to hear if anyone is working on that station before they notice you. Crafting stations make noise 35m away, though they're louder with multiple teens working on a single one.
If you find a teen before you transform, aim your camera on potential exits to see which way they go! If you don't see or hear them run, there's a good chance they're still in the room!
Take your time to learn the maps. Teens make different sound footsteps depending on where they are. Understanding which rooms make which noise will take time and patience. This game's tracking is largely based on sound so you need to learn to understand what exactly you're hearing.
Don't run in a straight line.Ambushes are extremely effective against monsters. Teens can be hiding around EVERY corner, and you need to minimize your chances of being caught off guard. Don't run down a hallway, see if you can take an alternate path. Sometimes it's better to take a few steps back before going up stairs or a hallway to see if anyone pops out with a weapon. the more you GET ambushes, the more you'll be able to recognize the best spots to be cautious around.
Learn what all the weapons do"Know thy enemy and know yourself; in a hundred battles, you will never be defeated" A cheesy quote but one that hold true. Did you know that you can't use Howl to get a teen out of a shocksphere? What about the range of an enigma being 12m, and the raygun having a 40m range. The Flamethrower can shoot for 9.5 seconds and only needs 2 seconds to kill you, meaning they can kill you almost 5 times before it's out of juice. Go into the training area or play teen matches yourself so you can better play against them.
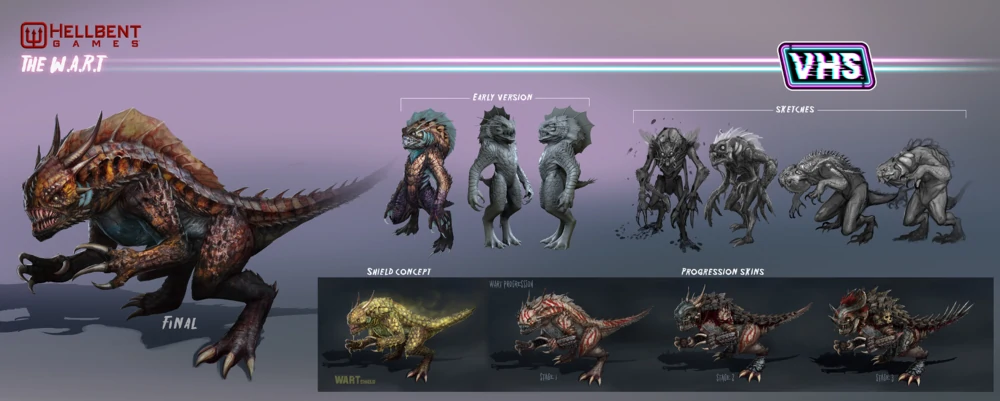
MONSTER GUIDE: WART
 ABILITIESLeapAcid ArmorEcholocationPERKS


 EXAMPLE HIGH LEVEL GAMEPLAY
After focusing for 0.7 seconds, the W.A.R.T will leap forward at great speed. The force of the landing will create a Shockwave that causes all teens within 6 meters of the W.A.R.T to be Staggered, slowing movement speed for 1 seconds.
COOLDOWN: 7 seconds.
After focusing for 1.5 seconds, the W.A.R.T will cover themselves with protective acid, gaining the Armored status. This will shield the W.A.R.T from damage for up to 12 seconds or until shattered by a weapon strike.
If the Armor is shattered, the W.A.R.T will Flinch, unable to perform most actions for 1 second.
COOLDOWN: 32 seconds.
After focusing for 1.8 seconds, the W.A.R.T will emit a resonating pulse across the entire map. 2.5 seconds later, an Afterimage of all active teens at the time was used will be shown to the W.A.R.T for 8.5 seconds. Teens can also see their after image, notifying them of which mutation your're using.
COOLDOWN 35 seconds.
All Consuming 1
Generate Rage 15% faster than normal while feasting
COST: 3 Perk Points
All Consuming 2
Generate Rage 30% faster than normal while feasting
COST: 6 Perk points
All Consuming 3
Generate Rage 45% faster than normal while feasting
COST: 9 Perk Points
Easy Target 1
When an active(non prone) teen more than 28 meters from you gets within 10 meters of 2 other active teens, you will be alerted and these teens will be Exposed for 4 seconds. This can only activated once every 120 seconds.
COST: 8 Perk Points
Easy Target 2
When an active(non prone) teen more than 28 meters from you gets within 10 meters of 2 other active teens, you will be alerted and these teens will be Exposed for 4 seconds. This can only activated once every 90 seconds.
COST: 10 Perk points
Easy Target 3
When an active(non prone) teen more than 28 meters from you gets within 10 meters of 2 other active teens, you will be alerted and these teens will be Exposed for 4 seconds. This can only activated once every 60 seconds.
COST: 12 Perk Points
Lethal Weapon 1
Attacking a healthy teen does 4% more damage per hit (22.8% of total HP bar)
COST: 4 Perk Points
Lethal Weapon 2
Attacking a healthy teen does 8% more damage per hit (23.6% of total HP bar)
COST: 8 Perk points
Lethal Weapon 3
Attacking a healthy teen does 12% more damage per hit (24.4% of total HP bar)
COST: 12 Perk Points
General Strategy has a large slow that goes through walls. Taking damage while leaping will shorten the distance you travel and cancel the shock-wave from happening when you land. IF you're armored, the shock-wave will still happen but it will be 40% smaller. Learning to not complete the channel on your leap can also trick the teens into thinking you're actually going to leap, and make them show themselves prematurely or waste ammo. is a perfect ability to close the gaps in a fight or to quickly escape when at a disadvantage.
Wart's armour lasts for 12 seconds. You're still slowed as if you're being flinched but you're able to use your leap ability freely. When armour is broken, you cannot attack for 1 second, so be mindful even if you're within range to attack. Always be watching at the bottom of your screen for when your armour will go down. Use it often, even when you don't see teens but you need to go through a dangerous area like Hotel's Lobby stairs and you're not confident. A teen that breaks your armour will lose their weapon, but even forcing them to use weapon charges is beneficial during an engagement.
Wart's Echo can be misdirected easily. If teens call it out, you may get after images that are running is misleading directions, or pretending to still be working on a table when they're actually already finished. It works through lockers but it won't show teens that are prone or dead. Use this mainly to take note of where every teen is and what they're doing. Try to choose teens that are still working on tables, alone, or healing. They can move during this time too, so don't commit too hard to looking around that area for them.
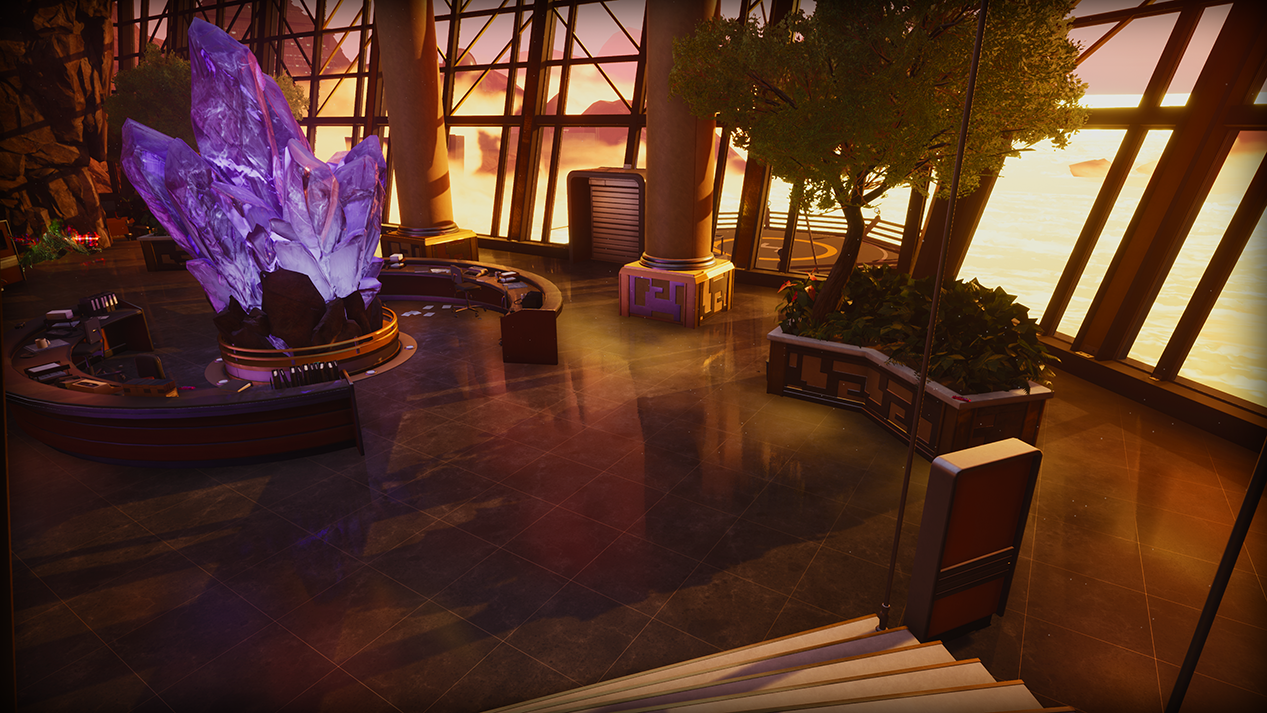
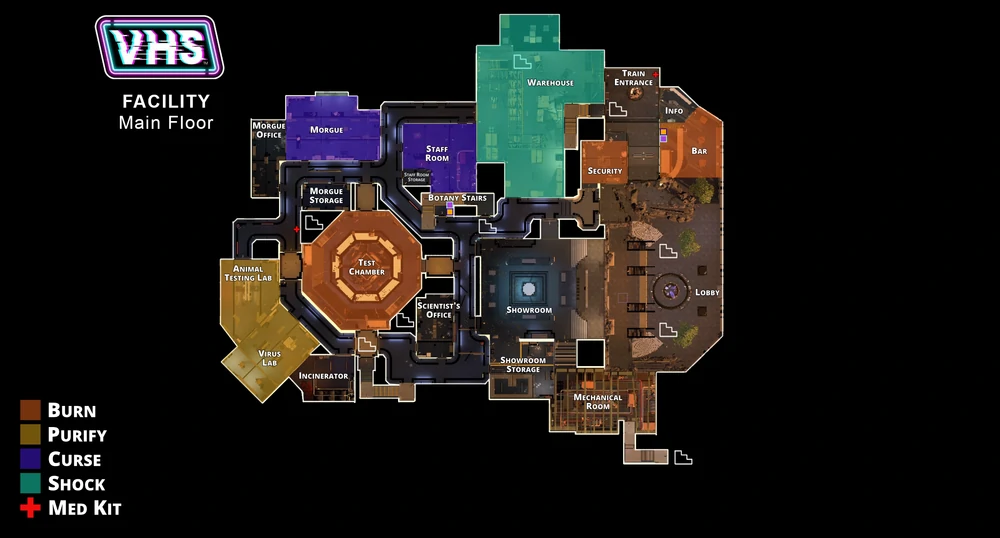
MAP: Secret Facility
LORE:
"From the secret depths of the Replicorp facility, unleash the experimental W.A.R.T. (Weaponized Amphibious Replicant Technology). Wreak havoc on humanity with this chimera’s violent , track prey with a super Echo, and withstand attack in . Evolution is unstoppable."
This game was actually against some really good players in the first beta! 1 is a WART main themselves!
My mutations in the game are Kinetic, Immune, and Detect.
MONSTER GUIDE: WEREWOLF
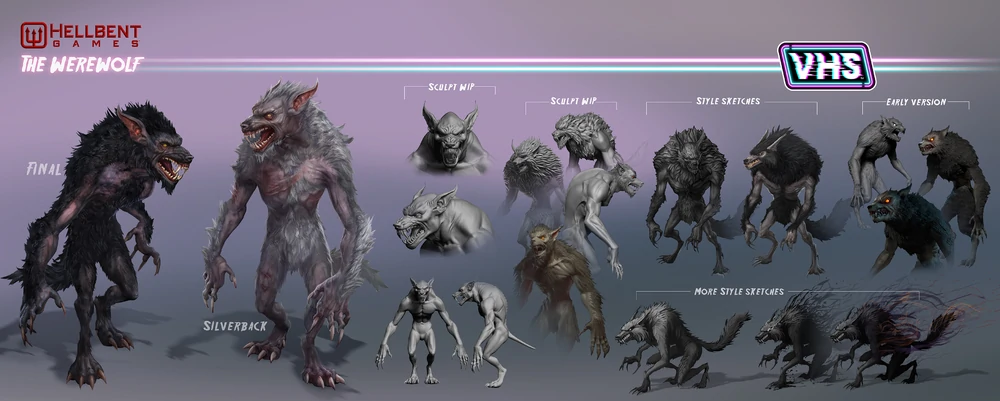 ABILITIESHowlHuntGeneral StrategyLORE:
Berserk
After focusing for 0.8 seconds, their run, lunge, and vault speed are increased by 24% and their movement speed while recovering from a missed attack by 14% for 12 seconds.
Increases Tension Track by 5% while berserking.
COOLDOWN: 24 seconds. (3 second forced cooldown after hitting a teen)
After focusing for 1 seconds, the Werewolf lets out a terrifying , causing all living teens within 30 meters to Cower in fear. Cowering teens are unable to attack or perform most actions for 8.5 seconds.
COOLDOWN: 28 seconds.
After focusing for 1.5 seconds, the Werewolf enters a ing state for 25 seconds. While in this state they will be able to detect the presence of any living teens up to 24 meters away via a Heartbeat sound that increases in frequency the closer teens are.
COOLDOWN: 55 seconds.
Werewolf is the fastest Monster naturally, with Berserk increasing that even more. Use berserk right before you howl during engagements, so you're not wasting time with the channel. WW is the most vulnerable Monster, requiring the teens to waste ammo or be downed to lose their weapons. the combination of Berserk and the fact that your hitbox is so low to the ground when you're running makes you a surprisingly difficult target to hit. Whenever you swing, slow down, back up or stand still your hitbox goes from all 4's to standing up.
is a strong ability that acts like a Scream, but has some rules. It cannot disable remote weapons (RC flyer, Eye, Solar Flare) or projectiles in the air (Firebomb + slingshot). It won't cleanse damage, nor can it be increased by Screamfest. You also stand still when you're actually howling, so you can be an easy target if you do it at the wrong time. The general loop is berserk, get closer to Teens, howl, and then chase them down. Teens will try to counter you by spreading out so that not all of them are affected. Don't be afraid to take things slower if you're unsure you'll get the hit.
is a very effective ability, but can take some getting used to. When you're close to a teen you'll hear a slow heartbeat. The outside of your screen will also flash red more often the closer you are to a teen. When you're within 5m, it will beat REALLY fast. think of it like playing the game Hot and Cold. Faster beats/flashes = closer to teen. Slower beats/none mean there's no one close. You can use this before going up stairs or around hallways to see if there's an ambush up ahead for you as well.
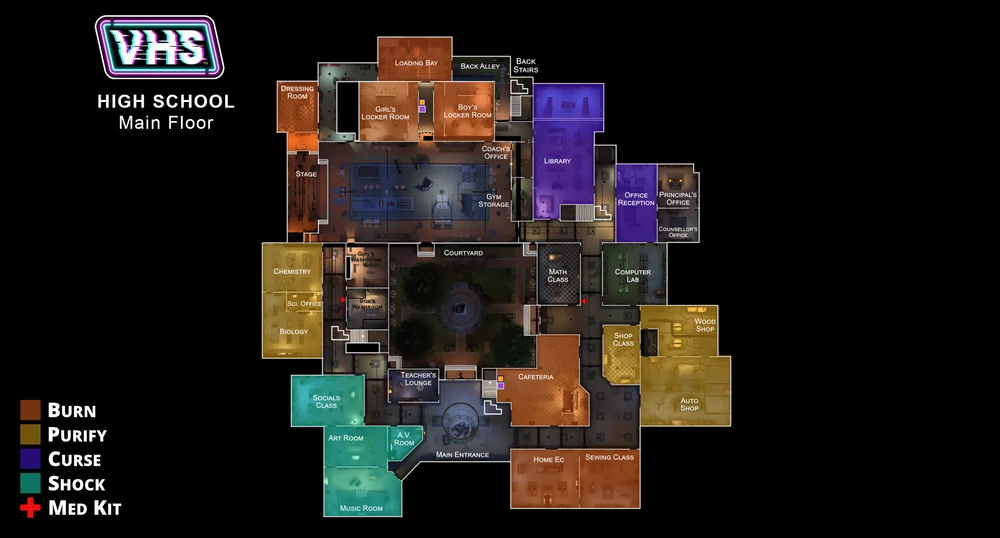
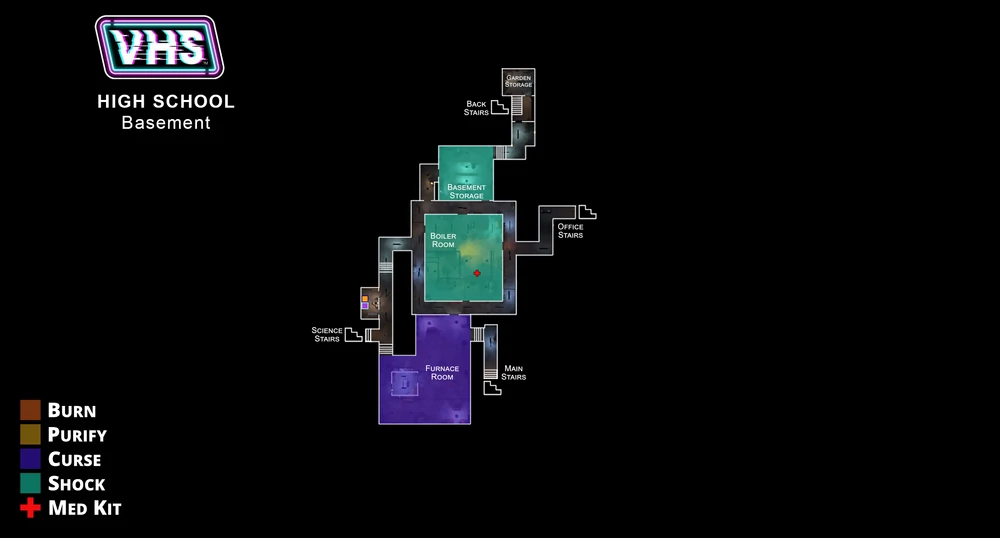
MAP: Pine Bluff High School
"Unleash the Werewolf and strike fear into the heart of your enemy with this mythical and maniacal creature. Terrorize high school hallways with a relentless hunt, berserk speed, and a devastating howl. Ferocious and feral, no full moon is needed to feel this ancient wrath."
High trilogy
Playing Werewolf with NO mutations and NO perks
https://youtu.be/YXyhwe3x5v4
MONSTER GUIDE: DOLL MASTER
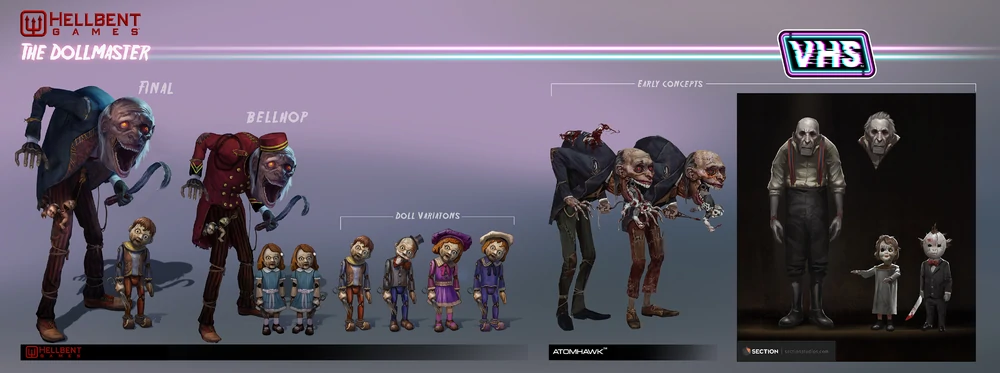 DOLL MASTER IS THE MOST COMPLICATED MONSTER CURRENTLY AND TONS OF FUNPowersDoll TrapDoll PossessionDoll JumpDoll TeleportHIGHER LEVEL GAMEPLAY EXAMPLE
After focusing for 1 seconds, the Doll Master places a on the map. A detects living teens up to 22 meters away by changing icon color.
A is selected by centering the screen on it, allowing use of and .
If a teen walks or runs within 1.75 meters of a , it will become Alarmed for 6 seconds and then self-destruct. While Alarmed, the focus time required for using on that is reduced by 50%.
s can be placed while the Doll Master is in the Banished state.
A maximum of 5 s can be on the map at a time. Each time a is disarmed or a Doll is destroyed, this number is decreased, to a minimum of 2.
Hitting teens will recover a lost , and suffering a Wound will reset the count to maximum.
After focusing for 1.4 seconds, the Doll Master possesses a selected for up to 30 seconds.
(while possessing doll)
After focusing for 1 second, you can quickly jump forward. Being damaged during the leap reduces the distance jumped slightly.
COOLDOWN 8 seconds.
A possessed Doll may use to switch control to another and refresh the possession time.
While possessing a Doll, if any weapons get within 22 meters of the Doll Master a colored border will appear around the screen to alert the player.
If a possessed Doll is destroyed by a weapon, the Doll Master will be Exposed for 13 seconds.
COOLDOWN 12 seconds.
After focusing for 1 seconds the Doll Master instantly travels to selected , destroying it in the process.
COOLDOWN 60 seconds.
Jump
After focusing for ? seconds, the possessed Doll can jump forward 6 meters over 1 second.
COOLDOWN 8 seconds.
MAP:HOTEL
LORE:"From within the walls of an abandoned hotel, summon the craftiest of creatures. The Dollmaster haunts his victims with a deadly lullaby before whittling their petrified bones into his precious children. Set traps, possess dolls for wicked deeds, and disappear into the darkness."
https://www.youtube.com/watch?v=qv8_WDtAIEA&
Monster Mutations
Status Effects
AgonyBlunderCoweringDisrupted ExposedEnragedSkill BoostStaggeredJammedVision
Status effects are displayed that the bottom of your screen. They can be buffs or debuffs to your character. Most will have an outer ring to show how long they will last for.
is only applied from a Plague the Monster brings in. It increases the rate in which teens on the ground bleed out by 250% of the normal rate for 11 seconds. You normally lose health at about .5% per second
A blunder happens from a missed minigame skillcheck. It slows your crafting progress by 50% for 5 seconds.
is similar to disrupted, but is caused by Werewolf's Howl ability. The duration cannot be increased with SCREAM FEST.
When a Monster gets a successful hit, they Scream, causing a wave of disruption in a 30m radius around where they are. If a Teen is caught in the range, they are disrupted for a base of 5 seconds. The perk SCREAM FEST can increase the duration to 5.6, 6.2, and 6.8 seconds. teens cannot revive, heal, use items, craft, or use weapons. It won't stop the activation of perks.
The other side can see your aura (an outline of your body). Capturing the rift, perks, mutations, and mods can all cause you to be exposed. You don't take more damage with this status effect, it only gives the information of where you are.
This is a mechanic that empowers the Monster. Each time the monster gets a successful attack, their rage meter goes up about 33% (see Monster section for a more detailed breakdown). An empowered Monster's next attack will cause the Teen they hit to go prone immediately. Any stun or banish against the monster will remove the effect.
A crafting speed increase after getting a "perfect" skill check. It increases your crafting speed by roughly 50% for 1 second.
Stagger is currently only applied by a Wart's leap shock-wave. It only slows a Teen's movement speed by about 75% (similar to the speed they are when they are attacking with a weapon).
The status effect can happen through the Plague of Dread It reduces your crafting and healing speed by 50% for 20 seconds.
is a buff gained through multiple means and means that you're able to see the aura of the other team. The most common causes are the rift and noisemakers but there are multiple perks, mutations, and mods that can cause it.
Sound
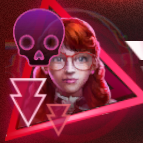
IF Sound Wasn't Stopped By Walls, This Is How It Would Look. Red Is The Terror Track(35m), Yellow Is The Footstep Distance(20m)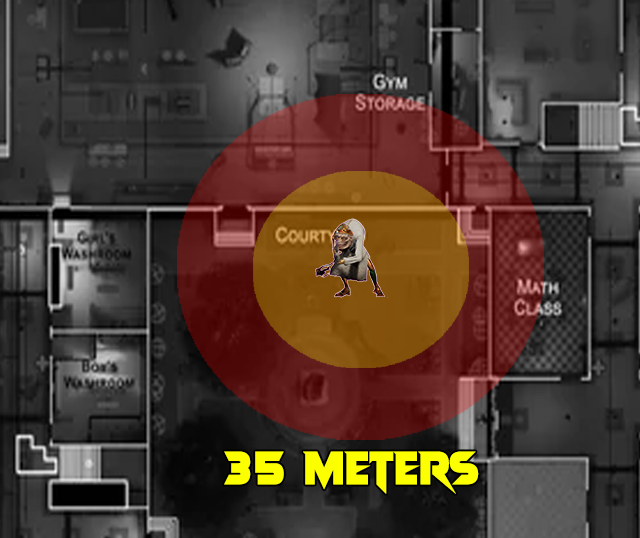 HOW SOUND WORKS IN VHS
 This Also Is The Logic Behind Doll Detection, Crafting Tables, Rift Spawns/shockwaves, And Monster Screams!
Sounds in VHS has interesting logic behind it and can take a little bit to get used to.
Sounds is affected by walls. Sound travels ONLY THROUGH OPEN SECTIONS. IF you are downstairs in High School, and the monster is directly above you; they are technically 8~ meters away. Since there is a solid wall between you, you won't hear them. There is 1 exception to this rule! Look at the below examples for a visual example.
Hopefully this conveys how sound travels through the shortest distance but not through walls.
Scoring Points
 TEEN POINTSINGENUITYGRITCOOPFIGHTMonster PointsONSLAUGHTPURSUIT TORMENTDOMINATION
During the game, certain actions give you points in categories. There are 4 Categories and the max level of points you can earn in a single one is 4000, making a score of 16000 a perfect game. These points give you experience in whichever character you were playing, as well as Account Level experience.
Actions that award points
appear in the top right!
THE POINT VALUES I HAVE ARE SUBJECT TO CHANGE!
You can get more or less depending on some factors but this should give you a better understanding of which actions give you which category!
Interacting with objects, either by crafting, opening containers, or using items.
SKILLCHECKS - 200 GOOD, 250 GREAT. MOST I've seen is 5 for 1 Raygun.
Found Item (450 for unlocking Soda same for Candy machine + wastebasket)
Drank Pop (100)
Trap Disarmed (50)
open book of the Dead (600?)
walkie Talkie Time (250 full duration)
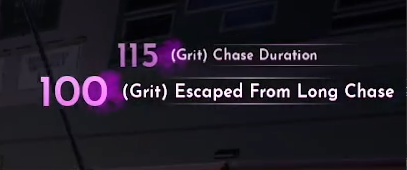
Grit is how well you're surviving. Escaping chases, collecting luma, healing yourself, as well as winning the game gives you 1000 + about 150 per % life you have left (1/2 hp will get you 750)
Chase Duration (down, hit or escape / points depend on duration. 60-90. got 27 for having the chase symbol for 5 seconds. 114 for 28~ seconds of chase symbol. 148 for 20~ seconds at end of game with weapon? 73 for 14 seconds with weapon. 32 for 6 seconds with weapon it was ambush kill. 162 for 25 second chase)
Luma Absorbed (111, 119, 97, 90, 107, 145. Luma seems to grow in "potency" and reward more points depending on their life span.)
Shatter Armor (325)
Escaped from Long Chase (100 for a 5-10 seconds need to double check)
Self Heal (255 full heal w/ staff OR medkit)
Life Loss (Prevented for a WIN after taking 2 hits. around 65% HP for 806. 1166 for only 1 hit)
Survived Match (1000)
Basically anything that helps your teammates. Healing, assisting with weapon strikes, etc.
Guardian (250 getting hit from healthy)
Revive Assist (88 for just pickup, 490 for full pickup with another teen helping, 691 for around 80%)
Heal Assist (950~ for full heal, 1021 full healx2)
Chase assist (shattered armour when other people were also being chased, also ended in someone else getting a wound, 300 for being a part of a chase where someone else got a kill? maybe rewarded for pathing into a weapon )
Wound Assist (263 for breaking armour into wound. 850 for same thing in a different game)
Resurrection (1250)
Damaging the Monster/minions with weapons
Weapon Crafted (400 even charge weapons)
Damaged monster (197 WART full armour break)
Wound Monster (849 full cross wound = happened again same. 850 for eye wound )
Damaged Monster (60% damage then hid behind wall 140, 60% with sword 130)
Killing Blow (850)
Stun Monster (500)
Destroyed Minion (500)
Dealing damage to teens
Teen Injured (100) hitting teen armed and unarmed
Teen Downed (150-200) unarmed
Teen Defeated (350) killing a teen
being in chase with teens. More points if the teens have a weapon but you don't get struck.
Chase Duration roughly 38 points per second the chase lasts.
Unscathed In Long Chase (100 no weapon )
Using you power to damage teens
Armored Attack (200(+100)
Leap Attack (200(+100) don't have bonuses, it just said +100. I hit the teen about 2 seconds after leaping and I didn't stagger them cause I was running kinetic so there must be a timer after using the power)
Echolocated (300) I had JUST echo'd and hit someone about 6 seconds after, the echos were still visible when I hit them)
Hunt attack (225) Attack while hunting
Howl Attack - Attack a cowering Teen
Jump Attacks - Attacking within 1.5 seconds after using your Doll Jump ability
Doll Attacks
Damaging armed teens
Hit Armed Teen (175)
Rage Knockdown (300 even on injured teen)
Wounds Avoided (500) awarded per stigma left
MAPS
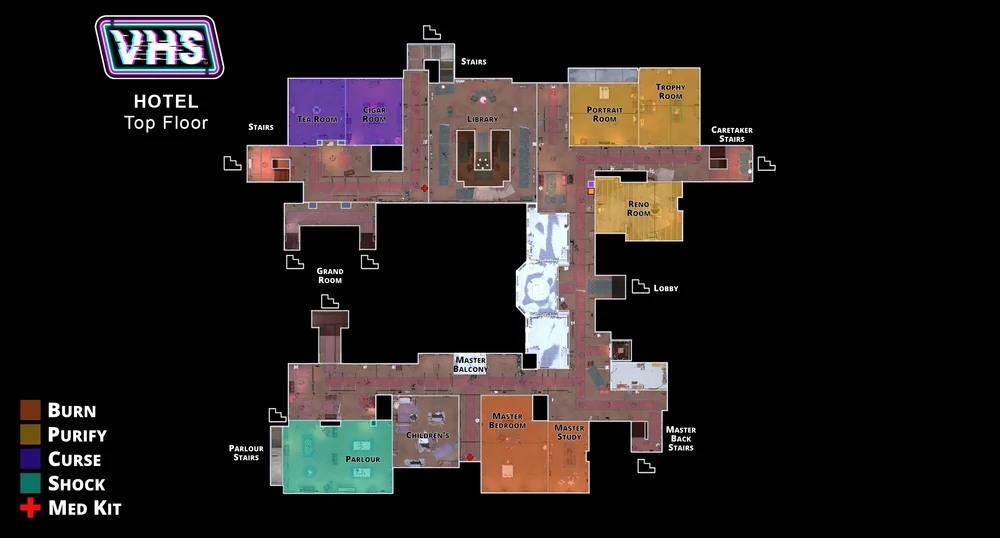
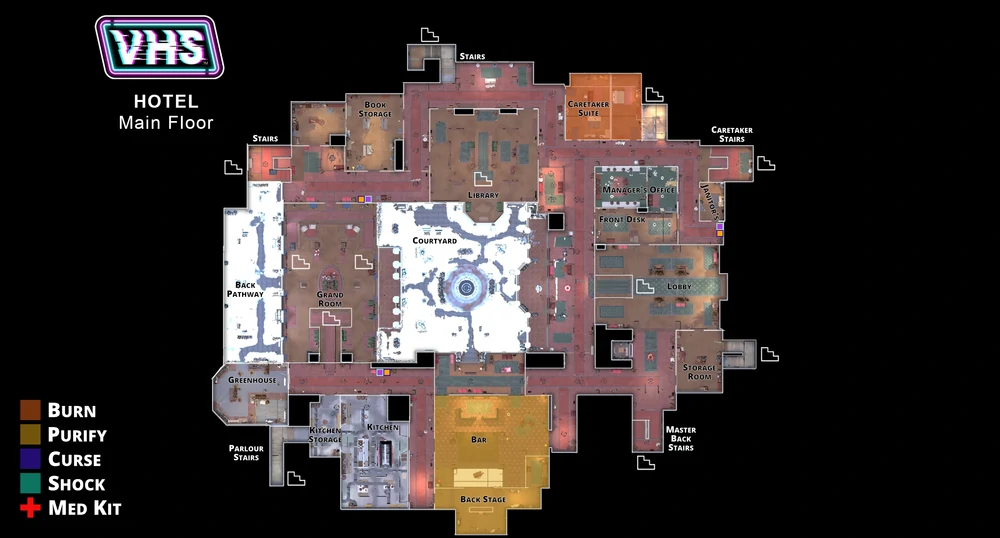
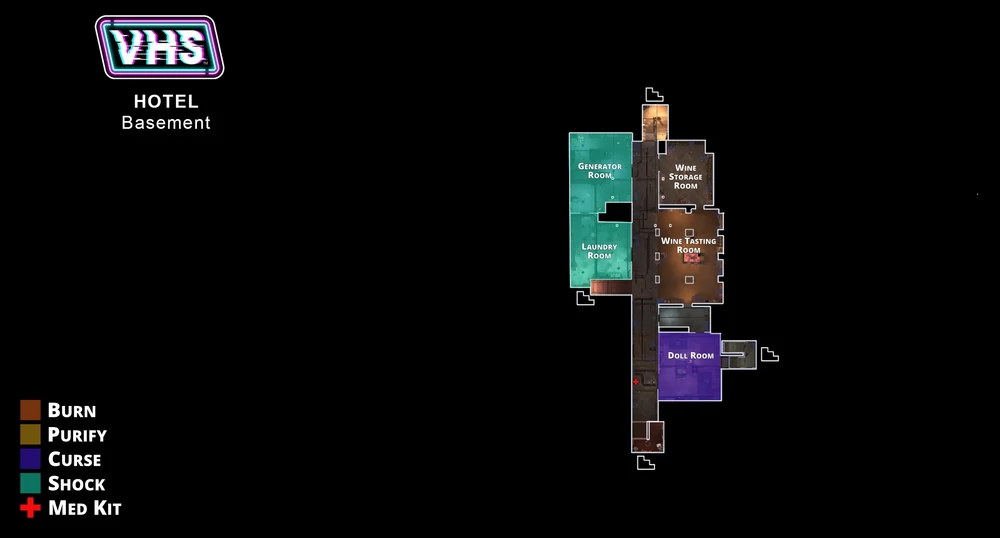
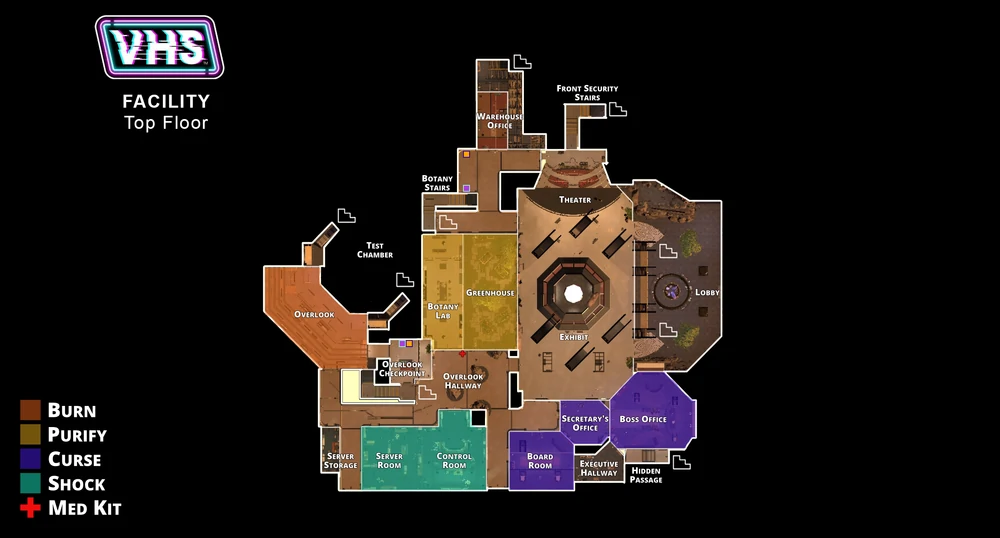
Currently there are 3 maps in VHS. They belong to each of the 3 original Monster movies!
The Hotel
The Facility
The Highschool
Prizes
This section is a bit sparse but also long winded. Basically you have point boosters, an addition Monster ability that resets on 8-11 hits, Map chance increases, the ability to start with an item as a teen, chances to spawn away from the monster or close to teens, and either extra or fewer item spawns on the map. I'll tweak this as it goes, there's a quick video at the bottom that basically says all of this.
Prizes are something you can bring with you into the match that give you a benefit. Some will simply affect your score; granting you more experience at the end of the match, while others will grant you advantages in games.
You earn prizes through a character's journey and through prize boxes you gain from leveling up or purchasing with in game currency in the shop.
Prizes come in 4 different rarities, and certain movie scenes require specific rarities and types.
The first prize type we'll talk about are score boosters.
Your inventory of score boosters are shared between Monsters and Teens. They boost different but similar categories, for example- onslaught and fight scores are both mostly earned through damaging the other side. It's important to note that for movie scenes that require you to earn a minimum score in a category, boosts are NOT counted.
Map offerings can also be used by either side. They're very straight forward, choose this prize if you wish to go to a specific map. If both sides bring a map prize, it's random as to which one will be chosen!
These next few prizes can only be brought by the teen side.
Stash prizes add one additional pickup to spawn somewhere on the map. I don't believe these actually affect additional wastebaskets or vending machines to be powered on and only have them laying around somewhere. Leo has a great perk to help you to find them!
Unlike stash prizes, These rare prizes allow you to spawn into the map already holding an item! These are very strong, as you don't have to spend time searching around the map for your prize!
Next are spawn prizes. These affect where you spawn in at the beginning of the match, either Away from the monster and next to a weapon station, away from the monster and with another teen, or simply spawn away from everyone. These can be really nice to ensure that you're much safer from getting caught early on.
The last teen prize is called Black Magic and it affects the Book of the Dead! It can give you one of 4 different effects chosen randomly,
Reducing the lockbox puzzles down from 4 to 1
Bringin back the teen into a healthy state instead of an injured one
giving them 100% more life, which lets them take a few extra hits,
or reduce the noise while rezzing for a stealthy insult to God.
Interesting enough, you can stack 4 of these offerings and it will apply all of them, making for super easy resurrections
Now on to the Monster ONLY
As a counter to bringing snacks, the monster can deny them from spawning. These can really help hinder the extra supplies the teens might have brought, or punish them for not bringing any at all.
Plagues are an additional monster ability. You have one use at the start of the match, and you get another use after you've hit enough teens. Since games are typically 20-30 hits, you can get about 2 to 3 uses on average.
Late fees are in their own category. At the start of the match, you can wait an additonal 7 seconds before you transform, meaning you have 21 seconds to run around and find a teen. Once you find them, your transformation duration is halved, meaning whichever poor player you find will have very little chance to run or hide.
The LAST and most rare prize is the Mouse Trap.
This cheeky little prize spawns every player in the same spot, causing a mad dash from all the teens: as they've spawned far from crafting stations and in the open. The monster can quickly transform and chase down one or two teens before any weapons are made. This CAN be countered by the teens bringing their own spawn prizes but as you can't tell what the monster is bringing before hand, you may just get unlucky. Personally I prefer to announce a "dance party" while we're in the lobby; where we all dance as teens for a few seconds at the start of the match, and then I leave them be for a minute to get started on weapons; but to each their own.
With that, you now know all the prizes in VHS! Subscribe for more guides and gameplay videos, and feel free to follow me on Twitch! I have over 300 hours currently in VHS and I'm absolutely loving the game. If you have any questions or requests please feel free to ask in the comments or my chat! Thanks again to everyone for your support and look for more VHS guides to come soon!
This is a somewhat outdated guide but it still works as an overview for the prizes
Game Lore
Extra Resources
Coming From Dead By Daylight Or Other Asym Games?
We've heard it before, VHS is NOT DBD.
* ANY FPS GAME!
Aiming, reflexes, using voice comms, positioning, tactics. All these skills can transfer over to VHS. Luckily there are a lot of weapons with large AOEs and autoaim so it's fairly forgiving.
* Dead by Daylight!
The problem with coming into VHS from DBD is when people don't understand they're VERY different games and not ALL of your skills will transfer over. Some do though.
The main killer interaction for survivors in DBD is running away/looping. A successful interaction is when you don't get hit or even avoiding an interaction all together. In VHS, you NEED to be interacting with the monster. There is no escape, you should be staring the monster in the face multiple times in a match of VHS. If you come into VHS expecting to be a god since you're so good at DBD you're in for a bad time.
Looping CAN happen and knowing how the character can move is important.
360's are a thing, though harder to pull off.
Knowing not to sandbag your teammates is important. It's actually easier not to since they can ping their position + you can always know where they are by looking in the bottom right.
Lockers are a thing but there aren't any survivor perks associated with them and they DON'T block aura reading or monster abilities. THey act more as a place to visually hide from the monster which can help if you pop out with a weapon or a WART echo'd you or something.
The "EXPOSED" status effect means you're aura is shown, not that you'll go down in 1 hit
When the monster is "ENRAGED" think of it like DBD's Exposed Status effect. Next hit insta downs, but it only lasts for 1 hit and will go away if the monster gets banished or stunned.
There still is RNG in terms of the where items spawn, where YOU spawn, which map you get (though there are map offerings) and where exactly the crafting stations spawn. They'll always been in the same general area but they may move 1 room over. The RNG is far less impactful and game changing.
ANY game with Communication! LOADS of games have voice chat to help your organize yourselves and call out information. There are lots of perks in DBD that can help with
Full Gameplay
These are some additional matches that I've had as both Teen and Monsters!
https://www.youtube.com/watch?v=o-MIVzDLzwI&ab_channel=bunbunHD
https://www.youtube.com/watch?v=GfiBh-LPG2o&ab_channel=bunbunHD
Additional Links
This is a living document, meaning I'm going to constantly update and change it as the game progresses. I truly love this game and want to see it succeed. Links to my social media to ask questions or just hang out:
Discord.gg/VHS - official discord
https://twitter.com/VHSTheGame -official twitter
Author's Links
www.twitch.tv/bunbunHD
www.YouTube.com/bunbunHD
www.Twitter.com/bunbunHD
www.tiktok.com/@bunbunHD
Any questions or comments can be written in the comments, or sent to [email protected]
PATCH NOTES - Links
Patch 1.0.69499
Bug Fixes & Tweaks!
https://steamcommunity.com/games/611360/announcements/detail/3388413422001610988
GUIDE UPDATE LOG
7/27
- Added a section to show how often I update as well as updated title.
- Added to the Sound Section with an amazing gif I made myself and it looks good so be nice >:(
- Added Book of the Dead to Teen Items and Added gif showing the rez
- Added Patch notes section and Patch 1.0.69499 link
Source: https://steamcommunity.com/sharedfiles/filedetails/?id=2837835503
More Video Horror Society guilds
- All Guilds
- [RU] VHS
- VHS DBD?
- Guia para Iniciantes
- Monster guide (all you need and extra information)
- All weapon skins
- All Status Effects
- Fix for no Audio in-game
- All Known Movies
- Monster Guide! (General Tips,Tricks,Advice) [WIP]