
Story Mode Completion


Nothing to say here. You'll get this achievements while playing campaign. In my opinion all the bosses are pretty easy (except for the last one).
- - - - - - - - - - - - - - - - - - - - - - - - - - - - - - - - - - - - - - - - - - - - - - - - - - - - - - - - - - - - - - -
No Mercy: Mag Bandit 1
Defeat the Mag Bandit.
No Mercy: The Gunner Twins
Defeat Church and Jorge.
No Mercy: The Sheriff
Defeat the Sheriff.
No Mercy: Burger Gil
Defeat Gil.
No Mercy: Mag Bandit 2
Defeat the Mag Bandit again.
No Mercy: The Gunner Twins 2
Defeat Church and Jorge again.
No Mercy: Dr. Christoff
Defeat Dr. Christoff.
No Mercy: Tricky
Defeat Tricky the Clown.
No Mercy: Gestalt
Defeat Gestalt...for now.
No Mercy: The Gunner Twins 3
Defeat Church and Jorge yet again.
No Mercy: Dr. Crackpot
Defeat Dr. Crackpot.
No Mercy: Ghoul
Defeat Ghoul.
No Mercy: Blackguard
Defeat the Blackguard.
No Mercy: The Hive
Defeat the Hive.
No Mercy: Phobos
Defeat Director Phobos.
No Mercy: Gestalt 2
Defeat Gestalt once and for all.
Story Victory
You've beaten the Story Campaign! Well done!
Story Victory: Madness
You've beaten the entire Story Campaign on Madness Difficulty. Incredible!
* To unlock Madness difficulty you have to complete level on Tough first. Playing on Tough isn't hard (I did my first playthrough on Tough difficulty), only time consuming.
* May take a while beating last levels on Madness. Just try over and over and you will get it eventually
Story Mode Miscellaneous


B*O*N*K
Two besties put their heads together in an attempt to defeat you.
* In any fight with Church and Jorge stand between them and they will try to run into you, bumping into each other instead if you dodge at the right timing.
Iron(ic) Defeat
Finished off Project Gestalt with a taste of his own medicine.
* After defeating Phobos on the last level you will have to kill Gestalt. Just grab metal peace of armor nearby and stick it into his scull.
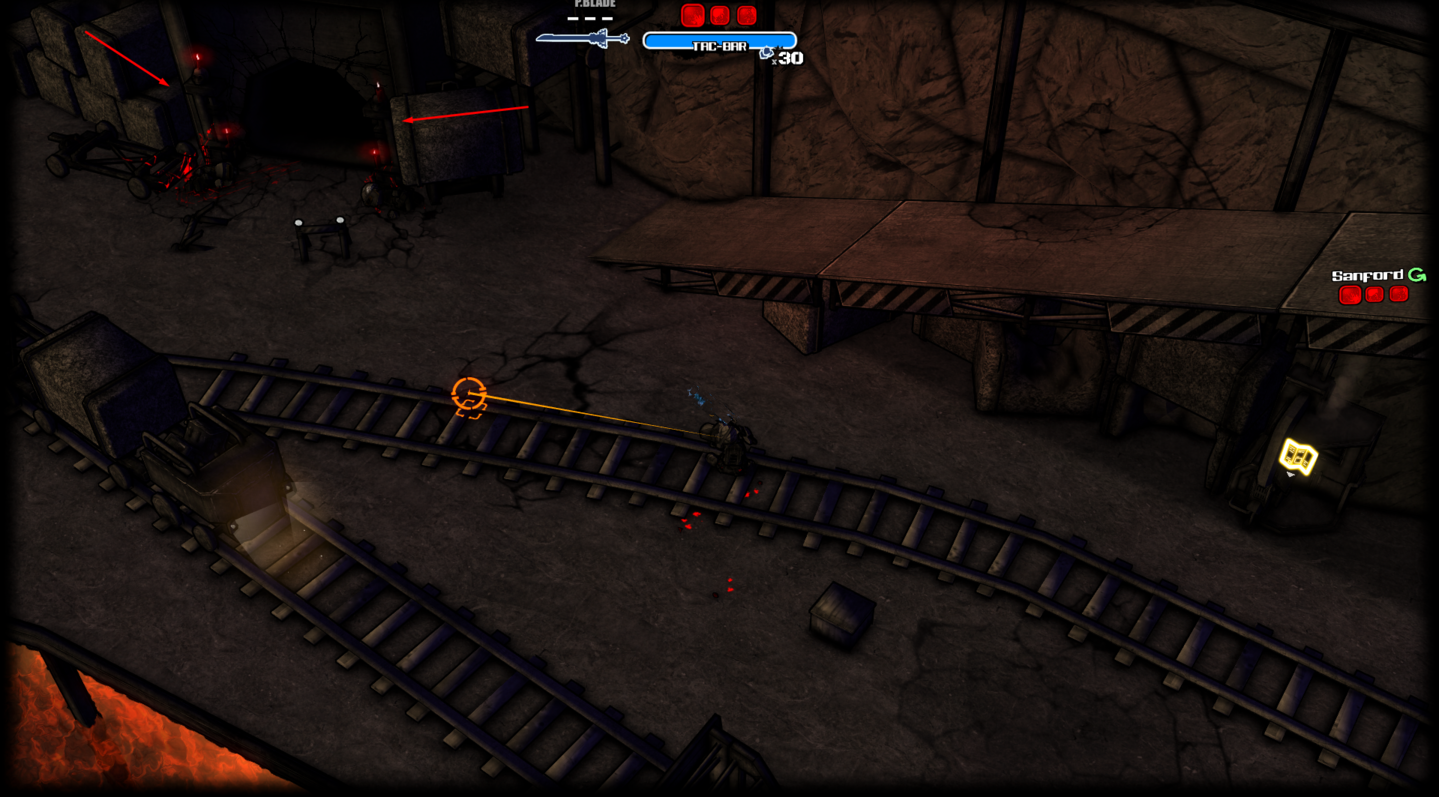
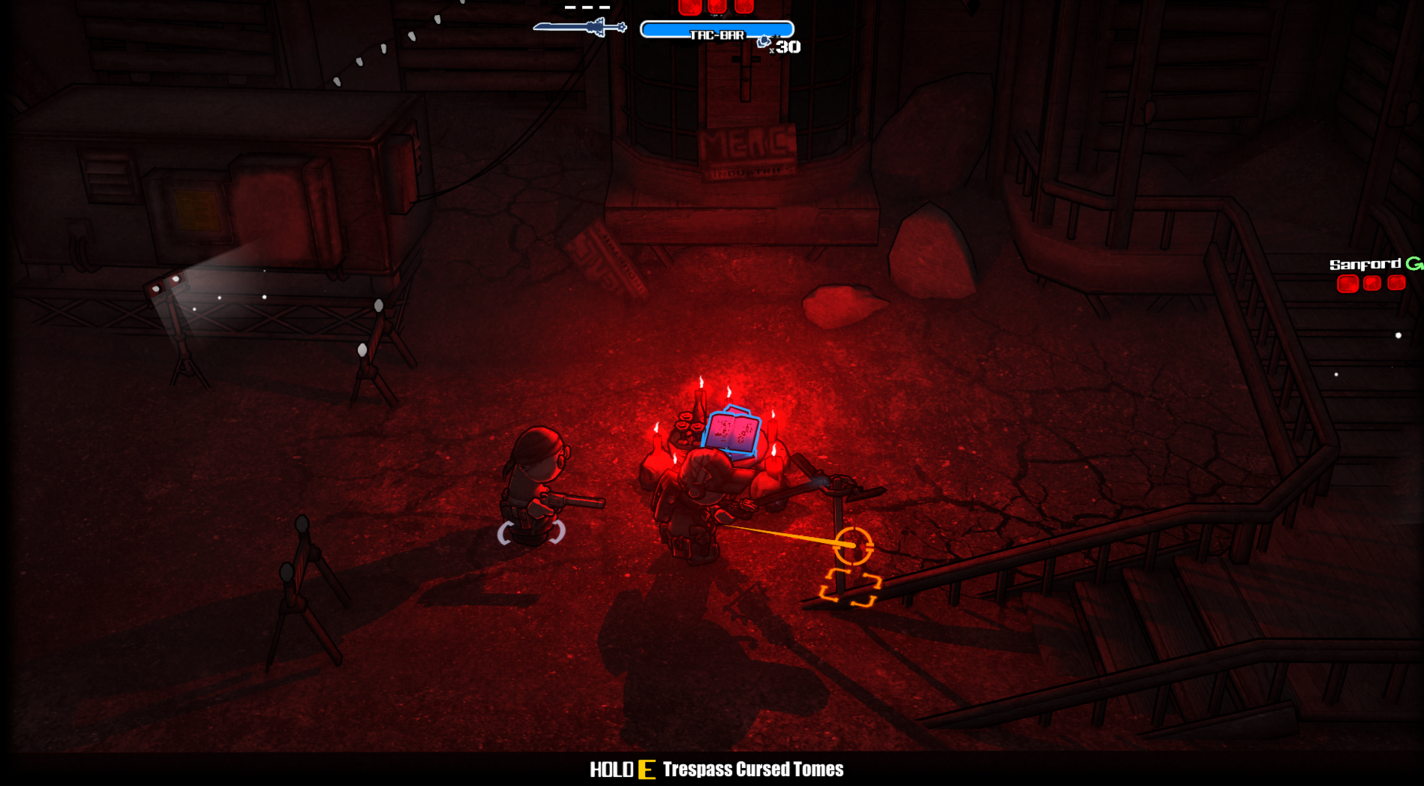
Bloodsucker
You've been cursed by the undead!
* In the mining sector go all the way to the bottom. To the left will be a cave. Inside you will find a book with candles around, read the book and three vampires will appear. Kill them and now you have both the achievement and curse on you.
* First screenshot is the cave and the second one is the book which you need to use.
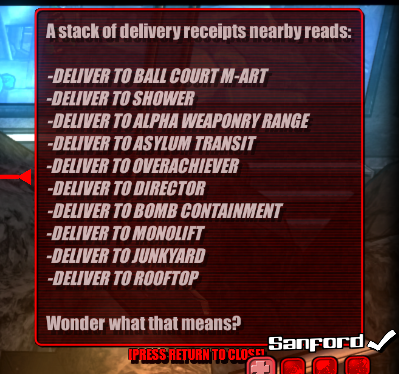
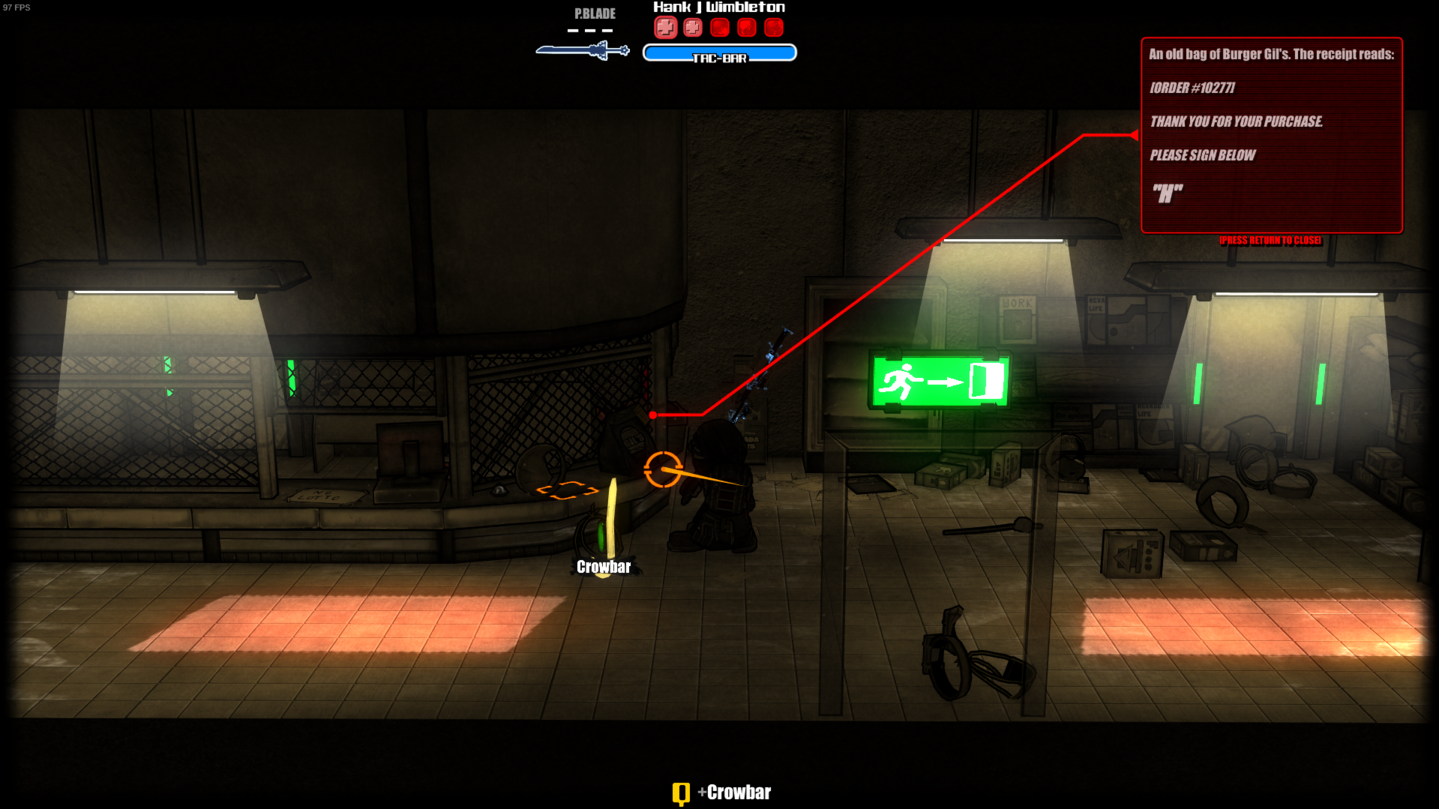
Burger Detective
Found all of Burger Gil's special deliveries.
* You need to find Gil's list of orders and start looking for them to deliver them to customers.
* Gil's list is on the "Beat the Streets" level, right before the fight with the Gil himself. When you enter the building (after walking through the streets) Gill will run out, shout something and then run back. Don't go after him and instead approach food package on the table and press E. The list will appear.
Here's the list:
Locations of Gil's packages with screenshots:
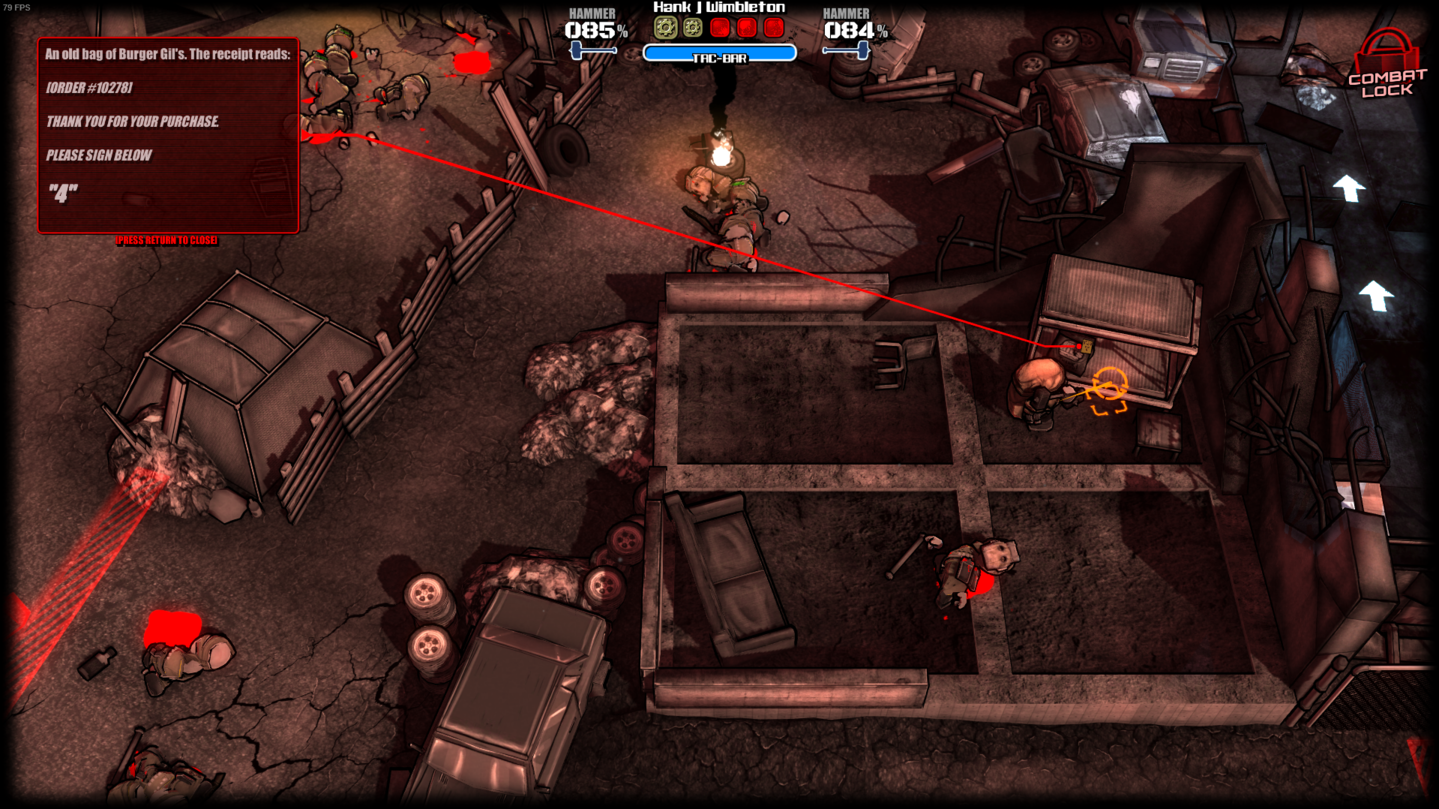
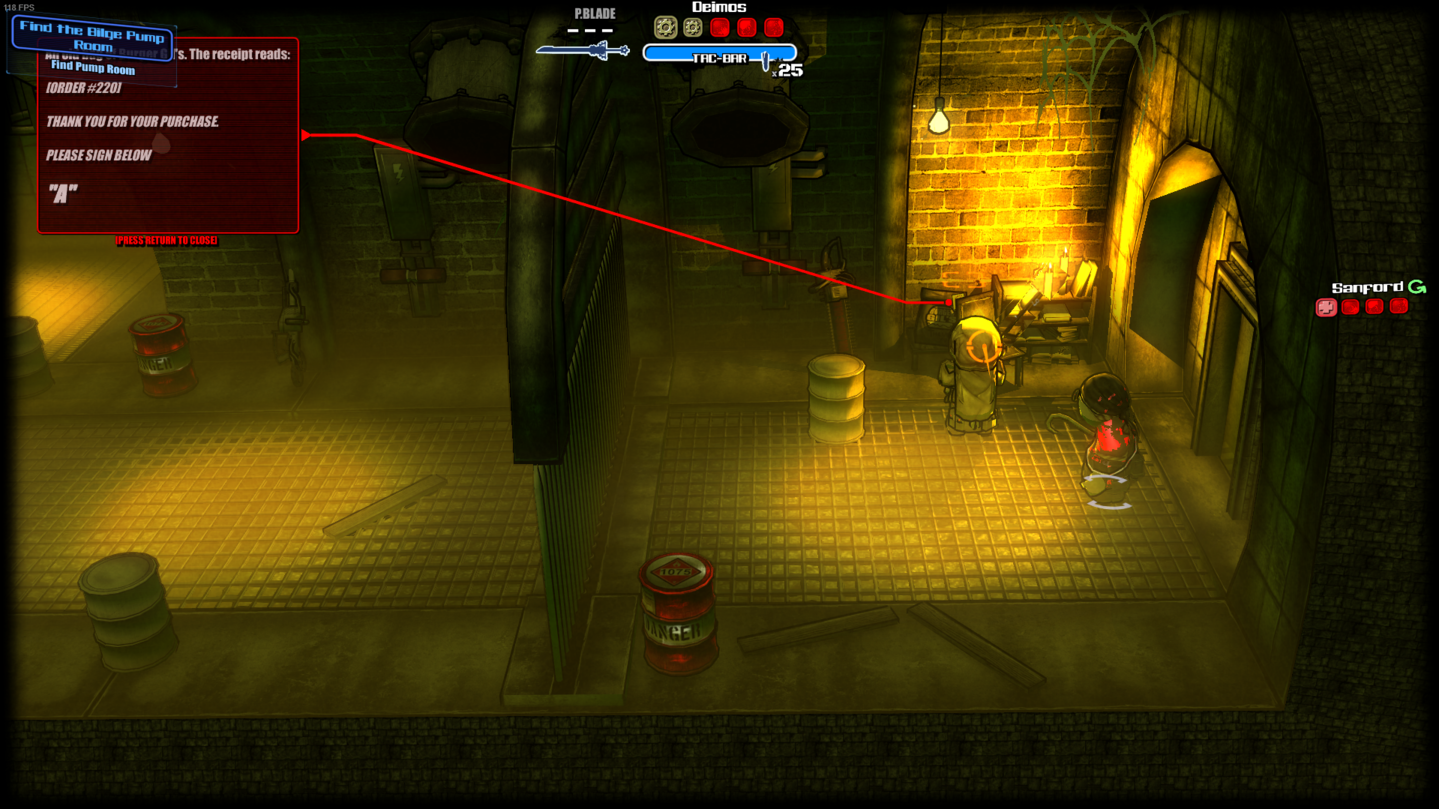
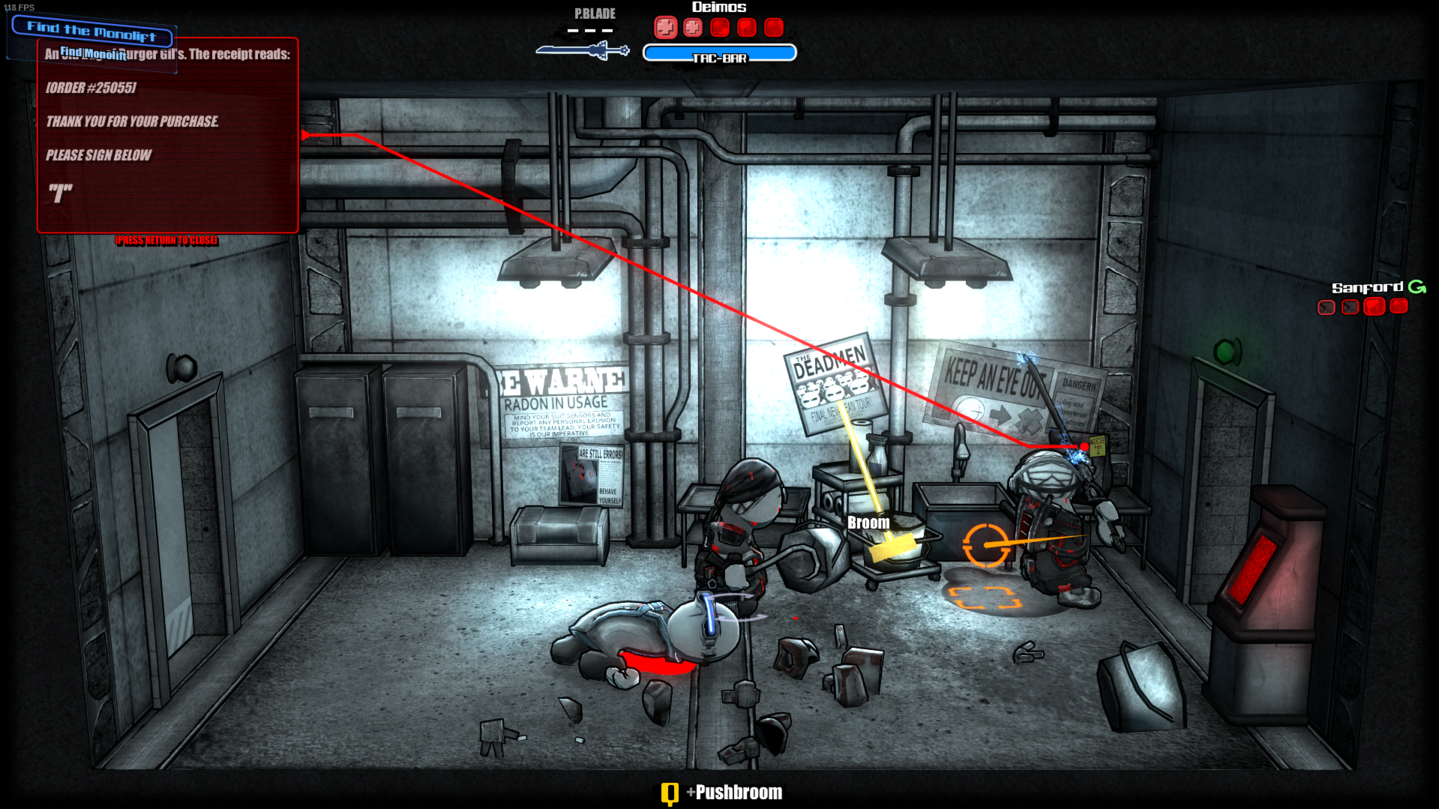
1) The Outskirts. Inside the gas station near the "The Escape" mission.
2) Mission "The Escape". You'll be walking through a junkyard. Package will be in a dumpster.
3) Mission "Power Play". In a room where you meet Rich and turn the station off.
4) Mission "The Bomb Factory". Next room right after the fight with Church and Jorge.
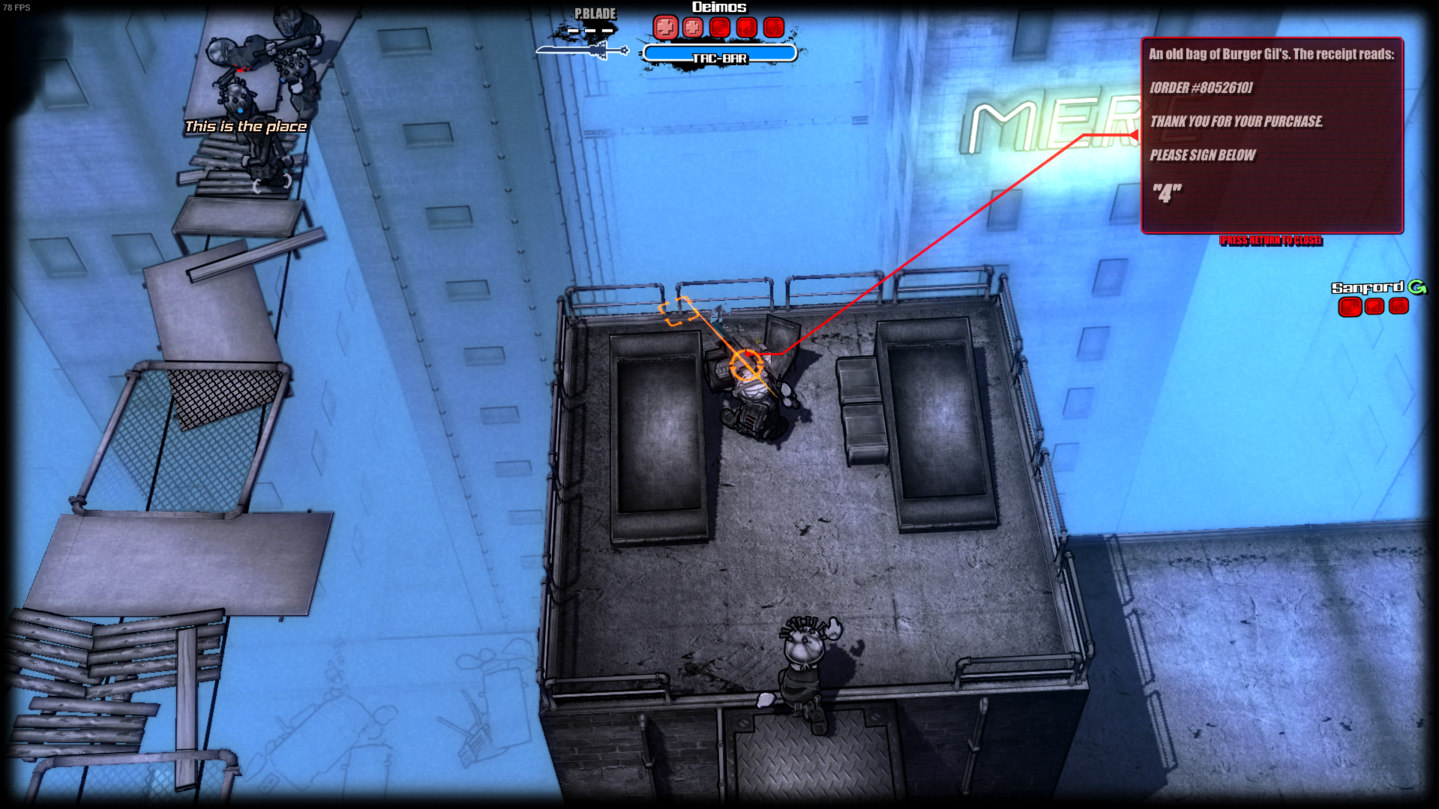
5) Residential Sector. There will be an arrow with word "Gil" pointing at "Beat the Streets" mission. Package will be on a roof up from that arrow.
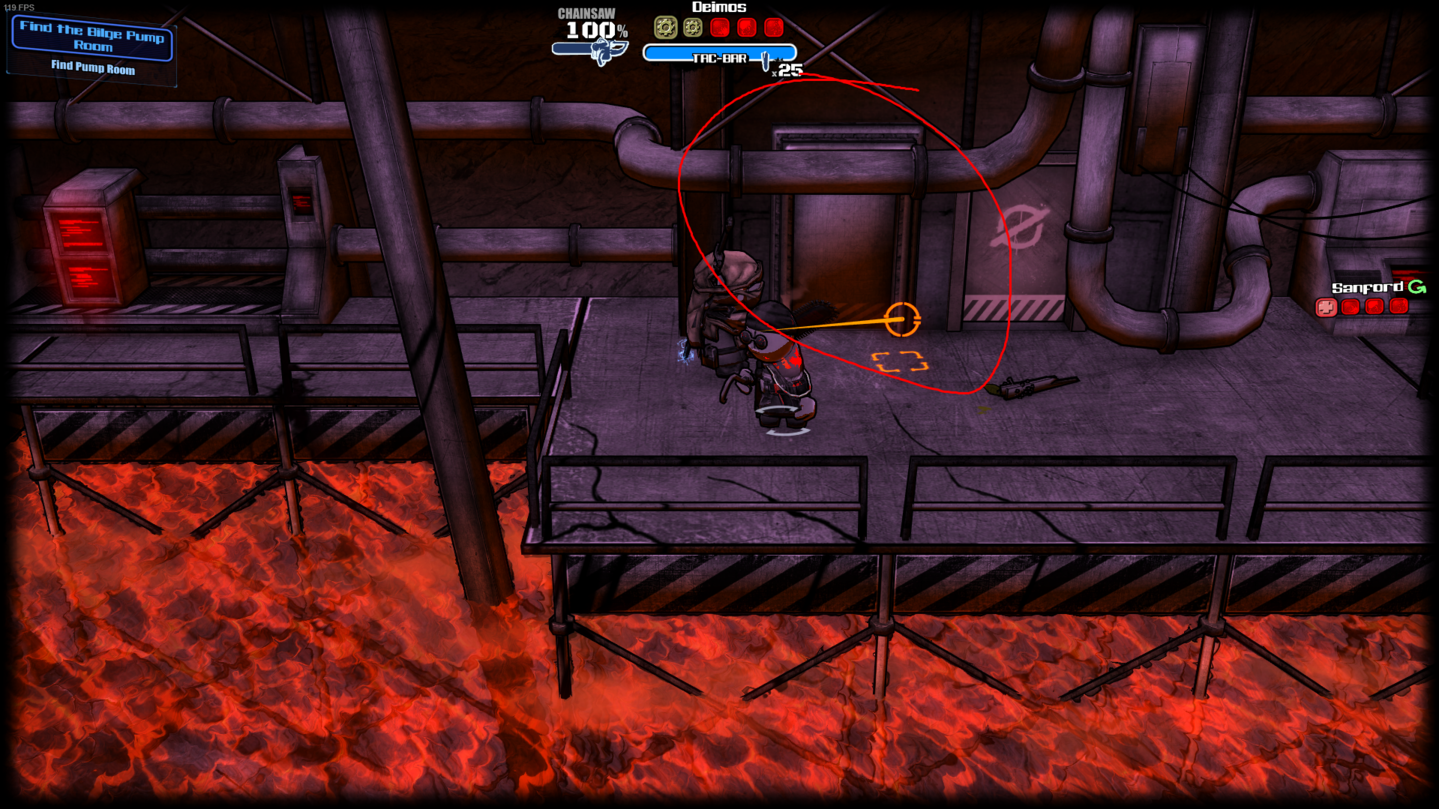
6) Mission "Flood Control". Secret door which leads to the sewers (with a lever for 'Lever Alone' achievement).
7) Mission "The Last Leg". The room after fight with three guards with shields.
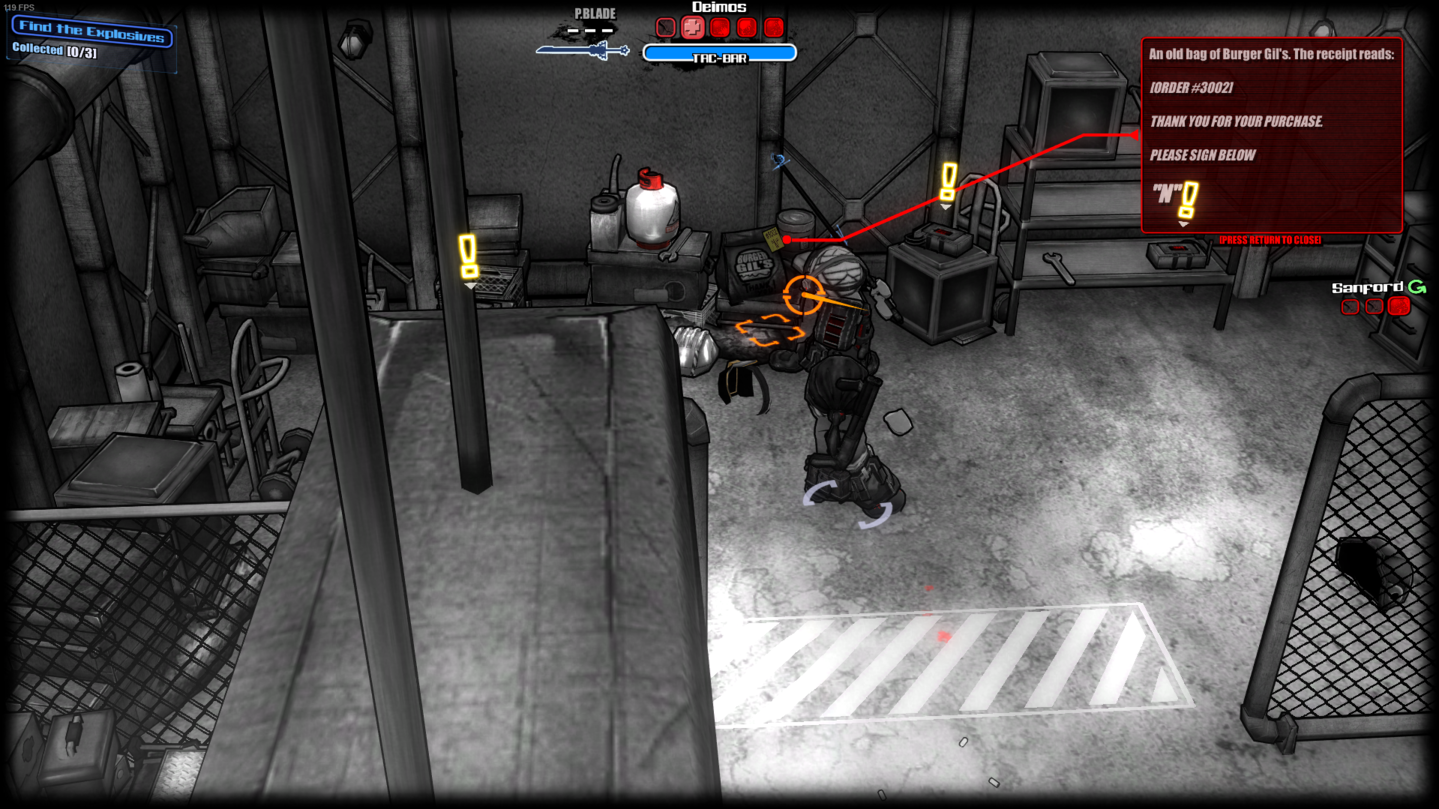
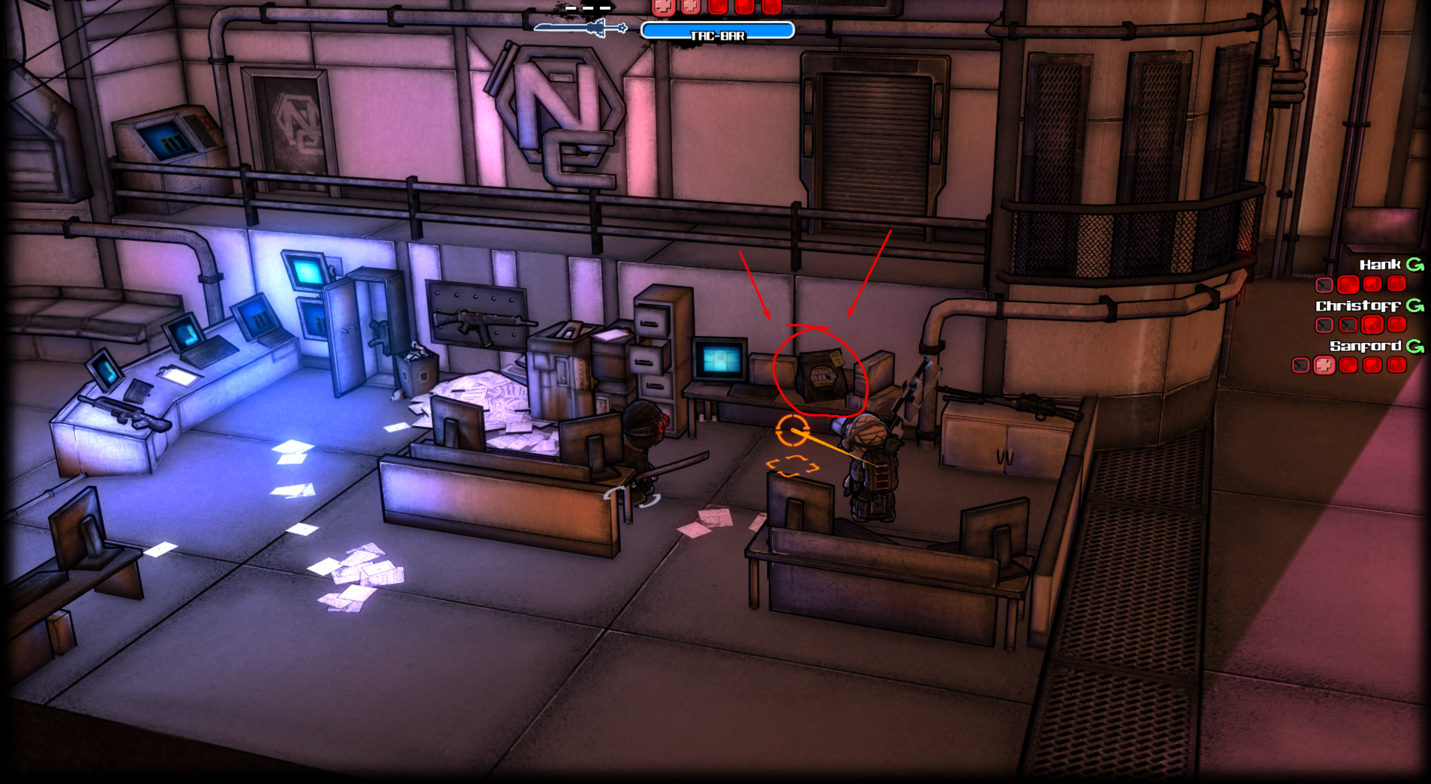
8) Mission "Base Jumping". At the computers in GO3LM locker room.
9) Mission "Climb!". Shooting range after the 2-minute fight at the helicopter platform.
10) Mission "The Rush". At the beginning of the room with Phobos's body.
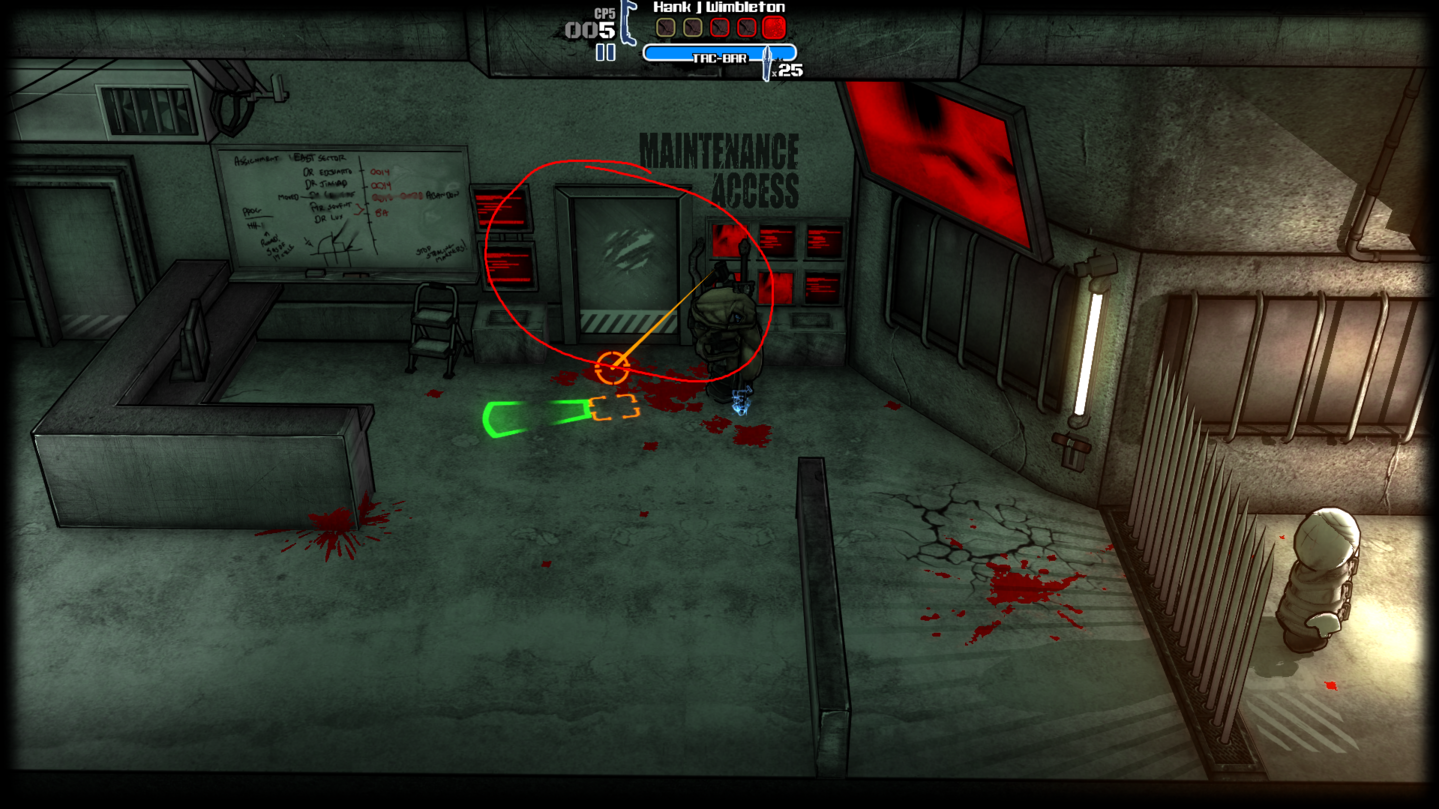
Lever Alone
Discovered both ends of the hidden sewer passage.
* Seeking Asylum and Flood Control levels have two secret doors leading to a grated sewer. To get the achievement, you need to lower both levers on both sides of the grate in these levels.
* There's also Gil's package there.
* First screenshot is door on "Seeking Asylum" mission and the second one is the door on "Flood Control":
Arena Mode Completion


You'll get this achievements while playing arena mode. If you are struggling with some levels, farm XP or money on easier levels. Also don't forget to use hirelings! They may seem too bad at... well... EVERYTHING, but on high levels and with good equipment they will help you a lot.
- - - - - - - - - - - - - - - - - - - - - - - - - - - - - - - - - - - - - - - - - - - - - - - - - - - - - - - - - - - - - - -
Victory: Sleepwalker Program
You've completed the Sleepwalker Program.
Victory: Pit Stop
You've completed Pit Stop.
* The West side of the map will group enemies until there are enough (around 6) to launch an attack. A good idea is to always check there and kill a few guys.
* Enemies will also try to break the East barrier to launch attacks, this buys you some time and allows for easy kills as they are busy.
Victory: Foundry
You've completed The Foundry.
Victory: Fast Track
You've completed Fast Track.
* Look out for the big guy. His charged attack can make your life much harder.
Victory: Slaughter Time ™
You've completed Slaughter Time ™.
* First waves are good for farming XP (especially acrobatics) and leveling up your hirelings.
Victory: Haunting
You've completed The Haunting at Nevada House.
Victory: Murder Room
You've completed The Murder Room.
Victory: Hard Sell
You've completed Hard Sell.
* One of the hardest levels in my opinion. Here's some tips:
1) At the beginning of every wave place your hirelings strategically. I usually order them to take cover behind some boxes so they look in direction of one of the hallways.
2) Don't chase the enemies to their spawn zones, you may miss others going to the objective in the meantime.
3) Don't let the enemies brake the casing of the objective because it will result in fast game over.
4) Try to kill fast weaponless guys first. They are very annoying and can quickly shorten the distance between you.
Victory: Facility
You've completed The Facility.
* The last level and one of the hardest. Be sure to upgrade and use support squad because your hirelings probably won't make it far enough.
* Try to avoid killing melee enemies (shield dudes and big boys with hammers), as there is a pop cap of simultaneous enemies in the arena, the wave become a lot more manageable when there are only 2-3 guys shooting at you at the same time.
Wave Completion
You've beaten all Arena Combat Waves! Nice.
* Arena combat waves are: all helipad missions + the sleepwalker program (same for the next achievement).
Wave Completion: Madness
You've beaten all Arena Combat waves on Madness Difficulty. Outstanding!
* By default, madness is unlocked after winning in 'Tough', but you can actually unlock madness mode by finishing in any difficulty, as seen in this guide.
* Hard Sell and The Facility are VERY hard to do on Madness difficulty so be prepared and upgrade as much equipment and hirelings as you can.
No Mercy: The Machine
Defeat The Machine.
* For me it was an easy boss, just kill robots, take their guns (if yours are empty) and shoot the Machine.
I've Seen it All
Complete the Arena campaign three times, and collect three Imprints.
* When you get to the final story mission, you'll be able to start from scratch with a new imprint, and a little boost to stats.
* After the second run, the fastest class to finish the game again is tinkerer due to his ability to install very powerful upgrades to guns. I recommend this guide for speedrunning.
Origin Collector
You've imprinted your Arena character with every available origin!
* You need to complete Arena Mode with all origins.
Arena Mode Miscellaneous


Hello?
Doc, are you there?
* In the main HQ room, there is a phone to contact 2BDamned.
* You need to use it right after you complete "The Goods" mission, when Doc is standing in the same room. (Thanks to Umbra for checking this)
Take a Load Off
It's a really big load.
* For this one you need to play on the origin Massive.
* After Fickle Friends mission loft will be unlocked on your Base. In your loft go upstaires. In a room there is a bed, a TV and a sofa. For achievement, you need to interact with the bed.
Nothing Good On
Found something more important to do than save all of Nevada.
* After Fickle Friends mission loft will be unlocked on your Base. In your loft go upstaires. In a room there is a bed, a TV and a sofa. For achievements, you need to interact with the sofa and TV.
New You
Give yourself a bangin' new look at the loft mirror.
* After Fickle Friends mission loft will be unlocked on your base. There is a mirror in your loft, just use it to change your grunt look for tokens
Dye Trying
Swap those grey duds for a colorful new getup at the colorizer.
* There is a closet next to Q-Bert's shop in which clothes are dyed. Use it and the achievement is yours.
Maximum Headquarters
Fully upgraded all your base.
* As description says, just upgrade fully hireling level cap (kitchen), hireling capacity (next to the kitchen), support squad (to the right from the kitchen) and Medbay.
Nerdgun
Deck out a Magiturge wand with an attachment in every location.
* Playing as Magiturge origin, upgrade your wand in every way possible. That's all.
Make it Reign
Complete a Heist mission at Madness difficulty and let those sweet, sweet tokens spill.
* To get the achievement, you need to drill through all the vaults on Madness difficulty and open the box with tokens. You just need to open the box, nothing else. Pretty hard to do this mission on Madness. I recommend to prepare for a tough fight.
Slaughter Achievements


Slaughter Rank: Bloodied
You've made 50 people disappear. Nice!
* Kill 50 enemies.
Slaughter Rank: Impaler
You've fed 200 people to the crows. The crows send you their thanks.
* Kill 200 enemies.
Slaughter Rank: Psychopath
You've cut 500 lives short. I want to be your friend.
* Kill 500 enemies.
Slaughter Rank: Seas of Blood
You've put 2000 bodies into the ground. Some of them may come back later as Zeds, but we won't let that impact your score.
* Kill 2 000 enemies.
Slaughter Rank: Wargod
Well, that's 5000 fewer mouths to feed. What do you mean, "What mouths?"
* Kill 5 000 enemies.
Slaughter Rank: Pale Rider
And behold, a white horse! And their name who sat upon it was...wait, what's your name again?
* Kill 10 000 enemies.
Slaughter Rank: Genocider
Well, you've done it. It probably cost you a lifetime of back pain, but you've wiped out the entire population of a medium sized town. Those 53,594 brave souls will have a light lunch waiting for you in Valhalla.
* Kill 53 594 enemies
- - - - - - - - - - - - - - - - - - - - - - - - - - - - - - - - - - - - - - - - - - - - - - - - - - - - - - - - - - - - - - -
* If you complete main campaign at least twice (on tough and madness difficulties) then you'll probably get the first 4 achievements from this list. If you'll be doing arena mode with 1-3 imprints then you'll get another 2 achievements. But if you are not planning on playing this game for more then hundred hours then you'll have to grind a lot for the last one. I have 90 hours in this game and still not even got half of the kills required.
* If you are willing to grind for the Genocider then I suggest using tinkerer or magiturge imprints. As tinkerer you can buy some fast shooting weapon and upgrade it with dissonance cannon ammo. As magiturge just upgrade your wand however you like, this imprint is very powerful by itself.
Source: https://steamcommunity.com/sharedfiles/filedetails/?id=2961641148
More MADNESS: Project Nexus guilds
- All Guilds
- MADNESS: Project Nexus Guide 1039
- MADNESS: Project Nexus Guide 1029
- Madness PN( )
- The Definitive M:PN Modding Guide (INCOMPLETE)
- MADNESS: Project Nexus Guide 1002
- [WORKSHOP] HOW TO INSTALL A MOD
- Flash Madness Combat games: Download and play just in 5 minutes
- Nexus Codex: Encumbrance and You
- HOW TO MAKE ANY CUSTOM ORIGIN 0 IMPRINTS!
- MADNESS: Project Nexus Guide 953