
Guide


As you may know, Farthest Frontier is a unity game and has the possibility to be modded with MelonLoader. So let's get started !
Step 1 : Downloading required tools
You need to download 3 things :
MelonLoader [github.com]
Il2CppDumper [github.com]
Visual Studio 2022 (with .NET Framework 4.7.2) any edition (community edition is enough)The first tool will help us to load our mod into Farthest.
The second tool will dump some DLLs we need to have from Unity.
The last one will compile our mod into DLL format file. (I will not detail here how to install Visual Studio 2022, there are many videos on YT for you :))
Step 2 : Installing MelonLoader
So now, we have to install our tools. For MelonLoader, you should have downloaded the installer from previous step.
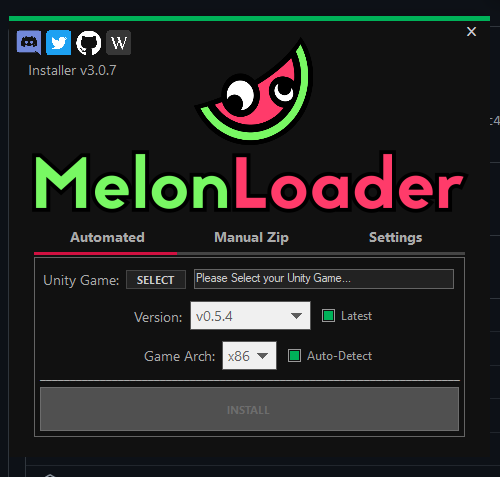
Launch the installer and you shoud see that :
Now click on "Select" button and open your exe file :
Click on "Install".
You should see now a bunch of new folders/files into your main folder :
Congrats ! You installed the loader for mods !
Step 3 : Dumping Unity Dlls
Now we absolutely need to get those DLLs to reference them in our modding project in Visual Studio.
So, extract zip folder of "Il2CppDumper" and open the "Il2CppDumper.exe":
You should have a console opened asking you to open a file :
Open the "GameAssembly.dll" file as shown above. The program will ask you to open a second file. This second one is located in "Farthest Frontier\Farthest Frontier_Data\il2cpp_data\Metadata" and is called "global-metadata.dat". After this second file opened, the program should have extracted the DLLs:
Note : You !!! WILL HAVE TO REPEAT THIS STEP TO KEEP YOUR MOD UPDATED !!!
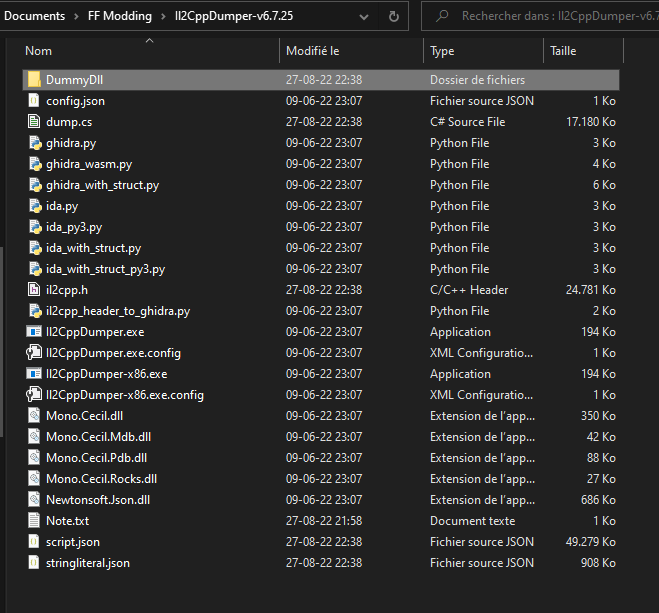
A new folder has been created in "Il2CppDumper.exe" folder called "DummyDll"
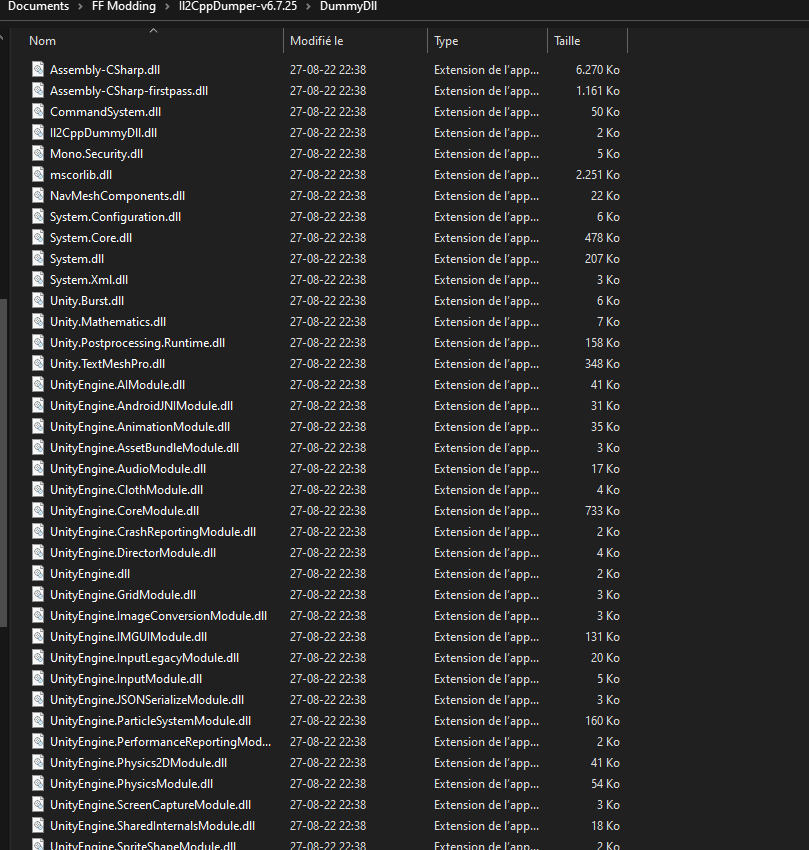
This folder contains all DLLs we need for Visual Studio :
Step 4 : Making mod
First thing we need to do is to create our modding project with Visual Studio :
Be sure you selected DLL with . NET Framework, it won't work otherwise !
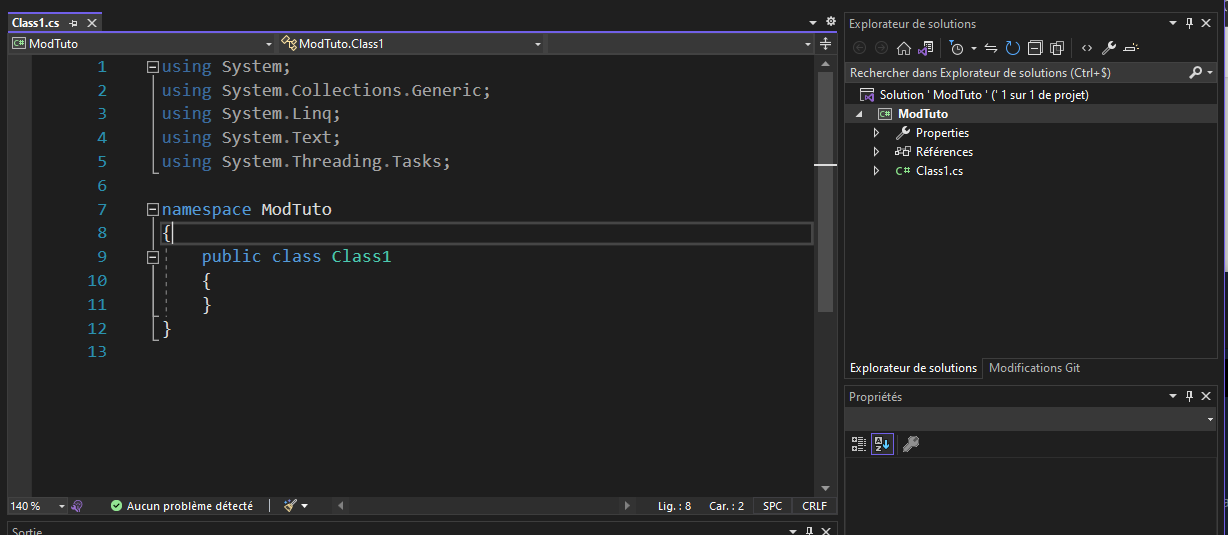
You now have a new sample project with basic class :
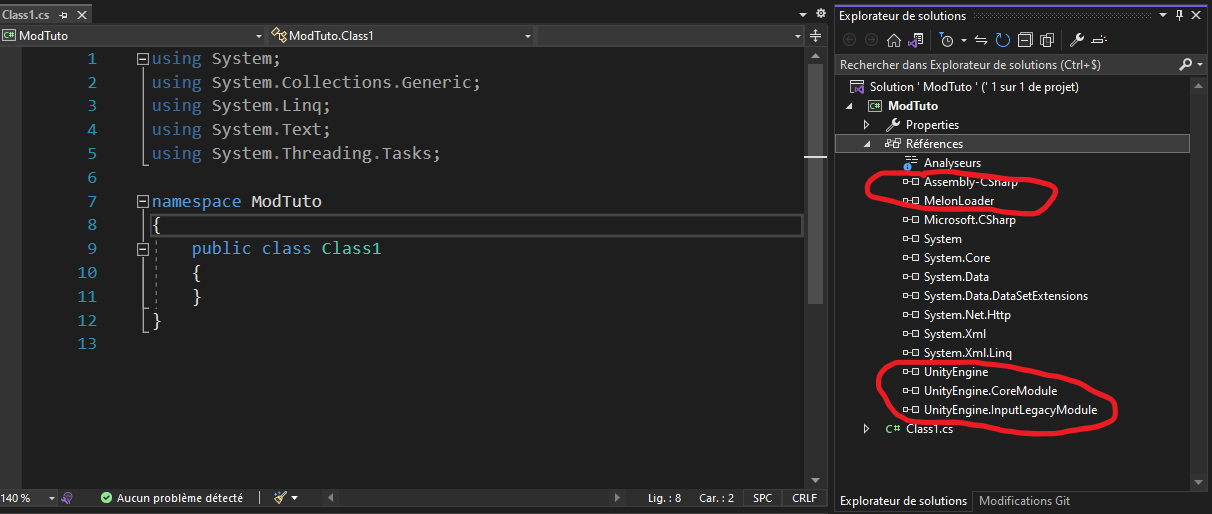
Let's add DLLs from MelonLoader + dumped from Farthest.
To do that, right click on "References" and add the following DLLs :
Assembly-CSharp
MelonLoader
UnityEngine
UnityEngine.CoreModule
UnityEngine.InputLegacyModule
Those DLLs are located at :
Assembly-CSharp : inside folder named "DummyDll" (Step 3 : Dumping Unity Dlls)
MelonLoader : inside folder named "MelonLoader" (Step 2 : Installing MelonLoader)
UnityEngine : inside folder named "DummyDll" (Step 3 : Dumping Unity Dlls)
UnityEngine.CoreModule : inside folder named "DummyDll" (Step 3 : Dumping Unity Dlls)
UnityEngine.InputLegacyModule : inside folder named "DummyDll" (Step 3 : Dumping Unity Dlls)You have to add at least those 5 Dlls to your mod project. Notice that there are more Dlls in "DummyDll". Here the most important is "Assembly-CSharp". It contains most data of your game. Of course, you can add other Dlls if you want to add specific things related to Unity.
Now expand the "Properties" with icon tool above "References". It contains a file named "AssemblyInfo.cs". Open it and add this :
using System.Reflection; using System.Runtime.InteropServices; using MelonLoader; using ModTuto; // ... [assembly: MelonInfo(typeof(Class1), "Test", "0.0.0", "ϞϢϘ") ]//MelonInfo(typeof(ClassOfMod), "Game Mod Name", "Version", "Author") [assembly: MelonGame("Crate Entertainment", "Farthest Frontier")] //MelonGame("Studio", "Game")]
Now add some sample features in our mod :
using UnityEngine; using MelonLoader; namespace ModTuto { //The class called by MelonLoader. This class has to inherit of MelonMod main class public class Class1 : MelonMod { public override void OnUpdate() { //This is one of Melon API function we can use to add features : https://melonwiki.xyz/#/modders/quickstart //Here only a key to exit the game and another to spawn a villager on cursor position if (Input.GetKeyDown(KeyCode.T)) { Application.Quit(); } if (Input.GetKeyDown(KeyCode.V)) { MelonLogger.Msg("V pressed"); GameManager gameManager = GameObject.Find("GameManager").GetComponent<GameManager>(); if (gameManager != null) { Vector3 mousePosition = Input.mousePosition; Vector3 terrainWorldPointUnderScreenPoint = gameManager.terrainManager.GetTerrainWorldPointUnderScreenPoint(mousePosition); gameManager.villagerPopulationManager.SpawnVillagerImmigration(terrainWorldPointUnderScreenPoint, true); } } } } }
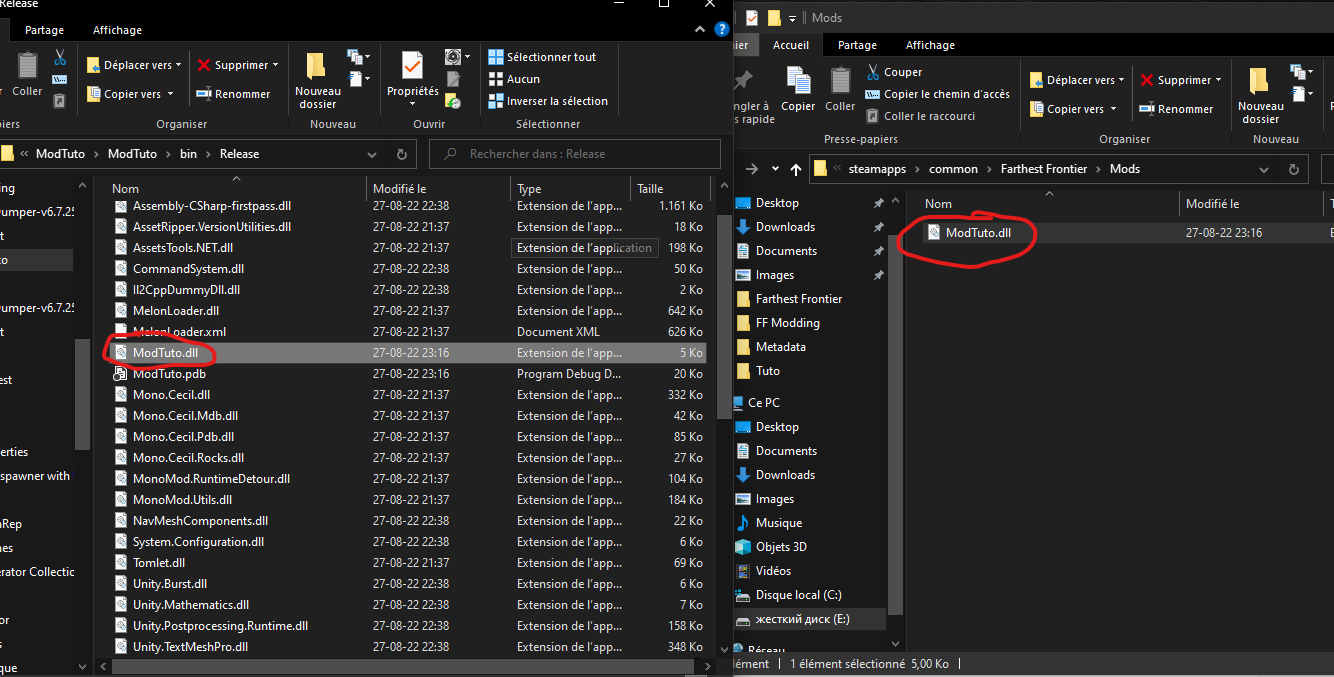
Let's install our mod ! Build the Dll file and drop it into "Mods" folder :
Now you can press 'T' to leave the game or 'V' to spawn villager on cursor position !
If you wanna explore what you can do, you will have to search inside "Assembly-CSharp" !
Hope you like this tuto !!
Ref :
MelonLoader [melonwiki.xyz]
Il2CppDumper Download sample project : MegaNz [mega.nz]
Source: https://steamcommunity.com/sharedfiles/filedetails/?id=2854936721
More Farthest Frontier guilds
- All Guilds
- Beyond-the-beginner tips and info [v0.9.4]
- Big Agriculture : Set-n-Forget Food Processing Complex
- Creating Town in First 5 Years
- Farthest Frontier Guide 38
- Optimal residential area layout
- Advanced Landscaping Guide
- Temple Relics [v0.9.0]
- Early Access FF game play mechanics -vers 7.5d
- [v0.7.5] - Field / Farming