
Requirements
Before you start, there are a few things that you should keep into account:
This uses either a locally run Stable diffusion setup or you have the know-how to set one up using Sagemaker. The days of google Colab are sadly over to run a cloud hosted stable diffusion setup. You could probably also do some of these things using an AI generator website that pop up lately that use pretty much the same thing. These may not have all the settings you want however especially as this uses img2img.
If you want to set up a stable diffusion setup locally then it is greatly recommended that you have a somewhat modern Nvidia RTX card (10xx or higher)
You also need to be able to crop and modify images, in my case I used Photopea[www.photopea.com] to modify my images and Irfanview to crop the images but you could also use windows default applications.
Installing ForgeForge is a fork of the Stable Diffusion A1111 webinterface that allows you to run a stable diffusion setup on your own device and control it through your webbrowser, Forge at the time of writing is a slightly faster version compared to A1111.
Installing Forge is easy, you follow this link[github.com] , scroll down until you see the "Installing Forge" part and download the one-click package. It also specifies what you do after download. After updating and then running the batch file it should open up a browser tab with the stable diffusion interface.
There are some great resources online that show you how to install and use Stable diffusion, I highly recommend you check those out. (although it is a huge rabbit hole to fall into!)
Grabbing A Source
While you could use just a prompt to define how your character looks, you can also use screenshots as a source!
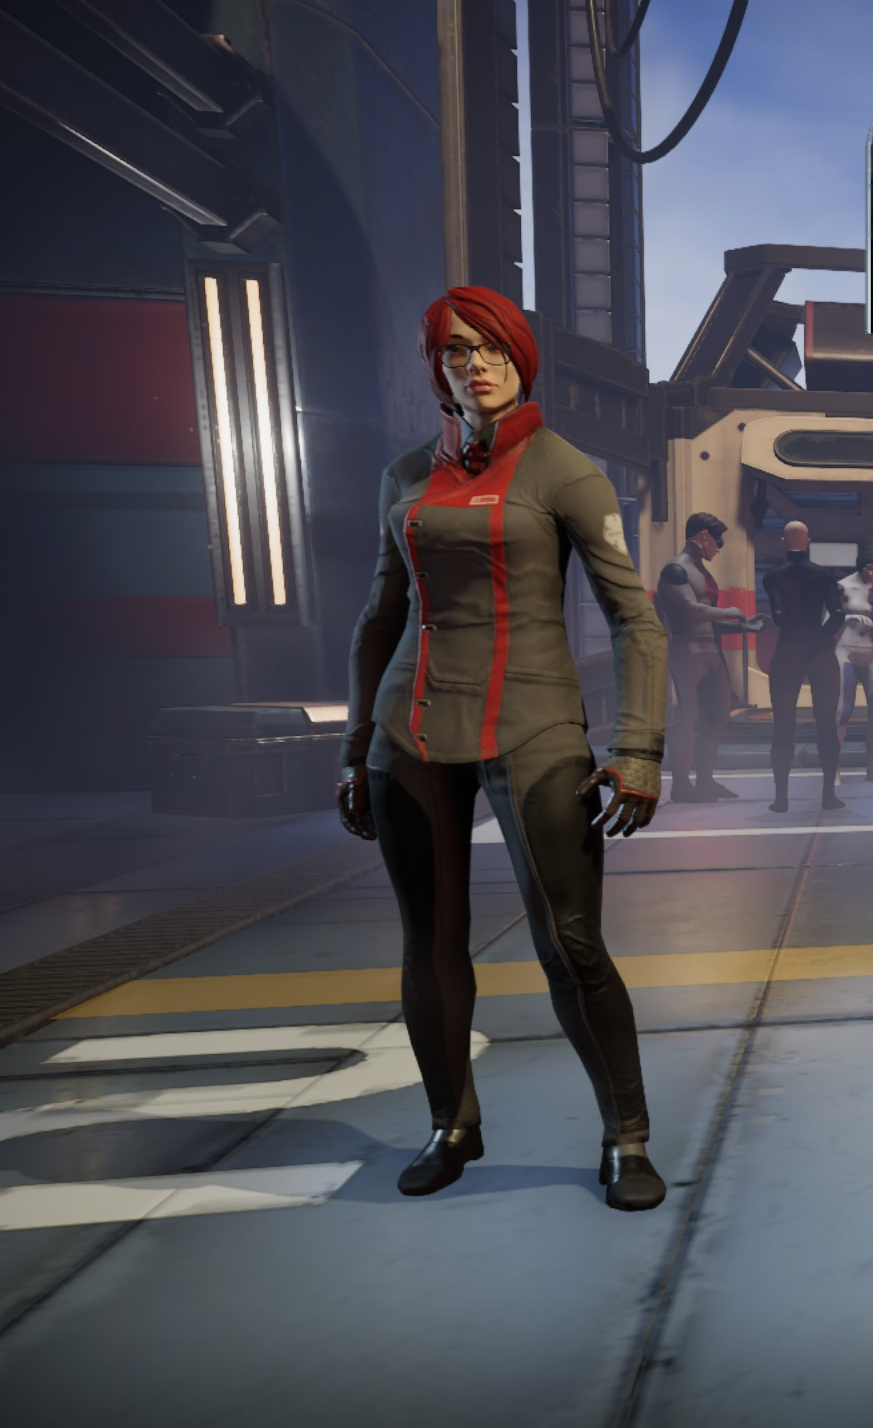
So in this case, I created my character, then made a screenshot in character creator with F12.
In this case I already removed the character specification card. Keep in mind that the higher resolution you take this in, the better input source you will have and this could allow you to have pictures with higher accuracy.
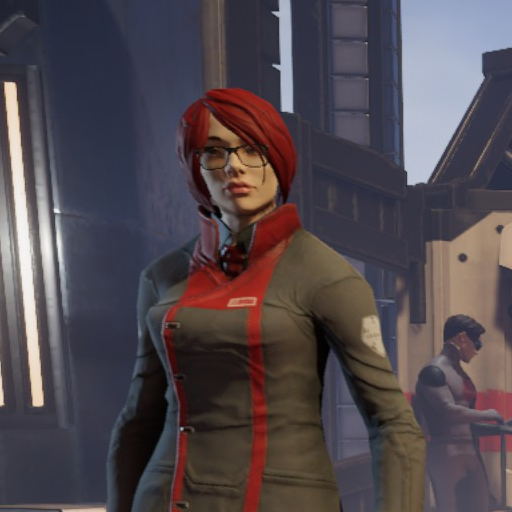
Getting the screenshot readyDepending on if you use a Stable diffusion 1.5 or SDXL checkpoint later on you may need a screenshot of a different size, but you can always use AI upscaling later on if you change your mind. So for now, we just crop the image until we get a half body portrait sitting at 512x512 pixels. The reason we get 512 is because most SD 1.5 checkpoints are trained on this size, so the results will be better. Cropped, it will look like this:
Generating Images, Prompt Building And Refining
Alright, so you have a source and its time to start up Stable diffusion! In the requirements we mentioned that we would be using forge. So after you have it running you can switch to the img2img tab and either drag in the source image or load it by clicking on the center.
What checkpoint to use? Where do I get them??This depends on the style you want to go for. A popular choice for anything fantasy and not hyperrealistic would be Dreamshaper. Forge, when first started up will download a model (realisticvision) but this may not be good enough for this purpose.
As to where to get your models from Civit.AI is a website where you can search and find many types of models for all kinds of purposes. In my case I grabbed Darksun_v7b for this example.
Once you have downloaded the model you can put the .safetensors file in /[installation folder]/webui/models/Stable-diffusion/ this allows you to select the model from the drop down menu in the top of the UI.
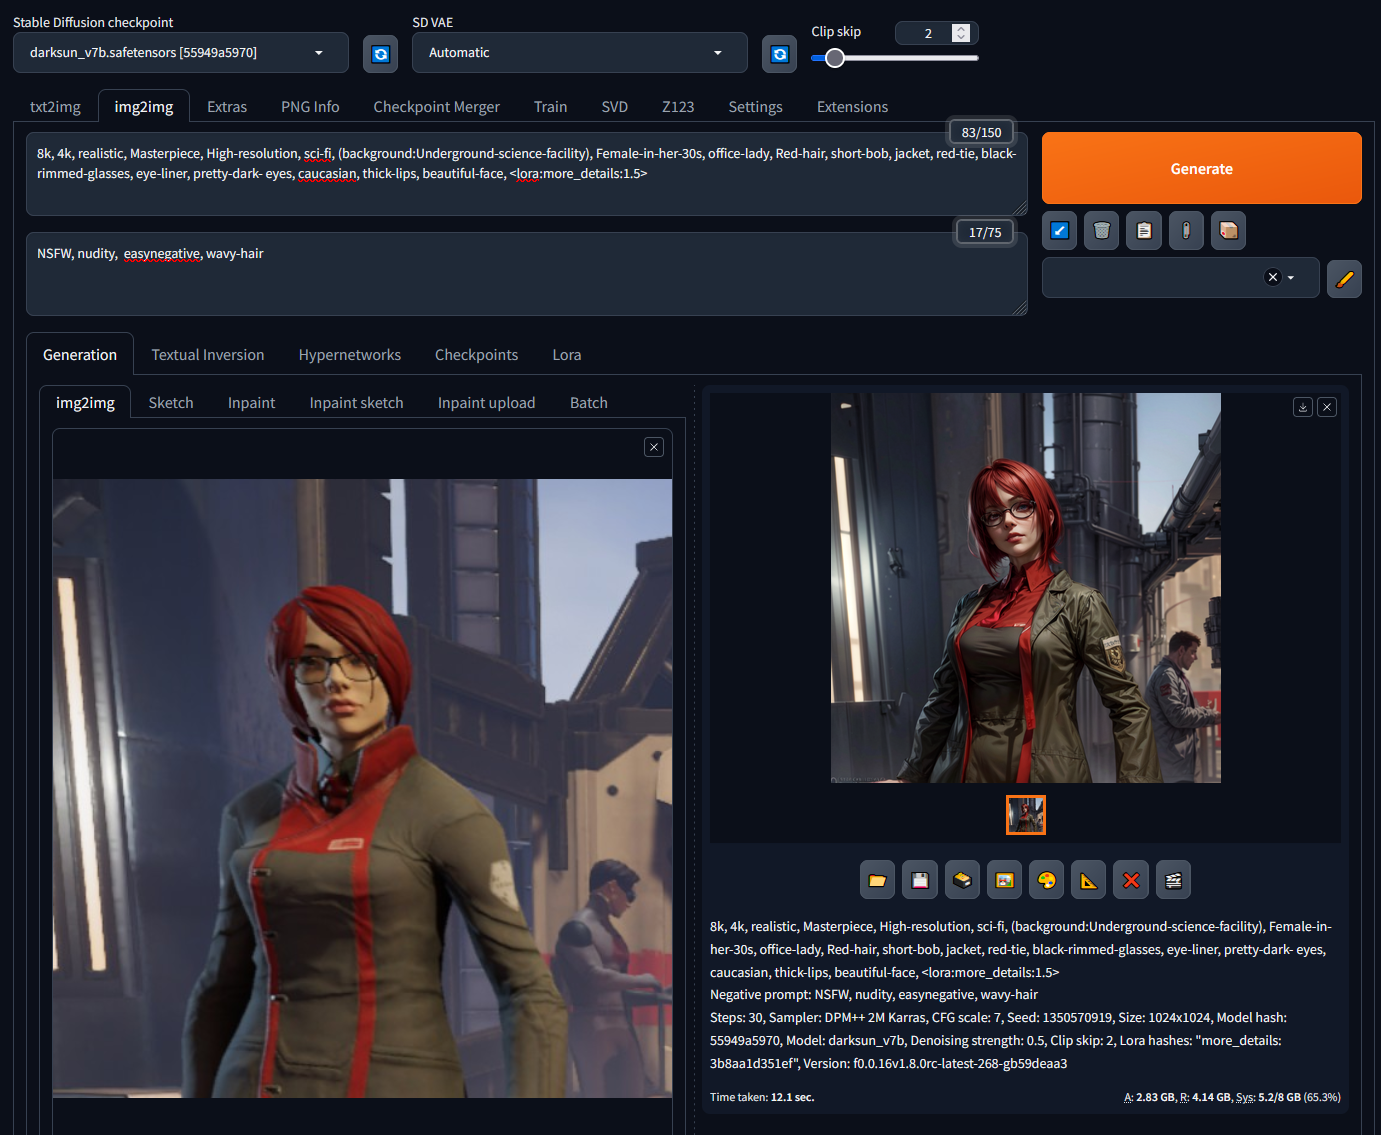
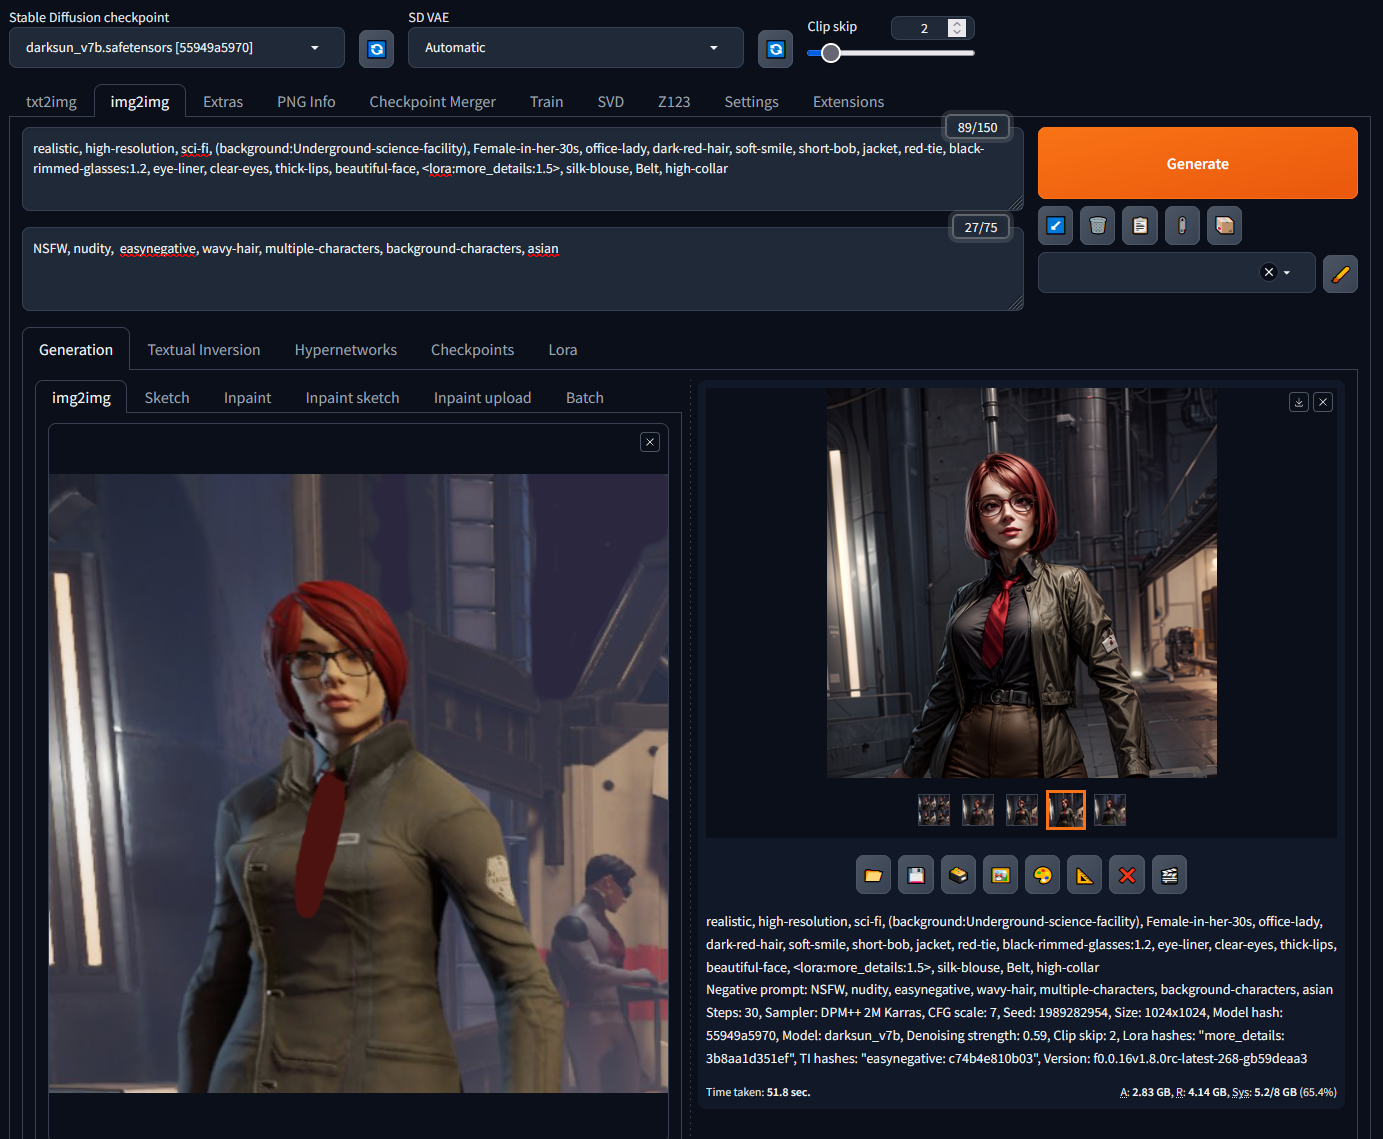
PromptsWhat do I put in the prompt? Well that depends on what you are trying to generate. In my case I wanted a serious and cutthroat but beautiful silver wing character so I added tags to set the mood, and tags to define the character. Then I also set the Denoising Strength to 0.5 so I tell the AI to use some information from my image, but also to generate some information itself. Denoising strength is a powerful tool that allows the AI to be more creative or to follow the original image more. In my case my first result looked like something like this:
Not bad right? Note all the settings visible in the image. Considering this model can be used for NSFW content I put that first in the negative! The only important setting that is missing is that I Resize by scale 2, so the output is 1024x1024.There are also some confusing things in the prompt such as a tag between <> and something called easynegative. I will skip over these for now.
Personally with this image I have things I would want to see changed; the background is too light because its from the character creator, I dislike the two red lines that come from the base outfit (in many attempts the AI would create two ties here, which is weird). To fix this it would require me to set the denoising strenght much higher and then run a ton of attempts to find an image that fits it perfectly, but you can also do it easier!
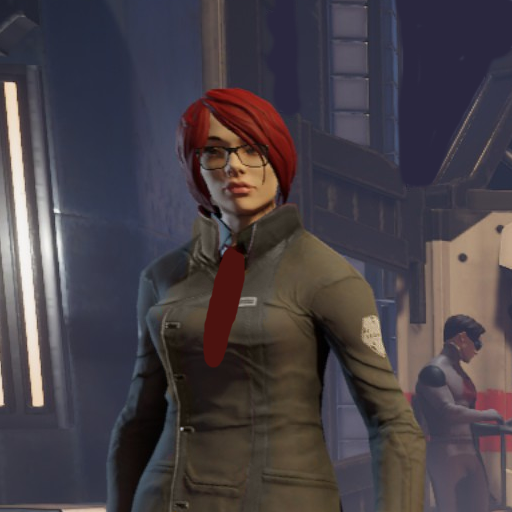
Garbage in, garbage out..?So this will look a bit dumb, but you can actually modify base images with an editor and the result will actually look pretty legit. So I moved my source image to Photopea and modified it, so it looked more like this:
Then by using that in img2img, along with some more prompt and denoising refinement I get results like this:
For this example, this is good enough for me.
Upscaling, Cropping And Putting It In The Game.
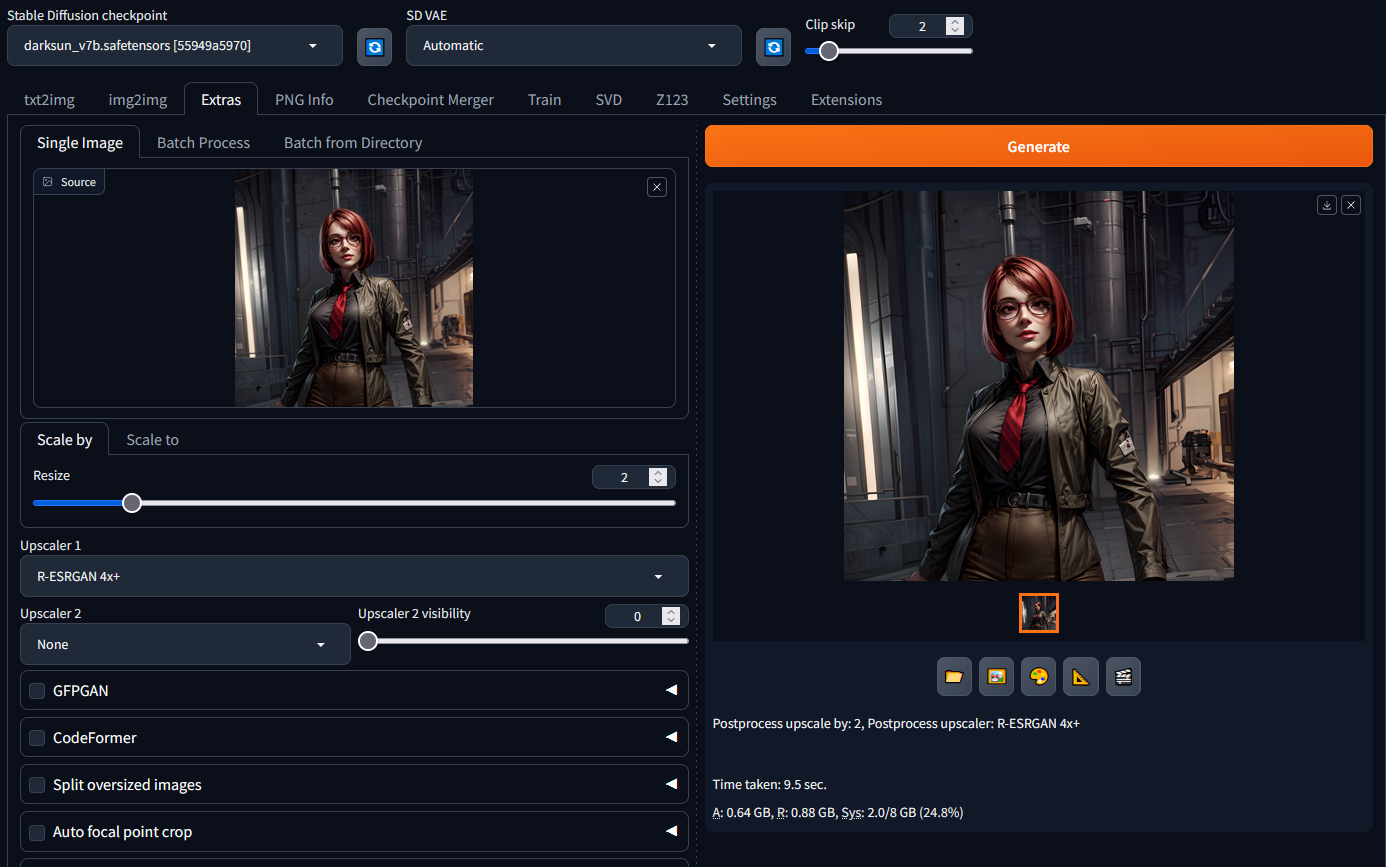
Once you have an image that you like press the little triangle button below the image to send it to the extra's tab. You could skip this upscaling part, but considering that for this game we will only be using a small part we want to have as much detail as possible. For settings, I used this:
As the source image started at 512x512, which got upscaled to 1024x1024 in img2img, this result will be 2024x2024, this allows us to crop a face capture that has more then enough quality to be downscaled to 256x256 for the game. Once again the settings used are visible in the image.
Once the upscale is done you can click the folder icon to open the location where the image is stored. By default Forge stores all generated images in /[installation folder]/webui/output/ the upscale images it will save in the extras folder
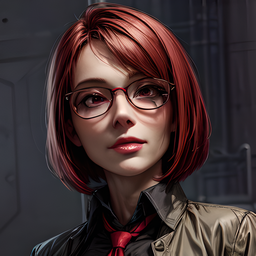
Once you got your upscaled image you will want to crop out the face, so it has similar proportions to the game's portraits, and then rescale this image to 256x256. Once you have done that you should have your portrait ready!
Putting it in the gamePutting portraits into the game is actually quite easy, you look for the /[steamlocation]/steamapps/common/Encased/Encased_Data/CustomPortraits folder and drag your image into said folder. After that you can pick your portrait from the portrait menu during character creation.
Things I Missed
So first of all, I glossed over the cropping and editing part. This is not in the scope of this guide. Secondly, you can use this method for creating portraits in other games. I use this method to create my own custom portraits for the pathfinder games for example. I just use text2img instead of img2img.
I also skipped over Lora's and Embeddings while I did include them. These are like modifiers that allow you to steer a Stable diffusion checkpoint in a specific direction. I used the easynegative embedding which does a lot of negative prompting for me. And I used the more detail Lora that makes the model add more detail. You install them like models, except they have their own folders where they go into.
If I missed other things or parts are too confusing let me know! I see if I can add additional information.
Source: https://steamcommunity.com/sharedfiles/filedetails/?id=3176498646
More Encased guilds
- All Guilds
- Encased/
- Junktown Mayor Election Kurt Spengler
- Allrounder
- Stealth Pacifist Walkthrough
- Getting Cloud Saves to Work on Steamdeck
- Secrets & Servoshell Upgrades
- Encased en Espaol
- Encased Guide 212
- Encased Guide 202