
INTRODUCTION
This is a guide to help new players navigate the expansive open world of Sailing Era.
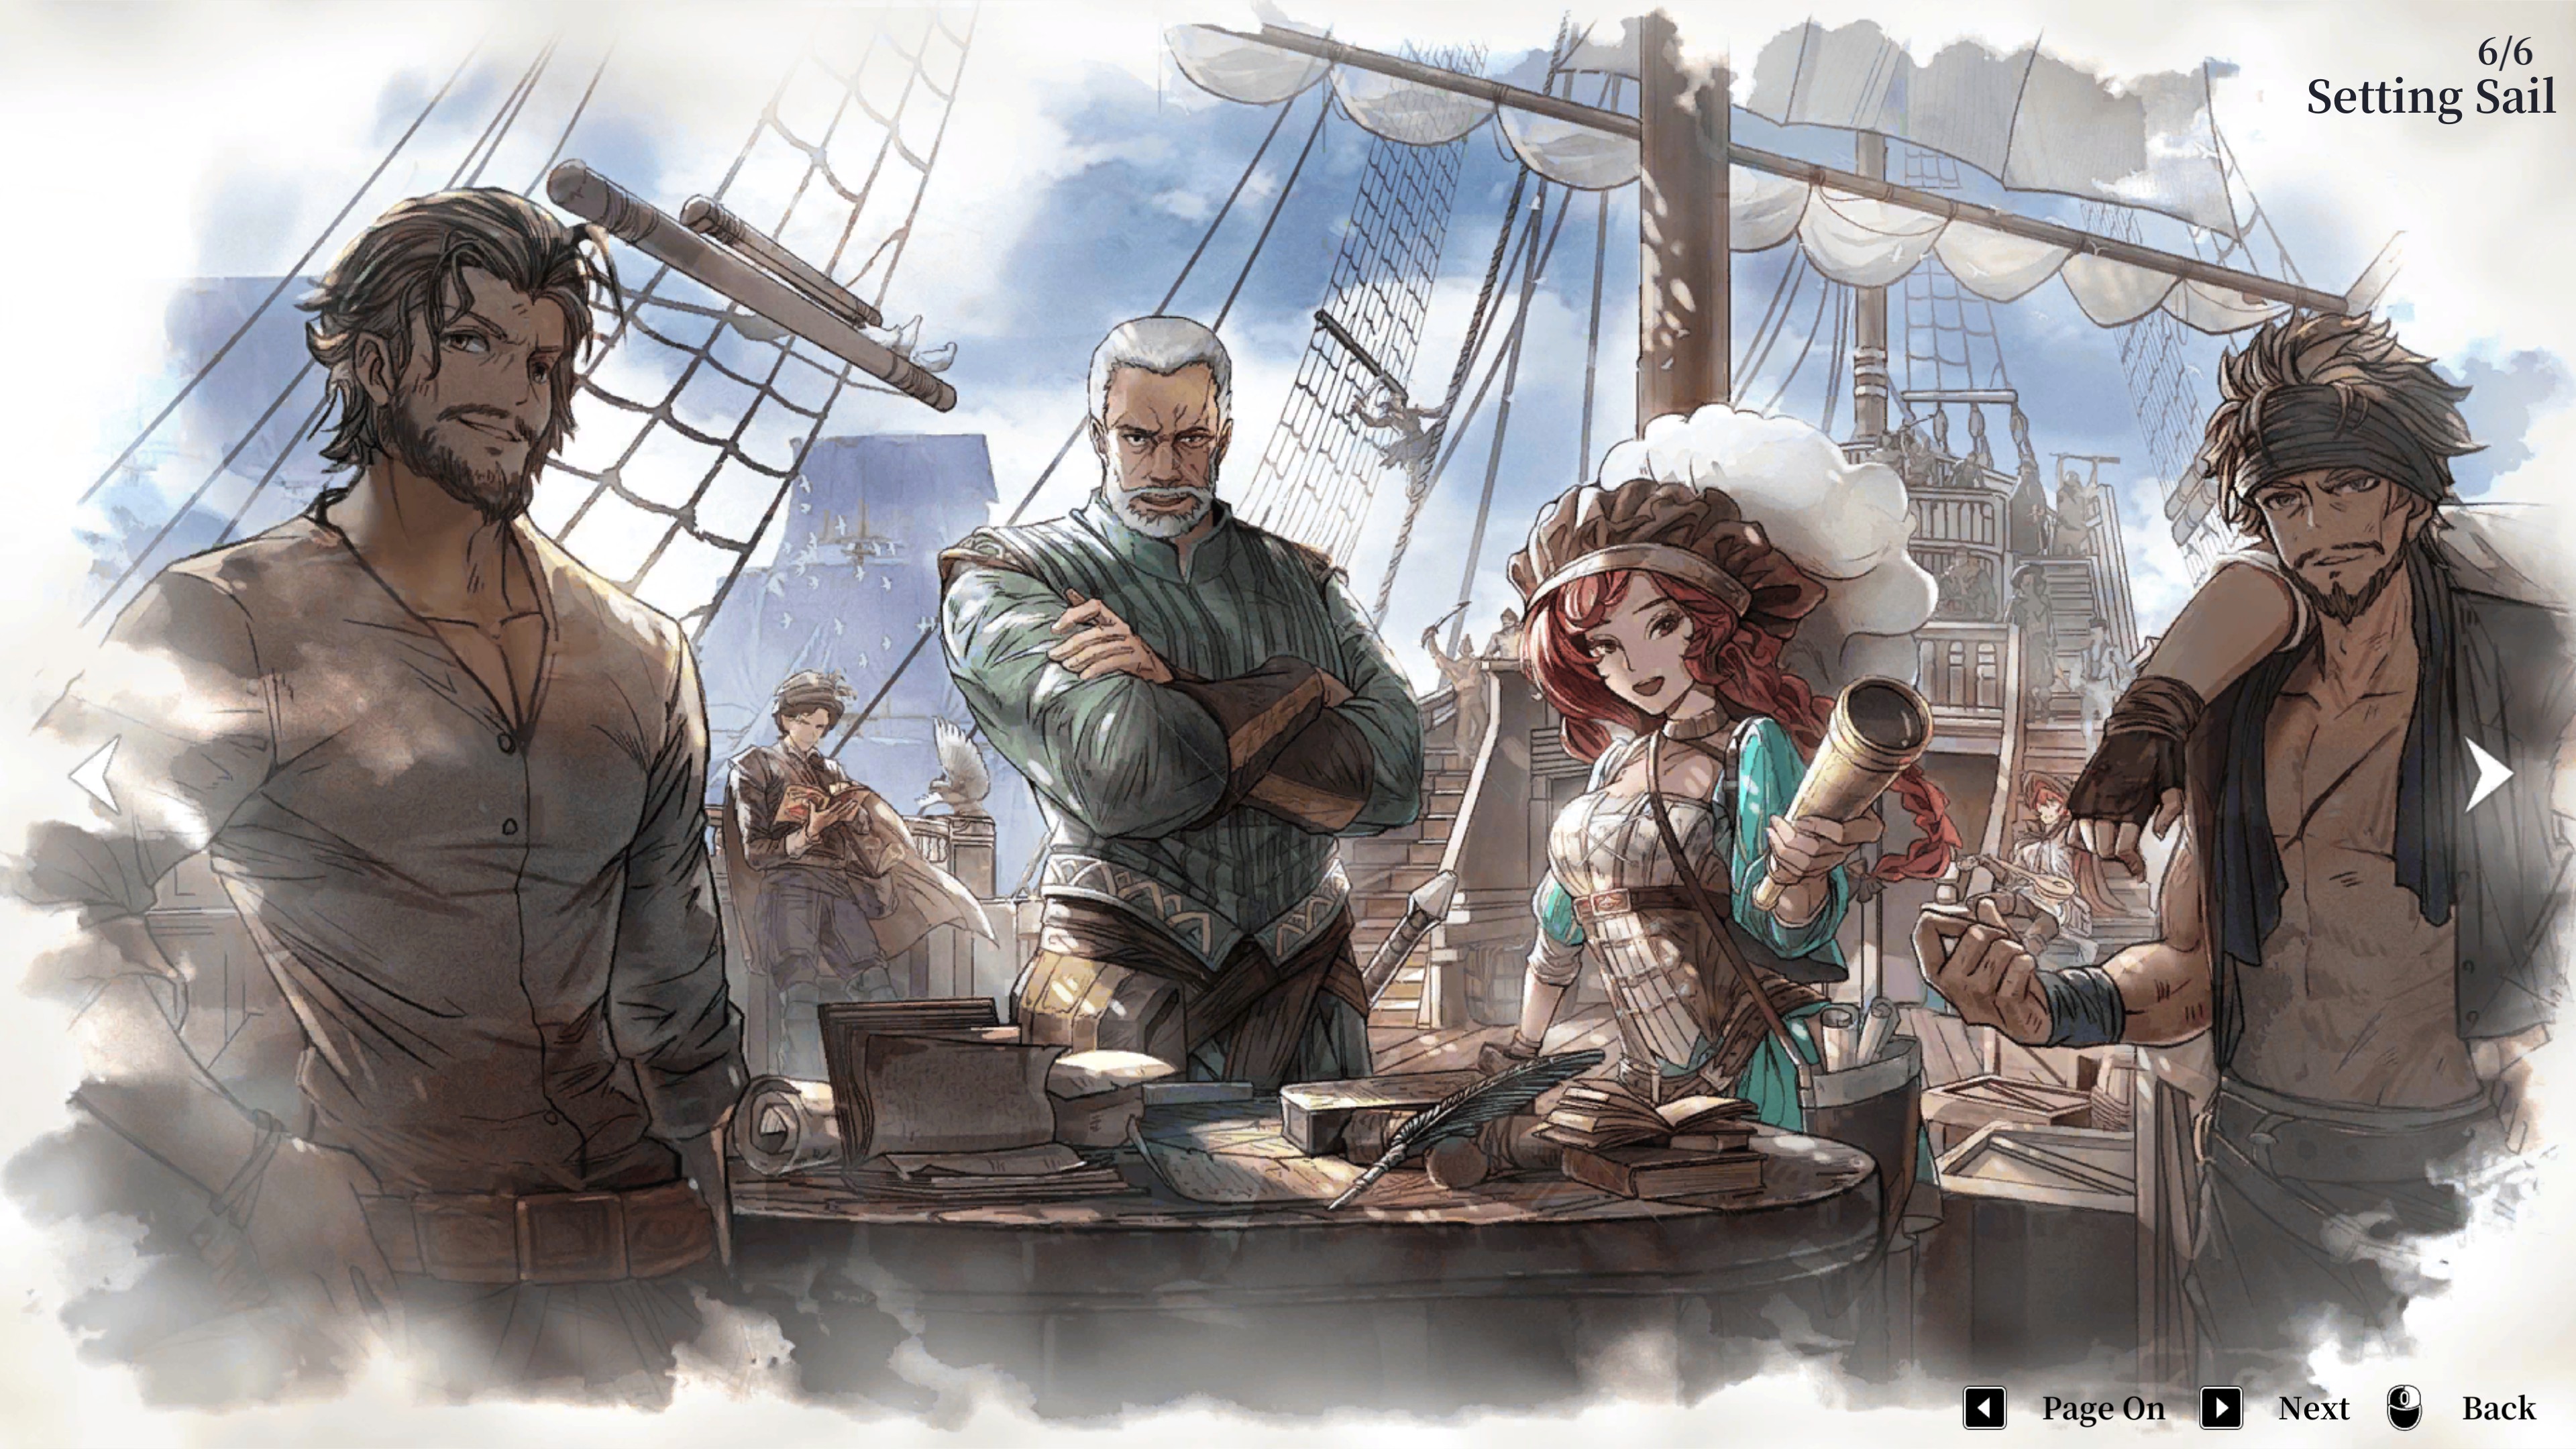
The game sets you loose on a to-scale map of the Earth right from the start (having a passing knowledge of world geography will actually be a benefit). There are hundreds of ports to find, hundreds of commodities to trade, tons of skills to learn, crew members to recruit and loads of secrets to find. Getting started and knowing what to spend your time on can be a daunting task, especially since the in-game tool-tips are not always entirely helpful or may be translated awkwardly.
This guide is not meant to be a full walkthrough. It will not go into details about how to find this or that and it won't list out a ton of facts. There are plenty of other guides out there for that. The point of this guide is to simply help new players make sense of all the stats, numbers, concepts and decisions available in the game so you can play the game well without worrying about what to do next.
CAPTAINS
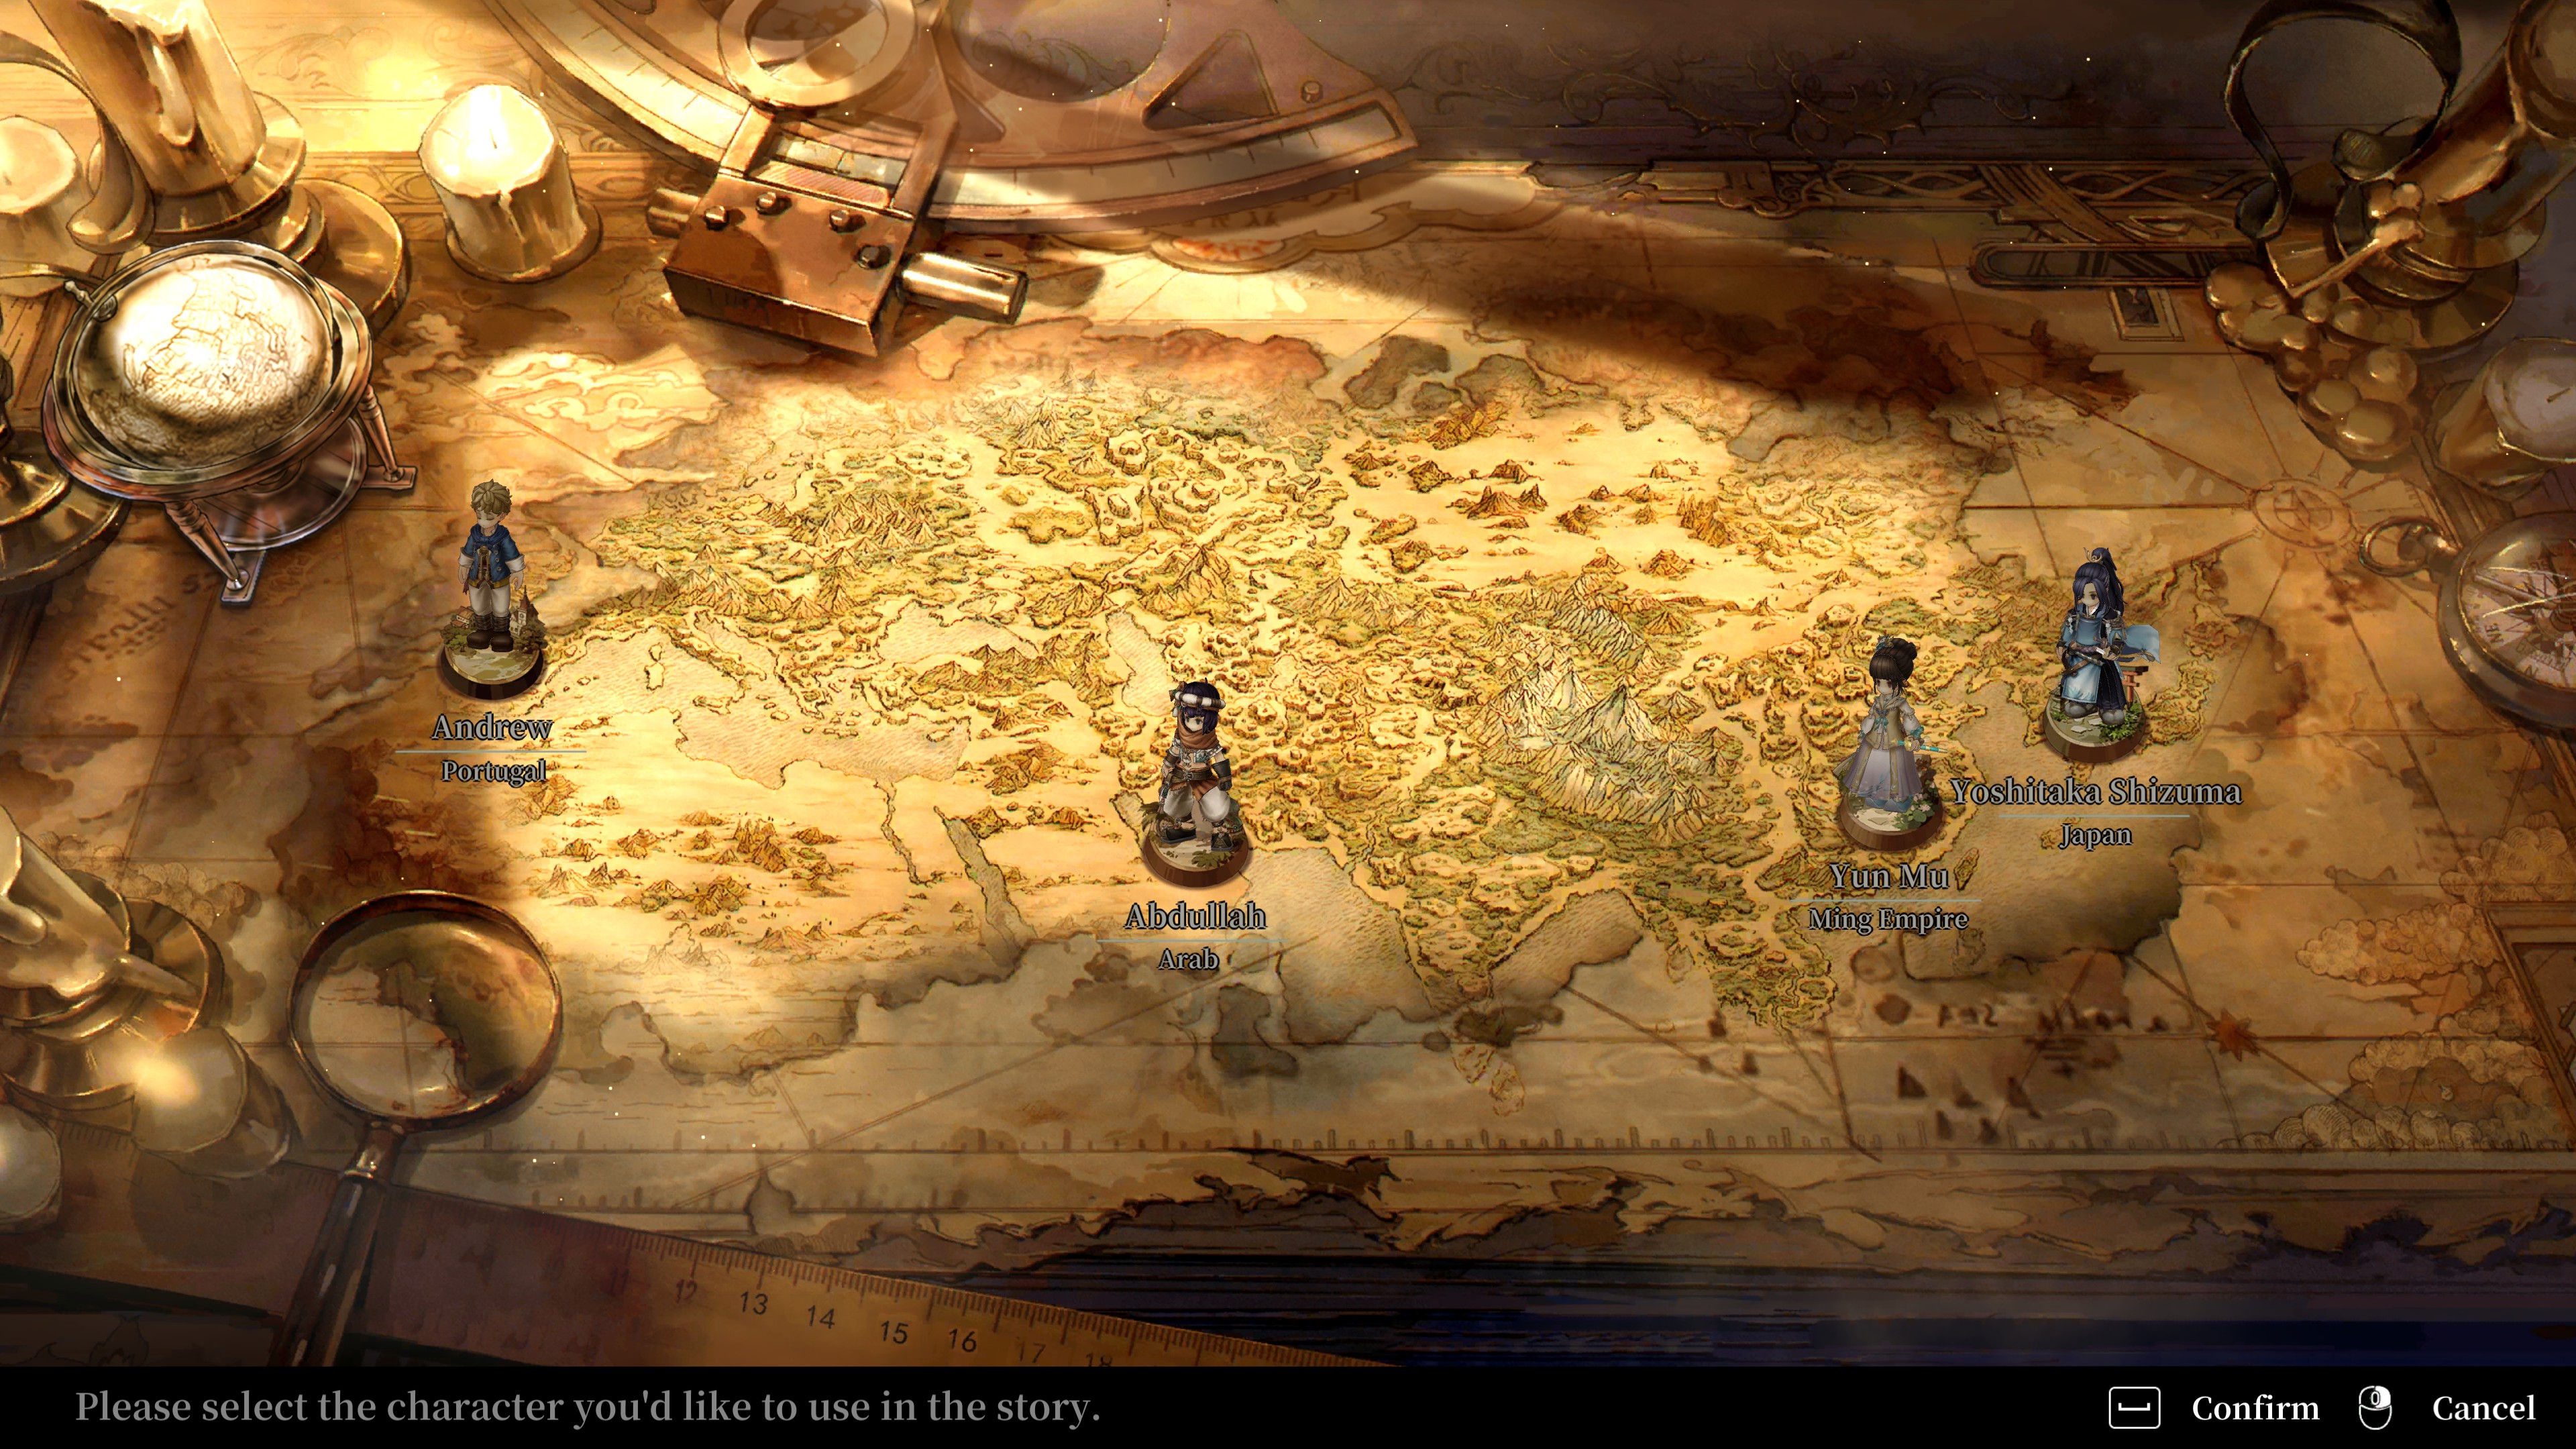
The game starts off giving you a choice of 4 Captains to play as; Andrew, Abdullah, Yun Mu and Yoshitaka Shizuma.
Each character has their own personal storyline with unique missions. Each one is also suited for a certain style of play.
Andrew is set up for Exploration focused game play and starts in Europe.
Abdullah is set up for Combat focused game play and starts in Arabia.
Yun Mu is set up for Trade focused game play and starts in China.
Yoshitaka Shizuma seems to be well rounded and focuses on building large fleets of ships. They start in Japan.
Regardless of how the stories or special abilities are set up for each character, all characters can do anything in the game.
As Andrew you can easily become a trader, a pirate, a privateer bounty hunter, an explorer or all of the above for example.
CHARACTER TAB
Once you have selected your captain, it is advisable to follow the prompts for the first set of missions. Many game mechanics are unavailable until you finish some of the tutorial steps. Other aspects of the game are unavailable early on until you meet certain requirements which we will cover below. Once you get to a point in the main storyline where you are on the world map piloting your ship, the game is pretty much open to you. It may be possible to build up a fleet of 5 warships and millions of gold before you even finish the first chapter of the story, but let's not get ahead of ourselves.
When you are able, hit the TAB key and go to your menu. Here you will have access to the map, your inventory and other useful information. of note are four Crew related tabs; Character, Skill, Equipement, Fleet.
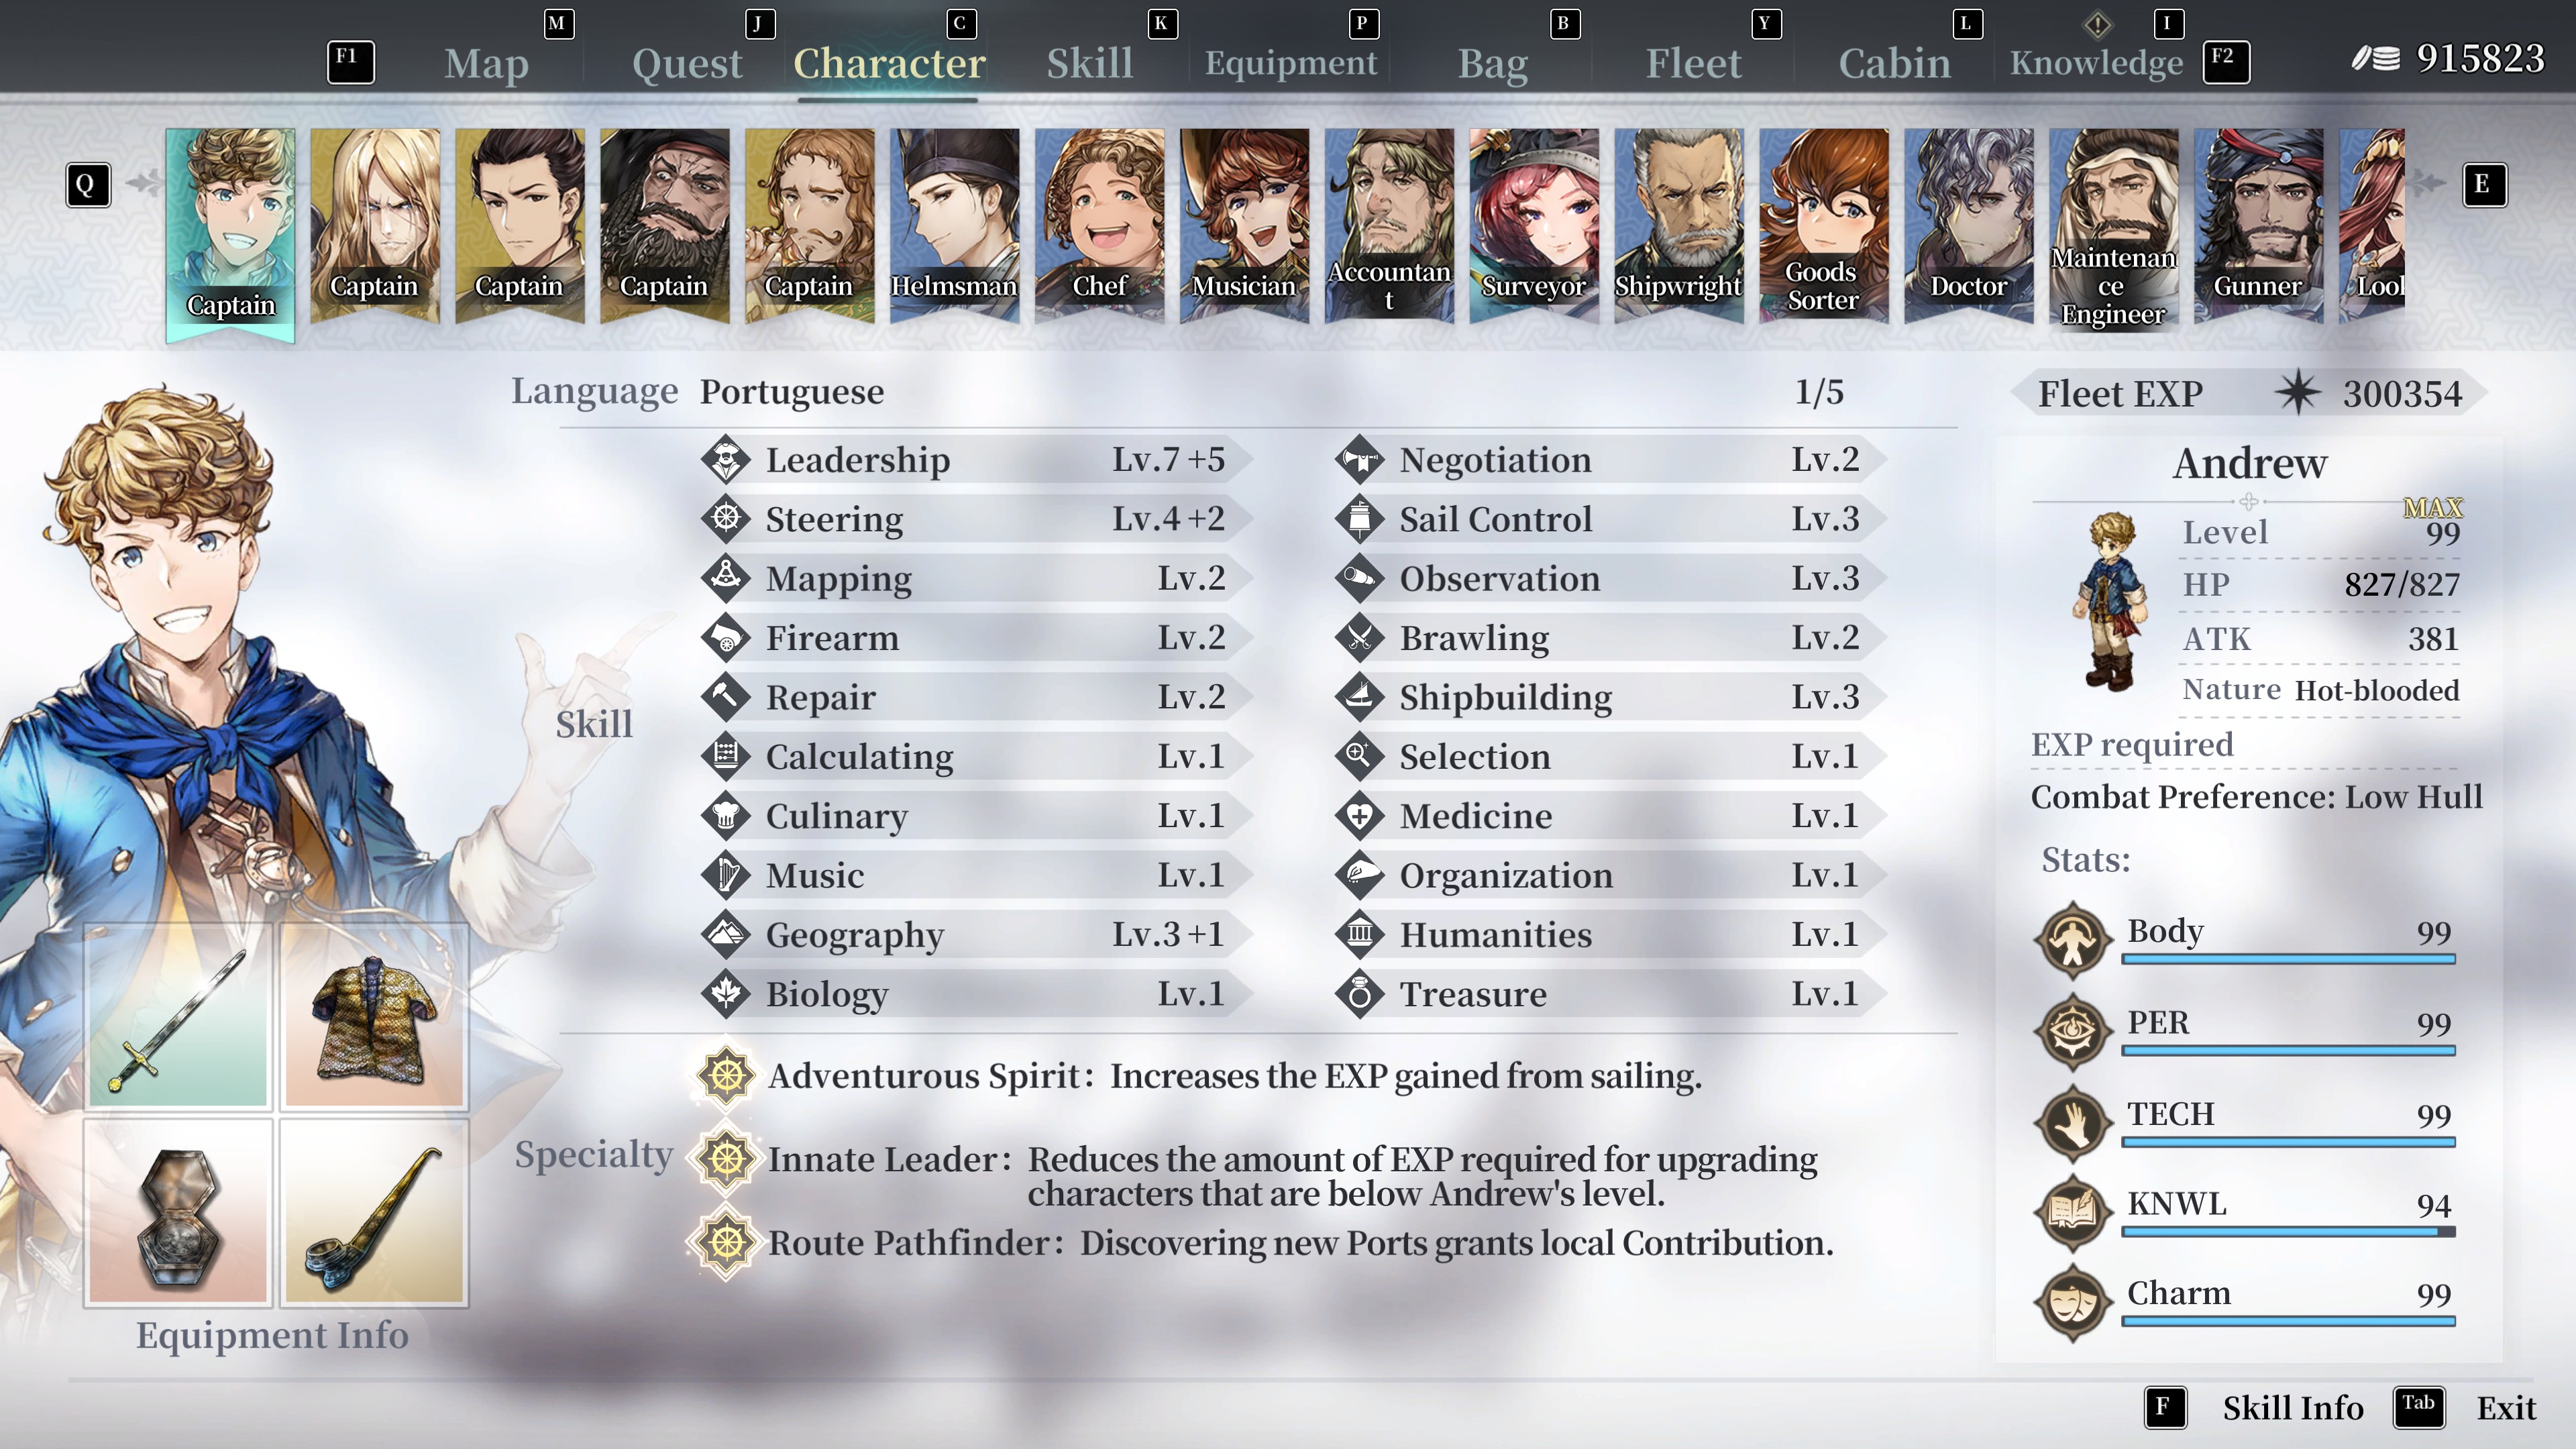
The Character tab displays all of a crew member's statistics, and, yes, there are a lot of them.
CREW MEMBERS
This guide will not cover specific crew members or how to obtain them. We are going to focus on the basics; why are crew members important, how do you use them and what do all of those skills and levels do?
From the beginning, following each character's main story you will be introduced to some other crew members who will join your fleet. Some crew members will join right away, you just have to find them. Others will have more complex missions or requirements that need to be met. There are other guides on Steam that go into those details. For now, we will just talk about why crew members are important and how to make the best use of them.
As far as I know, all crew members are recruitable by all captains. In addition, when you have completed the main storyline for any captain, that captain will be made available as a recruitable crew member by other captains. Many people refer to this as a "New Game+" mode.
LEVELING
You level up at a tavern. XP is gained from doing all manner things; combat, exploration, guild quests, trading, etc. XP is awarded to the fleet and you spend it like a currency to level up crew members at your leisure.
5 stats (Body, PER, TECH, KNWL and Charm) are increased automatically when you level up a crew member, you have no control over these (they are discussed more below). For the other skills, you get 1 skill point to assign every 15 levels. This means you have a very limited pool of skill points to use and they go very quickly. It is highly advisable to specialize your crew members. When you get a new crewmate, look at their skills and see what your fleet needs and what they are best at and capitalize on their specialty. For most things in the game, you only need one person doing any one particular job and they should be very good at it by the end of the game.
LANGUAGES
Each character starts with at least 1 or more languages. They can learn new languages from skill books. Languages only serve one purpose; to read books in the library which eventually leads to discoveries and secrets (and sometimes story quests). If you don't care about discoveries, then you can ignore languages for now.
STATS
To the Right hand side of the Character screen you have level related information:
Max level is 99.
HP is relevant for hand to hand combat when your captain is fighting a duel. It also matters when your characters go on a land expedition. The HP of the character is their stamina which is used when provisions run out.
ATK is how much damage they do in duels.
Nature doesn't seem to do anything mechanically.
Combat preference applies when they are the captain of a support ship and gives you an indication of how their AI will perform in the battle.
The stats of Body, PER, TECH, KNWL and Charm are used during land expedition events. When random events happen during a land expedition these stats are used to determine the outcome. These stats go up automatically when you level up a character. You have no control over them other than that.
SPECIALTIES
These are perks that can be unlocked for each crew member when you meet certain requirements. The requirements are shown on screen and could include leveling up to a certain level, having certain skills at a certain level or completing side quests. There are other guides on Steam that list these perks and what they do. For the most part though, they are all worth getting.
SKILLS (Part 1)
The important thing to note is that skills (with a few exceptions) only work when a character is assigned to a specific job. It is highly advisable to specialize your crew, even from the very beginning. A skill does nothing if the crew member has no job assigned. There are 5 exceptions to this and we will cover them below.
Leadership
Mid to High Priority
This skill does different things for the captain vs another crew member. For the captain it increases the maximum morale of your fleet. Since the captain can only be the captain of the flag ship and does nothing else, guess what the captain should specialize in? We will talk about morale later. So, why does the captain have other skills? Remember how I said that all captains can be recruited as crew members in a New Game+? That’s why.
For crew members, this only has an effect if the crew member is the captain of a support ship (a ship other than the flag ship) When they are captain of a support ship, there is a chance they will coordinate their cannon fire with your flagship during combat doing extra damage (sort of like a critical hit during combat). We will cover combat tactics later. For now, do not worry about the support ships until you are ready for combat.
Negotiation
Very Low Priority
This skill only works when a crew member is assigned to an Officer's Room. When you are out at sea and see another fleet, you can click on them to see information or attack them. If you have a Negotiator assigned, you can also open trade with the fleet and do some bartering. The Negotiation skill allows you to get better deals from other merchant fleets. You can still get deals at ports or just fight pirates for money. Trading with other fleets is interesting, but can be avoided for the entire game if you like.
Steering
Low Priority
This skill only works when a crew member is assigned to the Pilot House room. When assigned, the turning speed of the flagship is increased by a percentage based on the crew member's skill. The boost to turning speed is quite low and is not really needed. You can easily control your steering radius by reducing your speed with manual controls. I went an entire play through and had no one assigned to the pilot house and didn't even notice.
Sail Control
Medium to Low Priority
This skill only works when a crew member is assigned to a Mast on deck. When assigned the top speed of the fleet is increased. Larger ships can have multiple Masts and the effects are additive. While speed is important, the boost you get is not enough to worry about early on. This is an assignment you give to a crew member when all the other jobs are taken by more qualified characters.
Mapping
High Priority
This skill only works when a crew member is assigned to a Map Room. When assigned you gain access to a few different things. Firstly you can see your exact coordinates in the world when on the map. This is especially useful when searching for secrets. In addition, it allows access to the game's version of fast travel. When you find a navigational chart (available at some item shops in ports) you can set the fleet to auto sail. Auto sail nearly doubles your speed and makes course corrections for you. The higher the mapping skill the further you can auto sail in a single outing.
Observation
High Priority
This skill only works when a crew member is assigned to the crow's nest. Without a crew member in the crow's nest you cannot find hidden treasures or sunken ships. It also increases the radius by which you can find new ports and uncover the fog of war. You can still find new ports without an Observer, but you need to be closer before it shows up which could mean that you pass it by if you don’t know it’s there yet (like from a past playthrough). This is arguably one of the most important jobs.
SKILLS (Part 2)
Firearm
Low Priority
This skill only works when a crew member is assigned to a gunroom. Gunrooms are not needed for combat, they enhance combat and so this room and its associated job are optional. When assigned to this room, the crew member will reduce the cooldown on your cannons. The cooldown is minimal, but you can have multiple gunrooms with additive effects.
Brawling
Medium Priority
This skill only works when a crew member is assigned to the Deck as a boatswain. Brawling is used when you get close to an enemy ship and start melee combat between crews. If you get into a lot of combat, this is high priority, otherwise, its low priority. Larger ships can have multiple Deck slots with additive effects.
Repair
High Priority
This skill only works when a crew member is assigned to the Maintenance room. Your ships will take continuous damage over time in the form of aging. The only way to repair age damage is with a Maintenance room and a shipwright with decent repair skill. Without this room or a shipwright, your ships will age to half their maximum health making them easier to destroy in combat. It should be noted that in order to unlock the blueprint for the Maintenance room you do need to Order the building of at least 2 ships.
Shipbuilding
Special
This is one of the few skills that works without being assigned to a job. When you go to the shipyard in certain ports, and order a ship to be built or modify your current fleet, you need someone in your fleet to have a minimum shipbuilding skill in order to do certain things. You need a minimum of level 3 in this skill to modify the hull of existing ships. This skill does nothing outside of a shipyard. It should be noted that in order to unlock the blueprint for the Maintenance room you do need to Order the building of at least 2 ships.
Calculating
Medium to High Priority
This skill only works when a crew member is assigned to the Accounting room. Very simply, when selling goods at a port you get extra money based on the skill level. Even a small percentage can give high margins. This is just free money. If you are going to do any amount of trading for income, get this room and assign a crew member earlier rather than later. Even one level in Calculating is free money.
Selection
Medium to Low Priority
This skill only works when a crew member is assigned to the Studio room. When the Studio room is manned by a crew member there is a chance each game day when you are out at sea that a random item in your cargo hold will upgrade to a premium item. This is essentially a 50% boost to its base value. Just like with the Accounting room and Calculating skill, Selection is just free money. Also, this has the added benefit of creating premium goods for use in quests.
Culinary
Medium to Low Priority
This skill only works when a crew member is assigned to the Kitchen room. When assigned, the kitchen will reduce the supply consumption of your fleet allowing you to stay out at sea longer. At first and early in the game when your cargo hold is small, this is a great boon, but, as your fleet and ships grow and you have more cargo space, supplies won't be an issue. This is useful for exploration when you don't know how far the next port may be, but, with navigational charts and auto-sailing you rarely run out of provisions.
Medicine
Low Priority
This skill only works when a crew member is assigned to the Medical Room. The doctor will reduce the health loss the crew suffers while sailing for long stretches of time. This sounds good, except that sailor health is returned to maximum after you visit a port. This may be useful if you are doing a lot of combat between ports, otherwise, don't worry too much about it.
Music
Medium Priority
This skill only works when a crew member is assigned to the Music Room. The Musician will reduce the morale loss while you are out at sea. This is useful for all situations. Morale affects your crew's ability to fight in hand to hand combat and may have an effect on negative random events like fire and riots. Morale will always decay, it will just decay slower with music.
Organization
Medium - Low Priority
This skill only works when a crew member is assigned to the Preparation room. While carrying goods in your cargo hold, there is always a chance that they can become damaged or wet. These conditions will reduce the base value of the item which cuts into your profits. A staffed preparation room will reduce the chance of these negative conditions from occurring but it can't be prevented. Like Accounting and Studio rooms, this Room/Skill combo will get you more money from trading.
Geography, Biology, Humanities, Treasure
Special
These skills are special skills in that they don't do anything directly. They are needed in order to find certain discoveries, read certain books or complete certain events. If you are not going for an exploration/discovery focused playthrough you can ignore these.
SKILL TAB And BOOKS
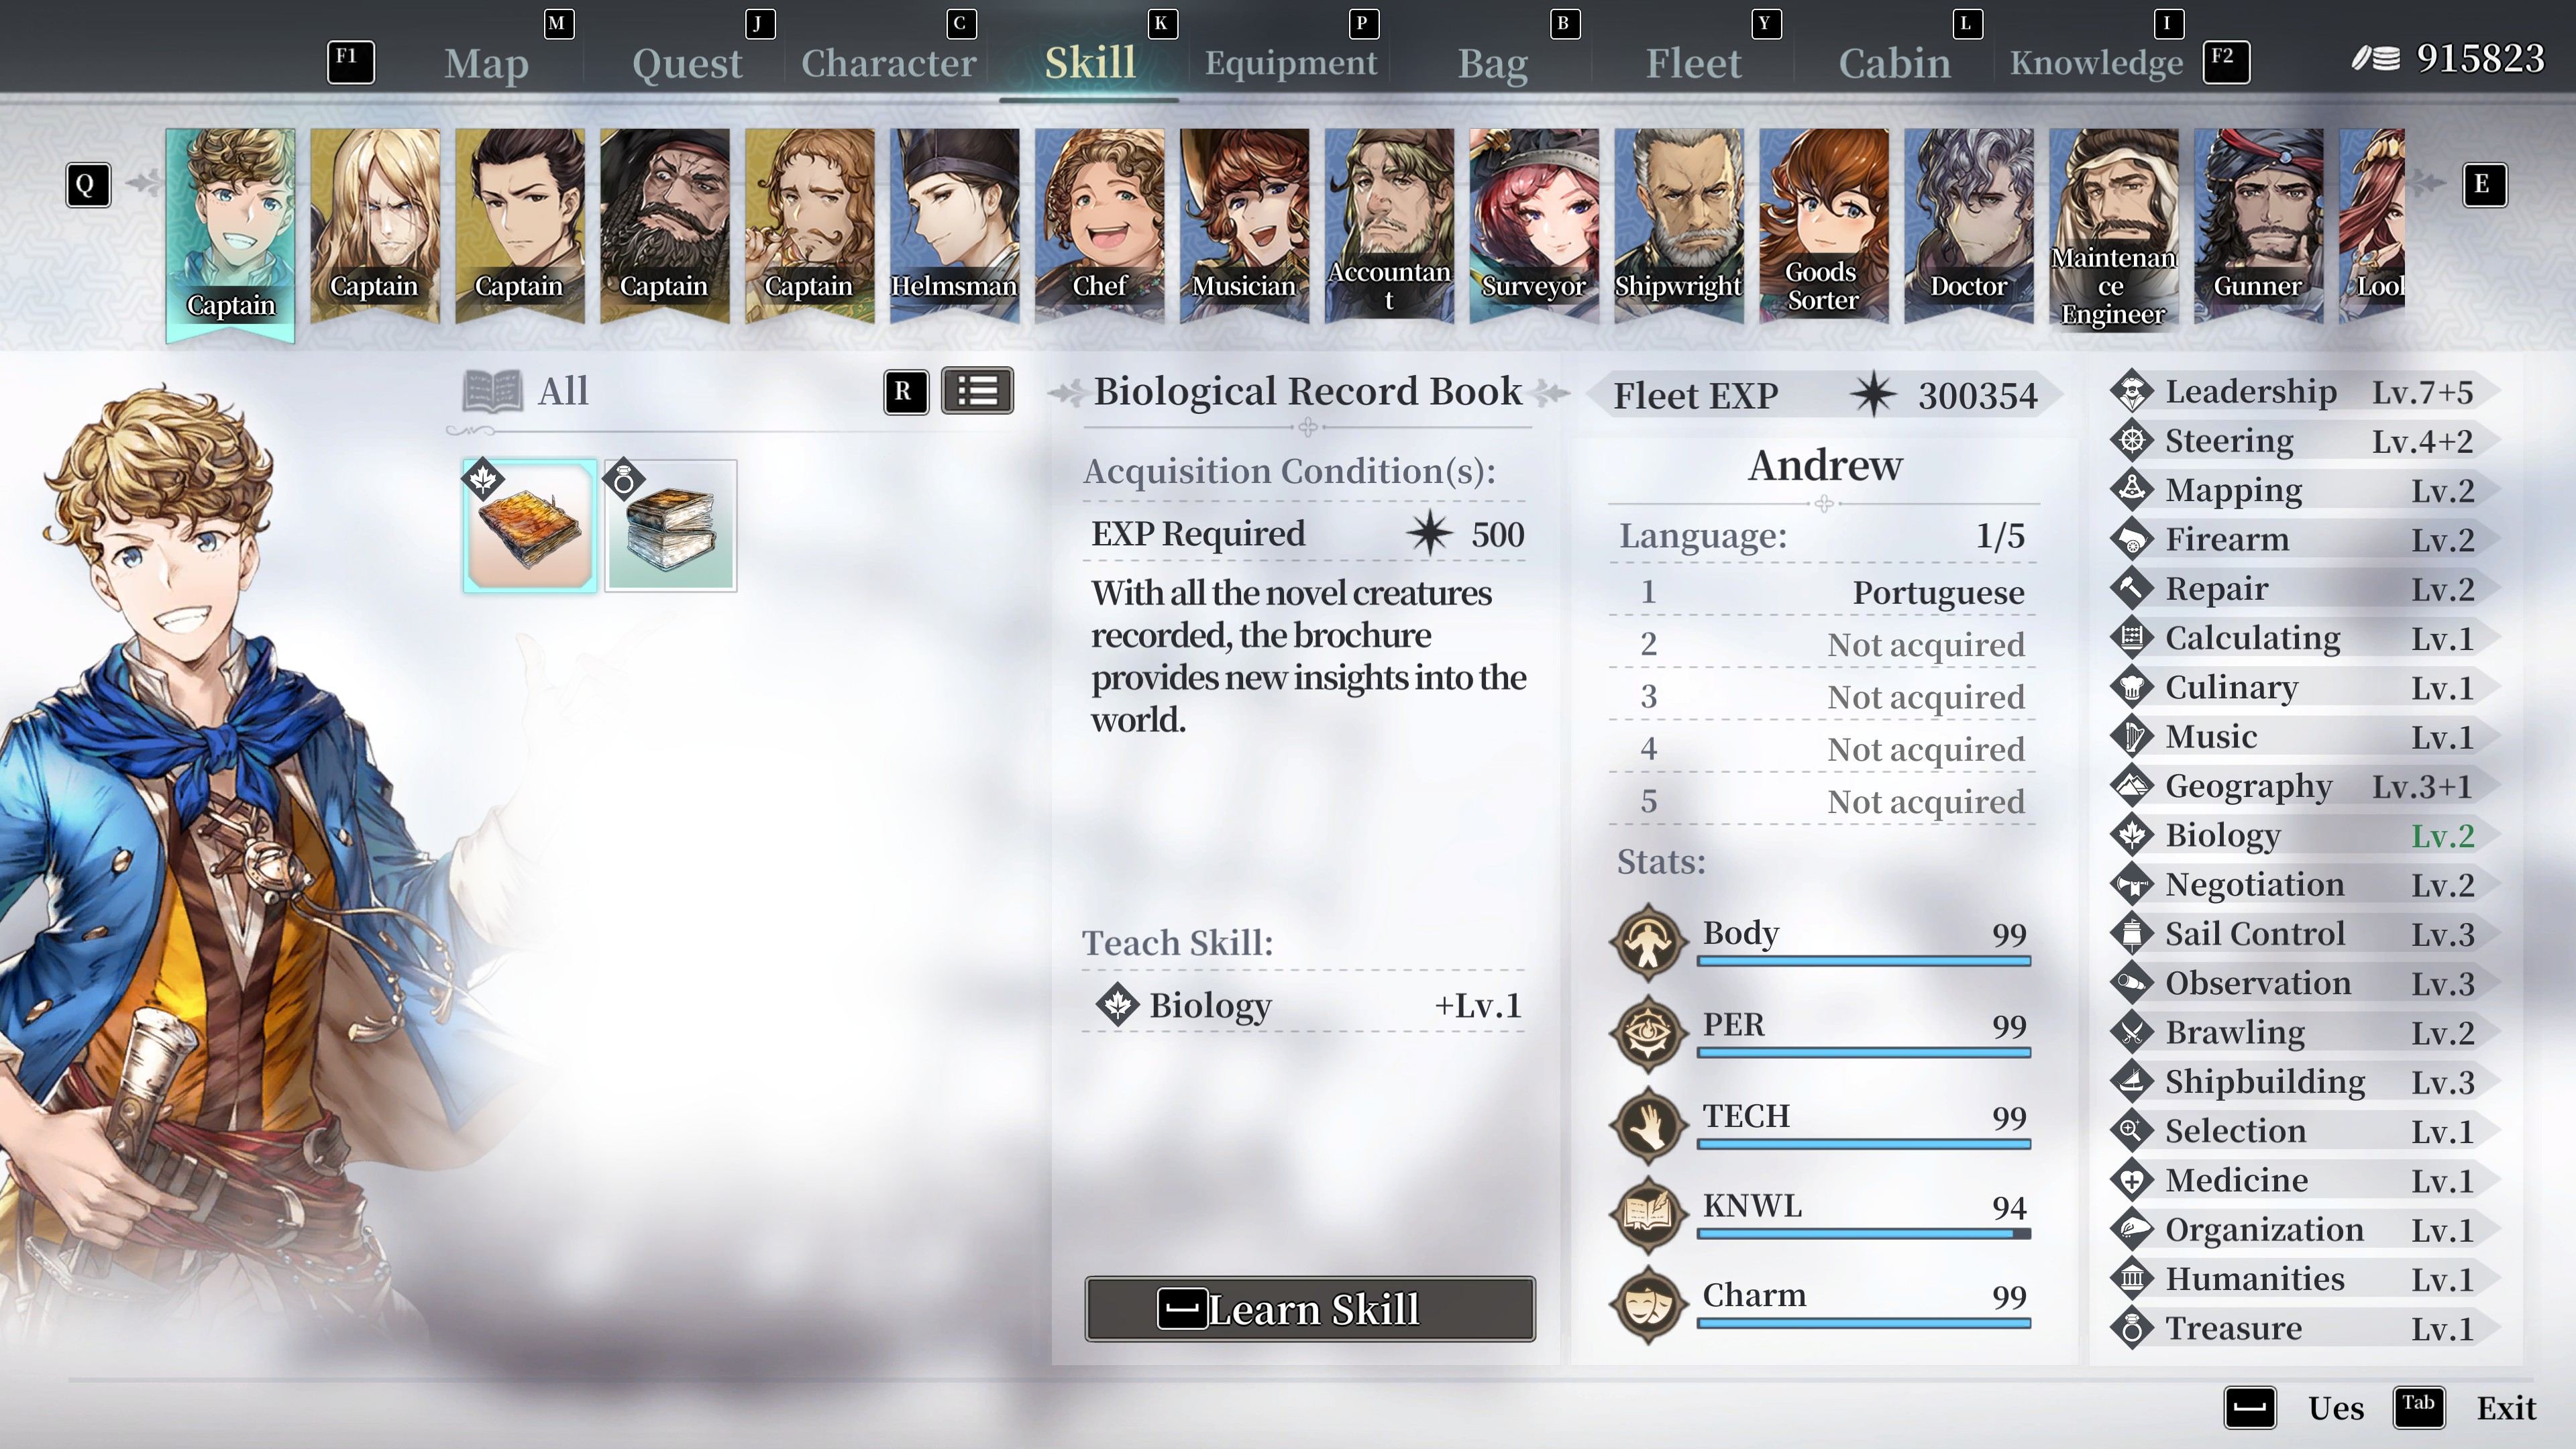
The skill tab will only unlock when you have found a skill book. You mostly obtain skill books from bookstores and they cost quite a bit of money (100k in the mid to late game). You can also get skill books from quests and chronicles.
It is highly advised not to use a skill book until you absolutely know who will benefit most from it and only when it is needed to accomplish a task (like interpreting a book in the library). Skill books are rare and expensive, don't waste them.
EQUIPMENT TAB
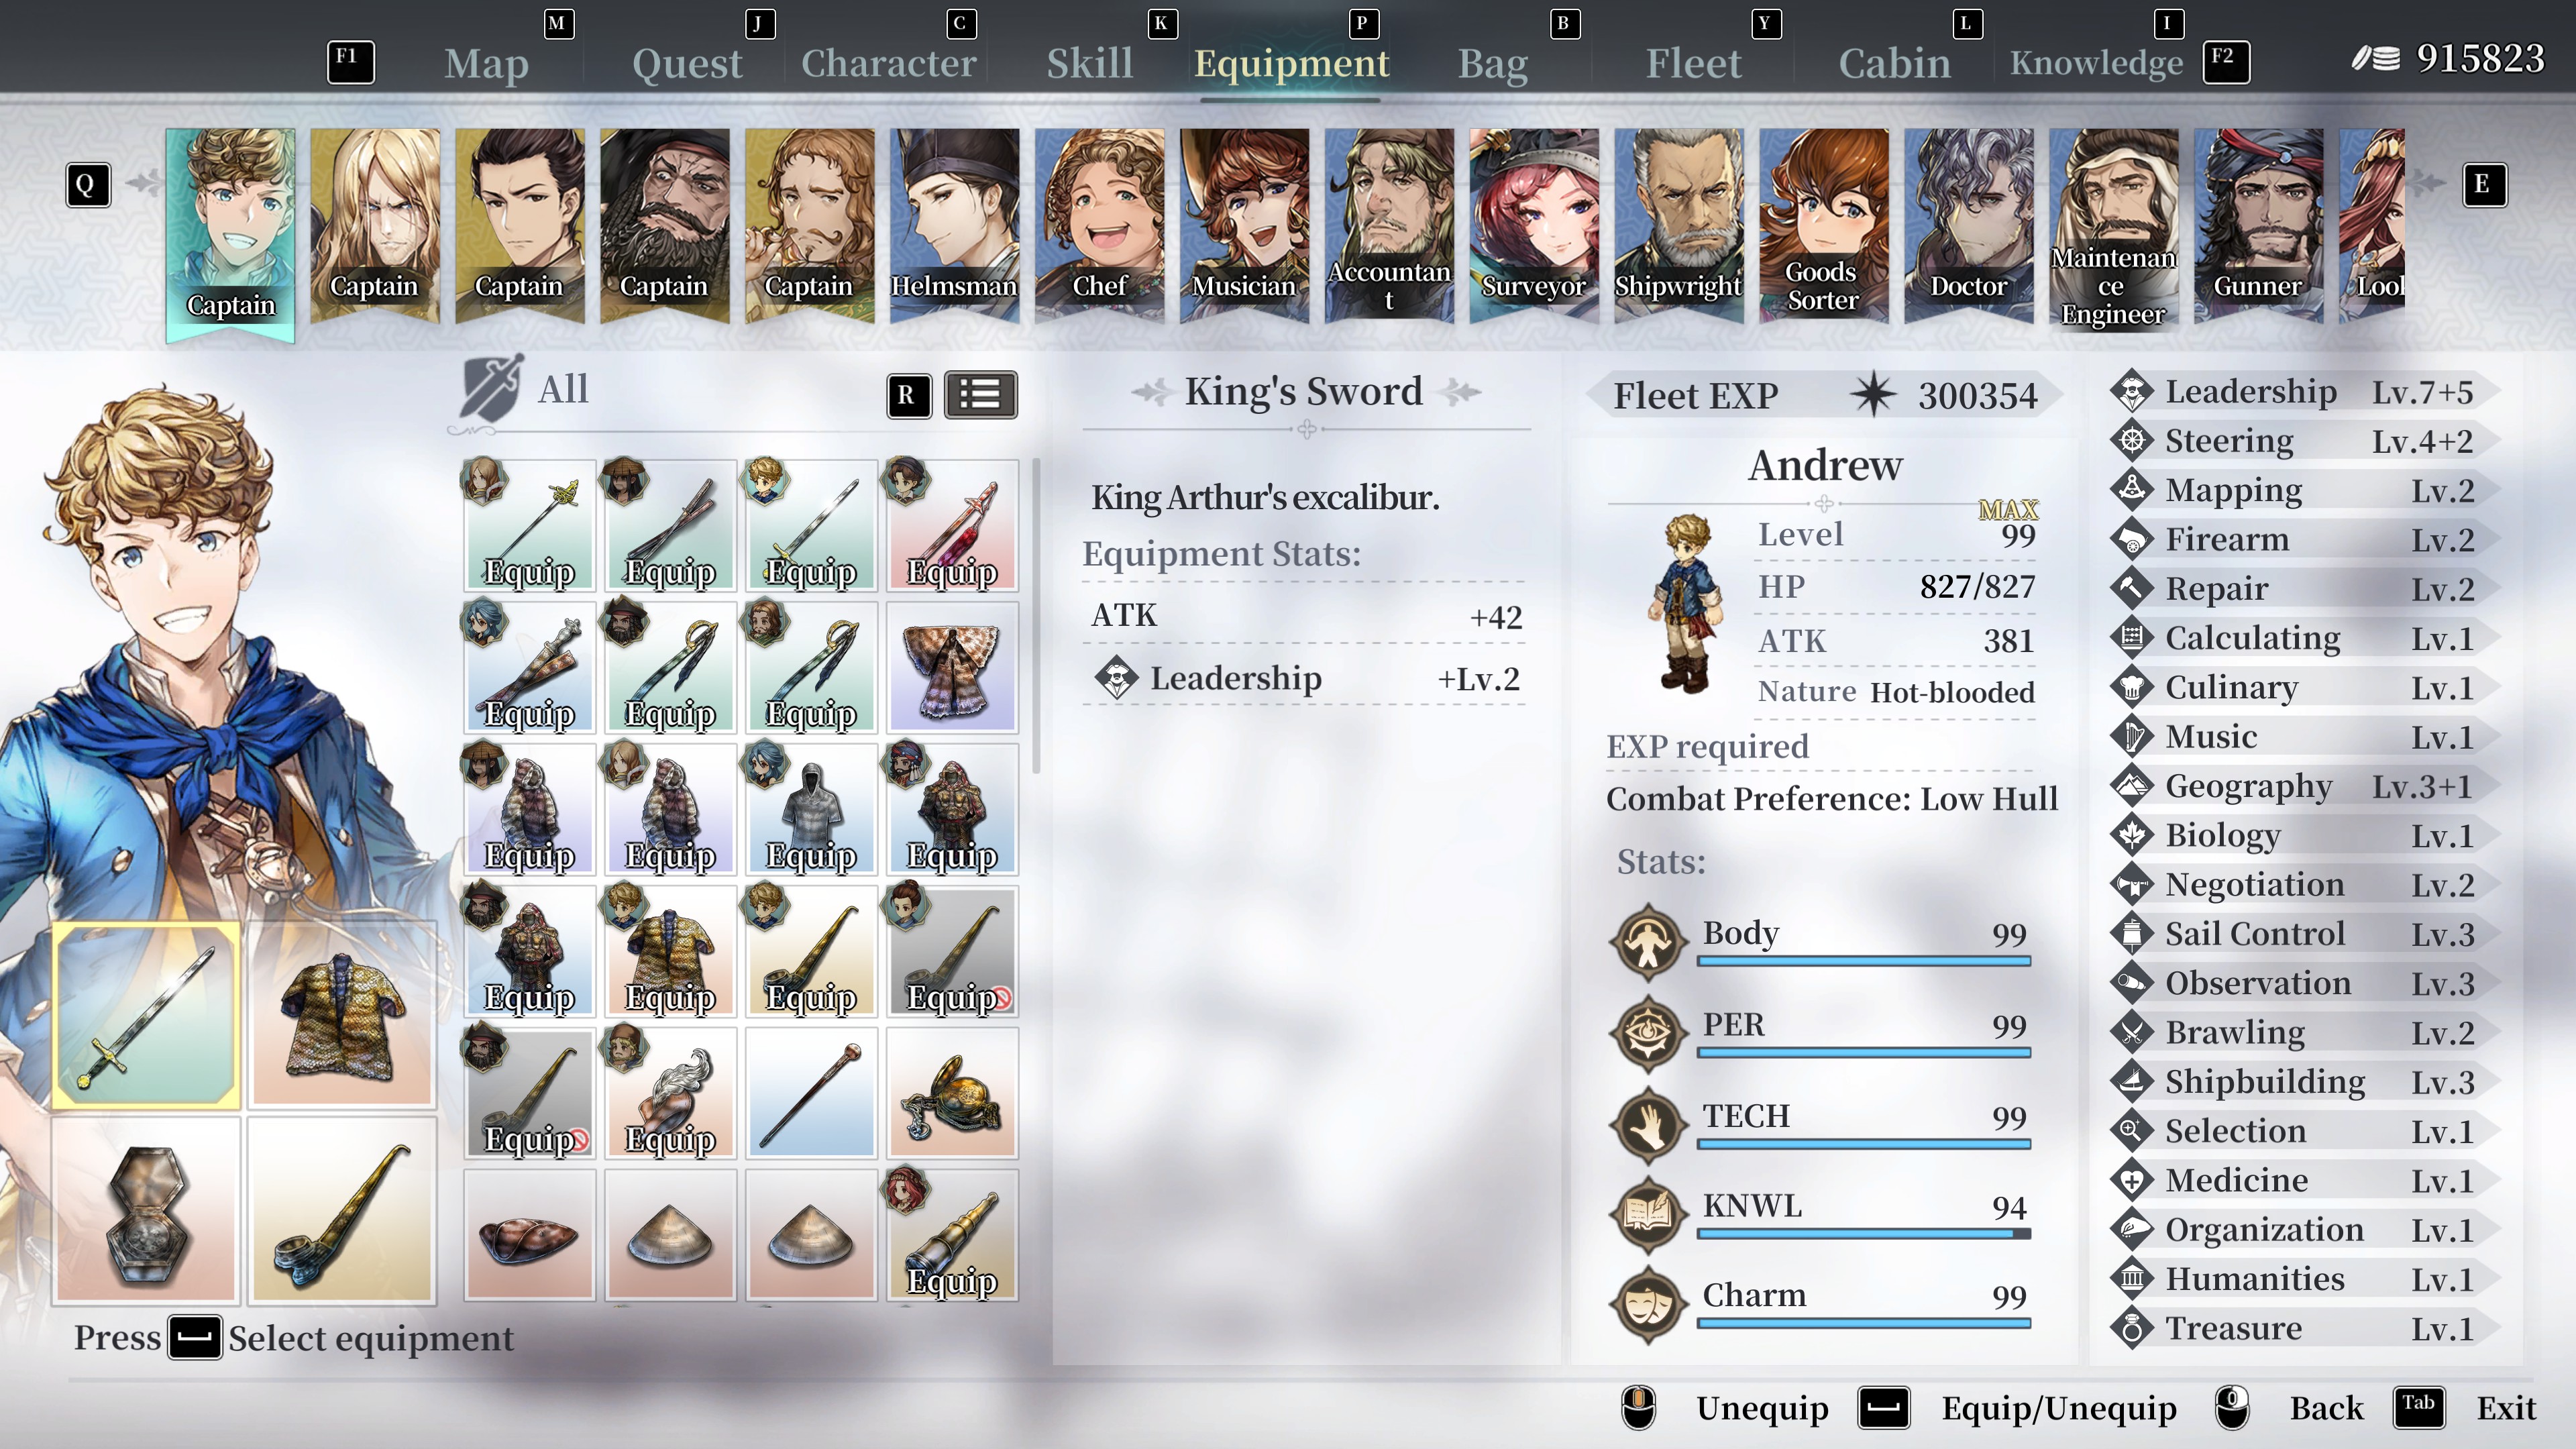
During the course of the game you will find items that can be equipped onto your crew members. Each crew member can have up to 4 items equipped. Equipment, for the most part, passively raises your skills. Therefore, it is advisable to give equipment to a crew member in order to raise the skill that improves their job the most. Give your doctor all the medicine equipment, give your musician all the music equipment, give you captain all the leadership equipment, etc.
Each character has a special item that when equipped will give them extra skill boosts. I do not have a complete list of these items, but I am certain there is a guide out there that does. You can tell these special items apart as they will have a purple name and the extra skills will only appear when they are assigned to the correct character. Andrew’s special item, for example, is the Compass.
Of note are weapons and armor. These items are only useful if you plan on doing a lot of duels in combat or if they come with other skills. Best to give them to the captains or the boatswain (the one assigned to the Deck using Brawling Skill).
FLEET TAB
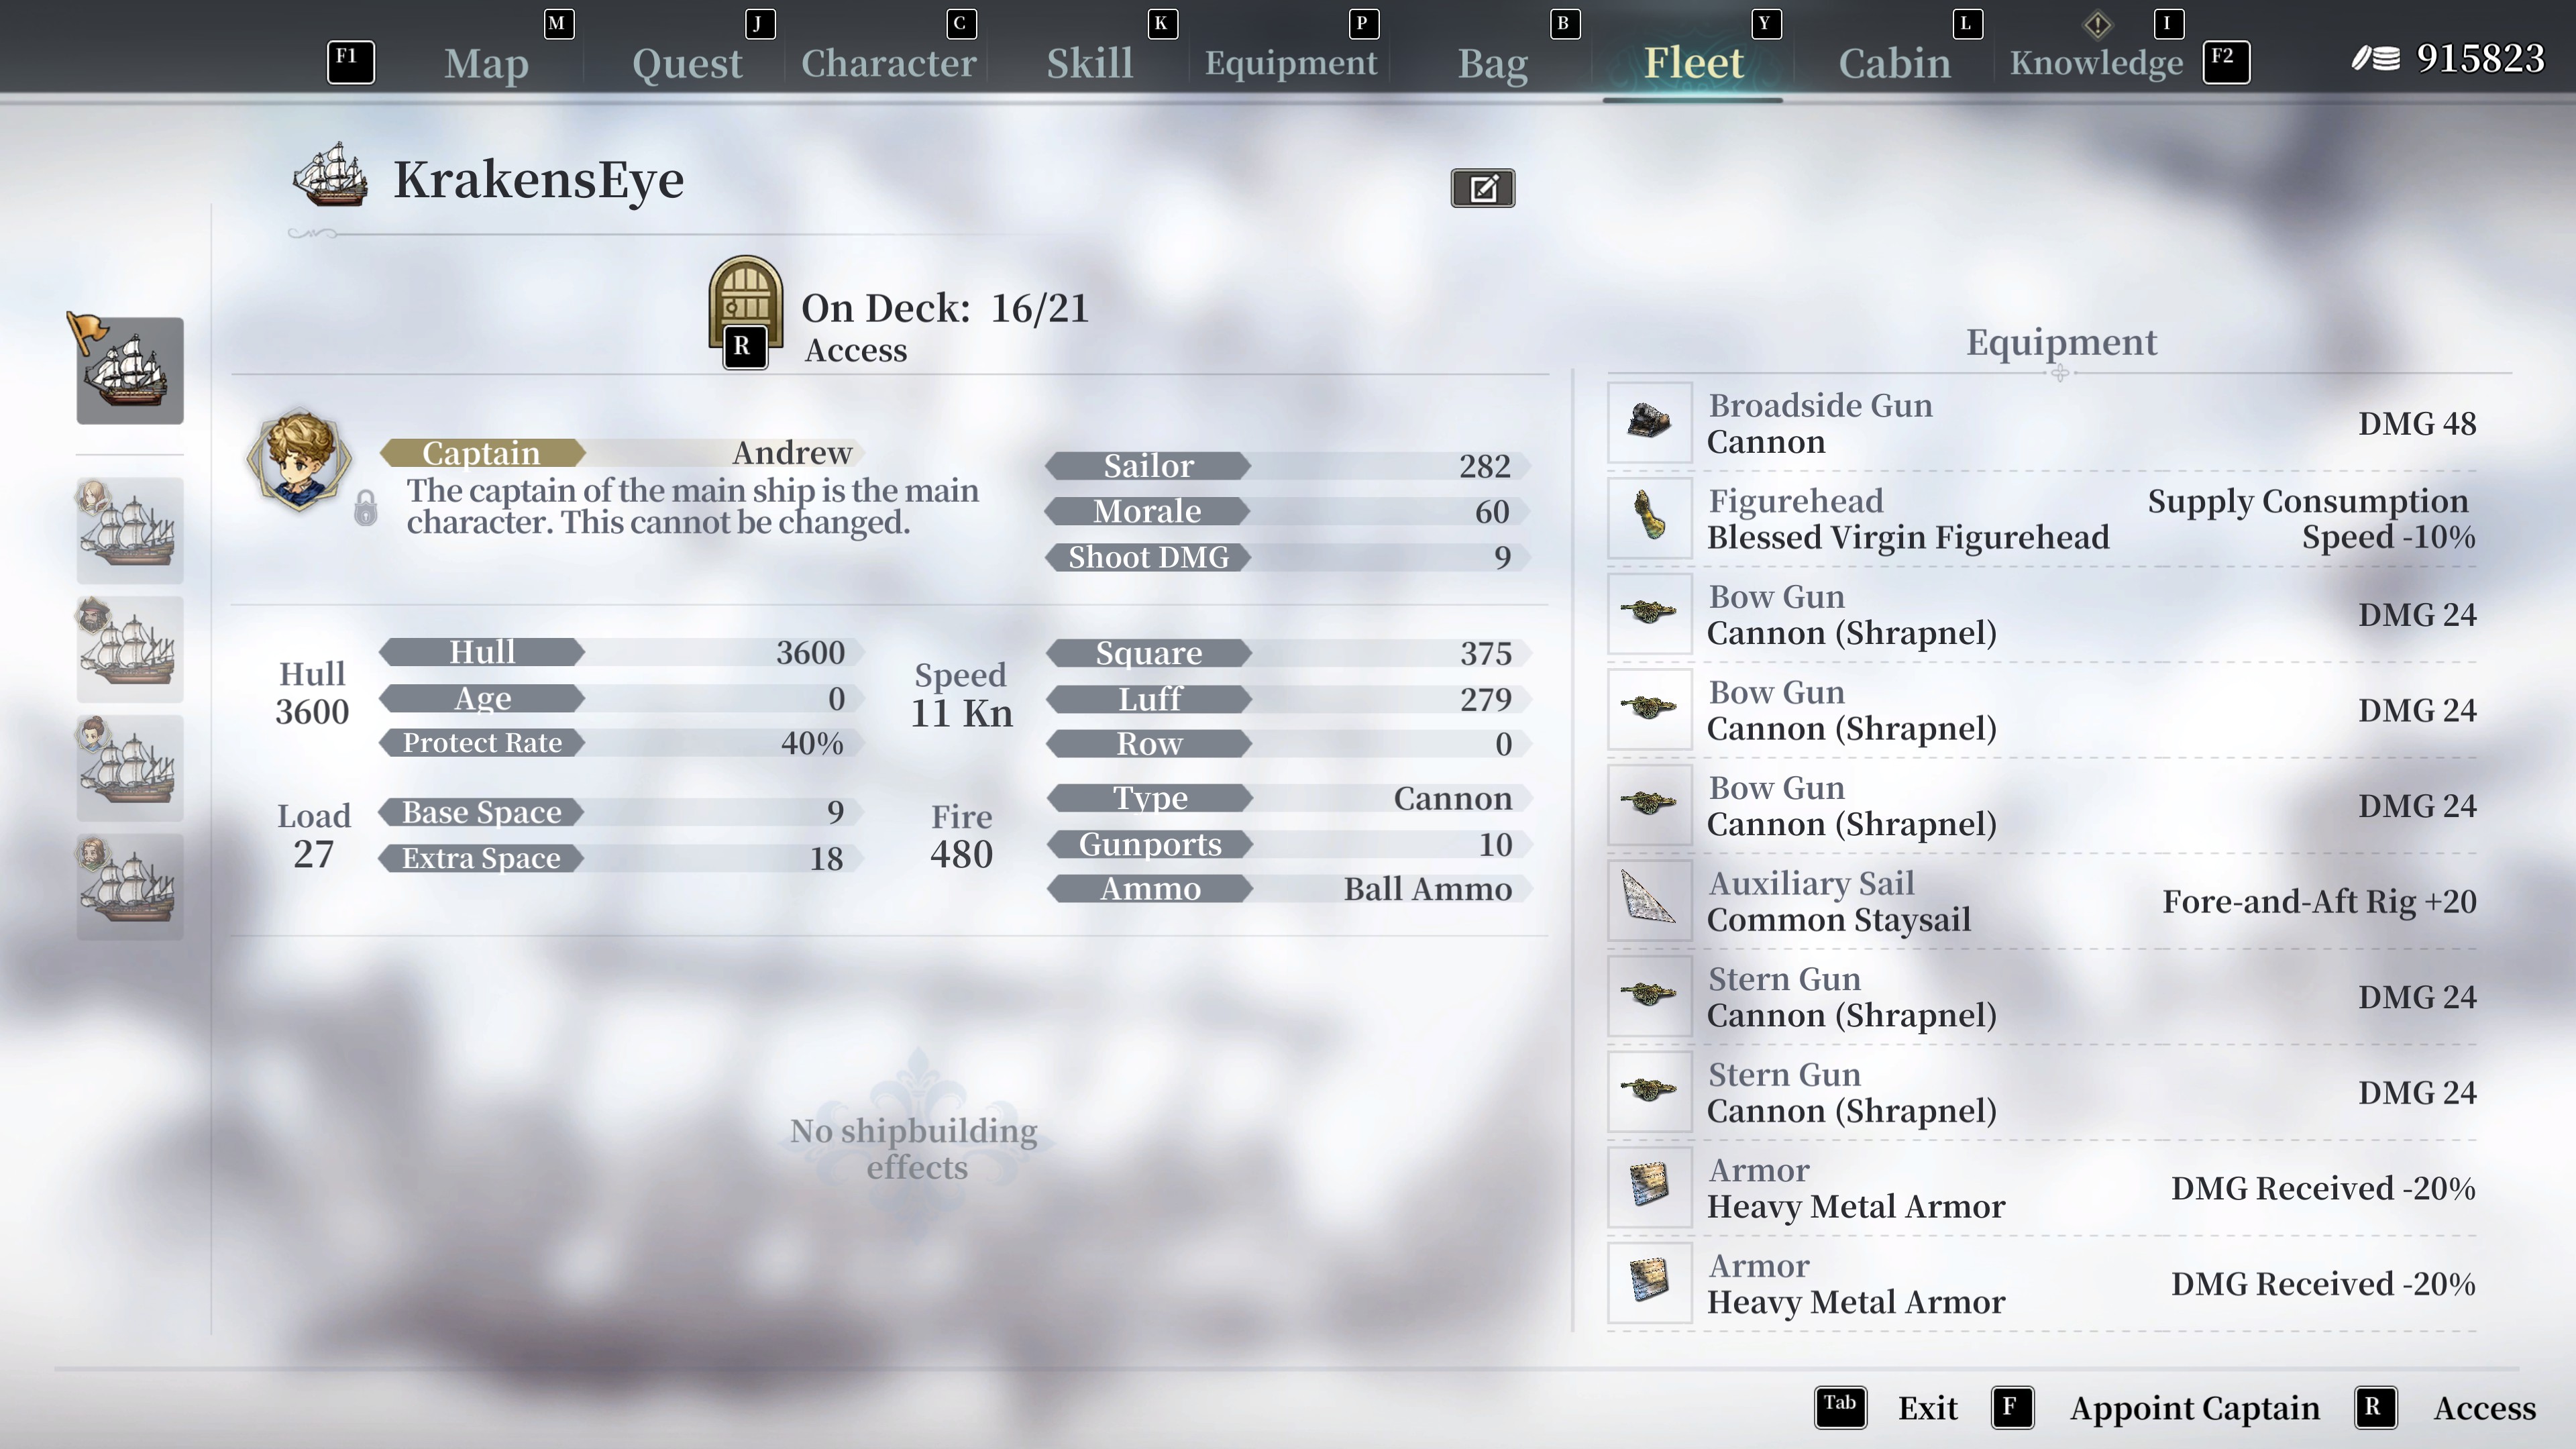

The Fleet Tab is where you see your ships and more importantly where you assign crew members to jobs.
Jobs can only be assigned to rooms on the flagship. Support ships cannot have crew members assigned other than a captain, so any rooms other than gunrooms and warehouses on a support ship are pointless. All other room types need to be on the flag ship and must be staffed with a crew member in order to function. When staffed, they affect the entire fleet.
When on this tab, you can hit the R key and go to a cut away of your flagship. Here you can drag and drop crew members into rooms. You can do this at any time. So, early in the game when you have few crew members, you can quickly swap a person from the crows nest, into the gun room during battle and then swap them into the accounting room before you sell your loot. In the mid to late game, you will have plenty of specialized crew members and swapping won't be needed.
Ideally, every crew member should be doing something.
Honorable Mention: There is another room that has not been mentioned yet, the Lounge. I have yet to find a use for this room…
TRADING TIPS
Because the game has so many different commodities and so many different ports in so many different regions where do you even begin to make money?
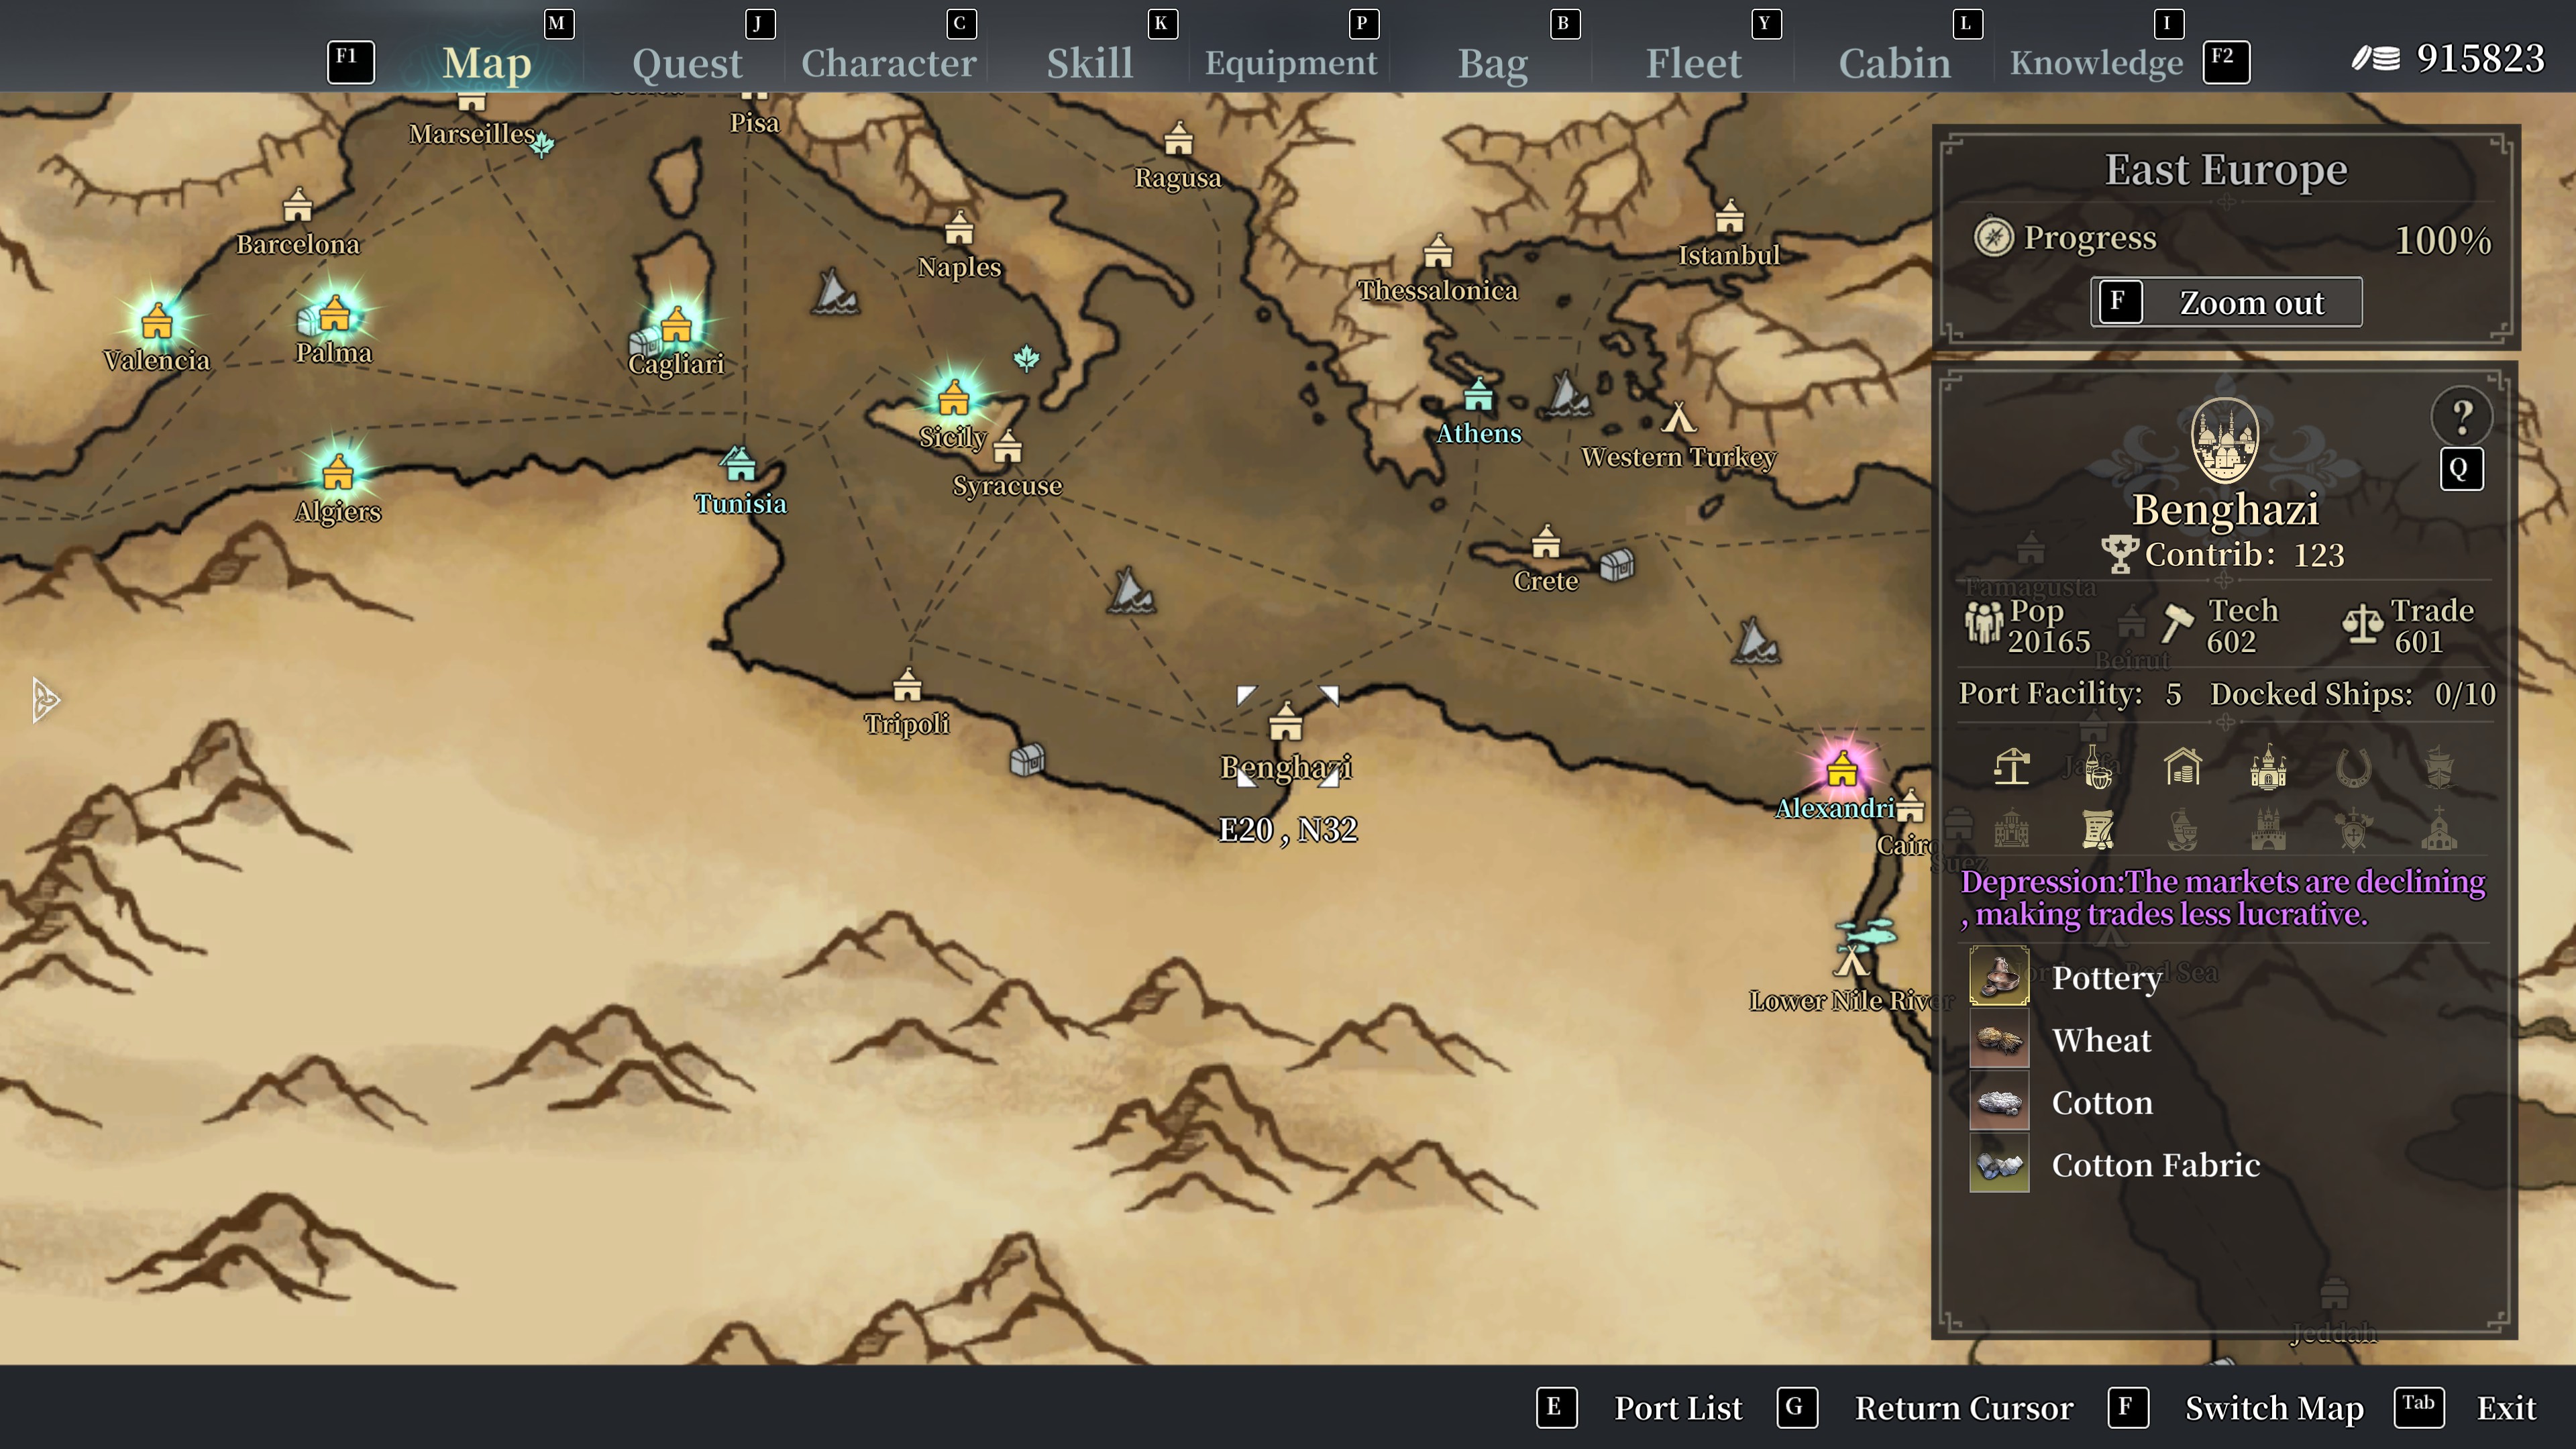
Every time you find a new port, get into the habit of checking their market for goods. When you do this the game saves this information in the Knowledge tab of your menu. With this information, you can click on the port on the map and it will tell you what goods are sold there for future reference. In the Knowledge tab, you can also search for a specific good and the game will tell you what ports you have found that sell that good and potentially what cultural sphere that good is associated with. This is very useful when you need to find a good for a quest, for example.
When you are in the market, hit the R key and the price of each item will change from a raw price to a percentage. The percentage is based on the relative value of the goods compared to that port's base value. If you are buying items, look for goods that are less than 80% (70% or less is ideal). when selling goods look for values above 100%. This will guarantee a profit.
When selling goods, the game will tell you if the goods you are selling are being sold for a profit by showing the value/percentage with a green color. If the color is white, then you are not making a profit. The game includes the price you bought it at and any negative status from breakage or wetness. Also, the base value of an item is different in different cultural spheres. Items will not sell well in ports that also sell that item.
Ports have economic status. At the start of each month, the game checks the economic status of every port. The status can be Normal, Depression, Prosperous, Plague or Cultural. You find the economic status of a port by clicking on it on the map. What you are looking for is to buy products from a port in Depression where the goods are cheap and sell those goods to a port that is Prosperous (those ports are easy to find as they glow orange on the map).
Ports also have a cultural sphere. A port’s cultural sphere plays a big role in determining the base value that a port will buy or sell a good for. Goods can have different base values in different cultural spheres. When a port is having a cultural economic status, it will say which cultural sphere it wants to buy products from for higher prices. If you can capitalize on that, you can make good money. A good example of high profits from cultural sphere trading is buying gold, diamonds and ivory from West Africa cultural sphere and selling them in any cultural sphere in Europe. You don’t even need to make use of the depression/prosperous angle, just normal value is enough to make good profits due to cultural sphere differences.
When a port is experiencing a plague, you can sell them medical goods at very high values. I have seen medicine sold in plague cities for over 200% of its base value. Combine that with a city selling medicine in a depression and you have quite a big payday.
Goods in your cargo hold can become damaged or get wet. The longer you keep an item in the hold, the worse its condition gets. These conditions will lower the base value and potentially cause you to lose profits. You can alleviate (not prevent) negative conditions by having a Preparation room on your flagship staffed with a crew member with high Organization skill.
If you have an Accounting room on your flagship staffed with someone with high Calculating skill, then every time you sell goods you get a bonus to the overall value. This is just free money.
If you have a Studio room on your flagship staffed with someone with high Selection skill, then every day you are out at sea, there is a chance that a random good will upgrade to a premium quality (denoted by a purple star). This increases the base value by 50%. Again, it’s just free money. Yes, premium goods can get damaged or wet.
FLEET MANAGEMENT TIPS
This is a game about sailing so it stands to reason that such a game is going to center much of its mechanics around managing a fleet of ships. Here are the basics:
You can manage your fleet by going to the menu and selecting the Fleet tab (should be obvious, but, we need to start somewhere.) There are a lot of numbers and stats here, but much of it you can ignore (for the most part a higher number is better).
Your flag ship is the one at the top of the left hand side and is the only ship that really matters. special rooms only work when they are on the flagship and they affect the entire fleet. The only exception to that is the gunroom and the warehouse.
From the Fleet tab, you can press R and go to a cut away section of your ship where you can assign crew members to each station and give them a job. It is highly advisable to assign crew members to the job that matches their best skill (see skills above). Every crew member should have a job if one is available. You can easily switch crew member jobs at any time. Any crew member can do any job, some are just better than others.
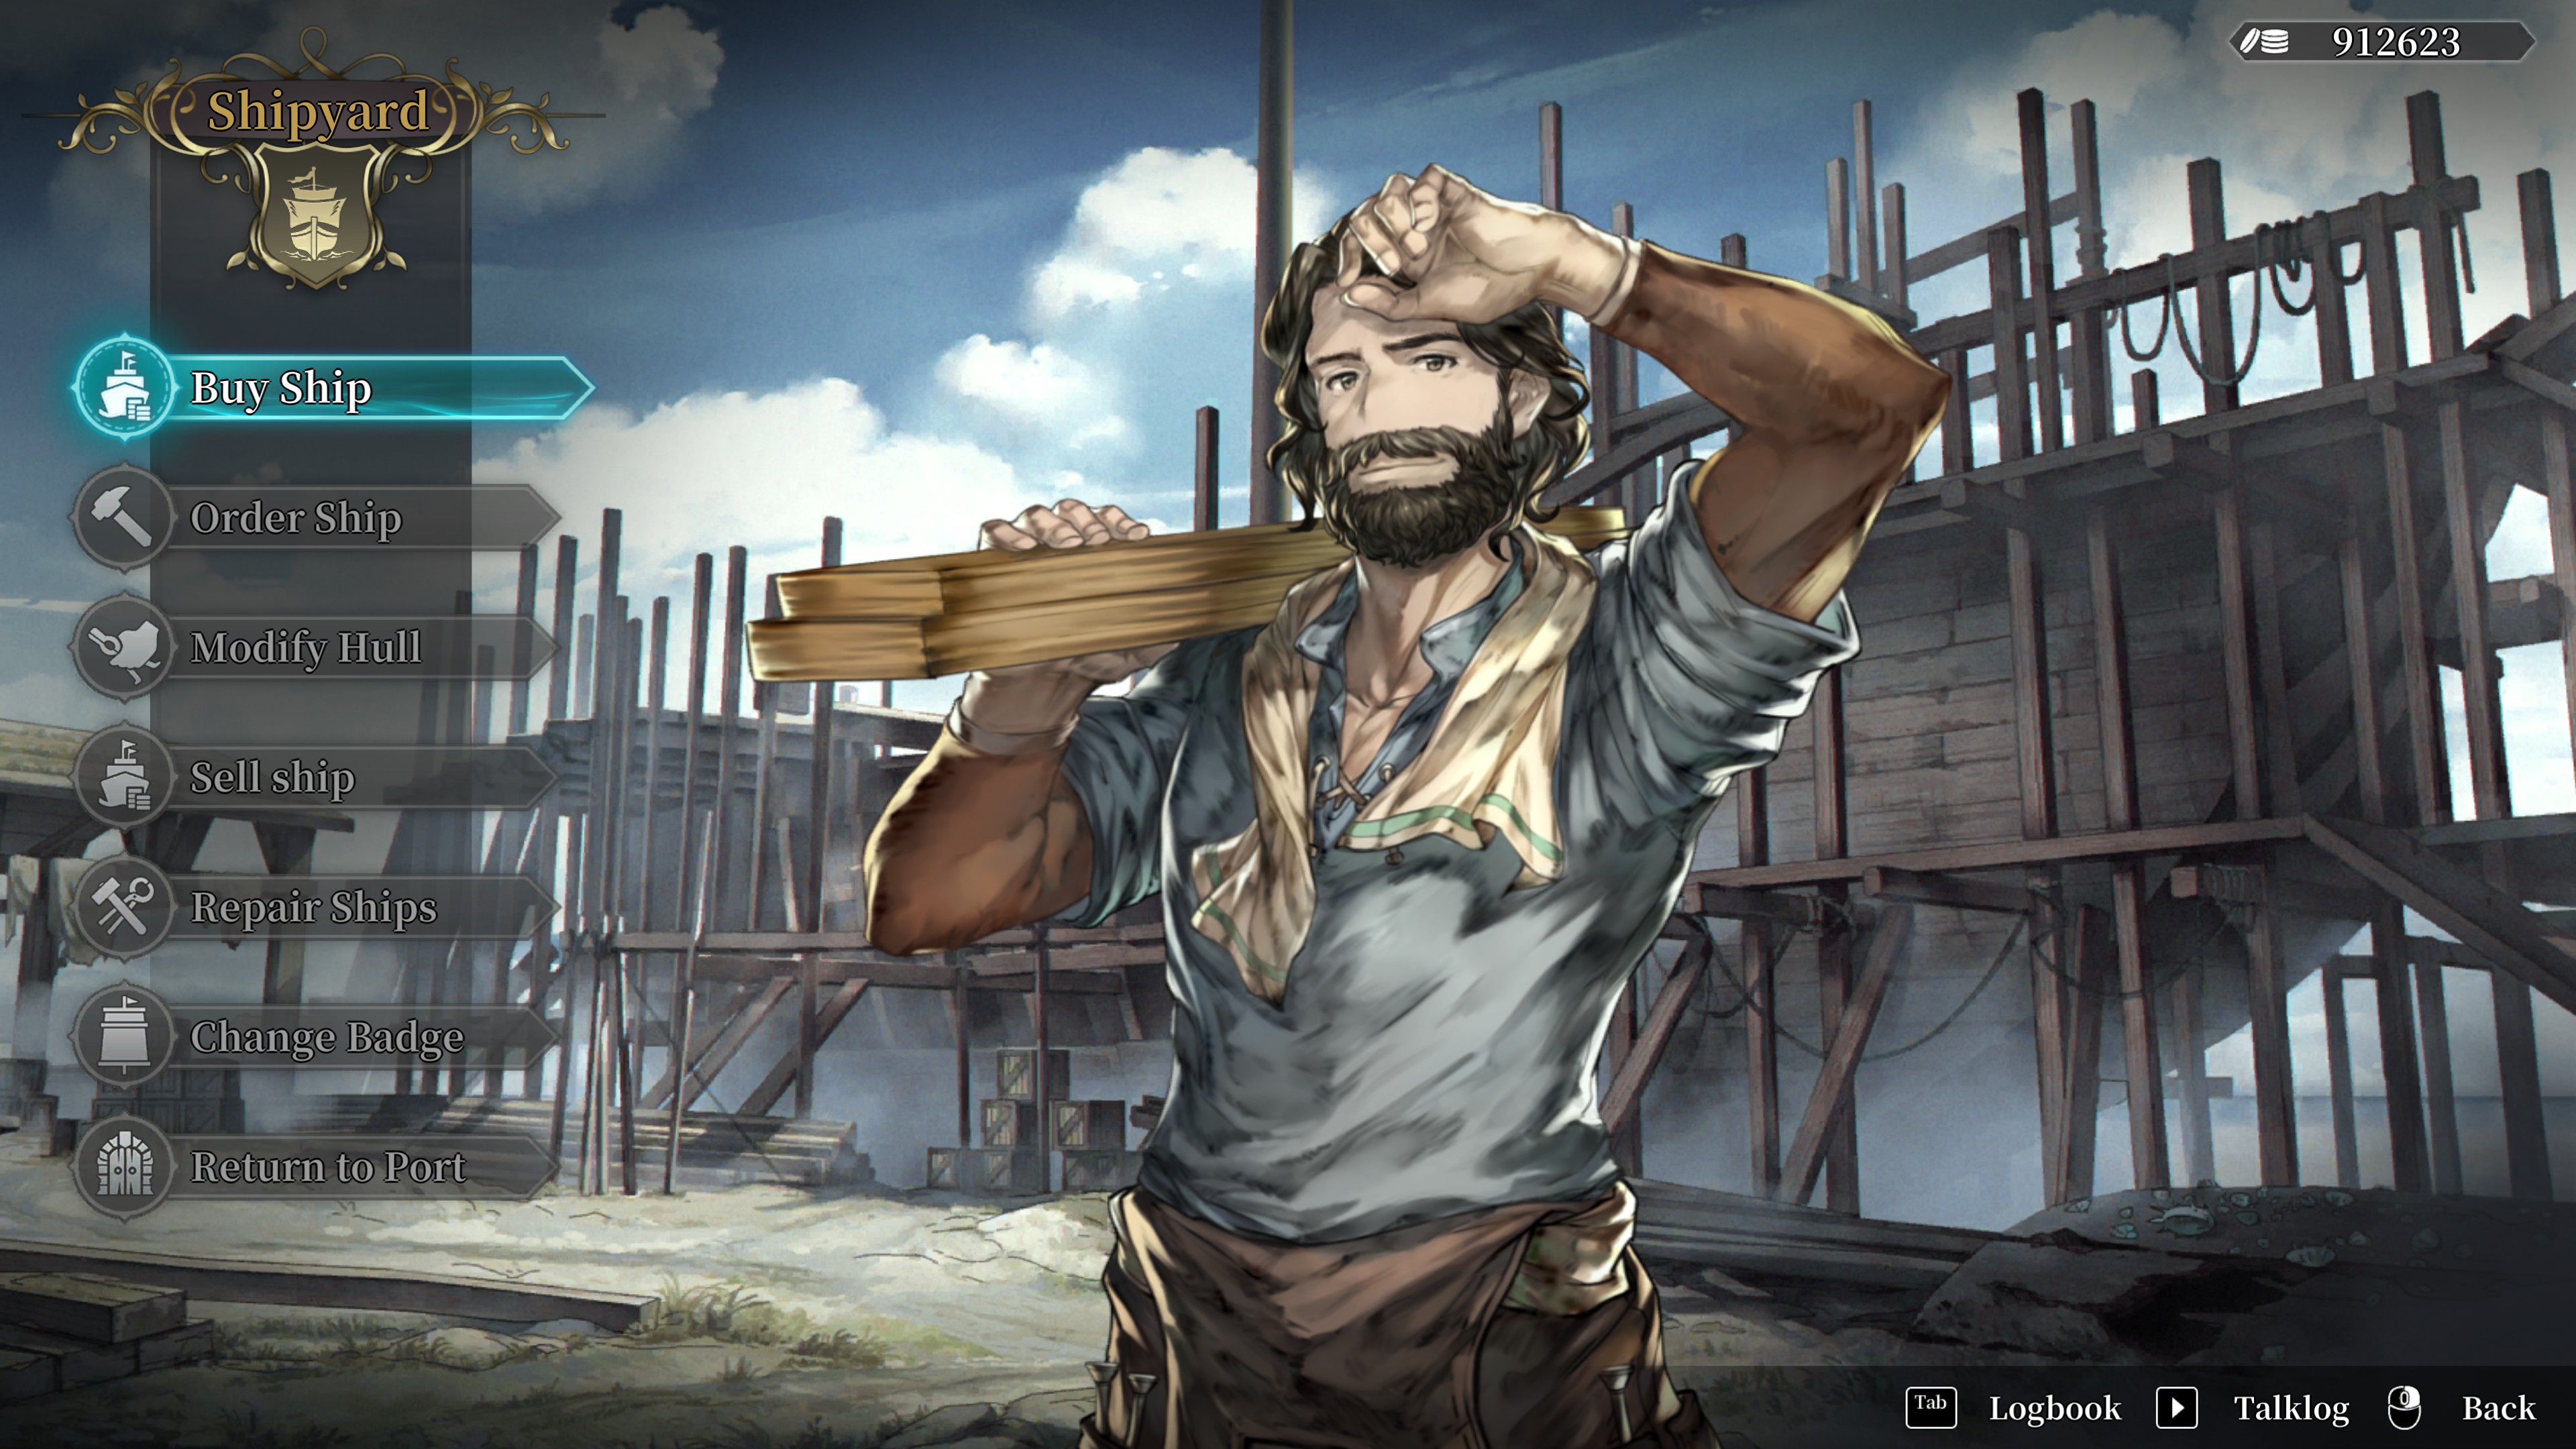
To modify your ships you need to be in a shipyard at a port. Not all ports have shipyards. There are other guides that list this information. When in a shipyard you need at least 1 crew member to have the shipbuilding skill at level 3 in order to modify hulls (this option will be locked if you don’t meet that qualification). In addition to this, some rooms require a special blueprint called the Cabin Extension Blueprint. This is acquired at an item store at a starter city where the tech level is 300 or more. This is easy to miss and many people get frustrated with it. A starter city is any port where a main character begins the game (Andrew starts in Lisbon for example). It may be possible to find in other ports, but it should be guaranteed in a starter port.
When modifying the hull, you can replace one room with another and change gun types. Many rooms require blueprints (in addition to the Cabin Extension mentioned above) which you get from completing objectives in the Chronicle section of the Knowledge tab (for example, you need to do 3 bounty hunting missions to unlock the gunroom blueprint). Larger ships have more space for more rooms. Each room can only be added once except for the gunroom and the warehouse which have additive benefits with more rooms of the same type.
Cargo space is recorded for the fleet as a whole. The game does not record which ship has which items, it's just recorded at the fleet level. All ships have a base cargo space and a warehouse adds 2 more cargo for each one added. A common strategy is to put all the special rooms on the flagship and make all the support ships full of warehouses for maximum cargo capacity. (There is a crew member that has a perk which adds 10 cargo spaces to the fleet!)
Ships age over time. This is seen as permanent damage to a ship in the form of a gray bar over the ship’s health. Age damage can only be repaired if you have a Maintenance room with a crew member staffed. With that room you can then repair age damage at the shipyard. Even with a maintenance room, age damage will still occur; it cannot be prevented. Without maintenance, age damage will reduce a ship to 50% of its max health at the worst so maintenance is not needed, but it is a very good idea.
Ships need sailors in order to function. You gain sailors by going to the Tavern (inn, restaurant, cafe, etc). Here you can also Treat your sailors to improve their morale. After recruiting sailors, you go to the Pier, and then you have the option to Assign Sailors. Here you can choose any number of sailors to assign to any ship. A ship can still function with a single sailor, but its speed will be reduced if the number of sailors is less than the minimum. You can lose sailors due to negative random events at sea (sickness, fire, etc) or to combat.
Sailors also need provisions while at sea. In the Pier Warehouse screen there is the option to alter your cargo space. Here you can decide how much of your fleet's cargo is set aside for provisions and how much is set aside for trade goods (this way you don’t over buy trade goods and run out of space for food). If you choose to fill supplies you can get an estimate of how much time you spend at sea before you run out. Generally 20-30 days is more than enough to do trading. Exploration focus should be closer to 50-100 days depending on where you are exploring. Experiment with sailor assignments and cargo adjustments to get the right balance for what you need.
The speed of your fleet is determined by the speed of the flag ship. Auto sailing using navigational charts (which requires a map room and crew assigned) increases your overall speed although it might take you on a less than efficient route. Larger ships tend to have higher top speeds. The Clipper is the fastest ship design, but is hard to find.
ORDERING NEW SHIPS
Ordering a new ship to be built can be a little confusing at first so it gets its own section.
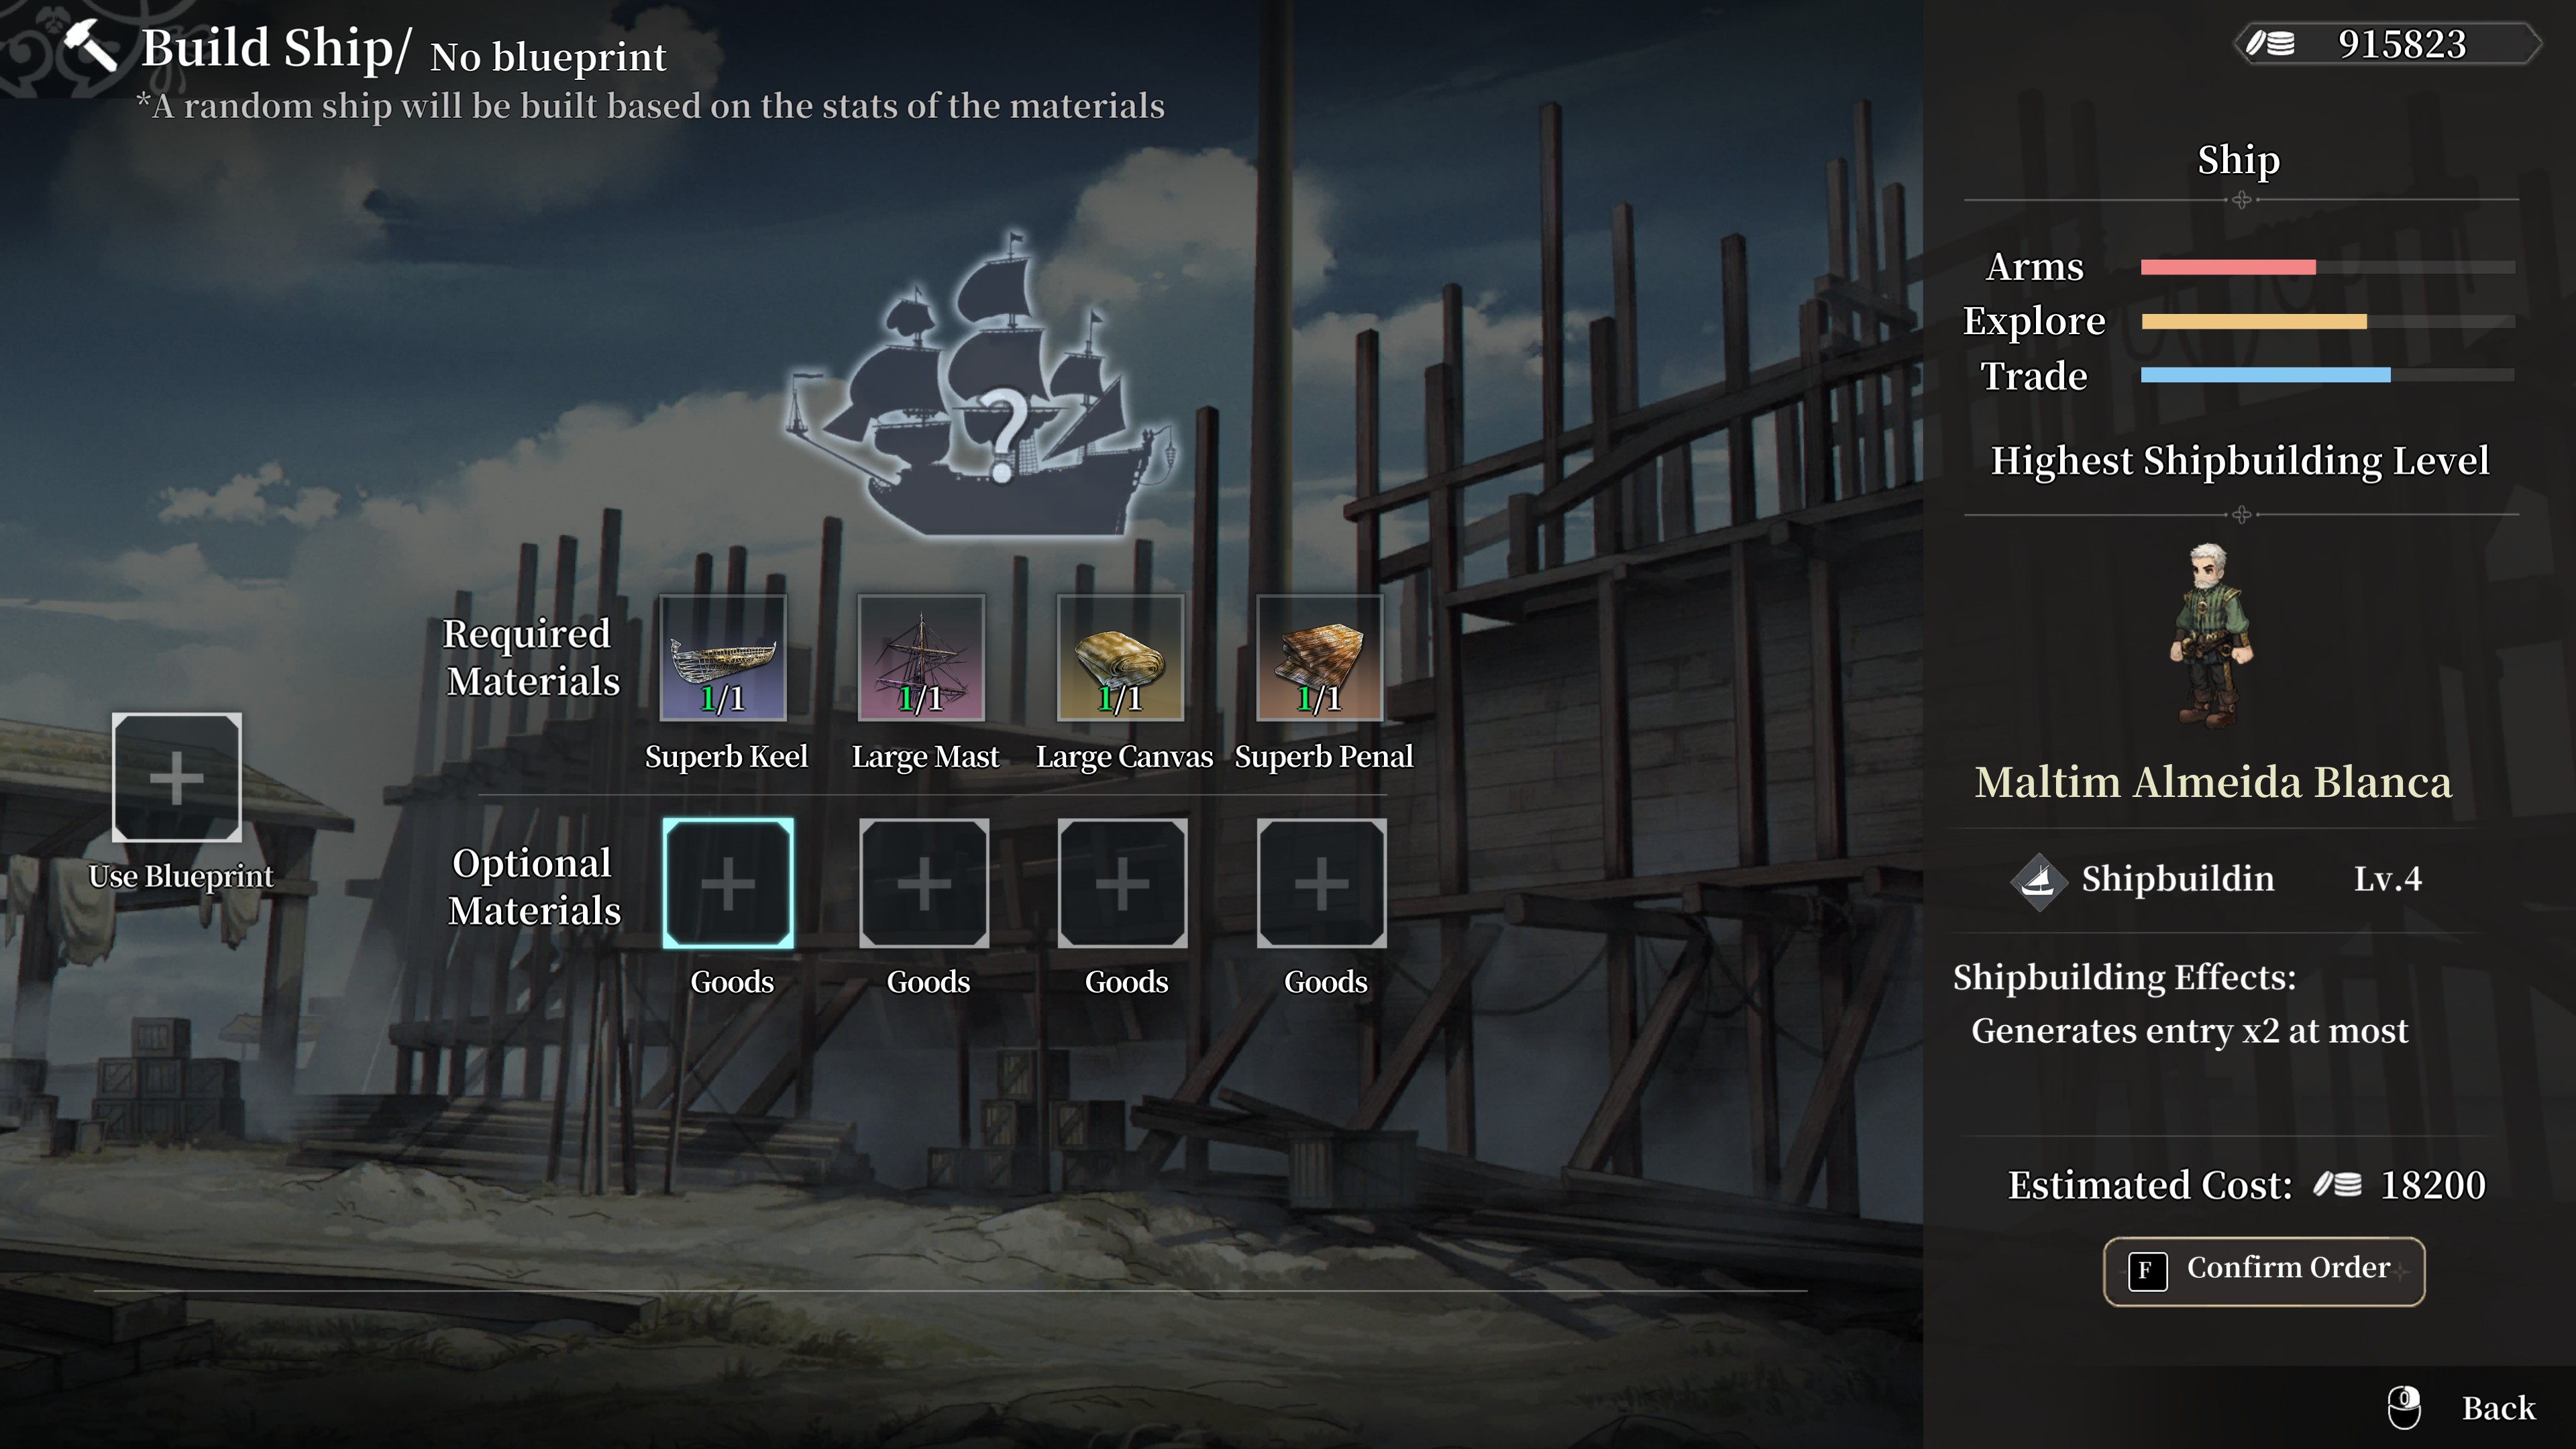
When Ordering a ship you need to provide a minimum of 4 components; a hull, a mast, canvas and penal. These items are found in Ship Material Stores. Ship Material Stores are not always found in the same ports as shipyards (frustrating, I know). Just another reason to unlock lots of ports. These items are expensive. If you can’t find a decent ship for sale in the shipyard, it may be your only option for an upgrade.
It should be noted that to unlock the Maintenance room blueprint, you need to order 2 ships to be built.
The four components come in different qualities and types. Better qualities are unlocked when the port’s TECH level (see below) reaches different thresholds. The Highest quality components are “Superb” and only unlock at TECH level 1000.
If you provide those 4 components at minimum you will be able to build a random ship. You can get an idea of what ship will be built by looking at how long it will take. 20 days is most likely a small ship. 30-40 days is a medium ship. 40-50 days should be a large ship. The higher quality the components and the higher the TECH level of the port the better the ship will be. You can cancel the building at any time and get a full refund, then try again if you want to attempt to get a bigger ship.
In addition to the 4 required components you can attempt to up the value of the random roll by investing trade goods. Different trade goods add different values to the ship. I will leave that as a discovery exercise for you or for a more indepth guide later.
If you are lucky enough to have found a blueprint for a specific ship type, then it will tell you exactly what you need. Blueprints always require a special component which can be found in Ship Material Stores at certain TECH levels. Blueprints are rare and oftentimes come from special guild missions or side quests. Because of the special component, you cannot build a specific ship without the blueprint because special components can only be used when using a blueprint. If you find a special ship material that is not a hull, mast, canvas or penal and you don’t have a blueprint that uses it, then the best thing to do is just sell it.
COMBAT BASICS
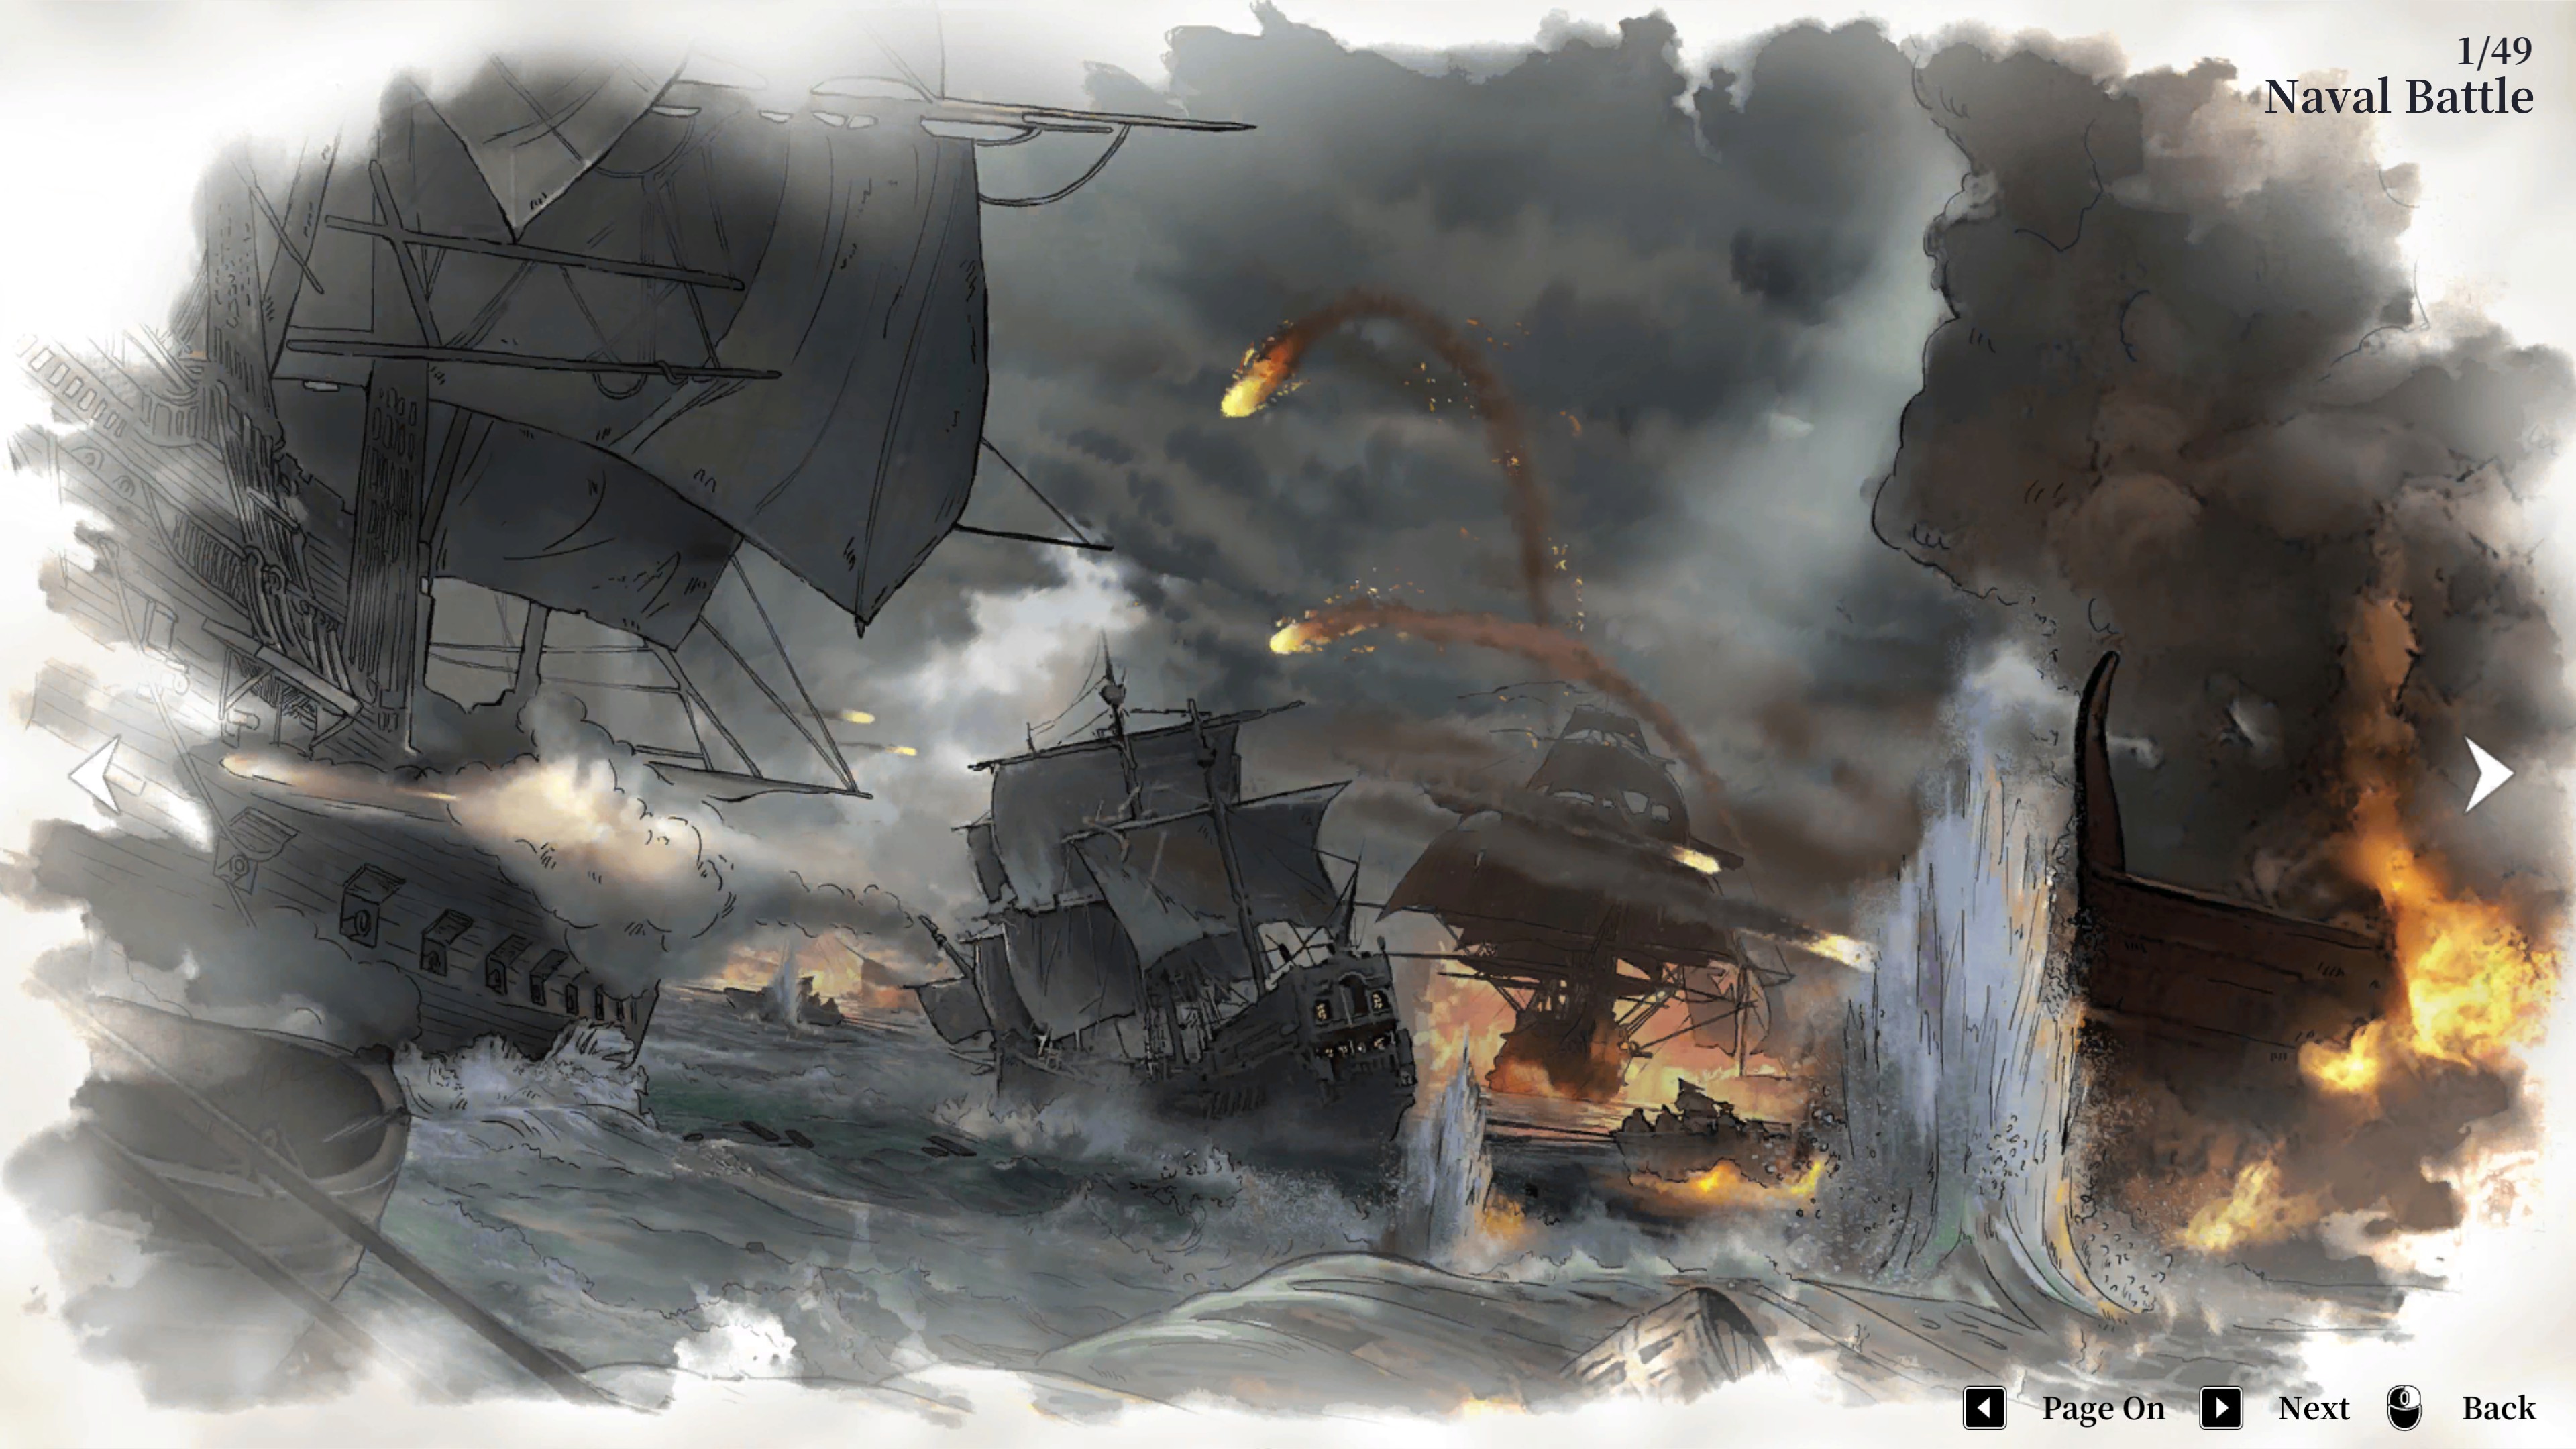
The game includes real time combat at sea between fleets. Each main character goes into a combat tutorial early on so I won’t cover those basics here. This will just be some supplementary tips to help you survive beyond the tutorial.
You can run away from random battles if you are fast enough. This is advisable if you are not geared for combat or just need repairs. In a full 40 hour game with Andrew I was only attacked by random pirates once. But, in a different playthrough I was attacked quite often in Southeast Asia region. Your experience may vary. Most combat should be mission relevant.
Mandatory combats occur at certain points in the story or for side quests. Leaving mandatory combat causes you to lose and you need to reload your save.
Turning speed can be controlled easier when you are slower. Put your ship on half mast sails and you will have better control.
Your front and rear cannons fire automatically when they are ready and have a target in range, you don’t need to press space like you do for the broadside cannons.
When doing ship to ship combat with your crew, you need to have high morale. Morale degrades naturally over time and is replenished when you use the Treat action at a Tavern in a Port. It is very cheap to do this and you should get into the habit of doing it often. Morale degrades slower if you have a music room and Musician assigned. Moral cap is increased by your Main Captain and is based on their leadership skill.
When you can modify your hull, add shrapnel cannons to the front of your ship (the bow). Shrapnel cannons do damage to the crew instead of the hull which then makes boarding and ship to ship combat much easier for you. This style of combat is arguably better than trading cannon fire with broadside guns, But, that is a personal playstyle you should experiment with. With a combination of shrapnel cannons on the bow and high morale you can actually take on ships of larger size and come out ahead, making ship to ship combat a potent strategy.
PORT GROWTH AND GUILDS
Just like your crew members can level up and get stronger with new skills and perks, ports level up and get better with time and investments. Here are the basics to get you started:
All ports have 3 factors that determine their development status; Population, Trade and Tech. As these numbers go up the port will offer new and better things such as more trade goods, premium goods, more equipment, better ships and ship components, etc.
All ports will naturally grow over time. These ports will naturally grow no larger than 30,000 population, 600 trade and 600 tech. Some cities grow at different rates and natural growth is very slow. They need to invest in a city in order for it to grow larger. Maximum effective value is 40,000 population, 1000 trade and 1000 tech.
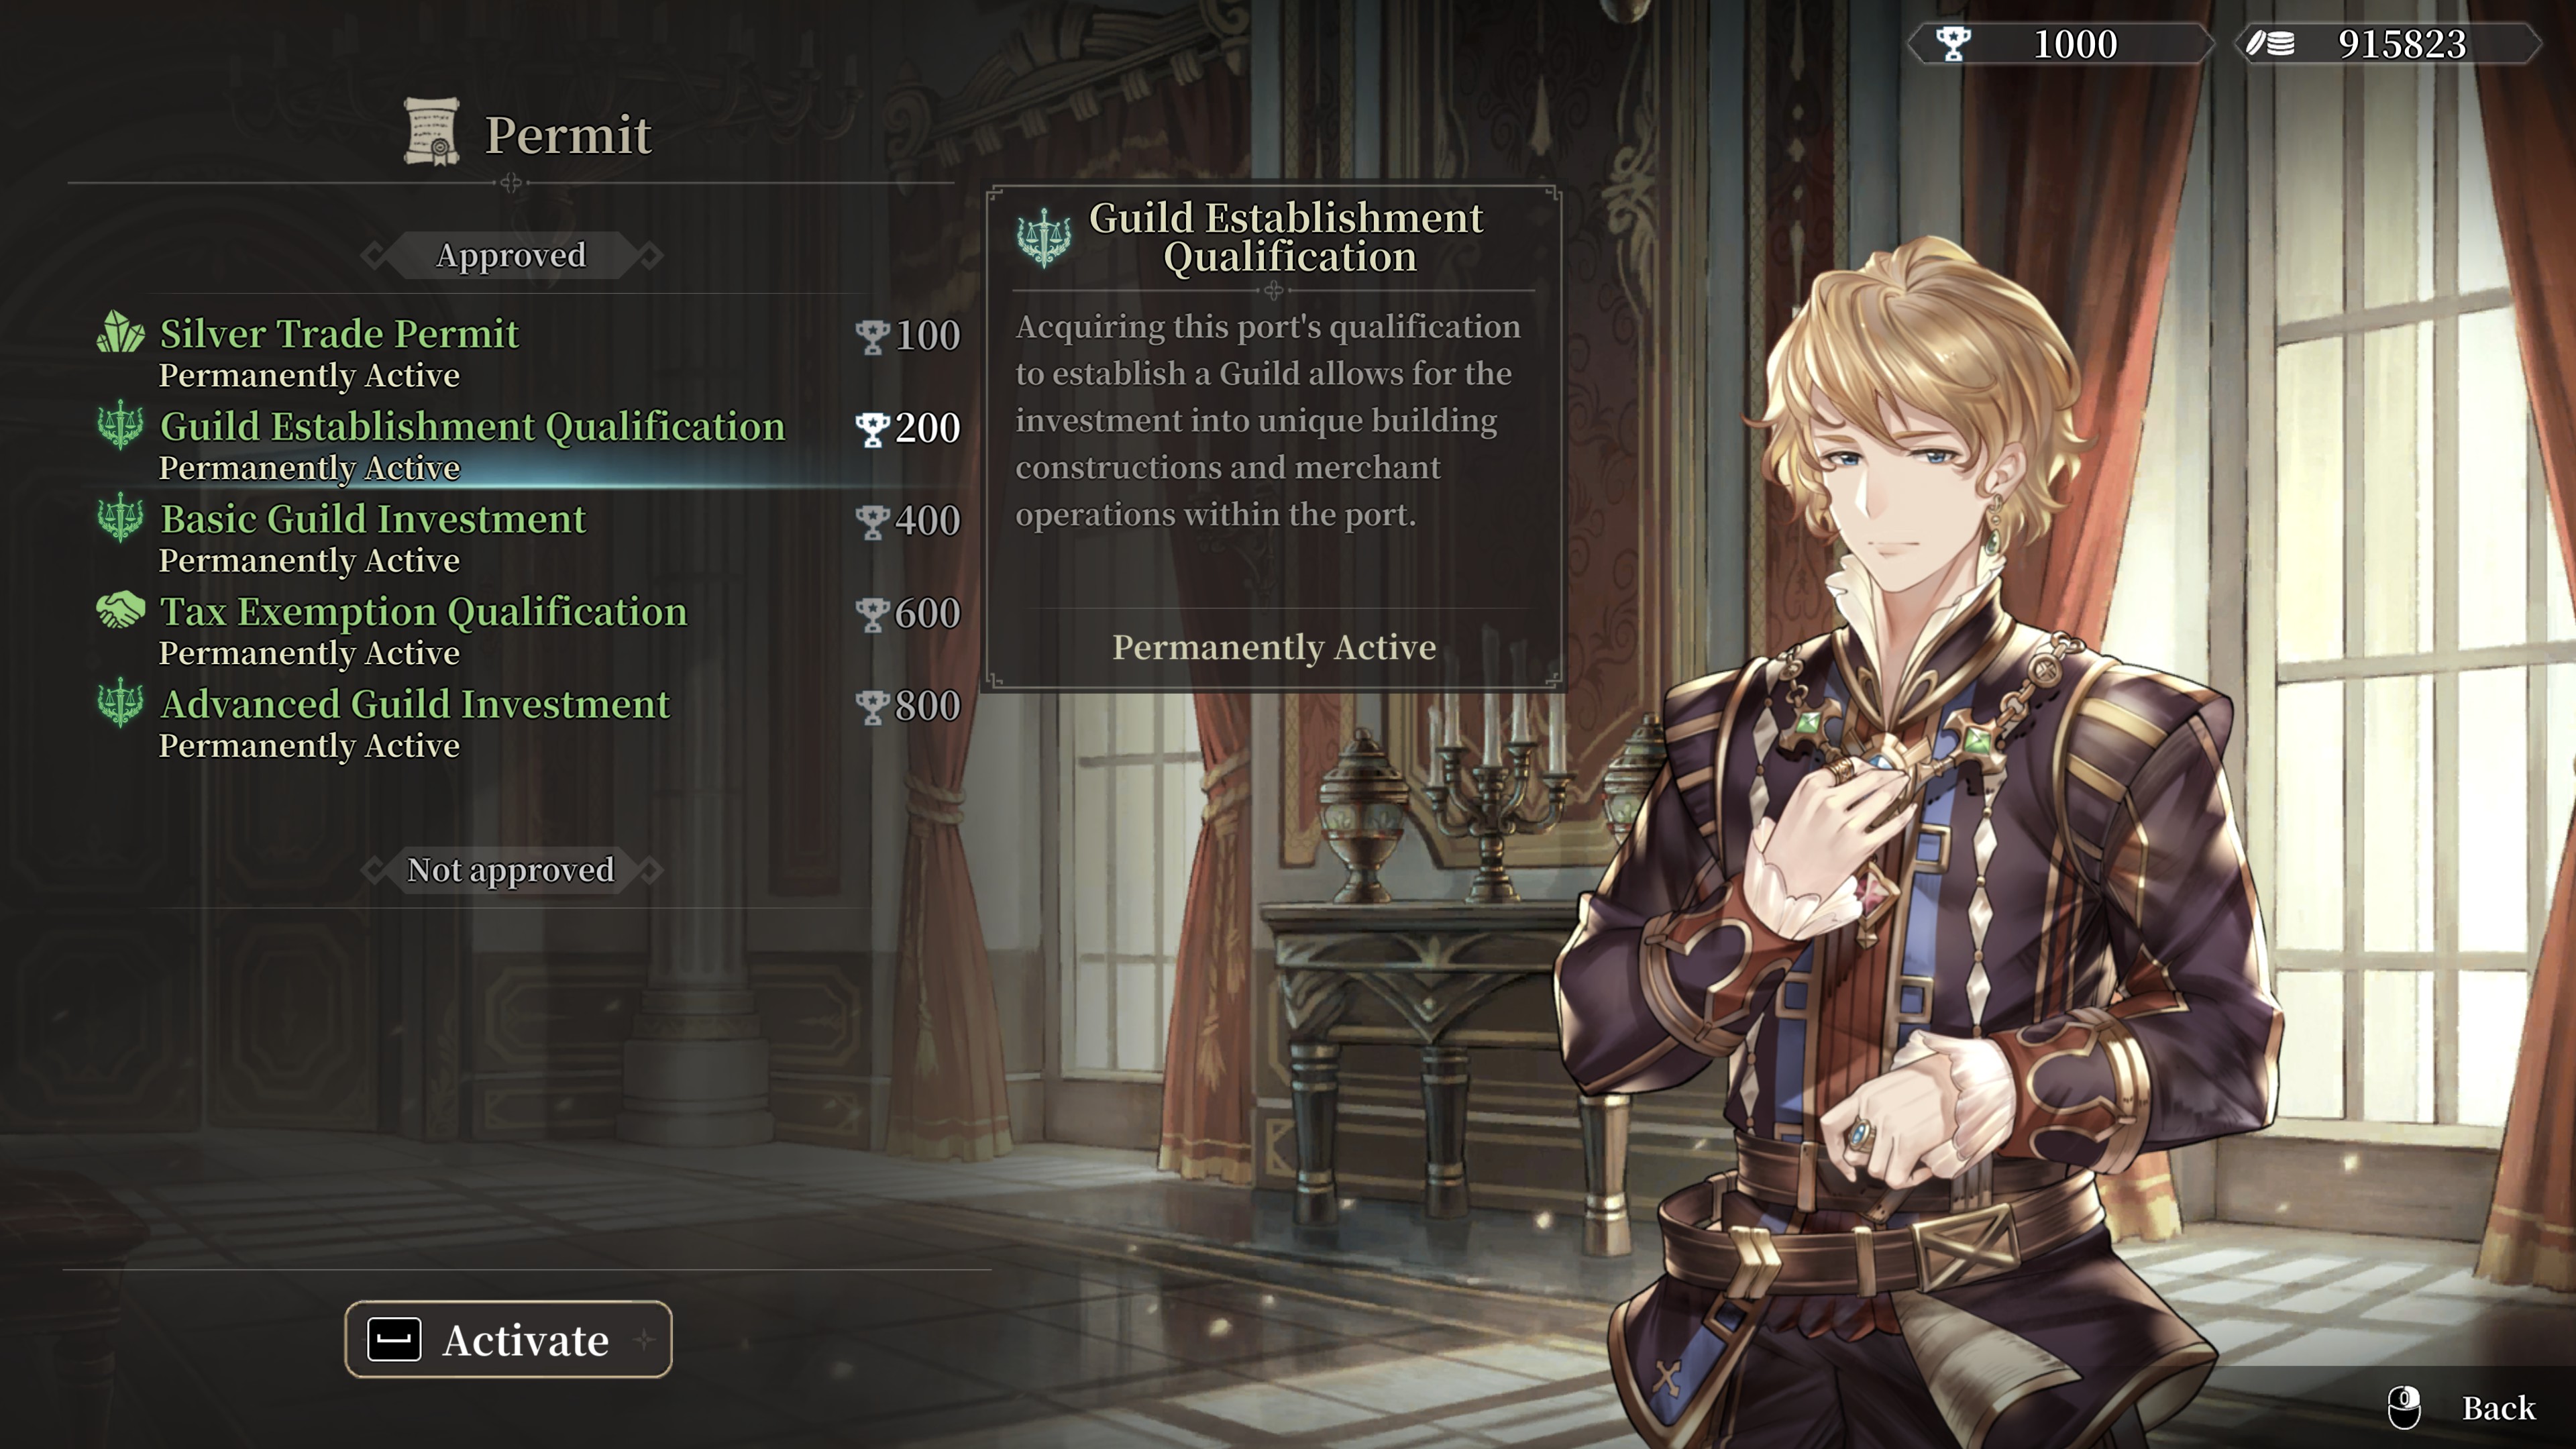
To grow a city faster or beyond its natural maximum you need to establish a private guild. You need to have a guild established in each city that you want to grow beyond the normal limits. To establish a guild you must contribute to the port and unlock permits.
To contribute to a port you can do any of the following: sell large quantities of specialty goods to the port from different cultural spheres, perform commerce guild missions, bounty hunter missions or turn in discoveries.
When your contribution to the port is high enough you can go to the governor's office (palace, etc) and unlock permits. Keep unlocking permits until you have enough to establish a guild and start making investments (that's two different permits). You can continue to contribute for more permits (like tax exemption), but it is not needed.
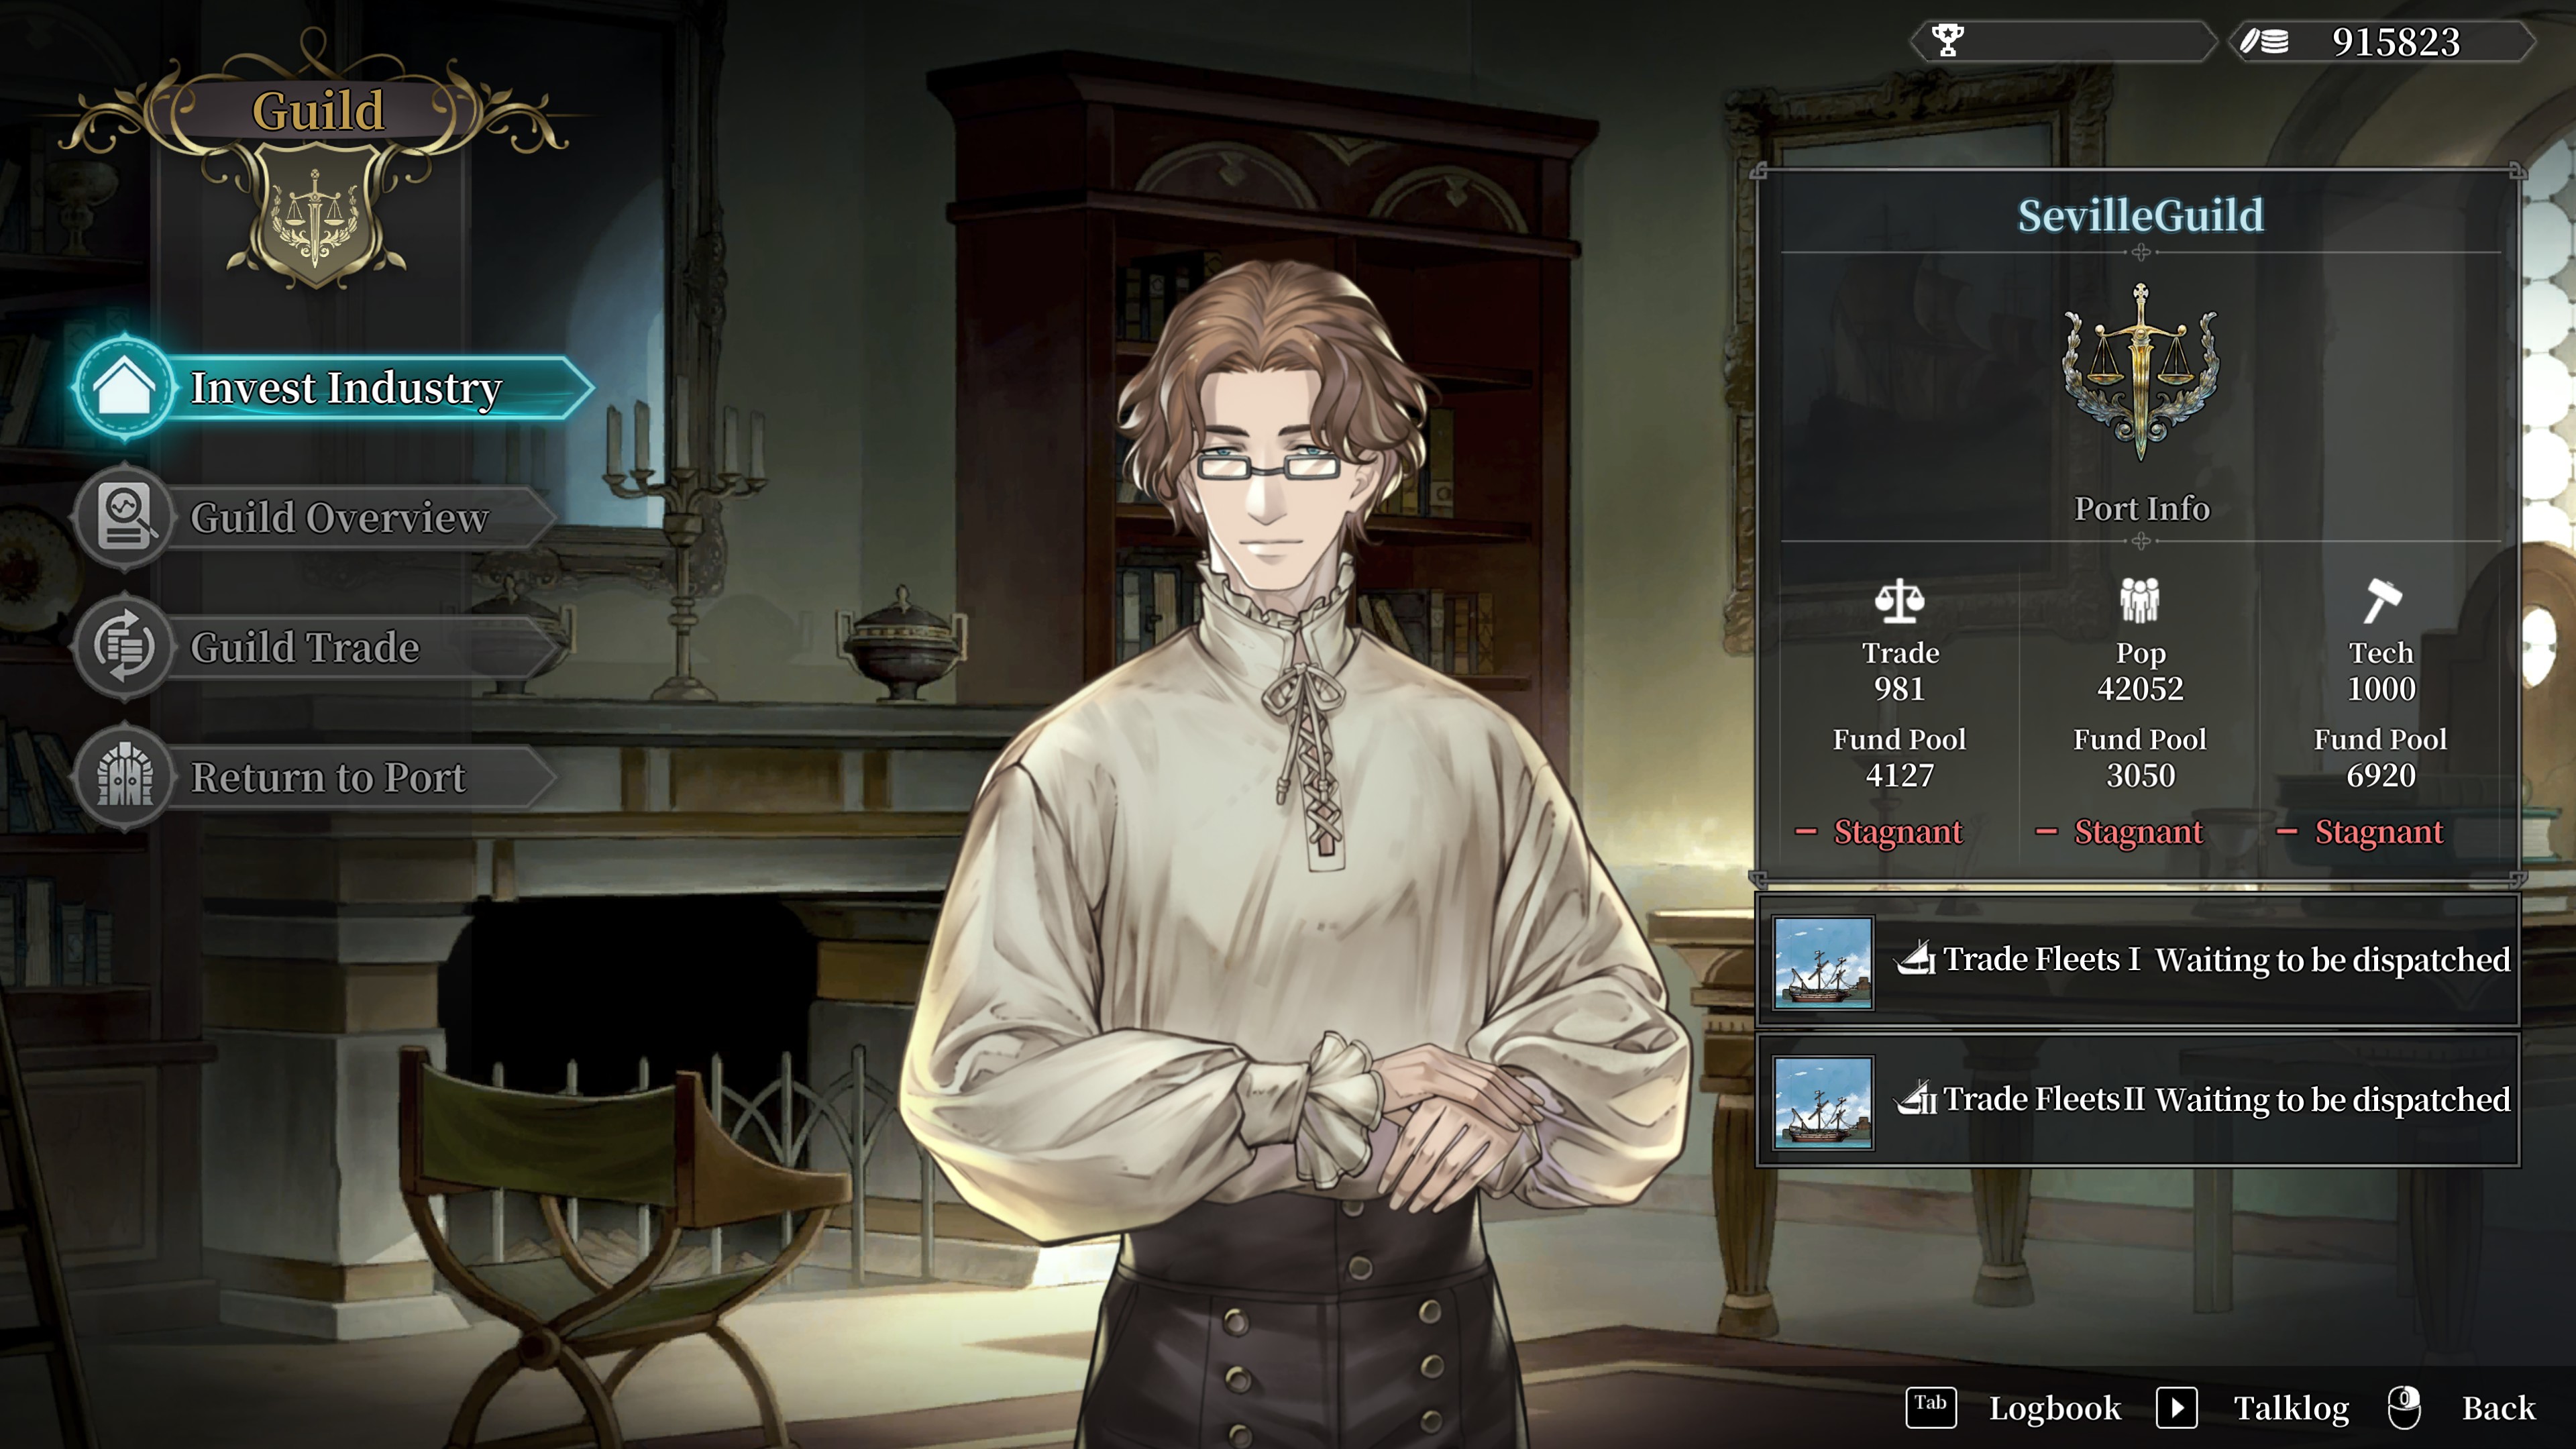
Once you have the permit to make a guild, you then have to build it. Talk to the governor again and ask to establish a guild. This action will require a 50,000 gold down payment. Once established, you will have a new option available on the main port menu.
With your guild established, you can invest money into trade, population or tech of the port. The more money you put in the faster that aspect grows. Over 100,000 gold will give you the fastest growth rate. investing is expensive so make sure you have a strong financial status before you begin.
Getting a port to maximum can take millions of gold and years of investment (this is the game's main money sink), and is needed in order to unlock the best items and ship materials. But, that is more of an advanced strategy for a different guide.
Try focusing guilds in ports with shipyards and ship material stores first as those will be of the best benefit early on. Mid game, when you know what commodities you like to trade, build guilds in major ports to get a tax exemption permit and unlock new trading commodities. In the end game you may want to invest in ports with bookstores to gain more skill points.
EARLY GAME FOCUS AND STRATEGY
So you have all this information and are excited to start sailing the seven seas. Where do you begin? If you are the adventurous type you can go anywhere and figure it out on your own. If you want a more rigorous plan then keep reading:
Unlock New Ports: As soon as the game releases you from the tutorial missions of your main character story arc, start looking for ports to unlock and take note of their goods. With a few ports unlocked take note of where the shipyard is as well as ship material stores and equipment stores.
Recruit New Crew Members: As you explore new ports you may run into new crew members (especially in Europe). Otherwise, you may need to follow a guide. Spend your early game focusing on building your crew.
Earn Money: While you are building your crew decide how you want to make money; trade or combat. Then focus on that.
Earn Contribution: In the early game, if you want to focus on trade then do commerce guild missions. They will always give you a profit and give you a contribution toward a guild later. If you see any obvious depression/prosperity trades then take advantage of that as well. If you want combat focus then do bounty missions for money and contribution.
Build Your Fleet: With a few crew members helping you out you should now focus on building your fleet. You will need someone with shipbuilding 3 and the cabin extension blueprint (which requires a major/starter port at tech level 300 or more, sold in the item shop). Remember that support ships don’t need a captain unless you are doing combat.
Buy Don’t Build: In the early game, don’t waste resources ordering a ship (except for the two you need to unlock the Maintenance room). You won’t have any blueprints and the ship you get is random anyway. Instead, focus on buying medium sized ships (which will be an upgrade to the small starter ship). If you are combat focused and have crew members with the proper perk you can steal ships that surrender in combat (another reason to use ship to ship combat instead of cannons). Your fleet can have up to 5 ships, so get 5 medium ships as soon as possible. The point of this is to increase your cargo cap and overall speed so you can increase your income potential and staying power out at sea.
When you get to mid game and start to grow ports and find some blueprints then you will want to start custom building large ships (build time of 50 days).
Set Sail For Adventure: At first, it will seem daunting to upgrade to a larger ship as they require far more sailors to operate, but the cost of the extra supplies is negligible compared to the extra cargo space the ship provides. Not to mention the extra room space for special rooms and extra cannons. Larger ships also tend to be faster and have far more health.
With a fleet of 5 medium ships and some extra crew members assigned to custom rooms on the flagship you are ready to move on with the story and enter the mid-game. This is where the guide ends. There are so many things left to do that weren't even covered above; discoveries, books, secrets, side quests, buried treasure, sunken ships, land expeditions, etc. There are plenty of other guides out there with advanced or specialized information. But, a big part of the game is about discovery. So, good luck and have fun!
Source: https://steamcommunity.com/sharedfiles/filedetails/?id=2927284894
More Sailing Era guilds
- All Guilds
- Sailing Era Detailed Ports List (Facilities, Coordinates, Waitresses etc)
- Sailing Era Guide 177
- Specialty goods region
- Shipbuilding optional material tencency
- Speedrunner's Guide to Yun Mu
- Main Character Comparison
- Sailing Era Guide 127
- Sailing Era Guide 117
- [Unlock] Abdullah / Yun / Andrew save before main quest completion
- Super Awesome Mega Spreadsheet