TL;DR
Time is of the essence.
Do mission, random or story.
Stay in random mission as much as you can, preferably wave13+.
Don't scan unless you are ordered to.
Reserch wisely.
Be an expansionist.
Create useful stuff.
Use said stuff.
??
win.
Time: How Campaign Goes
Your goal is clear: Stop STROL from achieving theirs, as eating humans and turning to one of them. But the virus is still "fresh" at the start, so not much should be going on for now. but they soon will. So how does this mode goes? Simply put, it is XCOM (except the fact that i hate RNG a little too much to play XCOM myself).
You get your resupply every 7 days, replenishing your Deployment and gaining Supplies that depends on your outposts (I personally call this a Cycle, and referring so in this guide).
You will get up to 3 Random missions, along with a couple random scanning missions every Cycle.
All random missions / scans have time limit, and missions will be considered as failed as they expire, giving you negative effect. Scanning mission meanwhile, just expires without demerits.
You need to progress the main story to win the mode, along with a few research projects that gets unlocked as the story progresses. Story missions usually do NOT have time limit, unless it says specifically otherwise on the top left objective(happens once or twice).
Your "Global infestation" will rise slowly. If it reaches 100%, you will instantly lose.
Local infestation level also rises slowly. Local infestation will affect adjacent region if it reaches 4.
High local infestation might destroy city bonuses, city itself, and/or your outposts.
During campaign, you can NOT:
Forcefully spawn mission on your desired location to lower infestation / gain more intel.
Exchange some resource to other ones. you cannot do slavery how sad
Dismantle comm relay to lower its price, unless you nuke it from orbit yourself.
Your Resources
Timeas mentioned before, time slips away if you are not careful. Moving between places for doing mission, building outposts, or scanning are major factors to make the time pass. DO NOT click places randomly, and hover over instead to check basics.
SuppliesThe most limiting factor of the campaign that is clearly visible unlike time. Building / upgrading outposts, initiating research, building items/more troops costs this. Your two major income of this will be random side missions and trickles from outposts.
DeploymentEach mission costs deployment, random or story. You can use more deployments into one mission to make things easier, especially in the highly infested areas, as they throw more nasty stuff. Keep in mind that you normally want to complete all 3 missions per Cycle, and also story mission of top of that whenever available. It replenishes on each Cycle and excess will be wasted, so do use more once you got yourself good eco going. You can get total of 4 by completing upgrades on HQ, and more from completing level 2 outposts on cities that provides some.
SpecialistsHard to earn early game, difficult to figure out what to spend on later. You need them to progress your research, engineering items, making more troops, and upgrading your HQ. It can be quite limiting factor at first, and on early game you will need to get more by doing side objectives called "Rescue civilians", netting you 3 specialists unless you lose them to explosions, mostly. Making troops and upgrading HQ permanently consumes these people, but the benefit significantly outweighs the cost. They also trickles in for each region that provides you Specialists per Cycle.
Troops/ Black OpsYour friendly bots. You want to have 3 of them at all times. They gain XP and promotion as they fight alongside you, and eventually becomes Level7, gaining more skills and stats.
At level 7, you can send them as "Black ops" to any region of your liking, assuming they are unlocked (3 per region is maximum). This is BY FAR the most OP way to counter the STROL infestation, as it costs NOTHING compared to building outposts, which can cost like 1800 resources to build one, and another 350 to make them do their job. it also INTSTANTLY drops the infestation level by 1 no matter how far it has gone bad, which means you can drop them on level 4+ infested areas to say NOPE to STROL from spreading faster. They take a long time for both building and leveling, so make sure that you have your next fresh men coming. Ideally, you want to queue your next 3 troops as soon as your current trio hits level 3. Better yet, have 2 groups at your disposal, who are not level 7 yet - 1 group of freshmen that are level 3 or lower for lower infestation, and another group with level4 or above for "serious business", so you wont have to go very tough mission with newbies.
Engineering Itemsyou get random stuff over the course of campaign, some of which can be engineered at the cost of resource and temporal occupation of specialist, while other item like Reaper turrets are drop only. You want to use these as soon as game start throwing tougher ♥♥♥♥♥ like Etaphravens, Behemoths, or worse. details later.
IntelIntel means how much you know about the enemies in the region. Each point gives the mission in the same region more time until they expire by 12 hours. More intel means you will get more information about how the waves will go on that region, and has a chance of giving you "Assault" mission that lets you drop the local infestation level significantly. Also, Intel 4+ will unlock the "side mission" slider to let you choose "many", which will net you 5 side missions instead of usual 3. 5+ intel temporary halts the infestation spread, but any infestation in the region will decay the amount of intel over the time, blocking you from completely securing the entirely Mars so easily, not by a long shot by just scanning.
InfestationTechnically not your asset and more like enemies', but here it goes. Infestation means how ♥♥♥♥♥♥ the region is, and will determine the difficulty of a mission in the region. As for ingame difficulty, the difference between 0 to 1,and 2 to 3, does not give much different feeling to me, while others i can kind of tell. Higher infestation instantly sends you to later waves, while the large portion of map is infested, making everything difficult, and throws you tougher enemies. Highly infested region will require highly trained bots, lots of Engineering items, AND a lot of deployment to ease the odds to get some chance of winning. Also, high infestation triggers different kind of missions, raising the stakes of the consequence on your failure / ignorance of the mission.
Reserch / HQ Upgrades
Researching stuff will net you unlocking more stuff to use in combat and more advanced research, but they cost both time and a lot of specialists(who are free, and not engineering stuff). But you REALLY want to keep it going, unless it is on halt because of your HQ moving. You can also upgrade your HQ, which grants permanent bonuses and CAN be researched simultaneously along with other HQ upgrades.
Research order at the start of the game
Infrastructure. Precursor to Communication systems.
Communication Systems. This unlocks adjacent region to HQ. get your HQ start moving. Also start researching HQ upgrades.
Arsenal Production. Get yourself Breach shotgun, which will be your friend for a while. And bots' as well.
Outpost Comm relay. this unlocks outposts. Start building some whenever you don't have mission.
Advanced Subsystems. This unlocks Light Weapons to you, a quite strong module for assault.
Pathogen Mutation.
Improved bio Containment. Unlocks Capture trap, A great tool to buff your damage later.
Landship Support. Precursor to Dropship Airframes.
Dropship Airframes. Unlocks HQ upgrades.
Colony Security system.
Shielded power systems. Unlocks HQ upgrades.
Hardened Comm relays. More HQ upgrades.
This should cover the basic tools. Keep checking HQ upgrades, and prioritize ones that unlocks more HQ upgrades (Mobile lab is most important, but others also helps quite a lot the earlier you unlock.)
HQ upgradesAll of them are very powerful, but if I must tier it, Lab > Pods >>>> Medbay> Recon > Robotics. In any case, just research them as soon as available.
Mobile lab: Technically the mainstay way to reduce your Supplies expenditure. keep this stuff going.
Robotics Factory: Not necessary early game, but it becomes a must in midgame and beyond. Research away anyway.
Recon Squad: after researching these two, your HQ becomes mobile STROL suppressor. Get them.
Energy Pods: +2 deployment each, total of 4, that you can grab early game. Plus your Secret sauce, the Black Ops, for midgame and on. grab em.
Landship Medbay: +3 extra lives to waste your bots' life. they will start dying as you pass them explosive ordnance, and enemies get nasty. A must.
Decision Making On Macro Scale
A simple priority list *This is not exactly strict, and you will have your room here and there, but it should be respected.
DO NOT move your ship until you made up your mind what to do next. That is the easiest way to lose your game in the long run.
Random Mission with "Global infestation down by 1" effect.
Other random missions with higher priority. (details later)
Scan mission with "Global infestation" effect.
Main quest, assuming you have either finished all 3 random missions of the week, or you have enough Deployment to handle(usually when you have 14+ max deployments).
Drop your Black ops to higher priority lands. (details later)
Move your HQ if its current location is with 1 or lower infestation, and with 5 or more intel.
Reserve resources to keep the research going.
Reserve resources to keep the fresh bots and items coming.
Build outposts to explore more areas, on highly infested areas, or cities with good bonuses (EN regen, Suppression, Research cost)
Upgrade your outposts for city bonuses, deployment, or to gather intel on infested areas.
Do lower priority random missions (details later)
Scan on closest land with highest infestation.
Scan for resources (Super early game ONLY, when you have only 1 region unlocked and it has 5+ intel)
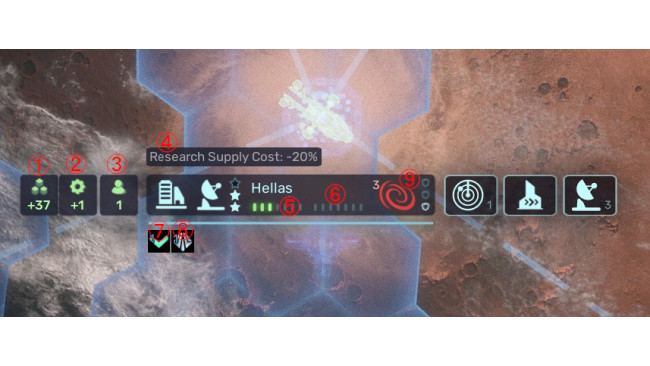
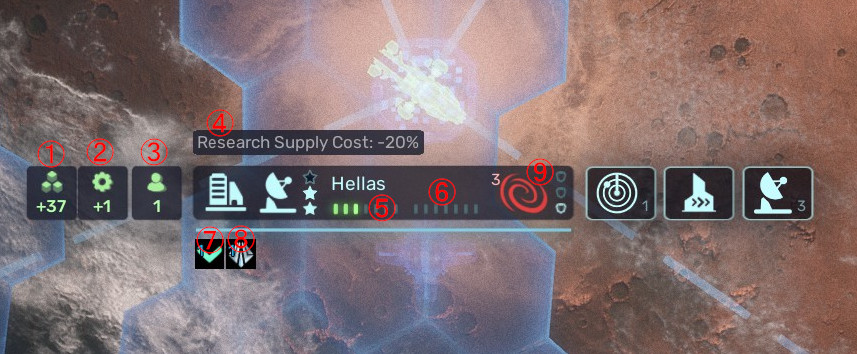
How to read intel, infestation, and Mission
There are a several things that comes into play how to read a region state.
Supplies: Amount of supplies you will get each week. Needs Outpost lv1 in the same region to be acquired.
Deployment: Ditto for deployment. Needs Lv2 Outpost to be provided.
Specialists: Ditto for Specialists. Needs lv1 Outpost.
Specials: Colonies give you these special stats semi-permanently. Needs Lv3 Outpost to be available.
Regional Intel.
Regional Infestation.
Infestation Growth buff/debuff. details later.
Black Ops buff.
Red Storm strength. You will have a bad time if it is strong.
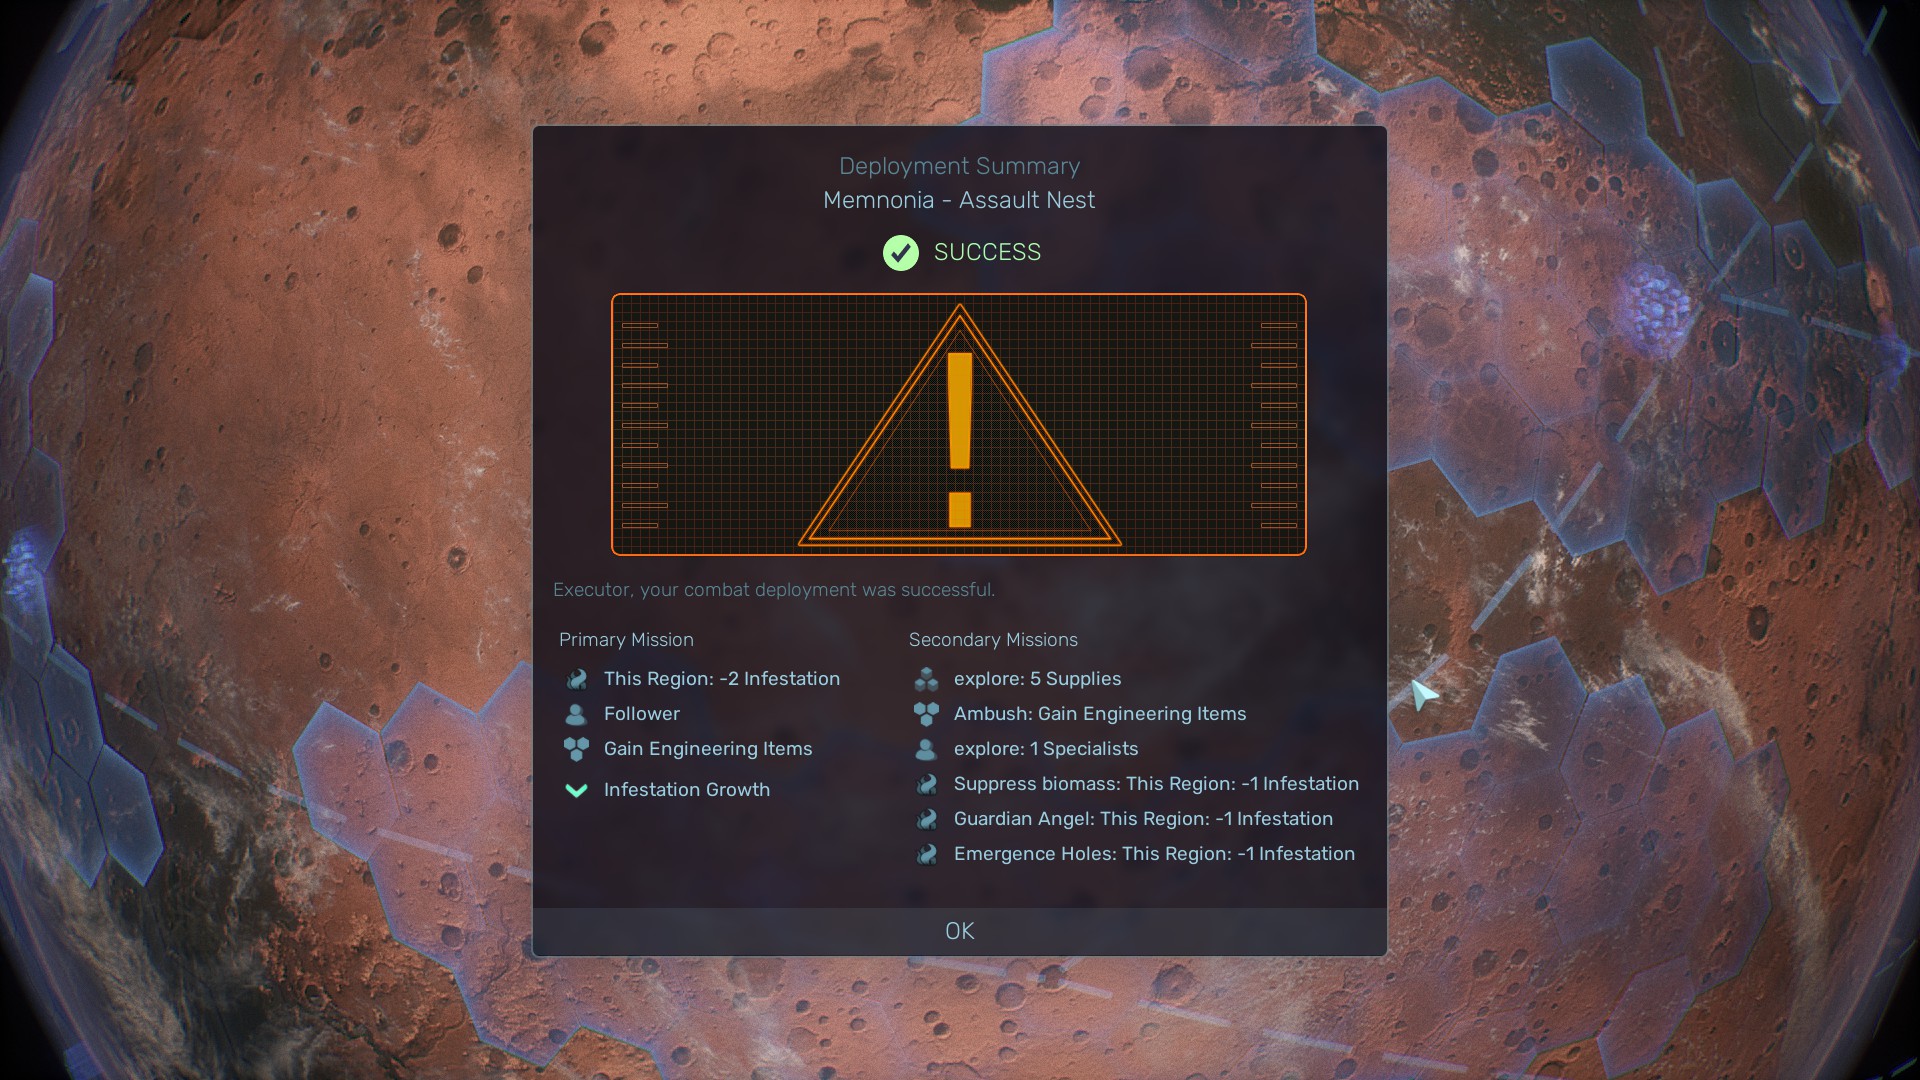
Why do i have to hang around and do side missions?because this can happen to your highly infested colony.
The assault mission gave me -2 infestation, but side missions gave me another 3 missions of -1 infestation, a total of 5, which is insane. this region will be completely cleared of infestation, and
will stay that way for quite a while.
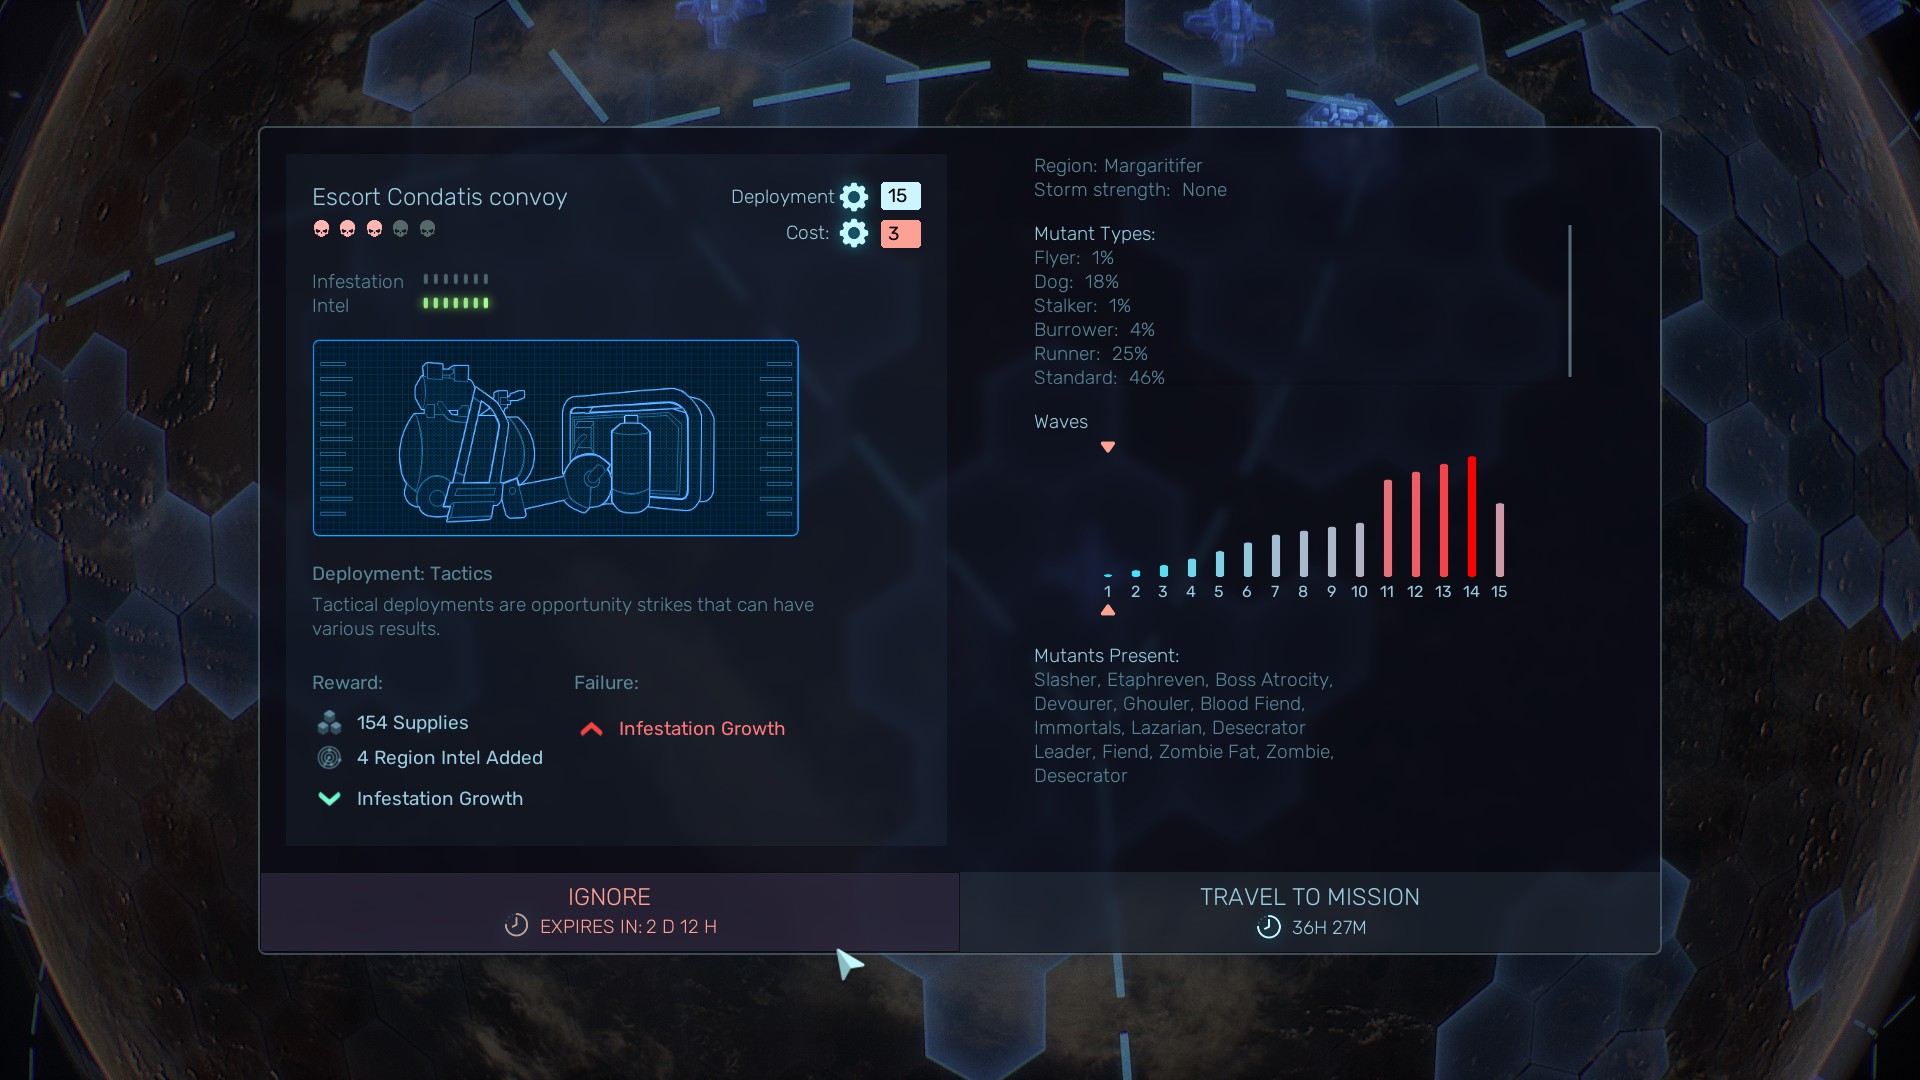
What is "low Priority mission"?It looks like this:
Why?
Infestation level is 0, so it won't help lowering local infestation, even from side missions.
Intel level is already 7, but one of the reward is +4 intel.
Consequence is just "infestation growth +".
Travel time tells that it is literally on the other side of Mars.
Off screen, but this region already has 3x "infestation growth -", which is maximum.You can ignore this mission for almost no consequence, and focus onto building/upgrading outposts safely.
Items And Buffs
If you want to solo win a Campaign, you better learn how to utilize these.
Engineering Items 101Use them when you feel the necessary. Try not to waste them, but you will get tons of random stuff, so you don't have to go crazy saving them.
S tier itemsSuit Power Overcharge: Negates the high infestation mission starting later waves somewhat. Cost is quite cheap as well.
Medical Care: Ridiculously underpriced at the base cost of 15, +5 HP regen negates your low level medic being so incompetent.
Experimental Stimulants: Similarly underpriced(30), this is great choice to just finish off the first few missions FAST so you will have more time doing biomass clear/ looting. Shame that it doesn't last long.
A Tier itemsReaper Targeting: It's just a solid choice for a something that you cannot create your own, but still is a solid choice. Won't save your skin too much though, as they are stationary and have limited health.
Elpida Targeting: Similar as above. just use it whenever you feel like.
Capture Trap: Go Pokemon master and catch your STROL friends. Most of new spieces you catch that you haven7t during the campaign session will unlock research buff that permanently increases damage by 8% ,and there are a total of 12.
Artillery Targeting: Fairly common as mission reward, and works great at clearing biomass.
Builds
abso-♥♥♥♥♥♥♥-lutely Work in Progress.
I has no idea what i am supposed to do now.gif
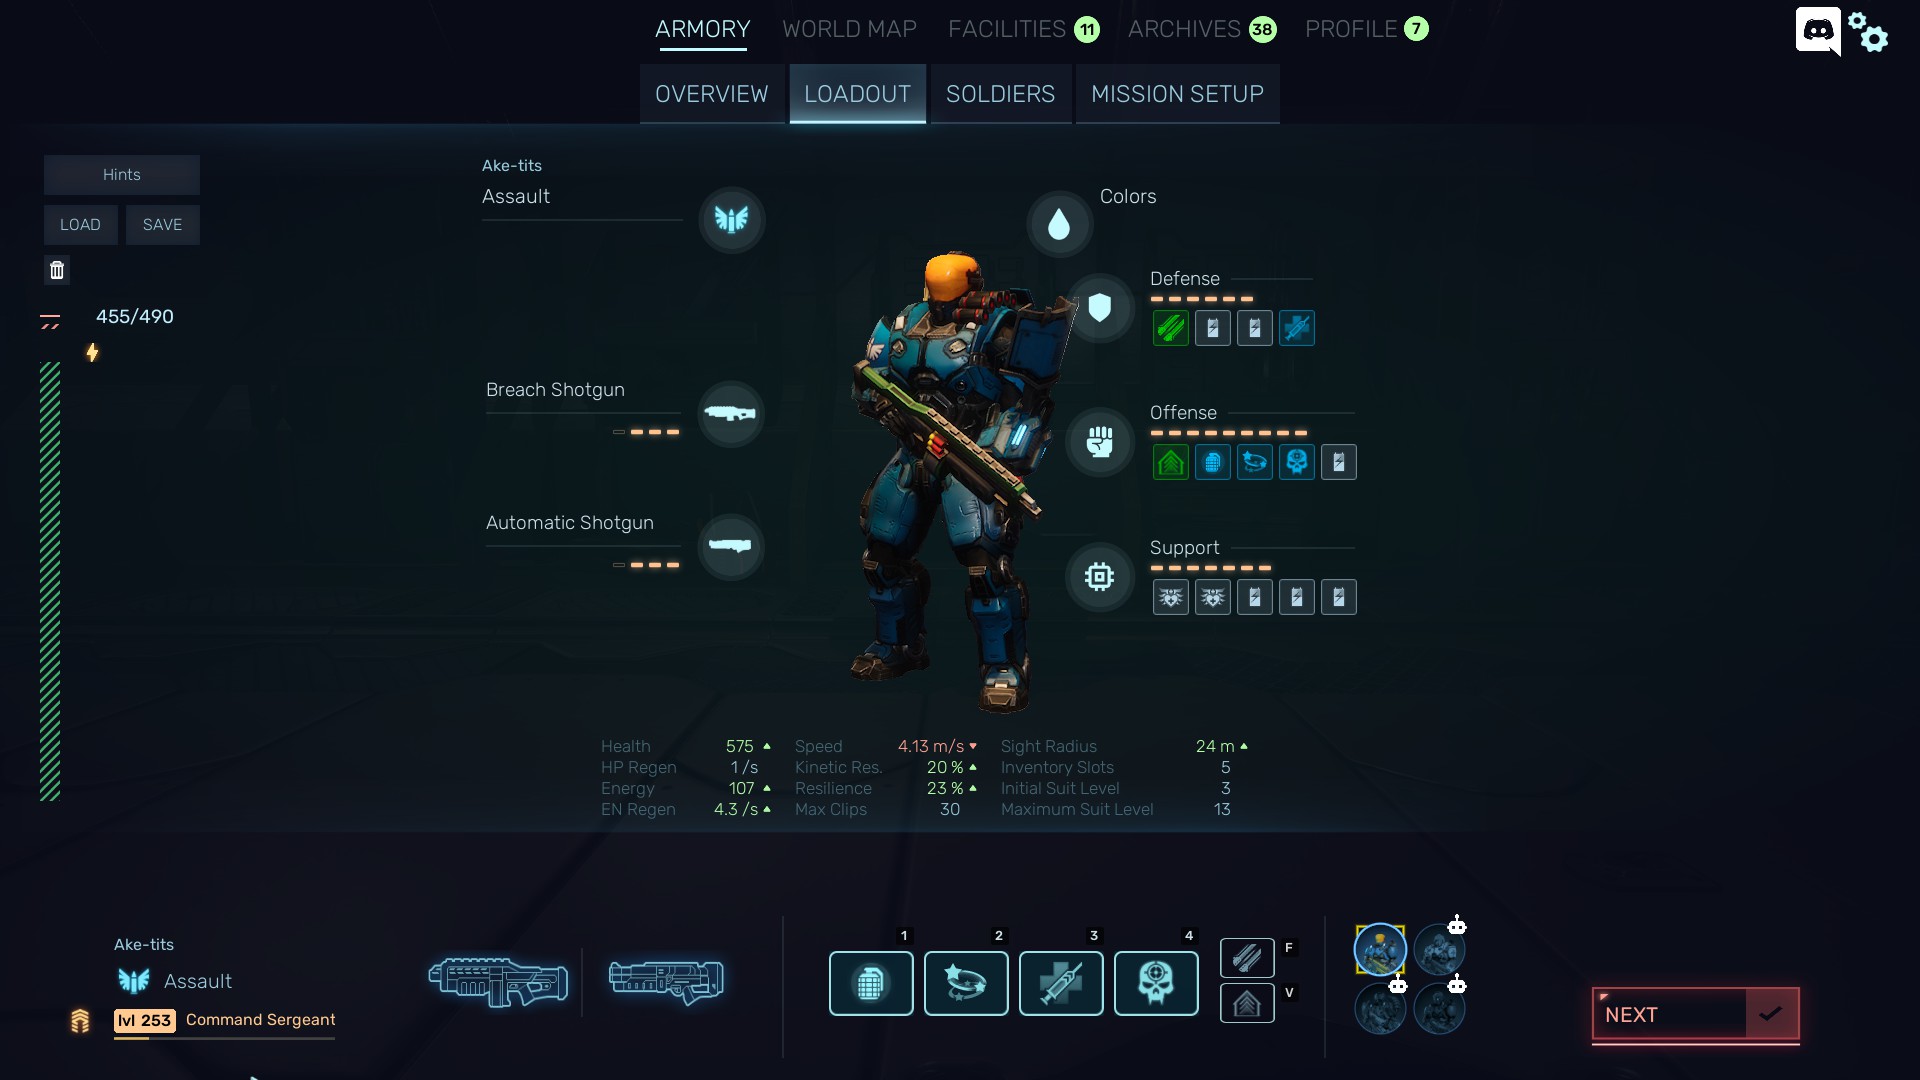
What you can make with what you have at start. Well, except the shotgun, but build will be the same.
1 points to grenade, 1 point to buckshot, 1 point to stimulants.
Prioritize making buckshot to 3, then put the rest of the points to Stim. don't level crit.
i got slightly better.avi
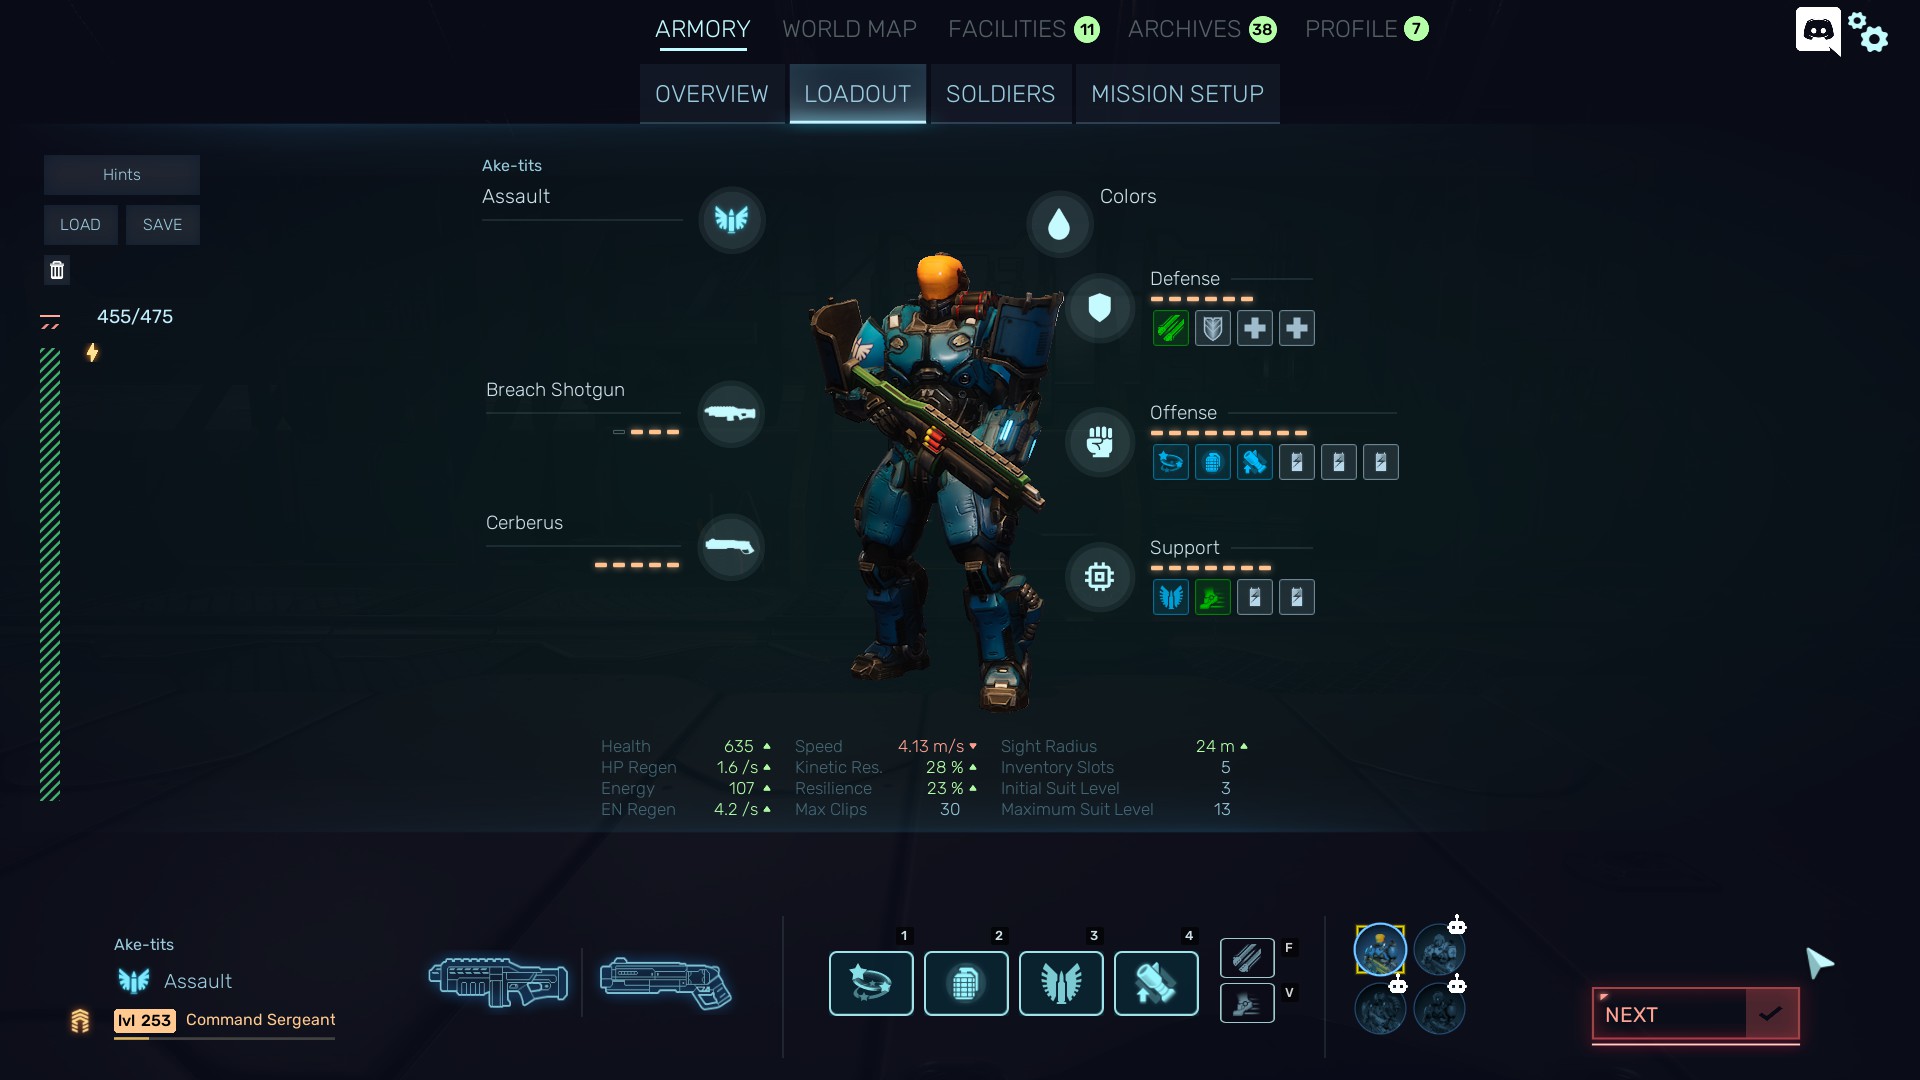
Available after getting light weapons. you can use any light weapon of your choice, and secondary.
2 points to buckshot, 1 point to grenade.
Prioritize making buckshot to 3,then 1 point to specialist after you used up your first magazine of secondaries, and try your to keep its cooldown running. put 3 points to light weapon if you think your bots needs more normal firepower.
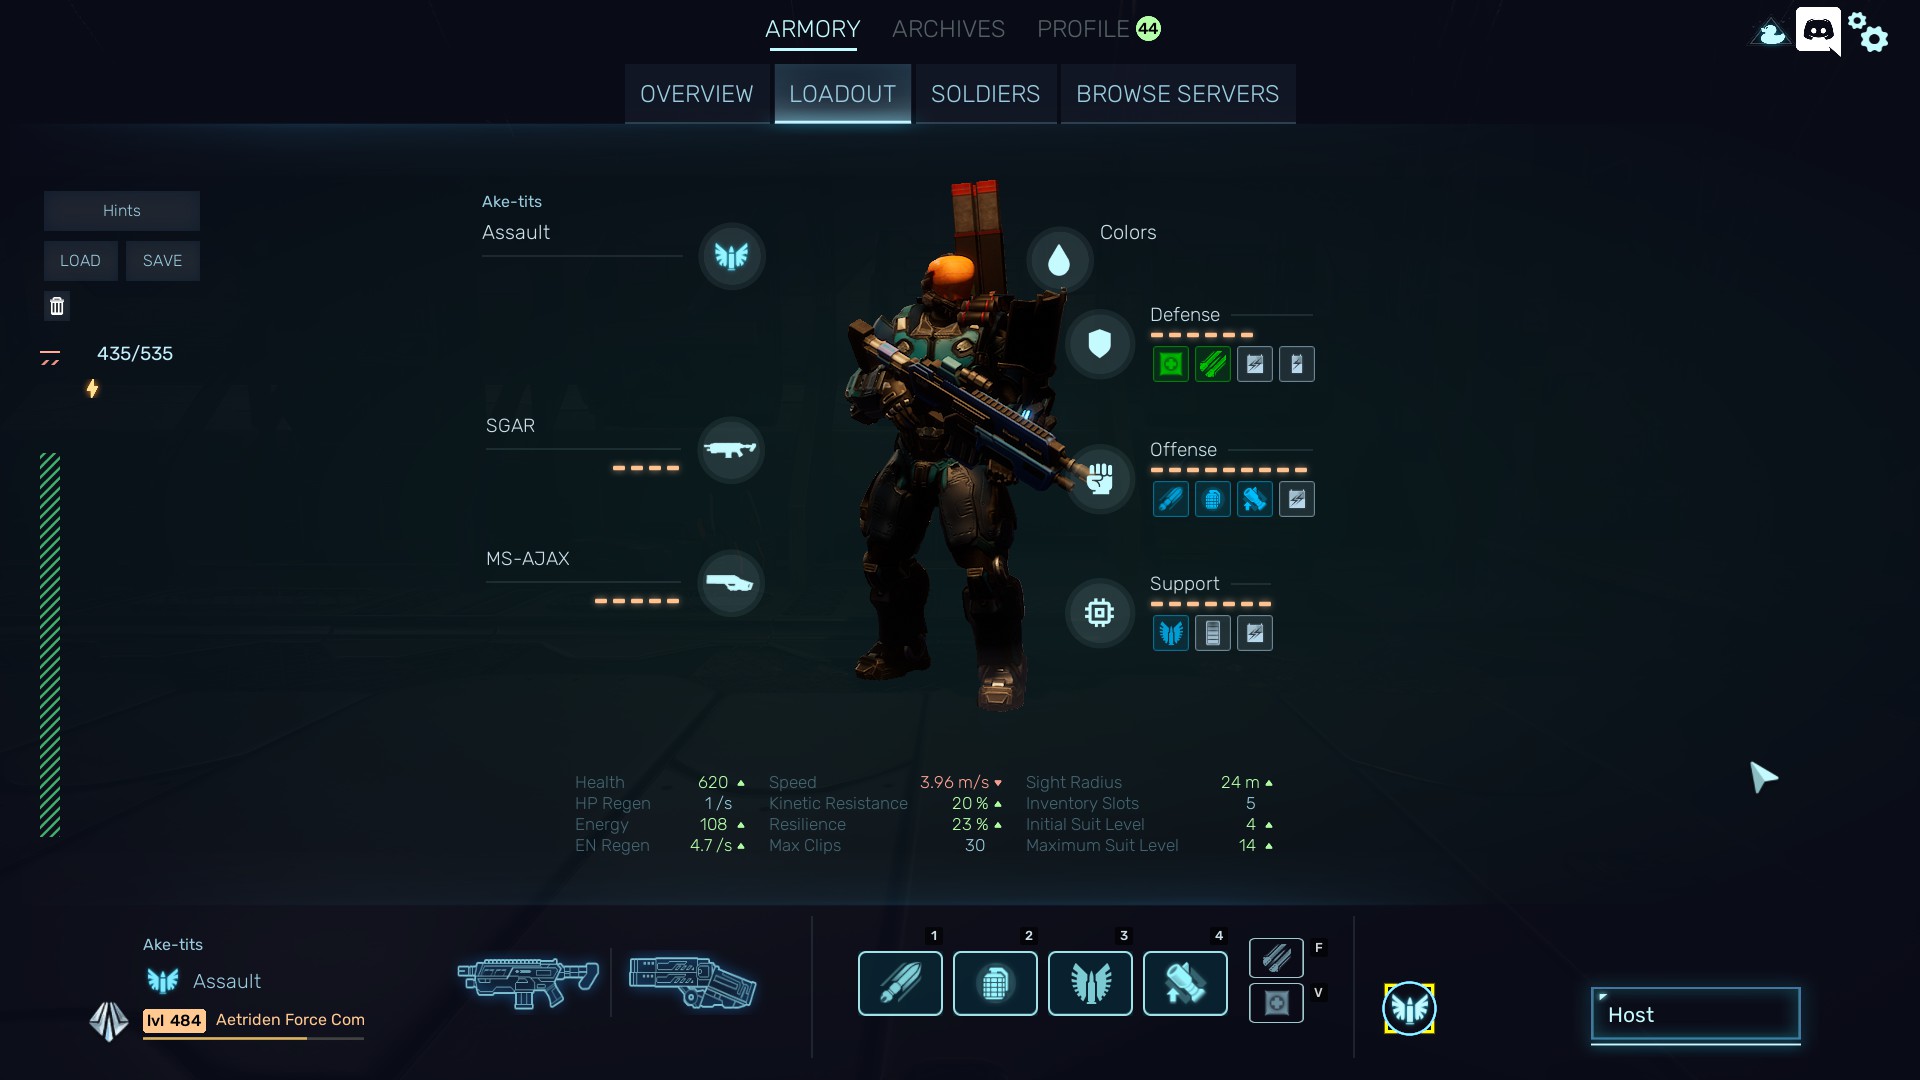
i feel confident.jpg
After you got everything. Replace Overcharge with Secondary extender if you feeling like using bigger one.
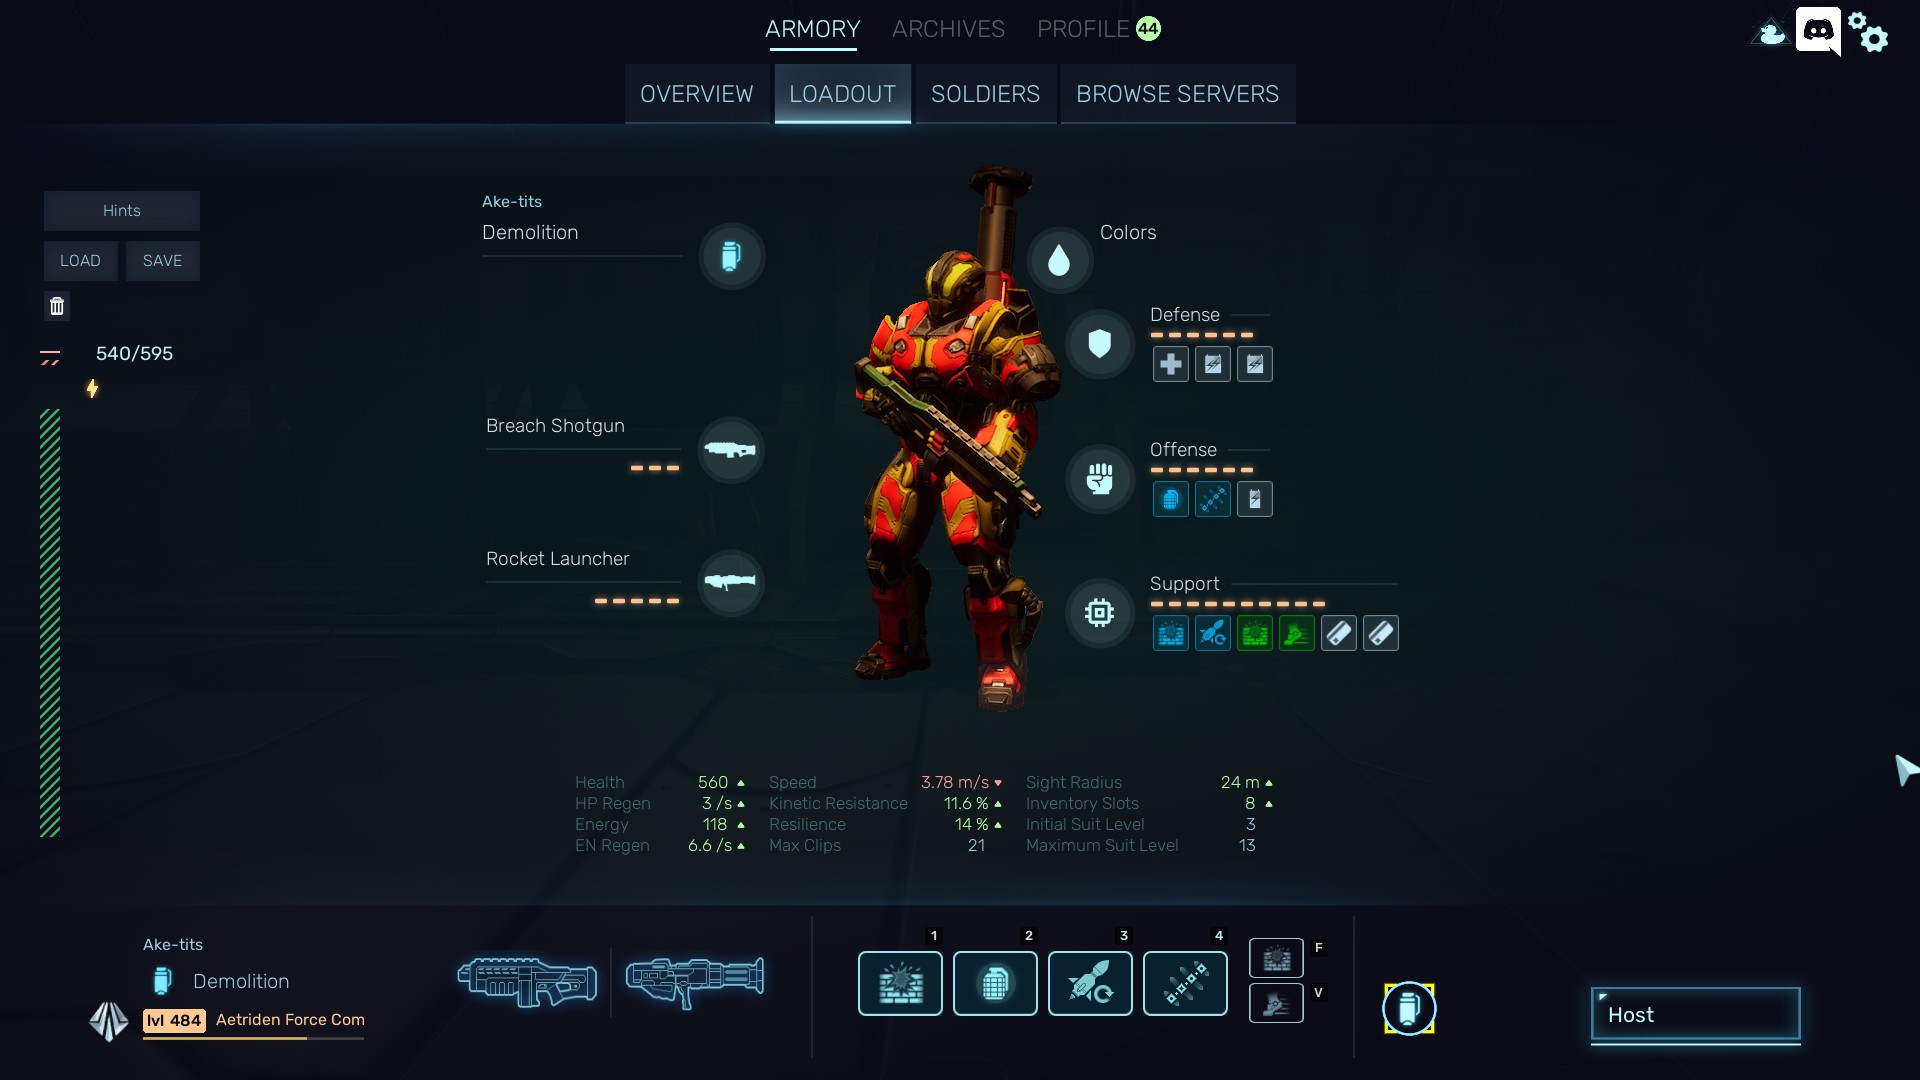
Danger zone
1 point to grenade. you will need to juggle points for this kind of build.
Breaching charge = your main method to take out (Boss) Atrocities and Holers. place on ground.
Grenade = shred/ignition agent. keep it at 1.
Rocket ammo = when nothing too scary is around, 1 otherwise
Stationary explosives = OH ♥♥♥♥ BIG STUFF INCOMING. keep it 1 otherwise
Wallbreaker = break into shops and steal candies, OR driveby- vandalize some houses for SPEED.
Spoiler Stuff
How to achieve good engingNot so spoiler way:
As the Executror, the last best hope of mankind, you will need to make some tough choices. As in, Tellltale Walking dead Season 1 kind of tough choice (RIP Telltale btw). When you are making choice, A few things to remember:
What is your "Purpose" as Executor?
What "Needs" to be done to achieve that purpose?
What is "your" critical assets?
Which is "more" important critical assets?
OK chief, but what exactly?
There are technically 6 choices. I'd rather count it as 4, but it needs to be done anyway so. With the order of appearence:
In the Mission "City of Flesh", Don't assault Howell HQ, and wait outside.
When you got Scan mission with "OR wait" text, Scan to get test subjects.
In the Mission "Echoes of Fear", Get the hell out ASAP, and ignore Terminators.
Research Executor Suits and Weapon.
In the Mission "Fleeting Hope", Spare Founders by NOT touching the console.
In the Mission "The Crimson Storm III", Do ALL side missions,
Here's a catch, though: in Echoes of Fear, You really cannot tell if you did fresh delivery of Vivian Park's arm. Characters talk the same way whether you delivered it fast enough or not. What you can do here as precursor knowledge before starting mission is to cheese the game a little bit: On the later part of the map, you will see an obvious boss arena. To the left of you will be the extraction point , at the burning area. You can bust the blast doors down prematurely to set up Explosive turrets there around the second corner and near the downhill towards extraction: 1 set should be enough to buy you enough time. Of course, don't forget to use speedy build. I left with more than 1 minute left on mission timer, and I could get the Good ending.
Version Notes
v0.1 - Due to the Halloween sale, new people are flooding in. this is in half-baked state, but i feel the need to upload it anyway. Hopefully more to come soon.
v0.2 - Engineering section, spoiler section, as well as a few screenshots are added.
Source: https://steamcommunity.com/sharedfiles/filedetails/?id=2616704955
More Red Solstice 2: Survivors guilds
- All Guilds
- Condatis Outline
- Red Solstice2 Nightmare build2.99
- DPS Calculator
- Red Solstice 2: Survivors Guide 221
- Psychic Handler Guide
- Red Solstice 2: Survivors Guide 202
- Capture Trap Bonuses
- UBAS & You, A Complete In-Depth Mecha Guide
- UBAS & You, A Complete In-Depth Mecha Guide
- All skins in game