Disc 1 Walkthrough > Alexandria
HPAPGILSTEAL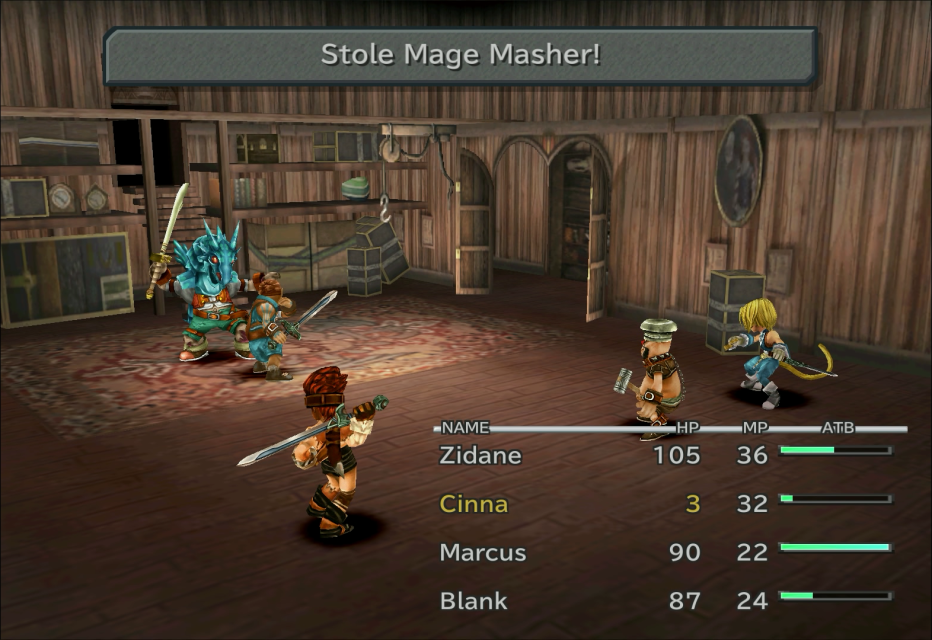

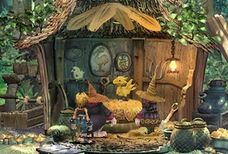
Prima Vista
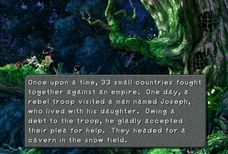
As you explore the room you will see a lamp in the center. Before lighting it, proceed to the topmost area and check the left and right sides for 47 Gil and a Potion. Once you have them, go the lamp and light it. You can put whatever name you want but we'll use the default name, Zidane. The rest of the Tantalus crew comes in and the very first battle ensues.
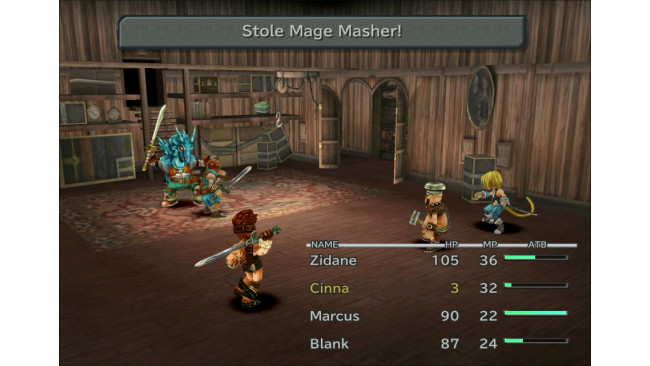
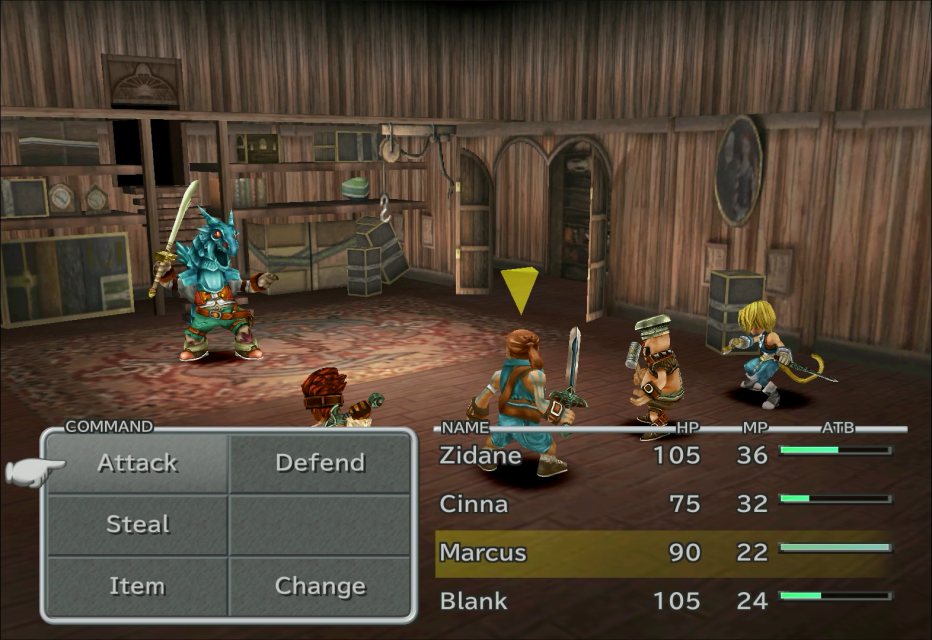
BOSS BATTLE - MASKED MAN
160 N/A N/A Potion, Wrist, Mage Masher
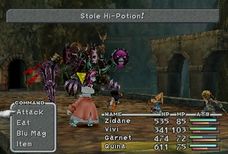
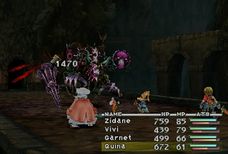
You can't really do much at this point so just attack, but only after you steal all of Baku's items. Stealing is a key element in this game, as it will ultimately determine the power of Zidane's Thievery skill much later in the story. Steal from everyone and everything as much as possible.
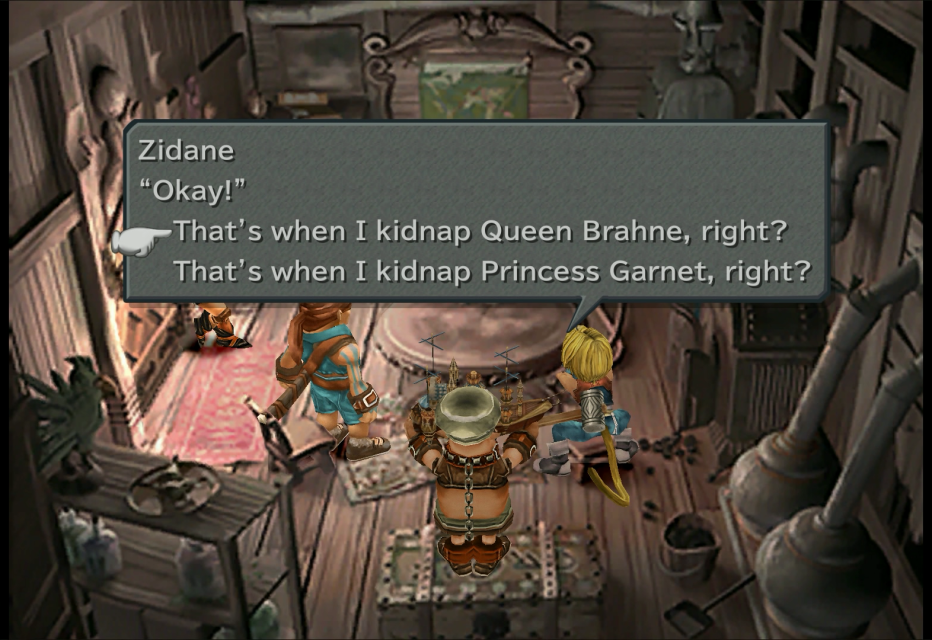
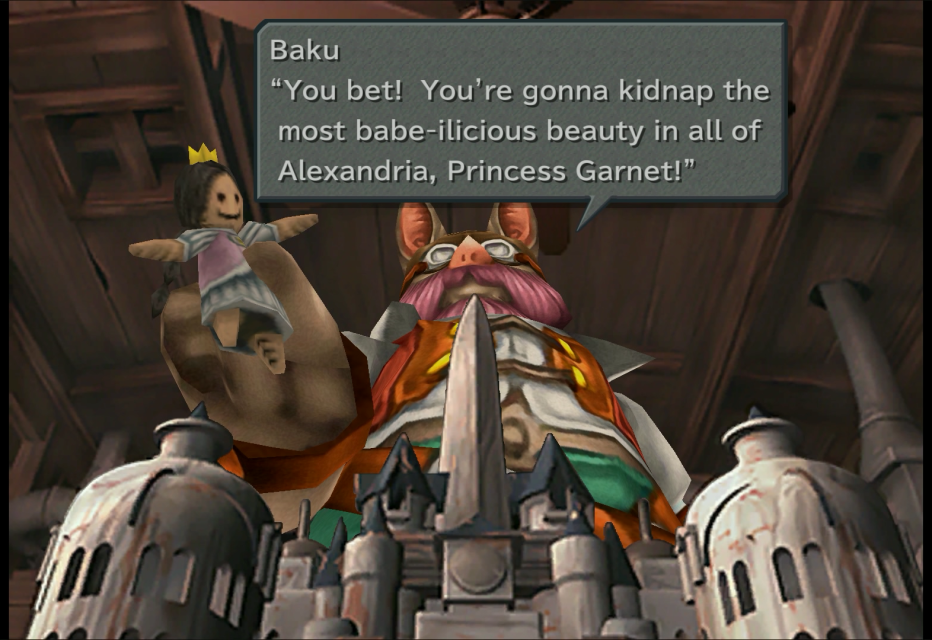
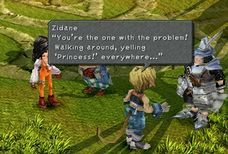
At some point near the end of the mission briefing when Baku prompts for a response from Zidane, tell him "kidnap Queen Brahne" 64 times for a wee bit of extra dialogue with Ruby. Giving the correct answer, "kidnap Princess Garnet" concludes the meeting. The intro sequence continues, after which you'll gain control of someone else in within Alexandria.
Alexandria
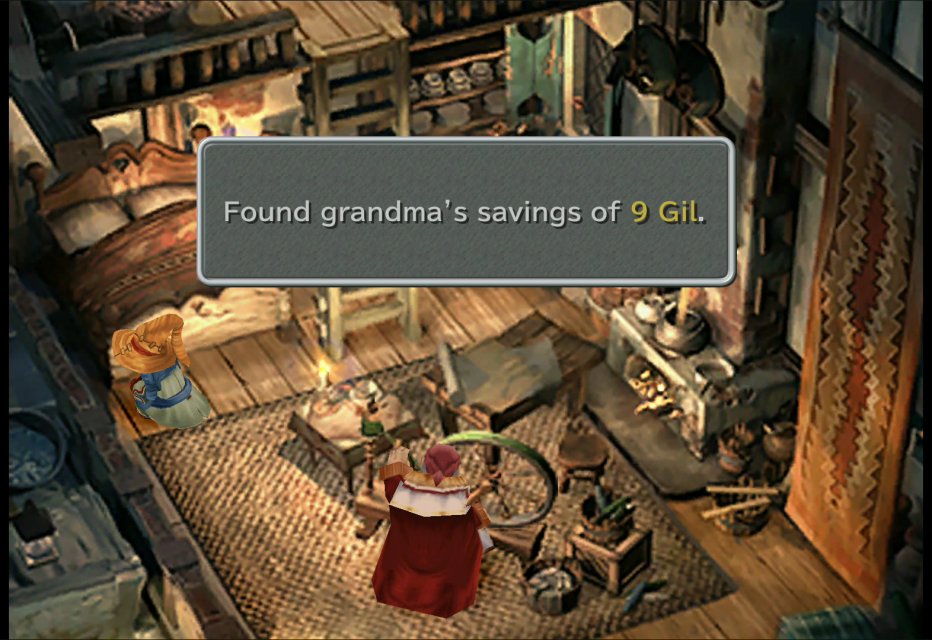
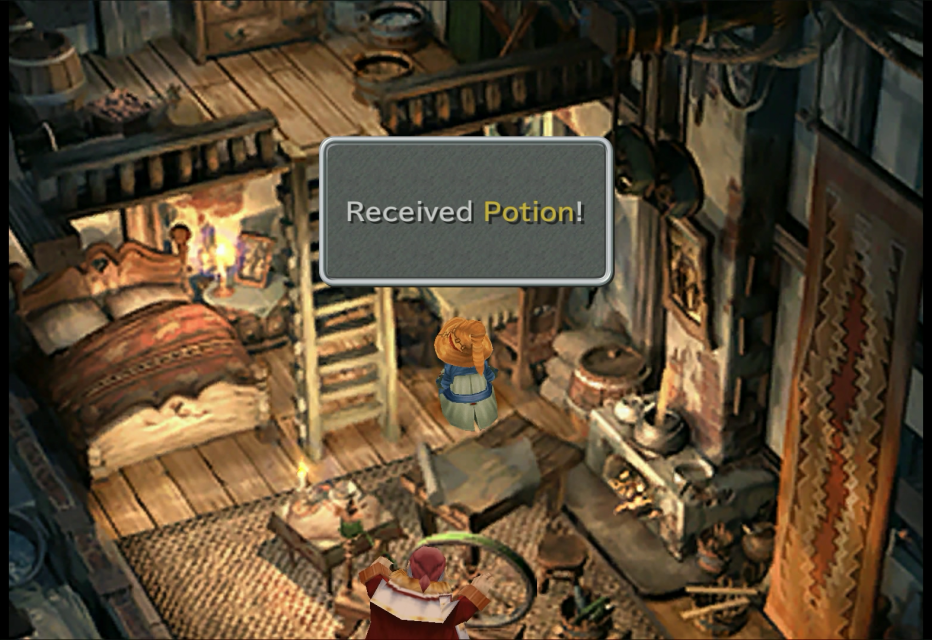
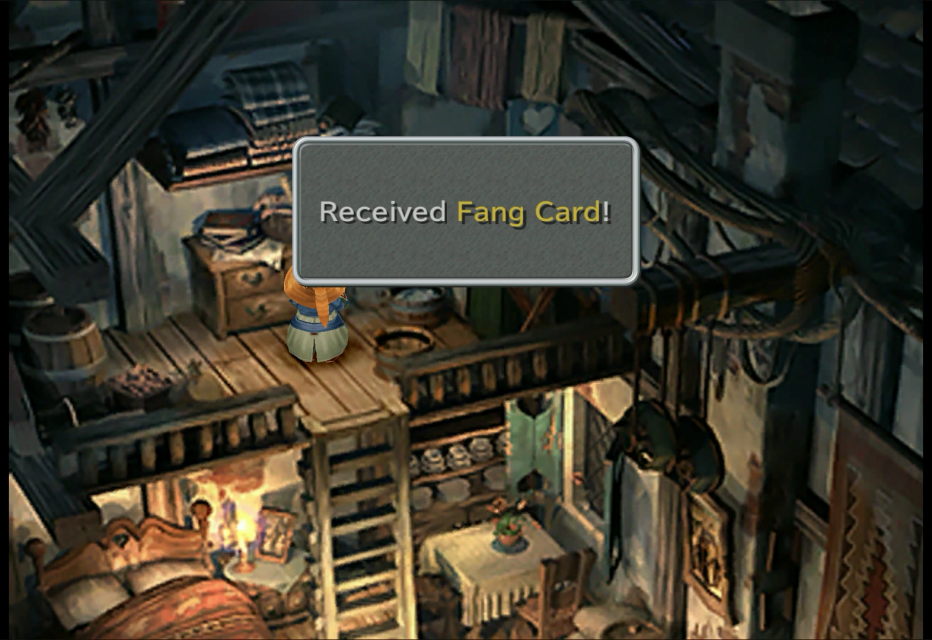
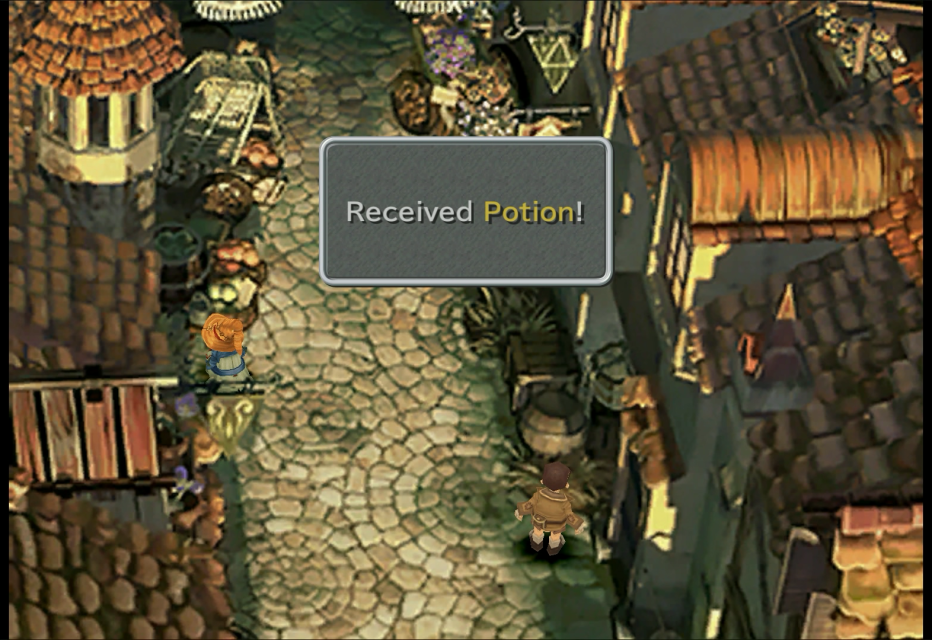
You start off controlling the black mage, Vivi. Before you proceed, check the barrels on the left side of where you fell to find a Potion. Enter the room right across the barrels and check the bed on the left to snag Grandma's 9 Gil savings; look under the table next to the ladder for a Potion and then climb up the ladder to check the drawer for a Fang Card.
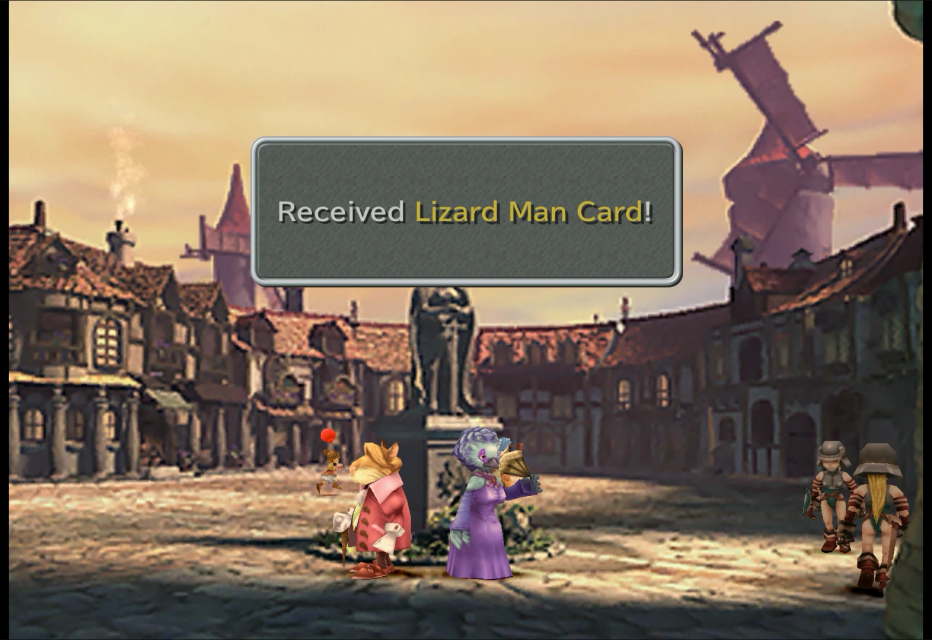
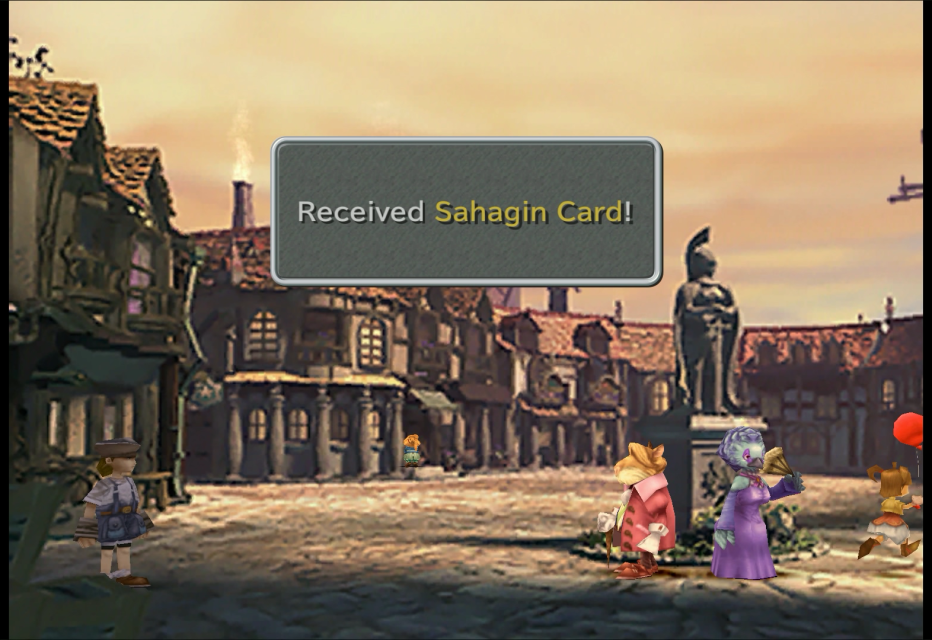
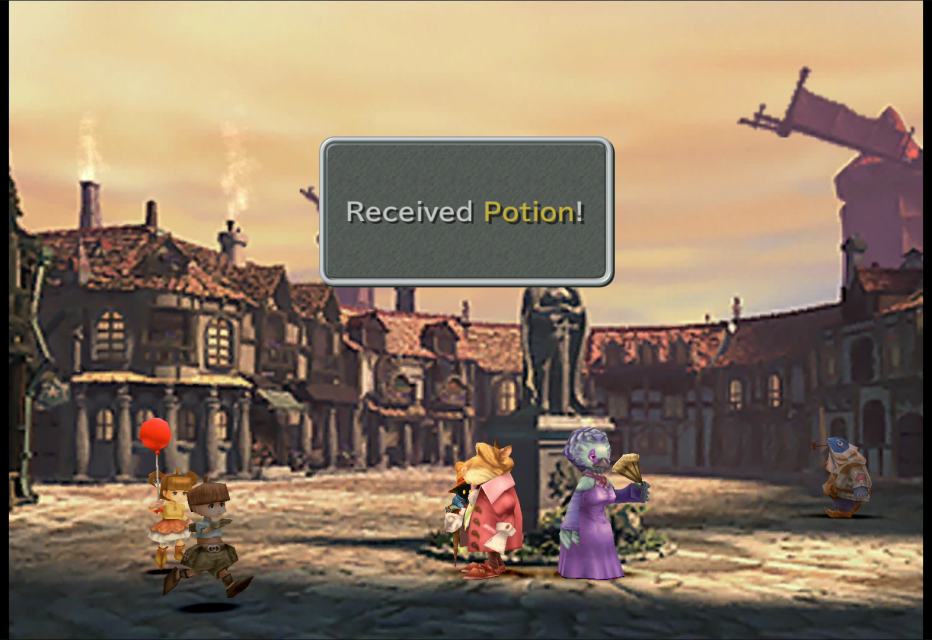
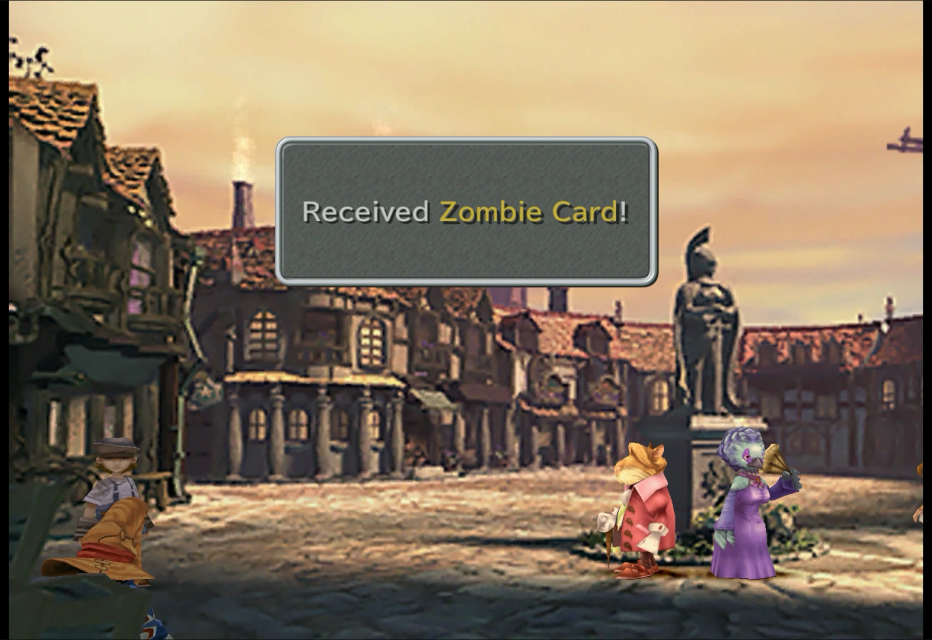
Exit and head south to the palace entrance: a Lizard Man Card and a Sahagin Card are yours when you inspect the buildings on the farthest end. Check the back of the statue for a Potion and the lower left corner of the screen for a Zombie Card. Once you have everything, proceed north while check the sides to find another Potion (left-hand side around all the fruit and bread baskets and exit this section of the town. In the following section go into the tavern.
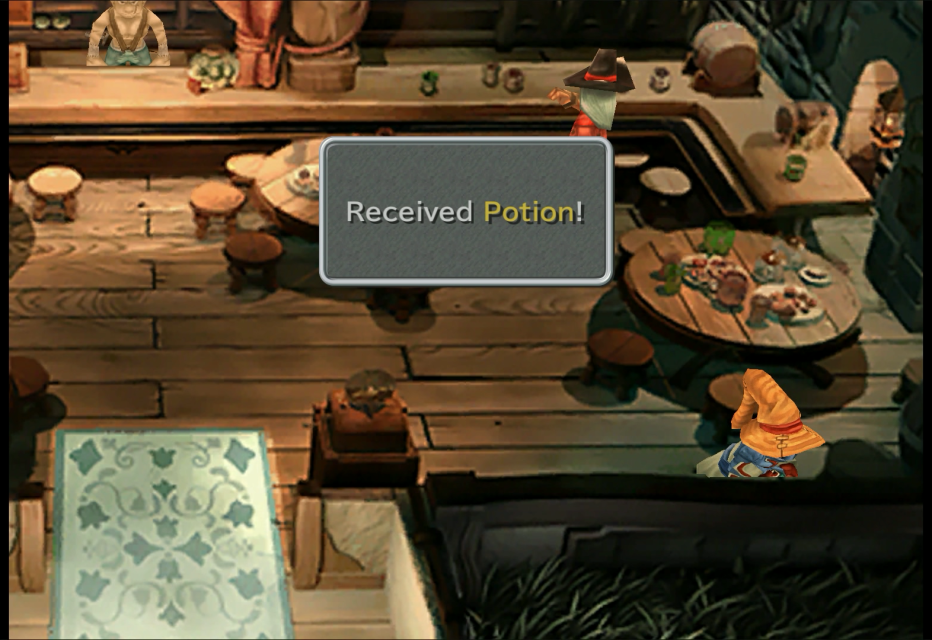
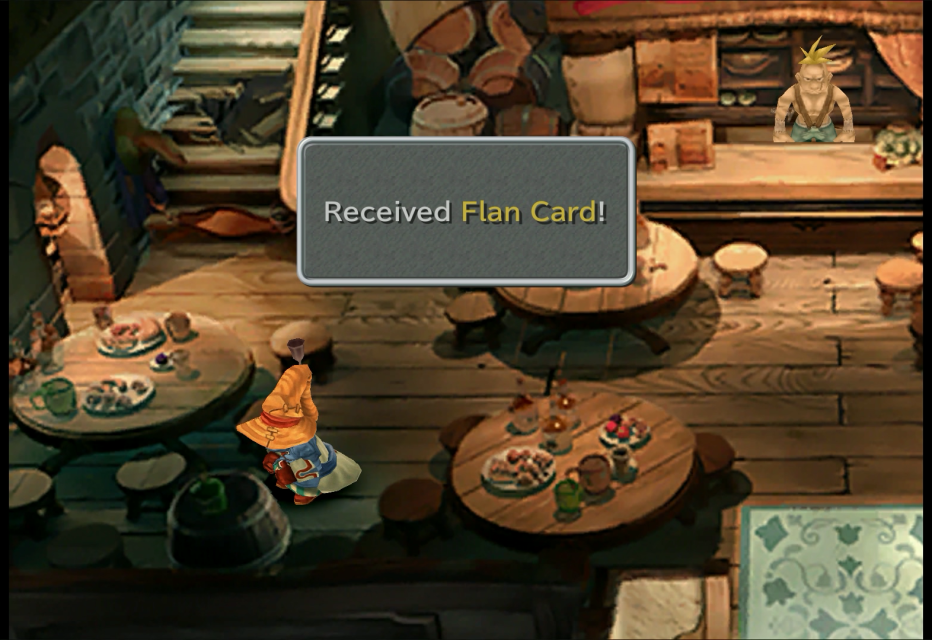
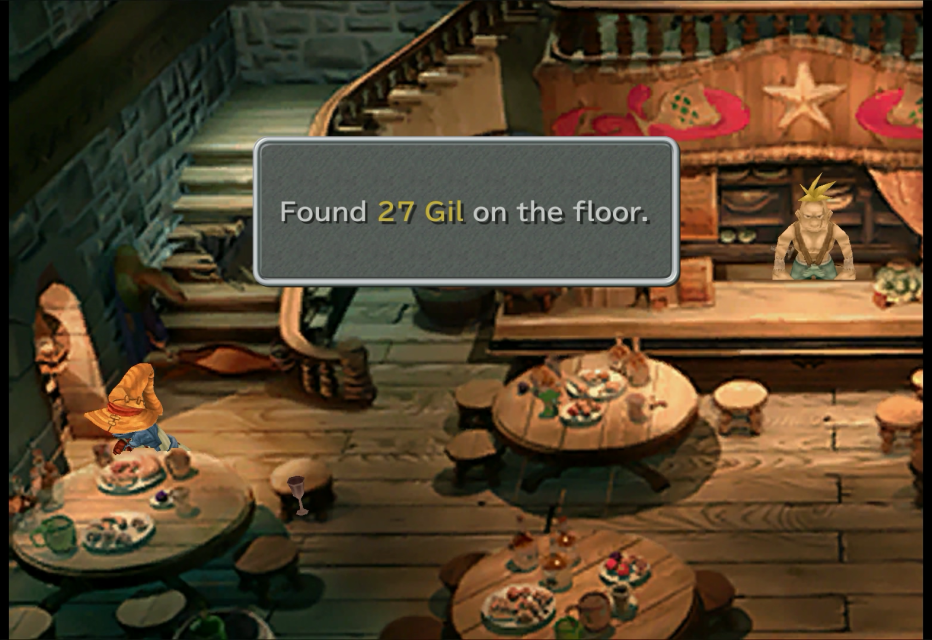
To the right hand side there is a barrel with a Potion. To the left check barrel between the tables for a Flan Card. On the left wall check the lit alcove for 27 Gil.
Alexandria Part 2
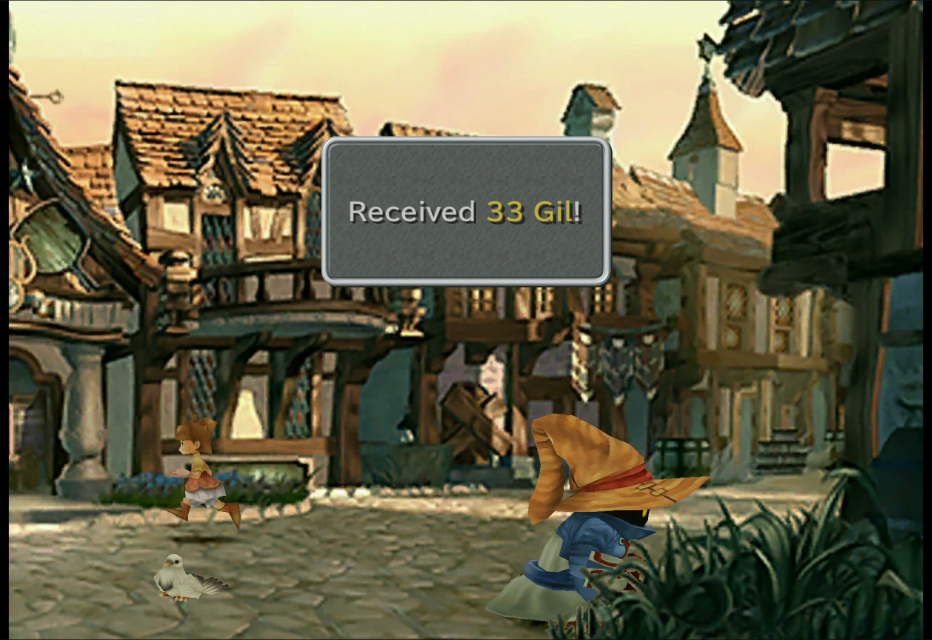
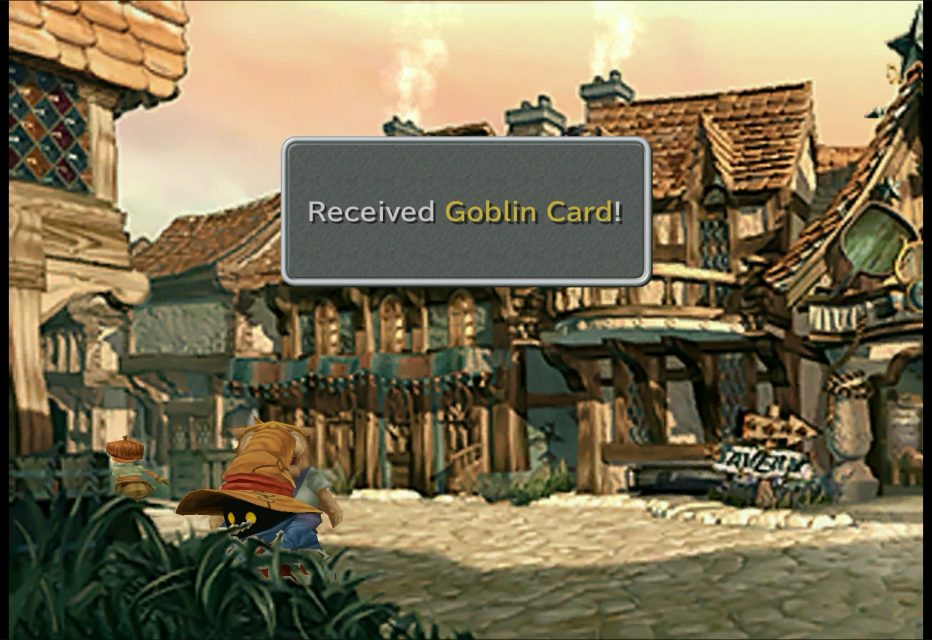


Exit and check the grass across from the tavern to collect 33 Gil and a Goblin Card then head left.
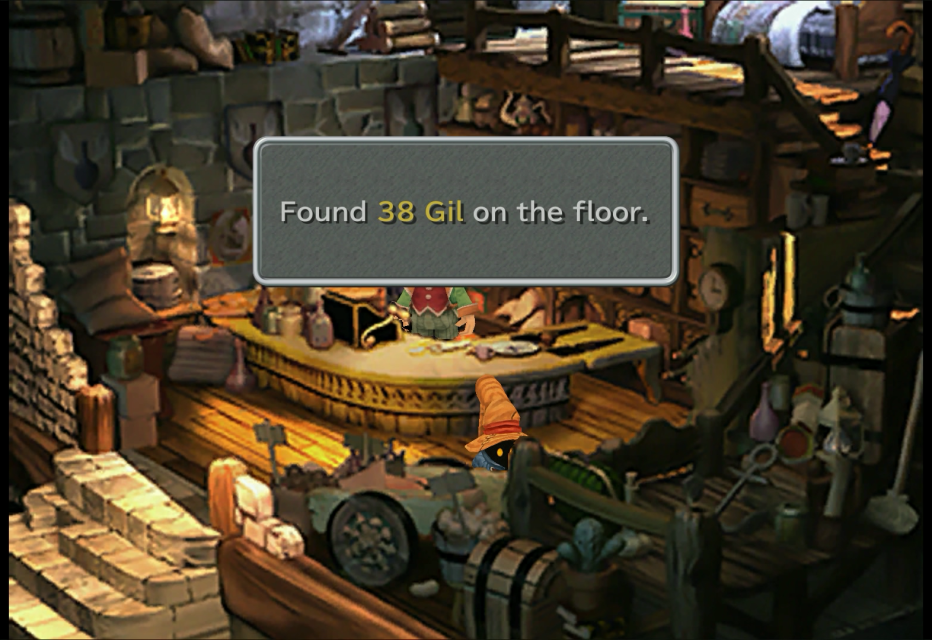
On the right side of the road is the Item Shop; enter to find 38 Gil on the floor.
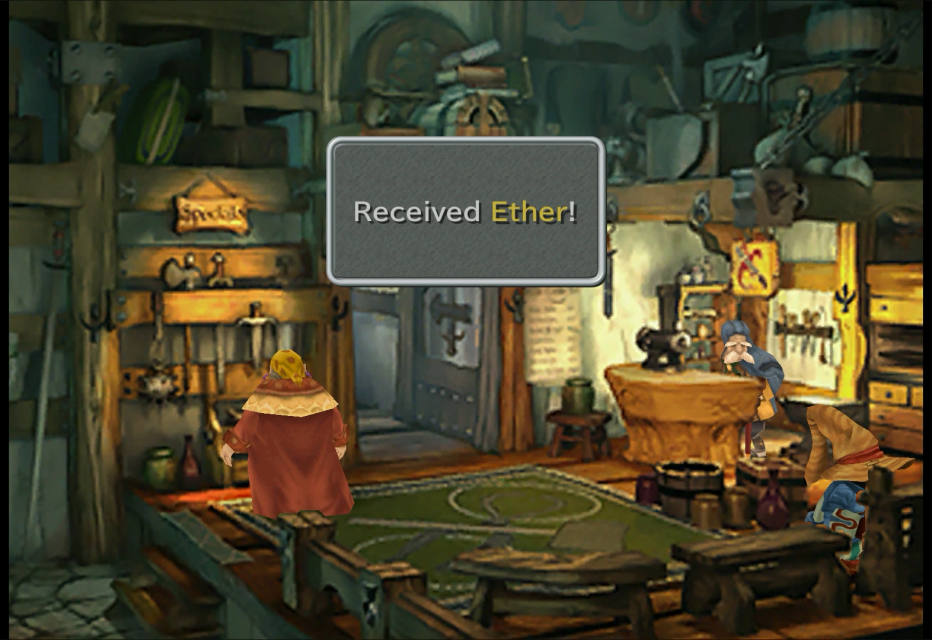
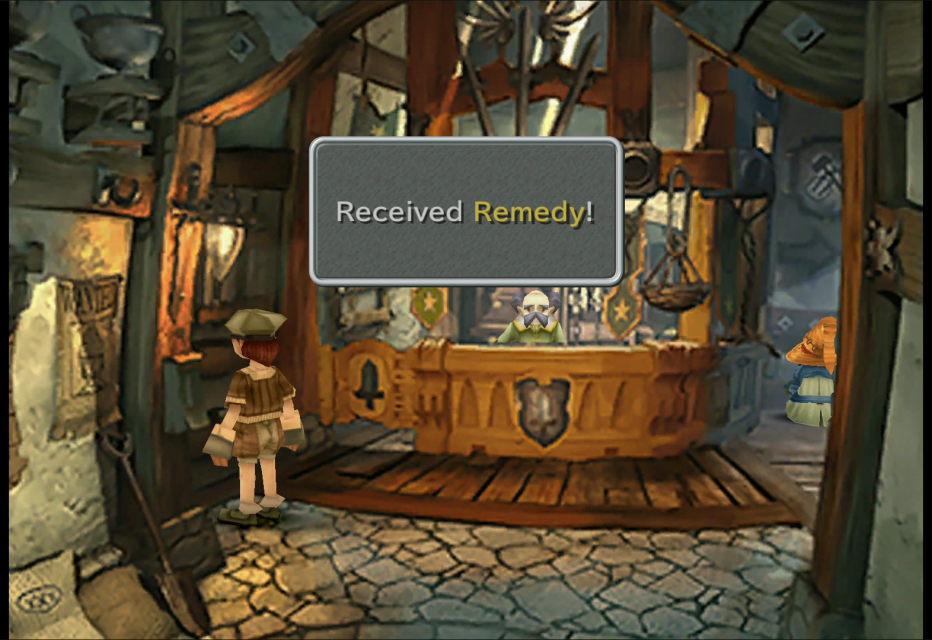
Proceed to the next screen, this area has the Ticket Booth at its center, but you don't need to go there yet. Enter the Synthesis Shop on the right side of the screen, it's closed but you can pick up an Ether in the back corner. Go through the hallway to the Weapons Shop. Walk back towards the hallway for a Remedy.
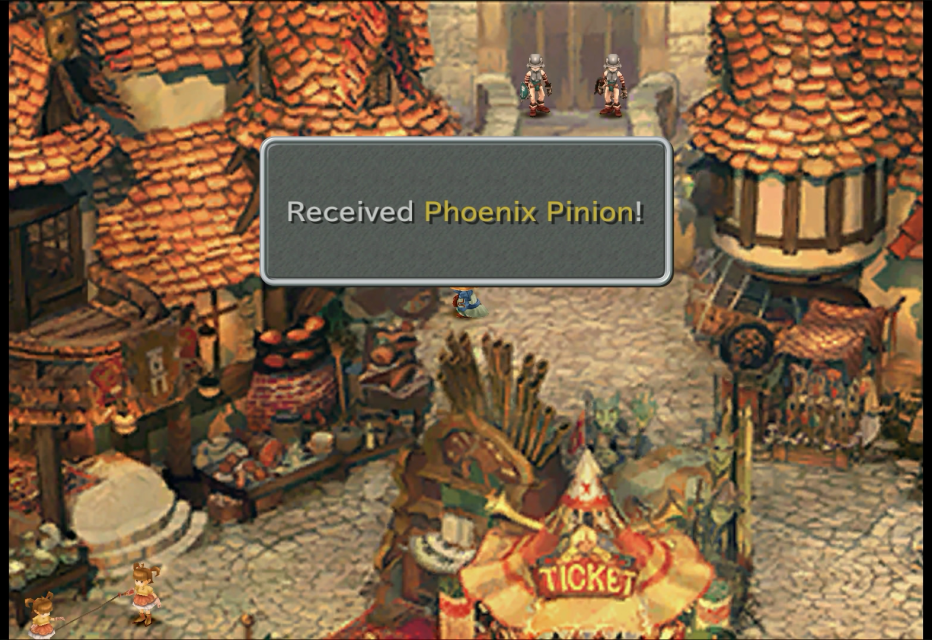
Exit the shop and talk to Hippaul (standing just left of the shop near the path up). He will tell you he has hidden his three precious cards. You'll find them in a bit. At the bottom left corner of the bridge is a Phoenix Pinion. Continuing around the outer edge of the circle there is an Inn, but nothing for you there apart from an optional scene.
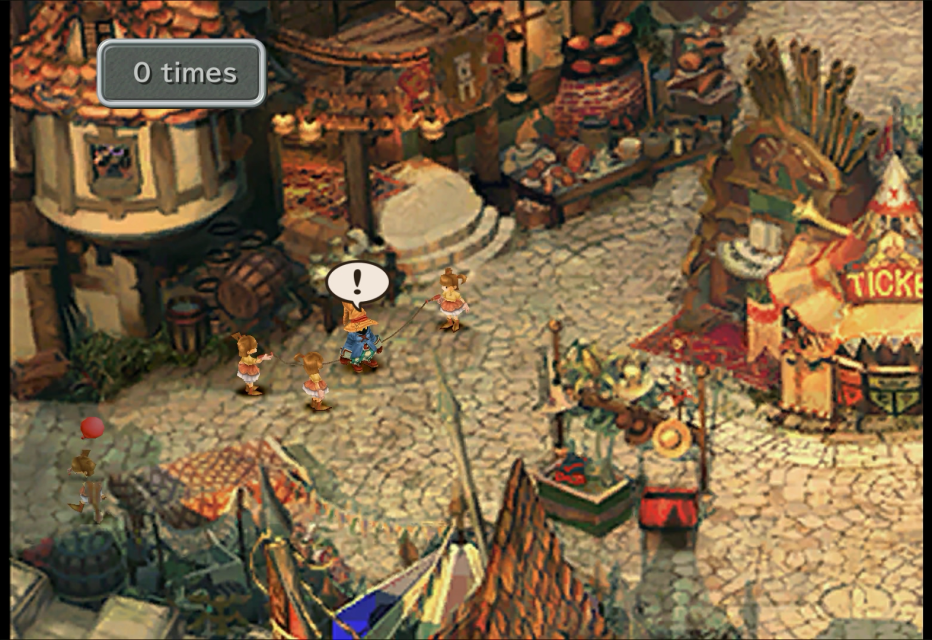
Outside the Inn some kids are playing jump rope. Have Vivi join them and you'll receive rewards upon achieving a certain number of consecutive jumps.
You can try this mini game now or wait until Disc 3. For the latter, you can only join if Vivi or Eiko are in your party. Rewards: 20 Jumps: 10 Gil; 50 Jumps: Cactuar Card; 100 Jumps: Genji Card; 200 Jumps: Alexandria Card; 300 Jumps: Tiger Racket Card; 1000 Jumps: King of Jump Rope.
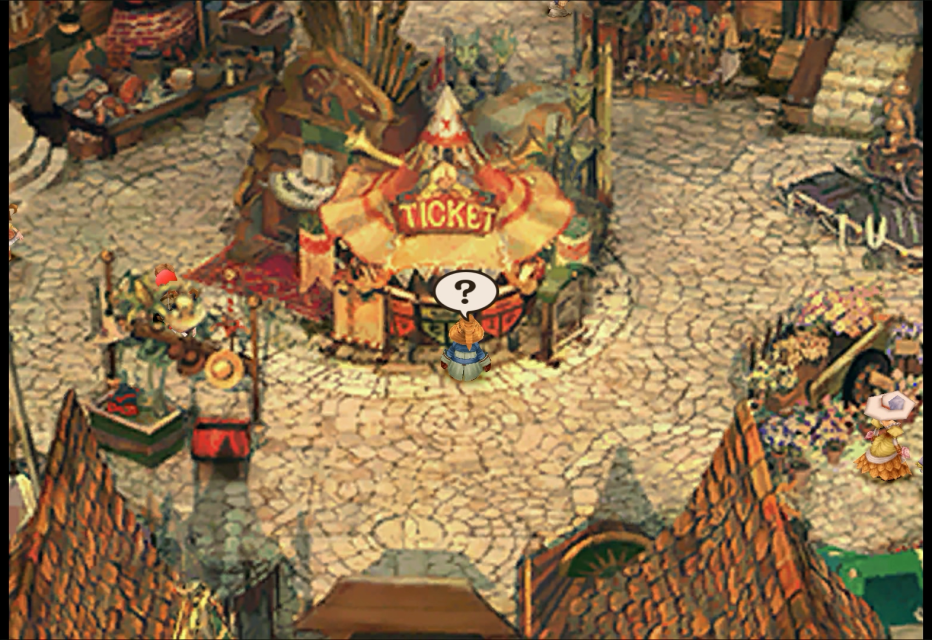
You can talk to the person at the Ticket Booth now, or come back after picking up a few more items (If you do not want to miss items, skip to the next paragraph). Some people on the next two screens will say different things before and after you've checked your ticket.
Exiting the circle to the left, the next screen just has dialogue and a sign to read. Continue on to the next screen.
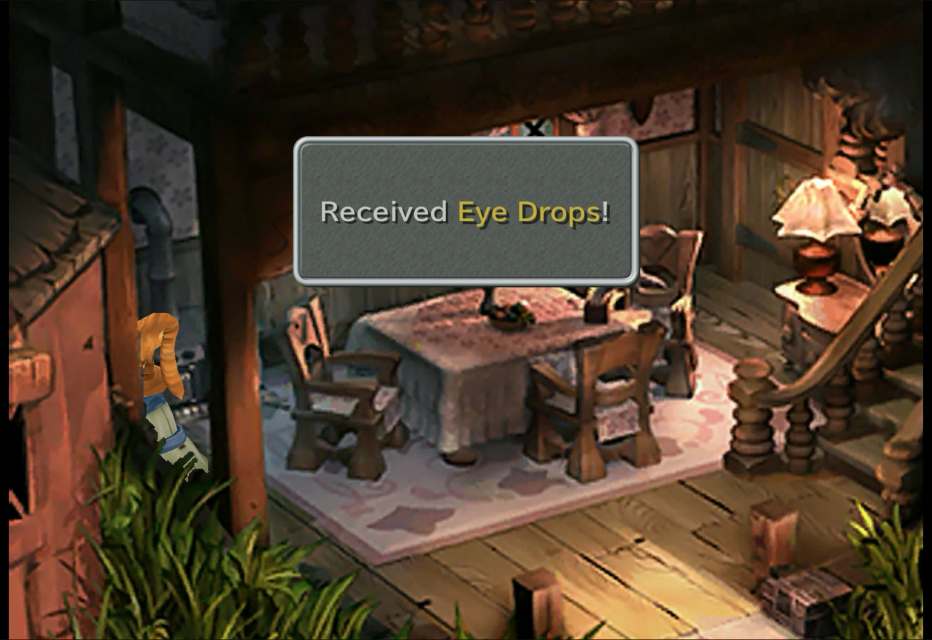
The first entrance on the right is Ilia's House. She will either run into it or out of it when you enter this area. When she is outside, you can enter and go upstairs to find 3 Gil near the window. Downstairs in the corner by the stove you can find Eye Drops.
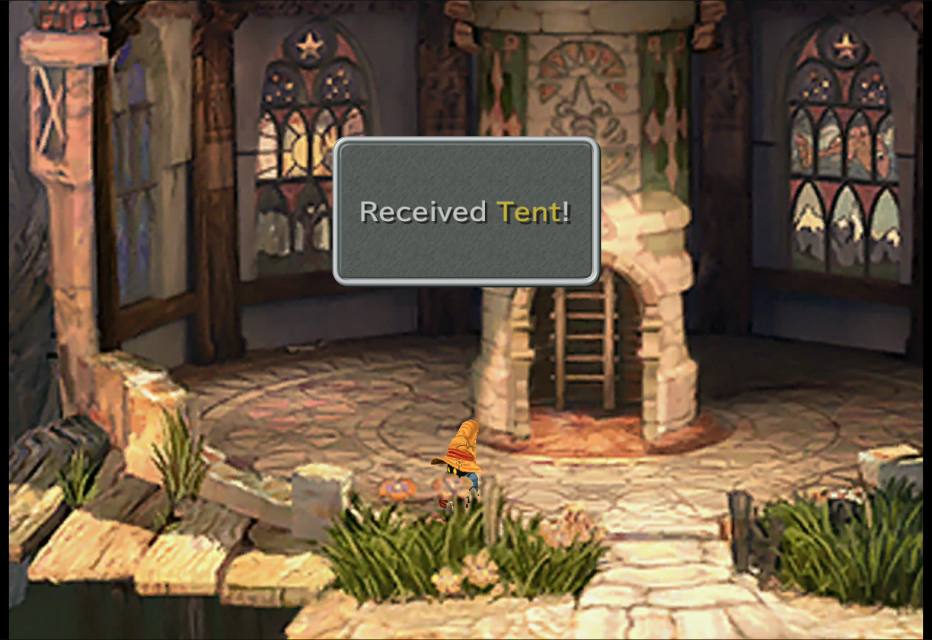
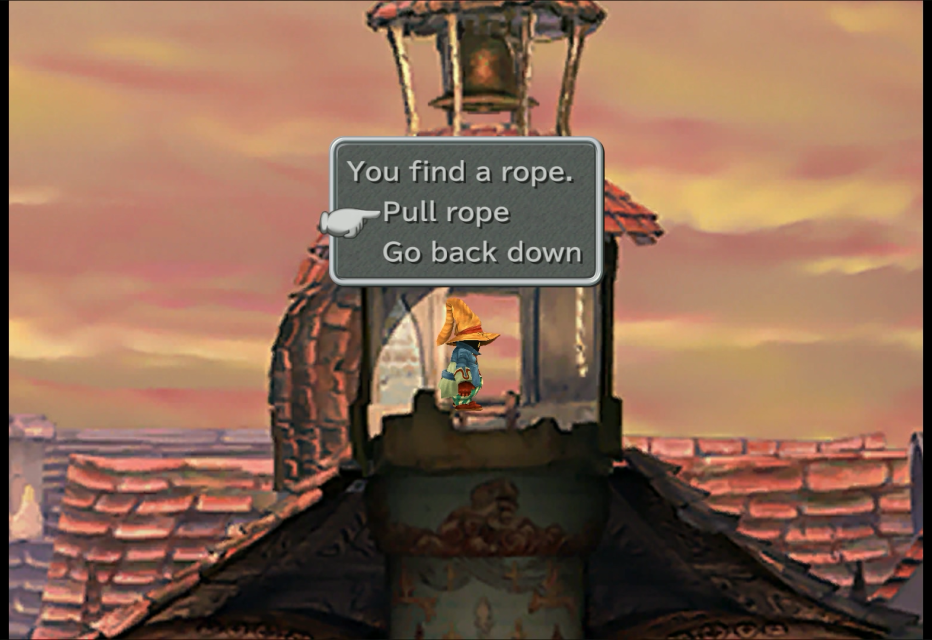
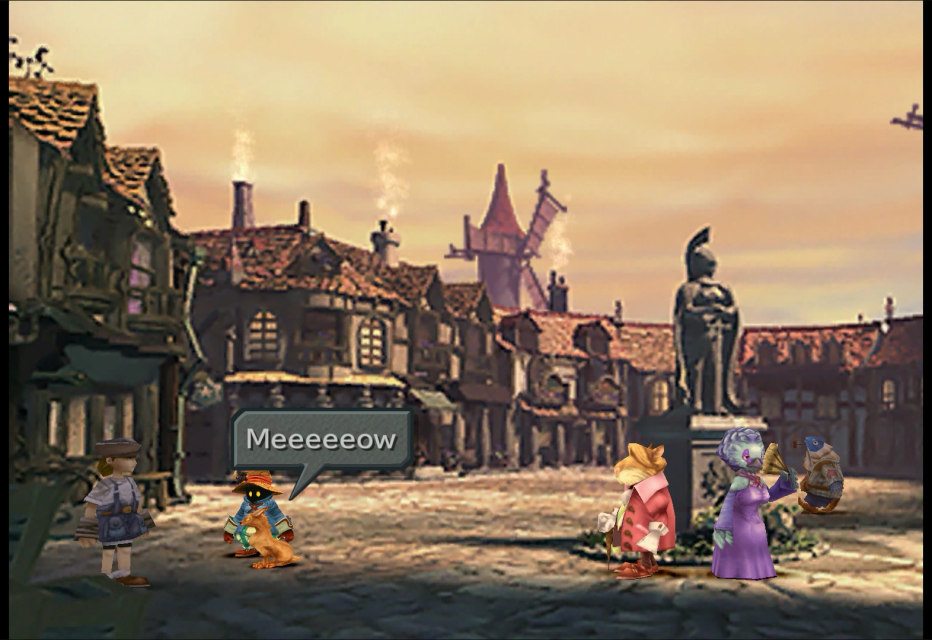
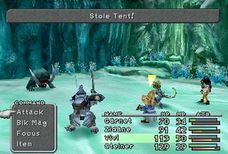
Exit the house and enter the Chapel next door. Walk around the inside of the outer wall for a Tent and a Potion. Go up the ladder and pull the rope to get Hippaul's Ironite Card, Gobling Card, and Fang Card. Exit the church, head down the stairs and up the ramp to talk to the small boy Tom. Tell him you will help find his kitty. Mittens is all the way back at the other end of Alexandria by the statue. Talk to the cat and Tom wil show up. Follow him back to his original location and he will give you a Bomb Card.
If you haven't already, go 'peek inside' the Ticket Booth -- sadly, your ticket is fake. However, the ticket salesman will give you a Goblin Card, another Fang Card, and a Skeleton Card.
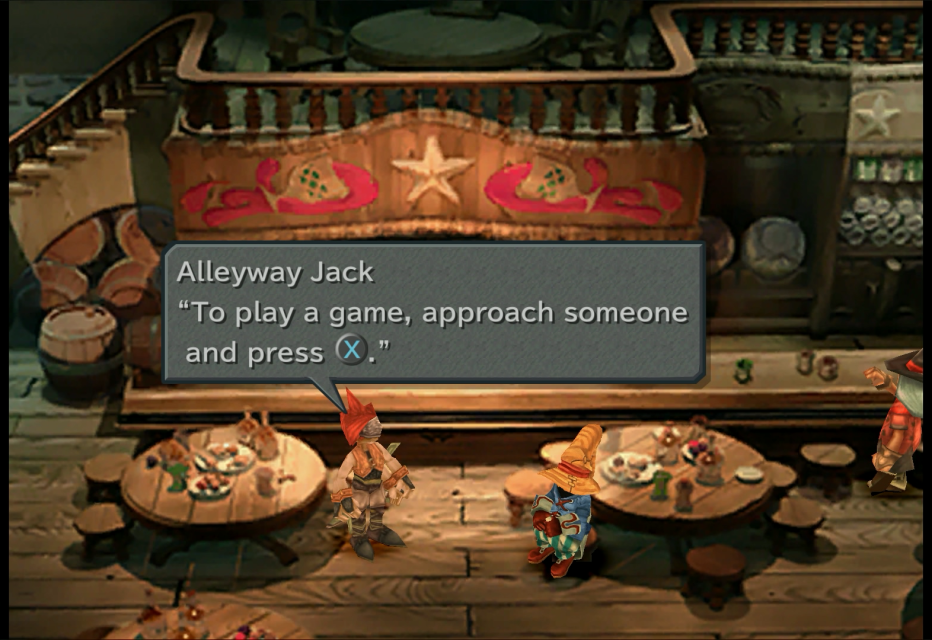
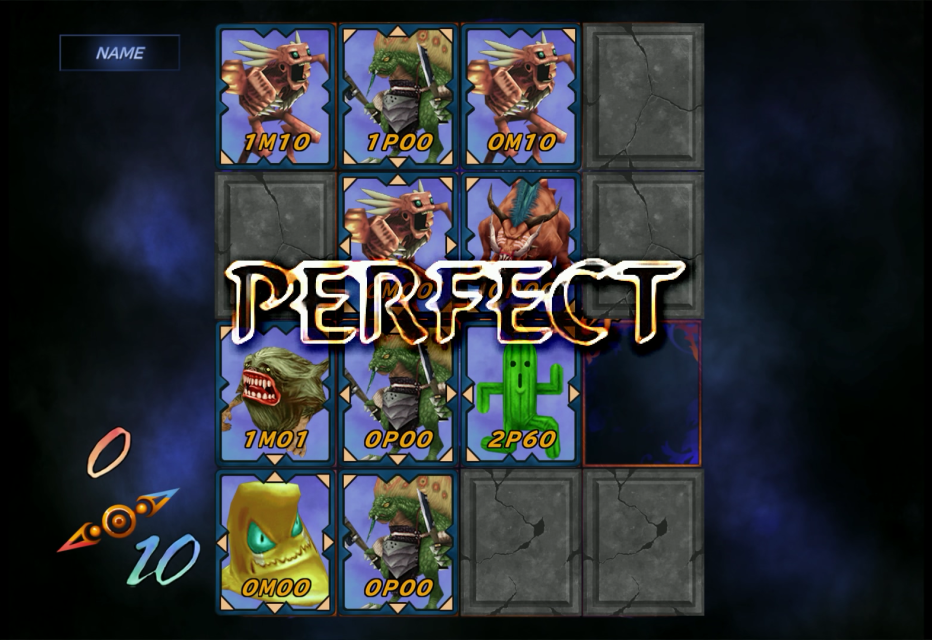
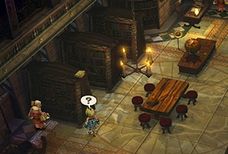
To address Vivi's ticket problem, head for the Alley where you'll meet the rat kid again. If you haven't gathered the items above, say no and go get them before talking to him again! Agree to be his slave and tell him the coast is clear. The man that appears after Puck runs off with the ladder is Alleyway Jack (note that he can mug you if you aren't fast enough to initiate talk so be careful). Speak to him to learn about Final Fantasy 9's card game Tetra Master.
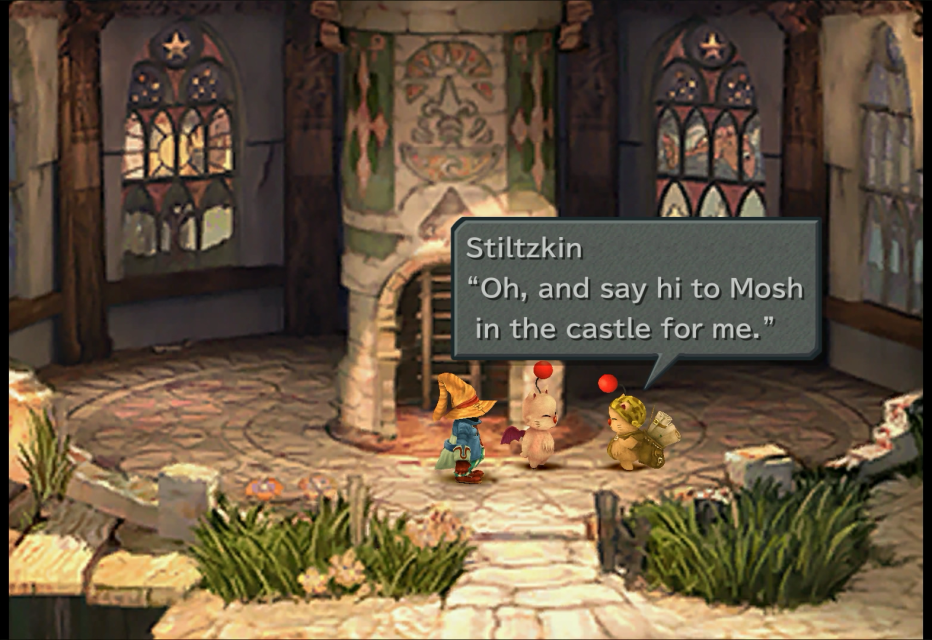
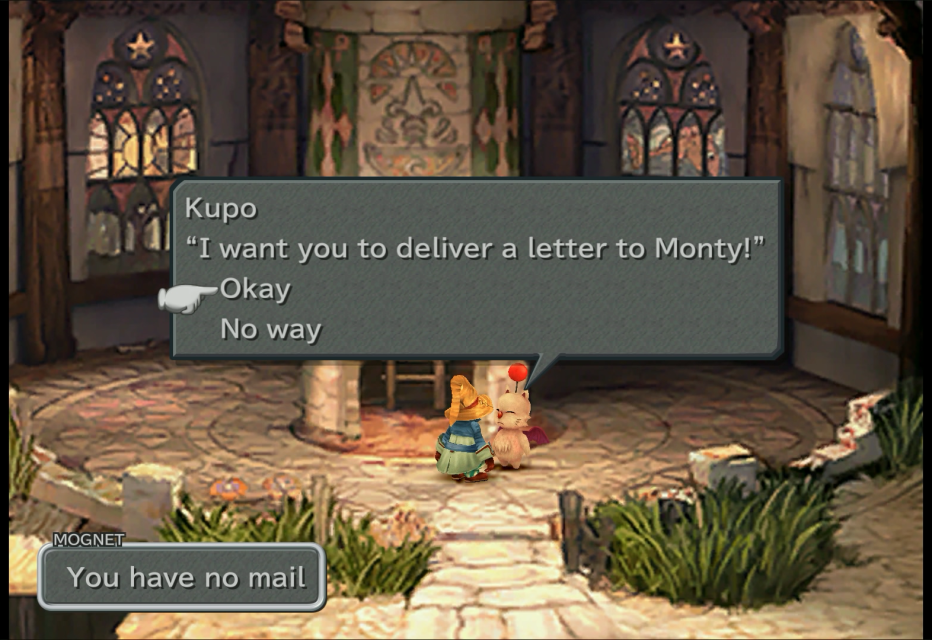
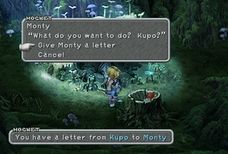
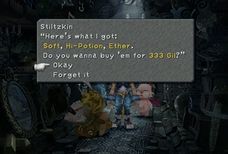
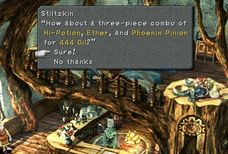
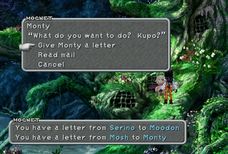
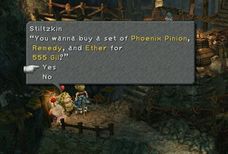
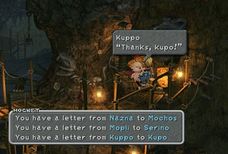
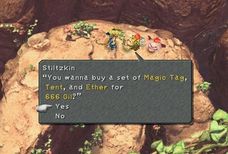
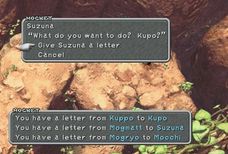
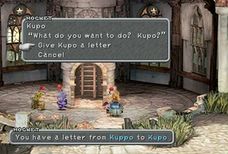
The card game can be tricky and you haven't saved yet! I'd recommend not playing Jack now. Go through the tutorial but head back to the chapel once you're done. Inside the chapel a regular moogle and Stiltzkin will show up. The regular moogle will do a lot of your save/load functions and Stiltzkin is a traveling merchant, selling rare goods ranging from items to equipment. Whenever you run into Stiltzkin, try to buy from him, especially his bundle offers. Save your game and learn about Mognet by talking to Kupo.
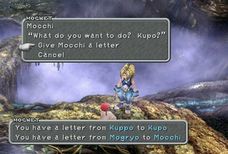
Also, whenever you encounter a moogle in a town or city, access the Mognet option to see if they have any letter for another moogle. Deliver every letter to their recipient, and you'll be able to access Mognet Central late in the game. That said, Kupo has a Letter for Monty (who is in Evil Forest).
Now that you've saved, you can go get any items you have missed, play jump rope for prizes, or go back to the Tavern and play cards against Alleyway Jack. When you are ready, climb the ladder and contnue after Puck, the Rat Kid.
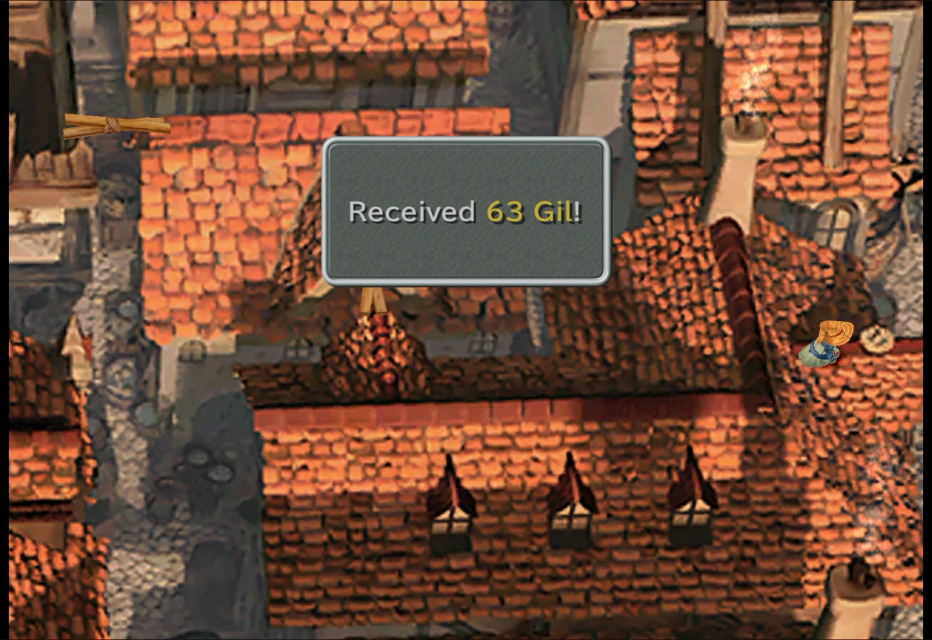
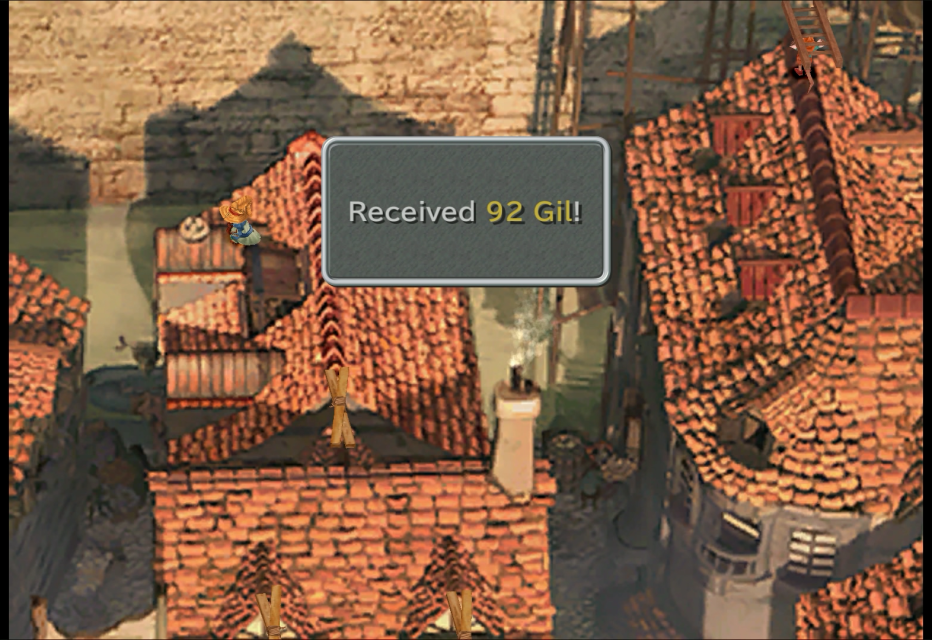
Once you get to the far left, Puck will head up; get the 29 Gil that's on the bowl directly in front of you. Follow the rat kid again but before you finish your course take a right down some stairs and follow the boards to get to 63 Gil. Go back up the stairs and continue up; you'll be on one of the houses that's farthest on top. Check the pot on the roof for 92 Gil. Go back down and head right, then up to follow Puck to enter the castle.
Alexandria Castle (1st Visit)
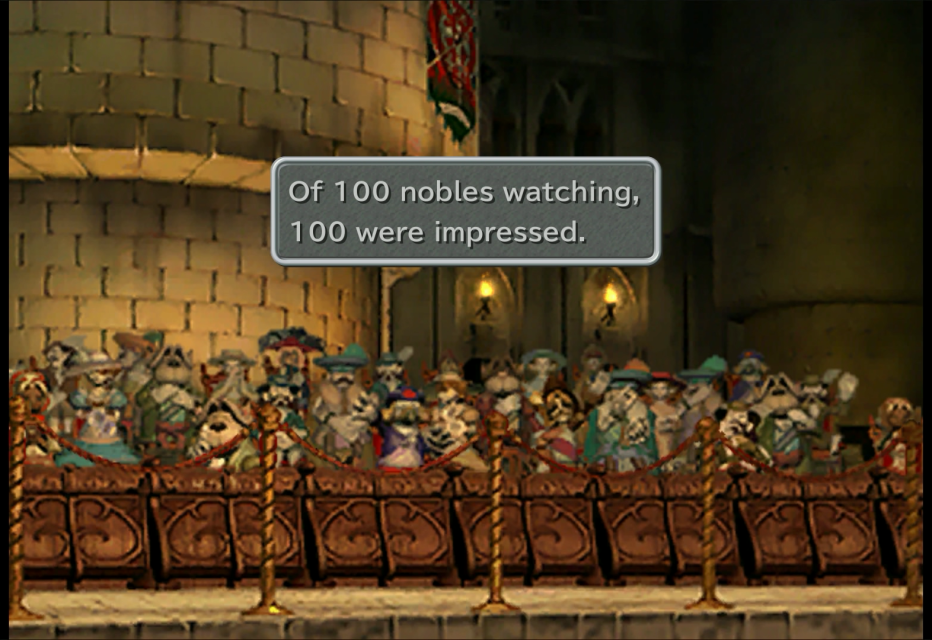
 Number Of NoblesRewards From Queen1-49Ether80-99Silk Shirt100Moonstone
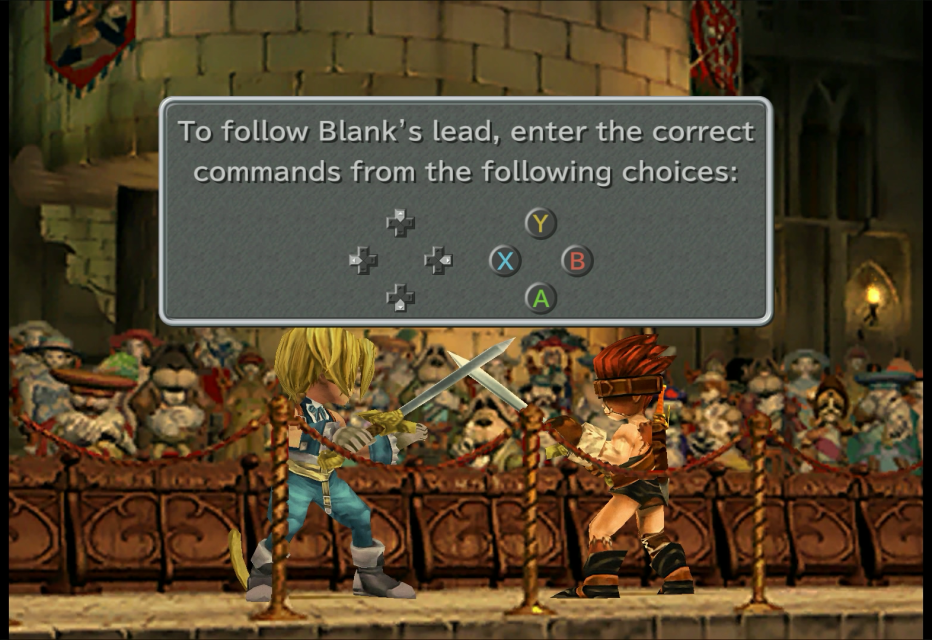

 HPAPGILSTEAL
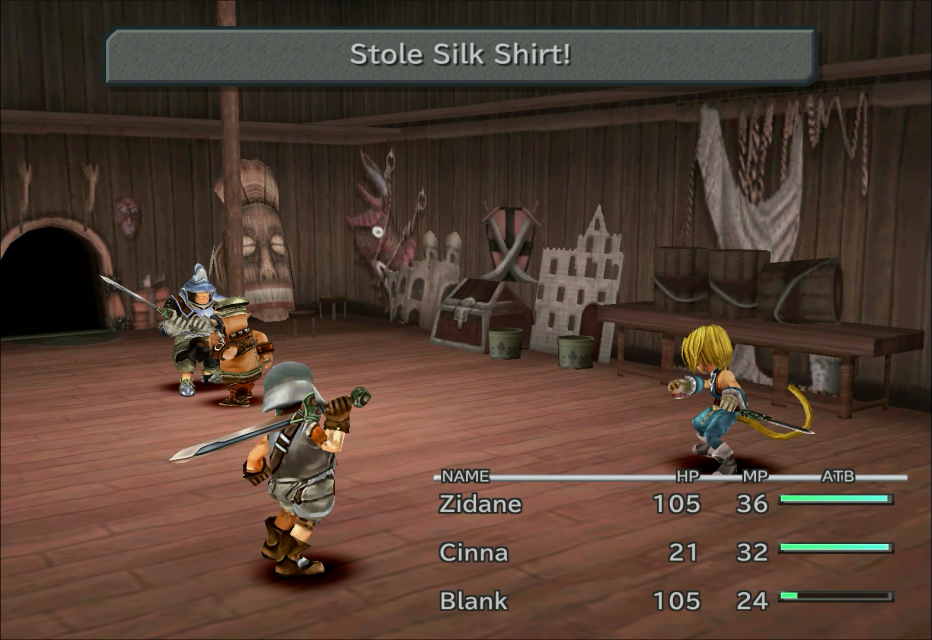
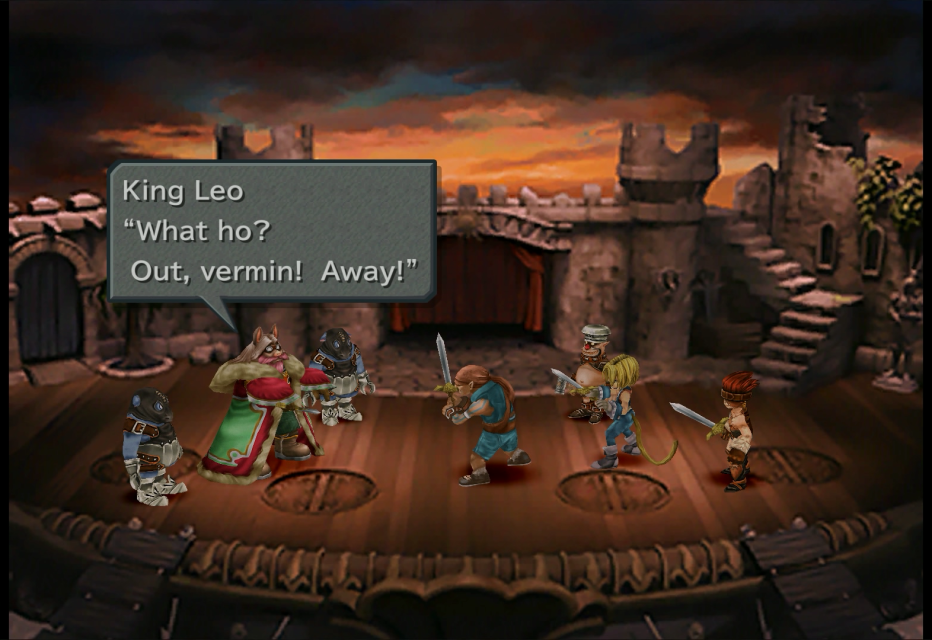
This section starts with the play where the Steal command is replaced with SFX, which allows you to cast fake spells such as Pyro. It deals no damage but adds a nice touch. In the mock battle against King Leo, defeat the goons first then deal with Baku. You can be as flashy as you want.
The fighting then spills into the audience. This time, you will have to follow Blank's lead during the fight scene. Just press the buttons he tells you to correctly and quickly. Apart from pressing the correct buttons, your speed also affects how impressed the audience and Brahne would be at the end. You will receive Gil based on your performance; 00 gil being best.
Note:
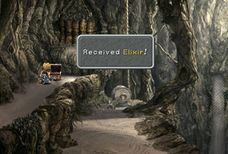
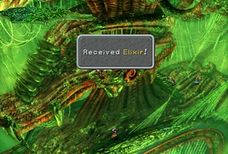
Also depending on sword duel performance you gonna get one of these items from Queen Brahne when control shifts to Steiner:
50-79 Elixir
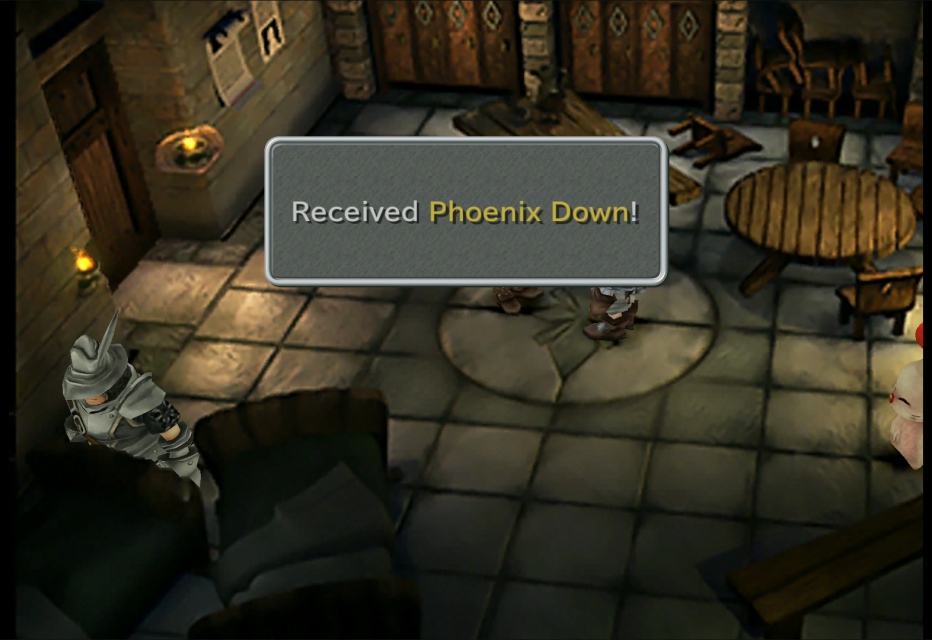
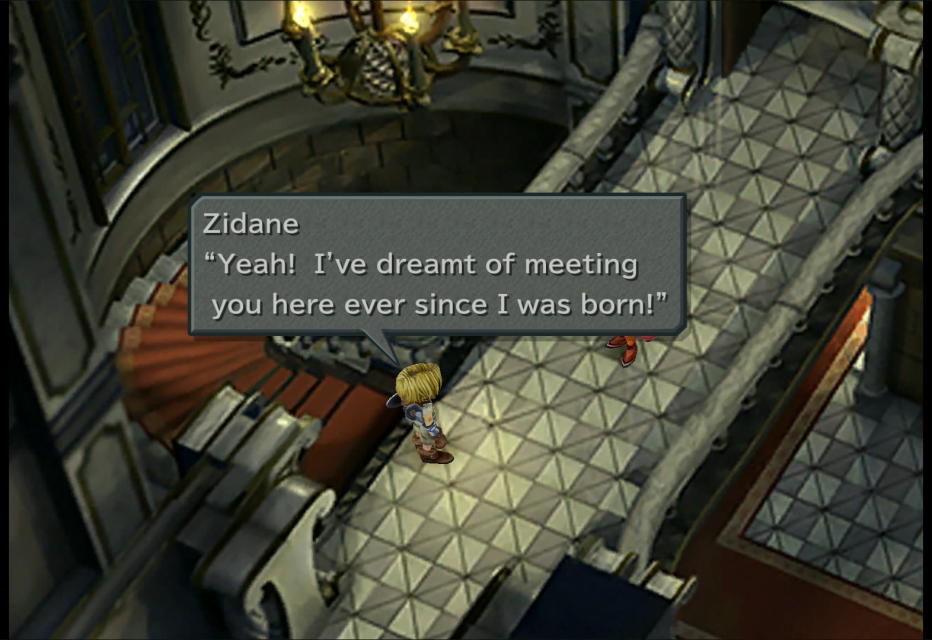
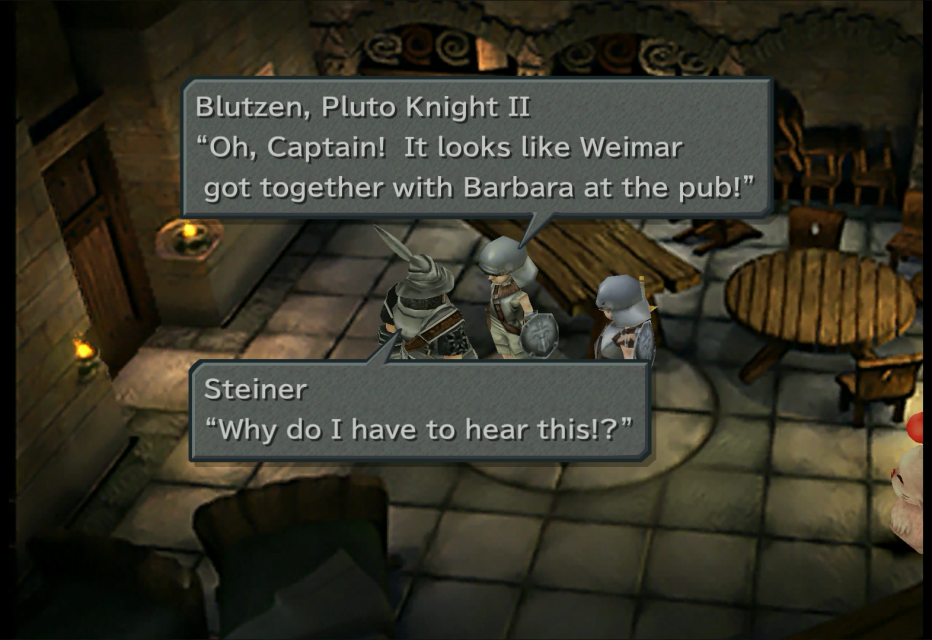
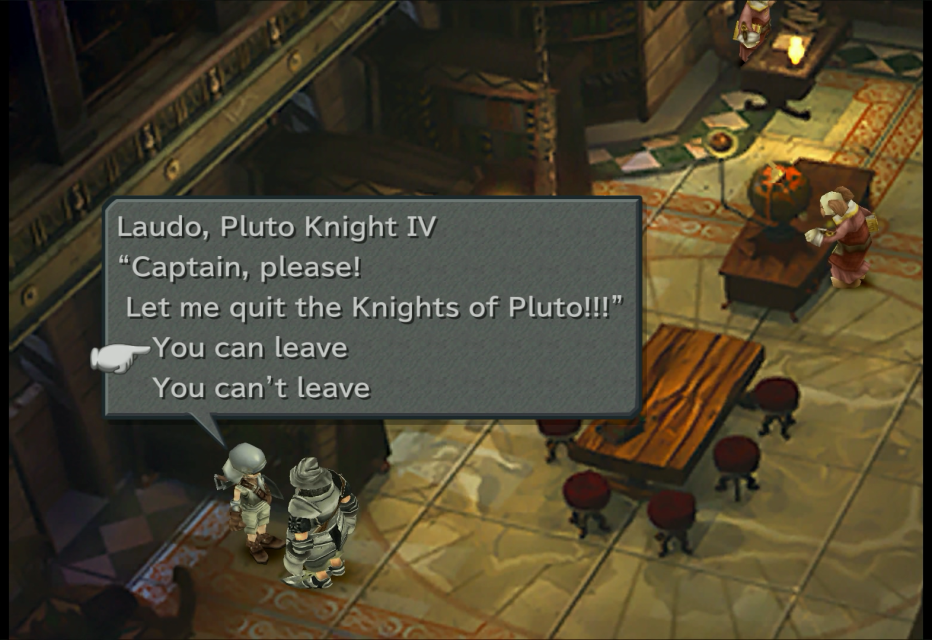
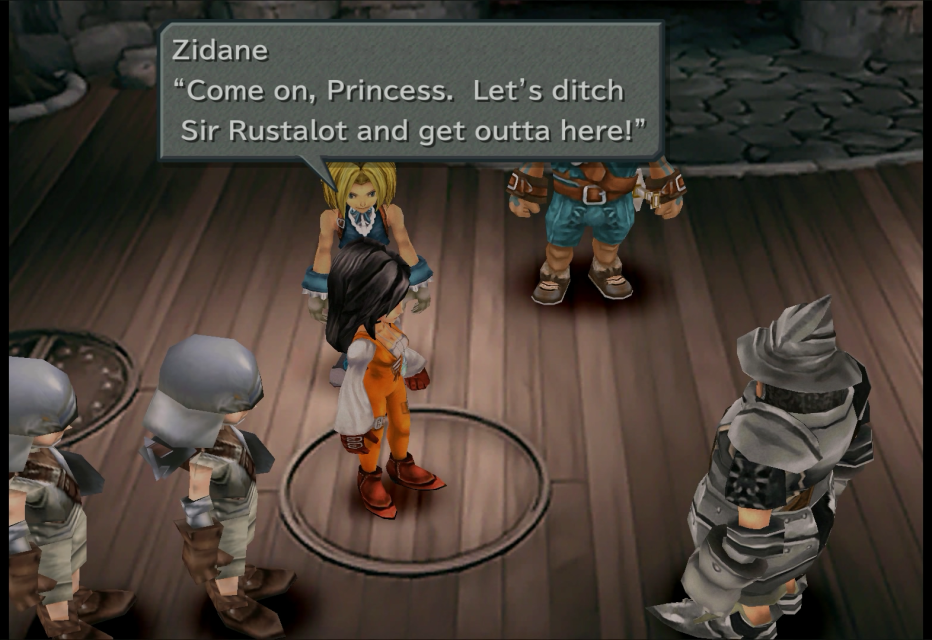
With Zidane in the castle, climb up the staircase and you will run into a girl in white robes. Pick either answer and Zidane soon realizes that the girl is the princess, Control switches over to Steiner now. Enter the Guard House to your right and speak to the pair of Pluto Knights. Have Mosh save your game and check the lower left corner of the room for a Phoenix Down. Head back to where Brahne is, and talk to her for a free this is of course assuming you already impressed nobles and Queen Brahne earlier in mock duel.
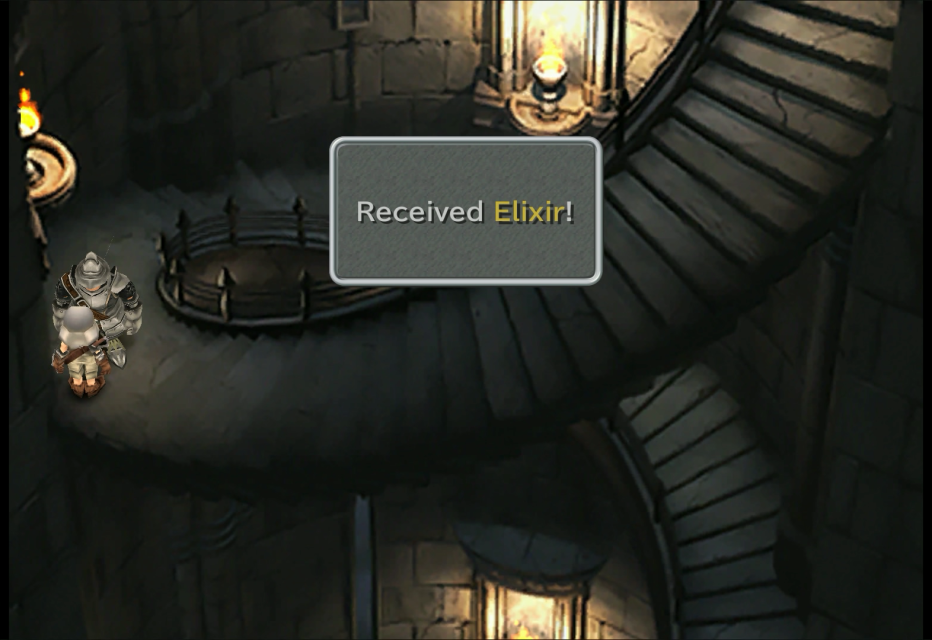
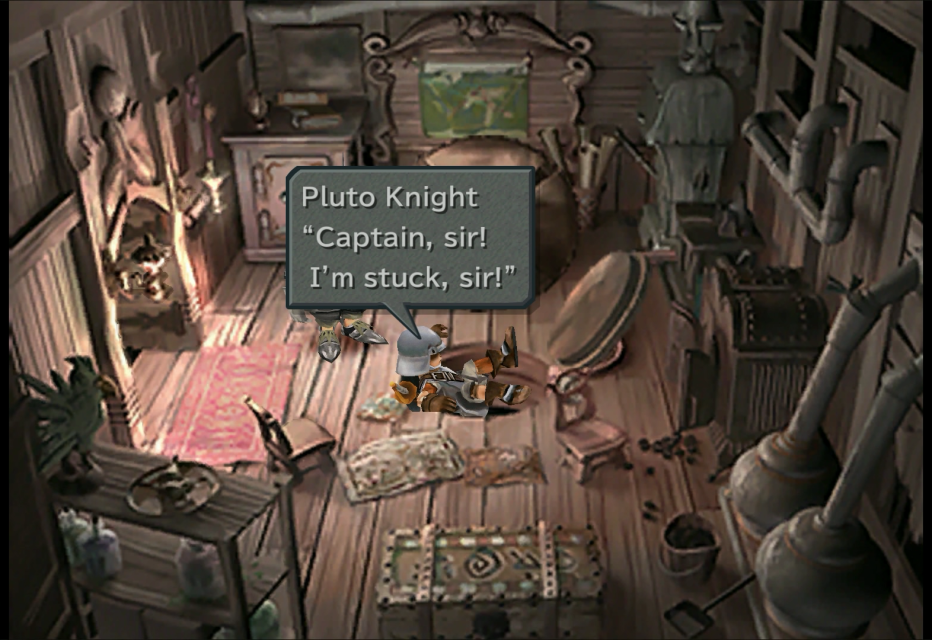
Explore the rest of the accessible parts of the castle and search for the rest of the Knight of Pluto members. Just talk to them and Steiner gives the order to look for the princess. After that, head outside and then left into a tower. Talk to the Pluto Knight halfway up the staircase to receive an Elixir if you managed to pass the order to every one of Steiner's subordinates. Continue to the top of the tower for an event, after which control will once again switch back to Zidane aboard the Prima Vista.
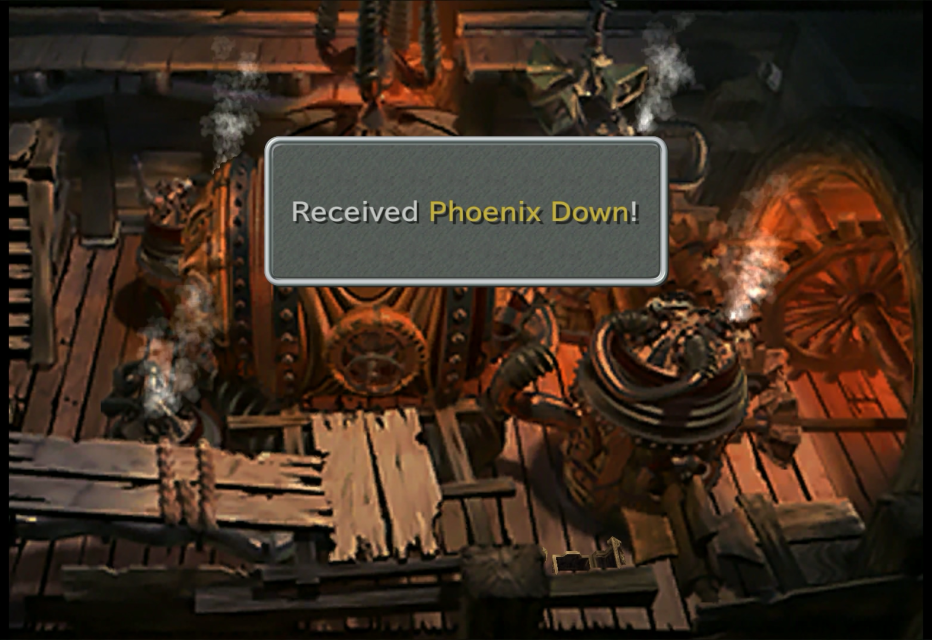
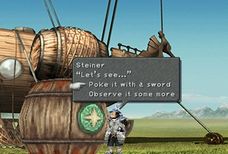
Follow Garnet into the room to the right. Inside, ignore Ruby for now and continue down to have a word with the princess. Head back up afterward and talk to Ruby then follow her downstairs for a scene. Once the scene is over, head over to the engine off to the right and turn the wheel both ways. This drops a pair of chests with a Phoenix Down and Phoenix Pinion.
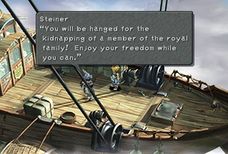
As soon as you leave the engine room, Steiner drops in for a fight.
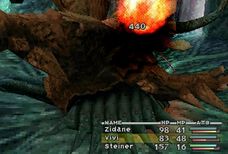
BOSS BATTLE - STEINER
169, 162, 167, 1867 N/A N/A , Leather Hat
This encounter is pretty much the same as the one you had with Baku at the beginning, Attack him after you steal all his items, but unlike Baku, Steiner only has 2 on him instead of 3. Use Potions to heal when needed.
Watch the next series of events, followed by another battle with Steiner.
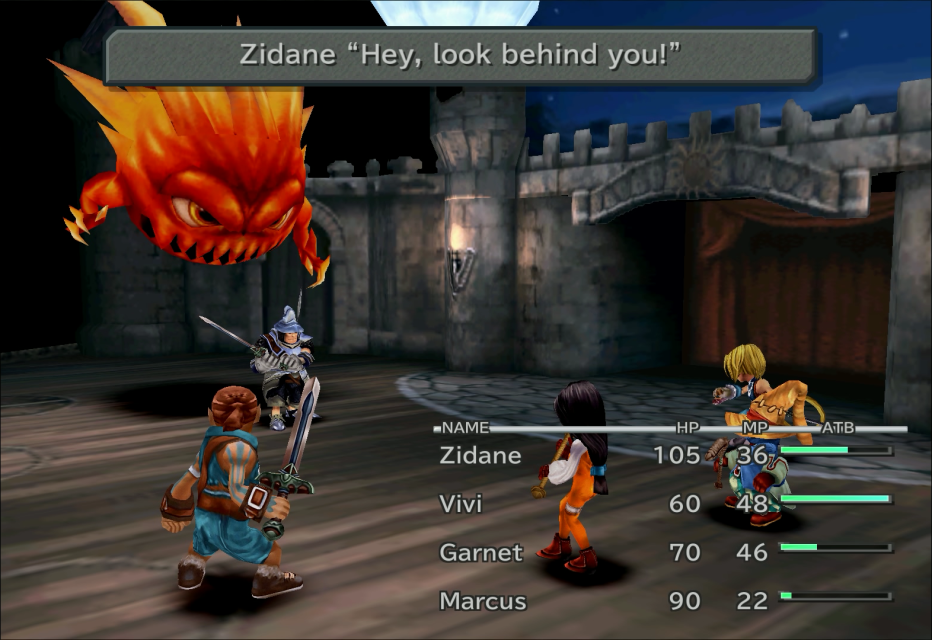
You have Vivi and Garnet in your party now, but since you're onstage, the Steal command is gone again. Attack with Zidane and Marcus while Vivi casts Fire (you can have him Focus first for a stronger spell). Keep at it until the Bomb is just about ready to blow, the battle ends automatically.
Evil Forest
 HPAPGILSTEAL
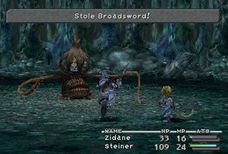
 HPAPGILSTEAL
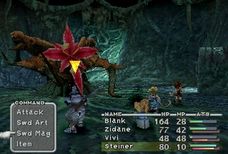

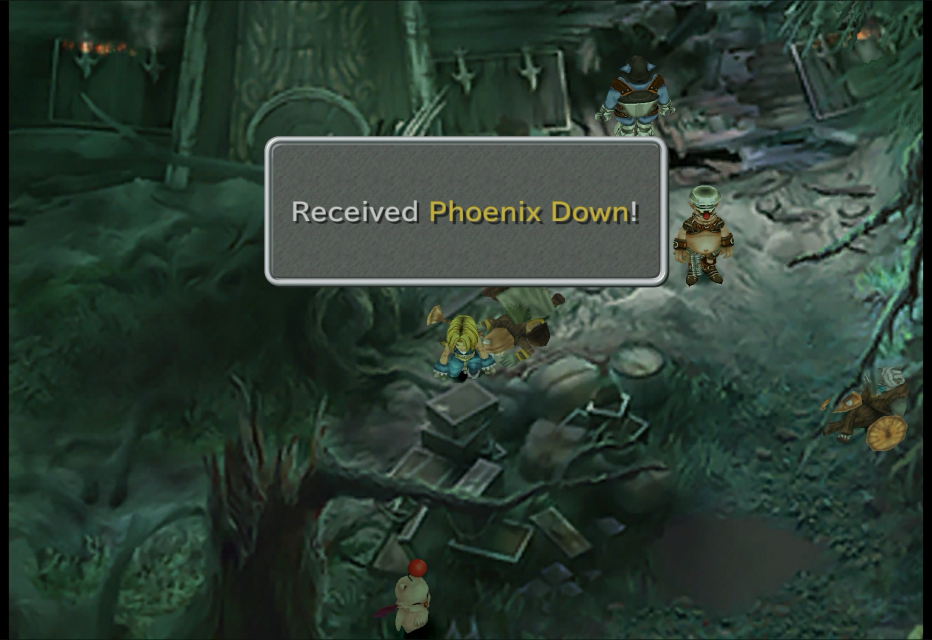
After the crash landing, a moogle appears for a brief tutorial on Active Time Events (ATE), which are mostly optional extra scenes that you can watch (and sometime recieve items from). A prompt will appear at the lower-left corner of the screen if an ATE is available; press the Select button to view them (The Forest Keeper). Check the far left side below the guy lying down for a Phoenix Down then save your game with the moogle. Continue southeast and into the hollow log in the bottom right corner.
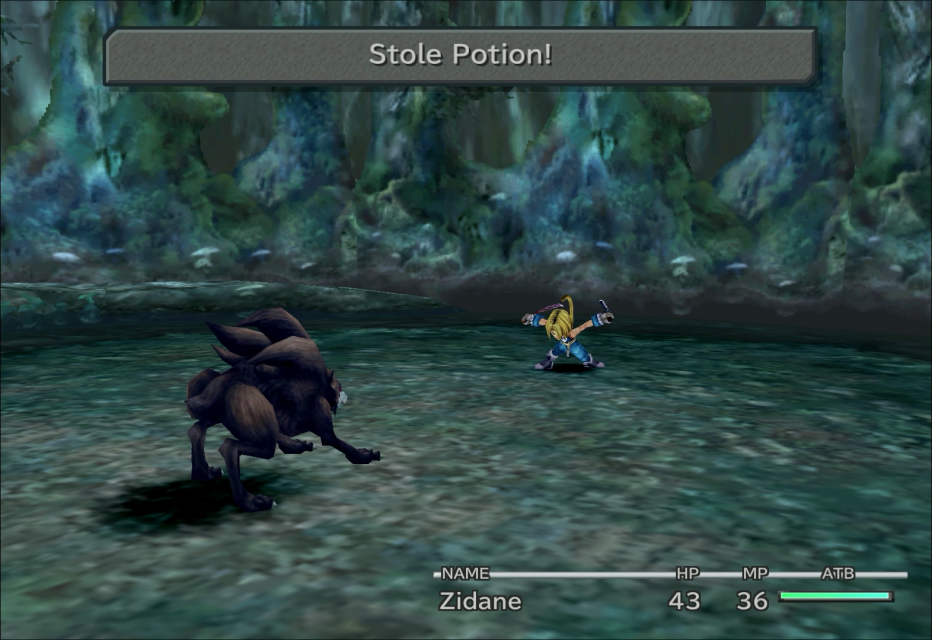
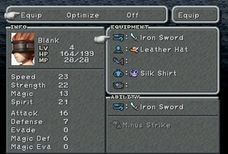
Stick around this area for a while to level up some, and don't forget to equip the Mage Masher and Silk Shirt you stole earlier. Nearly every monster in this forest carries a Potion, so be sure to steal some. After grinding to at least level 5, return and save. Head east, deeper into the woods.
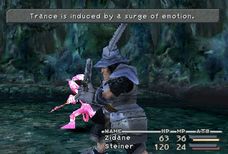
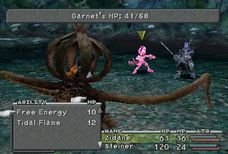
You'll receive a quick explanation on Trance at the beginning of the battle. Trance is this game's take on Limit Breaks, wherein a character gets access to special attacks for a period of 3 turns. Trance fades when the red meter empties. Use Zidane's Free Energy attack (do NOT use Tidal Flame). The monster also drains from Garnet throughout the battle so heal her with Potions when her gets low. If Garnet dies, it's game over so watch her health carefully. During the first battle there is also nothing to steal so don't waste the turn on trying. Defeat the creature and it comes back for a second helping.
BOSS BATTLE - PRISON CAGE
533 3 N/A Broadsword, Leather Wrist
This round is essentially the same as the last one -- only this time, Vivi is the one trapped. He will cast Fire on Prison Cage every turn so there's a bit of good news for you. As for Zidane, have him steal while Steiner attacks.If stealing proves difficult and you fear killing the monster before securing all the loot, have Steiner Defend by pressing right on the D-Pad.
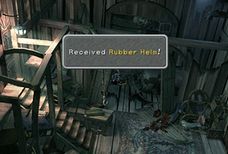
After the battle, view the set of ATEs then collect the Bronze Gloves from the treasure chest near Baku. By the foot of the staircase to the left is a Wrist. Enter the nearby room, talk to Vivi then grab an Ether from the chest and 116 Gil from the top bunk. Leave and say you want to look for Garnet. Head to the left and enter the door; to your immediate left is an Ether. Go down and into the room next to Marcus; there's a Rubber Helm waiting to be picked up above. Baku is in the room to your right.
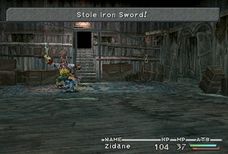
Go there and snag the Potion before speaking to Baku for a fight. This encounter is one-on-one but shouldn't be at all difficult, he only has just over 150 health. Make sure you steal both the Iron Sword and Hi-Potion before beating him. With Baku's permission to look for the princess, head for Vivi's room and ask him to join you. Steiner should be in the room that was previously blocked by Marcus; it should be accessible now so go get Rusty and an Ether then leave the ship. You'll get some of Blank's Medicine on the way out. The chest to the right of Blank contains a Leather Hat; don't forget to grab it. Make sure to equip both Vivi and Steiner and level them up some.
Proceed back to were you first found Vivi in the forest and you'll get an ATE. Continue north afterwards. You can go left on the next screen to see a waterfall but you'll want to go to the right. There's a moogle in the trunk here. It also happens to be Monty, the recepient of Kupo's letter.
Talk to him and select Mognet to deliver it. Use the spring next to Monty to fully restore your and MP. Onward to your first real boss battle.
BOSS BATTLE - PLANT BRAIN
916 20 486 Eye Drops, Iron Helm
This is the first boss fight where losing becomes a real possibility, but Plant Brain is not much of a problem as long as you play it safe by keeping your s high at all times. Start off by stealing as always, while Vivi casts Fire and Steiner spam Fire Sword, Shift to offense with Zidane once you have all of the plant's items. Heal with Potions as necessary. When Blank joins the fun, have him assist with stealing just in case.
With the "Master" dead, the entire forest comes alive with an intent to kill. Some really angry plant life will try to run you down so run for it until you reach the exit. You might also want to consider stripping Blank of all his gear (he has an Iron Sword); you won't see him for a long while after this.
After the FMV sequence, it appears that the moogle Monty has also escaped the forest safely, and gives you the Moogle Flute. This lets you call moogles on the world map to save your game by pressing Square.
Ice Cavern
 HPAPGILSTEALHPAPGILSTEAL
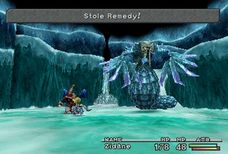
The North Gate
There really isn't much of a point of going here, it's north of the Ice Cavern. The gate is sealed shut but if you "Listen close/Call out to her/Buy some Medicine" she sells potions, which you may wish to stock up on. There are also a couple treasure chests behind the broken part of the fence that hold a Potion and Eye Drops. You may wish to level up and then enter the Ice Cavern.
Ice Cavern
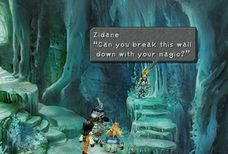
Begin by hopping up the step for a Tent and up the next one to the next area. At the top of the east staircase is an ice wall that can be melted down with Vivi's help. Just check them and your Black Mage will do the rest. Behind this first wall lies an Ether. Also pay attention to the air jets that blow across some sections of the cave; you'll be forced into battle if you touch these. Ignore the steps to your left and circle around it to the back for a Potion. Climb the stairs you ignored earlier to the next room.
Here, head left at the intersection and melt the ice wall up top and get an Elixir. Cross the pillar at the lower part of the room; the treasure chest here has a Potion. Check the pillar again; Vivi melts the ice supporting it, creating a path down to another treasure chest with a Mage Masher.
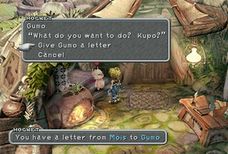
Head up to the next screen. When the path splits, go right for a Phoenix Down. Return to the fork and head left this time to another ice wall, Melt it and follow the path to a Leather Wrist. Go back to the intersection one more time and head north. In this area, examine the frozen moogle to have Vivi free him from his ice prison. Mois has a letter for Gumo so don't forget to check in on Mognet. You might also want to stick around a bit and fight battles until Zidane's Trance meter is near full. You'll need it later. You may also want the trance meter low so you can concentrate on stealing if that is your first priority.
A know-it-all moogle named Mogster also has a few things to teach you; have a look at the tutorials if you like then rest in a Tent and save.
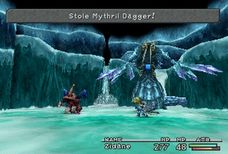
BOSS BATTLE - BLACK WALTZ 1 & SEALION
229 05 339 Silk Shirt, Remedy 472 05 339 Ether, Mythril Dagger
The Black Waltz carries the Remedy and Silk Shirt, while his pet Sealion carries the Ether and Mythril Dagger. The Sealion's items are really the only ones that matter, but if you also manage to steal from the Black Waltz then all the better. Secure the items you need, and once Zidane enters Trance, unleash Tidal Flame to eliminate the Black Waltz. This also leaves the Sealion with just a tiny bit of so finish it off with a single attack.
Village Of Dali


 HPAPGILSTEAL
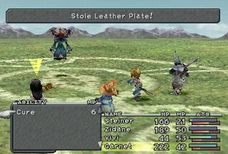
The South Gate
Just like North Gate, nothing much is going on here, but if you speak to the guard a woman named Mary will appear to sell you medicines. It is located above the exit of Ice Cavern and to the right side.
The Tower
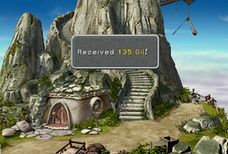
Next to the Village of Dali is a tower (you will visit there as Steiner later). If you talk to the old man named Morrid he will tell you about his desire for three rare coffees. In exchange for giving him the coffees he will give you a mini-Prima Vista. If you search near the bottom of the stairs there is 135 gil, which can also be found by Steiner later, as well as a Hi-Potion along the wall.
Village of Dali
Upon entering the village, head through the first door on the right. This is the Inn. Mois also asked you to deliver a letter to Gumo earlier, so hand ithe letter over to him. Pick an ATE then check the chest for an Antidote. On the far right side next to the bed under the plant is a Potion. Visit the equipment shop on the left to pick up some new gear for everyone. It is recommended that you hang on to all your old stuff, as they will be needed to create new items later on, with help from the synthesis shops.
Once outside the weapons shop, head just around the corner below the airship parts just across from the inn window to find 137 gil.
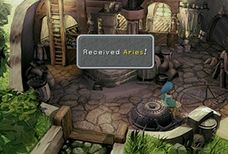
The item shop is a little further north, to Vivi's right. Head for the back of the mayor's house by entering the door to Vivi's left. Behind the spinning pillar, on the floor is the Aries. This is one of the 13 Stellazzio Coins, that someone in a city called Treno is looking for. Anyway, go talk to Vivi outside. You might also notice that you can't seem to get to some of the treasure chests no matter how hard you try. They are inaccessible right now; you will have to come back for them later at a specific timeframe.
Head back to the shop and speak to Dagger then talk to her again at the Inn. Now, you'll have to go search for Vivi. Proceed to where you last saw him for a brief scene, then head for the back of the Mayor's house. Examine the large cover on the ground to reveal a secret passage.
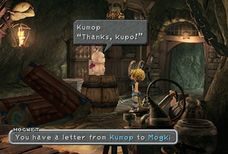
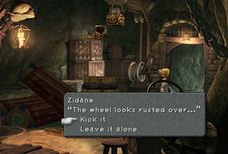
Head straight and go down the lift; check the chest in front of you for 156 Gil. Head to the left and enter the next screen. Check the area were Vivi was in for a Potion and the chest below for some Eyedrops. Continue to the right and check the first barrel on the left to find a moogle. This is Kumop and he has a letter for Mogki. Take it and save your game. Next, hop up the crates behind the barrels to claim an Ether at the top. Back on the ground beside the door is a wheel that you can kick for a Potion.
Head to the right and go into the left staircase; jump to the fake chest and cross the plank; take a right to get an Iron Helm. Jump back down and inspect the chest around the center of the room for a Leather Wrist. Head to the right and enter the next screen; after the cutscene check the chest in the upper right hand area for 95 Gil. There is a door above you; go in and defeat the monsters to collect a Phoenix Down, a Potion, and a Phoenix Pinion. You might want to return to Kumop and save before heading right for an event. Control will now shift to Steiner elsewhere.
Descend and check the area to the right of the stairs for 135 Gil, then proceed into the house and speak to Morrid for the next set of events.
BOSS BATTLE - BLACK WALTZ 2
1030 05 441 Steepled Hat, Leather Plate
As always, try to snag all of the Black Waltz's items first. Steiner should spam whatever Magic Sword skill you have available and Zidane attack once he's done stealing. Viv's magic won't do much damage as is; try to spend a couple of turns using Focus before you cast a spell, he is also weak to Fire. As for Dagger, the Black Waltz will not hurt her, so her health will not be an issue. Just have her focus on healing the others should the need arise
After the battle, go back to the village and rest at the Inn. Don't forget to save your game with Gumo before heading out to board the airship.
One last thing, if you explore the plains and/or forests outside Dali, you might come across a friendly monster, Brown Mu. He will ask for an Ore so give him one. In return for your kindness, he gives 10 and a Potion. There are several other friendly monsters throughout the game. Make sure to stock plenty of Ores just in case you encounter more of them.
Lindblum
 HPAPGILSTEAL
 HPAPGILSTEAL
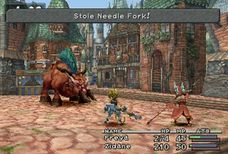
Cargo Ship
With control of Zidane, head up the ladder to the deck where you'll find Steiner lamenting the princess' fate. Talk to him and he'll keep you from ever going down again, head for the cockpit to trigger the next scene.
After a quite a bit of destruction and talking later, a boss fight ensues.
BOSS BATTLE - BLACK WALTZ 3
1128 N/A N/A Steepled Hat, Linen Cuirass, Silver Gloves
If you're not into stealing, this battle will be a piece of cake. Otherwise, you'll find yourself wasting a lot of items and even risking some game overs -- all while attempting to snag the enemy's third item, even with Bandit equipped. This trend will persist throughout the game so best of luck to you. As for the battle, Vivi starts this one in Trance state. Take advantage of this and have him cast Thunder twice and the other two attack. This version is weak to Thunder.
Lindblum
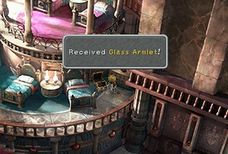
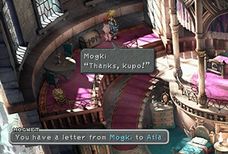
It's been a while since you last set foot on a big city. Follow Artania into the castle but not into the lift. Instead climb the stairs to your right. You can head left first and talk to Erin then go upstairs into the guest room. Collect a Glass Armlet from the treasure chest, then go deliver Gumo's letter to Mogki here. He also wants to have a letter delivered to Atla. The chest next to Mogki contains an Ether. Go back downstairs toward the lift.
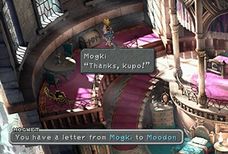
Watch the events and you'll eventually get to explore Lindblum. At the Inn, discuss Mognet with Moodon in the next room to read the letter from Ruby then save. Back downstairs, examine the lower left corner to find 163 Gil. Leave and head straight up to another section of the Business District; enter the house up ahead to snag an Echo Screen and a Hi-Potion. Leave and head left, check the tree near the church entrance for a Tent. Inside the church- climb the ladder behind the minister, and in the corner is a Leather Plate.
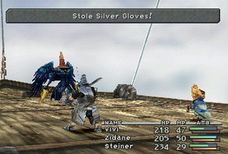
Return to the previous screen and go right this time. Here, you can check the shops, including the first ever synthesis shop in the game. On the table at the back-left side of the synth shop is a pair of Silver Gloves. When you're done shopping, proceed to the air cab station directly across form the Inn and fly to the Industrial District. At the top, head left then down to collect a Leather Wrist from underneath the cat. Next, barge into the house at the far end of the street, but don't forget to grab the Bronze Vest between the door to the pub and the guy standing against the wall. In the house, grab the Mimic Card and the Steepled Hat inside. Take the air cab the the Theater District afterward.
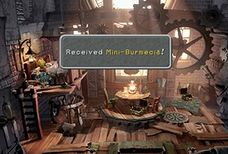
Enter Michael's studio just outside the air cab station where you can collect an Ore. By the door outside the studio is 127 Gil. Head downstairs and enter Tantalus hideout at the next screen, All the treasure chests in here contain a small amount of gil (447 Gil total); don't forget to pick up the Mini Burmecia on the top bunk as well. If you leave and go down the stairs you will run into a fan club that is stalking an actor named Lowell who will hide and come out again wearing a moogle costume. He ends up in Michael's studio where you just recieved an ore a moment ago. Speak with him to receive his Autograph and find his Moogle Suit in the drawer to the right. Once you have everything, take the air cab back to the castle and continue to the guest room. Talk to Steiner then save.
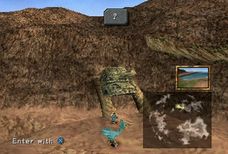
Now to find Dagger, leave the room and head toward the lift. The guard will not let you through, so run back to the hallway below the guest room and you should spot a sleeping guard on the couch to left. Speak to him to steal his clothes. You can use the lift now; ride it up then head to the top of the tower. Speak to Dagger there before using the telescope to pick out certain locations. Areas of interest will be marked with "!" so press X to check them out, there are 6 of them. A series of events follow once you've seen all the areas.
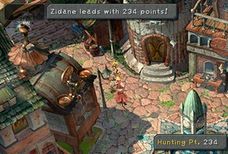
The Festival of the Hunt begins the next day. Save your game before heading out for the the Theater District. The goal here is to defeat as many monsters as you can and earn points within 12 minutes. If you kill all the smaller monsters in all 3 districts , head to the Square in the Business District to face the Zaghnol. Fight and defeat it with Freya's help.
BOSS BATTLE - ZAGHNOL
1500 N/A N/A Mythril Gloves, Needle Fork
With the proper weapon, it takes less than a minute to kill this beast, and whoever lands the finishing blow pretty much wins the tournament. If Zidane wins, you get 5000 Gil; if it's Freya, you get a Coral Ring; if its Vivi you get a Theater Ship Card. The card is usless if you don't play Tetra Master plus you can get that card later from a chocograph treasure. The Zaghnol also has some nice items so try stealing them. At the time Freya has the best reward so have her win, the Coral Ring teaches three different abilities that most of the characters can learn at least one of.
With the festival and the scenes over, head to the lift and ride it down to the Base Level then board the right trolley to Serpent's Gate. There's a chest to the right with a Wyerd Card. Then take the trolley to Dragon's Gate. The treasure chest here contains a Tent. The moogle may not be Atla but he did receive a letter from Stiltzkin so do ask him about Mognet before saving. You cannot return to Lindblum after you leave so make sure you have everything you need.
Gizamaluke's Grotto

 HPAPGILSTEAL
Qu's Marsh
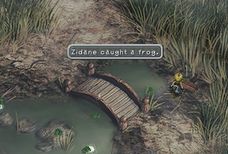
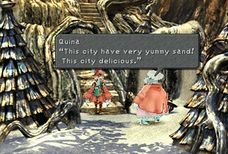
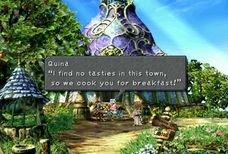
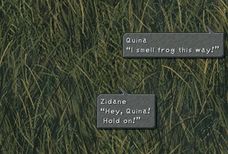
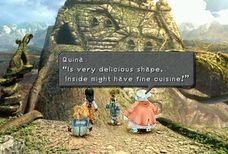
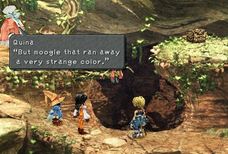
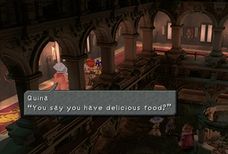
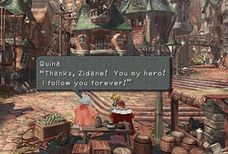
Upon leaving Lindblum, head north and you'll eventually reach a marshland somewhere between Lindblum and Gizamaluke's Grotto. There's an oddball character that you can recruit in here so go in. Head north all the way past Moggy and Mogster and through the tall grass. You'll emerge in an area where Quina is staring longingly at the frogs.
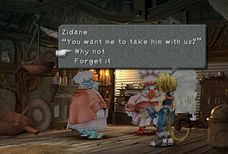
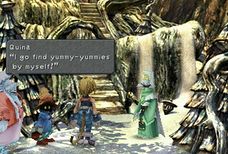
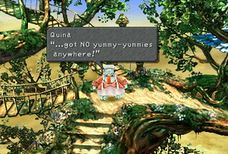
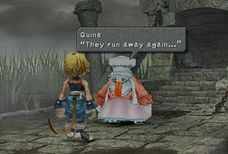
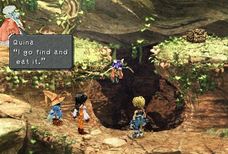
Go ahead and catch a frog and give it to Quina. When Quale asks you to take Quina along, say yes and Quina joins the party. From this point until about halfway through Disc 3, Quina will wander off in search of "yummy-yummies" and vanish from time to time. It is only after you help him in Lindblum during Disc 3 that s/he stays with the party permanently.
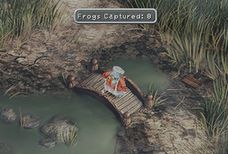
Quina has a the ability to consume enemies with the Eat command and learn enemy skills. You can also visit marshes to let Quina catch frogs as part of his training. Quale appears to give you a prize after successfully catching a certain number of frogs. Quina will tell you that a monster tastes bad if he already know the move s/he already know the move consuming the monster would teach. Quina will also tell you if s/he cannot eat the monster. That's all for this area, moving on.
Chocobo Forest
This is the first time you can get a chocobo. To find the chocobo forrest from Qu's Marsh, go east until you find a bridge, cross the bridge and it's right there. For more information visit the Optional Quest section.
Refilling Station
This area was seen in an ATE of the rest of Tatalus. It has a small place to drink water that refreshes you and to the right of that is where you find the Moccha Coffee if you are doing the sidequest for the mini-Prima Vista. Good place to go to save tents. It's located to the north of the Chocobo Forest.
Gizamaluke's Grotto
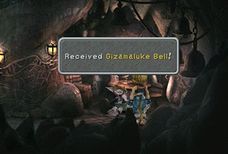
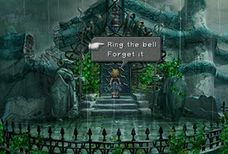
Speak to the wonded soldier on the ground for the first of several Gizamaluke's Bell. Ring it at the door to proceed. Inside, defeat the Black Mages to get another bell then head up the stairs at the center and check the west (left). The third bell is with the soldier just around the walkway there is also a Bronze Vest on that walkway.
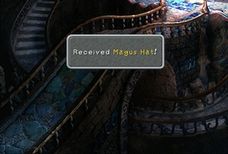
Use this one to open the door off to far right side of the room, proceed through. About halfway around the top of the staircase, an "!" will pop up on Zidane's head; be sure to examine that area to find a pair of Mythril Gloves. The path then takes you underneath the bridge where you can collect a Magus Hat.
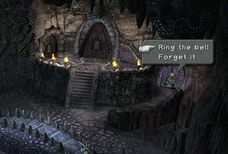
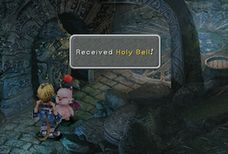
Walk up to the large bell for a scene with the newly-wed moogles. They will run off into one of the rooms afterward. Pick up one more Gizamaluke's Bell from the treasure chest and ring it at the right door. Save your game then try to leave; the male moogle gives you a Holy Bell for the other door outside, and don't ever use the vine to climb out of the grotto.
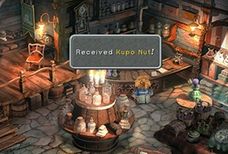
You may want to come back to this little room everytime you receive a Kupo Nut for delivering mails with Mognet. Give these treats to the male moogle and you'll receive some neat rewards once the quest is done.
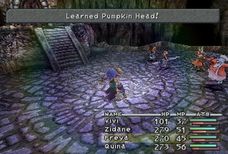
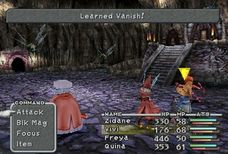
There are quite a few monsters in here that Quina can eat to learn some Blue Magic spells. The Lamia teaches LV3 Def-less; the Skeleton teaches Pumpkin Head; and the Hornet teaches Vanish. Ring the Holy Bell at the left door outside to open it and head in to face Gizamaluke.
BOSS BATTLE - GIZAMALUKE
3175 05 800 Elixir, Magus Hat, Ice Staff
For this battle, be sure to equip everyone (except Freya) with a Headgear and/or Glass Armlet, while Freya should put on the Bronze Helm. These should reduce Water damage by half, which is very useful as Gizamaluke is a water monster. Begin by stealing as usual then go on the offensive once you have everything. Freya should Jump every turn. As for Vivi, have him use Thunder and if the boss' Silence counterattack connects then just pop an Echo Screen and continue spamming Thunder. Quina cannot eat the monster so do not try, use s/he for healing.
Burmecia


 HPAPGILSTEAL
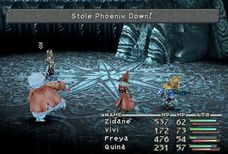
South Gate
When you arrive at the entrance to South Gate (Steiner is holding a huge bag), search the lower left corner for a chest containing a Multina Racket. Once Steiner successfully negotiates his way past the gate, talk to the woman by the alley then speak to the man next. The next person to chat with is the rhinoceros at gate to the left. Whether you kill him or not is up to you. After that, talk to man one more time. With the coast clear, head for the alley only to be stopped by a guard who gives a Gate Pass.
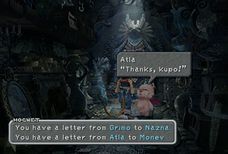
As Dagger, you can check out the item shop at the top right corner and save your game with Grimo. He also has a letter for Nazna. Make sure to equip both with their strongest weapons and armor. Finally, speak to the conductor standing in front of the cable car to get on board.
Burmecia
Back with Zidane, exit the Grotto and head for Burmecia to the north. But first, you might want head for the North Gate just nearby to witness an amusing scene as well as collect a Hi-Potion plus a Tent.
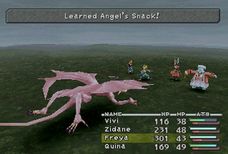
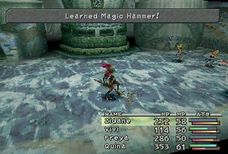
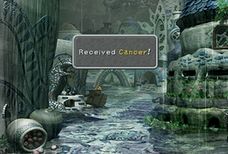
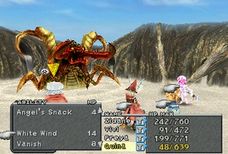
Once inside Burmecia, Quina can once again consume some monsters. S/he can learn Magic Hammer from the Magic Vice and Angel Snack from the Ironite, unfortunately Mimics cannot be eaten. Check behind the overturned cart at the first screen for the Cancer Stellazzio coin. You'll be doing a lot of running though because there are some monsters here that can hit your team for a lot of damage, as well as steal items and MP from you. If you find yourself dying frequently, go back outside and level up some more before returning in. Continue forward and after the cutscene you'll have to deal with two Black Mages again (Which you cannot eat); this time they should be no trouble for you. Head to the left and snag the Potion then right for a Soft. Exit and climb up the steps to the right side. If you head in the center room there is a cutscene with a couple who invite you to see them in Lindblum.
Once inside, check above where the base of the stairs is for another Soft. The chest upstairs is a Mimic, a creature that looks like a chest; when you approach it and check it, it will attack. You can use this opportunity to raise some more levels since the Mimic calls out smaller monsters to attack you with. Zidane should be able to beat each of the monsters that come out with one hit so just Defend until he calls a creature and kill it, or have Zidane Steal and Freya kill the monsters as the monsters have the same items the do when you run into them normally. When you get bored or start running low on Potions kill the mimic and continue to the left into the door. You will pass a sealed door and wind up in the area you saw when you entered the left door.
Walk (make sure to walk, not run) across first to get a Germinas Boots. Head back across and the platform will fall; go back to the left door and use the newly-found bridge to cross across the gap and check the chest if you want to fight another mimic. Head into the door by the mimic and head to the right; cross across. Go in and check around the left side behind the round dresser for an Ether. Talk to the Burmecian soldier on the right and proceed to check under the farthest bed for a Protection Bell. Now head back to the door you weren't able to open earlier and ring the bell there to open it.
Head straight into the house for a cutscene. Once you're back out head up the right staircase for a Phoenix Down and a Tent. The chest on the other side of the room is a Mimic. Go through the north door and into the door on the right side to save your game at the moogle. This is Atla so give him the letter from Mogki. He also asks for a letter to be delivered to Monev. You will also receive a Kupo Nut after handing him Mogki's letter.
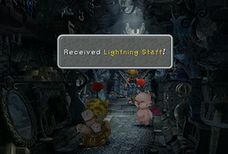
Head behind Atla to get a free Lightning Staff for Vivi; If you're not close to or around level 18 or so try to get there; plus the money you'll earn can go towards buying the items that Atla has. Make sure to purchase the item bundle from Stiltzkin as well. Make sure you check the room on the left to get a Mythril Spear for Freya. Make sure to equip the strongest weapons and armor available. Enter the middle door for a boss battle.
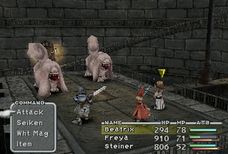
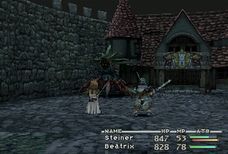
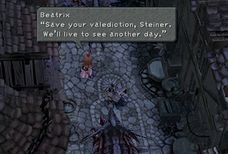
BOSS BATTLE - BEATRIX
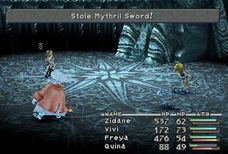
3,630 N/A N/A Phoenix Down, Chain Plate, Mythril Sword
This is the first of three unwinnable encounters you will have against this woman throughout the game, and since you're not really looking to fight, it would be wise to put everyone on back row. Start stealing with Zidane and try to snag all of her items (make sure the Bandit ability is equiped), while Vivi sticks Slow, have Freya cast Reis Wind during the first round and Quina use Mighty Gaurd and Vanish on Zidane (if available) then have them focus on healing while Zidane continues to try to steal. The goal here is to survive long enough until Beatrix gets bored with you and uses Stock Break to end the battle.
Disc 2 Walkthrough > Treno (1st Visit)
 HPAPGILSTEAL
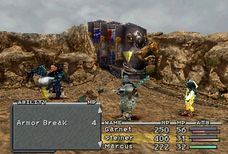


South Gate
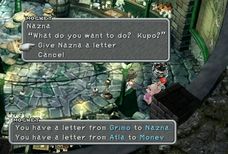
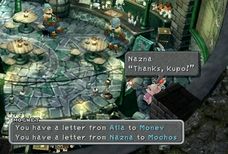
After exiting the train head to the right or left; stock up on new equipment by talking to the shopkeeper on the lower right hand corner of the rest stop. The moogle here is Nazna so give her the letter from Grimo; she also has a letter for Mochos. Snag a Phoenix Down from the chest.
Save your game and after you've done all your preparations head to the upper right. Garnet will see some familiar faces; head back in to the rest area. Don't forget to equip Steiner with the Mythril Sword that you stole from Beatrix. Talk to either Tantalus members then to Steiner. Outside, speak to Cinna then board the train. Defeat Black Waltz 3 again.
BOSS BATTLE - BLACK WALTZ 3
1292 05 864 Steepled Hat, Lightning Staff, Flame Staff
Zidane isn't here so Marcus will have to take over the stealing duty, and in case you plan to make Steiner your primary fighter, it would be a good idea to put Marcus on back row while you're trying to snag the monster's items, then just change the order once you have everything..Dagger should act as the healer obviously while Steiner focuses on offense, have her use Protect when necessary to mitigate damage.
Once you're off the train, there's an item shop off to the right where you can restock on supplies if needed then head for the exit. Take the steps down to a treasure chest containing 1610 Gil just past the bridge.
At the world map, make your way east towards Treno. Take this chance to gain a few levels as well since the monsters here are quite easy. Also there's a possibility that you'll meet a friendly White Ghost in this area; give him an Ore and you'll be rewarded with 10 and a Hi-Potion.
Treno
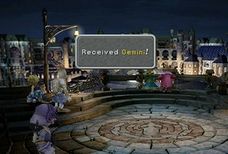
As Steiner, throw 10 gil into the fountain at the left side of the entrance 13 times to receive the Stellazzio coin, Gemini. The nobles here also have quite a few cards that you can win if you play Tetra Master. Head up the stairs to the right to reach the slums where you can climb down the ladder to collect a Yeti Card. The Taurus coin is behind the small house.
The inn is off to the left. Further north past the slums is the Knight House. Save your game with Mogrich and enter the building. You can buy new equipment here as well as ask the shopkeeper about the monster below. You can fight it with Steiner, but first you might want to visit Queen Stella and hand over your 4 Stellazzio coins for Steiner's Blood Sword.
Stella's mansion stands just beyond the Card Stadium, which in turn can be reached by going south along the lower path from the Knight House. Defeat the caged monster in the shop to receive a Tonberry Card.
Exit the area via the west staircase. Dagger is in the Auction House. It is recommended that you bid for the Fairy Earrings while you're here. If it's not up for auction, then just leave and go back in. The trick to winning items at a reasonable price is to let the nobles outbid each other, then join in at the very last minute, when the item is about to be sold. At this point, just add 100 gil to the last bid and the item will almost certainly be yours.
When you're ready, head back to the Inn and speak to Marcus. Doctor Tot's tower can be reached by heading left from the city entrance then proceed further left at the next screen. Collect the Mythril Dagger.
The door leading up to the tower is now unlocked so continue up. Also, before heading down the hatch to Gargan Roo, exit the tower completely to view the bonus missable ATE outside, titled Crime and Punishment.
Cleyra Part 1
 HPAPGILSTEAL
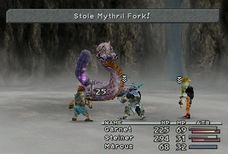

Gargan Roo
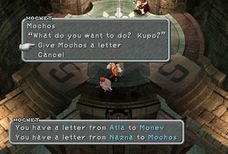
As soon as you enter this area, go speak to the moogle Mochos and give him the letter from Nazna. Head left after saving and collect a Phoenix Down and a Chain Plate from the pair of treasure chests. The monsters here give good experience and fall easily to Stener's Blood Sword, plus his will not be an issue as the weapon also absorbs from the target. Anyway, pull the lever then head back to the previous room and go right.
Pull the lever here so that the Gargant appears. Now, you might want to go back to Mochos and save before pulling the feed switch to Tot's left.
BOSS BATTLE - RALVURAHVA
2500 N/A N/A Bone Wrist, Mythril Fork
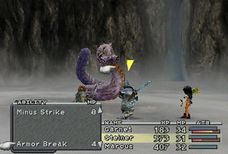
Equip both Steiner and Dagger with Antibody, and just use Panacea on Marcus when he gets poisoned. For the battle, Marcus should steal while Steiner sticks Armor Break on Ralvurahva. If Steiner has the Blood Sword, you can heal him fully with a single attack, This way, Dagger has one less person to worry about, and focus only on healing herself and Marcus.
Cleyra's Trunk
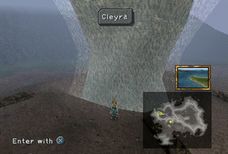
Back with Zidane, head northwest upon exiting Burmecia and you'll come across a massive twister on the desert. Go inside and climb all the way to the top of the trunk to reach the Settlement. Flip the lever to your right to open up the hatch and proceed. In this room, you can score a Phoenix Down to the right before pushing onward up to the next screen.
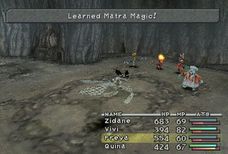
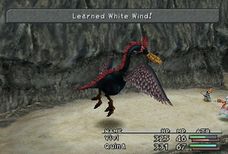
You might want to run around here a bit until Quina successfully eats a Dragonfly and learns Matra Magic. At the bottom of the area is a pair of Magican's Shoes and at the top is another hidden chest with an Ice Staff and head outside. Be sure to allow Quina to eat a Zuu (the big birds) in this area to learn the valuble White Wind spell. This is extremely useful since your current party does not have a healer and turns Quina into perhaps your best party member. Climb the hill and collect an Ether before sticking a hand into the hole to activate a switch that fills a certain section with sand. Back to the previous area and climb up the vine. Cross over to the west exit.
In here right next to you is a Needle Fork. Continue up the hill and collect a Tent from the treasure chest at the intersection. You'll also see a moogle nearby. This is Monev so go ahead and give him the letter from Atla. Save and proceed, taking a left at the next split for a Flame Staff. In case you run into Sand Golems, cast Blizzara on the red core to take them out in one hit. Further up the path is a cave with several exits. Make sure you explore this area thoroughly to score quite a few excellent freebies.
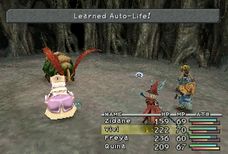
In the middle is a pair of Desert Boots, while off to the right is a Remedy plus a hidden passage leading around to a pair of Mythril Gloves. Operate the crank here as well before returning to the cave area. Just west of the hidden passage is a Mythril Vest. Also, do run around in this cave until Quina consumes a Carrion Worm and learns Auto-Life.
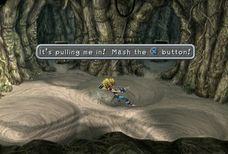
Take the far left exit to the next screen. Collect the Potion then take a right at the fork for an Elixir. Next up is a section with 3 whirlpools and at the top is a pair of treasure chests with a Hi-Potion and 900 Gil. Play around with these whirlpools so that you can navigate toward the loot, The exit is off to the left and to reach it, leap into the lower left whirlpool and mash X until Zidane gets off safely then continue on to the next screen.
Pick up some Gysahl Greens from a treasure chest behind the ladder and climb up. In this next room, run around once again to encounter a Zuu (if you missed it earlier) and have Quina eat it to learn White Wind, which restores a fair amount of to all allies; an incredibly useful spell that you must learn early.
The main issue with attempting to consume this monster is that it can swallow your characters, so if it's Quina that gets swallowed, then you're out of luck. You'll have to kill that Zuu and try again with another one. A simple Fira spell seems to be enough to weaken the Zuu enough to eat it which makes things quick; two turns.
Cleyra Settlement
Here, you can accept the offer for a tour or explore the settlement on your own. The guided tour takes a long time, so it's better to just check the place out by yourself. Just up the stairs the first steps at the entrance, you can pick up a Phoenix Pinion to the right. When you reach the intersection, head right and you'll be taken to the inn, where an Ore is waiting among the pretty flowers to the right. Dan will be here to sell some neat new equipment as well, so do take this opportunity to upgrade.
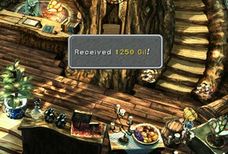
Enter the Inn and check the floor off to your right and snag 1250 Gil, and an Echo Screen at the left side in the back Head upstairs to buy Stiltzkin's item bundle, rest and save your game with Mopli. He also has a letter for you from Ruby, There's an Ether in the dresser here too. Back outside, look at the stairs to the riight for a Remedy, Head up then up again at the split. You'll be at the Cathedral, but go explore a bit more.
Pick up another Echo Screen then enter the Cathedral, checking the floor on the left for a Yellow Scarf. If you talk to the guards, one of them will pass a message from Freya telling you to wait at the Inn. Before doing that, go down one screen outside and you'll find someone selling items; restock if you need to then head left. In the next screen, examine the ground to the right of the water wheel for a pair of Thunder Gloves.
At this point, you're ready to head back to the inn, where someone informs you that the Antlion has attacked a kid. Go save your game with Mopli and follow the man, Take a right toward the Sand Pit to battle the Antlion.
Cleyra Part 2
HPAPGILSTEAL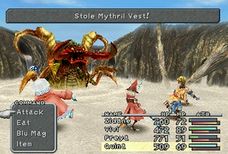
 HPAPGILSTEAL
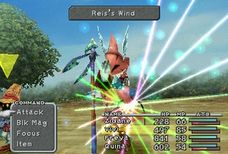
BOSS BATTLE - ANTLION
4000 05 1616 Annoyntment, Mythril Vest, Gold Helm
This creature's strongest attack is Sandstorm which takes your entire party's down to single digits plus it also inflicts Darkness. While Sandstorm in itself can't kill, any other attacks will so have Quina cast White Wind then Angel's Snack to cure Darkness. It only takes a few rounds of Blizzara to defeat the Antlion, but stealing the Gold Helm can make this encounter so infuriatingly difficult... leave it if you can't get it.
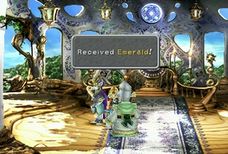
Watch the lengthy scenes and when you have control of Freya, go back to the Cathedral and speak to the priest for an Emerald. After that, head back to the Inn and save. Mopli has a new letter for you and Stiltzkin is now at the inn too, so make sure you buy what he's selling. Prepare as you see fit then head to the settlement's entrance when you're ready.
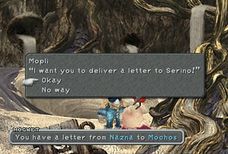
Make your way back down the trunk and defeat all Alexandrian soldiers you encounter. Puck eventually catches up to you and asks for help with the town. In the chaos, you should notice Mopli and Stiltzkin fleeing towards the Sandpit. Save your game and take Mopli's letter for Serino.
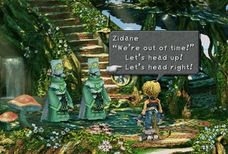
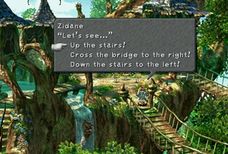
Apart from resisting the invaders, you'll also need to help survivors flee to safety. For the first pair, tell them to head right; for Dan's family, tell them to go left first then to cross the bridge to the right, The more survivors you save, the more freebies you receive later. At the Cathedral, speak to everyone to receive free items and cards. Prepare and head outside.
Equip your party with anything that works to lessen lightning damage then put everyone on back row. Use a Tent if you like then save your game.
BOSS BATTLE - BEATRIX
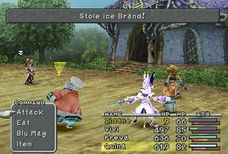
N/A N/A N/A Phoenix Down, Thunder Gloves, Ice Brand
This battle is identical to the one you had when you first encountered her in Burmecia. Have Vivi stick Slow as usual and start stealing. Freya's Reis's Wind helps somewhat in keeping your s up. Revive whoever falls vicitim to Shock and survive until Beatrix ends the battle with Stock Break.
Alexandria Castle (2nd Visit)
 HPAPGILSTEALHPAPGILSTEAL
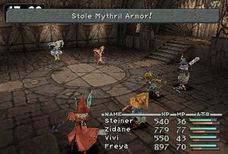
 HPAPGILSTEAL
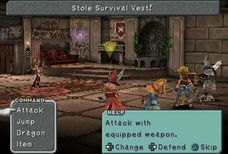
 HPAPGILSTEAL
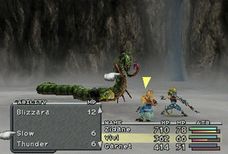
Red Rose
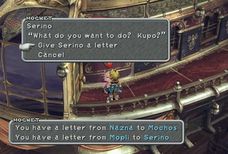
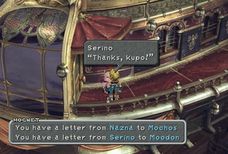
With the party (minus Quina) on the Red Rose, go upstairs and then left to the end of the walkway for a scene. After that, head back down then up again to chase the moogle. This is Serino; give her the letter from Mopli.
She also has one to be delivered to Moodon so don't forget to take it. Follow Vivi back to the pods and use these to teleport to Alexandria.
Alexandria Castle
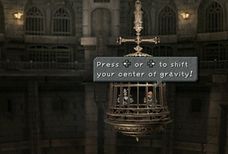
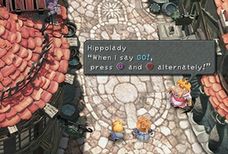
You'll need to get out of the cage first, and to do that you need to shift your center of gravity left and right alternately by pressing the corresponding buttons on the D-Pad. Just hit a button once you start swinging in that direction. The cage will smash through the right wall.
Climb up the ladder to the far left to proceed, but do take this opportunity to gain some levels by defeating the soldiers that come after you. Steiner is practically immortal with the Blood Sword equipped, and with help from the Level Up ability, you can rack up experience quite easily. If Marcus dies, just leave him as you won't ever have to use him again after this. Steiner reunites with Zidane and co. at the top and you get a time limit.
Head through the doors to reach the main hall. At this point, you can go left to the library and face the tough optional boss Tantarian, but the battle will be far easier on Disc 3 when you have a stronger party. That said, head straight to Brahne's chamber, where you can examine the purple light to reveal a hidden passage and go down to the basement level. Move along until you get to a rotating platform to use and reach the Ice Brand and Tent. Enter the double doors further down for a boss battle.
BOSS BATTLE - ZORN & THORN
4000 N/A N/A Partisan, Stardust Rod 3000 N/A N/A Mythril Armor, Mythril Armlet
You cannot kill these two so just damage them enough and they'll go away. For stolen items, the Mythril Armlet and Mythril Armor is from Thorn, while the Partisan and Stardust Rod is from Zorn. They can share powers with each other and will cast a somewhat potent spell soon after. Meteorite in particular can be deadly if you leave your s unchecked. To keep the spells from bein cast, hit them with strong attacks to knock them over.
With that done, approach the altar for a scene then save your game with Mosh. Head back up to Brahne's chamber for a scene and then....
BOSS BATTLE - BEATRIX
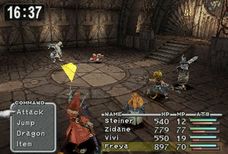
N/A N/A N/A Phoenix Down, Ice Brand, Survival Vest
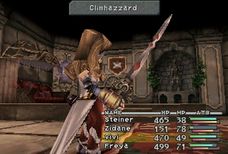
This is the last time you'll face Beatrix as an enemy, and she gets a new finisher too. Anyway, you should know the drill by now. Back row everyone; have Vivi stick Slow then Steal. Survive until she defeats you again.
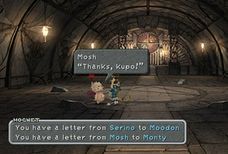
Beatrix and Freya are left to fight the Bandersnatches while the rest of the party escapes. Defeat the monsters and control shifts back to Zidane. Before heading for the exit at the bottom, return to the Chapel and speak to Mosh, who now has a letter for Monty. Take it; save before leaving.
During this time, control will shift between parties a few times. With Beatrix, defeat the Bandersnatches, and with Zidane, continue downward to find a way out of Alexandria. A boss battle ensues after a brief gargant ride.
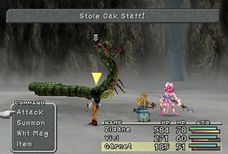
BOSS BATTLE - RALVUIMAGO
3500 07 1404 Phoenix Down, Adaman Vest, Oak Staff
There's a trick to this battles that lets you win it without taking any damage. Start by having Vivi cast Fira and Zidane attack. The snake assumes a defensive stance when hit with a physical attack. It stays like this for a while before uncoiling; take this chance to steal whatever you can. Once uncoiled, repeat the Fira-Attack pattern to coil it up again.
Pinnacle Rocks


Pinnacle Rocks
For starters, speak to Monty and give him the letter from Mosh before heading off to try and locate all 5 of Ramuh's apparitions. Head to the bottom of the hill for a Mythril Vest, and off to the back, check the right corner where Ramuh tells you the Human part of the story. Go left.
Snag The Ogre from the chest. Ramuh also appears for the Cooperation piece. Circle around the incline next to hear Silence
Back to the previous area, head up, down at the intersection, then take a right Ramuh is here with the Beginning piece. Return one more time and cross the bridge, leaping to a ledge and claiming a Mythril Armlet.
Now, go all the way back to where the gargant trolley is to find the final spirit with the last part of the story, Hero. Make one last trip across the bridge and down the slope. Tell the story in this order: Beginning, Cooperation, Silence, Human/Hero. The choice for last part matters not.
Upon reaching the exit, you can choose to jump off or stay. Choose the latter and head back to Monty to read a tattered letter from Stiltzkin.
Lindblum
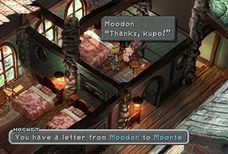
With the majority of Lindblum ruined, the areas you can access in the city is very limited. Head to the inn first and give Serino's letter to Moodon, who in turn has a letter for Moonte. Save your game and head north.
Here, examine the pile of rubble at the top center for a Lindblum Card. Enter the nearby house to secure an Ether and a Phoenix Pinion. Continue northeast to the Square where Artania takes you to Cid.
He gives you 3000 Gil after a brief dialog and you'll be given a chance to prepare before leaving Lindblum. Buy new equipment from the weapon and synth shops plus restock on items; talk to the man outside to proceed.
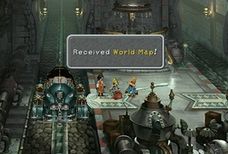
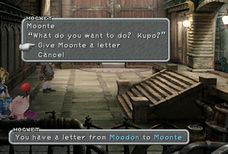
In the castle, ride the lift down to Base Level. You'll receive the World Map from Cid. Moonte is at the Serpent's Gate; give him Moodon's letter before you leave. There is a Bandana in the chest between the stairs and the exit. A guy here also sells items; buy from him if you want.
Fossil Roo
 HPAPGILSTEAL


Qu's Marsh
If you didn't get the Moccha Coffee before, stop by South Gate which should be near the Chocobo Forest. There, check the plants to the right to get it. Otherwise, head to Qu's Marsh.
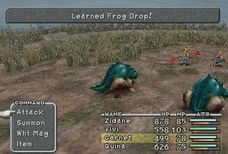
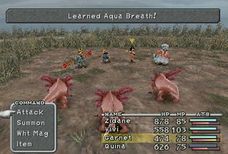
Head for the pond to meet Quina again and s/he rejoins the party. Make sure Quina eats both Gigan Toad and Axolotl if s/he hasn't already done so, as these monsters teach Frog Drop and Aqua Breath respectively. Leave and come back to the pond area if you want to start the frog catching minigame. Frog catching increases how powerful s/he's Frog Drop attack. You can also get items from Quale depending on how many frogs you catch. Once you catch two, or five, Quale will give you an Ore and an Ether, respectively.
To find the entrance to Fossil Roo, head east from the pair of moogles until you see a passage through the tall grass. Quina will chase some frogs, inadvertently leading you to the excavation site entrance. It's recommended that you head back to the overworld and save, before heading into Fossil Roo.
Fossil Roo
Proceed a couple of screens in and you'll be chased by a monster. The trick is to run along the edges of the path; it's easier to get past the swinging traps this way. If it catches up to you, you will have to defeat it.
Though the monster only has a little over 800 , fighting it is not really worth it, considering there is a real boss battle as soon as you escape.
BOSS BATTLE - LANI
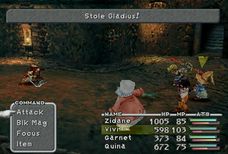
6000 N/A N/A Ether, Gladius, Coral Sword
Lani will almost exclusively only attack Dagger in this battle, so be sure put her in back row and equip armor that provides good defense. Lani responds with counterattacks to any physical attacks; hit her with characters who have a fair amount of health to spare. She also uses Water magic on everyone, therefore equipping armor that provides some sort of resistance to water helps. Heal with Cure and White Wind.
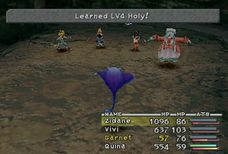
Return to the very beginning of this dungeon and through the now open cell for an Elixir. Abominations are very common on the way back. Have Quina consume one to learn Night. Back where you fought Lani, pick one yellow flower, stand on the spot where an "!" appears and press X to feed gargant and get on it. Feather Circles start spawning in this area, have Quina eat one to learn Level 4 Holy.
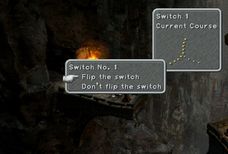
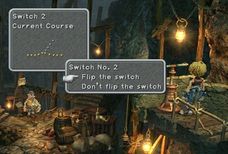
Speak to the treasure hunter to have him give some directions. Save and buy Stitlzkin's items; head southeast first past the moogles to the next screen where you can hitch a ride on a gargant. When dropped off, head outside for a Fairy Earrings. Head back to the main cavern and go north this time. Hitch a ride on the gargant and flip Switch No.1 in the next room.
With the gargant's course changed, it will drop you off somewhere else. Take the top path to reach an Ether outside before following the longer path around to Switch No. 2. Flip it and go back to call the gargant, and ride it back to where Switch No. 1 is and flip that one again. This time, you'll be taken back to the main cavern where you should go southeast.
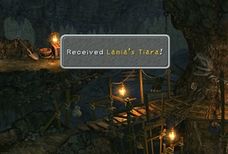
Talk to the treasure hunter here, and buy weapons or armor if needed. Head up the stairs to reach Switch No. 4, flip it and head right to ride the nearest gargant. It will take you to an area leading out to a ledge above the Mining Site. The chest here contains a Lamia's Tiara. Return to Switch No, 4 and flip it.
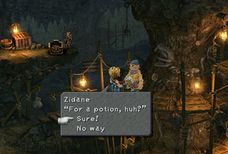
Riding the closest gargant will take you to a new area. If you didn't before, run around here and consume a Feather Circle so that Quina learns LV4 Holy. Navigate to the right exit to reach the Mining Site. There, speak to the treasure hunter and give him a Potion, Dig at the rocks on the top-right side of the cave until a moogle, Kuppo spills out. He also has a letter for Kupo.
You can also dig at different spots on the column for items like Ores and Hi-Potions, or even a Madain's Ring if you're lucky, In the room to the right, there is a Survival Vest along the far left side. Go back outside and navigate along the vines to reach Switch No. 3 at the northwest corner.
Flip this and leave via the bottom path. Ride a gargant one last time at the next screen. It will take you to an exit leading to the Outer Continent.
Black Mage Village


Conde Petie
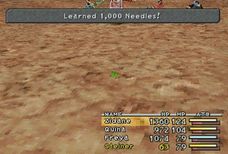
Welcome to a whole new continent, and your next stop is Conde Petie, a small settlement sitting atop a bridge to the west. But first, you may want to run around the desert areas near Fossil Roo. Cactuars are quite common in these parts for Quina to consume and learn 1000 Needles.Equip everyone with Clear-Headed and attack the Cactuar only when it is fully exposed. Otherwise it will counter with 1000 Needles; deadly at this point.
Additionally, there is a Qu's Marsh sitting a bit to the east. You can go over there to catch frogs if you like, and when you do, spare at least a pair of adult frogs (a male and a female). This makes the frogs respawn faster.
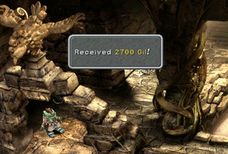
Once in Conde Petie, examine the corner next to the dwarf by the entrance to find 2700 Gil, then head right twice to get to the shop. Mogmatt has a letter to be delivered to Suzuna; don't forget to take it.
At the bottom of the stairs here is a Phoenix Pinion. Continue upstairs from the shop and speak to Vivi; view the ATE after he leaves and return to the shop for a scene. A dwarf tells you about the southeast forest. Head there next. Before leaving stop by the Inn, two screens to the left, and check the bed in the bottom left to get 1800 gil.
Black Mage Village
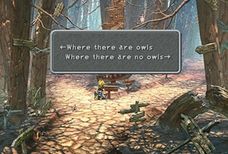
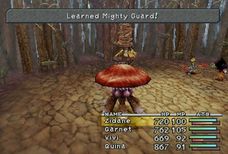
To get to the Southeast Forest, head straight from Conde Petie, and when you get to a ramp, take a right. Follow the forest to a round dome and enter. To enter the village, you must repeatedly walk along the path with no owls. The sign post will point you to the right direction so check it as you go. If you haven't already, have Quina consume a Myconid here to learn Mighty Guard. If you don't have White Wind, Quina can eat a Zemzelett and learn it.
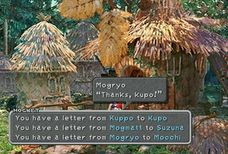
In the village once the party splits, make sure the first ATE you watch is titled "Everyday Life". Check just outside the house to the left for an Elixir before heading left into the weapon shop. You should already have most of the stuff here, including the Gladius if you managed to snag one from Lani. Leave and proceed to the house off to the right. Mogryo has a letter for Mocchi. Take it and go inside. Snag some Gysahl Greens off the floor in the stabes, and watch the rest of the ATEs.
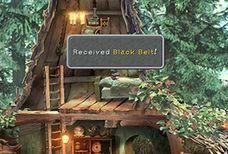
Back to the first screen, head up the stairs in the middle and go right. Enter the Inn just across the bridge, and you'll find the Virgo Stellazzio coin by the ladder near the bed. The house to left of the Inn is the item shop where you can find a free Ether on the shelf. If you watched the "Everyday Life" ATE first thing upon coming into the village, you will be given the option to buy "the usual" from this shopkeeper. He then moves from behind the counter to look for something opening the path to the ladder behind him. Go up the ladder and open the upside-down chest for the Black Belt. It has +20% HP for Zidane and Demi for Vivi so make sure you get it. Leave and head left into synthesis shop to snag 2000 Gil from a hidden chest in the back.
Look through their goods and see if there's anything you need. The ladder here leads to the roof where a chest with 843 Gil is waiting. Leave and head left to the cemetery for a scene. Return to the Inn and sleep.
Also, there is a possibility that you may encounter a friendly Ladybug monster within the forest outside Black Mage Village. Give it 2 Ores and you'll be rewarded with 20 AP and an Ether. The Ragtimer also appears in this area occasionally to conduct pop quizzes. The reward for this is gil.
Conde Petie
 HPAPGILSTEAL
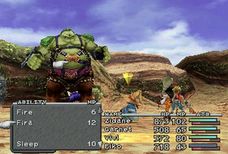
Conde Petie
Go upstairs and speak to the dwarf at the northeast corner. They will tell you to go talk to the priest. Exit northwest to a corridor downstairs and you'll find the said holy man. The following scenes are highly amusing.
When Vivi and Quina asks about how they will get past the guards, either options will work, but telling them to get married is way more satisfying.
Return to the Kirkboat and take Diamond(cannot be got after going to Terra). You can get there from the left side, where couple standing.
Mountain Path
After the scene, Eiko joins the party and Quina runs off. You won't get to use the Qu for a while so remove any important gear s/he may have. Climb up the hill to the left and up the vine. Take the Blue Stone out of the statue then turn back to the left for a Remedy and climb down.
To your right is a Tent. Examine the statue here and remove the Red Stone as well. Make your way back to the lower section and head east then north. Buy Stiltzkin's combo pack. Give Mogmatt's letter to Suzuna.
Save your game, head left and climb the ladder to the next area for a quick scene, followed by a somewhat brutal boss battle against Hilgigars.
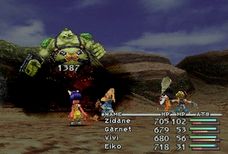
BOSS BATTLE - HILGIGARS
8000 09 2136 Phoenix Down, Mythril Fork, Fairy Flute
This monster may look intimidating but it's really not that difficult. You can try to steal the Fairy Flute, but you'll have an opportunity to buy one soon. Hilgigars' attacks consist of punches, butt slams, and Earthquake. The first two are moderately powerful but inaccurate, and the last one can be avoided completely by having Garnet cast Float, or you can reduce the damage to half by equipping your party with Desert Boots. Have Vivi stick Slow then cast Fira spells while Zidane attacks, and the females provide support.
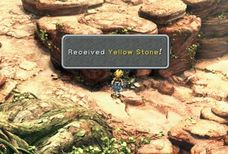
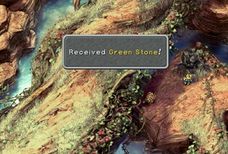
Collect a Yellow Stone from the nearby statue after the battle and continue right. Take another right at the intersection to find an Ether, plus a Green Stone from the statue. Now that you have all 4 stones, return to where the moogle pair are at and follow the bottom-right path next to them to reach a bigger statue to put the 4 stones in. You will be rewarded with a Moonstone for your troubles. Back to the boss area.
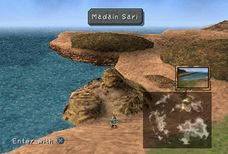
Once there, head right then left and follow the path out to the world map. Madain Sari should be located just across from the Mountain Path.
Madain Sari


 HPAPGILSTEAL
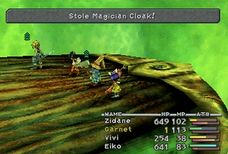
Madain Sari
Begin by looking into the fountain here for the Libra Stellazzio, and pick up a Tent from a treasure chest by the spot that Dagger just vacated.
Head straight up, speak to the moogle then return. The ATE here involves Eiko assigning tasks to the moogles. Just pick whoever for whatever as the choices don't seem to have any effect on how the dinner goes later.
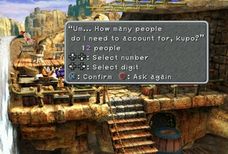
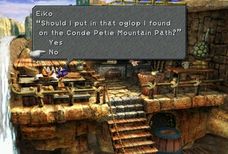
When you can move again, proceed south and talk to Vivi before trying to enter Eiko's house. Your next stop is the Eidolon Wall so go up one screen to trigger another ATE. For the water, keep in mind that there 6 moogles and 5 party members (including Quina), which makes 11, though a higher number also works. As for the oglop, do not include it in the stew.
When the fishing moogle asks for help, go ahead and assist to fish Quina out of the water. At this point, you can ask him for advice. If you do, s/he checks the pot but won't help if you didn't account for his share, declaring "I no help when I no eat!" and waddle away. The dinner's success rests on Quina's expertise so make sure you pour water for 11 or more guests.
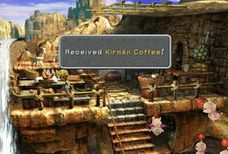
With Zidane, head to the village entrance and speak to Dagger then proceed to the Eidolon Wall then go to Eiko's house again. Loot the house after dinner for a Phoenix Pinion and Ore. Take the pot to the kitchen, speak with Eiko twice and grab the Kirman Coffee off the floor. Try to leave and Momatose will ask you to rest. Leave for the Iifa Tree the next day.
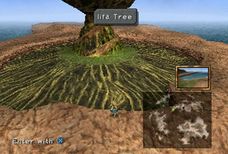
Iifa Tree
To reach this place, return to the Mountain Path and follow the fork west. You'll soon exit back to the world map at the othe side of the mountain.
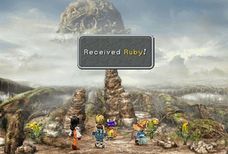
Keep in mind that majority of the enemies in this tree are undead so curative spells can be used to kill them. For Zidane, equip Undead Killer plus Jelly on everyone; continue inside. You'll reviece Ruby. Keep going and you'll soon meet up with Mocchi; give him Mogryo's letter. Stand on the lift to go down.
Make your way further downward. A monster called Dracozombie is a common enemy here. Use a Phoenix Down on it to finish it off quick. If your characters get inflicted with Zombie, they will not receive any experience or at the end of a battle. Remove this ailment with a Magic Tag.
At the three-way fork, follow the second path right to a switch and activate it and claim a Phoenix Down from the chest that drops. Go down at the next intersection for a Hi-Potion. Move along to the next screen where you can operate another switch at the second corner, and to the right is a hole with an Ether inside. Next, circle around to the edge of the bottom left path to get a Lamia's Flute plus a Remedy from the nearby chest.
Take the lift down to the bottom of the green pit. You'll fight some monsters along the way. At the bottom, collect an Elixir from the chest off to the right of the platform. Around the corner behind Eiko and Vivi is a chest hidden behind the 'machine like tree' containing Brigandine. Consider equiping it to Zidane, It raises str. Talk to Eiko and watch the water with her for a humorous exchange. Head left now and press X at the "!" to trigger a scene. Run back up to where Dagger is, and you'll eventually battle a talking tree.
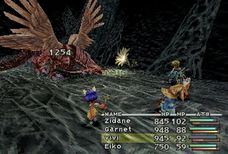
BOSS BATTLE - SOULCAGE
10000 09 3800 Oak Staff, Magician Cloak, Brigandine
The tree uses Mustard Bomb which inflicts Heat, protect your party with Body Temp. Once again, you are facing an undead enemy, so Undead Killer is a plus. All cure and Life spells deal damage as well. Have Vivi stick Slow while Zidane steals what he can. This boss is also weak to fire but it triggers Soulcage's Fire Blades attack which by the way is very strong, so It would be best to avoid casting fire spells of any kind in this encounter.
Iifa Tree
 HPAPGILSTEAL

Madain Sari
Leave the Iifa Tree and go through the Mountain Path again to reach Madain Sari, where you must head to the kitchen in Eiko's house. There, you'll see moogles gathered outside a room by the dock below. Go in there for a scene then snag the Survival Vest and Phoenix Down.
Proceed to the Eidolon Wall and ask the moogle to heal you before peeking inside. A moogle will also give you an Exploda and an Elixir.
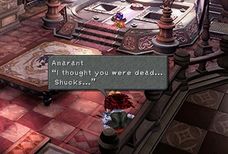
BOSS BATTLE - SCARLET HAIR
10000 09 4790 Ether, Poison Knuckles
Yes it's Amarant but the game's description says Scarlet Hair at the moment so let's go with that. Anway, the only time you'll be able to hit Amarant is when he is at the center of the screen. Wait for him to say "Here I go." then attack. Also, all of Scarlet Hair's weapons are very expensive; try to snag the Poison Knuckles before you defeat him. Use Elixirs to heal when needed; you should have plenty of those by now.
Return the secret room at Eiko's house and talk to her. It doesn't matter what you say to her, so you should remove any items you want to keep After talking. to her, you receive a key item, Memory Earring. You can also rest by talking to Momatose at the dining room. Once you're ready, leave the house and press X at the "!"
Leave for Iifa Tree again the next day. Amarant also joins the party.
Iifa Tree
Go through the tree like you did the first time and watch the events. Kuja eventually sends out Mist monsters for you to fight. Kill them and keep moving. After the second encounter, save your game with Mocchi who is barely visible behind a tree. He also has a letter from Stiltzkin.
You will receive an Aquamarine after a scene just a bit further along.
Return here as soon as you are able with Quina in tow so s/he can eat a Stroper and Zombie to learn LV5 Death and Roulette respectively. Watch the closing events for Disc 2. Save when the prompt appears.
Disc 3 Walkthrough > Alexandria (2nd Visit)

Alexandria
The first thing to do is visit the equipment shops. Head left from where you are to reach the courtyard that has the weapons shop. Their inventory has advanced a great deal so hopefully you have gil to burn, which you should unless you somehow fled from every random encouter up until this point....
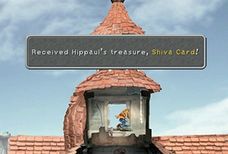
Once satisfied, head over to the bell tower and give Kuppo's letter to his brother Kupo, Buy Stiltzkin's items for 777 Gil, and then climb the tower and pull the rope to snag Hippaul's treasure of 3 common monster cards plus the Ramuh and Shiva Cards. Proceed back to the city square and check the wagon on the left at the top of the screen, for a Phoenix Pinion, and then head up to the moat. You won't be able to cross it until a bit later, but do check the ground near the guard on the right to score 3927 Gil and the guard on the left to get a Phoenix Pinion.
Back where you took control of Vivi, head to the right and down another screen to enter another courtyard. Check the outside walls of this courtyard for three cards.
If you're interested, there is an arthritis-inducing mini-game you can try at the main street. Here, you can race with Hippaul to get him back into shape. You'll get a rare card for every 10 levels that Hippaul gains, which by the way can only be done when you win the race. Try an angle where you can press the necessary buttons easily and quickly. The prizes are:
Level 10: Wyerd Card; Level 20: Carrion Worm Card; Level 30: Tantarian Card; Level 40: Armstrong Card; Level 50: Ribbon Card; Level 60: Nova Dragon Card; Level 70: Genji Card; Level 80: Athlete Queen. Quite a great list if you're into collecting Tetra Master cards.
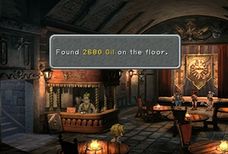
When you're done exploring, head to the alley, talk to Blank and agree to see the play. Watch the scene; Doctor Tot will hand over a bunch of stones including an Opal, a Topaz, and an Amethyst. As Eiko, leave the Guardhouse and proceed to the upstairs corridor for the next sequence of events before control shifts back to Zidane. Stop by Ruby's theater to snag 2680 Gil off the floor near the table at the bottom.
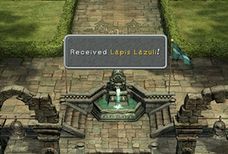
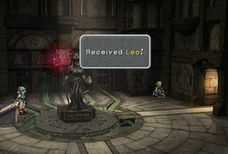
Take the boat to the castle and check behind the fountain for a Lapis Lazuli. Head to the west tower next, where you'll find a Phoenix Pinion next to the metal gate. Enter the door to your left, examine the wall at the upper right corner for the Stellazzio coin, Leo. Head for the castle's main entrance, watch the events there. The party leaves for Treno soon after.
Treno
Village of Dali
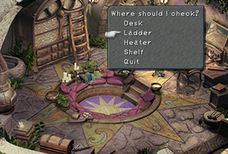
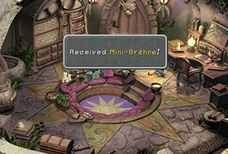
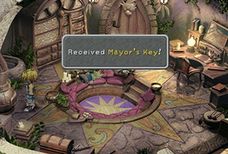
This is the only time in the game that the mayor is not home, so leave Treno for now, head through South Gate and back into Dali. Go to the mayor's house and you'll see his son asleep on the couch. The goal here is to grab the Mayor's Key from the heater. Examine the desk first.
You'll find a Mini-Brahne there. The thing is, moving around too hastily wakes the man on the couch, and to get around this, just examine whichever object you're at 3 times until the son falls back to sleep (zzz...) before heading over to the next furniture. Use the key to unlock the door to the mayor's backyard. The treasure chest off to the right behind the chocobo contains 30000 Gil and under it is the Burman Coffee.
The windmill has also stopped so you can now head up there and grab the Cachusa and Elixir that were inaccessible during your first visit.
Now that you have all 3 coffee types, go visit Mr. Morrid at the observatory just outside Dali, and give him the beans. You can head back to Treno.
Treno
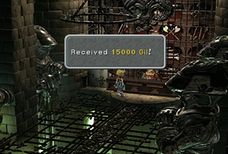
Begin by paying Stella a visit to hand over the Stellazzios you collected. The Knight House also has a new monster waiting for an opponent; you can head over there and fight it if you want. The prize is 15000 Gil.
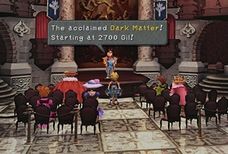
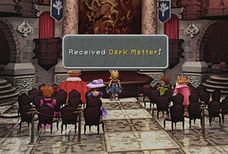
The shop also has upgrades available, including a Coral Sword for Steiner. Buy it if you failed to steal one from Lani earlier. Next up is the Auction House where the Dark Matter can be won. Again, join the bidding war only when the item is about to be sold; add 100 gil to the last bid to make it yours at the most reasonable price possible. You may also try to bid for the Une's Mirror, Doga's Artifact, Rat Tail, and Griffin's Heart.
Take the time to view all the ATEs, some of which are fairly important and one gives you a free Chimera Armlet. Quina has somehow made it to Treno without explanation, but apart from some really entertaining ATEs, you won't get him back into the party until you get back to Lindblum.
This is the only time in the game that you'll be forced to play Tetra Master so head to the Card Stadium and talk to the man behind the counter to register then go inside. Win all three games to receive a Rebirth Ring.
Alexandria Castle (3rd Visit)
 HPAPGILSTEAL
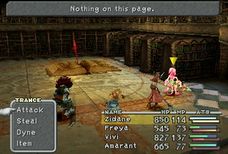

Alexandria Castle
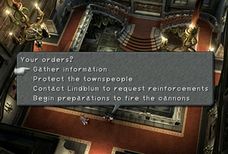
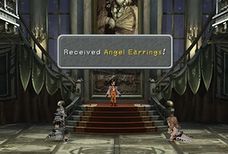
As Garnet, you'll have to assign the correct task to the correct pair. Give the orders as follows: Have Blutzen & Kohel gather information; Weimar & Haagen should protect the townspeople; Breireicht & Laudo should contact Lindblum; and cannon duty falls on Dojebon & Mullenkedheim.
Do all this correctly and you'll receive some Angel Earrings, a rare accessory that teaches Auto Regen to female party members. Control now shifts to Steiner and Beatrix where you must rid the town of Kuja's mist monsters. You haven't used Steiner for quite a while so be sure to set up his equipment properly. Consider taking the Cross Helm (and everything else) from Beatrix and replacing it with some of your old equipment.
Back with Garnet, go through the only areas you can access, and you'll eventually reach a section of the castle that you've never seen before. Head up the stairs all the way to the top to trigger a long sequence of events, followed by another party change back to Zidane's group.
With your main party, head for the Guardhouse to save before returning to where you started and go left to the Library. There, stand next to shelf with a book on top of it. Listen to the voice then challenge the book.
BOSS BATTLE - TANTARIAN
20000 30 4472 Ether, Elixir, Silver Fork, Demon's Mail
Equip everyone with Antibody along with Devil Killer for whoever has it. The goal here is to deal a total of 150-200 damage on the book to reveal the seemingly harmless-looking monster among the pages. Once found, stick to magic attacks, as hitting it physically will cause the book to close. At this point, Tantarian will only attack with Poison. Zidane's Thievery and Amarant's Spare change should easily achieve the damage required to locate Tantarian so use those whenever the book shuts. The boss uses Paper Storm when closed, so you'll want to open it up again immediately.
After the battle, go the same way Garnet had gone previously. The scenes continue when you reach the top and you'll soon end up in Lindblum.
Lindblum (3rd Visit)
Lindblum (3rd Visit)
Open the pair of treasure chests for an Elixir and an Egoist Armlet. Mogki also has a few letters with him; one you can read and another for Moodon. You can't go explore the town until you check in with Cid in the throne room after reuniting with the party in the conference room. To get to the throne room, head down, and then left, and then down again. Take the lift to the upper level. After seeing Cid, go to the guest room to check on Garnet then back to Cid.
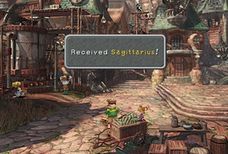
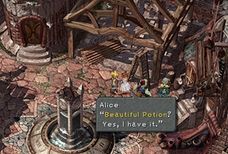
Next, you'll be asked to collect 3 types of potions in hopes of turning Cid back into a human. Stop by the Inn first to deliver Mogki's letter then head north to the next screen. Off to left against the wall is the Sagittarius coin. In the house above are two chests with an Elixir and Remedy. Onward to the Square, ask Alice (the woman in white at the top-right side of the area) about the potion, to get the Beautiful Potion from her. Take the air cab to the Theater District next.
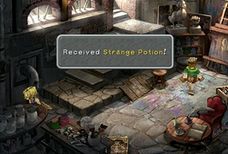
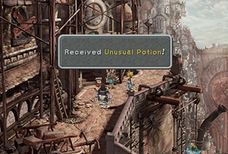
You'll meet Kal and Wei (the couple from Burmecia) again. With the introductions over, enter the studio directly across from the station and talk to the painter. The Strange Potion is at the bottom-left corner of the room as well as a Lapis Lazuli at the opposite side. For the Unusal Potion, speak to Cinna outside the Tantalus Hideout. The treasure chests in the Hideout have also respawned; loot all three of them for extra gil.
At this point, you can return to the castle and try the quack mixture on Cid, which fails as expected. Before heading down to the Harbor, head over to the Business District and save Quina from Grandma Pickle's wrath, S/he will be so grateful for your help and stays with the party permanently.
Go back to the castle and take the lift down to Base Level and ride the trolley to Serpent's Gate, where you must head south to reach the Harbor and board the Blue Narciss. Don't forget to pick up the Chimera Armlet from the chest at the landing point for Serpent's Gate.
Now that you have a ship, you can accomplish a few other things before heading to the Black Mage Village such as returning to the Iifa Tree so that Quina can eat a Stroper and Zombie, or continue hunting for Chocograph treasures. Plus you can also visit Alexandria by docking at the Harbor east of the Mist Continent and explore the ruined city for a few extra freebies.
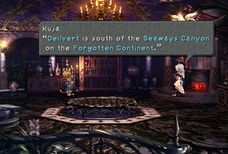
Oelvert

 HPAPGILSTEAL
Black Mage Village
What you must do here is talk to the Black Mage at the cemetery, Also with the village pretty much empty, you can now access the ladder at the back of the item shop and step on the bed above to get a Black Belt, If you didn't get it already.
Anyway, follow Vivi to the chocobo stables after speaking to No. 288 at the cemetery. Board the Blue Narciss and sail southeast, docking on the beach there then trekking to the desert with four quicksand pools on it.
Desert Palace
Picking the wrong entrance pits you against Antlions which can still prove nasty at times so look for a pool without any sand puffing out of it. This is the one furthest north. Save your game with Moguo first and go inside.
You don't really have a choice at this point so just go wherever Kuja tells you to go. Your next destination has an anti-magic field in place so magic of any kind will be unusable. However, it would be wise to leave a melee fighter or two (preferably Freya and Amarant) in the palace; they will prove their worth later. Make sure Quina goes with Zidane so s/he can consume an Adamantoise on the way to Oielvert and learn Earth Shake. There are also enemies called Armstrongs that are quite nasty so watch out.
When the airship lands on the Forgotten Continent, you need to trek southeast to reach Oeilvert; its location is already marked on the map so use it as a guide if you need help. Also, there's a Qu's Marsh some ways north of the landing zone. Go there for frogs if you want. Talk to the airship and one of the twins will sell you items. Be sure to stock up on Vaccines!
Oeilvert
Start by taking Mimoza's letter for Mooel then check the Mogshop to pick up some neat upgrades. Just don't buy the Diamond Sword; you can get one for free inside. Magic won't be sealed until you enter the big door.
This dungeon is crawling with monsters called Epitaphs, which release mirrors of characters (even those not in your party) whenever you do anything to it. If it produces a clone of a current party member, that character will be KO'd instantly. At this point, do not revive the dead ally until you've dispatched all 3 available clones, after which you can revive your dead ally and kill off the Epitaph itself for a ton of experience points. You can use a Soft on them to instantly kill them, but you won't get any experience points for using that method.
Go right to meet Stiltzkin before proceeding. You'll find Mooel and Stiltzkin here plus a Gaia Gear at the upper right corner. Give Mooel a letter, buy Stiltzkin's item bundle. Go back to the first room.
Collect a Remedy from the chest under the stairs to the right then go up for a Rising Sun, Head left to the next room to activate a switch. The chest in here has an Elixir. Return to the first screen and through the lower left door. The blue one won't budge for now so you'll have to use the one near it. In this room is a Diamond Sword and a Shield Armor,
Continue downstairs and collect the Power Vest then head up to check the hologram on the Left. Next look at the right one before heading down to examine the two at the bottom. The chest upstairs contains a pair of Feather Boots by the way. Head out via the top left stairs and examine the large orb halfway along the path for next part of your history lesson.
After that, follow the path further around to return the room where you saw the planet hologram. Leave and enter the previously sealed blue door. Watch the strange scene. After the scene, head back to the save room, and walk around to the other side. Head through the door, and ride the elevator to another room. Try to grab the Gulug Stone here and you'll get attacked by an airship. Make sure everyone has Clear Headed equipped.
BOSS BATTLE - ARK
20000 11 5964 Elixir. Power Vest, Holy Lance
Begin by having Steiner stick Armor Break on Ark. Zidane should steal and keep at it until you get Freya's Holy Lance. For offense, just use normal attacks and heal with Hi-Potions, especially after Ark uses Photon which reduces your to 1. If you brought Amarant, use his Chakra ability to heal during the battle.
Desert Palace
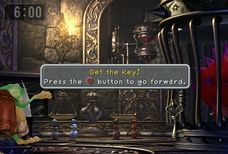
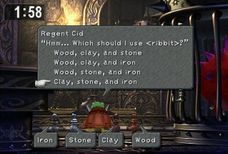
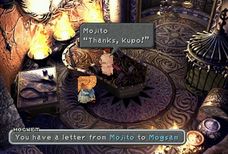
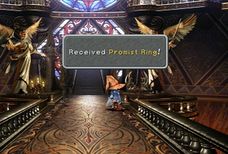
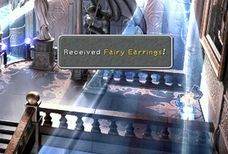
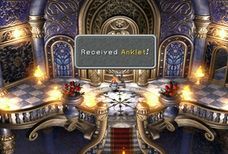
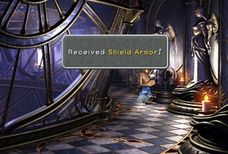
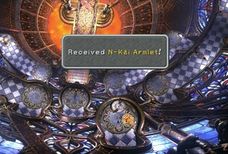
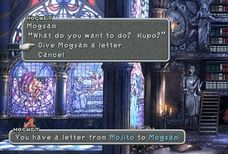
 HPAPGILSTEAL
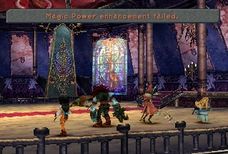
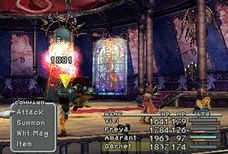
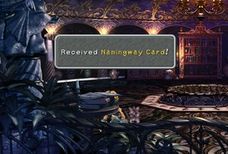
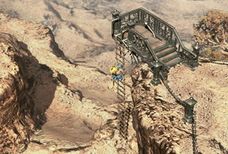
Desert Palace
As Cid, you will need to inch your way towards the cage and snag the Hourglass Key. To do this, you must move only if the Hedgehog Pie has its back to you. If caught, then you'll have to start over. Once you have the key, examine the weights. Place the Clay, Stone, and Iron weights on the scale You only have 6 minutes to accomplish all of this; try not to take too long with the key.
With your main party, start by heading right to the Palace/Rack where Mojito is waiting with a letter for Mogsam. You can also check out his shop if you want but the goods are the same as what Mimoza had in Oeilvert. Save and go the other way to reach the Palace Lobby. Light the candlestick to your left and examine the purple light for a Promist Ring. If you didn't take Quina with you to Oeilvert, and s/he knows Level 5 Death, you'll be all set for any encounter here.
Proceed to the next screen, check the goddess statue and try to head left. A staircase will magically appear so head up and light the candle at the balcony. Run back down, checking the right side of the hallway for a set of Fairy Earrings, then continue left to the next section. Here, light the pair of candles on the left so that the two mirrors disappear allowing you to cross to the other side, where you must light the only candle that does not affect the pair of mirrors and run back left to light the remaining candle.
This will make one of the statues vanish so you can light the pair of candles in the middle then the remaining two to the right. Finally, light the candle at the bottom of the stairs; grab an Anklet from the bloodstone. The anklet has the healer ability, an interesting ability that causes any physical attack to heal the target, instead of damaging them. Something that would've been useful in Oeilvert.
Go right to another corridor where you must light the lone candlestick and get a Shield Armor from the third bloodstone. Follow this corridor around to a staircase and head up. Light the candle here then proceed down to the Library. Light the candle on the left to reveal a set stairs. Climb it and light one more candle, also to the left. This opens a path behind the shelf. Take it out to a balcony securing an N-Kai Armlet from the bloodstone.
Go back to the library and climb the smaller stairs to another candlestick. Light it and head through the door it opens, lighting the two candles along the stairs and returning to the library. Head down the small stairs and light the candle to the right. This opens another path behind the shelf. Go through here to reach another candle and light it. Return to the library and you will hear the call of a moogle. Head left through the stained glass to find Mogsam. Give him the letter from Mojito and save your game before proceeding further left.
In this room, light all the candles to get a Black Hood, after which you can head over to the other side and repeat the process for a Venetia Shield. Now for the last bit, manipulate the candles on both sides so that the shadows of both gargoyles are facing left. A magic staircase will appear in the middle. Climb the stairs and attempt to light the candle for a boss battle. Make sure you give Vivi the N-Kai Armlet, so he has water, and that Garnet has the aquamarine jewel equipped.
BOSS BATTLE - VALIA PIRA
12000 11 4089 N/A
For the first time ever, you won't have to worry about stealing anything. Valia Pira will rely on active bloodstones to enhance its stats, which should fail completely if you found all the bloodstone treasures. Vivi should stick Slow and use Water magic. Freya should just attack, while Garnet summons Leviathan. You should have Amarant's Kaiser Knuckles by now if you dig for chocograph treasures regularly. If you have Quina use mighty guard to protect your party members from Valia Pira's magic attacks. Valia Pira will also cast reflect, so be prepared to heal if he casts it before Vivi can get a water spell off.
With the security gone, light the final candle and use the warp. Control shifts back to Zidane where you must head for the warp and see Kuja. Just before you leave the room after watching all the events, be sure to look through the pile of books at the bottom left to find a Namingway Card. Take the left warp in the Palace Hall.
Head for the spot the Hilda Garde 1 vacated and kick the switch there, causing a ladder to drop. Climb down and go north to leave the area.
Mount Gulug
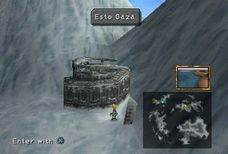
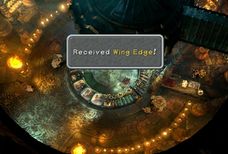
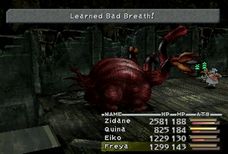
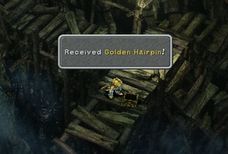
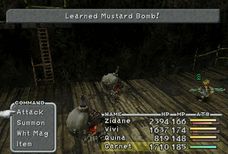
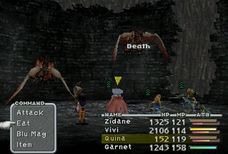
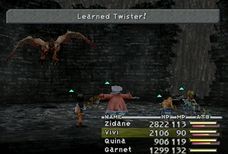
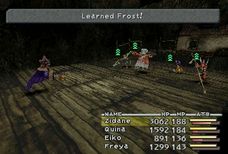
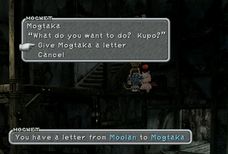
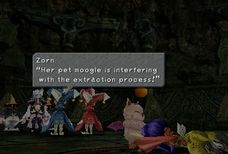
 HPAPGILSTEAL
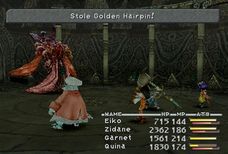
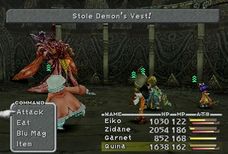
Esto Gaza
The Blue Narciss will automatically dock at a beach near Esto Gaza. Follow the coastline left to enter the small town. Equip Locomotion as the monsters here can cast Stop. Visit the shop to the right and check their inventory for anything you like. Buy a Flame Sword for Steiner just so he can learn the ability in it.
You can go around behind the counter and find a Wing Edge on the floor to the right, The priest outside provides inn service as well. Continue to the terrace where Mogrika is waiting with a letter for Moolan. Before you enter Mount Gulug, equip everyone with Antibody, Body Temp.and armors that resist fire. Quina can eat plenty in there so do bring him along too.
Mount Gulug
You'll encounter a fork as soon as you enter. Head left into the house first where you'll find 9693 Gil on the floor by the lower right wall. Run around this room for a bit until Quina successfully consumes a Worm Hydra to learn Bad Breath. After that exit through the other side and climb down onto the platform and collect a Red Hat from a corner. Go back to the fork and head right past the house and to the other side. Hop onto the platform above. You'll score a Golden Hairpin from the chest up here.
Grenades are also quite common in these parts so have Quina eat one to learn Mustard Bomb. Return to the previous screen and climb down the rope. At the bottom, go right from the well and talk to Moolan in the next room. Give him the letter from Mogrika; he has a letter for Mogtaka.
Leave through the east exit here and make your way around until you reach the very top to find a Gaia Gear. Now, on the way down, you'll encounter Red Dragons, which are deadly without proper protection. Equip anything that grants some form of resistance to wind, preferably something that absorbs it. Quina can also learn Twister from them.
These annoying things are quite susceptible to Death so have Vivi cast that to make things easier especially if you're fighting two of them at once. Anyway, return to the well and head left this time. You may want to run around a bit once again to allow Quina to consume a blue flame Wraith and learn Frost. In the house here is a Demon's Mail and just next door waits the moogle Mogtaka so give him Moolan's letter. You can snag an Elixir from the room upstairs after defeating another Red Dragon.
Return to the well one more time and pull the lever down three times until the bucket hits the bottom and climb down. You'll encounter another Red Dragon ambush. Defeat them and continue left for some scenes, followed by a scripted battle from which you'll receive your very first Ribbon.
If you have Vivi in your party, he will run off and Eiko takes his place in the upcoming boss battle. It's nothing too difficult though so don't worry.
BOSS BATTLE - MELTIGEMINI
25000 11 6428 Vaccine, Golden Hairpin, Demon's Vest
Zorn and Thorn have fused to form one mean-looking monster. Their arsenal is mostly limited to Poison-related attacks so all you need to do is equip Antibody then let loose. Mini also works so have Eiko use it if she has it. As Viral Smoke, it inflicts Virus which prevents your characters from receiving experience or at the end of a battle, remove with Vaccine.
The Exploration

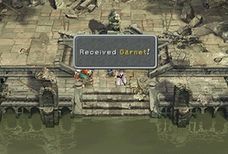
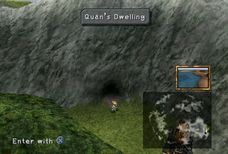
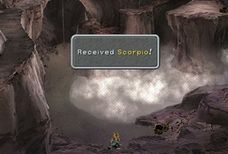
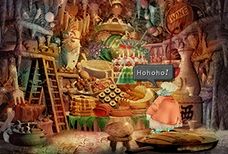
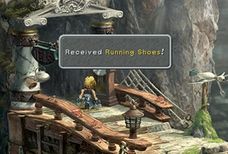
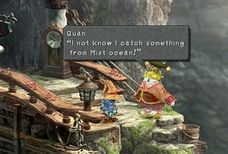
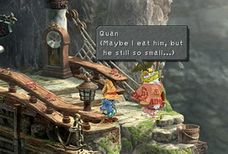
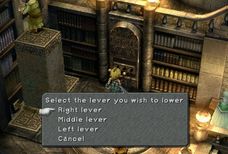
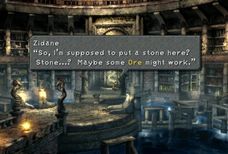

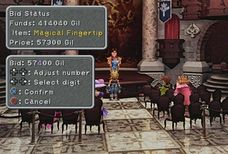
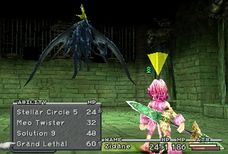
Lindblum
During this brief stop in Lindblum, speak to Mogki in the castle's guest room and he'll have a letter for Kumool. After that, go to the conference room to meet with Cid and hear what Hilda has to say. The scene soon shifts elsewhere and you'll receive a Garnet from Beatrix. You are leaving Lindblum with the Hilda Garde 3.
There are a few places to visit before heading to Ipsen's Castle. First is the cave to the east of Treno. Have Vivi and Quina in your party for this.
Quan's Dwelling
Go inside and down the stairs to open a treasure chest for an Ether. Head behind the pillar and down the rope to open another treasure chest for another Ether. Check just south of the hot springs (next to the treasure chest) for the Scorpio stellazio coin.
Enter the cave at the top for some rather entertaining scenes, after which you can examine the dead clock to score a pair of Running Shoes. After the scene head back to the previous screen and climb the small brown ladder to receive yet another Ether.
If you choose to make Vivi come back here during the Treno card tournament in Disc 3, then have Zidane visit after you return from Dali.
You'll learn more about Vivi's past: How he met Quan and that the latter had originally planned to eat him once he was deemed big enough.
Daguerreo
This town is situated on the largest of the cluster of islands to the west of the world map. On top of a mountain surrounded by waterfalls. Take this as an opportunity to level up your party. Park the airship right in front of the entrance to Daguerreo. Equip your party members with anything that will reduce Thunder elem attacks by at least 50%. Equip the "antibody" ability on all party members. Run around the small grassy cliff area in front of Daguerreo. You will encounter only 2 monsters; Grand Dragon and Gimme Cat. The Gimme Cat will ask you for a diamond. DO NOT GIVE IT TO HIM. Gimme Cat absorbs elemental magic attacks, so just attack with physical, or use Quina's matra magic ability to reduce it's HP to 1 and have someone else hit it quickly afterwards to make short work of it. Also, Vivi's "Bio" spell is an instant kill, especially if reflecting off of a teammate while Vivi has "Reflect x2" ability equipped. You will get 3 AP and some decent coin from Gimme Cat. Now. The Grand Dragon is quite possibly the easiest and deadliest monster you have encountered so far. It's two primary attacks are "poison claw" and "thundaga." It's attacks are powerful and it attacks very quickly. Put all of your party on the back row. If possible, equip "auto reflect" on whichever members have learned it. Be sure you have "Thunder Elem" reducing equipment on each party member, as well as antibody. The Grand Dragon is Lvl 60. Make sure Quina is in your party. Equip the Auto-Haste ability on Quina (learned from equipping "running shoes"). Then have her/him use "Lvl 5 Death" blu magic ability. This results in instant KO, every single time. Also, if you have learned the "Reflect x2" ability for Vivi, equip it. Vivi can cast/reflect Blizzara off a team member using "auto reflect" and it will deal 9999dmg to the dragon every time. It's easy to finish off after that, and frequently it will kill itself without you doing anything by casting Thundaga on your team and it reflecting back on it. Each battle will yield about 3900gil, 8802XP and 3AP if you have "level up" and "ability up" equipped. If you don't have Lvl 5 Death for Quina, go eat a Stroper at the Iifa Tree. After the battle, heal up if you need to. Go inside Daguerreo and rest in a hammock upstairs at the library, buy some tents or potions, and get back outside. It may take a while, but you can accomplish a lot of leveling here and ensure your party members catch up on learning abilities. Save frequently. Go back to the ship, swap out party members, and continue leveling.
When you are satisfied, go inside Daguerreo. Head right down the stairs from the entrance for the Capricorn stellazzio coin. You can trade ore for Aquamarine at the fountain in the back of the room. One Aquamarine for every four ore.
With that in hand, go the other way into another room. Here, you must find a way to fix the lift so you could get to the top. Fiddle with the left lever until the lift lowers enough exposing a slot where you can jam the metal bar into. Pretty simple fix right there. Now, you can ride the right lift up.
The weapon shop sells some neat new equipment so pick up what you can. Go upstairs and you can find the synth shop in the room to the far right, where you can forge a Sargattanas for Zidane, but you'll have an opportunity to get a far stronger weapon for him in just a bit so it's up to you whether or not to forge it. Another person of interest here is the old man at the Library. He wants a rare item called the Magical Fingertip.
This rare item appears in Treno's auction house after you've sold all the other rare items you bought there (Une's Mirror, Doga's Artifact, Rat Tail, Griffin's Heart) to some interested buyers in Treno. Return to this old man in Disc 4 and give him the Magical Fingertip to receive the Excalibur.
Treno
Visit Stella and hand over all the Stellazzio you collected for rewards then head to the Auction House and bid for the Thief Gloves, You can do this as soon as you get the Blue Narciss, but better late than never.
There's also a new monster, the Amdusias for you to beat up in the Knight House. Defeat that one to receive another pair of Running Shoes.
Ipsen's Castle
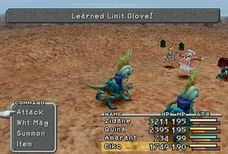
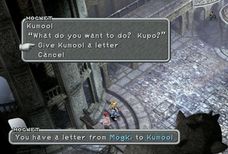
 HPAPGILSTEAL
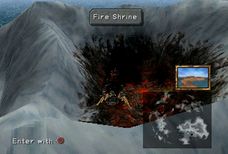
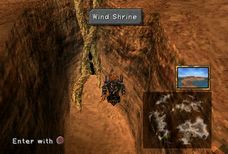
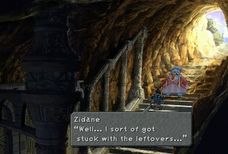 HPAPGILSTEAL
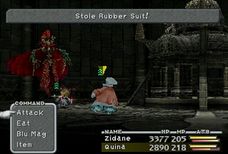
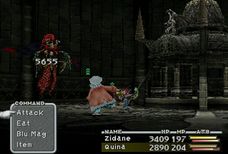
Ipsen's Castle
Once you're ready, fly to the northwest edge of the Forgotten Continent to reach Ipsen's Castle, or you can just auto-pilot over to it. The Jabberwock enemy is a common sighting on the plains outside the castle so have Quina eat one to learn Limit Glove if s/he doesn't yet have the skill.
For starters, you may want to equip your melee characters with the weakest weapons. The castle is upside down which means that weaker weapons will be more powerful. As for Amarant, he will leave regardless of what you say. Open both chests at the lobby to get a Dagger and the Aquarius. In the next room, you'll find Kumool. Give him Mogki's letter. Make sure everyone has the Jelly ability equipped, as the gargoyles here can cast Gradual Petrify.
Save and collect some Cat's Claws from the chest. Quina can eat a Veteran here to learn Doom. Slide down the pole to the next area. Make your way to the ladder on the right, and go around the path left to the exit. Proceed until you reach the next ladder, head up and once a "?" appears, jump right to collect a Broadsword. Go back to the ladder and jump left this time for a Javelin. Head back to the ladder again and go down.
At the bottom, climb up the ladder and jump off when you reach a "?". Follow this path to receive a Rod. Climb the smaller ladder to reach the platform above and go through the door.
When you enter, cross the room to the platform to find the "?" and examine it. Each option adds another until "Think". Then keep selecting different options until "Try something drastic" shows up. Finally "Rest" will show up and trigger the door. The chest on the right side of the balcony contains a Barette. Notice the middle door on the ground level opened for later. Go back inside the room.
Use the lift. Collect all the mirrors and something demands that you give them back. If you got the Thief Glove from the Treno auction house, make sure Zidane has Master Thief equipped. Also equip Bandit for a better chance to get the Orichalcon from this next boss.
BOSS BATTLE - TAHARKA
30000 11 8096 Elixir, Mythril Claws, Orichalcon
A pathetic guardian with good items. Steal all of Taharka's goods especially the Orichalcon for Zidane, If you have Quina in your party then have him cast Mighty Guard; Vivi cast Slow and attack and cast magic. This boss gains impressive physical defense when compact, so spam magic until it opens. Thievery ignores all defense so use that one too.
After the battle, make your way back out of the castle, only to discover that Amarant has not emerged. With Zidane alone, head for the moogle room and down the pole. You'll find Amarant sprawled in the room below.
Before leaving the castle, enter the middle door under the balcony in the Castle's first room. Follow the path until you get to a room with a lift in the middle. It will take you down to a room with 2 pots and 3 pedestals. Move the pots counter-clockwise twice each. That should trigger the energy from the sword into the pot on the right. Examine it for the only Ancient Aroma in the game. It teaches Dagger the "Odin's Sword" ability. The chest in here contains a Golem's Flute. Leave the castle again and start dropping people off at the shrines.
The Shrines
The Water Shrine is in the ocean some ways south of Ipsen's Castle, while the Fire Shrine is inside Mount. Gulug (the volcano) near Esto Gaza.
The Wind Shrine is located southeast of Oeilvert between a pair of mountains. Lastly, the Earth Shrine is just to the south of Desert Palace.
Equip both Zidane and Quina with Gaia Gear as well as Auto Reflect if available. Continue into the shrine; press X when the "!" appears to avoid being crushed by the traps. In the next room, set the mirror in place. Watch the scenes and you'll soon face off with the Earth Guardian.
BOSS BATTLE - EARTH GUARDIAN
20000 11 4512 Avenger, Rubber Suit
With the right equipment, this battle is a cakewalk. Apart from Earthquake, the Earth Guardian also attacks with level 3 elemental spells. Counter this with Auto-Reflect while Gaia Gear absorbs damage from Earthquake. If you don't have Auto-Reflect, have Quina cast Mighty Guard at the start of the battle, and anytime a level 3 spell is used, immediately cast White Wind. Steal all of his items then just attack with Devil Killer equipped. He is also weak against Mini and Darkness.
Bran Bal
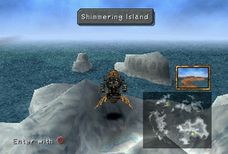
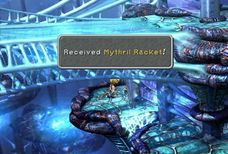
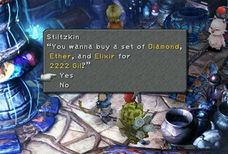
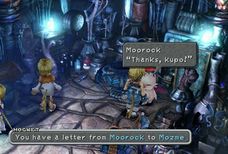
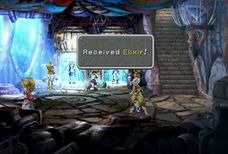
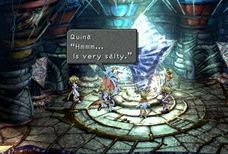
Terra
With the shrine guardians defeated, the seal to a different world has been broken. Meaning, you can now enter the Shimmering Island, located on the ocean south of Esto Gaza. You will land on Terra soon after. Consider equipping status protection abilities like Bright Eyes and Antibody for your melee characters and Loudmouth for your mages. Plus the monsters on this planet have a thing for inflicting Virus so stock up on Vaccines first.
Begin by heading straight up to the next area then descend. Hop across the platform to the right to get a Coronet. Jump back and continue following the platforms where you can get a Dragon Wrist. Time to go after the genome girl so return to where you saw her last and go up. Pick up an Elixir to your left before proceeding further north after Mikoto. Descend using the web at the opposite end of the bridge to reach a chest containing a Remedy.
Climb back up and take a left to pick up the Mythril Racket. When a prompt comes up as you try to hop past the gap, descend to find a Demon's Vest. Mikoto will be waiting nearby so follow her up to the next area. There, head left along a hidden passage for a Minerva's Plate, and proceed up the staircase to reach the soulless village of Bran Bal.
Bran Bal
Continue left downstairs and through the structure off to the top of the village. Go down and pick up an Elixir from the floor. Leave this building to visit the one at the far-eastern section. This is the storage area where you'll find Stiltzkin and another moogle, named Moorock in the pot. Moorock has never heard of Mognet but he does have a letter for Mozme and a Mogshop that sells very good but pricey upgrades. This is the only shop you'll encounter for a while so don't hesitate to burn some gil. There's a Wing Edge in the chest next to Moorock. If you come here after viewing the scene at the Inn, Stiltzkin won't be here. Simply come back when you take control of Eiko, and you can buy what he's selling.
When you're done shopping, trek to the west side of town and into the Inn for a brief scene, after which you must go back inside to get an Elixir from the treasure chest. Proceed to the lab next. It's the structure located at the top of the village where you picked up an Elixir from the floor earlier.
Speak to Mikoto and follow her back upstairs. When control shifts to Eiko, examine the water outside of the inn for Angel Earrings.Explore the village and collect your party members after viewing the ATEs.
Make your way to the lower section of the village that was previously blocked off. You should be able to pass through now. When control shifts back to Zidane, keep following Garland for quite a bit of storytelling.
Pandemonium
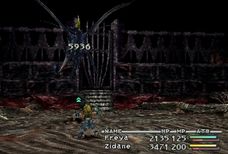
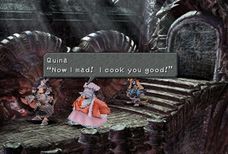
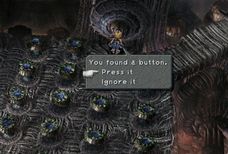
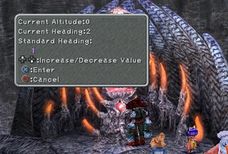
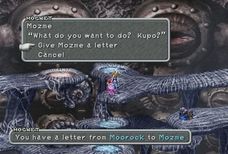 HPAPGILSTEAL
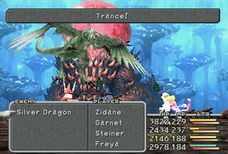
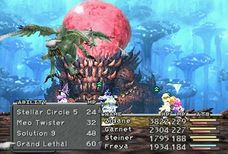 HPAPGILSTEAL
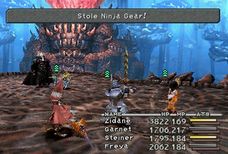
 HPAPGILSTEAL
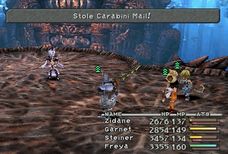

Pandemonium
For this part of the dungeon, you'll be controlling a messed up Zidane as well as a few other party members against some nasty-looking monsters. You should have no trouble beating these enemies unless your party members are for some reason, ill-equipped or severely underleveled.
The final monster can be dangerous if you don't pay attention to your health, as it has an attack that can reduce your to 1, plus Earth Shake which may also deal heavy damage. Garnet should focus on healing duty when she arrives while Zidane simply attacks with Beast Killer equipped.
Make your way back right to collect the friends you ditched earlier. Moorock will be with them too so save your game. Exit back through the door behind the moogle and check the mind control chair for a Holy Miter. Continue towards the left again and you'll soon reach the generator room, where you must press the button and head for the exit at the other side within 30 seconds without coming into contact with any blue light. You'll fight monsters if you do, time runs out and you'll have to start over.
Assuming you make it to the exit in time, there will be a bridge in the next room for you to cross which leads to the control room. There, you can operate the switch to change the values which affect the orientation of the elevator platforms next door. Change the value to 3 and go the next room. Step on the platform to go up then use it one more time to reach a chest with 20007 Gil. Head back to the control room.
Change the value to 4, then head back to ride the elevator up to the next floor. Here, there will be 3 different warps that lead to different sections of the maze. Take the top-right red warp first. Take the left-most blue warp to get the Carabini Mail. Go back, and run to the right-most blue warp to get an Elixer.
Travel back to the warp room, and take the bottom warp, which allows access to the blue warps that lead to a treasure chest containing a pair of Battle Boots plus a moogle in the maze.
The moogle here is Mozme so give him the letter from his buddy Moorock. Save your game and prepare for a three-round gauntlet-style battle.
BOSS BATTLE - SILVER DRAGON
25000 13 5240 Elixir, Kaiser Knuckles, Dragon Mail
The dragon only has three attacks and two of them are wind-based, so equipping something that absorbs wind (like Ribbons) is a good idea. If you have Freya in your party, equip her with Dragon Killer as well. You don't really want to expend too much resources in this round as there are two more battles coming up. For a quick win, equip Vivi with the Reflectx2 ability and have someone cast Reflect on him. At this point, Vivi should bounce a Flare spell off himself. This deals consistent 9999 damage.
BOSS BATTLE - GARLAND
40000 N/A N/A Battle Boots, Ninja Gear, Dark Gear
Once again, Reflect is your best friend. Make sure Vivi (if he's part of your party) has Reflectx2 on then just repeatedly bounce Flare and Holy off him. As for your other characters, having Auto Reflect is a good thing but you might also want to equip them with Auto-Regen, as having Reflect means casting curative magic on allies is out of the question. Make sure your melee characters have Man Eater equipped as well. In case you don't have Auto-Reflect, equip everyone with Locomotion to prevent Stop.
BOSS BATTLE - KUJA
45000 N/A N/A Ether, Carabini Mail, Light Robe
Kuja counters all magic attacks with Flare Star, which means that you can hit him with physical attacks freely without Kuja harming you. That said, equip your melee fighters with MP Attack plus Man Eater and you'll win this battle no time flat without a scratch. Also, do put on armor that protects against Thunder. Remember that it's okay to use magic on yourself.
You'll now have to return to Bran Bal to rescue the other Genomes. There's really only one way to go so you can't possibly get lost. The party then escapes Terra in the Invincible. Save when the prompt appears.
Disc 4 Walkthrough > Preparations
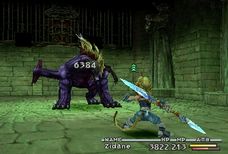
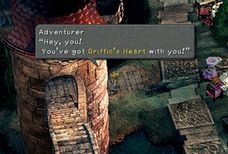
Black Mage Village
There isn't much to do here besides watch the genomes and black mages try to get along. Though you might to do some last minute shopping for the best equipment before leaving for the next stop that is Treno.
Treno
There are a few things to accomplish before heading into the Iifa Tree. First, enter the Invincible's bridge and open the chest next to Amarant for the Pisces Stellazzio coin. Take this to Stella and when she asks why she feels like she's missing something, tell her "because there's one more."
You should get all the coins back to help you with the last Stellazzio coin Ophiuchus, which can be found in the exact same spot as the Scorpio. You'll receive the Hammer for your efforts. This item can be used in Hades' synth shop in Memoria or kept to view an extra ending scene.
The weapon shop has another new monster that the owner wants to get beaten up. This time it's a Behemoth. Defeat it for an extra Circlet.
The Excalibur
To make the Magical Fingertip appear at the Auction House, you must first sell the Griffin's Heart and Rat Tail to the Adventurer that walks out from the bridge outside the Cafe in Treno; the Une's Mirror can be sold to the Nobleman strolling outside the Cafe, and the Doga's Artifact is a must-have item for the Scholar waiting inside the synthesis shop in Treno.
Once you've sold all the items, return to the Auction House and bid for the Magical Fingertip, which by the way can get very expensive, Take that item to the old man in Daguerreo and he'll give you the Excalibur in return.
Chocobo's Paradise
Now that the Shimmering Island is gone, you can now dig for the treasure in the water using a Dead Pepper. Take note that there won't be any bubbles to help you pinpoint the treasure's exact location. Limit your search to the ocean at the very center of the Shimmering Island's remains.
Once you have obtained all the chocograph and Dead Pepper treasure (click here for a detailed guide), visit the Chocobo's Paradise formally end the treasure hunt side quest and receive the Fat Chocobo Card.
Memoria Part 1
HPAPGILSTEAL
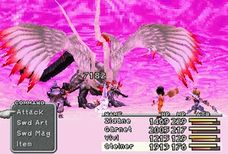
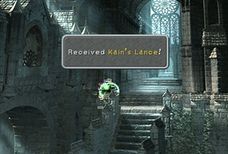
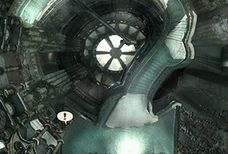
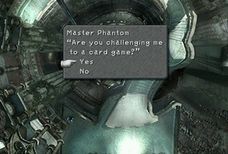
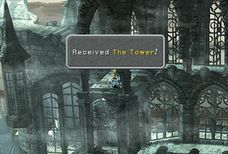 HPAPGILSTEAL
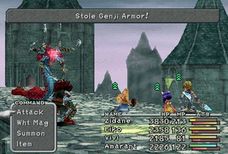
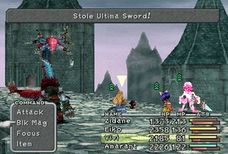

 HPAPGILSTEAL
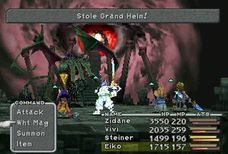
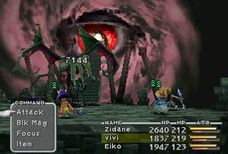
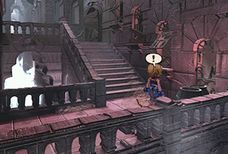
 HPAPGILSTEAL
Memoria
When you're ready, pilot the Invicible to the purple light above the Iifa Tree. Watch the awesome cutsenes, to be followed by a boss battle.
BOSS BATTLE - NOVA DRAGON
55000 13 9506 Remedy, Dragon Wrist, Grand Armor
This boss counters all physical attacks with Psychokinesis which can deal heavy damage. Equip all the Ribbons you have, or anything that resists/absorbs Water to protect yourself from the dragon's best attack, Tidal Wave. Both Zidane's Thievery (if you steal a whole lot) and Vivi's Reflectx2 ability deal heavy to maximum damage consistently as well.
Upon entering, you'll find a warp at the bottom of the stairs that allows you to return to the Invincible. Use the save sphere and climb up, Be sure to check the wall to the right about halfway, where an "!" appears to pick up the Kain's Lance for Freya. Proceed further up to the next screen.
If you stand at the far left corner at the bottom of the stairs where an "!" appears, notice that nothing happens when you press X. This is actually the first of five card master phantoms in this dungeon; press Square instead to get them to talk to you. These phantoms carry a lot of rare cards, so take the opportunity to challenge them if you're into Tetra Master. Anyway, climb up and near the exit at the top is a small balcony sticking out. Examine the left edge of this balcony to snag The Tower.
At the Outer Path. move along and you'll soon encounter Maliris, the first of Kuja's four Chaos Guardians about 3/4 of the way up the staircase.
BOSS BATTLE - CHAOS GUARDIAN MALIRIS
60000 10 8532 Masamune, Genji Armor, Ultima Sword
First off, equip everyone with Body Temp and anything that resists or absorbs fire damage, plus Devil Killer and MP Attack for your melee fighters. Given that Maliris has a great inventory for you to steal, make sure you get everything before killing her. It would be best to back row your party and have them defend while Zidane steals, Once you have all the items, just attack Maliris until she falls. You may use magic too but since she casts Reflect on herself a lot, physical attacks will work better.
This next area is called The Past, and on the platform you'll find a hidden save sphere plus an Angel Flute for Eiko. Onward to the next screen.
Push past the corridor and out to a rainy area for another flashback sequence. Approach the left side of to find the Defensive Phantom.
Moving on to the Time Interval. You can pick up a pair of Rune Claws for Amarant at the bottom of the stairs. Go up for another boss encounter.
BOSS BATTLE - CHAOS GUARDIAN TIAMAT
60000 10 8820 Blood Sword, Feather Boots, Grand Helm
This one can get really annoying. Stick with Body Temp plus Loudmouth, but replace your fire retardant gear with something that absorbs wind. Vivi's Octagon Rod has this ability while everyone else should equip Ribbons. Aside from Twister, Tiamat also has the ability to absorb some of your character parameters, thus weakening your party, and worst, this monster counters all physical attacks with Snort which ejects a character from battle. You can try stealing all of Tiamat's items if you want, but it's best not to risk it. Make use of Vivi's Reflectx2 ability and hit Tiamat with your best spells, while Zidane spams Thievery. With this you can cause maximum damage without fear of Tiamat snorting anyone away.
Proceed further in and you'll soon reach an area called Lost Memory. At the bottom of the first staircase to the right, waits the third card master, Strong Phantom. He also carries the most number of rare cards.
Continue until you get to the next save sphere. Use a Tent first then save. In the next room, you'll witness an entertaining scene with Quina. After which you can choose whether or not to engage the optional boss Hades who grants access to the legendary synthesis shop once defeated.
To fight Hades, check behind the large rock to the right. Take note that an "!" will not appear so keep pressing X until a mysterious voice speaks to you. When asked to leave, refuse to do so and Hades will attack you.
BOSS BATTLE - HADES
55000 30 9638 Robe of Lords, Reflect Ring, Running Shoes
Equip your entire party with gear that absorbs shadow damage plus Bright Eyes, Clear Headed, and Antibody. Also, equip weapons with Holy element and anything that boosts holy elemental attack. Hades' best attack is Doomsday, but with the right equipment it becomes a blessing. The only thing you need worry about now is Curse which deals damage and inflicts a multitude of status ailments including Confuse, Blind, Venom, and Mini. Cast Mini on your tiny characters to reverse the effect. Eiko should spam Holy and revive multiple dead allies with Phoenix. Hades' Cleave can also prove deadly so remember to cast Protect on your front row characters. Phoenix also occasionally appears when your entire party is annihilated.
Memoria Part 2
HPAPGILSTEAL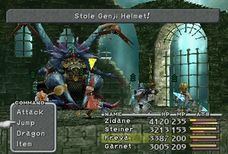
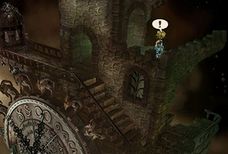
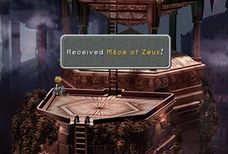
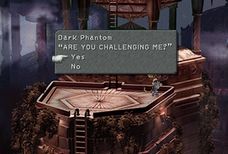 HPAPGILSTEAL
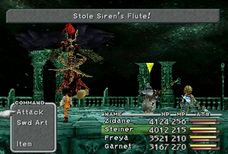
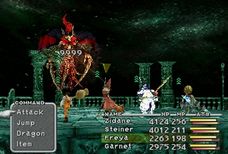
After the battle, speak to Hades to access his synth shop. Here, you can forge Steiner's best armor, the Tin Armor but it requires the Hammer, an item that allows you to view an extra scene during the game's ending should you hang on to it. Beatrix's Save the Queen can also be forged as a throwing item for Amarant, but some say you can view another extra ending scene if you have it too. The Pumice is also here which teaches Ark to Garnet, but you can get that from defeating Ozma so keep your Pumice Pieces. Go back to save and proceed past the ocean room.
BOSS BATTLE - CHAOS GUARDIAN KRAKEN
60000 10 17376 Genji Helmet, Wizard Rod, Glutton's Robe
Once again Body Temp is a must but switch your armors or accessories to anything that negates or absorbs water damage, Kraken has two tentacles, that is pretty much the source of most of its best attacks, and killing both will limit Kraken's arsenal to a weak Leg attack. Steiner's Climhazzard is very effective as it deals massive damage to all targets.
Beyond this room is the Time Warp where you can find a hidden save sphere at the lower right edge plus the card master, Rare Phantom.
In the next room climb a couple of ladders to a platform where you can pick up a Mace of Zeus for Vivi to the left and challenge the card master, Dark Phantom to the right. Exit through the top door to the next area.
If you reach this room (Gate to Space) within twelve hours, you'll find Steiner's Excalibur II sitting by the top-right wall after beating Lich.
BOSS BATTLE - CHAOS GUARDIAN LICH
60000 10 8436 Genji Glove, Siren's Flute, Black Robe
Lich is a death expert. First off, equip everyone with Antibody and Locomotion, and whatever happens don't ever enter this fight with your character levels being multiples of 5, lest you be slaughtered by LV5 Death. One other thing is to equip armors that negate or absorb earth damage. As for abilities equip Devil Killer and MP Attack on your melee characters. Reflectx2 is useful again so make use of it as much as possible; Eiko spam Holy, while Zidane and Steiner should just attack. When Lich uses Doom, cast Esuna or pop Remedies to remove it.
After the battle, step off onto the void as Garland commanded, and walk north until you exit out to a different place known as the Crystal World.
Crystal World
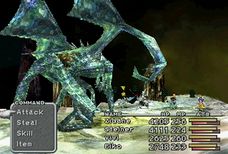
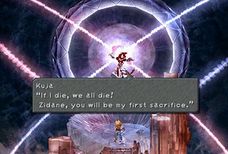 HPAPGILSTEAL
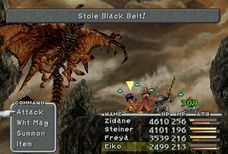
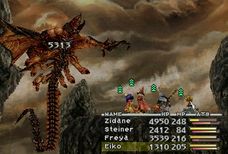 HPAPGILSTEAL
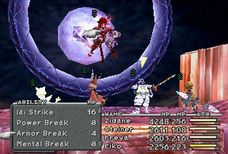
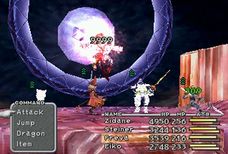 HPAPGILSTEAL
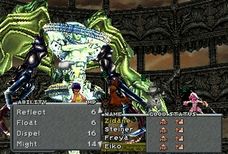
Crystal World
The enemies here are crystallized versions of the chaos guardians, with the same moves as the originals but not as strong. Follow the path until you reach the final save sphere. Use it and proceed to face Deathguise.
You can still leave the boss chamber to save after defeating Deathguise. For abilities, remove Level Up and Ability Up; replace with Auto Regen.
BOSS BATTLE - DEATHGUISE
55000 N/A N/A Elixir, Black Belt, Duel Claws
Your main concern for this battle will be the creature's Twister and Meteor attacks. The former can be dealt with by equipping wind absorbing armors and accessories as always. Meteor however does heavy but somewhat random elemental damage, sometimes it kills and sometimes not. Summon Phoenix to revive if it kills multiple allies. Spam your best spells with help from Reflectx2 or simply attack using both Devil Killer and MP Attack.
BOSS BATTLE - TRANCE KUJA
55000 N/A N/A Ether, White Robe, Rebirth Ring
Kuja will be using Flare Star a lot in this battle and it deals quite a bit of damage to your entire party. Heal with Cura or Curaga or stick Slow and let Auto Regen take care of your . It should be able to keep up if Kuja is slowed. Equip your Man Eater plus MP Attack and.... attack. You can use magic but he uses Reflect pretty often so physical attacks work better.
FINAL BATTLE - NECRON
55000 N/A N/A Elixir
This is the final battle so it would be fair to expect that Necron cheats. He is naturally fast, capable of taking two straight turns so Auto Haste is an absolute must. There are two attacks that you should really watch out for: Grand Cross and Neutron Ring. Worse yet, he tends to do both consecutively, Grand Cross can inflict your party with any existing ailment in the game so try to equip as much status protection as you can. While Neutron Ring does not really kill, it still does tons of damage on everyone. Keep your s up with Auto Regen plus curative spells. If Necron buffs himself, cast Dispel. Having Reflect on your party is also a big plus, as most of Necron's spells can be reflected back at him for damage.
Optional Quests > Chocobo Treasure Hunt Part 1

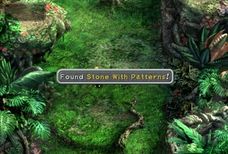
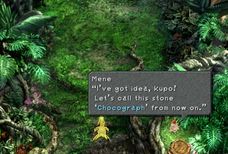
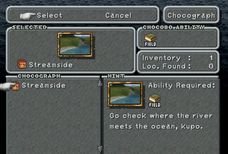
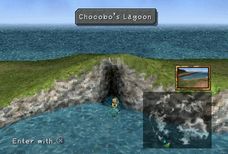
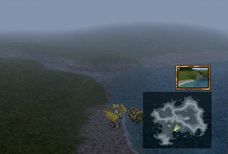
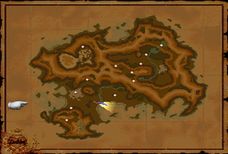 Clue #01Go Check Where The River Meets The Ocean, Kupo.
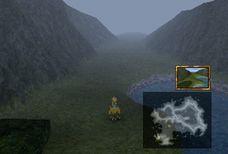
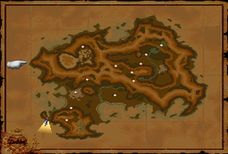 Clue #01Go Look Near The Mountains Facing The Ocean On The Southwest Side Of The Mist Continent.
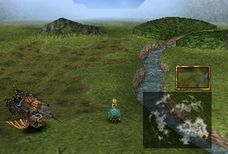
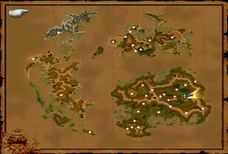 Clue #01The Treasure Is Buried Near A River, But I Don't Think It'll Be Easy To Find.
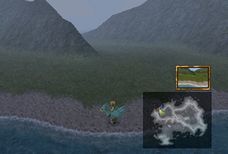
 Clue #01I've Seen A Beach That Looks Like This Near A City With High Winds, Kupo.
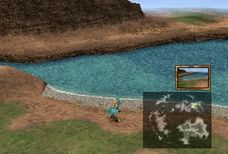
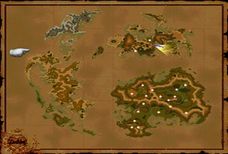 Clue #01I Think There's A Beach Near A Huge Dying Forest. That Might Be It, Kupo.
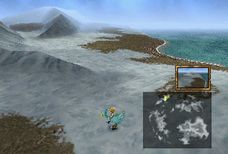
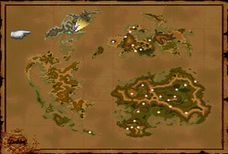 Clue #01Looks Like A Very Cold Place, Kupo...
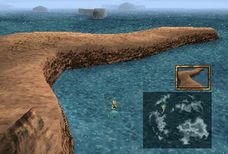
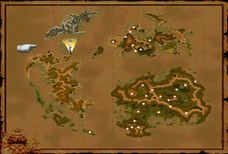 Clue #01Kupo! Why Not Go Play In Some Icy-cold Water?
The Chocobo Forest
This long but incredibly productive side quest starts when you visit the Chocobo Forest as soon as you leave Lindblum for the first time in Disc 1. The forest is located northeast of Lindblum, directly east of Qu's Marsh.
Once inside, speak to Mene to learn a few things and receive a Gysahl Green. Take that item and use it while standing on the chocobo tracks outside to summon Choco then return to the forest. At this point, Mene will let you play Chocobo Hot & Cold, which allows you to dig up as many items as you can in 60 seconds, All the items you find are yours to keep.
Aside from consumable items and gil, you may also dig up stones called Chocographs which point to locations of buried treasures. A chocograph must be equipped before you can hunt for the associated treasure. Much later into this side quest, you'll be allowed to dig for Chocographs in other locations such as the Chocobo's Lagoon and Chocobo's Air Garden.
The Chocobo's Lagoon is located at the southmost tip of the Forgotten Continent, and can only be accessed once Choco gains the Reef ability. For the Air Garden, Choco needs the Sky ability along with some Dead Pepper. Once you dig every chocograph in the Lagoon and Forest, Mene will tell you about the Chocobo Paradise. At this point, you can access the Air Garden by hovering over its shadow and using a Dead Pepper.
The Chocographs
In total, there are 24 Chocographs to found in the game, and for Chocograph 20, you need to collect all 6 Chocograph Pieces from the Lagoon and Forest to form one complete chocograph in your list.
CHOCOGRAPH 01 - STREAMSIDE
This chocograph is found in the Chocobo Forest and the treasure's location can be accessed with just the basic field (yellow) ability.
Clue #02 You're hopeless if you can't find this, kupo! Treasure 2x Elixir, 3x Hi-Potion, 4x Ether, 2x Germinas Boots Location Cross the bridge just southwest of the Chocobo Forest and you'll find a spot where the river ends and flows into the sea.
CHOCOGRAPH 02 - BETWEEN MOUNTAINS
This chocograph is found in the Chocobo Forest and the treasure's location can be accessed with just the basic field (yellow) ability.
Clue #02 Try going somewhere you don't usually go, kupo. Treasure 5x Potion, 5x Hi-Potion, 2x Tent, 2x Cotton Robes Location Eunorus Plains, near the coast northwest of Lindblum. Search the area between the two mountains.
CHOCOGRAPH 03 - UNCULTIVATED LAND
This chocograph is found in the Chocobo Forest and the treasure's location can be accessed with the mountain (red) ability.
Clue #02 Maybe you should leave it alone for now, kupo. Treasure 10x Antidote, 1x Jade Armlet, 3x Wing Edge, 1x Cargo Ship Card Location Zamo Basin, east of river and north of Treno.
CHOCOGRAPH 04 - HEALING SHORES
This chocograph is found in the Chocobo Forest and the treasure's location can be accessed with just the basic field (yellow) ability.
Clue #02 Kupo! You already know how to call a chocobo, right? Treasure Reef (blue) ability upgrade Location Esistern Coast, on coast off to the west of Burmecia and Cleyra.
CHOCOGRAPH 05 - ABANDONED BEACH
This chocograph is found in the Chocobo Forest and the treasure's location can be accessed with just the basic field (yellow) ability.
Clue #02 There are treasures on continents other than the Mist Continent! Treasure 9x Phoenix Pinion, 5x Phoenix Down, 12x Peridot, 1x Diamond Gloves Location Outer Continent Gegalrich Shores, southeast of Qu's Marsh.
CHOCOGRAPH 06 - COLD FIELD
This chocograph is found in the Chocobo Forest and the treasure's location can be accessed with just the basic field (yellow) ability.
Clue #02 There are other things you can ride besides chocobos, kupo. Treasure 5x Echo Screen, 7x Hi-Potion, 3x Tents 1x Theater Ship Card Location Lost Continent Quelmiera Shores, northeast of Esto Gaza.
CHOCOGRAPH 07 - FORGOTTEN LAGOON
This chocograph is found in the Chocobo's Lagoon and the treasure's location can be accessed with the reef (blue) ability.
Clue #02 Some treasure is hidden in the shallows, kupo. Treasure 8x Gysahl Greens, 5x Ether, 7x Hi-Potion, 1x Dragon's Claws Location South of Shimmering Island.
Chocobo Treasure Hunt Part 2

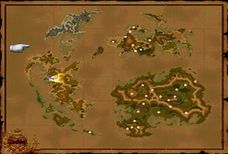 Clue #01I Heard There Is A Long Stretch Of Reef... That Might Be It, Kupo.
 Clue #01I Hear There's A Sunken Treasure Near A Peninsula In The Southern Part Of The Outer Continent, Kupo.
 Clue #01There Are So Many Small Islands Surrounding The Mist Continent, Kupo!
 Clue #01It's A Beach On A Small Island! A Great Place To Vacation, Kupo.
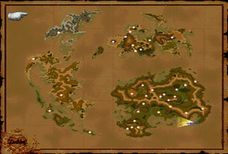 Clue #01It's Near A City Where The Night Never Ends.
 Clue #01The Forest Lies Where Many Mountain Ranges Merge, Kupo!
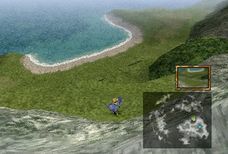
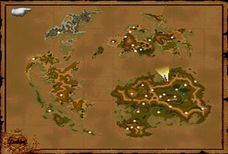 Clue #01There Are Treasures On The High Plains, Too, Kupo!
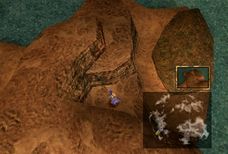
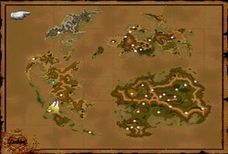 Clue #01What A Beautiful Sunset, Kupo!
 Clue #01The Long Peninsula Sort Of Points To The Location Of The Treasures, Kupo.
CHOCOGRAPH 08 - FARAWAY LAGOON
This chocograph is found in the Chocobo Forest and the treasure's location can be accessed with the reef (blue) ability.
Clue #02 It feels really far away if your chocobo isn't grown up kupo. Treasure 37x Potion, 6x Magic Tag, 1x Shield Armor, 1x Gaia Gear Location Forgotten Continent, shallows north of Oeilvert, south of Ipsens Castle.
CHOCOGRAPH 09 - ABANDONED LAGOON
This chocograph is found in the Chocobo's Lagoon and the treasure's location can be accessed with the reef (blue) ability.
Clue #02 Start your search on a small beach, kupo. Treasure 6x Soft, 4x Ether, 1x Feather Boots, 1x N-Kai Armlet Location Reef south of Iifa Tree, by the southwest tip of the Outer Continent.
CHOCOGRAPH 10 - BIRD'S EYE LAGOON
This chocograph is found in the Chocobo's Forest and the treasure's location can be accessed with the reef (blue) ability.
Clue #02 Try changing your point of view with R2, kupo. Treasure 8x Potion, 4x Phoenix Down, 3x Ether, 1x Magician Robe Location Next to one of the islands to the west of Tuhanda Shores, which is the beach west of Mist Continent's Qu's Marsh.
CHOCOGRAPH 11 - SMALL BEACH
This chocograph is found in the Chocobo's Forest and the treasure's location can be accessed with the reef (blue) ability.
Clue #02 There's nothing there, but it's my favourite place, kupo. Treasure 4x Remedy, 2x Elixir, 8x Rising Sun, 1x Oak Staff Location Lanshake Island, cross shallows eastward from Nomarania Beach, which is east of LIndblum Dragon's Gate.
CHOCOGRAPH 12 - DAWN LAGOON
This chocograph is found in the Chocobo's Lagoon and the treasure's location can be accessed with the reef (blue) ability.
Clue #02 Lots of rich people live there, kupo. Treasure Mountain (red) ability upgrade. Location By the southeast tip of the Mist Continent, in the reef south of Treno.
CHOCOGRAPH 13 - FORBIDDEN FOREST
This chocograph is found in the Chocobo's Forest and the treasure's location can be accessed with the mountain (red) ability.
Clue #02 You need to go over a very high mountain. Treasure 7x Ether, 2x Elixir, 10x Wing Edge, 1x High Mage Staff Location Nolrich Heights, west of Dali. lone forest surrounded by high mountains.
CHOCOGRAPH 14 - GREEN PLAINS
This chocograph is found in the Chocobo's Forest and the treasure's location can be accessed with the mountain (red) ability.
Clue #02 High plains are grass fields that are found at a higher elevation. Treasure Ocean (dark blue) ability upgrade. Location Alexandria Plateau, ledge overlooking the beach west of Evil Forest.
CHOCOGRAPH 15 - DUSK PLAINS
This chocograph is found in the Chocobo's Lagoon and the treasure's location can be accessed with the mountain (red) ability.
Clue #02 At a certain location on the Forgotten Continent, it is always dusk, kupo. Treasure 12x Phoenix Down, 14x Ore, 1x Kaiser Knuckle, 1x Iron Man Card Location On a plateau near a small forest northwest of the Wind Shrine.
CHOCOGRAPH 16 - FORGOTTEN PLAINS
This chocograph is found in the Chocobo's Forest and the treasure's location can be accessed with the mountain (red) ability.
Clue #02 Look for the withered plateau, kupo. Treasure 17x Ore, 5x Ether, 14x Opal, 1x Demon Mail Location Peninsula west of Ipsen's Castle, on one of the ledges on the plateau.
Chocobo Treasure Hunt Part 3

 Clue #01There Must Be More Treasures Deeper In The Ocean.
 Clue #01Look Carefully! There's A Small Reef, Kupo!
 Clue #01What A Complicated Cove. The Water Looks Very Cold, Kupo.
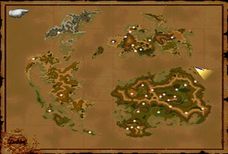 Clue #01Look Around The Small Islands In The NE Shore Of The Mist Continent.
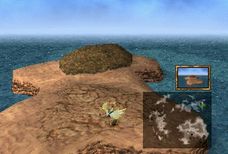
 Clue #01Kupo. It Isn't A Very Big Island.
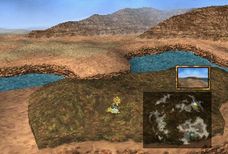
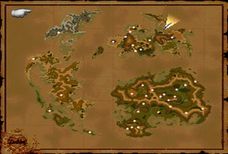 Clue #01I Think There's A Desert Nearby, Kupo.
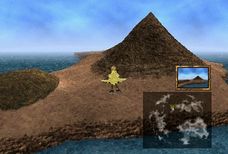
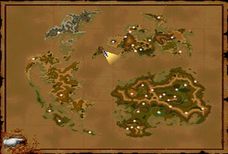 Clue #01There's A Mountain On The Middle Of The Island.
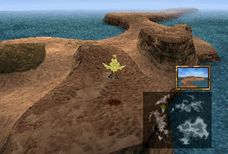
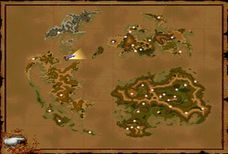 Clue #01What A Strange Shape For An Island, Kupo.
 LocationMountain Next To Crescent-shaped Forest, Straight North From Oielvert.
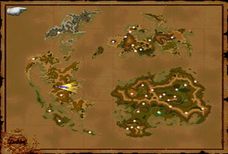 LocationMountain A Tad North From Oielvert, Northeast Of Water Shrine
CHOCOGRAPH 17 - SEA AT DUSK
This chocograph is found in the Chocobo's Lagoon and the treasure's location can be accessed with the ocean (dark blue) ability.
Clue #02 Go dig in the ocean! Treasure 15x Phoenix Pinion, 1x White Robe, 1x Diamond, 1x Masamune Card In ocean NE of the Wind Shrine and Oeilvert, north of Chocobo's Lagoon.
CHOCOGRAPH 18 - OCEAN
This chocograph is found in the Chocobo's Lagoon and the treasure's location can be accessed with the ocean (dark blue) ability.
Clue #02 Call a chocobo near this place, kupo! Treasure 27x Ore, 1x Light Robe, 1x Whale Whisker, 1x Alexander Card In the ocean west of Everlang Island.
CHOCOGRAPH 19 - COLD LAGOON
This chocograph is found in the Chocobo's Forest and the treasure's location can be accessed with the ocean (dark blue) ability.
Clue #02 Why would anyone hide treasure here, kupo? Treasure 11x Peridot, 9x Opal, 15x Sapphire, 19x Topaz Seatence Ice Field, NW of Fire Shrine; NE section of Lost Continent.
CHOCOGRAPH 20 - MIST OCEAN
This chocograph is found in the Chocobo's Forest or Chocobo's Lagoon once you have located all 6 Chocograph Pieces, and the treasure's location can be accessed with the ocean (dark blue) ability.
Clue #02 Be patient and dig! Dig! Dig, kupo! Treasure Sky (gold) ability upgrade. In ocean some ways from the pair of islands northeast of Alexandria.
CHOCOGRAPH 21 - OUTER ISLAND
This chocograph is found in the Chocobo's Air Garden, and the treasure's location can be accessed with the sky (gold) ability.
Clue #02 How scary! I hope you like heights... Treasure 21x Amethyst, 16x Garnet, 1x Genji Armor, 1x Ragnarok Korua Island, the small island on the eastern tip of the Outer Continent.
CHOCOGRAPH 22 - OUTER ISLAND 2
This chocograph is found in the Chocobo's Lagoon, and the treasure's location can be accessed with the sky (gold) ability.
Clue #02 I don't think you can get near it from the ocean, kupo... Treasure 11x Sapphire, 1x Circlet, 1x Pumice Piece, 1x Hilda Garde 3 Card Likanmack Island, this is a small island northwest of Desert Palace.
CHOCOGRAPH 23 - FAIRY ISLAND
This chocograph is found in the Chocobo's Air Garden, and the treasure's location can be accessed with the sky (gold) ability.
Clue #02 Try going to places you couldn't reach before, kupo! Treasure 33x Potion, 15x Annoyntment, 1x Holy Miter, 1x Dark Matter Card Vile Island, island off to southwest of Iifa Tree.
CHOCOGRAPH 24 - FORGOTTEN ISLAND
This chocograph is found in the Chocobo's Air Garden, and the treasure's location can be accessed with the sky (gold) ability.
Clue #02 You've come this far! You can figure it out, kupo! Treasure 1x Ribbon, 1x Rebirth Ring, 13x Amethyst, 1x Ark Card Pilkiras Island, an island off the southern tip of the Lost Continent.
Dead Pepper Treasures
Once Choco gains the ability to traverse mountains, you'll also be able to dig up Dead Peppers in both the Forest and the Lagoon. This item puts Choco in a frenzied state for a brief instant, and enhancing his natural abilities. This allows you to find treasures in areas apart from those indicated in chocographs, namely foams in the ocean or mountain cracks.
MOUNTAIN CRACK 1
Choco must have the mountain (red) ability to access this spot.
Treasure 19x Eye Drops, 1x Madain's Ring, 1x Genji Helmet, Hilda Garde 1 Card.
MOUNTAIN CRACK 2
Choco must have the mountain (red) ability to access this spot.
Treasure 1x Maiden Prayer, 1x Dragon's Hair, 1x Gauntlets, 1x Odin Card
Chocobo Treasure Hunt Part 4
 LocationSeatence Ice Field, Mountain NE Of Lost Continent, NW Of Fire Shrine.
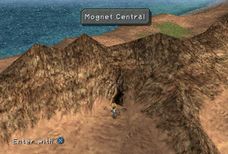
 LocationCazedil Plains, The Largest Land Mass North Of The Outer Continent.
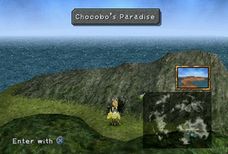
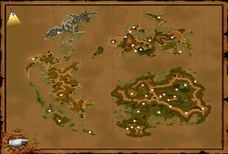 LocationUaho Island, The Unmapped Island On Northwest-most Tip Of World Map.
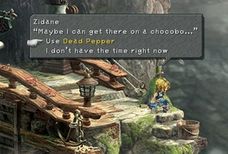
 LocationQuan's Dwelling, Check The Ledge Where The Dead Clock Is At.
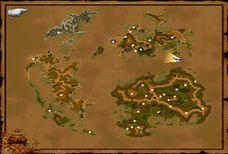 LocationSouth Of Earth Shrine, Southern Tip Of Outer Continent.
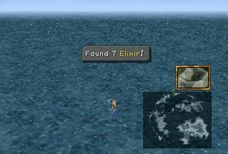
 LocationIn The Ocean Near The Northern Edge Of The World Map In Between The Forgotten Continent And The Outer Continent.
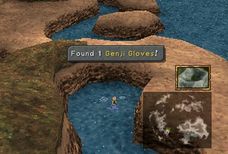
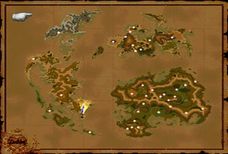 LocationIn The Ocean Southeast Of The Forgotten Continent, North Of Chocobo's Lagoon And South Of Wind Shrine.
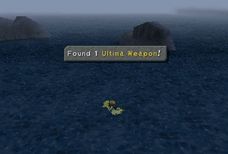
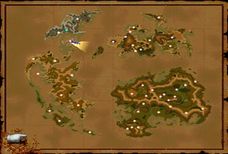 LocationShimmering Island. Accessible In Disc 4 Once The Island Is Destroyed.
MOUNTAIN CRACK 3
Choco must have the mountain (red) ability to access this spot.
Treasure 41x Lapis Lazulis, 1x Rosetta Ring, 1x Protect Ring, 1x Airship Card
MOUNTAIN CRACK 4
Choco must have the mountain (red) ability to access this spot.
Treasure Mognet Central
MOUNTAIN CRACK 5
Choco must have the sky (gold) ability to access this spot. The entire treasure hunt quest concludes when you visit the Chocobo's Paradise after getting all chocograph and dead pepper treasures.
Treasure Chocobo's Paradise
OCEAN FOAM 1
Choco must have the ocean (dark blue) ability to access this spot.
Treasure 9x Ore, 15x Topaz, 1x Tiger Racket, 1x Red Rose Card
OCEAN FOAM 2
Choco must have the ocean (dark blue) ability to access this spot.
Treasure 8x Straw Hat, 8x Pearl Armlet, 7x Aloha T-shirt, 8x Sandals
OCEAN FOAM 3
Choco must have the ocean (dark blue) ability to access this spot.
Treasure 50x Potion, 25x Hi-Potion, 9x Ether, 7x Elixir
OCEAN FOAM 4
Choco must have the ocean (dark blue) ability to access this spot.
Treasure 10x Remedy, 1x Black Robe, 1x Genji Gloves, 1x Blue Narciss Card
OCEAN FOAM 5
Choco must have the ocean (dark blue) ability to access this spot.
Treasure 10x Aquamarine, 1x Ultima Weapon, 1x Maximillian, 1x Invincible Card
Mognet Central
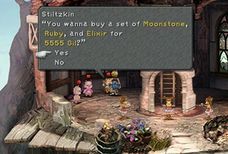
Mognet
This side quest spans throughout the game and involves delivering letters between moogles. The reward for completing this quest may not be much but since moogles are so helpful to you, it's only fair to help them too.
The Letters
In total, there are 27 letters to be delivered, including the all-important ones in Disc 4. In fact, you can ignore all the other letters except the endgame ones and still complete this quest. Most of the moogles in the game are met only once so if you miss a letter, chances are it's gone forever. Lastly, you can carry a maximum of 3 letters at any one time.
From Kupo (Alexandria Bell Tower) to Monty (Evil Forest Spring)
From Mois (Ice Cavern) to Gumo (Dali Village Inn)
From Kumop (Dali Underground) to Mogki (L. Castle Guest Room)
From Mogki (L. Castle Guest Room) to Atla (Burmecia Vault)
From Grimo (Bohden Station) to Nazna (Summit Station)
From Nazna (Summit Station) to Mochos (Gargan Roo Entrance)
From Atla (Burmecia Vault) to Monev (Cleyra Tree Trunk)
From Mopli (Cleyra Sand Pit) to Serino (Red Rose Cabin)
From Serino (Red Rose Cabin) to Moodon (Lindblum Inn)
From Mosh (A. Castle Chapel) to Monty (Pinnacle Rocks)
From Moodon (Lindblum Inn) to Moonte (Lindblum Dragon Gate)
From Kuppo (Fossil Roo Mining Site) to Kupo (Alexandria Bell Tower)
From Mogmatt (Conde Petie) to Suzuna (Mountain Path)
From Mogryo (Black Mage Village) to Mocchi (Iifa Tree Roots)
From Mogki (L. Castle Guest Room) to Moodon (Lindblum Inn)
From Mimoza (Oeilvert Outside) to Mooel (Oeilvert Star Display)
From Mojito (D. Palace Rack) to Mogsam (D. Palace Library)
From Mogrika (Esto Gaza Terrace) to Moolan (Mt. Gulug Room)
From Moolan (Mt. Gulug Room) to Mogtaka (Mt. Gulug Storage)
From Mogki (L. Castle Guest Room) to Kumool (Ipsen's Castle)
From Moorock (Bran Bal Storage) to Mozme (Pandemonium Maze)
From Kupo (Alexandria Bell Tower) to Atla (Burmecia Vault)
From Atla (Burmecia Vault) to Mogryo (Black Mage Village)
From Mogryo (Black Mage Village) to Kumool (Ipsen's Castle)
From Kumool (Ipsen's Castle) to Mois (Fossil Roo Entrance)
From Mois (Fossil Roo Entrance) to Noggy (Daguerreo Right Hall)
From Noggy (Daguerreo Right Hall) to Kupo (Alexandria Bell Tower)
Mognet Central
Mognet's HQ is located behind a mountain crack on the Cazedil Plains near the northern edge of the Outer Continent. You need Choco's Mountain ability and some Dead Peppers to access Mognet Central.
The final 5 letters can only be delivered in Disc 4 even if you managed to unlock Mognet Central much earlier. Begin by paying Kupo a visit in Alexandria's Bell Tower. You'll also see Stiltzkin who offers to sell you one final bundle of items, buy it as always. If you bought every single one of Stiltzkin's offer throughout the game, he gives you a Ribbon as thanks.
Take Kupo's letter for Atla to Burmecia and start delivering the five remaining letter until the cycle ends with a letter from Noggy to Kupo.
The Superslick can be obtained by speaking to Ruby at the Mini Theater in Alexandria. With the item in hand, drop it off with Artemicion in Mognet Central. He gives you a Protect Ring. That concludes this side quest.
Kupo Nuts
After visiting Gizamalukes Grotto each time that you deliver a letter you will recieve a Kupo nut, if you are not already holding a Kupo Nut.
Kupo nuts can be traded for random prizes with the moogle at gizamalukes grotto, one of which is a rare item (Aloha TeeShirt.)
Optional Bosses
Defeating Ozma
Ozma's lair can be found in a small cave at the top-left section of the Chocobo's Air Garden. Examine it and Mene warns you to stay away. Ignore his advice a take a look anyway. Prepare to engage Ozma.
To prepare, you might want to select a party with long range abilities. You will not be able to reach Ozma using normal attacks unless you managed to locate all the friendly monsters scattered throughout Gaia.
The recommended party would be: Zidane, Freya, Eiko, and Vivi/Quina. Make sure no one in your party has levels that are multiples of 5 or 4 if you can get away with it; Ozma has LV5 Death and LV4 Holy. As for character abilities and gear, equip the following:
Skills: Antibody, Clear-Headed, Auto-raise, Auto-potion, Bandit, Auto-Regen, Auto-haste.
Equip: Any and all armor that protects against shadow damage.
Strategy: Have Zidane steal constantly as Ozama has an Elixer, Robe of Lords, Dark Matter, and a Pumice Piece. Have either Eiko or Garnet heal constantly. If Steiner is in the party have him use shock.
Side Quests Part 1
Quests: actual sidequests
Stellazzio Quest: Treno there is a lady living in a house north of the Combination Shop. She will tell you about a set of thirteen Stellazzio that are spread across the world. Find them each and she will reward you everytime you return. YOU MUST FINISH THIS QUEST IN ORDER TO SEE THE ALTERNATE ENDING!
Aries: Dali; In the windmill all the way to be back (not downstairs)
Cancer: Burmecia; behind the overturned cart
Scorpio: Quan Cave spring
Gemini: Fountain at the first screen after you enter Treno; throw coins thirteen times into the fountain.
Taurus: Treno; behind the item shop.
Virgo: Black Mage Village Inn; around the beds
Libra: Madain Sari fountain
Leo: Alexandria (after raid); Left Tower near Neptune Statue
Sagittarius: Linblum; in the left side of the 3d screen up of the Commercial Square.
Capricorn: Dargelo Library; right hand side
Aquarius: Ipsen Heritage; right hand pillar at entrance
Pisces: Treasure chest inside Invincible.
13th Stellazzio: Return to the Quan Cave that's east of Treno after collecting and returning all 12 coins.
Land Spirits
In certain spots of the world map you'll stumble across a couple of friendly monsters. They are land spirits and each of them will make a request from you. Fufilling their request enables you to be able to use the "Attack" command when you are fighting Ozma, who's unlocked in the Chocobo Garden by inspecting a large rock on the upper right hand corner.
You'll get Garnet's strongest Summon, Ark, from defeating Ozma but it is a very hard battle. A good strategy vs. Ozma is to use Quina's "Magic Hammer" or any other MP-reducing attack/spell since Ozma relies heavily on magic. After that it's just a matter of using your normal attacks. If you find Ozma WITHOUT finishing the Land Spirits quest, you will NOT Be able to use the "Attack" command which places you in the worst possible situation.
Squirrel: Around Dali. Ore stone.
Ghost: In front of Treno (but not too far) or around the South Gate. Ore stone.
Ladybug: Around the Black Mage Village. 2 Ore stones.
Yeti: Forest outside Madain Sari. 2 Ores Stones.
Nymph: Forest near Iifa. 3 Ore Stones.
Jabberwork: Forest East of Oeivell. Emerald.
Feather Suckle: Ice Continent, on the Chocobo tracks. Moonstone.
Galda: Forest outside Gizamaluke Cave after climbing rope. Lapis Lazly.
Yan: Bile Island (small island near center of map). It will keep running away until you have found all 8 other Land Spirits. Diamond.
Coffee Quest:Give the guy at the Watchtower in Dali the 3 coffee beans he wants and he'll give the Prima Vista figurine.
Pass near the Chocobo Forest, around the right side of the screen.
In the Madain Sari kitchen
Disc 3, before finishing the Card Game (While you're waiting for King Cid) head to Dali and check the Chief's hut (thief! LOL) for a key to the previously locked door inside the windmill.
Items:
These are mini games that give you items.
Rope Jumping: When you start the game VIVI can do an option "Rope Jump" game in the Alexndria town square. Depending on how many jumps you get, you'll get a progressively better item. Go for 1000!
100 jumps: Genji Card
200 jumps: Alexander Card
300 jumps: Cat Paw Racket
1000 jumps: King Of Skipping Title
Catch those Frogs!Those frogs may seem like a stupid litte minigame but they can be a source of some good items and new weapons for Quina, plus the number of frogs Quina eats will power up the "Frog Drop" spell.
2 frogs: Ore Stone
5 frogs: Ether
9 frogs: Silk Robe
15 frogs: Elixir
23 frogs: Silver Fork
33 frogs: Bistro Fork
99 frogs: Quina's Master appears and fights you; just use standard attack/heal techniques and be around level 40.
You'll get the Gourmet Fork for winning.
Quiz Master: If you ever see a weirdly-dressed character that has a circle and an X floating around him, you've
found the Quiz Master. He hangs out around the Black Mage village and will ask you a series of 13 questions. If you get it right you'll get a TON of AP and if you answer ALL 13 you'll get a Memory Ring.
EXCALIBUR!
Buy the "Magic Finger" item at the Treno Auction early on; once you reach Dargelo give it to an eldery man in there and he'll be so kind that you'll get Excalibur for giving him the finger -- which doesn't happen everyday, mind you.
EXCALIBUR II!
This one is a tough one. You have to get ALL THE WAY to Hades (see the Miscellaneous section of the Side Quests) in UNDER 12 HOURS. After beating Hades, check the farthest right pillar for the sword. Here's some tips on how to get to Hades in under 12 hours:
Skip all ATEs
Do not engage in any sidequests
Constantly JAM on the Circle button to get the conversations to go faster.
Save OFTEN!
If you don't think you're moving fast enough, do a soft reset (L2R2R1L1 + START + SELECT) and pick up from your last save.
There WAS (I haven't tried it recently; neither I nor IGN are held responsible if you try this and it either messes up your CD or your PS) a way to skip FMV's with some other games that may work with FFIX; just open the lid when the an FMV starts up and close the lid IMMEDIATELY after the disk stops spinning. In essence you'll make the PSX think the FMV is over while you don't get docked for time.
Ultima Weapon!
Go back to the glacier around were Terra was (Before Kujah went gangstah on it) and search around with a Chocobo and a dead pepper. You'll find it there =o)
Secrets:
Alternate Ending!Just finish the Zodiac Quest and keep the "Shina's Hammer" that you find the room after fighting Lich in the fourth disk -- don't lose it, use it, or sell/combine it. It has to be present in your inventory.
New Carbunkle/Fenrir Skills!Diamond+Carbunkle= DiaLight
Virgin's Hope+ Fenrir= 1000 Year Dust
Moonstone+Carbunkle= Pearl Light
Emerald+Carbunkle= Emerald Light
Increase your Collector's Rating!
Find the Mini-Cid (Treno Auction), Mini-Burmecia (Treno Auction), Mini-Brahme (under chair at Dali Chief's house), and Prima Vista (after finishing up the Coffee quest) to see your collector's rating soar!
Fight in the Library!
Inside the Alexandria Library there is a rare mini boss you can fight. You only have TWO chances to get to him -- the first time in disk 2 when you rescue Garnet and in disk 3 when Garnet and Eiko summon Alexander (that huge thing with wings). Go get'im!
Return to Quan Cave
Go with VIVI and Quina and wait for an event; afterwards check the clock for the Elmac shoes that can teach you the RARE Auto-Haste!
Garnet's NOT HER NAME!?On Disk 4 have Garnet and Eiko in your group and head back to Madain Sarai. In the Kitchen you'll talk to Rene (Rani, whatever) again and then, after Rani leaves, reform your party and remove Garnet and Eiko. Head to the circle (farthest left in the town) and look around until you see an exclamation mark pop out. DO NOT do anything, just go around clockwise once and then counterclockwise. Garnet's real name will show up in the wall -- nope, I'm not telling ^_^
Namingway's Back in Business!
Stick around in Desert Empress long enough to get a Namingway card. Then when you are in Dagelero show it to a man wearing brown clothing and he'll change your character(s) names.
Side Quests Part 2
Updating Mognet!
On disk 4 get (if you don't have one) a flying Chocobo. Head to the island north of Madain Sarai and find a crack in the mountain. Use a dead pepper to open it up and then you'll have to visit some Moogles to get MognetHQ back up.
First, go to Burmecia, Black Mage Village, Ipsen's Heritage, QU's Marsh (in the Mist Continent), then Dargelo Library, and finally Alexandria. You'll get "Protect Ring" which is kind of lame considering how much you wound up having to travel.
Ultimate Combination Shop + Hades!
When you get to the last dungeon ("Memory Room/ Birth") look or an underwater (or seemed like it to me, anyways) and move to the right of the room to find Hades. There's no exclamation mark to mark it out for you so you'll have to keep tapping the button until you find him. Defeat him (shouldn't be too hard) and you'll be able to check out the Combo shop. If you weren't able (or don't want to) either get the Alternate Ending or fight Ozma you can get Garnet's last summon here.
Chocobo Paradise!!!
With a flying Chocobo, head to the northwestern corner of the map and find a crack inside a mountain; use a dead pepper and go on in.
Get Rated!!
Talk to the four-armed man in Dargelo's Library and he'll tell you how good of a collector you are. He also has some rare cards on him so play him often!
BLACKJACK!!
Just tap</p><p>R2, L1, R2, R2, Up, X, Right, Circle, Down, Triangle, L2, R1, R2, L1, Square, and Square
When you get to the end of the screen after you see all the game's credits!
...on to Card Secrets
Miscellaneous Quests
Miscellaneous Quests
THE LOST NERO FAMILY QUEST
http://www.youtube.com/watch?v=9vYMDCuS_lA
This quest is found when visiting the Lindblum Tantalus Hideout in Disk 4
The reward for completing the quest is the Protect Ring, which has some nice stats and reduces all elemental damage by 50%
SKIPPING / JUMP ROPE
Skipping / Jump Rope is available in Alaxandria at the very beginning of the game with vivi, and in disk 3 with vivi or eiko in the party.
The key to winning is timing and rhythm
prizes are tetra master cards and a key item
20 Jumps: 10 Gil; 50 Jumps: Cactuar Card; 100 Jumps: Genji Card; 200 Jumps: Alexandria Card; 300 Jumps: Tiger Racket Card; 1000 Jumps: King of Jump Rope / King of Skipping key item
MORRIDS COFFEE
Morrid is an old man who can be found at the observation mountain beside dali village. He will give the player a quest when they first visit him in disk 1 to find some rare coffees before he dies.
Moccha - is found at south gate (near chocobos forest)
Kirman - is found in Eikos Kitchen in madain Sari
Burman - is found in the windmill in Dali, but can only be accessed by leaving Treno during the card tournament and visiting dali, and taking the key from the mayors house.
You must also give all three coffees to morrid before entering the shimmering isle.
The reward is the Theatre ship model, which will greatly boost your treasure hunter / collectors rating.
HIPPAUL RACING & CARD STASH
On disk 3 when playing as vivi in alxandria you briefly have the opportunity to race hippaul and win prizes, you can also find his rare cards at the same time by seaching the bell tower.
Level 10 Wyerd Card Level 20 Carrion Worm Card Level 30 Tantarian Card Level 40 Armstrong Card Level 50 Ribbon Card Level 60 Nova Dragon Card Level 70 Genji Card Level 80 Athlete Queen
FROG HUNTING
Whenever you enter a marsh with quina you will be given the option to catch frogs. Each frog that you catch boosts the attack damage of quinas frog drop blue magic ability (up to 9999) and can unlock prizes from master quale.
Prizes
2 Frogs: Ore
5 Frogs: Ether
9 Frogs: Silk Robe
15 Frogs: Elixir
23 Frogs: Silver Fork
33 Frogs: Bistro Fork
45 Frogs: Battle Boots
99 Frogs: Gastro Fork and battle with Master Quale
(Gastro fork is Quinas ultimate weapon and Master Quale carries Gluttons Robe, Ninja Gear, and Robe of Lords he also carries and drops an elixir and may drop a rare grand dragon card, he is quite tough if you battle him early on but later in the game he is pretty easy.)
RAGTIME MOUSE
When you enter a forest in the world map there is a chance that you will encounter the ragtime mouse. He will ask you a question and you will get a chance to win a cash prize if you answer correctly
The 15th Lindblum War started in 1600. - False
Chocobo Forest is located between Lindblum and South Gate. - True
The Theater Ship Prima Vista was built in Artania Shipyards. - False
"I Want To Be Your Canary" was written by Lord Afon. - False
Lindblum Castle is larger than Alexandria Castle. - True
Some Mus are friendly and don't attack. - True
Fossil Roo is a tunnel that connects Treno and Alexandria. - False
Theater Ship Prima Vista uses Mist as its source of energy. - True
Berkmea cable cars have been running for eight years. - True
Lindblum's air cabs operate around the clock. - True
Only one desert exists in the entire world. - False
Conde Petie is a village of Goblins. - False
Prima Vista means love at first sight. - False
Treno's cafe, Card Carta, is members only. - True
Bobo bird is a bird that brings you fortune. - False
After answering the questions above:
You can defeat Ragtime Mouse. - True
if you answer all of his questions correctly you will battle him and win a cash prize plus a protect ring and exp, if you don't answer all his questions correctly you will just win the ring
Source: https://steamcommunity.com/sharedfiles/filedetails/?id=667562503
More FINAL FANTASY IX guilds
- All Guilds
- FINAL FANTASY IX Guide 10
- Tetra Master for scrubs
- Finding All Stellazio
- EASY JUMP ROPE MINIGAME [not hax] | *2020 Updated*
- FINAL FANTASY IX 100% Achievement Guide
- - Steam
- All Achievements Guide
- Final Fantasy IX: Blue Magic (Quina) Guide
- Final Fantasy IX - Achievement Walkthrough