Update
18/11/2022:
Updated achievements: Life… Finds a Way, All Geared Up, Prepared For Anything, What Lies Below, Seeker, Despised
Added achievement images
19/11/2022:
Updated achievements: A Second Chance, Press-ganged, The Package, Pilgrimage’s End, Embellished
Tips
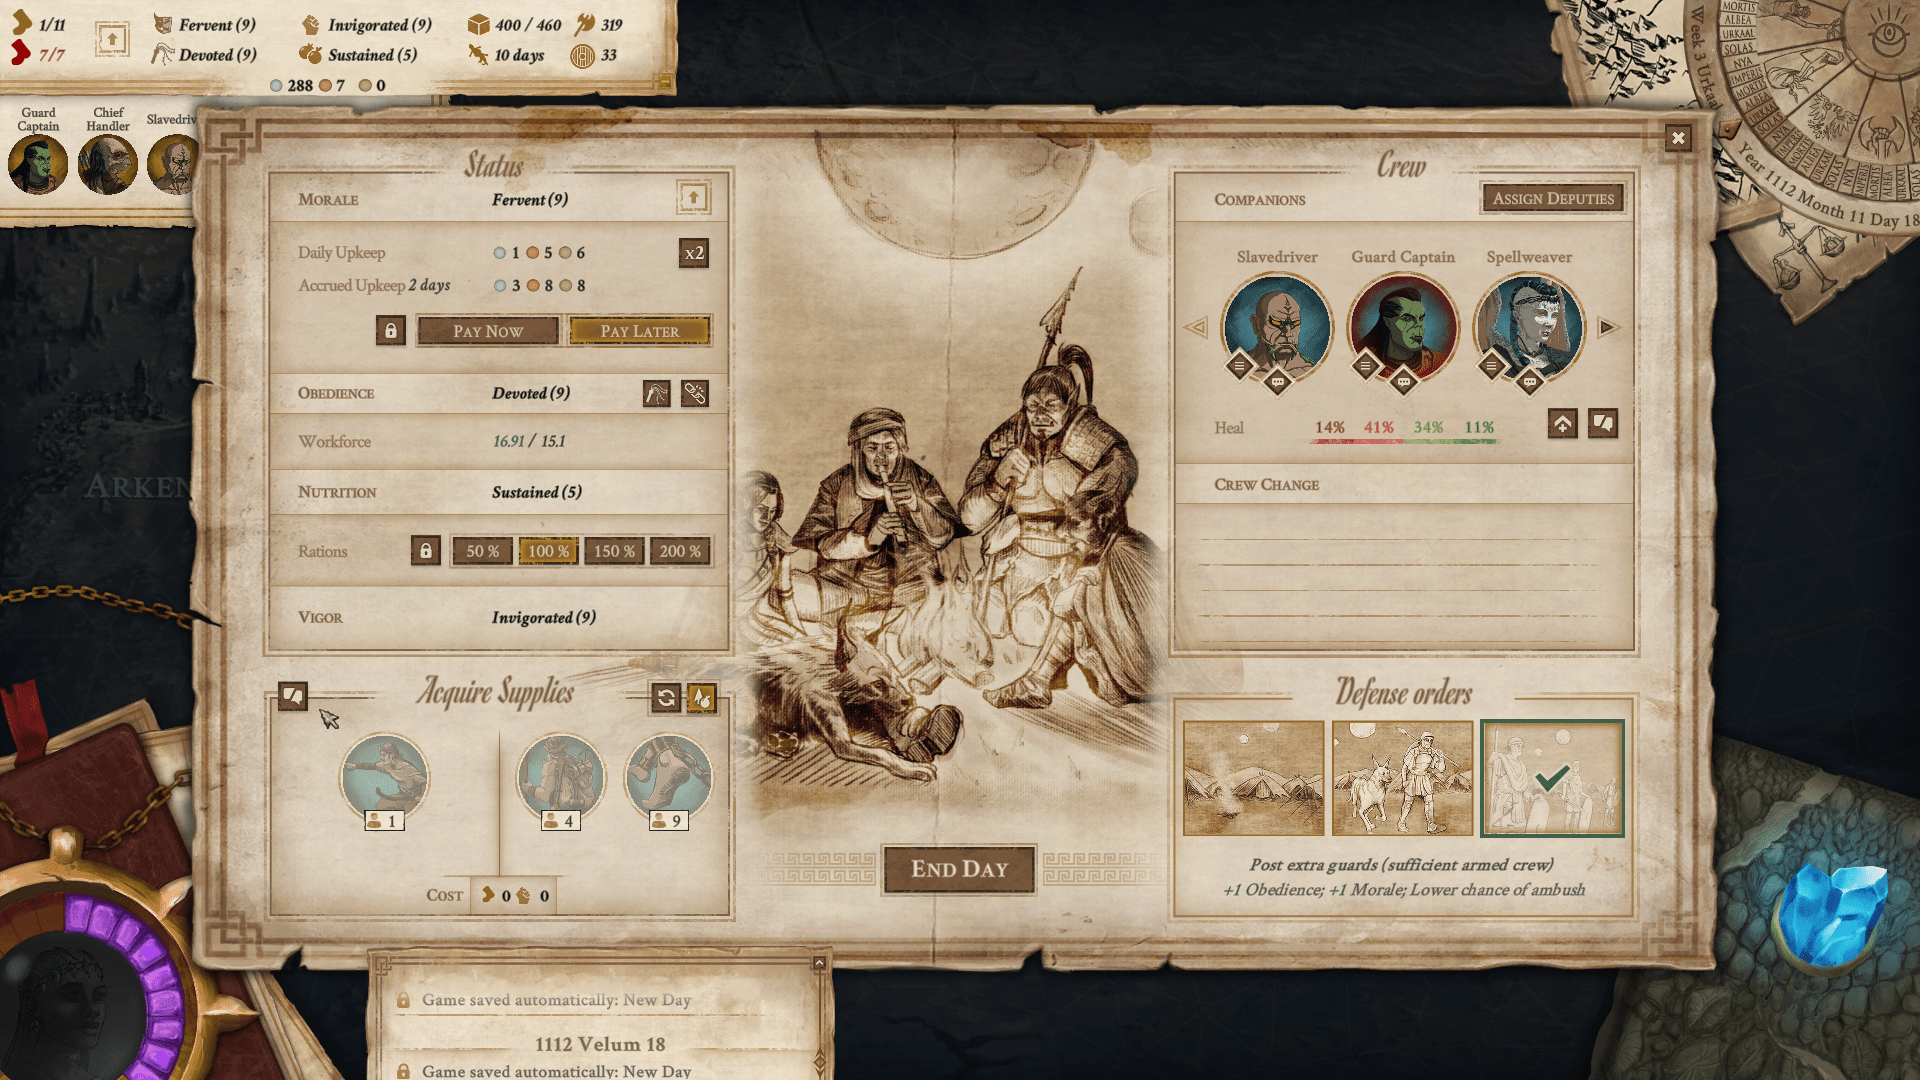
As in any games doing the tutorial is highly recommended. But I found the tutorial storyline ‘Pilgrims of the Wasteland’ much harder than the rest of the game. So don’t get discouraged if you’re having significant difficulty finishing the prologue.
Vagrus is about exploration, so explore a lot, go to the confines of the playable map. Don’t hesitate to select every option when visiting a location. Even when you have visited a location many times, a new option may appear because you have the requirements. Buy every rumor you can because it may unlock quest.
An important point is that you can’t explore the whole map. You can’t go beyond the fork north of Deven, The Twin Towers and Carravhon to the south, The Crimson gate to the east, Sadirar and Eitrar to the west.
Start small and then improve your comitatus little by little to transport more goods and generate more profits. Avoid travelling without transporting goods as much as possible, because you lose money this way.
Hire enough fighter so that your comitatus is sufficiently protected. It will be easier to maintain vigor, moral and obedience to high levels because you will not have a penalty of 1 vigor if you guard the camp when camping.
Outriders are stronger than fighters but they consume more than the sum of fighters and mount. When you don’t have a fight, don’t forget to dismount them.
Recruit companions as soon as possible. Check regularly with your crew when you set camp. Sometimes they will ask you something and it will start a new quest. Max your authority as soon as possible. And then later in the game also try to max your resourcefulness. Also, the leadership perk call ‘Command’ will help you a lot in Crew Combat even if you do not have enough combat strength, this perk unlock action that can make you win the fight.
Be careful to always get enough supplies when travelling. When you comitatus run out of supply, they will wear themselves out and end up not being able to move forward. Save as often as possible, you don’t know what awaits you on the road.
Don’t spend your insight points too fast, rather wait to see what you need or you risk getting stuck.
How to make profit: Do tasks for factions. It will increase your reputation with them and you will get tasks with more interesting reward. Opposite of buying and reselling you don’t need to spend anything. Passenger transport isn’t the best way to make profit in most cases.
Pilgrims Of The Wasteland (Part 1)


A Second Chance
Leave Scrapheap in ‘Pilgrims of the Wasteland’
First you need to travel to Scrapheap, two nodes away from where your comitatus is standing. But before you enter Javek will talk to you about your next mission.
Select: Time will tell, but I still have my doubts – It does yes – Our plan ought to give us another chance – If he is not willing, we must find a way to compel him – Taking a peek? – Apology accepted.
Select Track Down Narbo – Walk over to the bar – Wait until he is done with his paper – Walk over to Narbo’s table – Apologise to him – You breeze in – Tell him that you will be in his debt. Let him know that in exchange for his help, you can help him out with a problem he might have right now. He will ask you to deliver a package to Skornar in Avernum.
Buy everything for your journey to the market: 24 Scrap Metal, 800 Supplies, The Awnings equipment (you will be guided through this by the tutorial).
Don’t quit yet. In the story pane, click on: Stroll Scounger’s Lane. Find the merchant who is selling the cheap supply and buy the supplies. Then select: You recall a little shop hidden in an alley and buy the compass; it will be a great help to you. When you are read click on the exit arrow on the top right corner. You will have a conversation with Jarvek. You can choose what you want, but I advise you to spare the members of your comitatus: +3 Morale. The achievement should pop.
Press-ganged
Reach Avernum in ‘Pilgrims of the Wasteland’
Before moving don’t forget to equip the Compass. To travel you will have only one road so don’t bother about where Avernum is situated. It will take 10 days for you to arrive in Avernum. When camping you need to choose about defense, select: Post Guards.
At the end of day two after camping, you will see an event window and you will have to fight two Jhakra. The tutorial will guide you through your first fight. When it’s over choose to: Harvest the damned critters before going back to bed.” Reward: 2 Ivory, 90 Supplies, 5 Hides.
During the fifth day of travel (day 11 on your calendar), you will encounter The last Pilgrimage: Try to find a place where you can hide – Hunker down with the comitatus.
On the sixth day of travel, the game will remind you to pay your comitatus. You can’t yet, so continue to travel to Avernum.
When you reach the extremity of the voiceless lake, a window will appear. If you fail the test, you can still pass but you will lose : 1 Mount, 1 Fighter, 1 Slave and 2 Morale. If you fail, reload and try again. If you succeed you will gain +1 Morale.
But you are not at the end of your sorrows. After leaving the lake behind, you will hear battle sounds. Rush in and attack the undead and get +1 Morale. A fight will commence against two cinderborns and one congregated. You will have two allies at your side. Place Morwen on the front row and Jawek behind Sedarias. After the fight you loose 1 fighter. Tell him that you are a trading comitatus travelling south – Best not to make him wait – Exhaust all four options and ask him what he plans to do now.
Now you don’t have enough fighter so when camping play between : Post no guards and Post guard to keep Morale, Obedience and Vigor above 3.
On the seventh day of travel (Day 19 on your calendar), you encounter The last Pilgrimage again. Hide and gain +5 Insights
On the ninth day, you will arrive in the city of Avernum.
Before entering Avernus, Sedarias will want to have a chat with you. Ask him every question then agrees to help him (you can choose the reason). Enter the city, pay the tax gate and the achievement should pop.
The Package
Deliver Narbo’s package to Skornar in ‘Pilgrims of the Wasteland’
When you have reached Avernum on the story pane select: Meet Skornar – Talk to Skornar – Hand him the package. Reward: +2 Insights.
Pilgrims Of The Wasteland (Part 2)


Pilgrimage’s End
Complete the main story in ‘Pilgrims of the Wasteland’
After you have delivered the package to Skornar enter the temple of Ashkul ask the priests about the walls and their gods and Visit the Great Ossuary to gain +2 Insight. You also gain +2 Insight each time you add 10 new codex entries. So, try to exhaust every option. As there are many, I won’t detail all of them.
Visit the Sorcerer – Tell me what you can about the last Pilgrimage and exhaust all options: +5 Insights
To dispose of the Sergorodites belongings: Seek out the foundries – Smelt down the arms and armors of the dead Sergorodites: +1 Iron, +1 Bronze
In Sedarias’ hideout, you can ask him to pay for the tax gate: +1 Lyrg. Then report to him, he will give you three targets. You need a day by target.
Assistant Magistrate Geludis Darro: Tell him you have heard rumors – Tell him the fake story - … and my scout returned with news of dead bodies – We took some weapons.
Centurion Vardis Pendius: Talk to the bartender – Convince the bartender to spice up Pendius’ drinks – Continue to buy him spiced-up drink (you can use resourcefulness to ease the test).
Smelter’s Collegium: Lavinus’ watering holes – Ask Skornar if he can help you the investigate the Smelter’s Collegium – Use Skornar’s help in dealing with the collegium. Report your findings on the three suspects to Sedarias. You can tell him anything that you want in the list, it will not change a thing: +7 Insights.
When you are ready head to The Warehouse but be wary as there will be tough combat in there. So be sure that you companions get at least 6 hp. First fight: Three enemies and two allies (Sedarias included). Second fight: 4 enemies and Sedarias. Reward: +10 Insights
When you leave the city gate a Sergorodite will give you 350 supplies, so leave enough places to take it with you. To help Sedarias you will have to eliminate three abolitionist camps.
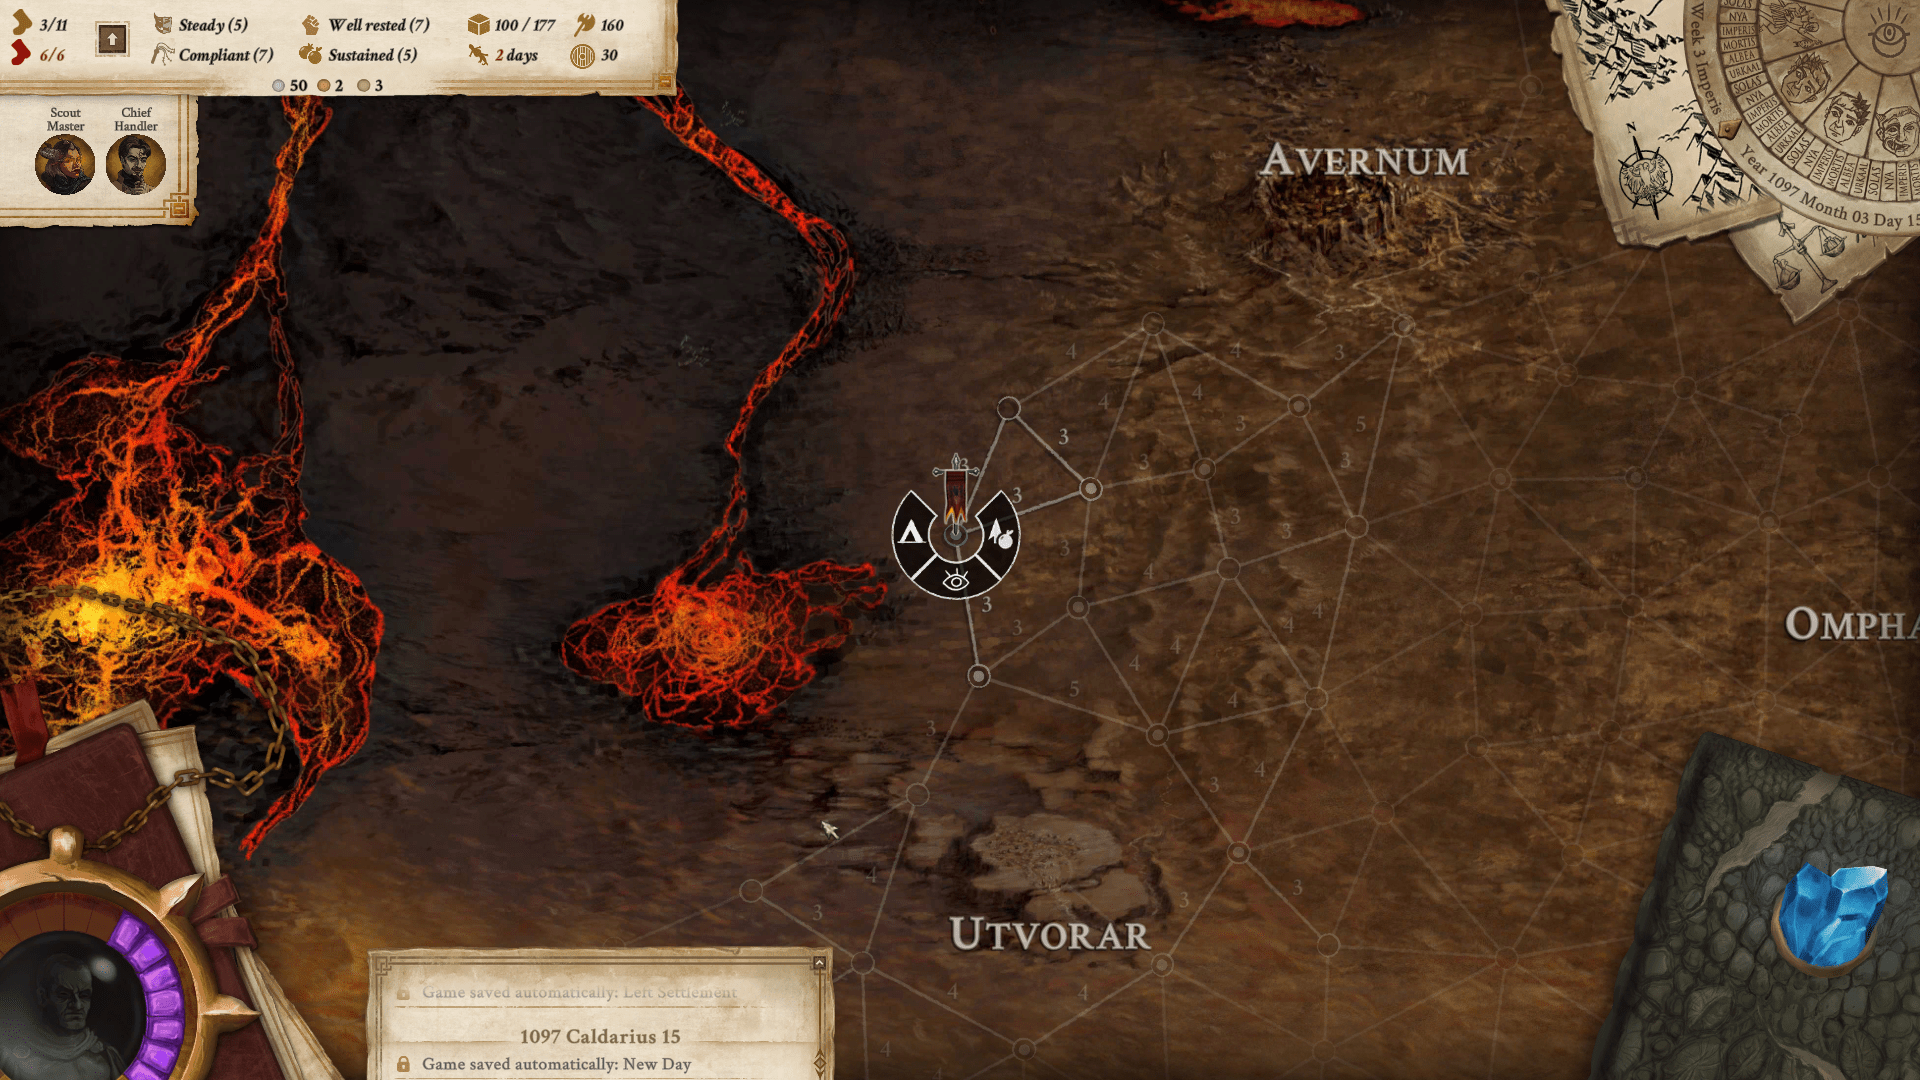
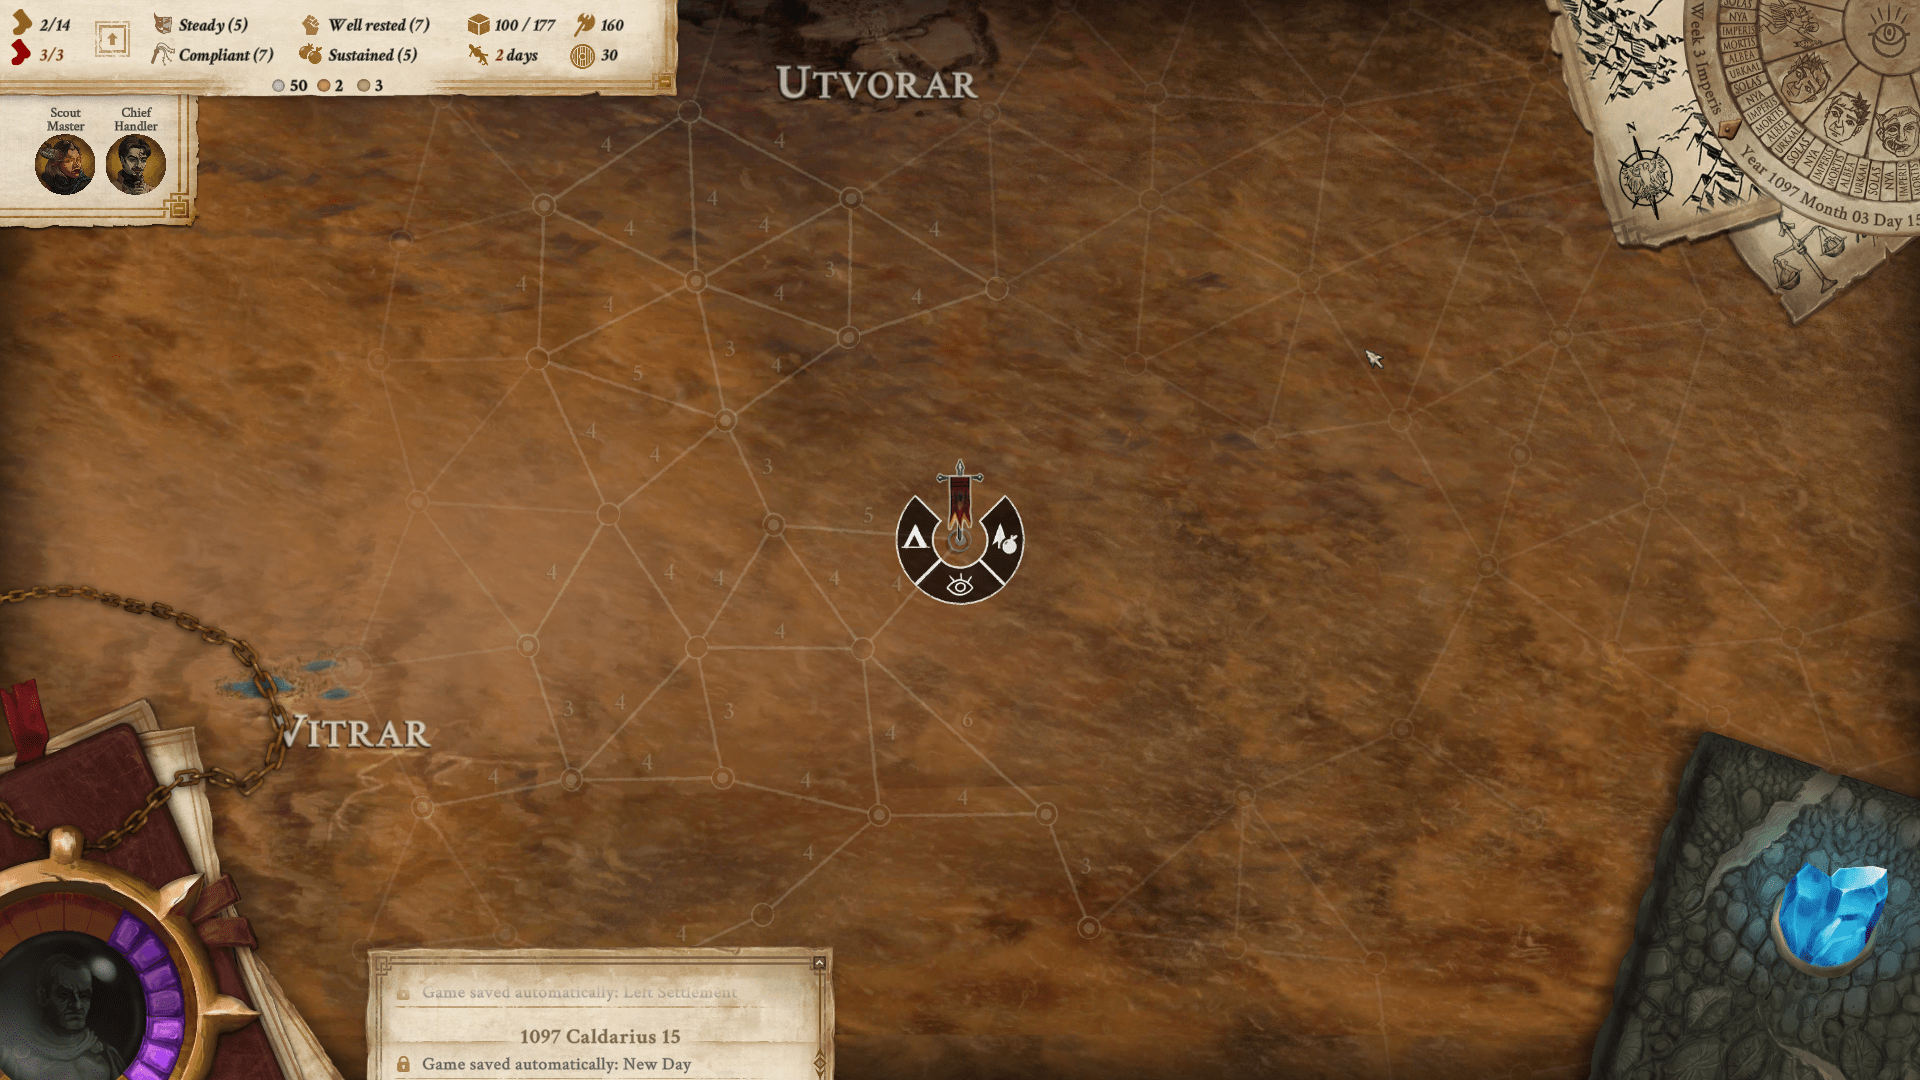
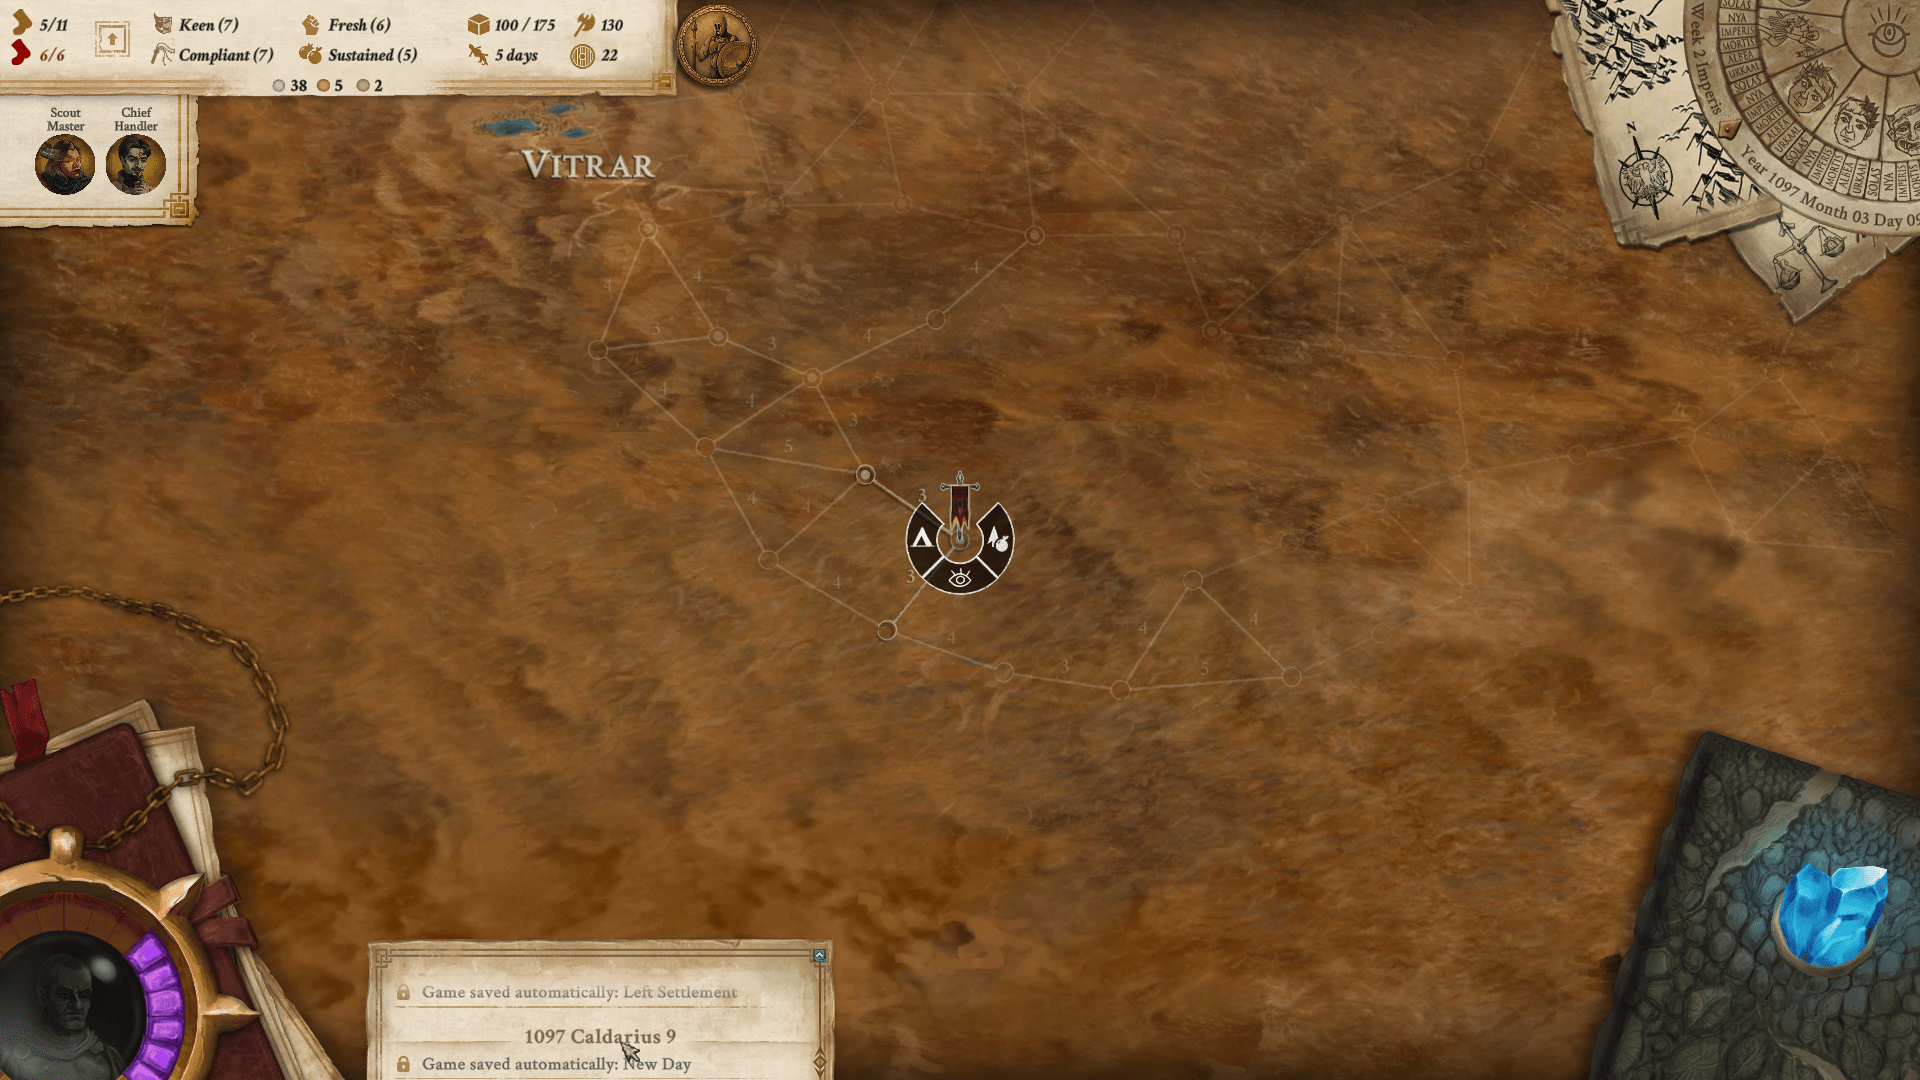
For the first one (see location below, on the left you can see Vitrar): Make plans for an attack – Send scouts – Send in several scout – Send in a lot of fighters. You will have to fight 3 enemies – Turn right and go down the dark corridor: 150 supplies, 8 grains, 11 obsidian blades, 3 wine, 3 Ivory. The second fight is again against 3 enemies. Try to persuade Serdarias to give the slaves to you. You can choose between two tests or use your former service to Sergorod as leverage. For the second one: See the Embellished achievement (Skornar’s quest)
For the third one sees location below. Buy two mounts. Before reaching this place get four outriders with mounts and fighters. Take your fighting crew and approach the camp – But do you remember to check what happens behind you? – You can send outriders ahead. Reduced casualties: - 1 slave, -1 workers, -2 fighters. Fight against 5 enemies but with Sergorod followers instead of your companions. Reward: 400 Supplies, 12 Grains, 2 Scrap Metal, 16 Bogweed, 2 Dwarven Gadgets, 3 Medical supplies.
When you have found, all three of them Sedarias will send you to a fourth Abolitionists camp see location below. But before going there be sur to have 4 outriders and 3 scouts. Approach the camp in formation – Send your outriders to fight them (4 required) – Lead the counterattack yourself. You will have to fight 4 enemies. Choose to send Morwen with some scouts - Have your fighters enter the fray – Did you manage to turn the tide of the battle?
I tried different combinations but every time I lost 8 fighters just before the second fight against. Stay at Javek’s side. Reward: 380 supplies. The day after you will lose 2 companions and 3 workers.
Defy the black knight: +2 Morale and a fight against Sedarias and a wounded priest of Sergorod. Sedarias can’t be moved or stunned so just hit him. When Sedarias is on the ground take care of the priest. You gain 15 slaves. If you obey the black knight: -2 Morale and you will still have to fight against Sedarias and a wounded priest of Sergorod. So, it’s a better choice to defy him.
After the fight you will be able to follow only one route. And a fight against the last pilgrimage will happen. You can’t win this fight but you have to fight till the end to finish Pilgrim of the Wasteland.
After the tutorial you can create your own Vagrus or you can skip the tutorial and begin the main storyline. You will that the main game take place 10 years later, so the cities you have visited in Pilgrim of the Wasteland might have changed.
Embellished
Complete all side-stories in ‘Pilgrims of the Wasteland’
In Avernum – Explore the city. You may randomly encounter a group of merchants who want to go to Vitrar agree to take them at start the quest: The price of water. When you are in Vitrar select the water merchants disembark – Let’s hear it – I’ll see what I can do. Seek out the Shamans in Vitrar – Negociate trading rights – Try to bribe them or convince them. Return to The Water Merchants’ Camp – Inform the merchants of your negotiations. Reward : 280 supplies, 2 Bross, 3 Insights.
In Avernum – Visit the Slagfort – Go the bounty office and take all bounties.
The Abomination (see location below): Follow the man and them use him to flank your enemies. If you do so you will only have to fight the abomination. Reward: 3 Bross.
The Jhakra Alpha (See location below): Follow the tracks – Follow the trail on the rocky area – There is a movement up on the rocks. Fight : 2 Jhakra and 1 Jhakra Alpha. Take whatever you can and leave this place. Reward: 2 Hides, 1 Ivory, Amulet of Protection and you lose one scout. Report back to get 2 Bross.
Avernum – Meet Skornar (after delivering his package) – Ask how you can help him – Accept his request
To see where to find the outlaw chieftain see below. Send scouts to size up the camp – Approach ready for a fight – A battle commences : If you succeed you lose only two fighters. You will have a fight against 3 enemies (Korveas included). Try to convince Sedarias to spare Koveas. Reward : 375 supplies, 1 Scrap metal, 2 Obsidian, 9 Salt, 11 Bogweeds, 2 Medical supplies, 3 Slaves, 10 Insights. You need to bring Korveas alive to pursue this quest.
Storyline - Part 1


Theory to Practice
Complete ‘the Golden’ Theory storyline.
On your first visit to Tor’Zag’s Shelter when you intend to leave, you will be stopped by an Imperial official who will ask you to deliver a letter.
Accept it and deliver the letter to Arken. Follow the road to the north pass the Crossroad and when you arrived at a new cross go west to find Arken.
The man you are going to deliver the letter will ask you to accompany him to Lumen.
Lumen is southwest from Arken you could go there directly from Arken or go back to Tor’Zag’s Shelter and go there by road if you want to do more trade or tasks on the road.
When you arrive in Lumen, you will meet another person: Kandake. He is a scholar who will ask you to bring him many and various goods.
1 Dragonbone and 30 potteryFor the Dragonbone you have two choices. Attain relationship (to increase relationship see the faction section of this guide) with the Ratharnak Alliance and buy it in Mine of Plenty – The Rathnarnak Emporium – Browse their special goods. It will cost you 27 Bross, 7 Lyrgs and 6 Changers.
If you do not want to business with the Scythichnis Covenant then go to Deven. It’s on the road south of crossroads. Choose to go to the Hintercaves, then select enter the Wraith slums. There you will have to buy it from the black market for 26 Bross, 6 Lyrgs and 3 Changers. Be careful because Dragonbone is considered as contraband in most of the cities you will pass by. So, I advise you to save before entering a city. If it’s too hard, you could buy Hidden Compartments to equip for your cargo. If you hide contraband in secret compartments, you don’t need to do any test when entering a city.
Then buy the pottery in Tor’Zag’s Shelter.
2 Rare jewelsGo back to Tor’Zag’s Shelter and buy a rumor called ‘The Jewellery shop’ if it will be available at this moment.
Go to Deven – The Shadow Bazaar. It’s on the road south of crossroads and go to the new place that this rumor unlocked: The famous jewellery shop. Buy two rare precious stone and bring it back to Kandake.
4 Silver and 40 Ivory : The best place to buy it is at the mines of Plenty (prices are low and it’s not too far)
3 Jade and 30 obsidians : You can buy it in many market places just check on the price history to be sure.
10 obsidians and 30 flavo crystals : You can buy it in many market places just check on the price history to be sure.
10 timber and 8 coppers : You can buy it in many market places just check on the price history to be sure.
4 tins and 1 Dragonbone : For the Dragonbone check above in this guide. And for the tin you can buy some in market places.When you have brought her everything, she needed, she will ask you to escort her and her assistant to Leviathan’s Demise. Be careful as her cargo will take some slot.
Leviathan’s Demise is southwest from Ioscian Quarry. This quarry is on the southern slope of the mountain called Sergorod’s Blade. Be careful to bring enough supplies because you won’t find much on the road.
Continue to talk to Kandake to the point where she asks you to find the first missing dragon head. It’s not far from where you are standing. You can avoid combat if you succeed in the test.
Return to Kandake with the first head so she can ask you to get the second on. It’s south on the map at the foot of Sepis’s Mountains. You will find it at the beginning of the road in dotted line. You can avoid combat with the dragon by selecting the response in the dialogue. There is not one solution to this dialogue.
Come back with the second head then Kandake will ask you to wait 14 days. It should be enough to refill. You can talk to Kandake about your reservation but it will change nothings.
When you return to Kandake she will perform the ritual. Watch it till the end to end the quest line.
You could report in Salum about it but you will lose 15 points with the Scythichnis Covenant.
Trouble at Fort Larius
Complete ‘the Trouble at Fort Larius’ storyline.
To start the quest line, go in Tor’Zag’s Shelter – Temple district and look for the Magistrate called Tullus Caepasius (you need to have a rumor for it to have been activated ‘The man called Caepasius’).
He will ask you to investigate fort Larius. Before hitting the road, buy some merchandise that will be needed for this quest line:
500 supplies.
8 salts
10 grains
12 linensFort Larius is situated east to Tor’Zag’s Shelter beyond the Hollow Crags. The place doesn’t sales supplies so be sure to bring enough to come back.
Enter fort Larius and talk to Bashir. He will give you three tasks:
Raid a comitatus not too far from Crossroad on the path between Tor’Zag’s Shelter and Crimson Gate and bring him 10 Iron
Pillage near Vigilus Tower and bring him 20 obsidians.
Bring him 500 supplies, 8 salts, 10 grains and 12 linens (if you follow this guide, you should already have that in your cargo)Crew combats are pretty easy, especially if you succeed in the test.
When you complete all three tasks Bashir will present you to Dewcatcher. Talk with him about every subject. If you can have his name, you will be awarded latter with some insight points.
Dewcatcher will ask you to look for his vanished spies. Do has he says and go back to Tor’Zag’s Shelter – Market district and find Buzzard.
Follow the quest and when you will be prompted between ‘helping him’ or “pursue the wraith”, pursue the wraith. Choose Finndurath if you have her in your party, it will ease a test to follow the wraith.
When you catch him, you will have a combat with the companion you choose against a unique wraith.
Continue the quest line and when you have two options choose to stay and listen. You will hear a dialogue between two persons.
When you are prompted again chose to attack. For the next fight, I advise concentrating your attacks against the leader and to take care of the rest after. When you have finished, you should find a letter on the corpses.
Be careful because, if you pursue the quest when you report back to Tullus Caepasius you will only have one month to complete the quest.
It is time to report back to Magistrate Tullus Caepasius, if you have the letter and the real name of Dewcatcher give it to him and you will be awarded with two insight points.
Then go back to give your report to Dewcatcher, feel free to alert him or to stick to the plan of helping the Empire.
If you help Tullus Caepasius then you should help the Empire during the assault. You will be awarded with 20 Sergorod’s Church points at the end of this quest.
Been There, Done That
Complete the “To the Four Corners” storyline.
To begin this quest, meet Iulas in Mirage. Mirage is west from Crystal. The legendary Vagrus will ask you to visit four places:
Carravhon, the howling city
Border Range
Hills of Talien
Voiceless lakeThese four places correspond to the four corners of the visitable map. You just need to go to these places (marked on your map). Then go back to Mirage to meet Iulas again.
Storyline - Part 2



Inquisitions of Discord
Complete “the Source of Discord” storyline.
Inquire in Tor’Zag’s Shelter – The Temple District – Go to the authorities, Deven – The Gardens – Office of the Legate, Kotrar – The Shaman.
As you progress through the game, the wind situation will change and so you can have different responses when you inquire about the wind situation.
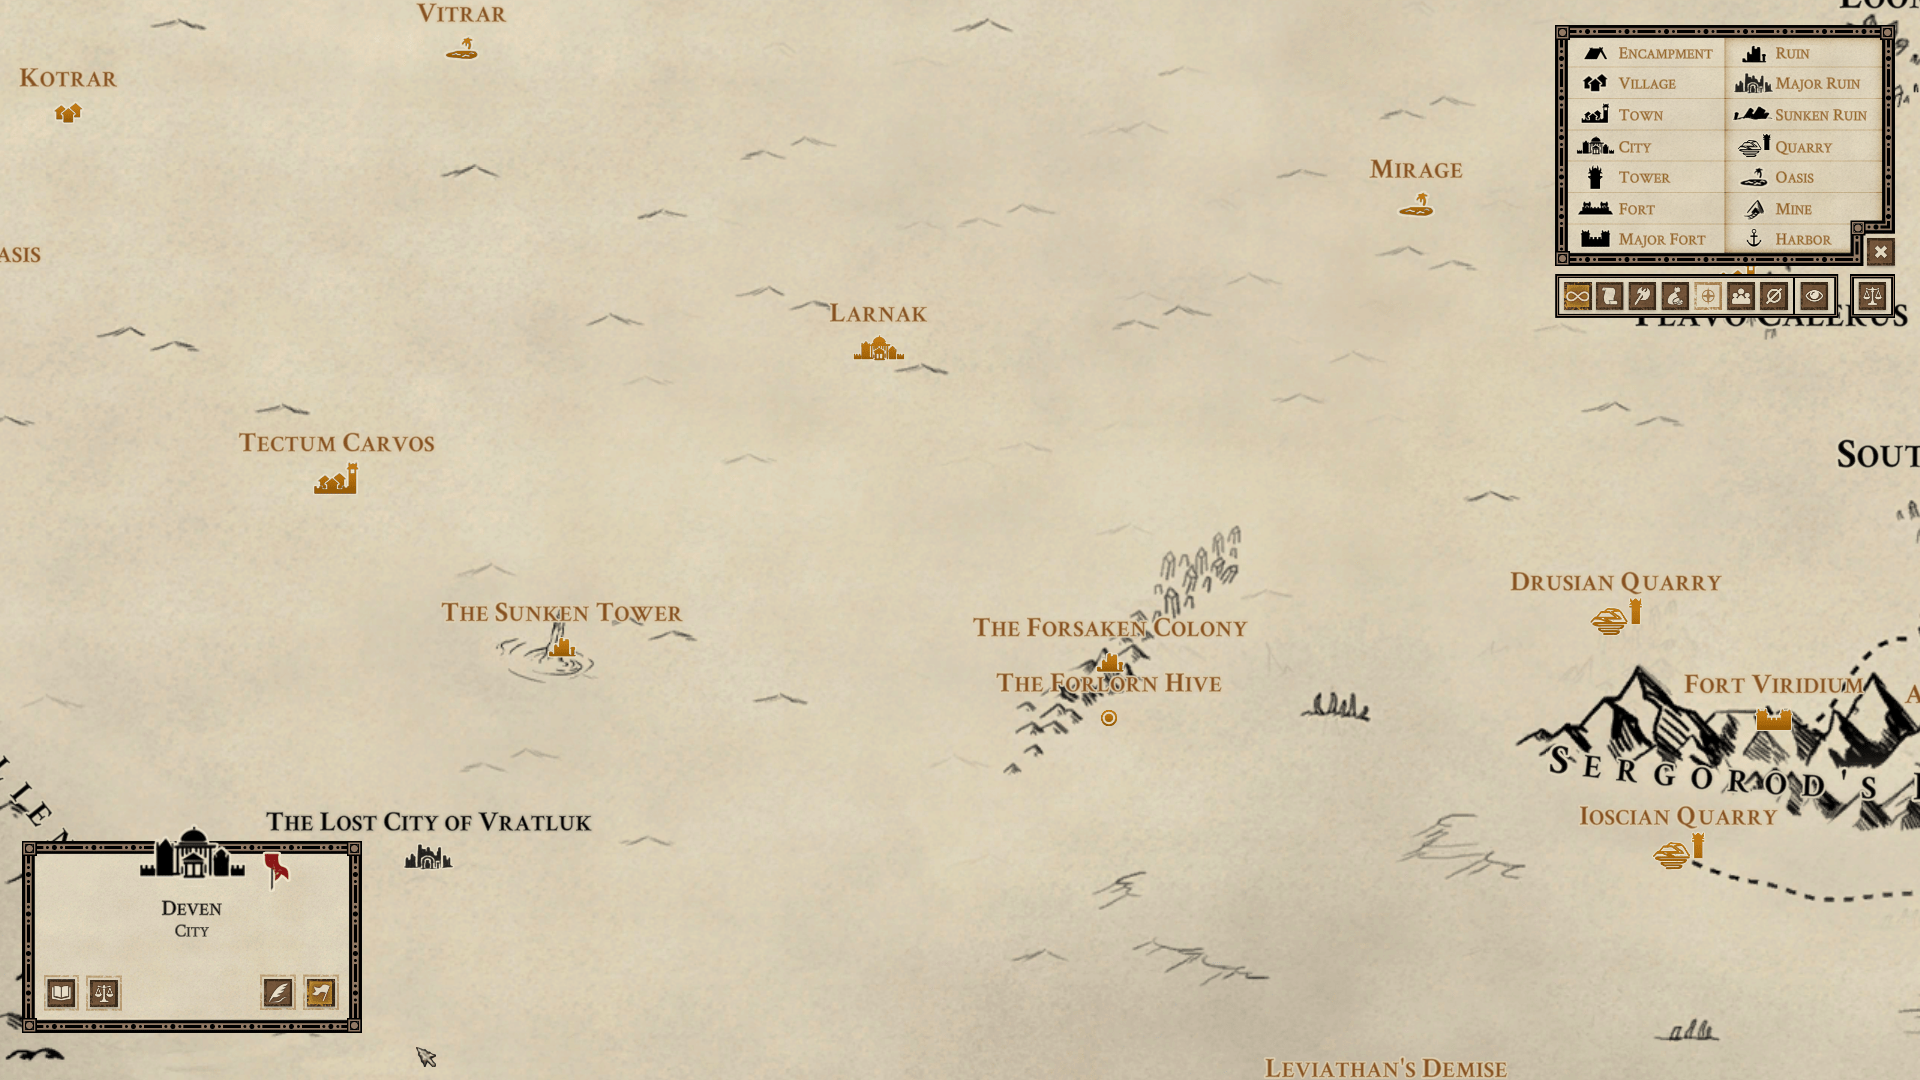
When you unlock the quest: The Source of Discord, you need to visit distant places to investigate the singing wind. Have a sorceress in your crew (Nedir or Finn) to scry on the ruins of Carravhon.
As I have done this quest a long time ago, I don’t remember much of the rest. I will try to complete it on my second playthrough.
Insectoid Propagator
Complete the “Insectoid Propagation” storyline.
To begin you need to be trusted enough by the Yskorri Ambassy in Larnak. A value of 10 is required. Then asks to have Yrgs for yourself. To do so bring him Dried Fruit you need at least 35 units to give it to him.
When you meet the required friendship, the Yskorri Ambassador will ask you to investigate the forlorn hive south east from Larnak.
When you report back to the embassy, this will increase your relationship again.
When you meet the necessary requirement, it will start the quest: Yrg of Burden. To begin with you have to find a crystalmancer. Go to Lumen and talk to the Crystalmancer. She will tell you to go back to Larnak – Lucernum District to find a Crystalmancer named Murno. But before departing buy two stacks of Ceruleus crystals. In Larnak Murno will ask you for the Ceruleus crystals. Then pay 100 Bross. You will have to wait for Murno to finish his work. When he is finished meet him at his shop then at the embassy.
In the third and last quest, the Yskorri will ask you to establish Yrg hub in each great city: Tor’Zag’s Shelter, Avernum and Deven. You need a certain level of trust with Avernum Prefectus and The Dark Elve Prince in Deven. When you have found the three allies report back to the Yskorri Ambassy. The achievement should unlock.
For Avernum Prefectus: See The Last Voyage achievement for more info.
For The Dark Elve Prince: See The Darkness Within achievement for more info.
Bounty Hunter
Complete all bounty hunting storylines in a single playthrough.
Bounties quest are not far from where you unlock them. There are not very hard and you will be rewarded with coins and reputation in Sergorod’s/Ashkul’s Church.
Four in Tor’Zag’ Shelter
The Price of Freedom: Travel to Vigilus Tower to learn more about the outlaws. Eliminate the outlaws (marked on the map).
Death Incarnate: Kill the necromancer in his den (marked on the map).
Savage Business : Travel to Drussian Quarry to learn more about the rogue sadirar tribe. Go to the location marked on your map. You can make them flee or kill them.
Reptilian Instinct: Find and kill the rogue Krawag (marked on the map).
Three in Avernum – The Hill – Visit the Slagfort – Go to the Bounty Office
The Haunting of the Warehouse: To begin with this quest you need the rumor: The Haunting of Scoria. Ask about it in Avernum – Hill District in the bounty office. This will start the quest. Go to the warehouse in Scoria and investigate. Save before as you need so succeed in every test. Also ask around about what happens in the vicinity and give them money for them to talk. You will have a fight if you succeed. Then report back to the bounty office.
Abominable Congregation: Destroy the undead to the northwest (marked on the map). Pursue until you find the Necromancer and defeat him.
Terror of the Spirit: Travel to Kotrar to find out where Zangos is hiding. They will indicate on your map where you can find Zangos. You can capture or kill Zangos.
Three in Deven – The Gardens – Office of the Legate – Bounty Office
Hunter of hunters: Destroy two Ifreanni nests (marked on the map)
Bug Hunt: Eliminate three Yrgs nests (marked on the map)
Bragga the Braggart: Execute Bragga an outlaw (marked on the map)
Crew Combat Encounter



Conciliator
Successfully appease the foe during a crew combat encounter.
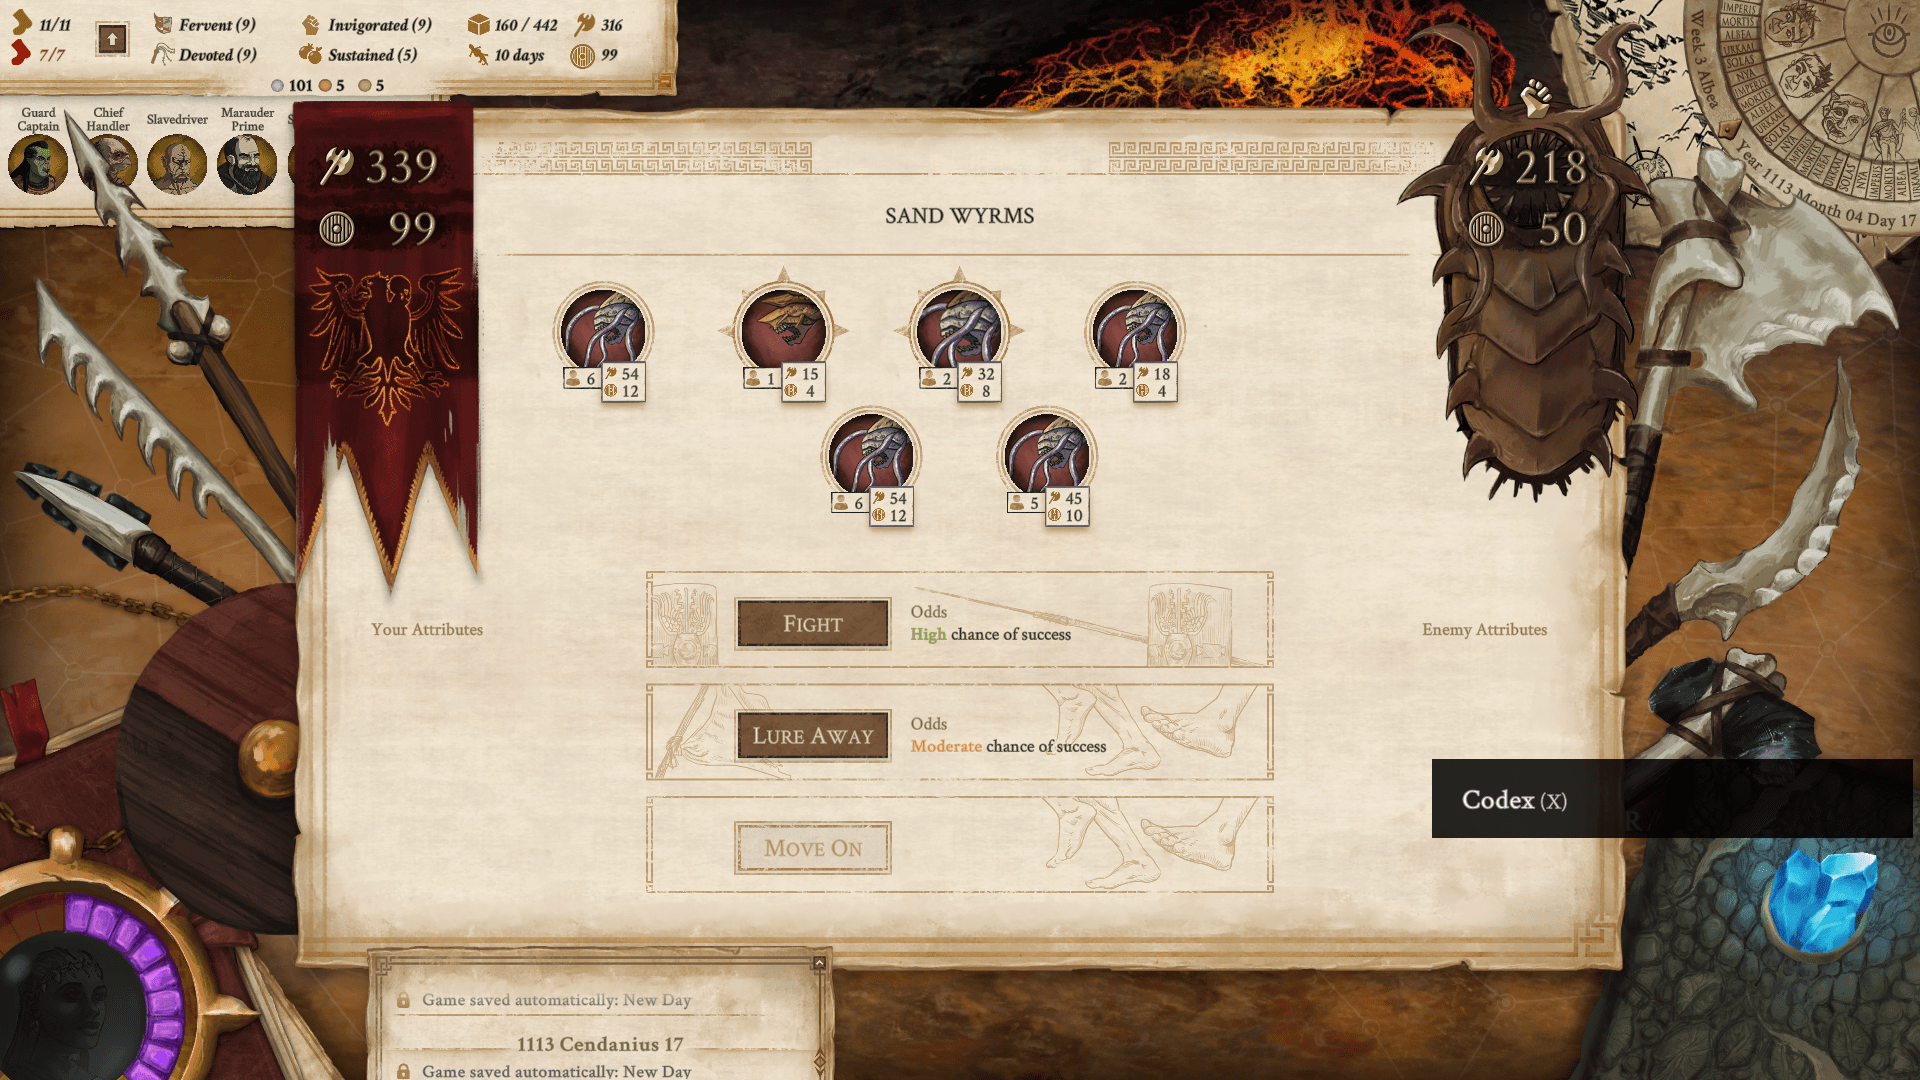
When you get a crew combat encounter choose to flee from it. Then to the right side of the screen you can give them money to increase your chance to flee. Use the button automates to give them automatically the right amount to avoid combat. If the Move On button is available then you can’t flee. It’s because the group you met isn’t aggressive so you can fight them or just pass them without doing anything.
Fight Another Day
Successfully flee from a crew combat encounter.
Same as above except don’t give them any gold. Prefer to do it with a crew combat where you get a high chance of fleeing. If the Move On button is available then you can’t flee. It’s because the group you met isn’t aggressive so you can fight them or just pass them without doing anything.
A Real Battle
Defeat a foe with at least 1000 Combat Strength in a crew combat encounter.
It happens during the quest The Return of The Wyrm when you defend Tectum Carvos against the sand wyrms. The last wave got around 1200 combat strength. To know more about it, see the Ever After achievement.
Crew Members And Cargo Capacity


Tactician
Start an in-game day with at least 250 Combat Strength and no more than 50 armed crew members.
Strategist
Start an in-game day with at least 500 Combat Strength and no more than 50 armed crew members.
General
Start an in-game day with at least 1000 Combat Strength and no more than 50 armed crew members.
For Tactician, Strategist and General, recruit 50 fighters and buy as many mounts as you can. Use both to get outriders as they have a superior combat strength. You have to start the day with enough combat strength, so mount camp after getting the right combat strength.
Some equipment will help:
Standard Armaments (+1 Fighter/Outrider/Scout Combat Strength),
Bronze Armaments (+1 Fighter/Outrider/Scout Combat Strength, +1 Fighter/Outrider/Scout Defense),
Iron Armaments (+2 Fighter/Outrider/Scout Combat Strength, +1 Fighter/Outrider/Scout Defense),
Dragonsteel Armaments (+3 Fighter/Outrider/Scout Combat Strength, +2 Fighter/Outrider/Scout Defense),
Lances (+1/2 Outrider Combat Strength), Blinders and Combat Saddles (+10 Chase, +1 Outrider Combat Strength),
Fire Bombs (+2 Scout Combat Strength), Hunting Animals (+10 Hunting Base Chance, +5 Chase, +8 Combat Strength).
Quartermaster
Start an in-game day with at least 600 Cargo capacity, no more than 50 work crew members and no more than 5 Beasts of Burden.
Supercargo
Start an in-game day with at least 600 Cargo capacity, no more than 50 work crew members and no more than 4 Beasts of Burden.
For Quartermaster and Supercargo have no more than 4 beasts, buy as many mounts as you can and equip the Kal-Rish SaddleBag (+3 Mount Cargo, +3 Outrider Cargo). You can order it in Crystal – The workshop for 5 Hides and 2 Lyrgs. It will take 5 days to Dek-Rai-Kaan to finish it. Suppress every outrider as it decreases your cargo capacity. You have to start the day with enough cargo capacity. So mount camp after getting the necessary capacity.
For example, when I unlock this achievement, I had 4 Beast, 29 Mounts and a Kal-Rish SaddleBag equipped.
Hired Help
Extend an elite hireling’s contract twice.
You can hire elite mercenaries or taskmaster, slave masters, overseers … in certain locations and for a limited time. Extend this duration twice.
Companions - Part 1


Potential Unlocked
Reach Prowess 9 with any Companion.
To unlock prowess, you need to spend insight points. But companion progression is limited by your advancement in their storyline. So, you need to finish their quest, except for Skornar where you need to go near the end but not till the end.
Talent Nurtured
Reach Prowess 6 with at least 6 Companions in a single playthrough.
See Potential Unlocked
Company of Heroes
Reach Prowess 9 with at least 6 Companions in a single playthrough.
See Potential Unlocked
Adept
Unlock Tier 3 for all four Skills of a Companion during a single playthrough.
See Potential Unlocked
Legacy of a Mercenary
Complete Harvek’s personal storyline.
You can have him through Braxius or recruit him in Lumen – The Blind Jhakra.
Aid Harvek in killing his target. Every time you get in a settlement where there is one, Harvek will tell you. Alas, I haven’t taken note on my first playthrough as to where his targets are.
When you have aided him enough, you can talk to him about it and it will give you insight points and Harvek will become more loyal to you.
When you have crossed off everyone on the list, Harvek will talk to you about Cresus. Go to the faction headquarters with whom you have the highest standing. Avernum for the Carpenter Guild. Tor’Zag’s Shelter for the Loader Guild’s. You can also go to Avernum Prefectus if you befriend the prefect.
Whomever you choose to go, it will send you to a villa in Blackblood Mountains, behind Tor’Zag’s Shelter. The villa is located in a passage that separates the mountain in two, just behind Tor’Zag’s Shelter.
A few combats will happen there. They are not too difficult. In the villa, Harvek will learn about his son. Ask about him Carpenter’s Guild in Deven. They will redirect you in Fort Viridium, where you have to make Harverk’s son escape.
The Darkness Within
Complete Renkailon’s personal storyline.
If you haven’t unlocked him at the beginning, you can find him in Deven. To recruit him to need to befriend The Dark Elven Prince Laekor in the Hindercaves. To increase friendship with Leakor give him Obsidian or dedicate your victory to him when fighting in the Arena of Echoes.
When he trusts you enough, he will give you a quest: Heritage of Hatred
You have to defeat a garrison in a location marked on your map. If you need fighters, you can find a fair number of them to hire in Deven.
I think you need 6 in friendship to ask him to release Renkailon. Then bring the news to the dark elve.
For now, I didn’t get far with Renkailon.
Huntress Unbound
Complete Criftaa’s personal storyline.
I you haven’t unlock her at the beginning you can find her near Velarias. To be able to meet her there you need to buy a rumor: Bounty Hunter on the Prowl.
In Velarias ask about her and you will see a circle on the map of where to find her. Say to her that you want to kill the orc. When you have killed Krog’Vor, collect the bounty in Tor’Zag’s Shelter – Temple District.
Sometime after this first bounty Criftaa will ask your help about four more (be prepared for crew fight):
Vaiak’s Valor
Bonegrinders
Hollowmen
Terath’s SunstridersAfter eliminating the last tribe, you can speak to Criftaa and say to her to hunt down her handler. That is what I did. I don’t know what happens if you don’t (will do on my second playthrough). If you make the choice to hunt down her handler, you will have to defeat the garrison of Limus Custodis. Be prepared for quite a hard crew fight. Hire fighters and mounts before it.
After the combat you can spread the word about what you have done and it will increase your reputation with the Abolisionist Faction but it will decrease your relationship with Criftaa.
Forged in Battle
Complete Gor’Goro’s personal storyline.
If you haven’t him at beginning from Braxius a rumor appears. Buy it so you can take the quest where you have to help him and Gaius. If you don’t do it with Braxius then you will have to bring your own companions.
When you have enough relationship with Gor’Goro he will ask you to win arena championship titles and discuss with. To increase relationship with him, offer him gifts, visit Gaius compound each time you arrive at Tor’Zag’s Shelter and be kind during the game. You have to win each arena in the game:
Bestiary Arena in Tor’Zag’s Shelter: Fight beasts in the arena until you meet X. You will need to wait a few days between each fight. The man will have a special fight for you. If you win you will be the new champion.
Sun Rock fighting’s pit: Fight there until you meet the champion. As in Tor’Zag’s Shelter you will need to wait a few days between each fight.
Arena of Echoes in Deven: Enlist in the tournaments. Between each fight you can rest and sometimes you can choose some option that will help you during the tournaments. Fights are not too difficult.
Ash: I’m not a hundred percent sure, but I think you need to fight in here at least once.After getting all this championship titles Gor’Goro will trust you enough for the following. Talk to him during camp to unlock the next part: Kingslayer.
Rent the Arena Maximus in Tor’Zag’s Shelter for his fight. It will cost you a lot. Then you have to wait for the champion to arrive in Tor’Zag’s Shelter.
For the fight against Krag’Gorn you will have Gor’Goro and only Gor’Goro so be sure that he is well prepared. It can’t hurt to us ‘Inspire’ on him at the beginning. Also, you can bet on Gor’Goro to gain more money.
After the combat you will unlock: Call of the Ancestor.
Be prepared for some crew combat (hire fighters and mounts) and some crew fight. Find mysterious shamans in the hollow crags, right next to Tor’Zag’s Shelter on the next side of the road. The shaman will ask of you to destroy two Hollow Eyes lair. After removing both lairs go back to the shaman hut and bring him 12 spectral residues. You can find spectral residue on ghosts in the sleepers’ valley or you can buy some in Crossroad (what you can buy here is random).
Be sure to be blessed by Ashkul priests (Blessing of Unbinding) before performing the spirit dance as you will fight ghosts.
When it’s done, Gor’Goro will have one last request: Help him forge a new armor.
Before depart be sure to have:
3 units of Dragonsteel scraps (Mines of Plenty)
2 Demon horn (Avernum – The Hill – Invernus)
Urd Urn
6 Hides (any market)It will be needed for the armor. Then wait a month before retrieve the new armor.
Companions - Part 2


The Voice of Hereafter
Complete Finndurarth’s personal storyline.
Take Finndurarth to Kernak Waystation, you have no more than 22 days to do so. After the fight talk to Finn during camp. To continue the quest, ask when it’s possible about the eight-legged lizard tattoo. This investing will lead you in Ash to talk to a man name Harn. This meeting will let you know the base of Corneus Serpentis is. Go there to find who hired them.
The second part of Finndurarth’s personal storyline is called: Conclave and Black and White.
Your first task is to find the incognito Cadmador agent in Fort Larius. When meeting him you will have a fight with some assassins. After the combat you can talk more with the quiet man.
Then go to Crystal to meet Nhaera. Follow her in Flavor Calerus you need to equip your comitatus with Calerus Protection Gear (Lumen or Crystal Market) and Heat Shielding Crystal.
To get the Heat Shielding Crystal you need to do another quest, see at the end of this achievement.
The next step is to Convince Khaledisthar in Sun Rock to tell you where the Oghres envoy are. If you can’t convince him on your first try, the second will be good. Khaledisthar will tell you the location. Be careful as the combat there will be difficult. Hire enough fighter and buy enough mount for you comitatus in order to get enough combat strength.
Then you have to travel with the Oghres envoy to the south of the Last Oasis. Here too the fights are very difficult, but you will mostly have fights with your companions.
The White Crystal
You need to accomplish this quest in order to get the Heat Shielding Crystal. To unlock this quest, you need a rumor: Master Crystal Mage. After getting the rumor go to Lumen – The Crystalmancer’s Vaul. Shebenni will ask you to deliver a pure white crystal in Lumen. You can find one south of the Loom and you will have a few fights to get to the white crystal. Or you can buy one in Deven, I think.
To equip it you need a spellweaver who has the channelling skill: Finndurath or Nedir. If you do not have either one of them in your party see the achievements linked to those companions. The Amulet of Concentration can give channelling to Finn or Nedir.
Sorry I didn’t give munch information about the Finndurarth’s personal storyline, as I did this quest a long time ago and I don’t remember much of it.
A Terrible Will
Complete Nedir’s personal storyline.
Contact her former tutor in Avernum – The Hills. But before meeting with him, be sure to bring:
1 Demon Horn (you can buy one to Incanus)
12 Spectral residues: You can find spectral residue on ghosts in the Sleepers Valley or you can buy some in Crossroad (what you can buy here is random).
3 units of Oils (In most markets)
2 units of Jade (In most markets)He will need those ingredients to perform a ritual. Nedir will understand what cursed her. In Tor’Zag’s Shelter – Market District find Pardar. This will lead you to a Wraith named Weid in the Undercity of Tor’Zag’s Shelter. Then follow Weid and his associates in the sewers. You will get a name to continue your quest. This will lead you to Dai-Kor-Vass in Tor’Zag’s Shelter – Market District and then in Tectum Carvos. The third time you will have to look in Avernum. You will know that he is dead. So, look for his bones in the Ossuary in Avernum – The Hills. The next fight is quite hard, because you have only four companions and Nedir is one of them. I never took Nedir in fight as I prefer Finn and so that was difficult for me. But if you upgrade her well, I think the fight isn’t too hard.
This meeting will lead you to Larnak in the Temple of Bal Ur Kaal. If you haven’t done the quest Faithful Conviction. You have to do this quest now. During this quest you have to travel to Vigilus Tower and convince a young officer to abandon his military career.
If you have done the quest, the Bal Ur Kaal priestess will indicate the Nosferatis Hideout (marked on your map). As you might have guessed, you will have to fight in here. When you have recovered the relic bring it back to Invernus in Avernum – The Hills. After performing the ritual, you will have to fight. But before that, asks for a blessing of Unbinding to the priest of Ashkul.
The Last Voyage
Complete Skornar’s personal storyline.
To recruit Skornar go to Avernum in the Arena and observe a fighter in the pit. Then go talk to the prefects. If he likes you enough, he will liberate him so you can recruit him in your comitatus. If you hadn’t befriend him already see below for more info.
Skornar will ask you to help him with his vengeance. Travel to Deven to meet the Carpentenr’s Guild in the Hall of Trade. Return to Avernum in the Carpentenr’s headquarters in Lavinus Watering Hole (Scoria District). Ambush Flaco late at night. Then you will have to fight Falco in Avernum’s Arena. Skornar will be alone against Falco, so be sure that he is well prepared. It can’t hurt to us ‘Inspire’ on him at the beginning.
After your victory, discusses with Skonar at the camp. This will unlock the second and last part: A Life Long Lost.
Travel to Crimson Gate to see if Syrtir is still there. Once there you will have to ask from the garrison and the resident of the Crimson Gate. They will give you information that will lead you to the Mines of Plenty – Hungry Miner. To find Syrtir investigate the tomb of Kathovras (marked on your map).
After the bloodbath try to find Kjartenin in any village of the tribes in The Searing Plains. They will guide you to Sadirar. You need to be accepted by the tribes. See the Seeker achievement. They will let you see him if you have access to the upper village. But they will want you to follow them in the mountains. Don’t miss a test, help your guide and you will be granted a visit to Kjarten.
The next step will be far away from your actual position. In Auguros Work Camp see for Hafri. You can pay the overseer or help Hafri escape. Take him to Maar Gorad (marked on the map). But before going there be sure to gather:
2 stacks of timber.
4 stacks of Linen
2 units of Iron
1 stack of mushroom beer
200 units of supplies.Then ask him about building a boat. If you have followed this guide, you should have what he required. If you want to keep Skornar save before, let him go to unlock the achievement the reload. When you bring Hafri what he required, you can fully upgrade Skornar.
A quest to help you befriend Avernum prefectus: An Account of Corruption
Deliver to him a prisoner who is in Auguros Work Camp. If you don’t bring him back but deliver him instead, you will lie to him and it will also increase your friendship with him.
Companions - Part 3


Ever After
Complete Eylani’s personal storyline.
In order to recruit Eylani you need to help Tectum Carvos (See below, the quest: The Return of The Wyrm).
Talk to her in camp to finish this part. For the following you will need to have a good relationship with her. To do so give her gift and show her the animals you have in your comitatus.
When she is confident enough, she will ask you to search for her husband. Meet some of his old acquaintance:
Avernum, Scoria, Drug den
Salum
Kernak WaystationTo continue the quest after that, go to Sun Rock there Eylani will talk to you and this will start a fight. You can tell her what you want about her husband. It doesn’t matter for the achievement.
The Return of The Wyrm
Deliver material to 400 Preparadness. It’s a long quest at it will take time for you to reach the necessary preparedness. For goods you need one complete stack per delivery.
Supplies, Obsidian, Ivory, Obsidian Blades
Medical supplies (20 Maximum): Per pack of 10
Mining Equipment (maximum 5): 1 per 1
Task/slave master (maximum 2): You can recruit both in Drussian Quarry (House Oquo). You can’t recruit two tasks/slave master at once.
Overseers (maximum 3): In Ash (House Darius).
Fighter: Per group of fiveYou can see your advancement in the Qualities section: ‘Tectum Carvos : Preparadness’. Each time you enter in Tectum Carvo you have to fight to be sure to bring enough fighters in your comitatus.
After you have gathered everything you can assist to a meeting with the leaders of Tectum Carvos. The will ask you to rally allies for the battle to come. A high friendship/loyalty with your contact is needed:
Avernum Prefectus (Avernum – The Hill): See The Last voyage achievement in this guide for more info.
Dark Elve Prince Leakor (Deven – The Hindercaves): See The Darkness Within achievement in this guide for more info.
Magistrate (Crystal): See below
Yskorri Ambassy (Larnak): See Insectoid Propagator achievement in this guide for more info.
Sadirar: See Seeker achievement in this guide for more info.
Dhuzani (The Last Oasis)When you have gathered every help you can, the battle can begin. This will last 8 to 10 days. Be sure to have enough combat strength to win every combat crew. If you have the Command leadership perk, a strength of 800 should be enough. If you don’t have the Command leadership perk, a strength of 1000 should be enough.
At the end of this hard battle meet the leaders in the war room. They will ask you to consult Denekar a shaman in the Writhing Oasis. Report back to the leader in the war room in Tectum Carvos.
If you choose to bring them b prepared to have many fighters as they need many for their protection during travel. You have to escort them to The Last City of Vraltuk. You will have many fights with a group of four of your companions and some imposed fighter (shaman, tarkian soldiers). You will have at least 6 fights. I could not go further because of the characters that were imposed for the fights. They are not very strong and we have the rights to very few companions for a total of 6 fights.
I think that the end of this quest can give you the masked achievement: Wyrmslayer. That would be logical, but I’m not a hundred percent sure.
Quests to befriend the Magistrate of Crystal: The Magistrate’s Needs
Get 10 balls of bogweed to the magistrate (you can buy some in Deven – Hindercaves – Wraith slum district – Black market)
Bring him a special ingredient from an apothecary in Lumen.
Business As Usual
Complete Garrik’s personal storyline.
The first thing he will ask is to recover some stash (marked on the map):
South end of Terathion’s fall
South of Mirage
Southeast Hargard TuulTalk to him during camp to retrieve a fair share.
The second begin in Avernum. When you explore the city, you will have a chance to meet a man. He will ask you to assemble a crew for a heist:
Therulion: Larnak – The Fields – The Petal of Dusk
Fignit: Salum – Pawnshop
Cairistonia: Deven – Shadow BazarBring all of them in Lumen – Blind Jhakra. You need to have the three of them at the same time. You can’t leave them one by one. Then take the team to Mirage to proceed with the plan. Infiltrate the company. After the heist you will retrieve your share. But you will have to sell it. To find a buyer go to Tor’Zag’s Shelter and search for a potential buyer. You will need several try with few days between. Don’t hesitate to trade between the surrounding places in waiting.
When you find someone, be prepared for a fight.
Voracity Confronted
Complete Vorax’s personal storyline.
You can find him on the road between Kernak Waystation and The Twin Towers.
After a certain amount of time and when you attain a certain relationship with Vorax he will give you a new quest: The trial of trials. To make the make dishes you have to bring Vorax rare and specific ingredients.
A bottle of Empyreana gives you a quest The Grape of Grath (see below)
Jhakra stomach: In Eitrar help Burhek chase a Jhakra. Before going there be sure to bring 10 beast lure and 10 slimegrass. It will take you several days and two combats to get it, but it’s not very hard. Then you need to wait again for the stomach to get infused.
Ambershroom stain (Deven, Hanging Garden): Plant some in the garden, then go back there after a month to harvest it.
3 Spices: You can buy it in many markets.
Tarkian Mugworth: Tectum Carvos
Wraithgrass: Deven, The Hindercaves, Wraith Slum
Arran’s Bell (Tor’Zag’s Shelter – Civic District – Garden): Ask to the gardener for Arran’s bell he will be elusive, the ask him if he is alone to take care of the garden, he will tell you that a sorceress take care of it. This will unlock a new option in the garden of the Shelter. The sorceress will give you some Arran’s Bell.When you have gathered everything in the list talk to him during camp. Then bring him in Sun Rock – Davris Marius Paulus’ villa.
For The Grape of Grath, Grath a barman in the Copper Pugio of Deven ask you to bring him six bottles of rare beverages in order to give you a bottle of Empyreana.
Goradian Absinthe (Tor’Zag’s Shelter – Civic Distric – Dragon’s Nest inn): Trade a dragonbone.
Luminalirium (Larnak – The Fields – Bumbling Boatman): Take on a quest where you have to help the local with a beast problem.
Maekrathar’s Spirit: Purchase it in Salum of Mine of Plenty.
Aqua Infernis (Avernum – Scoria – Lavinus Watering hole): Trade 35 units of coffee beans.
Ulalud (Vitrar): Trade it for 6 Sadirar bone necklace.
Cerulean Essence (Lumen – Blind Jakhra): Win a card game. It will require several tests to succeed. You can retry if you fail, but it’s best to save before.
The last part is called Cursebreaker: Travel to Larnak – Vernius Villa, but take a detour in Avernus to get a blessing of Unbinding by the priest of Ashkul. Explore the manor until you meet ghosts to fight.
A new objective will appear: Find a Sorcerer well versed in curses. Go to Avernum – The Hill – Incanus to ask him if he can help Vorax. Take the opportunity to buy 10 Ahskulite charms you will need later. Refresh your blessing of Unbinding (it lasts only 12 days). He will send you to The Last Oasis. Dhuzani will agree to meet you in Larnak. When you get there discuss her findings. Then give to her the 10 Ahskulite charms and 10 Spectral residues. The quest will end with the performing of the curse-breaking spell by Dhuzani. She will ask you to defend her against the spirit.
Tasks


You can access tasks in cities when you click on the Faction button. Trade tasks have the axe logo and mercenary task have the bag one.
You can see how many cargo slots it will take to bring the merchandise near a box symbol. Be sure to have enough place to bring supplies for the journey.
For mercenary tasks, the colour of the logo indicates if you can win the battle with your actual strength. When you hover on the axe logo, you can see the actual strength you will be fighting against, if you need to let fighters, how many fights will be needed and also if you have to fight another faction, which one is it?
Breached
Fail a Faction Task.
Accept a task with a short time limit preferably and just wait until you run out of time.
Taskmaster
Complete 50 Tasks.
This can be trading tasks or mercenary tasks.
Merchant
Complete 100 Trade Tasks in a single playthrough.
Merchant Lord
Complete 250 Trade Tasks in a single playthrough.
Mercenary
Complete 100 Mercenary Tasks in a single playthrough.
Mercenary Lord
Complete 250 Mercenary Tasks in a single playthrough.
Codex Entries


To unlock codex entries, talk to people and exhaust every option when you visit places. Visit as many places as you can inside the perimeter. When returning to places that you know, see if there aren’t new options available.
Try to do storyline and quests. You can also buy/order books in Larnak (The Fields – Noon Day Reader), sometimes you will find codex entries in them. Return regularly as his shop will get new books through the game. Books also give you one or two insight points.
You can see your progression at the bottom of your codex. There are a total of 224 entries.
Scribe
Unlock 85 codex entries in a single playthrough.
Scholar
Unlock 150 codex entries in a single playthrough.
Loremaster
Unlock 215 codex entries in a single playthrough.
Factions






Acquaintance
Reach a Tier 3 standing with any faction.
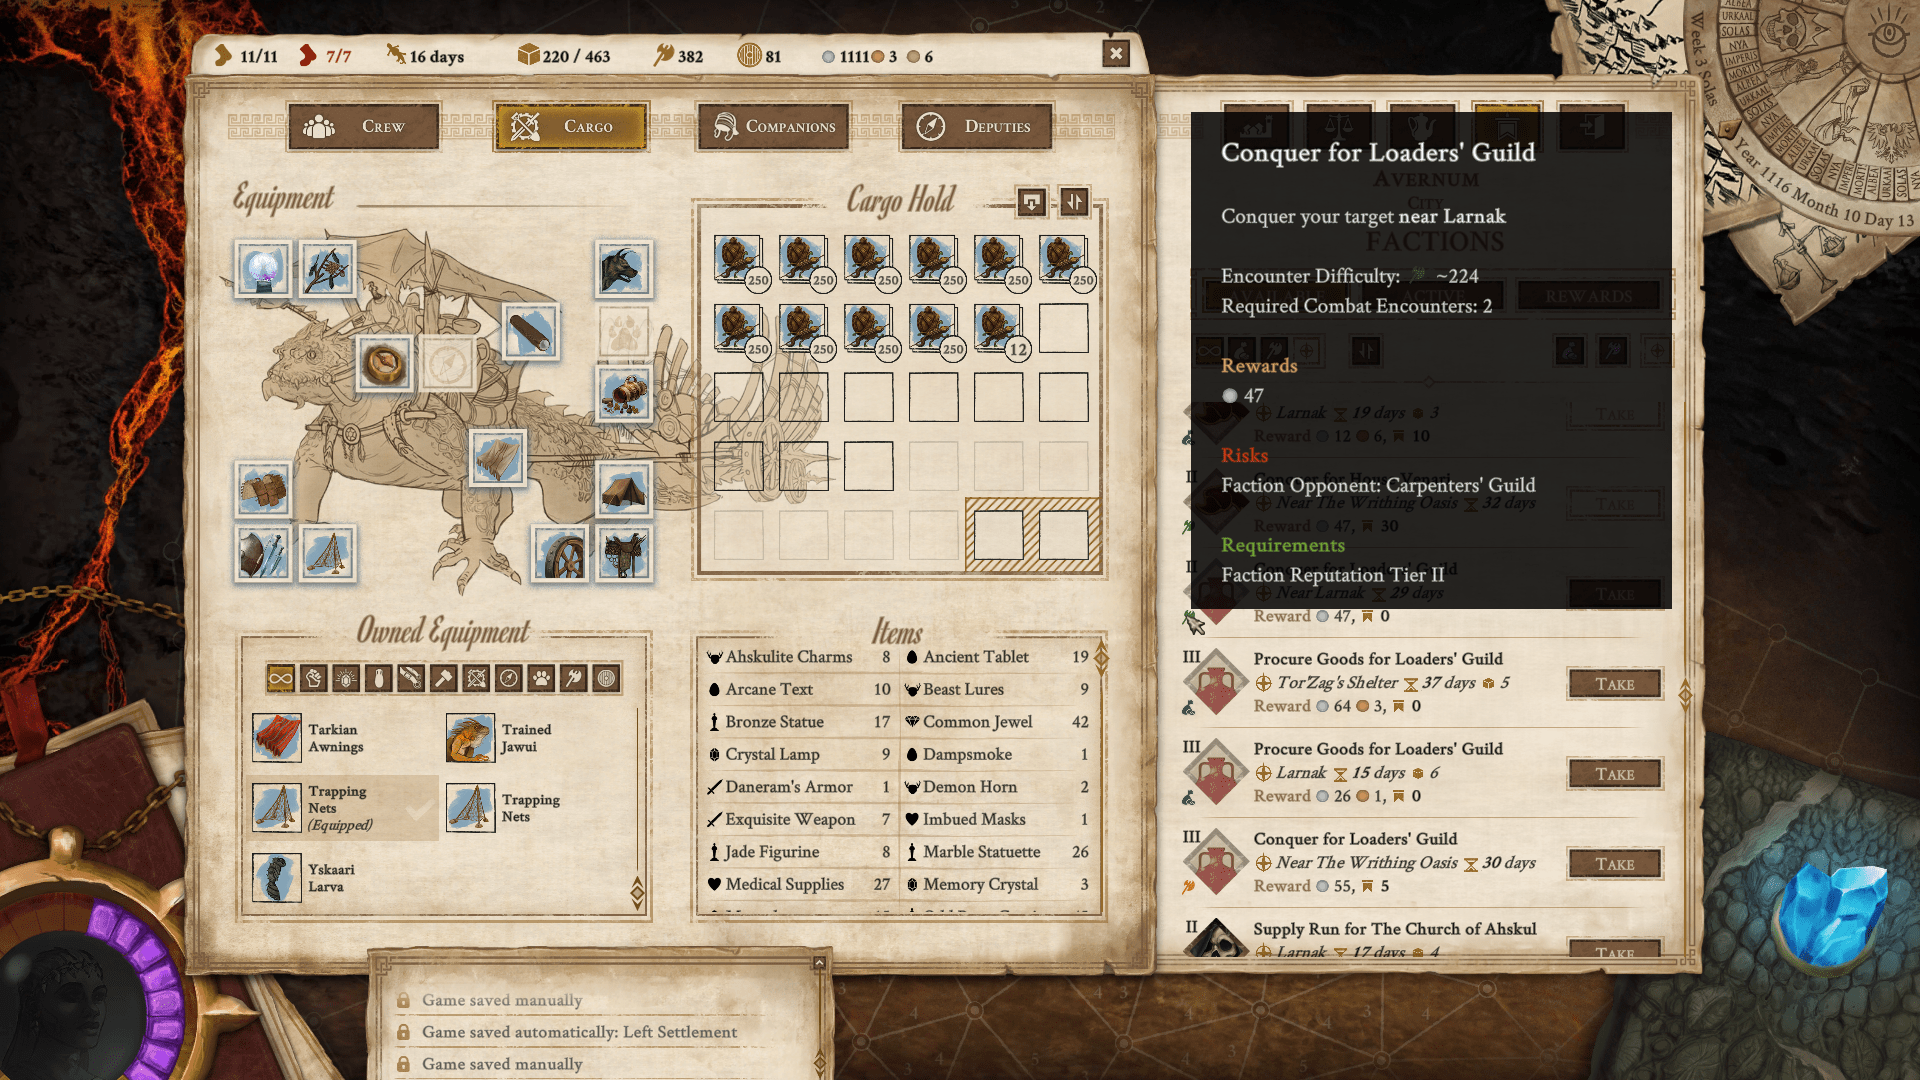
To increase your reputation with any factions you can take tasks (mercenary or trade), do errands for officials (you need a certain reputation level to unlock this option). For more information about errands see below achievements with each faction.
Despised
Reach the lowest standing with a faction.
The easiest way to do it is to take a mercenary task for their adversary. When you hover on the axe logo, you can see the actual strength you will be fighting against, if you need to let fighters, how many fights will be needed and also if you have to fight another faction, which one is it. Take tasks where you have to fight the faction you want the lowest standing with.
I also this discovered that when you are selling slaves in market your relation with Abolisionists decrease.
Diplomat
Have Tier 4 standing simultaneously with 8 different factions.
For more information see Acquaintance
Factotum
Have Tier 5 standing simultaneously with 6 different factions.
For more information see Acquaintance
Manticore
Reach the highest standing with House Venari.
Didn’t get a high standing with house Venari.
Captain
Reach the highest standing with House Darius.
Didn’t get a high standing with house Darius.
Trailblazer
Reach the highest standing with House Oquo.
Merchant Lord Valabentu of House Oquo: Drussian mines.
Quest: A Matter of Presence
Larnak – The Fields: Find Rasheed
Secure the warehouse for house Oquo: If you have a good relationship with the Loader’s Guild or a high enough renown it’s easy. If not, you have to raid the place.
Then report back to Lord Valabentu.
Despoiler
Reach the highest standing with the Ratharnak Alliance.
Official’s location: Mine of Plenty – Rathanak Compounds – General Angaroth
Quest: Agent of Destruction
Agree to take a wraith woman to Velarias then report back to Angaroth.
Arcanite
Reach the highest standing with the Scythichnis Covenant.
Loader
Reach the highest standing with the Loaders’ Guild.
Official’s location: Tor’Zag’s Shelter – The undercity – Bath House.
Quest: The Stand
In Salum ask about the Har-Tak-Gai Tribe. Go to the meeting point west of the Vortex which is marked on your map. You arrive in the middle of a conflict between the Har-Tak-Gai Tribe and the Sharduk marauders. You can talk with each leader before taking a decision. Then report to the Loader’s Guild.
Handymen
Gain at least 5 Bross from a single Odd Jobs city rest action.
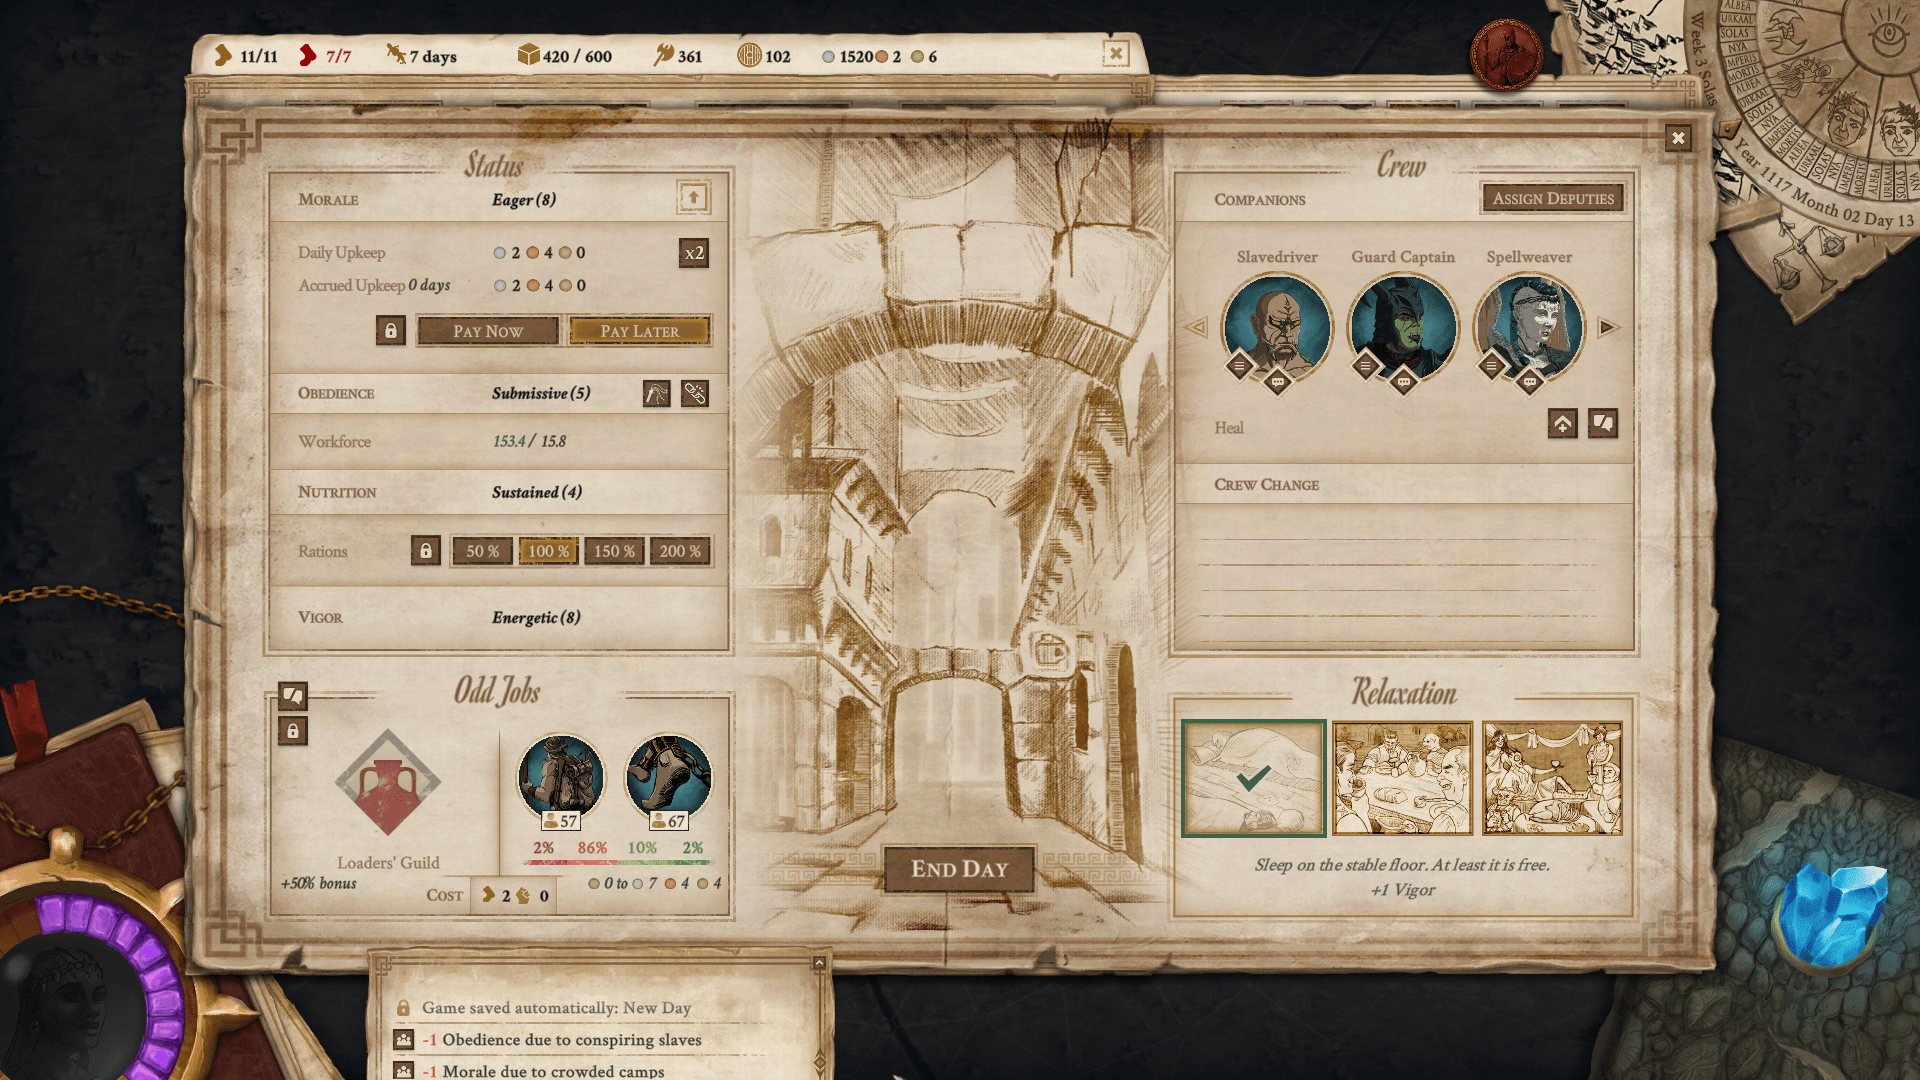
Easy to do it with a high standing with the Loader’s Guild as it will increase your chance a succeeding. You can do jobs when resting in Mansio. To increase your chances have as many slaves and workers as you can. But save before doing so.
For example I had 57 Slaves and 67 workers.
Carpenter
Reach the highest standing with the Carpenters’ Guild.
Executor
Reach the highest standing with the Church of Sergorod.
If you accomplish bounty, you will increase your standing with the Church of Sergorod.
Watcher
Reach the highest standing with the Church of Ahskul.
In Deven – The Temple Ward – Necropolis of the Great King the high priest will ask you to kill an undead called Thatmas in Arken. You need a standing of 1 to petition for an audience with a high priest. Even if you refuse to take Thatmas life when meeting him, you will get some standing with the Church of Ahskul.
If you gave them some spectral residues, you will also increase your standing with them.
Making Contact
Unlock access to the Abolitionist faction’s headquarters.
For the Cause!
Unlock access to 10 different Abolitionist cells in a single playthrough and report your success to the faction.
Liberator
Reach the highest standing with the Abolitionists.
Passengers


Delayed
Keep a Passenger for an in-game year.
Easy to do during the quest Trial of the Wind. Help the shamans and keep them for at least one year before returning to Kotrar.
Escort
Transport 100 Passenger groups to their destinations in a single playthrough.
In locations take passengers to their destination through the passenger panel in Mansios. I don’t know if passengers from quests count in this achievement.
News


Harbinger
Get paid for recent news from a ‘Far Away’ source of origin.
You need to visit distant cities and bring news between them. It will happen during your playthrough if you explore a lot, but you need to get news from non-visitable cities. In TorZag shelter and Deven there is a random encounter when visiting the city where you can have news from cities out of playable zone (Thoth and Dustwind Outpost). In Deven – Hindercaves – Dark Elf Colony – Court of Prince Laekor – Seek an audience with the Prince (news from Thot and Dustwind Outpost). For the last one, it’s possible that you need enough friendship with the prince.
To gain friendship with the Dark prince see The Darkness Within achievement in this guide.
Courier
Exchange news 200 times in single playthrough.
Don’t forget to exchange news each time you arrive in a place. This achievement will unlock quickly.
Wining And Conditions




Conqueror
Win the game.
Pretty explanatory.
Entrepreneur
Win the game through the Wealth Ambition.
Celebrity
Win the game through the Renown Ambition.
Seeker
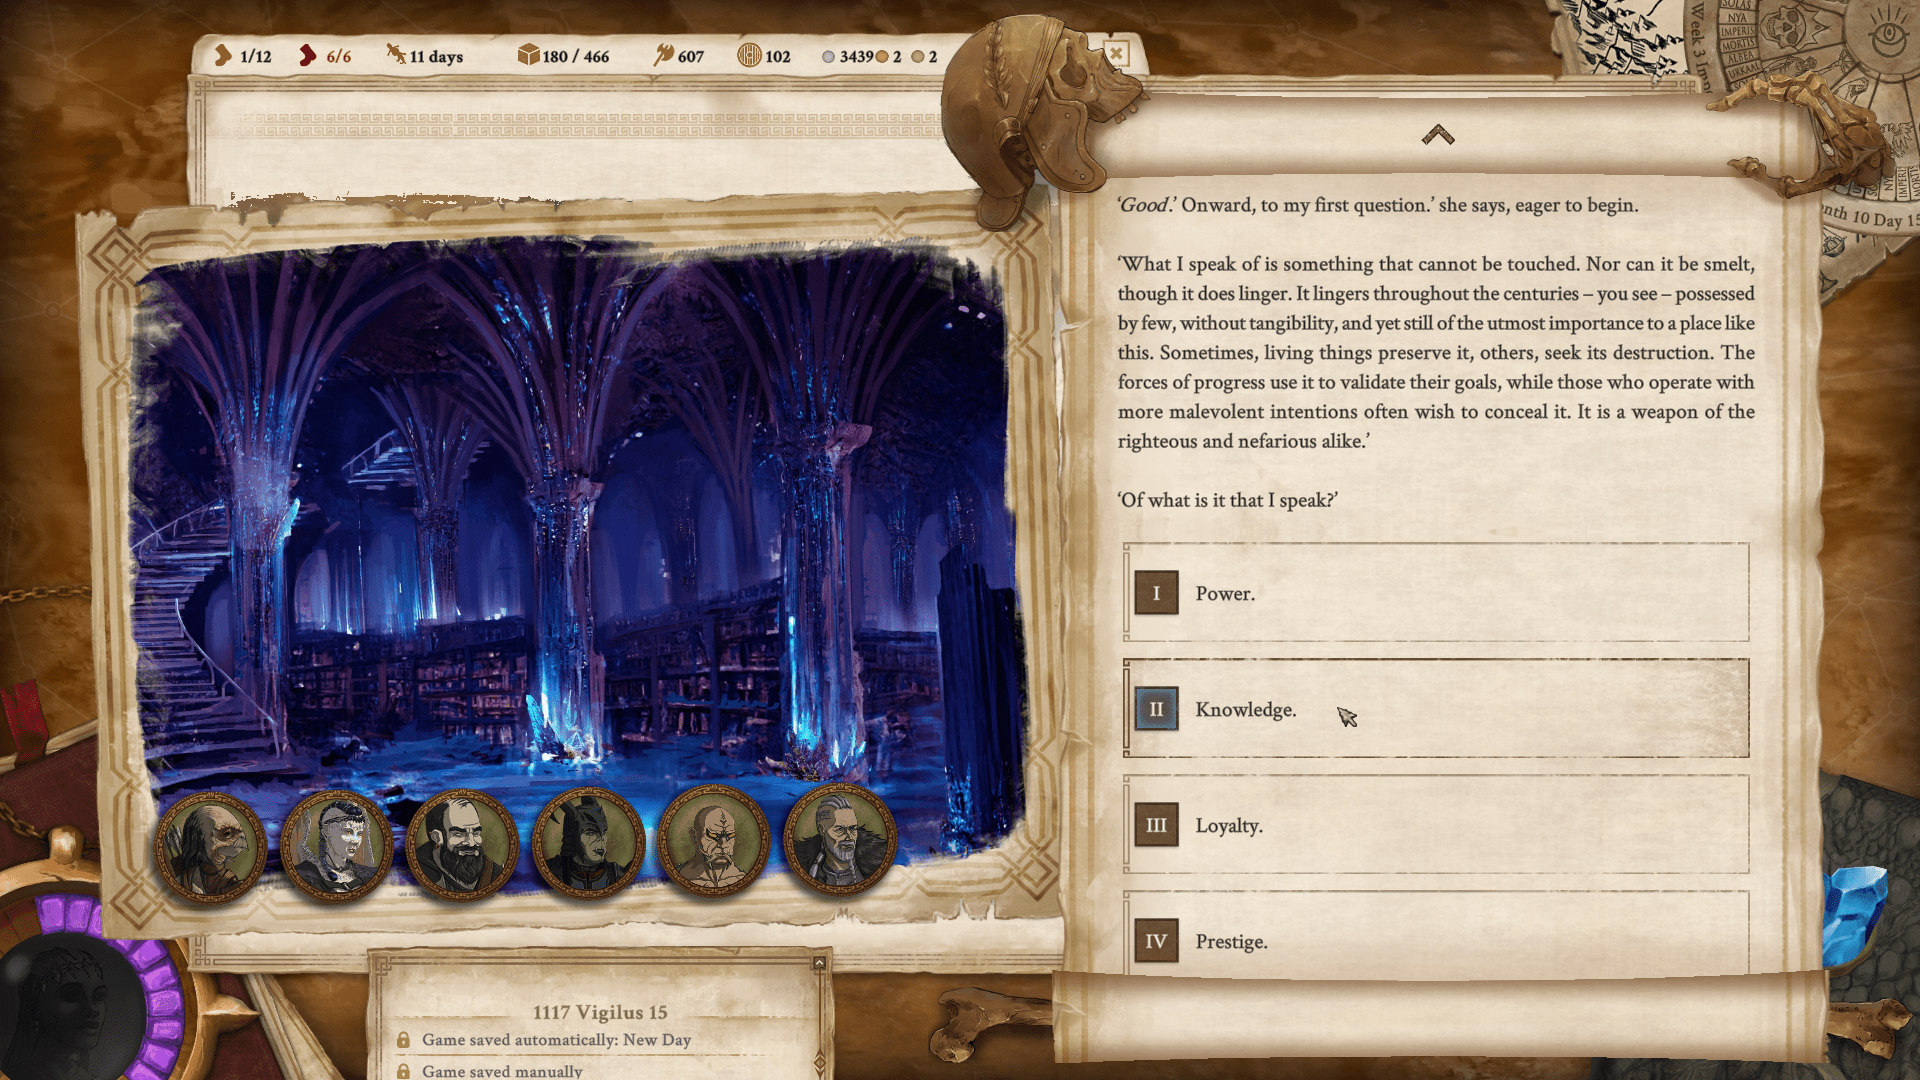
Win the game through the Knowledge Ambition.
As I learned too late, the quest to succeed in this way is not yet finished being implemented but I will describe here what I have been able to do so far.
To unlock the quest for this ambition you need to have enough codex entries: Seekers of Knowledge
The merchant who runs the bookshop in Larnak – The field will give you this quest if you meet the requirement. He will tell you to seek out Tertia Sartra: Tor’Zag’s Shelter – Civic District – Public Library.
Tertia Sartra will give you a new quest. You have to go to the Upper Village of Sadirar. In order to go to this sacred place, you need the pass the trials of the tribes:
Trial of the Winds: The quest starts in Kotrar. Shamans are not always there, so if they are not here when you arrived do something else and return there 2 weeks later. You have to take the Kotrar Shamans at the centre of the Singing Winds (marked on your map). Wait and assist them in their ritual, they will take part in combat. When they are ready take them back to Kotrar.
Trial of Earth: In Eitrar enter the Grotto of Reflexion. Inside you have to take the yellow colour. If you fail you can try again the next day. Or you can save before trying.
Trial of the Water: in the Writhing Oasis talk to Danekar and escort her into the Writhing Oasis. Do not try to go without her as you will die. If you take Finn and/or Nedir with you, you will not have to fight. Return to Vitrar to finish the quest.
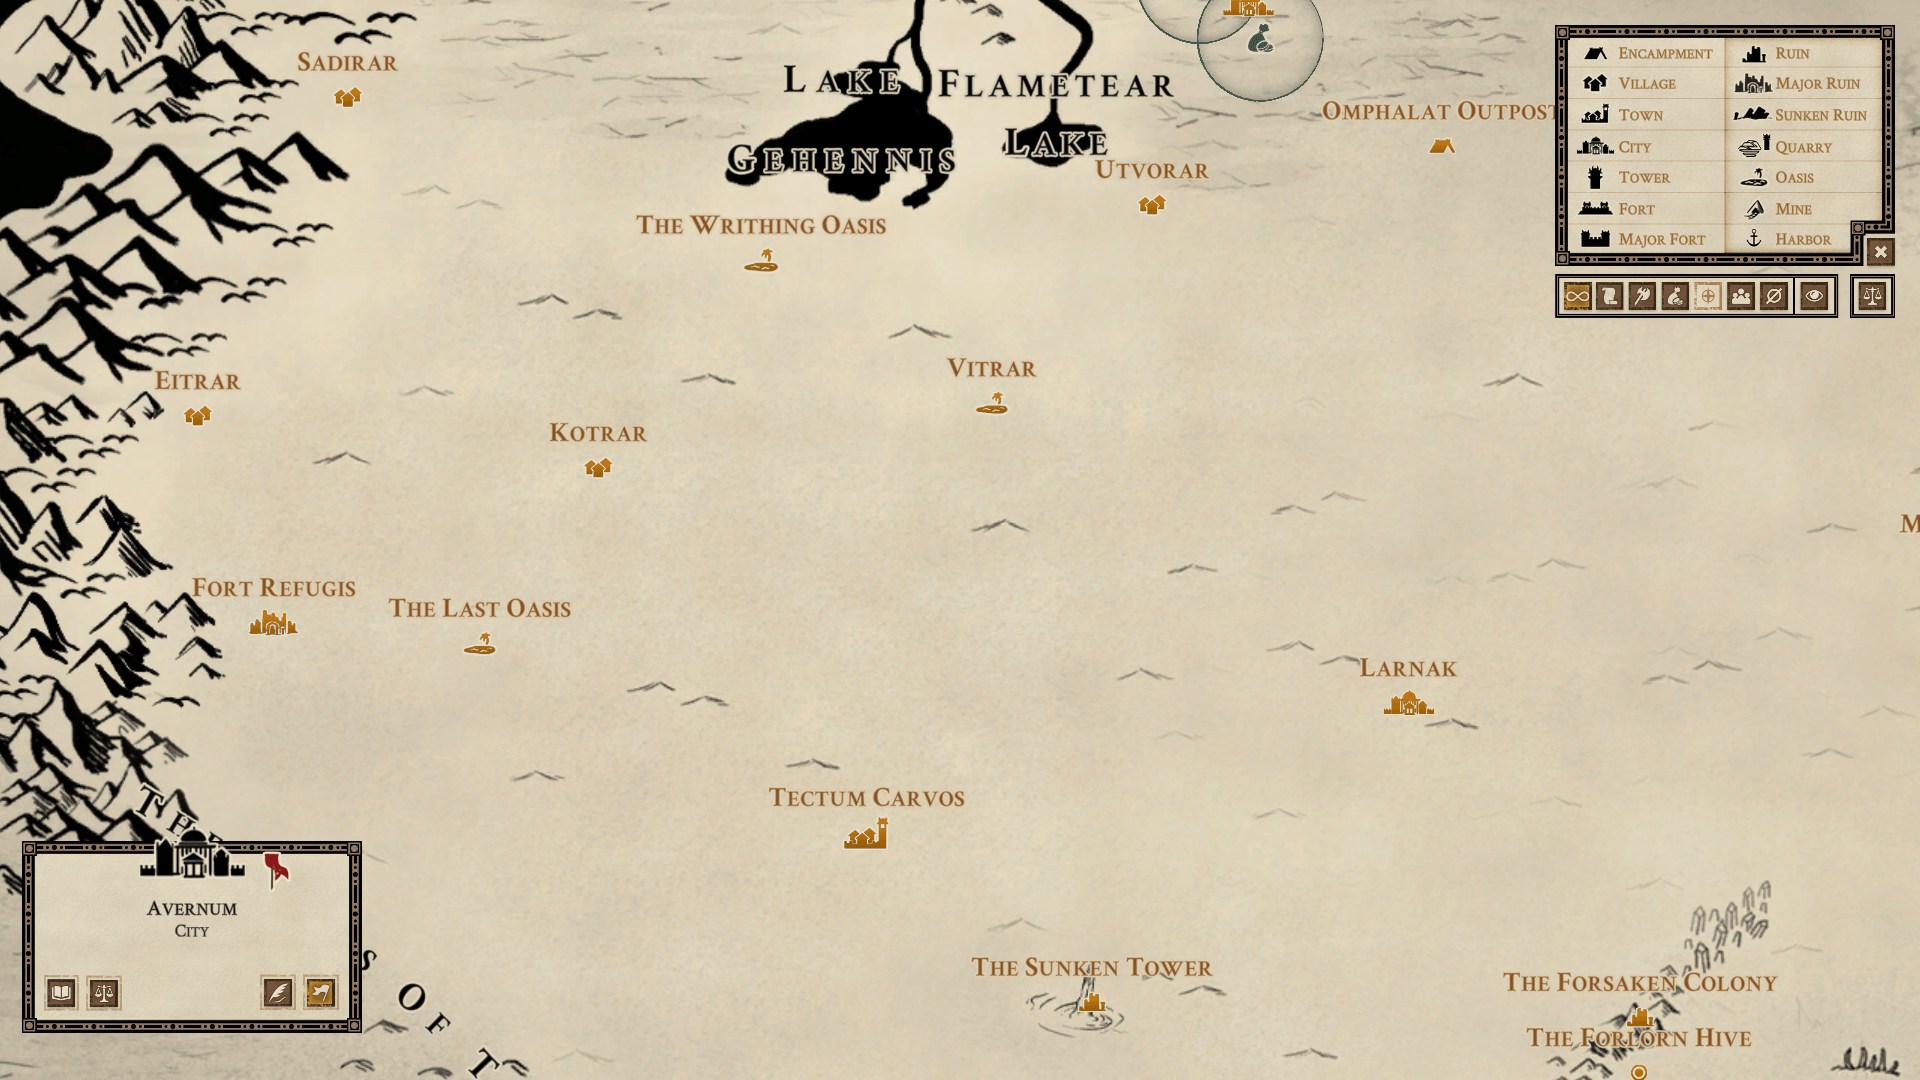
The Trial of Flame: Kill sand wyrms pack when travelling into Arena Vorax. The attack often so that shouldn’t be a problem for you to get 12 trophies of Sand Wyrms. Bring the trophies in Utvorar to be allowed to pass the trial. Travel to the place marked on the map. During the trial don’t lose tests, pass right through the flame when ask, and give something in the altar, don’t take anything from it. As in Eitrar, if you fail you can try again the next day.
After succeeding in every trial, you need to return to every tribe to get their blessing. Travel quickly as benedictions don’t run indefinitely. When you arrive in Sadirar you should have the four blessings still active. If you do so, they will grant you access to the upper village.
Talk to the shaman and they will ask you to escort them to the Sunken Tower. They will set up a base camp there and leave your comitatus. The Sunken Tower is southeast from Tectum Carvos. Talk to the guardian in the Sunken Tower then explore the tower until you arrive at Study Hall. Combat are hard in this place.
After exploring the tower, you have to report your finding to Tertia Sartra in Tor’Zag’s Shelter. She will then ask of you to get to the Crystal Archive. When you try it, the first time it should unlock a new quest: Sealed Beyond.
To access the Crystal Archive, you will need two different items: A scepter and a glyph. First explore the Study Halls until you find the Spell of Opening and the Diary of Narma. Those items appear randomly during your explorations. Enemies and combat appear randomly also. Possible encounter: Divine Instructor, Arcane Instructor, Spectral Warrior, Custodia Genius. You need a blessing of Unbinding to be able to wound them. The shaman in the camp can bless 2 companions. You also risk falling into traps. Avoid them with Engineering and Arcane Lore test.
If you delve to much deeper you can find your way back with an Arcane Lore test.
In the Lecture Hall search for the scepter of the Bibliothecaris Prefectus. You may encounter a woman see below:
She will ask you three questions:
First answer: Knowledge
Second answer: Morality
Third answer: Head librarianSimultaneously in the dormitories search for the imbued key to access the Library.
In the library you will find an item: Mage Memory Crystal. Bring it to Murno’s shop (Larnak) or to Shebenny (Lumen). The Glyph of the Seeker will appear to you.
With the last two artifact you can open the Crystal Archive. There you will find new enemies : Splinter (can be harmed without a blessing), Spectral Warrior Elite, Shade, Divine Praeceptor, Custodia Prime, Custodia Genius. Random event may also happen:
Don’t inspect windows or you will be attacked by 3 shades
Don’t try to free desiccated individuals or you will be attacked
You can try to loot scavenger’s body, you will be attacked but you will gather some thingsReport your success to Tertia Sartra in Tor’Zag’s Shelter – Civic Distric – Public Library.
Visit Shebenni in Lumen and aid her in the construction of Nexus Gnaritis. For this task you need 9 Pristine Memory Crystal and the right codex entries. I will not list all the needed entries as there is a bunch of them.
Pristine Memory Crystal can be found randomly in the Crystal Archive. When you have found one go back to the surface immediately to not waste the chance.
For now I’m stuck at this stage, as I missed 2 Codex entries and reached the end of the playable era.
If you miss just a few entries, buy perks points in: Alchemy, Arcane Lore, Beast Lore, Engineering, Herb Lore, History, Navigation, Outer Realms Lore and Religion. And go to Larnak – The Field – Noonday Reader see if he has new books.
Rage Repressed
Receive the Wrath of Sergorod during the first three in-game weeks and win the game without ever removing it.
To get the Wrath of Sergorod (+10% enemy combat strenght) in any temple defy Sergorod. It works in Tor’Zag’s Shelter or in Deven for example.
Death Denied
Receive the Disdain of Ahskul during the first three in-game weeks and win the game without ever removing it.
To get the Disdain of Ashkul (higher chances of undead ambushes) in any temple defy Ashkul. It works in Tor’Zag’s Shelter or in Deven for example.
Deceptions Disclosed
Receive the Treachery of Bal Ur Kaal during the first three in-game weeks and win the game without ever removing it.
To get the Treachery of Bal Ur Kaal (You can’t see the effect you gain the Treachery of Bal Ur Kaal) defy Bal Ur Kaal in the temple of Larnak – Lucernum – Sanctum of Bal Ur Kaal.
Defiant
Receive the Wrath of Sergorod, Disdain of Ahskul, and Treachery of Bal Ur Kaal during the first three in-game weeks and win the game without ever removing them.
See above for more information.
Vagrus Supreme
Receive the Wrath of Sergorod, Disdain of Ahskul, and Treachery of Bal Ur Kaal during the first three in-game weeks and then win the game without ever loading a manual save game in the playthrough.
See above for more information.
Beloved by Irafons
Win the game without ever loading a manual savegame in the playthrough.
Others (Part 1)




Conquered
Die for the first time.
Pretty explanatory
Randomized
Roll 100 on an Accuracy roll.
It should happen much faster than you think.
Unseen Patterns
Listen to the strangest sounds of the wasteland.
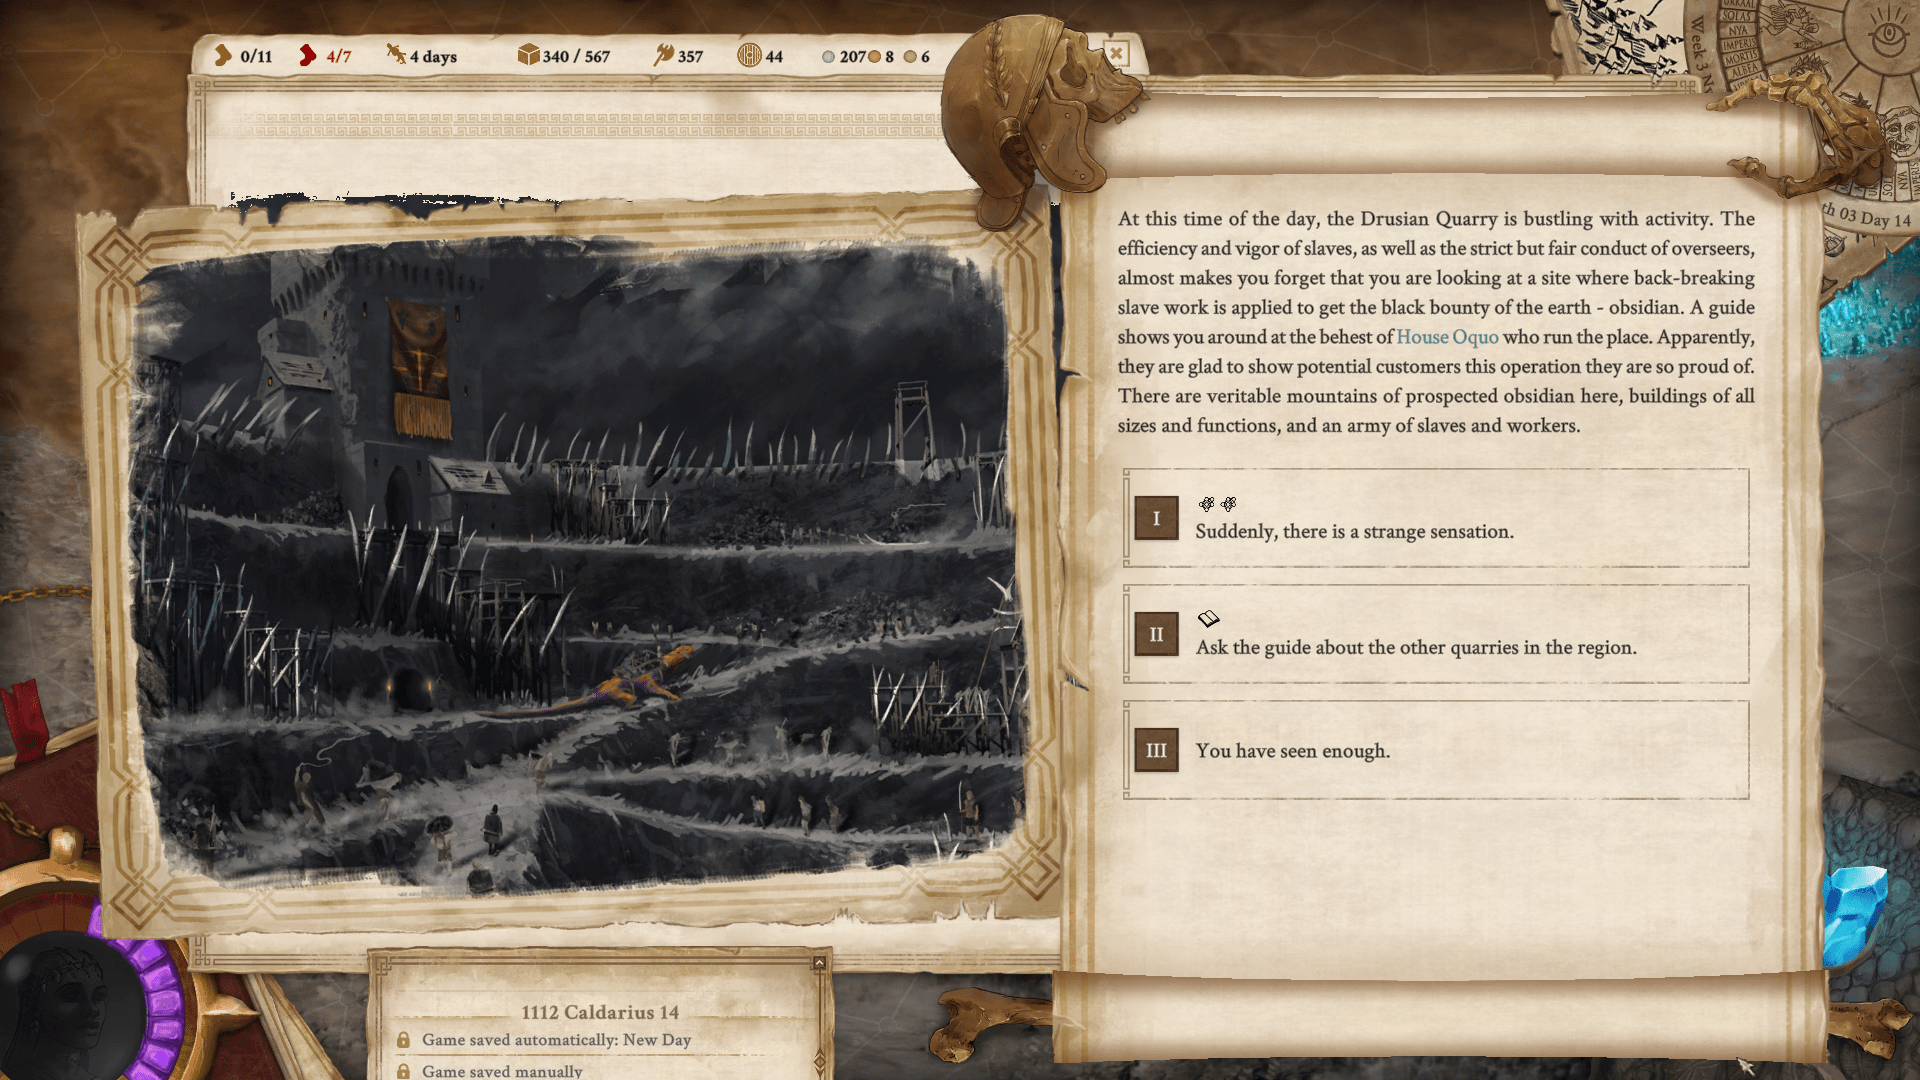
The picture is misleading because this achievement won’t unlock in Ventulium.
In Drussian Quarry ask for a tour of the quarry and if you have five in perception and six in magic sense, you can select ‘Suddenly there is a strange sensation’ during the visit. If you don’t have the requirement, this option will not appear.
Life… Finds a Way
Gain the Spirit Idol.
Buy the wooden idol from Thatmas in Arken or in Mirage.
In Tor’Zag’s Shelter – Civic Distric – Garden of Laviena : Talk with the superintendant and ask him questions. If you have the wooden Idol with you, you will be prompted to show the statue to him.
Then in Deven – Hanging Garden : Talk with the botanist and show him the idol transformed by the superintendant.
And last take the idol to The Last Oasis and talk with Djuzanni she will transform it into the spirit idol and the achievement should pop.
Accomplished Explorer
Discover all accessible named locations and regions.
As I didn’t unlock this achievement, this list isn’t complete.
Acherus Quarry
Arken
Ash
Auguros Work Camp
Avernum
The Crimson Gate
Carravhon, The Howling City
Crossroad
Crystal
Deserted Cove
Deven
Drussian Quarry
Eitrar
The Forlorn Hive
The Forsaken Colony
Fort Larius
Fort Refugis
Fort Viridium
Ioscian Quarry
Kernak Waystation
Kotrar
Larnak
The Last Oasis
Leviathan’s Demise
The Lost City of Vratluk
Lumen
Mines of Plenty
Mirage
Omphalat Outpost
Sadirar
Salum
The Sunken Tower
Sun Rock
Tectum Carvos
Tectum Kelvar
Temple of the Sleepers
Tor’Zag’s Shelter
The Twin Towers
Utvorar
Velarias
Ventulium
Vigilus Tower
Vitrar
The Writhing Oasis
Metropolitan
Visit the four great cities within 14 in-game days or less.
The four great cities: Tor’Zag’s Shelter, Avernum, Deven, Larnak.
All Geared Up
Own at least 40 unique Gear.
These are the ones that you equip your companions with. You can buy some off them or find some others during quests and encounters. The isn’t an exhaustive list.
Candle of the dead
Crystal idol
Dragonstone of Protection (Salum)
Dragonstone of Enchantment (Salum)
Dragonstone of Vitality (Xevarian Gambit)
Dragonstone of Celerity (Salum)
Dragonstone of Clairvoyance (Salum)
Dragonstone of Teleportation (Salum)
Orcish Terror Totem
Small Energy Crystal
Large Energy Crystal
Murky eye Broche (The last oasis, Avernum)
Greater Luck Talisman (The last oasis)
Luck Talisman
Talisman of Divine Rage (The Temple of Avernum, Kotrar)
Torture Devices
Urd Rune (Avernum)
Trap kit (TorZag Shelter – Braxius store)
Enchanted perfume (TorZag Shelter – Braxius store)
Gval Rune (Avernum)
Amulet of Concentration (Avernum, Salum)
Amulet of Protection
Demonbone Vambraces (Avernum)
Alchemical Tools (Infirmary)
Medicos tools (Infirmary)
Herbalist Tools (Infirmary)
Potent Poison (Infirmary and alchemist)
Survival Kit
Trap Kit
Thatmas Idol (Arken or Mirage)
Bronze Owl Pendant
Windwalker Talisman (Kotrar)
Bloodstone
Ring of Leeching
Bone Wand
Great King Blessed Rin
Icareon’s Circlet
Morgarthan’s Gaol
Smoldering Heart
Vernus Matriach Skull
Spirit Idol (Life Find a ways achievement)
Prepared For Anything
Own at least 45 unique Equipment.
These are the ones that you equip on your cargo. You can buy them in cities. The isn’t an exhaustive list.
Awnings
Tarkian Awnings (Tectum Carvos)
Blinders and combat saddles
Calerus Protection Gear (Lumen, Crystal)
Dowsing rod
Candle of the Living
Dwarven Compass (Eylani’s quest end - See Ever After achievement))
Extra Storage
Fire Bombs
Standars Armements
Bronze Armements
Iron Armements
Dragonsteel Armements
Good quality tools
Heat Shielding Crystal (Lumen – See The Voice of Hereafter achievement)
Hidden compartments
Lances
Kal-rish Saddlebags (Crystal)
Protected Harnesses
Perimeter Alarms
Scrying Orbs
Reinforced Cartwheel (Mine of Plenty)
Reinforced Wheels and Axles (Avernum - Scoria)
Slave Cages
Skewers
Shriekers
Smuggler’s compartments
Hidden Compartment
Spyglass
Trapping Nets
Trained Jawui
Guard Animals
Hunting Animals
Falcons (Tectum Carvos)
Mount Blankets (Tectum Carvos)
Legionnaire Tents (Fort Refugis)
Yskaari Larva (Larnak - See Insectoid Propagator achievement)
Others (Part 2)





Chromatic Collector
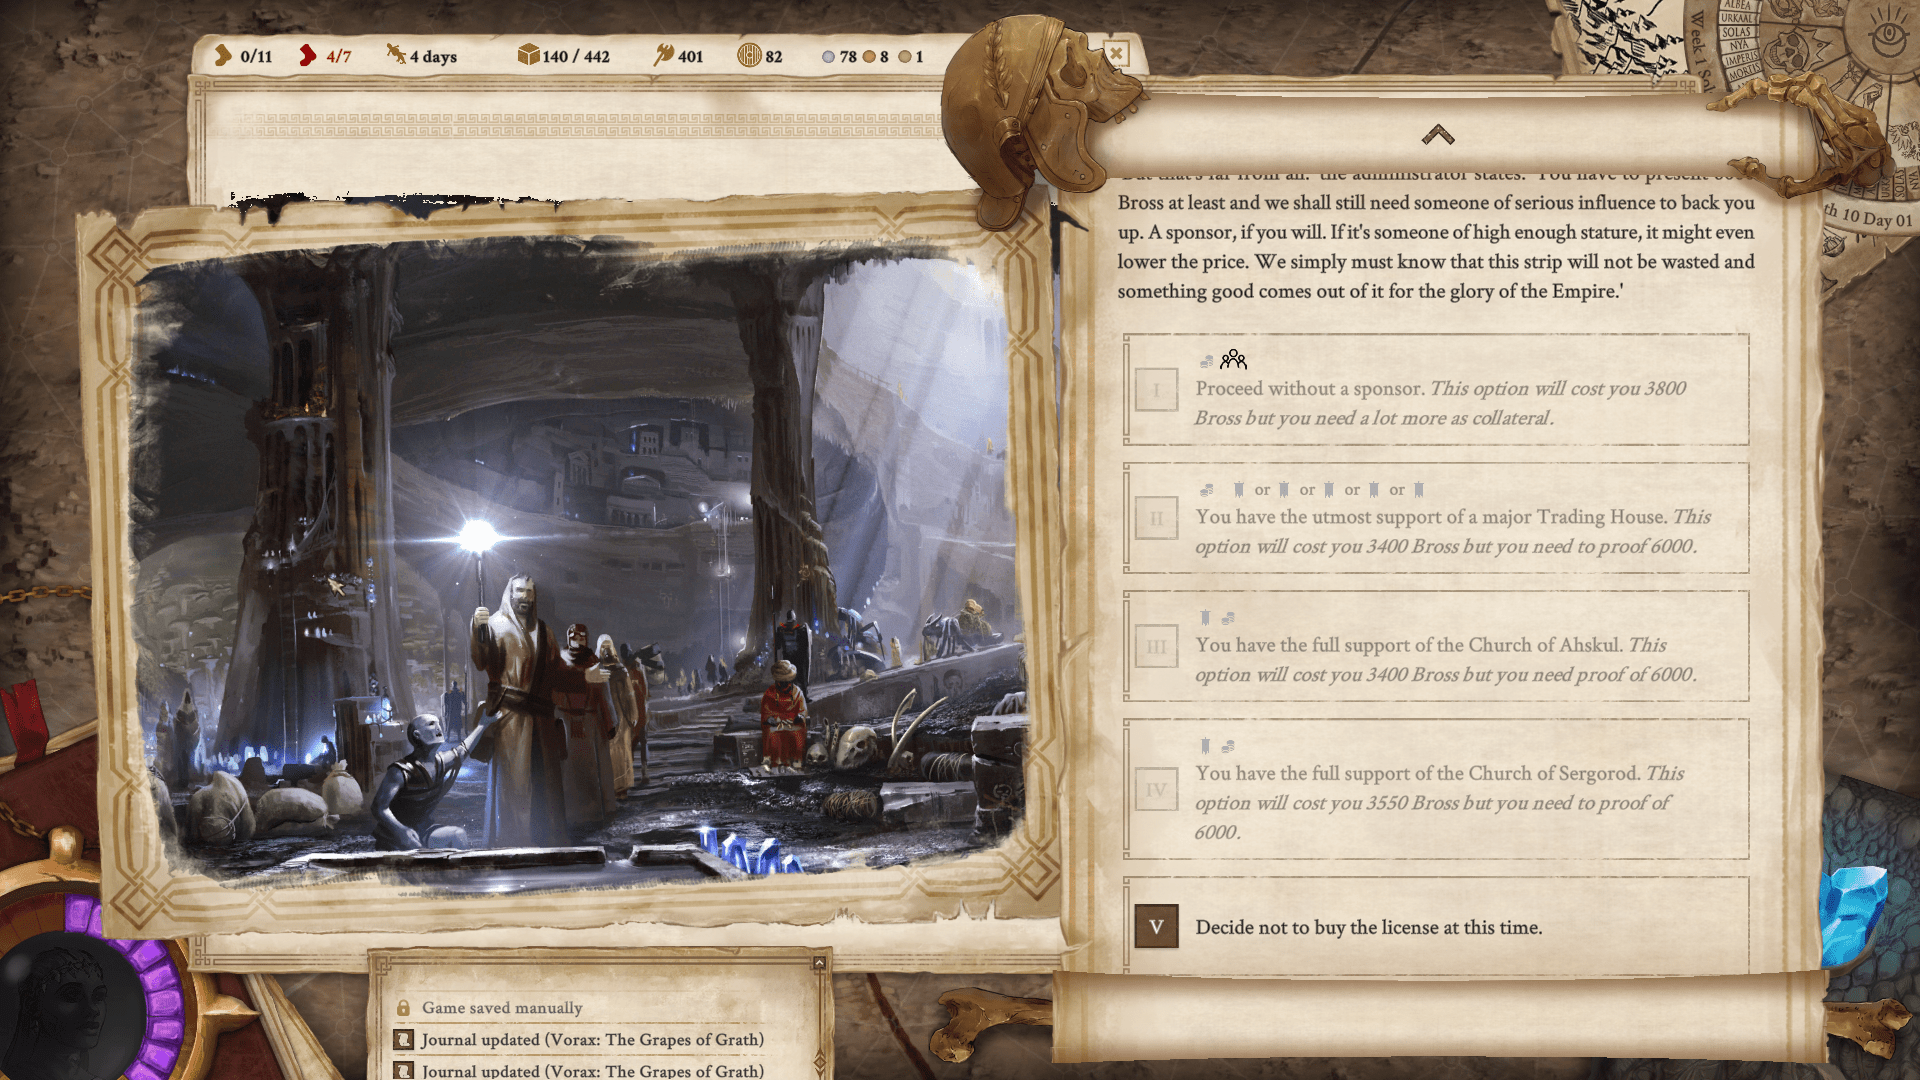
Own one of each Dragonstone.
In Salum you can buy Dragonstone of Celerity, Dragonstone of Clairvoyance, Dragonstone of Enchantment and Dragonstone of Teleportation.
In Mine of Plenty, you can buy Dragonstone of Protection.
Dragonstone of vitality is a reward for the quest The Dread Reavers when Daneram Xevaris, the young noble asks you to bring several things for a feast he is holding (See Xevarian Gambit achievement)
Glorious leader
Unlock all Leadership Perks as well as reach the maximum Resourcefulness and Authority in a single playthrough.
It will cost you a great number of insight points. If you are not interested in getting every leadership perks, you can wait to get enough insight point save, buy everything needed for the achievements then reload again. But max authority is very important and full resourcefulness may help you in combat.
Tail-wind
Start an in-game day with a total of MP plus MMP higher than 20.
Moving At Odd Angles
Start an in-game day with a total of MP plus MMP higher than 28.
Drawen Compass (a rare equipment) + 1 MP
Chief Handler (a deputy role) gives + 1 MMP
Reinforced Cartwheel (Mine of Plenty – Ratharnak Emporium) gives + 2 MMP
Reinforced Wheels and Axles (Avernum – Scoria – Anvil of Thardraz): You need to give the dwarves 3 Iron, 2 Timber and 6 Bross. After that you need to wait for 20 days: +20 Flee, +1 MP, +1 MMP.
If you have 8 or more in moral and vigor you get a bonus MMP and MP.
Ifaron blessing (random encounter on the map) +2 MP.
Kalarruk’s favor (Deven – Random encounter when exploring the city, give money to the poor) + 1 MP
Blessing of the wind (Kotrar after finishing the quest Trials of the Wind) +1 MP.
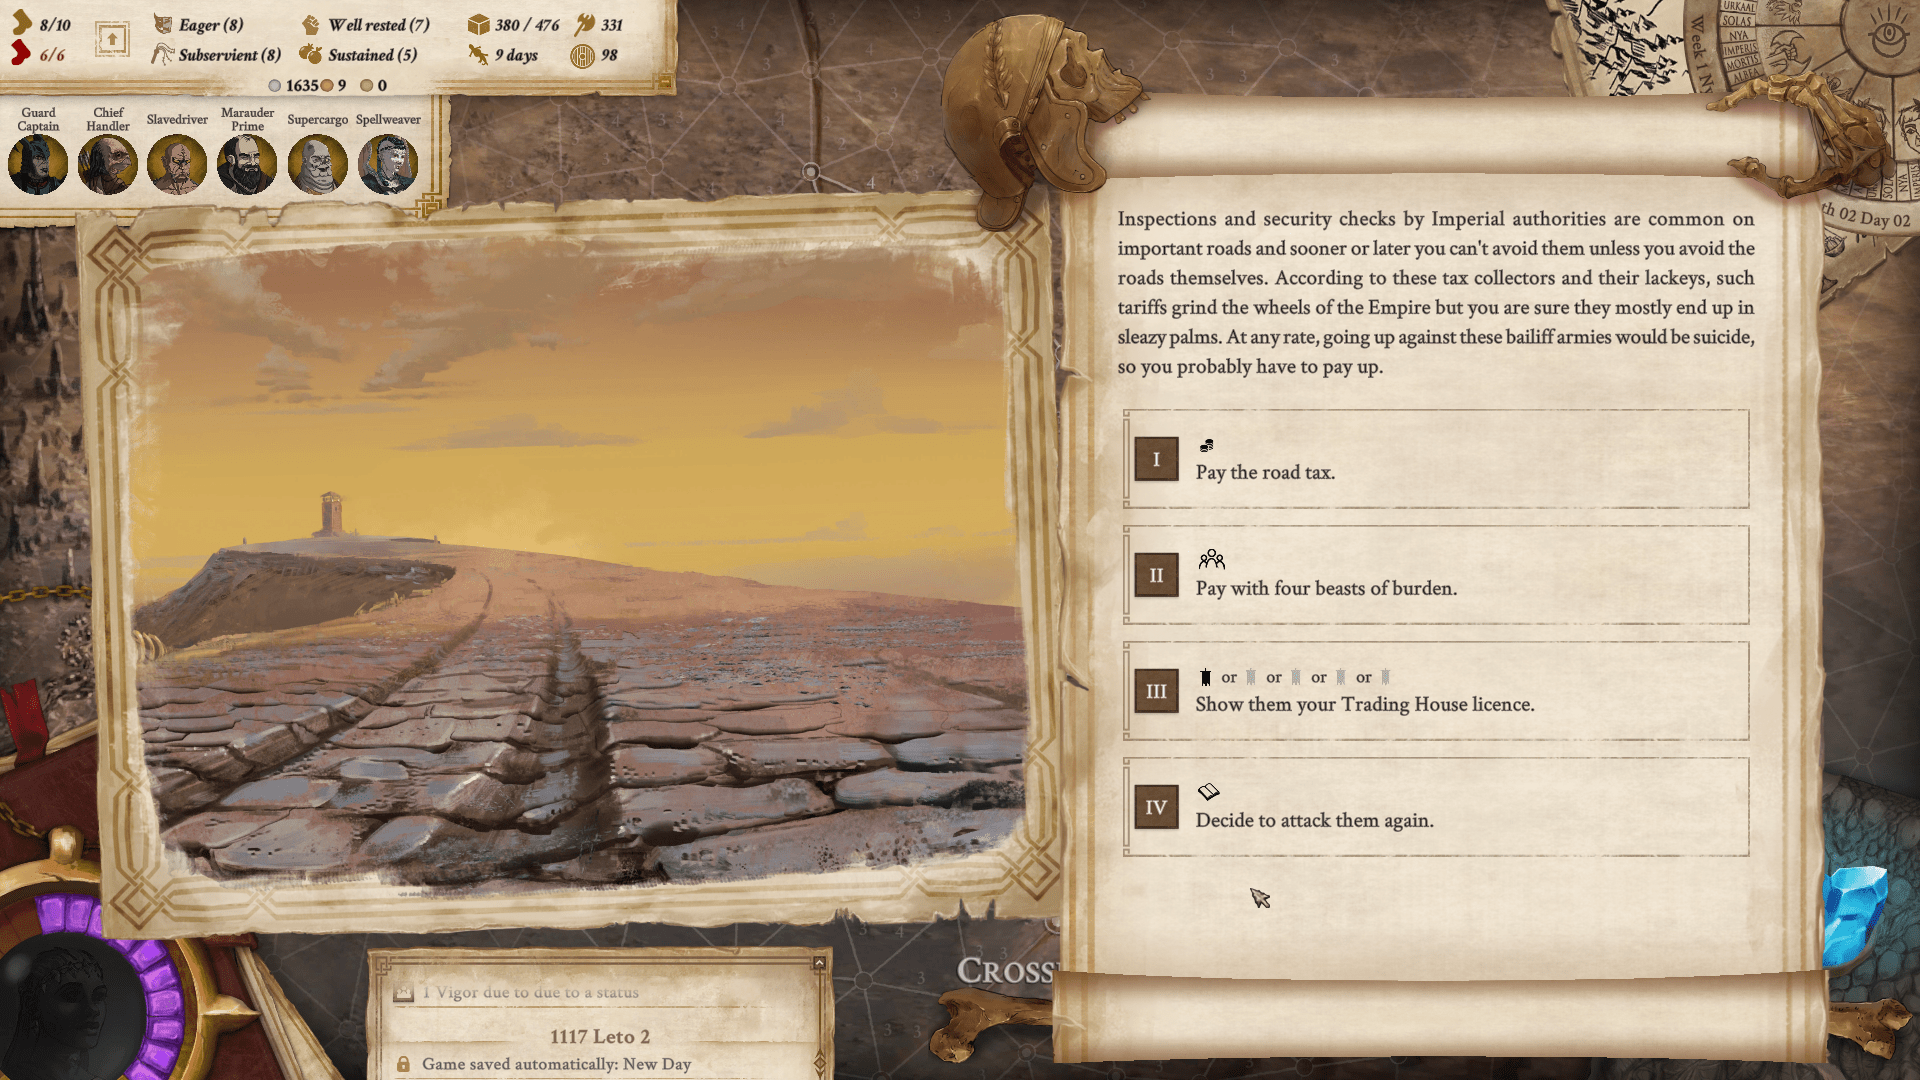
Tax Evasion
Avoid the highest tier of road tax.
Road tax increase through the game but you can escape them with enough reputation with factions. In each tier the needed reputation increase. Loader’s guild and Carpenter’s Guild can’t help you in this matter.
Huntsmaster
Gain at least 950 Supplies from a single Hunting camp action.
Foraging is a camp action that can be accomplished with scouts. Prefer to camp in the wilderness. There is also equipment that can give you a bonus: Falcons (+10 Hunting Base Chance, +15 Scouting Base Chance), Hunting Animals (+10 Hunting Base Chance, +5 Chase, +8 Combat Strength).
To see where to find equipment see the Prepared For Anything achievement.
Forager
Gain at least 500 Supplies from a single Foraging camp action.
Foraging is a camp action that can be accomplished with slaves and workers. Prefer to camp in the wilderness. There is also equipment that can give you a bonus: Dowsing Rod (+10 Foraging Base Chance), Trained Jawui (+10 Foraging Base Chance).
To see where to find equipment see the Prepared For Anything achievement.
Settler
Build your own outpost and develop it to its full potential.
To build an outpost you need to go to TorZag Shelter or any major city and spend 250 Bross at the authority office.
The following take place in Deven, you need either a reputation of 14 or higher or a certain level of relationship with factions.
Then it will cost you 3 000–5 000 Bross
Over the Horizon
From the start of a campaign, reach the Last Oasis in 17 in-game days or less.
Masked Achievements




And the Sky Full of Stars
Ruiner
What Lies Below
Learn the truth about the Great Machine.
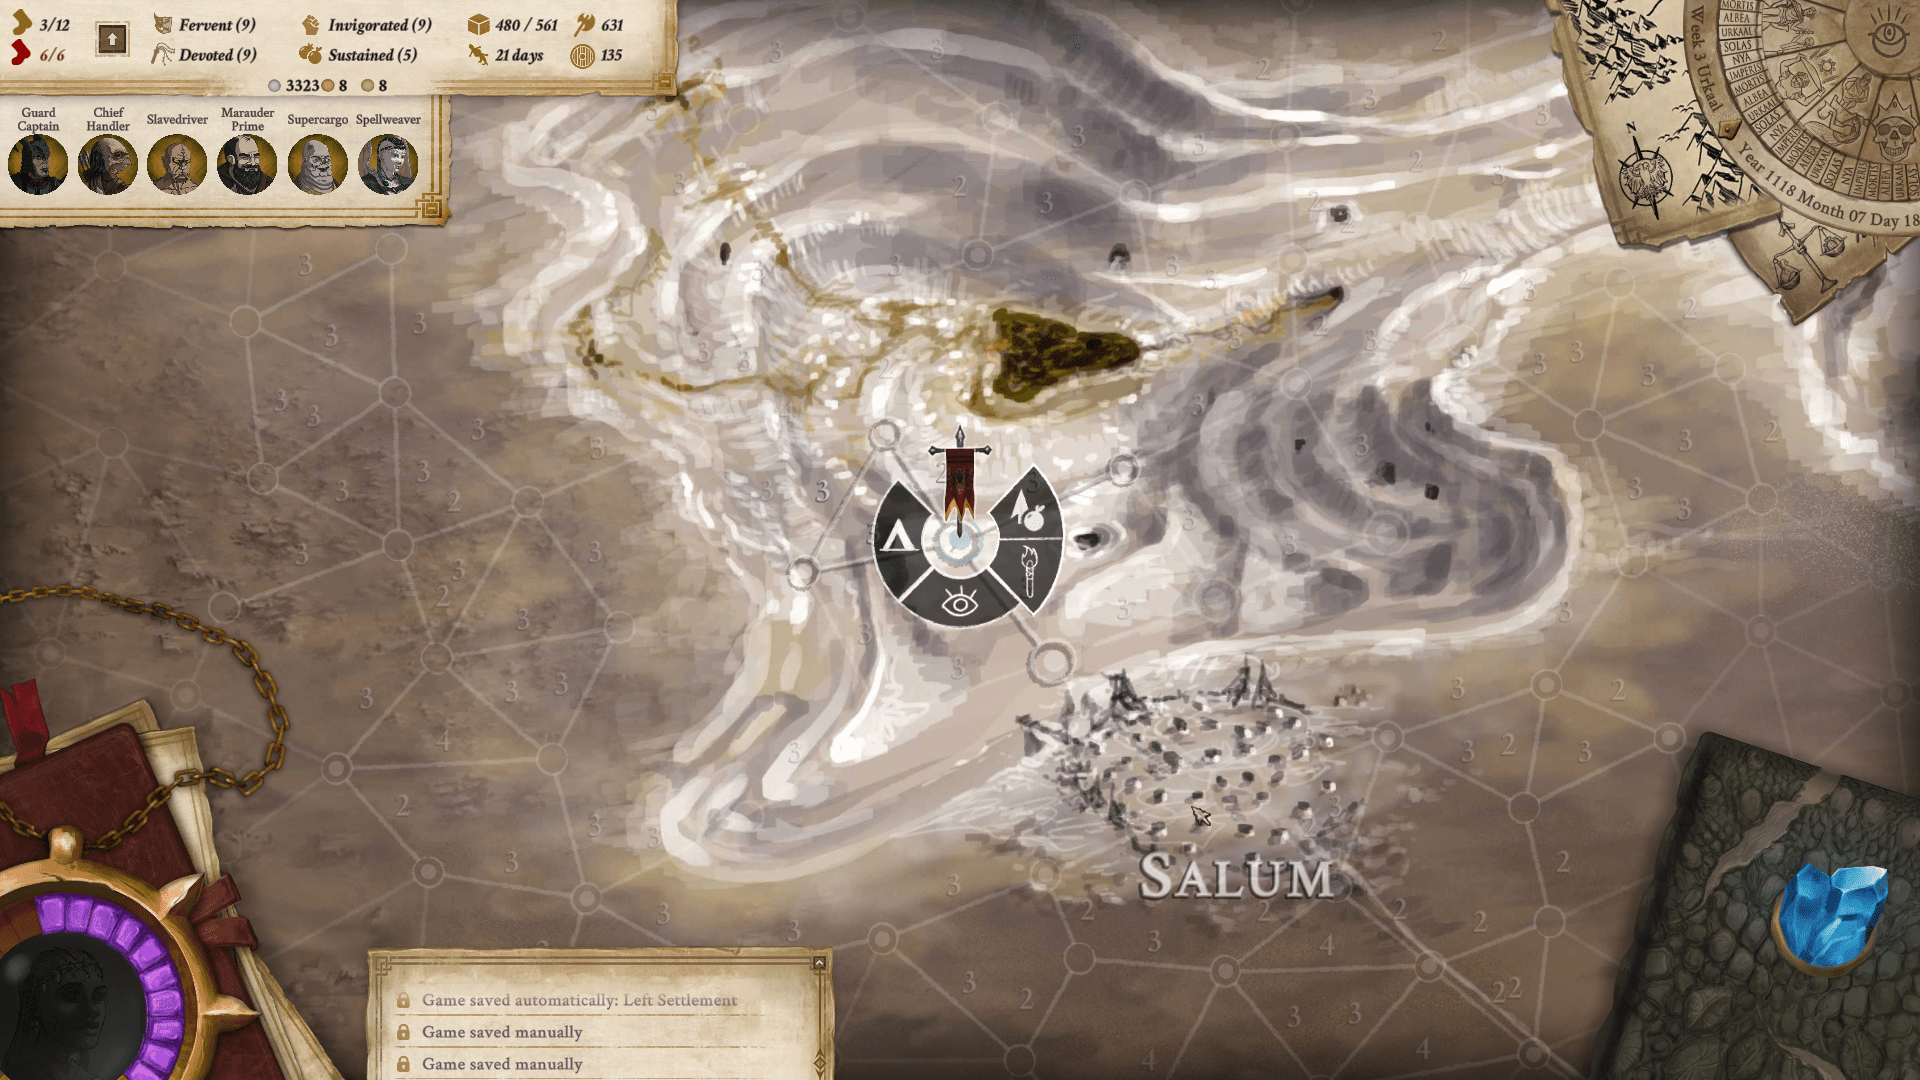
For this quest explore (torch icon) areas in front of Salum to mine some salt. Explore area with bigger circles. Those are controlled by the Scythichnis Covenant. To mine there you will need permits: Salum - Covenant House – Purchase permits. Purchase at least 10 tokens. When mining salt you will meet a wounded miner’s group and a new quality will be add to your journal: Brine Mere: Unfortunate Miners. Go back to Salum – Lakeview Square – Salt Shaker – Talk to the salt miners and then ask about wounded miners. They will indicate you where they came from and a new quality will be added: Brine Mere: Decimated Camp. To see where the camp is situated see screenshot below.
Look for the camp of the dead crew on the plateau
Bury the dead: + 5 Church of Ashkul
Load up the salt the miner has abandoned: +2 Salt
Scout the area: You need to take 3 companions with you (try to bring Garrik it will ease some tests)You can break open the pipe and then follow it, nothing bad will happen to your crew.
An easy test (Navigation, Savvy and a bonus if you are a dwarf or if you take Garrik with you).
Continue to follow the quest until you can take a look around an old miner’s camp :
Take the lamp crystal and valuables: +4 Crystal Lamp, +1Arcane Text, +2 Ancient Tablets, Good quality tools
Observe the edifice close up: If you can do everything below: +3 Insight
The runes appear to be Dwarven (Garrik or history test)
The technology and design of the structure is intriguing (need: 5 in Savvy and Engineering)
Perhaps there is magic at work here (Need: Magic sense 3, Arcanic lore 4) Try to search the place thoroughly: new quality added “Brine Mere: What lies Below” and someone will approach but you will get no reward, so prefer to observe the edifice close up (see above)You can’t avoid combat even if you are friend with the Scythichnis covenant: 2 Renegade Dragonguards
Try to run down into the tunnel you will have a fight against 2 Renegade Dragonguards again.
You will meet a tall dragonkin: You can tell him that you want assurance or ask him who they are but it will not change anything. Do not surrender or you will be dead instantly.
This will start a new quest: Secret below
Escape from the tunnel with the help of Garrik and gain +1 Insight and lose 6 movement.
Go back to Salum. You will have three choices of allies. You can choose only one of them
If you have at least 2 with Scythichnis Covenant: Covenant House – Visit the inner sanctum: Don’t ask them about a group of sickly miners of you will loose relation. Instead Report what you have found below the surface of Brine Mere. Confirm by choosing Inform the Dragon and the Archmage. Insist on helping them: + 80 Scythichnis Covenant + 5 Insight.
If you have more than 0 with the Ratharnak Outpost: Lakeview Square – Visit the Ratharnak outpost – Chief Agent Welgan – Inform Welgan about what you have found below the surface of Brine Mere – Inform the chief agent – Offer your help: + 40 Ratharnak Alliance, +2 Insight
If you have at least 2 in the Church of Ahskul/Church of Sergorod : Lakeview Square – Salt Shaker inn – Contact Xeshara - Report what you have found below the surface of Brine Mere – Inform the imperial spy – Agree to help : +20 Church of Ahskul and Church of Sergorod, +2 InsightFor the following I choose to take side with the Scythichnis Covenant (other path may diverge on some points) as the reward is much more interesting:
Go back to the camp of the dead crew on the plateau : visit the crevice that leads into the salt tunnels – Find your allies nearby and continue to follow the quest until have to fight against renegade dragonguards. You will be accompagnied by two allies. In the second fight you will be accompagnied by 3 allies againt 3 renegade dragonguard and 2 renegade dragonmage. After some times you will meet a third group of 3 renegade dragonguard and 1 renegade dragonmage. For the third combat you will have three allies with you. When prompted ask Garrik for help against the mage. You will gain +3 Insight after some times.
Reward at the end of the quest : 20 Salt Mining Tokens, 1 Rare Jewel, +70 Scythichnis Covenant, Dragonstone of Enchantment, +6 Insight, 6 Bross and the achievement should pop.
Wyrmslayer
I didn’t unlock this achievement but I think that it’s linked to the quest, ‘The Return of the Wyrms’. For more information see the Ever After achievement in this guide.
Xevarian Gambit
Listen to Daneram Xevaris announce his intentions at his feast.
You can start this quest when you have at least 2 Renown. In Tor’Zag’s Shelter – Civic Distric – Dragon Nest inn, a mercenary company called The Dread Reaver will ask you to transport them to Lumen – Blind Jhakra. When they quit your comitatus talk to their leader in the Blind Jhakra tavern. To traverse the Crystal Forest you need to equip: Calerus Protection Gear (Market in Lumen or Crystal) and Heat Shielding Crystal.
To get the Heat Shielding Crystal see The Voice of Hereafter achievement in this guide. Equip the protection on your cargo then talk again with the Dead Reaver. Before leaving be sure to have enough supplies for 12 to 15 days as the quest can be long. Locate your guide and then transport them Calerus Valley. The fights are a little hard in here so be careful. When you have finish you have to take them to Arken. Once in Arken the Dread Reaver will ask you to bring them in Salum – Salt Shaker inn, to contact a man. Take all of them to the north next to Wyrm’s Teeth (the place is marked on your map). Once there you will gain a new passenger. Bring all of them to Deven. To obtain your reward, visit Daneram Xevaris in his villa in the Garden District.
Daneram Xevaris wants you to bring rare goods for an upcoming feast:
A ceremonial armor: Avernum – Scoria – Anvil of Thadraz
Tarkian Spice Infusion: Tectum Carvos – Tarkian (you might need to help defend Tectum Carvos before)
Zewura’s Zenith: Ash. If you do not bring every member, he will be displeased but you can continue the quest.
Sweet Ygr nectar: Larnak – Yskorri Ambassy (you might need a certain level of relationship with them)When you have brought everything he needs, talk with him about the feast. Before going to the feast, you will have to wait 1 day. Be careful as combats are a little hard. When the young noble escape, you will receive your reward and the achievement.
Source: https://steamcommunity.com/sharedfiles/filedetails/?id=2888694005
More Vagrus - The Riven Realms guilds
- All Guilds
- Vagrus - The Riven Realms
- Crew Composition
- Vagrus - The Riven Realms Guide 106
- Vagrus: Event Trading
- Rare Achievements
- Vagrus - The Riven Realms Guide 76
- Vagrus: The Trading Guide
- Random tips to help get started
- Playable area map with all locations for making money[contains spoiler]
