
Introduction / はじめに

Welcome to my guide :)
I think the tutorial in this game is not enough.
It was especially hard for me to understand the temperature system.
Unfortunately, there are few guides on temperature.
So I decided to create this guide.
Some of the content of this guide was cut from my other guide (in Japanese) to make it easier for others to find.
...Please don't say "Use Seer".
このゲームは説明不足な点がたくさんありますが、気温ゲージの見方なんかは特に「?」です。
気温に関するガイドが少ないのと検索のしやすさも兼ねて自分の別ガイドからクローズアップして新たにガイドを作りました。そのため、一部内容は重複しています。
「シーアを使え」は禁句です。
https://steamcommunity.com/sharedfiles/filedetails/?id=2605941921
-----English------------------------------
(日本語は下の方にあります。画面右側の目次より移動してください。)
Temperature Gauge
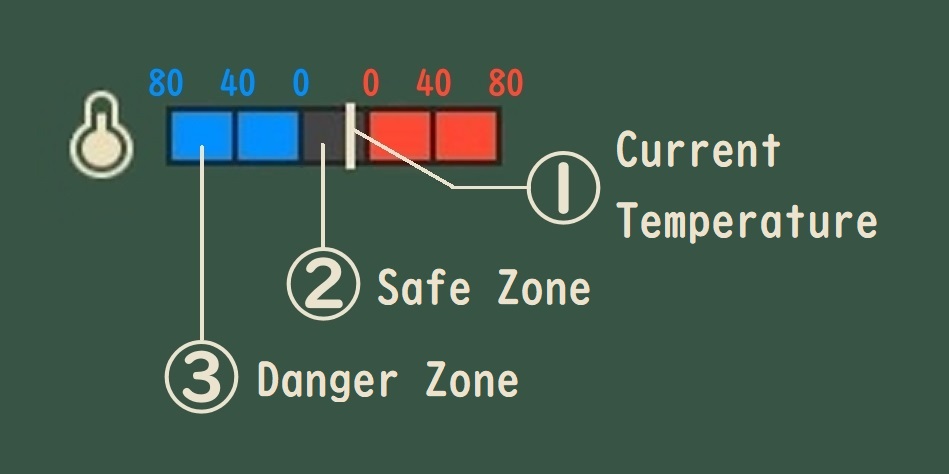
1. White Line
Indicates the current temperature.
The left side of the gauge is colder and the right side is hotter.
2. Black Area
Indicates the range of temperatures that your equipment can resist.
If the white line is here, there is no problem.
You can expand this area by upgrading your equipment.
The cold resistance expands to the left and the hot resistance expands to the right.
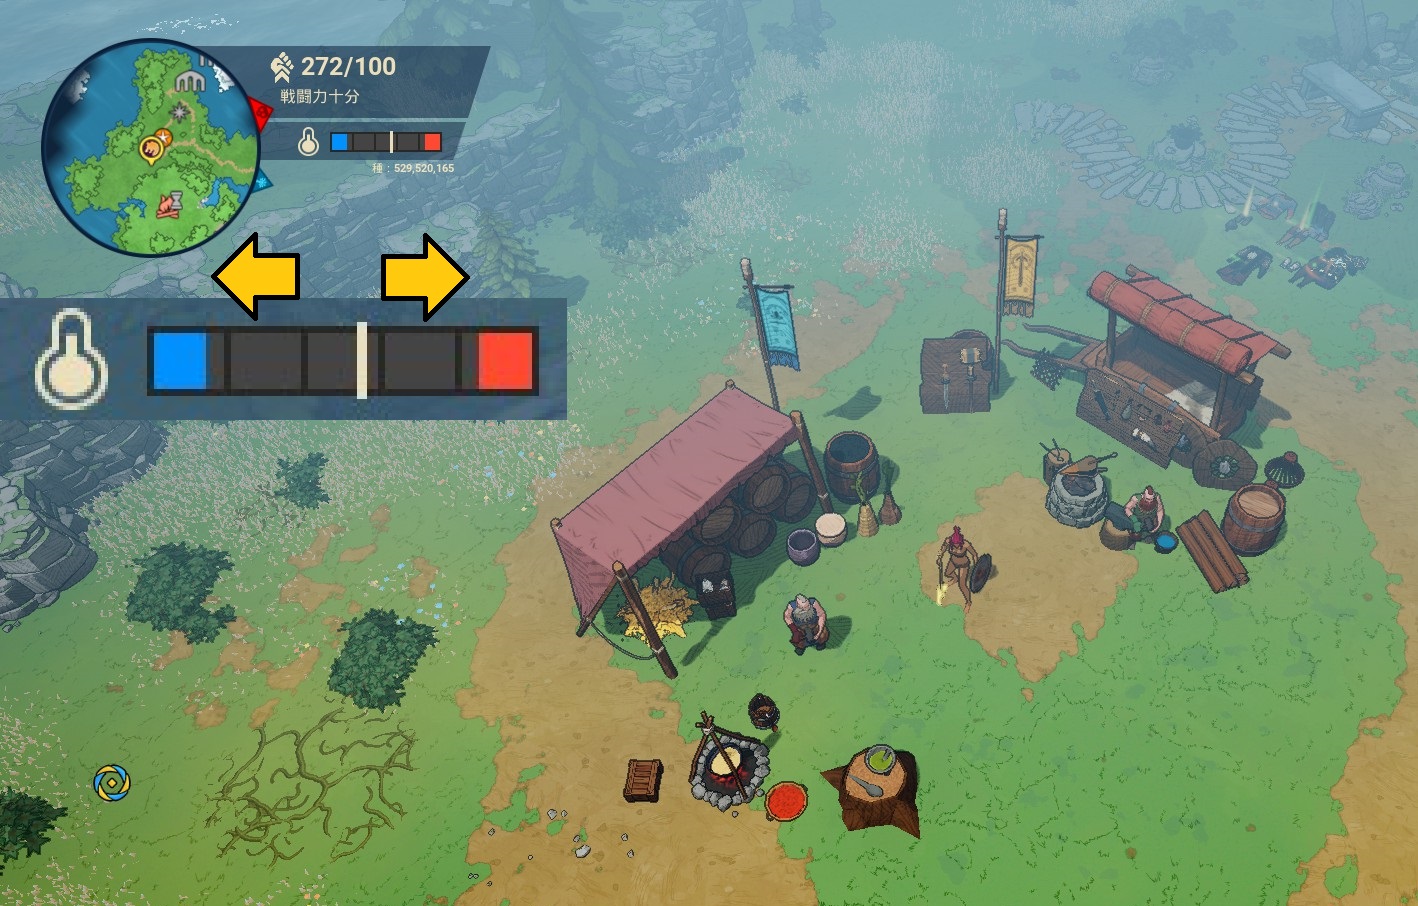
The screenshot shows the temperature gauge when you are naked = 0 resistance value.
3. Blue or Red Area
Indicates the range of temperatures that your equipment can't resist.
If the white line is here, it is too cold or too hot.
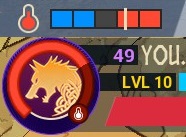
Cold or heat will accumulate in the body temperature gauge (around the portrait).
The deeper the white line goes into this area, the faster cold or heat accumulates.
When the body temperature gauge reaches its maximum, you will start to take damage.
Temperature Data
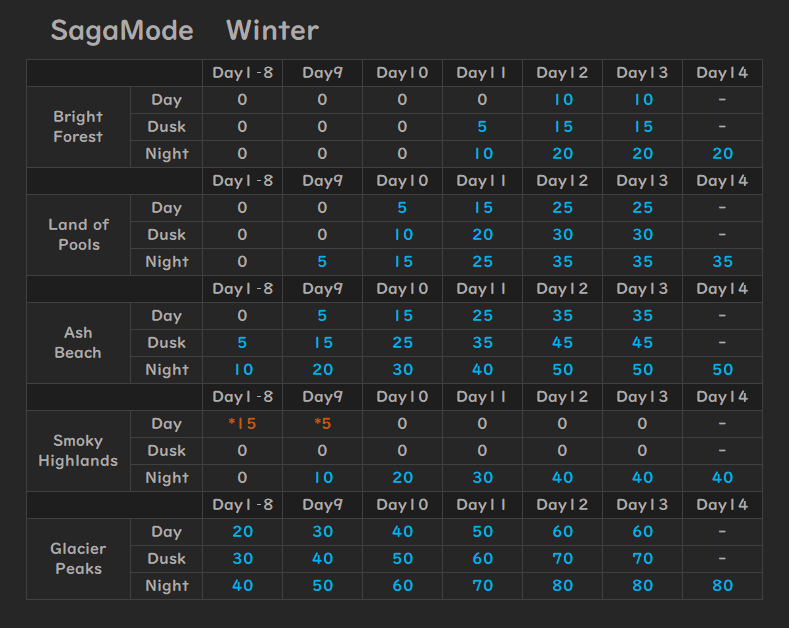
The values in the table mean the resistance values required to resist the temperature.
Blue = Cold , Orange = Hot
" * " means hot resistance. For color vision support.
Resistance Of Armors
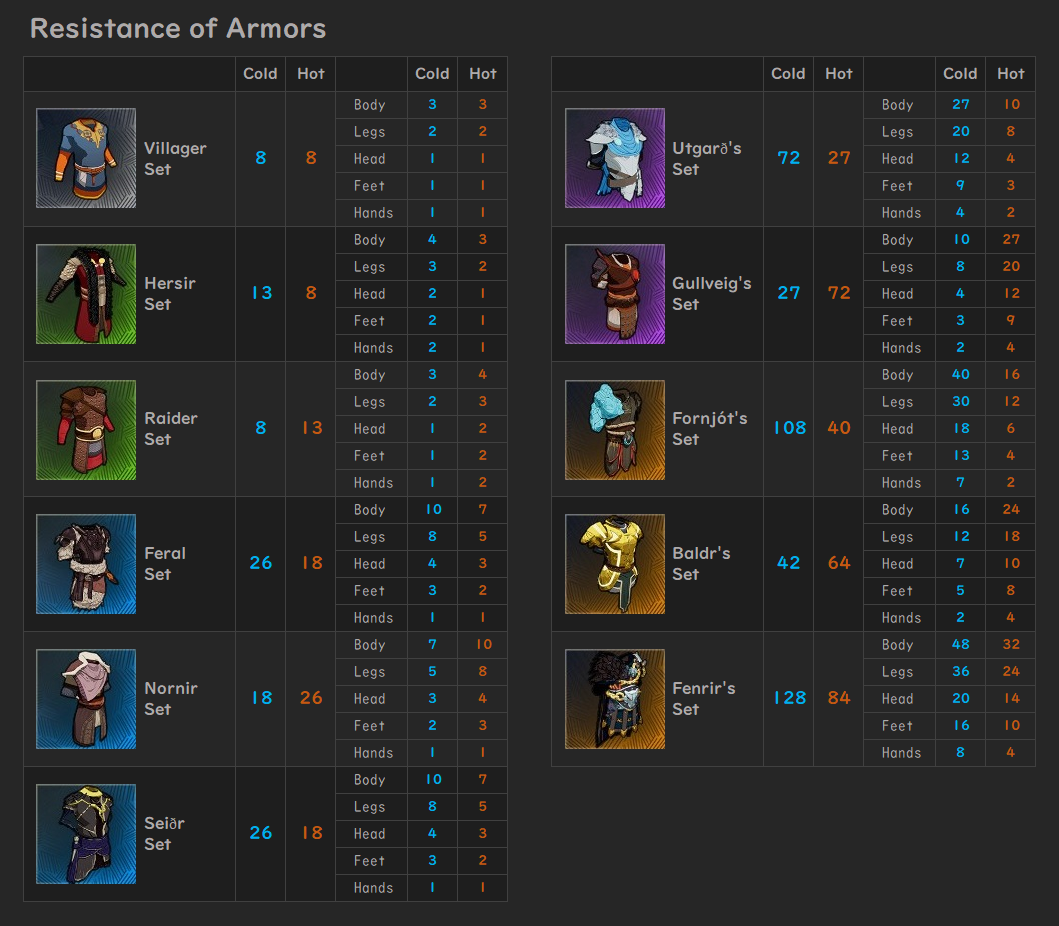
Please use this together with the above data.
Safe Spot
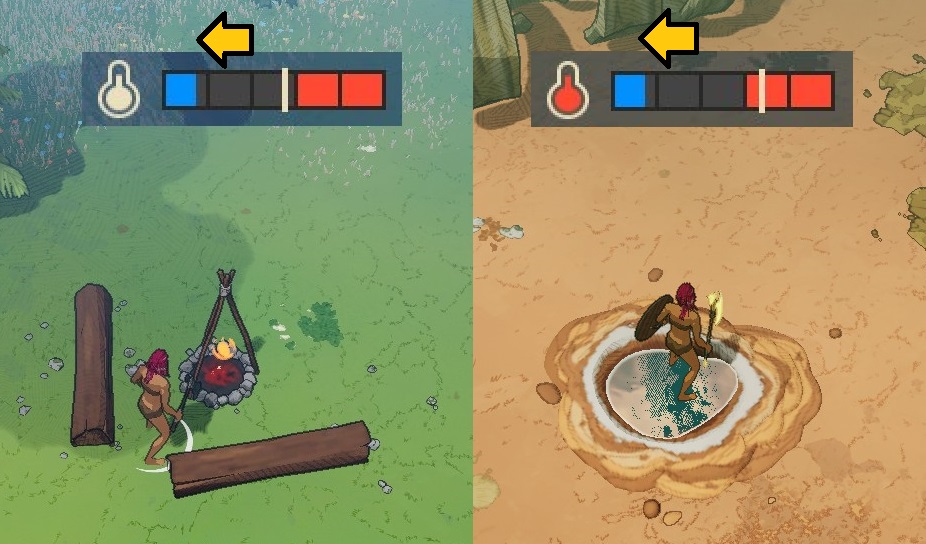
Some objects are safe spots: NPCs, ruins, available shrines, lair.
While in these, your resistance is greatly increased (+50 for both cold and hot resistance).
Other objects like the ones in the next screenshot will also increase your resistance value.
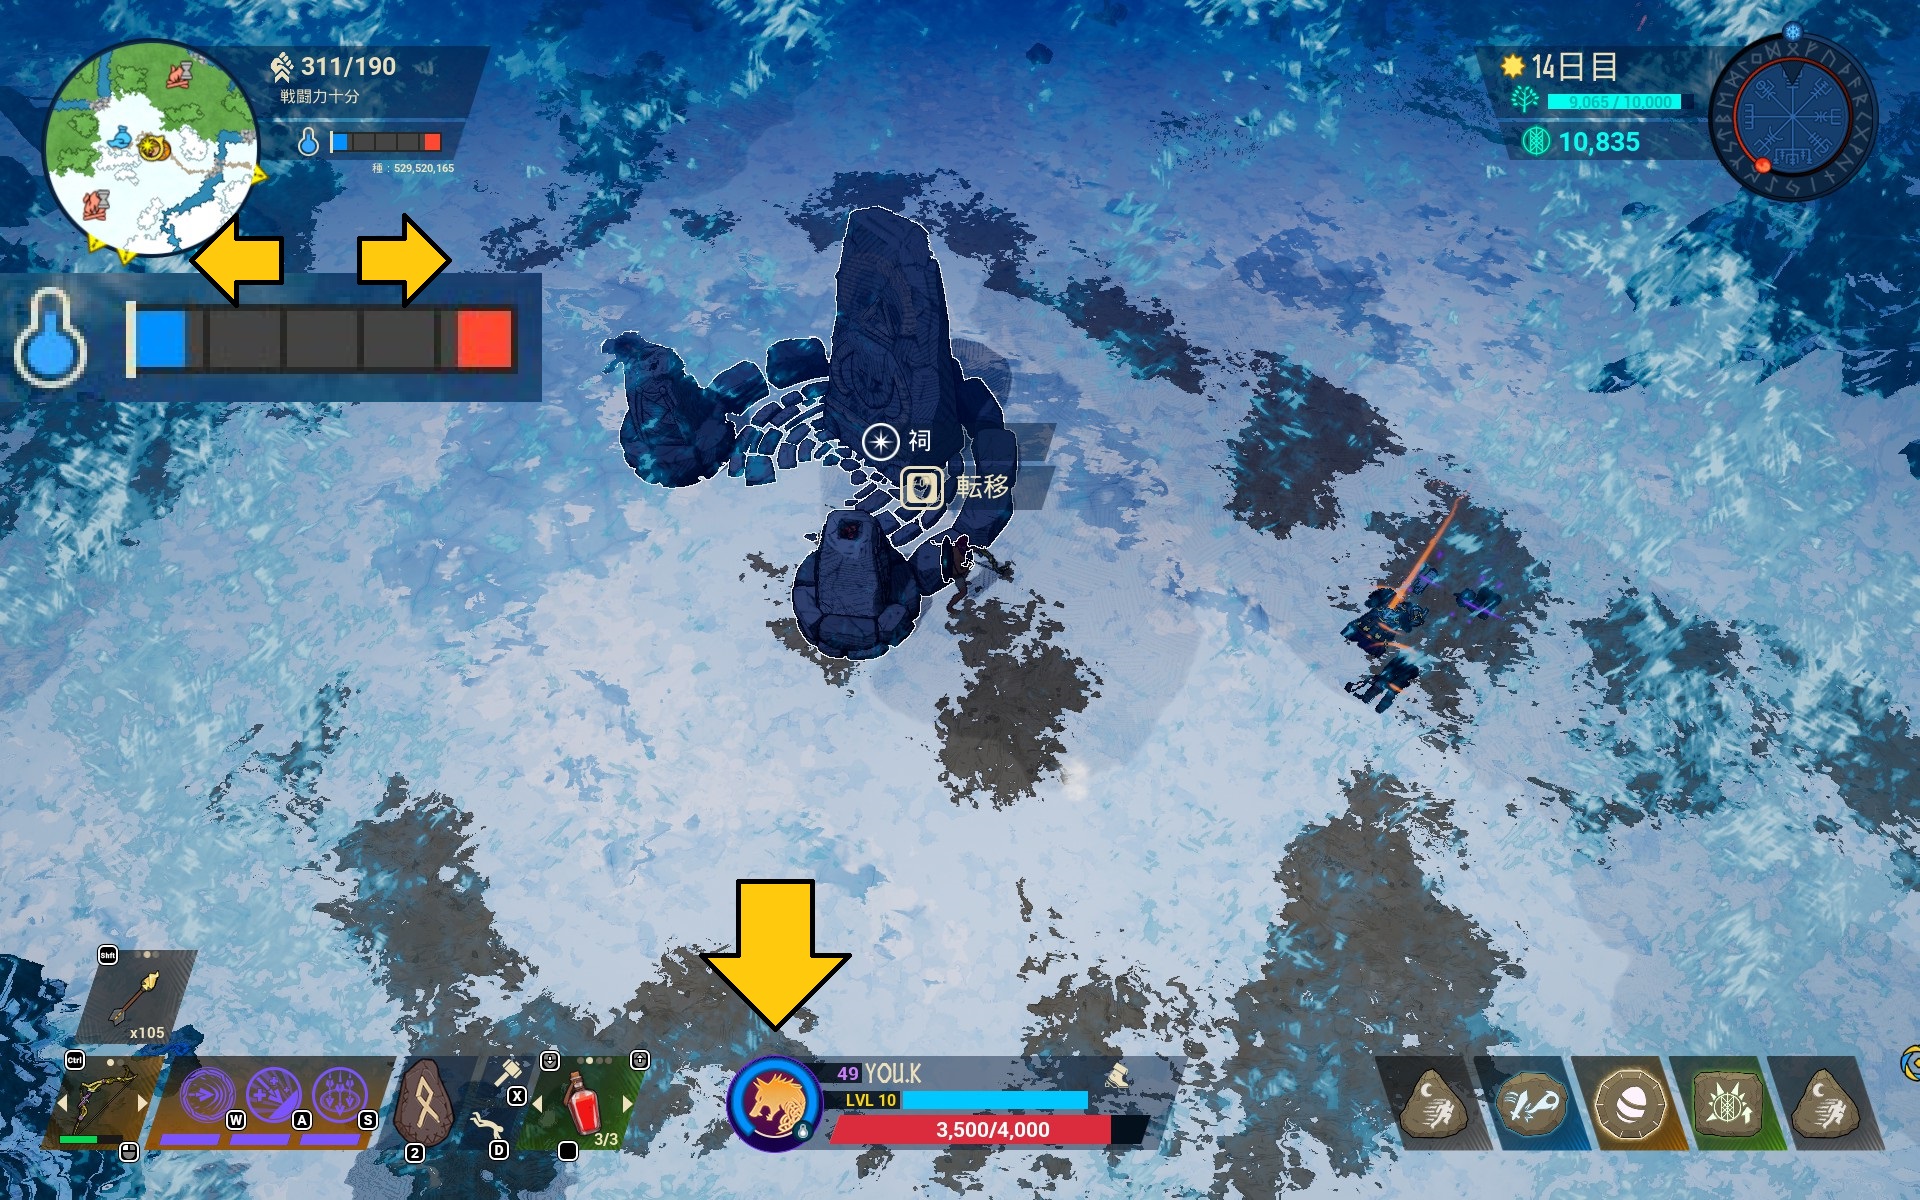
If you escape to a safe spot and your resistance is higher than the temperature, the body temperature gauge accumulation will reset immediately.
We often misunderstand that "temperature has no effect in safe spots" because we can resist most temperatures in safe spots .
As mentioned above, safe spots are only increasing your resistance.
If the temperature is higher than your resistance, of course, the body temperature gauge will start to accumulate.
-----Japanese / 日本語-------------------
(This section is in Japanese.Please use the table of contents on the right side of the screen to browse.)
気温ゲージ
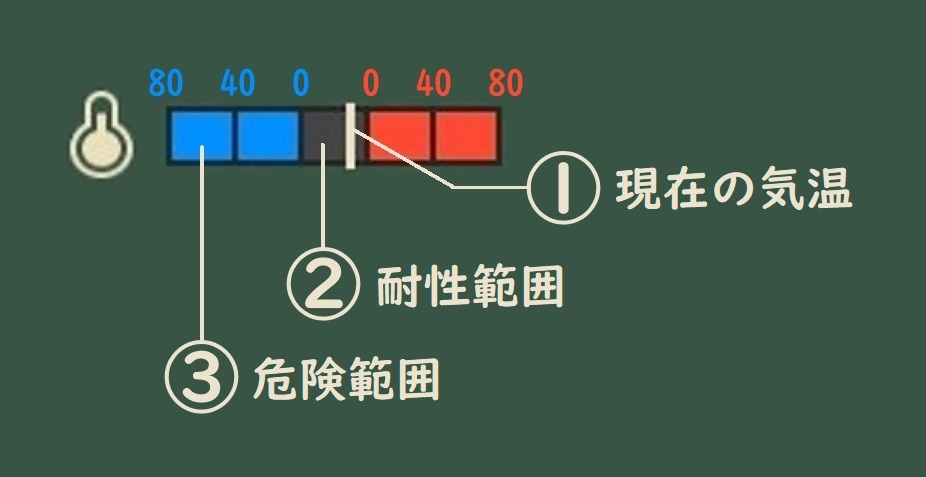
①白のライン
現在の気温を示す。
左にあればあるほど寒く、右にあればあるほど暑い。
②ゲージの黒い部分
現在の装備で耐えられる気温の範囲。
白ラインがこの中に納まっていれば問題ない。
装備を整えていくことでこの範囲を拡げることができる。
耐寒値は左に、耐熱値は右に拡げる。1目盛40。
上の画像は裸の状態=耐性値0。
③ゲージの青い or 赤い部分
現在の装備では耐えられない気温の範囲。
白ラインがこの中にあると寒すぎる・暑すぎる状態となり、
体温ゲージ(ポートレイト周り)に寒さ・暑さが蓄積されていく。
白ラインの超過が大きい程、蓄積されるスピードも速くなる。
体温ゲージがMAXになると一定間隔でダメージを受けるようになる。(気温ダメージ)
気温表
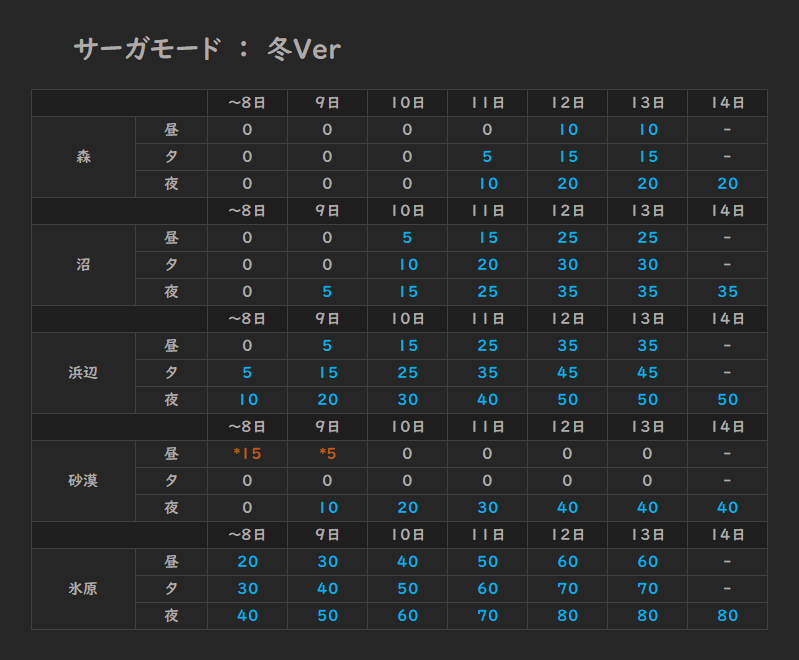
表中の数字は気温を無効化するのに必要な耐性値。水色は寒さ、橙色は暑さ。
※色覚的なアレコレはわからないので、とりあえず『 * 』で暑さ。
防具の耐性表
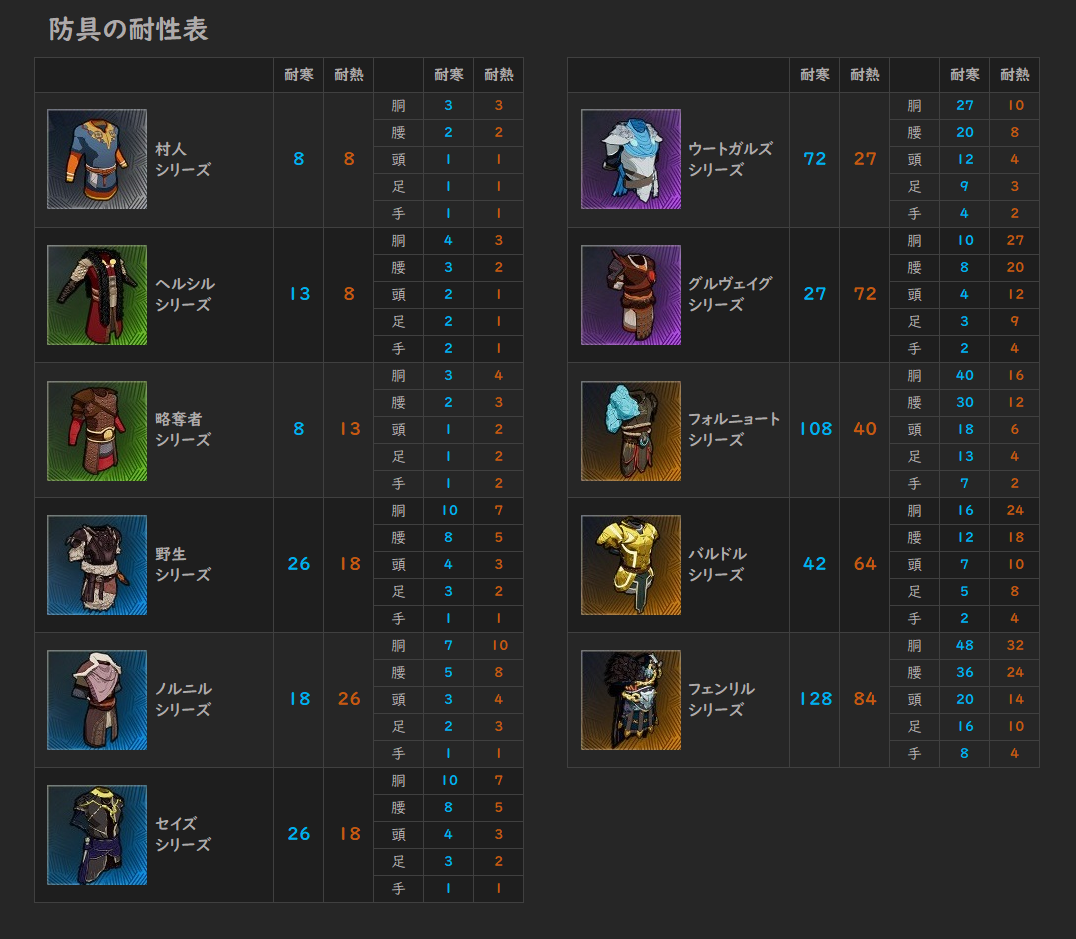
気温表と合わせてご利用ください。
施設で寒さ・暑さを凌ぐ
NPC(クエスト・商人・魔術師)、遺跡、ポータル、起動済みの祠などが該当。
これらの付近では耐性値が大幅に上昇する。(耐寒・耐熱ともに+約50)
施設に逃げ込んで耐性が気温を上回れば、体温ゲージの蓄積も瞬時にリセットされる。
耐性ポーションがない時はこれらを中継地点として利用するとある程度の探索が可能。
施設以外にも道中にある焚火などでも暖をとることができる。(耐寒値が+約50)
体温ゲージがリセットされるので『施設の付近は気温を無効化している』と勘違いしやすいが、
耐性値が上昇しているだけで気温無効化ではないので耐性値を超えれば気温ダメージを受ける。
------------------------------------------
That's All / おしまい

Thank you for reading my guide!
I hope this guide will be useful in your gameplay :)
読んでくれてありがとうございました。
このガイドが何かしらのお役に立てば幸いです。
Source: https://steamcommunity.com/sharedfiles/filedetails/?id=2617134164
More Tribes of Midgard guilds
- All Guilds
- Tribes of Midgard Guide 257
- HOW TO FREELY ROTATE THE CAMERA WITHOUT CONSTRUCTION MODE
- Story Mode - Random tips
- ? / How to play in co-op?
- Guia de Conquistas
- Tipps und Tricks fr den Anfang
- Tribes of Midgard Guide 222
- Tribes of Midgard Guide 212
- How to block Epic Online Services
- "Make it Hail" Achievement Guide