
Warhammer 3 Immortal Empires Taurox - Beastmen Campaign Overview, Guide And Second Thoughts
Hello everyone. In this guide I will cover:
- Victory conditions, faction and climate;
- Starting location;
- Diplomacy and outposts;
- Mechanics of the race and faction;
- Province edicts and army stances;
- Buildings and research;
- Lords and skills;
- Army compositions;
And give you my final notes on the specific faction. Hope you enjoy it.
If you prefer to watch the video, it also helps to support me:
https://www.youtube.com/watch?v=LTM7iPwWi78
If you prefer to read, here it is:
VICTORY CONDITIONS:
Short victory:
- At the start of your turn, have at least 220 Marks of Ruination;
- Occupy, loot, raze or sack 35 different settlements
The reward is +30 Winds of Magic power reserves, great to have your casters even more effective in battle.
This is a very straightforward and simple objective, and very sandbox driven as you have the choice of going anywhere you wish, really.
Long victory:
- Achieve the short victory;
- Occupy, loot, raze or sack 80 different settlements
- Destroy the factions of Reikland, Couronne, and all the minor Empire ones.
- Raze or Conquer the Oak of Ages.
The reward is +10 Lord recruit rank, which is excellent to ensure your new armies always have a decent lord to lead them right as you recruit it.
This is a much longer victory condition, forcing you to essentially migrate towards the Empire and the Old World, instead of maintaining yourself in the New World.
Taurox leads the Call of the Doombulls, and he benefits from:
- Rampage mechanic, where by maintaining Momentum from successive battle victories Taurox can earn rewards and bonuses.
- Dread cost -25% for increasing the capacity of Minotaurs, Minotaurs with Shields, and Minotaurs with Great Weapons units.
Adding to this, his raiding stance actually increases movement range by 25%, encouraging you to use it to get to the next target faster.
Taurox focuses of course in the Minotaurs and is perfect for a Minotaur centric build, which is always fun to have.
Climate is not an issue for the Beastmen, as they can go anywhere without any problem or penalty, perfect for world domination, or world extermination.
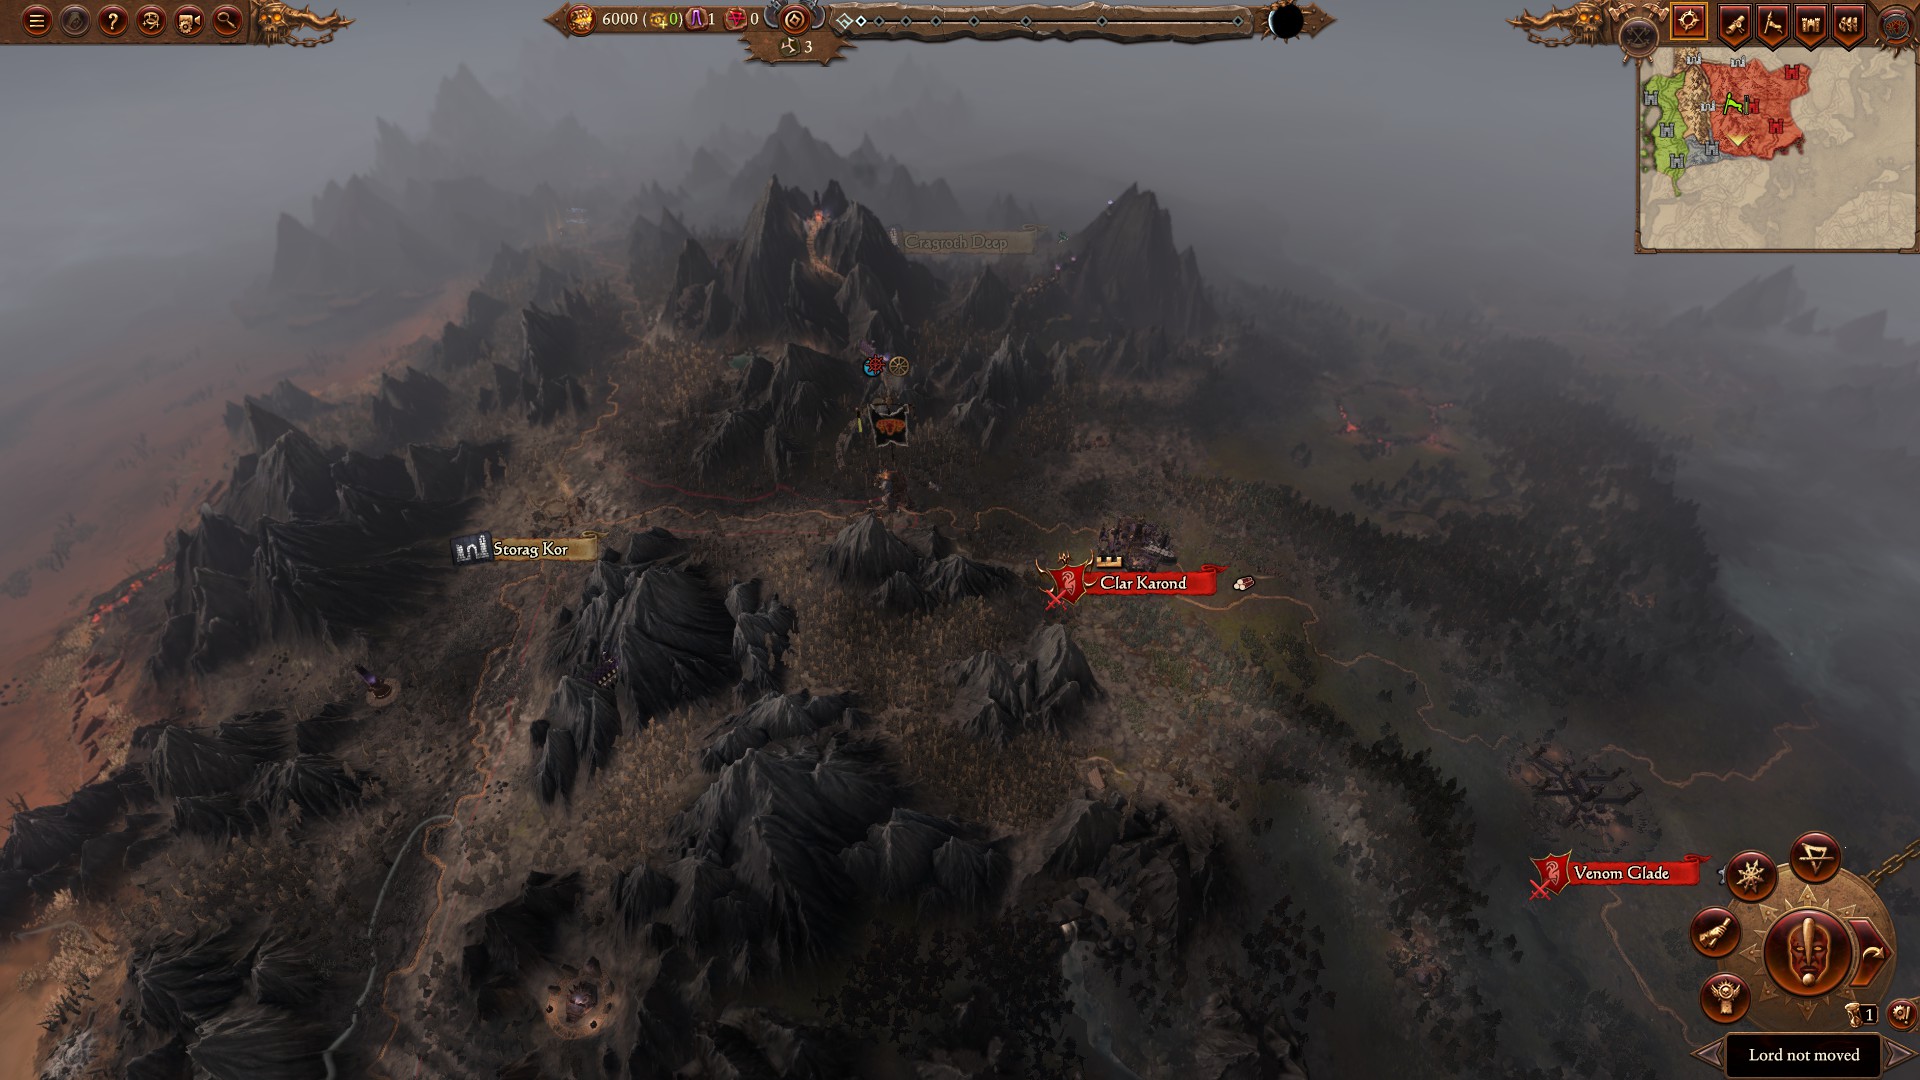
STARTING LOCATION:
Contrary to some other beginnings of the Beastmen, you actually do have a choice for the first Herdstone, either in Clar Karond or Storag Kor. However, given how Clar Karond is the province capital and it does have a unit producing facility it is quite recommend to occupy it.
Typical expansion is to get rid of any initial enemies you have or gain by razing everything around the initial herdstone. Then you can go into any direction, really, North towards Naggarond, West to completely raze that section of the map, East towards Alith Anar, and Cylostra, or South towards the Sisters of Twilight. Up to you which enemies you will face.
DIPLOMACY AND OUTPOSTS:
Diplomacy is rather negligeable for the Beastmen, but you may yet be able to have good relations with Chaos, Skaven, and Ogres. Enemies will likely be everything else, with the initial ones being Dark Elves, Dwarfs, Vampire Coast, and even Wood Elves.
Therefore, for outposts some decent missile units from the Ogres and Skaven will do just nicely for your compositions.
MECHANICS OF THE RACE AND FACTION:
As for mechanics these are the same as other Beastmen:
- Herdstones: raze a location and put a herdstone on it. The neighboring settlements become Blood Grounds, which you can raze to generate Marks of Ruination.
- The Marks of Ruination allow you to unlock units and more army capacity, as well as more Herdstones. These are obtained via the ritual conducted at the herdstone.
- Dread is a currency, basically, useful for increasing unit capacity, recruit lords or hero capacity, herdstone upgrades, and items. All of them are useful, implying a lot of variety, so take your time to study your best solution to the issues at hand.
- A note on unit capacity, because some of them are paired, it is a good idea to have some armies planned out to enjoy any surplus units you may have while you choose the other. (Giants because you wanted to get Spawn, Manticores because you wanted to get Harpies, Etc.)
- The fourth mechanic is the Moon, as from time to time you will have an event to choose the Moon Effects, granting nice factionwide bonuses.
- Bestial Rage is tied to your armies, and it allows you to have increased growth and replenishment bonuses to your hordes, as long as you keep fighting.
- Your units cost no upkeep at all. This is great to ensure you can continue to have your best troops available.
In terms of specific mechanics:
- Taurox has a unique raiding stance that actually increases his movement instead, which is great to traverse the map faster.
- The Rampage mechanic is basically around the need to keep fighting and mantaining Momentum, and as you do it you will unlock specific bonuses that you can give to your army.
- In addition, completing a Harsh Rampage will give you the option of having an extra movement turn for Taurox, ideal to keep the Momentum going and fight and fight again.
PROVINCE EDICTS AND ARMY STANCES:
The Beastment have no province edicts; however, their herdstone buildings kind of act similarly to nearby bloodgrounds. Their effects include:
Casualty replenishment and horde recruitment capacity, corruption;
Winds of Magic power reserves, line of sight, Dread (factionwide);
Campaign movement reduced for enemies, small chance of a plague, vigour in battle winded for enemies;
Ammunition, reload time increase (debuff) and missile damage debuff for the enemy.
Basically, use whichever building is preferable, and don't be afraid to adapt to the circumstances if things start to go poorly.
Army stances:
Ambush is the natural attack stance. You do have the chance to get an ambush battle while engaging, which encourages you to seek out the fight and be very aggressive with your playstyle.
Raiding is different for Taurox, in that it actually increases his movement range by 25%. It gives you also Bestial Rage, and more Winds of Magic for your casters. Also provides immunity to attrition.
Hidden encampment costs 10% movement only, reduces Bestial Rage by 2 per turn, gives you immunity to attrition, and you are hidden until discovered. This stance also allows you to build and recruit units. Note that this is also your ambush stance.
Use Beast-Paths is your typical underway stance. You can only use it if you have not moved in that turn. It allows, like the other similar ones, to traverse difficult terrain and is a great tactical advantage on the campaign map.
These are some of the best army stances, very thematic and appropriate for the faction, giving you a great deal of tactical possibilities.
Warhammer 3 Immortal Empires Taurox - Beastmen Campaign Overview, Guide And Second Thoughts(continuation)
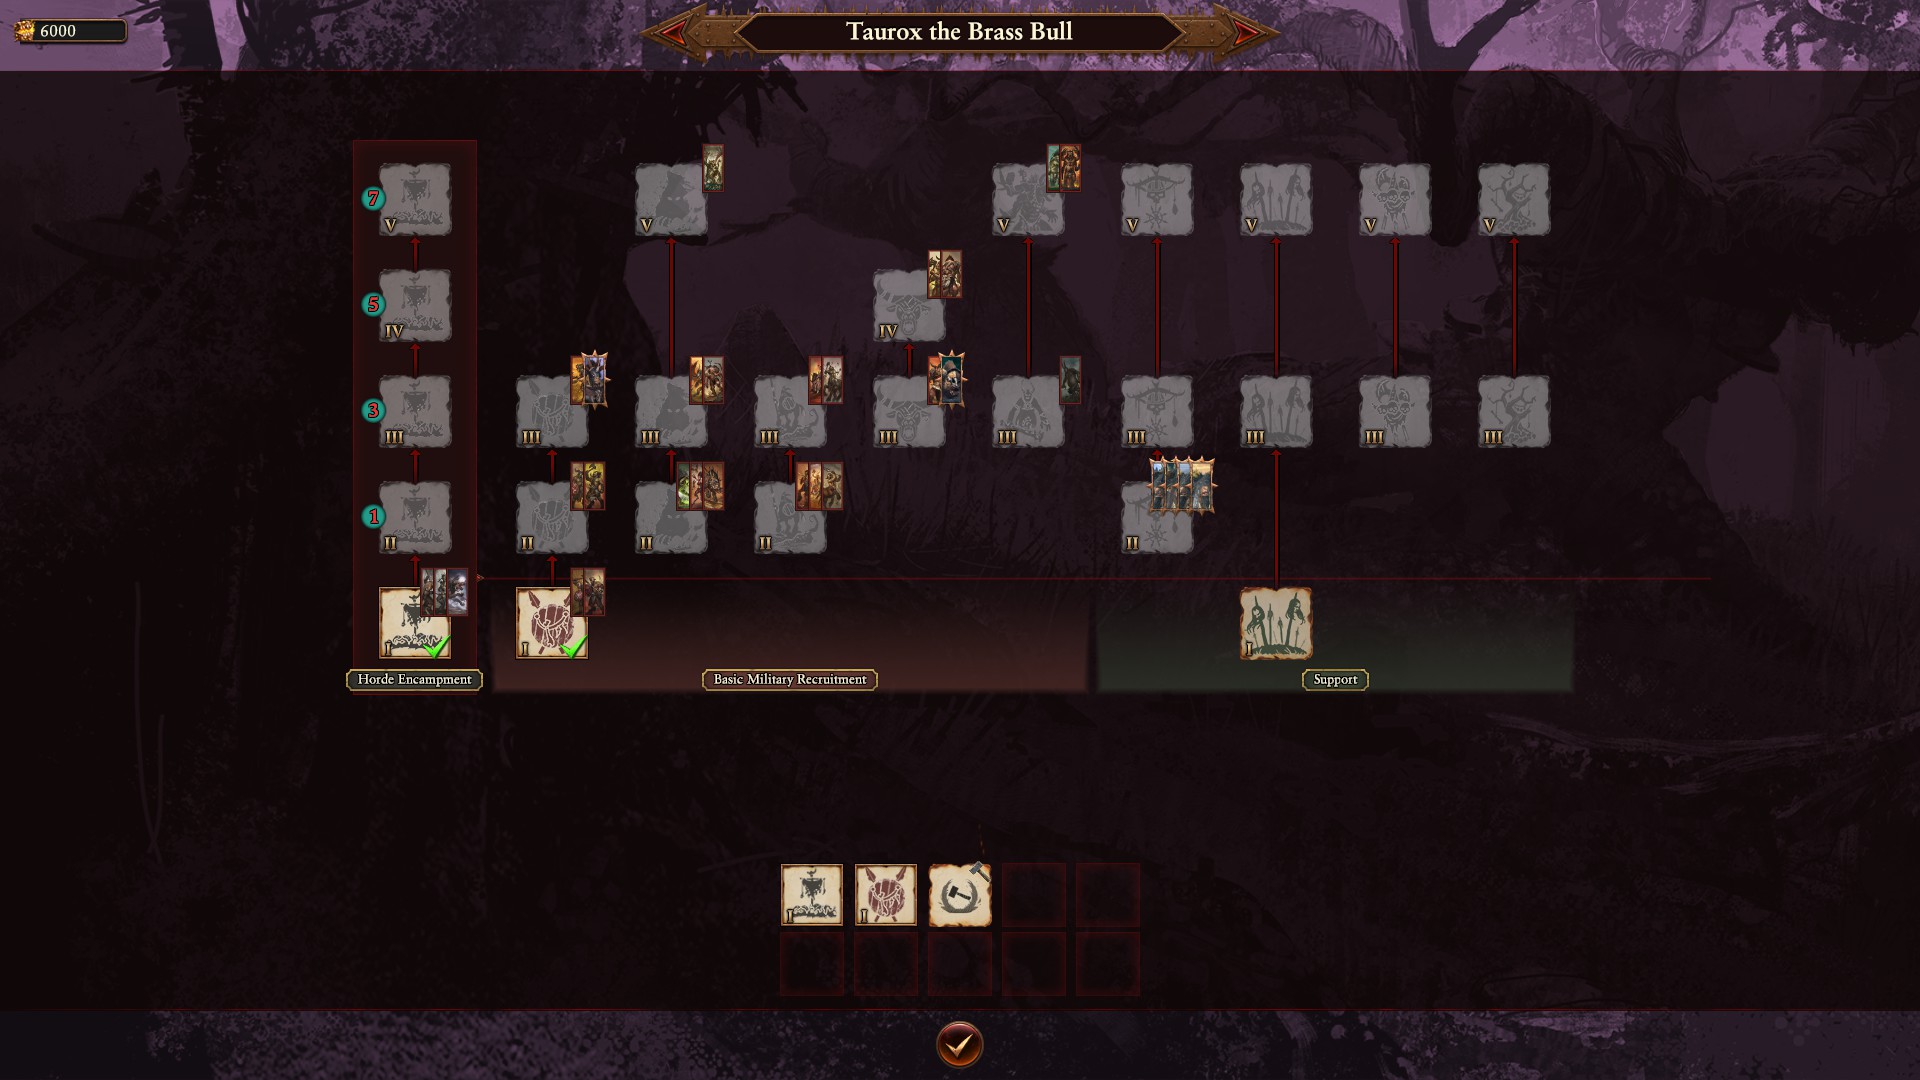
BUILDINGS, RESEARCH:
- You are a horde faction, and thus your armies are your settlements.
- You have 5 military buildings, and 4 infrastructure or support buildings.
- Each of those Infrastructure buildings also provide an army ability, in addition to:
1 - Winds of Magic
2 - Dread gained per turn;
3 - Magic item drop chance increased, income from post-battle loot increased;
4 - Corruption.
- You can build nearly every single building in your horde, which implies that all you need is to choose the order, of course. At tier 3 your units are already good and give you plenty of choices for your armies. Tier 4 and 5 are the ones that provide you the true Beasts and single entities, Minotaur variants, Cygors, Jabberslythes, and Ghorgons.
Research works slightly different than others, via Challenges. You should check each technology for what "Challenge" you need to complete to unlock it. Take your time at the start learning what you would want to ensure you complete that Challenge as quick as possible to benefit from the tech later.
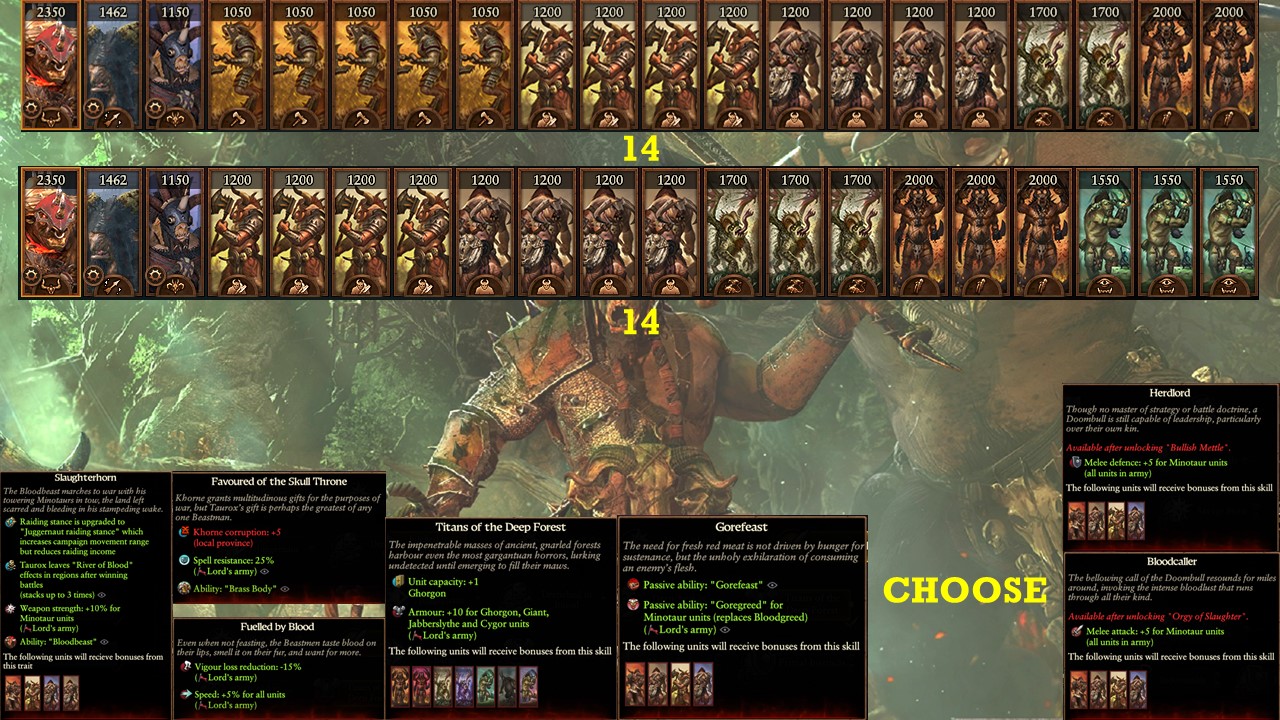
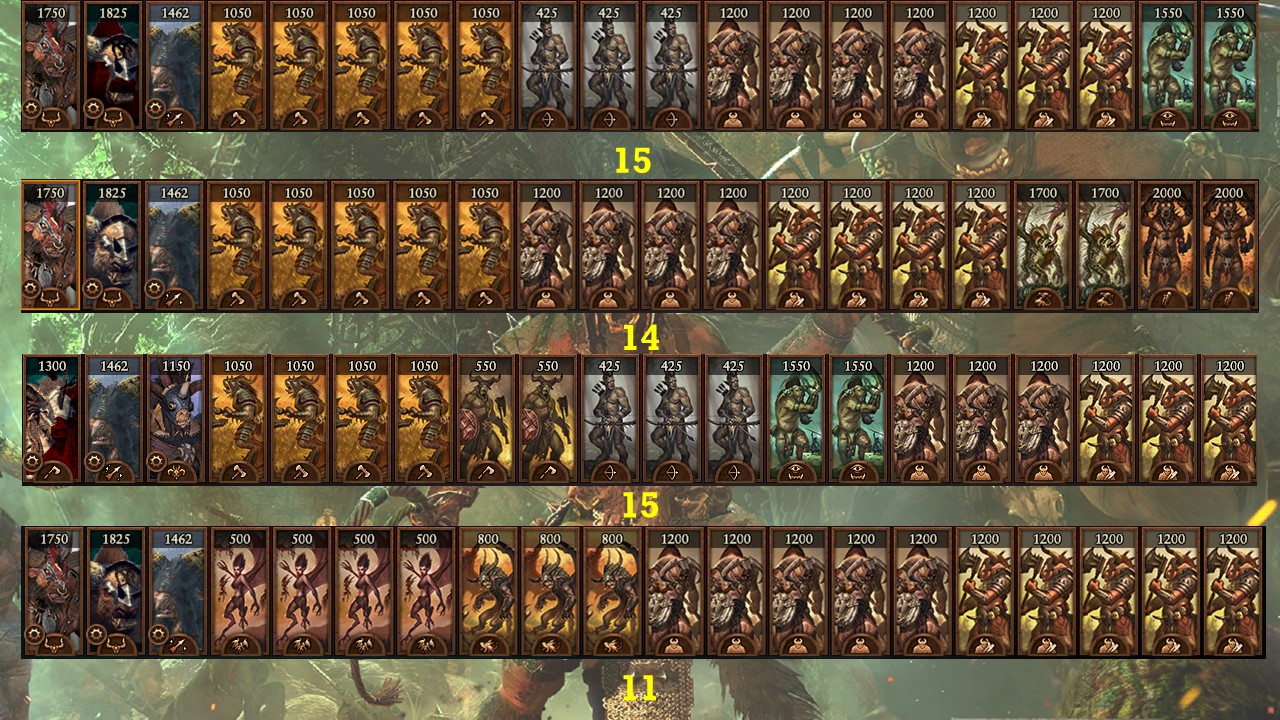
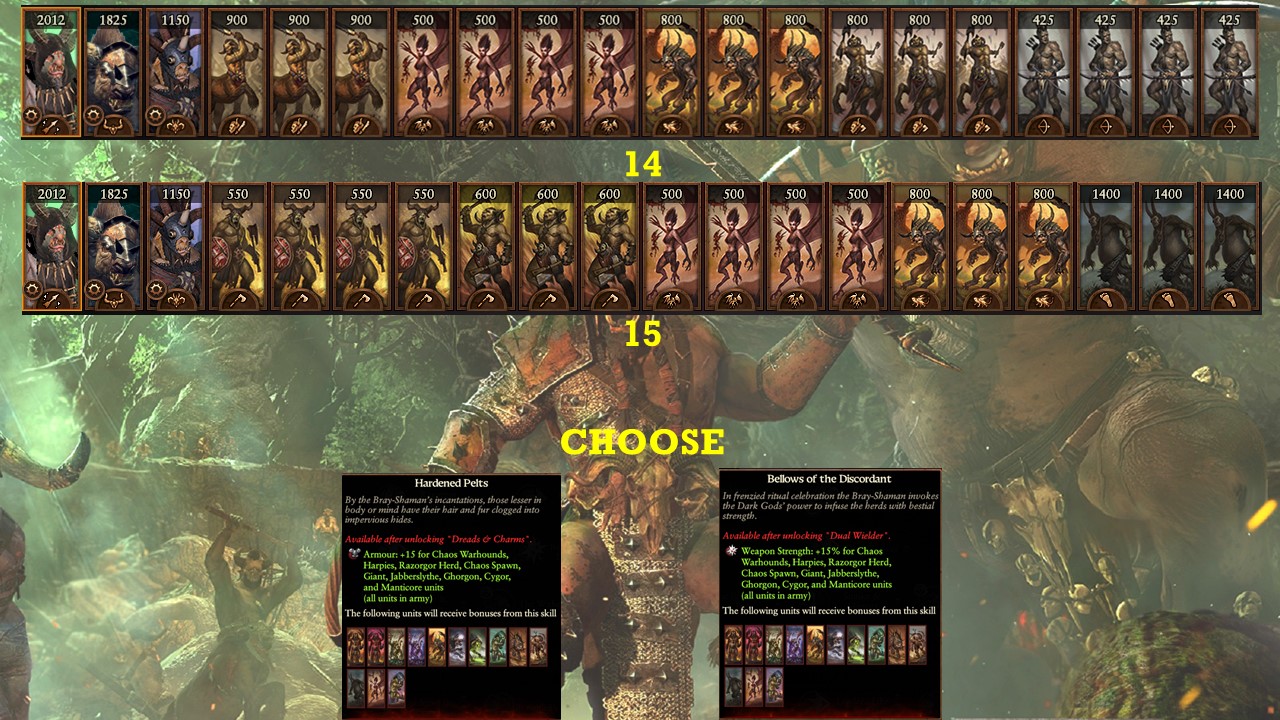
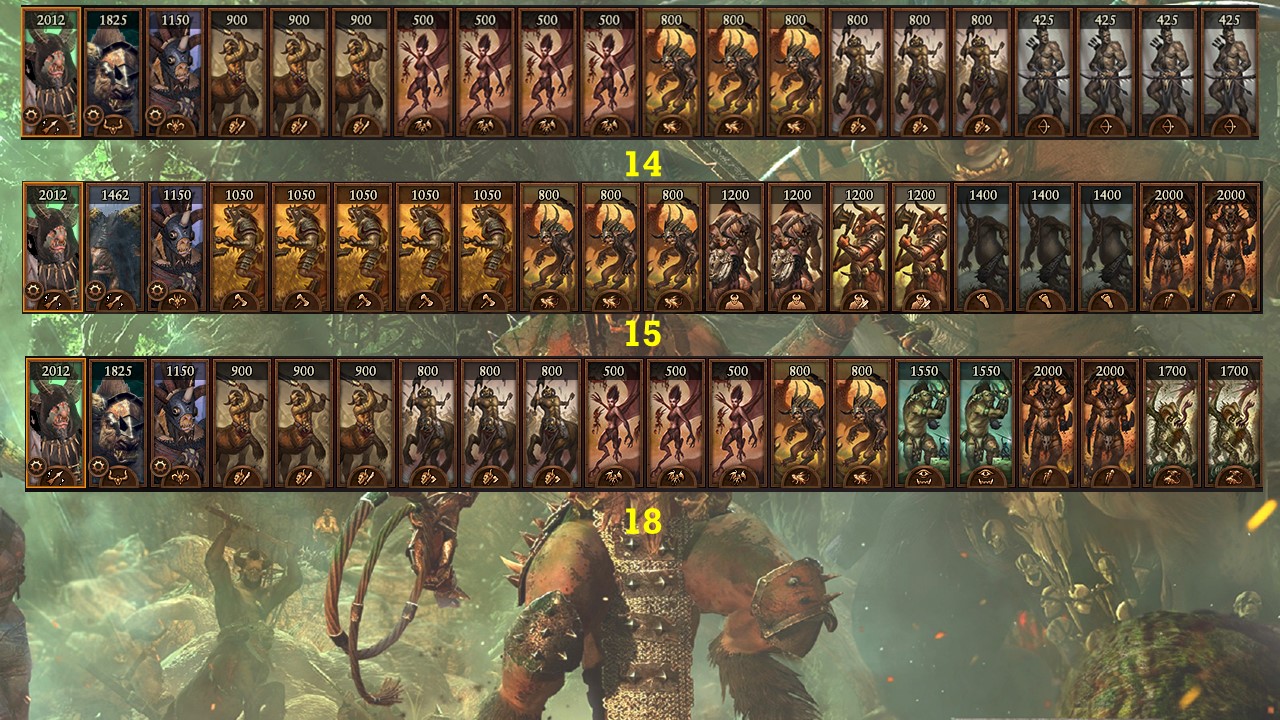
LORDS, SKILLS, ARMY COMPOSITIONS:
- Blue line has attrition reduction and replenishment combined, which for me is a no-brainer. However, you may perfectly choose a path based on razing or raiding income as well. Since you have the possibility of ambushing while attacking, I typically bypass Lighting Strike altogether.
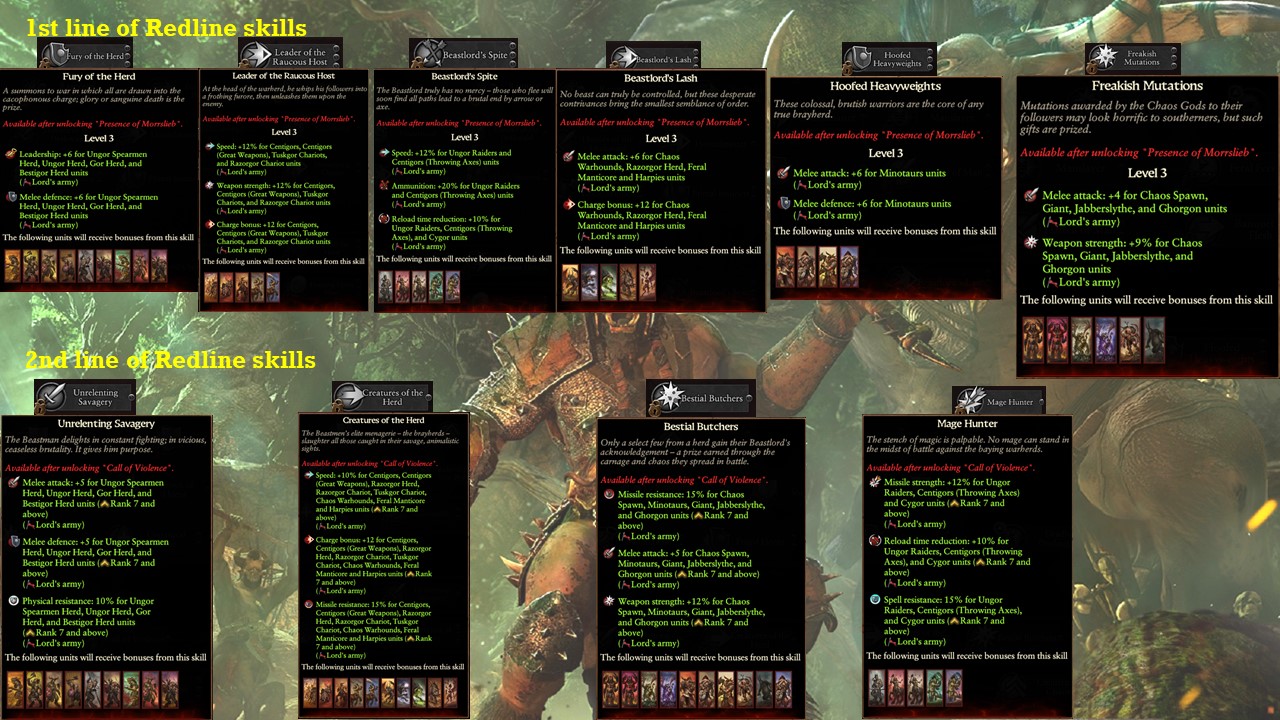
- Redline is rather expensive considering the units you have. They have finally provided bonuses for Manticores here, which turns them into quite good single entities.
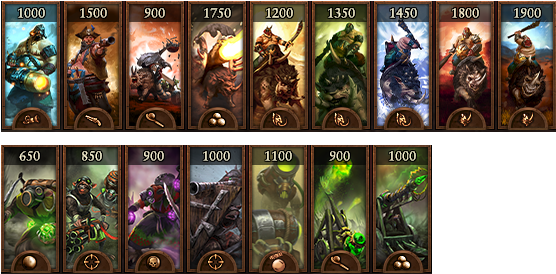
Taurox is all about himself and some big ones, the Minotaurs, Giants, Ghorgons, Jabberslythes... Thus, combinations of those units are in order. For the sieges, I always like to have a few Bestigors and Wargors to help them out, or just go really with a full Minotaur stack for fun.
As for other armies, combinations of infantry with Minotaurs and missile support work well. You will likely need to have some lower tier units in your armies because of the unit caps, so it is good to plan out some different combinations too.
The Bray-Shamans have a possibility of enhancing some unused units overall, thus having some sweeper armies with them with flyers and centigors may prove quite effective, specially after the main enemy lord is taken.
Finally I add some combinations of sweeper armies or alternatives, again, for fun. They are somewhat expensive in terms of how many redline skills are required to upgrade them (number in yellow below the army composition), so remember that.
For heroes, Wargors provide replenishment, and other heroes have some benefits for your army that you may wish to use. As always, all that I provide is a basic template of having at least a caster hero and a melee/support hero, but feel fine to use whatever you prefer and adapt to your own playstyle.
FINAL NOTES:
- Once more a nice change of location, Taurox enjoys a set of distinct enemies, and combined with his unique mechanics, allows for a very enjoyable campaign.
- Focusing much more on the Minotaurs and single entities, it is also one to enjoy the powerful those can be. If you like Minotaurs, there is no better choice.
- Your army consists of:
1 - Reliable infantry
2 - Average missiles, as what they have is somewhat decent;
3 - Great monsters and single entities;
4 - Good flyers
5 - Lacks heavy cavalry
6 - Lacks elite anti-large infantry
Replenishment is great, and since you have no income, all you need is to keep fighting to get better units for your armies.
Due to all this, I believe it is time for you to follow Taurox the Brass Bull into a Rampage!
Source: https://steamcommunity.com/sharedfiles/filedetails/?id=3006708816
More Total War: WARHAMMER III guilds
- All Guilds
- Skulltaker - Khorne overview Total War: Warhammer 3 Immortal Empires
- TOTAL WAR
- 20253MOD
- Immortal Empires Maps: Resources 6.0.3
- Free FPS (7$ tops I promise), or how to make Warhammer III fast
- Total War: WARHAMMER III Guide 1654
- how to prevent an update killing your modded campaign
- Total War: WARHAMMER III Network Ports
- How to stop playing Total War: WARHAMMER III [lite version]
- Epidemius - Nurgle overview Total War: Warhammer 3 Immortal Empires