
PREFACE
I was inspired to write this guide after watching YT channel MuklukPlays (great channel) do a Riftbreaker Campaign on Brutal 500%. This is a custom game setting in which the Difficulty is set to Brutal and Attack Wave Multiplier set to 500%. Having completed several campaigns on Brutal, I gave this a try and OMG, it's truly insane!
Also shoutout to Christian's guides that are available here.
I'll start by noting the news from the game's Summer 2023 Update:
"The Riftbreaker is a very open-ended game. There is no right or wrong way to play. As long as you can sustain the economy of your base and withstand the enemy attacks, you can do whatever you like. You are free to use any of the available power sources, protect the base with a variety of defensive towers, and run any side projects you might come up with, like cultivating plants."
So what follows is simply my way. This guide focuses on the initial few days as those are the most important.
DAY 0

1) The periodic attack waves only start AFTER you build the HQ. So contrary to what the game tells you, don't rush to build it. Scouting is important here. I'd run around swinging my sword (also to get leaves, will explain later) and checking for nearby Carbonium, Ironium, Mud and Sludge.
2) Power/Energy is the key to this game. More power means more AI cores means more defensive towers. Research Labs consume the most (250, then 500, then 1000, then 2000, then 4000 each). So if there is no nearby mud/sludge and/or if there are too few Carbonium/Ironium nodes, I'd restart and hope for a better map.
3) My criteria is at least 5 Carbonium and 3 Ironium nodes. In Brutal 100% campaigns, I'd simply expand my base as needed to get them and build defenses at the outer edges of those production factories. Then in later game, when I build my final base borders, I'd simply collapse my defense line back to highly defensive compact structure.
Figure 1: Default Brutal difficulty. Some towers at outermost buildings are enough.
This cannot work in 500%, the spawns are massive and they'll spawn along the entire side of the map. So if they spawn on the left for example, they head to your leftmost defenses but also swarm over to your top and bottom areas. So in 500%, you must scout the map enough to determine NOW what your final defense line will be. Hopefully, at least 3 of each resource node are within those borders and the remaining 2+ are nearby (easily sold before attack hits them).
4) Some players may choose to scout the map further and move HQ away from starting location to a more defensible location. This doesn't work well. The key reason here is the starting location typically has 3 Carbonium nodes with ~50K. Carbonium nodes in other locations are usually ~20K.
5) Choosing final base borders should consider natural bottlenecks for the monsters but NOT for your base, i.e. if only a short section of wall will be facing a wide open area for an incoming swarm, that is not good. Pull the walls back from the chokepoint such that it funnels monsters in a narrow path to a long(er) wall with lots of turrets.
6) Final base borders should have sufficient space. I'd like space for a big bunch of wind/solar/energy storage, a bunch of AI Hubs, at least 16-20 solid material storage, plus the mandatory tower ammo factories + ammo storage, comm hubs and space near mud/sludge/geothermal for research labs.
7) The game starts at 12:10pm. Sunset is at 8:00pm. Sunrise is at 8:00am. So from game start, I'd be exploring, cutting leaves, killing nearby monsters till Day 1 7:00am. Right then, I'd lay down HQ, rush to build up Carbonium factories with solar power (1 solar per 1 factory). This way, solar gets to work for the full day. This gives time to setup several factories before it gets dark and you need wind energy.
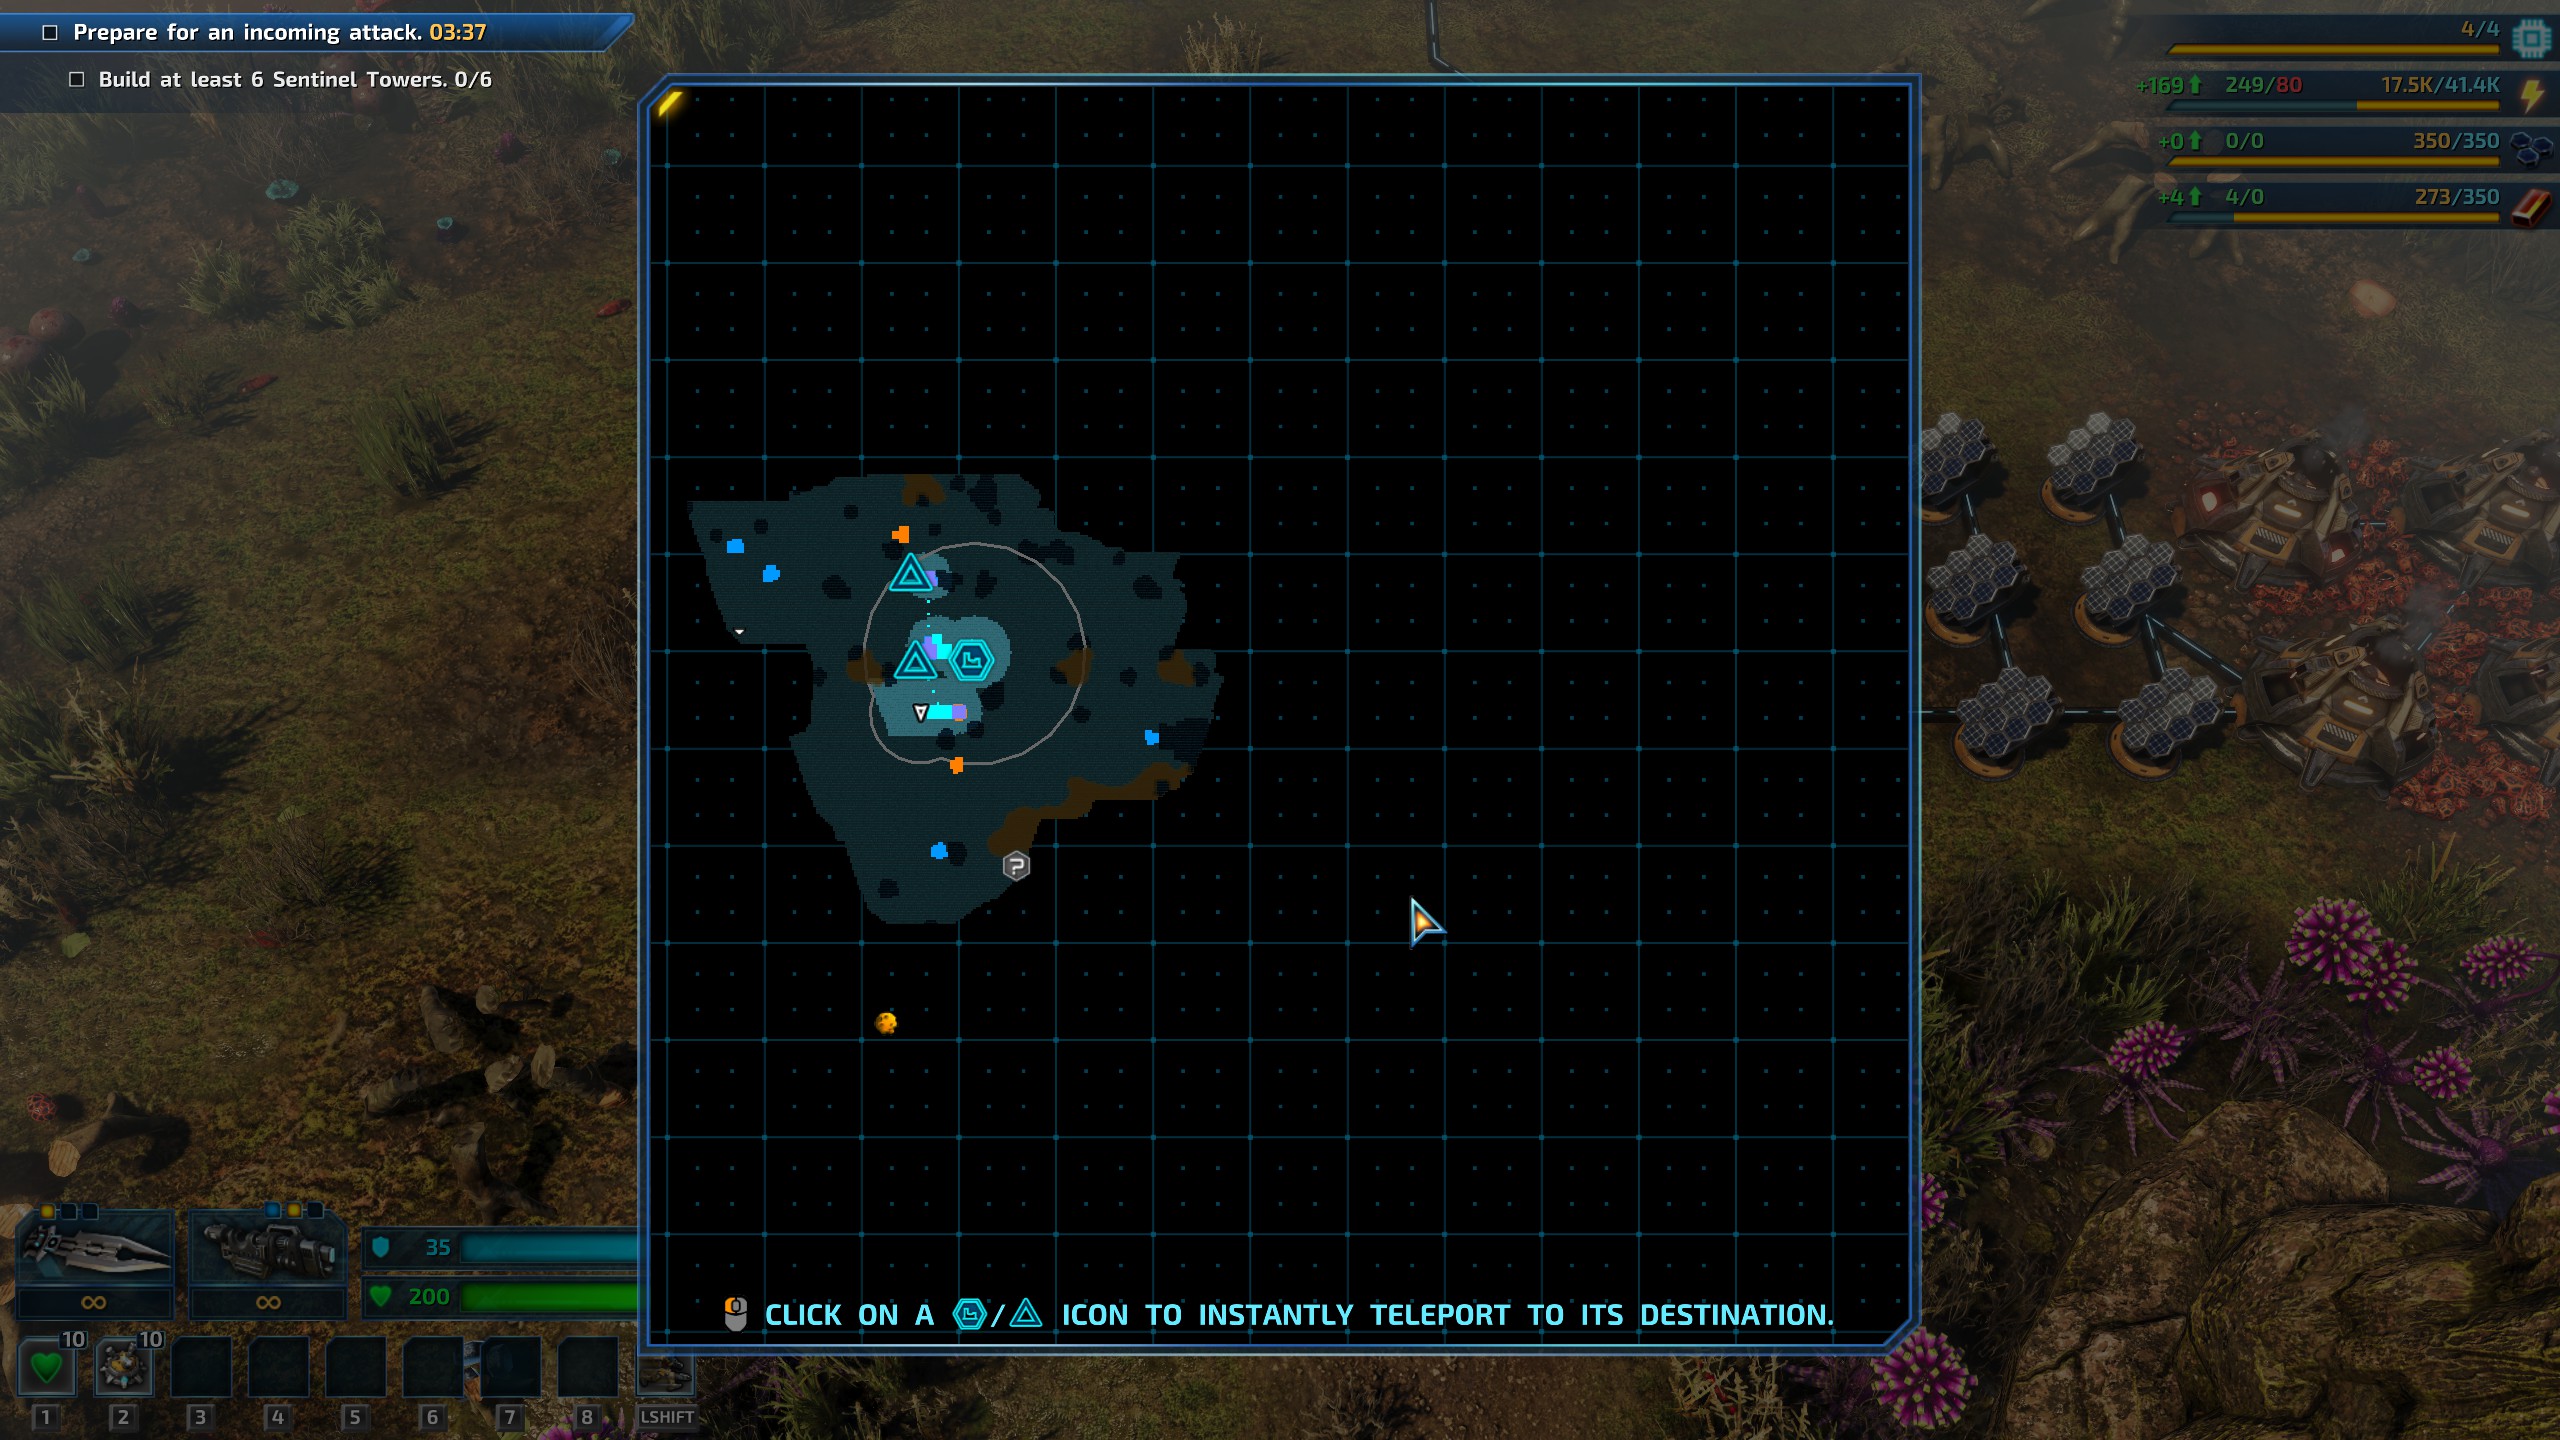
8) Pause the game, take a screenshot, then stare at the explored area and figure out where your base borders will be.
Figure 2: Starting area explored and final base borders defined.
DAY 1
1) Start HQ build at 7:00am. Setup Carbonium factories with solar power. Sun comes up at 8:00am just as the first factory and solar panel are done.
2) Every time carbonium is full when you're travelling to setup the next resource node, portal to your designated resource storage location and build a few solid material storage. Also portal to designated energy area and setup more wind and a few energy storage. Goal is to have continuous power after sunset.
3) Build Armory. Craft Armor Plating for +20hp. Craft laser sword (optional, requires DLC).
DAY 2
1) First attack wave will hit very early AM. I managed to setup 3 Carbonium and 2 Ironium nodes (with 3-4 factories on each node, I don't use Carbonium power - it's wasteful), 82K energy storage, 1.5K solid material storage. This will be a huge swarm of canoptrix. Don't let them get to your base. Go out and meet them. It's easier if you have laser sword with your back to a rock (thanks, Mukluk), they can't get to swarm behind you and the laser sword is fast enough that they can't kill you. Alternatively, stand in a mud pool and slash away.
2) After defeating the attack wave, continue with the resource node setup.
Note: Positioning is key. The mob will spawn on the entire edge of one side and there needs to be space for you to lure them all to you and more space to fight/maneuver. If not, some will run to your base.
DAY 3
1) All previously explored nearby resource nodes should be setup by now. Just keep building wind/solar/storage/AI cores.
2) The 2nd attack wave will very early AM. Most players know by now you can "replace" the next attack wave with a HQ upgrade attack wave. Do it. This will be canoptrix with arachnoids.
3) At this point, my income is Carbonium = 12-22/s, Ironium = 10-14/s. 122.5K energy storage. 5K solid material storage. 64 AI cores.
4) HQ level 2 is built. Portal to HQ, build Comms Hub, then go fight the incoming mob. Do this everytime you upgrade HQ level. In later levels, HQ upgrade will be done just before the mob reaches you. Open Research and quickly download the next HQ level. Don't wait for battle to finish, at 500% it can be a long fight. Keep slashing the canoptrix else they will keep the sentinel towers busy while the Arachnoids chew up the towers.
5) Comms Hub done. Immediately research HQ level 3. When done, upgrade existing Comms Hub and build a new Comms Hub lvl 2.
Note: With just sentinel towers, the arachnoids will chew them up fast. The 5K solid material storage will enable rebuilds in mid-battle.
DAY 4
Research Order:
1) Next HQ level (quickly upgrade 1st Comms Hub and build 2nd Comms Hub when done. This is what that 3K storage is for).
2) Tower Ammo Handling
3) Artillery towers (to get those ranged Arachnoids and Bomogans)
4) Flamer towers (Canoptrix are weak to fire)
5) Acid Spewer towers (Hammerecoros are weak to acid)
6) Biomass Energy (normally useless but at 500% you get a lot of meat that makes 200 power)
7) Cobalt Handling
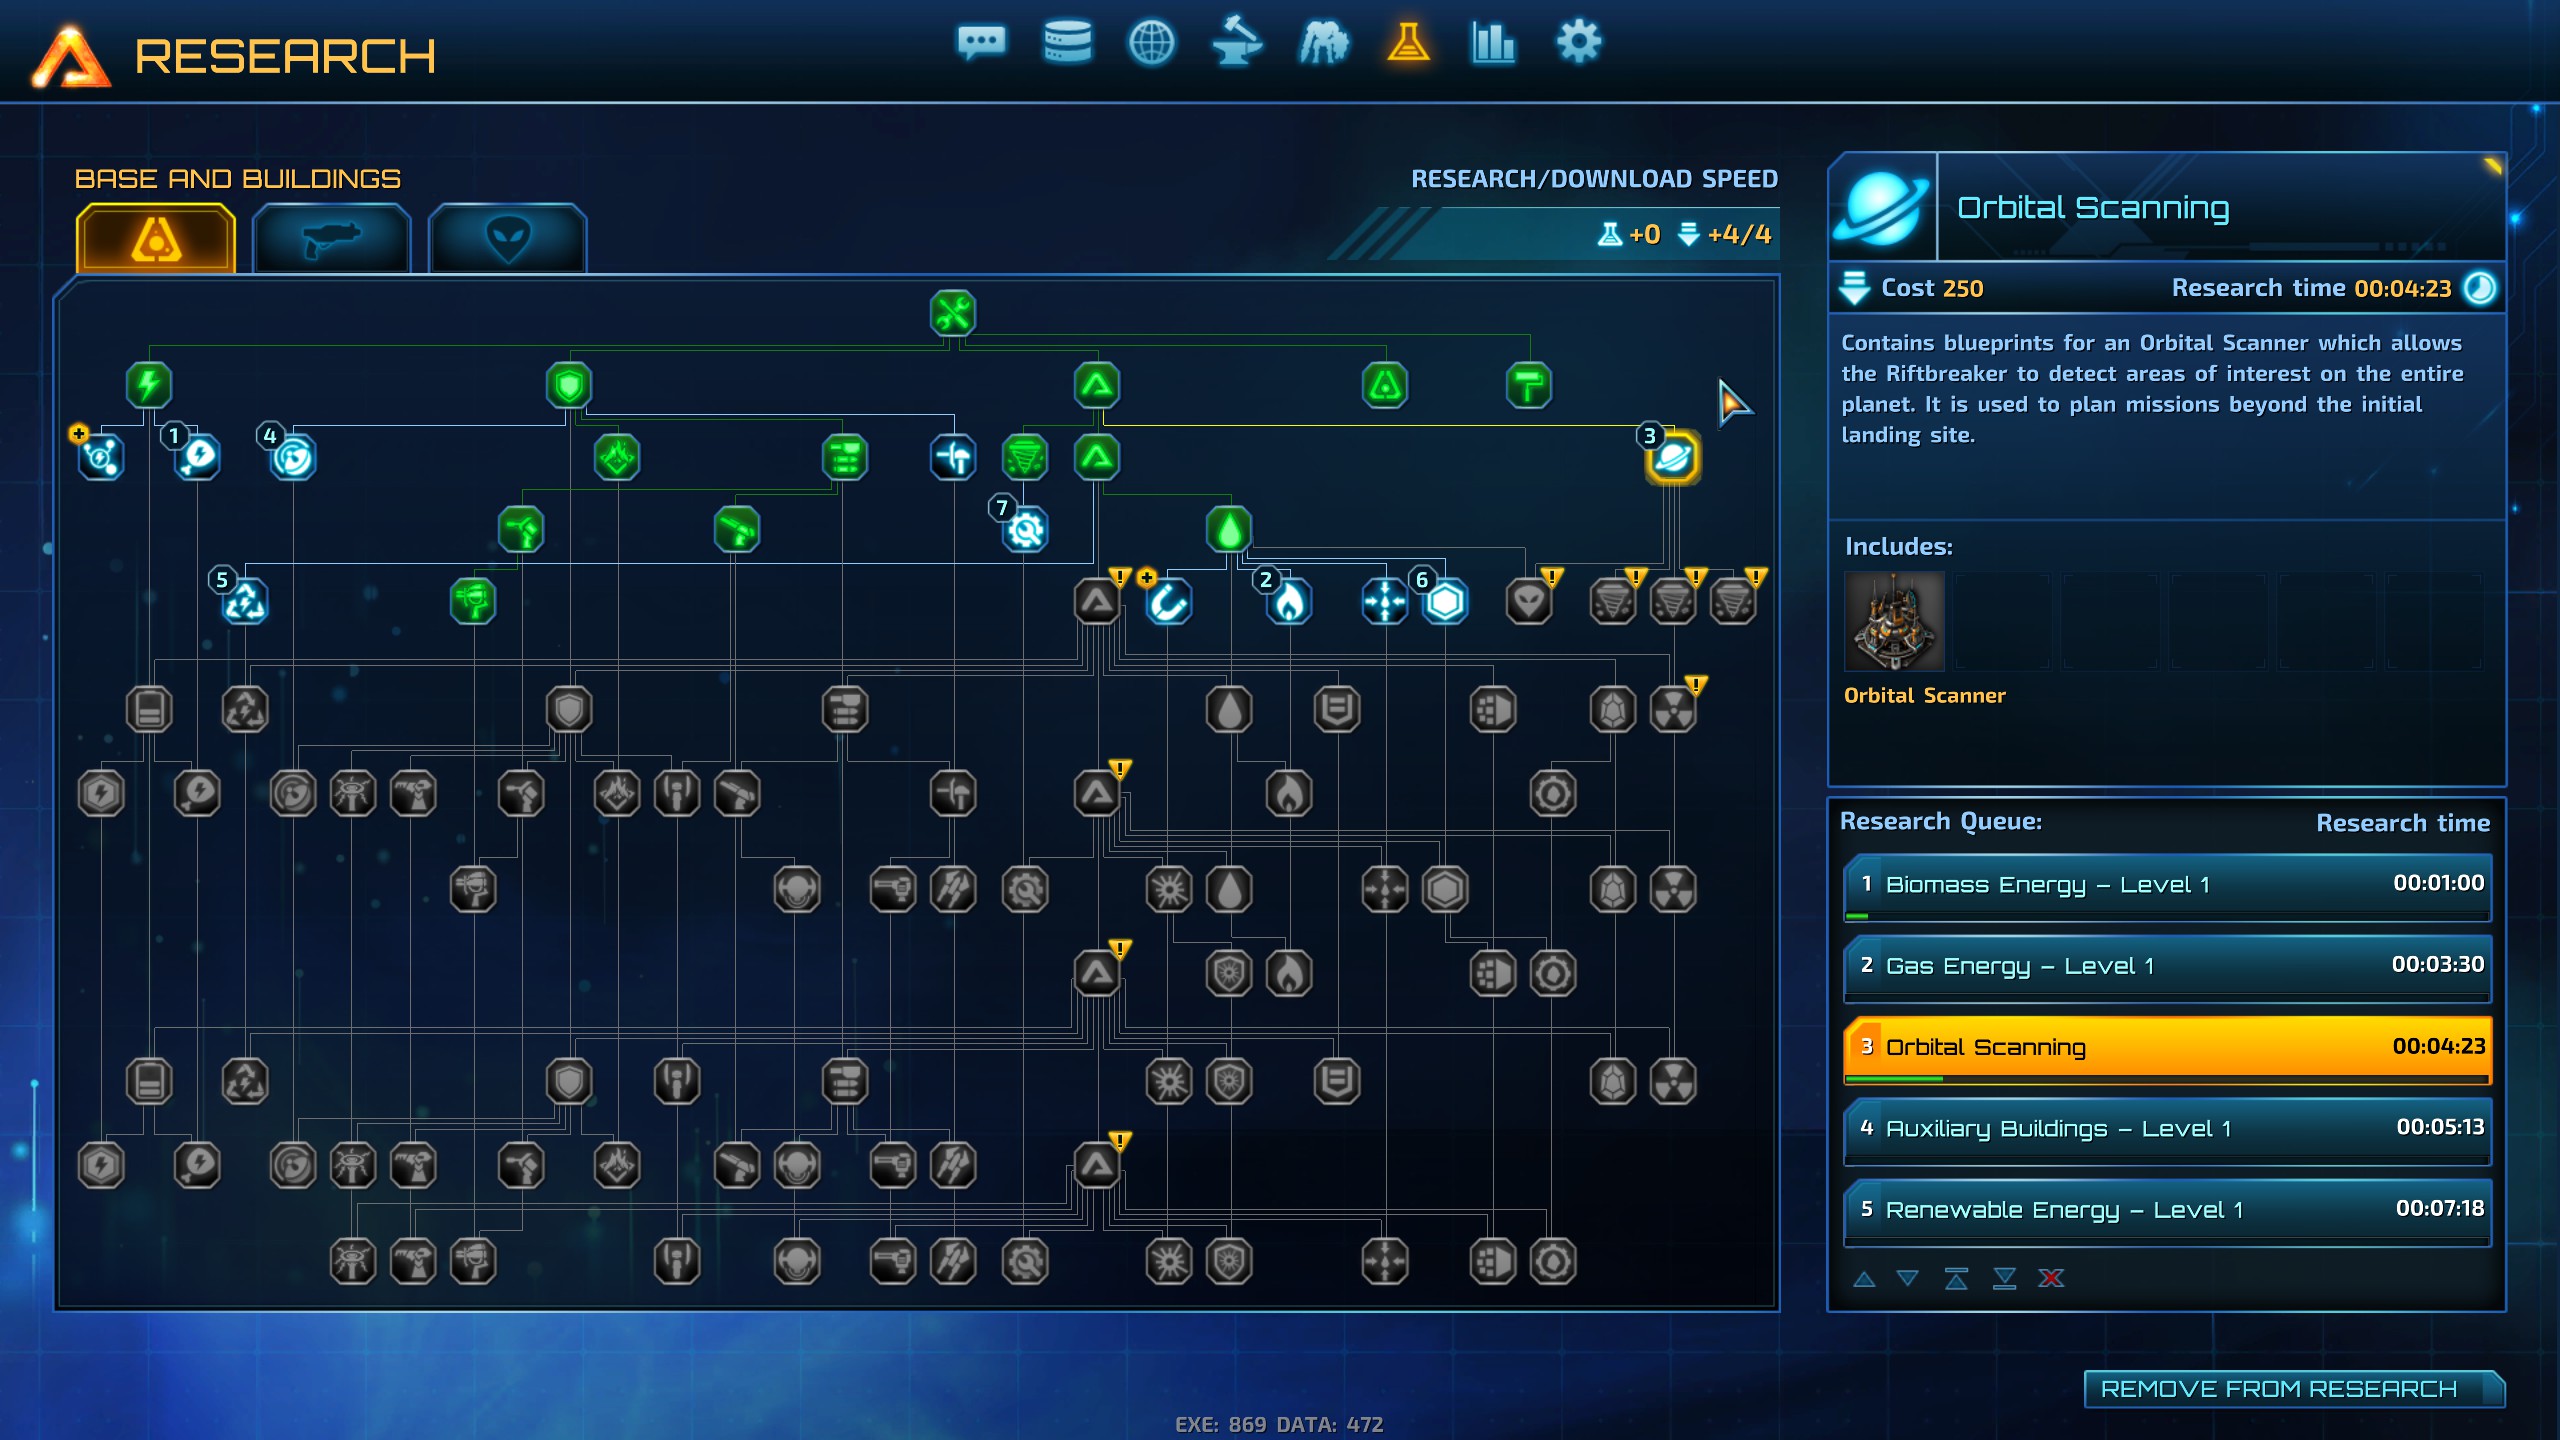
8) Orbital Scanner
9) Liquid Resource Handling 1
10) Gas Energy 1
11) Aux Buildings
12) Renewable Energy 1
13) Basic Resource Production 2 (very long 15mins, optional)
Solid material storage is now at 9.5K.
The 3rd attack wave will hit late night. You should be able finish research for #1-#5. I got to #7 in mid battle and picked up 400 cobalt from mob drops. Still just canoptrix with arachnoids. So sentinel towers, flame towers and artillery towers. After fighting the canoptrix, you don't really need to fight the arachnoids but it'll really help to keep them targeting you while you run around and the towers kill them.
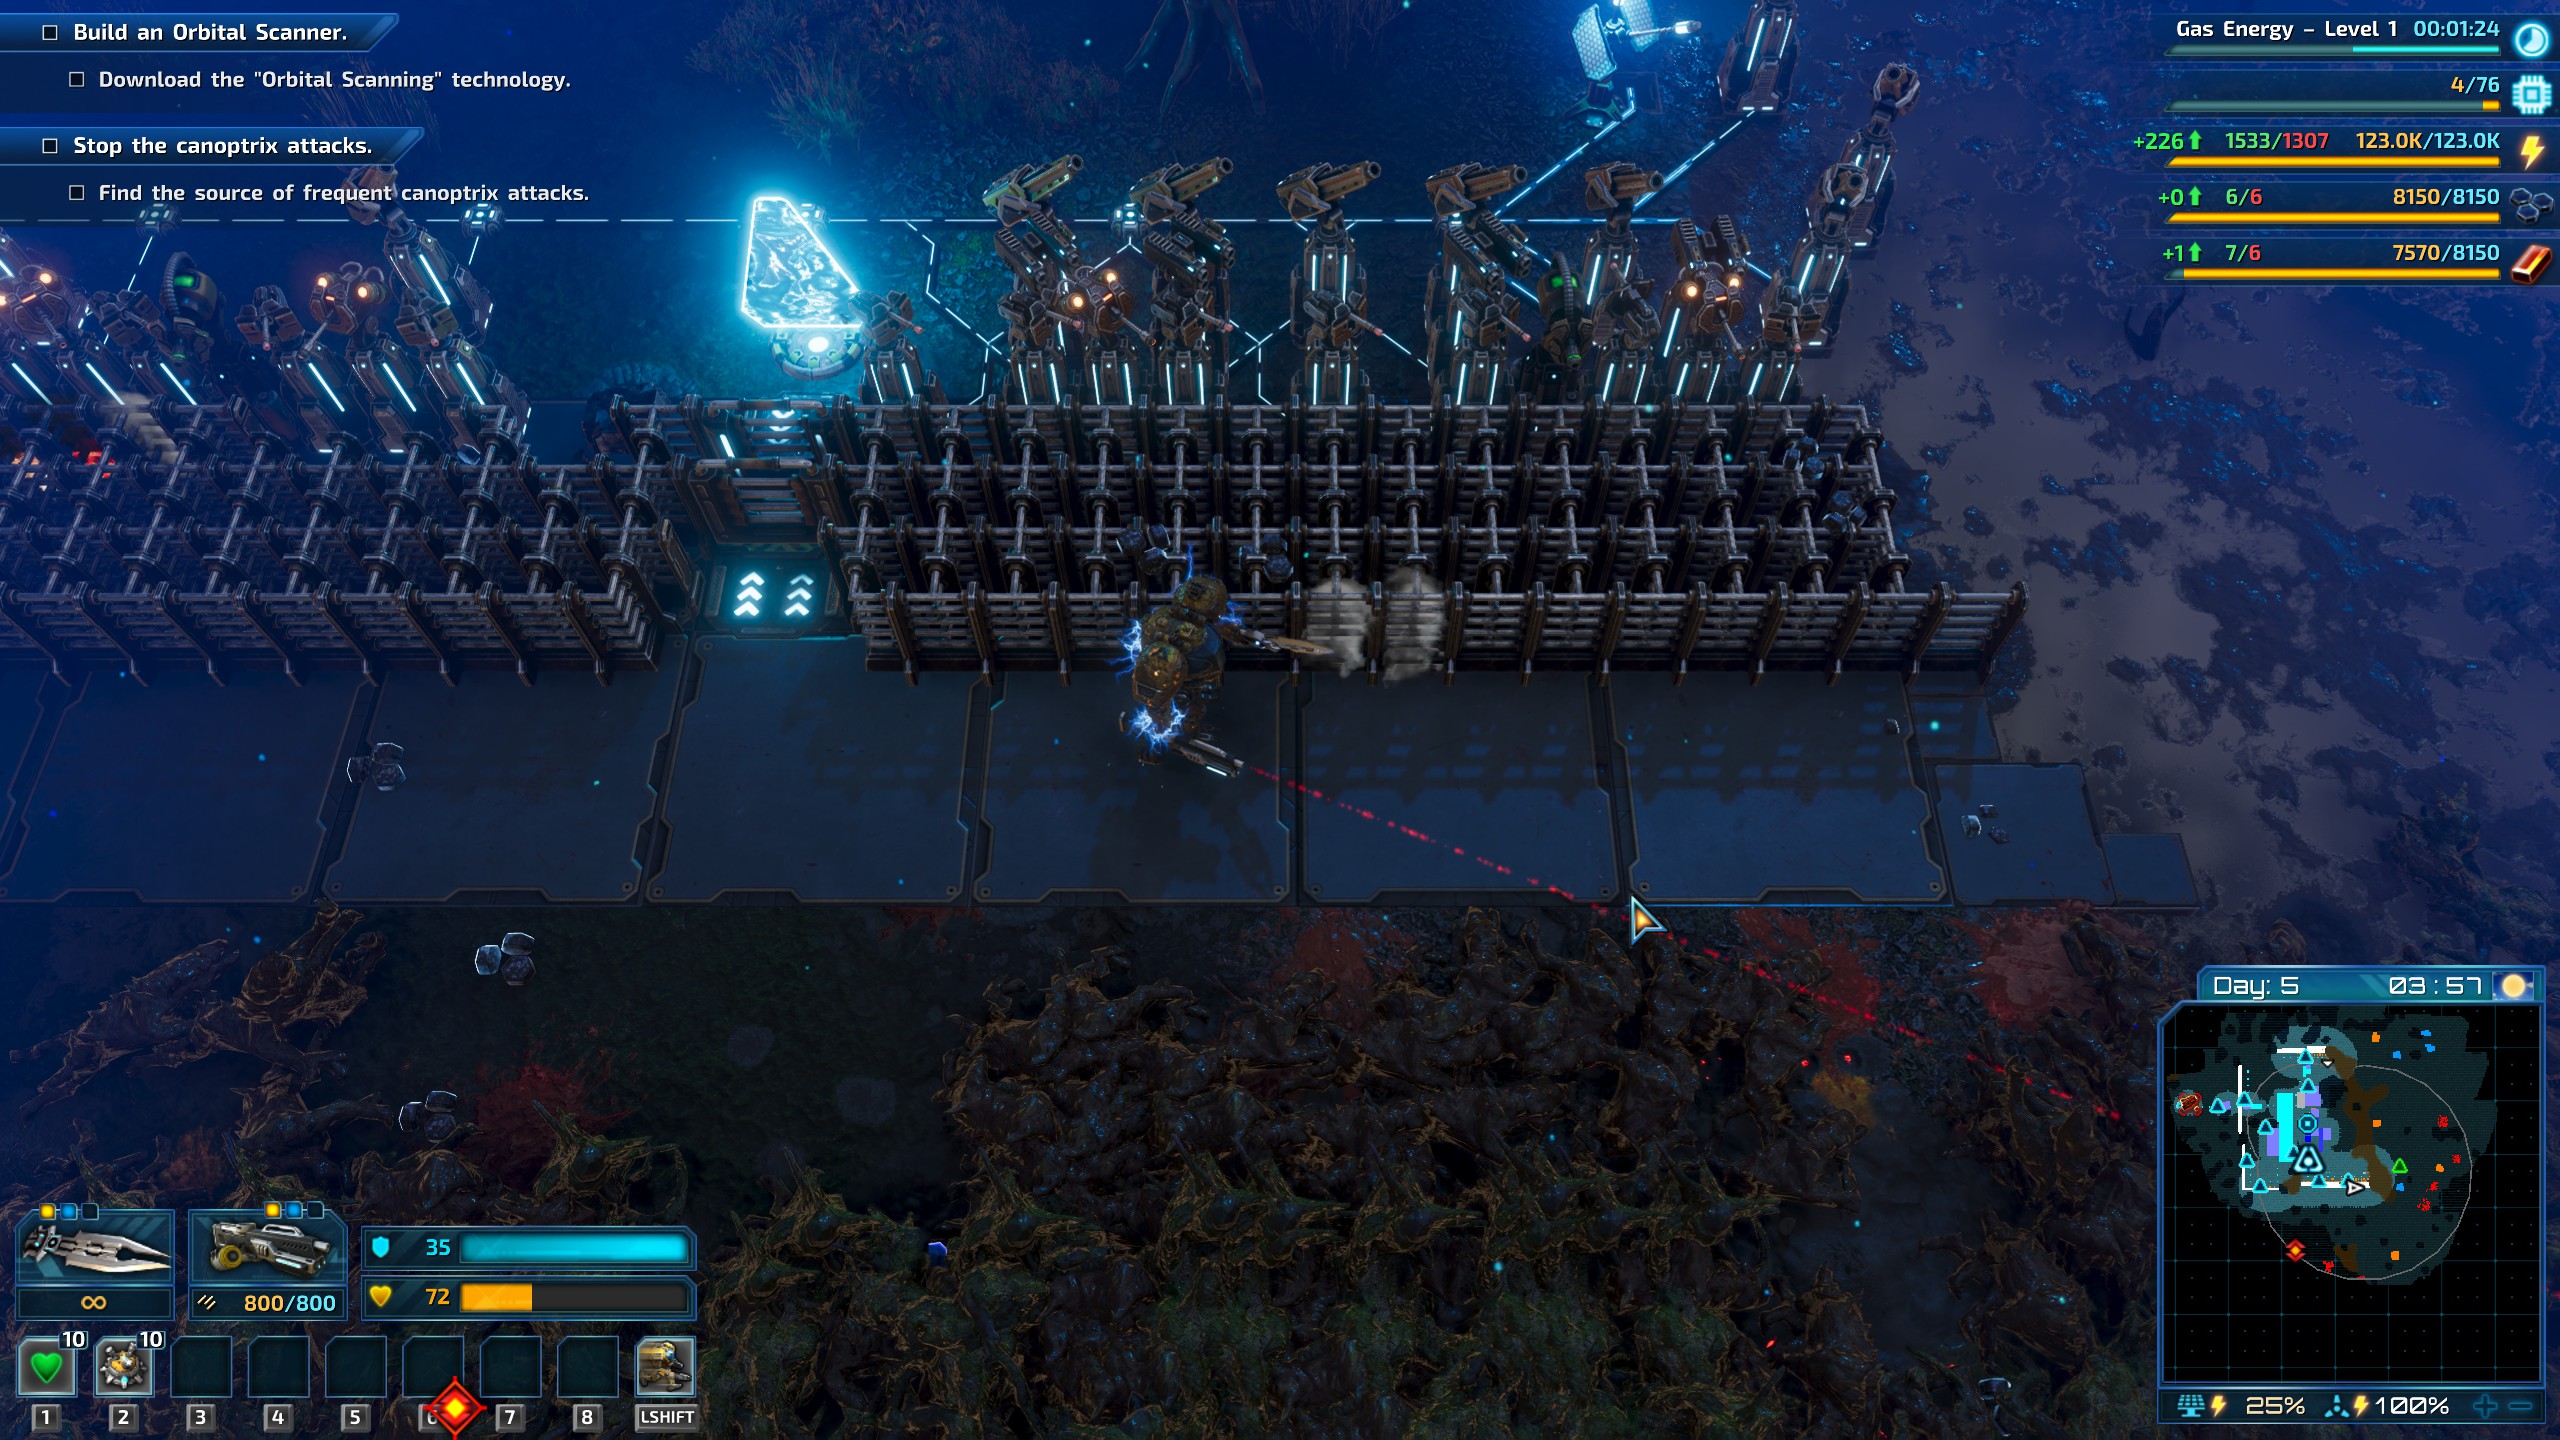
Figure 3: Key defense towers researched in time for next wave.
DAY 5
1) Once you unlock Cobalt Handling, the attack waves will give you plenty of Cobalt. One time, I got attacked and ended up collecting 500 cobalt (enough for Orbital Scanner) before the game marked where the sole cobalt node in the HQ map was (usually near far edge of map). So I had to reload just before the attack and not collect so many cobalt, haha. Goal here is to get at least 1000 cobalt. You'll see later. 500 cobalt is for the Orbital Scanner.
2) Once you have Gas Energy 1, build gas power on sludge (if you're lucky enough to have that) or gas power on mud using Water Filter to feed BioComposter (tip: only 10 water each, so can share with the same water filter for Research Lab). Every 2 Biocomposter feeds 1 Gas Power Plant which makes 500 energy but consumes 2 leaves/sec. That's why slashing around as you explore is handy.
3) Don't spend all that extra new power on AI Hubs and towers. Save 500 for Laboratory (only 250 at first but it'll be upgraded soon). Prepare a water filter for it too.
4) At late PM, change periodic attack wave into a HQ Upgrade attack wave. Research should be done up to #12. #13 takes a long while and is optional but it doubles the output of all Carbonium/Ironium factories, meaning I don't have to expand anymore outside of HQ when the nearby resources run out.
5) HQ Upgrade done just before attack wave hits. Research HQ lvl 4.
6) Attack consists of again canoptrix and arachnoids but this time with tanky hammereroceros. These are weak to acid. So build a few Acid Spewer towers. Add 1-2 more rows of walls if you can and maybe a few more Sentinel towers. No point having too many artillery and flame/acid towers as they'll run out of ammo fast even with 6 ammo factories.
Figure 4: Defensive layout for HQ lvl 4 upgrade.
DAY 6
1) HQ lvl 4 research done. Start Alien Research. Deprioritize Basic Resource Production 2.
2) Upgrade/Build Comms Hubs, build Laboratory.
3) Research Defensive Buildings 2 and Tower Ammo Handling 2 (no uranium for Ammo Factory 2 but you can upgrade Ammo Storage to lvl 2).
4) Upgrade walls and AI Hubs as soon as Defensive Buildings 2 are done. Upgrade Ammo storage.
DAY 7
1) Laboratory is built. Bioscanner enabled.
2) Start scanning for Fungus Crystallo Luteus (only need to scan 1 to enable Hazenite Concentration mission. Don't worry if you chopped some down, there's always a few giant indestructible versions around). Then research Hazenite Handling (5mins).
3) Scan Fungus Regula Corulus (scan 10 to enable cobalt farming). Just need to scan as many as you can find. Don't worry if you don't reach 10.
The goal now is to leave HQ map for missions ASAP. The longer you stay here, the more attacks you endure. You still can't cover the entire base borders with turrets. So depending on where the next attack comes from, you may need to sell (build more storage if full so no resources are wasted) existing turrets and build new ones facing the attack direction. Turrets should be mostly Sentinel with a few flamers up front and a small mix of Artillery (not too far back), Rocket and Acid Spewers. Have at least 6 Tower Ammo Factories running. If needed, sell resource factories outside base just before attack hits (and rebuild after).
DAY 8 And Beyond


OK now you can go on the Hazenite Concentration mission. Wait, Armory 2 and Research Lab 2 have not been downloaded nor built. Just leave HQ first, we can download those next while doing Hazenite Concentration. If you don't leave, you'll eat another attack soon. Also research these:
1) Finish Basic Resource Production 2
2) Plant Cultivation 1
3) Renewable Energy 2
4) Solid Material Storage 2
5) Preferred Mech technologies and weapons (start with Sentry Bioscanner)
The Hazenite Concentration mission is also in the Jungle biome but it has no periodic attack waves. It does have stealthed Kermons. So I like to run around slashing my sword. It also brings in leaves to keep Biocomposters running, at least till first Plant Cultivator is setup.
If you weren't able to scan 10 Fungus Regula Corulus in the HQ map, don't worry, scan what you can nearby, don't waste time in HQ map looking for more. You can scan more here.
While waiting for Plant Cultivation 1 to download, explore the map and find suitable Mud and Sludge locations. Also start building Level 2 Carbonium/Ironium factories powered by Wind2 as you explore. Use Sludge for gas power and Mud for water. Build Outpost here. Build at least 1 Plant Cultivator set to Fungus Regula Corulus which gives a slow trickle of Cobalt, leaves and even Ironium. Build a few Tower Ammo factories here. If HQ map doesn't have a lot of sludge/mud for energy, build Armory 2 and Research Lab 2 here or pop back to HQ, build/upgrade those, wait for them to finish (sometimes will bug out if you zone out of map before they finish) then zone back to Hazenite map. When Solid Materials Storage 2 is done, build enough to bring storage up to at least 30K. While storage is filling up, research your preferred Mech technologies after Armory 2 is done.
While in Hazenite map, I'd like to look for and scan 3 Baxmoth. That will enable Mech Combat Drones in Alien Research. My preferred Mech Armor Mods:
1) Energy Sensors for forcefield, radar and bonus drops.
2) Maintenance Tool for repair drone and speed increase at Extreme quality.
3) Defense Gear for defense drone and speed increase.
4) Offensive Equipment for attack drone and speed increase.
Note: The Defense Gear and Offensive Equipment will always give a speed increase at any level, but the Maintenance Tools only gives speed increase at Extreme Quality level and even that, it's not a guaranteed attribute but since I normally craft 4 of them (see below), I always get at least one with that attribute.
A faster mech makes exploring and fighting so much easier. Also the modifiers in each slot stack up. So I can have 4x Energy Sensors if I want to farm mods (300% at Extreme quality). Whenever I do a big base building spree, I load up 4x Maintenance Tools for reduced cost and faster build times. At Extreme quality, the cost and time is only 36%!! That makes Fusion Reactors shockingly cheap and fast to build. Devs, please don't nerf this.
Figure 5: Mech with 4x Maintenance Tools, Extremely quality. Runs fast and builds fast/cheap. Great for upgrading HQ, setting up new Outposts.
Figure 6: Mech with Energy Sensor, Maintenance Tools, Defense Gear and Offensive Equipment. Fast and can explore/fight well.
Preferred Mech Weapons:
1) Sword with these mods:
Hit Point Gain on Hit Enable. Amazing mod! Low HP? Fight more!
Range. Increases range from 3m to 4m (Extreme)
Any damage mod (prefer cold damage to slow monsters)
2) Minigun with these mods:
Homing Projectile Enable
Target Piercing Enable
Splash Damage Enable
3) Grenade Launcher with these mods:
Ammo Cost reduce
Rate of Fire increase
Any damage mod
4) Plasma Gun with Homing Projectile and others
5) Rocket Launcher with Homing Projectile and others
6) Corrosive Gun with Homing Projectile and others
After Hazenite map, the next missions will be the Acidic biome missions to enable Palladium. This is crucial for Gas Energy 2 (and 3). The next HQ upgrade really needs the energy as it enables more Comms Hub and Research labs. The 30K resource storage is for this. I personally slowly build the storage up to 50K before the next HQ upgrade. Then 100K for the next and 200K after that for final total (storage is spread across multiple outposts with a few in HQ). By then, your economy should be good enough to fight off 500% swarm after swarm. Now you can play your game however you like.
TIP: Shield Generators stack!!! One gives 4000 shield to walls and turrets, 2 will give 8000.
TIP: My final HQ defensive turret layout is simple - just 2 rows of turrets and 2-3 layers of wall. 1st row is alternating Minigun Towers and Plasma Towers. 2nd row is alternating Rocket Towers and Artillery Towers. Each corner gets a Gatling Laser Turret.
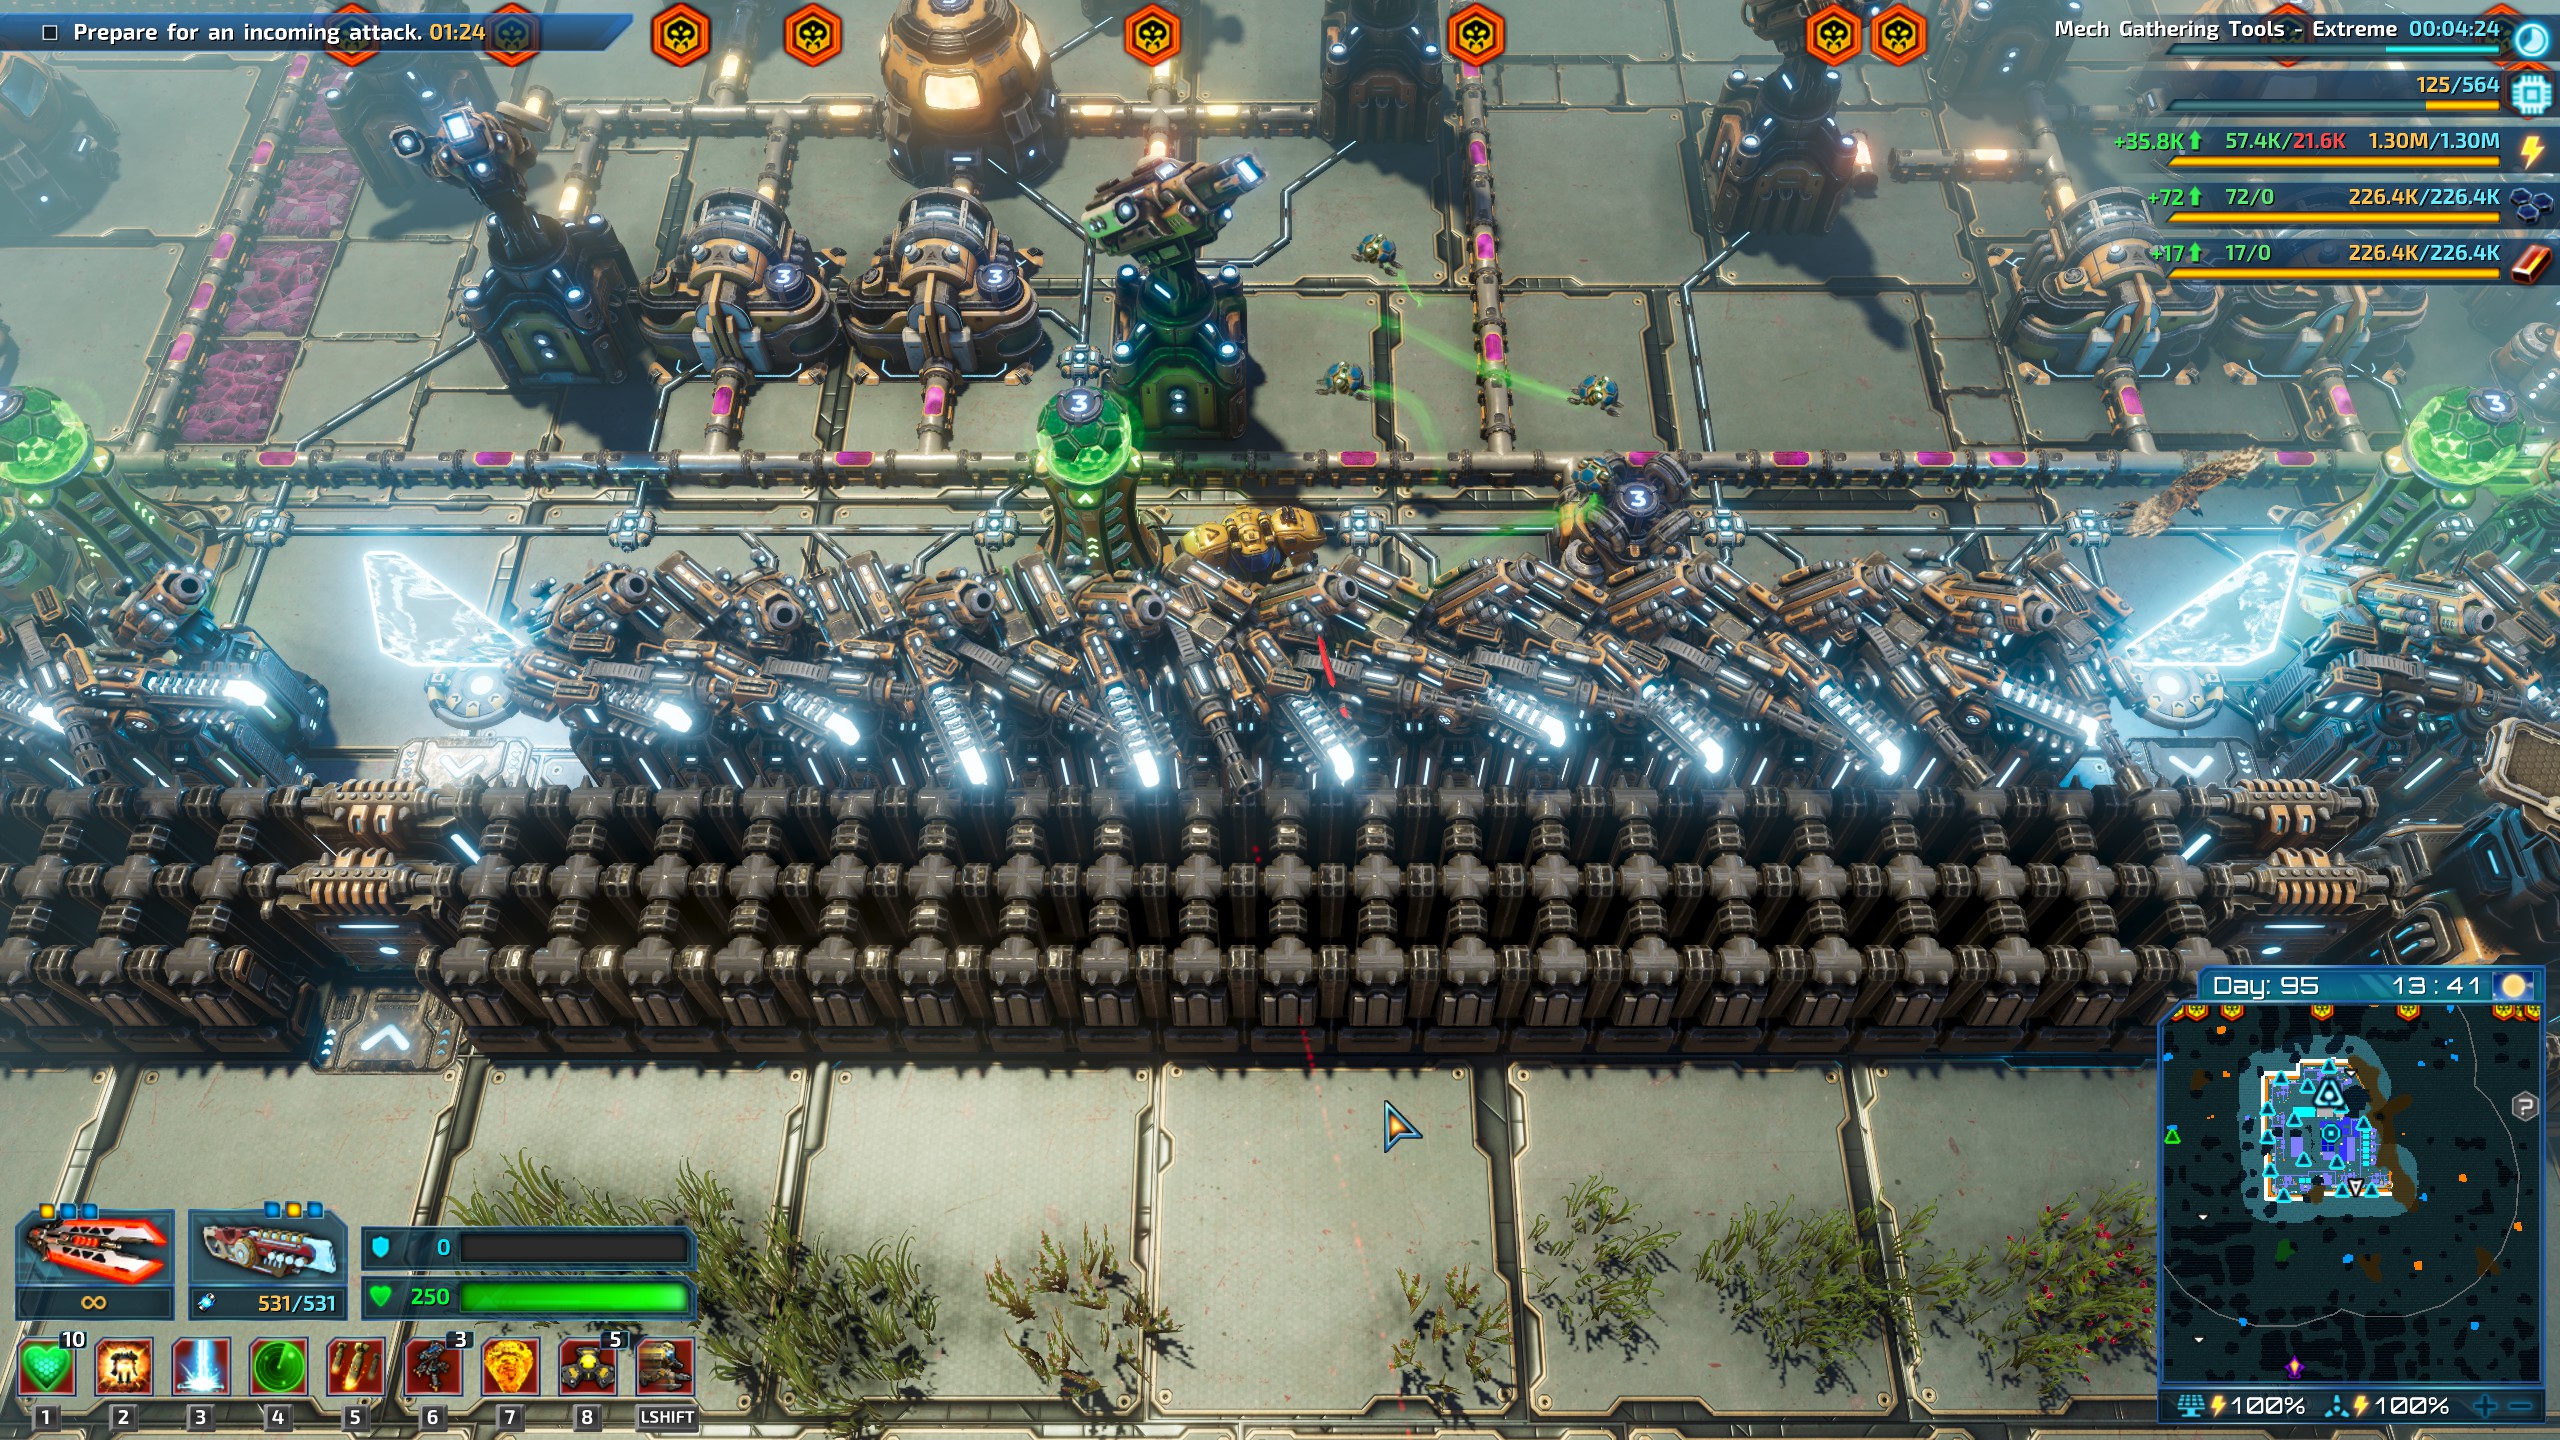
Figure 7: Final HQ defensive turret layout.
TIP: My Mining Outpost defensive turret layout is lighter. 1st row is repeating pattern of Minigun, Plasma and Rocket turrets. 2nd row is repeating Artillery towers with 2 empty spaces between each. Mining Outposts face 2 types of attacks.
1) Periodic attack waves. At 500%, these are huge but mostly zergling types. Easy once Outpost walls/turrets are setup.
2) Upon completion of Mission Objectives (e.g. Rare Mining Factory or Uranium Centrifuges built), a 500% massively crazy wave with tanky type monsters mixed in. Help out by standing at certain spots in front of turrets to lure monsters in a way that spreads them out for more turrets to fire.
Figure 8: Mining Outpost towers and completed objectives defense. Here, I'm standing in the middle of the tower line to lure some mobs away from the corners.
TIP: Each Mining Outpost usually gets 4 Tower Ammo Factories. That helps with the massive attacks back at HQ to prevent low ammo.
TIP: I find these towers to be useless:
Railguns and Lasers eat too much energy to use them en masse.
Attack Drone and Mine Layer towers are slow and bulky.
Short range towers like Flamer, Shockwave not needed as monsters don't get close enough. Any damage towers/walls take in late/end game is usually from very ranged mobs like Nurglax. None get close enough to need Flamers.
NOTE: The final attack wave in the game when you open the rift portal back to earth is bugged. It does not scale in difficulty or wave multipliers. So the "this is it" battle is quite a letdown.
Source: https://steamcommunity.com/sharedfiles/filedetails/?id=3023904858
More The Riftbreaker guilds
- All Guilds
- Trmchen mit Schirmchen
- . / many weapon mods
- [FULL Game] The Riftbreaker: Heart of the Swamp,
- How to clear inventory - trash/delete mods fast
- 100% Achievements (English)
- New corrected Camera Zoom modif
- Full Guide on How to Set up a Nuclear Power Plant
- [FULL Game] The Riftbreaker: Metal Terror +
- How to Zoom and guide Riftbreaker