
Introduction
Hello and welcome!
This guide is meant to give you some background and tips for the early stages of Planet Crafter with absolutely no spoilers. I won't be discussing any specific locations / lore / or anything beyond the beginning of the game.
Many other guides are on Steam for Planet crafter, but I think they give away too much information and this game really is better if you come into it with as little information as possible - because YOUR playthrough is what makes it special.
Overview Of What To Expect
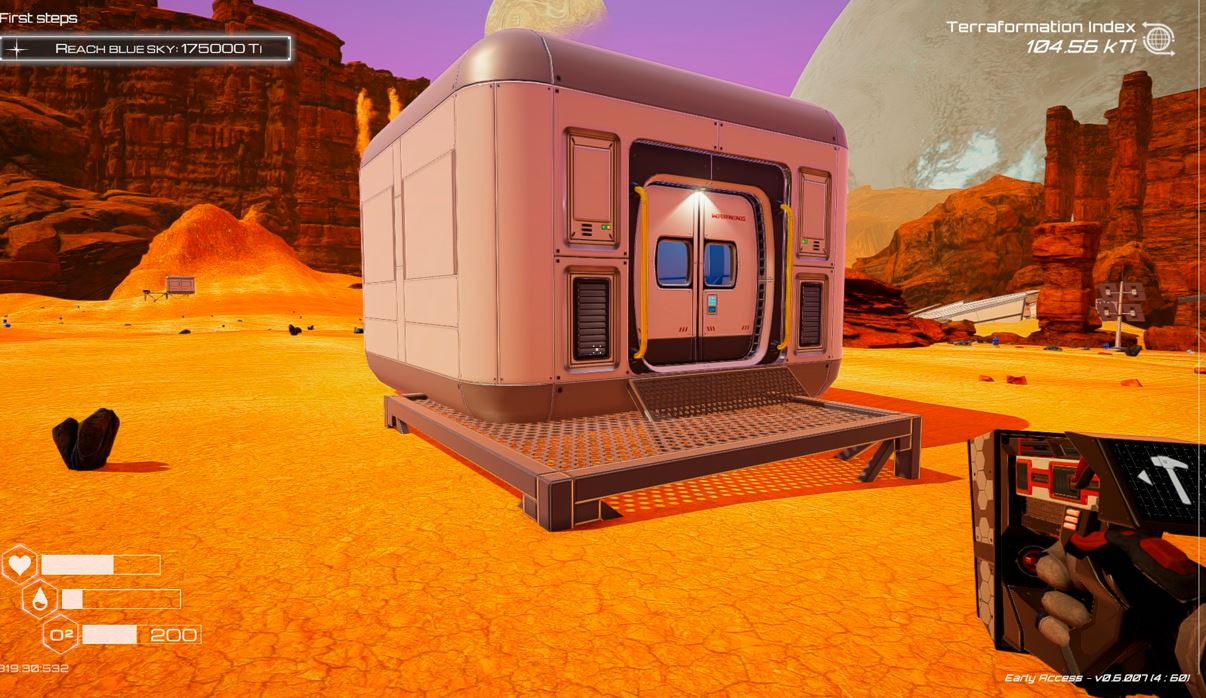
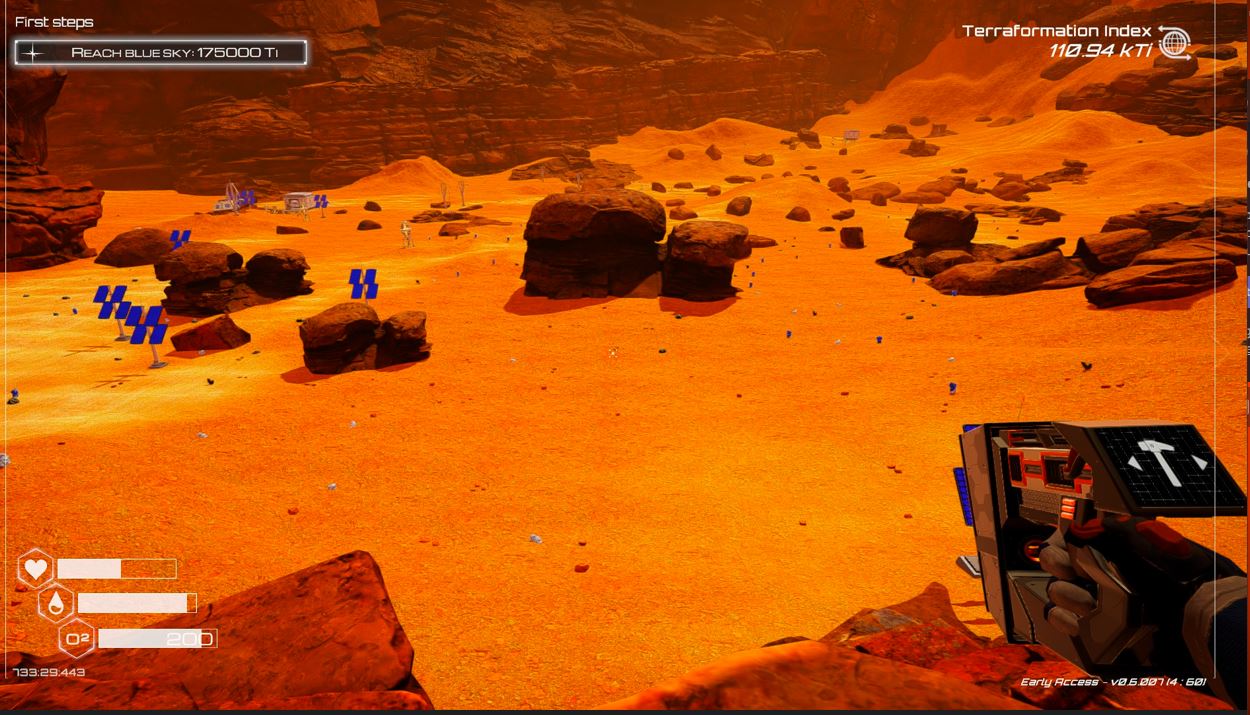
So you've landed on an alien planet. You're a convict who has chosen to terraform this planet in lieu of serving time in prison.
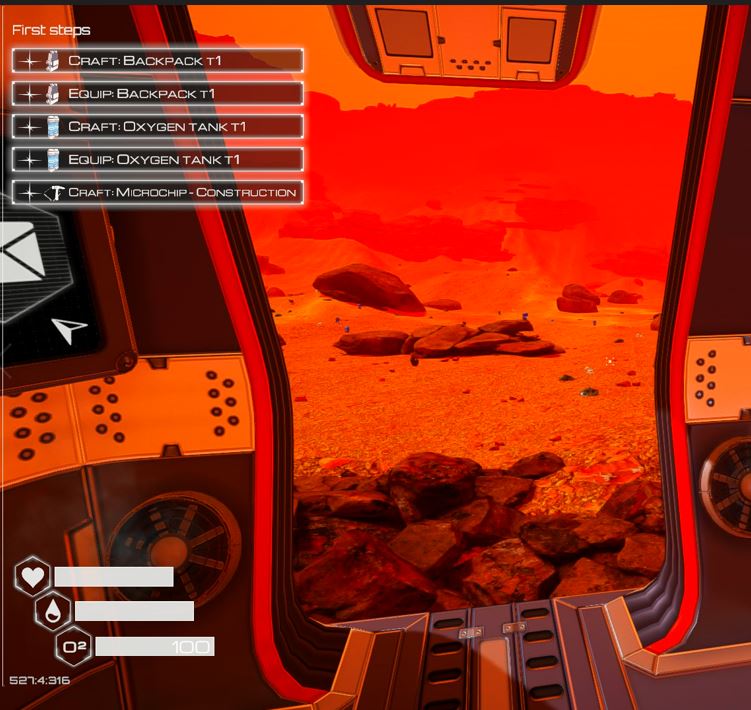
When you land on the planet, you have a small pod with a minimal amount of food and water which will quickly be gone. You have an extremely limited amount of oxygen to breath which will limit how far you can go.
The good news is your penal authorities will give you early goals which will increase the space you have to live, a larger oxygen tank and more storage. All it takes is gathering minerals and crafting newer and better things. Look at these goals on the top of your screen and do them as you find the correct minerals.
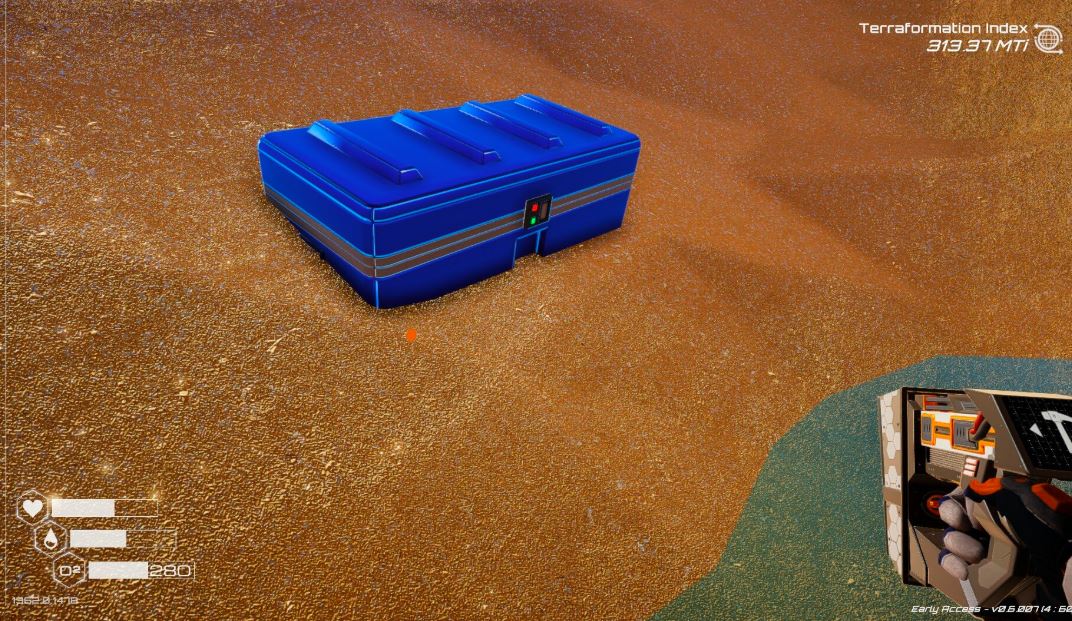
This is a HUGE planet. If you look in all directions from where you land, this is but a fraction of the overall size of the planet. On this planet you will find blue storage boxes, scattered about, likely remnants from ships that have crash landed. And you will find these wrecks and you will find subterranean abandoned bases only visible by a ladder on the surface.
In the early game, it's important that you FOCUS on your immediate surroundings and build the things your authority is asking for. Don't stray too far because you need to get stabilized with your food and water. Once that is taken care of, things can go at whatever pace you want.
But the VERY early game, getting food working is critical because it is the one thing you can run out of until you get it up & running and if you don't, well I guess the penal authority will need to find another person to fulfill your role!
Controls
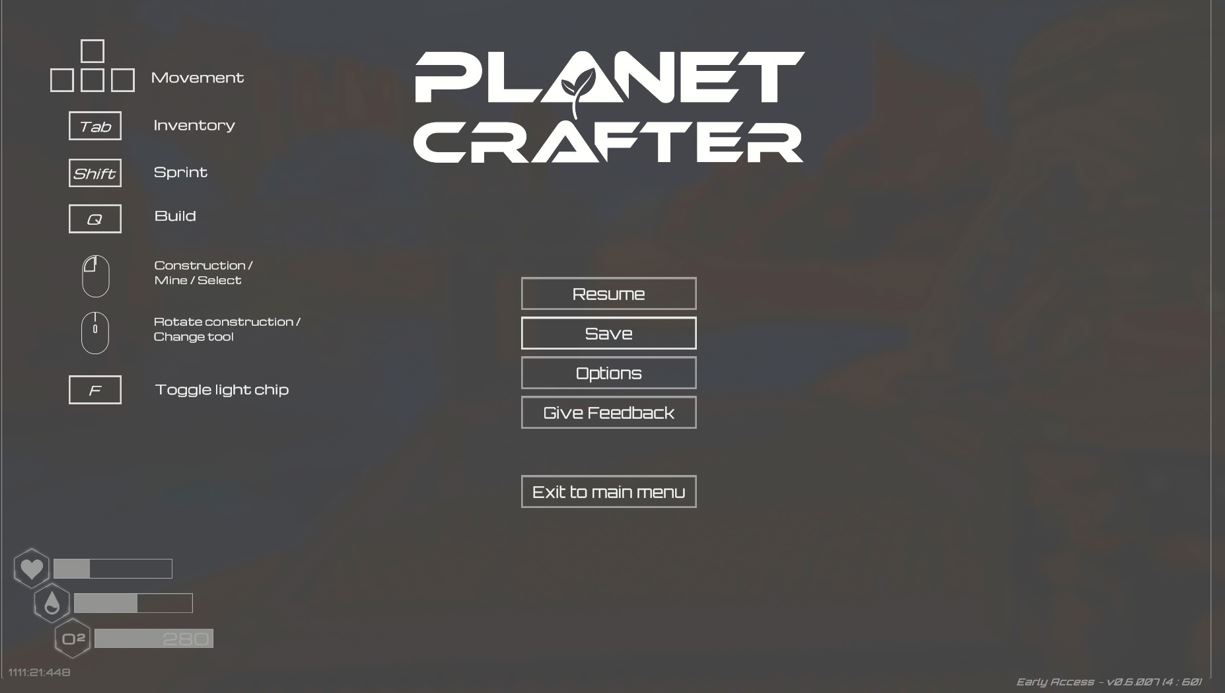
The best part of Planet Crafter is it has a very small number of controls and they are always there to remind you when you press the Escape key!
W,A,S,D for movement
Left mouse click to:
Pick up minerals
Craft
SelectQ to build
TAB for inventory
SHIFT to toggle sprint
Things not listed:
<space> to jump
<double tap space bar and hold> to fly with jetpack (once you have it)
<r> to rotate
That's it!
What You Can Build Now And In The Future
When you first land, you only have a crafting station in the pod with you. You have a tool in your hand that can pick up minerals by pointing at any mineral. The name of the mineral will be displayed and if you left-mouse click and continue to hold down the mineral will be picked up and placed into your backpack.
The crafting station in the pod has a screen. If you click on it, it will list the things that it can build and if you mouse over any of these items, it will display the recipe for it.
One of the first things you need to craft is the construction tool! This will give you a tool that you can point at the ground and build things.
IMPORTANT: When you build anything from the crafting station, it goes into your inventory. IT DOES NOT EQUIP IT. You must open up your inventory (TAB) and move the tool you just made to your tool belt. Then the tool is available.
You can swap between different tools by using the scroll wheel on your mouse.
As you progress through milestones, you will unlock more sophisticated crafting stations that have a wider array of items to craft.
Once you've crafted your build tool and equipped it, you can craft by pressing Q and select what you want to build and click on it. The outline of the thing you want to build will be displayed - it must be green to be able to be built. If it is red, the ground is either obstructed or you don't have the required materials to build it. Once you are satisfied with the location, click again and It will take the minerals from your backpack and build it where the green outline is at.
To craft with a crafting station - click on the screen to bring up the things that it can build and then click on what you want to build. It will take the minerals from your backpack and build it and place what it built into your inventory.
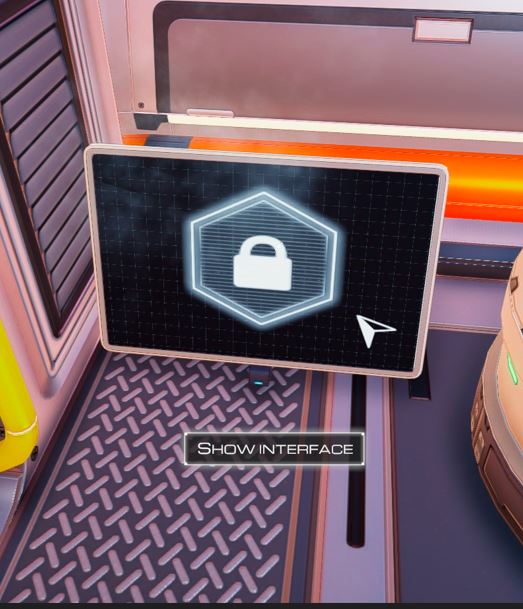
One of the early things you are asked to build is the lock display:
Build this & place this on the floor of your pod for now. As for any screen you build, you can craft and place them in multiple places so you can look at it anywhere. Use the mouse scroll wheel to rotate it if you so desire.
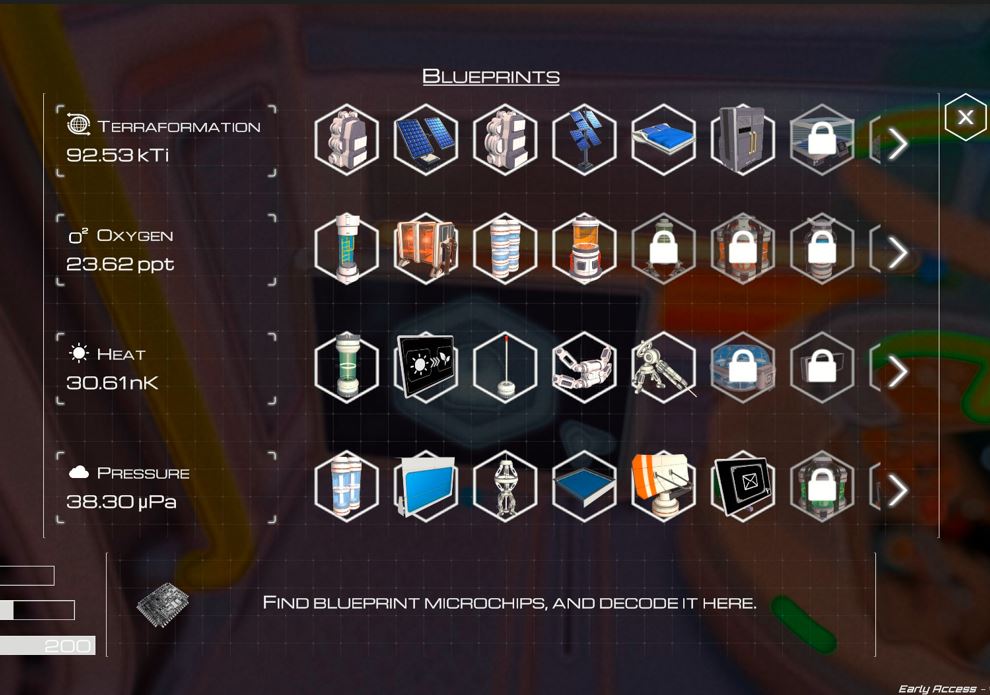
When you first open the lock display screen, it will be filled with *most* of the items you can craft or will be able to craft and you can see they are categorized in sections and each section has things that unlock when you reach certain values in one of 4 different categories:
* Note: There is a 5th thing, called biomass, which has it's own dedicated screen in it's specific building which you will get later - but it also shows the unlocks.
You will see new buildings, new technology and new tools that become available as you progress in each of these categories. Anytime you feel stuck, you should look at this list and see what would be a good goal to unlock next, and work on increasing the terraforming values in that specific category.
How To Focus On Food
You need two things to get food:
1. Most important is seed packets.
There are 4 different kinds of seeds:
Mushroom
Beans
Eggplant
Squash
ALL can be eaten for health, but beans give the most health and the other varieties are needed for crafting, so it's best to save everything and only eat beans. But you may not get a bean packet for a while - so grow what you can!
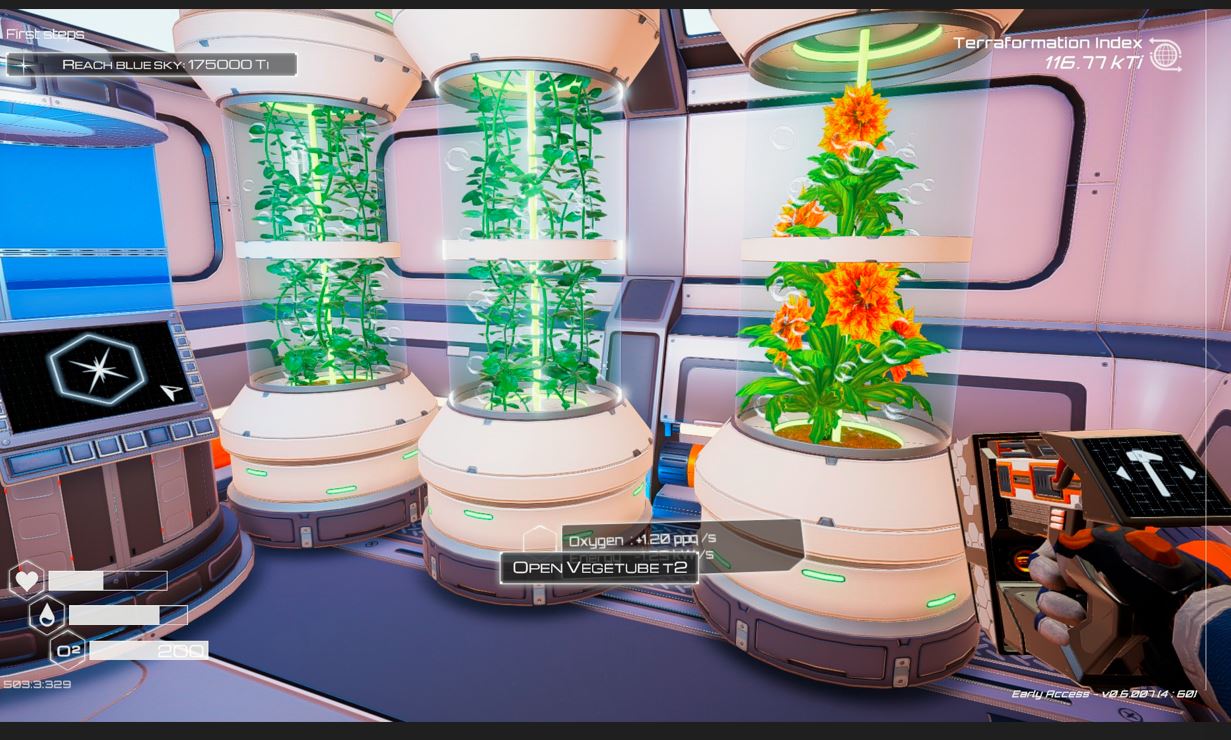
2. You unlock the Food Grower when you progress Oxygen to 12.00ppt. So it's vitally important that you craft a few of the plant growers and place flowers in them to generate Oxygen to get to that level so the Food Grower is unlocked.
These are vegetubes with flowers in them
IMPORTANT: Once you build the veggie tube, you click on it to add the flower to it.
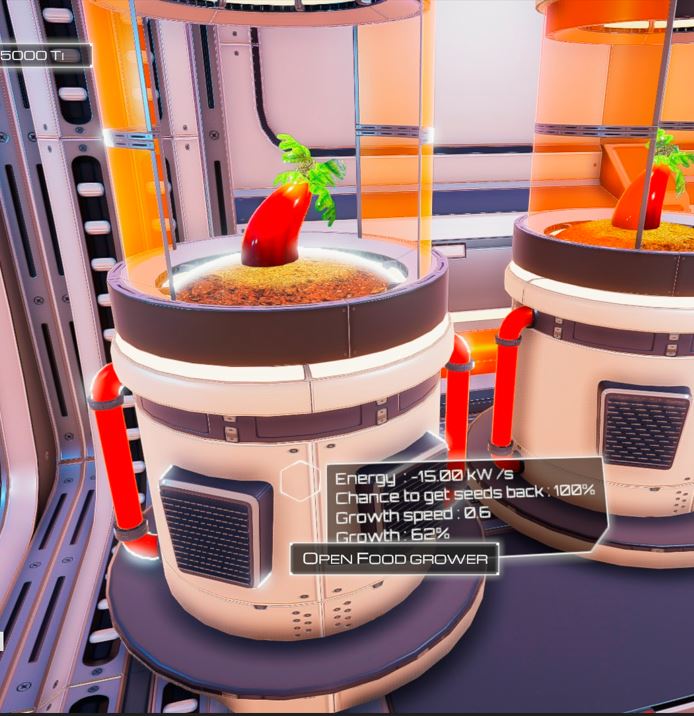
And here is the food grower - your initial goal to obtain it and start growing food!
IMPORTANT: Same as the vegetube, you must click on the food grower and load the seed packet you want to grow!
Notice when you mouse over the base of the food grower, it tells you a lot of information on the food grower and the progress of the food growing inside!
To generate oxygen you need to find Flowers to plant and craft veggie domes for them to grow in.
Both Seeds and Flowers are found in wrecks and the blue crates. You need to explore to find these!
Exploring We Will Go!

To survive and thrive you need to explore. With a limited oxygen capacity, you're very limited on how far you can go. The good news is you unlock larger Oxygen tanks with progress and in no time you'll be going long distances.
In fact, one of the first goals the penal colony gives you is to build an oxygen tank. Prioritize this!
TIP: Windmills only cost 1 iron and are tall and are great markers to find your way on this huge planet!
But when you first start, the distance you can travel is very limited!
You have two ways of exploring:
1. Go one direction and return on one tank (not recommended but needed in the first few forays)
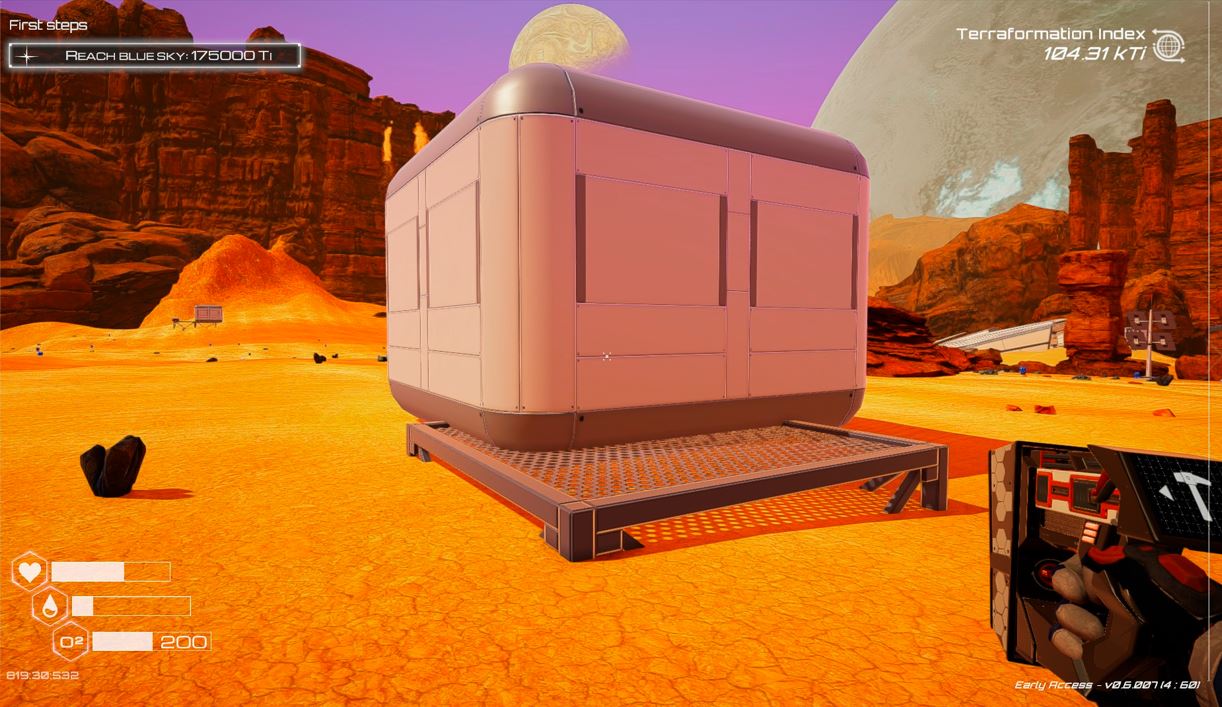
2. Go as far as you can AND build another habitat at the end to refresh your oxygen because ALL habitats give you oxygen!
A habitat is one of the first goals your penal authority gives you. To build one, it takes (4) Iron, (2) Titanium and (1) Silicon
Foundation: 1 Iron
Habitat: 2 Iron + 1 Titanium
Door (most important!): 1 Iron + 1 Titanium + 1 Silicon
You should practice building this so you can do it and know how long it will take you so that you can begin building it before you run out of Oxygen!
IMPORTANT: You can adjust the height of the foundation by pushing it into the ground so you don't have to jump high to get in!
In the beginning of the game, you can use these an mini-bases to expand your reach so you can gather more minerals safely and also find blue boxes and wrecks.
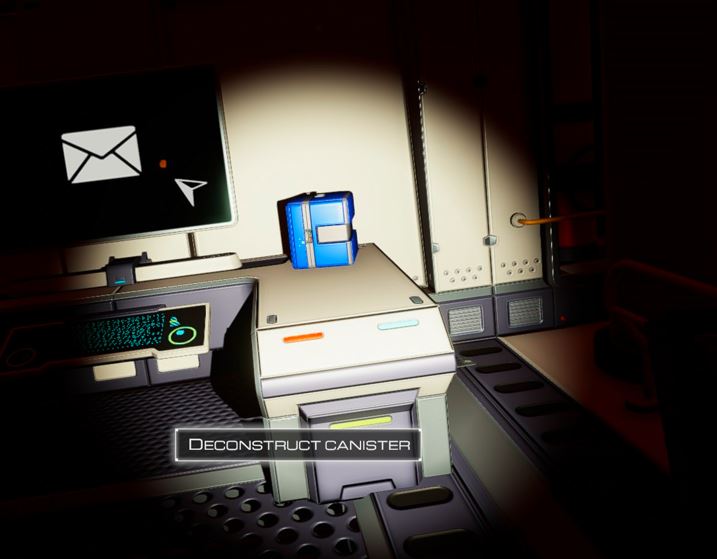
Blue boxes are laying about almost anywhere. They are a storage box that contains things that you need and will use!
When in wrecks, you need a flashlight (torch) and you need to have the disassemble tool. Many wrecks have barriers in your way that you must disassemble to be able to progress beyond it.
Look for the blue print boxes in wrecks! They have a chip that you collect and can unlock using the lock screen you build.
TIP: Once you've emptied a blue box or a blue print box, you can disassemble the empty box to get back a few iron depending upon the type of container.
When you find a wreck, you want to build this habitat right next to the opening of the wreck so you are travelling the smallest amount of distance from the habitat to the wreck.
Power / Electricity
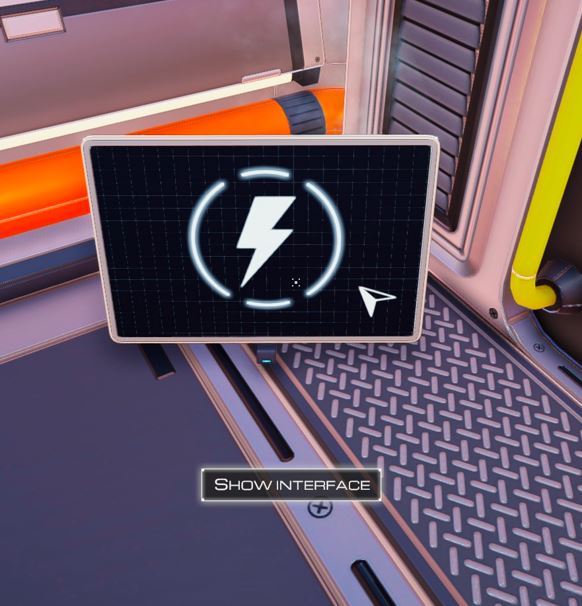
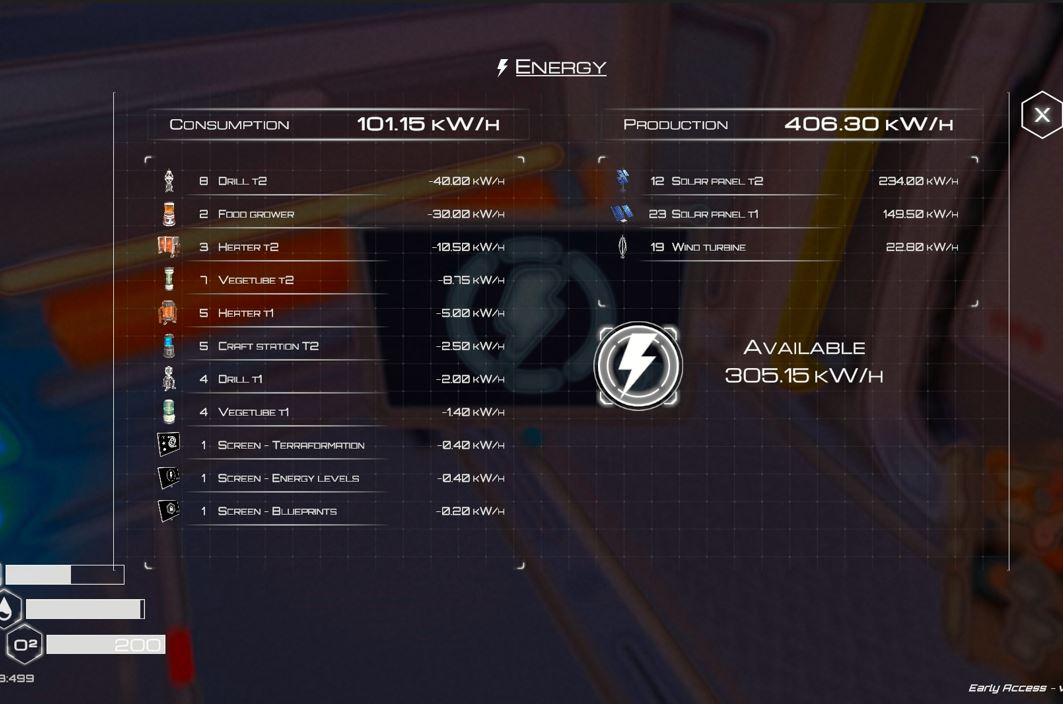
Electricity is something you have to be aware of because if you build one too many things, everything shuts down.
The best way to fix it is to always be building more power. You can literally never have enough power because of all the machines you need to build and they ALL require electricity to run.
The power screen is your friend. It tells you all the thing producing power and all the things consuming power. You should look at it often.
Build more power before you need it!
In the beginning, you will do wind turbines - you will need 5-10 of them at most before you get solar arrays. There are T1 and T2 variants of the solar array and you should build a lot of these - think somewhere around 20 T1 and 20-50 T2 arrays.
Note: Solar provide power 24x7, it's the magic of the stars. However! If your power generation ends up under water, they will stop working, so you will need to move them!
TIP: As you're exploring, always be picking up minerals for a solar array and plop them down as soon as you have the minerals. It's a great way to explore and create energy at the same time. Here is my beginner valley littered with power generation (t1, t2 + wind)
Optionally to building out more than T2 arrays, you can start the nuclear renaissance and begin building nuclear power plants, but then you're going to have to do rockets, which while not a bad way to go, is a timesink in itself. So your choice! See the chapter on rockets. You will have to go nuclear eventually, so it's just a matter of when.
Building Buildings
There really isn't a lot of building rules - living quarters must be placed on a single foundation, but that's it. You don't need to put foundations everywhere and other buildings can be built literally in the air.
Even with the living quarters, you don't need to place it perfectly on a foundation. It can just be touching the foundation on one edge. Don't sweat it. If it's green, you can place it!
The best part of building is you can make something bigger just by snapping another building to it. They can be different buildings or the same type, just build another one and you'll see it touch and then click.
It's easy to disassemble, as long as the building is empty. Doors don't count. When you disassemble, you get all the minerals back so you can build it again.
TIP: You can rotate a building while in build mode by scrolling with the mouse wheel. Sometimes it will be harder to see, but you can do it! This is particularly helpful for the BioLab if you want the Crafting station to be pointed a certain way.
Upgrading Buildings
In general, once built, just leave it - what is it hurting right? Even if what the building is producing is so poor compared the your current biggest tier, the effort to deconstruct and rebuild just isn't worth it.
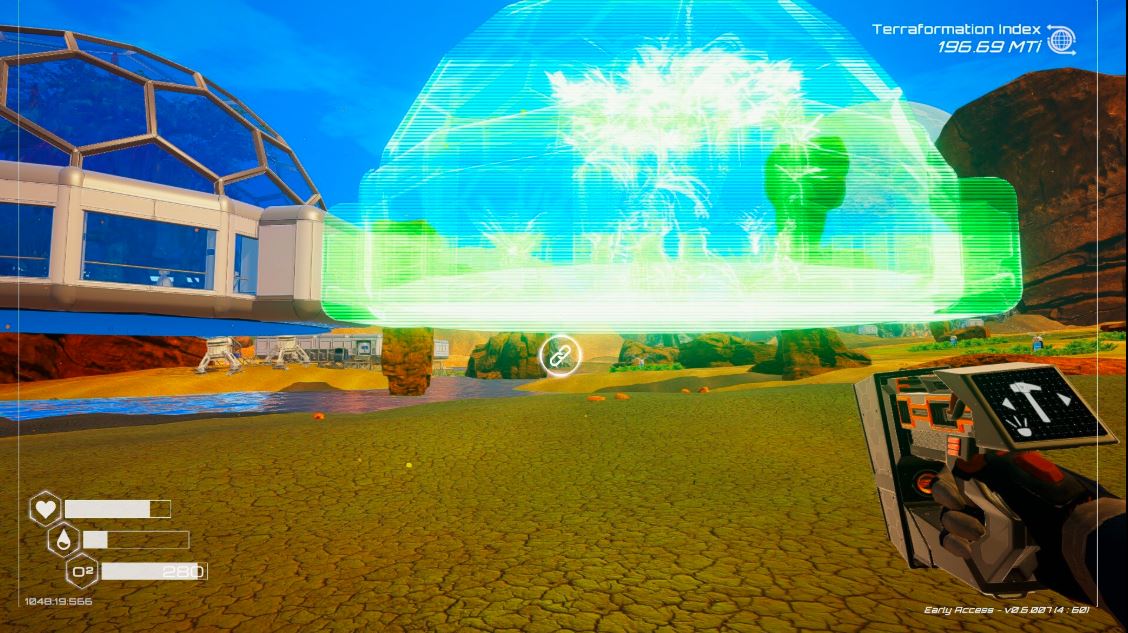
Except for plants / flowers that is. For flowering plants (vegetubes), you want your best plants in your best plant / Oxygen generation. It is really a waste if you leave those plants in those t1 or t2 vegetubes when you have t3 available.
Also - sometimes if you're low on uranium rods, it makes total sense to upcycle the T1 nuclear reactors into T3
Your Backpack
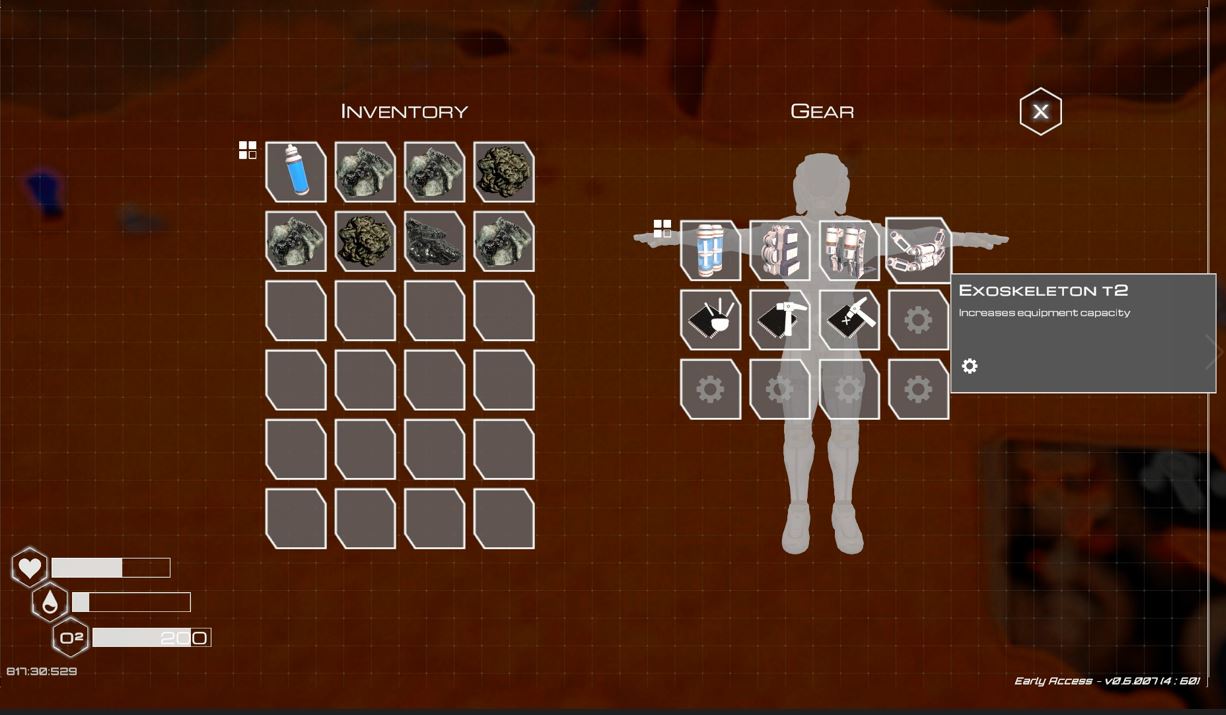
Your backpack starts small with a few spots and can be upgraded throughout the game. You access both your backpack and gear by pressing the TAB key:
The exoskeleton is the most important part - it limits how many accessories/tools you can attach - and your backpack is one of those things!
Without the most basic exoskeleton, and this is super important, you only have 4 spots and when you remove the exoskeleton to upgrade it, anything over these 4 spots is immediately dropped to the ground and if your backpack was one of those, all materials from the backpack will drop as well!
In the early game, you may have to constantly swap out things if you haven't unlocked and upgraded to the T1 Exoskeleton.
Sooooo....Always empty your backpack before you upgrade the exoskeleton. And be ready to pick up all the accessories that drop to the ground when you take the frame off to upgrade it to the next level. Or, remove them manually and place them in a storage locker before you upgrade.
Many things can attach to your exoskeleton and will improve the game immensely for these upgrades once you unlock them. Always be looking to see what has been unlocked by visiting your crafting stations!
Meteors
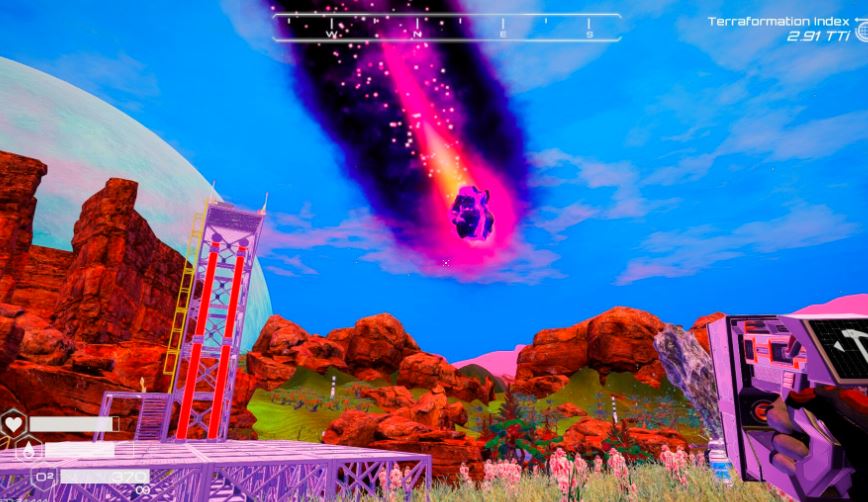
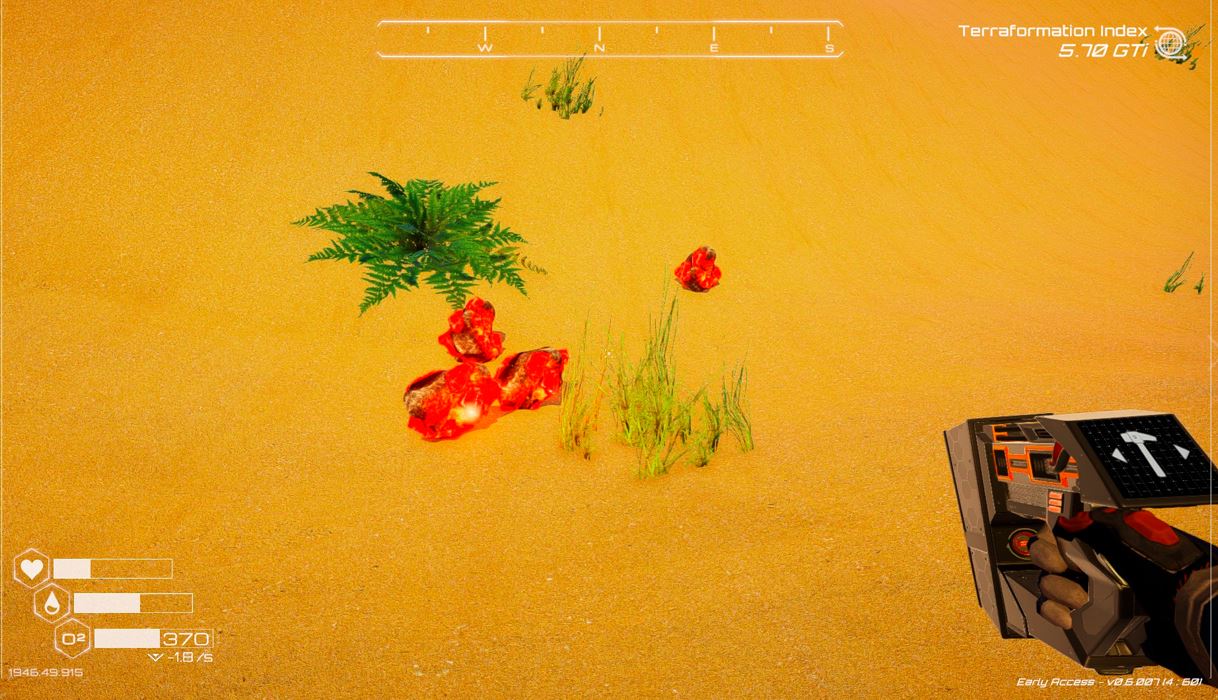
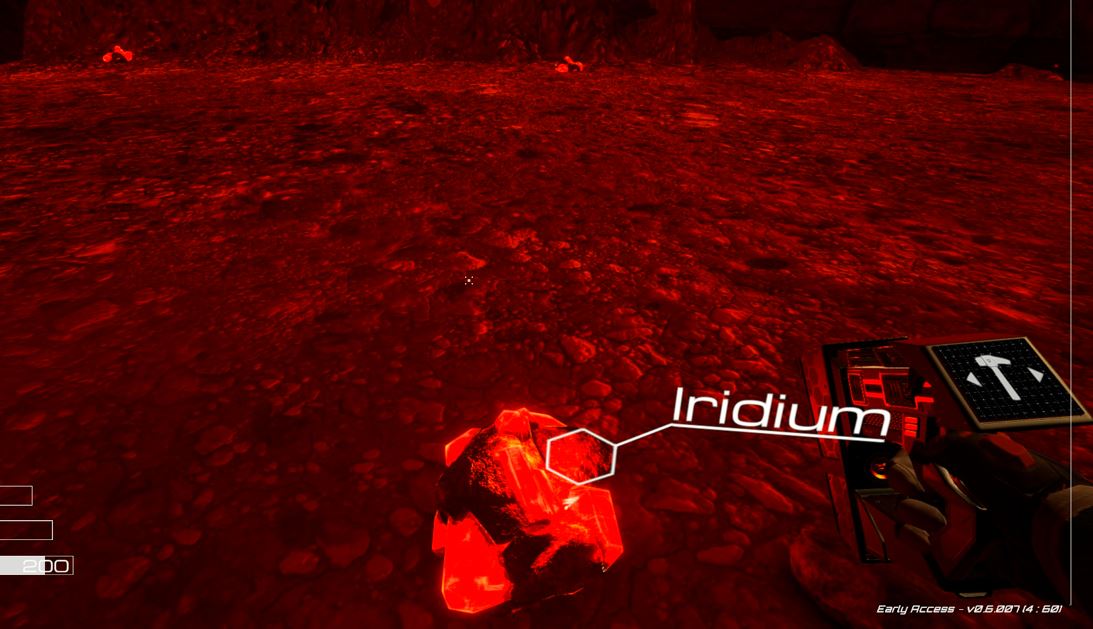
Meteors will happen from time to time. They come in many different types and depending upon the type, they will leave material deposits of that type. Some will leave > 1 type of material. If you look carefully at the color of the meteor, you will see each color gives certain types of minerals.
Meteors are always centered on the player within a few hundred yards to either side but they can hit you. In fact, if you get hit, your health will drop by about 1/2 and if you weren't at full health, its possible that you may die.
You will remain safe if you are inside a living quarters or in a natural cave.
Most natural meteors will leave material on the surface for a few minutes. You need to be pretty quick on searching & picking these up, particularly those minerals that are more rare.
Later on, when you build rockets, certain rocket types will generate meteors. These are covered in more detail on the rocket page.
Rockets
Launching rockets are an indispensable part of Planet Crafter and you will find that launching them will help you:
1) Get certain materials
2) Dramatically increase the rate of terraforming
3) Give you satellites which provide some mapping utility
You need to build the rocket launch facility first - it's VERY large and needs a large open area for it. Then go to the ladder and when it shows "climb", click on it and it will transport you to the top. On the top there is a console that you can click on and it will show you the types of rockets that are available and the materials required for each rocket and what (if any) meteors it will attract.
Once have the materials for the type of rocket you want, you can click on it and it will be magically built on the pad right there. Then you just press the red button and it will launch the rocket.
If the type of rocket you built and launched "attracts meteors", you will get about 8 meteors of that type and they will be centered on WHERE THE PLAYER IS STANDING. Each meteor will contain about 5 of the material strewn about the debris field for a total of about 40 for all 8 meteors. This is a significant amount of material (Iridium and Uranium) that you can gather.
The debris rocks and boulders will despawn over about 15 minutes and all minerals will despawn in about 40 minutes.
Since the meteors will impact in a rough area around the player, it is possible that meteors will land on top of any cliff, wreck, or water and be inaccessible to the player. Therefore it is suggested that you pick a place to launch these that has a wide open area around you to increase the likelihood that you can gather the majority of the minerals the meteor contains.
TIP: It is very hard to track where all 8 meteors hit. It is advised that you should do a wide sweep about 20 minutes after impact to find any minerals you may have missed.
Note: As of the writing of this guide, there is a weird bug that if any material lands in shallow water, it can not be picked up and will be lost.
TIP: You can go do other things for 15-20 minutes and come back and most of the debris field will be gone and you can more easily gather the minerals.
Secret TIP: As of the writing of this guide, if you launch multiple rockets - waiting for the meteors to hit the ground before launching another, the debris will despawn almost instantaneously for the first meteor.
Crafting Stations
Crafting stations are numerous. You have the one in your hand that is accessible via Q on your keyboard.
Many others exist in the game and typically they all have some sort of console you need to click on to build the things that it has.
As with all crafting, you must have the materials to craft in your personal backpack and what is created is placed back into your backpack.
When you build something new, approach it and click on the screen to see what is available for crafting. One specific thing that may not be immediately apparent is the Bio Lab. The Bio Lab is a large building and inside it there is a console for crafting.
Special Mineral Areas
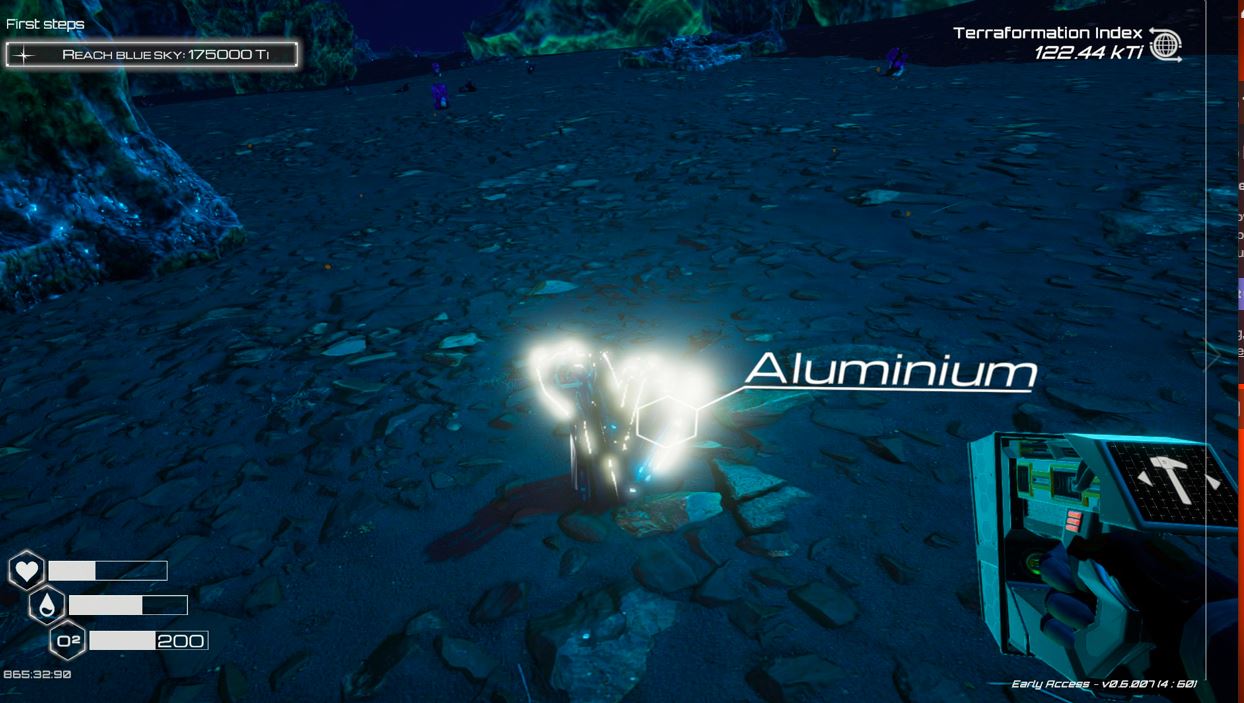
There are areas scattered across the map that are special in that they are dense with a certain material. If you place an ore extractor / mining rig in these areas, they will generally get more of that mineral than everything else. You can usually identify these areas by their unique color and a having a lot of the special material laying about on the ground.
[previewimg=29637192;sizeFull,floatLeft;Planet Crafter Aluminum.JPG][/previewimg][/previewim
This Concludes The Beginning Guide
Milestones within what I consider the "Beginning section"
1. Finding your first plant
2. Finding your first blue print
3. Getting a food grower operational
4. Getting a water condenser up & running
5. Getting to a T1 Ore Extractor
I hope you have a great time with this game. It is wonderful and a unique approach. I hope you have a lot of fun exploring the planet and finding all the cool things in store for you!
If you enjoyed this guide, give it a like! This way it will show up on the list and other people will find it!
Source: https://steamcommunity.com/sharedfiles/filedetails/?id=2885568978
More The Planet Crafter guilds
- All Guilds
- The Planet Crafter. .
- How to get any version of The Planet Crafter
- Web application to consult all crafting routes
- The Planet Crafter Guide 795
- MEILLEURS paramtres PC (Maximiser les FPS et la visibilit)
- v 1.406 29.12.24
- [] 1.405
- How to make your base look cool
- Starform Crate's
- Special Characters Allowed in Text