1. Getting Started

Modding Settlement Survival is not completely straight forward, but with a few hints it is pretty easy.
At the time of writing (2021-11-11), only basic xml editing is supported. That means that you can change values or text, but you can’t code in completely new game mechanics. Still, you can change a number of things doing that.
I'd recommend using Notepad++ to edit files. It will detect that you're dealing with xml files and for example mark comments accordingly, which you can ignore when editing the files.
To get started, go to your Settlement Survival folder which you can do by going to your game library, opening the properties of the game, and under "local files" click on "browse".
Now, you will need to make a new folder called “MyMods” in the following location:
Settlement Survival\Settlement Survival_Data\MyMods
Then, create a folder for your mod with the name of your mod so that the structure will be \MyMods\YourModName
Substituting “YourModName” with the actual name of your mod.
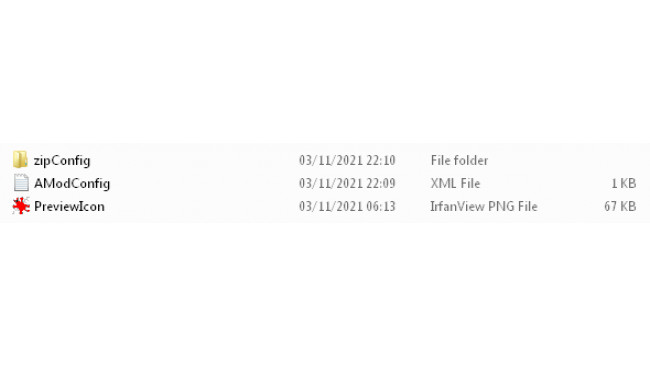
In that folder, your mod will need 3 basic components:
1. AModConfig.xml with some basic data about the mod, like title and description
2. PreviewIcon.png which will show up as the picture in the Steam Workshop
3. A “zipConfig” folder which will include the modified xml files which will actually be modifying the game
We'll go through these step by step, but here is what the contents of your MyMods\YourModName folder should look like in the end:
2. AModConfig.xml
The AModConfig.xml carries the metadata of the mod, so for example it's name.
Below is what the file needs to contain, where you just need to fill in the following parts yourself:
- The mod name / title
- Description
- Your name under auther (yes, it’s “auther”, not a typo in this guide)
- ChangeNote
You can either create an xml file with the content below (and your changes to it), or copy the file from another mod and then modify that file accordingly.
If you take an existing mod's file, make sure you delete the steam key in SteamKey_Str. It will automatically be filled in after you publish the mod to the Workshop with a unique ID and it needs to be empty for a new mod as you can see here:
<?xml version="1.0" encoding="utf-8"?> <UGCItemInfo xmlns:xsd="http://www.w3.org/2001/XMLSchema" xmlns:xsi="http://www.w3.org/2001/XMLSchema-instance"> <Title>A Mod Title</Title> <Des>Description of what your mod does</Des> <Auther>Your Name</Auther> <Lang>schinese</Lang> <ChangeNote>Changed a thing</ChangeNote> <SteamKey_Str></SteamKey_Str> </UGCItemInfo>
3. PreviewIcon.png
This step is pretty simple. You'll need a png file that will be displayed in the Workshop.
The official guide recommends a size of 200x120 pixels for the icon.
4 Editing The Game Files
Now that everything else is set up, we can get started with actually modifying the game files.
First, we'll need to find where we can find the entry that we want to modify.
Then, we can make an xml file with the changes we want to make.
If you struggle following what you need to do, in 4.3 there will be a full example file so you can see the end results of all the steps. Generally, it's also a good idea to look at other, existing mods and learn from how they work. And of course don't hesitate to ask questions in the comments either if something is unclear or you have any questions.
4.1 Finding The File / Entry
Sometimes it can be obvious which file an entry is in and where you need to make the changes. Often, it's not obvious because of the way the game stores information.
A lot of files make use of IDs instead of names. So for example, the building Reservoir has the building ID 2036.
To figure out the ID, you can search for the name in the lang.xml file. This file handles the names that end up getting actually displayed in the game, so if you search for "Reservoir" in this file, you will quickly find this entry:
<LangConfig> <ID>Building_Name_ID_2036</ID> <LangList> <Lang> <LangType>Chinese</LangType> <LangValue>蓄水池</LangValue> </Lang> <Lang> <LangType>English</LangType> <LangValue>Reservoir</LangValue> </Lang> ....
And at the top of that entry you can see the ID.
One thing to keep in mind is that sometimes buildings have the same name as a technology for example, so make sure you're looking at the ID for the right type of entry - building, item, technology etc.
The same ID can also be used in several different contexts so if you want to do the opposite and look up the name of something based on the ID, again make sure you look for the right type.
Once you have the ID, then you can use that to find the actual entry you want to change. So for example, if we wanted to modify some values of the Reservoir, we could now search in the building.xml file for 2036 and we would get to the Reservoir entry.
Sometimes it can be difficult to find what you are looking for, especially when you're not even sure which file something is located in. In that case, i'd recommend using a grep tool, which basically allows you to search for some text (like an ID you found in lang.xml) in not just one text file, but all the text files in a folder.
4.2 Editing An Entry
When you have found the file / entry, you can start actually modifying it. For that, first make a copy of the original file, and put it in the zipConfig folder in your mod folder (Settlement Survival\Settlement Survival_Data\MyMods\YourModName\zipConfig).
The files will have many individual entries. Every entry starts and ends with a tag, for example building entries start with <BuildingConfig> and end with </BuildingConfig>If you just look at how the first proper entry starts (ignoring comments), you'll know what to look for.
Then, delete all other entries apart from the one you want to edit (or if you're editing multiple buildings, keep all the ones you want to edit). Make sure to not delete the first 2 lines or the last line in the file, and only delete other entries.
For building.xml, that means making sure these lines don't get deleted:
<?xml version="1.0"?> <ArrayOfBuildingConfig xmlns:xsd="http://www.w3.org/2001/XMLSchema" xmlns:xsi="http://www.w3.org/2001/XMLSchema-instance">
And the last line:
</ArrayOfBuildingConfig>
In between there should only be the entry (or entries) you want to modify left.
Now you can make the changes you wanted. This is often pretty self explanatory, but there are also comments at the beginning of a file with some descriptions.
For example, if we wanted to change the output of the Reservoir, this would be the relevant part:
... <ConsumeAddAbilityList> <!--配方--> <ConsumeAddAbility> <ID>1</ID> <Name>Building_Name_22</Name> <Lable>Building_Lable_1031</Lable> <ProduceType> <GoodsList> <Goods> <ID>1001</ID> <UnEducated>24</UnEducated> <Educated>24</Educated> </Goods> </GoodsList> </ProduceType> </ConsumeAddAbility> </ConsumeAddAbilityList> ...
So both uneducated and educated citizens produce 24 water by default. (To find out what item an ID refers to, you can look it up in the lang.xml file similar to earlier. The item ID 1001 in this case refers to water, which is the only item the reservoir produces.)
Besides changing how much water gets produced, you could also change the ID to another item, or make it produce 2 different items.
4.3 Example File
All in all, if our goal was to double the output of the reservoir, we would end up with a building.xml file in the zipConfig folder of our mod that looks like this:
<?xml version="1.0"?> <ArrayOfBuildingConfig xmlns:xsd="http://www.w3.org/2001/XMLSchema" xmlns:xsi="http://www.w3.org/2001/XMLSchema-instance"> <BuildingConfig> <ID>2036</ID> <!--蓄水池--> <!--特性--> <ContentDes>Building_ContentDes_2036</ContentDes> <!--建筑升级槽位数量--> <RemouldSlot>2</RemouldSlot> <!--是否可以建造地板--> <CanFloor>false</CanFloor> <!--表现类型--> <ViewType>1</ViewType> <!--建筑类型--> <FuncType>3</FuncType> <!--建筑名称--> <Name>Building_Name_ID_2036</Name> <!--建筑描述--> <Des>Building_Des_ID_2036</Des> <!--建筑序号--> <Order>1</Order> <!--建筑图标--> <Icon>Icon_building_1011</Icon> <!--建造的类型--> <BuildType>1</BuildType> <!--建筑边界道路--> <Border> </Border> <!--建筑方向--> <BorderArrow>back</BorderArrow> <!--建造次数=配置值--> <AllConsumWorker>75</AllConsumWorker> <!--最大耐久度--> <MaxDurability>150</MaxDurability> <!--该建筑工作职业--> <WorkerCareer>22</WorkerCareer> <!--最大建造人数--> <MaxBuilder>2</MaxBuilder> <!--默认工作人数--> <DefaultWorkerNum>1</DefaultWorkerNum> <!--工作动作--> <DoAction>31</DoAction> <!--点击音效--> <ClickSound> <Path>Sound/Building/Build_Click8</Path> <Volumn>1</Volumn> </ClickSound> <!--建筑模型列表--> <ModelsList> <Models>Building/Building/Breservoir001</Models> </ModelsList> <!--建筑地面网格--> <FixedSize> <Condition> 4,4,4,4,4,4 4,4,4,4,4,4 7,7,7,7,7,7 7,7,7,7,7,7 1,1,1,1,1,1 1,1,1,1,1,1 1,1,1,1,1,1 </Condition> <Attach> 1,1,1,1,1,1 1,1,1,1,1,1 1,1,1,1,1,1 1,1,1,1,1,1 1,1,1,1,1,1 1,1,1,1,1,1 1,1,1,1,1,1 </Attach> </FixedSize> <!--建造建筑点相对坐标--> <BuildLocList> <!--建筑建造位置--> <BuildLoc> </BuildLoc> </BuildLocList> <!--整体消耗资源--> <AllConsumResList> <!--整体消耗资源--> <AllConsumRes> <ID>33007</ID> <Num>30</Num> </AllConsumRes> <AllConsumRes> <ID>33008</ID> <Num>30</Num> </AllConsumRes> <AllConsumRes> <ID>4001</ID> <Num>40</Num> </AllConsumRes> </AllConsumResList> <!--维修材料消耗--> <FixStaff> <ID>3001</ID> <Num>2</Num> </FixStaff> <!--消耗原材料获得能力--> <ConsumeAddAbilityList> <!--配方--> <ConsumeAddAbility> <ID>1</ID> <Name>Building_Name_22</Name> <Lable>Building_Lable_1031</Lable> <ProduceType> <GoodsList> <Goods> <ID>1001</ID> <UnEducated>48</UnEducated> <Educated>48</Educated> </Goods> </GoodsList> </ProduceType> </ConsumeAddAbility> </ConsumeAddAbilityList> <!--工作人数区间:额外控制界面上的开关按钮--> <WorkerRange> <Lower>1</Lower> <Upper>2</Upper> </WorkerRange> <!--工作人数区间--> <WorkRequired> <!--产出物品所需工作总次数--> <NeedWorkRequired>8</NeedWorkRequired> <!--受教育者工作次数--> <EducatedWork>2</EducatedWork> <!--未受教育工作次数--> <UnEducatedWork>2</UnEducatedWork> </WorkRequired> <!--一级物品上限--> <CollectItemMainTagLimit>1</CollectItemMainTagLimit> <!--建筑改造列表--> <RemouldList> <RemouldID>1</RemouldID> <RemouldID>7</RemouldID> </RemouldList> </BuildingConfig> </ArrayOfBuildingConfig>
Note how the whole BuildingConfig entry is included even though we just changed 2 numbers, for educated and uneducated workers, here:
... <Goods> <ID>1001</ID> <UnEducated>48</UnEducated> <Educated>48</Educated> </Goods> ...
Also note how the first 2 lines and the last lines of the file are preserved.
5. Combining Mods
Because the game only allows any entry to be modified by one mod, this means you may run into issues if you're using several mods that want to modify the same things. So for example, our mods Simple Meat and More Fancy Food both make changes to recipes with meat and so change the entries for buildings processing meat. Installed together, the game will give an error because they both want to edit the same entry.
To deal with that, you can make a new mod that combines the functionalities. Our mod Food Overhaul is exactly that, the changes from Simple Meat and More Fancy Food combined. Most changes of the mods don't conflict with each other so they can simply be added together, but for the mentioned recipe changes this mod then combines the change in item ID and amount.
6 Enabling, Testing And Publishing The Mod
After you made your changes, it's time to test if it worked!
To enable a mod, start up the game, go into the mod menu and tick the box at the right.
One important thing to keep in mind is that right now, the game does not automatically reload mod files after they were changed, even if you close the game!
So any time you make changes to your mod, you need to manually tell the game to reload the mod files, which you do by going into the mod menu, disabling and reenabling your mod.
Also, some changes won't be applied if you load a savegame. For example, if you change recipes that buildings are currently using, you will have to go through those buildings and reselect the recipes. In other cases rebuilding buildings may be necessary.
When you have tested your mod, confirmed it works and are ready to / want to publish it, all you need to do is to click the "publish" button in the mod menu in the game. That's it! You've made a mod for Settlement Survival!
7. Updating A Mod
If you want to make additional changes to your mod, or need to fix bugs, that's also pretty easy.
1. Make the changes to the mod files as usual
2. (optional) Update the change notes in the AModConfig.xml file for what you changed
3. Make sure the SteamKey_Str is now filled in with the ID of your mod
4. Press publish
If the mod ID is not in the file and you're not sure what it is: it's the number string at the end of the link to your mod, so for example:
steamcommunity.com/sharedfiles/filedetails/?id=2644570870The mod ID here would be 2644570870
8 Conclusion
A lot of the information in this guide was learned through trial and error. There may be other quirks that we have not mentioned here or are not aware of, but hopefully this was still helpful in showing the basics of how to make a mod for Settlement Survival.
Don't hesitate to ask for help if you run into any issues, although because our experiences are also mostly based on playing around, we may not have all the answers either. Happy modding!
Source: https://steamcommunity.com/sharedfiles/filedetails/?id=2651434001
More Settlement Survival guilds
- All Guilds
- Settlement Survival Guide
- (Console) V4
- Settlement Survival
- (Console) V2 (Commands List)
- Settlement Survival | lk Trke Rehber
- Supply Chain Guide
- How Many Workers Do You Need?
- Easter Island Perfect/Imperfect statues
- Guide & Tips for Easter Island
- How to Keep Citizens Warm in Settlement Survival