
Weapons


Before we start, I would like to mention that no weapon is the greatest. There will be situations where you should use different load-outs in order to push through alive. Keep in mind that this game does not have extra damage for headshots, so make sure you focus on the torso. This region is easier to follow, aim at, and shoot, increasing the chance of you sending your enemies to the Ferryman!
CutlassThe cutlass is one of the weapons you can't really play without. It provides great mobility and is often very useful to survive longer against more pirates. For every hit you take with it, you will cut off 25% of your opponents health.
Normal attack (25%) Sword Lunge (60%)
Left clicking will perform an attack, usually in a three-slash combo if you're not interrupted. Holding this button will perform a lunge attack, which takes ~0.5 seconds and cannot be blocked, dealing 60% damage. Keep in mind that you are vulnerable while performing it and after if your hit doesn't land on an opponent.
Holding right click will block any attacks coming from the front. This is the bread and butter of sword play, and you will have to master quick blocking to become good with this weapon.
When it comes to cosmetic variants, you will want to avoid skins that take up a lot of space on your screen and focus more on slim designs. In general, you will also want to avoid weapon skins that radiate light or other effects, as it will be easy for other players to spot you from farther away.
⠀⠀⠀⠀⠀⠀⠀⠀⠀⠀⠀⠀⠀⠀⠀⠀
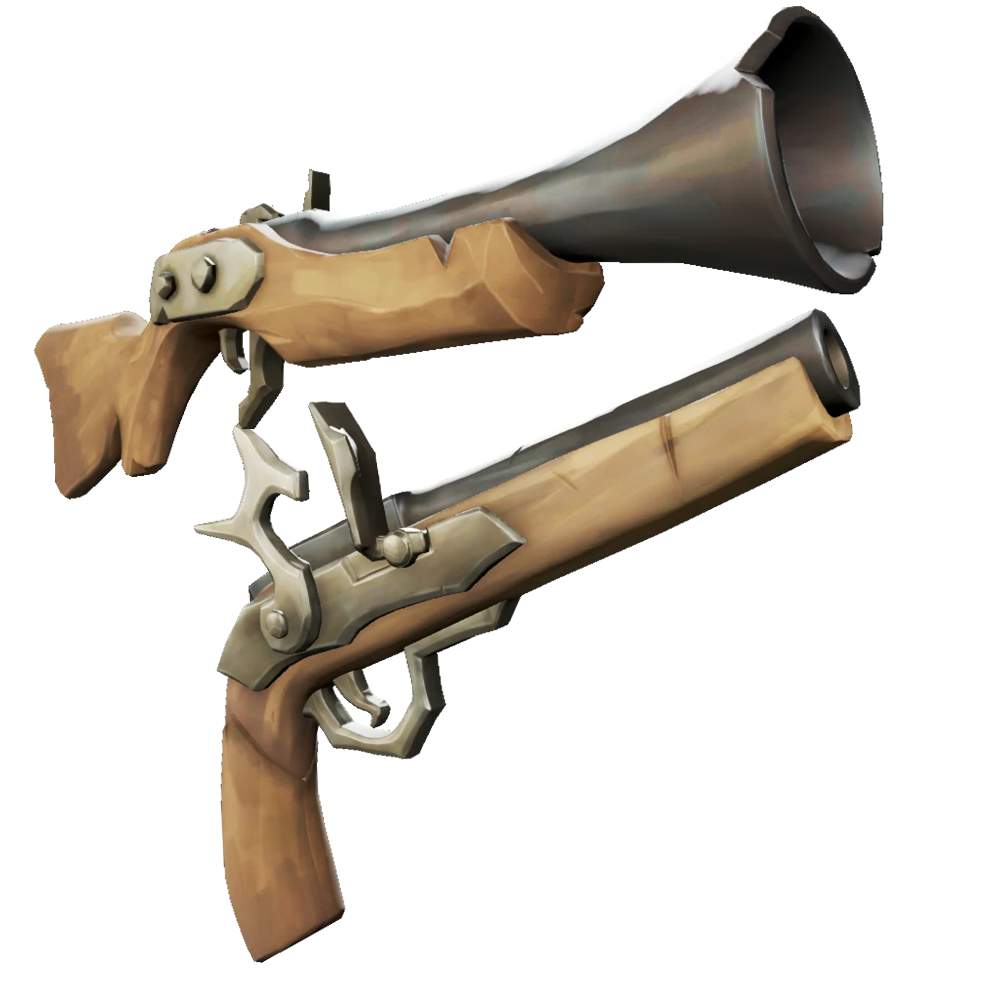
Flintlock The flintlock is a great weapon for both close range and long range. It is a good balance between the Blunderbuss and the Eye of Reach, allowing you to hip fire close opponents and snipe pirates that are trying to scurry away. For every landed shot, this weapon deals 55% of the enemy's health.
Normal attack (55%)
For this weapon, will shoot a bullet, and will aim. Choosing a good cosmetic for this weapon will improve your aim, as the aim sights on various cosmetics point at very different locations while shooting. I personally like the Sea Dog pistols and the Mercenary one, since the sights on these skins indicate the landing location with a high precision.
Blunderbuss The blunderbuss will be your main weapon if you want to get rid of boarders. It is a short ranged weapon that will shoot out 10 pellets, each dealing 10% damage. Make sure you don't blunder snipe, a.k.a. shoot people when they are more than 3m away from you, as you will waste your bullets.
One pellet (10%) Point-blank shot (10 pellets, 100%)
If used correctly, this weapon will instantly kill your opponent. For this, you must make sure you aim a bit lower (at the stomach region) to ensure that all pellets land on your target.To facilitate this, you should use cosmetic that doesn't completely block your aim sight:
Eye of Reach The Eye of Reach is very good at killing potential boarders (while still in the water) and shooting unknowing pirates if you miss a board. For every landed shot, this gun will shave off 70% of your enemy's health.
Normal attack (70%)
While this weapon is long-ranged, it can still be used during close-quarter combat if you can master quick scoping. Make sure you don't try to no-scope it, as the bullet will not maintain the direction indicated by the center of your screen and will go off randomly to the side.
For cosmetics, similarly to the ones described above, try to use one that does not emanate light and does not have a coloured scope (e.g., the Cronch Eye of Reach and Soulflame Eye of Reach). I like to use the Cultured Aristocrat skin, but any similar ones will work:
Blunderbombs These are always useful to carry, regardless of the combat phase you are in. The Blunderbombs can be used to stop other pirates from hurling cannonballs at you by shooting them at their ship, but also to get rid of pesky boarders on your stairs. In close-quarter combat, the blunderbombs can be very useful at keeping sword lords away if you have run out of ammo.
If you can land a direct hit on the enemy pirate, you will be able to blow away 50% of their health. If you miss, but it still lands in their vicinity, the blunderbombs will deal 15% splash damage.
Direct hit (50%) Splash damage (15%)
Weapon Loadouts


When it comes to weapon loadouts, you should aim to have at least one type of weapon for each range. The list below shows the top loadouts that are currently available in the game, which is built mainly from my own experience and popularity with other pirates. The ranking does not denote their power, but rather a mix between ease of use, damage output and mobility.
Overall, you will be changing frequently between them, depending on the situation at hand. If you plan to perform a deckshot and start blasting everyone on the enemy ship, I would recommend taking the Blunderbuss and the Eye of Reach. If you plan to fight skellies at a fort, a sword is preferred alongside another weapon. Every loadout is situational and you shouldn't swear by one alone.
1. Blunderbuss and Eye of Reach The Blunderbuss is very good for short-range combat, while the Eye of Reach can help you take down pirates that are running away. You have to be very careful with this, as a sword lord can always spam you and stop you from actually aiming and shooting.
With this loadout, you will always have to be on the move and you should aim to stay on top of the deck. Since you are using 2 guns, you should also pay attention to the amount of bullets you have left and reload whenever possible. This is one of the hardest load outs to use, so practice a lot before maining it.
2. Cutlass and Eye of Reach This load out maximizes mobility and long-range defense. It is very good for boarding, as you can sword dash to an enemy ship and stay on top-deck to shoot and slash.
While handling boarders, you will have to either use Blunderbombs or perform a sword lunge to make sure that the climbing pirate falls off. You can also shoot the pirate on the ladder using the Eye of Reach, and finish him/her off with your sword if s/he manages to climb up.
3. Cutlass and Flintlock This load out is also very versatile, as you can perform sword dashes and hip-fire enemies. This load-out is preferred if you are on a sloop, as you can focus more on moving around and shooting if you are boarded.
Overall, this combo has a lower damage output, when compared to the Cutlass and the Eye of Reach, but is easier to handle if you are a beginner.
4. Flintlock and Eye of Reach This loadout, in my opinion, is one of the hardest to pull off. I am not yet skilled enough to use it properly, as it requires you to have good aim and reflexes. With the Flintlock and the Eye of Reach, you should always keep your distance from other pirates to ensure you aren't one blundered or sword spammed.
If you have great aim and you master the techniques described in "Advanced Tips", you will often 2-tap an enemy pirate in a very short period of time.
5. Flintlock and Blunderbuss This one is not a bad load out, but it pales in comparison to the other ones described above. Similarly to the other ones that do not use a sword, you lack the extra mobility, but you also have a lower long-range defense. The Flintlock is good for mid-range combat, but is not as powerful as the Eye of Reach if you need to take a long shot.
This is potentially good against newer players, as they often can't properly land long range hits, which gives you the opportunity to get close and one-shot them. The Flintlock has a faster reload rate compared to the Eye of Reach, so you could potentially shoot faster than your opponent. Overall, I would recommend this if you want to defend your Sloop, as the movement area is limited.
6. Cutlass and Blunderbuss This is not a good load-out to use if you plan to PvP. Firstly, using a Cutlass and a Blunderbuss only makes you effective at close-range combat. If you ever fall into water, and another pirate jumps off to finish you with a Flintlock/Eye of Reach, you will not be able to defend.
This loadout is mainly useful if you have to kill bosses and skeletons, as the damage output of the blunderbuss is very high. Furthermore, sword spamming is free, so you can focus on chopping off as many skeletons as you can see!
Movement
As mentioned before, always be on the move. Since hit registration is a pretty big issue in Sea of Thieves, being light on your feet could potentially save you many times. Therefore, most of the time, you will want to be staying on the top deck, regardless of the loadout you're using. Keep in mind that it is not necessary to kill your enemy or anchor their ship (which can be hard against an experienced crew), but rather to keep them preoccupied with you while your crew rains cannons on them. Try as much as possible to make your movement erratic (e.g., move left and right often, making a somewhat zig-zag pattern), as it will make it harder for other pirates to predict your next step and shoot you.
If playing alone, you will mostly want to stay on your ship and deal as much damage as possible, until it is clear to board (e.g., they are second deck and everyone keeps bailing). You can also increase your chance to board by using cursed cannon balls, either by putting them to sleep, making them dance, etc. Nevertheless, you should first make sure your ship is safe before commencing a board.
Sloop
When boarding, you will want to quickly jump either to the left or right. If using a Cutlass, you can also try blocking and dashing using M2, which can be useful to dodge a pirate waiting with their Blunderbuss drawn. If you cannot go left/right to anchor them, you will want to go in the front of the Sloop and use the mast as cover from your enemy's shots. If they come to sword you, you can always jump in the water and attempt a second board. Once you anchor the enemy ship, you should attempt to stay on the back region to have better visibility over the ship.
When defending from a board, you will want to stay mainly on the back region to watch for boarders. Once you hear the ladder, position yourself close to it and be ready to deliver a nice plate of pellets to the unsuspecting pirate. If not using a Blunderbuss, you can try to sword lunge at them once they get up or use Blunderbombs to drop them back into the sea.
You will need to reload once in a while, so try not to get caught by multiple enemies on the bottom deck. Try to hide behind the map area and hurl as many blunderbombs as you can if the enemy is far enough.
Finally, one fun thing you can do on the sloop is grabbing the ladder from the inside. If you go very close to the windows in the boat, you will see a prompt to grab the ladder. This might be hard to do if you're under pressure, but it might save your hide one day!
Brigantine
Similarly to the Sloop, you'll want to dodge any incoming shots while boarding. Once you're on, get to the front of the ship and try to anchor them. This boat is flat, when compared to the Sloop and Galleon, so it will be more easy to get shot from behind. Make use of the masts to dodge and try to bring an Eye of Reach with you to land long shots from the front. If you manage to wipe out their crew, try to wait for them to respawn behind the wheel.
Again, you will have to be more careful on this type of ship, as shots are a bit easier to land. Similarly, a pirate with a Cutlass would have an easier time chasing you if you were double gunning. Be light on your feet and don't hesitate to jump back in the water to keep pressure on them.
Galleon
The Galleon is one of the most fun ship types to PvP on. There are plenty of masts to hide behind, and the elevated top deck will allow you to dodge your enemies' shots. Regardless if you anchor them or not, try to stay on the top deck, behind the wheel. This will give you an easy time to jump off behind the Captain's quarters and go around the back of the boat to surprise your enemies.
Your main target will be to make your enemies chase you while you run around dodging their shots. From my experience, a Blunderbuss and Eye of Reach combo will maximize your efficiency on this boat, as you can snipe any pirate that comes up from the bottom deck, and you can one-shot any enemy that tries to raise anchor.
Finally, never be afraid to jump back in the water if you feel like you are about to be skewered. By doing this, you will keep the enemy on their feet, which can demoralize them during a fight. Attempt another board and get ready to dodge blunderbuss shots!
Advanced Tips


Cutlass - Cancelling the Lunge Attack
Hold ,
Catch items around to stop the lunge. If you know you're going to miss your sword lunge, this will allow you to continue fighting without being tired for 1-2 seconds.
Cutlass - Block Leap
, / / / +
If you intend to main the cutlass, hopping around should become second nature to you. This move allows you to dodge pirates that try to shoot you, as well as surprise cutlass wielding enemies. You can use this, as well as jumping, to get behind pirates to chop them up.
Cutlass - Leap Lunge
, hold , wait to dash, right after
This one is not really an advanced tip, but I will mention it for newer players. These sword dashes allow you to jump farther and are often very useful to board a boat that you have harpooned.
Make sure you don't dash while a ship is nosing you. I have done this when I was new to the game and it made me miss many boards.
Cutlass - Wide Area Attack
, ,
Moving your mouse from left to right while slashing will allow you to hit a wider area, which can be useful if you're surrounded.
Quick Scoping
,
By right-clicking twice, you will be able to bypass some of the frames in the scoping animation.
Quick Reloading
, ,
To bypass a small part of the reloading animation, you can quickly press twice after shooting. This will give you a few extra milliseconds to shoot, which could make or break a fight you're having.
Double Gunning - Quick Swapping
, or / , , ,,
This is a tricky one. Right after shooting your weapon, you will want to quickly change your weapon, move forward while sprinting, aim and shoot. If you did it correctly, you should not have any delay between changing your weapon and shooting. It is tricky because recent server issues will make it harder to land this trick. If you can't always get it right, don't despair and wait for server fixes.
Many players scroll up to change weapons, but I have also used / before. I believe that using will also make it harder for you to shoot early, so try getting comfortable with that one first. Regardless, experiment yourself and see which one is more suited for you.
If you can master this step, you can pair it up with Quick Scoping and Quick Reloading to become a sweaty double gunner. People will hate you and you will sometimes be called a hacker.
Ladder Shooting
Repeatedly press +
While boarding a ship, you might encounter pirates waiting to feed you some lead. If you were lucky enough to bring a Blunderbuss, you can try to quickly drop from the ladder and shoot the enemy crew, after which you quickly grab the ladder again. The Blunderbuss will at best kill the defendant, and at worst it would send them flying back. You can also do this with the Flintlock, but you won't have any knockback effect, nor a chance to insta-kill. The Eye of Reach is not really reliable for no-scopes, so I do not recommend trying this trick with this weapon (unless you mastered quickscoping).
Shooting from the ladder works very well on a Galleon, but on the other ships is not really useful. This is due to the incline of the ladder on the Galleon, while the other ships have an almost vertical ladder. Performing this trick on the Sloop/Brigantine will most likely lead to you falling off during your boarding attempt.
Training

If you are new to this game, you will definitely struggle with some of the techniques described above. To make it easier to learn these, you can practice the techniques on the bell on your ship. If you hear a *ding*, then that means that your shot landed at the correct spot. Similarly, you can create a private session with your target ship type to practice your movement around it.
Start slowly with each technique and do it step by step until you get it right. Practice pressing the keys slowly, and then start slowly building up the speed. Trying this for 10-20 minutes should already bring you some improvement, but don't rush things!
If you have aiming issues, you can always try some software that allows you to practice your aim. You will first want to identify a sensitivity that you are comfortable with in Sea of Thieves, and then convert that to the one used by your software. Sensitivity converters for Sea of Thieves can be easily found by doing a search with your favourite search engine.
Changelog
This guide is still a work in progress. If you see that something was patched, is missing or could be better in the guide, please let me know!
18 May - Created
21 May - Introduced videos detailing advanced techniques and movement on ships.
Source: https://steamcommunity.com/sharedfiles/filedetails/?id=2809572451
More Sea of Thieves guilds
- All Guilds
- Jak napi si dojebanego rumu?
- How to jump: an in-depth guide
- Sea of Thieves
- How to complete the Skull of Sirens Song quest
- How to Open Sea of Thieves
- A Solo Guide to Sea of Thieves
- Sea of Thieves Guide 1845
- Sea of Thieves Guide 1847
- All achievements for fishing in Sea of Thieves
- Legend of the Veil Guide