How To Create Safe Sections Between Work Areas.

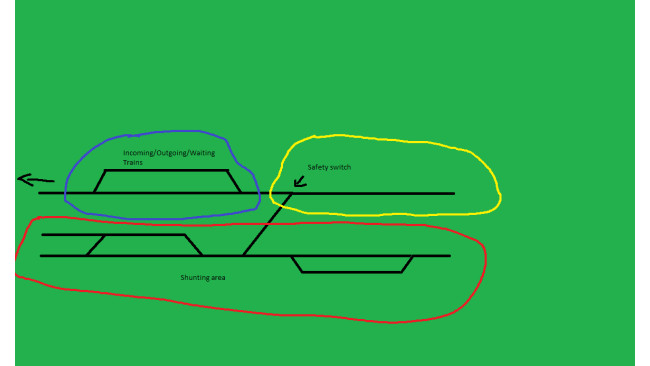
As you can see in the picture i created 3 different zones. The red zone is for shunting and where the station is (e.g. the sawmill). The blue area is where all trains arrive/depart or wait. A safety buffer is created by the yellow section which is used to reach the shunting area. In order to reach the red zone from the blue zone you will have to move into the yellow zone and use a switch. The track in the yellow section leads to nowhere and must be at least as long as the tracks in the blue area so you can pull out all the wagons at once. The point of the safety switch is, as long as you are in the red zone it will always face towards the red area and all following trains from the blue area will derail unless they will use the switch again. At that point they will have to ask themselves if the following track is without train movement. And from the perspective of the host it´s less complicated to rerail only a couple of wagons than two messed up trains.
Hope this will help you a little in fiddling with your track layout.
Source: https://steamcommunity.com/sharedfiles/filedetails/?id=2629649733
More RAILROADS Online! guilds
- All Guilds
- Long truss bridge guide
- Stage your new cars quicker: Hump Yard Physics
- Aurora falls map with pre placed industry heights
- Load calculator for the grades.
- Mouse sensitivity adjustment for the game
- RRO Calculator - Wiki Update
- plantation cars storage capacity
- Signs, Buildings and Prop lists
- Bien dmarrer - et plus encore...
- WESTLAND OPERATIONS CREW BOOK