
Guide Info
The achievements aren't particularly hard, but some are luck-based and a few are very grindy and might require a lot of time investment. Most of them can be done in bot modes except Focused Momentum and Fickle Fortune. This is my second guide so if you have any suggestions on how I could improve feel free to comment.
The guide is split into six sections: Cultivation Achievements, Location Kills Achievements, Weapon Achievements, Cave Achievements and Miscellaneous Achievements.
Cultivation Achievements


✦•········································································•✦•········································································•✦
As Fate Wills
Raise a hero's Cultivation to 'The Chosen One'.
There are seven cultivation levels for each Hero in Naraka: Step into the Realm (default), Greater Understanding, Eminent Being, Mortal Legend, Yin Yang Mastery, Deific Presence and The Chosen One. You have to complete three quests relating to in-game activities to advance to the next level. Such activities can range from dealing damage with certain weapons, using the hero's skills, completing contracts, etc.
✦•········································································•✦•········································································•✦
Jack of All Trades
Complete 20 Heroic Tales quests.
For this achievement, you have to complete 20 'Heroic Tales' quests. These refer to increasing the cultivation level of a hero. Each cultivation level adds a certain value towards the completion of this achievement. The values are as so:
Greater Understanding = 1 Heroic Tales Quest
Mortal Legend = 2 Heroic Tales Quests
Deific Presence = 3 Heroic Tales Quests
The Chosen One = 4 Heroic Tales Quests
Since completing the 'As Fate Wills' achievement mentioned above will already count as 4 Heroic Tales towards the required 20, you will only need to complete another 16 to obtain the achievement.
✦•········································································•✦•········································································•✦
Weapon Achievements


✦•········································································•✦•········································································•✦
Close Combat
Raise a melee weapon to Lv. 25.
This is where the grind begins. It requires a LOT of weapon XP to get to Level 25 of any weapon. It will likely take a very long time. The best way to do this is the Bloodbath game mode. I recommend getting all other achievements, leaving this and Assured Accuracy (Level 25 of any ranged weapon) for the last. In Bloodbath you have access to all weapons and all of them are at purple rarity. Just pick the melee and ranged weapon you are most proficient in and go for it. You can either idle or actively participate. I recommend active participation as you get more XP for kills.
✦•········································································•✦•········································································•✦
Accuracy Assured
Raise a ranged weapon to Lv. 25.
Refer to the details given in the Close Combat achievement mentioned above.
✦•········································································•✦•········································································•✦
Sure Shot
Unlock Perfect Aim achievement in 3 matches.
To unlock the 'Perfect Aim' in-game achievement, you require 5 headshots in a single match. You need to do this thrice in three separate matches. The easiest weapon to do this with is the Repeating Crossbow, due to the sheer volume of ammo it has. Just aim at the general vicinity of the enemy heads and you should unlock this achievement very easily. It is possible to do this with any other ranged weapon, but I do not recommend it unless you have godly aim.
✦•········································································•✦•········································································•✦
Brawler
Defeat an enemy with your bare fists.
Easily accomplished in bot mode games. Just get the bot's HP as low as you can without killing it, then unequip your weapon and finish the job bare handed.
✦•········································································•✦•········································································•✦
Super Weaponry
Defeat an enemy with a Ballista.
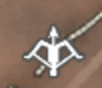
Pretty straightforward. Ballistas are giant crossbows you can mount and shoot. They can be moved around a small route and reloaded with the same Weapon Repair Kits used on normal weapons.
> This is what their icon looks like on the map.
There is one near Shadowjade Mine that's on the ground instead of on a tower like all other ballistas. It can also be moved around a fair bit, making it very suitable for getting kills.
✦•········································································•✦•········································································•✦
Mortal Coil
Defeat an enemy with the waterwheel.
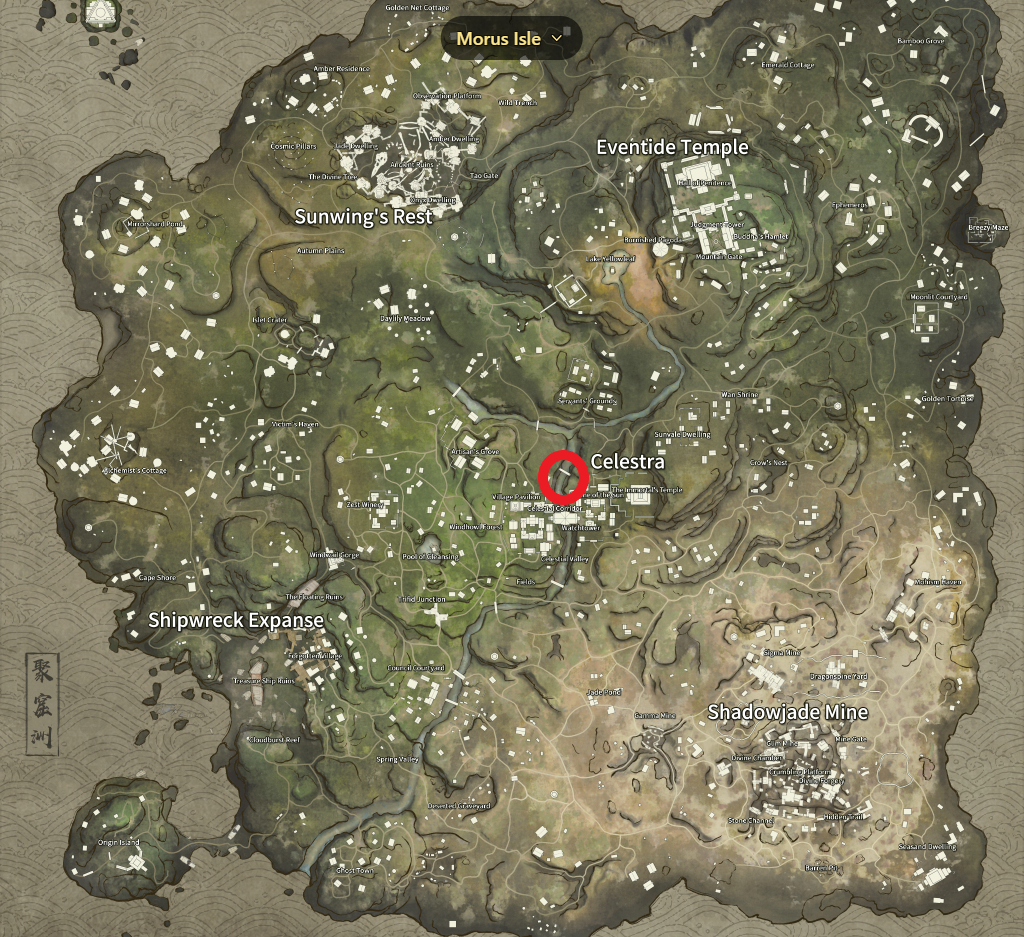
There is only one waterwheel located on the Morus Isle Map, in Celestra.
To use it, just break the boxes at the bottom of the giant wheel with your weapon and it will roll all around the gorge. Timing this can be tricky. I recommend going into a bot match, baiting a bot here, getting it down to low hp and making sure it's positioned right, then unleashing the wheel for the kill.
✦•········································································•✦•········································································•✦
Drunken Fire
Deal 5,000 damage with Flamebringers.
You can obtain Flamebringers from the Morus' Blessing chests, which spawn in both Bloodbath and Survival game modes. They come in either purple or yellow rarities. These are basically flamethrowers and are extremely potent. This achievement should be easily obtained once you get one in your hands.
✦•········································································•✦•········································································•✦
Yi's Instrument
Deal 5,000 damage with Swarms.
You can obtain Swarms from the Morus' Blessing chests, which spawn in both Bloodbath and Survival game modes. They come in either purple or yellow rarities. These are trickier to use than Flamebringers. They are basically machine guns with a large charge-up time. The best way to use these is to charge them up beforehand and lie in ambush for an unsuspecting victim.
✦•········································································•✦•········································································•✦
Spirit Spikes
Deal 5,000 damage with Bloodrippers.
You can obtain Bloodrippers from the Morus' Blessing chests, which spawn in both Bloodbath and Survival game modes. These are rarer to find even within these chests unlike Flamebringers and Swarms found in the same chests. It will require some searching to get your hands on it. Bloodrippers are basically giant chainsaws and are quite fun to use. They have a small charge up duration then you can run into your enemies with purple focus (can only be countered by blue focus, i.e. charged weapon attacks).
✦•········································································•✦•········································································•✦
Location Kills Achievements


Naraka Bladepoint's Survival mode has two maps: Morus Isle and Holoroth. All the achievements here are related to Morus Isle. None of the achievements in this section can be completed on the Holoroth Map.
✦•········································································•✦•········································································•✦
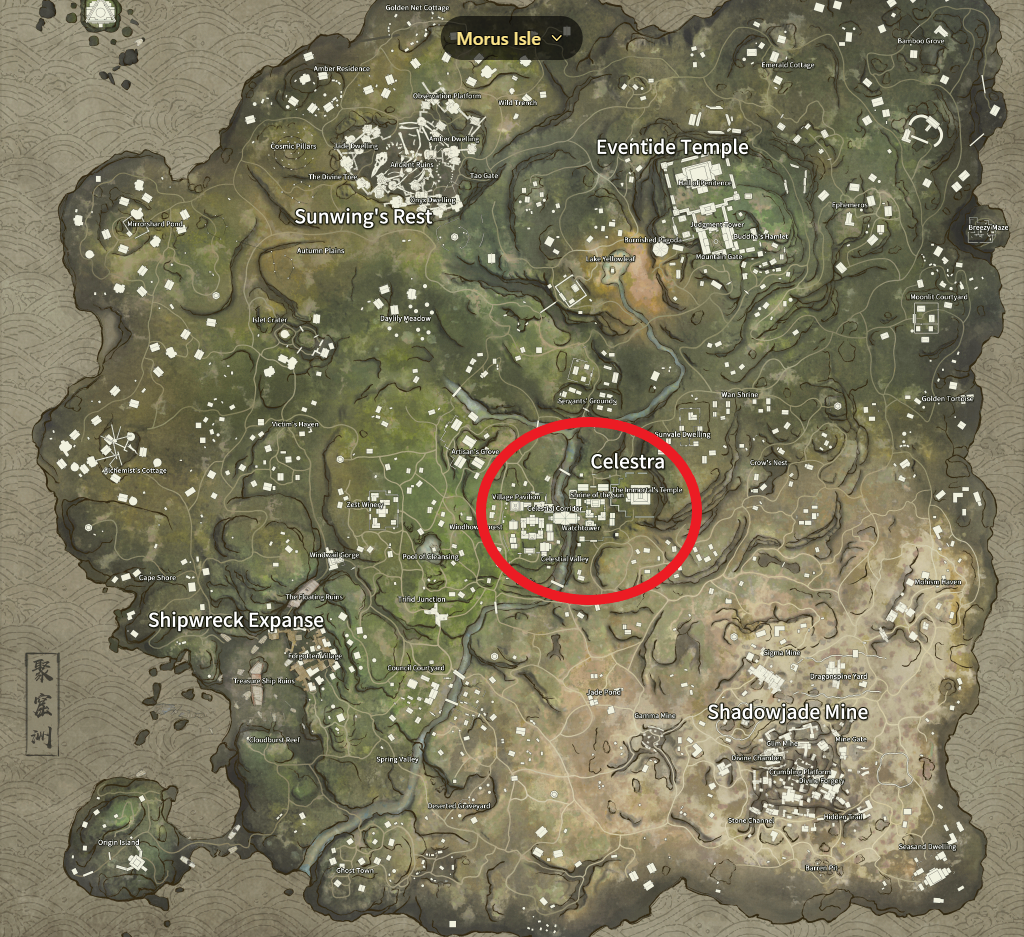
Divine Lord
In a single game, defeat 5 enemies in Celestra.
Kill 5 enemies here in one match. P.S. - These are not the actual borders of the entire area, just a general location.
✦•········································································•✦•········································································•✦
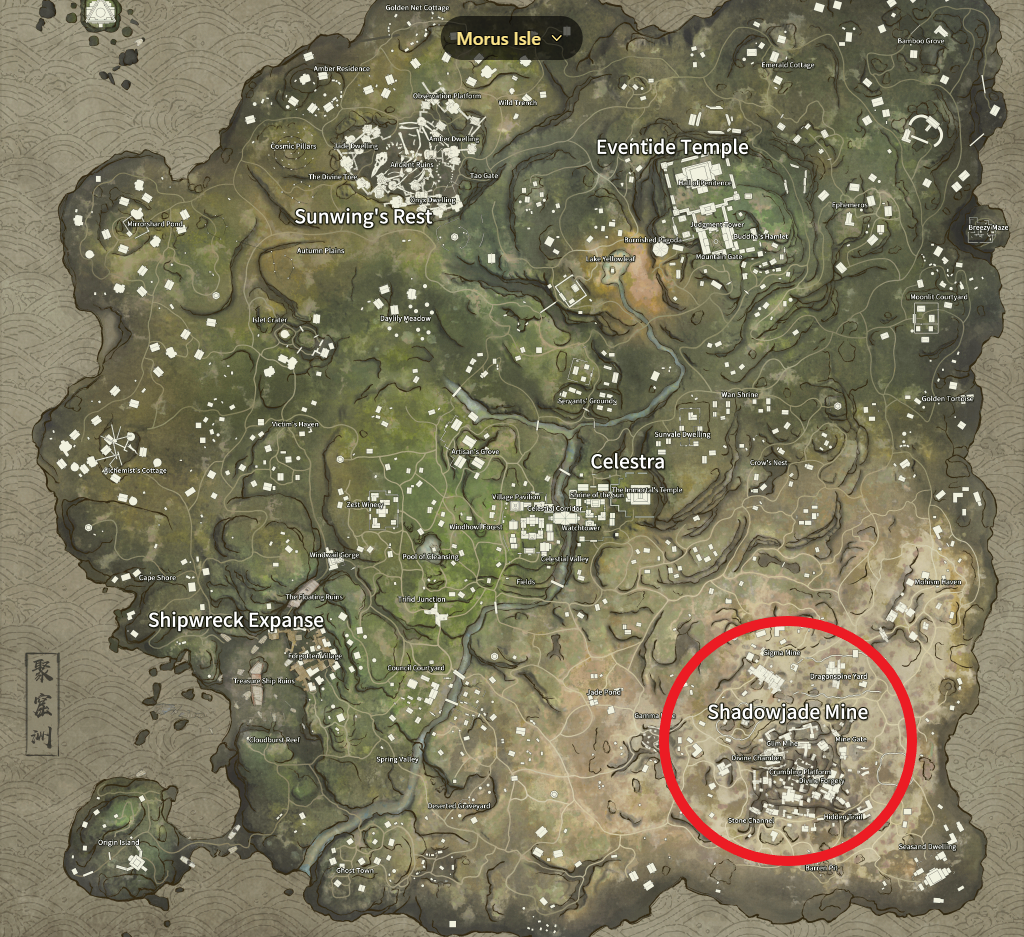
Temple Warrior
In a single game, defeat 5 enemies in Shadowjade Mine.
Kill 5 enemies here in one match. P.S. - These are not the actual borders of the entire area, just a general location.
✦•········································································•✦•········································································•✦
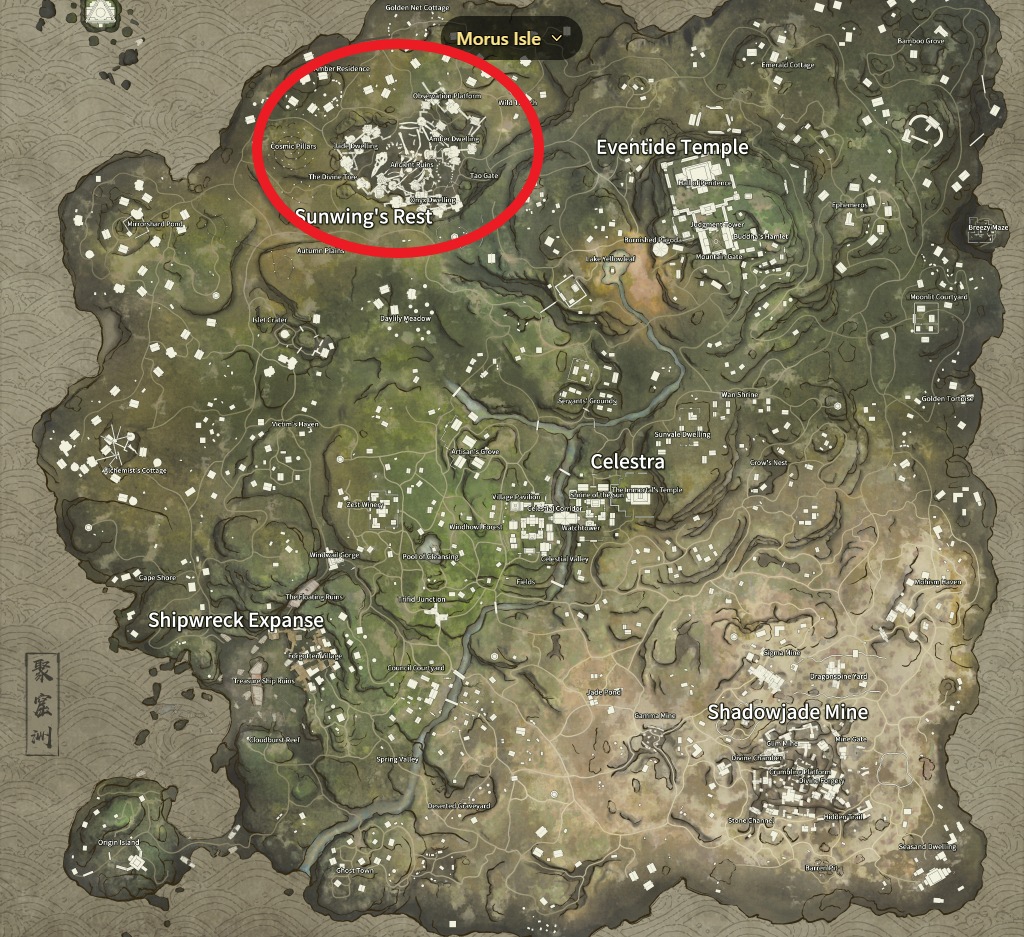
Sunwing's Messenger
In a single game, defeat 5 enemies in Sunwing's Rest.
Kill 5 enemies here in one match. P.S. - These are not the actual borders of the entire area, just a general location.
✦•········································································•✦•········································································•✦
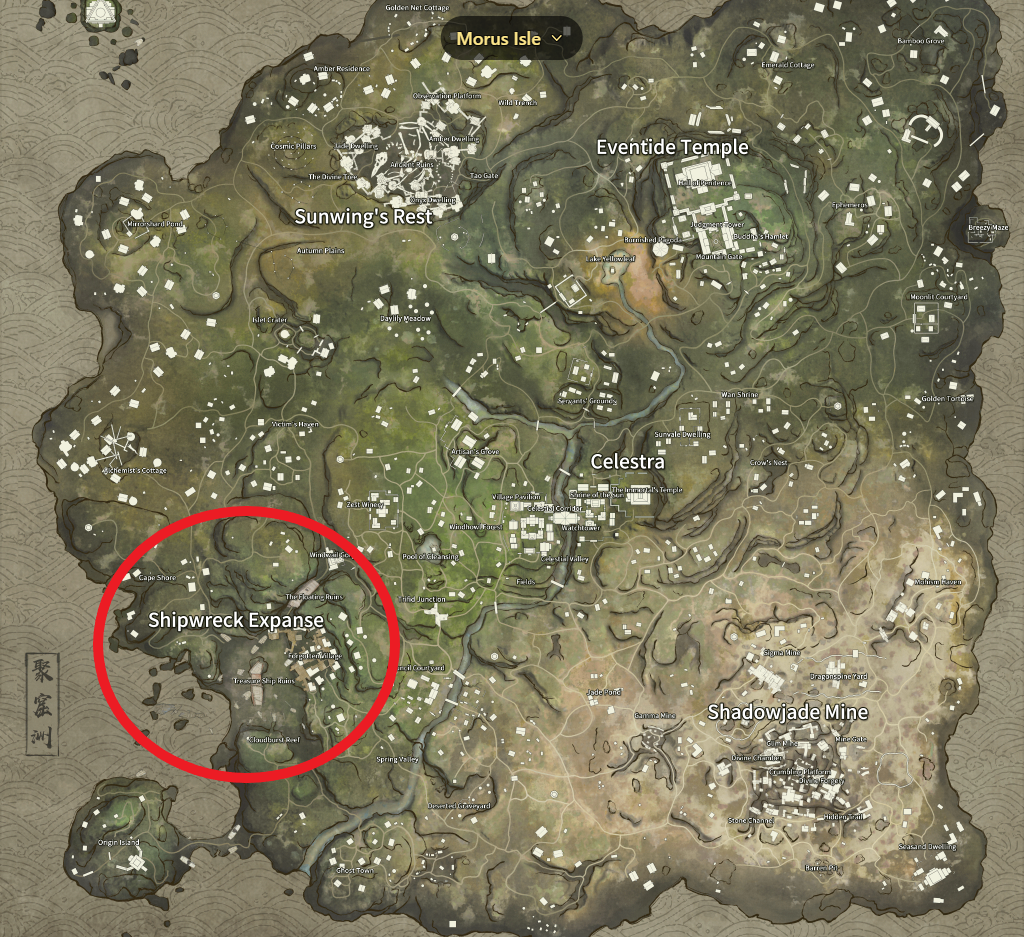
Captain's Bloodlust
In a single game, defeat 5 enemies in Shipwreck Expanse.
Kill 5 enemies here in one match. P.S. - These are not the actual borders of the entire area, just a general location.
✦•········································································•✦•········································································•✦
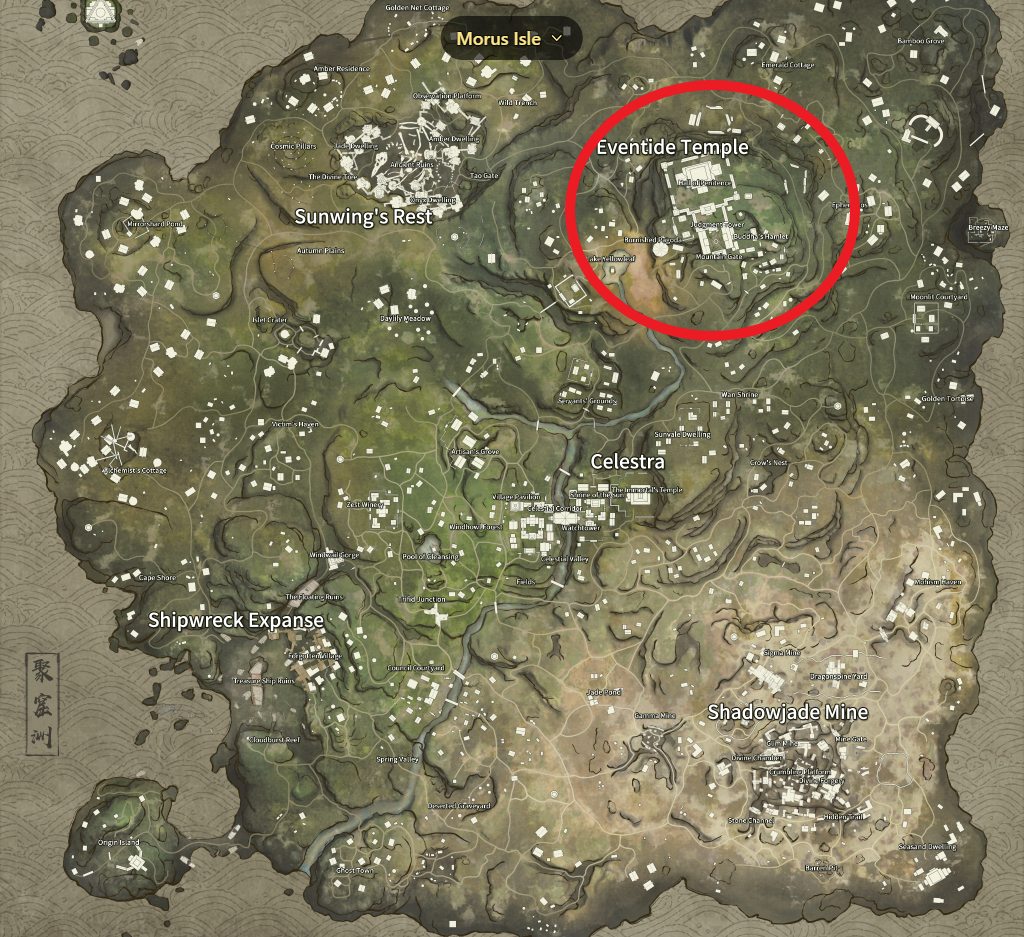
Fight Fire With Fire
In a single game, defeat 5 enemies in Eventide Temple.
Kill 5 enemies here in one match. P.S. - These are not the actual borders of the entire area, just a general location.
✦•········································································•✦•········································································•✦
Stashes Achievements


Stashes are also occasionally referred to as caves in-game. These achievements are largely luck based but are not particularly rare. You can easily farm bot matches to find them. I will explain how to access them below.
✦•········································································•✦•········································································•✦
What Lies Within
Open a Stash.
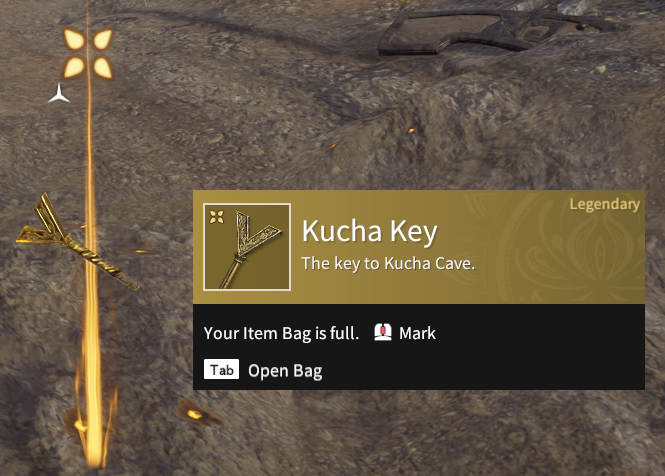
There are a few Stashes containing Souljades, coins and occasionally items and weapons in the map. Stashes need a key to be opened. Keys can be obtained in two ways: either randomly obtained from looting or by killing a Golden Toad, which is also randomly spawned. I will explain how to find a Golden Toad below. Finding keys are uncommon but not especially rare. Once you obtain a key, simply go to the marked location on your map and open it.
> This is what a key looks like.
> This is what the cave/stash icon looks like on the map. This can only be seen after obtaining the corresponding key.
By the time you finish the rest of the achievements, you will have naturally obtained this achievement by normal play. If you still do not have it or want to get it out of the way first, you can farm bot matches for the achievement.
✦•········································································•✦•········································································•✦
Miracle Encounter
Kill a Golden Toad.
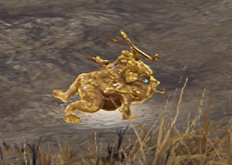
Golden Toads are one of the two sources of keys used to open stashes. They are randomly spawned. If one is nearby, you can use the audio cues of loud croaking and coins clinking to track them down. They will be jumping back and forth and will disappear if alerted. The best way to kill them is with a ranged weapon of your choice. If they disappear, just move away for a bit and they will reappear eventually.
> This is what they look like.
✦•········································································•✦•········································································•✦
Give Thanks
Pray to a statue in a Stash.
Stashes have a small chance of having a statue inside of them. Interacting with the statue will activate a global effect (i.e. applies to all players). These statues are large and not easily missed. If you don't see anything resembling a large interactable statue inside a stash, it's not there.
✦•········································································•✦•········································································•✦
Fickle Fortune
Feel the effects of a statue another player's prayed to.
Pretty straightforward. You don't have to do anything special to 'feel the effects', it will just be automatically applied to all players once someone activates it. Activating a statue on your own will obviously not trigger the achievement, but it is important to note that your teammate activating it will trigger the achievement. It is best farmed with another player in bot mode duos or trios.
✦•········································································•✦•········································································•✦
Miscellaneous Achievements


✦•········································································•✦•········································································•✦
And So It Begins
Play a game of The Survival.
'The Survival' is the standard battle royale mode of the game. You can play either solos, duos or trios. Bot matches WILL unlock this achievement as well.
✦•········································································•✦•········································································•✦
Mask of Immortality
Attain 'Undying Glory'.
Basically, win a match. Bot matches count too.
✦•········································································•✦•········································································•✦
Apogee
Attain 'Undying Glory' 20 times.
Basically, win 20 matches. Bot matches count too.
✦•········································································•✦•········································································•✦
First Blood
Get the first kill.
Pretty straightforward once again, just get the first kill of the match. Bot matches count too. Choosing a populated spawn location in a bot match should get you this achievement very easily. It should also unlock the Fearful Aura achievement mentioned below.
✦•········································································•✦•········································································•✦
Fearful Aura
Become the Kill Leader (the player with the most kills in the game so far).
The achievement description tells you everything you need to know. Unlocking the First Blood achievement mentioned above should unlock this too.
✦•········································································•✦•········································································•✦
Unbreakable
Perform 2 Counters in 60 seconds.
There are two ways to counter/parry in this game, composite parry and quick parry. Composite parry is activated by pressing LMB + RMB at the same time. It's delayed and rather slow, so I don't recommend trying to use it. Plus, the unfortunate way of activating it leads to many accidental parries while trying to attack, so I recommend just turning it off altogether. The other way to counter/parry is called quick parry and activated by pressing the G key. It's a faster and easier way to parry.
Once your opponent starts charging up their blue focus (can be recognised by the blue light) just parry once the attack is just about to hit you. It takes some practice to get the hang of it, but it's not particularly hard. This achievement, like most others, can be done in bot matches. Do keep in mind you'll probably need to be fighting multiple opponents at a time to get this off, since a successful counter disarms and staggers the opponent for a while, making it unlikely you can counter again within 60 seconds.
✦•········································································•✦•········································································•✦
Bloodthirsty
Defeat 3 enemies in 60 seconds.
Nothing to explain here. Can be done in bot matches.
✦•········································································•✦•········································································•✦
Deep Pockets
Possess 30,000 Dark Tide Coins.
Highly recommend doing this one in solo bot matches, as it's far easier. There are three main ways to earn Dark Tide Coins:
1. Looting
2. Killing opponents and picking up their coins
3. Completing in-game quests such as Bounties, Blessing quests, Salute quests, and Valiant Challenge. This is by far the best way to earn coins.
These quests can be accepted by interacting with floating scrolls scattered across the map. These are not particularly rare and can be easily found.
Blessing and salute quests are the safer options and are marked by a golden scroll. You just have to either ring a large bell thrice or use the salute emote (press X to open emotes menu) twice in front of a statue.
Bounties are marked by a purple scroll. A player's location is marked on the map, and you have to kill the player within the specified time limit.
Valiant Challenges are marked by a red scroll. This gives away your live location to all other players on the game and all other players are given a quest to kill you. You must survive until the specified time runs out. This is by far the riskiest quest, but still pretty easy in solo bot matches.
✦•········································································•✦•········································································•✦
Ancient Wrath
Defeat an enemy with a Moonbane Charm.
Moonbane Charms can be bought with Dark Tide Coins (explained how to obtain above) at Rift Dealers, which can be found at many places across the map. Moonbane Charms basically call down a meteor rain at the specified location for some time. I recommend playing bot mode trios for this. The best way to use them is when other players/bots are fighting, then just use the Moonbane Charm at their location. It'll likely finish them off, but might take a few tries. Using them out of combat is futile since they can be easily escaped.
✦•········································································•✦•········································································•✦
Miscellaneous Achievements PT2


✦•········································································•✦•········································································•✦
Luster
Obtain a Gold Souljade.
Pretty straightforward. This is what Gold Souljades look like. Just keep looting and you'll come across one eventually. They're also commonly found in late game Morus' Blessings and stashes (refer to the Stashes Achievements section of this guide)
✦•········································································•✦•········································································•✦
Mighty Mortal
Equip 3 Gold Souljades at once.
Refer to the the Luster achievement above. Easiest way to do this is to open a stash. (refer to the Stashes Achievements section of this guide)
✦•········································································•✦•········································································•✦
Augmented Arms
Equip 3 different Souljades for a single weapon at once.
Certain Souljades have special effects for certain weapons. Reading the souljade description will tell you what weapon it's suitable for, if any in specific. Opening stashes is once again the best way to get this achievement. (refer to the Stashes Achievements section of this guide)
✦•········································································•✦•········································································•✦
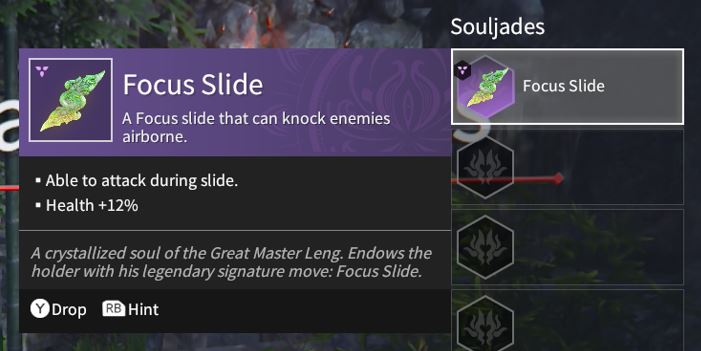
Focused Momentum
Equip the Focus Slide Souljade and use its effects to knock an enemy airborne.
This is a tricky achievement. In my nearly 90 hours of play, I have not yet seen this achievement drop in the Survival modes. I've seen it drop once in the Campaign when my teammate got it, and it can apparently also be obtained from Bloodbath and the 'Shadow Surge' game mode which is closed at the time of writing (but will reappear eventually). I'm also pretty sure it is possible to drop in the Survival mode, but the chances are very low.
Image credit to Ryot Control on TrueAchievements.
✦•········································································•✦•········································································•✦
A Legend is Born
Obtain a piece of legendary-quality gear.
Legendary-quality gear refers to yellow/gold armour and weapons. Best way to find these is either choose a high-loot spawn location at the start of the game (areas marked in yellow on the map) and loot as much as you can or wait for late game Morus' Blessing chests which are guaranteed to contain legendary gear.
✦•········································································•✦•········································································•✦
The Overcomer
Survive for over 3 minutes and achieve victory while the only one in your party still alive.
Best way to attempt this achievement is to play bot mode duos on easy difficulty. Your teammate will probably end up dying off before the end of the game as long as you don't intervene in their fights and move separately. After that, I recommend just hiding in bushes till there's only you and one other team left.
✦•········································································•✦•········································································•✦
Spoils of War
Unlock 8 achievements in a single match.
These refer to in-game achievements earned by doing certain actions in a match. This is best unlocked in bot mode solos, as it's much easier. This is a list of all obtainable achievements.
https://naraka.win/wiki/achievements
✦•········································································•✦•········································································•✦
Hand of Grace
Rescue 3 downed party members in a single game.
Pretty straightforward. It is uncommon this will occur in a normal match, so I recommend boosting this with a friend (or asking for help on the Discord or subreddit) in bot duos by having them die to poison mushrooms or bots and rescuing them thrice.
✦•········································································•✦•········································································•✦
Lurker
In a single game, spend a total of 150 sec hiding in bushes.
Hiding in any random bushes won't do, you need to hide in the purplish-red coloured bushes that actually render you invisible. They're pretty easy to find.
✦•········································································•✦•········································································•✦
Sixth Sense
Defeat an enemy from over 50m away.
Using a ballista is by far the easiest way to do this. Refer to the Super Weaponry achievement in the Weapon Achievements section on this guide for more info. Most kills with a ballista will by default be over 50m away without you trying unless they're standing right next to you.
✦•········································································•✦•········································································•✦
Marathon Runner
Travel 7,500m in a single game.
Stock up on grapples as soon as you spawn and get moving. You'll have to keep running and grappling non-stop till almost the end of the match to get this.
✦•········································································•✦•········································································•✦
Conclusion
This is a pretty straightforward 100%. I estimate completion time to be around 130-160 hours. Best of luck, and happy achievement hunting! Please rate the guide if you found it useful in any form, I would really appreciate it.
Source: https://steamcommunity.com/sharedfiles/filedetails/?id=3019418260
More NARAKA: BLADEPOINT guilds
- All Guilds
- How to get a social life
- Greek salad for gamers
- Lose Yourself
- Triss Face
- NARAKA: BLADEPOINT Guide 681
- NARAKA: BLADEPOINT Guide 671
- How to JUMP
- PRESETS FOR ALL GIRL IN THE GAME
- Naraka Temel Saldr Teknikleri
- emxpxnk%?#$