
Table Of Contents

This is a long guide, going over information you might already know. So here are the main sections.
Table of Contents <-- You are here!!
Introduction to Mirror Dungeons
What Should you Do to Prepare?
What is Starlight?
Starlight Buffs + Prioritization
Normal Mirror Dungeon Layout and Bosses
Normal Mirror Dungeon Mounting Trials
Hard Mirror Dungeon Layout and Bosses
Hard Mirror Dungeon Mounting Trials
Enemy Base Levels (This is important!!)
Starting E.G.O Gifts
General Strategy + Tips and Tricks
Thanks for Reading!!
Introduction To Mirror Dungeons

A Mirror Dungeon in Limbus Company is a side mode that can be played for many rewards. The structure is usually similar to a rogue-lite; you select nodes to fight on based on battle types. There are also event nodes that give you a choice (they can give E.G.O gifts and various buffs, but also debuff), resting nodes that let you enhance and fuse together these gifts, and a shop node that lets you buy and sell gifts (and also heal, replace skills for an ID, and change teams) via Cost, which is gained from beating battles or rare events. Some battles are focused, some are normal, and some are more difficult for a higher Cost gain. The Mirror (Dungeon) of the Lake has 4 floors (5 in hard) and each floor ends with a boss. Mirror Dungeon layouts are one team of 12 Sinners selected at the start that can be changed in the shop.
Mirror Dungeons have a system called Starlight where you get a certain amount via beating a Mirror Dungeon based on the number of nodes you’ve beaten and rest. IDs that have not been deployed to a Mirror Dungeon will give you more Starlight when next taken in a Mirror Dungeon, up to 5 extra Starlight per ID. Starlight can be used to buy various buffs for the team. However, to balance this out, after each final node of a floor, you will get an E.G.O gift choice that also applies a buff to the enemies (Mounting Trials), selected based on the floor the player is on.
Mirror of the Lake is available as soon as you complete Canto II, but contains enemies and bosses from future Cantos. No need to worry about spoiling yourself though! Each enemy is Canto locked, meaning you won’t encounter Canto III enemies until you’ve actually completed Canto III. Same situation for Canto IV and V. This Guide assumes you have completed Canto V though, so be warned about potential spoilers when viewing the ‘Boss’ sections.
What Should You Do To Prepare?


First of all, you have to make teams based on the 7 main status effects (technically 6 but 7 is more fun). Why? The Mirror of the Lake heavily rewards and focuses on getting E.G.O gifts for a certain status archetype of the main 7, as well as not repeating the same exact team multiple times in a row. It does this through Starlight and Cost bonuses, so you gain resources faster the more varied your team is from your last one. These statuses are Burn, Bleed, Tremor, Rupture, Sinking, Poise, and Charge. Cycling through these, as stated previously, gives more Starlight to use on more rewards (which also includes buffs for status effect gifts such as decreasing cost, increasing how many status effect gifts show up, and unlocking new gifts, making it a self-sufficient cycle).
The Rest Bonus works by adding bonus starlight for every sinner ID that hasn’t been used in the previous run. This bonus increases linearly for each additional run, up to a maximum of 5 bonus Starlight per ID (assuming each of those IDs has not been used for 5 complete Mirror Dungeon runs). This Rest Bonus is why we recommend setting up a team for every status effect, since that way, you can swap between teams easily to get that maximum Rest Bonus every single time.
There is an additional benefit to letting an ID rest for at least 1 full Mirror Dungeon run, in that, if they have at least 1 Rest Bonus, then every ID will give an additional 25 Cost per on entry (for a total of 50 Cost per O and OO, and 25 Cost per OOO). This means that, even if you aren’t farming for Starlight, you should still plan for a single Rest Bonus to at least get the bonus cost.
The top row shows the Starlight Rest Bonus, where Yi Sang was used in the previous run and thus gives no bonus, while each sequential character to the right hasn’t been used for the number of runs that they have the Starlight Bonus for. For example, W Don hasn’t been used for 2 runs, Rosepanner Meursault hasn’t been used for 4 runs, and LCB Hong Lu hasn’t been used for 5 or more runs.
The bottom row shows how having even a single Rest Bonus gives +25 Cost, while O and OO give 25 Cost by default. Heathcliff, Rodion, and Outis were all used in the previous run, and thus have no Rest Bonus, but Heathcliff and Rodion both give 25 Cost despite that. Ishmael, Sinclair, and Gregor all have at least 1 Rest Bonus, and thus all give +25 Cost.
A few good guides for Status Effects that totally aren’t made by the creators of this one for creating teams for each status can be found down below:
We don't have Burn done yet lmao, wait a few days/weeks.
How to Bleed by Borderlined
https://steamcommunity.com/sharedfiles/filedetails/?id=3117516645
We don't have Tremor done yet lmao, wait a few days/weeks.
We don't have Rupture done yet lmao, wait a few days/weeks.
How to Sinking by Silver
https://steamcommunity.com/sharedfiles/filedetails/?id=3118228803
We don't have Poise done yet lmao, wait a few days/weeks.
We don't have Charge done yet lmao, wait a few days/weeks.
Mirror of the Lake’s Normal difficulty immediately sets all units to level 40, but the ID must still be uptied manually. In contrast, the Hard difficulty needs the ID to be leveled and uptied manually, using their real level directly. As such, if you don’t have enough resources for 6-7 fully leveled teams, I would recommend doing 2 Mirror runs per week; one with a team you have set up for Hard in Hard, and one different team in Normal so you get at least one Rest Bonus for the main team and activate the Cost Rest Bonus. Otherwise, you can just use different teams each week on the Hard version.
What Is Starlight?

If you haven’t beaten your first Mirror Dungeon yet, this isn’t going to be relevant to you just yet, and you can skip this section for now and move on to the Normal Mirror Dungeon of the Lake explanation. Make sure to come back after winning at least one normal run!
Starlight is the mode's main reward system.
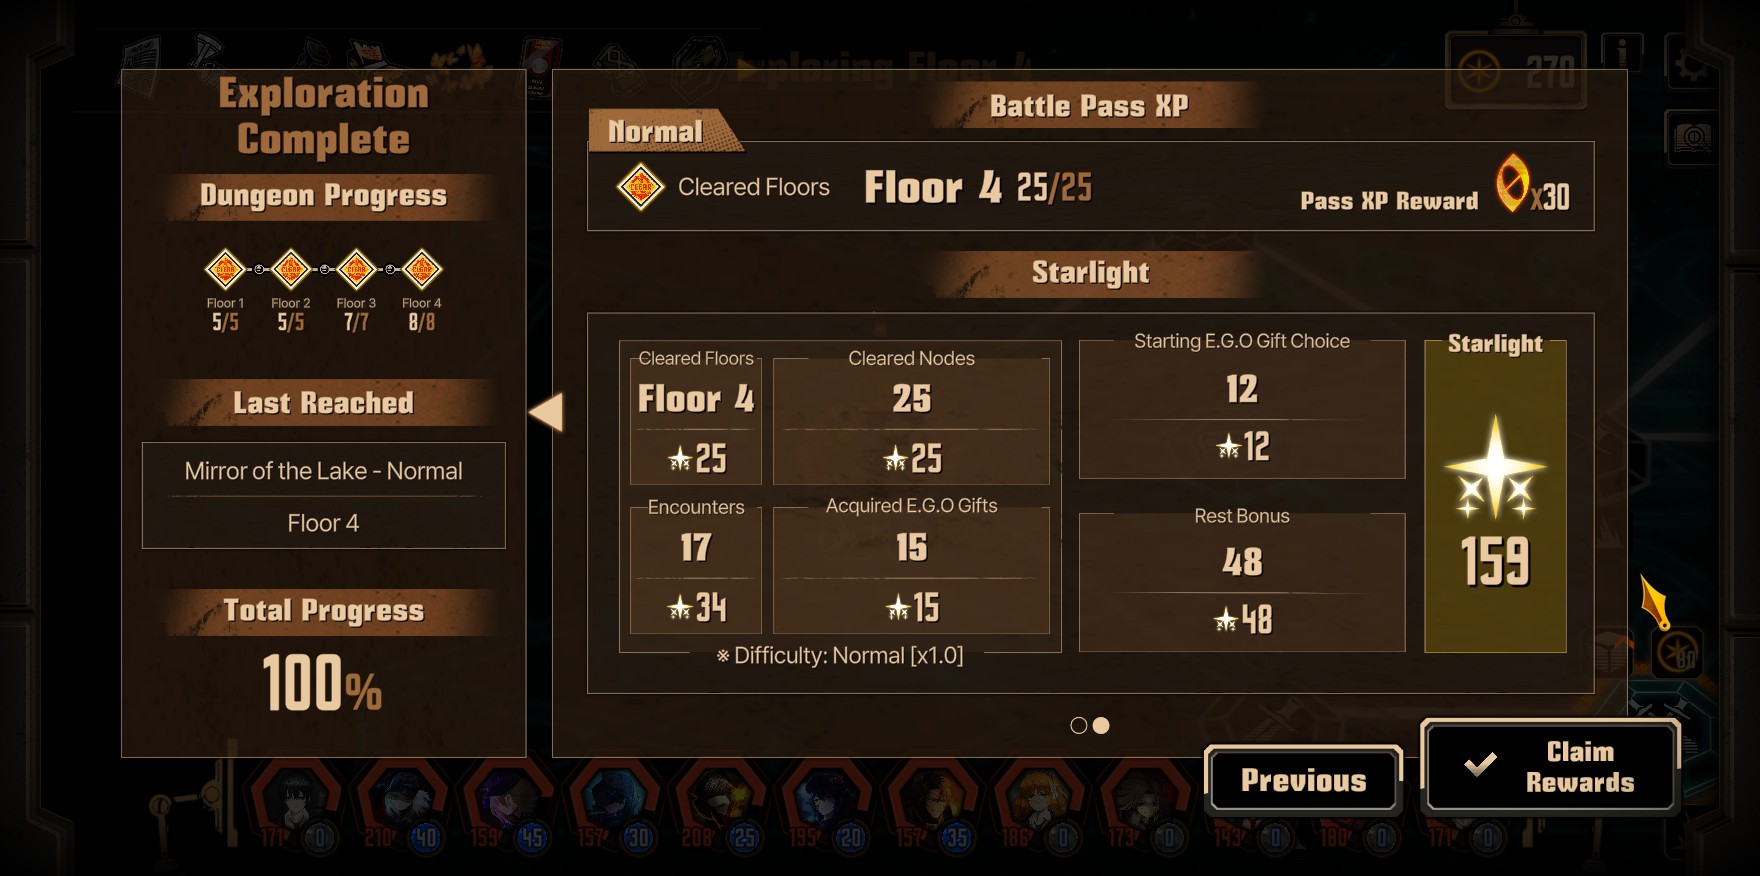
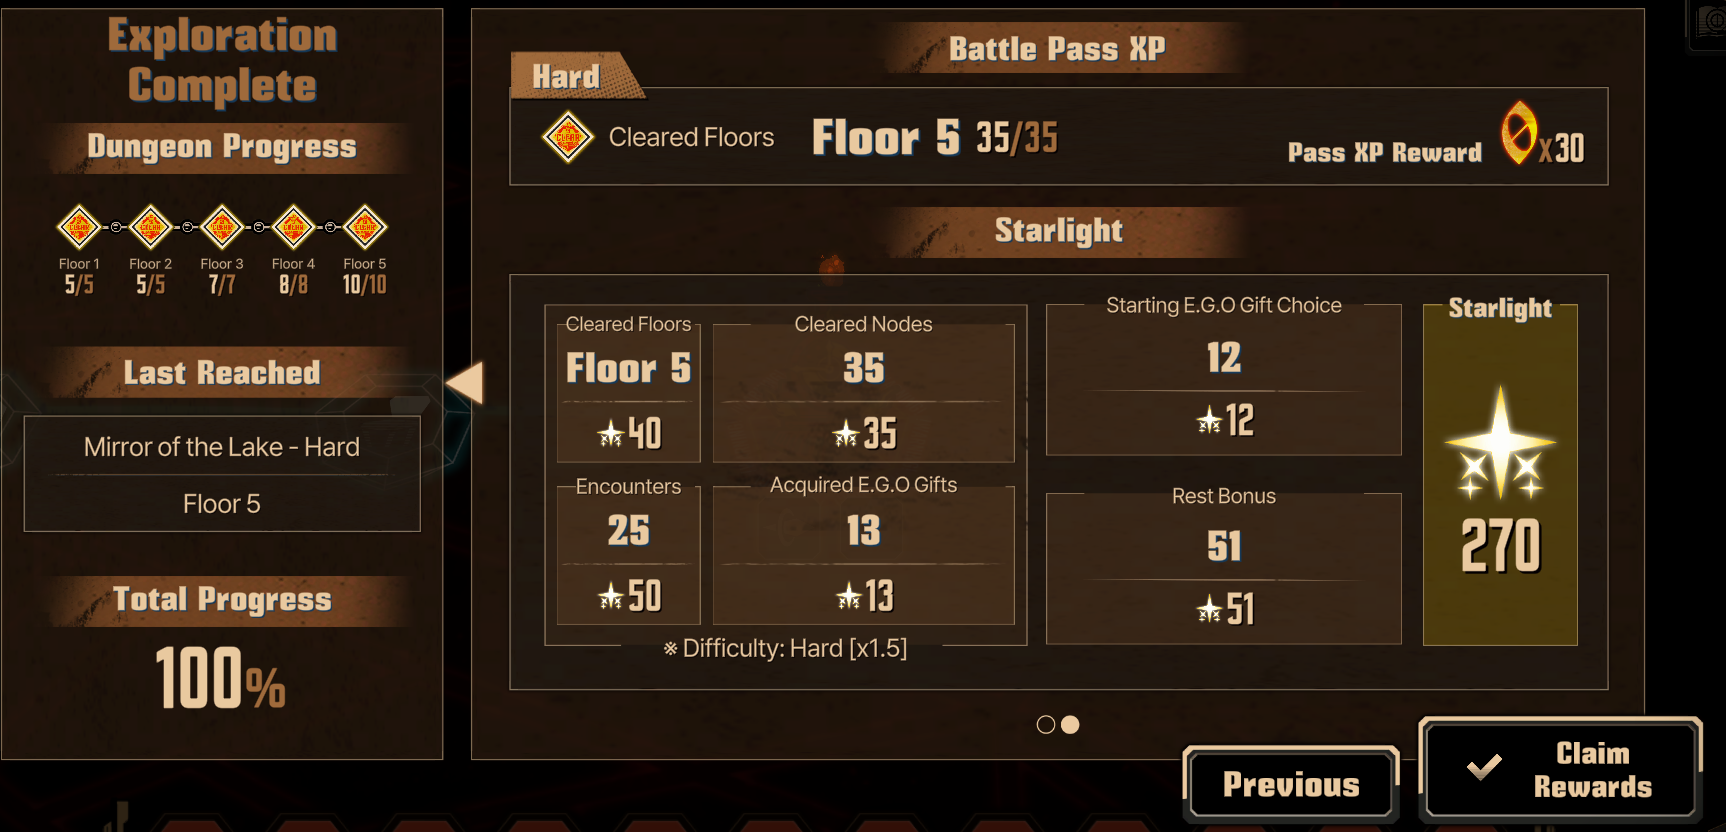
Starlight is given to a player when they accept rewards after beating a Mirror Dungeon. Rest bonuses, again, give Starlight. Starlight is calculated like this on Normal:
Encounters X 2 (ex. 2 encounters would be 4 Starlight)
Cleared Nodes (ex. 1 cleared node is 1 Starlight)
E.G.O Gifts acquired in the dungeon (1 Starlight per Gift)
Starter Gift (+12 for each Starter Gift selected)
Floors Cleared (4 Floors cleared is worth 25 Starlight, 5 Floors cleared is worth 40 Starlight)
Images show a Normal and Hard completion respectively.
Except for the Rest Bonus and Starting E.G.O Gift Choice, these rewards are improved by 1.5x while playing the Hard version. Starlight is used for Buffs, which is the player version of Mounting Trials. Each Buff takes from ~150 Starlight to ~400 Starlight to activate, with smaller Nodes surrounding most Buffs that apply more Buffs related to the center Buff. Buffs are usually increases in Cost gain, E.G.O Gift unlocks, Gift price reduction, and other quality-of-life things that are mostly related to E.G.O Gifts.
What is to note is that it takes 26550 Starlight to unlock everything on the Buffs list, meaning it is not recommended to unlock every Buff (as in near impossible without insane amounts of farming). I’d describe it more as a push-and-pull of opportunity between each Buff, as most are very good. However, some Buffs stand above the others.
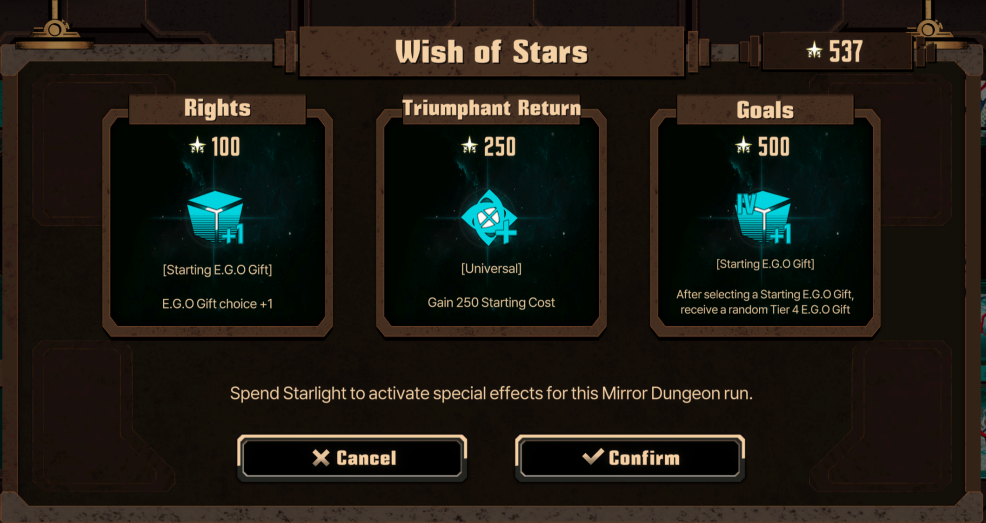
After having gotten every Base Buff (the larger, center Buffs with smaller Buffs around them), you unlock the Wish of Stars buffs.
These buffs are respectively:
Rights (100 Starlight)
Staring E.G.O Gift Choice +1, meaning you can bring a total of 3 Starting E.G.O GiftsTriumphant Return (250 Starlight)
Gain 250 Starting CostGoals (500 Starlight)
After selecting a starting E.G.O Gift, receive a random Tier IV E.G.O Gift.
These Wish of Stars buffs are consumable Starlight buffs, unlike the others, which are permanent (until we get Mirror Dungeon 4 at least). This means they can only apply to a single run. I do NOT recommend using these unless you have literally gotten every single starlight buff available, including all secondary buffs, since they are honestly a waste of starlight. Triumphant Return is useless since you never are truly struggling with Cost, especially if you have the permanent Cost Starlight buffs. Rights is useful but locks you into whatever you got by random chance, rather than being able to reroll the starting E.G.O gift multiple times. It also requires you to have gotten at least a few of the 'Fruits of Labor' Secondary Buffs, since that will let you have 3 E.G.O Gifts in the category. Goals is nice since it gives you a tier IV, but it both being random (meaning you can get a status effect you don’t care about) and having a cost of 500 Starlight makes it less than ideal. Save your starlight for the actual, permanent buffs, not these.
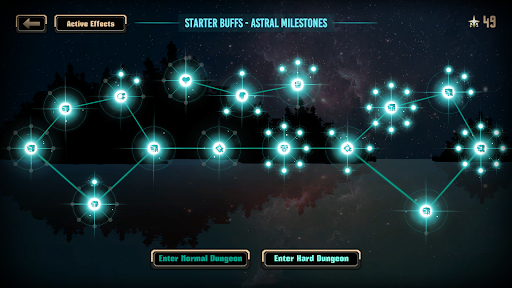
So, what Buffs should be prioritized with our limited Starlight?
Starlight Buffs (1/2)

Note 1: If it is marked with a * in the Name category, then it is a Secondary Starter Buff underneath the main Base Starter Buff.
Note 2: Remember, you unlock Wish of Stars when you unlock every Base Starter Buff, not the Secondary Starter Buffs.
Note 3: I will be squashing down certain Secondary Buffs that are all similar, just varying in what Status Effect they apply, and other similar buffs, since the description for all of them would be the exact same. I will note these in the comments of it.
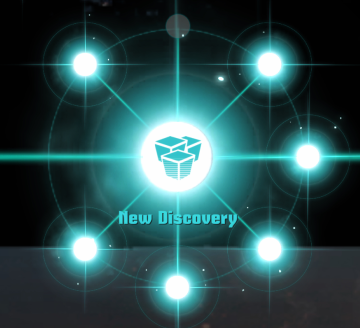
Name Starlight Cost Effected Category Effect Parent Comments A Journey’s Start 100 [Starting E.G.O Gift] Adds a small chance for Tier 3 E.G.O Gifts to appear N/A The first buff you should get, and one of the two possible starting buffs. Very very useful for getting a solid foot on the ground. A Journey’s Start* 150 [Starting E.G.O Gift] Adds an increased chance for Tier 3 E.G.O Gifts to appear in the __ category. A Journey’s Start This is actually 8 Secondary Buffs, only differing in what Starting E.G.O Gift category they apply to (Burn, Bleed, Tremor, Rupture, Sinking, Poise, Charge, & Random). Overall, its useful to speed things up, but not required, since you can always just reroll the starting gifts until you get what you want anyway. Just in Case 200 [Shops] Number of E.G.O Gifts sold at Shops +1 A Journey’s Start Mostly something you get in order to get further up the tree. Just in Case* 100 [Shops] Number of E.G.O Gifts sold at Shops +1 Just in Case Not very useful, since I find myself using the Rest Stops more often than the Shops. If you are filling out the tree after getting everything else you want, it might be useful. Seize the Opportunity 150 [Shops] Higher Tier E.G.O Gifts appear; Small chance for Tier 4 or higher E.G.O Gifts to appear A Journey’s Start Your main source of Tier 4s. Luckily, its one we have to take in order to get further on the tree to the one we REALLY want. Also enables Lunary Memory to spawn, so thats nice. Seize the Opportunity* 200-300 [Shops] Higher Tier E.G.O Gifts appear; Small chance for Tier 4 or higher E.G.O Gifts to appear Seize the Opportunity This is actually 3 Secondary Buffs with the exact same effect, only having their costs be 200, 250, and 300 respectively. Similar to a lot of Secondary Effects, its something to get after we get the more important ones, such as fusion gifts. Fruits of Labor 250 [Starting E.G.O Gift] Number of Starting E.G.O Gifts for each Category +1 Seize the Opportunity Enables a future Starter Buff we want to get to even function. Fruits of Labor* 250 [Starting E.G.O Gift] Number of Starting E.G.O Gifts for __ Category +1 Fruits of Labor This is actually 8 Secondary Buffs, only differing in what Starting E.G.O Gift category they apply to (Burn, Bleed, Tremor, Rupture, Sinking, Poise, Charge, & Random). Without this, the Rights Wish of Star buff is useless. However, just with the base buffs, all this does is speed up how fast you can reroll Starter Gifts. Useful, but not required. Worthy Prize 250 [Universal] Gain +50 Starting Cost Fruits of Labor & Just in Case Not massively useful, but it is required in order to keep going forward, so we’ll take it. Worthy Prize* 300-400 [Universal] Gain +50 Starting Cost Worthy Prize This is actually 3 Secondary Buffs with the exact same effect, only having their costs be 300, 350, and 400 respectively. I never really find myself struggling on Cost (as long as I’m doing my Rest Bonus properly), so I’d say this isn’t important. New Discovery 250 [Universal] Introduce 3 new E.G.O Gifts to the Gift Pool Worthy Prize Our crown jewel of a Starter Buff. The 3 new E.G.O Gifts are Non-Disclosure Agreement, Ancient Effigy, and Reverberation, not massively useful ones, but this one shines in its Secondary Buffs. New Discovery* 250 [Universal] Introduce 2 new __ E.G.O Gifts to the Gift Pool New Discovery This is actually 7 Secondary Buffs, only differing in what Starting E.G.O Gift category they apply to (Burn, Bleed, Tremor, Rupture, Sinking, Poise, & Charge). They each unlock the Fusion E.G.O Gift and one of the Fusion Items for its category, so its incredibly useful, and something you should aim for. Look at my E.G.O Gift Guide for more details. The Spoils of War 300 [Universal] Gain +10% Cost after winning a Combat Encounter. (Not affected by Starter Bufs or other E.G.O Gifts). New Discovery Mostly just a stop in between New Discovery and More the Better. The Spoils of War* 500 [Universal] Gain +10% Cost after winning a __ Encounter. (Not affected by Starter Buffs or other E.G.O Gifts). The Spoils of War This is actually 4 Secondary Buffs, only differing in what type of Encounter they apply to (Focused, Risky/Dangerous, Floor Boss, and Regular). I’d say if you start to notice really struggling on Cost these are useful, but usually my Rest Bonus is enough to get me going. More the Better 300 [Starting E.G.O Gift] E.G.O Gift Choice +1 The Spoils of War Very useful, and one you should aim for. Lets you take 2 E.G.O Gifts into the dungeon rather than 1, meaning you can get both fusion items right away if you are lucky or reroll.
Starlight Buffs (2/2)

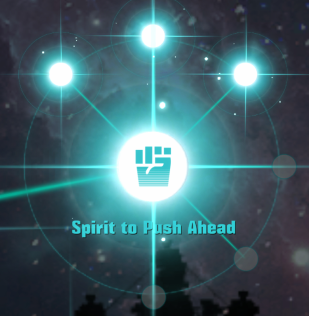
Name Starlight Cost Effected Category Effect Parent Comments Perseverance 300 [Rest Stops] E.G.O Gift Enhance Cost minus 20% More the Better Perseverance* 400 [Rest Stops] Additional minus 20% Enhance Cost for E.G.O Gifts with __ Perseverance This is actually 7 Secondary Buffs, only differing in what E.G.O Gift category they apply to (Burn, Bleed, Tremor, Rupture, Sinking, Poise, & Charge). Overall, it lowers Upgrade costs by 40%, but I don’t tend to see myself struggling with Cost already, so just the base 20% decrease is enough. Perseverance* 250 [Rest Stops] 20% chance for a Cost-free Enhance Perseverance If you plan on enhancing a ton, it's useful, but the luck aspect makes it more of an add-on than a must-take. Established Trust 200 [Shops] Refresh Cost minus 20% More the Better Refreshing the Shop isn’t very useful unless you have all the Seize the Opportunity Secondary Buffs. Established Trust* 300 [Shops] Refresh Cost minus 20% Established Trust -40% total, but refer to the main Buff comment. Established Trust* 300 [Shops] 20% chance for a Cost-free Refresh Established Trust Refer to the main Buff comment. Established Trust* 300-400 [Shops] Skill Replacement Cost minus 20% Established Trust This is actually 2 Secondary Buffs, costing 300 and 400 Starlight each. Useful if you replace often, but not required, since 200 to replace a Skill 1 with a Skill 3 isn’t that expensive by default. Namesake 300 [Shops] Gain +20% more Cost when selling E.G.O Gifts Established Trust I don’t tend to sell my Gifts, preferring to fuse them if needed, but it can be useful for a last-minute shop. Namesake* 300 [Shops] Gain +20% more Cost when selling E.G.O Gifts Namesake +40% total, but refer to the main Buff comment. Fame and Feats 400 [Shops] E.G.O Gift purchase Cost minus 15% Namesake & Perseverance I tend to get my gifts from Fusion and the starter buffs rather than the shop, so not massively useful to me. Go by your play style though. Fame and Feats* 400 [Shops] Additional minus 15% purchase Cost for E.G.O Gifts with __ Fame and Feats This is actually 8 Secondary Buffs, only differing in what E.G.O Gift category they apply to (Burn, Bleed, Tremor, Rupture, Sinking, Poise, Charge, & No Specific Status). -30% overall, but refer to the main Buff comment. Readiness 250 [Encounters] +1 to all E.G.O Resources N/A This is the other possible starting buff, and it is basically a free Resource Gift. Useful, but between the two starting Base Buffs, not the better of the two. Readiness* 250 [Encounters] +1 to all E.G.O Resources Readiness Doubles the amount of Resources, so that you basically don’t have to worry about them anymore. Only really take if you find yourself struggling on resources, or have none of a certain resource. Readiness* 200-300 [Encounters] Max Speed +1 Readiness This is actually 2 Secondary Buffs, with a cost of 200 and 300 respectively. Very useful if you are using Speed-based IDs like Rcliff or Cinqclair. Spirit to Push Ahead 250 [Encounters] Damage Dealt +3% Readiness A useful buff, but not a massive change. Spirit to Push Ahead* 300 [Encounters] Damage Dealt +3% Spirit to Push Ahead +6% total, which can add up. It also applies regardless of damage type. Spirit to Push Ahead* 300 [Encounters] Offense Level +1 Spirit to Push Ahead This is actually 2 Secondary Buffs of the same cost, so +2 total. To compete with some of the Hard Version enemies, this is very useful. Spirit to Push Ahead* 450 [Encounters] Deal +4% __ Damage. Spirit to Push Ahead This is actually 3 Secondary Buffs, only differing in what damage type they apply it to (Slash, Pierce, Blunt). With all the other buffs of this category, that's a +10% increase in damage, which again, adds up quickly. It will depend on what you actually use though. Physical Training 200 [Encounters] Damage Taken minus 3% Readiness Only really matters if you are losing clashes and actually taking damage…so don’t do that. Physical Training* 250 [Encounters] Damage Taken minus 3% Physical Training Refer to base Buff comment. Physical Training* 250-300 [Encounters] Defense Level +__ Physical Training This is actually 2 Secondary Buffs, costing 250 and 300 respectively, and giving 1 and 2 Defense levels respectively. Combined with the Offense Level Buffs on the other side, this can be something to aim for. Physical Training* 400 [Encounters] __ Resistance minus 0.1 Physical Training This is actually 3 Secondary Buffs, only differing in what damage type they apply it to (Slash, Pierce, Blunt). It makes the enemy weaker to that damage type, effectively being around a 10% increase in damage (if something was 1.0 to a damage type, and now 1.1, then 10% increase). I like it more than the other side, but they synergize well.
What Starlight Buffs To Prioritize

There are generally two tracks that I would recommend taking in order to maximize early buffs.
The first track is to unlock the Fusion Gifts as soon as possible, which are the Secondary Starter Buffs under the ‘New Discovery’ main perk. I would, however, recommend going one further before getting the Fusion Gifts in order to unlock the ‘More the Better’ perk, as that will help you get those fusions all the faster. Focus on the Fusion Gifts that you are actually going to use; If you never run a Tremor team, then there is no reason to waste precious early starlight on the Tremor Fusion Gift. Once you have the fusions you are going to use, move on.
The second track is to unlock the two Offense Level +1 buffs under the ‘Spirit to Push Ahead’ main perk first, as well as the two Max Speed +1 buffs under ‘Readiness’ (assuming you run people that benefit from increased speed, such as Cinqclair or Rcliff).
Whichever path you go for though, I’d recommend taking the other path immediately after, so that you get both benefits as soon as possible. After that, its a good idea to get the buffs that boost your chance of getting good Starter E.G.O Gifts, since those are what Mirror of the Lake are built around. If you can reliably start with a good Tier III gift, or even better, the Tier III and Tier I gifts to create the fusion gift for the status effet you are running, then every run is super easy. Almost everything is secondary to boosting your E.G.O gifts. After that, it's generally picking the ones that benefit you most for whatever situation you are in. If you find yourself enhancing E.G.O Gifts often, go for Perseverance and its Secondary buffs (the same situation for the fusion gifts, prioritize the status effects you use). If you want a stronger start, the Fruits of Labor and A Journey’s Start Secondary buffs are your friends. If the enemies are still too hard, the other Secondary buffs in the ‘Spirit to Push Ahead’ and ‘Readiness’ will give you additional defense. The main thing to remember is, to pick the buffs that enhance what you already do. The ‘Established Trust’ Secondary Buffs are useless if you never refresh the shop or buy replacement skills. The ‘Worthy Prize’ Secondary buffs are useless if you never feel like you are struggling on Cost.
Everything is available for you to read in the ‘Starter Buffs’ section of the Mirror Dungeon, so click around and see what buffs you think would be useful!
Normal Mirror Dungeon Description


A Normal Mirror Dungeon is basically a combination of everything we have covered so far.
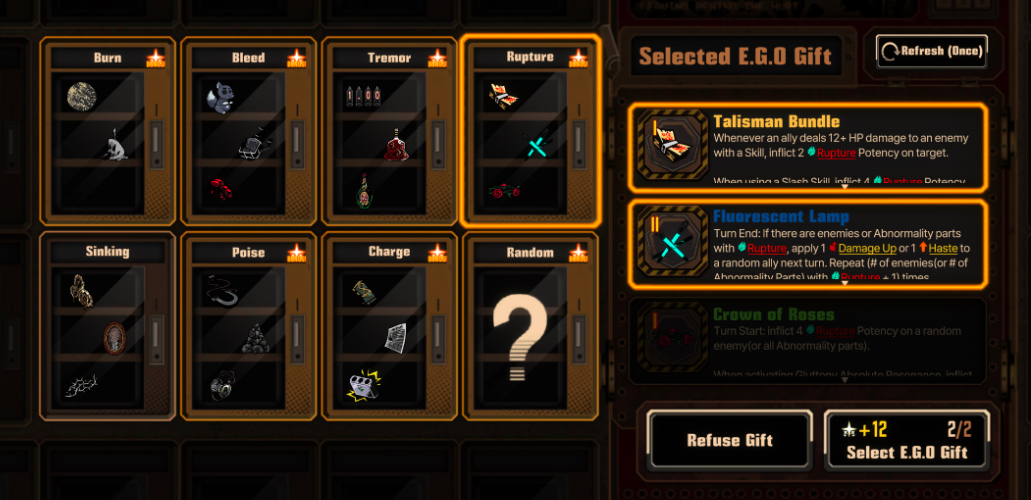
First, you must select your Starter Gift. Selecting a Starter Gift gives extra Starlight via how many have been chosen (12). Each Gift is linked to one of the 7 status effects, which is why 6 status teams were recommended (other than Rest Bonus). If you are confused over how to select your Starter Gift, make sure to click on the E.G.O Gift itself after selecting the category.
After this, you can select a team from the game's layouts to put into the Mirror Dungeon. We have already covered Rest Bonus, so I will not be rehashing that information.
Then, you enter the Mirror Dungeon. There are a few types of nodes.
Battle Nodes are regular encounters against non-Abnormality enemies. Each one has a Slash, Pierce, or Blunt icon under it; this is what the enemies in the encounter are weak to. Battle Nodes are by far the most common type of Node, and change per floor. Their icon is a sword going from the top right of the icon to the bottom left.
Focused Encounters are encounters against regular Abnormality enemies, where you can select where each attack goes. These Nodes also have a Sin Affinity along with the Damage Type icon on them, which signifies what Sin Affinity this Node is weak against. Their icon is a triangle with smaller crossed swords within it. The chance of getting a random E.G.O Gift after completing a Risky/Dangerous Encounter is 75%.
Risky/Dangerous Encounters are symbolized by crossed swords on a fight Node. This signifies the battle in the Node is more difficult, but it gives a higher Cost payout. In a Normal Mirror Dungeon, these are preferred, but in a Hard Mirror Dungeon, it is better to avoid these. The chance of getting a random E.G.O Gift after completing a Risky/Dangerous Encounter is 100%.
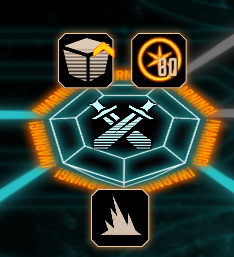
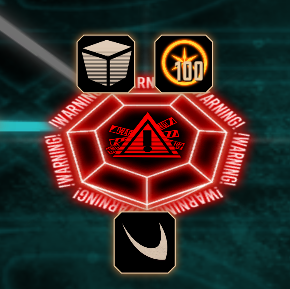
At the end of every Floor of the Dungeon is a Boss Node, which is red and covered in warning symbols. It also has a Damage Type and Sin Affinity icon. They can be both Battle Nodes and Focused Encounters, and beating them brings you to the next floor and gives you a free E.G.O Gift and Mounting Trial. When the boss on the final floor is defeated, the Mirror Dungeon ends.
Pictured above is an example Mounting Trial screen from Floor 1 of a Normal Mirror Dungeon.
After these are more utility nodes.
Choice Events are signified by a ?. Each Choice Event is an encounter with an Abnormality where the player has a minimum of 2 choices. Choices can require a Skill Check based on Affinities, where the player has to choose a Sinner with chances of success. Choices can result in practically every debuff and buff ever, from gaining levels, E.G.O Gifts, and free healing to mass SP loss and killing a Sinner.
Refer to the Guide in the Tips and Tricks section for Abnormality Choices.
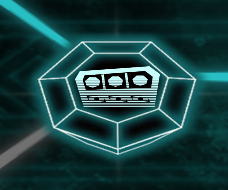
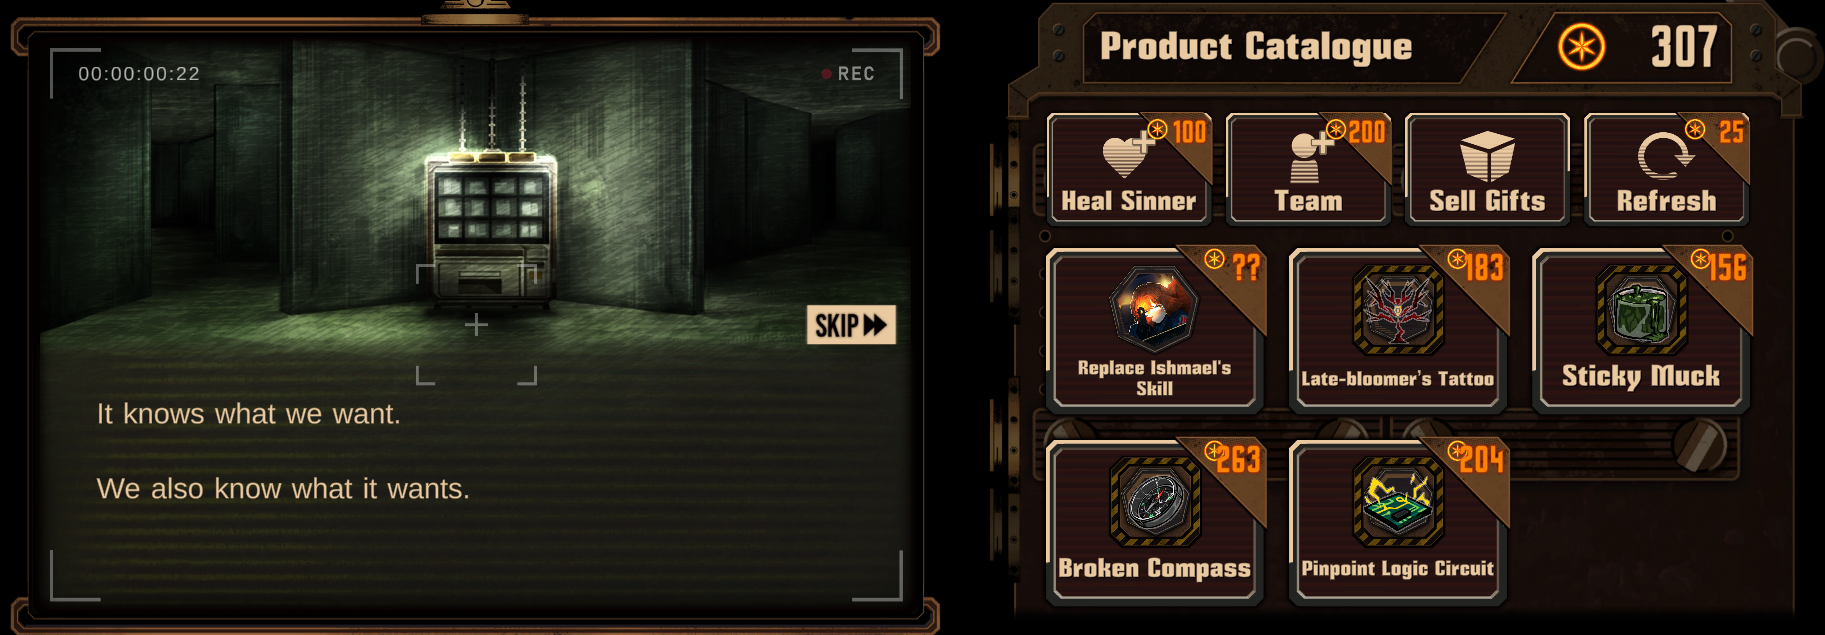
Shop Nodes are signified by a slot machine icon. In Shop Nodes, you can buy E.G.O Gifts via Cost, with prices depending on Tier and Starlight Buffs unlocked. You can also change a Sinner’s skills in 3 ways: replace 1 S1 in their Dashboard with a Skill 2, do the same but a Skill 2 is replaced with a Skill 3, or replace a Skill 1 with a Skill 3 for the highest price. Each Sinner is randomly selected per refresh. You can refresh the entire shop via Cost, but it increases by 25 Cost every time you refresh. Typically, only 1 Shop Node will spawn per floor, and usually around 3 per dungeon.
Parts that cannot be refreshed are the ability to change teams for 200 Cost, a healing option for 100 Cost (either all Sinners for 25% of their HP and 15 SP, or one Sinner for 50% of their HP and 45 SP). E.G.O Gifts can also be sold to give the player more Cost.
Rest Nodes are signified with a chair. Rest Nodes also give the ability to change teams and heal, but it also has the exclusive feature of Fusing and Enhancing E.G.O Gifts. You can Fuse up to 3 E.G.O Gifts at a time, with a prediction shown in the center of the menu. The Fusing menu is most useful when putting together unneeded gifts for a chance at a better one, or the 7 Fusion Gifts. Fusion Gifts are based around the 7 Status Effects and are obtainable only by fusing 2 specific gifts together and are usually run-winning items (This requires unlocking the relevant Starlight Buff). Enhancing gifts, meanwhile, means you can spend Cost on certain gifts to be able to improve their effect, usually in removing Abs. Res requirements and raising the amount of buffs gained by them. If a gift is enhanceable, it can only go up to 2 Enhancements before it cannot be enhanced anymore. The price to Enhance a Gift goes up based on rarity. Typically, only 1 Rest Node will spawn per floor, and usually around 2 per dungeon. Rest Nodes can spawn on the same floor as Shop Nodes. I think it is guaranteed for at least 1 Shop or Rest Node to spawn per floor, though both can spawn.
Refer to the guide in the Tips and Tricks section for Fusing and Enhancing E.G.O Gifts.
Layout (Normal Version)

Start Nodes contain nothing, they just are what you spawn on when you start the floor.
Random Nodes can be anything from normal fights, to Risky/Dangerous fights, to Focused fights, to Shop Nodes, to Rest Nodes, to abnormalities choices, unless specified otherwise. Only 1 Shop Node and Rest Node can spawn per floor, though both can spawn on the same floor, and it is guaranteed for at least 1 to spawn.
Floor 1: 6 Total Nodes
1 Start Node (Contains Nothing)
4 Random Nodes (No Risky/Dangerous nor Focused Fights)
1 Boss Floor 2: 6 Total Nodes
1 Start Node (Contains Nothing)
4 Random Nodes (Including Risky/Dangerous and Focused Fights. This continues for the rest of the floors)
1 BossFloor 3: 8 Total Nodes
1 Start Node (Contains Nothing)
6 Random Nodes
1 BossFloor 4: 9 Total Nodes
1 Start Node (Contains Nothing)
7 Random Nodes
1 Boss
For the Normal Mirror Dungeon, obviously, you should plan your route according to your situation, but generally, this is the priority order for what Nodes to go towards.
Shop = Rest Nodes > Risky/Dangerous Nodes > Focused Nodes > Normal Fights
Bosses (Normal Version)

We might have a short blurb for these eventually, but for now, here they are.
Floor 1:
G Corp Head Manager
Tingtang Boss
Aida
Guido the Persistent (Only After Completing Canto 3)
Rosepanner Workshop Representative Niko (Only After Completing Canto 4)
Lobotomy EGO::Red Sheet Marile (Only After Completing Canto 4)
Twinhook Pirates First Mate Smee (Only After Completing Canto 5)Floor 2:
Ebony Queen’s Apple
Doomsday Calander
You Want To Get Beat? Hurtily?
Pink Shoes
1 Everything There Inquisitor & 2 Proceeding Inquisitors (Only After Completing Canto 3)
2 Crawling Inquisitors & 1 Four-Legged Beast (Only After Completing Canto 3)
1 Slithering Inquisitor & 1 Wriggling Beast (Only After Completing Canto 3)
Golden AppleFloor 3:
Headless Ichthys
Alleyway Watchdog
So That No One Will Cry
Papa Bongy (Only After Completing Canto 3.5)
King Trash Crab (Only After Completing Canto 4.5)
Blubbering ToadFloor 4:
Drifting Fox (Only After Completing Canto 4)
Kqe-1j-23
Shock Centipede
Fairy Gentleman
Fairy Longlegs
Brazen Bull (Only After Completing Canto 4)
Kromer (Only After Completing Canto 3)
Mounting Trials (Normal Version) (1/2)

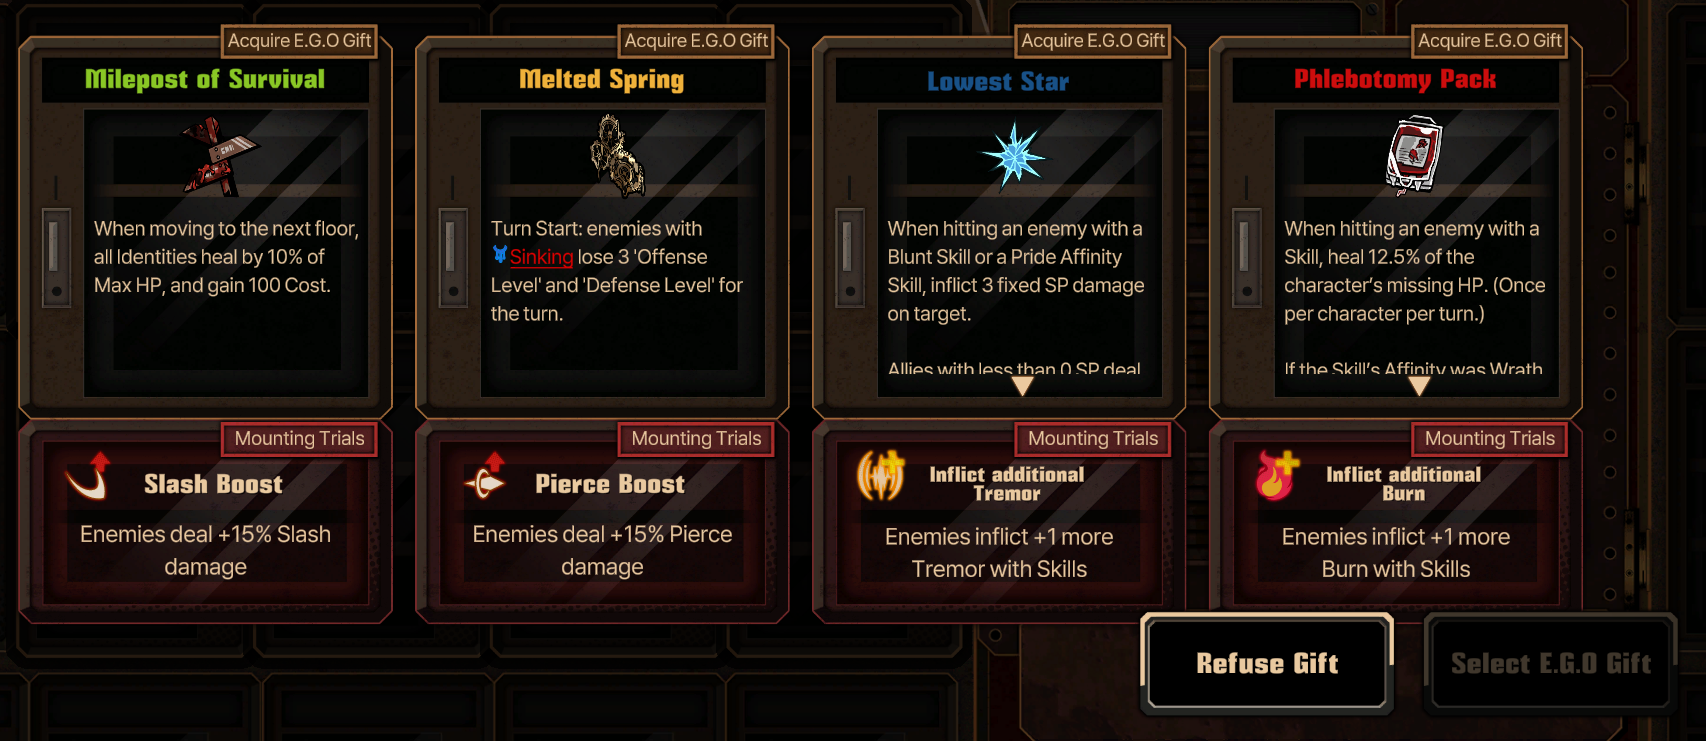
Mounting Trials are the unique element of the Mirror of the Lake, where every time you beat a floor boss, you get an E.G.O Gift and a corresponding buff to the enemy, called a Mounting Trial. If you choose to refuse the E.G.O Gift, then the Mounting Trial you get is picked randomly from the options available, so there's no real reason to refuse the gift (Especially when you can sell or fuse it later!!). Anyway, here are the specific Mounting Trials for the Normal Mirror Dungeon and my comments on each.
Note: The Floor Number listed means the Floor where the Boss is fought. The Effects themselves don’t apply until the Floor Number + 1.
Name Effect Icon Floor Comments Inflict Additional Burn (Enemies) Inflict +1 more Burn with Skills 1 Typically, you don’t have to worry about the enemy applying burn to you. The main exceptions in the Mirror Dungeon are specific bosses and abnormalities, but with how uncommon it is, I would say this is a free pick. Inflict Additional Bleed (Enemies) Inflict +1 more Bleed with Skills 1 Similar to Burn, not that many enemies actually apply this. Still a free pick, but I’d say less than Burn simply because you tend to be unstaggered, and thus taking Bleed Damage. Inflict Additional Tremor (Enemies) Inflict +1 more Tremor with Skills 1 Free pick. I think only the Technology Liberation Alliance really applies Tremor, and as long as you avoid getting Burst, then you are completely fine. Inflict Additional Rupture (Enemies) Inflict +1 more Rupture with Skills 1 Basically the exact same situation as the Bleed version of this. Inflict Additional Sinking (Enemies) Inflict +1 more Sinking with Skills 1 There are actually quite a few enemies that apply Sinking, but it's one of those status effects that, as long as you are winning, it shouldn’t affect you massively. Still prioritize the other status versions over this. Slash Boost (Enemy) Slash damage +15% 1 These 3 are all flat boosts to a damage type, and thus the most detrimental. It doesn’t affect clashes, so as long as you keep winning clashes you are still fine, but the status boost ones are more friendly than these general boost ones. Pierce Boost (Enemy) Pierce damage +15% 1 Look at Slash Boost’s comment. Blunt Boost (Enemy) Blunt damage +15% 1 Look at Slash Boost’s comment. Affinity Res. Up (Exc. Wrath) (Enemy) Resistance against all Affinities -0.1 (Except Wrath) 2 These are the lowest level boosts for Floor 2, and honestly they are generally all the same These make the neemies more resistant to attacks of that sin affinity, so if they were originally 1.0x to a sin, then they are now 0.9x, or a 10% damage debuff. I still find them to be more useful than the straight up health boost though. I don't tend to pay attention to which one I pick, but if it matches up with a good burst damage sin (like the Envy one for a Charge team), then good for you! This is MD3N though, it doesn't make much of a difference. Affinity Res. Up (Exc. Lust) (Enemy) Resistance against all Affinities -0.1 (Except Lust) 2 See the Affinity Res. Up (Exc. Wrath) Comment. Affinity Res. Up (Exc. Sloth) (Enemy) Resistance against all Affinities -0.1 (Except Sloth) 2 See the Affinity Res. Up (Exc. Wrath) Comment. Affinity Res. Up (Exc. Gluttony) (Enemy) Resistance against all Affinities -0.1 (Except Gluttony) 2 See the Affinity Res. Up (Exc. Wrath) Comment. Affinity Res. Up (Exc. Gloom) (Enemy) Resistance against all Affinities -0.1 (Except Gloom) 2 See the Affinity Res. Up (Exc. Wrath) Comment. Affinity Res. Up (Exc. Pride) (Enemy) Resistance against all Affinities -0.1 (Except Pride) 2 See the Affinity Res. Up (Exc. Wrath) Comment. Affinity Res. Up (Exc. Envy) (Enemy) Resistance against all Affinities -0.1 (Except Envy) 2 See the Affinity Res. Up (Exc. Wrath) Comment. Max HP Up (Enemy) Max HP +15% 2 Avoid if at all possible. It just makes fights longer, which gives them more chances to damage your sinners back. Especially on bosses with those massive health pools.
Mounting Trials (Normal Version) (2/2)

Name Effect Icon Floor Comments Weight Up (Enemy) Slot Weight +1 3 This matters if you tend to use AOEs, in which case, avoid. If you aren’t using AOEs on your current run though, then it doesn’t particularly matter. Siphon Damage (Enemy) On Hit, heal 5% of damage dealt as HP 3 Similar to the Max HP Up, but more friendly since as long as you win the clash, you don’t have to worry about it. Still, this mostly will benefit bosses, so it's on the lower end of the Floor 3 buffs. Boost Speed (Enemy) Max Speed +1 3 Doesn’t matter much as long as you have Bind or Haste application. Otherwise, still not a massive difference, just not as much control in clashes. Sanity Attack (Enemy) On Hit, deal 2 fixed SP damage 3 Similar to Siphon Damage, you just gotta win clashes to avoid this. I’d say it's more friendly since usually you’ll have a unit dedicated to boosting your SP (Fluid Sac, Blind Obsession, etc). Somewhat friendly. Keenness (Enemy) Turn Start: gain 1 Damage Up if this unit dealt damage at least once last turn 3 This one is probably the 3rd worst in the bunch since it's likely bosses will have dealt at least some damage to you, especially the Floor 4 Boss. This means a free Damage Up is likely, so unless a really good E.G.O Gift is up for grabs, avoid it. Regroup (Enemy) Turn Start: Gain 3 Offense Level Up if this unit did not take HP damage last turn 3 It looks bad, but honestly, this is the freest pick one in my opinion. You should ALWAYS have dealt at least some HP damage to bosses each turn, with at least a few of your units doing unopposed attacks or winning clashes. This will mostly affect your crowd fights, which you should be winning anyway. Unopposed Attack Boost (Enemy) Final Power +1 to Unopposed Attacks 3 This is probably the second of the bunch. You probably shouldn’t have unopposed attacks happening to you regardless, but there are many situations where it's unavoidable, whether that be the enemy having too much speed, or just too many things to clash, or whatever. This means boosted damage against you, so I’d avoid it. Clash Attack Boost (Enemy) Final Power +1 in a Clash 3 This is the worst of the bunch, simply because you should almost always be clashing anyway, and this punishes you for making the optimal choice. Unless it's Lunar Memory or Faith or something equally amazing, AVOID.
Hard Mirror Dungeon Description

The first four floors of the Hard version of Mirror of the Lake are the exact same as the Normal version. The only changes are the Fog of War (and the deterministic layout that comes with it), the unique Mounting Trials that might change how fights play out, the Floor 5 that's tacked onto the end, and most importantly your units do not auto level up to level 40.
The Fog of War means that you cannot see the entire Floor and only the Nodes directly selectable, unlike the Normal version of the Dungeon. The best way of dealing with this Fog of War is to choose the Node with the most options from your current one. You can’t see where those options lead, but by choosing the one with the most options you let yourself avoid getting locked into a certain route. Of course, take the amount of options and the actual Node’s contents both into account.
Even though this has been said already, I think it will be useful to restate. The Hard Dungeon only needs to be run once per week for its bonuses, meaning you only need one team made for it. However, for maximum Starlight, running at least one Normal Mirror Dungeon after the Hard Dungeon gives the main hard team at least one Rest Bonus.
A very critical piece of advice is to almost always avoid Risky/Dangerous Nodes, since the difficulty has been insanely buffed for them (Look at the Base Lvls for Floor 4 and 5 Risky Nodes below). Regular Focused Encounters are usually easier than Battle Nodes, and should mostly be chosen over them. Pierce Nodes, unless necessary, should absolutely never be chosen, due to their absurdly hard encounters, specifically on Floor 4 and 5.
While Hard is very possible without unlocking Fusion Gifts, the Coin Power gained by most Fusion Gifts helps balance the dungeon greatly, and I would recommend getting at least one Fusion Gift before running Hard. Specifically, Bleed, Tremor, Sinking, and Rupture are great for the Hard dungeon due to their generally powerful status effects (except for Tremor, which is mostly carried by E.G.O gifts that are insanely good) and amazing Fusion Gifts (along with good regular Gifts). Every Status Team can be run in Mirror Dungeon Hard, and I would recommend doing what you find fun! These statuses are just the most optimal, in the writer's personal opinion.
The Hard dungeon goes up to 5 Floors instead of 4. Every Node that requires a fight on the 5th Floor except for the boss comes in two waves, meaning a good back pile of E.G.O Resources or a very good Fusion gift is exceptionally useful. As such, E.G.O Resource Gifts are very recommended.
Keep in mind all Floor 5 Bosses are around Level ~47 at base, before taking into account the 4 Enemy Level Up buffs you’ve gotten throughout the Dungeon.
Also! If you are struggling to finish MD3H, then know that you still will get rewards for quitting early. Assuming maximum Weekly Rewards Remaining (3 Normal and 1 Hard):
Floor 1 Clear - 75 EXP, 225 Lunacy
Floor 2 Clear - 120 EXP, 450 Lunacy
Floor 3 Clear - 180 EXP, 600 Lunacy
Floor 4 Clear - 210 EXP, 750 Lunacy
Floor 5 Clear - 225 EXP, 750 Lunacy
Layout (Hard Version)
Start Nodes contain nothing, they just are what you spawn on when you start the floor.
Random Nodes can be anything from normal fights, to Risky/Dangerous fights, to Focused fights, to abnormalities choices, unless specified otherwise. They do NOT contain Shop or Rest Nodes, since those are deterministic with the Fog of War from the Hard version.
Floor 1: 6 Nodes
1 Start Node (Nothing)
3 Random Nodes (No Dangerous nor Focused Fights)
1 Rest Stop
1 BossFloor 2: 6 Total Nodes
1 Start Node (Contains Nothing)
1 Shop Node
3 Random Nodes (Including Dangerous and Focused Fights. This continues for the rest of the floors)
1 BossFloor 3: 8 Nodes
1 Start Node (Nothing)
1 Rest Stop
5 Random Nodes
1 BossFloor 4: 9 Nodes
1 Start Node (Nothing)
1 Shop Node
6 Random Nodes
1 BossFloor 5: 11 Nodes
1 Start Node (Nothing)
1 Shop Node
6 Random Nodes
1 Shop
1 Rest Stop
1 Boss
For the Hard Mirror Dungeon, just like the Normal Version, you should plan your route according to your situation, but generally, this is the priority order for what Nodes to go towards. Remember to almost always pick the Node with more paths out of it, unless it is a Risky/Dangerous Encounter.
Focused Nodes > Normal Fights > Risky/Dangerous Nodes (especially on floor 4-5. Before that, it might still be viable to go towards them).
Bosses (Hard Version)

Remember that the Floor 1-4 Bosses are the same as the Normal Version, so refer to Bosses (Normal Version) for those.
My Form Empties
My Form Empties uses the Karma gimmick, where getting 108 Karma on an enemy will kill them. There are 3 minions My Form Empties has you need to kill. They have high clashing, but they have low enough health (~300) that it’s very easy with enough E.G.O Resources. They are all based on previous bosses from Canto I to III. Out of the 3, I’d recommend defeating Aida first (the writer is very sad about this advice because they like her a lot) due to her difficulty; after that, the G Corp. Manager is very dangerous and should be defeated next, and then you have to defeat Guido, the tankiest of the bunch. After these three are defeated, My Form Empties itself is a breeze.
Faelantern
Fae requires a lot of Slash. Faelantern hypnotizes 3 Sinners (one per cycle), and the remaining Sinners must break its part for the rest to be freed. It goes through normal clashing for 2 turns, then the cycle restarts. Faelantern, with a Slash team or Slash E.G.O, is just as weak to it as it is in Refraction Railway, and takes around the same time as a Normal Dungeon boss with optimal play. Yet, the hypno gimmick doesn’t make it as easy as Dream-Devouring Slitcurrent.
Ambling Pearl
Ambling Pearl is just insanely annoying to fight. The fight's gimmick revolves around clashing the main pearl and preventing it from gaining any Green Slime by defeating the minions before it does; after it loses all Green Slime, it’s vulnerable. It’s a very easy fight, but it can’t be defeated very quickly because Ambling Pearl itself was meant to be very tanky before Mounting Trials came in, and as such it drags on for insanely long. Just kill its slime and break its head, and you should be good…assuming you finish within the year it takes to bring its health down.
Dream-Devouring Slitcurrent
This boss is definitely the easiest of the bunch. Assuming the player has numerous E.G.O resources, the problem of the constant Paralyze is completely removed. When the Flotsams are broken and the Paralyze is gone, the battle is practically won. The main problem here is the need for HP and SP and somebody to tank Blind Obsession, which is very easy since this is the final boss. Overall, a very good boss to get as your last.
Skin Prophet
Skin revolves around the gimmick of defeating its 4 candles around it before you can do damage, and it attacks everyone for at least 1 turn while defeating the candles because it is unclashable with candles. The best advice I can give you is to not use AoE because it may activate Skin’s counter; other than that, the fight is just very average, but a bit long.
Mounting Trials (Hard Version) (1/2)

You can look at the explanation for Mounting Trials in the Normal Section. The main difference in the Hard Mirror Dungeon is that they have changed the Mounting Trials to different effects, and now every Mounting Trial comes in two parts, the Enemy Level Up +, and the effect itself. Note 3 explains the Enemy Level Up, and the chart below shows the specific Mounting Trials for the Hard Mirror Dungeon and my comments on each.
Note 1: I've added clarifications for certain effects.
Note 2: The Floor Number listed means the Floor where the Boss is fought. The Effects themselves don’t apply until the Floor Number + 1.
Note 3: These are JUST the effects. There is more to consider when picking which one to choose since each Mounting Trial will also have a somewhat randomized selection of an Enemy Level Up for enemies. Enemy Level Up +2 seems to be the lowest possible value, and while not exclusive to Tier I Gifts, seems to be more common for them. Enemy Level Up +3 and Enemy Level Up +4 are the other options, and get increasingly more common the higher the Tier of the E.G.O Gift. Enemy Level Up +4 also comes with a second, free but random E.G.O Gift selection. All this info is useful, but generally you pick based upon how bad the Mounting Trial is, only depending on the Enemy Level Up if they are about equal difficulty or equal E.G.O Gift quality.
Note 4: Every single Mounting Trial in MD3H is bad. This is picking the lesser evil of many really bad evils. The main thing to remember is to AVOID STACKING SIMILAR DEBUFFS. They don’t override the previous one, they just get worse.
Name Effect Icon Floor Comments Defense Level Up (Enemy) Defense Level +4 1 2nd worst out of the floor 1 trials. It does what ‘Damage Taken Down’ does in a more roundabout way. It essentially will decrease damage taken by around 13-14% (Assuming Offense Level and Defense Level were equal originally. This percentage will change with differing Offense/Defense Levels), and thus is worse than the ‘Damage Taken Down’s 10%. Defense Power Up (Enemy) Defense Skill Base Power + 2 1 Best out of the floor 1 trials. This only applies when the Defense Skill is used, and so is the least general buff out of the four choices. Also, it's just a defense buff, so no extra damage to you. Max HP Up (Enemy) Max HP +10% 1 Worst of the floor 1 trials. You are going to be getting tons of Max HP up in the future trials, so it is best to limit it as much as you can. Damage Taken Down (Enemy) Damage Taken -10% 1 2nd best of the floor 1 trials. It's just Defense Level Up but a set percentage, and based on my math (which might be wrong, correct me in the comments), it's generally better percentage-wise. Offense Level Up (Enemy) Offense Level +3, Max HP +5% 2 Best out of the floor 2 trials. It essentially will increase damage dealt by the enemy by around 10% (Assuming Offense Level and Defense Level were equal originally. This percentage will change with differing Offense/Defense Levels), which makes it better than Damage Dealt Up. Also, all the floor 2 trials give the same HP, so I’m ignoring it. Final Power Up (Enemy) Final Power +1, Max HP +5% 2 Second worst of floor 2 trials. Will add 1 to the end of any usage of coins for enemies, so it makes it harder to clash with enemies. Base Power Up (Enemy) Base Power +1, Max HP +5% 2 Worst of floor 2 trials. Essentially the same thing as Final Power Up, but will deal slightly more damage if an attack hits. Damage Dealt Up (Enemy) Deal +15% damage, Max HP +5% 2 2nd best out of floor 2 trials. Essentially ‘Offense Level Up’ but a set percentage. Final Power Up I (Enemy) Final Power +1, Max HP +15% 3 2nd best of the floor 3 trials. It's essentially Final Power Up from the previous floor, +10% Max HP. I’d avoid stacking buffs (They DO stack, so that's +2 Final Power if you got both), but otherwise it's not the worst. Final Power Up II (Enemy) Final Power +2, Defense Level -4, Max HP +15% 3 3rd best of the floor 3 trials. Defense Lvl down is a benefit, Final Power is essentially the same as Base Power, but won’t damage you as much if you lose the clash, the main detriment is that Max HP +15%. Base Power Up I (Enemy) Base Power +1, Max HP +10% 3 Best of the floor 3 trials. It doesn’t increase HP massively like Final Power and otherwise is basically the same as Base Power Up on the previous floor. Base Power Up II (Enemy) Base Power +2, Defense Level -4, Max HP +10% 3 3rd worst of the floor 3 trials. Basically a carbon copy of Final Power Down II, but with Base Power (increased damage if you lose the clash) and less Max HP Gain. I rated them like this, but they are pretty close. Coin Power Up I (Enemy) Plus Coin Power +1, Minus Coin Power -1 3 Worst out of the floor 3 trials. It gets more powerful the more coins enemies have, and just tends to wreck ya. Overload I (Enemy) Offense Level +7, Defense Level -7 3 2nd worst out of the floor 3 trials. Tends to increase damage taken and dealt by 21-22 percent. It also increases clash power by 2, since for every 3 offense level above the enemy's defense level, they gain 1 clash power. It is a risk-and-reward type buff since it does make them more likely to TAKE a ton of damage, but that is up to you if you want to risk it since you still have to win the clash.
Mounting Trials (Hard Version) (2/2)

Name Effect Icon Floor Comments Final Power Up III (Enemy) Final Power +2, Defense Level +6, Max HP +10% 4 It's better than Base Power Up III. Honestly, probably the best 'Power Up' type one for Floor 4. Final Power Up IV (Enemy) Final Power +3, Max HP +10% 4 Honestly, Final Power +3 is better compared to Final Power +2, Defense Level +6, as long as you have the E.G.O Resources to win those clashes. Coin Power Up II (Enemy) Plus Coin Power +1, Minus Coin Power -1, Max HP +15% 4 Very bad, especially if stacked. I’d avoid it. Base Power Up III (Enemy) Base Power +2, Defense Level +3, Max HP +10% 4 Basically Final Power Up III, but more damage if you lose the clash, and slightly less defense level up. The Defense Level Up isn’t a deciding factor in my opinion, I’d say it's worse between the two. Overload II (Enemy) Enemy Offense Level +10, Defense Level -7 4 Best out of the Floor 4 buffs, assuming you didn’t pick Overload I for Floor 3. Essentially a Clash Power Up +3. It is still bad, don’t get me wrong, but the others are worse. Course, if you are using Evade Dice, then you basically can ignore Offense Level +. Resilient (Enemy) Max HP +25%, Defense Lvl +5 4 This one is in a weird spot. I’m leaving it unranked, but it's essentially the ‘take if everything else is terrible’ deal. It's not a good one for speedrunning the Mirror Dungeon, but more HP with clashes you can still win (and only 1 floor) is better than more HP and clashes you will always lose. It's also only really +15% more Max HP than almost every other upgrade for this floor. Headstrong (Enemy) Deal +50% damage and take -50% damage 4 Well, it's the only one that only takes effect when dealing damage, so if you are worrying about clash values getting too high, this one might be ok. Generally, I’d say avoid though, since -50% damage feels soul-crushing.
Enemy Base Levels

This is the table of base enemy levels per floor. Remember that these are the BASE numbers, and thus you should add whatever bonus Enemy Level +s you got from the Hard Mirror Dungeon Mounting Trials to this number.
Note: Risky/Dangerous Encounters and Focused Encounters do NOT spawn on Floor 1.
Floor Normal Fight Base Lvl Risky/Dangerous Fight Base Lvl Focused Fight Base Lvl Boss Fight Base Lvl Floor 1 Lvl 40 N/A N/A Lvl 43 Floor 2 Lvl 41 Lvl 42-45 Lvl 41 Lvl 44 Floor 3 Lvl 42 Lvl 47-49 Lvl 42 Lvl 45 Floor 4 Lvl 43 Lvl 50-53 Lvl 43 Lvl 46 Floor 5 Lvl 44 Lvl 50-53 Lvl 44 Lvl 47
Starting E.G.O Gifts

This is the list of all possible Starting E.G.O Gifts for both versions of Mirror of the Lake. It assumes you have unlocked ‘A Journey’s Start’, which Adds a small chance for Tier 3 E.G.O Gifts to appear as a starting gift, as well as each of the ‘New Discovery’ secondary buffs, which each add 2 E.G.O Gifts for a specific status effect. The secondary buff Nodes around ‘A Journey’s Start’ are not required, but do speed up the process.
Random is a separate situation, where it pulls from the previous 7 categories, plus some extra ones. Every Tier I, II, and III can appear as a starter. IV will never appear as a Starter Gift. If it does not fit in with any of the status effects, then it will only appear in the Random category. When I was testing it seemed weighted, about 50/50 between a non-status effect-related gift vs a status effect-related one, but that might have just been, well, randomness. Examples include: Almost every healing Gift, E.G.O Resource Gift, Carmilla, etc.
Note 1: If it's marked with a * after the Tier, then it is a fusion ingredient for one of the 7 Fusion Gifts.
Note 2: If it is marked with a * before the Name, then it requires the ‘New Discovery’ unlock. Remember, all Tier IIIs require the ‘A Journey’s Start’ Unlock.
Note 3: You can reference the E.G.O Gift Guide in the Tips and Trick's Section for the fusion requirements and upgrades of these gifts.
Burn Bleed Tremor Rupture Sinking Poise Charge Ashes to Ashes (I)* *Rusted Muzzle (I)* *Nixie Divergence (I)* Talisman Bundle (I)* Headless Portrait (I)* *Ornamental Horseshoe (I)* Wrist Guards (I)* Burning Intellect (I) Grimy Iron Stake (I) Green Spirit (I) Crown of Roses (I) Thorny Path (I) Pendant of Nostalgia (I) Curriculum Vitae (I) Hellterfly’s Dream (II) Wound Clerid (II) Blood, Sweat, and Tears (II) Broken Revolver (II) Melted Spring (II) Cigarette Holder (II) Employee Card (II) Pinpoint Logic Circuit (II) White Gossypium (II) Oscillating Bracelet (II) Fluorescent Lamp (II) Red Order (II) Stone Tomb (II) Nightvision Goggles (II) Fiery Down (II) Little and To-Be-Naughty Plushie (II) *Reverberation (II) Barbed Snare (II) Skeletal Crumbs (II) Nebulizer (II) Portable Battery Socket (II) Charred Disk (III) Rusted Cutting Knife (III) Melted Eyeball (III) Thunderbranch (III) Broken Compass (III) Endorphin Kit (III) Lightning Rod (III) *Dust to Dust (III)* Smokes and Wires (III)* Bell of Truth (III)* *Standard-Duty Battery (III)* *Midwinter Nightmare (III)* Four-Leaf Clover (III)* *Material Interference Force Field (III)*
General Strategy + Tips And Tricks

For your first few runs of the Normal Difficulty, you should not have a massive amount of trouble. Just follow the ‘What Starlight Buffs to Prioritize’ section in order to get the optimal bonuses with your starlight. Otherwise, just remember to swap out your team for different status effects for optimal starlight farming.
For the Hard version of the Mirror Dungeon, you are gonna have a tough time until you unlock a few starlight buffs to help boost your odds, though it is definitely possible before that if you have strong units and know how to properly clash. A good strategy once you HAVE unlocked a fusion and the ‘More the Better’ perk is to refresh until you have both the Tier III and Tier I E.G.O Gifts required for the fusion as a starting gift. You can refresh by simply entering the Mirror Dungeon, checking the gifts available, and if they aren’t what you want, leave the Mirror Dungeon and forfeit it. Make sure not to spend modules for the ‘rewards’ of that mirror dungeon, since you didn’t actually do anything on it and thus would be wasting modules. You can then repeat this until you get what you want as a starting gift! I would not waste too much time on this, but it is useful if you want a guaranteed win. After getting both, Floor 1 on the Hard version guarantees a Rest Stop where you can fuse the two right before your first boss.
As mentioned earlier in the guide, I recommend reading some of our 'How to __' Guides to team build and prepare your runs.
We don't have Burn done yet lmao, wait a few days/weeks.
How to Bleed by Borderlined
https://steamcommunity.com/sharedfiles/filedetails/?id=3117516645
We don't have Tremor done yet lmao, wait a few days/weeks.
We don't have Rupture done yet lmao, wait a few days/weeks.
How to Sinking by Silver
https://steamcommunity.com/sharedfiles/filedetails/?id=3118228803
We don't have Poise done yet lmao, wait a few days/weeks.
We don't have Charge done yet lmao, wait a few days/weeks.
I also recommend referencing these guides while going through the dungeon itself:
E.G.O Gift Fusion & Upgrading Cheat Sheet by Borderlined
https://steamcommunity.com/sharedfiles/filedetails/?id=3115645873
MD3 Farming [Strategy Deep Dive] by u/Effective-Engine6745 and compiled by Agender Witchery
https://steamcommunity.com/sharedfiles/filedetails/?id=3120055561
Mirror Dungeons Abnormality Cheatsheet (W.I.P.) by Echo
https://steamcommunity.com/sharedfiles/filedetails/?id=2940932941
Thanks For Reading!

Special Thanks to Lunarsault, who let us use some of their screenshots in this guide, and Silver, who co-wrote this guide with me, Borderlined.
Final Note: If there's anything you think we should add (such as an extra Tip & Trick), got wrong (I'm sure my math is off somewhere), or anything else, let us know in the comments!
Source: https://steamcommunity.com/sharedfiles/filedetails/?id=3118808724
More Limbus Company guilds
- All Guilds
- Mastering Gacha & Lunacy Resource
- TRADUCCIN al ESPAOL de Limbus Company
- Limbus Company Guide 831
- Limbus Company new players FAQ
- What to do if you have lost the love of your life
- How to increase your chances of getting christmas nightmare EGO!!
- Getting extra weekly bonus's from Mirror Dungeon overhauls
- How to delete Limbus Company
- How to Discard (with simple Q and A's)
- CantoVII speed guide