
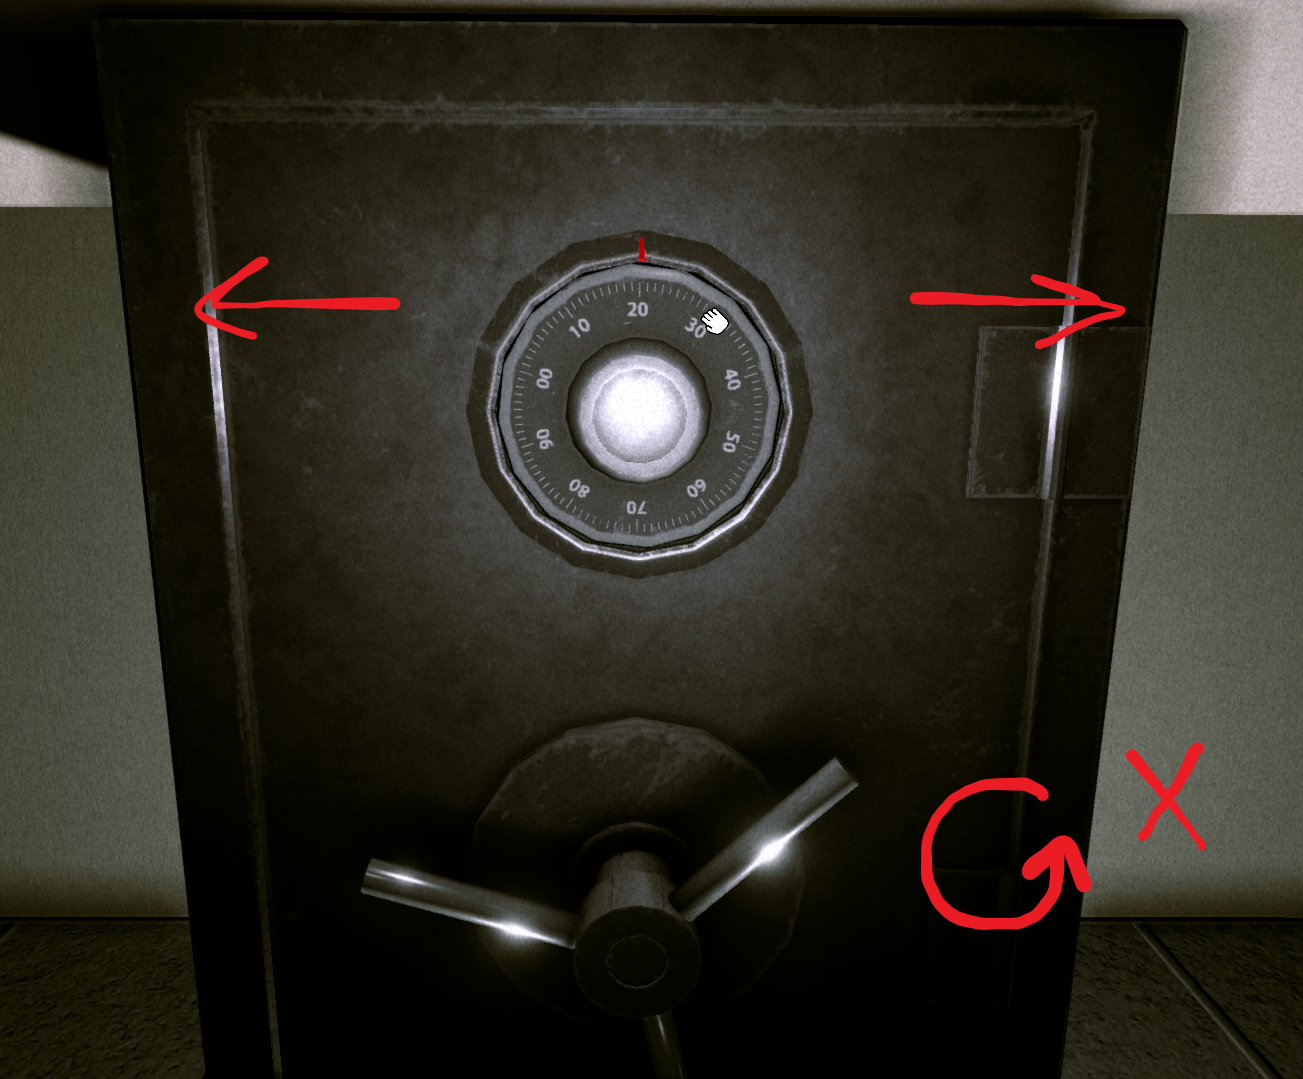
Level 0
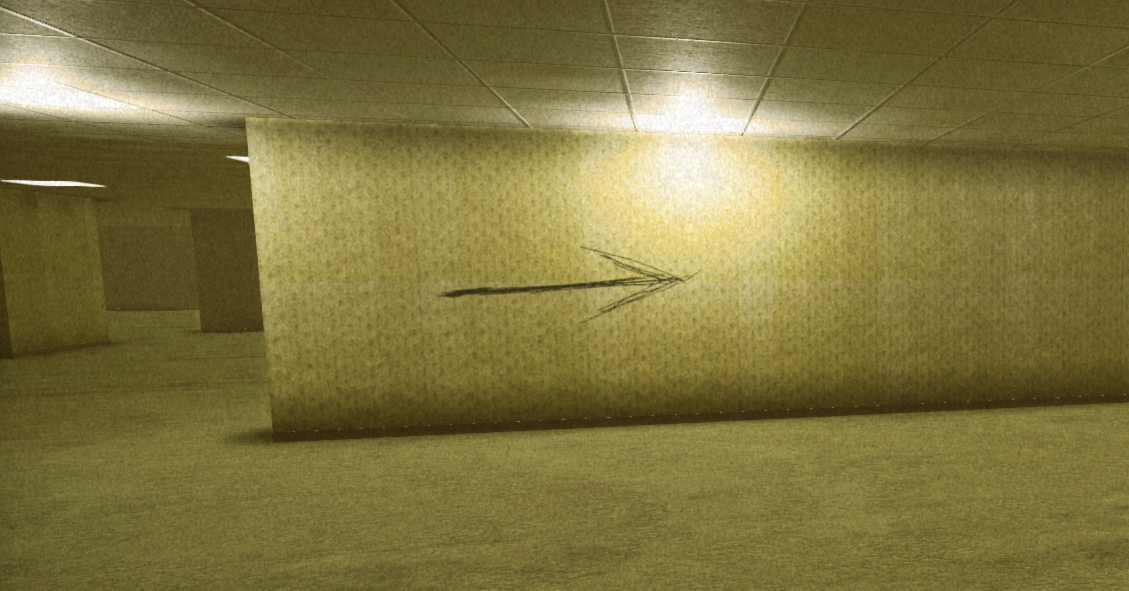
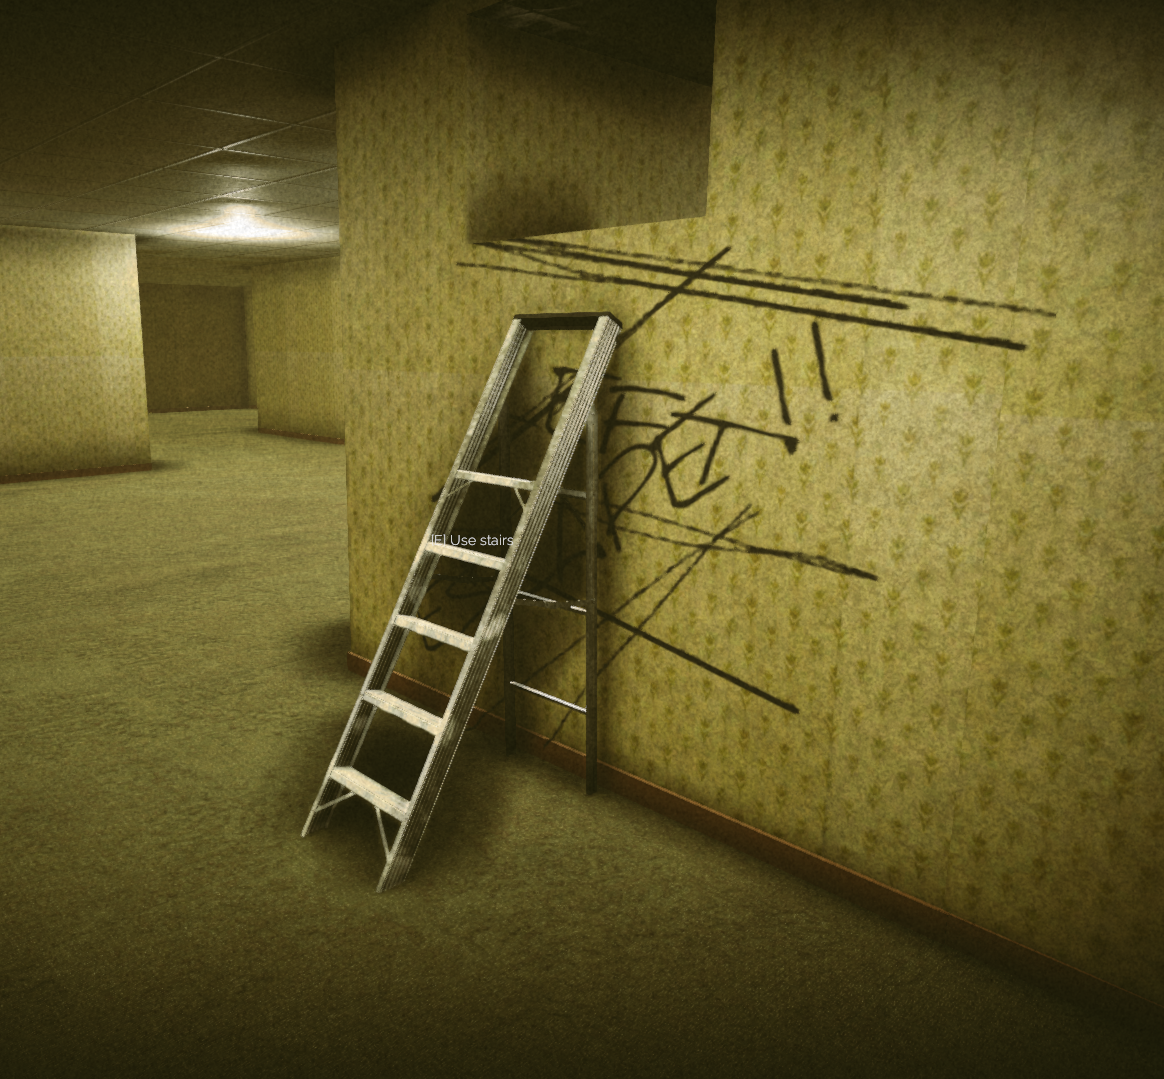
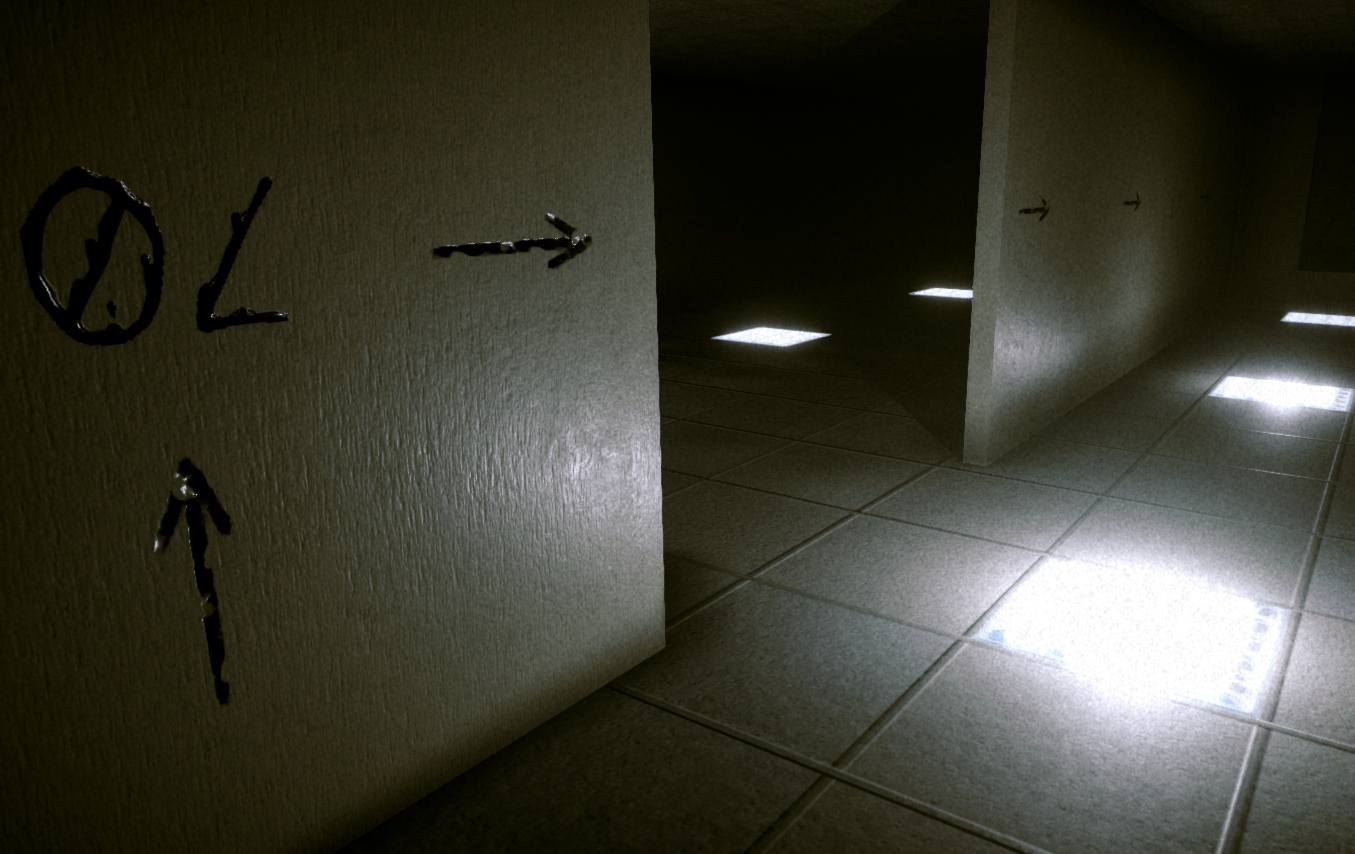
Okay so this is the easy bit, follow the arrows
then you'll find the escape.
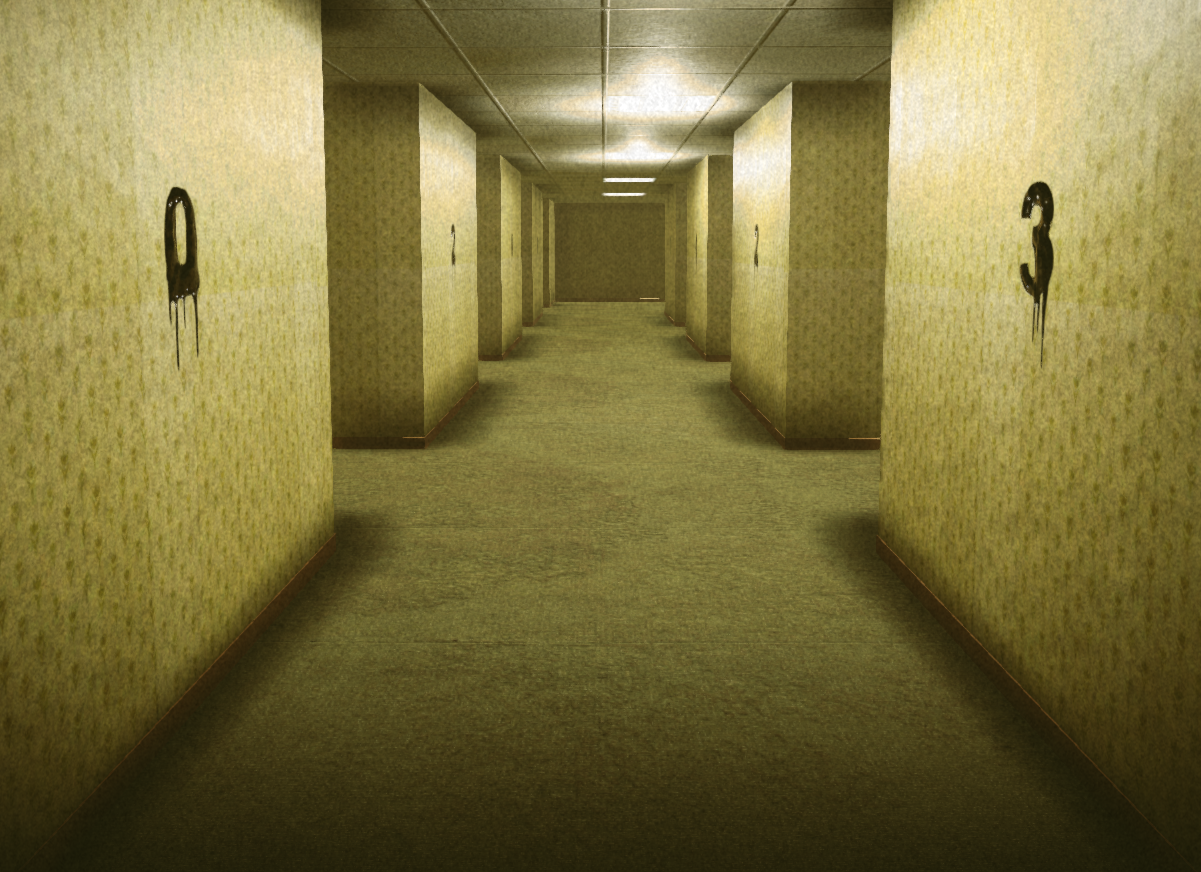
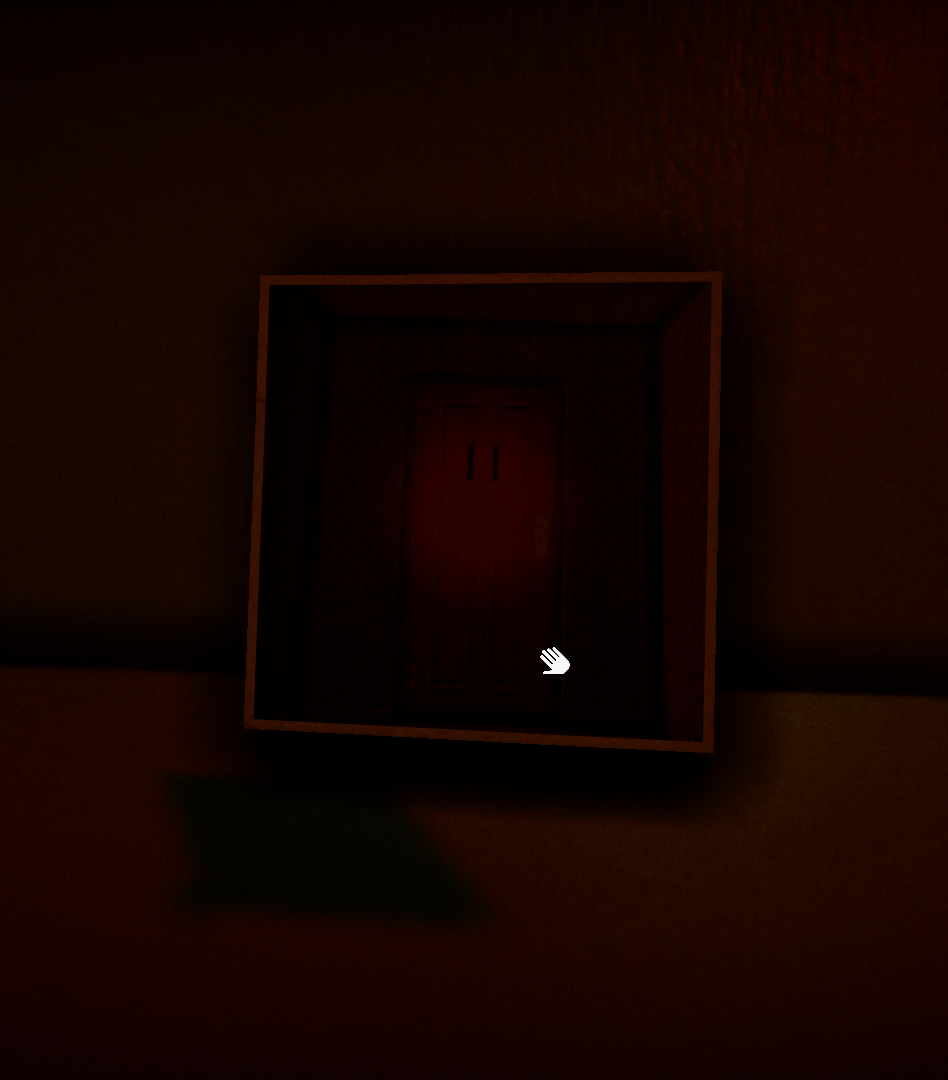
Afterward, you'll come to the hallway with numbers.
On the left is the code to the elevator, while on the right is the order.
Level 1
TIP: You can run more via spamming shift.
This is a gif comparison of spamming shift and holding shift[media.giphy.com]
So next is just collecting body parts, in which they can be within/near
Drawers
Lockers
Permanently open vents
Vases
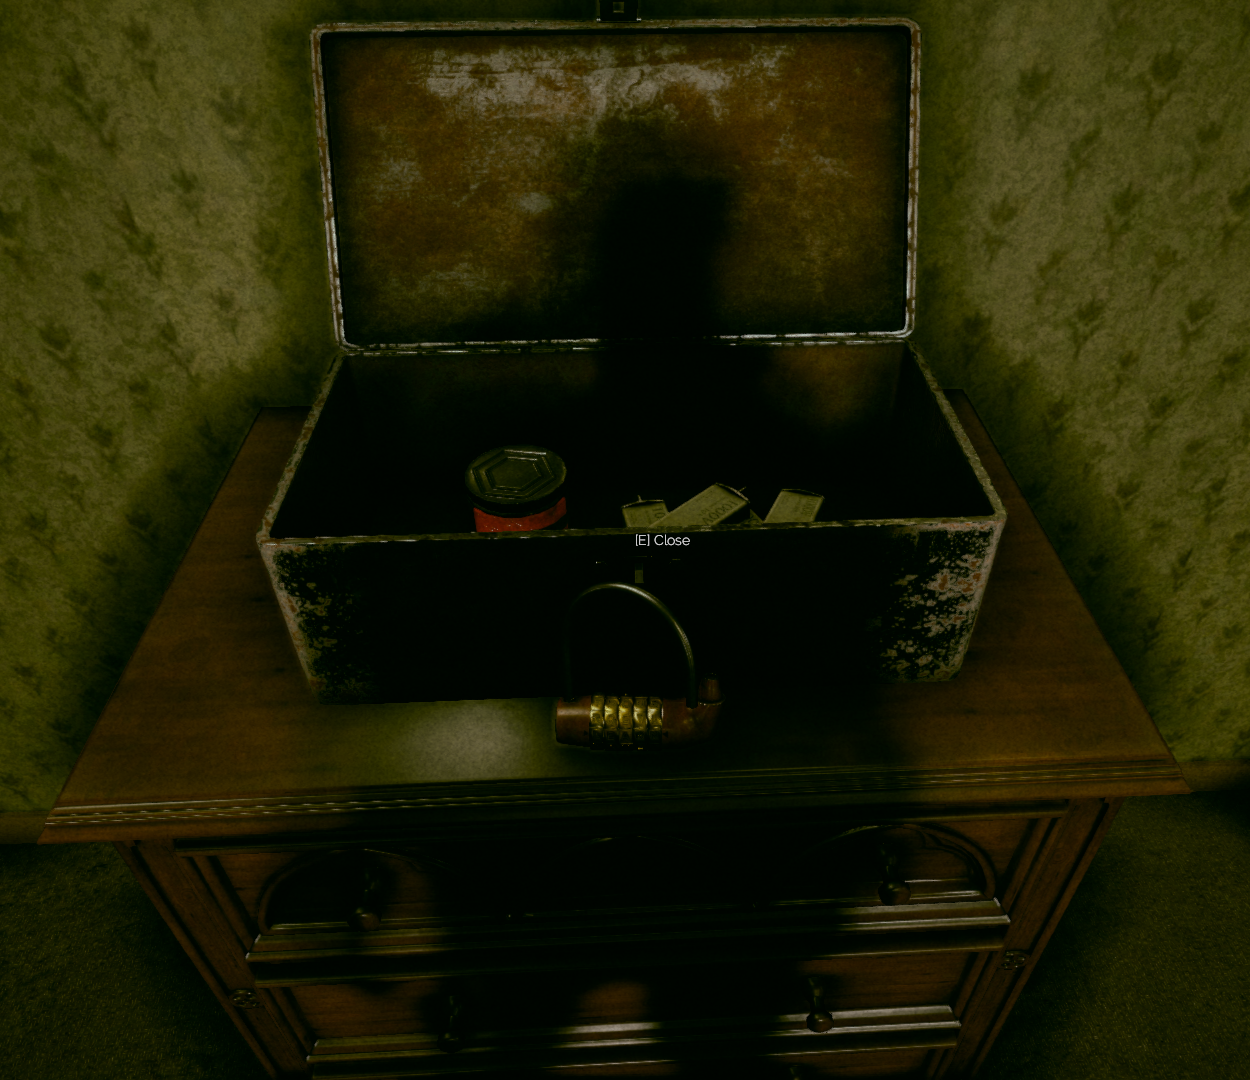
Next to the lock-box (in the red door room)
and in this specific room (near spawn).
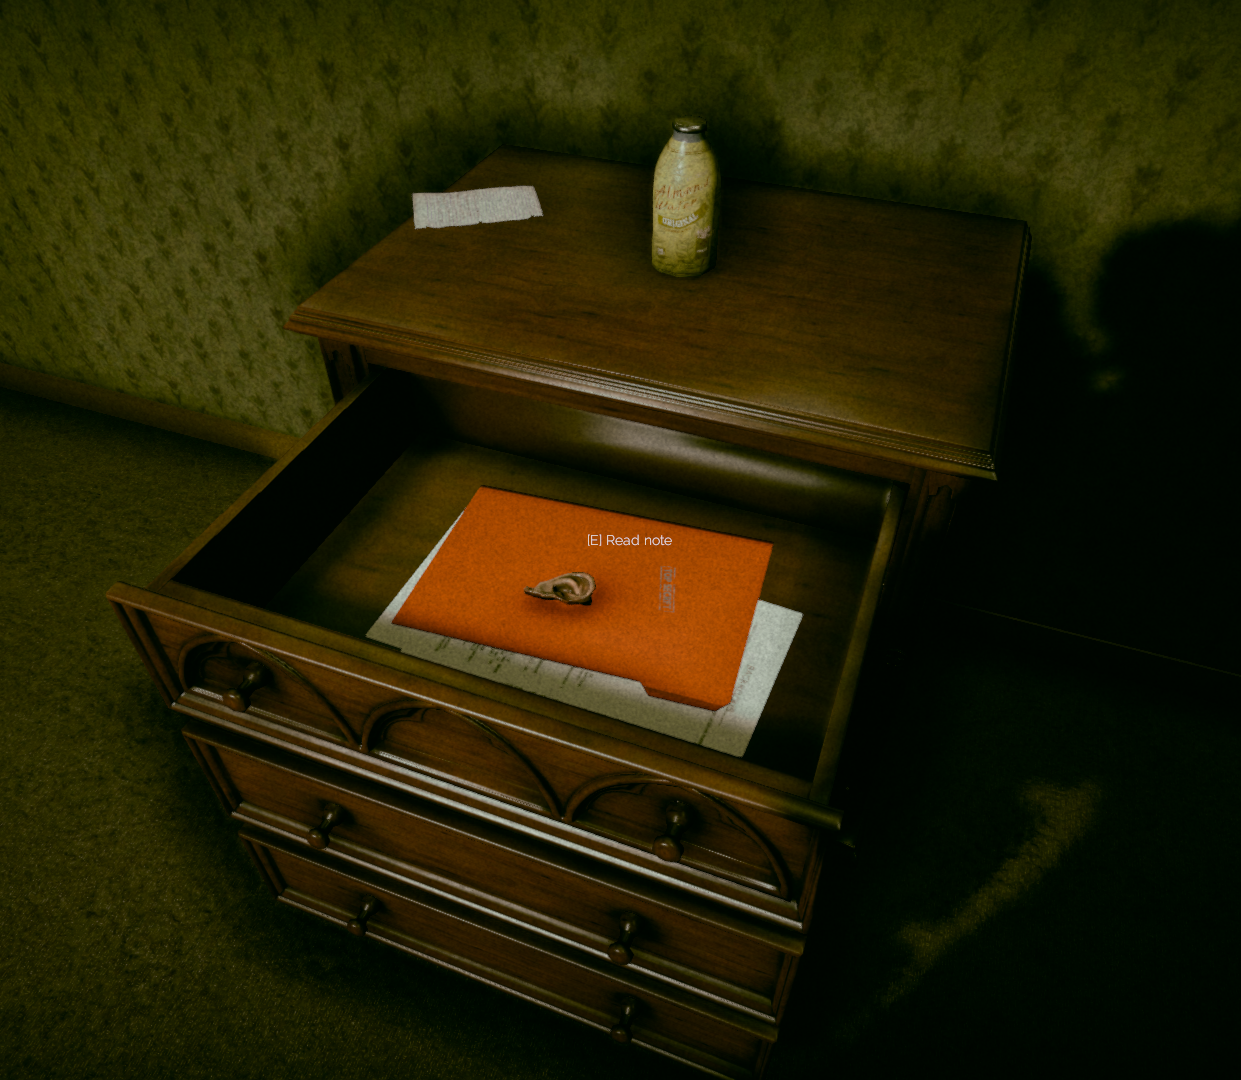
TIP: You can leave the VHS running and come back to it later for the answer. (If a smiler was blocking the way this can be used for efficiency) The VHS gives you the code for the body parts, to break the mirror.
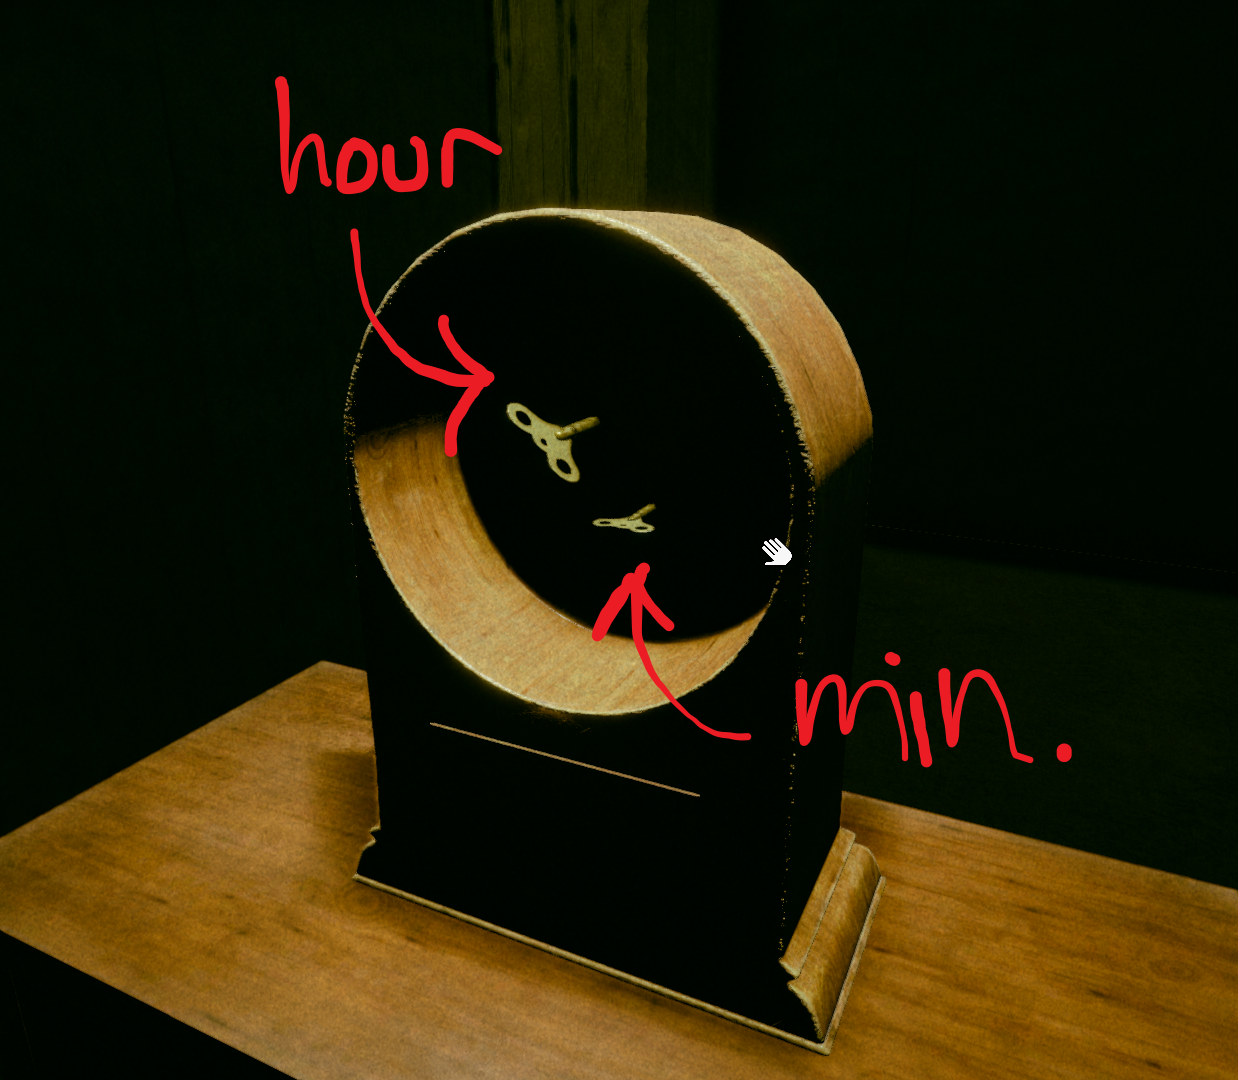
Next, complete the horse puzzle to get into the clock room. You'll need this code to break the chains on the door. The bigger cog (on the back of the clock) is the hour hand and the smaller cog is the minute hand.
TIP: Let's say the time is 8:30, you can count the clicks in your head so you don't have to turn to check. So 8 clicks for the hour hand and 6 clicks for the minute hand.
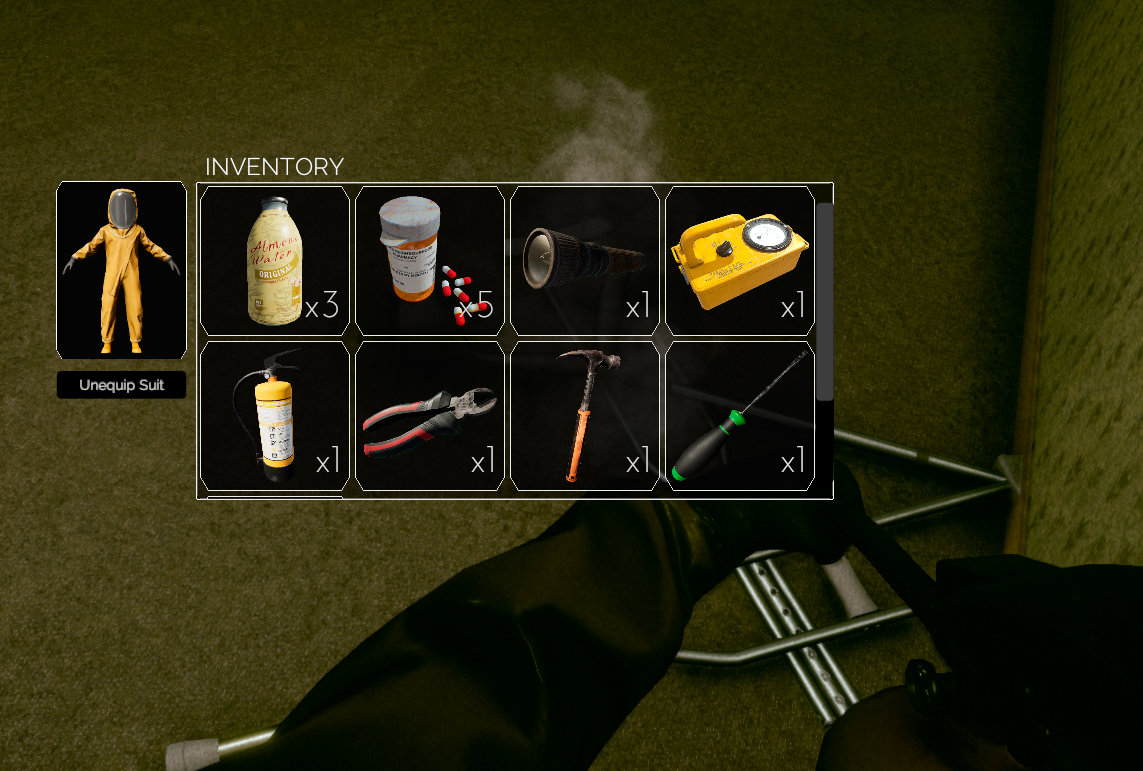
While in body room, collect the hammer. (If unsure how to open the locker use the note for reference). Use that for the vases. Use the hammer on the vases for the red key. The red key is used to collect the fuses for Level 2.
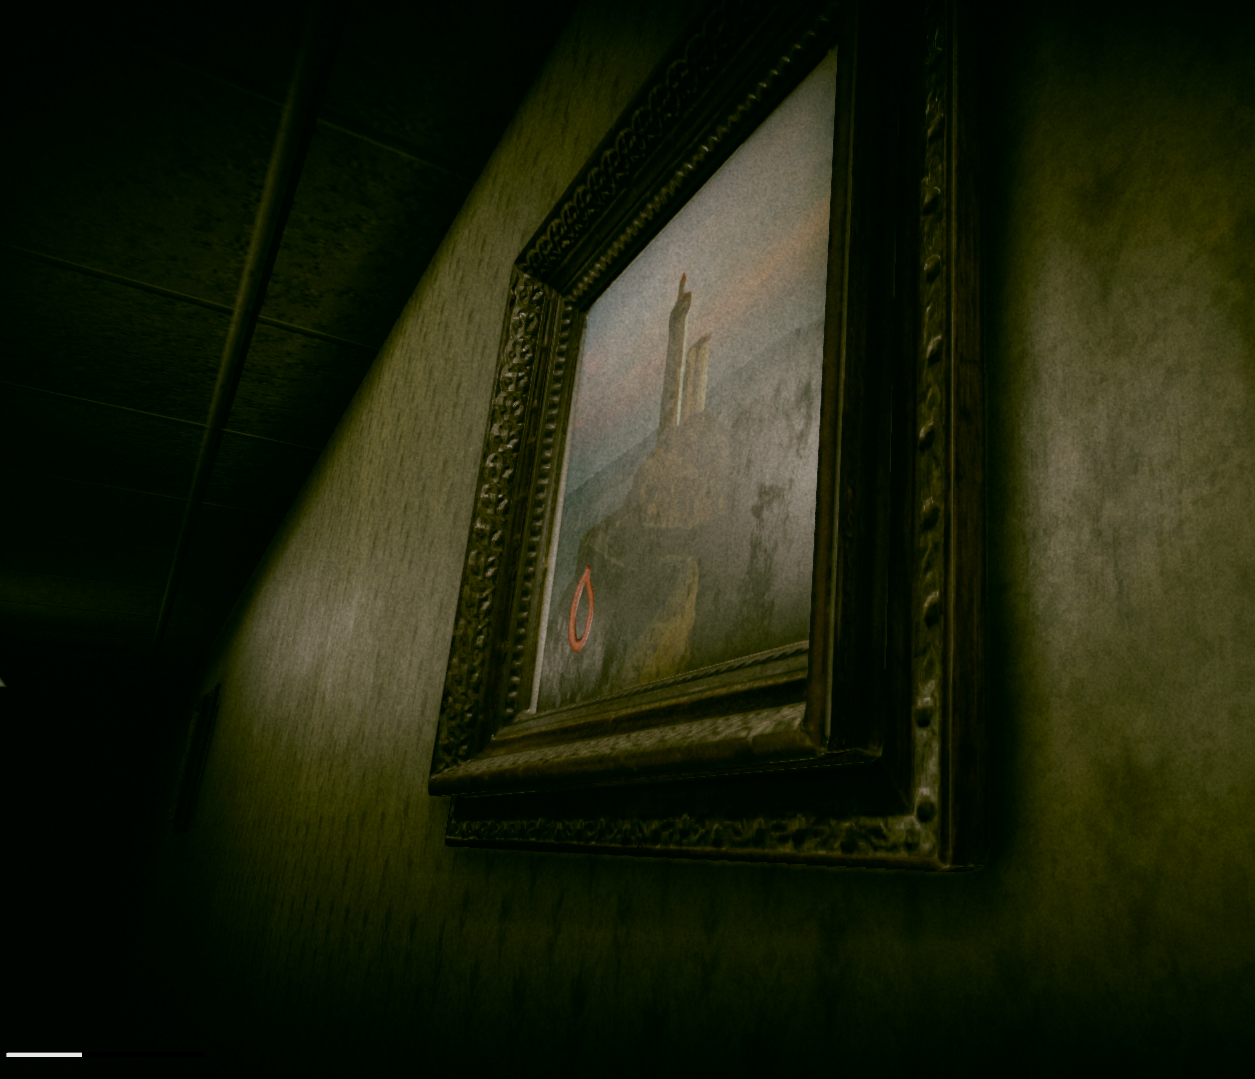
Once in the red door room look at the paintings with this angle, you'll see the letters every time, instantaneously.
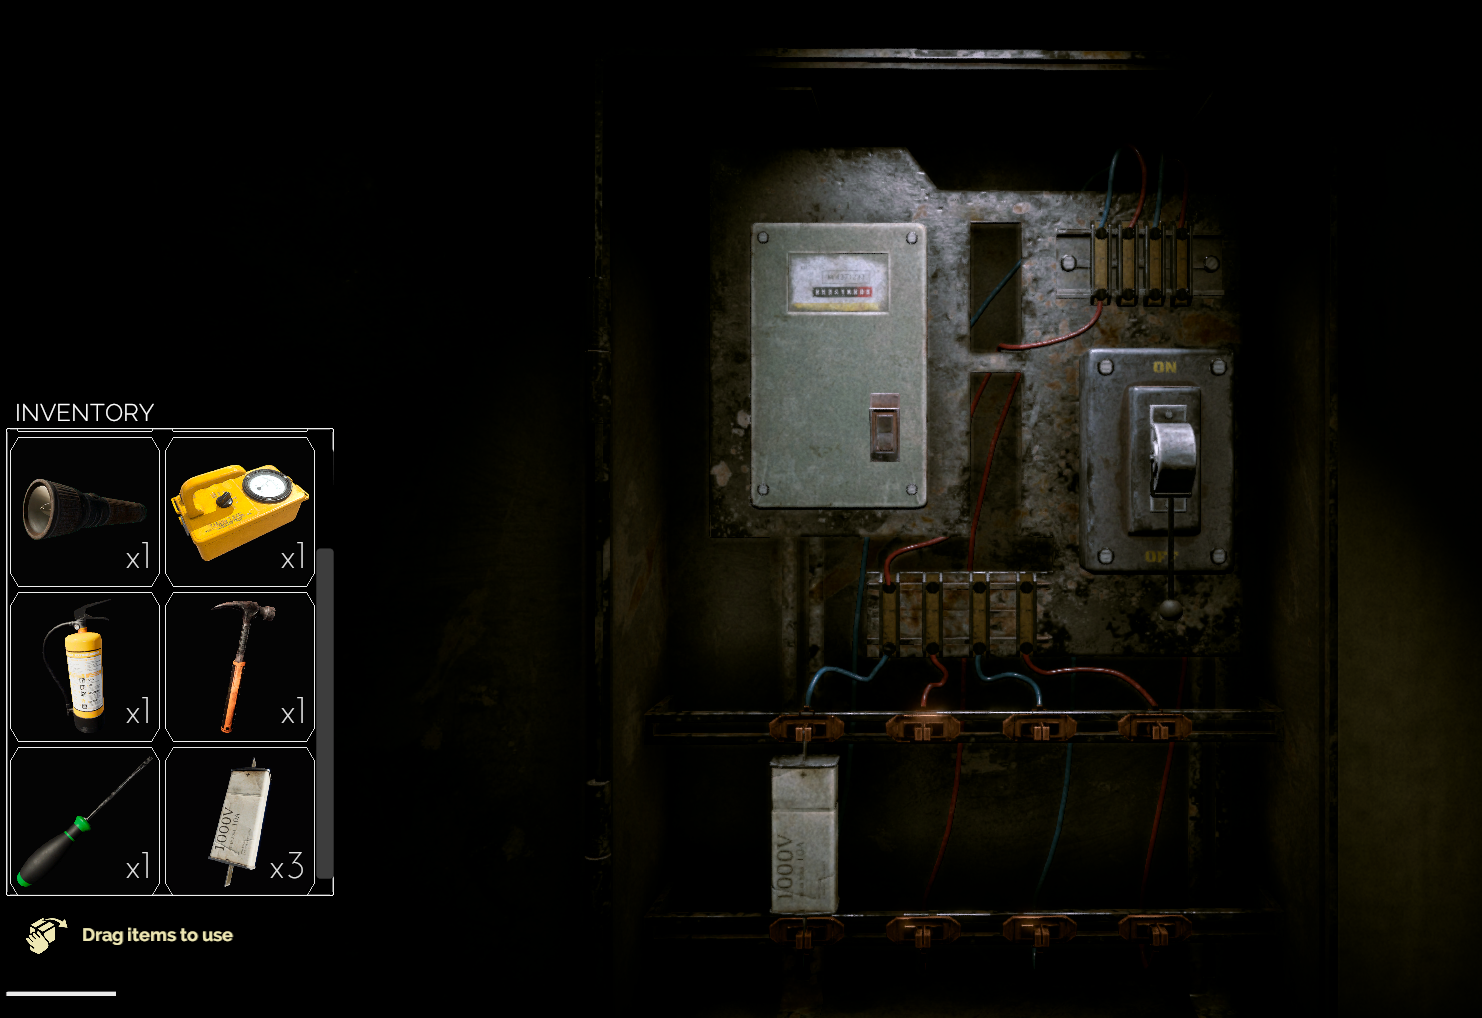
You'll gain a jam for unlocking the box (along with the fuses), use that when you're flipping levers. (For the anti-radioactive suit and purifier).
Once you've completed all the puzzles on this Level, purify the radioactive items.
If you open up your inventory while the purifier is going it will continue to go. which means you can hover over scanner for efficiency.
Find the jam in this section (which is by the locker), it will be needed for the parking lot area.
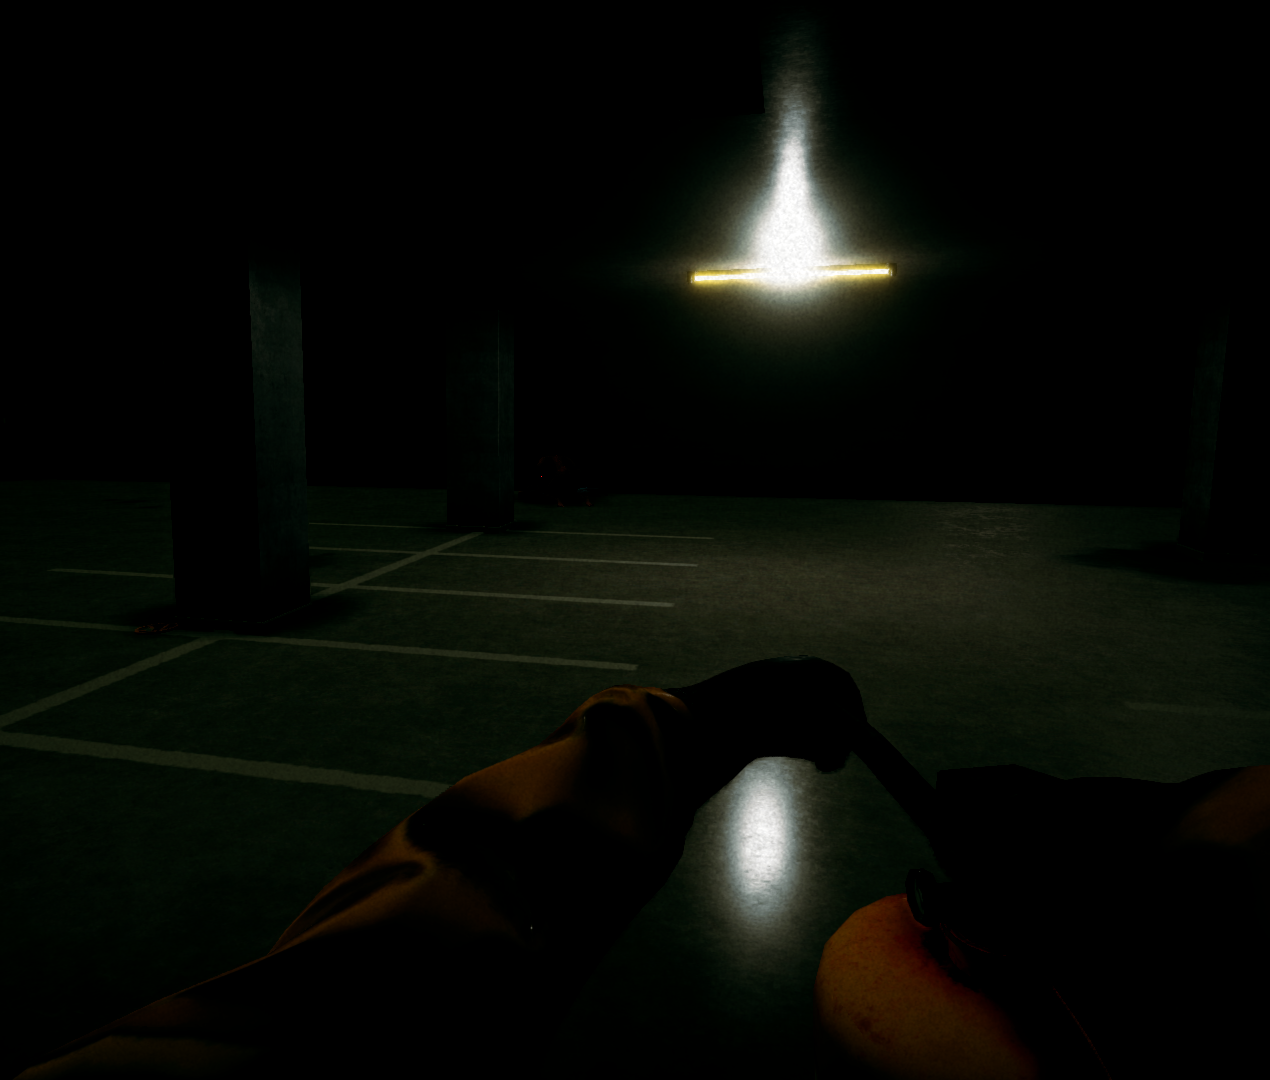
Okay drop-down, then instantly walk away from the ketchup monster.
Use the jam here and find the valves, you can only carry two at max. I'd recommend looking near the center while the jam is active.
Eventually, the monster will leave the body, which you can loot for the keycard and/or valve.
Afterwards, progress should be looking something like this.
Level 2

Okay, this section is the hardest bit, so be prepared.
First, turn on the lights. The room can be found near the computer. Since you've already done the red door puzzle, you can easily insert the fuses.
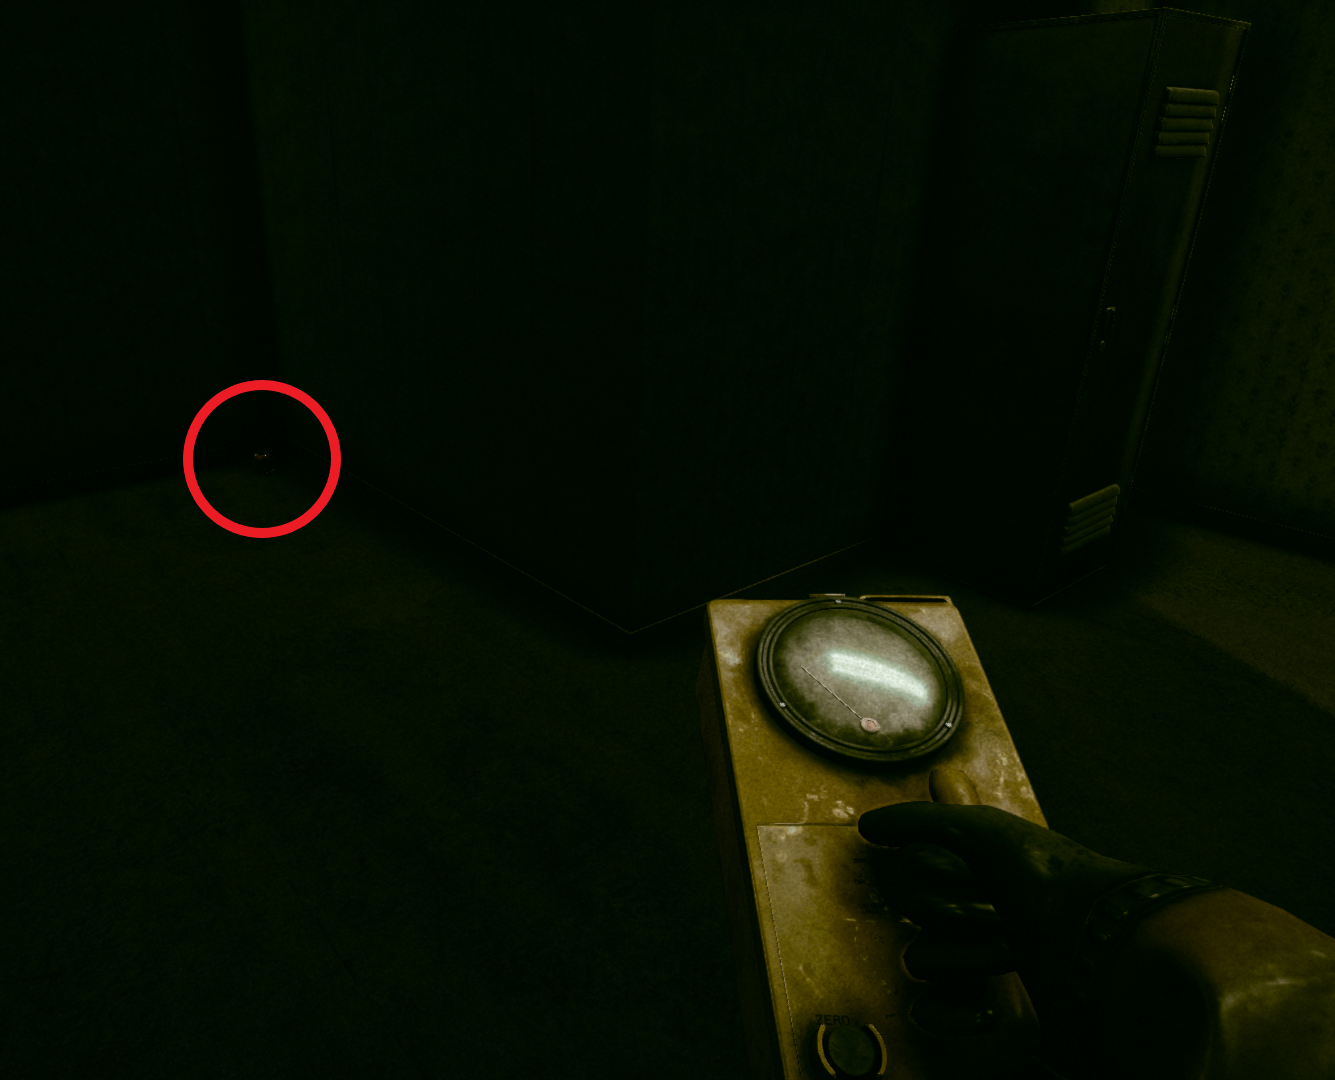
Next, do the safe puzzle. You gain the decoder and the monster detector. The monster detector will be extremely useful during the birthday maze (the hardest part) and pool.
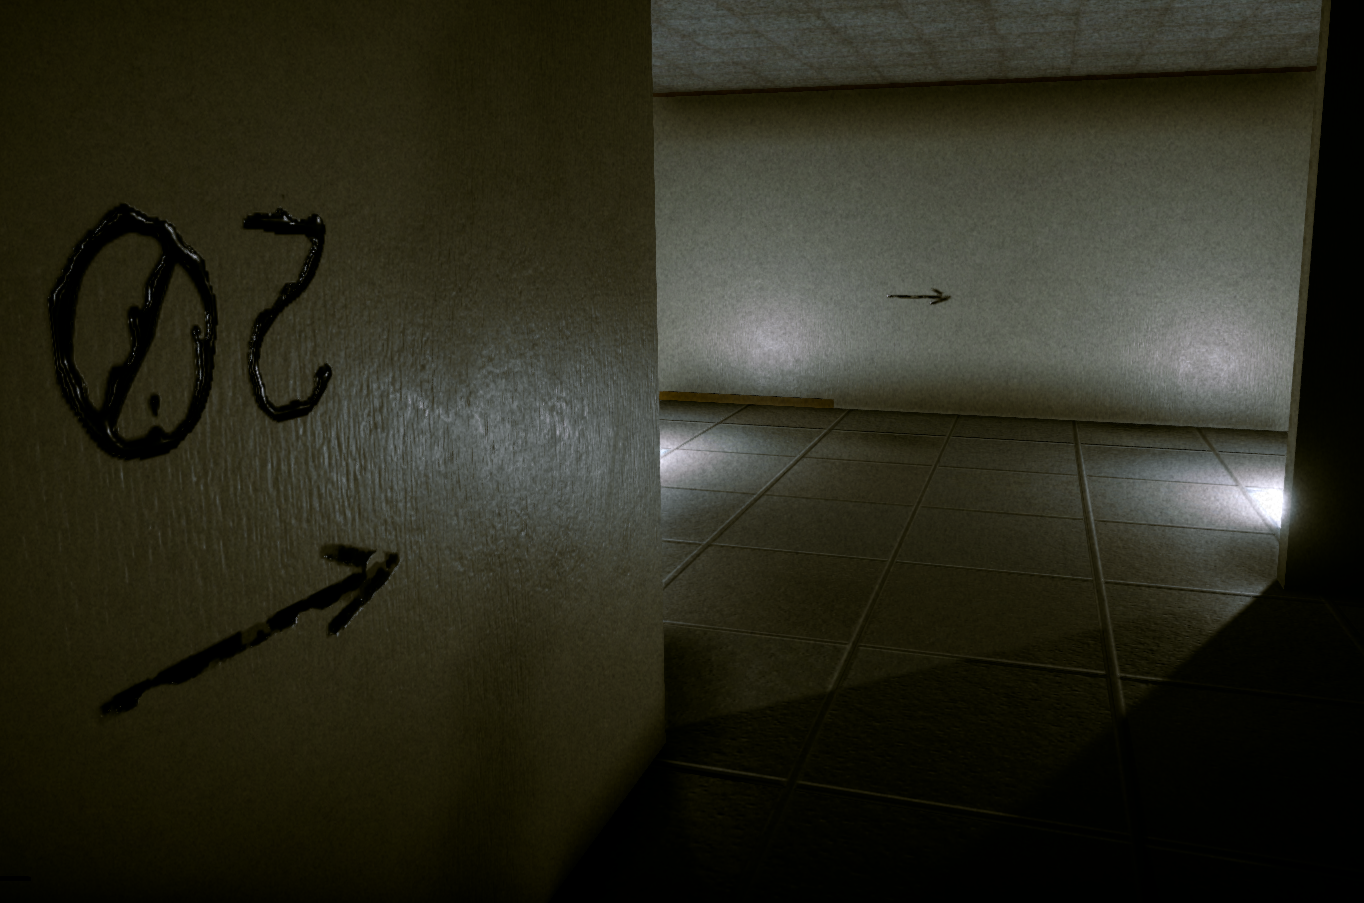
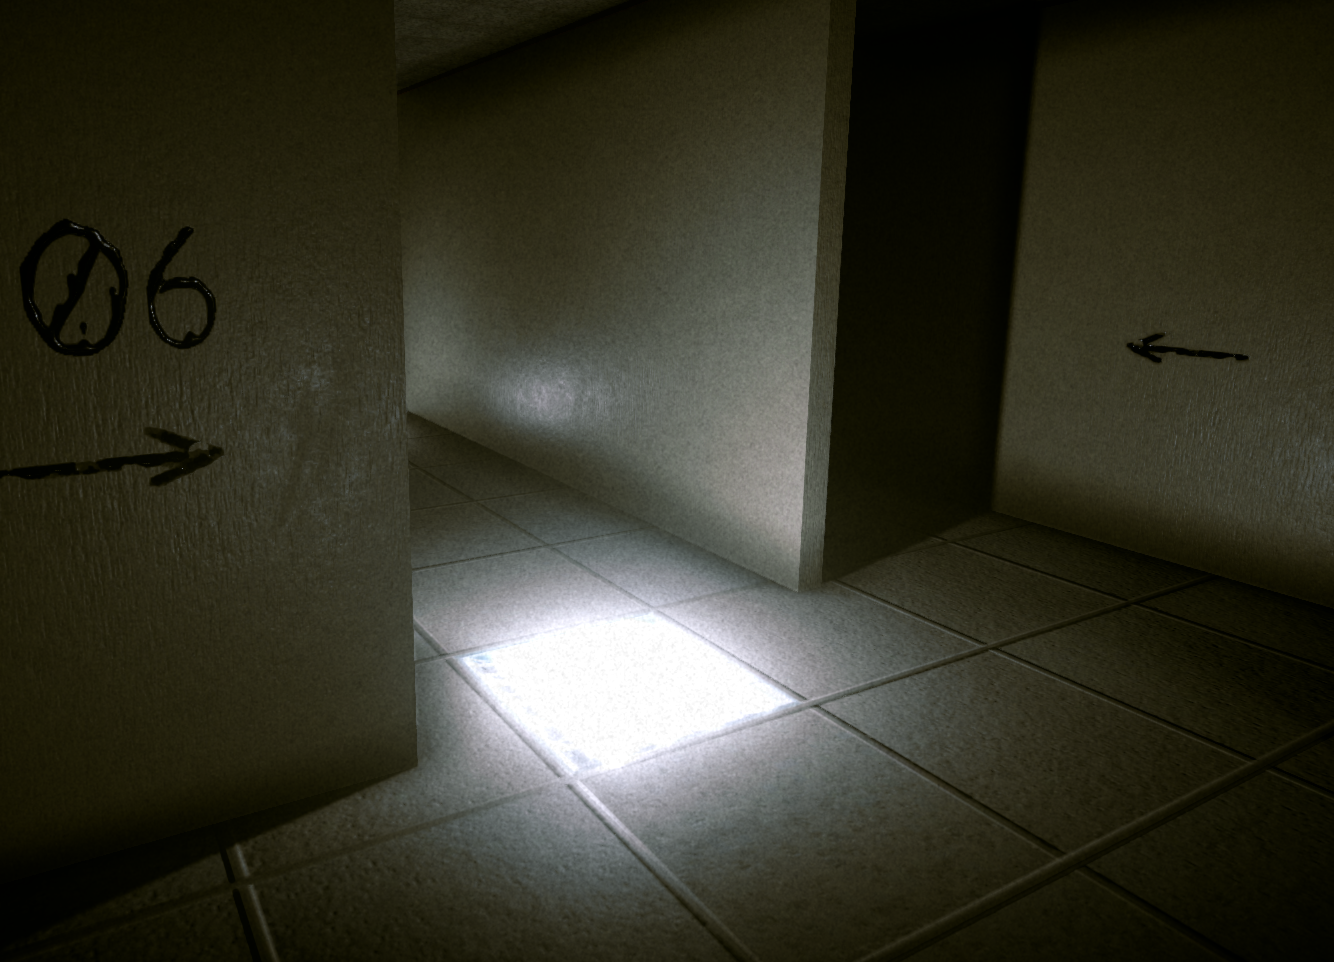
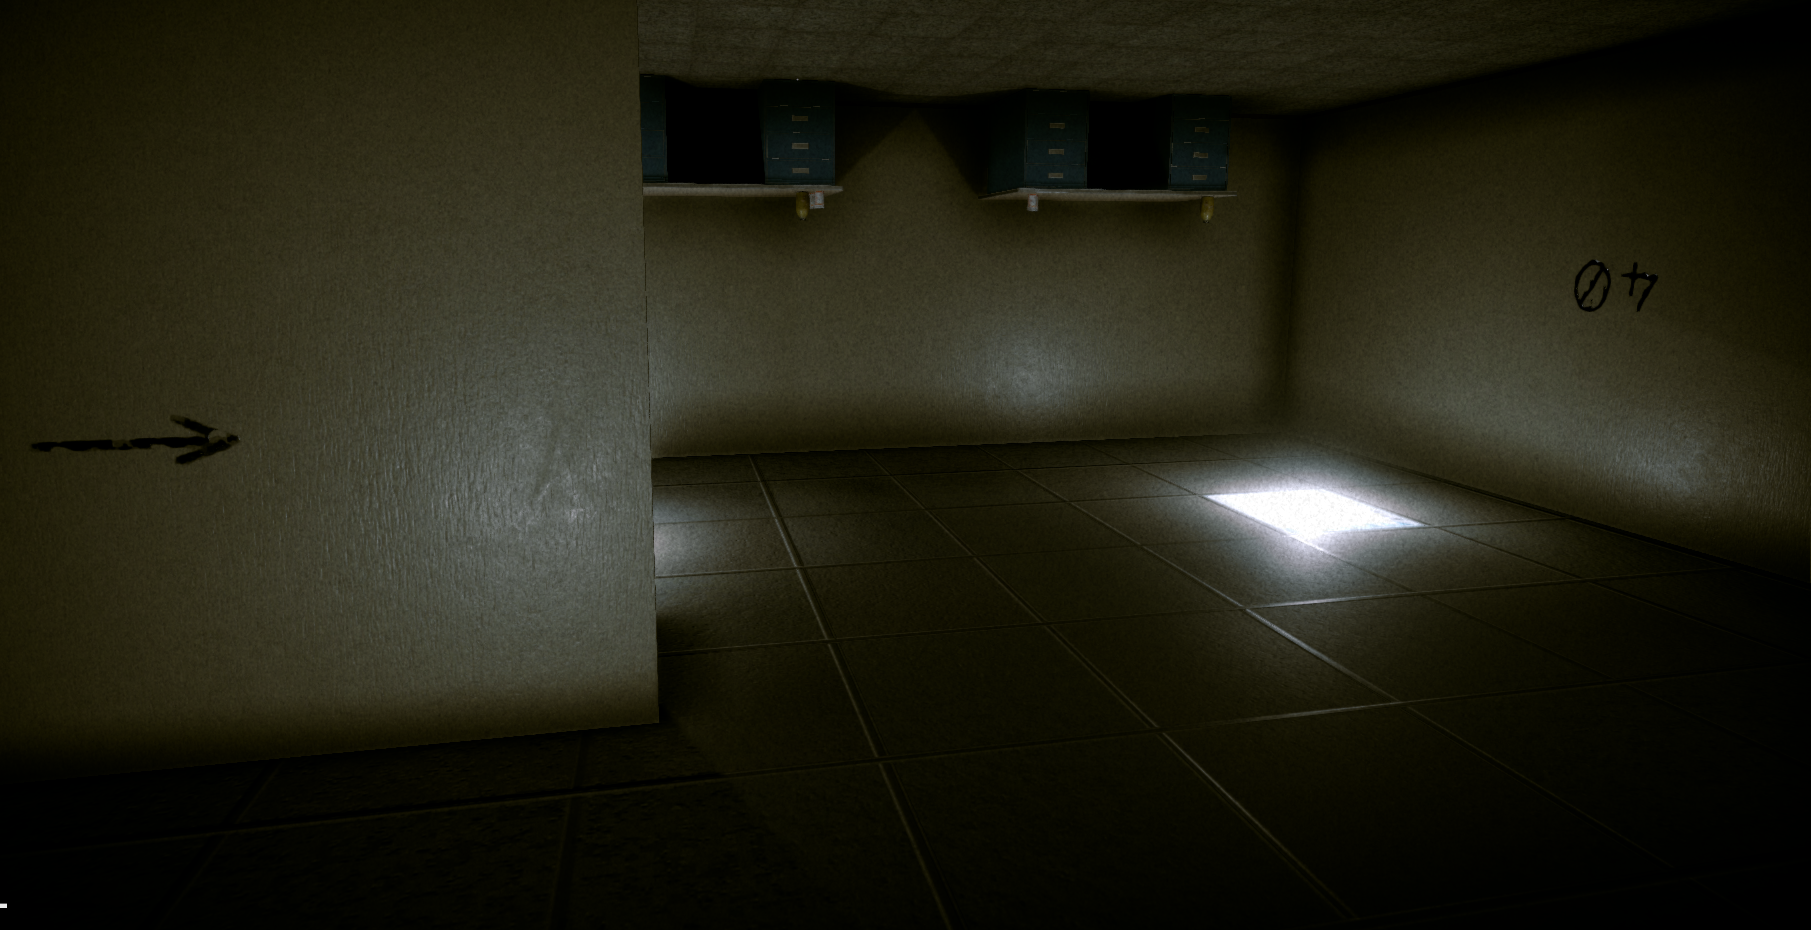
So how to get the code is by following the arrows. Start with the first number you see when you open the door. Mine is "07".
The second number is on the wall and so on. I will continue the images through the full cycle so you get the idea.
Okay, so my full code is "70, 20, 90, 50, and 40". But because this room is flipped you will also flip your own code. So, "40, 50, 90, 20, 70". The note explains how to move, but I wanted to show a visual in terms of how you move your mouse. Don't turn the nob when entering codes.
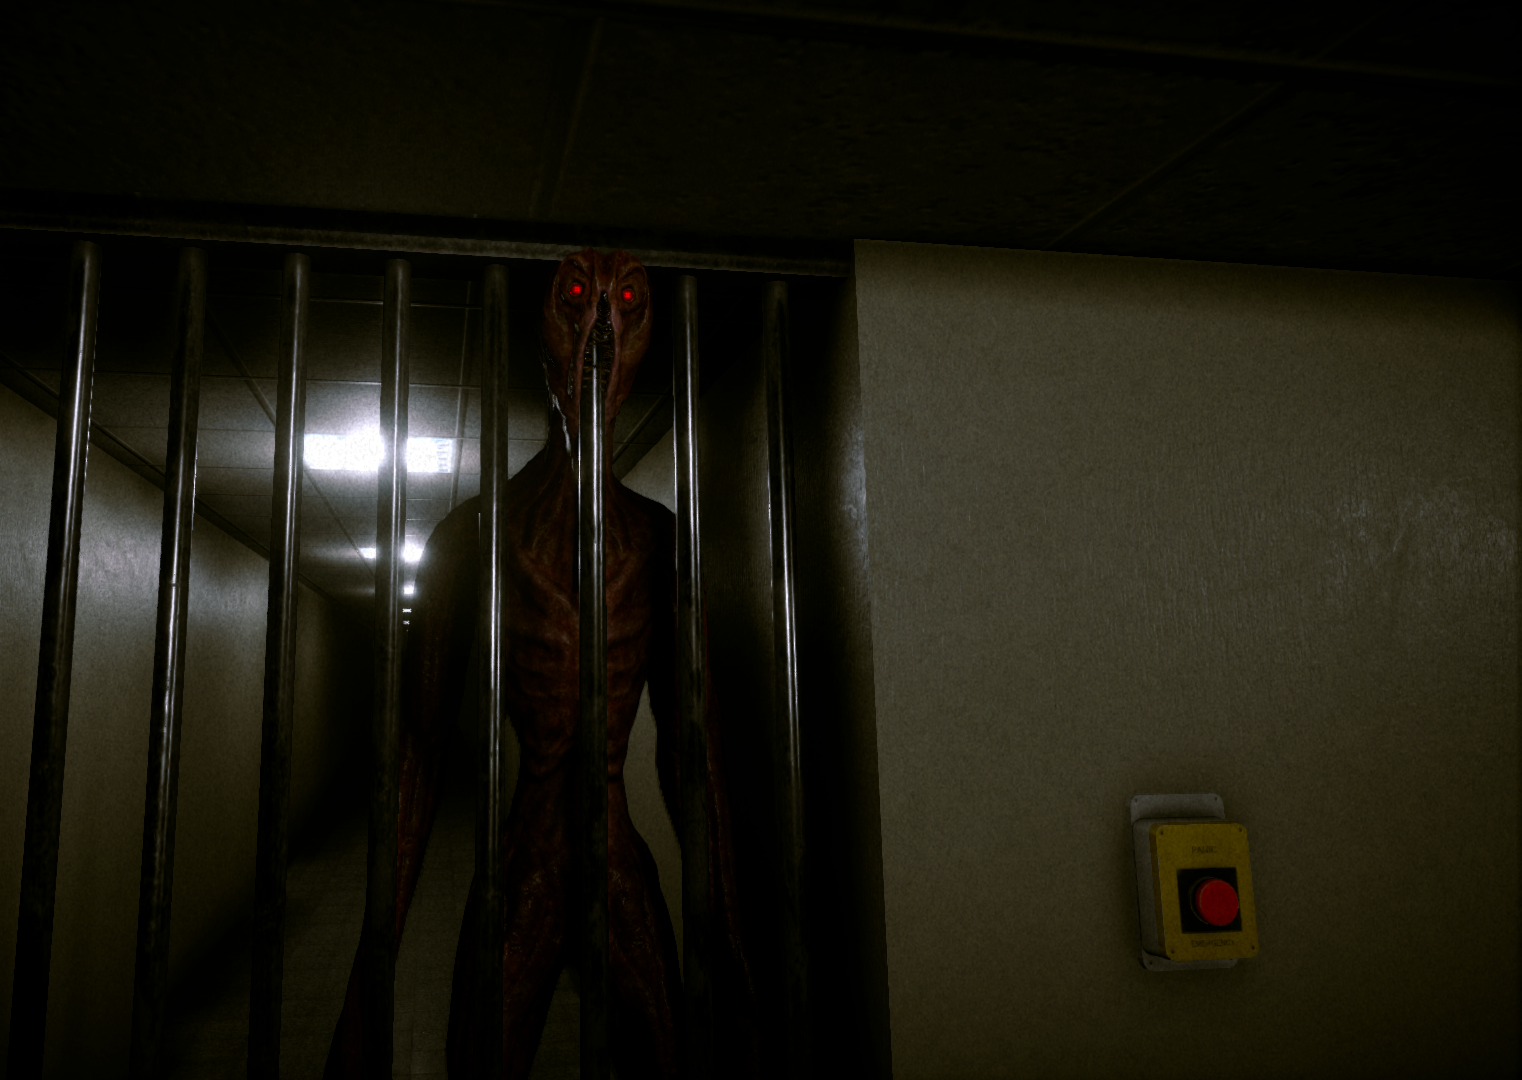
Near safe is a photo of the exit door, don't forget otherwise you'll have monsters chase you. (If you open the wrong door).
Next is the birthday room. Make sure you collect the moth jam and have full stamina before pressing the button. DON'T USE JAM ON THE BALLOON GAME. Trust me, the jam is waaaay better used during the birthday maze. Use the spamming shift trick I showed at Level 1 for the balloon game.
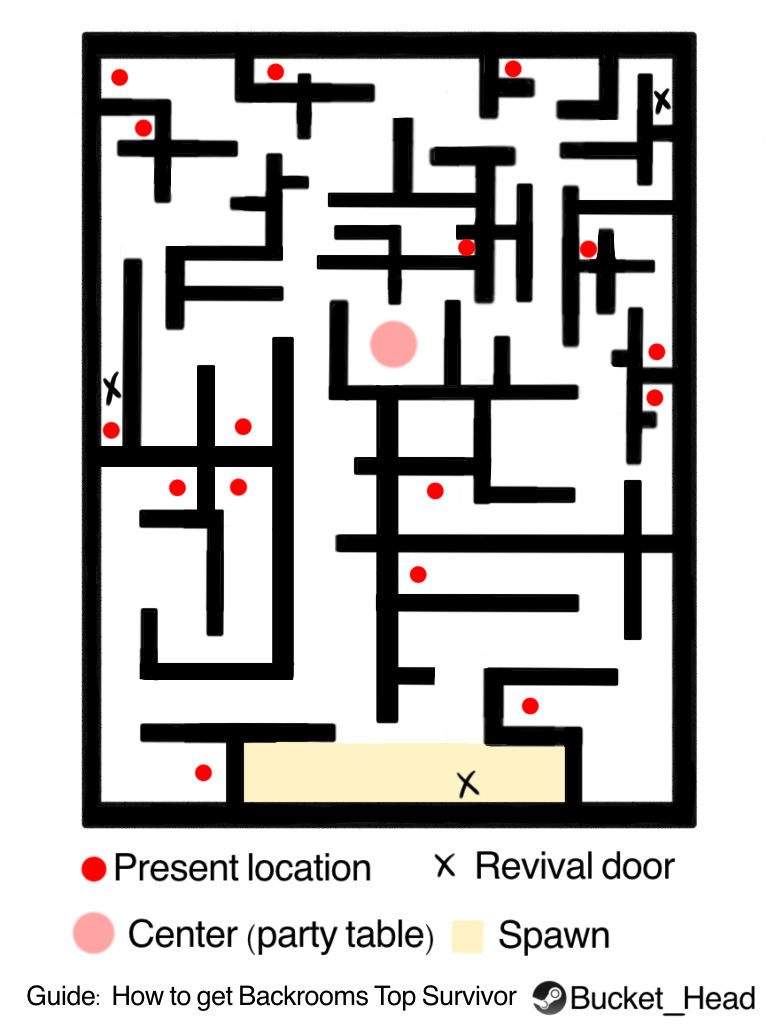
Here's the custom map I made for the maze. Not 100% sure if these are all the present locations possible so if you find a new one, let me know! (not accurate for scale but 100% accurate in terms of finding where you are within the maze).
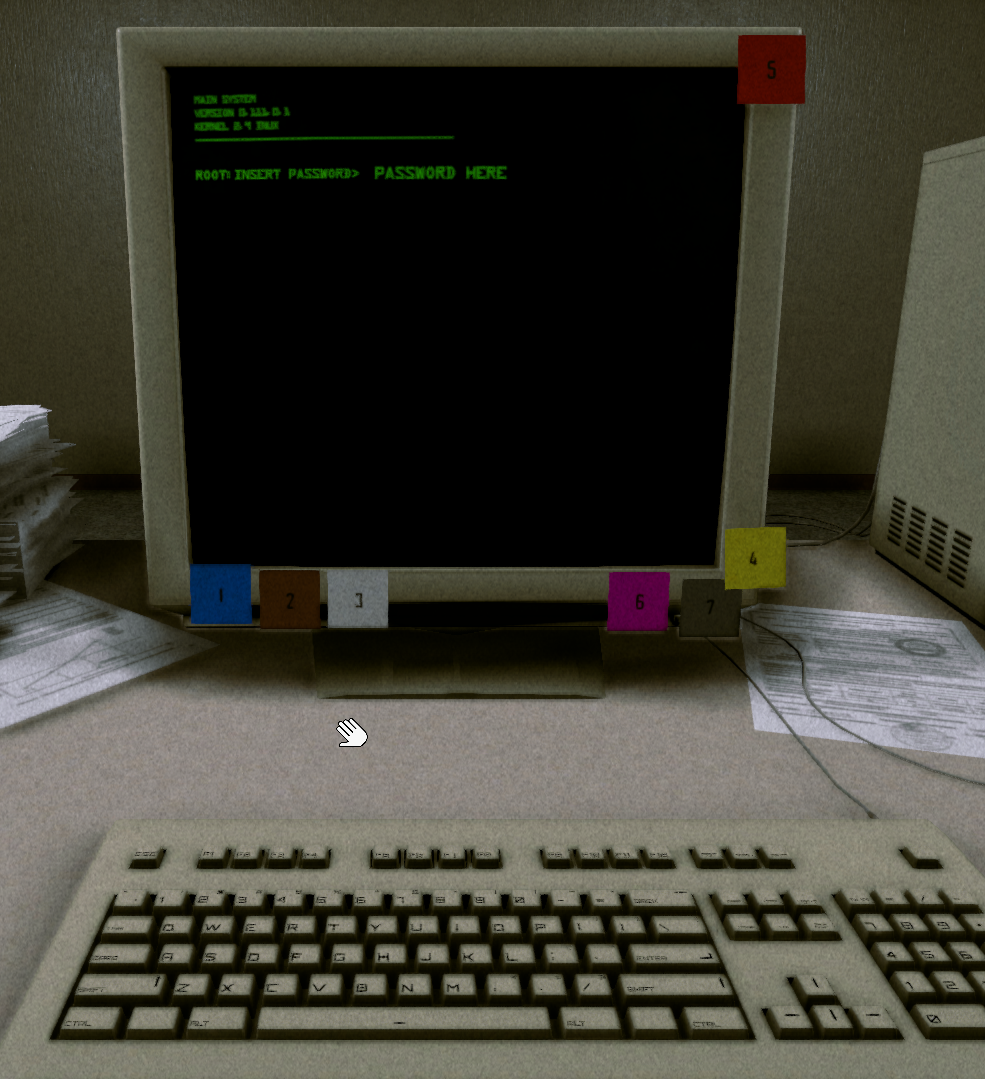
Once all the gifts are collected, and you've finished the candle maze, (make sure to grab the red card that was in the cake). Then it's time to decode the computers.
First, go through the whole room and look for computers with symbols. Write down the color and translate the letter with the decoder. You should have something like this by the end--
Grey X, Blue A, White Y, etc...
Type in the password for the computer.
Go back to power, and turn it off. Otherwise you won't be able to enter the pool.
Use the monster detector for the pool, AVOID the white dots. Don't be afraid to back up when needed, as the dots can move towards you.
Find the exit door and then congrats! You did it! Hope this guide helped :)
Source: https://steamcommunity.com/sharedfiles/filedetails/?id=2851976170
More Inside the Backrooms guilds
- All Guilds
- How to Open Inside the Backrooms
- RE-play OLD events guide
- Inside the Backrooms Guide 474
- Inside the Backrooms Guide 469
- Inside the Backrooms Guide 459
- Inside the Backrooms Guide 449
- Grassrooms - Progression guide + Map
- GRASS ROOMS - , ( )
- Grass corridors
- Inside the backrooms -