Introduction
There are eleven sets of equipment you can obtain in Hyper Light Drifter. Most of them have special effects as long as you have at least one piece of the set equipped; since there are three pieces of equipment, that means you can have up to three bonuses active simultaneously (it doesn't matter which piece of the set you equip; all three provide the same bonus, and they don't stack if you equip all three pieces of a single set).
This guide is primarily intended to list these effects, but I've also included a short description of how to obtain them all to help you get that Walk-In Closet achievement. These descriptions come in two parts: a "general area" hint for if you just want to know where you should be looking, and a more detailed description hidden behind spoiler tags.
Equipment is listed not in the order in which the average user will obtain it, but rather according to the ID number the game assigns to them (as determined by running my personal save file through a decoder). These numbers go from 0 (starting gear) to 10 (dash arena challenge gear), with 11 presumably being the NG+ cape (I say "presumably" because I haven't personally confirmed it, but other people have edited their savegames and said it was the case) and 12 being the "golden" sprite companion that was a kickstarter backer reward.
NoteThe color names are taken from this thread, since I happen to be colorblind.
The only effects I can personally confirm are those of Blue, Yellow, Pink, Black, Ochre, and Purple. The effects of the rest of the equipment are all taken from various people posting in the forums (mostly in the above-linked thread); if anyone has any additional or contradictory information, let me know. Particularly, some hard numbers for all of the effects would be nice (e.g. the exact percentage by which Orange speeds up grenade recharge).
The only equipment with no known effects are the starting gear (presumed not to have any effects). If you have any information that they actually have a special effect (or that the kickstarter Golden Companion Sprite has a gameplay effect), let me know.
Starting Gear - "Red"

(ID number: 0)
EffectNo known effect.
LocationYou start the game with this gear.
Hidden Gear - "Blue"

(ID number: 1)
EffectDecreases time between sword slash combos (allows you to attack again sooner after the third strike in a combo).
LocationNorth zone - indoors, behind a locked door.
Behind the 10-key locked door in the village where you first encounter flying bird enemies. It's the only key door in the entire North zone, and it's located right along the path towards the teleporter, so it's pretty hard to miss.
Hidden Gear - "Fuchsia"

(ID number: 2)
EffectIncreases the speed with which your ammo bar recharges from melee attacks.
LocationSouth zone - indoors, behind a locked door.
Behind the 16-key locked door, located down the southwest elevator. Don't go through the 1-module door, and keep an eye out for a platform you can dash to on the left edge of the screen.
Hidden Gear - "White"

(ID number: 3)
EffectHalves the time it takes to interact with something (opening doors, picking up health packs, etc.).
LocationEast zone - indoors, behind a locked door.
Located behind the 8-key locked door, which requires making a dash west from a specific platform in the room accessed from the door immediately southwest of the East zone teleporter.
MORE DETAILED SPOILER:
Starting from the door mentioned above, go through it and take the elevator down (you have no other path to follow, since the rest of that room is accessed through the 3-module door). Follow the path to the east, dealing with the enemy ambush, and then dash across the gap to the right. Follow it north to a flame pad and a health pack. There's a button hidden on the floor behind the giant box on the left side of this platform. Walk around the north side of the flame pad and then walk around behind that box until it retracts, then wait a little bit. A platform should appear from the left. Step on it, then hold interact to ride it to the left. Fight your way to the left end of this platform, and then dash to the small platform to the south. Immediately to your left is a barely-reachable platform with the 8-key door.
Hidden Gear - "Yellow"

(ID number: 4)
EffectIncreased movement speed.
LocationWest zone - outdoors, behind a locked door.
This one's behind the 12-key door, which is in the same area as the racoon hermit (the NPC in the West zone that talks to you in a series of three images).
MORE DETAILED SPOILER:
Travel west from the West zone teleporter, fight through the enemies to get to the ambush area in the southwest of that screen, then bust through the crystals to travel to the south. The next area has a crystal with somebody frozen inside near the entrance, which lets you know you're in the right area. On the platform immediately north of the racoon hermit, aim northwest and shoot the switch to raise some platforms. Use them to cross the gap west, then head north and deal with the enemies there. Head to the west side of the southern edge of this area, and shoot the switch to the south. Cross that gap and you'll see a small gap in the west wall of this little platform, blocked by some small crystals. Smash the crystals and dash west to land on an invisible platform (or you can smash the crystal, stand in that gap, and hold "interact" to confirm the existence of the invisible platform, but do it before the crystal respawns). Then just walk west across the invisible platforms to arrive at the 12-key door.
Hidden Gear - "Orange"

(ID number: 5)
EffectIncreases the rate at which grenades recharge (decreases time taken from 1:15 to 1:05, a 13.33...% decrease).
LocationEast zone - indoors, behind a locked door.
This one's behind the 1-key door. Behind the 1-key door is a sort of mini-dungeon ending with a module; dash to the right from the bottom edge of the module's platform, then dash south to the now-visible platform. From that platform, your sprite can show you the invisible platform you need to dash to to reach this equipment set.
MORE DETAILED SPOILER:
Or, rather, "how do I get to the 1-key door?" From the East zone teleporter, head east. Follow the path to the elevator and ride it down. Fight through the ambush of the giant plants, then go west and ride that elevator down as well. Go through the door and enjoy some more fighting with giant plants. Take the walkway to the west to reach the 1-key door.
Challenge Gear - "Green/Blue"

(ID number: 6)
EffectIncreases the speed with which you regain HP when using a medkit (although the healing animation still takes the same amount of time). Thanks to Charmics for lots of testing on this one.
LocationWest zone - indoors, after a chain-dash challenge.
You need all 8 modules for this. The 8-module door is located directly south of the West zone teleporter. Shortly inside the area, there's a doorway on the north side of the map that leads to an area full of crystal floor traps and enemies. All I can really say is "good luck"; if you can make it through, you'll be hard-pressed to miss this set. My one piece of advice would be to avoid drifting into the traps when you reach one of the small islands for resting and recharging your stamina.
Gift Gear - "Pink"

(ID number: 7)
EffectYou start recovering stamina sooner.
LocationSouth zone - outdoors, given to you by an NPC.
It's pretty much impossible to miss this one. Almost immediately upon entering the zone, you come across the other drifter, dying. Interact and he'll give you his equipment.
Challenge Gear - "Black"

(ID number: 8)
EffectNormal melee attacks cause more extreme deaths (e.g. decapitation, as though the charged slash was used). The effect is purely cosmetic; enemies don't take additional damage.
LocationCentral town - Arena
The Arena is accessed via the elevator behind the 12-key door in town. In order to unlock this set, you need to first complete each arena challenge by surviving ten waves in it. After you complete the first four, a path will appear to the east leading to a fifth challenge that mixes all the enemy types together. Completing that challenge (again, by surviving ten waves) will open up another path leading to this equipment set.
Challenge Gear - "Ochre"

(ID number: 9)
EffectIncreases your maximum health by 1.
LocationNorth zone - indoors, obtainable after activating every monolith.
There are 16 monoliths, 4 in each zone. For their exact locations, consult a guide dedicated to that (or search the forums). The monolith temple itself, where you obtain this set, is at the end of the area from the tutorial.
MORE DETAILED SPOILER:
To return to the tutorial area, start from the North zone teleporter. Head up the stairs to the north, then take the past west and go down those stairs. Go past the first teleporter pad, but instead of going across the bridge, head south. Find the piece of land that sticks farthest south, then dash across the gap. You should land behind some trees. Follow this path southwest to reach a gap in the trees, leading you to a secret screen to the south containing a gearbit box. This screen itself has a secret path leading south through the trees; follow that path to reach the tutorial area. After that, it's fairly straightforward to follow it to the end and reach the temple. The back wall of the temple shows you which monoliths you've already activated: the top-left four are the North zone monoliths, the top-right four are the South, the bottom-left four are the East, and the bottom-right four are the West. Once all sixteen monoliths have been activated, interact with the console in the middle of the room to get this equipment set.
Challenge Gear - "Purple"

(ID number: 10)
EffectDoubles your stamina (e.g. a special move that previously consumed half the bar will now only consume a quarter of it).
LocationCentral town - dash arena.
You need to chain-dash 800 times in a row to unlock the door containing this equipment set. This is very difficult if you try to do it with a controller. If you want an easier time of it, you can use keyboard & mouse controls, place the mouse cursor over a stamina recharge pad, and then just tap the dash key 800 times. If you want an even easier time of it, you can use a program like Autohotkey to do it for you; I'm not going to give you a link to a script for that, though. If you can't even find that on your own, I have to question why you're playing this game at all.
Miscellaneous


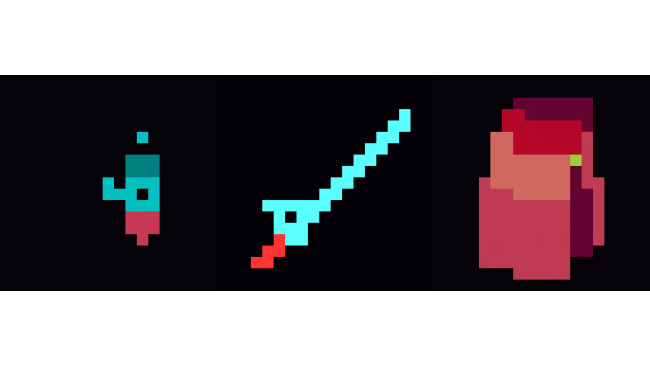
There's also the special NG+ cape (the corresponding (hidden) sword/companion sprite can't be obtained without hacking your save file).
(ID number: 11) Thanks to svanheulen for the picture.
It reduces your maximum health to 2 and stops you from being able to change your equipped cape; as a result, hacking your regular savegame to add it to your inventory is not recommended.
Additionally, it overrides the effect of the Ochre set, so you can't get 3 HP (2+1) in a New Game+ file.
Lastly, there's the golden companion sprite kickstarter reward.
(ID number: 12)
As far as I know, it's purely cosmetic.
Source: https://steamcommunity.com/sharedfiles/filedetails/?id=659138683
More Hyper Light Drifter guilds
- All Guilds
- "Don't Give Up!" achievement (save file)
- Estrateguia para Jefes
- Animation-canceling combos for massive increase in damage
- 800+ (, )
- : Hyper Light Drifter
- 100% Guide
- Decyphering the Language of Hyper Light Drifter
- Hyper Light Drifter - Little Trick to Beat Boss Rush
- Hyper Light Drifter - How to Beat the Soccer Kid (Without Charge Slash)