
Notes & Guide
 Guide Last Updated: 29/09/2022
Currently updating guide fast as possible but will be delayed with the new tropical information
All Fish Information Complete.
New Villager Added.
Update Notes Added!
Newest Update: Launch Update! Desert Island Update!
To noteThis Hokko Life Guide has been put together by 666reddog, a Hokko Helper to help players with the game while it is in Early Access.
If you find any useful information that is not yet added, you can reach out to me on Discord 666reddog#8440
Disclaimer
- I DO NOT work for Wonderscope Games, I have no part in the development side of the game besides being a player who enjoys Hokko Life and has knowledge of it.
-The walk-through of the tutorial quest is a baseline of how to complete each tutorial quests, no need to follow exact if you wanted to spend time farming resources and money and take longer time to complete each tutorial quest is fine and it's up to you how to play the game but the walk-though talks about how to complete each tutorial quests if ever get stuck or confused like how people do with the "bed with pink flowers" quest.
Useful Links
Hokko Creators Showcase Instagram: https://www.instagram.com/hokko_creators/
The Official Hokko Life Discord: hokko.life/discord
Hokko Life/Robert Pateron: https://www.patreon.com/wonder_rob
The Official Hokko Life Twitter: https://twitter.com/hokkolife
Robert The Developer's Twitter: https://twitter.com/robbodev
Hokko Life Website: https://hokko.life/
Backups & Reporting

Multiple saves? Yes! Within the game Hokko Life you can now have multiple saves! Compared to when first launched and you couldn't have more than a single save, you can now use the main menu and use the "save slot" to change between saves and to create new saves.
Back upsAt this current time Hokko Life is an EARLY ACCESS game, there will be bugs, there can be corrupt save files and many more things that come with playing an early access game. It's important to backup your save files in-case you may run into the pesky bugs or a corrupt save file.
Steam Cloud can be useful with backup files but isn't always the best thing to rely on. Steam Cloud can be broken/stop working, at times doesn't update or even sync files often and if it's a corrupt save it could have the corrupt save uploaded and force down said corrupt save causing you to be unable to play the game. I always personally recommend having a folder somewhere on you PC, (I use a USB or removable hard drive) and copy your save folder and paste the 'back up' within this folder to keep safe, and to remember to back up your save every so often.
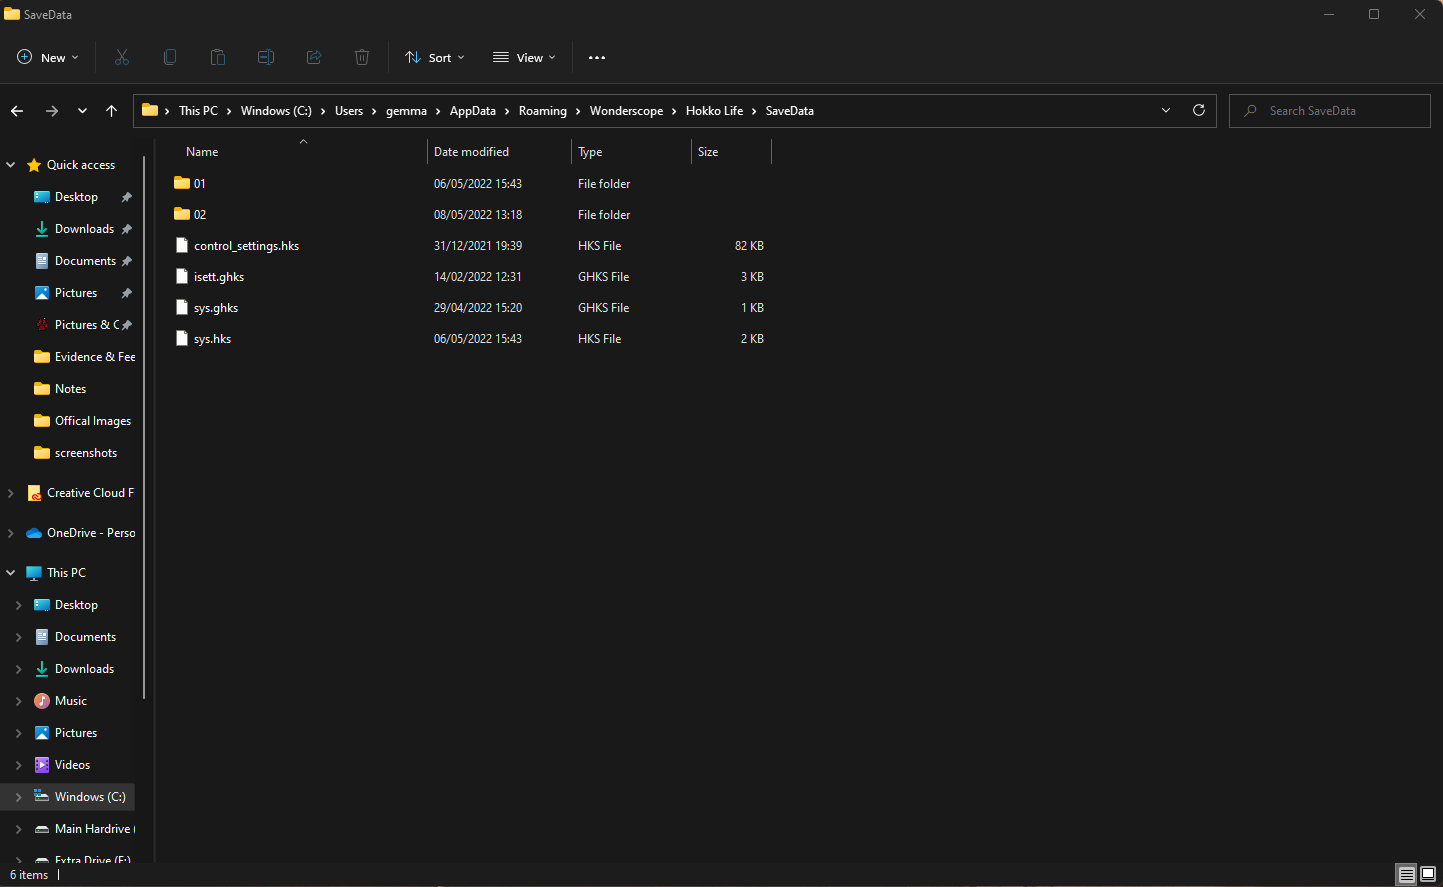
To find your save in the first place the best way I find it is below:
Press the windows key + R then input & run:
Save folders location : %AppData%/Wonderscope/Hokko Life/SaveData
Reporting Bugs, Submitting Suggestions!With playing early access, bugs are going to happen. Even fully made games there can be bugs that could happen! Report the bug with this link:
https://bitly.com/hokko_bugreport
IS IMPORTANT, unless a bug is reported with the link above it won't be fixed, or known to the solo developer of the game Robert. It can be important to report these bugs. You can also check what bugs are already reported here:
http://bitly.com/hokko_bugmap
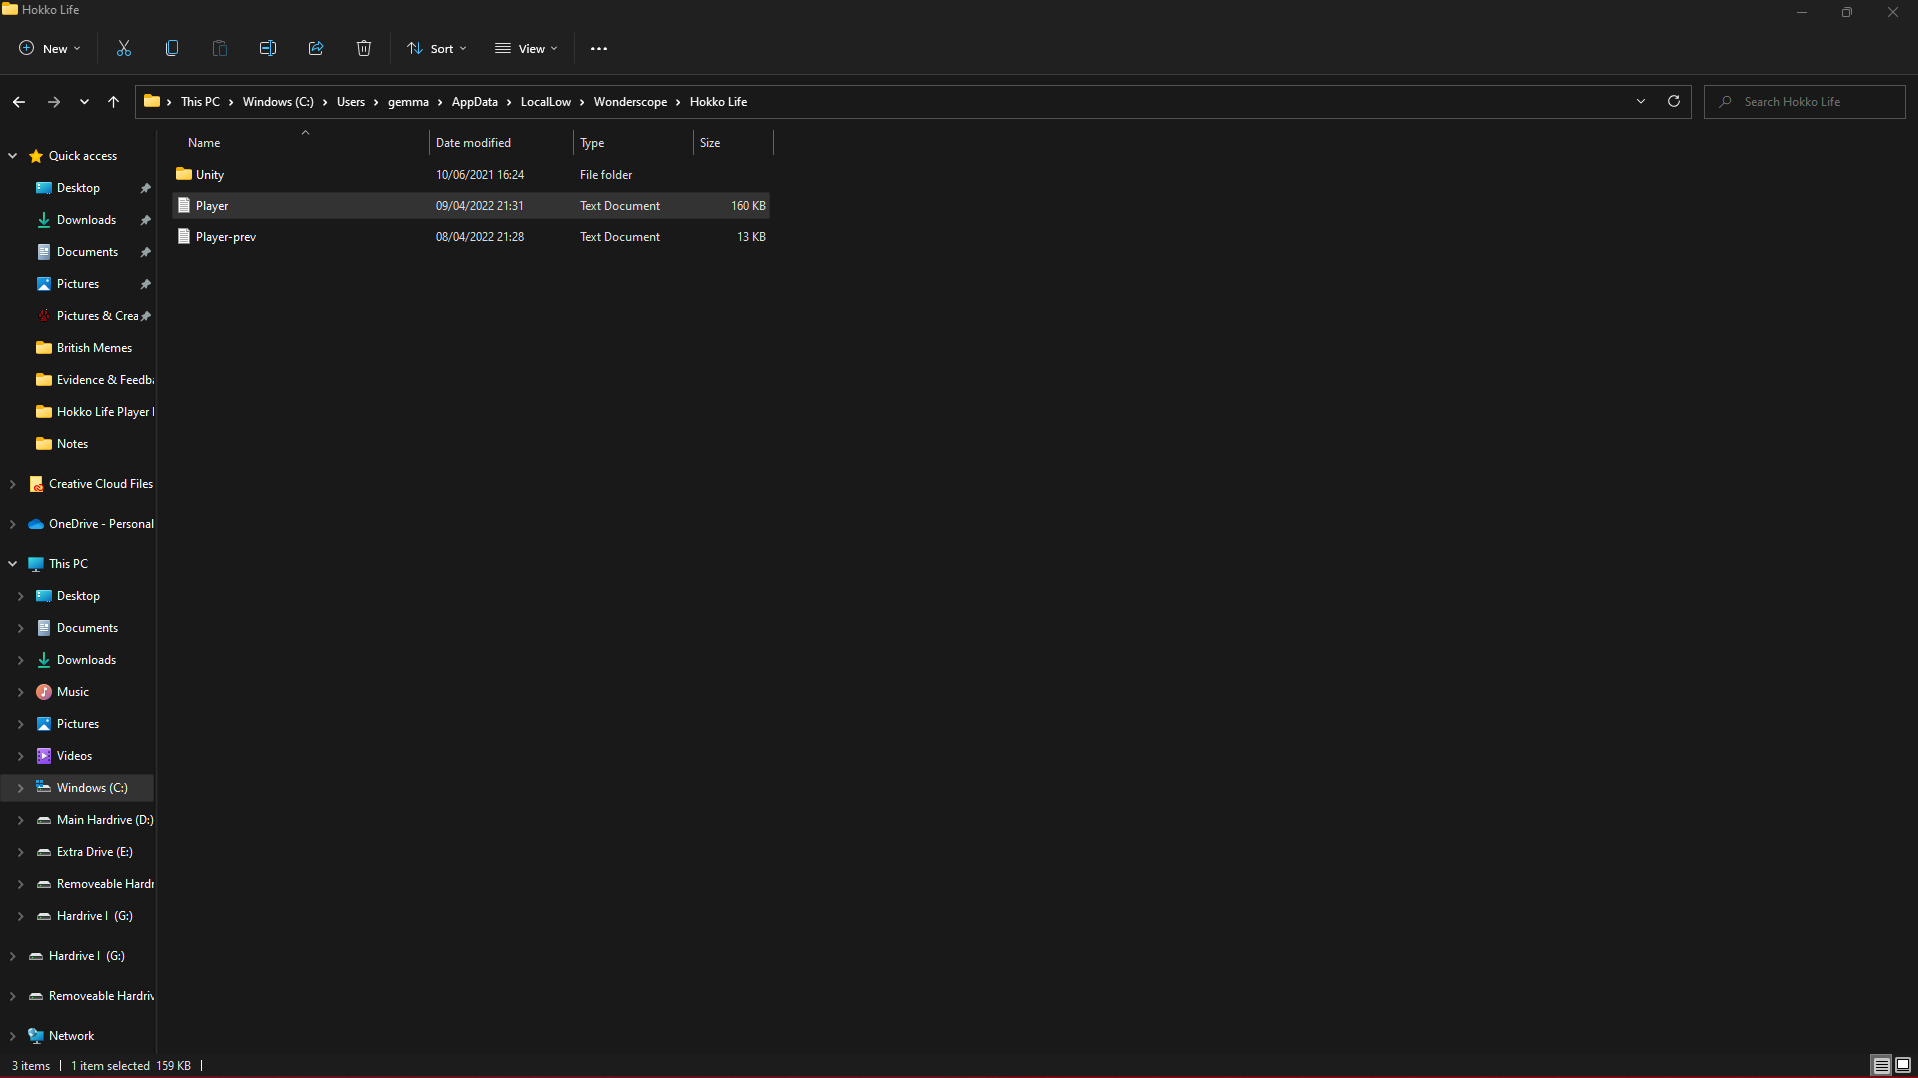
Something to note about reportingOutside of the save file you are using and have the bug occurring on, you also want a file called the Player.Log. The goal is to make sure BOTH of these are attached to the bug report if you want the bug/issue to be looked at and dealt with.
How to find these files:
Press the windows key + R then input & run:
Save folders location : %AppData%/Wonderscope/Hokko Life/SaveData
You are looking for a folder like these
Player log file location : %UserProfile%/AppData/LocalLow/Wonderscope/Hokko Life
You are looking for a file just called player like below
Suggestions Something that seems to be welcomed with Hokko Life developer Robert, is suggestions and ideas for the game! Something that is a simple process but somewhat similar to the bug report form. You just use this link to fill a very short simple form explaining your suggestion with as much detail of the idea as possible.
https://bitly.com/hokko_suggest
You can also see some suggestions already submitted here
http://bitly.com/hokko_suggestionmap
BIG Note for bug map and suggestion mapWhen you see the already reported bug and the already submitted ideas not everything submitted and reported are on the maps. The maps where you see what is already there has to be updated BY HAND, and limited staff have access to the site to be able to do this, updates and bug fixing is a priority compared to updating these pages but is updated when can.
Update Notes

Notes from Launch Update/Desert Island Update!Patch Notes Found Here For Full Details!
Changes/Additions:
Desert Island Distractions - Speak to Hurley in the Inn and hop on his boat to the new Desert Island Location!
- Archaeology - Use the Artefact detector and help Leonard find hidden artefacts around the island.
- New Design Tool Materials: Bamboo, Driftwood and Shells.
- New Tropical Ocean and Pond Fish.
- New Tropical Butterflies.
Take the Artefact Detector into the mines and dig for Geodes containing rare gems you can use in your designs.
Achievements!
Steamdeck Support!
New Villager ~ Ramesh
Removed confusing “Overwrite game data” popup when downloading a player item you already have.
Unified cursor speeds in the Design Tool, Painter and Placement.
Unified button used for rename screen on design tool and painter.
Community: You can now cancel out of renaming your character.
You can now use gamepad to change settings and the game displays the Steam text input screen when editing text in text boxes when using a gamepad.
Backpack full message is now shown when trying to take a message attachment with a full backpack
Note-able Fixes: (too many to list read patch notes linked top of section)
Community: Fix for two-seater chair being requested when that blueprint doesn’t exist.
Community: Fix for backpack thinking it’s full when it isn’t.
Community: Fix for being able to drop new fish and them getting stuck in the world.
Fix for fish swimming away despite being snagged when the auto-catch merit is unlocked.
Optimisations for the Design Tool that could prevent black-screen issues if using it for very long periods of time.
Community: Fix for locked player when interacting with storage items after placing a house.
Fix for fish not appearing correctly based on the weather.
Fix for gamepad icons appearing as squares if changing input while using the settings screen.
UI fixes for 16:10 aspect ratio.
Fix for transfer stack button prompts not correctly updating when switching input while a storage item is open.
Fix for bait menu not working if you don’t have Worm bait in your backpack.
Notes from Bug Catcher Update!
Within the newest update is a LOT of fixes and additions to the game. The update brings bug surveys, similar to fishing tournaments, and new fishs/bugs into the game! A very large amount a total of 10 new insects and 30 new fish to catch and collect!
As there is a lot of changes I will be linking the patch notes for you to read yourself as I wouldn't be able to fit everything here but will point out some major things I think would be great to know the most so please read the Bug Catcher patch notes here!
Changes/Additions:
The above information! Bug Survery, 10 new insects, 30 new fishes!
Fishing tournaments are now on the 17th day of the Season and the bug survey should be every 2nd of the Season
Insects in a level refresh every few minutes so there's constant variation!
New information on bugs/insects in the collection book! New UI and smoother loading!
Insect Behaviour, bugs now run away and are scared off by players prompting a new major
merit called "Bugs run away less", the bug magnet hat & traps will be more useful with this new change!
Request bonus rewards are no longer given all the time, but are awarded for quality of item, or speed or completion, or sometimes randomly.
Reworked the request system to be more reliable, causing less long delays between requests and the amounts of needed items of requests now scale based on how long you've been playing the save.
Mail is now ordered by date it was delivered and is not spilt into several letters when having large orders from city (Creator Stores, Community Store).
Bait is no longer removed if you cancel fishing without snagging a fish! A very large requested change!
Reworked avatar eye and mouth textures and reworked villager eye textures.
Community: Tweaked camera in house type 2 to help with visibility on 16:10 aspect ratios.
You can now close the backpack/emote menu/equipment options with the same button you opened them with!
Notable Fixes:
Community Reported Bug: Fixed a bug where fishing tournaments wouldn't be saved properly and got reset on game restart.
Community Reported Bug: Fixed black screen bug when using the weather control device around midnight.
Villagers should no longer request housing changes when that merit hasn't been unlocked!
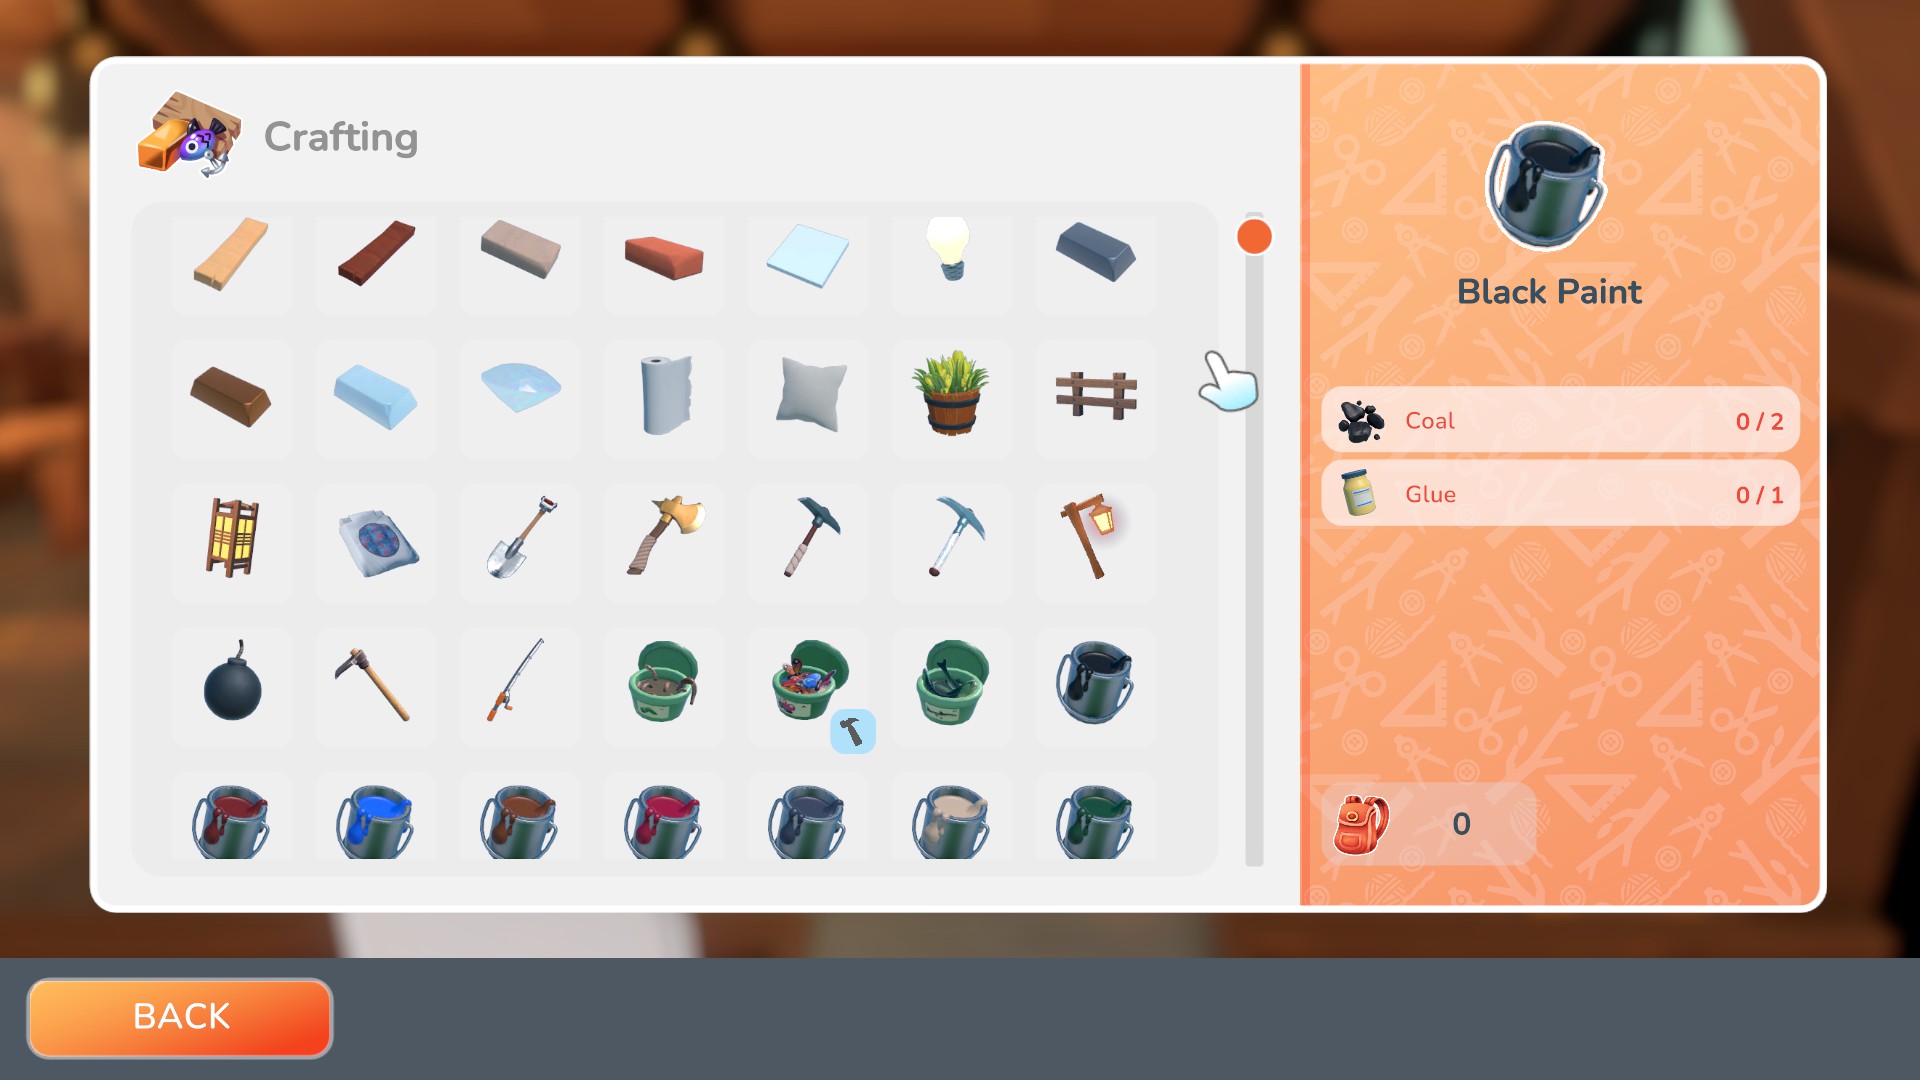
Villagers should no longer request paint when paint hasn't been unlocked!
Community Reported Bug: Fix for dyes getting placed when selected from backpack, and then not being able to be picked up.
Community Reported Bug: Fix for exterior wall and roof patterns being removed from backpack if selected outside of the building properties screen.
Editing an existing design will now properly take the required resources from your backpack.
Fix for weird dialogue camera when confirming a new house location not focusing on Rosa or the player.
Community Reported Bug: Fixed issue where you couldn't dig holes in the Grove.
Community Reported Bug: Fixed a bug preventing glasses, beanies, fedoras and other items not appearing in the fashion store!
There are more fixes more than anything in this new update, so please read the patch notes for the rest as there are just so many as this is just to give a rough idea of the updates for players. Find the patch notes here!
Notes from Mayor Merits Patches!
Second Patch (17th May 2022):
-Fix for equipment disappearing when swapping with inventory full.
-Fix for paints being removed from backpack if selected.
-Fix the issue where empty backpack slots were being ignored.
-Fix for freeze when switching input method on design tool/bench and rename screen
-Fix for black screen caused by weather device.
-Fix for various issues caused when using Place & Continue mayor merit when decorating.
-Fix for lock/crash/freeze when picking flowers with the Radial Pick merit
-CHANGES: Changes to the save system to help with corrupt saves - TO NOTE autosaving has been CHANGED to happen during moving to different areas ONLY.
First Patch (27th April 2022):
-Fixed the cause of the bug when cash reaches zero (unable to sell to moss or buy anything)
-Fixed multiple issues caused by equipping an item/tool you had more than one of in your backpack
-Fixed for players who custom/created content (their own made or downloaded from the city) being removed/deleted from storage items.
Controls

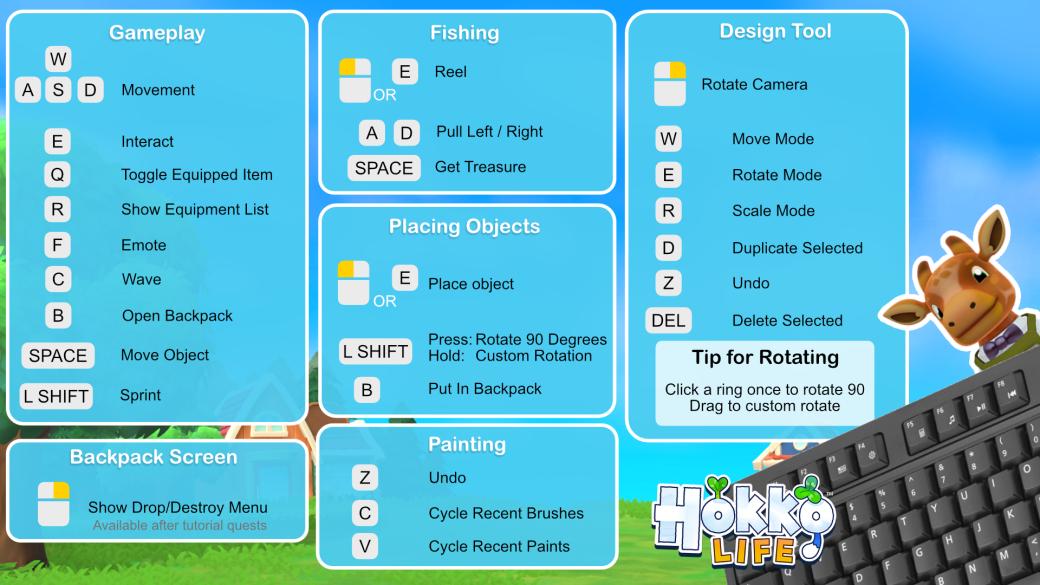

The wonderful world of Hokko supports using both mouse/keyboard and controllers to play the game at this current stage. Below are some known keybindings for the base game controls.
Keyboard/Mouse
Controller/Gamepad
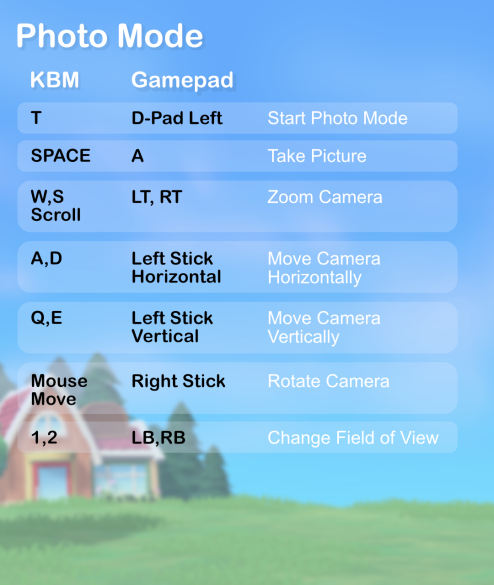
PhotomodeWithin the Super Shopping update the game gained the new "photomode" for people to take screenshots and images throughout their games within the Hokko world. To gain photomode you'll need to unlock it with Mayor Merits. Here are the controls for both mouse/keyboard and gamepad/controller:
Controls Added With The New Update
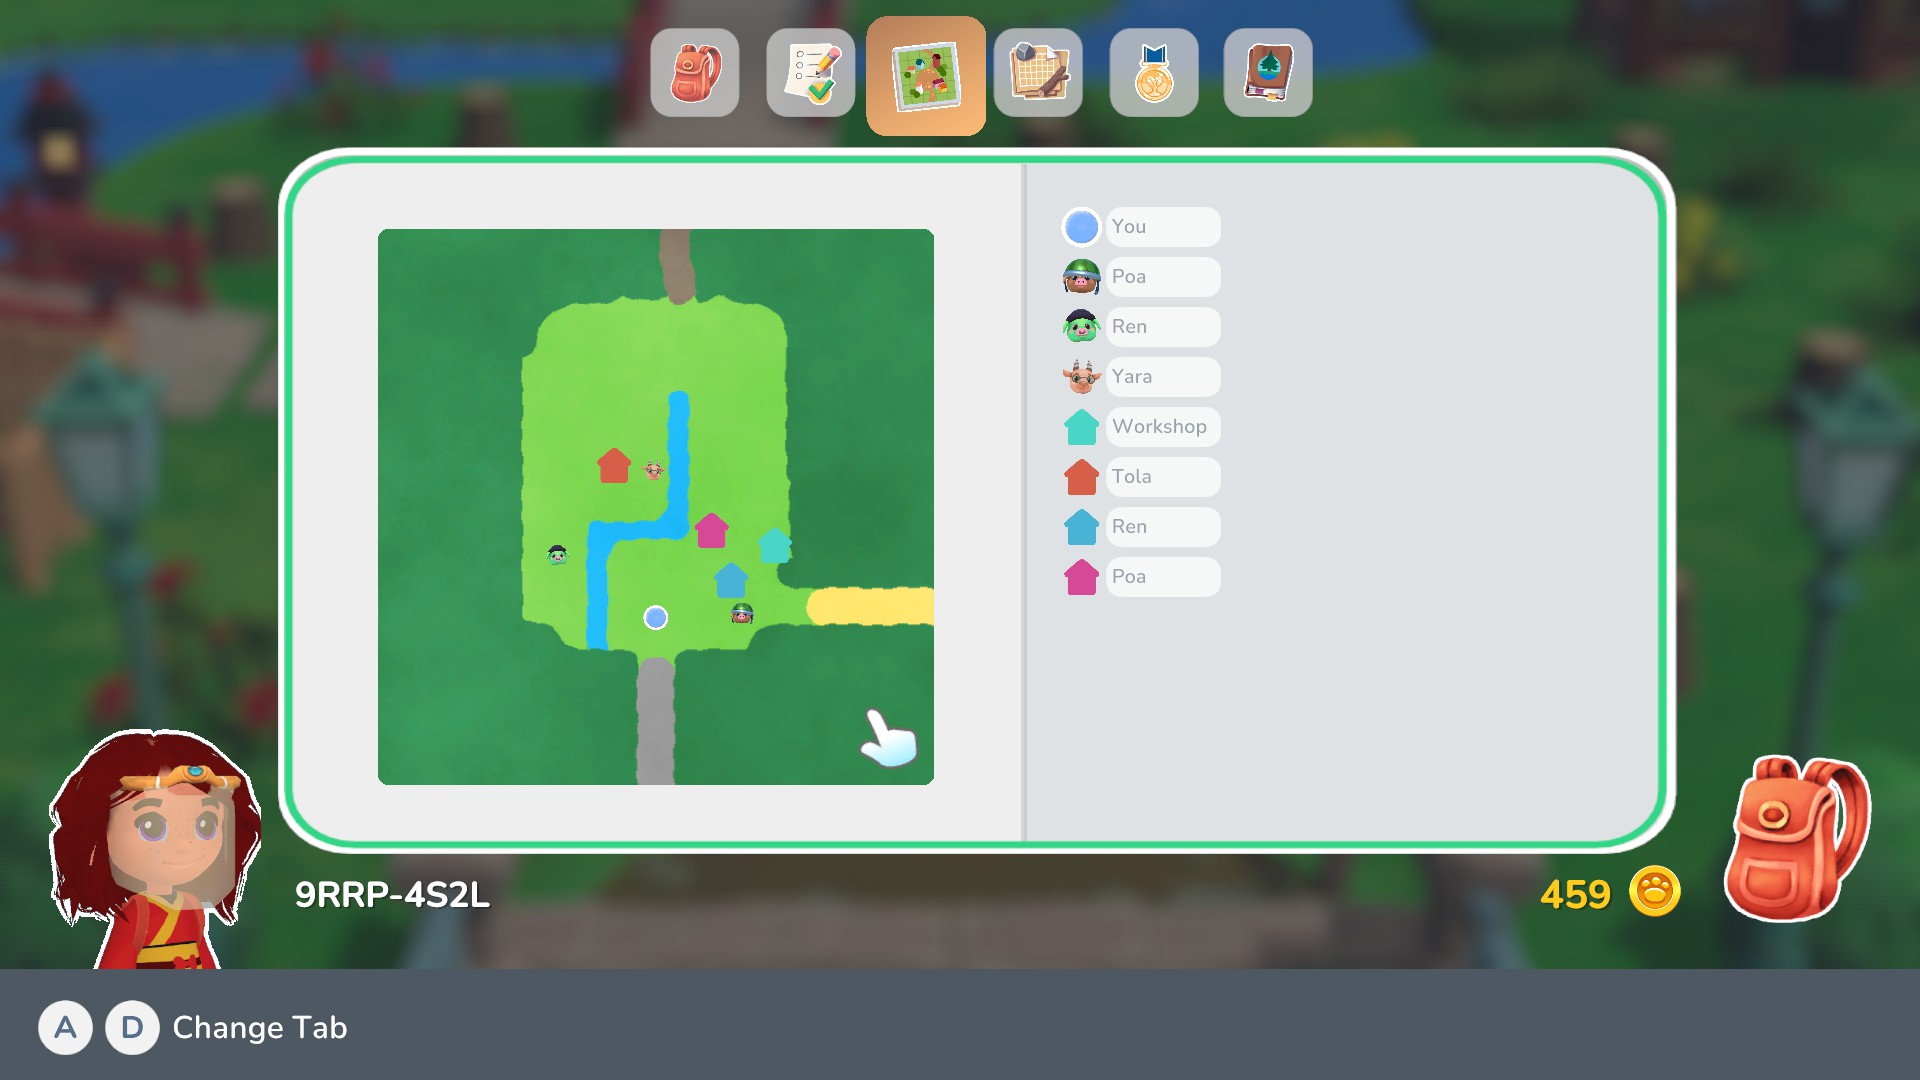
Within the mayor merits you can unlock the map perk. With this you can have a map that tracks buildings and who lives in which one, where villagers are in the current area you're in as well. With the map being in the backpack you can also trigger a small mini-map as well that will show in the left corner of the screen as you play.
Here should be the deafult keys for it:
Keyboard = m
Gamepad = Right Bumper
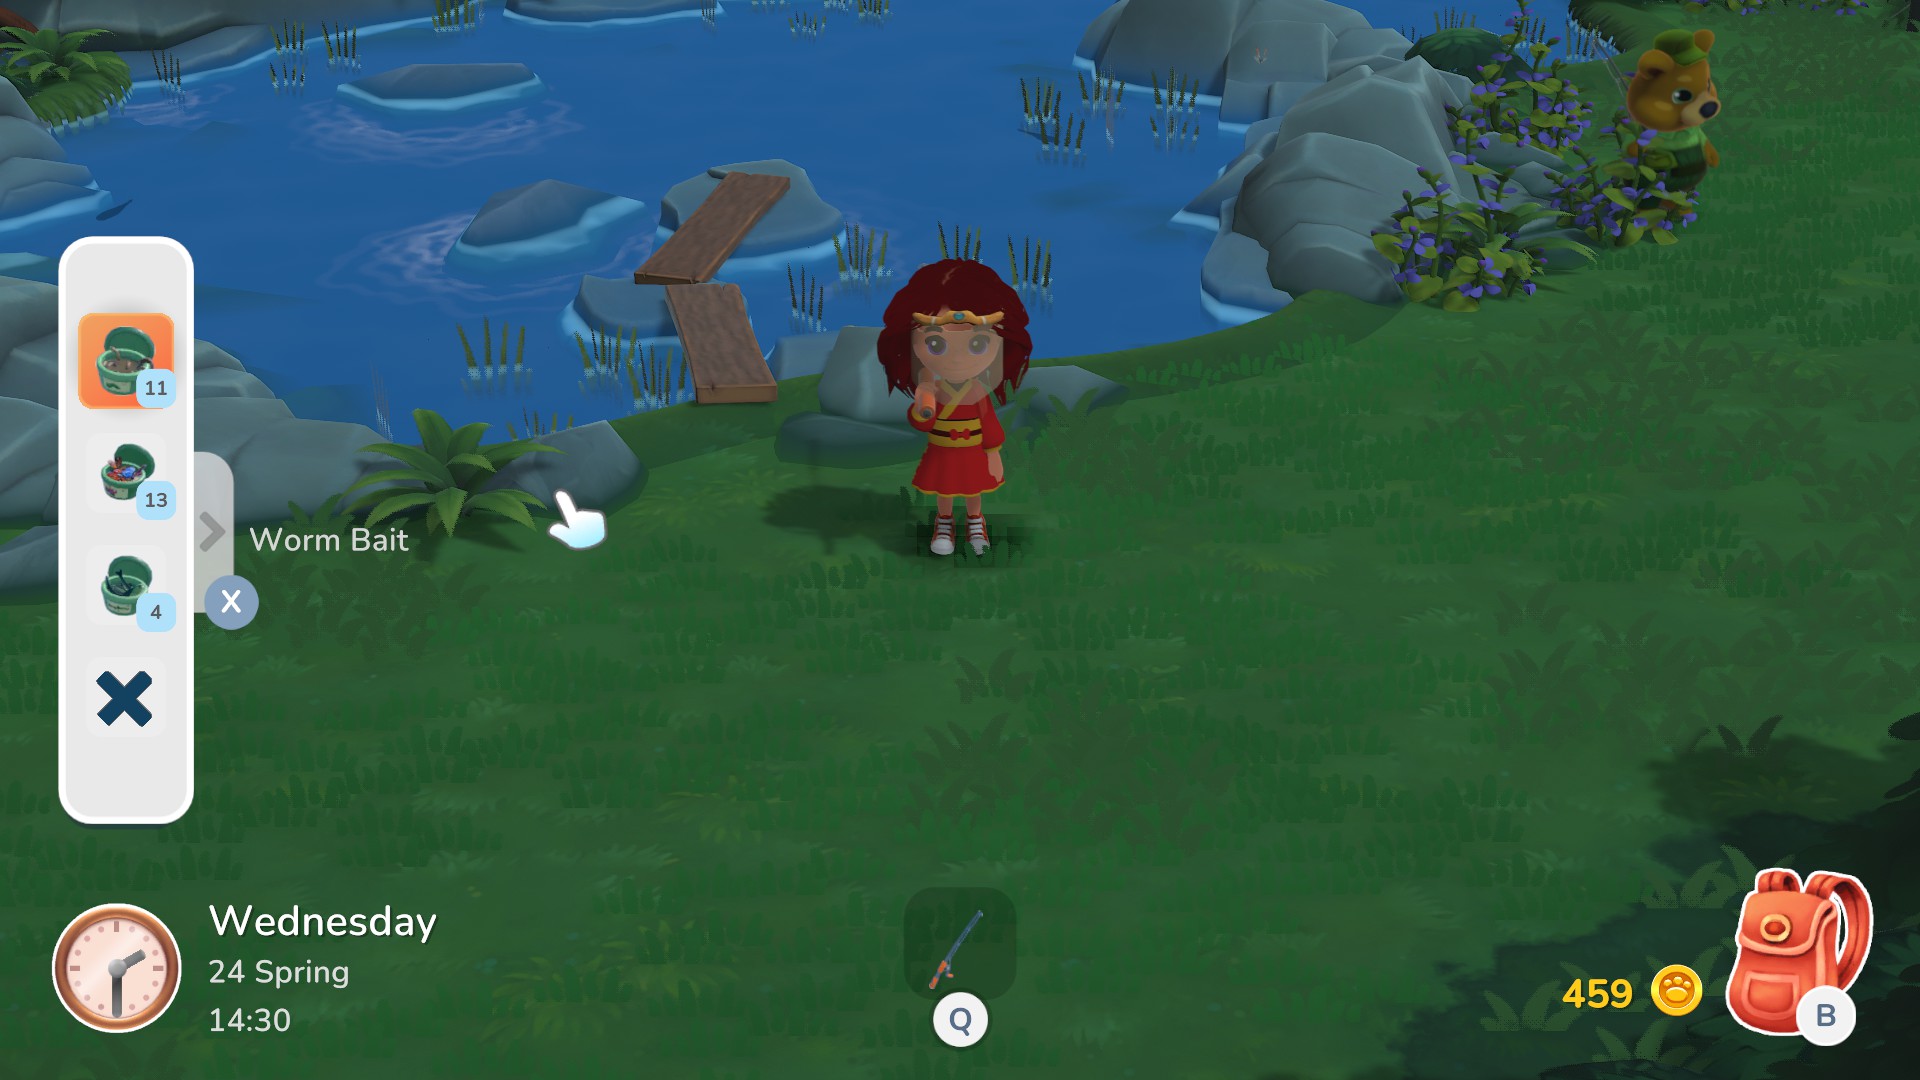
Also new to the update is how to attach bait to the fishing rod. You'll need to be holding your fishing rod and on the left side of the screen should have a close little pop up (it should say the key to use it on it).
Here is the default keys for it:
Keyboard = x
Gamepad = Left Bumper
Please know that you can indeed change the keybinding settings but sometimes with some updates if the default buttons don't work right away clicking the "restore to default" even when already on default has been proven to help make the keys start working at times. When changing the keybindings please possibly keep check of your keybindings after every update AND to check them out every so often to be safe.
Tutorial Quests - Part 1

Since the Narrative update, the starter quests have drastically changed to help players understand how to play the game and mainly use the design bench/tool, compared to when it was first launched. Many things have been changed and made into small multiple quests compared to the VERY short and limited tutorial it used to have.
Arrival The start of the game you'll end up falling asleep on the train and end up in the town of Hokko, you'll exit the train and only be allowed to enter the inn to the left. Oma the inn owner will be inside with Moss the shop owner who'll offer you a seat and a drink. Speaking with them you'll pick your character name and get a "room" within the inn to stay until you own a house of your own. After speaking with them you'll head up the stairs and sleep the night. The next morning you'll head downstairs and speak with Oma. She'll give you a quest to meet the only two villagers of the town (the starting villagers are random with each save). You'll find them within the meadow area. On leaving the inn you'll see the fallen tree from the storm at the very start of arriving to town is gone showing a pathway leading to the meadow area.
Lost Item & Axe Within the meadow area you'll meet your first villager right away who's lost their red scarf during the storm. The idea to look around the the run down and broken houses, the scarf should be wrapped around the log around one of the run down houses. Upon picking up the scarf you head back to the villager and speak with them, giving them back the scarf then speak with the other villager for Oma's quest before heading back into the Town Centre and returning to Oma. She'll talk about wanting to renovate one of the 2 broken down houses, but needing to clear the derby from around them. To do this she'll send you to Moss who's in his house to the right of Oma's inn. Speaking with him will get you an axe, from there you'll head back to the meadow area to chop all the logs in front and around the broken down houses. Remember to go into your inventory/backpack and equipping the axe to your "hand slot" to be able to use it.
Renovating The First House Once chopped, all the logs and you have gathered the logs dropped from destroying them with the axe, you'll head back to Oma in her inn. You'll inform her all debris is gone and she'll hand you a donation box, once you have got the box, head back to the meadow area and pick one of the two houses, this first house fixed up will become YOUR home so pick the one of the two you would prefer, and then use the interact button at the door of the chosen house. Using the interact button on the door will place the donation box there. The house will need 40 logs to fix it up, chopping other logs found on the ground and trees that you can access will get you enough to do this! Once you put 40 logs into the box you'll enter a cut-scene of everyone in town celebrating the fix-up of the house, then you'll head back to Oma's inn for some free food! You'll notice a guest at Oma's inn lurking in the background while still in the cut-scene at Oma's inn. She'll be important later. Once you finish eating it will move into the next day. You'll end up inside your house after the cut-scene is done (for now your house is pretty empty) and you just need to leave your house to trigger another cut-scene.
Starting Town Improvements In this new cut-scene Moss will talk about wanting to improve the town but not sure "where to start" so he'll ask you to ask the only other people living in the town as villagers, your starting villagers you met before, for their thoughts on how to improve the town. A tip is to gather more logs around the area if able. Once speaking with your starting villagers they will suggest a Flower Planter and a Fence to build for the town, once you get that head to Moss' store and speak with him. He'll then send you to meet Sally in her workshop, the 5th building within the meadow area. On the way to Sally's workshop pick up TWO yellow flower petals, this will be useful. After speaking with Sally you'll need to gather/have 10 logs and 2 yellow flower petals and then return to her and speak with her again. With the materials gathered, Sally will offer you to create the flower planter and fence yourself introducing you to the crafting bench, using it to create a single flower planter and a single fence, you'll then speak with sally one quick time and then head to speak with Moss.
Placements and Bridges You'll speak to Moss to show him the two crafted items, then he'll ask you to place them within the town. You can place the flower planter and fence in either the Meadow Area, Town Centre or Beach areas, you can put one in one area and the other in another area or both in the same area, that will be your choice. Once the items are placed return to Moss and talk to him, he'll suggest a bridge to get to another part within the meadow area. Before going to build the bridge, he'll tell you Oma has something she wants to talk to you about, go speak with her quickly to unlock Mayor Merits. After speaking with Oma head over to Sally. Speaking with her you find out that you'll need 10 wooden planks to create the bridge, Sally will give you the crafting recipe to make wooden planks at the crafting bench. Each wooden plank will cost 2 logs. If you run out of wood the stumps of the trees you've chopped down should regrow within 2-3 days and you can "skip" days by sleeping in a bed/sleeping bag in your home, but you should have enough wood to do most of these part 1 quests without doing so but with each meadow area map being different in every game save there is a small chance you might not. Once you got the 10 wooden planks crafted, you'll speak to Sally who'll unlock the first part of the design tool/bench, the pre-built designs feature, (added in the Narrative update). Upon entering the design bench you'll click the brown book icon and then the wooden bridge design to build. For the FIRST TIME ONLY building this bridge it will just cost 10 wooden planks but afterwards would cost 54 wooden planks to make more of this bridge. After making the bridge Sally will say some words and you'll get to place it on the river within the meadow area.
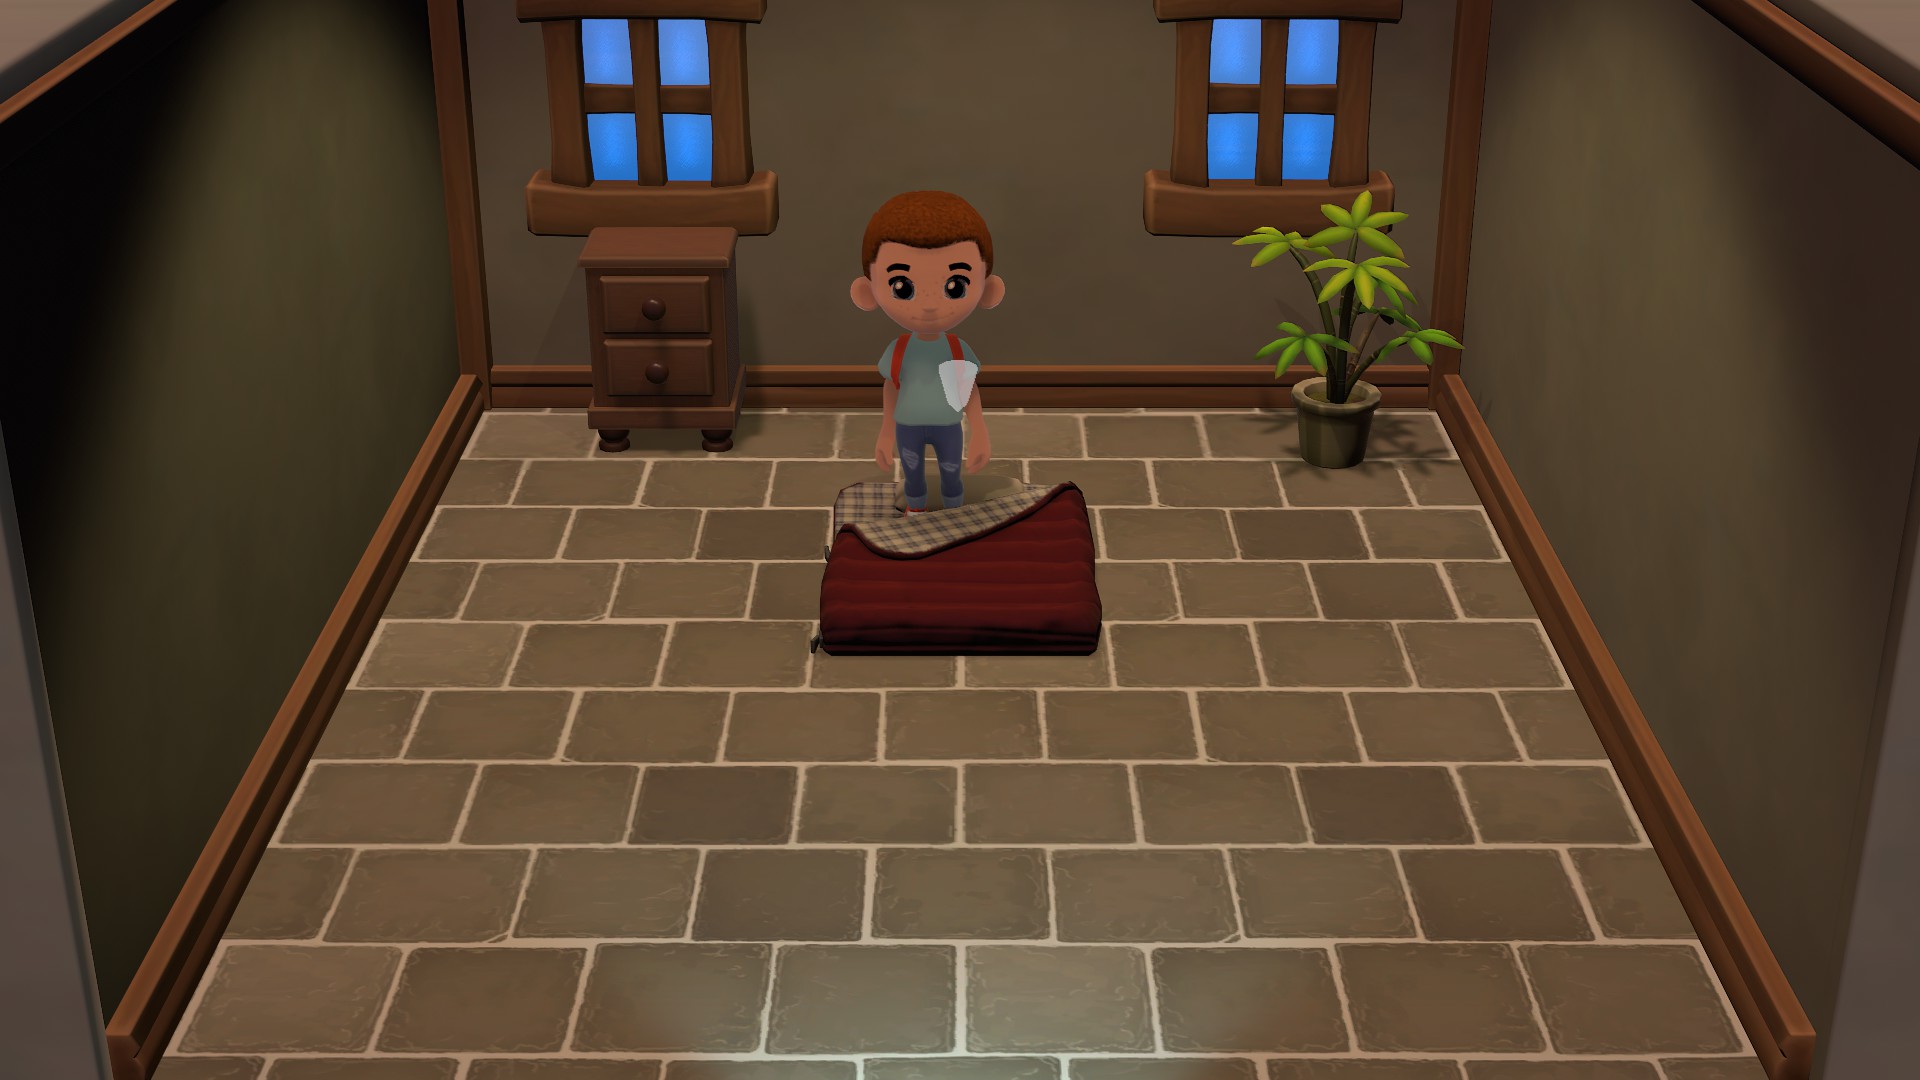
Second Renovation With placing the bridge you'll get a cut-scene of celebrating the new bridge. Within this cut-scene Oma will talk about fixing up the second broken down house. With this you'll get another donation box to place at the door of the broken down house by interacting with the door. There you'll need 40 more logs to fix up the house. Remember what was said about stumps and trees regrowing. Once you gather the 40 logs, place them into the donation box and you'll get another cut-scene to head back to the inn to celebrate. Here you'll see the background lurker from before and another. There you'll meet Benny the bunny an important character needed to complete all tutorial quests. You'll head to bed after convincing him to move to town, once you show up in your home you can just exit the building once again to trigger a cut-scene of Benny moving into his new home. In this cut-scene you officially meet Rosa, the pig animal character who's been lurking at Oma's inn. Rosa will talk about moving her workplace to town, building houses to grow and expand the town further as you develop it. After the cut-scene is done Rosa's office will start to be built in the town centre. You'll have to wait a single day for it to be fully built. But don't go to sleep right away just yet.
Tutorial Quests - Part 2
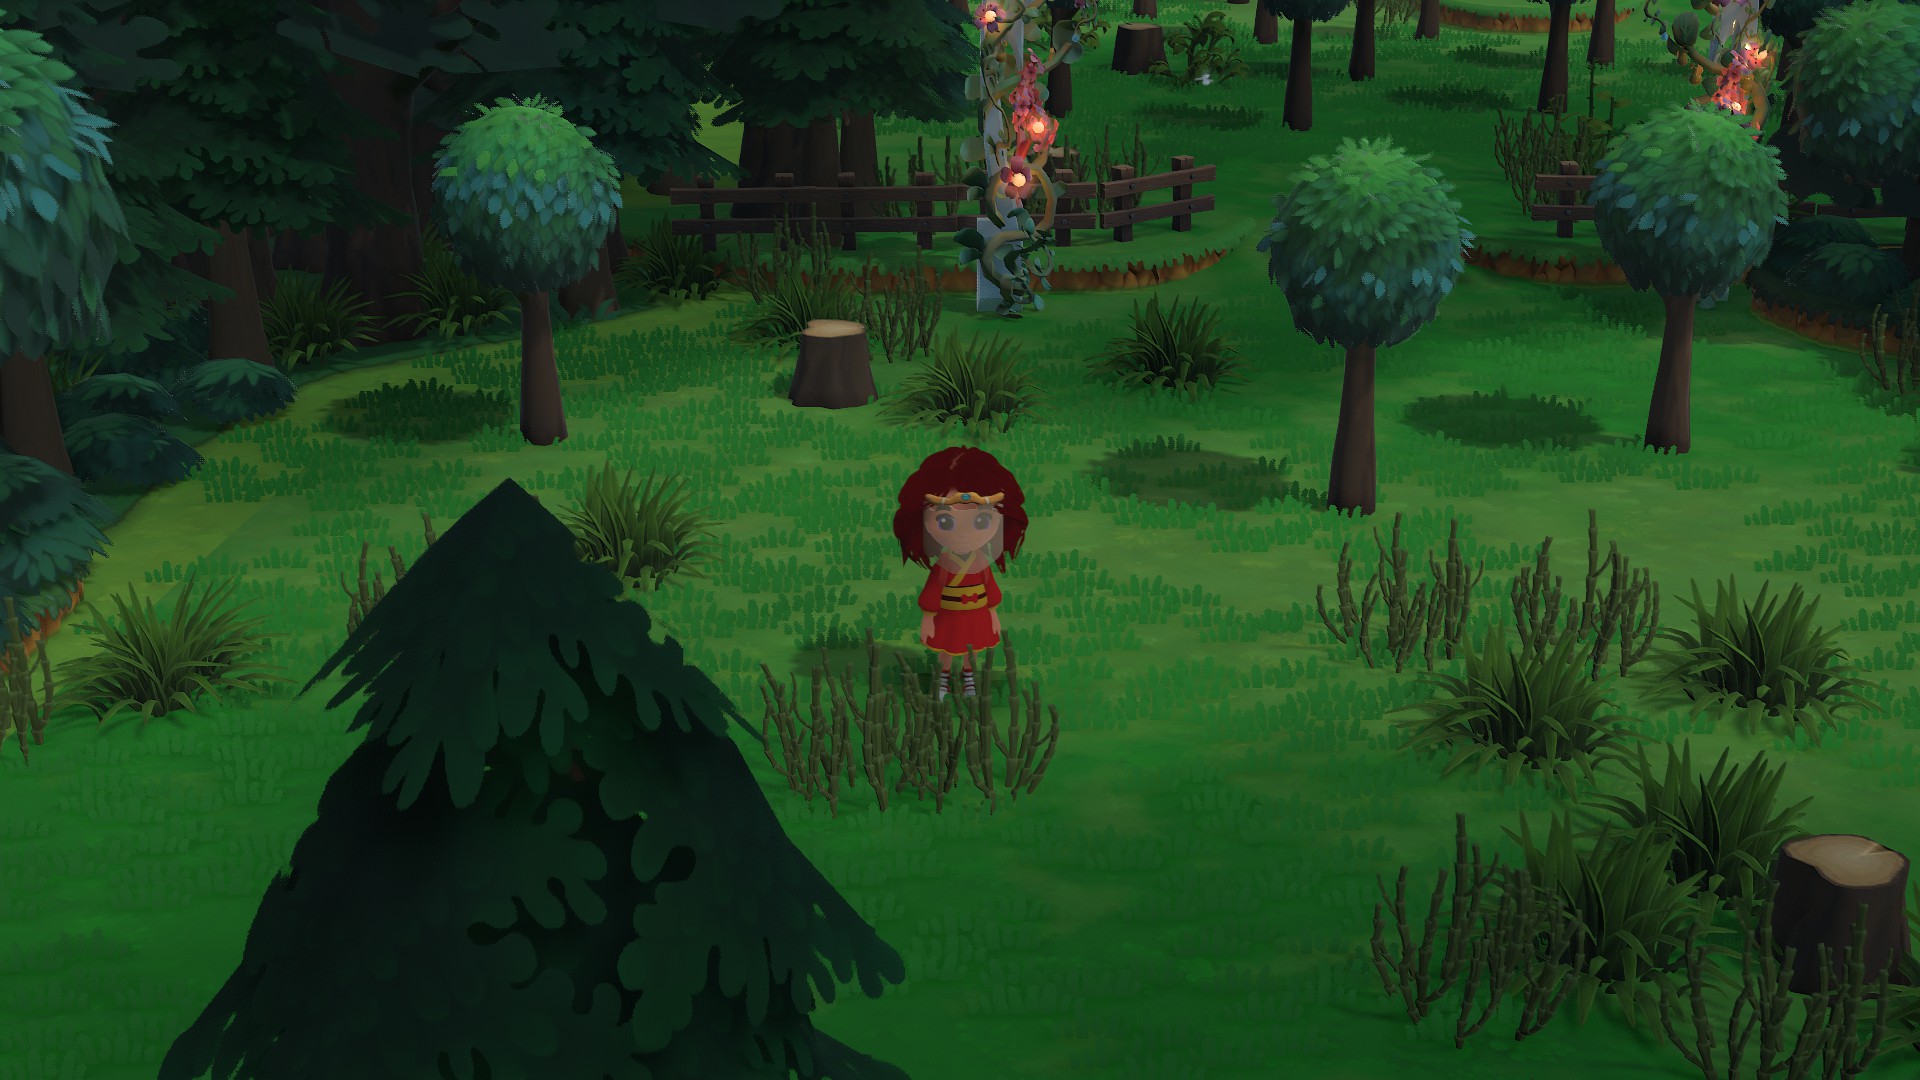
Waiting Quest! While waiting for Rosa's office to be built you can head into Benny's house and unpack his boxes to earn furniture for his home (only two small things for now, his house is pretty empty) and to get one quick tutorial quest made to do for this day, you'll head around town and look for a villager with a 'waving' hand and a speech bubble over their head, this speech bubble means they want to speak with you. They will talk about wanting to plant some trees for you to gather more wood! Speaking with them will give you the shovel crafting recipe and you'll need to go craft one to carry on the quest. You will need 3 logs and 1 wooden plank to craft the shovel. Once crafted return to the villager who gave you the quest and speak with them. They'll give you some tree seeds and you'll need to plant a max of 6 trees (if you have more seeds you can indeed plant some more if you wanted!). You'll need to use the shovel to dig holes and use the seeds on the holes to plant them. Once you have all seeds planted return to the quest giver and they'll then ask for flowers to be planted but you'll need to head to Moss first to get some seeds. Moss will give you 8 random flower seeds to plant, with it being random, you can't pick the colours for this quest. You'll also unlock the ability to sell things to Moss if you speak with him a second time, he'll buy anything that can go into your backpack.To sell to him just speak with him. You plant the flowers the same as the trees, use the shovel to dig a hole then use the seeds to plant into them. Once you plant all 8, return to the quest giver villager to end this quick quest line.
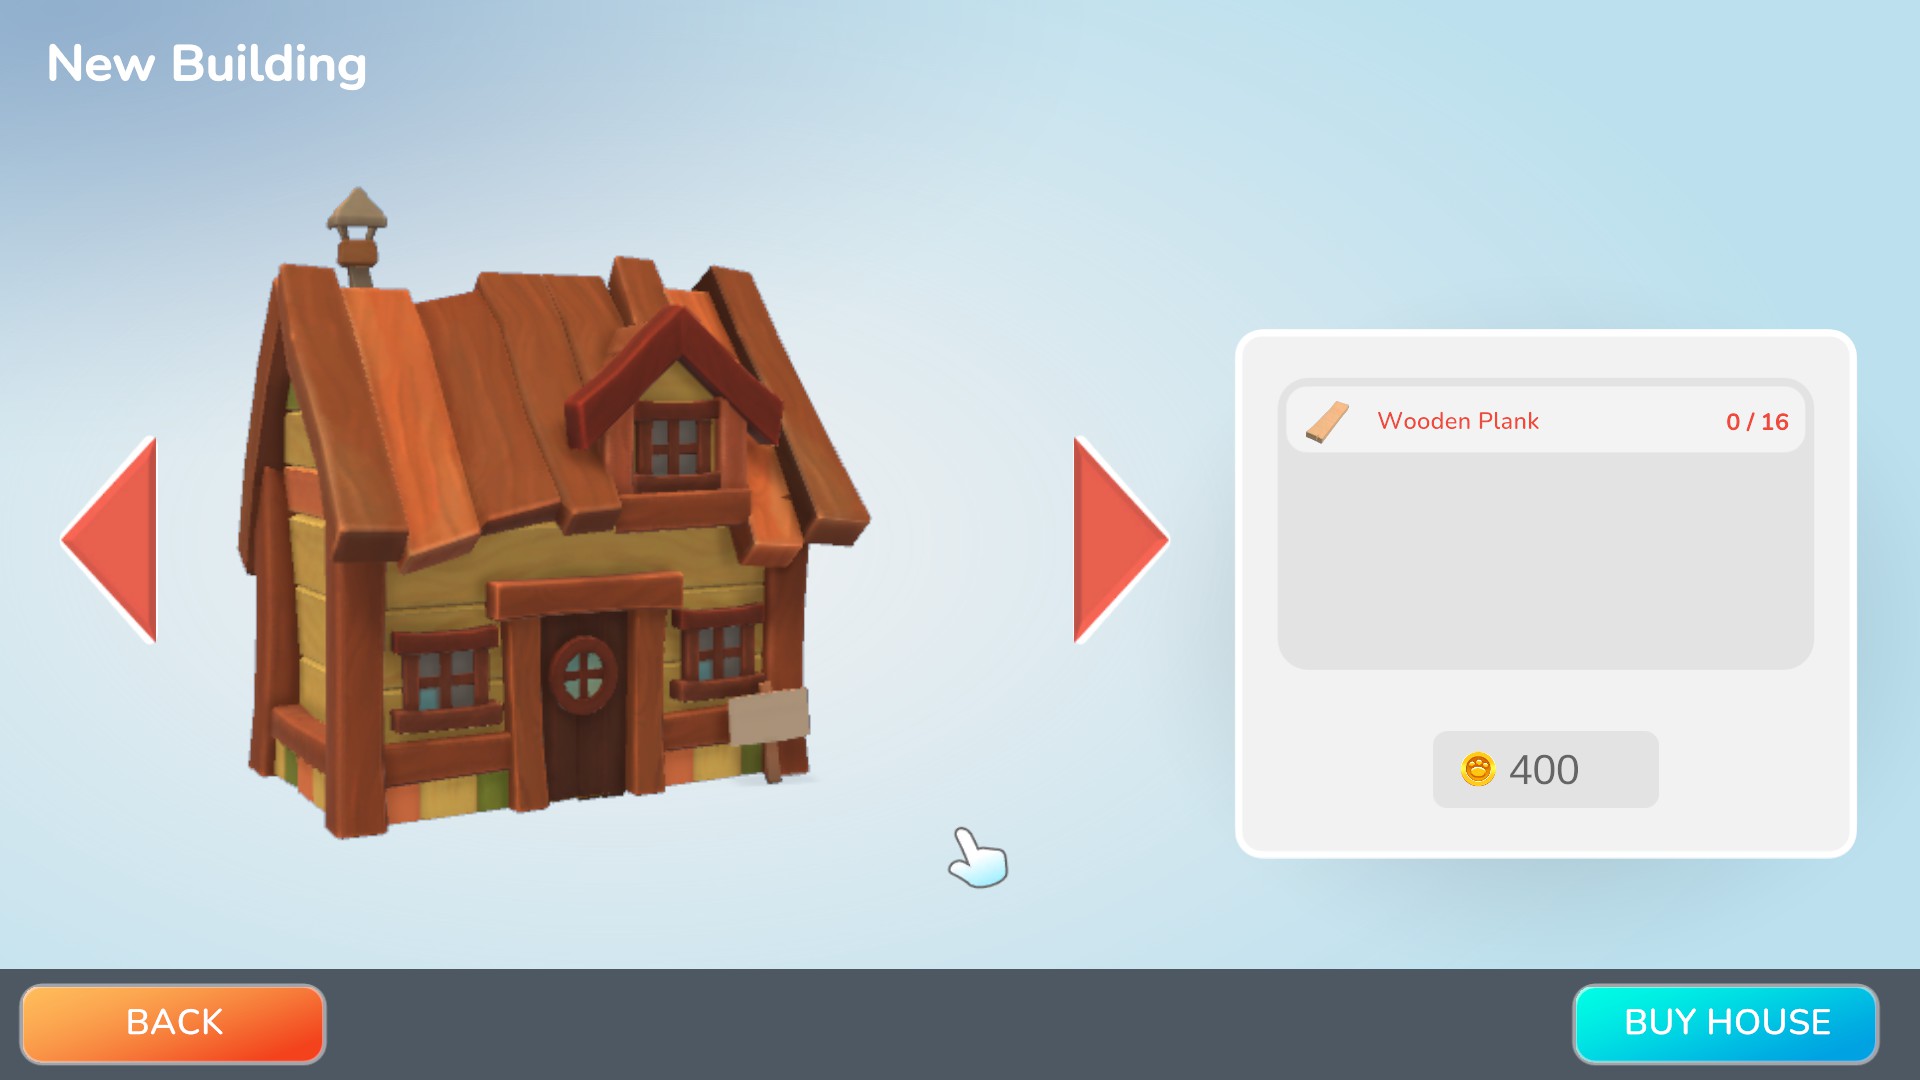
Rosa's Store After handing in the quest, you can sleep or wait until the next day. Soon as it arrives to the next day, head into the town centre to trigger a cut-scene with the wonderful Rosa, who'll be standing outside her new shop that is to the right of Moss' store. Once the cut-scene ends, head into Rosa's new store to trigger another. She'll explain you can buy roofing and walls for houses at the right of her store and the main thing is building 4 types of houses. Houses will require you to bring both money and resources to build. See Houses part of the guide to see the different types. She'll then show you the tab of buying a house, have a little look at the four choices if you would like but do back out the tab using 'esc' on keyboard to speak with her a little more. Once you finally finish talking to her you will see your 'main' tutorial quest is to build your first house from her store. You can build any of the house choices but the first house choice is the easiest to build and might be the only one we can build for now, don't worry in future you can demolish houses, doing so gets you the resources back and build the other types. For the first type of house you'll need 400 gold and 16 wooden planks.
Start Building The House Focus on gathering the things needed for the first house choice. When you return to the meadow area after speaking with Rosa's cut-scene you should see a person walking around the meadow who's new. They are Yara the mountain goat, a visitor who will give you a free bug net! Catching bugs and fishing is the main source of getting money at the start of the game, so getting this bug net is a big help to getting the 400 gold for the house. Once you get the materials and money return to Rosa in her store. Remember her store is open between 10am-4pm. Speak with Rosa to click the option "build a house" then ask to build the first house choice from the shopping screen. She'll ask you to show her where to place the house and will teleport you and her to the meadow area entrance. At this part of the game you can build the house in either the meadow area or if you walk to the right you'll find the beach, you can build houses on the green grass areas on the beach, you can pick wherever you like, you can move houses around in the future so don't panic thinking you need to pick the "perfect" spot right away. As you walk to the spot, Rosa will follow you but will walk VERY slowly, you can go to either go around the meadow area or to the beach and then speak with her. She'll say if "this is the spot" and you can choose the option "around here" and walk around the area you're currently in only, this way don't need to wait for Rosa to catch up walking, from hovering the house around in this bit place it where you want, it can take 2 days after placing the house to be fully built. Many sleep the days to skip but I don't personally recommend it as there is a quest to do as the house builds and you can gather more materials and such in the meantime.
Benches After placing your first house and start it's building, you can explore the meadow area and speak with the villagers, one of the three of them still have a quest for you. The quest is to make two benches out of wood logs. You'll get a pre-built design to the benches to use at the design bench/tool. Each bench is 11 logs, so you'll need a total of 22 to build both benches. Remember gathering resources like wood logs is very useful to do as often as possible, mainly when trees regrow for you to cut down, wood becomes a very useful resource for both tutorial quests and making your own creations. Once you have both benches in your backpack return to the villager who gave you the quest. Make sure the benches are in your inventory/backpack when you go speak with them to trigger the next part of the quest. Once you talk to them about finishing making the benches they'll then ask you to place them somewhere in town, you can place them at either Town Centre, Meadow Area or the Beach at this point in time. The choice is yours! Place those benches down and then return to the villager once again to complete the quest. From here you can spend the rest of the day gathering resources or catching butterflies to sell for some gold/income. Clams found at the beach can be sold for some extra gold as well. Remember to be watchful of your inventory space. There is a backpack upgrade for more inventory gained with the Mayor Merits. The set of draws in the room Oma let you stay in is a storage item as well, you can take these draws and place it in your home, this won't upset Oma or give punishment to do, so feel free. You can spend the rest of the day and even the whole night doing so, you don't ever really have to sleep if you didn't want to but the only way to change weather is to sleep so do keep that in mind, or those who want to get the tutorial quests completed faster can sleep until the next day. The choice is fully up to you.
Tutorial Quests - Part 3
Chairs & Tables The next day, speak with your villagers (this request should be from Benny), one of them will have yet another quest for you! You'll be asked to make a wooden chair and be given another pre-built design for a wooden plank chair. The chair will need 10 wooden planks to create it. Once you gather the wooden logs to craft into wooden planks, create the chair and with it in your backpack return to the quest giver to speak with them. They'll ask you to place the chair within their home, do so and then speak to the quest giver once more to finish the quest. From here go speak with the other villagers as another of them will have another quest to create a wooden plank table. This will give you another new pre-built design for the design tool/bench. The table will need 7 wooden planks to create, craft them at the crafting bench and create the table, once doing so return to the quest giver with the table in your backpack. Once speaking with them they'll ask you to place the table within their home. Feel free to pick up and move around or even steal the furniture in the starting villager houses. You can keep it or sell the furniture if needed or rearrange their houses whenever you'd like. The villagers won't get upset and don't mind you doing so. Once you place the table in the villager's home, return to them to talk and finish the quest. For both the chair and table quests you'll get a small cash reward in return for helping your neighbours out.
House Finally Built From here you can spend the rest of the day gathering resources, catching butterflies, plant some trees, flowers if you buy the seeds at Moss' store of craft some items you have unlocked at this point to place around town if wanted. You can even just sleep until the next day if wanted. Once you reach the next day, if you slept exit your house to the meadow area, it should trigger a cut-scene at the finally finished built house! The cut-scene will have Oma and the new villager moved into two. From this cut-scene you'll move the villager into the house using the white sign outside of the house, Rosa will give you the wooden plank stairs pre-built blueprint. Something to note, at this point in time you can only use the white sign to move in or evict villagers but unlocking mayor merits you can move/demolish houses and change their walls/roofing but you'll need the merits unlocked. Not too long will be a cut scene about moving villagers in, I mention this now because want you to think about your choices, keeping about 4-5 villagers at the start only you'll get through tutorial quests faster, you can indeed add more villagers but can at times take longer to get through the tutorial stage but can be enjoyable with requests to get money but sometimes you get requests for things like paint that you won't unlock until AFTER you finish the last tutorial so wanted to get this information to you so you can pick how YOU WANT to play the game, the choice is fully yours!
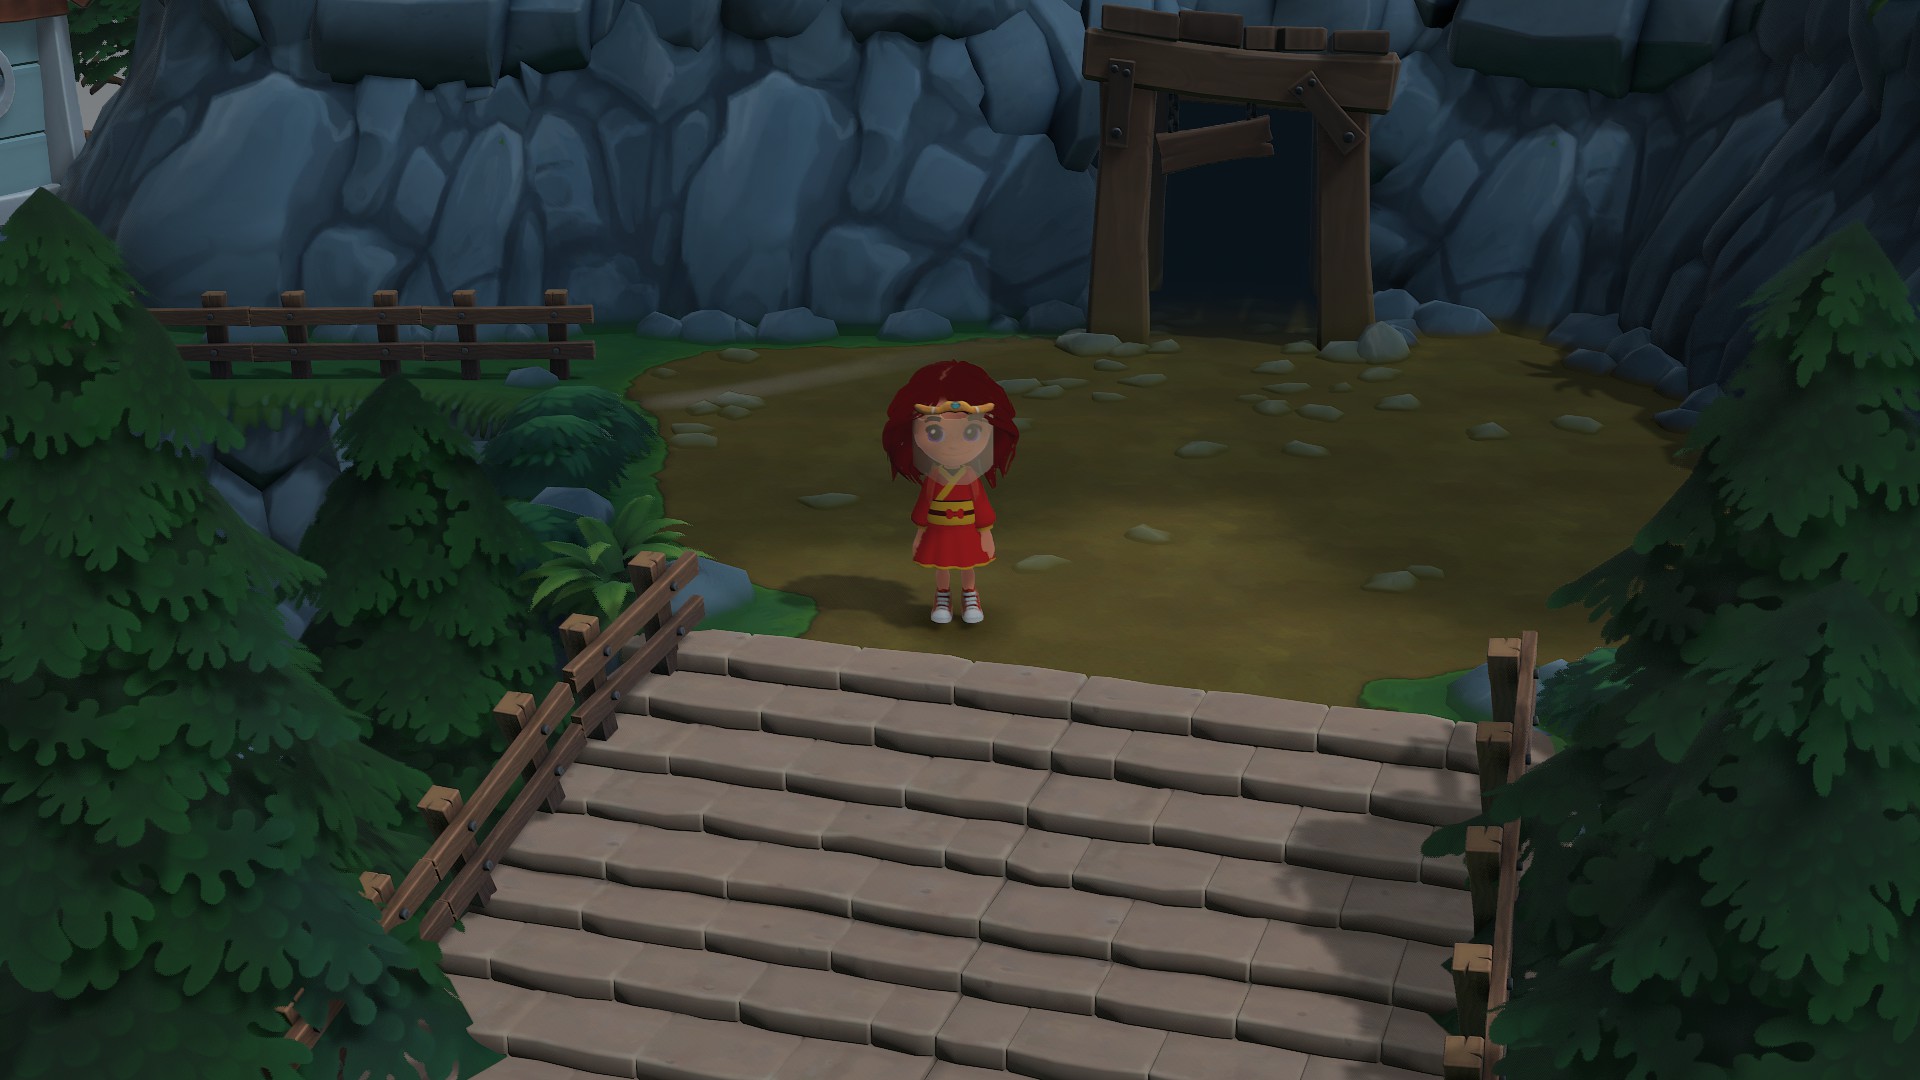
First Things First, Stairs, Forest Area & Pickaxe! First thing you want to do after finishing the main quest to build a house and move in your new villager, is to run to Sally's workshop and build at least one wooden plank stairs. This is what I highly recommend to help get ahead of your game. The stairs are 15 wooden planks to build. Gather what you need and craft the wooden planks and make at least one set of these stairs. Take these stairs into the meadow area, when exploring by now you've noticed the slope/raise area you can't get to, place these stairs at the slope part of the meadow area to gain access to the resources and more space BUT more importantly you can go to the back of the meadow now, you can access this area and find a set of stairs under a dark wood Torii gate. Once you find it I highly recommend you go through them to enter the Forest Pathway and entrance to the Forest areas. From there go up the pathway, take the first left to a waterfall and a gap in the pathway to unlock a bridge that costs far less than the wooden plank bridge. You'll being doing this in a small bit so just unlock the pre-built design for now. What you'll do is go back to the pathway and go up, past some blocks stairs to see the pathway go upwards then take a left or to the right with a rock wall blocking the way, you'll be going upwards then left towards the Mountain area, more importantly the Mine Entrance. Here you'll see a broken pickaxe on the ground, pick that up right away. The bug stopping this quest should be fixed but getting the pickaxe asap is super helpful. Upon picking up the pickaxe you'll be prompted to go see Sally. Do so, and she'll take the pickaxe saying she'll have it fixed the next day. Once this is done and out the way we can carry on with the rest of the quests we can do while waiting for it to be fixed. Something to note about the mountain area and mine entrance, to the left of the mine is a grass area, if you clear this area you can place creations, items and even a house on the green grass area. Another house placement area, very neat!
Oma's InnAfter speaking with Sally about the pickaxe and such, I recommend building the wooden log bridge while you are there, this will be needed in a small bit. The log bridge will take 22 logs to be built, making it the cheaper bridge of the two pre-builds open at this time. But after that head to town centre and go into Oma's inn. Heading into Oma's inn will trigger a small talk between you and her. Oma will talk about the opening times at the inn where visitors will come visit and you'll have the chance to ask them to move into town. The opening times at Lunch 11am - 3pm and Dinner 5pm - 9pm. You'll need to return to Oma's inn at Lunch to complete this tiny little intro quest. You can use the bed upstairs in Oma's inn to nap 2 hours or 6 hours to get to the correct time-frame if you aren't at 11am yet and wanted to do this tiny quest out the way right away (it is easier to do this). Upon entering the inn at the lunch opening will trigger Oma asking you to convince a guest to move into town. After Oma prompts you to convince the villager, go speak with them and they'll agree to want to move to town making them appear on the "move in" list the next day after speaking with them when interacting with a house's white sign. After speaking with them you're pretty much done with that and Oma will talk about wanting to move others into town. This is the cut scene mentioned before talking about moving those into town. How you play and pick to go forward is your choice so you can play the game how you want and enjoy, something I love about this game. Remember to check the inn often as when you play you'll unlock villager requirements to unlock villagers (can be found in the Villagers & NPCs tab). Now with this all done you'll want to head back to the waterfall within the forest area with the gap within the pathway we saw before, make sure to have a bridge in your backpack with you when heading there this time.
Tutorial Quests - Part 4
Meet Derris, Access to Fishing Heading to this gap at the waterfall within the forest path area, you can use the bridge I prompted you to build earlier or before heading there try to build a bridge as it will be needed. At this gap you'll place the bridge over it to access the other side, carry on and keep going to enter the Pond area, the lovely place great for fishing and catching forest area butterflies and moths but as you first enter the area you'll notice it's got trash/rubbish all over. You'll need to pick up the trash/rubbish and place it in your inventory/backpack to unlock Derris and fishing, so get cleaning! Make sure every bit is picked up and then head to leave the area to trigger a cut scene and meet Derris the brown bear. A fishing expert within the Hokko world. Derris will talk about how happy he is you cleaned up the pond area and such, after speaking with him he will come to either the beach or pond area every other day to give you weekly fishing challenges, rewards for catching fish and on the 15th of every month fishing tournaments. But to unlock fishing after speaking with him he'll be either at the pond area or beach, have a look for him and speak with him again, he'll give you the crafting recipe to make your own fishing rod!
Getting The Next Quest Now that you got those quick things out the way you can take a more chilled and relaxing approach to the tutorial, explore the slope area, gather materials but the real next step is to speak with your villagers until one gives you a quest. This quest being given is to fix a steel chair, this quest will unlock the editing/custom button on the design bench/tool. You'll be given the chair and it'll be placed in your backpack/inventory so make sure you have space to be given the chair. You'll be asked to take the chair to Sally to see if she can fix it. Doing so she'll tell you that she needs one steel bar to fix it, giving you the steel bar crafting recipe. Doing this quest before the pickaxe quest is what causes the bug which is why I recommended giving the pickaxe to Sally to fix first to prevent the bug stopping you from giving Sally the pickaxe to fix as you need it to finish this chair fixing quest. For this you'll need that broken pickaxe fixed since to make the steel bar you'll need materials only found in the mines and coal found by breaking rocks with the pickaxe, that means waiting or sleeping until the next day to be given it.
Pickaxe & Mines The next day head to Sally's workshop and speak to her to get given the now fixed pickaxe. Once given the pickaxe, Sally will mention the mines, the area you found the broken pickaxe before. Sally will also now be opening her store, holding pieces packs which will be needed to create your own custom furniture and creations, crafting recipes like dyes, materials and such (later on paint which is a common need for villager requests). Using the pickaxe is now the way to get to the mines and start gathering materials from within. Gathering these materials is what is needed to carry on the tutorial quests, so the main goal this day is to head there. Using the pickaxe you'll clear the rocks blocking the entrance and enter the first level of the mines. You'll be able to mine the rocks there, and then on the far right clear the rocks there and gain bronze ore to reach the second level, it's important to see the darkness, you'll try walking through the darkness but trigger you can't.This is important to do to trigger the next cut scene needed as the iron ore used to craft steel bars are on the second mine level.
Mine Lanterns and Gather Resources You want to now exit the mine after being unable to explore the second level to trigger a cut scene with Sally. You'll tell how dark the second level is and she'll come up with an idea to help, doing so she'll take you back to her workshop, using teleportation in a way straight there. Once there, she'll talk about the Mining Lanterns, the only light source that works in the mines, since other lights won't count. One mining lantern will be 3 coal, 2 stone and 2 logs to build. To gather coal and stone quickly you can use the axe on the large rocks found around the meadow area and one at the pond area. The mines level will reset at midnight and respawn all rocks inside the mines, the rocks everywhere else sadly don't re-spawn expect the ones on the beach, but the rocks on the beach only drop stone and chalk. Take this time to craft a good number of lanterns. You'll need a good amount for the 3 out of the 4 levels of the mines. I roughly start with about 10-15 to cover the most of the second level as you only need the second level for the tutorial quests to be completed for the iron ore.
Once Gathered Once you have got roughly 10, possibly up to 20 mining lanterns if you want to cover the whole second level, it is best to head back there to light up the second level, each lantern only covers a small amount of area for light which is why you need a good amount. To craft a steel bar for us to carry on with tutorial quests you'll need 5 iron ore and 1 coal. The left pathway on the second level leads to the entrance to the third level (you'll need the second pickaxe upgrade) while to the right can lead to the fourth level (you'll need the third pickaxe upgrade). Within the third level is also an entrance to the fourth level (you'll need the third pickaxe upgrade). Once you get that from the second floor head to Sally's workshop, craft the steel bar and then speak with Sally to trigger the next part of the quest.
Fixing The Steel Chair Speaking with Sally about having the steel bar will have her offer if you would want to fix the chair yourself, doing so will unlock the customise button on the design bench/tool. Though she forces you to do so no matter what you pick. Interact with the design bench/tool and you'll now have a backpack icon to click, this icon is to edit or copy creations that are in your backpack, a useful option. Click it and select the broken chair (make sure it's in your backpack). You'll see a list of materials used to make the chair on the left, you only need these materials in your backpack if you plan to make a COPY of the chair but this quest is to edit it so you don't need to worry. We look to the right and press the pencil button to edit/customise the chair. From there you'll get a prompt up the top explaining how to add 'pieces' (those packs sold by Sally) to the design, to use pieces you'll need to buy their packs from Sally and the materials in your backpack to do so normally but not for this quest. You'll follow it's instructions by pressing the + button and selecting the correct steel piece and will auto attach to the chair where outside of this you'll get to pick where the piece is placed on creations.
Tutorial Quests - Part 5
Handing in Quest Once you have the fixed chair in your backpack press 'save' and will exit the design bench/tool with the chair being fixed in your backpack. Normal usage will take you to another tab where you get to name your creation and even pick the icon it has when you add it to your inventory. Once out of the design bench/tool, Sally will give you a "job well done" chat and you'll need to head off and speak with the villager who first gave you the quest, if you've forgotten who gave it to you, you can open your backpack/inventory and go to the quest tab, the icon of a check-list and pencil at the top. The quest tab will have information and remind you what step is next for each request given. The chair will be taken by the quest giver and will be finished right there and then.
Next! These next quests will be exploring all the buttons used in the customisation usage with the design bench/tool. Something useful for all new players. From handing in the broken steel chair quest you want to wait or sleep until the next day. Gathering resources and money through fishing and bug catching is always a useful thing to do in the tutorial stage but it's fully your choice to pick. Once you get to the next day, speak with your five starting villagers to get given a quest, you should be given a bookshelf that is missing a shelf "or two". Fixing this shelf you'll need at least 1 wooden plank. Normally you'd need the piece pack to add pieces to the item but lucky for tutorial you don't, so get 1-3 wooden planks and use the design bench, much like chair you'll pick the backpack icon. You won't be able to select the backpack icon until you have the wooden planks in your backpack. Like before click the pencil on the right and follow the instructions which teach you to move the camera in the design tool/bench, add a wooden piece, move it about, rotate and resize pieces. Then it will let you add a shelf and then teaches you about the icon and show the screen where you normally rename your creations. To note you only need to add a single shelf to complete this task. You can add more if you'd like.
Handing in, Bed With Pink Flowers Once done you'll head back to the quest giver and show them the edited and fixed bookshelf. Then they'll ask you to place it within their house, do so then speak with them again. Once handed in you'll speak with the five starting villagers to get the next quest.This quest people seem to get confused on so let's go over it. The villager will give you a bed, asking you to "rework" it, then go into detail saying the pink flowers are what they want removed.Head to Sally's workshop and enter the design bench/tool. Select the backpack icon and then select the bed, people tend to believe they need to paint the bed but that ISN'T correct, you just need to remove the pink flowers. So press that pencil on the right and the instructions will talk about deleting pieces from your creations. It will ask you to select something to delete, in this case a pink flower, and it will inform you of the buttons to press to remove the piece. It will then quickly show you have to duplicate pieces and ask you to do so quickly then will leave you to finish removing all pink flowers from the bed and you can even remove the duplicated piece you made for the tutorial. Save and backout once finished and return to the quest giver. They will ask for you to place it, do so then speak with them again to finish the quest.
Make Something New
Once handed in, speak with your starting villagers again to trigger the next tutorial quest. You;ll be making a table, unlike before where you made a pre-built table this time around you'll be making it from scratch using the design tool/bench blueprint choice.This is how you make most of your custom designs (expect stair's and bridges for those you edit the pre-built designs to create your own custom design). For this quest you'll need a minimum of 5 wooden planks and then enter the design tool/bench. You'll get instructions pop up once more explaining different blueprints are for different things meaning to read the small descriptions when hovering over each choice being important, for this quest we want the table blueprint. For custom design's to be approved by villagers requests you need to use a minimum of 5 pieces within the design and spend roughly about 2-5 minutes on the design. For this table keep this in mind and create a table with the pieces the tutorial has given you of your own real design. Once built hit save and finish with picking an icon, you are finished. You know the table meets requirements when Sally says the table looks "fantastic", triggering her to sell pieces packs in her store and checking the quest tab to see it say "return table to ...". Go to the quest giver with the made table in your backpack and see what they think about the table. For normal requests if the requirements aren't met when showing them the item they will tell you to "work on it more" which will then need you to either spend more time or add more to it. The quest giver will then ask you to place the new table within their home, do so and speak with them again afterwards to finish the quest.
Final Tutorial Quest, Painting Picnic Bench! Once you got that table quest handed in speak with your five starting villagers once more to trigger the final tutorial quest. This quest you'll be given both some blue paint and a wooden picnic bench. Make sure to have room in your inventory when you get the quest. Also to note USE THE PAINT GIVEN ONLY though other paints should be locked some people somehow have gotten paint early and broke the quest doing this. With these items head to Sally's workshop and use the backpack icon and select the picnic bench, from there you'll get instructions showing how to paint items to give your creations colours but something to note, you can paint the bench however you like! Paint all of it, some of it where ever you want on it, paint it! You'll press + then bottom of the add tab will be a paint can icon, click that to select the paint colours you have in your inventory once selected, paint whatever part of the picnic bench you'd like. Newest update should have fixed the bug for this quest if not please comment below. Once you are finished and hit save, give it an icon image and click save again, you are done. From there head back to the quest giver and speak with them. Once informing them you have finished the picnic bench they'll ask you to place it in town. You can place it outdoors anywhere you'd like. Once placed return to the quest giver and you have finished ALL tutorial quests, the whole design bench/tool is open for you to use whenever and whatever you'd like! Paint will be in Sally's store so now you can do normal villager requests without issue as well!
From here you can play the game however you'd like. Look towards unlocking other villagers, items throughout the game, create your items and even unlock the ability to create clothing, wallpaper and flooring! The Major Merits & Villager Request tab will talk about unlocks so feel free to have a little peak. Major merits are a great way to find things to do if you aren't sure where to go next and it can be fully your choice how you go forward from here.
Villagers & NPCs

There are many wonderful unique characters within the world of Hokko Life! Both villagers and characters who mainly tend to stores which for now we'll call NPCs so we can tell a difference!
-To note Town Reputation is hidden to the players, but is calculated from generally how much the player has been playing
NPCS Oma The lovely inn keeper, Oma is a sweet heart who is kind and always welcoming to all those within the town of Hokko. Oma unlocks the amazing Food Crafting for fulfilling villager requests.
MossThe kind of gentleman who owns the town's only general store. Selling a bundle of different items from wallpapers, flooring, furniture, tools and crating materials. His store restocks every two days.
YaraYara is a recent addition to the game, they are a lovely character who enjoys and studies insects of all kinds. She'll give new players a bug net in the tutorial stage.
DerrisDerris is a fishing expect and enthusiast. Derris unlocks the fishing rod and holds weekly fishing challenges, rewards for catching new fish, rewards for catching large fish and holds fishing tournaments on the 15th of every season/month.
RosaRosa the calm and relaxed real estate agent/boss. Her store is used to build houses and to buy roofs/walls to decorate and customise houses. You'll unlock her in the early stages of the tutorial quests. Mainly when you fix up the second broken down house.
LasrusThe fashion designer and fabulous hair stylist Lasrus will own the fashion store for your character to buy clothing, face covers, masks and even allows to change your characters appearance. To bring him into town you'll need to move someone into the second fixed up house, speak with Oma about moving people into town by coming to the inn and check Oma's inn during lunch hours/time to see him. Moving them into town unlocks the fashion store.
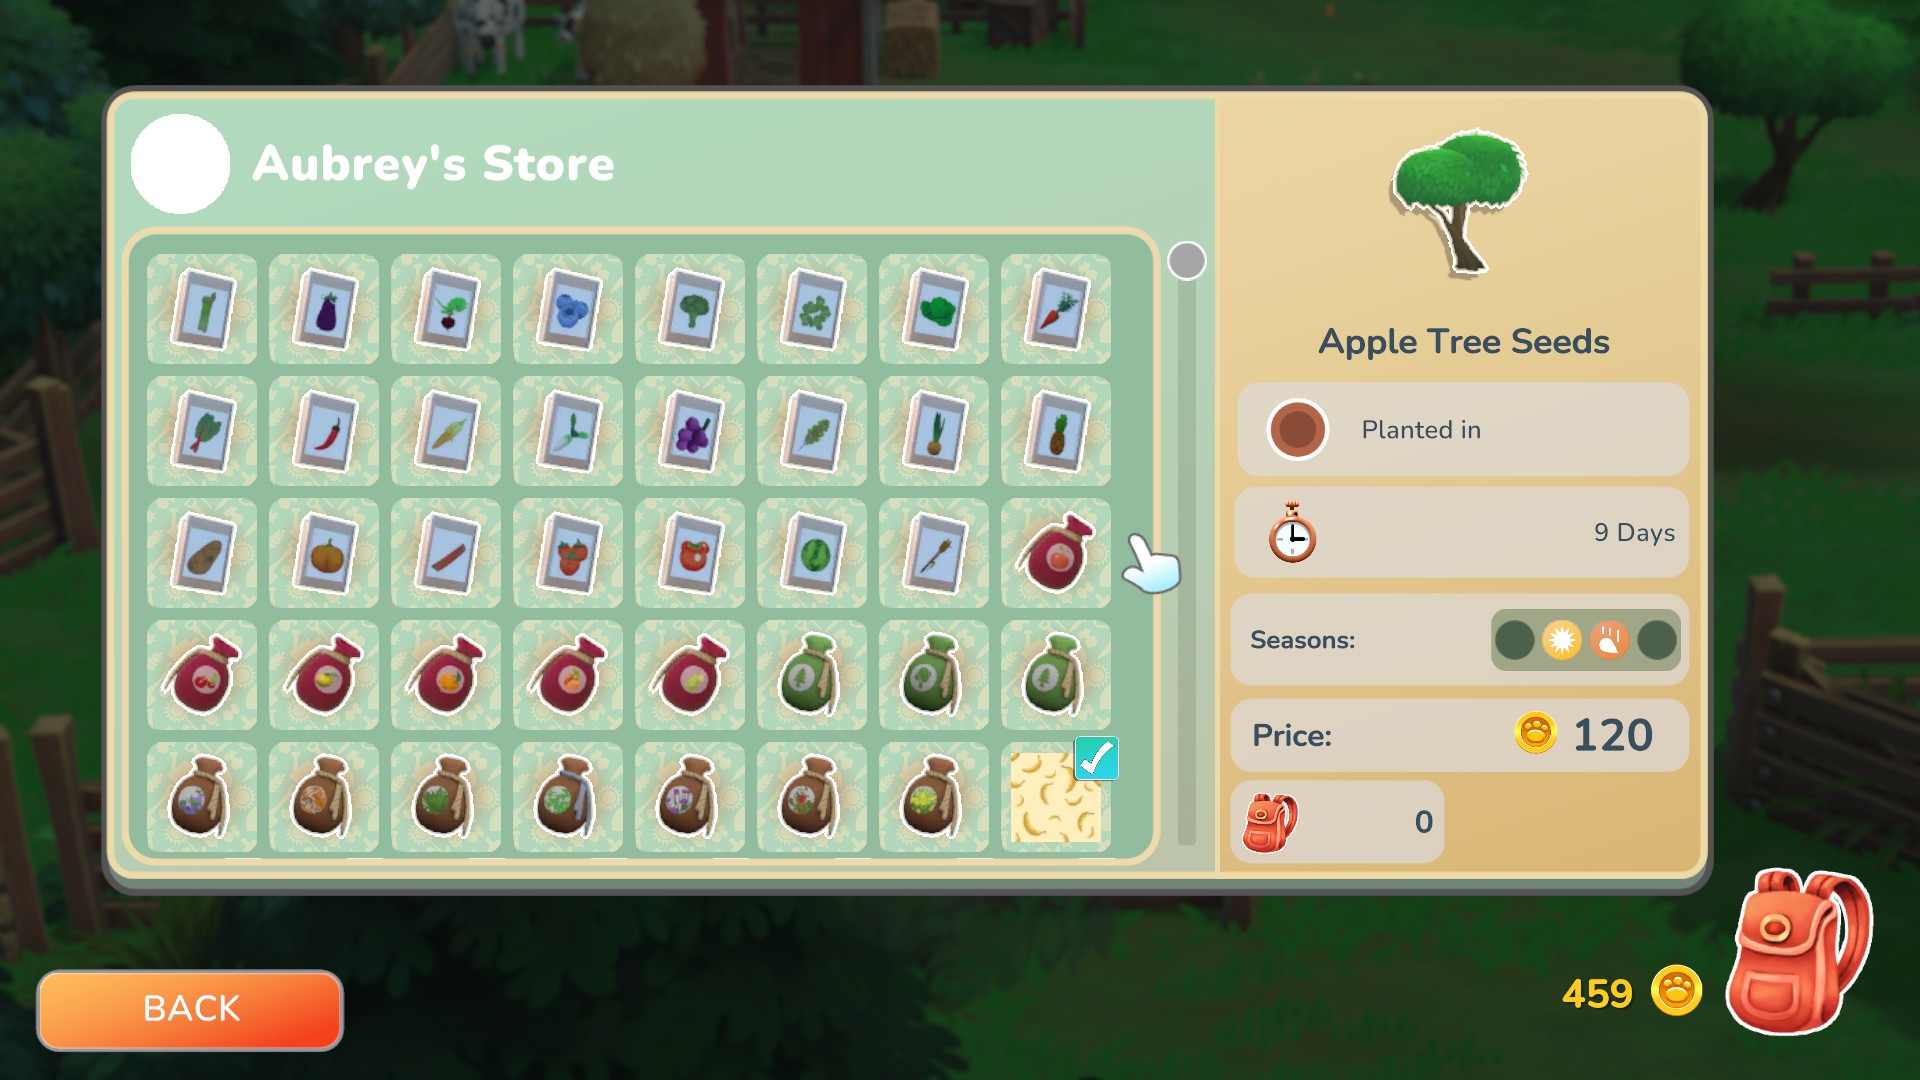
AubreyAubrey the deer is an excited farmer who loves the outdoors and brings both a store full of seeds and farming items and brings farming into town for you to enjoy. To draw them to town, you'll need to have planted 15 trees and 10 flowers, 10 in-game days passed, decorate the meadow area, unlocked Rosa's store, met Derris and been given the ability to fish! Moving them to town unlocks the farm area.
Hurley
Still gathering unlock information. Confirmed fact: Will appear in Oma's inn during the dinner hours/time!
VillagersAll villagers have unlock requirements to draw them into town, once Oma talks to you about villagers coming to inn you'll see villagers once you complete these below.
BennyBenny the bunny is a key character to do the tutorial quests and is unlocked during the tutorial after the quest of fixing up the second broken down house.
PipPip the piglet who enjoys a good day relaxing on the sofa. You'll need 75 town reputation and 1 in-game days passed.
OwynThe orange cat who enjoys a good walk in the woods. You'll need 120 town reputation, 1 in-game days passed and 4 houses built.
MeiThe bookworm elephant who enjoys a hot chocolate. You'll need 190 town reputation, 3 in-game days passed, 4 houses built and planted 10 trees.
RenRen the green pig who enjoys some good music. You'll need 190 town reputation, 4 in-game days passed and 4 houses built.
NikoThe tall purple elephant who enjoys playing the guitar. You'll need 290 town reputation, 5 in-game days passed and 4 houses built.
SherfThe blue bunny who'll hold down the law. You'll need 290 town reputation, 10 in-game days passed, visited the mine entrance and 5 rocks smashed/mined.
HectorThe chill and cool polar bear. You'll need 290 town reputation, 12 in-game days passed and 4 houses built.
TolaThe nature loving brown cow. You'll need 390 town reputation, 15 in-game days passed and 4 houses built.
PoaThe happy piglet who likes a good science experiment. You'll need 490 town reputation, 17 in-game days passed and 5 houses built.
OleanderThe senior dog with a sweet heart deep down. You'll need 490 town reputation, 19 in-game days passed, 5 houses built and 10 villager requests completed
LilyThe fox with attitude. You'll need 490 town reputation, 25 in-game days passed, 6 houses built and caught 65 insects.
RubyThe senior mountain goat with class. You'll need 490 town reputation, 27 in-game days passed, 6 houses built and caught 65 fish.
KikoThe colour cat with passion. You'll need 690 town reputation, 31 in-game days passed and 10 houses built..
YoyoThe cute and cuddly fox with a smile. You'll need 690 town reputation, 31 in-game days passed and 10 houses built.
NamiThe dog with a beat and kind personality. You'll need 790 town reputation, 40 in-game days passed, 11 houses built and plant 50 trees.
CookieThe panda bear of grace. You'll need 890 town reputation, 50 in-game days passed, 12 houses built and built a handful designs from the design tool/bench
QuillThe yellow rabbit who enjoys a good nap. You'll need 7 in-game days passed, 4 houses built, interacted with Derris at least once and visited all fishing locations (Sea, Pond, River)
Zea The sneaky kitty who enjoys a good comic book. You'll need 100 town reputation, 7 in-game days passed, 4 houses built, caught a total of 20 fish, caught 6 unique fish and unlocked Quill.
TimothyThe elephant with a passion for adventure. You'll need 100 town reputation, 7 in-game days passed, 4 houses built, 30 fish caught, 5 Derris weekly fishing challenges completed and unlocked Zea.
SwiftThe glamorous mountain goat. You'll need 4 houses built, all tutorial quests completed and to visit the mines at midnight.
PatchesThe colour and calm dog. You'll need 4 houses built and to have gone into the town centre 200 times.
FinleyThe farmer fox with passion of the outdoors. You'll need 4 houses built, been to the beach 50 times and only visits the inn during the summer season.
DanzoThe mountain goat with spark and energy. You'll need 4 houses built and to have visited the town centre, meadow, beach, pond area, redwood forest area and mines 25 times
FioreThe artist rabbit and Sally's best friend. You'll need a minimum of 6-in-game days passed and to create 10 custom designs from the design bench/tool. Unlocking Fiore and moving them into town unlocks the art easel in Sally's workshop!
Ramesh
Unlocked by visiting the Desert Island through Hurley's boat. Speak with them and then the next in-game day you can move them into a house!
Areas Around Hokko


There are a good amount of different areas within the town of Hokko. Here will be a quick list of areas and their names so you know the area is which with some of their names!
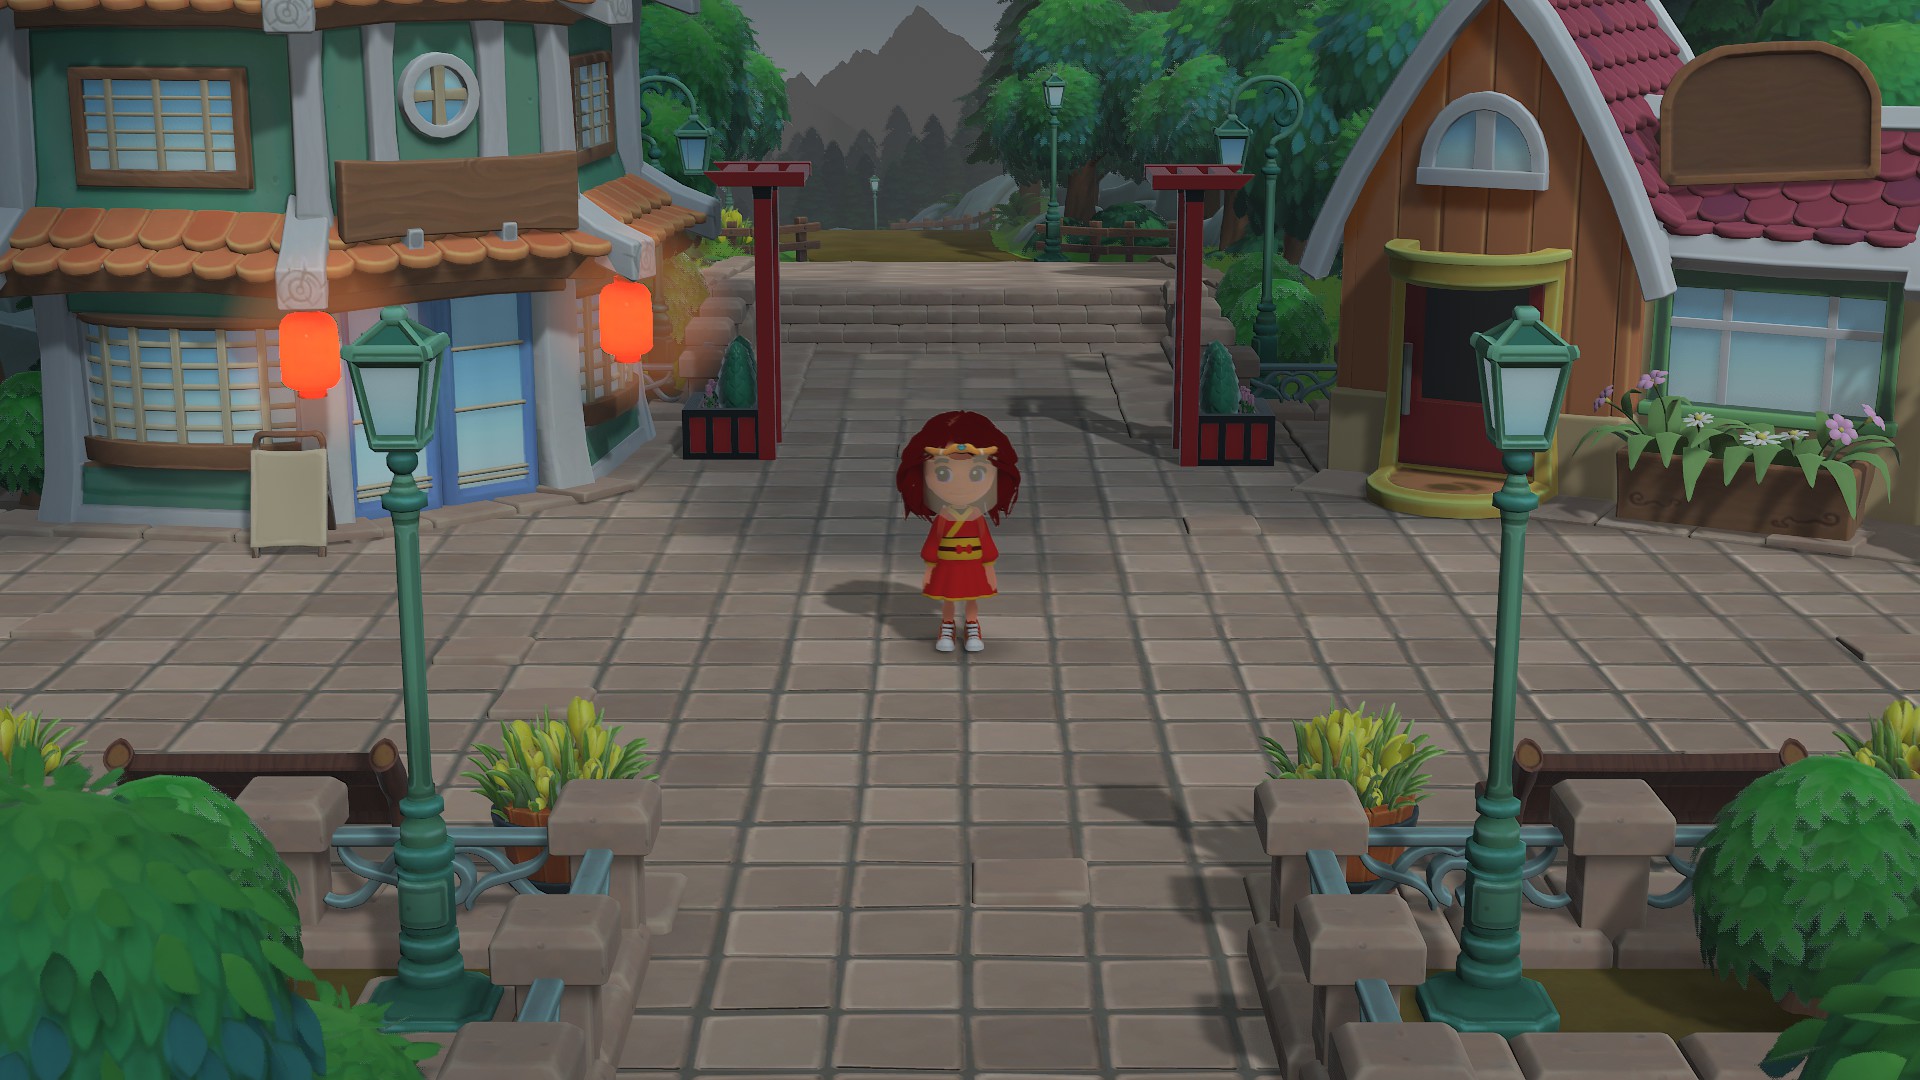
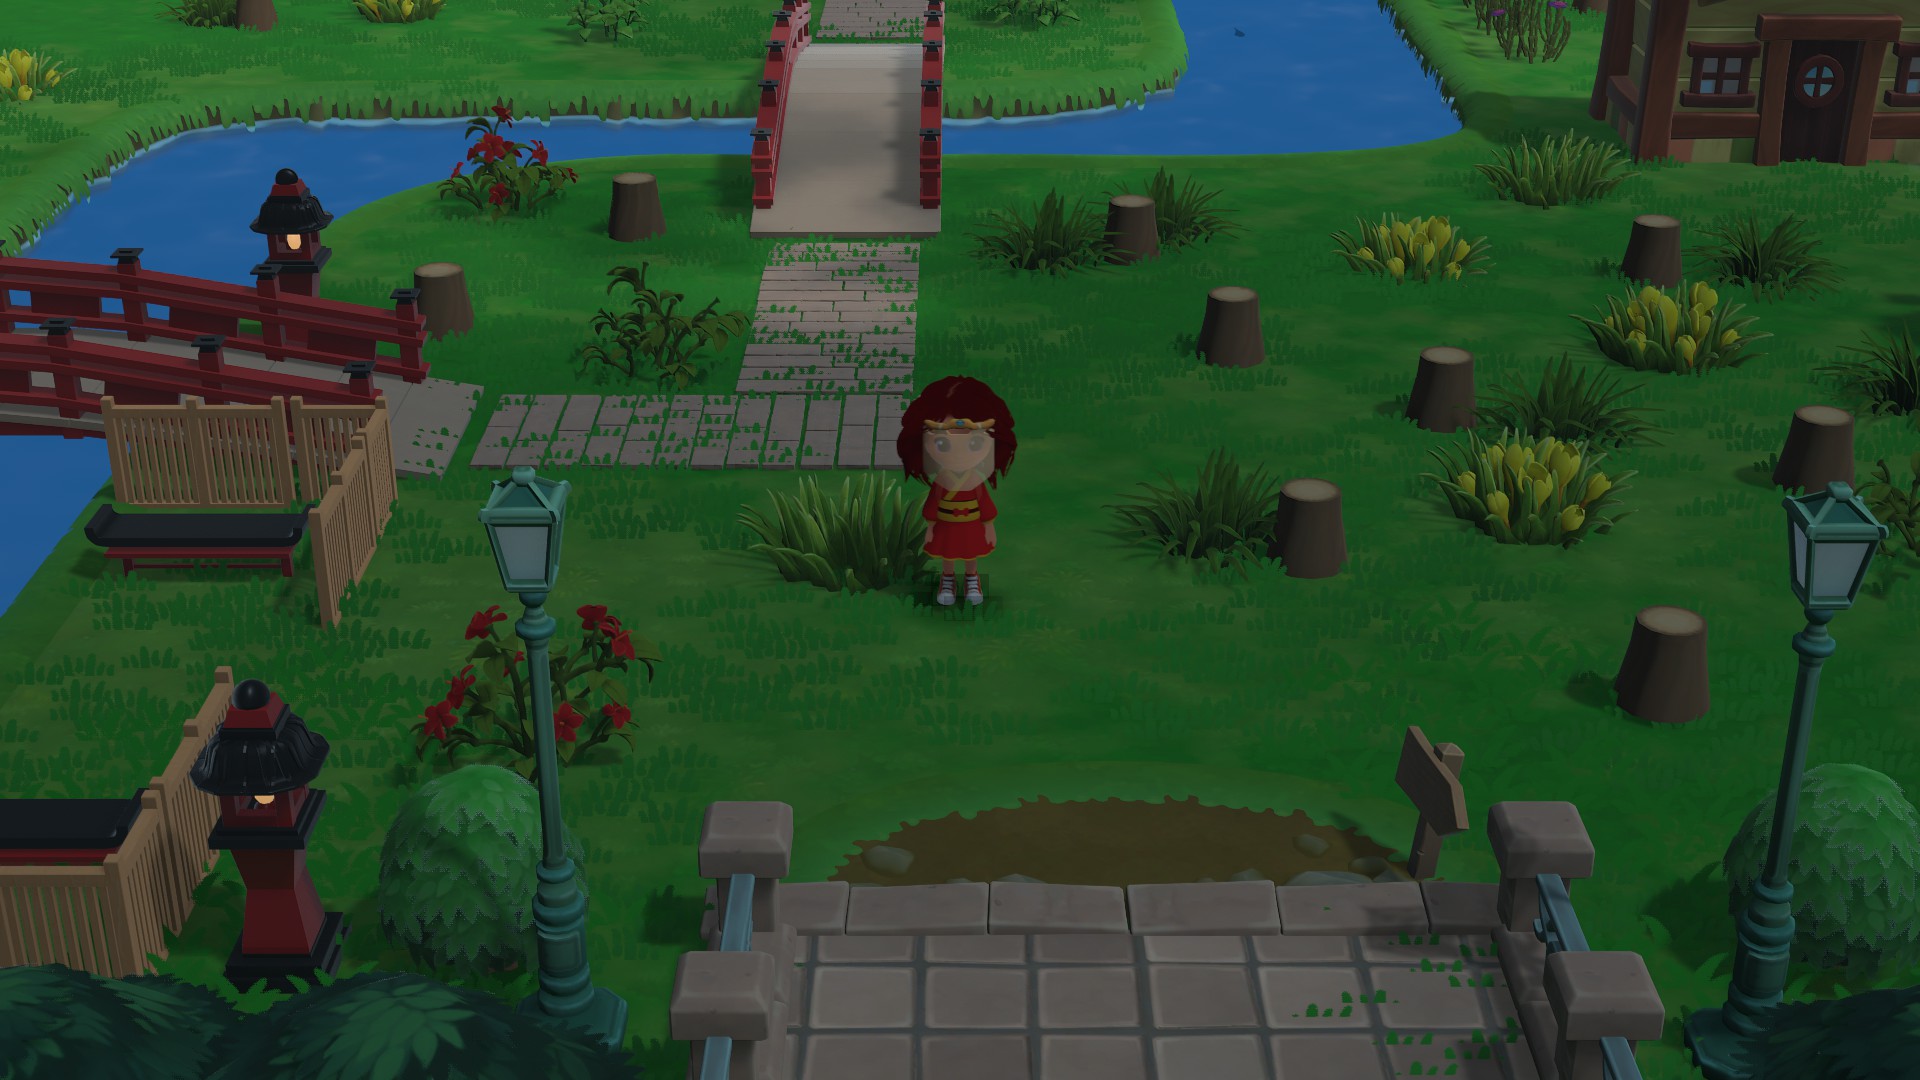
Town CentreThe home to the main stores of the town. Houses, general store and clothing store. Can't forget Oma's inn and even the train station used to head to the city. So often throughout the day you'll find bugs spawning around the town centre.
The general store ran by Moss and is seen to the right of the entrance way to the meadow area. It will sell furniture, objects to decorate your town, wallpaper and flooring for inside of houses to the right. Then to the left will have tools, materials used for crafting and someones lovely pink balloon to enjoy. Around the centre of the store Moss will have seeds, one plant and one tree seed, these change when store stock changes every 2 days. He will also have a pc unlocked during the tutorial where you can order past items inside Moss' store, this is called Moss' Catalogue.
Estate agent Rosa has her own office to the far right next to Moss' store. Within this store she'll sell roofing and outdoor walls for you to customise the houses throughout your town of Hokko to the right of her store. Speaking with Rosa who'll be at her desk to the left, you'll be able to build four different types of housing.
To the left of the entrance way to the meadow area, is home to Oma's inn, a building you first explore yourself when entreing the town of Hokko. Guests come to visit the inn at either lunch 11am - 3pm, and dinner 5pm - 9pm. Some villagers though only come at either lunch or dinner so be sure to check both to catch possible new villagers to get them to move into town.
The clothing store, owned by the lovely Lasrus. To the left of Oma's inn. It will sell of course clothing from tops, bottoms and shoes but will also sell many wonderful hats, masks, face accessories of all kinds to the right of the store. Then to the far left is a small booth where characters can sit and pay 50 gold to change their characters appearance as hair style, hair colour, skin colour and eye colour whenever they'd like. Place to find Town Insects.
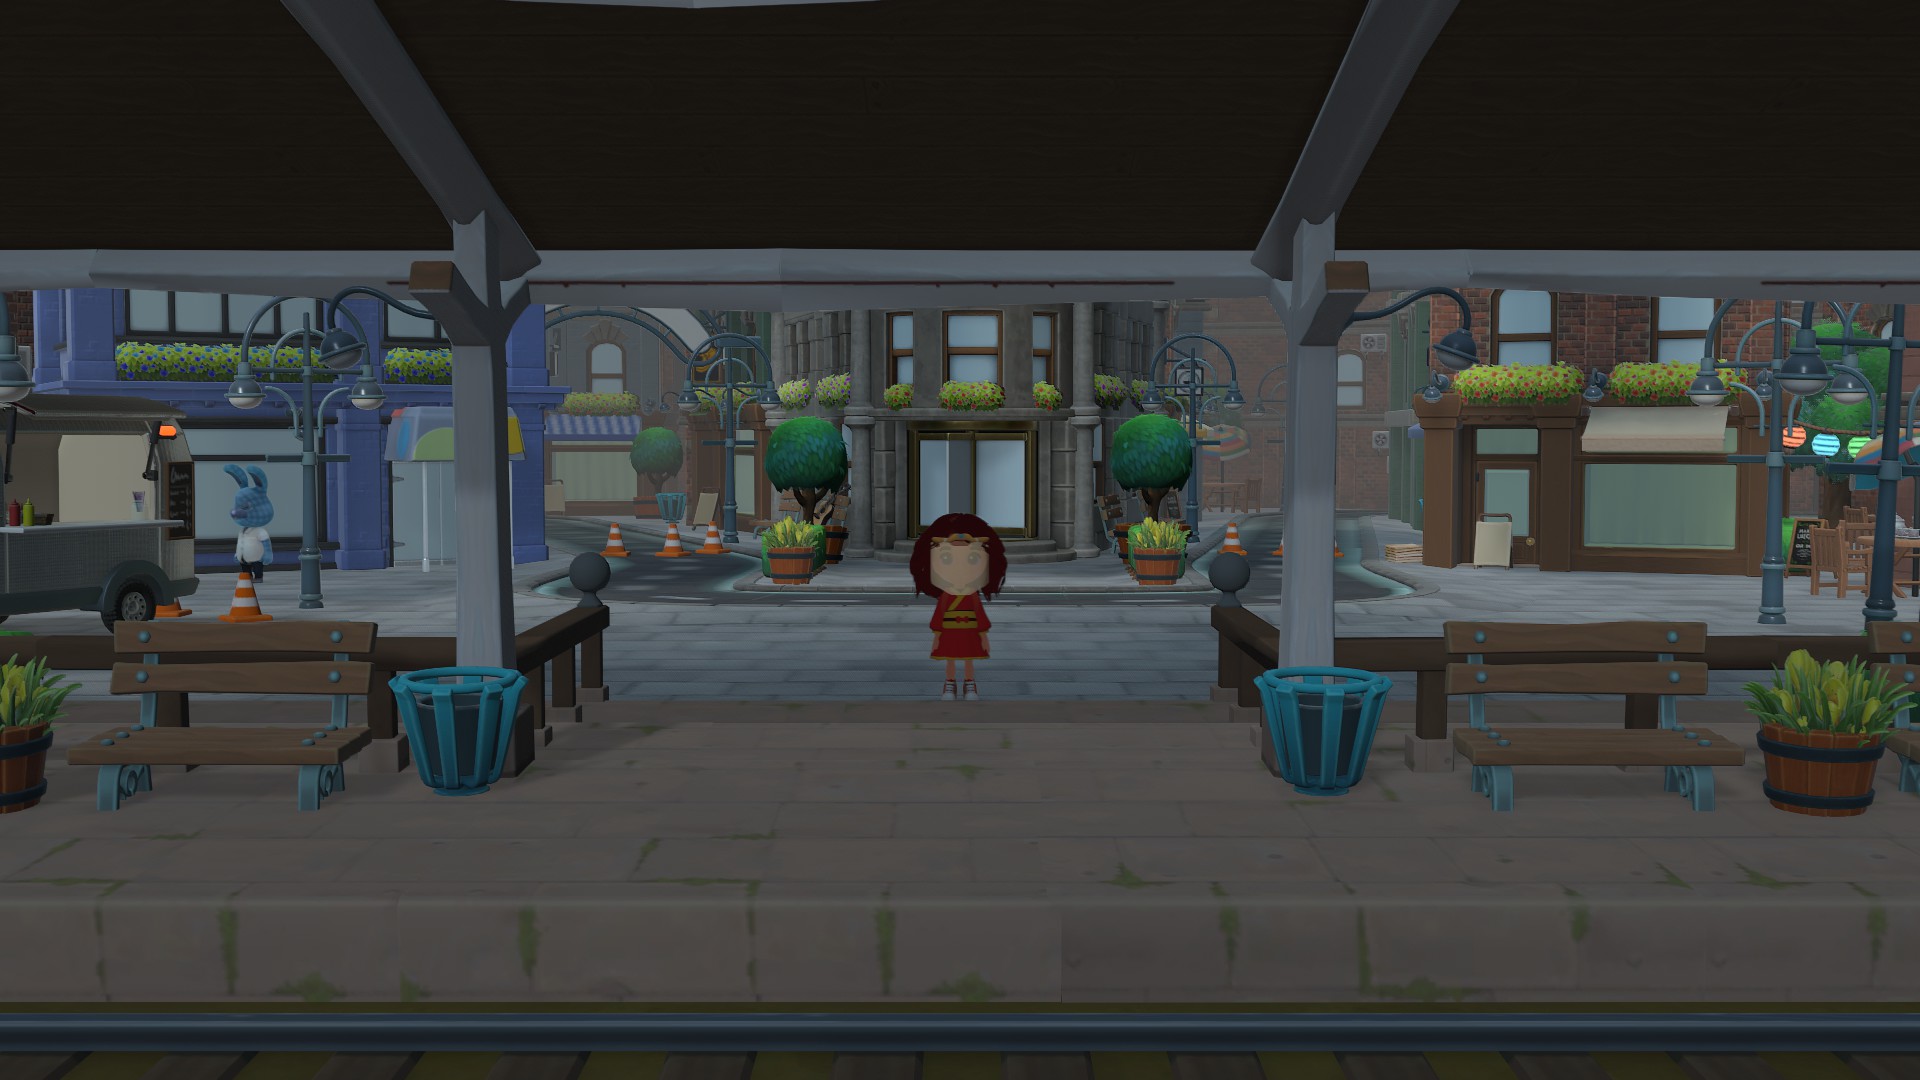
City CentreHome to the Creator Challenge store on the left, Creator Stores in the middle and seasonal store on the right. Check the 'Creator Store & The City' tab/category for more information.
Meadow AreaHome to a place most common to place villager houses but the home to Sally's workshop. Place you can sometimes find Yara.
Place to find River fish.
Place to find Meadow Insects.
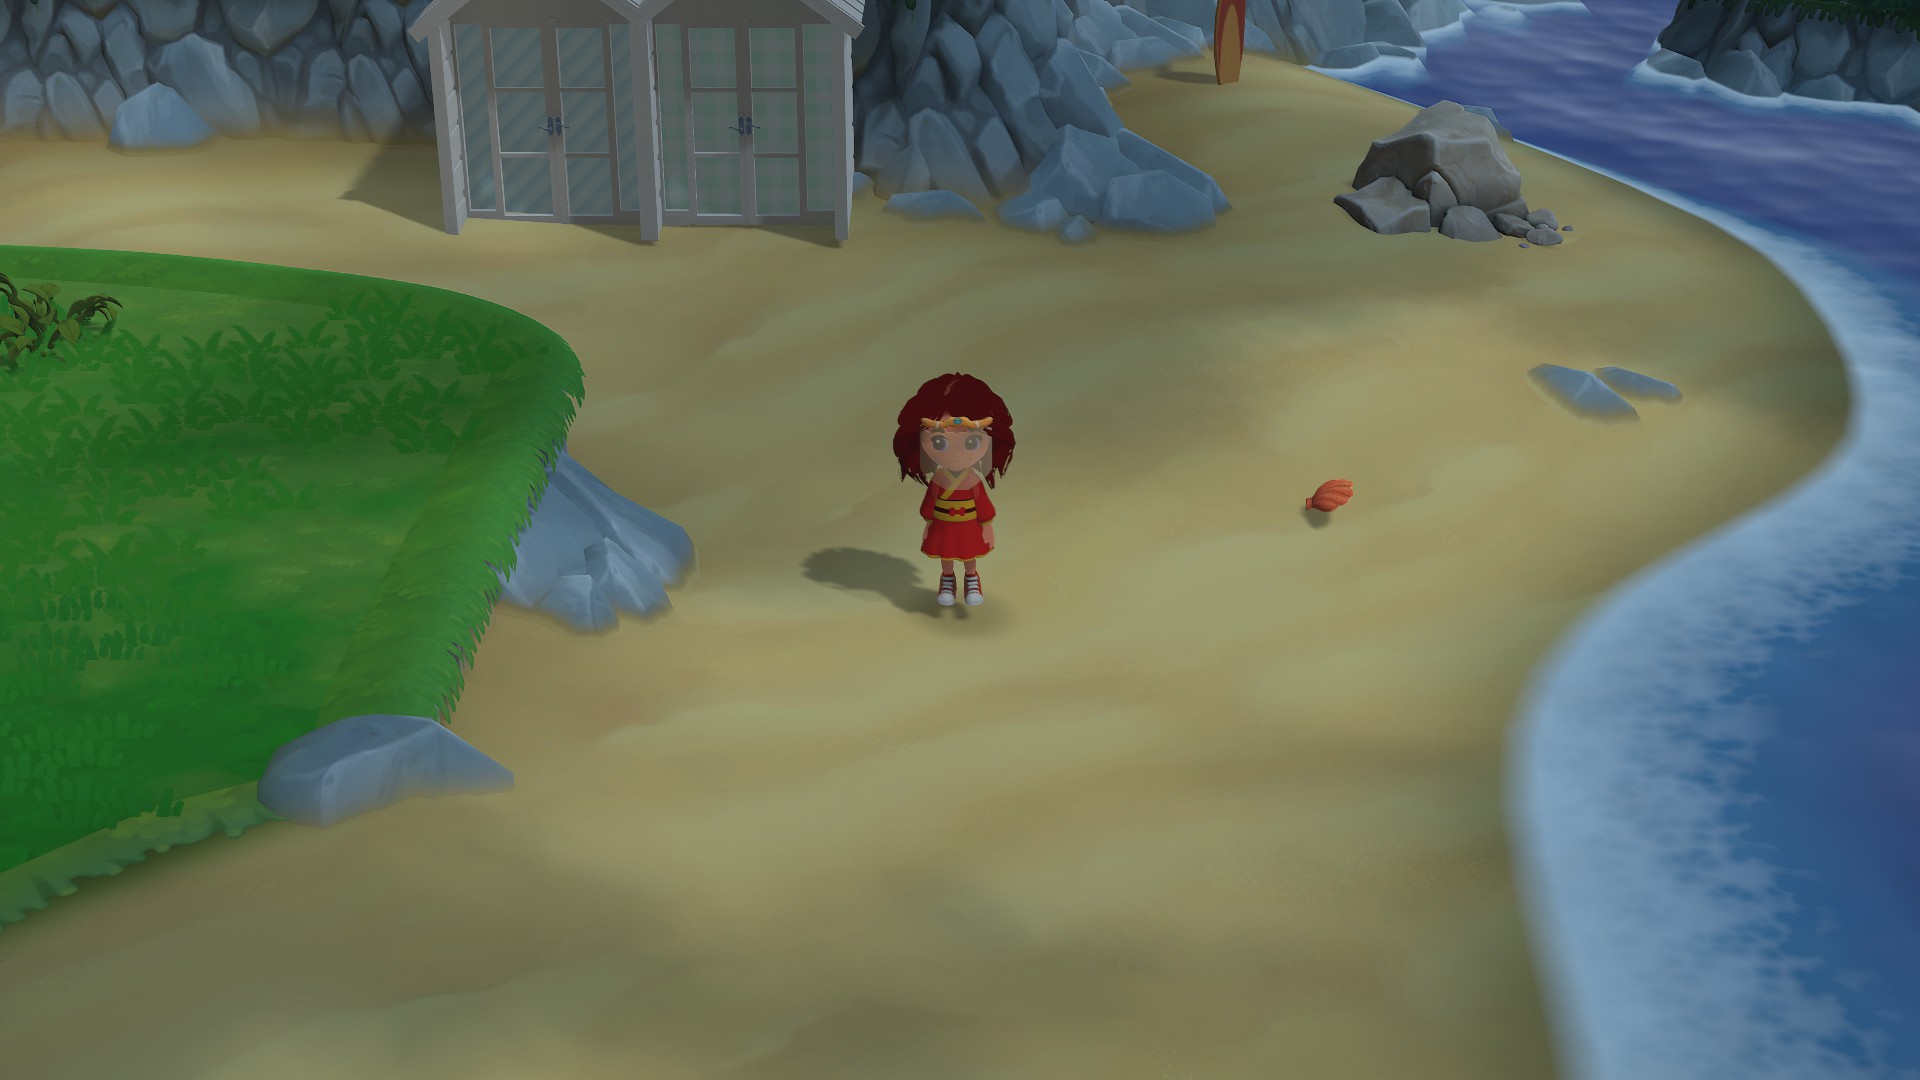
Beach*Note, Beach Huts made by user Alice, creator code 4HXF-HGFD
The beach is a great fishing spot at the sea and spawns lovely bugs to catch, houses can be placed in the grass area and a place Derris can be found. Can decorate the sandy beach however you'd like as well!
Place to find Ocean/Sea fish.
Place to find Beach Insects.
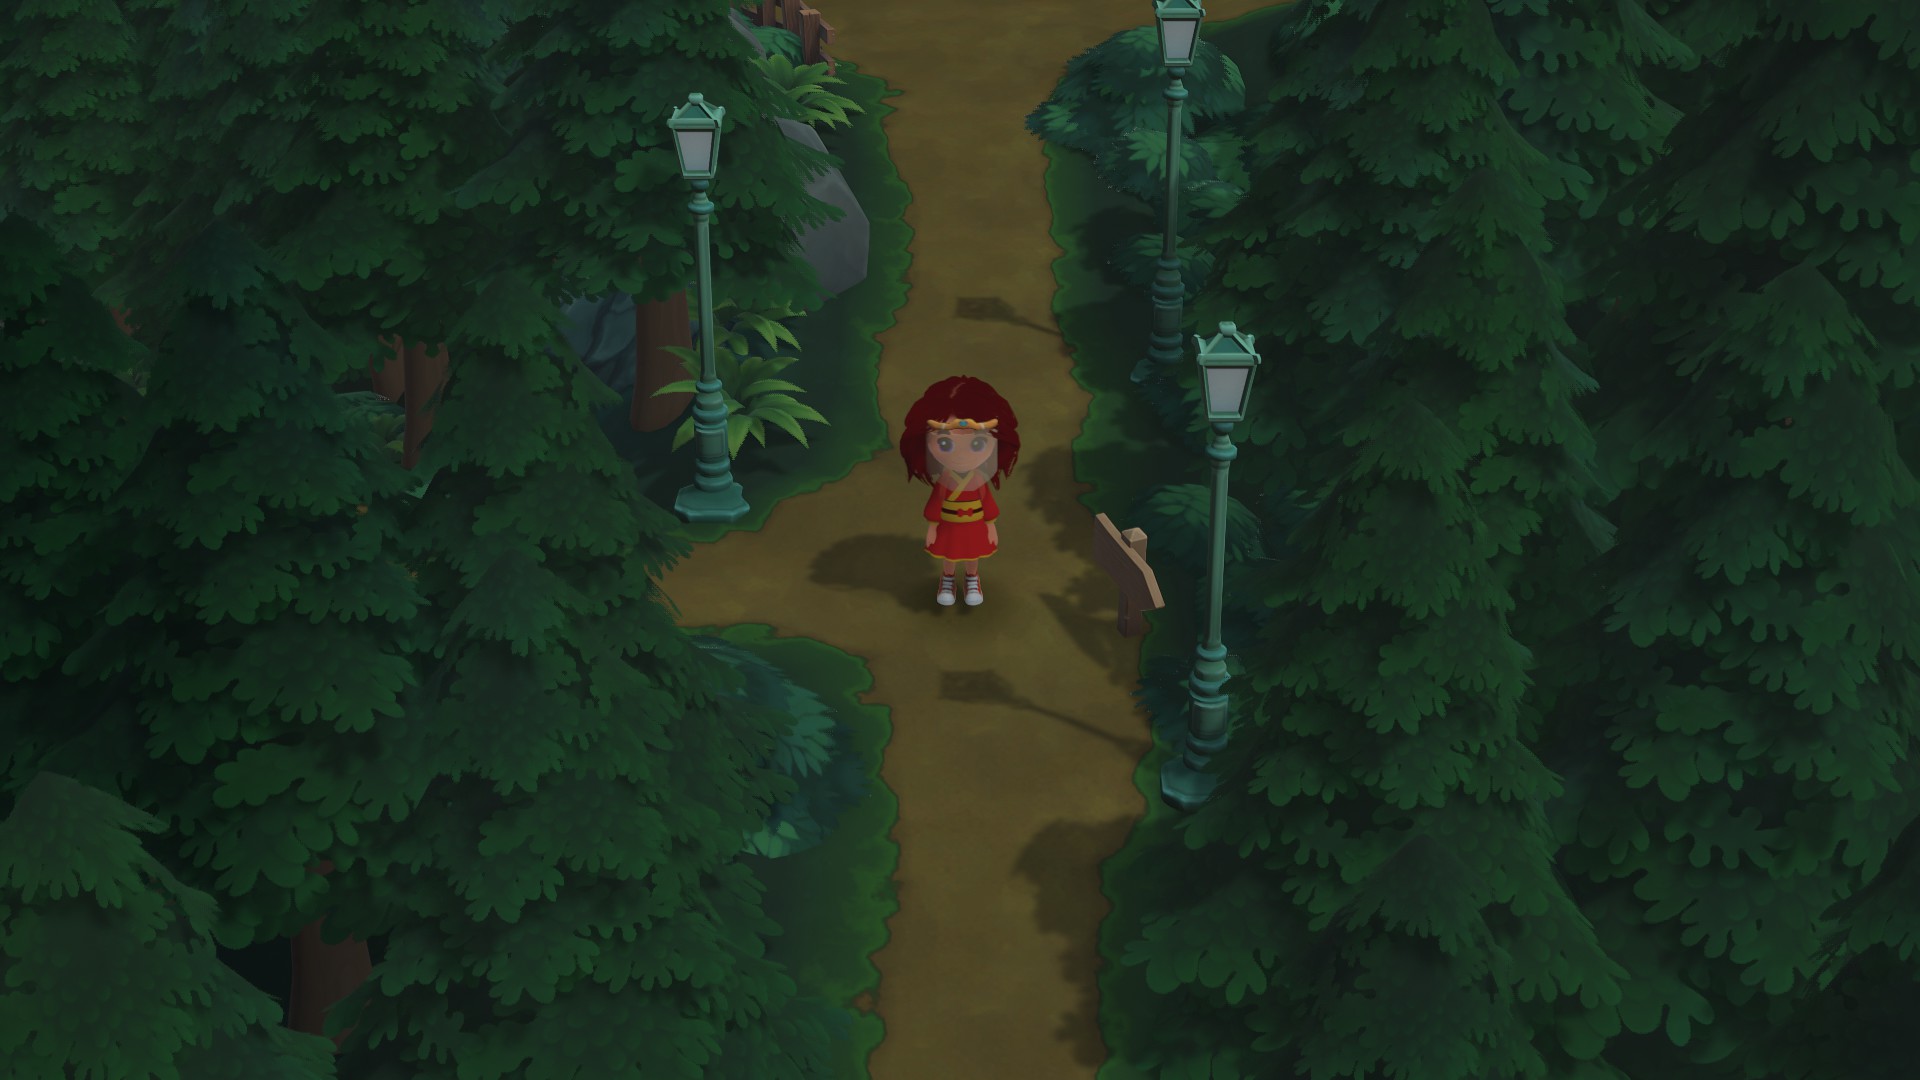
Forest PathwayThe pathway that leads to many areas, people tend to spend lots of times in and out.
Pond Area / The GroveThe first exit to the left in the forest pathway area. The pond is a great place to fish and even catch bugs. Place Derris can be found.
Place to find Pond fish.
Place to find Forest Insects.
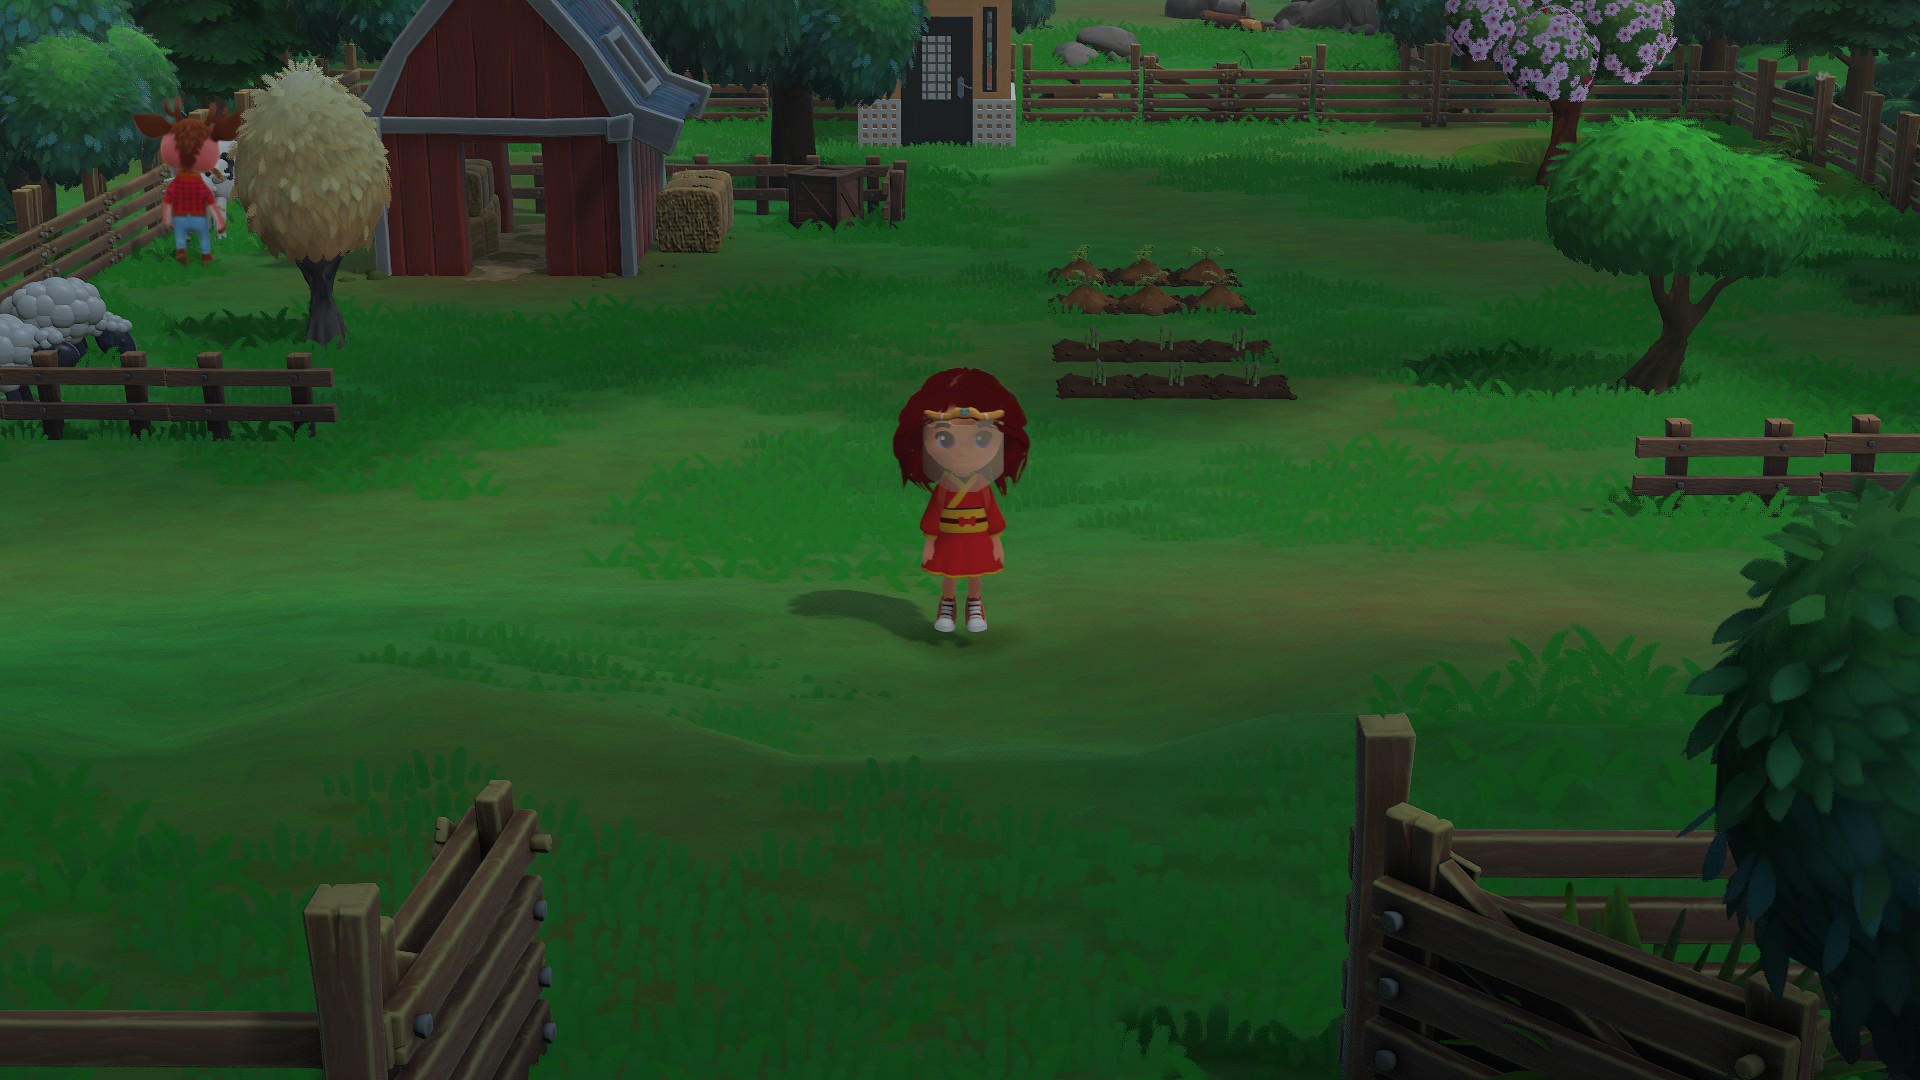
Farm*Note sheep made by Rozin, creator code: JAD2-CK9S
The next exit off the forest pathway is the farm area unlocked by Aubrey. Here is a clear space to grow your farm to grow crops and fruit trees. You can even place houses in the farm area for villagers!
Within the farm area you'll see Aubrey walking within it all the time throughout the day and night. Speaking with Aubrey can show her store tab where she sells seeds of crops, fruit trees, grass tufts, flowers for dye, and normal trees. The store also sells fabric patterns, the unlocks for farming like sprinkler crafting recipes and some decorative items to place around the town and area. Place to find Forest Insects.
Mines Entrance / Mountain AreaAs you carry on the pathway the 3rd exit heading upwards and then left, leads to the mountain area. Home to mine entrance and to the left of the mine entrance is a green grass area, this area you can decorate or even place a house.
Small Wood / Red Wood Forest AreaThe place you first are introduced to mahogany trees (red wood trees) for red wood. Found at the very end of the forest area pathway. A great place to catch bugs and a place you can place houses for villagers.
Place to find Forest Insects.
Desert IslandUnder Construction/Updating
House(s)

At this current time there are 4 different house types within Hokko Life. Each house type has different inside layout to really help give villagers their own unique homes.
-Please Note: Furniture Isn't Included When Buying/Building Houses
House Choice/Type One:
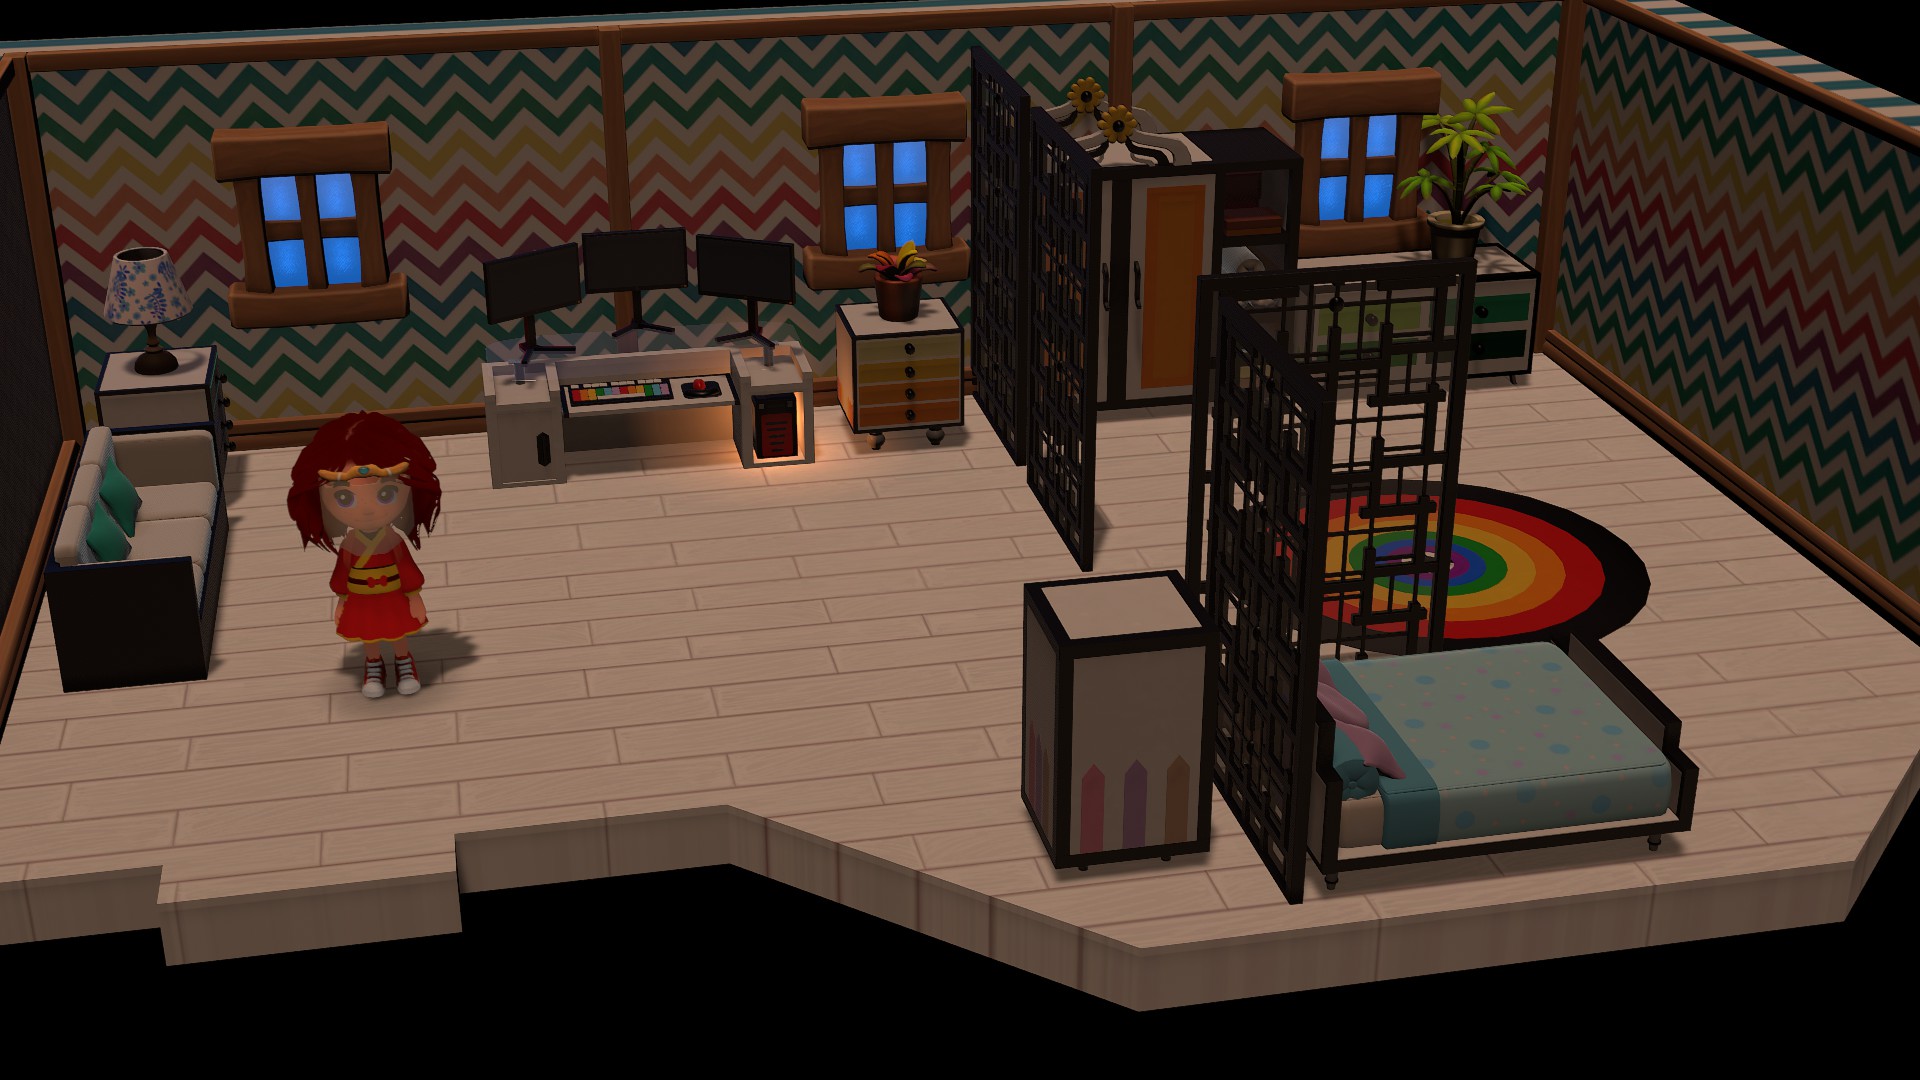
Inside Layout:
First house is the simple starter type house, you will need:
16 Wooden Plank
400 Gold Coins
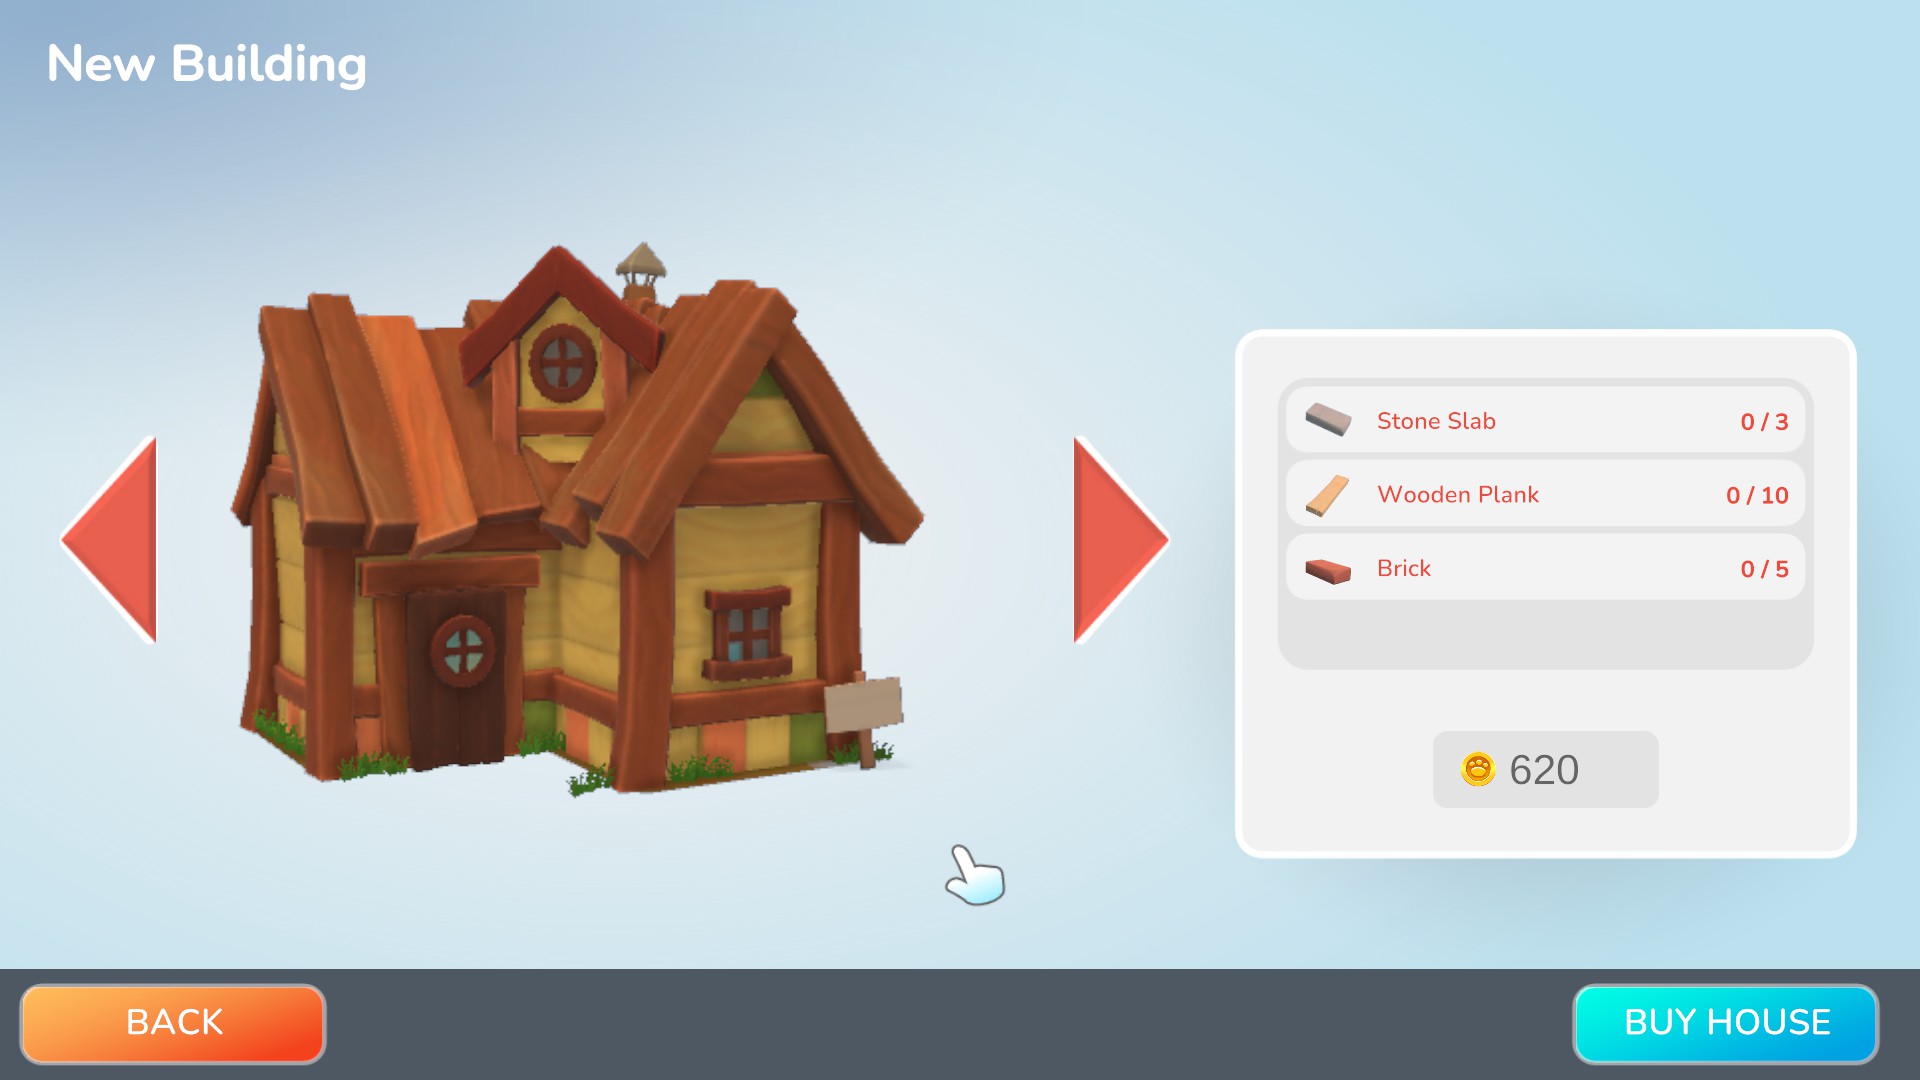
House Choice/Type Two:
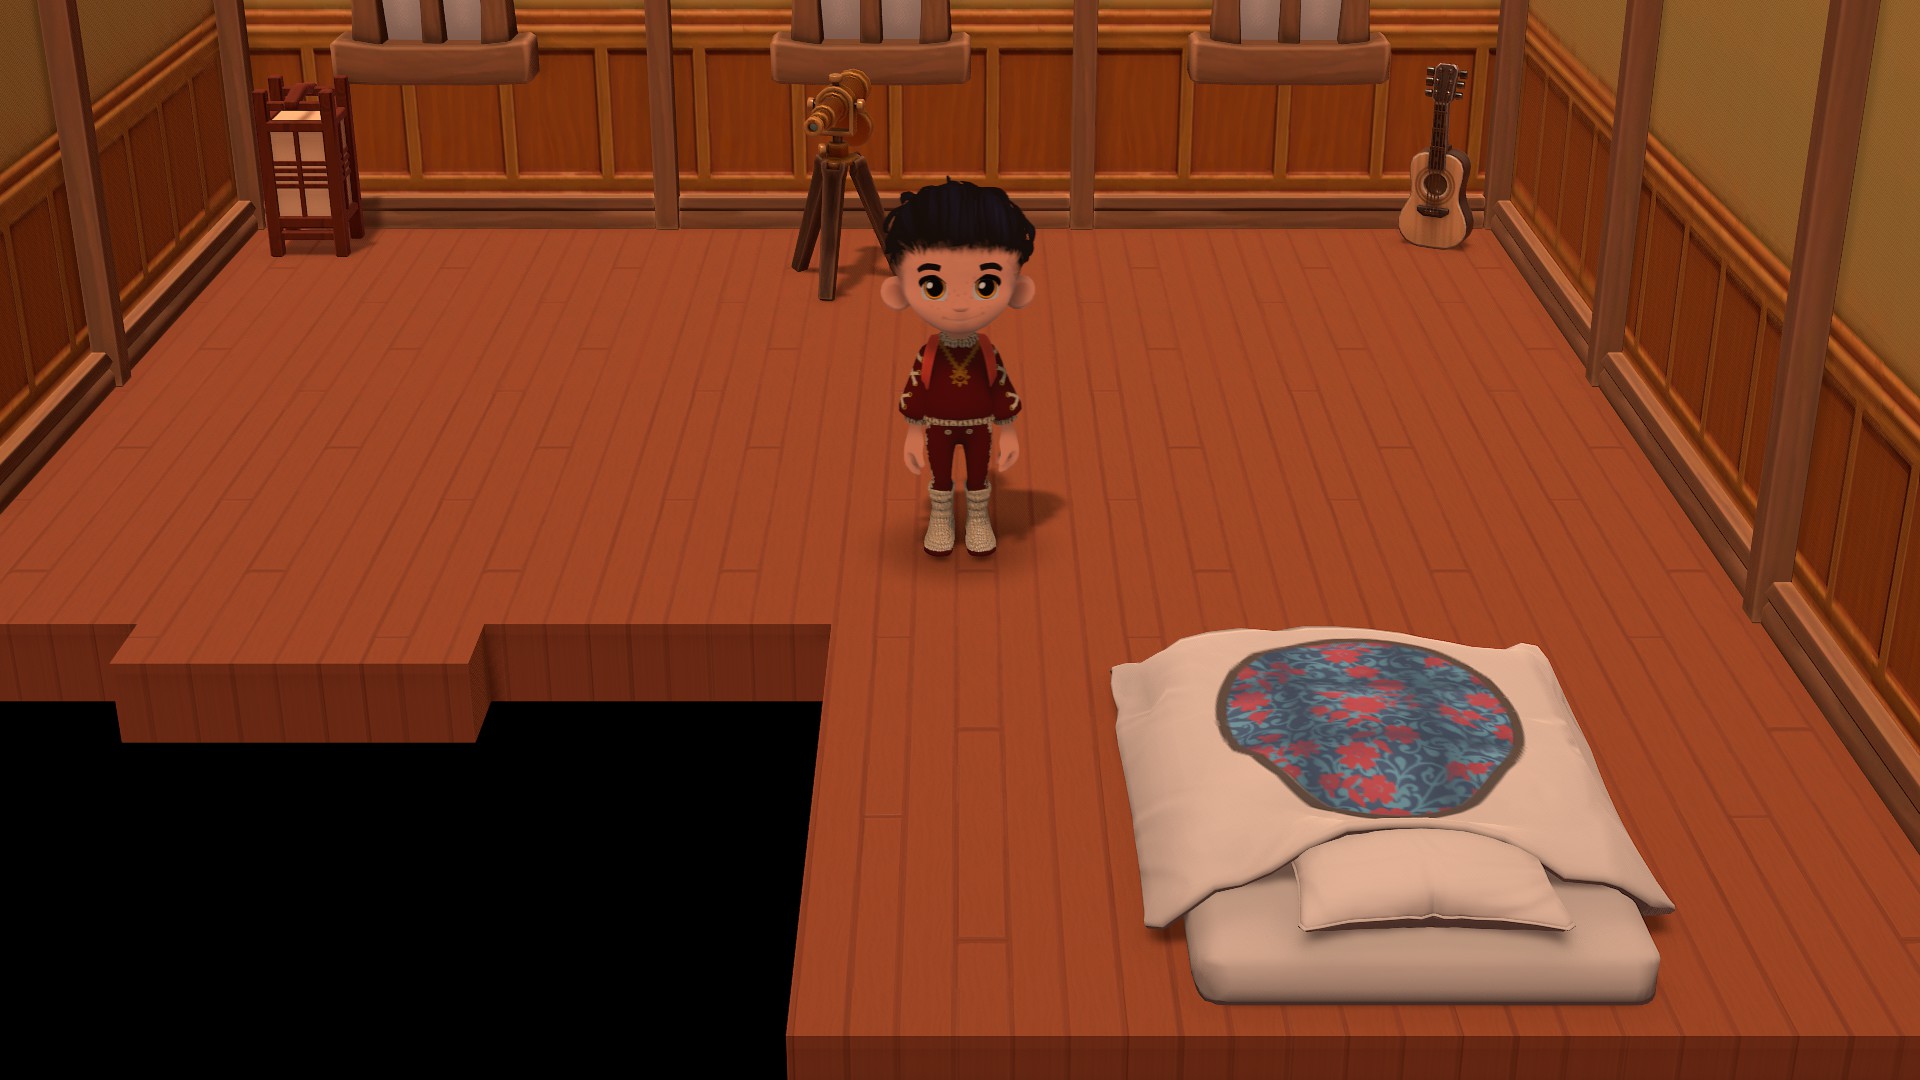
Inside Layout:
Second house is a slightly bigger house from the first choice, you will need:
3 Stone Slabs
10 Wooden Planks
5 Bricks
620 Gold Coins
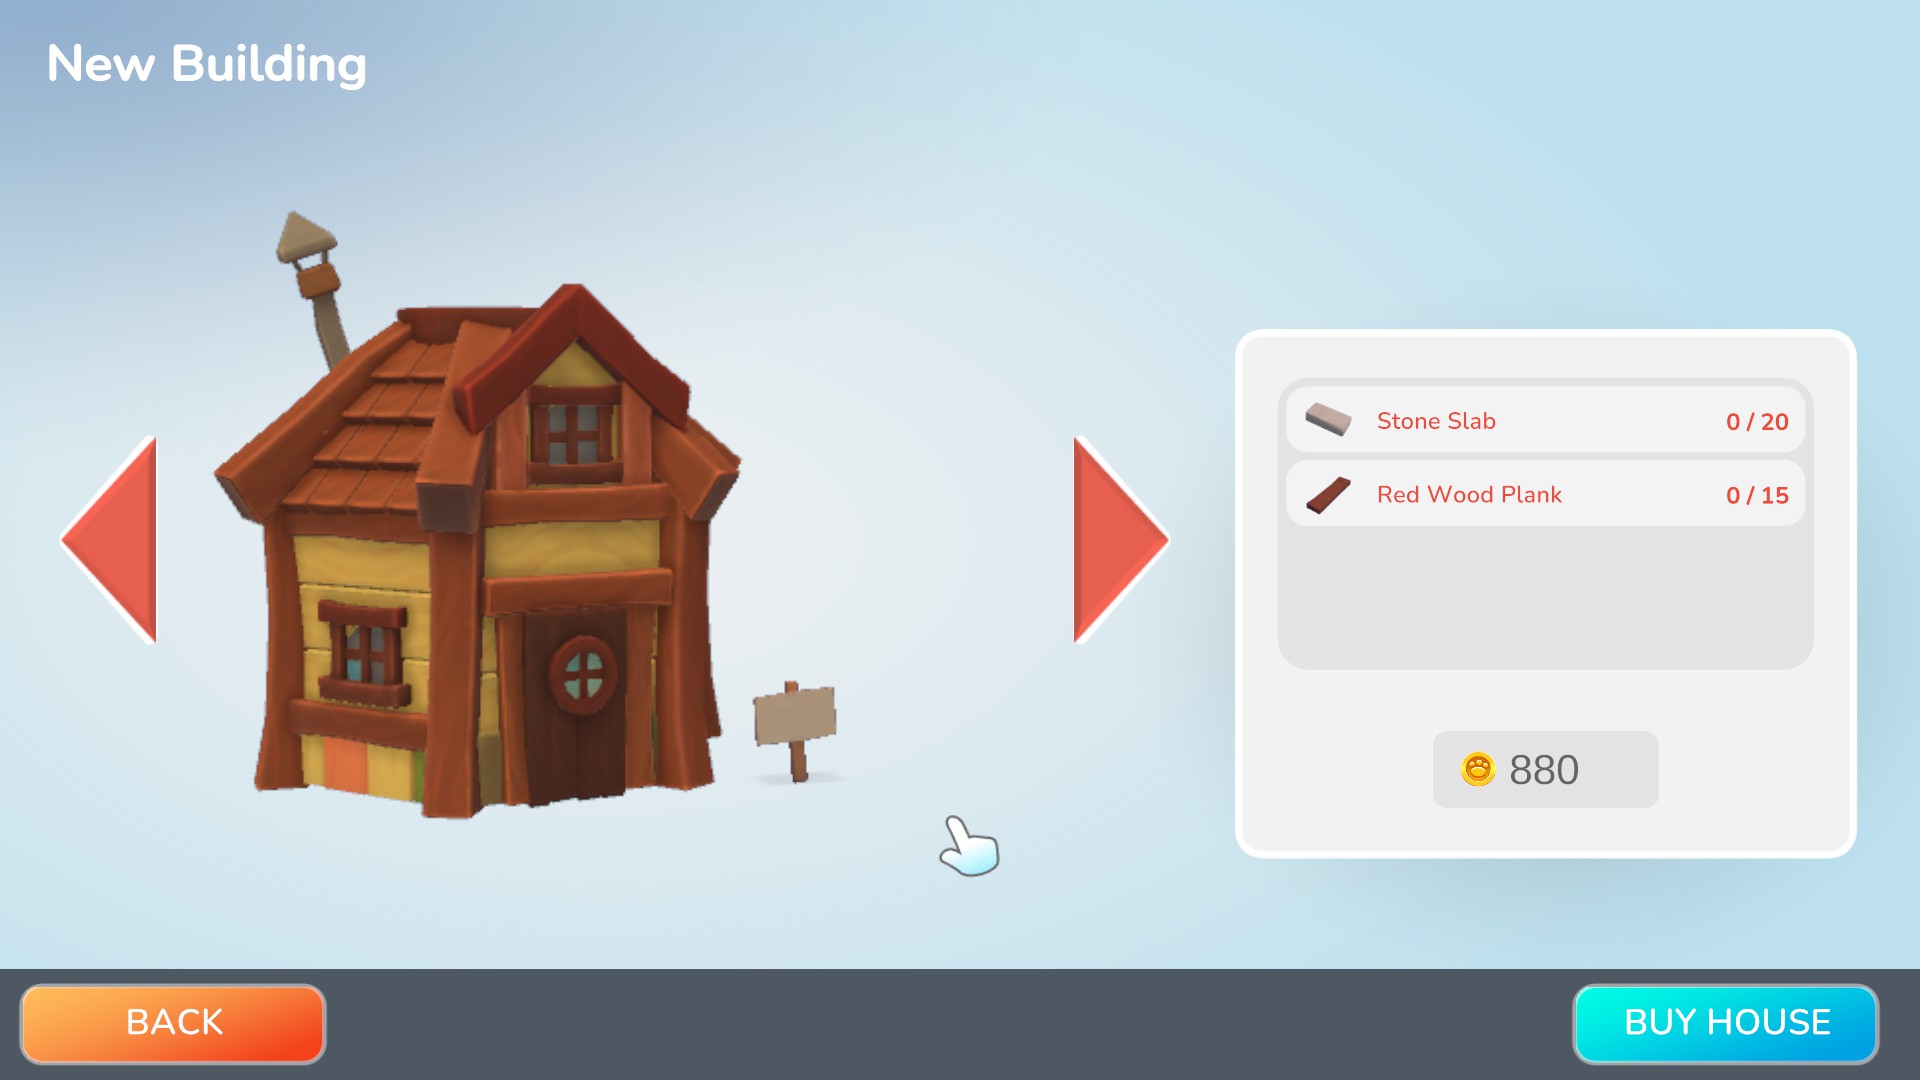
House Choice/Type Three:
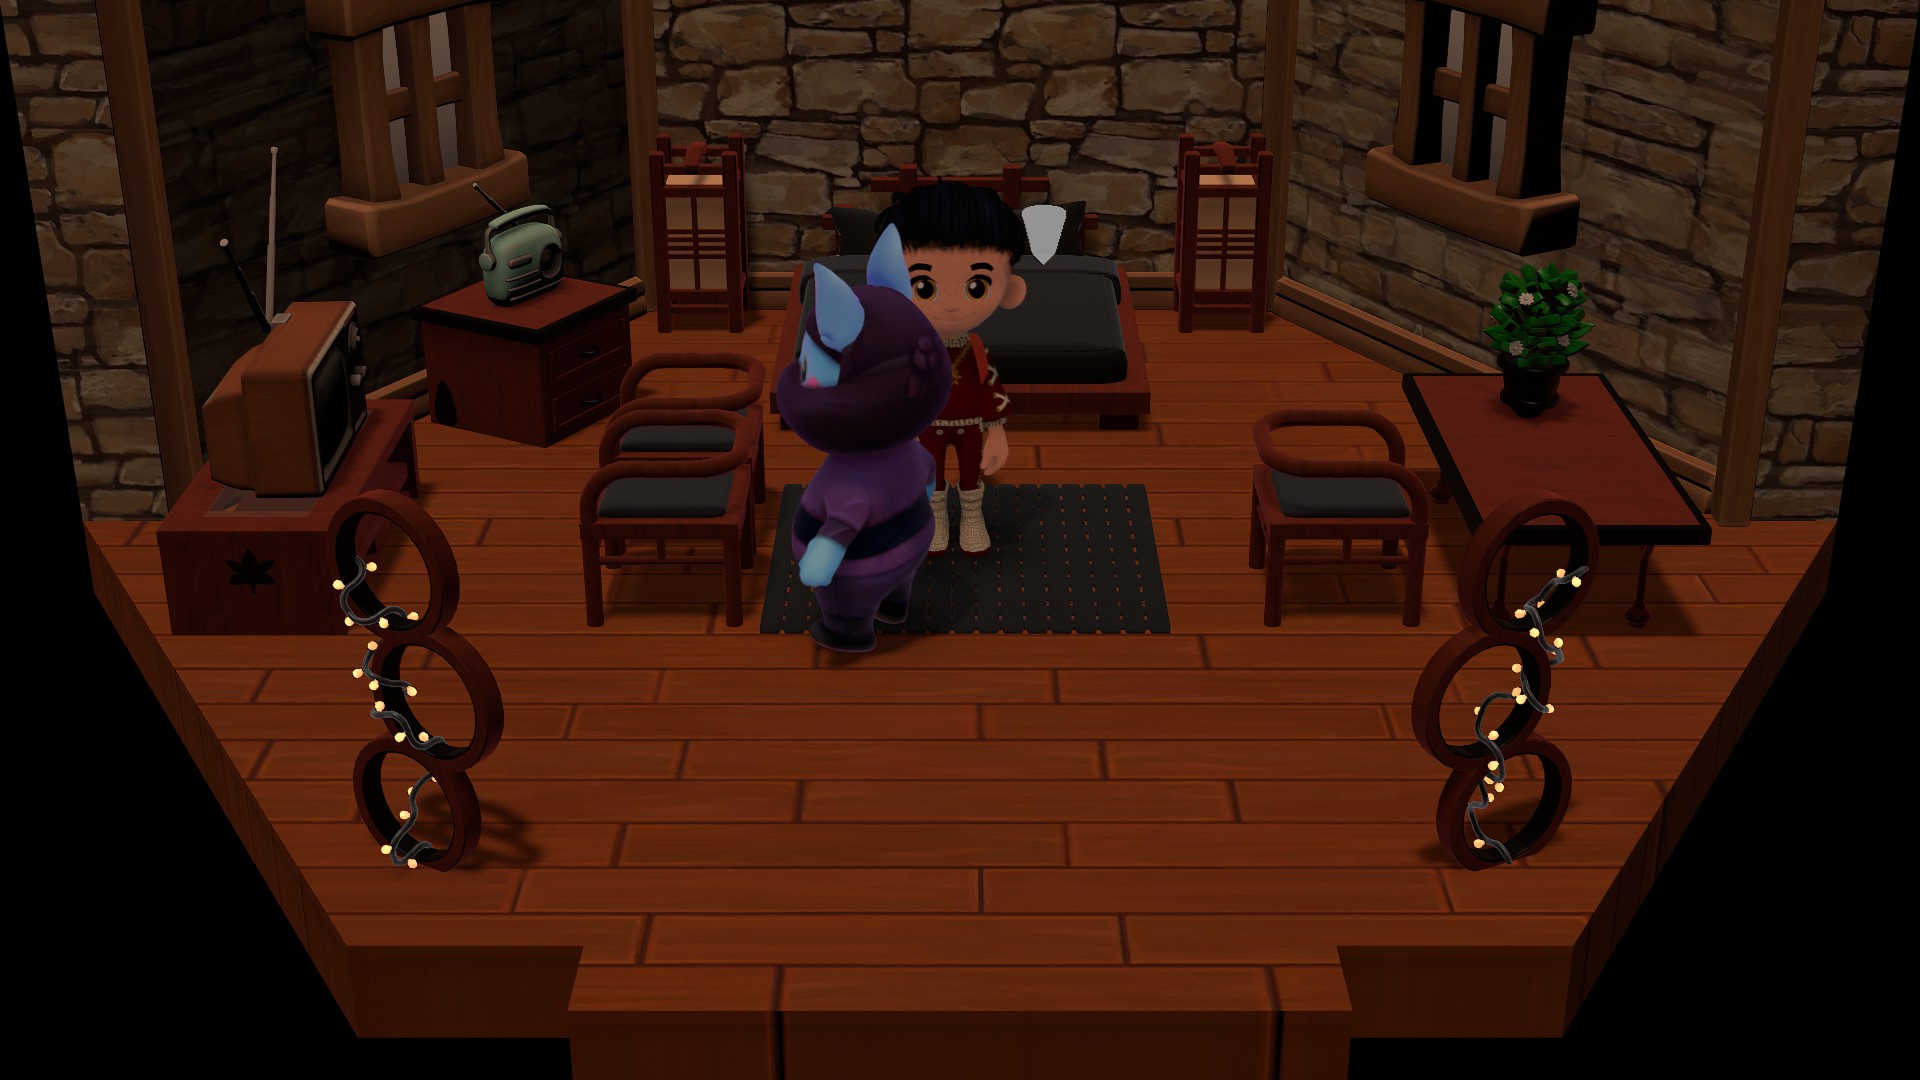
Inside Layout:
Third choice is the smallest option house, you will need:
20 Stone Slabs
15 Red Wood Plank
880 Gold Coins
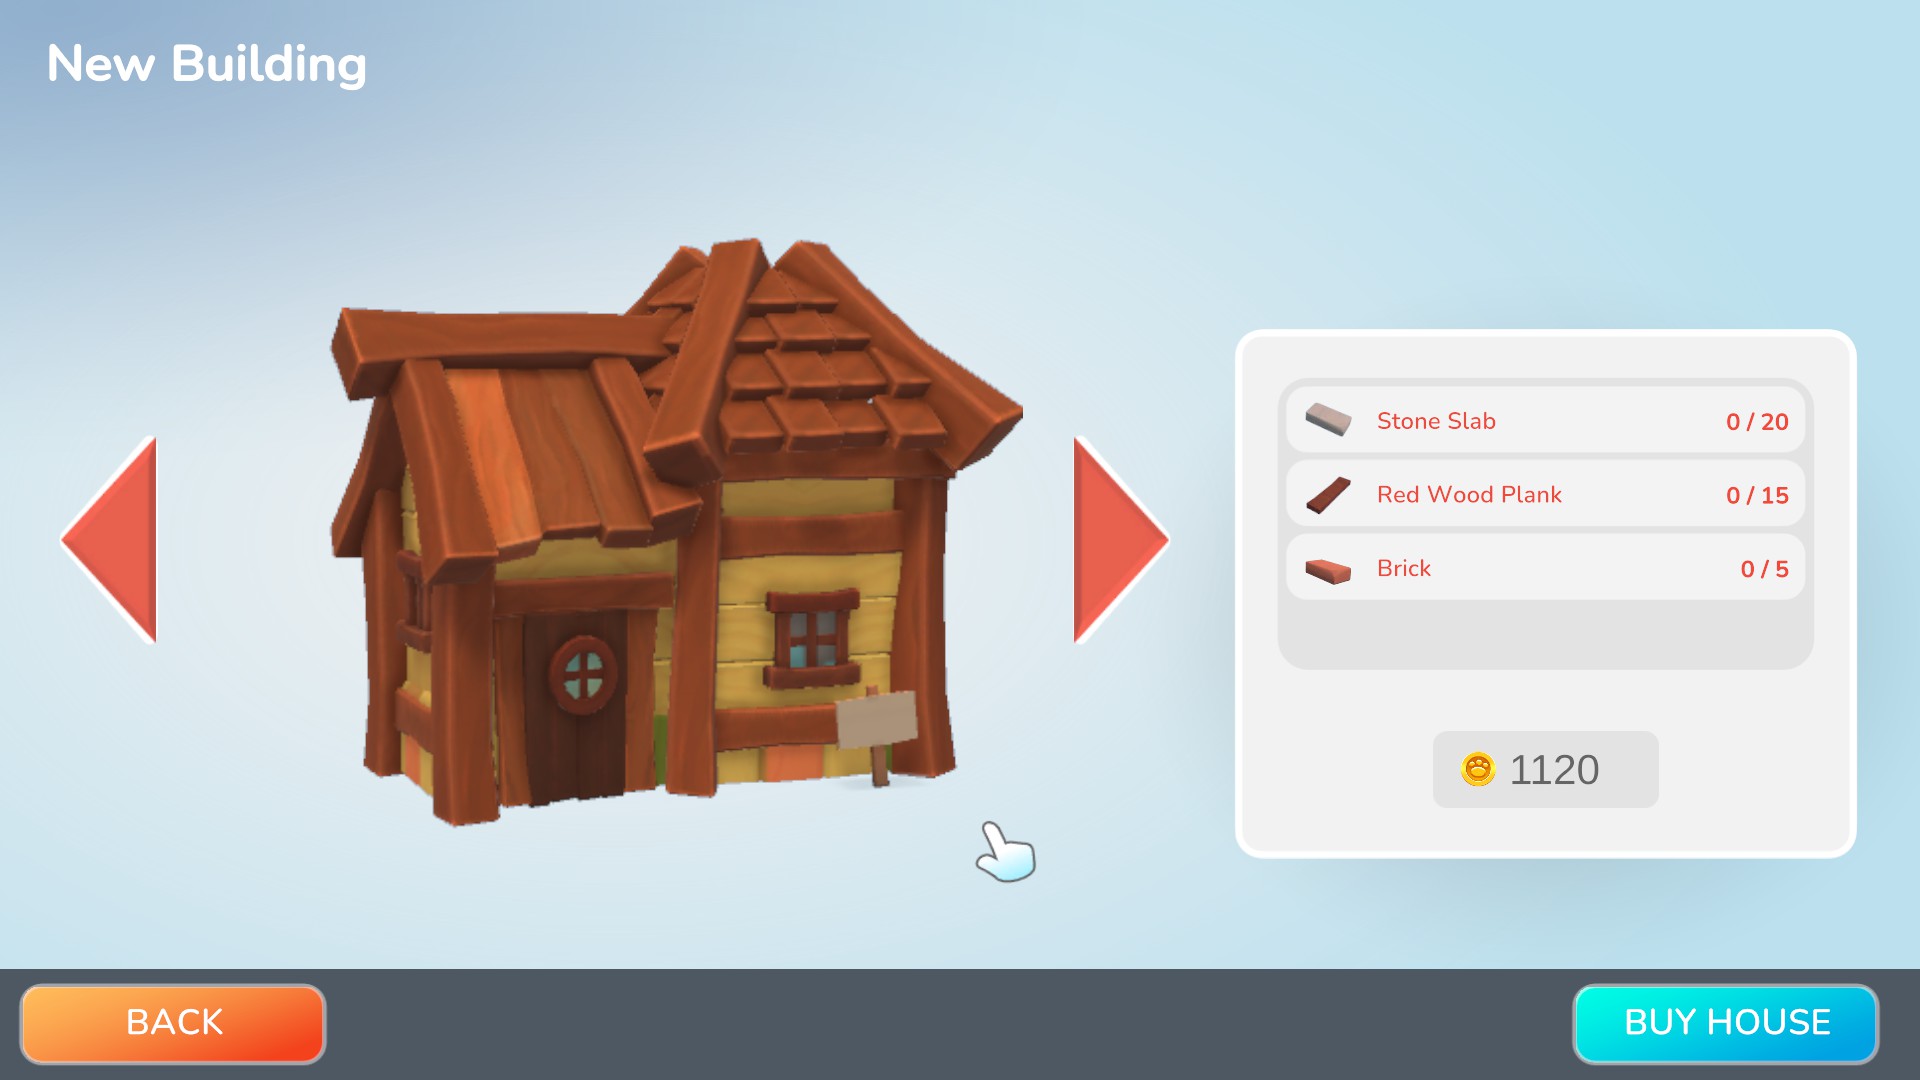
House Choice/Type Four:
Inside Layout:
The largest house choice of all four houses, you will need:
20 Stone Slabs
15 Red Wood Planks
5 Bricks
1120 Gold Coins
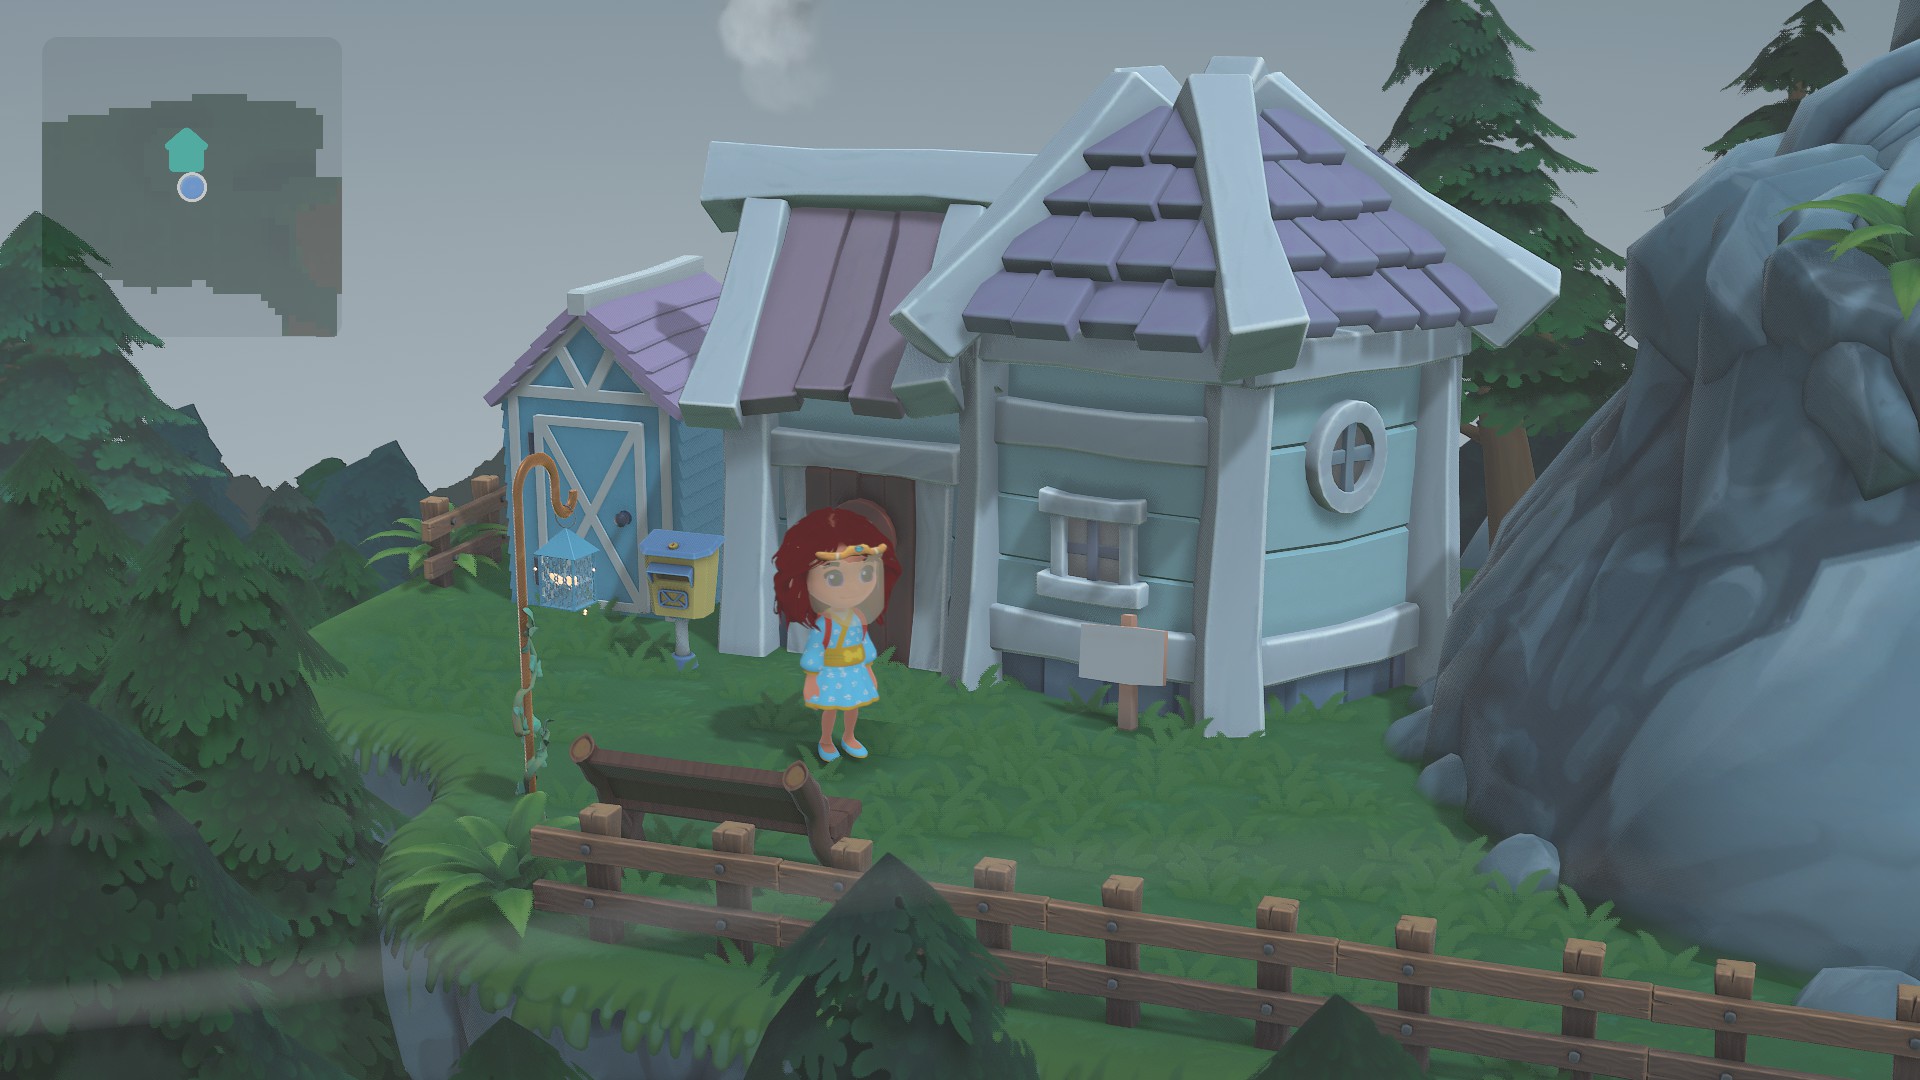
When it comes to houses outer looks, the above proves the shape is important to layout but with the items sold to the right of Rosa's store and unlocking the mayor merit, you can decorate the houses, both your own and other villagers. You'll even get requests from villagers asking you to do this once and awhile! To know which major merits check out Mayor Merits Part 2 tab for the exact unlock (the last tab, purple house)
Example:
Note, this example is showing the house with the "light blue" walling and "pink/purple roof" looks brought from Rosa's store.
Design Tool & Painting

Design Tool/Bench
One of the biggest mechanics in Hokko Life is the Design Bench/Tool to make your own creations and furniture to use and decorate within your town of Hokko. The design tool/bench is found within Sally's workshop and you'll need to go through all tutorial quests to unlock all the features and pre-built designs (for now, more to be possibly added in future). To use the design bench/tool one will need to remember to bring the materials needed to use within the bench but also has to remember to have brought the materials "piece pack" some Sally's store to be able to work in the design tool/bench.
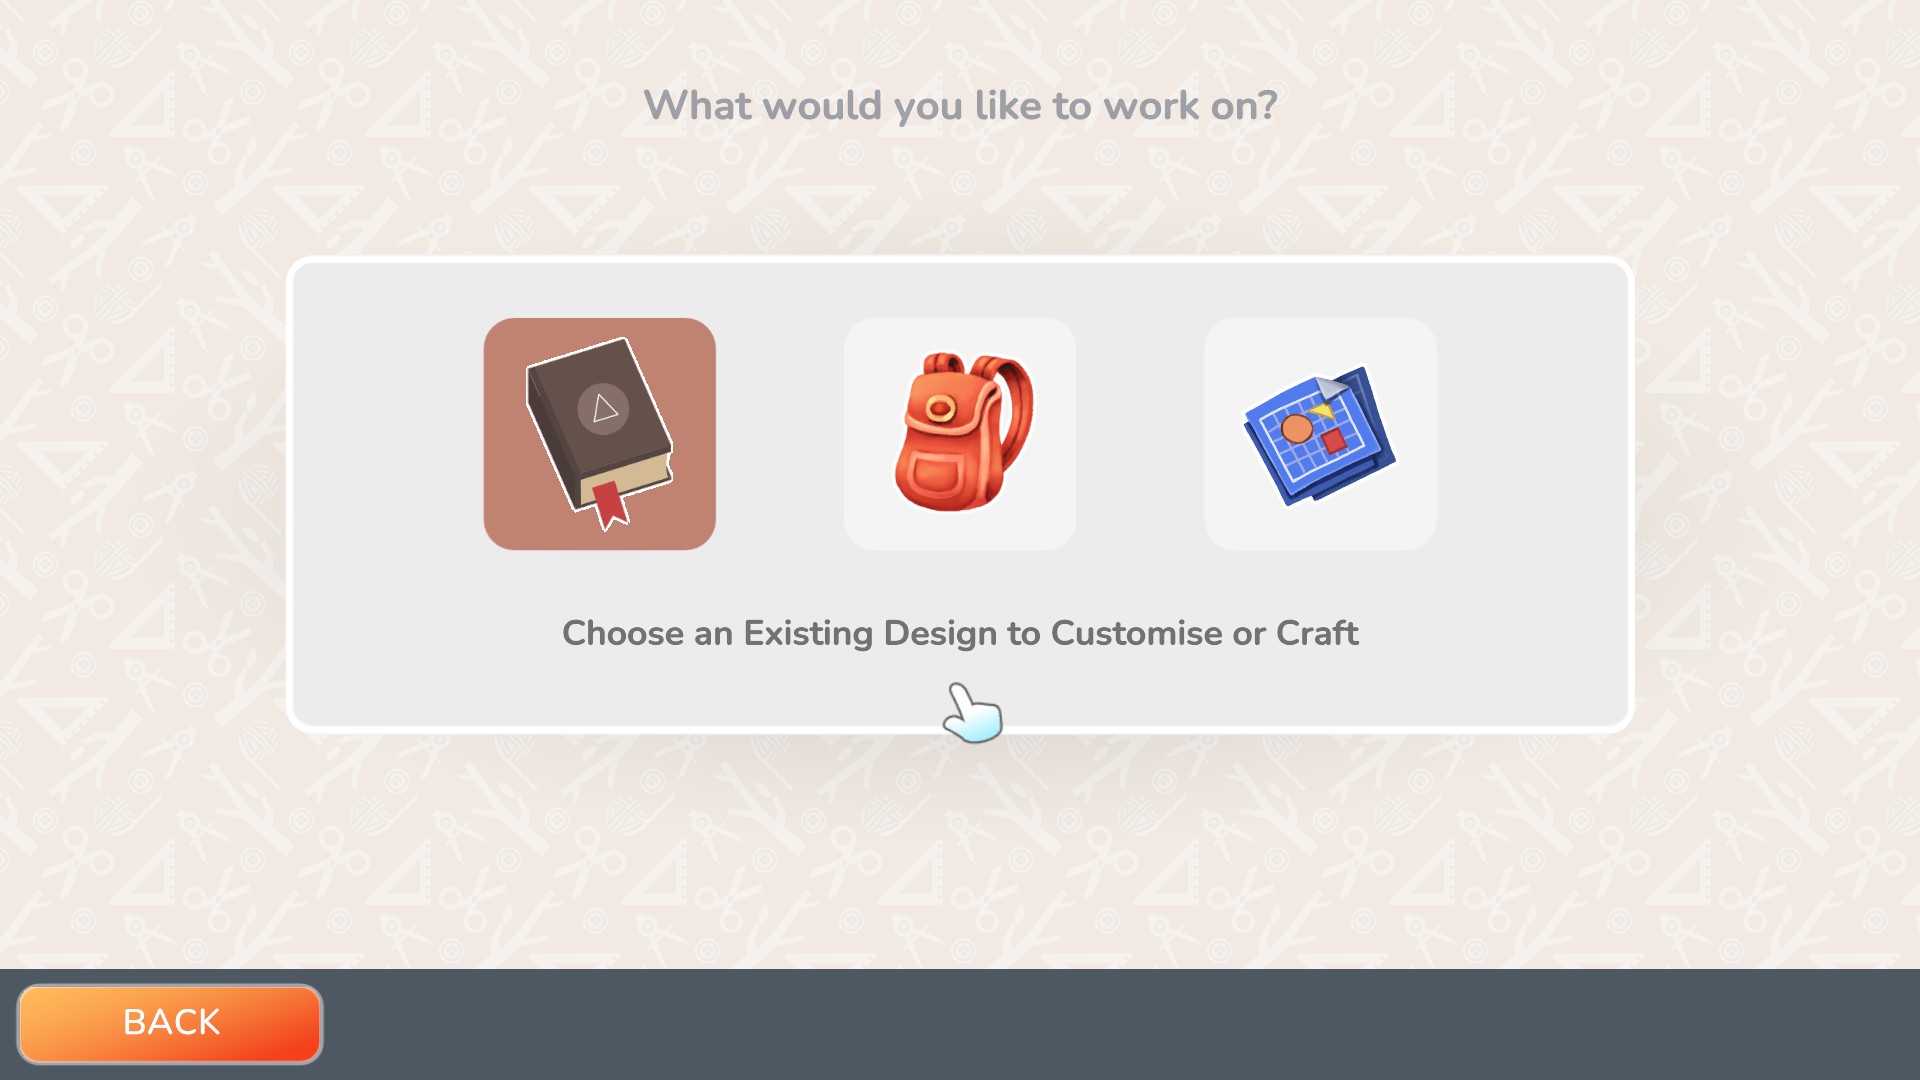
The design bench since the narrative update has three options to pick out of.
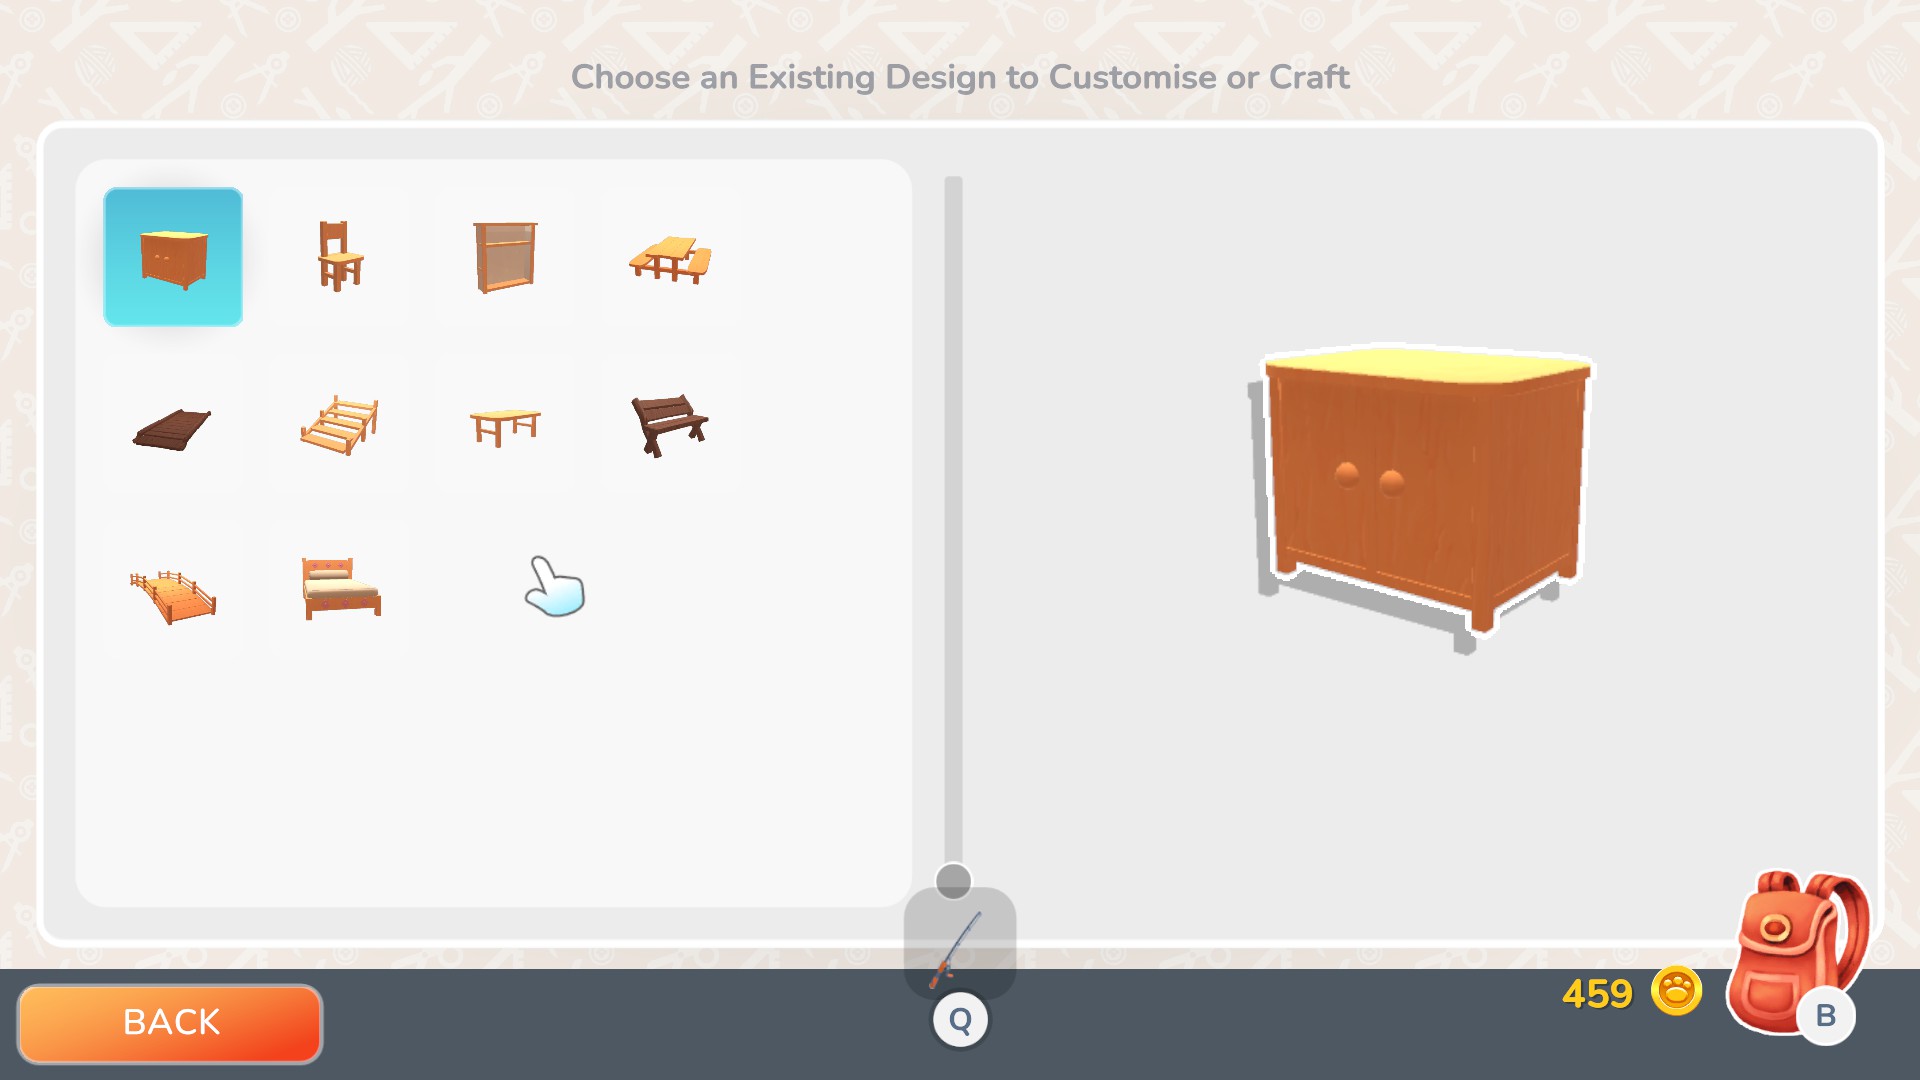
The brown book icon for pre-built design's for those who struggle to get creative with the design tool/bench. You can even edit and customise the pre-built designs to learn to use the design bench, using the pre-builts as a layout/blueprint itself to follow compared to building from scratch. Customising stairs and bridges in the pre-builts is now how you create your own stairs and bridges, this feature was changed/made since many people struggled to create working stairs and bridges, this way they have a layout to follow.
A Look Into Pre-Builds Tab.
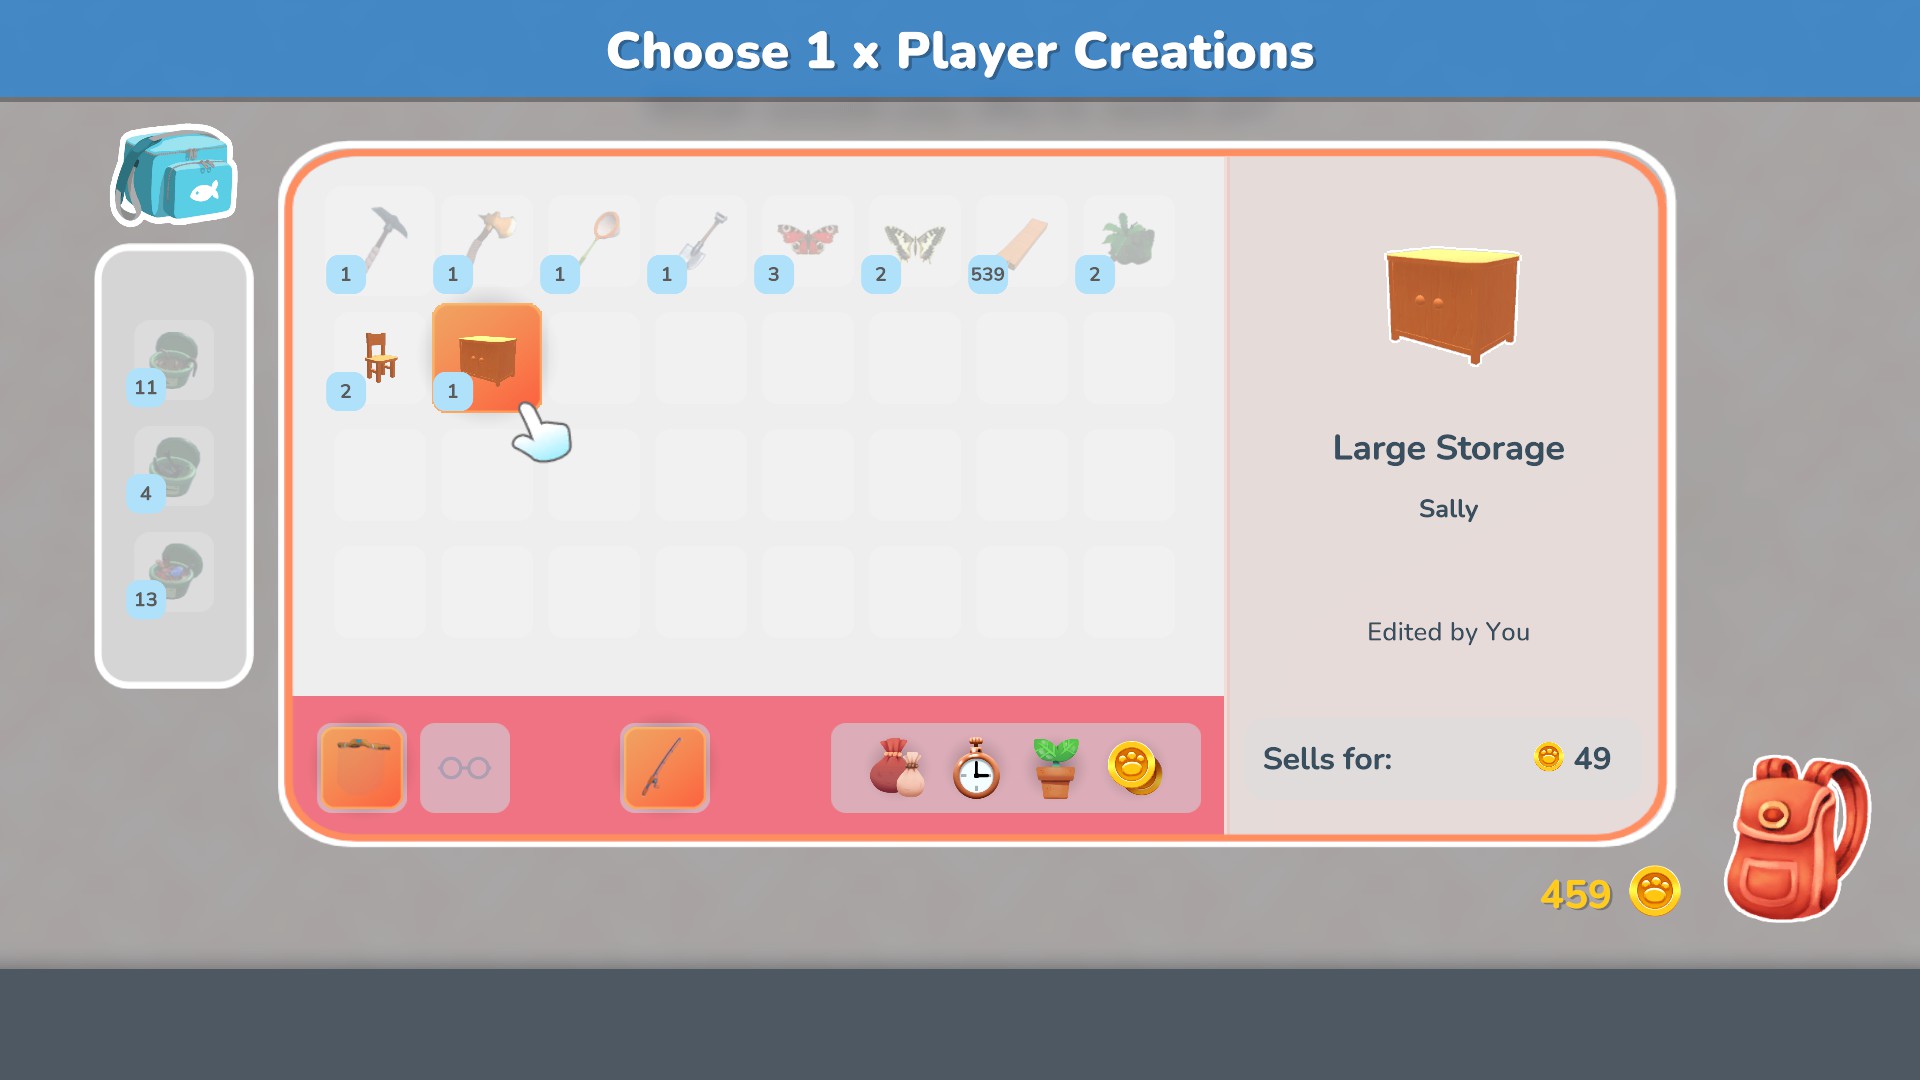
The second icon, the orange backpack is when you take an already created item from your Hokko World and bring it to the design bench to edit of create copies of said design/creation. This is a very commonly used tab when creating custom design's and need to tab out of the bench to test how it looks within the world of Hokko compared to when inside the design tool/bench.
A Look When Click Backpack Icon
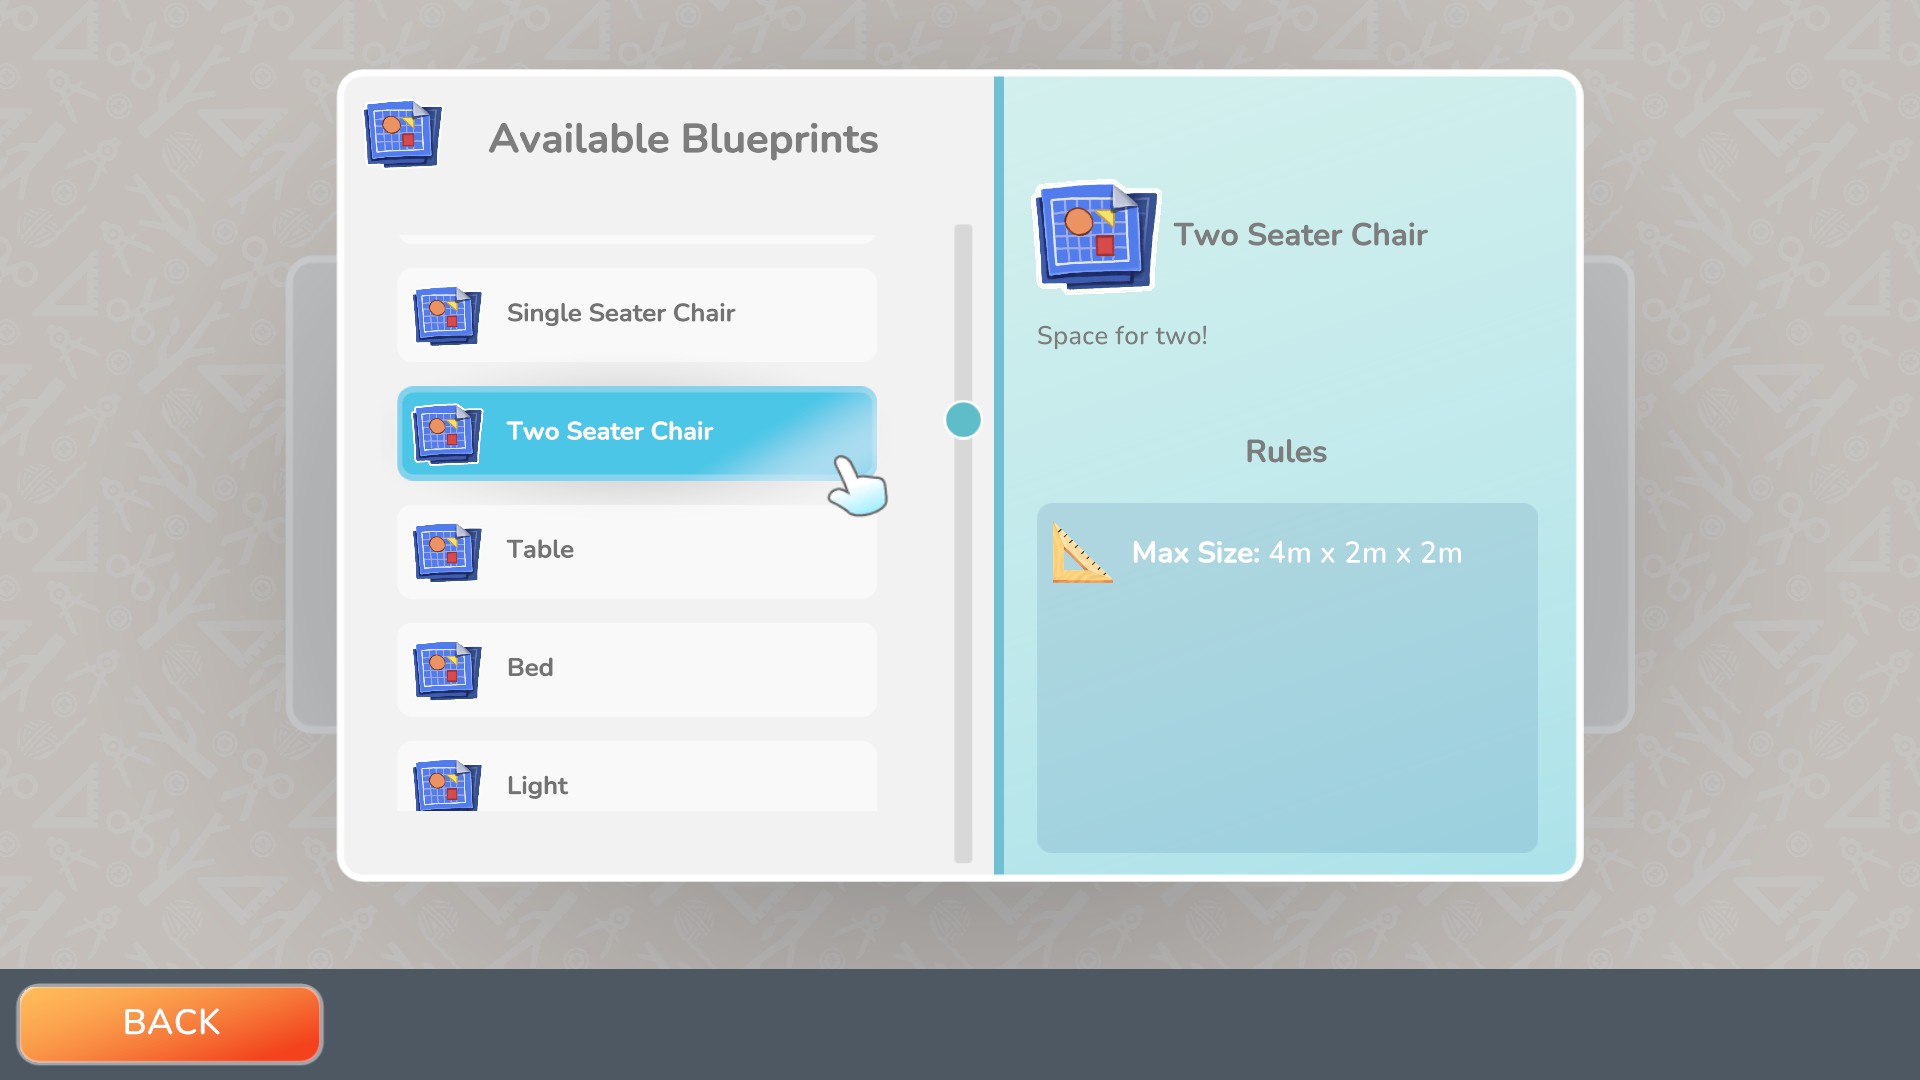
The last icon is the Blueprints option. When creating a "custom" design you'll be challenged to use the blueprint choice. The blueprint choice is needed for the custom design merits AND to unlock Fiore. You'll notice the blueprints as you hover over them have a description on the right of what each blueprint does/mean, each have different affects depending on what blueprint you choose so it's good to consider which you want your creations to be 'classed' under what. You'll also notice when hovering over and when creating with the blueprints have "Size Requirements" which are important to keep note as they mean your creation under that blueprint cannot be larger when the size written. In the past these requirements used to have a 'minimum size' as well but that was removed in the narrative update to give more creative room for people.
Blueprint List/Menu
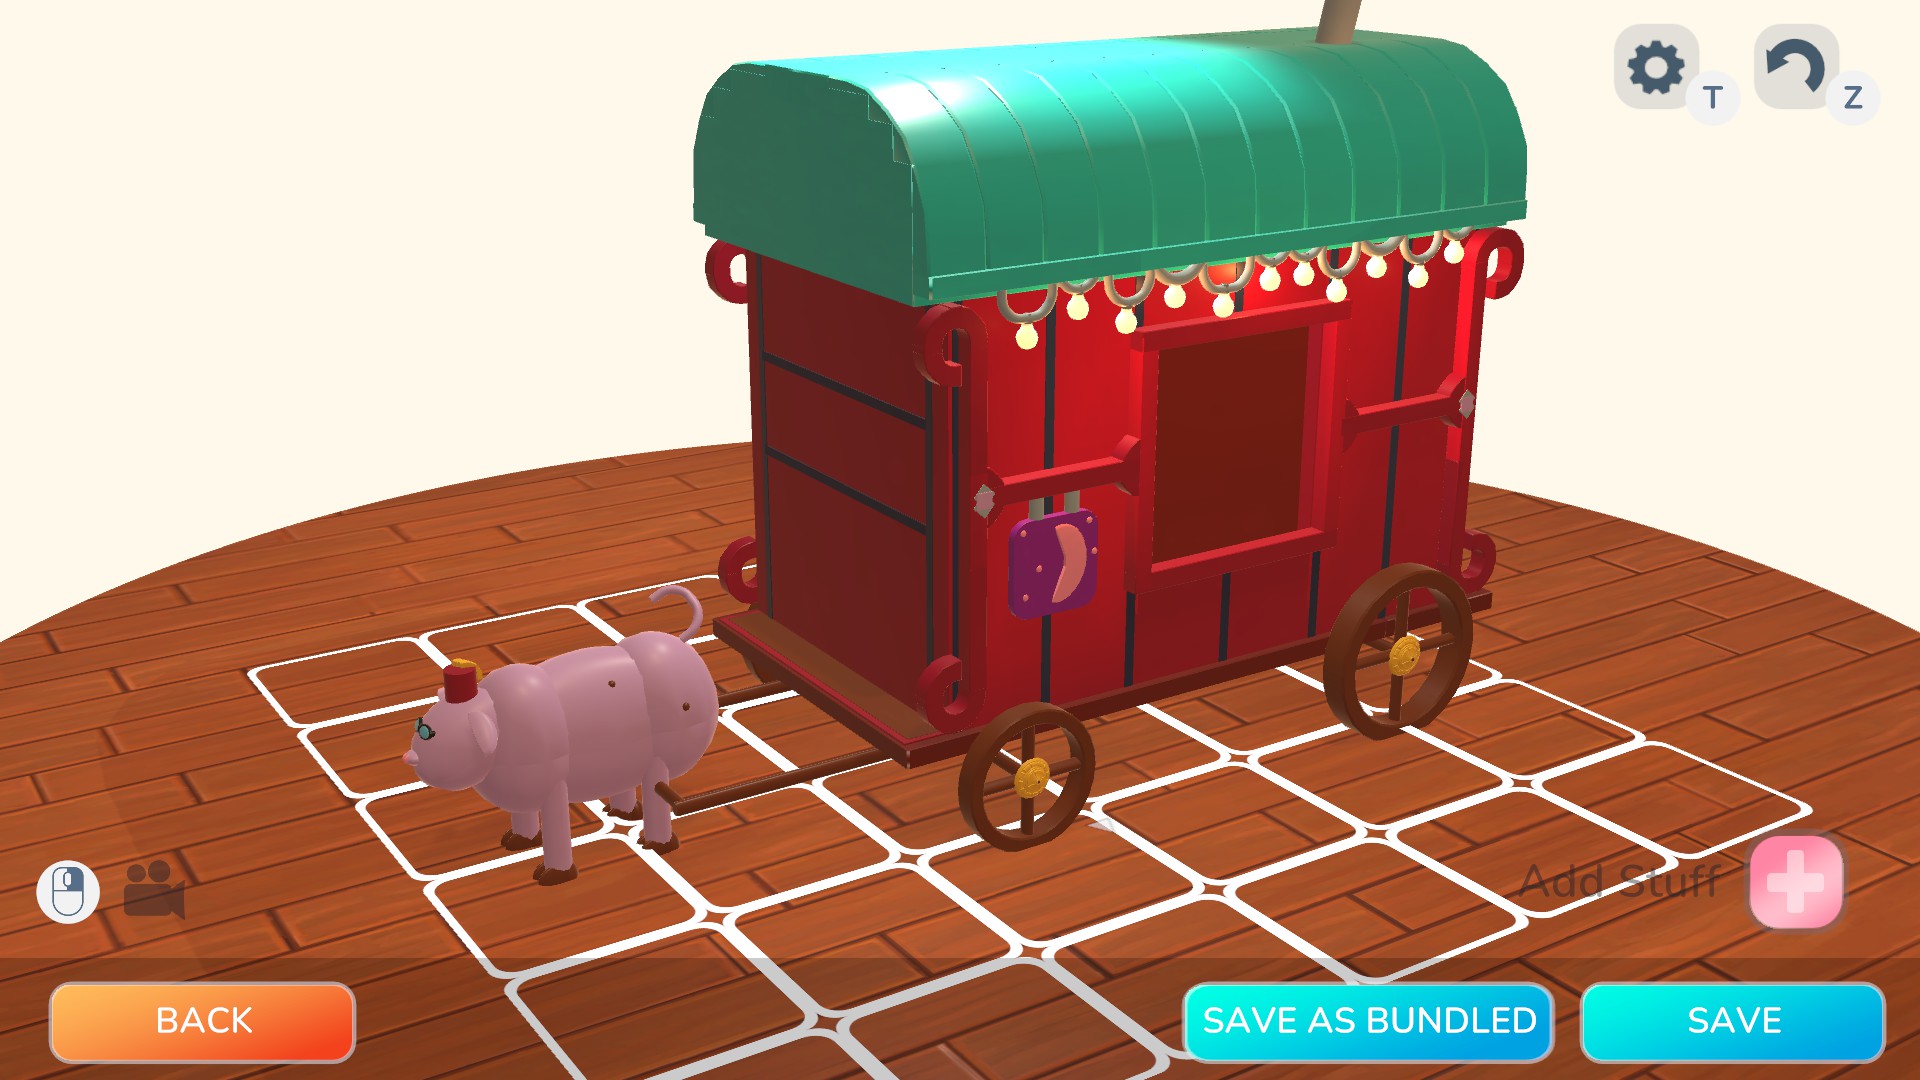
Example Screenshot of a Custom Design, Large Decoration Blueprint:
Created by Creator Code: 9RRP-4S2L
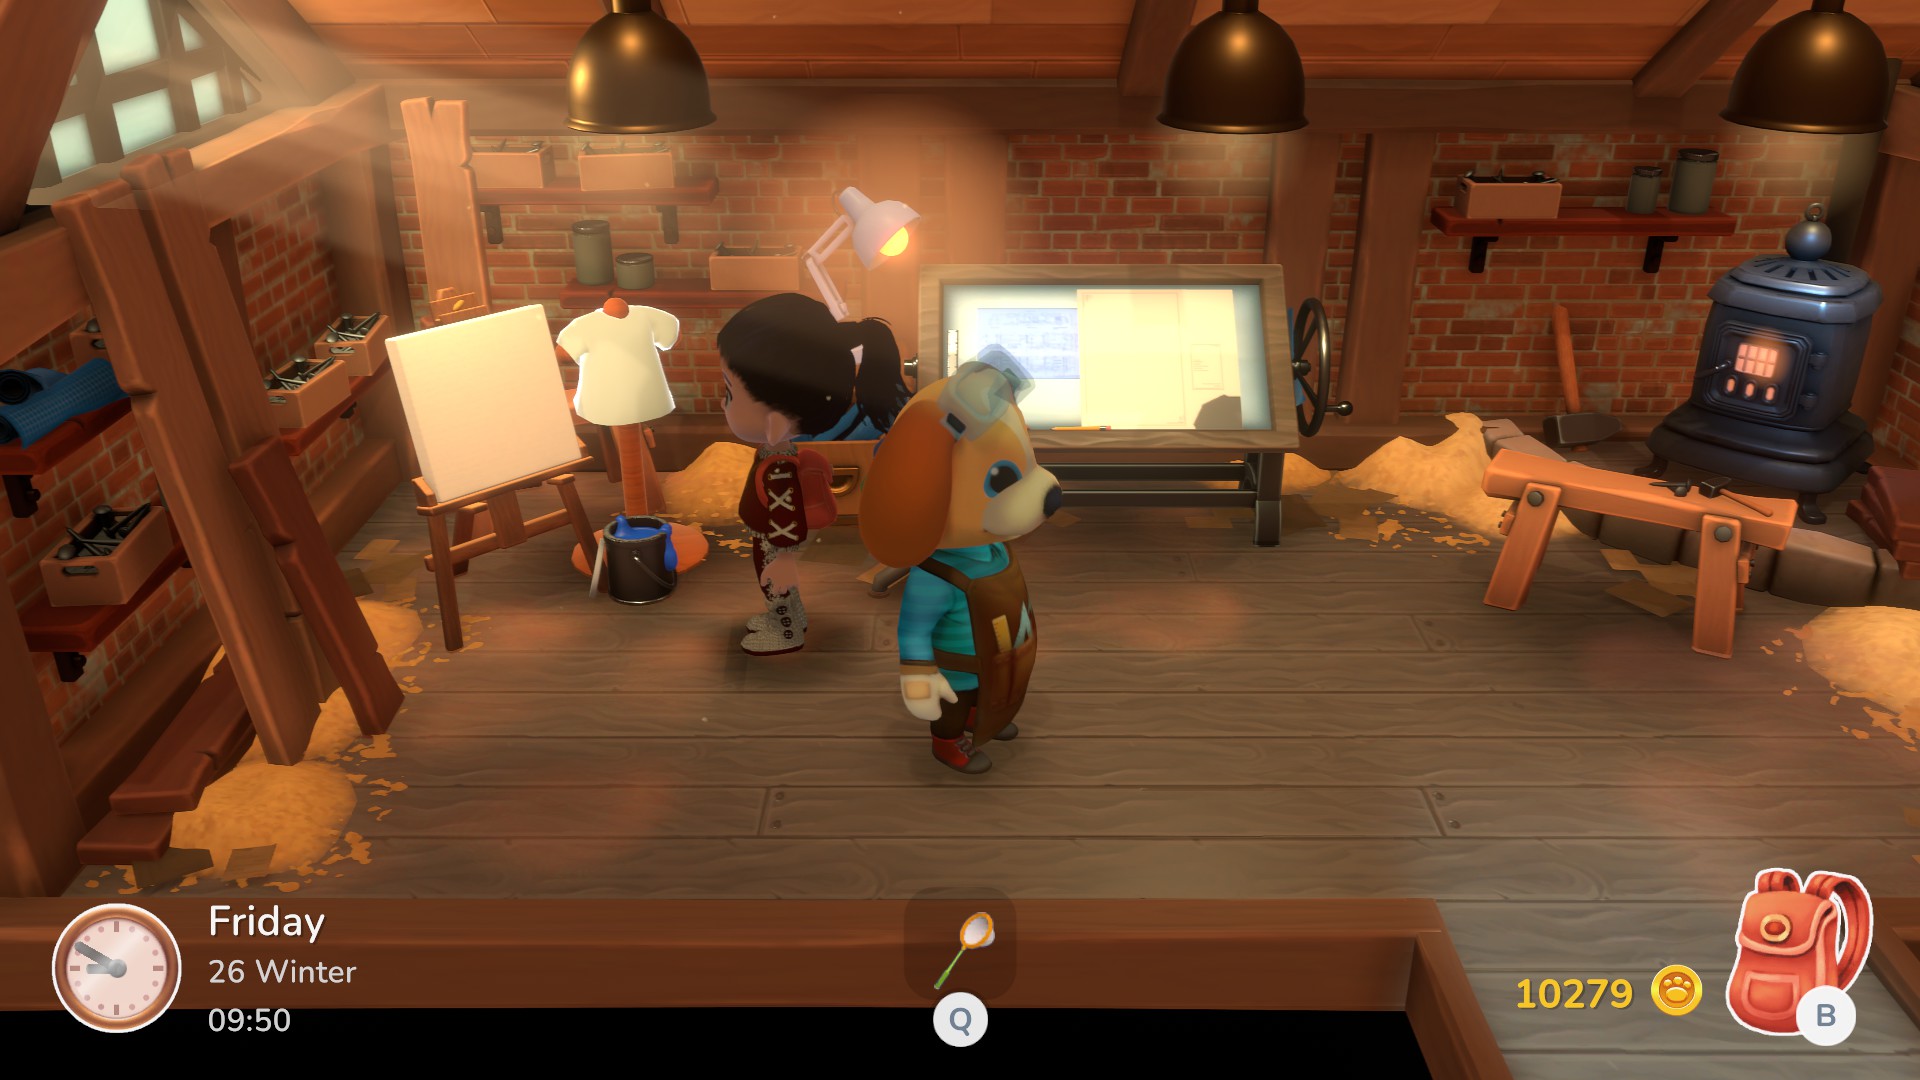
Painting/Art Easel
The painting and art easel once only was used to create flooring and wallpapers, by using crafted paint at the easel that lives within Sally's workshop once unlocked. Within the Chic Clothing update you can now create clothing with the art easel! A very well liked addition to the game that can take some practice to get use to the tools.
When it comes to the art easel, you'll need the Villager Fiore to move into town to unlock the art easel in Sally's workshop. Check out the Villagers & NPCs tab for their unlocks. You'll also need to buy "Brush packs" from Sally to use a wide range of shapes brushes when at the art easel. These brushes really add to what you can do within the art easel.
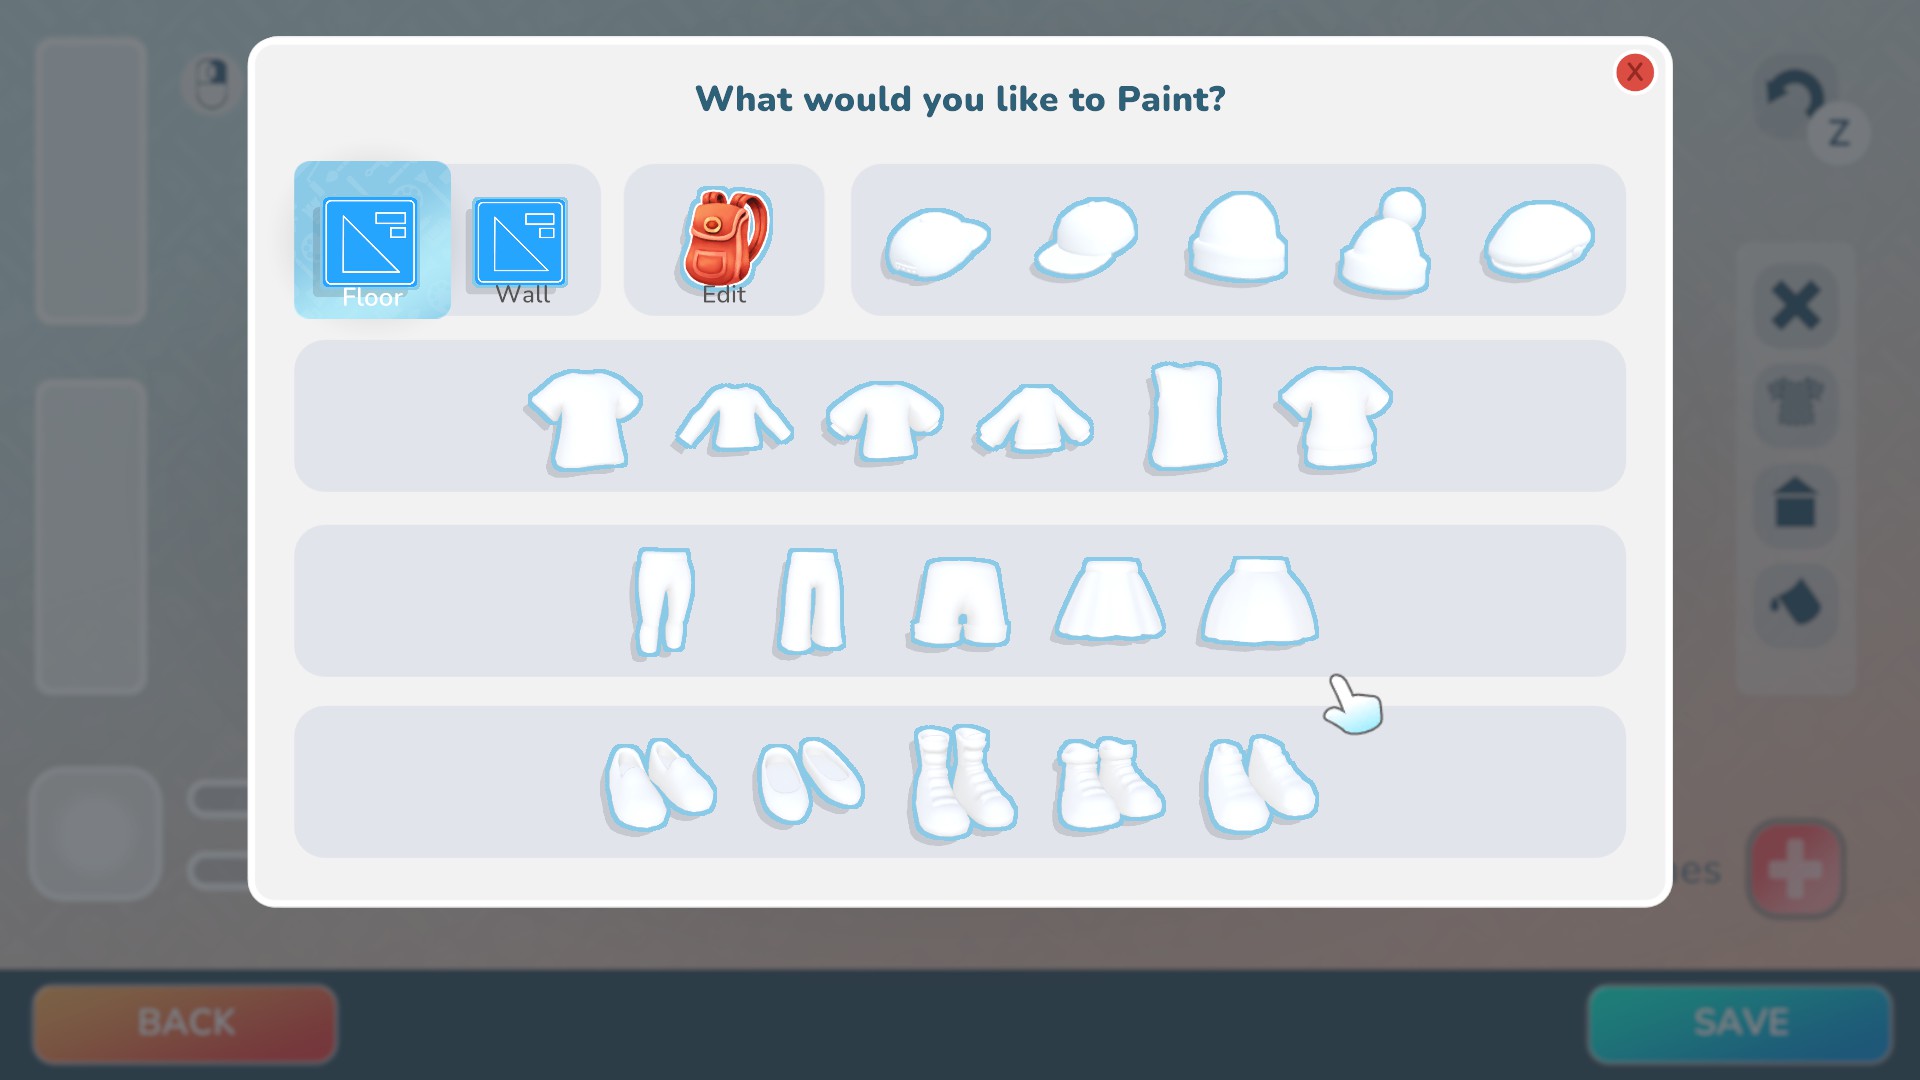
Within the art easel to date, you can create these from it:
Items Can Create Within The Art Easel
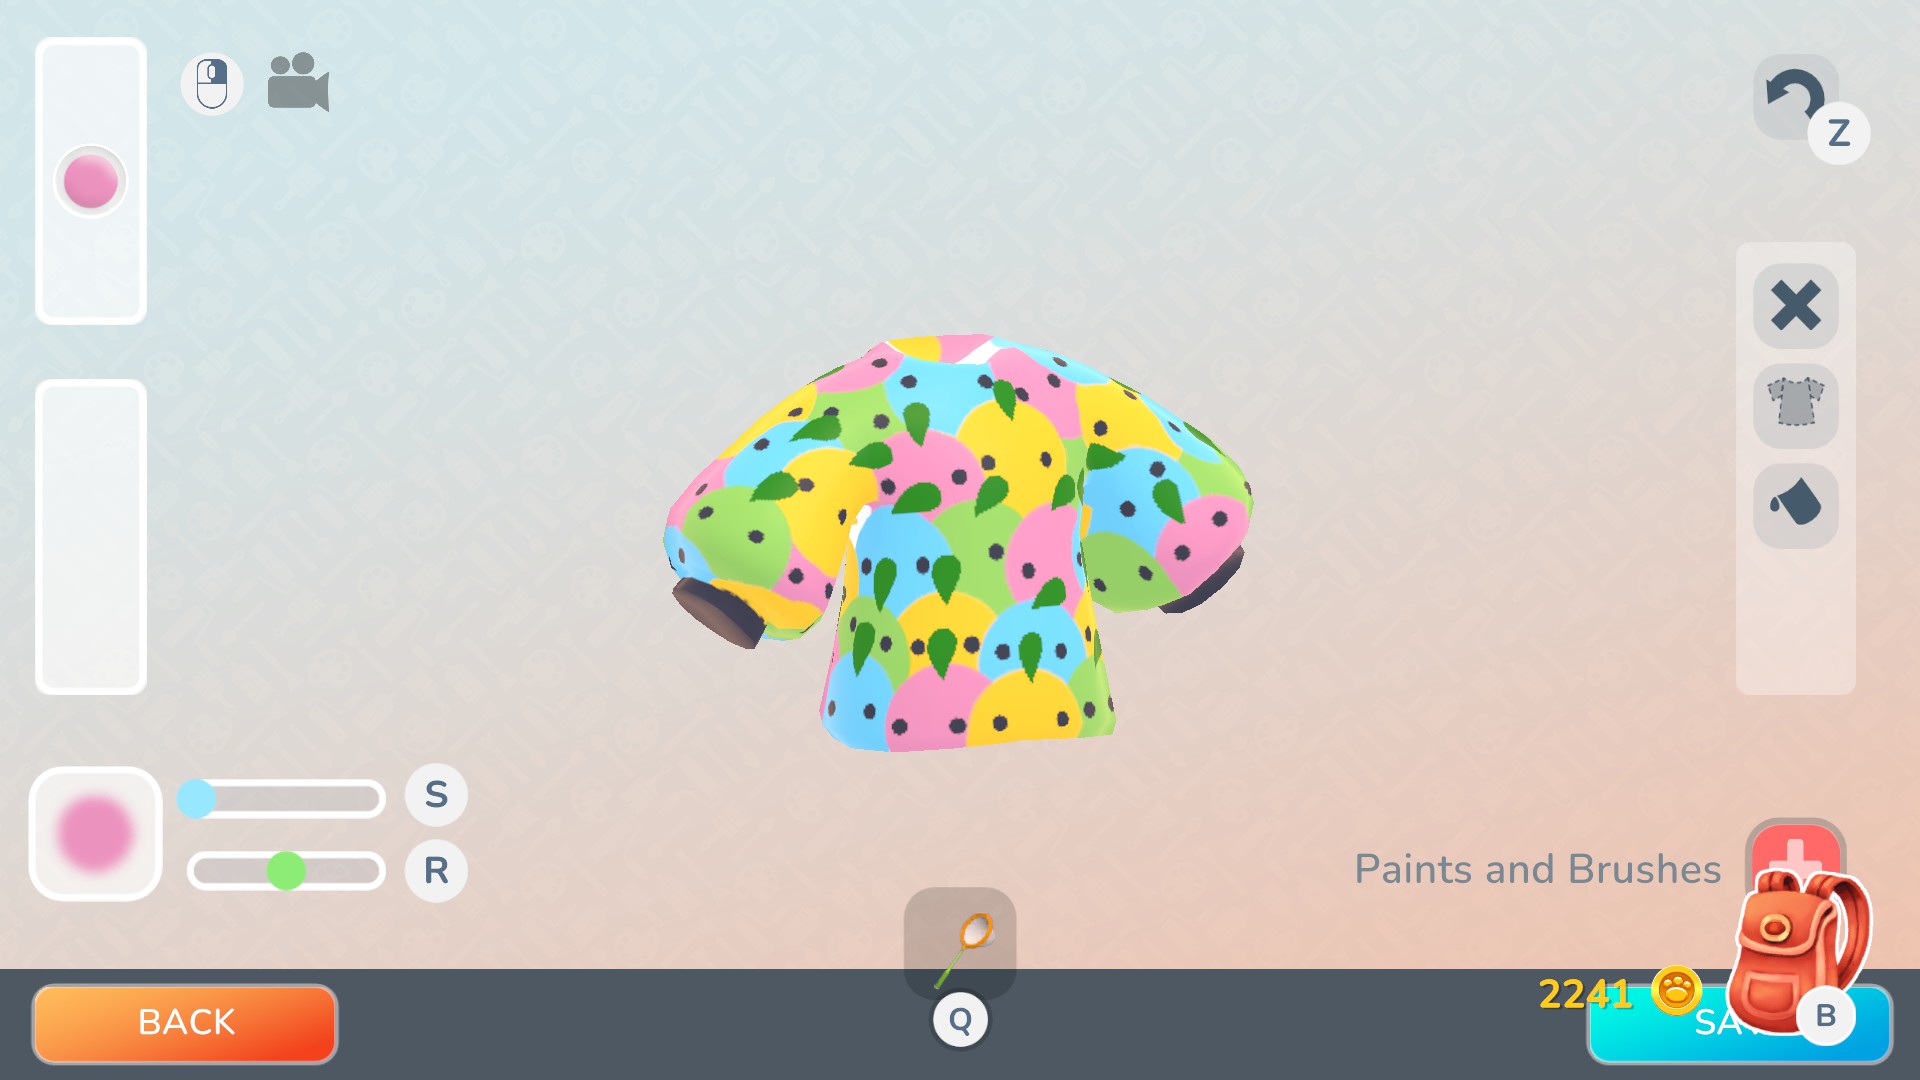
Example Screenshot of a Clothing Design with the Art Easel:
Found in the Official Discord by Creator Code: L9SK-5J3S
Crafting & Materials

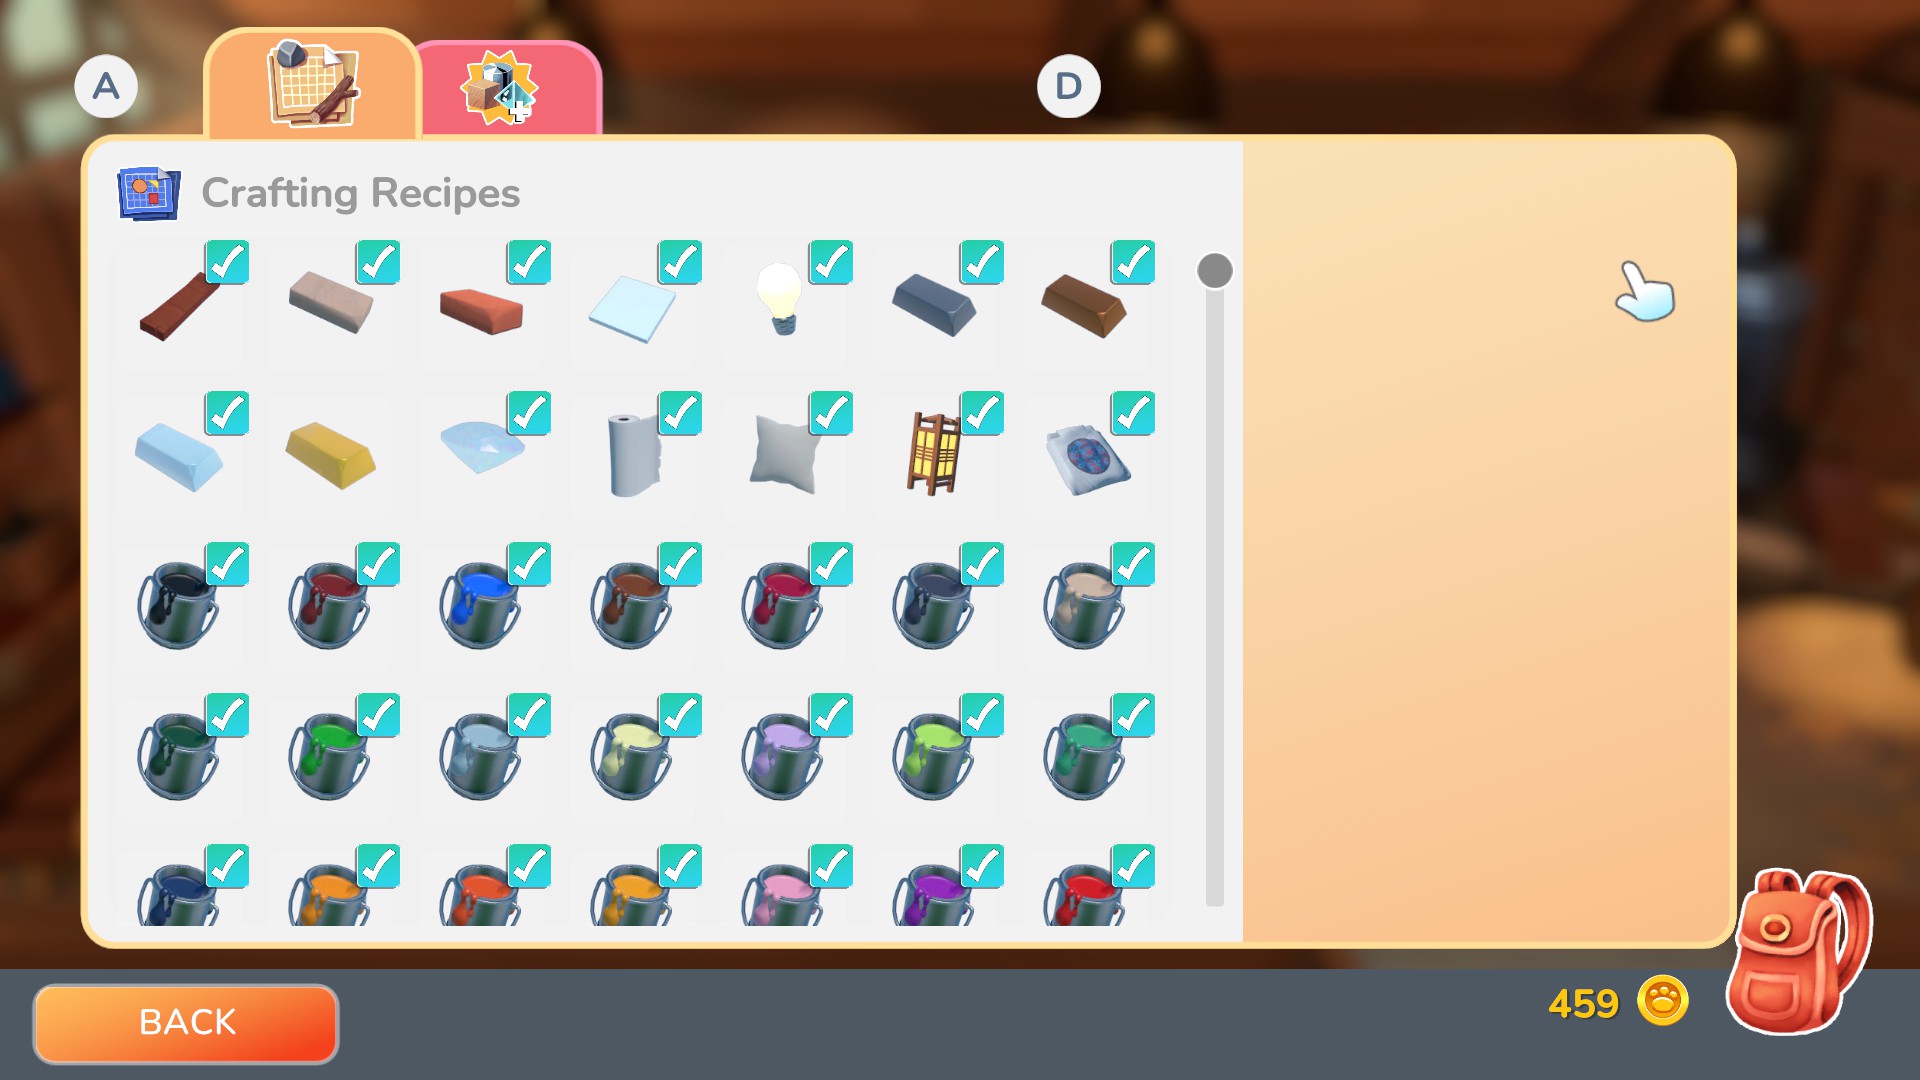
Within the world of Hokko players will find themselves quite often at the crafting bench throughout many parts of their game play. There is a wide rang of things people tend to craft within the game though the most used is paint and materials.
When it comes to most recipes you'll find them in Sally's Store. She'll sell many things that will be of use once you unlock her store. Throughout the tutorial you will unlock more additions to her store and the recipes tab. Since the Major Merits update you'll also find recipes being unlocked as you complete these Mayor Merits.
You'll use the crafting bench found in Sally's workshop to craft but with the new major merits you can now create a PORTABLE crafting bench to carry around with you and use wherever you are. This can help players who use the crafting bench to create items used to decorate town like the bushes, decorative rocks, trees and such.
Mayor Merits I & Villager Requests

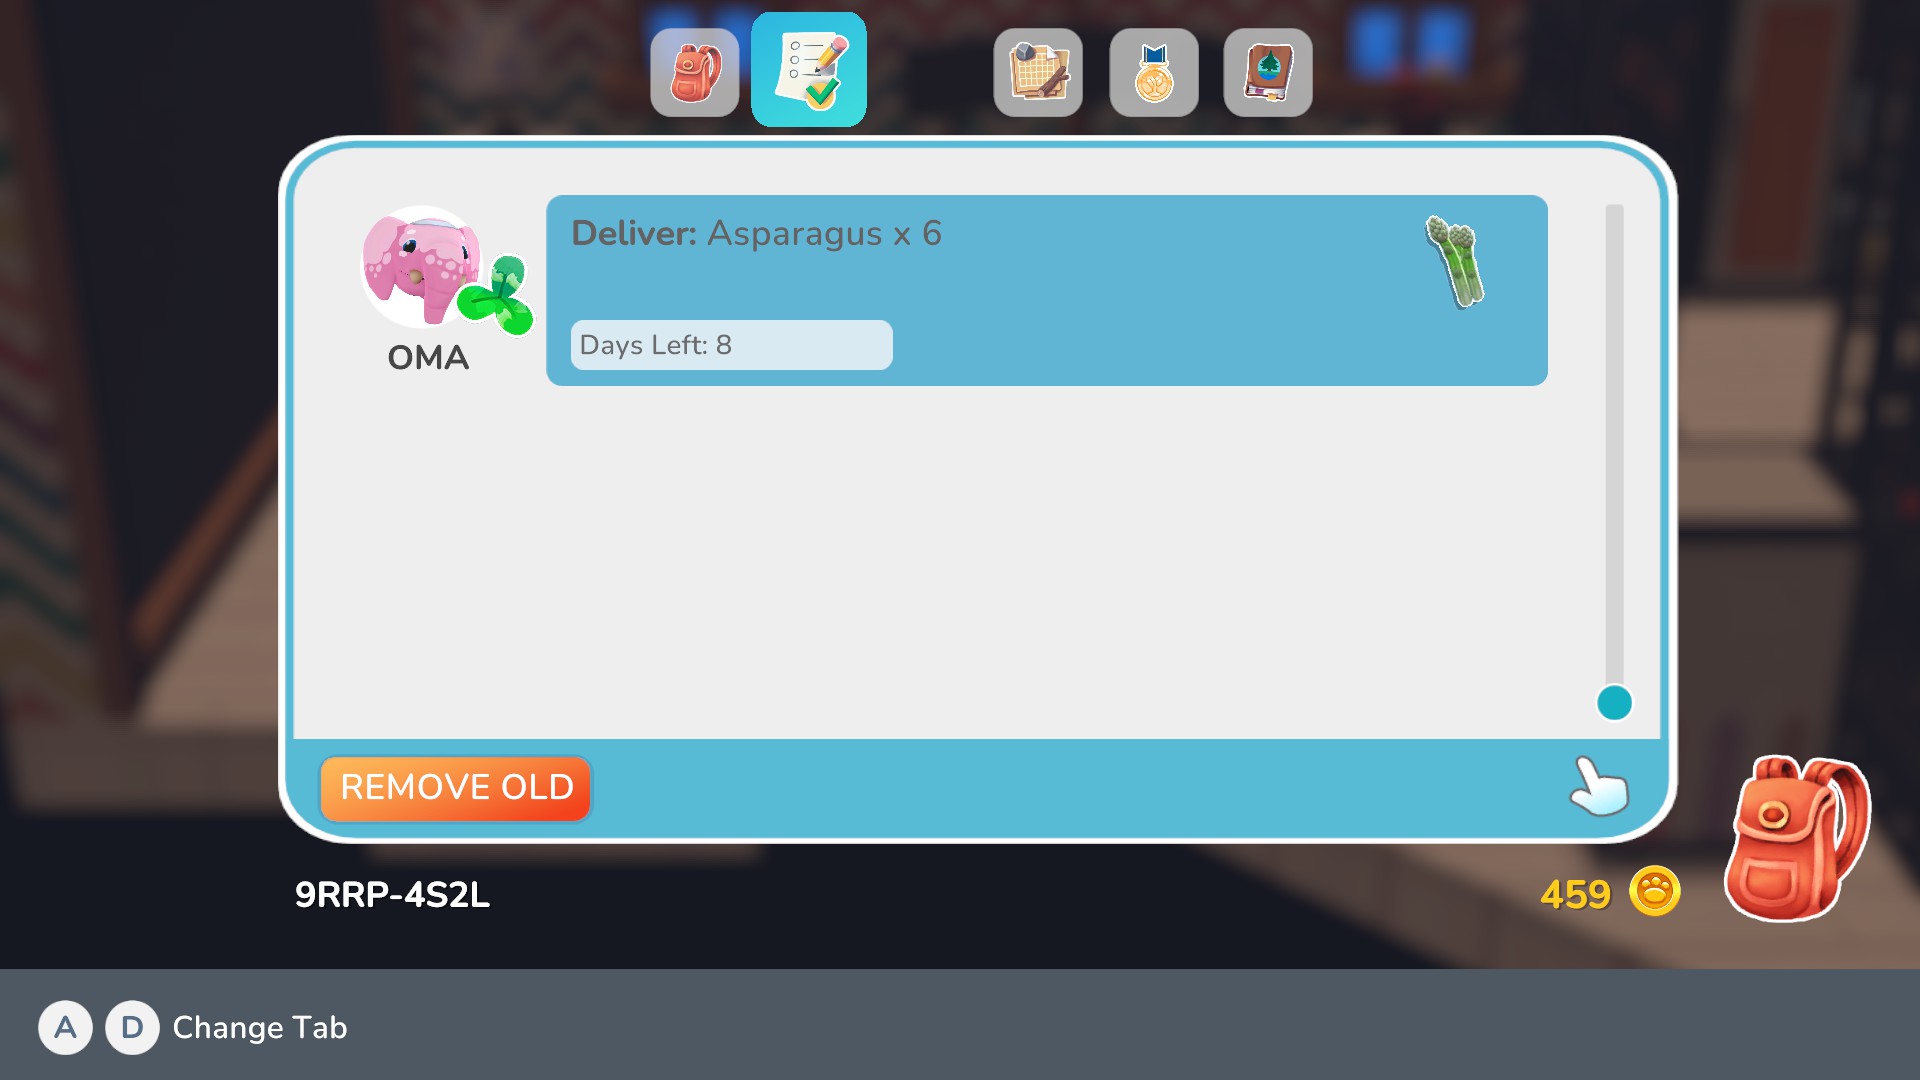
Villager RequestsThroughout your town of Hokko, you're villagers and neighbours will once and awhile need some help and will give you some requests to fulfil. You get rewarded with both cash and an item. Normally the item is clothing or a small piece of furniture like a Rice Cooker for example. You can have a long range of types of requests, from building certain types of furniture with certain materials, to crafting items like paint, to catching certain amount of a certain fish and insect or could be an item from Oma's Food Crafting Service. You'll have a limited amount of time to fulfil these requests and the best way to keep track of them is using the request tab within your inventory like this:
Requests though have a limited amount of time to fulfil which is something important to note. At this current time not being able to finish or do the request after accepting it won't have any penalties. The villager won't be upset or anything of the sort, the only thing is you miss out on some cash reward and a possible item of clothing or furniture. The items are still sold on both Moss' store and Lasrus' store so you won't miss out too much on the items from the reward.
Outside of these normal requests after unlocking Farming and harvest your first 6 crops, Oma will also give requests for harvested crops from your farming. She'll give cash rewards and the more food requests for Oma you do, you'll unlock things in Aubrey's store like sprinklers and types of fertiliser.
Mayor MeritsThe new update is all about these Mayor Merits, changing how many things are unlocked and introducing new benefits and items to unlock and enjoy with your town! The Mayor Merits tab is unlocked once you get the quest showed up in your quest tab to speak with Oma. After speaking with her you'll unlock the tab here:
Mayor merits is a great way to figure out what to do next as you decorate and grow your town. It's made to unlock anything in the level tabs that you wish, no need to go in an 'order' of any kind outside of the level selection. Each tab has "levels" where you need to unlock the first one to unlock the next. To figure out how to unlock each area to the right side in the tab is a list explaining what the icons in the "conditions" mean. A great way to keep track and simple way to check. It's important to note if carrying on from an old save NOT EVERYTHING will be tracked from your history of the save and will only be tracked once you unlock the mayor merits tab. You'll also lose the ability to sprint, use photomode and emote panels until you trigger mayor merits and some things like bomb crafting recipe you've unlocked before the mayor merits update you won't need to unlock again while things like photomode and emote panel you may have to unlock.
Here is the current information about the mayor merits unlocks and conditions below.
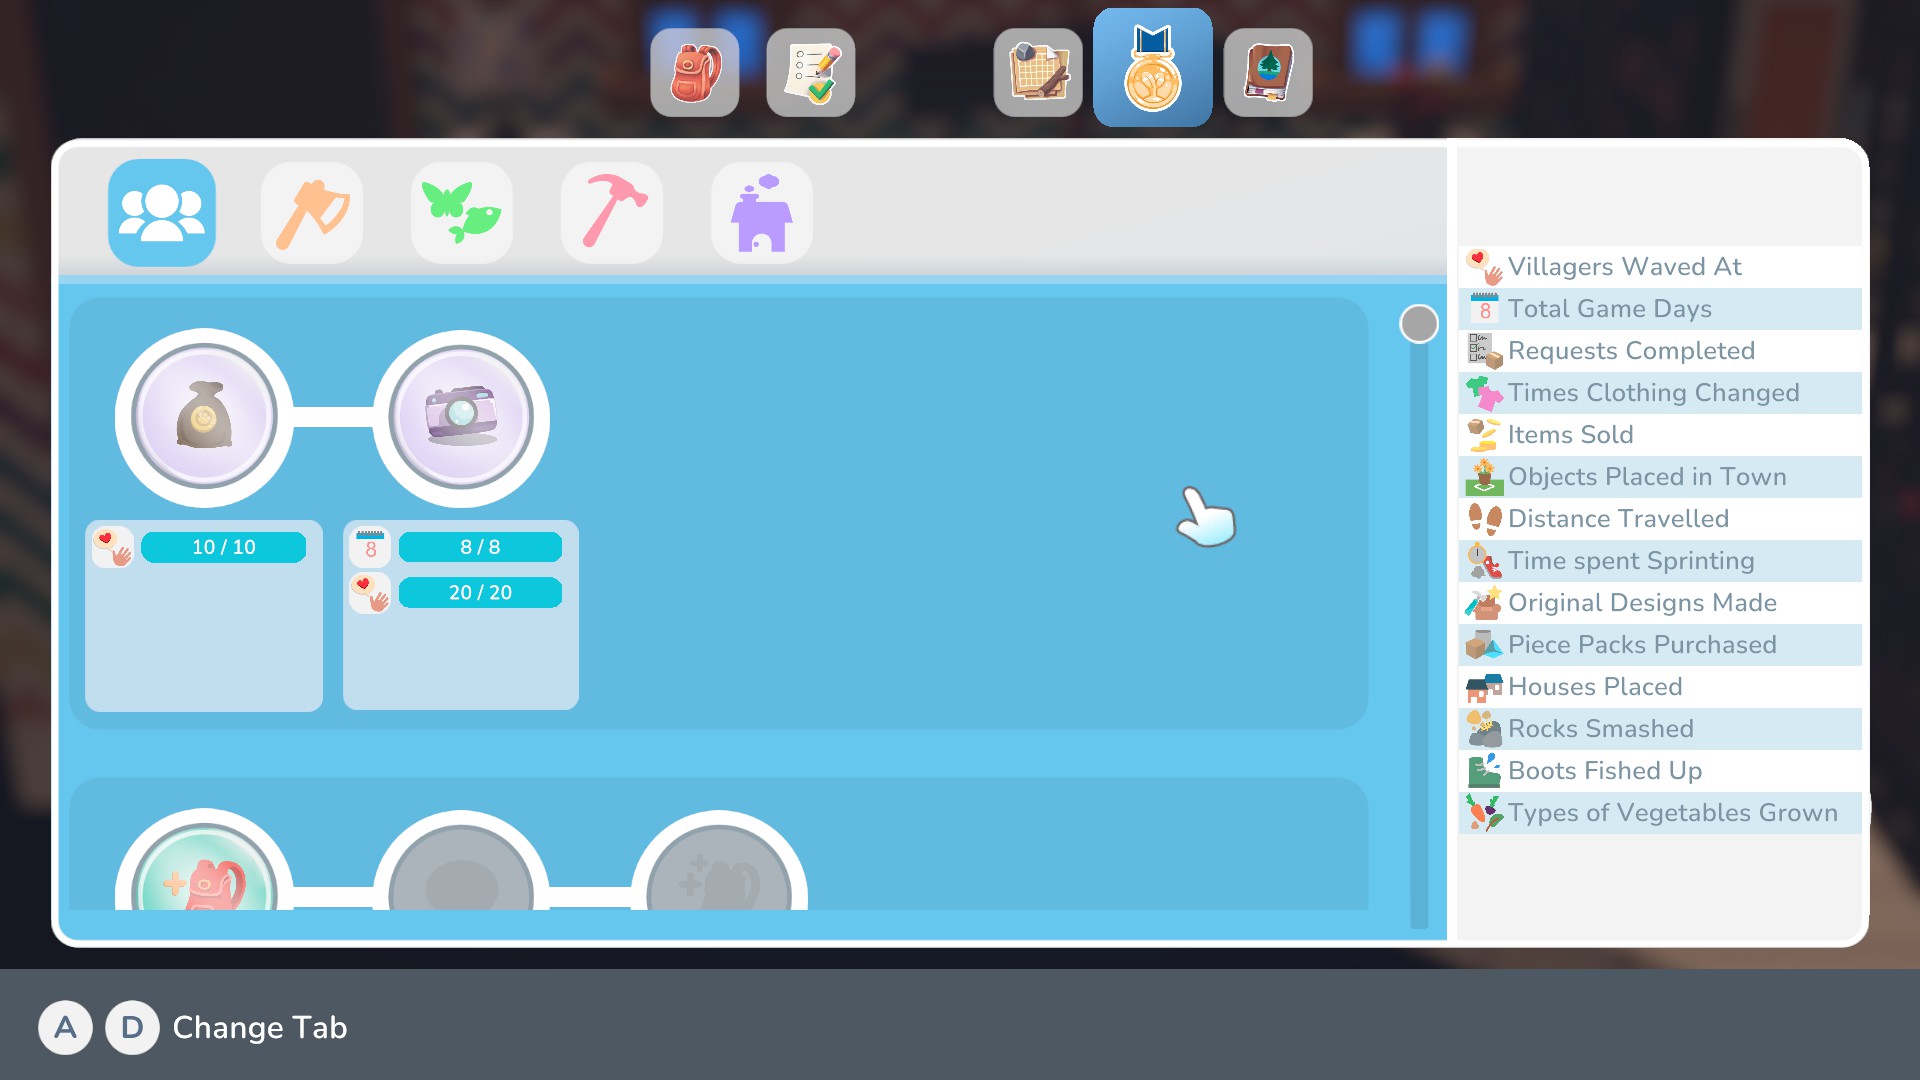
Tab One: Character Additions Unlocks - Three Blue People Icon
First Line; Level 1, Bag of Cash = Wave at 10 Villagers
Level 2, Camera/Photomode = Wave at 20 Villagers & Get to 8 In-game Days.
Second Line;
Level 1, Backpack Upgrade 1 = Complete 5 Villager Requests
Level 2, Emotes/Emote Panel = Wave at 20 Villagers & Change Clothes 15 Times
Level 3, Backpack Upgrade 2 = 50 Items sold to Moss, Complete 10 Villager Requests & Visit Redwood Forest/Small Woods
Third Line;
Level 1, Sprinting = 6 Objects Place In Town
Level 2, Map = Steps Taken/Distance Travelled 40, Time Spent Sprinting 600
Level 3, Bomb Recipe = Custom Designs Made 20, Pieces Packs Purchased 2, Houses Built/Place 2
Level 4, Mining Hat = Rocks Smashed/Mined 75 & Change Clothes 15 Times
Level 5, Infinite Sprinting = Boots Caught Fishing 20 & Time Spent Sprinting 3600
Fourth Line;
Level 1, Plant = Own Your Own Home
Level 2, Player Controlled Sleep = Get to 24 In-game Days & Time Spent Sprinting 1800
Level 3, Weather Control Device = Time Spent Sprinting 3600, Unique Produce Harvested 12 & Steps Taken/Distance Travelled 40.
Tab Two: Outdoor Recourse Gathering Unlocks - Yellow Axe Icon
First Line; Level 1, Bag of Cash = 12 Trees Planted
Level 2, Bag of Cash = 25 Trees Planted & 25 Flowers Planted
Level 3, Trees Grow Quicker = 50 Trees Planted, 50 Trees Cut Down & 10 Redwood Trees Cut Down
Level 4, Flowers Grow Quicker = 50 Flowers Planted, 50 Flowers Picked & 20 Weeds Pulled
Level 5, Pick Weeds in Radius = 30 Weeds Pulled & 15 Tiles Watered
Level 6, Pick Flowers in Radius = 50 Flowers Planted & 75 Flowers Picked
Level 7, Chance Seeds Drops From Picking Flowers = 25 Crops Harvested, 75 Flowers Picked & 50 Flowers Planted
Level 8, Chance for Double Resources from Petals = 75 Flowers Picked, 75 Flowers Planted & 40 Weeds Pulled.
Second Line;
Level 1, Line Soil Tilling = 25 Crops Harvested & 10 Oma's Crop Requests Complete
Level 2, Sow Seeds in Line = 50 Crops Harvested, 20 Oma's Crop requests Complete & 25 Holes Dug
Level 3, Radial Soil Tilling = 10 Villager Food Requests Completed, 6 Types of Crops Grown & 15 Tiles Watered
Level 4, Sow Seeds in Radius = 20 Villager Food Requests Completed, 12 Vegetable Types of Crops Grown & 15 Tiles Fertilised
Level 5, Auto-Sell Box = 75 Crops Harvested, 75 Items Sold to Moss & 10 dishes crafted with Oma's Food Crafting Service. (can be the same dish)
Level 6, Watering Can Doesn't Empty = 60 Tiles Watered, 25 Fish Caught,10 Vegetable Types of Crops Grown
Level 7, Quicker Crops Grow Speed = 100 Crops Harvested, 30 Oma Crop Requests Complete, 30 Tiles Fertilised
Level 8, Radial Harvest = 125 Crops Harvested, 40 Oma Food Requests Completed and 30 dishes crafted with Oma's Food Crafting Service. (can be the same dish)
Level 9, Ignore Seasons Fertiliser Recipe = 40 Weeds Pulled, 16 Vegetable Types of Crops Grown & 45 Tiles Fertilised
Tab Three: Fishing & Insects - Green Butterfly & Fish Icon
First Line: Level 1, Worm Bait = 30 Holes Dug & 25 Fish Caught
Level 2, Insect Bait = 25 Insects Caught, 50 Fish Caught & 15 Times Bait Used
Level 3, Fish Bait = 6 Unique Fish Caught & 15 Times Bait Used
Level 4, Bait Bag = 10 Unique Fish Caught & 15 Times Bait Used
Level 5, Magnet Tackle = 10 Fishing Tournaments Competed In, 20 Treasure Fished Up & 75 Fish Caught
Level 6, Auto-catch Fish = 15 Unique Fish Caught, 100 Fish Caught, 20 Weekly Derris Fishing Challenges
Level 7, Fishing Trap = 50 Holes Dug, 20 Fishing Tournaments Competed In, 30 Weekly Derris Fishing Challenges
Level 8, All Fish Any Time Fishing Bait = 20 Unique Fish Caught & 60 Times Bait Used
Second Line:
Level 1, Bag of Cash = Shovel Crafted
Level 2, Crafting Takes Less Time = 100 Objects Crafted, 50 Pre-Built Design's Built and 25 Objects Placed in Town
Level 3, Chance to Regain Resources Back = 125 Objects Crafted, 20 Redwood Trees Cut Down & 20 Diamonds Mined.
Level 4, Portable Crafting Table = 150 Objects Crafted, 30 Redwood Trees Cut Down & 30 Diamonds Mined.
Third Line:
Level 1, Bag of Cash = 25 Insects Caught
Level 2, Bag of Cash = 50 Insects Caught & 6 Unique Insects Caught
Level 3, Bug Magnet Item/Hat = 50 Flowers Planted & 18 Unique Insects Caught
Level 4, Bug trap = 125 Insects Caught, 28 Unique Insects Caught & 75 Flowers Planted
Mayor Merits II

Fourth Tab: Hands On Work Unlocks - Pink Hammer Icon
First line: Level 1, Pickaxe 1st Upgrade = 35 Rocks Smashed/Mined, 35 Objects Crafted & Visited Level 2 of The Mines
Level 2, Chance of Treasure When Digging Holes = 10 Treasure Fished Up, 50 items Sold to Moss & 50 Holes Dug
Level 3, Axe Upgrade = 60 Trees Cut Down, 25 Trees planted & Visited Redwood Forest/Small Wood Area
Level 4, Pickaxe 2nd Upgrade = 75 Rocks Smashed/Mined, 50 Objects Crafted & Visited Level 3 of The Mines
Level 5, Higher Yield from Trees = 100 Trees Cut Down, 75 Trees Planted & 20 Redwood Trees Cut Down
Level 6, Higher Yield from Rocks/Ores = 100 Rocks Smashed/Mined, 20 Diamonds Mined & 15 Paint Crafted
Level 7, Cut Trees Down in Less Hits = 125 Trees Cut Down, 100 Trees Planted & 25 Custom Designs Made
Level 8, Mine/Smash Rocks/Ores in Less Hits = 125 Rocks Smashed/Mined, 90 Objects Crafted & 15 Pieces Packs Owned
Level 9, Bombs Affect Rocks/Ores = 6 Bombs Crafted & 30 Diamonds Mined
Second Line:
Level 1, Bag of Cash = 25 Pre-Built Designs Created
Level 2, Bag of Cash = 7 Pieces Packs Owned & 25 Custom Designs Made
Level 3, Bag of Cash = 50 Pre-Built Designs Created & 50 Custom Designs Made
Level 4, Crafting Copies Has Chance To Return Resources = 100 Pre-Built Design's Made, 50 Items Placed Around Town & 30 Redwood Trees Cut Down
Level 5, Portable Design Table = 43 Piece Packs Owned, 100 Custom Designs Made & 50 Minutes Spent Designing
Third Line:
Level 1, Bag of Cash = 15 Paints Crafted
Level 2, Bag of Cash = 30 Paint Crafted & 1 Brush Packs Owned
Level 3, Portable Painting Easel = 20 Creations Made on Art Easel & 3 Brush Packs Owned
Fifth Tab: Town Unlocks - Purple House Icon
First Line: Level 1, Exterior Decoration = House Interior Changes 10 & 3 Villagers Moved Into Town
Level 2, Moving & Demolishing Houses = 8 Villager Requests Completed & 5 Villagers Moved Into Town
Level 3, Placeable Donation Box = 15 Villager Requests Completed, 50 Objects Crafted & 8 Villagers Moved Into Town.
Second Line:
Level 1, Moss' Shopping Catalogue (Offline) = 50 Items Sold to Moss & 50 Items Brought
Level 2, Next Day Delivery For Offline = 50 Items Placed Around Town, 10 Interior House Changes & 75 Items Brought
Level 3, Things Sell For More = 20 Diamonds Mined, 100 Items Sold to Moss & 15 Villager Requests Completed
Level 4, Things Cost Less = 75 Items Placed Around Town, 29 Exterior House Changes & 100 Items Brought
Level 5, Next Day Delivery For Online = 10 Creations Uploaded to Creator Store & 20 Creations Downloaded
Third Line:
Level 1, Bag of Cash = 25 Rocks Smashed/Mined, 25 Objects Crafted & Visited The Mines
Level 2, Repeat Item Placement = 75 Holes Dug, 10 Treasure Fished Up & 50 Items Sold to Moss
Fourth Line:
Level 1, Make Villagers Follow = 25 Rocks Smashed, 25 Objects Crafted & Visited Level 2 of The Mines
Level 2, Increased Amounts Donated = 75 Holes Dug, 10 Treasure Fished Up & 50 Items Sold to Moss
Level 3, Villager Resource Gathering = 100 Trees Cut Down & 50 Trees Planted
Farming I

Within the first major update of Hokko Life, the game was introduced to the Farming Update. The farm area was added and the entrance is found within the Forest Path area. It is the second exit off the path, the one after the taking left to the water. Players will find this entrance way blocked until they meet the deer NPC Aubrey in Oma's inn.
For those who didn't see the Villagers & NPCs tab, here are Aubrey's unlocks:
You'll need to have planted 15 trees and 10 flowers, 10 in-game days passed, decorate the meadow area, unlocked Rosa's store, met Derris and been given the ability to fish!
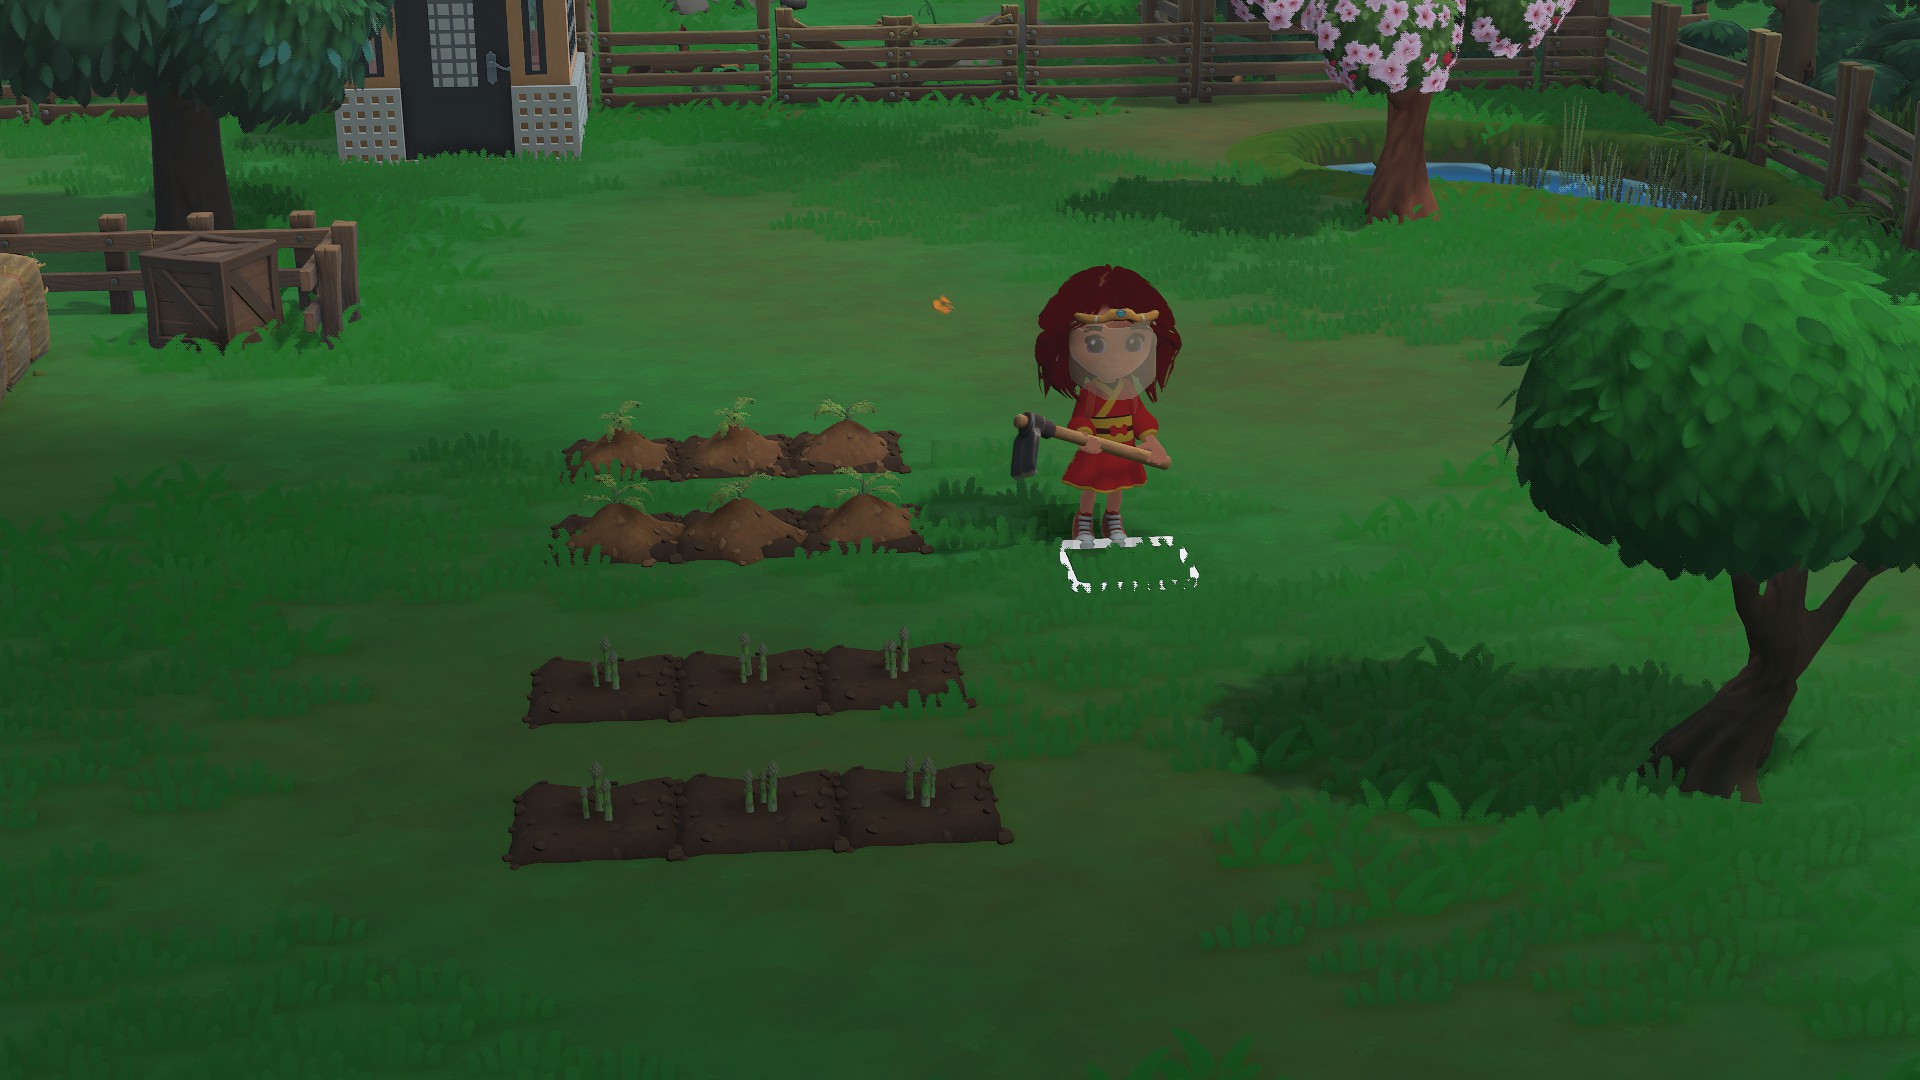
The farming area, you first get both a hoe to tile the ground to plant-able soil and a watering can to of course water and keep your crops alive. You'll need to water your crops daily to have them grow. Missing one day will cause the crops to dry up but watering them will be able to bring back their health but missing more than one day will cause the crops to die and be unsaveable. You can also leave the crops planted when fully grown, they don't seem to wither away once fully grown.
To gain the seeds to grow your own crops, you'll speak with Aubrey who will sell them in her store.
Aubrey sells a great many different types of seeds but all the crops and fruit tress will have information show up on the right when your cursor is hovering over the seed in question. It's important to note what season these seeds need. For crops they will only grow in the correct season for the most of it, the fruit trees are similar and even only produce fruit on their trees until the same correct season(s).
A fun fact, crops that are about 75% grown will continue to grow even if it falls to the wrong seasons. But any less than that season may dry out at all. But seeds planted in the wrong season won't vanish but stay there and will start growing once the correct season returns.
Crops & Seasons
With the farming, crops can be planted and grown in certain seasons as mentioned before. It can be very important to keep check.
Some Useful Information For Planting/Growing Crops
*Note prices can change with each update and will try keeping the tables updated best I can*
Crops Exact Seasons Grown Seed Price Crop Worth/Sell Price Grows In Medium Quality Worth High Quality Worth Asparagus Spring 15 Gold Coins 25 Gold Coins 7 In-Game Days 31 Gold Coins 42 Gold Coins Aubergine Autumn & Winter 31 Gold Coins 46 Gold Coins 9 In-Game Days 58 Gold Coins 77 Gold Coins Beetroot Autumn & Winter 24 Gold Coins 34 Gold Coins 9 In-Game Days 43 Gold Coins 57 Gold Coins Blueberrys Summer 31 Gold Coins 55 Gold Coins 11 In-Game Days 69 Gold Coins 92 Gold Coins Broccoli Spring 26 Gold Coins 46 Gold Coins 10 In-Game Days 58 Gold Coins 77 Gold Coins Brussel Sprouts Winter 26 Gold Coins 46 Gold Coins 10 In-Game Days 58 Gold Coins 77 Gold Coins Cabbage ALL SEASONS 16 Gold Coins 18 Gold Coins 7 In-Game Days 23 Gold Coins 30 Gold Coins Carrots Summer & Autumn 16 Gold Coins 22 Gold Coins 6 In-Game Days 28 Gold Coins 37 Gold Coins Chard Spring & Winter 24 Gold Coins 34 Gold Coins 9 In-Game Days 43 Gold Coins 57 Gold Coins Chilli Peppers Autumn 26 Gold Coins 46 Gold Coins 10 In-Game Days 58 Gold Coins 77 Gold Coins Corn Summer & Autumn 24 Gold Coins 34 Gold Coins 8 In-Game Days 43 Gold Coins 57 Gold Coins Daikon Autumn & Winter 16 Gold Coins 19 Gold Coins 5 In-Game Days 24 Gold Coins 32 Gold Coins Grapes Summer & Autumn 21 Gold Coins 34 Gold Coins 9 In-Game Days 43 Gold Coins 57 Gold Coins Kale Autumn & Winter 24 Gold Coins 37 Gold Coins 8 In-Game Days 46 Gold Coins 62 Gold Coins Onions Spring & Summer & Autumn 26 Gold Coins 34 Gold Coins 8 In-Game Days 43 Gold Coins 57 Gold Coins Pineapple Spring 36 Gold Coins 66 Gold Coins 13 In-Game Days 83 Gold Coins 110 Gold Coins Potatos Spring & Summer & Winter 16 Gold Coins 22 Gold Coins 7 In-Game Days 28 Gold Coins 37 Gold Coins Pumpkin Autumn 36 Gold Coins 66 Gold Coins 13 In-Game Days 83 Gold Coins 110 Gold Coins Rhubarb Spring 15 Gold Coins 25 Gold Coins 6 In-Game Days 31 Gold Coins 42 Gold Coins Strawberrys Spring & Summer 16 Gold Coins 22 Gold Coins 6 In-Game Days 28 Gold Coins 37 Gold Coins Tomatos Summer 14 Gold Coins 19 Gold Coins 4 In-Game Days 24 Gold Coins 32 Gold Coins Watermelon Summer 36 Gold Coins 66 Gold Coins 13 In-Game Days 83 Gold Coins 110 Gold Coins Bushels of Wheat Autumn 14 Gold Coins 19 Gold Coins 5 In-Game Days 24 Gold Coins 32 Gold Coins
Chart information gathering is thanks to the amazing DynamicXYZ (in the official discord)
Farming II
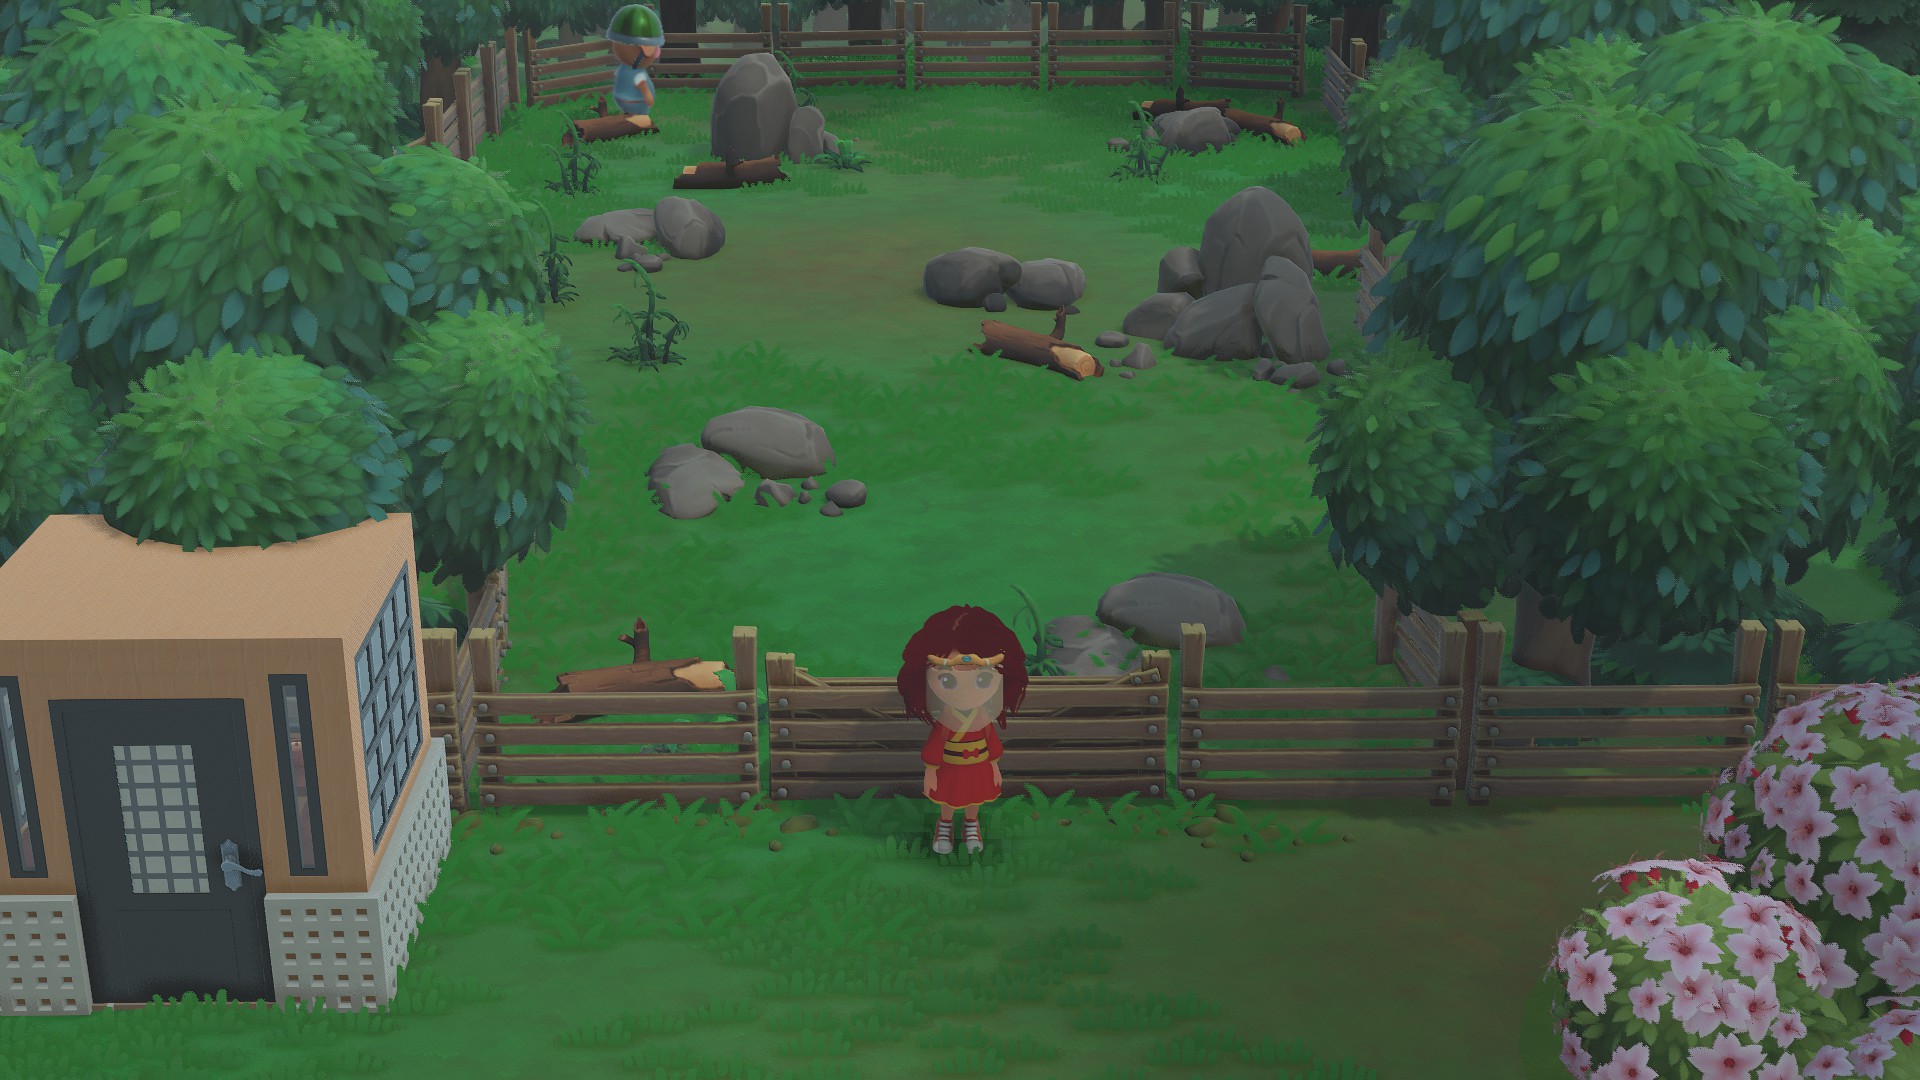
Along side crops you'll also find Fruit Trees can be grown as well. Fruit from these trees can be asked from Oma with her Crop/Produce Requests and can be used as pieces when creating designs at the design bench/tool. Yes some crops like Pineapple and strawberries along side the fruit trees can be used in the design bench/tool long as you first buy the pieces packs from Sally and of course have them in your backpack when using the bench/tool. Fruit from the
Here's a table for the fruit trees to match the crops above.
*Note prices can change with each update and will try keeping the tables updated best I can*
Fruit Tree Type Seasons Produce/Grow Seed Price Fruit Worth/Sell Price Grows In Apple Summer & Autumn 144 Gold Coins 6 Gold Coins 9 Days Cherry Summer 124 Gold Coins 12 Gold Coins 10 Days Lemon Spring & Summer 55 Gold Coins 4 Gold Coins 6 Days Orange Spring & Winter 55 Gold Coins 4 Gold Coins 6 Days Peach Summer 124 Gold Coins 12 Gold Coins 10 Days Pear Autumn & Winter 144 Gold Coins 5 Gold Coins 8 Days
Fruit tree seeds may be a large sum of gold coins to buy compared to the selling prices but you can cut them down to get some logs and more seeds, then leaving the stump should regrow the fruit tree. They can be useful but they can also be used as decoration as you can plant them anywhere long as it's on a grass patch. At the beach, small wood area, farm, meadow, the area next to the mine entrance to the left and such. The cherry tree looks so beautiful during the spring season covered in pink flowers so can be a great addition to your town!
Some Unlock Information
When comes to farming area you'll notice a back area with a closed fence gate blocking your path to explore. It can give you more space to plant more crops, fruit trees, place houses or do whatever you'd like in!
This area can be unlocked as you get into your managing your farm, the exact unlocks are:
Harvest 120 cropsFor unlocking Basic Sprinklers:
Harvest 50 crops
Complete 10 DIFFERENT Crop Requests for Oma When unlocking sprinklers you know you'll very close to unlocking them once you've unlocked Oma's Food Crafting.
For unlocking Diamond Sprinkler:
Harvest 30 High Quality Produce/Crops
Complete 25 Crop Requests for OmaFor unlocking the Upgraded Watering Can:
Harvest 100 crops
Use Food Crafting 25 timesFor unlocking Fertiliser:
You'll unlock the first fertiliser after the first 2-3 crop requests for Oma. The first type of fertiliser is automatically unlocked in your crafting recipes list and you can get straight away to crafting and making the first type. The more crops you go on to harvest and more requests you do for Oma will unlock the other types of fertiliser will unlock.
Bug Catching

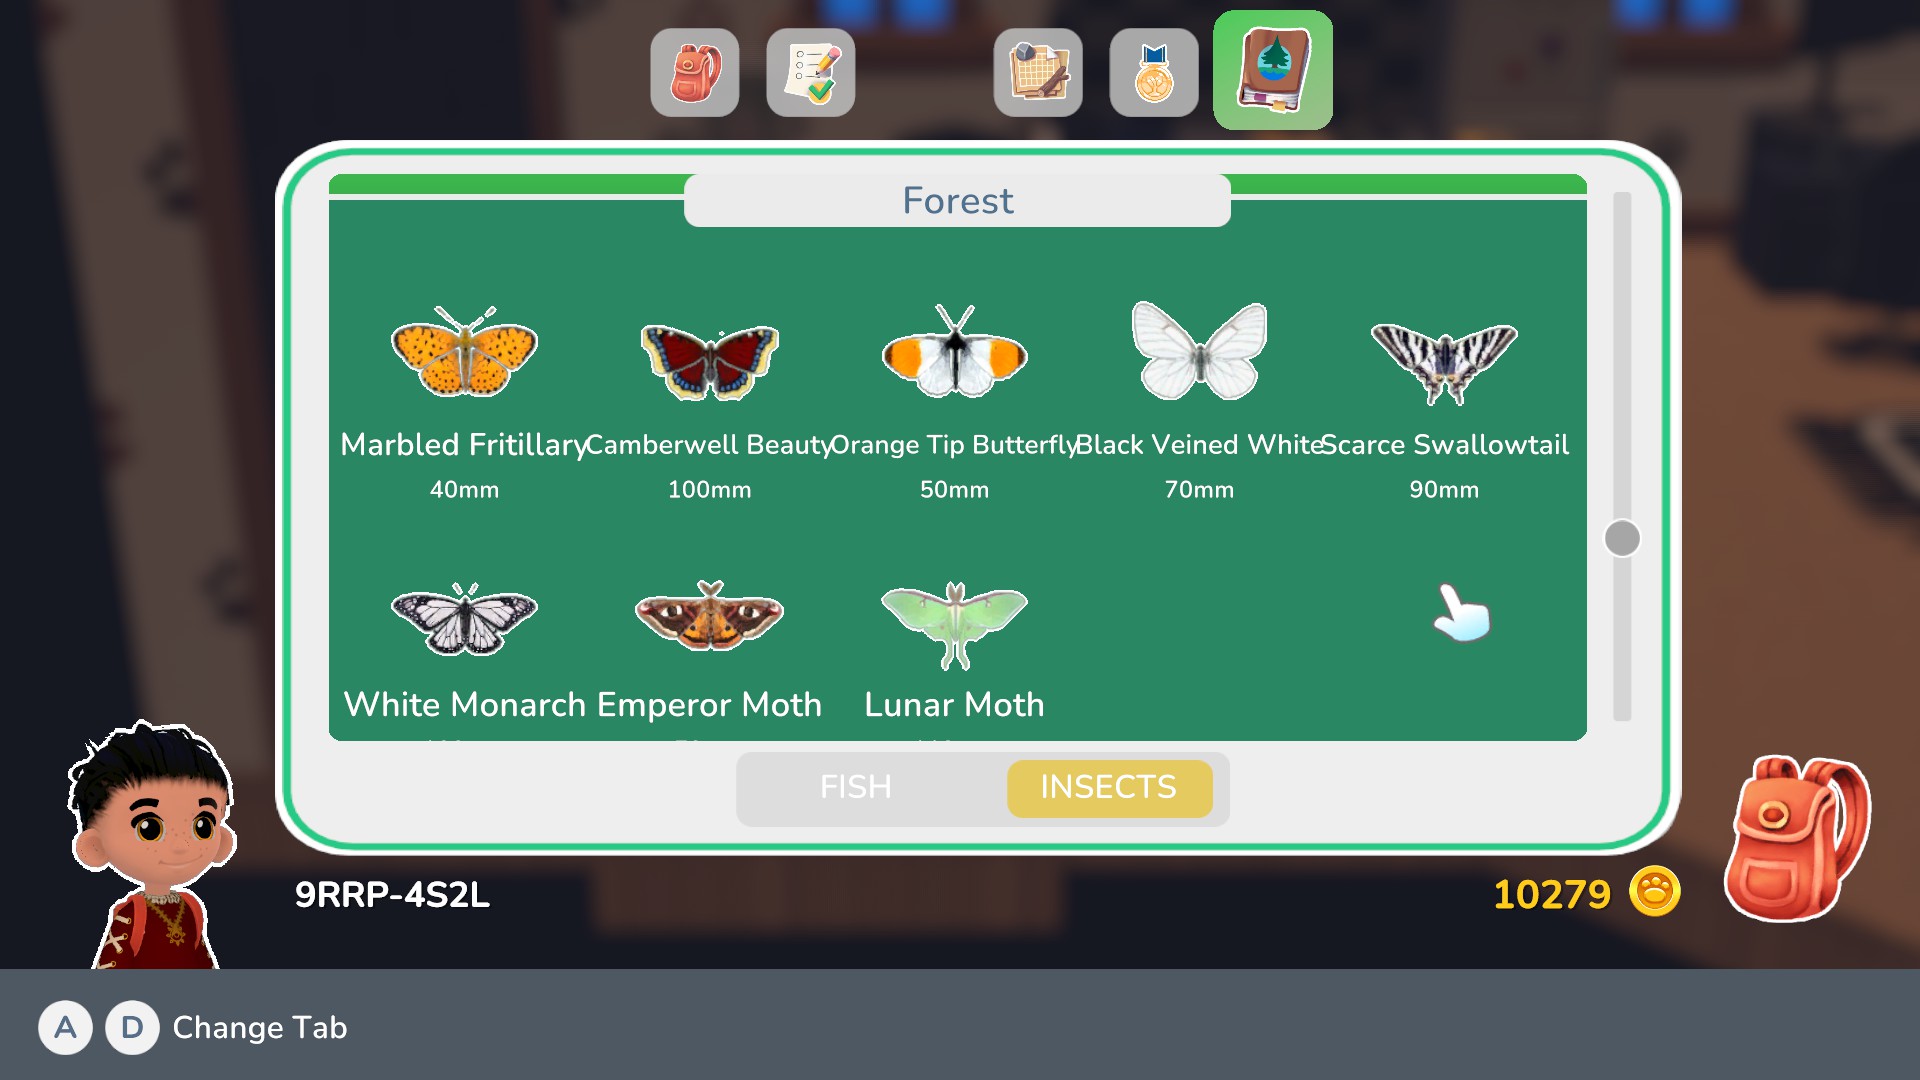
Similar to there being many types of fish within the Town of Hokko, you'll also find it home to insects, at this moment in time the only ones that can be caught are butterflies and moths. Similar to the fish you can catch them to fill the journal to log the different species of beautiful moths and butterflies. You can catch them around the Meadow Area, Forest Areas, Town Centre and the Beach.
To note Forest Areas include:
Pond/Gove, RedWood Forest/Small Wood Area & Farm Area
Example Image
Table of Insects Within Hokko Note the Price of Fish Change Within the Updates & Can be Off Slightly.
Insect Type/Name Location Found Season Catchable Time They Spawn Weather Needed Spawn Rate Price/Worth Apollo Beach Summer
&
Autumn
&
Winter 6am-5pm (06-17) All Types 50% 12 Gold Coins Brimstone Beach All Seasons 6am-5pm (06-17) All Types 80% 6 Gold Coins Cinnabar Moth Beach Summer
&
Autumn 2pm-8pm (14-20) Sunny 30% 58 Gold Coins Duke of Burgundy Beach Spring
&
Autumn
&
Winter 11am-8pm (11-20) Sunny 50% 23 Gold Coins Painted Lady Beach All Seasons 6am-2pm (06-14)
&
5pm-8pm (17-20) Sunny 80% 9 Gold Coins Zebra Longwing Beach Autumn 6am-11am (06-11) Sunny 20% Black Veined White Forest Spring
&
Summer
&
Autumn 11am-5pm (11-17) All Types 50% 12 Gold Coins Camberwell Beauty Forest Summer
&
Autumn
&
Winter 11am-8pm (11-20) All Types 80% 7 Gold Coins Emperor Moth Forest Autumn
&
Winter 5pm-6am (17-06) Sunny 30% 12 Gold Coins Lunar Moth Forest Winter 8pm-6am (20-06) Sunny 20% 25 Gold Coins Marbled Fritillary Forest All Seasons 2pm-6am (14-06) All Types 80% 4 Gold Coins Orange Tip Forest All Seasons 11am-8pm (11-20) Sunny 60% 7 Gold Coins Scarce Swallowtail Forest Summer
&
Autumn
&
Winter 5pm-6am (17-06) Sunny 50% 8 Gold Coins White Monarch Forest Spring
&
Winter 11am-5pm (11-17) Sunny 30% 20 Gold Coins Blue Adonis Meadow Summer
&
Autumn 6am-2pm (06-14) Sunny 30% 52 Gold Coins Blue Morpho Meadow Summer 11am-2pm (11-14) Sunny 30% 124 Gold Coins Cleopatra Meadow All Seasons 2pm-06am (12-06) Sunny 80% 6 Gold Coins Monarch Meadow Summer
&
Autumn
&
Winter 6am-8pm (06-20) All Types 80% 5 Gold Coins Peacock Meadow All Seasons 6am-2pm (06-14)
&
5pm-8pm (17-20) All Types 60% 7 Gold Coins Purple Emperor Meadow Spring
&
Summer
&
Autumn 2pm-6am (14-06) All Types 50% 7 Gold Coins Spanish Moon Moth Meadow Autumn
&
Winter 5pm-6am (17-06) Sunny 30% 36 Gold Coins Swallowtail Meadow Spring
&
Summer
&
Winter 5pm-2pm (17-14) Sunny 50% 2 Gold Coins
Second Table to Fit All information:
Note the Price of Fish Change Within the Updates & Can be Off Slightly.
Insect Type/Name Location Found Season Catchable Time They Spawn Weather Needed Spawn Rate Price/Worth Large Copper Town Centre Summer
&
Autumn
&
Winter 2pm-6am (14-06) Sunny 80% 6 Gold Coins Narcissus Town Centre Spring
&
Summer 5pm-6am (17-06) Sunny 30% 36 Gold Coins Red Admiral Town Centre Summer
&
Autumn
&
Winter 2pm-8pm (14-20) All Types 50% 16 Gold Coins Small Blue Town Centre All Seasons 11am-6am (11-06) All Types 80% 2 Gold Coins Tiger Moth Town Centre Autumn 5pm-8pm (17-20) Sunny 20% Two Tailed Pasha Town Centre Spring
&
Summer
&
Autumn 11am-5pm (11-17)
&
8pm-6am (20-06) Sunny 50% 12 Gold Coins
If you notice any of the above prices is out of date feel free to comment the correct price amount below so we can update the guide, thank you!
Fishing I

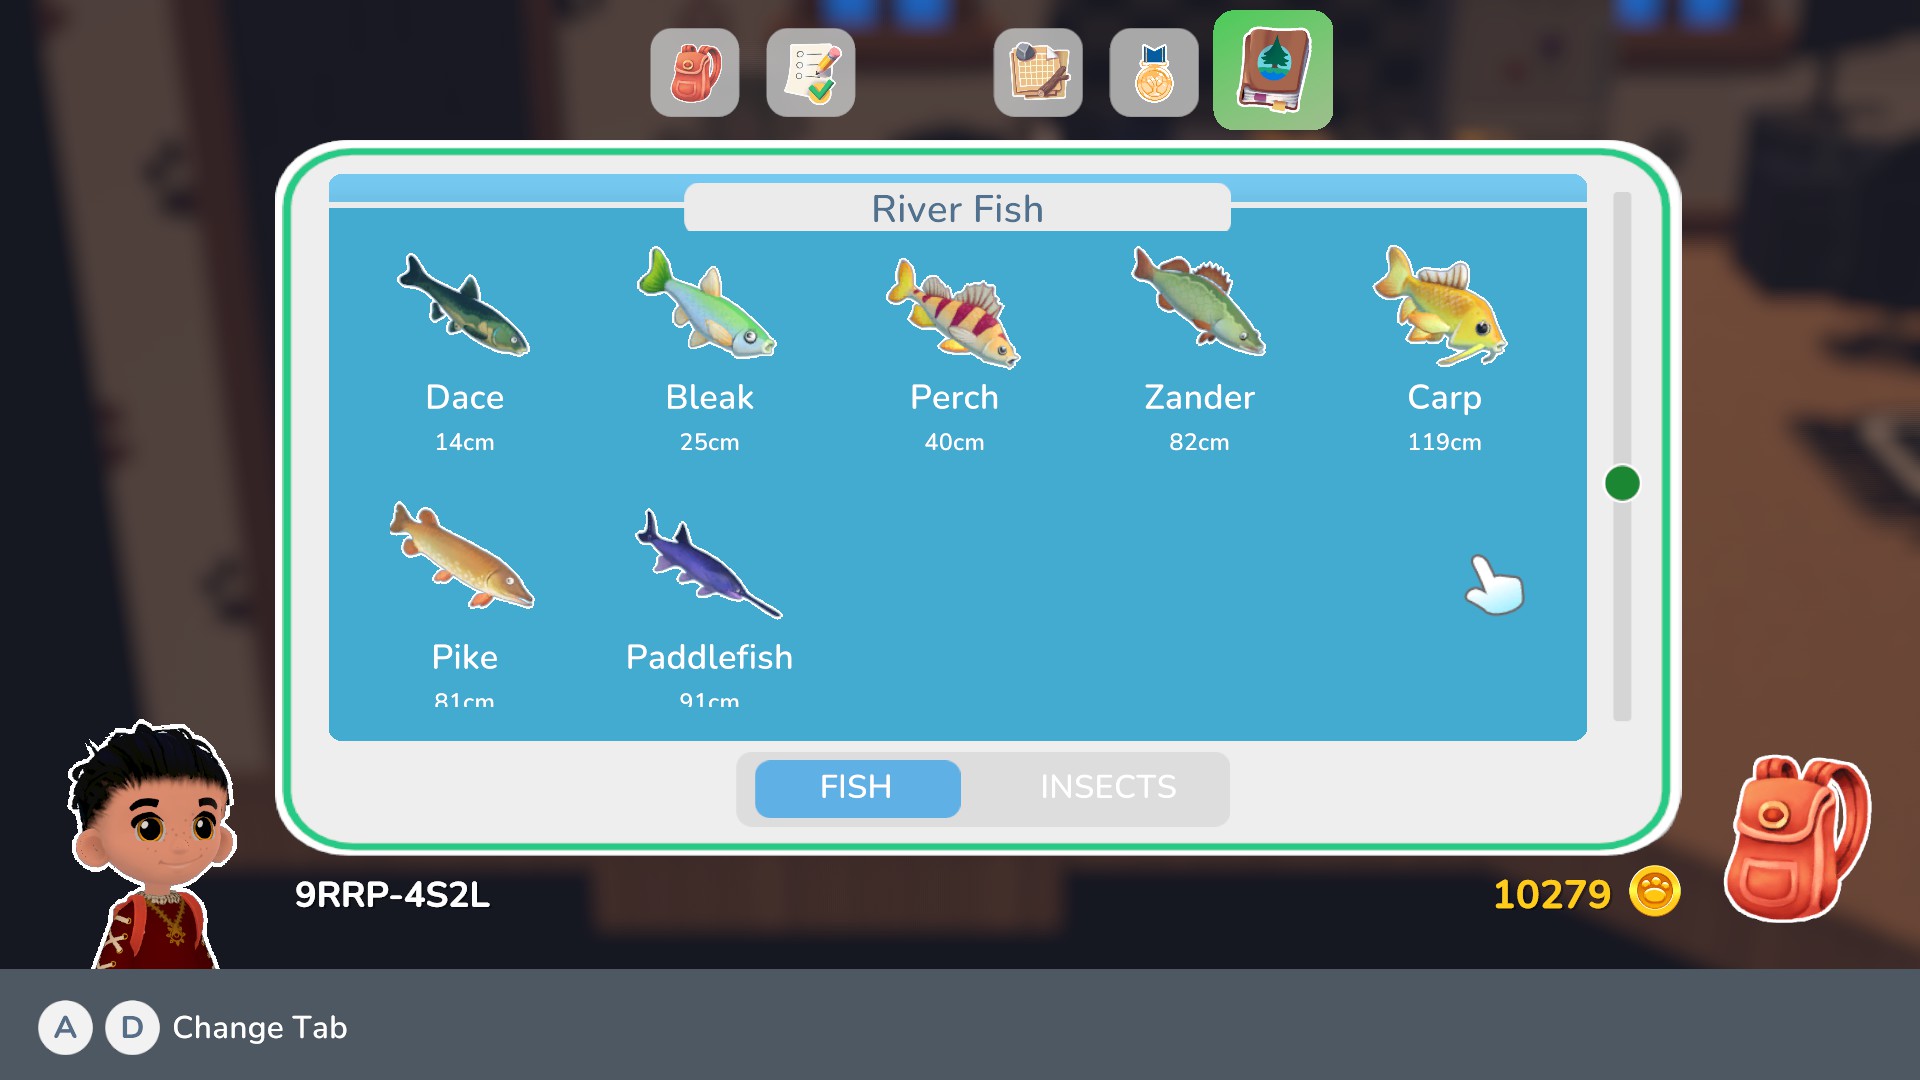
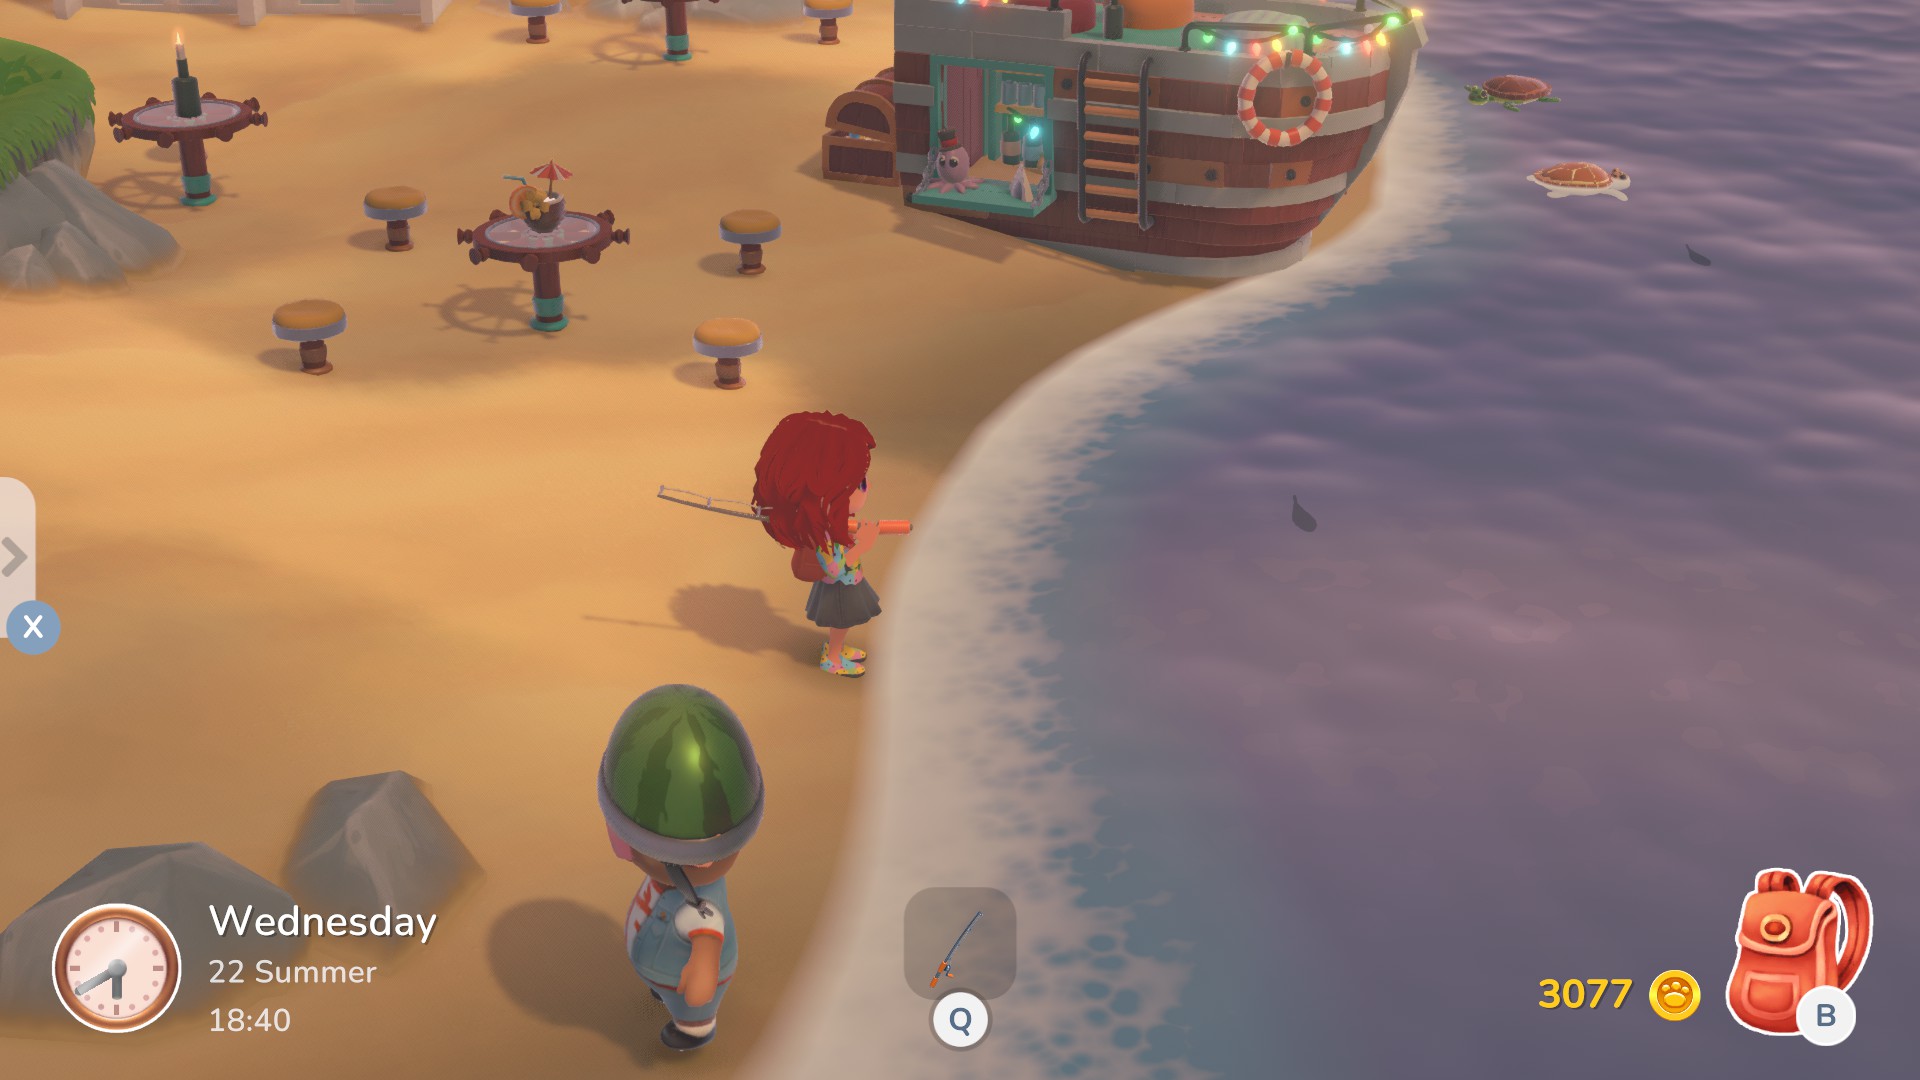
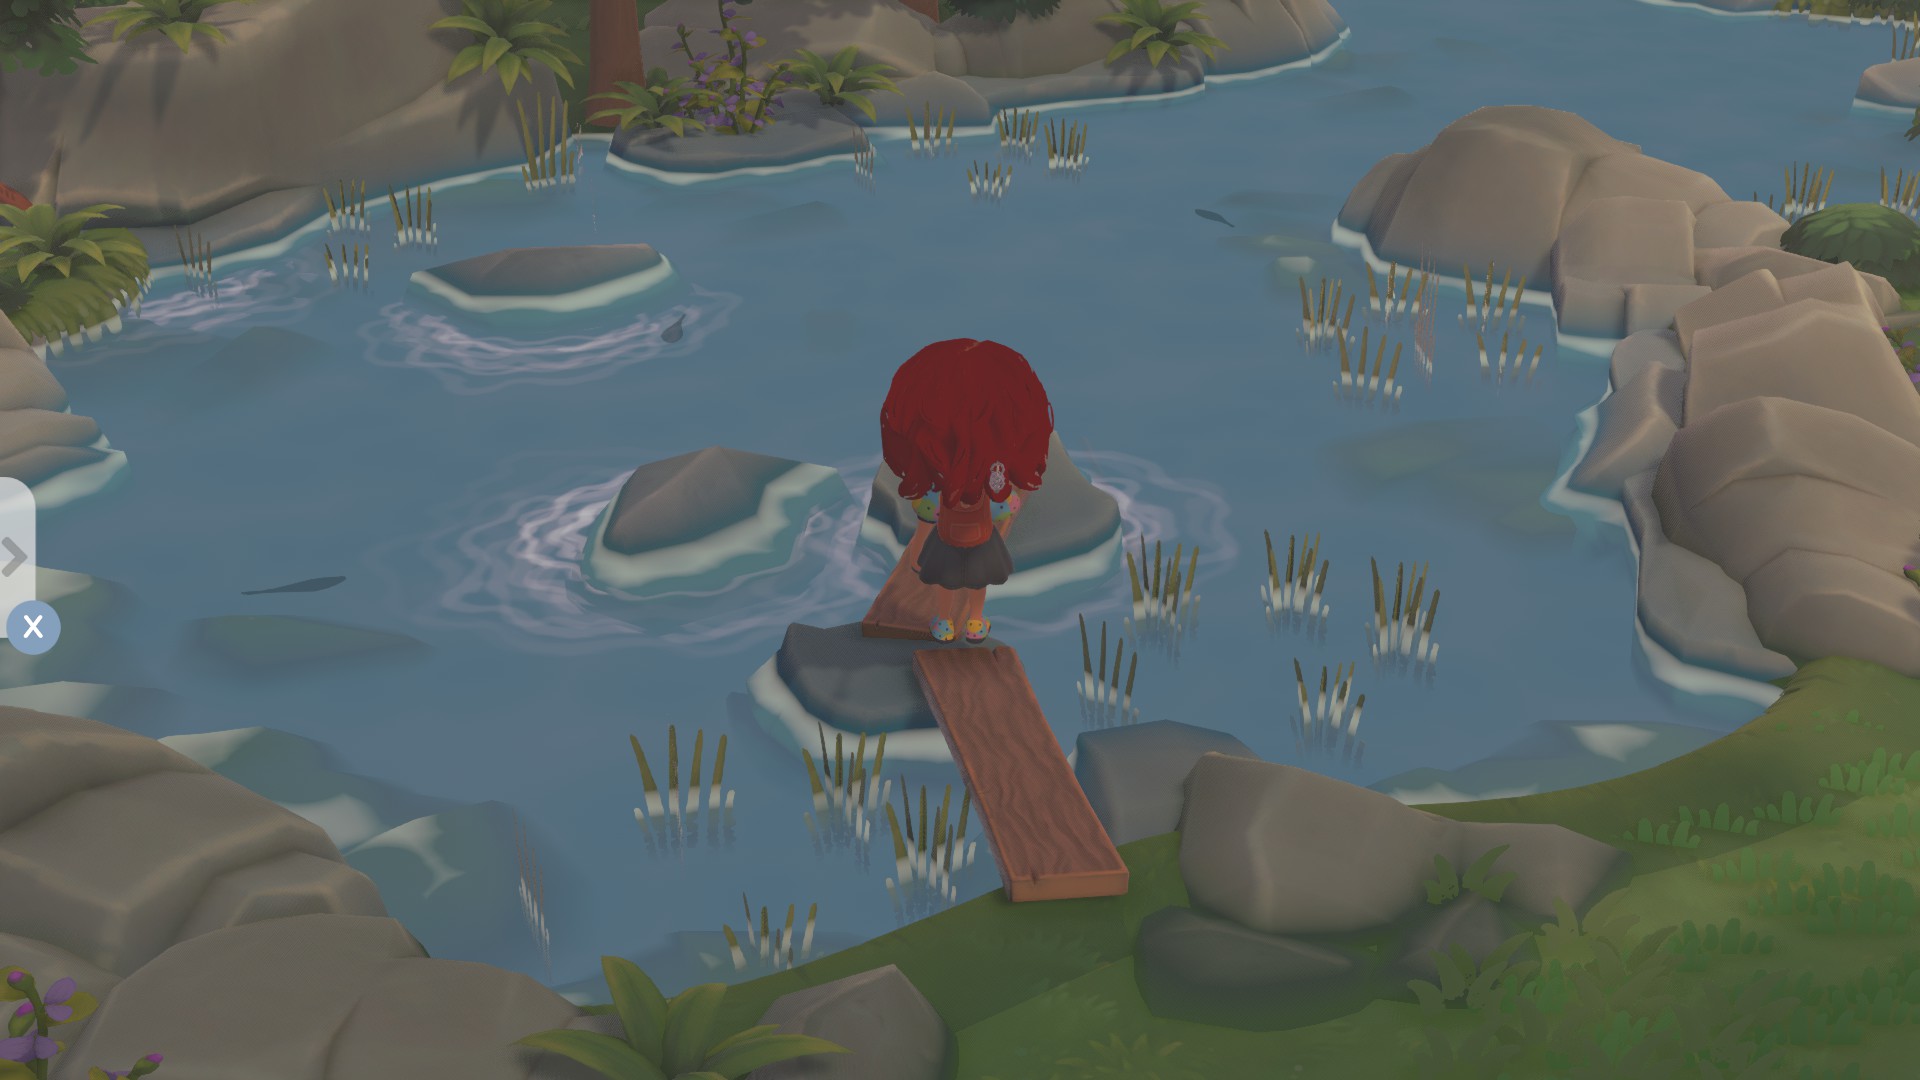
Within your town of Hokko you'll have three areas/points where you can fish. The Pond at the Grove/Pond Area, the River in the Meadow Area and the Sea at the Beach. Each of these areas has a handful off different kinds of fish and you can log these different fish species by catching them and logging them in your journal. Catching fish to fill the journal can help remind you where to get each fish from in time of tournaments and is a fun little challenge.
Example Image
Fishing bait recipies are unlocked within Mayor Merits and are crafted with:
Worm Bait = 2 Worms
Bug Bait = 2 Peacock Butterflies
Fish Gut Bait = 2 Tadpoles
Magic Bait = 2 Peacock Butterflies + 2 Worm + 2 Tadpoles + 2 Brown Petals/Leafs
There are many different areas around Hokko that you can explore but also fish! Certain fish can be caught with certain bait, time, season and weather condition to catch, but also where as well! Below you can find that information!
Note: Price/Worth of the fish can change with each update, if notice any wrong or outdated please comment or let me know, will keep it up to date as much as possible! Also the time is listed chronologically.
Fish Within the Beach Area Fish Species Location Season Time Weather Bait Needed Worth Plaice Ocean/Sea All Seasons 5pm-2pm (17-14) All Types None 13 Gold Coins Bream Ocean/Sea All Seasons 6am-8pm (06-20) All Types None 25 Gold Coins Atlantic Mackrell Ocean/Sea All Seasons 8pm-5pm (20-17) All Types Insect 13 Gold Coins Pink Salmon Ocean/Sea All Seasons 11am-6am (11-06) Sunny Worm 18 Gold Coins Skipjack Tuna Ocean/Sea All Seasons 11am-6am (11-06) All Types Fish 16 Gold Coins Bigeye Trevally Ocean/Sea All Seasons 6am-8pm (06-20) Raining Worm 27 Gold Coins Cod Ocean/Sea Spring, Summer, Autumn 5pm-11am (17-11) All Types None 24 Gold Coins Bass Ocean/Sea Spring, Autumn, Winter 11am-5pm (11-17) & 8pm-6am (20-06) All Types Fish 28 Gold Coins Needlefish Ocean/Sea Spring, Autumn, Winter 6am-5pm (06-17) Raining Insect 45 Gold Coins Wahoo Ocean/Sea Spring, Summer, Autumn 11am-8pm (11-20) Sunny Worm 50 Gold Coins Pompano Ocean/Sea Summer, Autumn, Winter 2pm-6am (14-06) All Types Insect 28 Gold Coins Dogfish Ocean/Sea Autumn, Winter 2pm-8pm (14-20) Raining Insect 77 Gold Coins Lampris Australensis Ocean/Sea Spring, Summer 11am-5pm (11-17) Sunny Fish 77 Gold Coins Atlantic Spadefish Ocean/Sea Spring, Winter 6am-11am (06-11) & 5pm-8pm (17-20) All Types Worm 53 Gold Coins Stingray Ocean/Sea Spring 6am-11am (06-11) Raining Insect 136 Gold Coins Flag Rockfish Ocean/Sea Summer 2pm-5pm (12-17) Sunny Worm 147 Gold Coins
Fish Within the Grove Area Fish Species Location Season Time Weather Bait Needed Worth Tadpole Pond All Seasons 8pm-5pm (20-17) All Types None 13 Gold Coins Sculpin Pond All Seasons 11am-6am (11-06) All Types None 16 Gold Coins Goldfish Pond All Seasons 5pm-2pm (17-14) All Types Worm 13 Gold Coins Rosette Pond All Seasons 2pm-11am (14-11) Sunny Worm 13 Gold Coins Rosey Red Minnow Pond All Seasons 5pm-2pm (17-14) Raining Fish 13 Gold Coins Shubukin Pond All Seasons 6am-8pm (06-20) All Types Fish 25 Gold Coins Black Crappie Pond Summer, Autumn, Winter 5pm-11am (17-11) All Types None 24 Gold Coins Crucian Carp Pond Spring, Summer, Autumn 11am-8pm (11-20) Sunny Worm 50 Gold Coins Algea Eater Pond Summer, Autumn 5pm-11am (17-11) Raining Insect 28 Gold Coins Cichild Pond Spring, Autumn, Winter 6am-5pm (06-17) All Types Insect 38 Gold Coins Koi Fish Pond Spring, Summer, Winter 11am-5pm (11-17) & 8pm-6am (20-06) All Types Worm 28 Gold Coins Rainbow Trout Pond Spring, Summer 11am-5pm (11-17) & 8pm-6am (20-06) Sunny Insect 70 Gold Coins Eel Pond Autumn, Winter 5pm-6am (17-06) Raining Fish 45 Gold Coins Paradise Gourami Pond Summer, Autumn 8pm-11am (20-11) Raining Fish 47 Gold Coins Golden Weather Loach Pond Spring, Summer 6am-11am (06-11) & 5pm-8pm (17-20) All Types Insect 53 Gold Coins Catfish Pond Summer 8pm-6am (20-06) Sunny Worm 106 Gold Coins Sterlet Pond Autumn 6am-11am (06-11) Raining Fish 136 Gold Coins
Fishing II
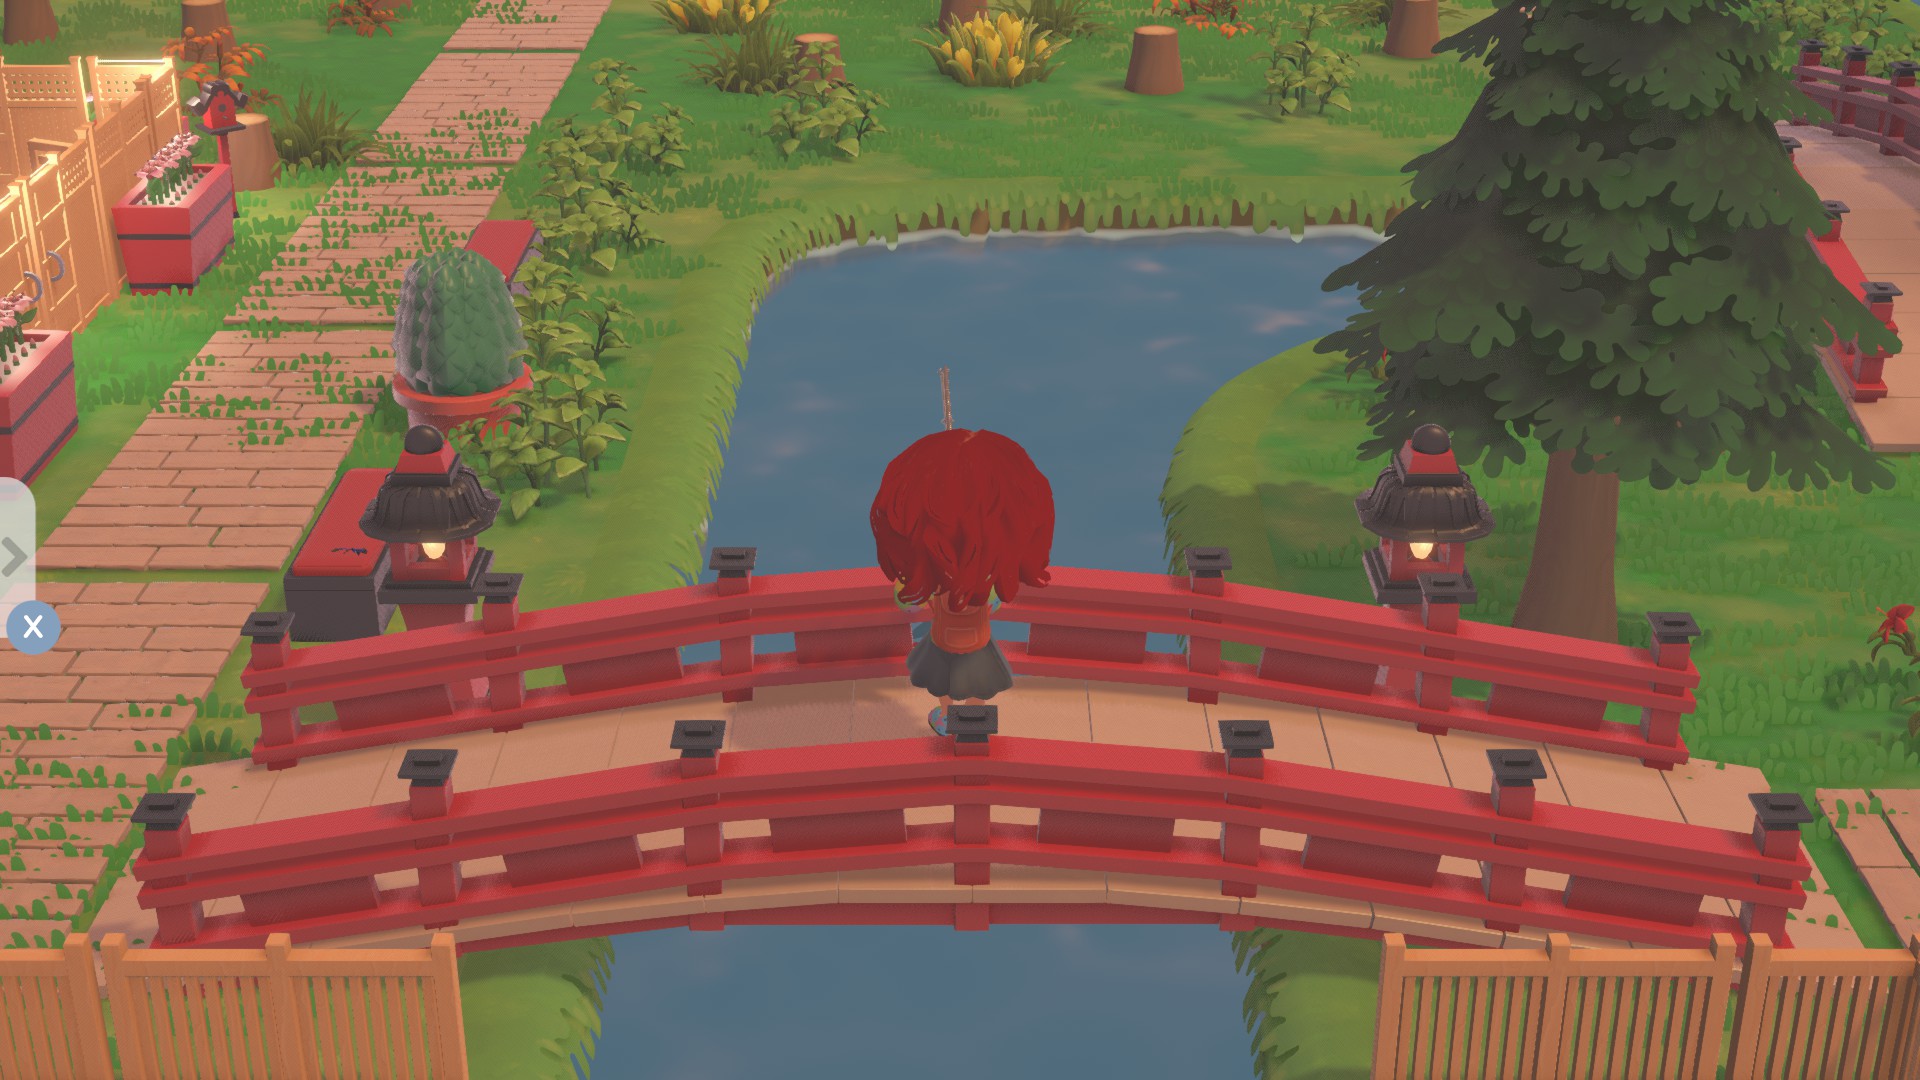
Fish Within the Meadow Area Fish Species Location Season Time Weather Bait Needed Worth Dace River All Seasons 5pm-2pm (17-14) All Types None 13 Gold Coins Bleak River All Seasons 11am-6am (11-06) All Types None 17 Gold Coins Perch River All Seasons 06am-8pm (06-20) All Types None 26 Gold Coins Cherry Barb River All Seasons 06am-8pm (06-20) Raining Worm 35 Gold Coins Oscars River All Seasons 11am-6am (11-06) Sunny Fish 22 Gold Coins Gourami River All Seasons 2pm-11am (14-11) All Types Worm 13 Gold Coins Zander River Spring, Summer, Winter 5pm-11am (17-11) All Types Worm 26 Gold Coins Crap River Spring, Autumn, Winter 6am-5pm (06-17) All Types Insect 35 Gold Coins Boeseman's Rainbowfish River Spring, Autumn, Winter 8pm-2pm (20-14) All Types Insect 26 Gold Coins Discus River Summer, Autumn, Winter 11am-8pm (11-20) Sunny Fish 66 Gold Coins German Blue Ram River Spring, Summer, Winter 2pm-6am (14-06) All Types Insect 30 Gold Coins Pike River Summer, Autumn 2pm-8pm (14-20) Raining Fish 115 Gold Coins Arapaima River Autumn, Winter 6am-2pm (06-14) Raining Insect 104 Gold Coins Electric Blue Hap River Summer, Autumn 2pm-8pm (14-20) Sunny Worm 115 Gold Coins Electric Yellow Lab Cichlid River Spring, Summer 11am-5pm (11-17) All Types Worm 66 Gold Coins Paddlefish River Autumn 2pm-5pm (14-17) Sunny Fish 248 Gold Coins Flowerhorn Cichlid River Winter 11am-2pm (11-14) Raining Insect 248 Gold Coins
Note: Price/Worth of the fish can change with each update, if notice any wrong or outdated please comment or let me know, will keep it up to date as much as possible! Also the time is listed chronologically.
Creator Stores & The City

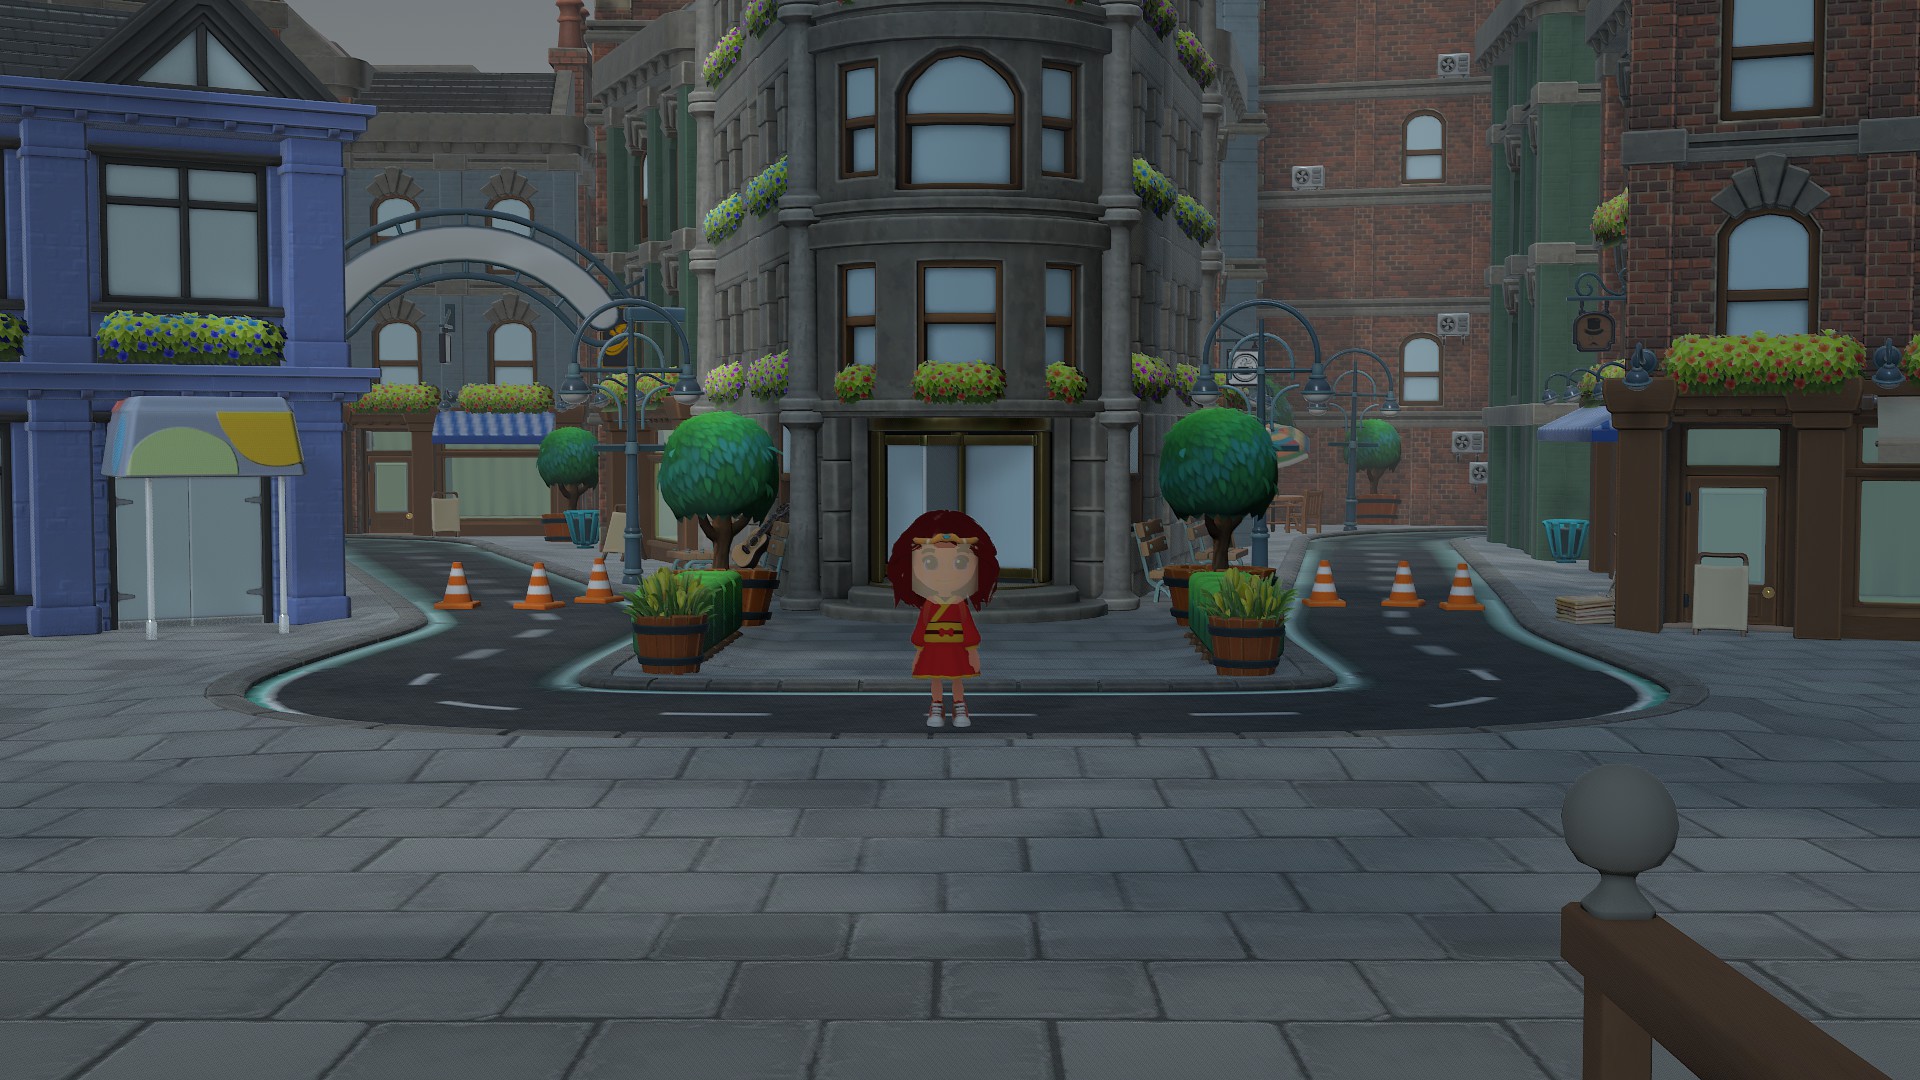
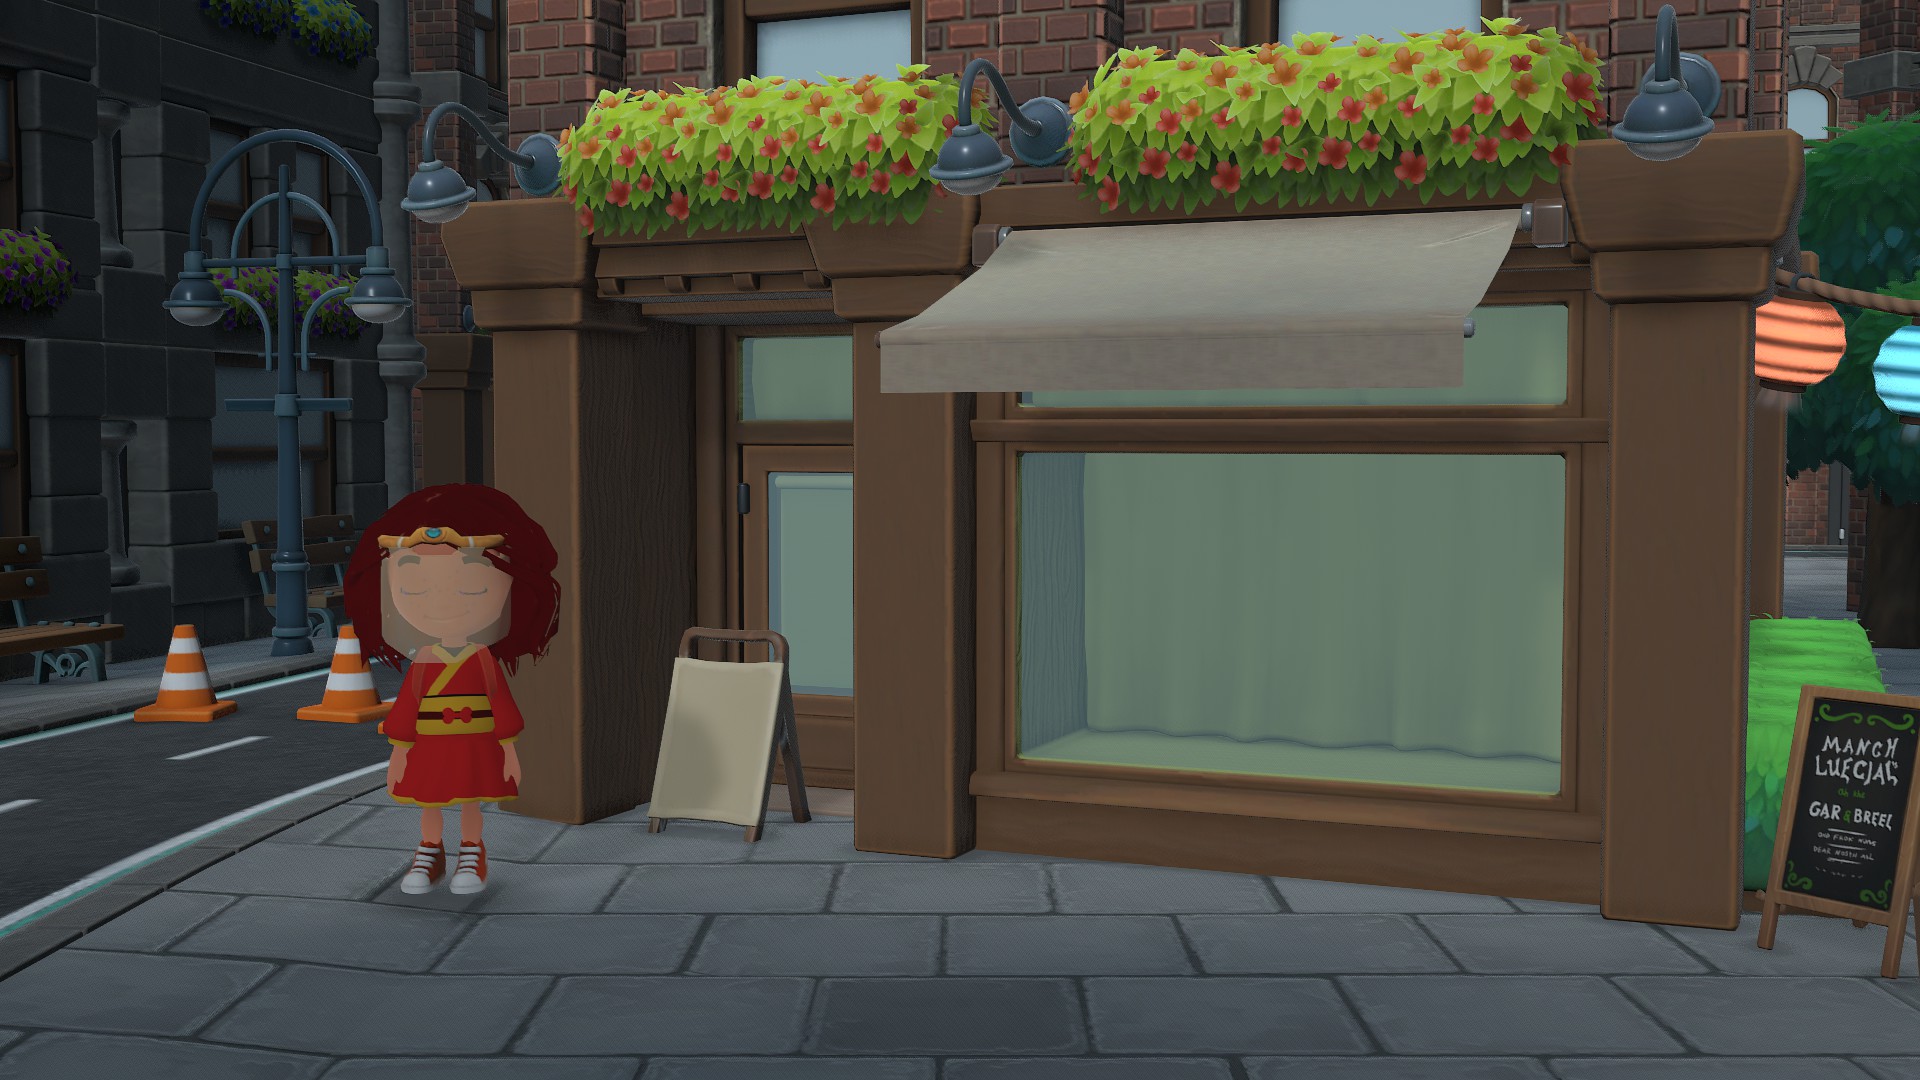
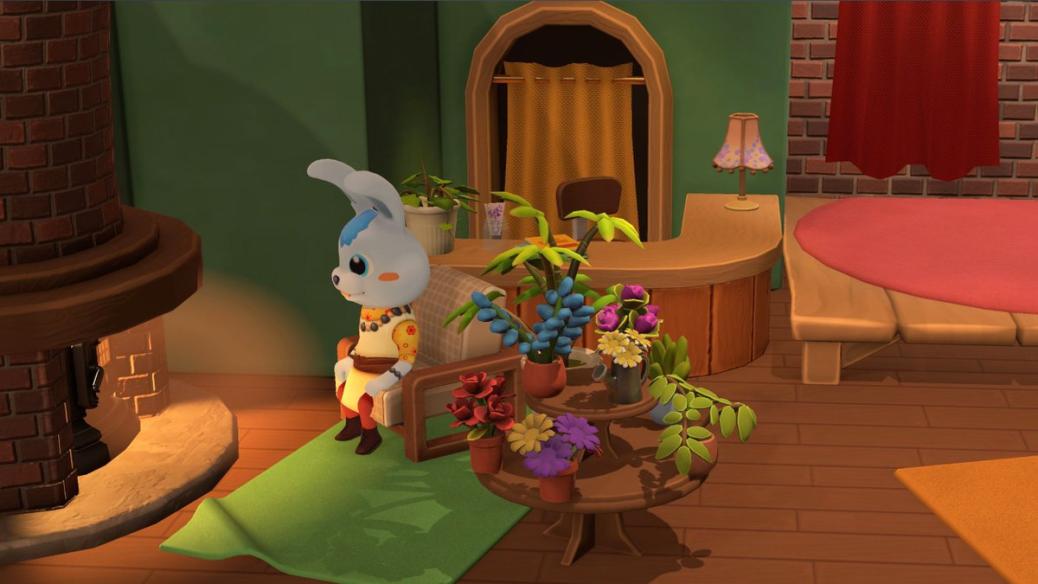
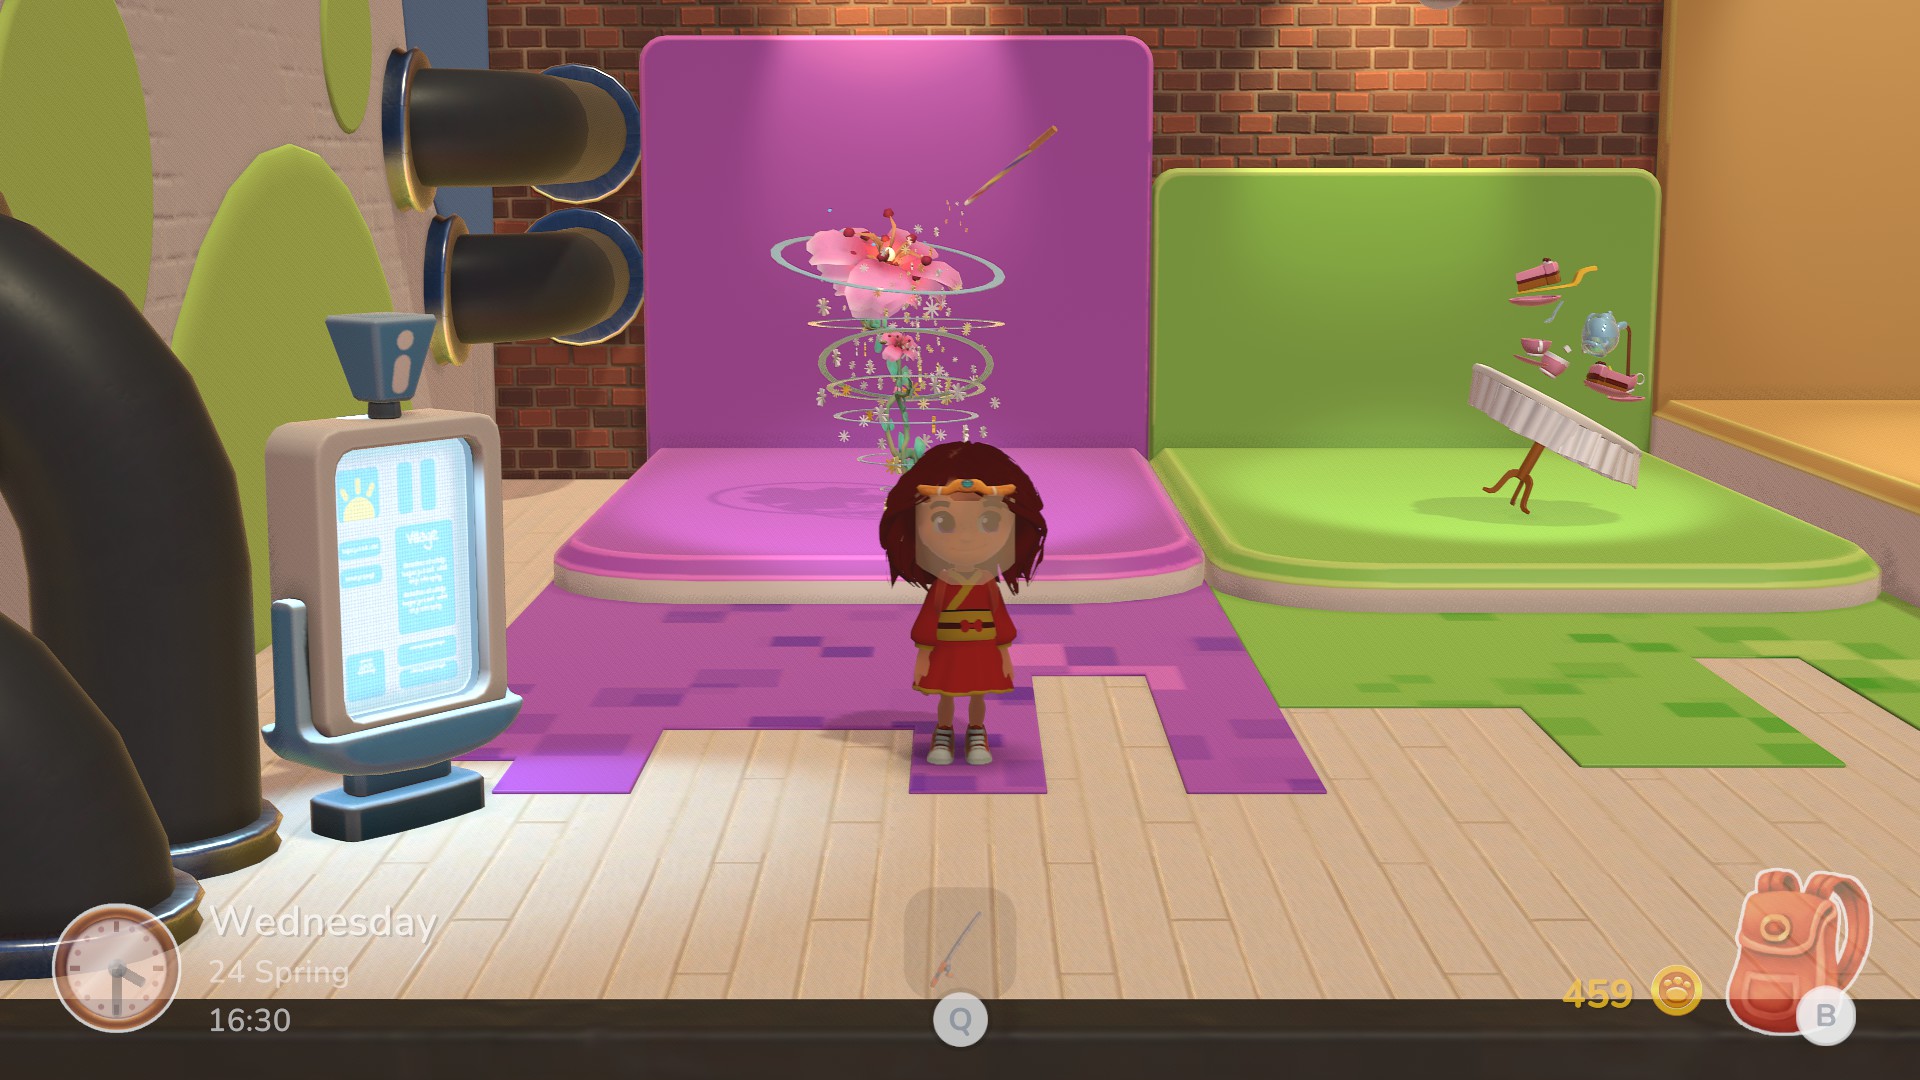
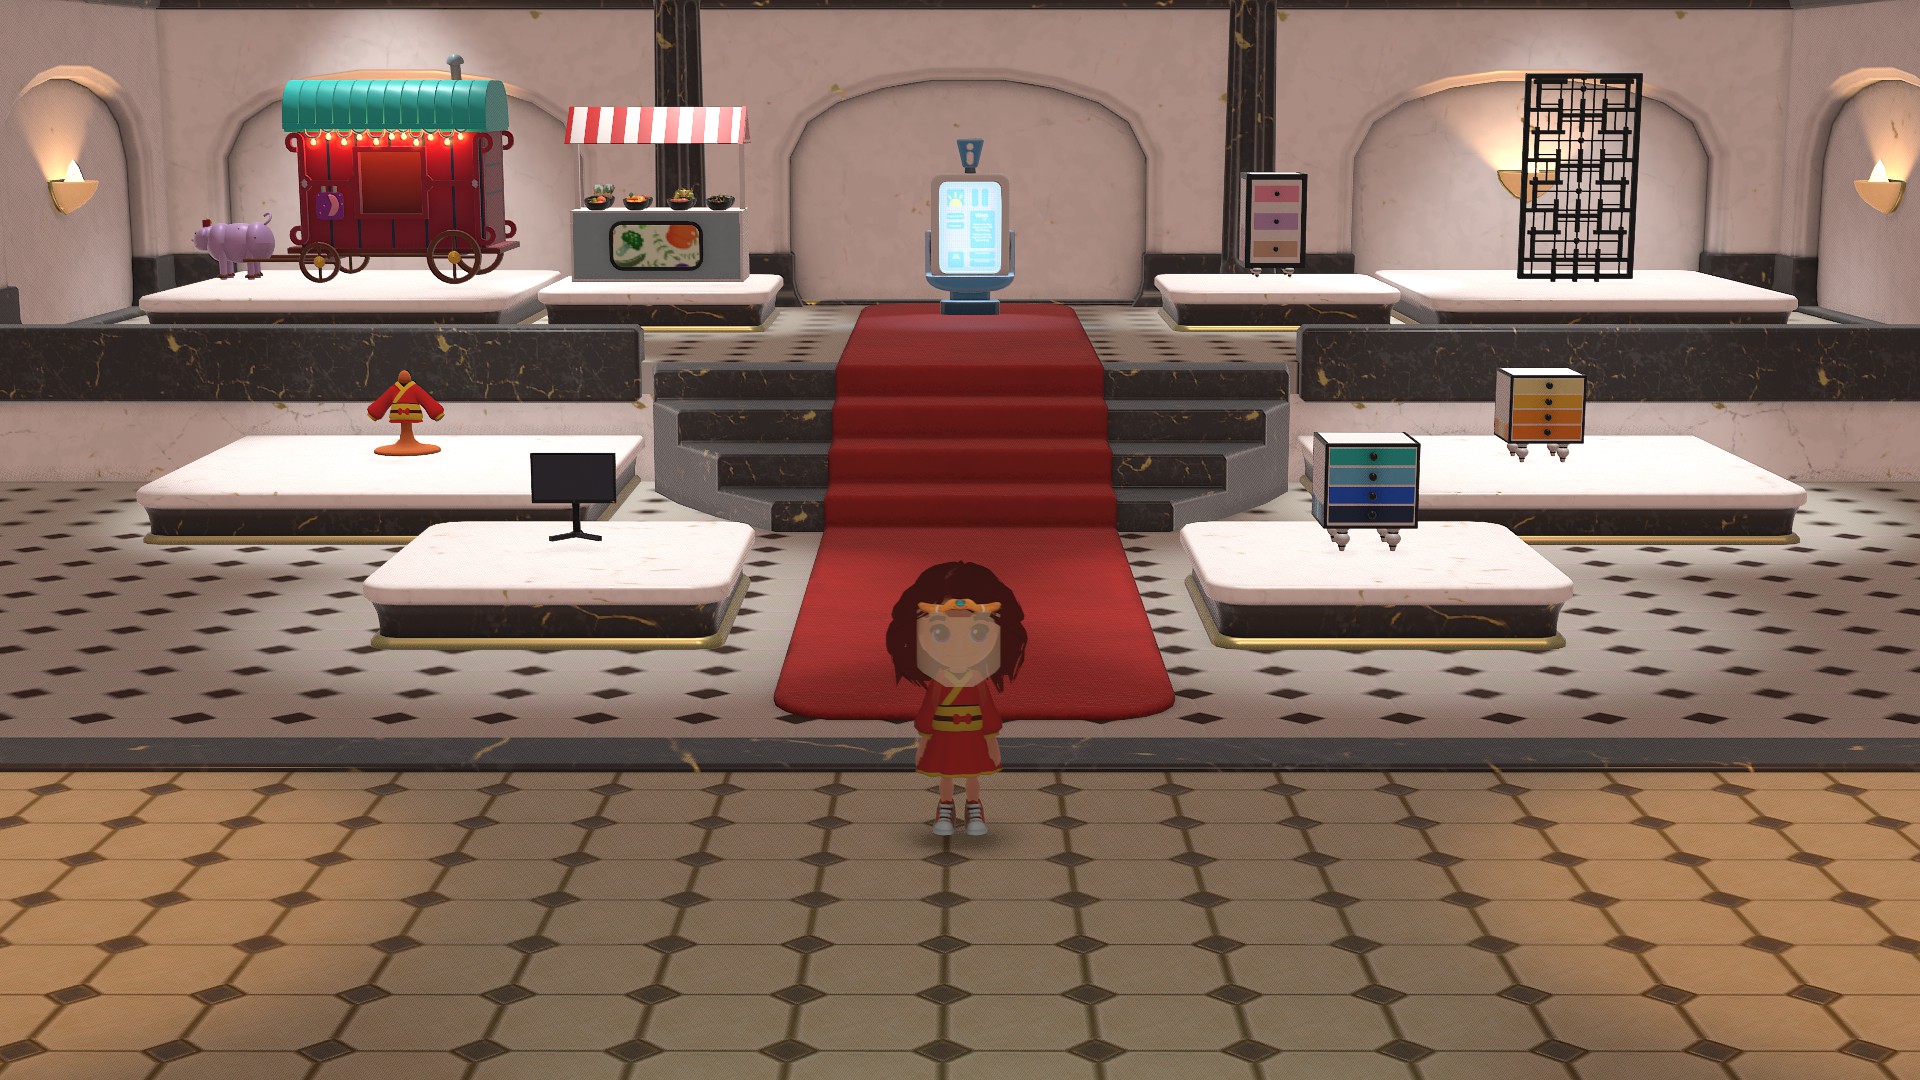
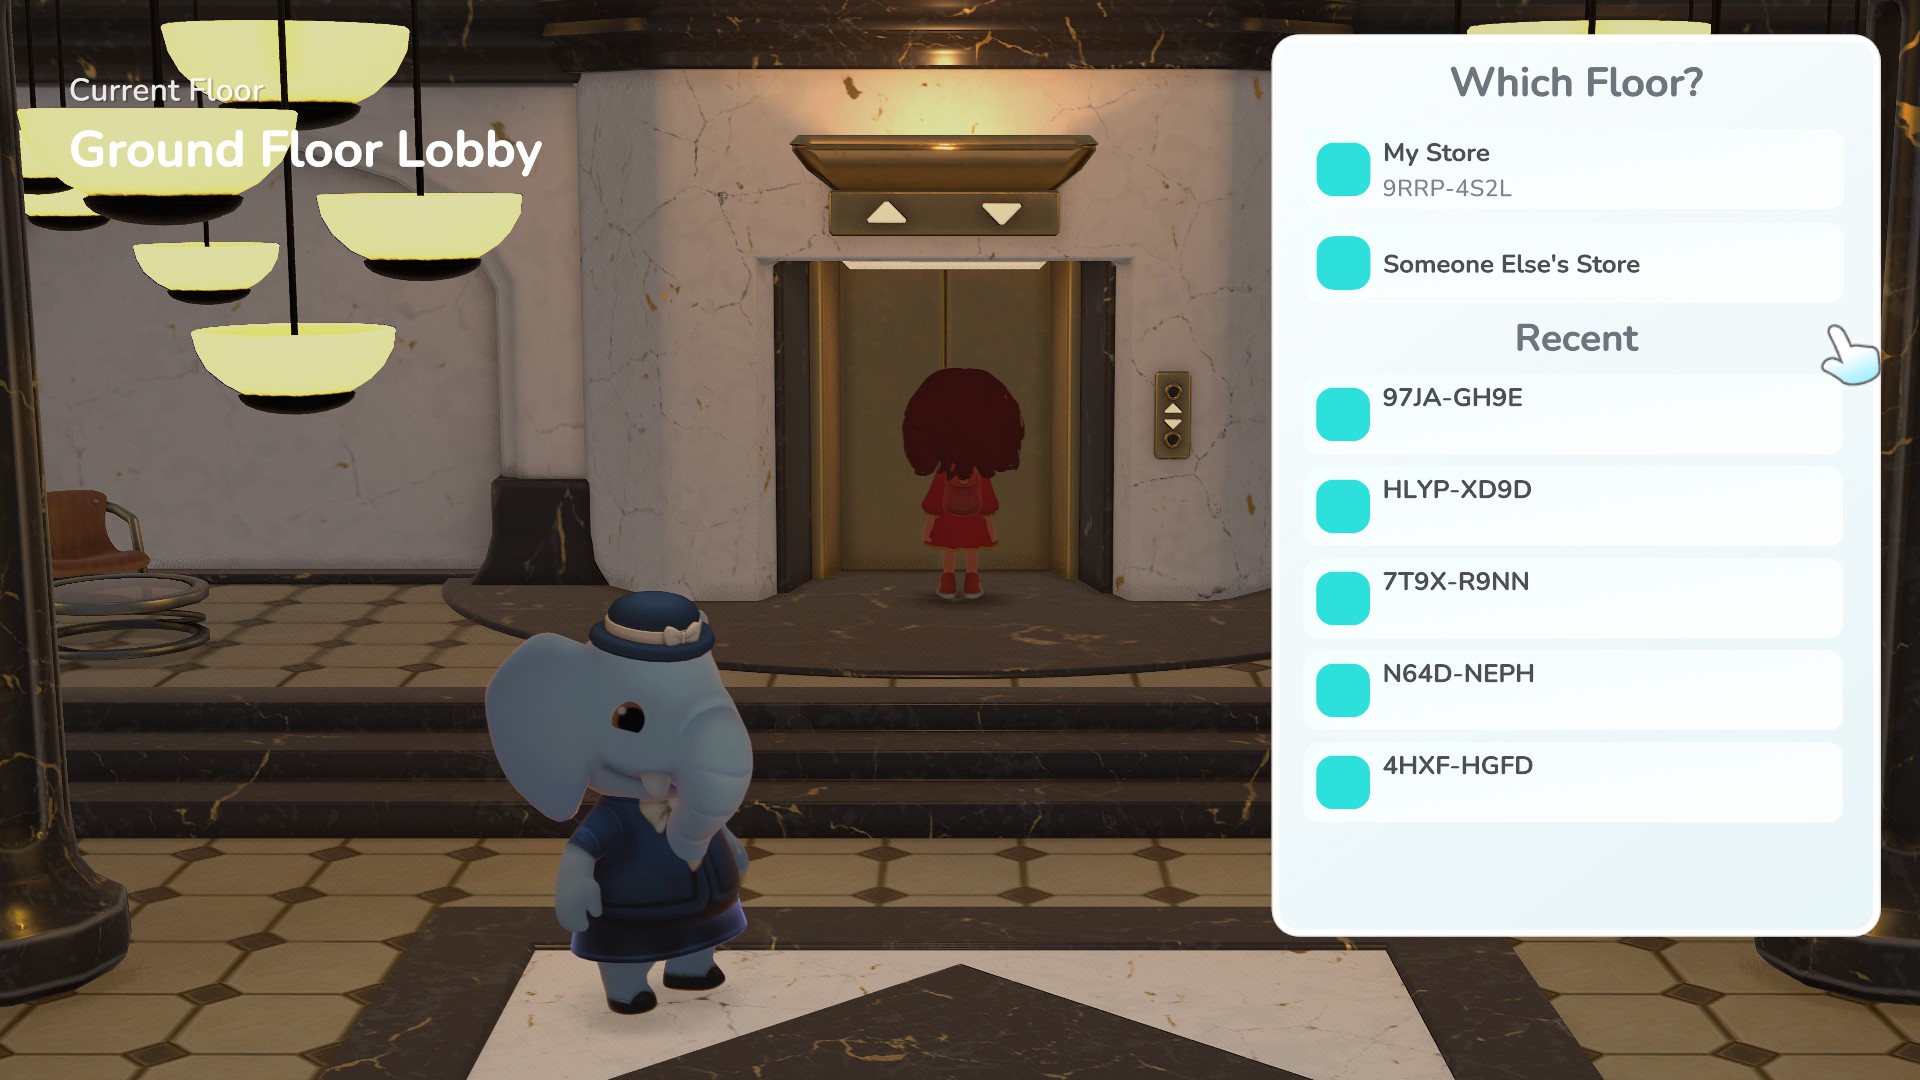
With the Super Shopping update came the usage of the Train Station to head into the City! Which holds three amazing stores and is now the home of the once called Creator Catalogues.
As you can see there are three lovely buildings with the city for those to explore. Let's got through them one by one shall we?
On the far right is the seasonal store. At the time writing/currently the seasonal store is closed.
The store is based off real-time and is all about having special items for events like Halloween and Christmas. Though not is much known about the lovely rabbit NPC within the store until it opens back up we do have this sneak peek of them here:
From what we know their name is Roderick!
To the far left is the Community Store, the place where hosts the Creator Challenges. The creations that are chosen by the community during the voting stage, are displayed within the community store for players to download the voted winners from the weekly challenge. You also come to this building and use the kiosk/tablet on the last of the room to submit your own creations for the theme of the current challenge
Within the store you'll meet the colourful deer Juno, a lovely creative soul who adores the works by the community.
In the centre is the Department building, inside that holds the Creator Stores, (what was once Creator Catalogue on the pc in Moss' store) to upload their own creations into their town for others to download/use within their own towns.
You'll have 8 slots to have your creations displayed but you can at any time return and change your uploaded creation for another whenever you'd like.
You can also use this store to visit other peoples stores and download/use their own creations. As you first enter the building you'll meet Paula the elephant who can answer some questions explaining the building. In this entrance you'll move toward the lift and will have a pop up letting you pick what store to go to. You'll get to pick out of your own store, enter a code for another person's store but it will also save the stores you've visited before to return there at any time you'd like.
Tropical Island I

Under Construction/Updating
Tropical Island II
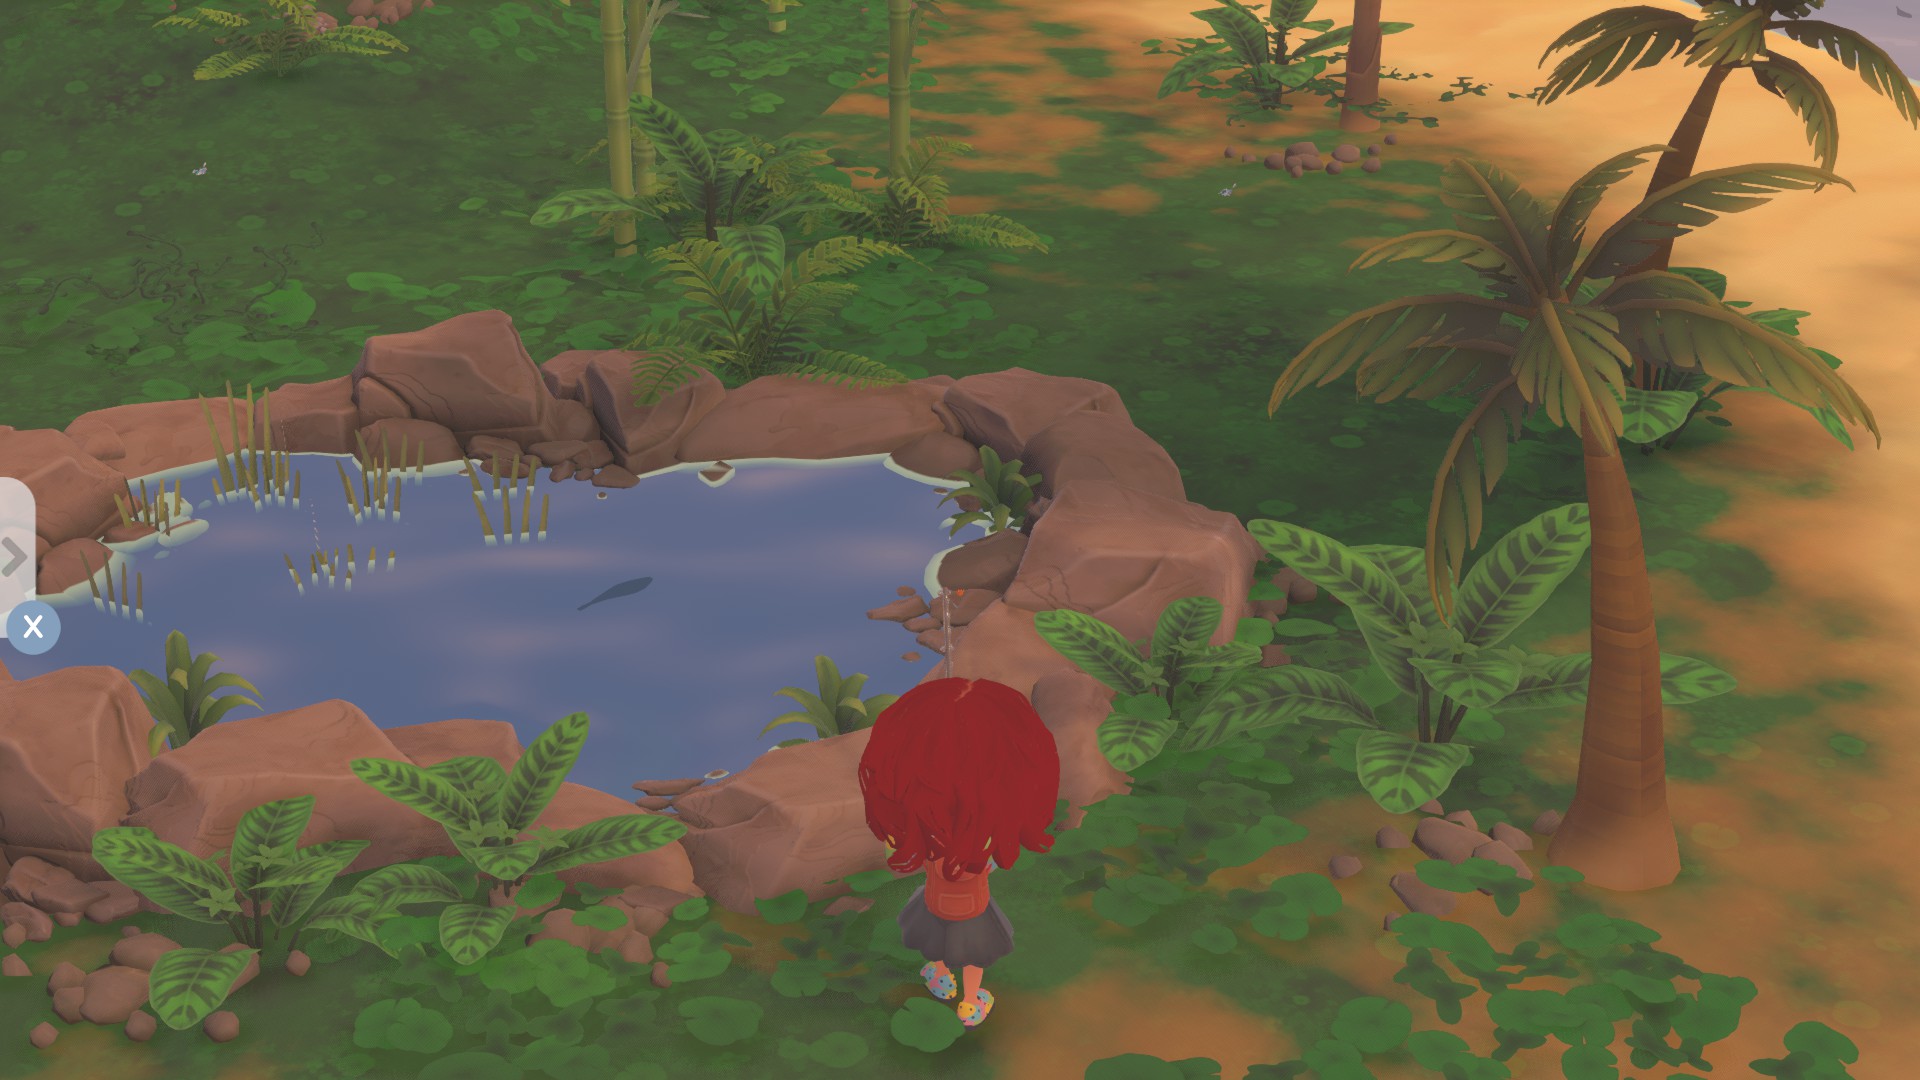
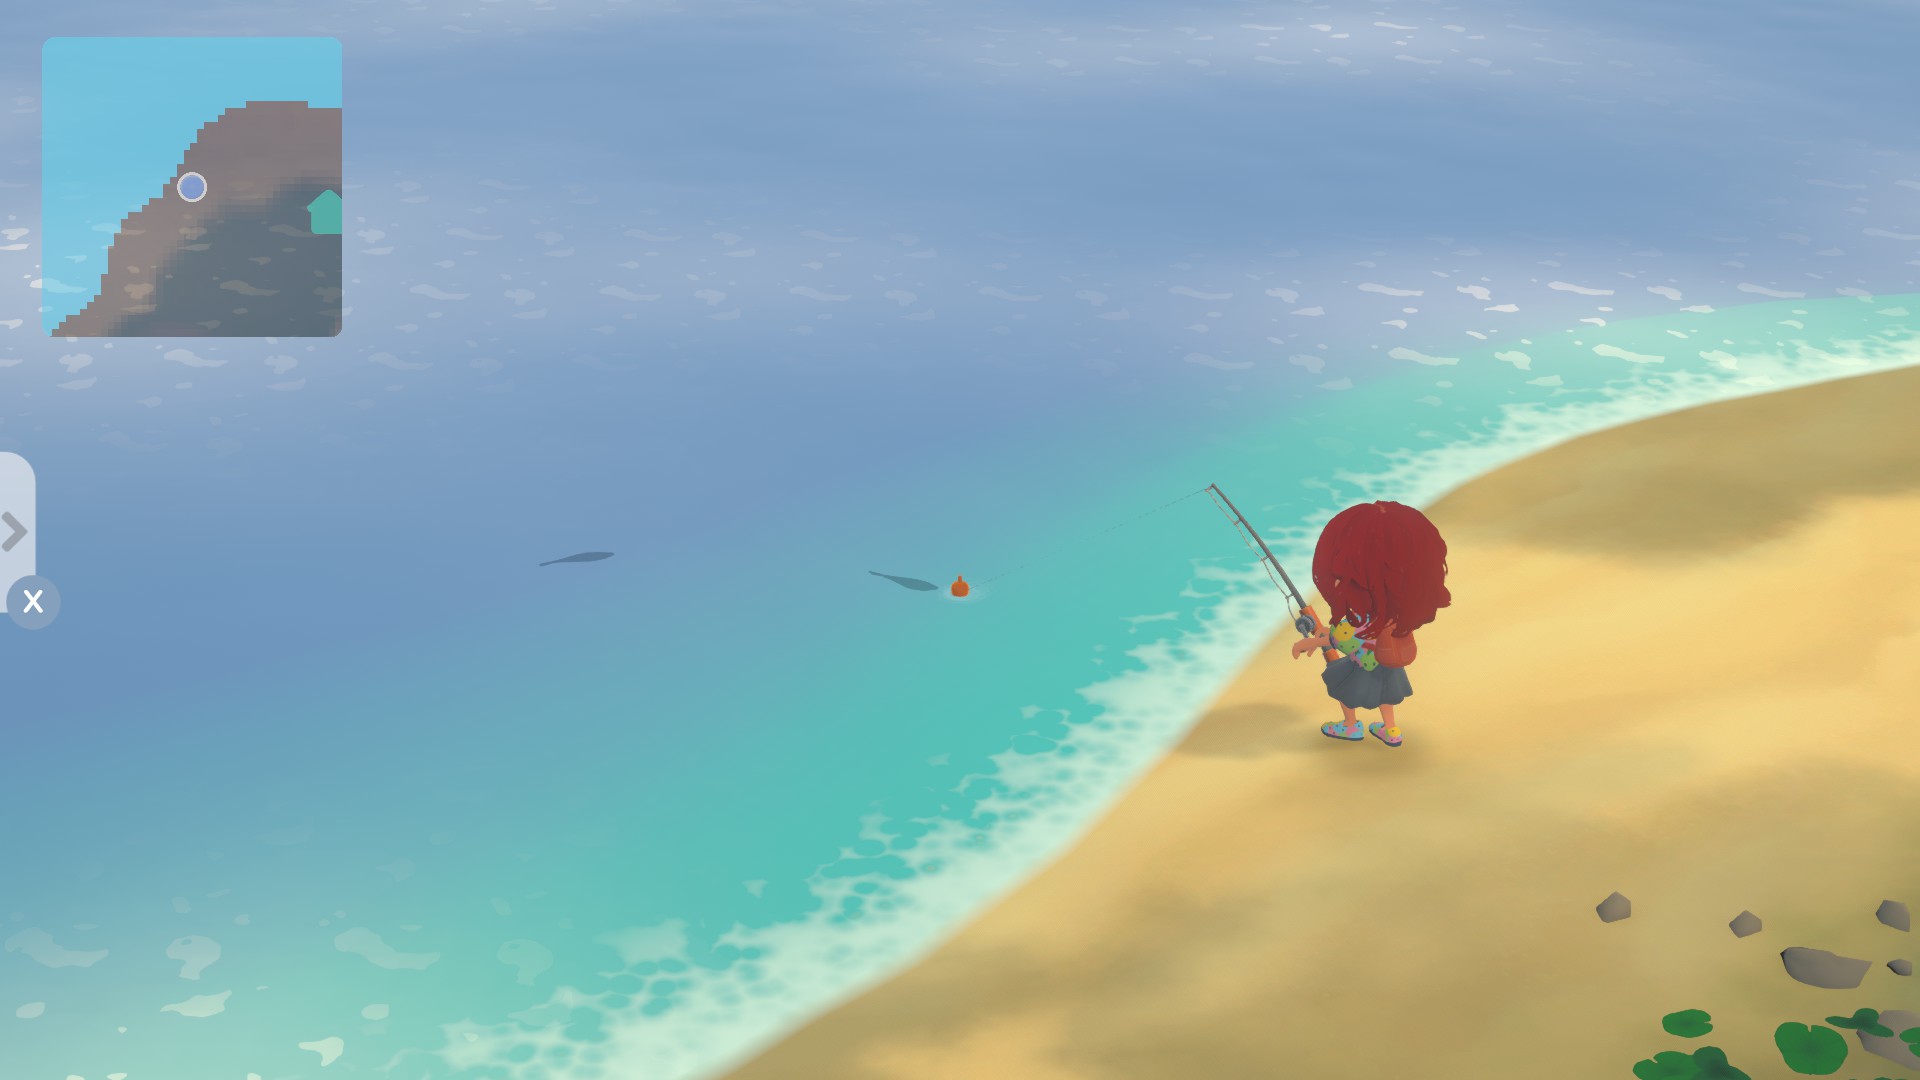
Fish & Bugs!
The new island has brought a handful of new additions of fish/insects to hunt down and collect! Below we will give information with tables on the tropical fish/insects!
Note: Price/Worth of the fish can change with each update, if notice any wrong or outdated please comment or let me know, will keep it up to date as much as possible! Also the time is listed chronologically.
Tropical Pond Fish! Fish Species Location Season Time Weather Bait Needed Worth Piranha Tropical Pond All Seasons 11am-06am (11-06) All Types None 17 Gold Coins Bluegill Tropical Pond All Seasons 6am-5pm (06-17) All Types Insect 42 Gold Coins Zebra Tiger Crayfish Tropical Pond Spring, Summer, Autumn 2pm-6am (14-06) All Types Worm 30 Gold Coins Pacific Tree Frog Tropical Pond Summer, Autumn 2pm-5pm (14-17) All Types Insect 71 Gold Coins
Tropical Ocean/Sea Fish! Fish Species Location Season Time Weather Bait Needed Worth Pelette Surgeon Tropical Ocean/Sea All Seasons 5pm-2pm (17-14) All Types None 25 Gold Coins Great Barracude Tropical Ocean/Sea All Seasons 11am-6am (11-06) All Types None 16 Gold Coins Leopard Flounder Tropical Ocean/Sea All Seasons 5pm-2pm (17-14) All Types Insect 13 Gold Coins Clown Anemonefish Tropical Ocean/Sea Spring, Summer, Autumn 6am-5pm (06-17) All Types Insect 38 Gold Coins Zebra Lionfish Tropical Ocean/Sea Spring, Autumn 2pm-6am (14-06) All Types Worm 28 Gold Coins Hawaiian Sergeant Tropical Ocean/Sea Spring, Summer 8pm-11am (20-11) All Types Worm 37 Gold Coins Longnose Parrotfish Tropical Ocean/Sea Summer, Autumn 5pm-8pm (17-20) All Types Insect 57 Gold Coins Mandarinfish Tropical Ocean/Sea Summer 2pm-5pm (14-17) All Types Worm 95 Gold Coins
Useful Walkthrough

Here in the Hokko Community there are many friendly, talented and just all round wonderful people. Many who love to help out, share their creations and even do tutorial videos. Something I adore and really believe can help players is the up-to-date walkthrough guide made by the user Sieshuku!
Sieshuku is known as Vermilion Phoenix on YouTube is part of the Official Hokko Life Discord.
They've gone out their way to make a wonderful walkthrough to show the ins and outs of the game, to explore the narrative update tutorials and all the way to unlocking mayor merits. Its got great details and is purely fabulous!
Be sure to check out the playlist for their walkthrough by clicking HERE <-
I'll post some of the first videos below so you can get a feel of the creator and vibe of their walkthrough, if enjoy the first episodes of their series please do check out the rest of it.
A big thanks to Sieshuku for allowing me to add their amazing walkthrough to my small Hokko Guide!
Source: https://steamcommunity.com/sharedfiles/filedetails/?id=2791886985
More Hokko Life guilds
- All Guilds
- Achievements guide
- The Hokko Life Guide
- Hokko Life - Anfnger Tipps und Tricks
- Hokko Life - Anfnger Tipps und Tricks
- Oma Gasthaus Rezepte
- .:The Ultimate Hokko Life Help Guide:. (WIP)(Spoilers)
- Jinxi's Builds
- Swapping Tools & Emotes
- .:Simple Guide To Deleting Your Save:.