
About This Guide

This guide is attempting to be a comprehensive compilation of all best practices, techniques, and strategy used to be successful in FTL: Faster Than Light.
This guide is geared toward Hard Mode with Advanced Edition content on unless otherwise noted. It assumes you have a basic knowledge of the mechanics of FTL - a few hours of play should be enough. It generally will not go into detail about statistics of weapons, crew, weapons, Etc. This guide refers to the "secret race" and the Flagship battle, so use discretion if you consider these to be spoilers.
This guide is written mostly from memory based on the experiences I've had in my thousand two thousand three thousand four thousand hours of gameplay. I update it regularly when new techniques are discovered or records are broken. Let me know if you see something incorrect, or if you'd like me to add more detail about a certain topic.
Thanks for reading, and I hope you find it helpful!
All screenshots are mine unless otherwise noted.
General Upgrade Strategy
In every encounter for the entire run, you want to base all of your decisions off of the idea that you need to maximize total number of jumps and collected scrap while minimizing hull damage. Part of this challenge is to not waste scrap by spending it on the right upgrades at the right time.
The following guidelines are generally how you'll want to time your upgrades for an average run. But be flexible and use what you're given! If you find good weapons, focus a little more on those rather than defense. If you don't find much in the way of offense, look for ways to optimize your defense, so you take less damage as you deal with your enemies. Just be sure to keep a little scrap onhand for essential system/weapon purchases.
Sector 1
With most ships, your first upgrade should be level two shields. This will pay for itself quickly in repair costs, and it will keep your essential systems safer. You generally won't have to buy reactor upgrades to power them - rob other systems of power till you can afford more reactor power. If you like, you can almost always find a ship that can't break level two shields - this will allow you to get experience for your pilot and engines crewmembers - possibly shields and weapons as well. This will yield 10% extra evasion.
Generally, you'll want to put a little more into engines right after upgrading shields. Level 3-4 engines is a good goal. If you have a Defense Drone I, you don't have to put quite as much into engines because you won't be relying on evasion alone to avoid missile damage.
After the essential upgrades, you'll want to start collecting some spare scrap. At this point, you'll find that around 65-80 scrap is a good amount to have around in case a store has something useful. Try not to save much more than that though because it could be better utilized on investing in defensive ship upgrades.
Early Sectors: 2-4
This is where strategy starts to diverge based on what you've randomly been given, and what useful items you've found in stores. If you have good weapons, start putting more scrap into weapon system upgrades. If you have a decent boarding team, focus on defense and being able to take out their medbay/clone bay. If you have a Defense Drone I, put more into shields. And again, don't forget to keep some spare scrap onhand for stores.
You might consider purchasing an optional system around this time to compliment your loadout. If you have a decent boarding team and some way to damage their medbay/clone bay, consider mind control. If you have only average weapons and a couple Mantis or Rockmen, consider teleporters. No good boarding crew and average weapons? Drone Control for a Defense Drone I. Cloaking is usually too expensive to buy until later sectors. And when in doubt, hacking is always useful considering the cost of the system.
Only upgrade doors if your crew isn't good at fighting or if you're very short on crew. If you have a spare crewmember to man them, wait a few sectors to upgrade. Most fires and boarders can be handled with good suffocation techniques. Level two doors don't help that much, and the scrap can usually be spent on better things. I usually keep my fourth crewmember on doors at the beginning of each jump. If the other ship doesn't board, I move him to shields.
Your weapons should be able to reliably deal with level two shields at the start of these sectors, and level three by the end.
Late Sectors: 5-7Generally, this is more of the same. Build on what you've been given.
You should try to have level three shields around sector four or a the latest five. You should have level five engines soon after that (especially if you like to use each sector to the fullest and fight the rebels at the end for that one last jump - it really helps to get you out of there in a hurry).
You should also have an optional system by now. Preferably two by the end of these sectors.
When your ship starts to feel powerful enough and you have the scrap to spare, you should upgrade all of your level one systems and subsystems to level two. It doesn't take that much scrap, and it will give you a bit of a damage buffer. You'll have more time to deal with fires and boarders before they destroy the system. These damage buffers are usually not essential though.
Your weapons should be able to reliably deal with level three shields at the start of these sectors, and level four by the end.
The Final Showdown: Sector 8
When you fight the Flagship, you should at the bare minimum have level three shields and level five engines. You should also have a couple of optional systems of some sort to make the battle easier. Your weapons should be able to reliably deal with four layers of shields.
Sector Choice
Profitability should generally be the driving factor when choosing a sector. Reddit user mekloz did a very thorough study about overall average sector rewards. Please check it out, but the summary is: civilian and rebel sectors have the highest rewards followed closely by Lanius and Zoltan. Uncharted sectors are definitely the worst. This was done without Long-Range Scanners though, so slug sectors are undervalued a bit.
Red sectors generally have more hostile encounters. If you're low on weapons or hull, green sectors are less hazardous to your health. They'll also have more beacons with free rewards or weapons, but also more empty beacons to make up for it. That said, Zoltan sectors can be as difficult as red sectors. If you have a lot of scrap to spend or you desperately need a store for other reasons, prioritize sectors that have more stores. Engi, Slug, and Civilian sectors have the most stores.
You should usually choose a homeworlds/stronghold sector over other sectors. They have a unique event with substantially higher rewards - the ship unlock quests. Know what you need for the quest before making this call. For example, the Mantis Homeworlds and Engi Homeworlds have very different requirements and rewards. If you have teleporters, upgrade your medbay/clone bay and go Mantis Homeworlds. If you don't, but have an Engi crew, go Engi Homeworlds. All this said, I never go out of my way to choose Slug Homeworlds because the ship unlock quest requires forfeiting rewards - its generally not profitable.
If you have the Long-Range Scanners augment, slug sectors can be very profitable. They allow you to seek out encounters, and you get a couple of extra jumps because the nebula slows down the rebel fleet. If you have slug crew, a couple Zoltan crewmembers or a Backup Battery, you should also consider slug sectors. Those make you much more resistant to common events and ion storms.
Also, when choosing your sector, look at the entire path rather than just the next sector. If one path funnels you into several other sectors that you don't like, take another path.
Specific Sector Types
Know the benefits and hazards of each sector and how your ship will deal with them:
Rock sectors have many asteroid belts and sun encounters, so they may be hard on your ship if you're low on shields. Their ships tend to have missiles more often than your average ship. Their ship layouts are particularly susceptible to beam and flak weapons.
Civilian sectors are your "generic" friendly sector. You'll encounter a fair amount of mercenaries and slavers. They'll usually have a few nebula beacons. Sector one is always a civilian sector. They have lots of stores if you need equipment. I will almost always prioritize this sector type when choosing.
Slug sectors are nebula sectors with lots of dishonest slugs, ion storms, and mind control. Sensors never work in nebula. If you encounter a Slug sector beyond four or five, you should consider upgrading your oxygen to level two because they have events that hack it. Rock crew have a few fairly common blue text events in this sector type. If you have a teleporter, there is a common event that can get free crew. Slugs will often plead for their lives with an unknown reward. Most of the time this reward is less beneficial than just destroying their ship. They also have lots of stores if you need equipment.
Nebula sectors are similar to Slug sectors but with less Slugs and fewer stores. These have the lowest scrap rewards. I never choose this sector type if I have an option.
Zoltan sectors have lots of Super Shields, so be sure you can remove those quickly before choosing this sector. There will also be several nebula beacons in this sector. Otherwise, this is a very profitable sector choice.
Engi sectors have many defense drones, so be careful if you're relying on missiles. Engi are very weak to boarding. This sector has a lot of free rewards including drones and weapons. They also have a lot of stores, so this is a great sector to choose if you're struggling. Engi crew have several beneficial blue text events in these sectors.
Mantis sectors have lots of boarding events, so be careful if you have a weak crew. You should usually try to start an encounter with one of your crew manning the door system, and maybe consider upgrading doors if your crew is very weak. It may seem counter intuitive, but Mantis ships are also more susceptible to boarding. Mantis sectors have very poor scrap rewards overall.
Abandoned sectors have many blue text events for your Lanius crewmember. If you're focused on boarding and you have a crew that happens to breathe oxygen, you should avoid these sectors (Crystal boarding can still be successful here if you're careful). Early (sector 2-4) abandoned sectors are usually very easy, and late abandoned sectors are usually very hard because the large Lanius ship has a lot of systems and weapons. Otherwise, this is above average with its scrap rewards.
Rebel Controlled sectors are your "generic" hostile sector. They aren't particularly weak nor strong against any type of offense. They have some boarding events. There are also a fair amount of airless auto-scouts in these sectors. This is the sector type is almost as profitable as civilian sectors, but its generally a little more difficult.
Pirate sectors are not a bad choice if you need crew - they have diverse crews and a good amount of slavers and distress beacons. But this sector has below average scrap rewards.
You'll basically always want to go to the Crystal Sector if you have a chance. Its a full extra sector of unique dangers and rewards!
Individual Sector Routing
At the beginning of each sector, you need a basic plan for a route. Familiarize yourself with the sector layout, and make sure that you don't run into any dead ends. Many runs have been cut short because the sector path wasn't planned. The rebel fleet can be extremely unforgiving - especially in early sectors.
Generally speaking, you'll want to plan your route so you can pass beside as many beacons as possible. You'll want to do this so you don't miss any stores or distress beacons. I usually accomplish this by generally making an "S" shape through the sector. Exploring like this is even more beneficial when you have Long-Range Scanners, so you know exactly what you're up against and what you want to avoid.
You'll also want to consider "diving" into the rebel fleet. It can be very dangerous, so carefully weigh out the costs and benefits. In the first couple sectors, you'll almost never want to engage the rebel fleet. Your low evasion and very slow FTL charge rate will be working against you. In late sectors, you'll almost always want to dive. The scrap rewards are much higher, and the danger will be lower. If you have level 6 engines, or level 4-5 engines with cloaking, you can almost always make it out of those without damage. If you're planning on diving (especially if you know you're going to have more than one rebel fleet encounter), its usually a good idea to repair your ship a little higher than you normally do to give yourself a little damage buffer.
Note: Make sure that you have the option enabled that shows which beacons you can jump to when you hover. It will save you from a lot of nasty surprises.
Races And Crew Positioning [1]
Some races are better suited for certain roles because of their attributes, and others are more desirable for their blue text events. Having a good mix of races and keeping them in the right positions could mean victory.
Try to get a balance of skills and abilities. If you don't have sensors, Slugs are very valuable. If your crew is mostly Engi or Zoltan, try to get a Mantis or two for protection. If you have mostly Rock crew, try to get a Slug, Engi, or Mantis to deal with issues quickly. Try to not leave yourself open to one type of threat (fires, boarders, damaged systems, etc.)
Generally, you should man your systems in the following priority: Piloting, Engines, Weapons, Shields, Doors, Sensors. There are tons of exceptions to this which depend on the scenario. If you don't have weapons, obviously, you shouldn't be manning them. If you have only four crew, you may want to put your fourth crewmember on doors or sensors at the beginning of each jump till you assess the threat. If the enemy can't break your shields and has no missiles or bombs, you don't even need a pilot. And so on.
There are buttons under the crew menu on the left to save your current crew positions and to return them to those positions. You should return your crew to their ideal positions before every jump. You can also change the names of your crew at any point, so feel free to name them something more convenient or memorable.
Blue Text
Generally, you'll want at least one Engi and one Rock crewmember. They each have several very common blue text events that have great rewards. Most other races don't have many common blue text events other than Lanius - they have a bunch of them, but they're mostly in the Abandoned sectors.
Slugs have a few blue text events, but they're less common, and they're focused on nebula sectors. The rest of the races only have one or two blue text events, and they're generally not worth factoring in when you're considering what crew to get or keep.
Captain Slug at the Helm
Some races are better equipped to handle certain tasks than others, so who you leave to man each system could mean the victory. Humans aren't bad at anything (and they learn skills slightly faster), so when in doubt, use a Human. However, they're not good at anything either, so there are generally better options.
Often, Rocks are the best pilots. They have 150 health, so they can put up with some weapons fire or hand to hand combat without needing to flee to the medbay. Also, they don't take fire damage. Slugs are excellent pilots as well because they're resistant to mind control. If you have your own mind control system, you can counter enemy mind control. In that case, there's little benefit in having a Slug pilot. Lanius are very good here because fires will be extinguished quickly, breaches aren't a threat, and boarders suffocate. Engis aren't the worst choice because they're good at repairing and putting out fires. However, they'll usually need other crew nearby to help them fend off boarders.
Engines are similar in requirements to piloting, so the same crew are usually desirable. Rocks and Engis are very good here. If engines are mind controlled, you lose far less evasion than piloting, so Slugs are still useful, but not as desirable here. Zoltans are an excellent choice for engines because of the consistent source of power that they supply. Also, if your engines should be completely offline from ion damage, you'll still have one power from the Zoltan, so you'll still have a little evasion.
Weapons can be safely manned by most races. Mantis aren't generally desired because their combat skills are often required elsewhere, and their repair speed is terrible. Zoltans can be good here, but be careful when you have them leave the room. If you don't have any spare reactor power, they'll remove power from your leftmost weapon, losing its charge.
Shields can also be manned by most races, but Engis are generally the best. Shields need to be repaired very quickly when they're damaged. Also, shields don't matter as much if they're not manned, so the Engi can run to help other crew repair with little negative effect. Again, be careful if you have Zoltans manning shields - if you remove them when you don't have spare reactor power, you'll lose a layer of shields. On the other hand, if you have multiple Zoltan in the shield room, your shields will be ion resistant. Two Zoltans will give you one level of shields that cannot be removed by ions, and four Zoltans will give you two levels. (See screenshot) Its possible to have three or even four levels of ion-resistant shields if you have Zoltans to spare and they're walking back and forth through the room, but this is almost never practical.
Doors can be manned by whichever race is handy. Generally, I like to put what I call my roaming Engi on doors. He's the first one that will scramble to deal with breaches or system damage. I choose Engi because doors are a good way to handle boarders, and Engi are weak against boarders.
Sensors can also be manned by whichever race is handy. But if I have a spare Mantis, he usually gets the spot. Sometimes you just need a peek into the enemy ship. The Engi can maintain door control while the Mantis deals with boarding threats. Leaving a Mantis on sensors as a starting position will allow you to do this.
Non-system placement considerations
Any extra crewmembers should be placed in empty rooms according to the weaknesses in the placement of your other crew. If you have weak crew in one location of your ship, place a Mantis in an empty room nearby. If you have your slow Rocks centralized on systems in another part of your ship, put a faster crew nearby to help with repairs.
They should be placed in empty rooms to distribute damage taken. For example, if a breach missile hits a room with both of your Engis and ignites a fire, they'll both need to be removed soon for healing. But if one Engi is nearby and doesn't take the damage, he can easily extinguish the fire because he started at full health.
Lanius and Rock are also good at ship-specific isolated locations like the forward weapon bays on Federation A and C, or the engines of Mantis C. Lanius are especially well suited for these isolated locations because other crew won't need to walk through the airless rooms.
During longer battles, your crew will often take non-trivial amounts of damage. Depending on threats, you may want to rotate crew out for healing as soon as they're damaged - you'll definitely want to do this with Zoltans. You should never leave crew with low health at their post because there are many sources of damage that can't always be mitigated.
Never leave crew in the medbay as their default position. Hacking can quickly kill them if you're not careful.
See the nearby screenshot for some crew placement working in practice. The Lanius gunner is by himself in the nose of the ship. The Rock pilot doesn't need to move from his post. The Mantis was recently fighting, but he's manning doors because the boarding crew is being suffocated, and the four idle crew are about to race back to engines to make some quick repairs. All the while, these crew have been rotated out to the medbay to keep their health high.
Races And Crew Positioning [2]
Crew Purchasing and Slavers
Generally, you should try to get a total of at least five or six crewmembers, but obviously all eight is ideal. You usually shouldn't be purchasing crew from stores unless you're really low on crew, or you want to buy a single engi (for his utility and the many blue text events). If you are boarding and you have a decent boarding crew, you should almost never worry about purchasing crewmembers because you'll usually be granted several randomly through standard boarding rewards. If you do end up purchasing crew, be sure to check what skills they have first.
Slavers are a great source of crew - especially the ones in early sectors. In these sectors, a crewmember is a relatively valuable reward. You might only get 20 scrap for destroying the ship, but they might offer you a free crewmember worth 50 scrap. So if you're low on crew, or it fills a weakness (combat or blue text) you should consider taking it. That said, if you get a crew kill, you have a good chance of getting a slave regardless. Later on, slaver crew rewards are much less valuable relatively speaking. Many times you'll receive at least as much value in scrap from destroying the ship. If you have a full or nearly full crew, and you already have the race they're offering, you may want to pass on the offer of a free slave.
A great method of getting and keeping crew is upgrading your medbay to level two. There are several blue text events that allow you to get a free crewmember, and others that allow you to take advantage of situations without risking their lives. Most life saving clone bay events are available with a level one clone bay.
And as always, know which events are safe for your crew's lives and which aren't.
Repairs
Most of the time, you'll want to repair systems, fix breaches, and put out fires as soon as they occur. Fires are especially threatening because they can spread and damage systems, however, they should usually be dealt with by venting. You'll want to repair your essential systems first, usually starting with piloting or shields. Engines and weapons are close behind.
But there are many times where you can leave repairs undone until the end of the encounter. If a systemless room is breached, its not a priority. If they damage your sensors or doors, it can probably wait. If they're not actively firing missiles at you, drone control isn't essential. Sometimes, you should even delay repairs to your oxygen room to keep your evasion high.
Partial system repairs reset when your last crewmember leaves the room. Sometimes, you'll need to cycle crewmembers to a medbay when repairing a room which is low on oxygen. Breaches are repaired incrementally, so you don't have to worry about cycling crewmembers.
If you have to repair rooms that are vented, use your Lanius crew.
Boarding And Hand To Hand Combat [1]
If you have the opportunity, you should board. When you kill the crew by any means, you have a much higher chance of finding a random crewmember, weapon, augment, or drone.
The general boarding strategy is to fight with a numbers advantage as much as possible, and to damage/destroy the enemy medbay just as the crew enters it. If they have a clone bay, make sure its destroyed before they can respawn.
Crystal, Mantis and Rockmen are the best for boarding. If you have two Lanius working together, they can be at least as effective as Mantis. Its not recommended to mix Lanius and non-Lanius boarders for obvious reasons. After that, Slugs (because of their mind control resistance), then Humans.
If you have a higher level clone bay and multiple Zoltans, the Zoltan-bomb strategy is also viable. When they die, they deal 15 damage to all enemies in the room.
Engi should usually only board when you need to use them as damage sponges to protect your other boarding crew.
Level two teleporters are fast enough to handle almost all boarding situations. They also have a nice blue text option that can get you a free crewmember in slaver events. That said, you can make do with only level one teleporters for a long time with good strategy.
Once you get very good at boarding, you'll know exactly how to handle your boarding crew, and exactly how much damage they can take. The Engis in the screenshot to the right have one health each.
Dancing (Fill Order)
Crewmembers have a fill order in each room. It goes top-left, top-right, bottom-left bottom-right. The only time it changes from this is if a system needs to be manned. The station will always be occupied first, then the normal fill order will occur.
You can "dance" using this knowledge. If you have multiple crewmembers in one room, you can make them change positions without ever leaving the room. Simply pause, select the crewmembers you want to change positions, have them move out of the room (without unpausing), then individually move them back into the room using your knowledge of fill order.
You can use this to your advantage while fighting. You choose which of your crewmembers takes damage from and deals damage to each enemy. For example, if you have a Mantis and a Human, and they're fighting a Mantis and an Engi, you don't have to flee when their Mantis has your crewmember almost dead. Simply trade opponents when they're about half way done with the fight.
Medbay - Standing Room Only
Sometimes you'll find yourself in a situation where more than three of your crewmembers are low on health and need to be healed. You can actually heal them all at the same time because medbays heal everyone in the room even if they're just walking through. There's no limit to the number of crew that can receive healing, so pause and micromanage their paths so that they all receive the healing they need.
Note: This doesn't really work on Stealth B because its medbay only has one entrance. If you're really in a pinch, you can probably get three crew in there continually, but it doesn't work well.
Crystal Boarding
Crystal are by far the best boarders. Their higher health and lockdown ability allow them to win any fight.
Depending on the situation, you'll want to use lockdown at one of two times: Either when you initially teleport into the room (to kill the first crewmember quickly or damage a system), or when the opponent is leaving the room to heal. If you're fighting against a Mantis or Rockman, you should use lockdown when you initially beam into the room - its dangerous to fight two of those at the same time. You'll be able to kill the Mantis before the lockdown wears off and either take on another enemy or flee. The Rockman may survive a single lockdown.
If you're fighting against lesser enemies (Humans, Slugs, Engi, or Zoltan), you can fight two at a time, and wait till they're about to leave before locking down the room. You should be able to finish off two with a single lockdown using this technique. If the enemy crewmember about to flee isn't standing beside the door that he will be fleeing toward, you can wait till he starts moving toward the door before locking down. Doing this, he won't be doing damage to your crew but to the sealed door instead.
When you activate lockdown, the effects are instant. Any crewmember that's not on the way through a door will be locked into the room for the duration of the lockdown. A crewmember counts as being on the way through a door if he is past the center of the tile next to the door.
Crystals are also the only crew that can safely board Lanius ships. Be sure to fight them one at a time, and switch your crewmembers' places when the opponent has half health to even out your damage.
You can also use lockdown in one room of a ship to block off access to other rooms. This is especially important to utilize on ships that only have two tile rooms.
If you don't have Crystal crewmembers, Lockdown Bombs can be used for the same effect. Unfortunately, they're not nearly as good for several reasons: You can't time them as easily, they can miss, and they use missiles.
Four Person Teleporters
Only a few ships have a four person teleporter. Generally, it just allows you to handle situations more quickly and easily than you otherwise would be able to. But it also has a couple of unique opportunities and pitfalls.
One of the room layouts for the Slug Interceptor has the oxygen and engine systems isolated from the rest of the ship. It has been lovingly dubbed the "Flying Coffin" by some of the community for good reason. When Advanced Edition was released, the two enemy Slugs were moved so that if you were boarding with a standard teleporter, you couldn't kill them both at once. However, with a four person teleporter, you can. If you board the engine room on the lower-right, two crewmembers will appear in the two-person room, but the other two will appear in the main body of the ship. You can kill both at the same time for a much faster and safer encounter.
One of the few pitfalls of a four person teleporter are the few ships that don't have any four tile rooms. If you beam into these ships, you will have to be careful about retrieving your crew. But with good timing, your teleporter can still retrieve all four crewmembers if they're all in one room.
If you happen to have a four person teleporter and crystal crewmembers (i.e. Crystal B), you have unique boarding opportunities. The best boarding team is 2-3 crystal with the rest being Mantis. Its debatable which combination is better, but I generally prefer three crystal crew, so you have more control over enemy movement. If you have this setup, you can board and lockdown enemy weapon rooms to completely destroy their weapons early on in the fight. This technique obviously works much better when boarding four-person weapon rooms. It will buy a lot of time for you to deal with rest of the crew.
Boarding And Hand To Hand Combat [2]
Kiting and Doors
On most ships, you only have a two person teleporter to work with. Unfortunately, this leads to a lot of situations where you can't quickly and easily kill the enemy crew. Often, it would be better to board with four crewmembers at the same time. With some practice, you can do this with a two person teleporter.
If you have four crewmembers you can spare to board, you can send over two at a time. The first two you send over should immediately begin running around the enemy ship randomly to avoid damage from attackers. This is called "kiting". This will also pull enemy crew away from their stations, giving you slight advantages. You'll usually be outrunning your enemies, because they'll keep trying to move into the rooms to attack you rather than directly chasing you.
Which crewmembers you send over first depends on the situation. They will take damage. If you're good at kiting, they should only take 10-15 damage before help arrives. You could send over Mantis first because they're slightly faster and they can avoid a little more damage than the rest. You may want to send over Rockmen because they have health to spare, but they'll take a lot more damage in the process. You may want to send over slightly more disposable crew first because they'll be in greater danger. If your first two take too much damage to safely finish the battle, just recall them for healing. You can retrieve all four of your boarding crew at the same time even if you only have a two tile teleporter room.
The main goal of sending over four crew at the same time is to fight with a numbers advantage, overwhelm, and eventually destroy their medbay. Unless they have a level three medbay, you should definitely score a kill or two the first time you send over multiple sets of boarders.
The following times you send over boarders, you should focus on destroying the medbay. You can do this by luring the enemy into another room like the shield room while another set of boarders attack the medbay. If you have Engi crew, you can have them attack the enemy crew to give you more time to disable the medbay. The fight should be easy after its down.
This boarding technique is viable with even level one teleporters in most situations, but its much safer with level two teleporters. Usually level three teleporters aren't necessary.
The above boarding technique only works when you can move freely between rooms. If the enemy has level two or even three doors, you can still make this work. Whenever your boarders break down doors, the enemy AI never closes them. You can use this to open a path of doors around the ship before you start attacking crew. Once the path is open, you can safely kite damage and board freely. This technique is especially useful in certain rare situations when fighting the flagship. Unfortunately, this technique requires a lot of time, and it should only be used if the enemy weapons aren't a threat.
Knowing your enemy
A primary consideration on how to board a vessel is how many crew they have and their race composition.
If you're not in a nebula and you have any sensors, this is trivial. If you have level one sensors, briefly man them to see in their ship (or the person that normally mans shields could be stationed on sensors initially, then moved to shields after you take a peek into their ship).
With most ships, you can tell what kind of crew they have just by their type. And you can tell roughly how many crew they have by what sector you're in. Early sectors will only have two to three crew, but later sectors could have up to six (more if you're boarded by an event and they have a clone bay). Most ships are manned solely by the race of their manufacturer. Zoltan ships are manned by Zoltans. Rock ships are manned by Rockmen, Etc. However, Mantis ships usually have one Engi around for repairs.
There are a couple of exceptions from this rule: events, and pirate ships. The crew types from events are spelled out in the event text (Mantis that have taken over Engi ships, rebels that have stolen mantis ships). But pirate ships have random crew types.
If the enemy is moving from room to room, pay attention to the duration that doors stay open. If a door is open for a long time, its Rock. You can also use this to tell the difference between Lanius, Mantis, and the rest if you're paying close enough attention. Doors are open slightly less time for Mantis and slightly more for Lanius.
Paying close attention to the timing of sounds, system damage, and crew movement will also allow you to know what your enemy is doing as the battle progresses. Listen to what rooms are breached when you hit them. If the enemy crew is low on health, they may not be able to repair the breach before fleeing the room. Watch system damage and door movement as the enemy crew moves around because of a fire. This knowledge can let you know how to handle the battle and where to send another Fire Bomb or laser blast to finish off their crew.
Venting
If you have someone manning doors, or if you have level two or three door control, you have a great deal of control over boarders.
To vent rooms faster, open as many exterior and interior doors as possible leading to the boarders. Breaches and Lanius cremembers work the same way, but they don't vent nearly as fast as an exterior airlock. Also, shutting off oxygen for a few seconds would speed things up. You'll often want to try to herd the boarders toward your medbay, so you can fight on your own terms. If they're nowhere near the medbay, you can wait till their room is vented, then send one of your crew at a time to fight them. They'll be taking suffocation damage, and they'll be forced to fight your crew before escaping. This is the fastest way to deal with boarders if you need to try to kill them before their teleporter cools down. Engi are great for this task because they're not terribly useful for their hand to hand combat damage in the first place.
If you're fighting in an airless room, you have decent doors, and you don't have a lot of crew health to spare, you can quickly move your crew in and out of the airless room. The boarders will be forced to confront your crew when he is in the room and will switch to attacking the door when he leaves. If you do this quickly enough, the boarders will spend most of their time walking back and forth. They will eventually break down the door but at a great cost to their health and very little to yours.
Be careful if boarders are attacking your oxygen or doors. If they're attacking doors, make sure you close your doors before they're destroyed. If they're attacking oxygen and you expect that you can't stop them in time, you probably won't want to vent at all.
The more doors you have opened, the faster the oxygen level changes. If you need to quickly fill a section of your ship with oxygen, open all interior doors that you can which aren't leading to Lanius or breaches.
If possible, pre-vent rooms that boarders are attempting to enter. Also, you can allow oxygen to flow back into rooms that you've previously forced boarders from. The already-low O2 levels will allow you to juggle boarders back and forth between rooms not causing system damage to any of them.
If you have an Anti-Personnel drone or a Crystal crewmember, make sure the room is vented during the fight. Other boarders are more affected by lack of oxygen than they are. And if you're boarded by Lanius, you'll want to keep your ship's airflow high - open doors and increase power to O2.
If you're severely outnumbered or outgunned and you don't believe you have a chance of fending off the boarders by any other means, vent your entire ship and put your crew in the medbay. You'll get rid of the boarders in a hurry. You could also leave one room on the opposite side of the ship with oxygen to force them to move - this will also prevent them from doing one or two system damage as they suffocate.
Boarding And Hand To Hand Combat [3]
Overwhelming the Enemy Medbay
There are certain boarding situations that will force you to fight in the enemy medbay. This is sometimes feasible.
If you expect that you'll have to fight in the enemy medbay, pay close attention to the speed at which the opponents heal (if you happen to only have level one sensors, briefly move a crewmember to man the sensors to observe him healing). With practice, you'll be able to tell the difference between a level one and level two medbay. Level three medbays heal at a ridiculous rate, so they'll be easy to identify. Most ships won't have level three medbays.
Before you engage enemies in the medbay, make sure that they're damaged as much as possible - never take on crew starting with high health in their medbay.
If your opponent has a level one medbay, mantis can easily outdamage the medbay. Unskiled humans damage slightly slower than the medbay, but fully skilled humans damage at roughly the same rate. You can easily win against a single opponent with a two person, non-Engi boarding crew.
If your opponent has a level two medbay, 2v1 teams can still outdamage the medbay. A fully skilled Mantis deals damage at roughly the same rate that it heals. Because damage is random, you'll sometimes be able to kill them but it may take several attempts. This can be time consuming, so only attempt if you're not in danger from the enemy weapons.
If your opponent has a level three medbay, don't bother. You might be able to outdamage them if you're fighting them 4v1, but its essentially never feasible. You'll be forced to damage or hack it if you want to kill the crew.
Boarding Auto-Scouts
In some situations, its necessary to board auto-scouts which have no air. This can be dangerous for obvious reasons, but it can still work.
This may be necessary if your ship doesn't have the firepower to break the scouts shields, if their evasion is high, or if they have particularly menacing weapons or drones. Obviously the Emergency Respirators augmentation will help greatly.
Level one teleporters can safely take Crystal crew back and forth. They can also just barely transport Rock crew.
Level two teleporters can transport everything but Zoltans. Most species will have 9-10 health left.
Level three teleporters can safely transport all crew to and from airless auto-scouts.
Be careful when doing this! If your teleporter is damaged at the wrong time, you will lose your crew. Unfortunately, its sometimes necessary to take the risk. Take a quick assessment of their weapons and your defenses. Only board if you think its worth the risk. Whether or not to board is highly situational - you'll have to make the decision from your own experience.
Of course, if you have a clone bay, don't worry about bringing your crew back. If the enemy has threatening weapons, board their weapon room first to protect your clones' lives. If necessary, you can destroy the scout entirely with boarding damage.
Medbay vs. Clone Bay
There's a bit of a debate as to which is better, but generally they're close enough that its not worth buying the other to replace what your ship comes with. If you're using Slug B, you'll usually just end up getting what the first store has in stock.
When it comes to events, clone bays are probably slightly better than medbays. Level one clone bay definitely has better events than a level one medbay. But when comparing them at level two, its a toss up. Keep in mind that clone bays don't have many blue text events, but they allow you to safely recover from bad outcomes from other events (I'm looking at you, giant alien spiders).
The medbay is superior when your ship is boarded.You have more control over your crewmembers' health, and their lives aren't in immediate danger if a stray missile hits the wrong room. Rotate your crew out for healing in the medbay, and watch for incoming missiles or bombs. If one is about to impact the room that your low health crewmember is walking into, turn him around.
If you have a clone bay and you are relying on boarding, you should consider the DNA Backup augment. If you don't, you'll have to be much more cautious about stray missiles destroying the clone bay at the wrong time. (See Screenshot) Also, the Reconstructive Teleport augment is extremely useful. Your crew won't be dying all the time, so they won't have the skill penalty. Its even more helpful when using lanius boarders. With normal crewmembers, after each battle, you can send them to the "medical airlock", so they can get healed. Not so with Lanius - Reconstructive Teleport works very well instead.
Personally, I prefer the medbay for a couple of reasons. Your crew never dies, so you don't have to worry about the room being taken offline at the wrong time killing everyone. Also, your crew keeps a 20% combat skill bonus. Its often hard to maintain even the level one skill bonus when using the clone bay. If you're careful with your crew and understand the risks to their lives in any given situation, you should almost never lose a crewmember when using the medbay.
Boarding And Hand To Hand Combat [4]
Miscellaneous Boarding Info
Be aware of what systems enemies will prioritize when they need to be manned or repaired. This knowledge will help a lot in knowing what room to board first and what room will make the enemies scramble to repair. Piloting will always be manned first, followed by engines, weapons, and shields (this order changes in lower difficulties). Enemies repair shields with the highest priority followed closely by oxygen and weapons.
If you only have a two person boarding team you generally shouldn't beam into a four tile room. This will give the enemy a chance to outnumber you, and you won't have as much control over the damage each crewmember will receive because they may be attacking random targets from across the room.
Be careful when boarding enemies with Anti-Personnel Drones. They have a lot of health. Sometimes it may be beneficial to you because they move slowly - you can get a fair amount of damage on one crew member before they arrive. When it does arrive, you can always run to another room and briefly have the numbers advantage again. Sometimes, you may be required to repeatedly destroy drones to exhaust them of their drone parts in order to execute your boarding strategy. This is much easier if they have System Repair Drones to kill quickly or defense/boarding drones which can be shot down.
Don't forget that enemy crew can't teleport away if you're cloaked. If you really need to finish off a couple of their crew, cloak before they hit about 20% health. On the other hand, you can't teleport to or from an enemy ship while they're cloaked, so be careful. Make sure you either have good timing with the teleporters, or that they have level one doors so that you can move freely to kite damage. If you have a level one teleporter and they have cloaking, the cooldown is the same. That means that if you beam over as soon as they uncloak, you'll be stranded on their ship as it cloaks again for five, ten, or fifteen seconds. Know the duration of their cloak, and wait for awhile after they uncloak so that you can retrieve your crew while the ship is uncloaked. Level two and three teleporters can safely board and retrieve crew during a single cloak cooldown.
Sometimes if an enemy ship is particularly powerful and you know you must flee, you may want to send over boarders just as a distraction. Make them run room to room to remove system manning bonuses. This could save you some damage and allow you to deal some damage to their weapons. Just make sure that you have time to safely retrieve your crew before you jump.
Be careful that enemy ships don't jump away with your boarding team. You can use your boarders to lure the crew away from piloting to increase the time it takes to jump. If the enemy is fleeing, the safest way to ensure they won't jump away with your crew is to disable piloting, then board it before its repaired. Also, be careful of one Mantis event that has an extremely short jump timer triggered by hull damage.
If you have a Fire Bomb (or some other way to reliably ignite their ship) and Rock crewmembers, you should set their medbay on fire and beam them into it. You can wait a few seconds before teleporting in, so the room has some time to take damage while your crew isn't. Just make sure you beam in before they put out the fire. Waiting before beaming your Rockmen in is especially useful on ships with four-person medbays. If the enemy has particularly dangerous weapons, set that room on fire and fight in there first. Make sure that you don't Fire Bomb the room when your crew are in there, so they don't receive the 30 damage from the initial explosion.
If you're boarding a ship with a clone bay, the battle will usually be much easier. The first time you send crew over, you should attempt to do as much damage as possible without killing crew. This will make your second boarding mission much easier.
Keep in mind that hand to hand combat damage is slightly random. Even if your Human may have a level in combat, its not guaranteed that he will win an even fight. There is also a small margin of time after you teleport away where your crew can still take damage. Unless you like teleporting corpses, pay very close attention to the health of your crew.
In certain scenarios, you may be forced to use your weapons to finish off the enemy crew. Even if they have a level three medbay, you can still kill fleeing crew with weapons. Bombs are the best option because they can't be shot down with drones, and they don't cause hull damage. Missiles are nearly as good, but they'll work in a pinch. You can even use beams or lasers for this if you time them well. Just keep in mind that, unless otherwise specified, for every one system damage a weapon does, it deals 15 damage to crew. Generally, you'll need weapons that deal two damage to kill fleeing crew.
A fairly advanced and situational technique requires you to synchronize the deaths of your Zoltans. This is most useful if the enemy ship has a medbay, and you have no good way to deal with it. If you have 2 or more Zoltans, move them around within a room to try to make sure they take damage at even rates and die at the same time. If you can do this, the enemy crew will take damage too quickly and die before they can flee to the medbay.
If you're about to retrieve your boarding crew after the battle, make sure there's no incoming missiles or other damage that could potentially kill your crew before they can be healed.
If you have enough ion power, you can disable their medbay or clone bay to prevent healing or respawning.
All races and skill levels deal damage at the same rate to systems. That means that an unskilled Engi can damage an enemy system as fast as a fully leveled Mantis.
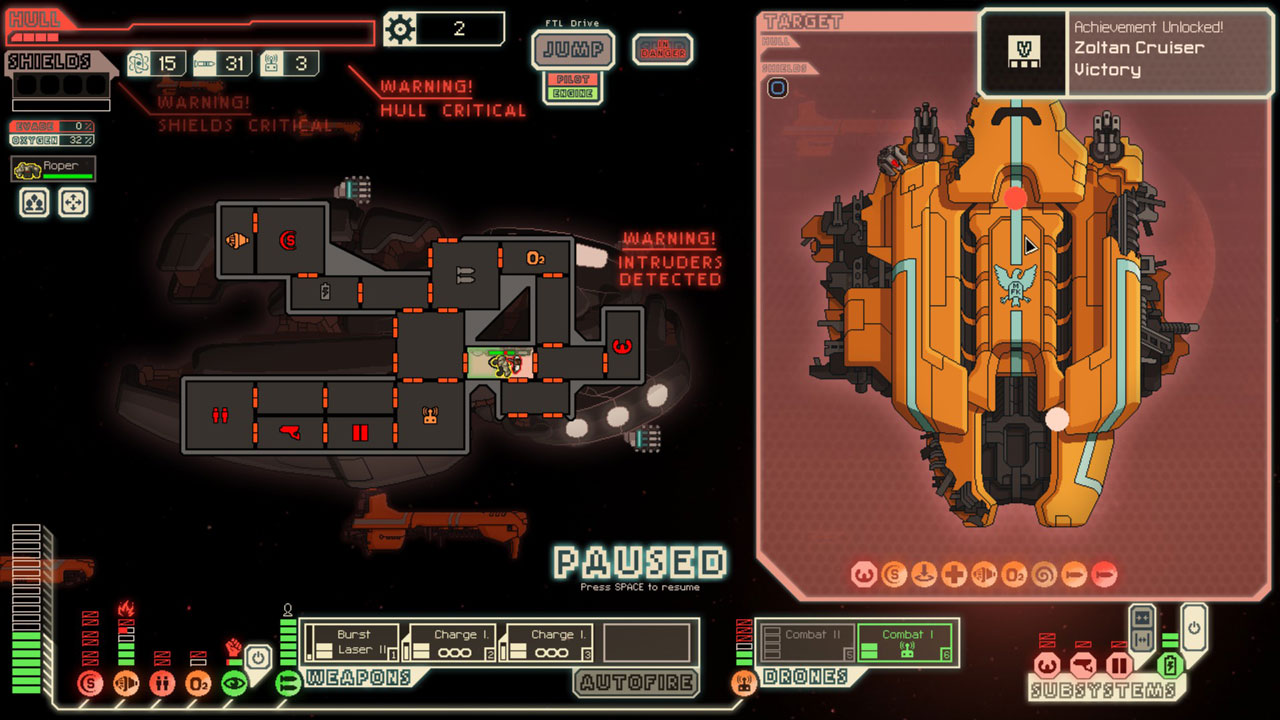
And yes, its somehow possible for a fistfight to end in a tie. (See Screenshot)
Power Management
You never need to have all systems fully powered. If you're not actively using a system, it doesn't need to be powered. Good power management can free up scrap to allow you to buy or upgrade things long before you otherwise could.
Systems Powering Preferences
You'll want to do your best to have shields fully powered and recharged at the beginning of each jump. This is because you'll sometimes jump into an asteroid field or a ship with Combat Drones. If your shields are down, asteroids could keep them down long enough for the enemy's weapons to deal damage. The same can be said about Combat Drones. A Combat Drone II might even score a hit before your shields come up. If you assess the enemy ship and determine that you don't need to have your shields fully powered, remove that power from the shields to use elsewhere.
Aside from this, the only other time its safe to rob shields of their power is when your shields have recently been hit, and you still need to dodge some lasers. For example, lets assume you have level three shields, level six engines, and you're in an ion storm so you have half reactor power. Lets say the enemy has a Burst Laser III. You have enough power to fully power shields, but only two power into engines. If the first laser hits your shields, reroute two power (from the layer of shields that just went down) to engines. And the next time that a laser hits, reroute two more power from shields to engines. You can substantially increase your evasion during a volley with this technique and save a lot of hull damage.
How you want to handle weapon system upgrades and powering depends completely on your entire loadout. If you have strong boarding, you'll only need minimal weapon power to support the boarders. If you have a Weapon Pre-Igniter, you'll probably want to put a lot more into weapon system upgrades and make sure they're fully powered before each jump.
Sometimes, you'll have two weapon "sets" to choose from, and they don't both require power simultaneously. Consider the following loadout: Fire Beam, Burst Laser II, Ion Blast I, Ion Blast I. If you have this fairly early on, you really only need four weapon power to be effective. Generally, you'll either want to destroy the ship or kill the crew. If you're killing the crew, the Burst Laser II isn't required (however, it can definitely be helpful, so you'll want to purchase those system upgrades eventually).
Engines are one of the first systems I rob to use power elsewhere unless I'm trying to flee. Its always a good idea to have one or maybe two levels of engine more than what you can power. You only need engine power for dodging, and engines need no time at all to adapt to the new power. Its easy to quickly steal power from oxygen or another system to attempt to dodge a missile or laser volley. Generally, you don't need to have a reactor power solely for the oxygen room - just borrow it from engines whenever you don't need the evasion.
If you have a defense drone, you don't need to have enough power exclusively for the system to run it continuously. Power up the drone only after the first missile is fired (sometimes it can be shot down accidentally or you could disable their missile launcher before it fires). You can always rob engines and oxygen for this. If you're using a ship that is particularly large or long, its a good idea to move the drone into a good position after a missile is shot down because defense drones have limited range. Position it by leaving the drone power on while the drone traverses the nose and and more importantly, the tail section. Cut power when it starts back around the side. It will be able to cover much more of the ship next time its powered on.
Power management for the rest of the systems is very situational. You'll almost never need to keep power in mind control. Hacking is very useful in many situations, but all three power is rarely required. Cloaking is incredibly useful, but its easy to steal power from another system to run it (just make sure your engines are powered enough to give you 100% evasion or as close to that as possible).
Types of Power
There are three types of power sources: Your reactor, Zoltans, and the backup battery. The backup battery is a supplemental power source, and it should be used accordingly. Neither your primary defense or offense should rely on it. You can determine which systems are supplied by each source. Zoltans need to be moved from room to room carefully, so they don't depower important systems like weapons or shields when they leave. The other power can simply be assigned in the lower left system menu.
Its a good idea to take your time and decide which systems should receive backup battery power because once the battery runs out, two or four power will be removed immediately. You can do this by assigning power to all of the systems that need continuous power first, then assigning power to the systems you want powered by the backup battery. Systems like weapons and shields need to be powered continuously to be effective, so they shouldn't receive backup battery power. Systems like oxygen, medbay, engines, and even offensive drones don't need continuous power, so they won't be harmed if power is momentarily cut and rerouted once the battery is drained.
Its most efficient to use the backup battery on systems that have a cooldown. Cloaking, mind control hacking, and teleporters are all candidates. Both these systems and their power source have a cooldown, so your reactor power won't be locked into the disabled system while its cooling down.
Stealing Power
Zoltans can steal power from systems that are cooling down. If you have just finished cloaking, usually the cloaking system will lock in the power you used for 20 seconds while the cloak recharges. If you walk a Zoltan into that room, he displaces some of the power that was locked. When he leaves, you can use that power elsewhere. This technique works with all systems that cool down. You can also do this with multiple Zoltans to steal more than one power at a time. A good place to use this is Stealth B - just make sure you have a spare, unused reactor power before you move, so you don't remove power from your Glaive Beam!
Assessing The Enemy And Attack Priorities
One of the questions you'll be asking yourself most frequently is: How should I go about this encounter? Should I flee? What should I target? This all depends on many factors including their firepower, your defenses, their systems, and your systems.
Pause at the beginning of every encounter and determine the biggest threats of the enemy and how your ship will be able to handle those threats. You can actually pause when the event text is displayed to save yourself a brief moment. Every encounter should begin with a cost benefit analysis. Take a look at their ship and your ship. If you think you'll be receiving more damage than the potential reward would compensate, you should flee. The vast majority of the time you should fight because fleeing doesn't improve your ship. Repairs take 2-4 scrap depending on what sector you're in, so make a guess of how much hull damage you'll be taking from the encounter, and if you'll be able to cover the repair cost in gained scrap. You should be more conservative when you hull is low, and a little more aggressive if your hull is near full. Also take into consideration where you expect stores to be. For example, if you know you've already passed all stores in a sector, and you have many jumps left, you should be a little more conservative with your hull.
First off: what you shouldn't target. Unfortunately, this list won't be very long. You should never target empty rooms or sensors. Sensors don't do anything for enemy ships because they choose targets randomly. You should almost never target doors as well. Most of the time you can get through doors just with patience and your boarding crew (see Boarding and Hand to Hand Combat: Kiting and Doors). You should generally only have to attack doors if something went wrong with your boarding strategy, and you need to kite damage while waiting for your teleporter to cool down. Breaking doors will also allow fires to spread between rooms faster, but this is not generally useful.
Pretty much every other system is a potential target, but shields, weapons, and piloting/engines are generally the biggest priorities.
You should target weapons if they are particularly menacing. If they have a missile launcher, lots of lasers, or some other threatening combination of weapons and drones, you should definitely start with weapons. Sometimes, enemies will have pairs of weapons. Two missiles firing at the same time will always overwhelm your defense drone. Two or three Burst Laser II's firing at the same time are a huge threat. You'll almost always want to focus on their weapons in order to desynchronize them. After they're not firing in volleys, you can reevaluate your options.
If the enemy can't can't penetrate your shields with its combination of weapons and drones, and isn't fleeing, you have all the time in the world to deal with them. You should try to kill the crew for the extra rewards. This usually involves breaking their Oxygen system and attempting to breach it or set fires. Try to deal as little hull damage as possible during this process. Also, know which weapons are best to deal the damage to the room. Heavy Lasers, and Hull Lasers are really good for this for their fires and breaches. Mind Control and Hacking make this process much easier and faster, but its definitely possible otherwise with practice.
If the enemy is a minimal threat, its usually better to start with shields or piloting. In earlier sectors, it almost always better to start with shields. This is because early enemies already have low evasion. In later sectors, you may want to start with piloting to increase the chances of your next volley landing. If a ship is attempting to jump away from you, its almost always better to start with piloting, then switch to engines once piloting is disabled. Keep in mind that partially disabling enemy engines will NOT give you more time for the encounter. The enemy FTL drive doesn't charge the same way yours does. Their ship will jump away after a specified time.
If you're fighting unmanned ships, keep in mind that they repair systems at Mantis-speed. Also, they can't repair rooms that have been breached. Auto-Scouts have some of the highest evasion of any ship. This makes breaching and disabling piloting extremely useful. One advanced trick for unmanned ships is that catching a room on fire resets repair progress - so your Fire Beam isn't as useless as you thought!
The rest of the systems can be targeted situationally, but they should usually only be targeted if a ship's primary threat isn't its weapons.
Engines are usually my next choice for targeting after the big three. It helps to ensure your future shots connect.
Drone Control is rarely a primary target. There are only a few situations where drones are a substantial threat. If you don't have shields, or the situation is keeping your shields from being as effective as they should, drones would be a good target. Some example of this are if shields are hacked by an event, hacked with a drone, you encounter an ion pulsar, or even if the enemy ship just has a bunch of ion weapons. Generally, you won't be damaging their drone control to manage boarding drones or ion intruders - you should only do this if your crew isn't capable of destroying them before they cause too much havoc. There are a couple of fairly rare situations you may want to target drone control to disable defense drones. If you only have missiles for some reason (like if you're using Rock A), and the opponent has a defense drone, you could send two missiles in a volley to disable it. Sometimes enemies have a Defense Drone II that needs to be disabled in order to start doing real damage. Usually, those only appear on Engi ships, so they'll be back up and running again quickly.
Sometimes you'll want to target cloaking to allow you to do more continuous damage. This is especially useful for when you're using ion weapons and cloak would break the effect.
Medbays or clone bays should generally only be targeted in conjunction with efforts to kill the crew - Usually boarding, sometimes fire or suffocation. Attempt to deal the damage to the medbay just as the injured crew enters.
Mind Control should usually only be targeted if its causing problems for your pilot. With most other systems the negative effects of mind control can be mitigated (See Mind Control for more detail), but such a large drop in evasion is never good.
Hacking is sometimes a good target if their hacking drone is compromising essential systems like weapons or shields.
Rarely, you'll want to destroy their teleporter to strand enemy crew on your ship so you can be rid of them.
Oxygen should only be targeted if you believe that you can keep it down long enough to suffocate the crew. Sometimes it may be good to target it as a distraction to pull crew away from manning systems - it has a fairly high repair priority.
When to Give Up
Never.
Even if your ship is severely unprepared, you've lost seven of your eight crewmembers, your last crewmember is under mind control, you have no shields, only a couple hull remaining, keep trying. (See screenshot)
You always learn the most when you're fighting an uphill battle. Sometimes you'll surprise yourself when you're able to turn things around and win.Those victories are the best ones.
If you think you're in a stalemate situation or that you've lost entirely, pause and consider your options. Many times you can get out of situations by upgrading your medbay, so your crew can get enough health to repair the oxygen system. If you're at a hazard, try to put someone in piloting to jump away and hopefully repair and upgrade. Keep in mind that upgrading a broken system doesn't repair the system - you'll just have one more bar of broken system to repair.
Weapon Technique And Ordering
Generally speaking, weapons should be fired in volleys with the most effective weapons fired after the enemy shields are down.
If missiles are part of your loadout, and they would help for the battle, fire them first. You'll want to target piloting or shields depending on which is more important to your enemy based on your weapons. Flaks aren't great at dealing damage, but they are amazing at removing shields. Time them to hit before your lasers. Fire normal lasers before hull lasers or heavy lasers. And fire everything before beams. Obviously, the goal is to have everything hit within the short window before any of their shields regenerate.
Keep in mind that on most ships, there's distance between where the weapons are physically placed on the ship. This will affect volley timing. If you're working with a weapons in the first two slots and ones in the second two, you'll have to account for the farther distance the blasts from the rear weapons need to travel. Different projectiles also have different speeds. Flaks and ions are slow, laser blasts are fast, and heavy laser blasts are faster still.
Be careful if you have Zoltans manning your weapons or even just passing through. Zoltans supply power to weapons from left to right. If you are using all of your power, the Zoltan will steal power from the weapon when he leaves the room. A worst-case example of this is Stealth B. If you leave your Zoltan manning weapons, he can easily lose 20 seconds of charge time on the Glaive Beam when he leaves the room. You can easily prevent this by freeing up power - have one unused power for each Zoltan moving from room to room to be completely safe. Oxygen is always a good candidate for briefly removing power.
Keep in mind that you don't necessarily need to have your weapon system upgraded enough to power all of your weapons. Often you'll have a bomb or missile that might support your boarders, while you have a flak and a laser for damage. You won't need to have both sets powered up at the same time, so don't worry about upgrading your weapons.
If you weapon system is damaged to the point that it can't power all of your weapons, the right most powered weapon becomes unpowered. However, its charge doesn't deplete immediately. If you're fast, you can pause and reorder your weapons to not lose the entire charge.
On a similar note, there is currently a feature/exploit that takes advantage of this behavior (I believe reddit user The_Sven was the first to discover this glitch). If you have a Weapon Pre-Igniter, you can fire more weapons than you can power as soon as your jump finishes. For an example, lets say you have a Pre-Igniter, a Flak 1, and a Burst Laser II, but your weapons are only level two. Before you make a jump, allow the Flak 1 to to fully charge (either weapon would work in this case). After its charged, pause, unpower the Flak 1, power the Burst Laser II, then make your jump. When the jump is over, both weapons will have a full charge. Fire the Flak I, and as soon as you hear the firing sound, pause, then switch power to the Burst Laser II and fire at will.
You can also use this trick to build up multiple charges of a weapon like the Charge Ion or Charge Laser II. Allow them to fully charge before the jump, but make sure that these weapons DO NOT have power when doing the jump, otherwise, they'll be reset to only one charge. (Thanks to Reddit user Eirh for this little trick)
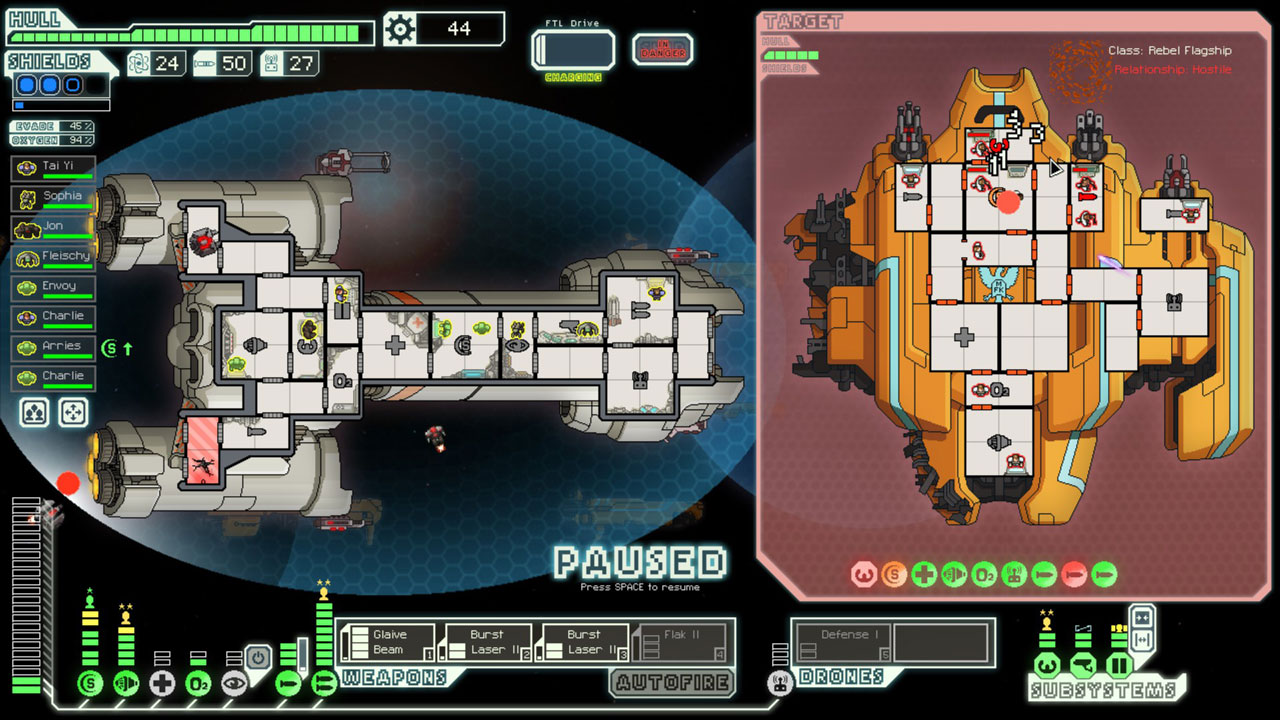
The nearby screenshot is an example of it in use. The Flak II was fired first, then power was switched to all the other weapons. A couple seconds later, the Burst Laser IIs were both fired, then the Glaive Beam once the shields were completely down. After the final laser blast hit, there was only four hull left on the Flagship. This screenshot was taken four or five seconds after the battle started - their Boarding Drone hasn't even landed.
Here is a video example of it in action also provided by Eirh:
And here's the link to it if you need it.
Weapon ordering
Generally, you'll want to order weapons from left to right in terms of usefulness and charge time. Chain and charge weapons should always be on the left because they take more time to become effective. However, ideal weapon ordering is extremely situational and can even vary from battle to battle. Here are a few examples of weapon ordering.
If you have a Burst Laser II and a Flak I, put the Flak on the right. It takes less time to charge, and its less accurate. In both cases, you have less to lose if its taken offline.
With Stealth A, you should usually have the Dual Laser in the first slot and the Mini Beam in the second slot. There's usually no benefit to keeping the beam on the left, because the Dual Laser can be useful in many situations without the Mini Beam. However, if you're fighting a ship without shields, Its usually more useful to put the Mini Beam on the Left.
If you have an extra weak weapon like a Basic Laser, it should always be on the right.
If you are using a Chain Vulcan, it should always be on the left.
Advanced Tip: If you are an experienced and attentive player, weapon ordering doesn't matter as much as physical position of the weapon on the ship. Consider the federation ships with two Flak I's and two Burst Laser II's. You'll want the Flaks on the font of the ship because their projectile speed is so much slower. This will make the first blast connect a full second faster and subsequent volleys easier to time. Again, only use this technique if you are ready to pause the exact moment that you take damage. You'll have to reassess your weapon ordering at that point.
Weapon Types

Laser
Lasers are your general purpose offensive weapon. They are straightforward, accurate, and easy to use. Laser blasts do one damage to hull and systems with a small chance of starting a fire. Hull Lasers should usually be fired after regular lasers because of their extra breach chance - whether or not you're firing on a systemless room. If you have either of the Heavy Lasers, fire them after the other lasers and supporting weapons. They do twice the damage, they have a higher chance of starting a fire, and they can cause a breach.
The ship to the right has a good laser-based loadout.
Missile
Missiles are generally powerful, have a decent chance of starting fires and causing breaches, and they always pierce all layers of shields (not including Super Shields). You should almost never be relying on missiles for dealing damage. If you are, you should be looking for weapons to replace the missiles (Rock A is a good example of this). Missiles cost far too much to be a sustainable source of damage. On a similar note, you should almost never buy missiles. That said, missiles make a great addition to many loadouts. If you're boarding, they're very good at taking down enemy medbays. If your other weapons aren't very powerful, missiles are good at removing a layer of shields or reducing evasion. Unfortunately, they'll almost always be shot down if the enemy has defense drones.
Flak
Flaks are extremely good supporting weapons, but they're not ideal for precise damage. They aren't accurate, so you can't consistently hit the room you're targeting - a projectile may hit a nearby room, or miss the ship altogether. That said, if you have enough flak, you can overwhelm any ship with it. They should generally be used to remove shields so lasers or beams can be used to their full effect. They're the slowest projectile, so they'll need to be fired a couple seconds before the lasers that they're supporting.
Note: Flak weapons throw extra pieces of flak beyond what the weapon description reports. They don't hit shields or damage rooms, but they will show a small impact or "miss". However, they can still be targeted by drones, so even if your drone shoots down one piece of the incoming Flak I blast, three can still connect for damage.
Beam
Beam weapons are 100% accurate, and they deal damage to every room the beam touches, but they're very weak to shields. They'll almost always need to be supported with ions, flaks, laser weapons, or hacking to remove the enemy shields. If you're using the Halberd Beam or Glaive Beam, they have partial shield piercing capabilities - one damage is removed for each level of shield the opponent has. So, if you fire a Glaive Beam on a ship with level two shields, it will still deal one damage per room.
When aiming the beam, pay close attention to the yellow highlight around the rooms, this lets you know exactly what rooms will be hit when the beam is fired. With careful aiming, you can usually hit one more room than you might initially think.
Beam weapons connect twice to Zoltan/Super shields, so they deal double damage to them. If the shield is destroyed on the second hit, the very tail end (maybe 5% of the beam length) can still deal damage to rooms.
Beam weapons are the only weapons that don't take time away from your current cloak when fired.
See Beam Mechanics and Placement for more information.
Ion
Ions disable systems but deal no damage. When properly used, they're the ultimate support weapon. For every one ion damage dealt to a system, that system is disabled for five seconds (each blue number displayed over the system icon indicates fives seconds where it will be disabled). Ions travel slower than lasers but faster than Flak.
Ions are very effective at removing shields to allow other weapons to connect. Like most projectiles, ion can only connect with the enemy shields until they're taken down. Therefore, all ion damage is applied to the shield system (there is no benefit for hitting the shield room over the shields themselves). In order to completely disable an enemy's shields, your ions need to "stack" - or deal ion damage faster than that damage wears off. Most of the time, if you want to make sure that your ion damage stacks, you'll need more than one ion weapon. Ion Blast II, Charge Ion, and Chain Ion(eventually) are capable of stacking ion damage by themselves without the help of Automated Reloaders. However, these weapons will be much more reliable if they're paired with another ion weapon. Interestingly enough, all ion weapons are capable of stacking damage with a fully skilled crewmember and enough Auto-Reloaders.
For ion loadouts like you start with in Zoltan B (two Ion Blasts), Its a fairly common misconception to believe that staggering ion damage is always more effective than firing at the same time. When ion damage connects, it adds five seconds to the current amount of ion damage existing (rather than resetting the counter). So, if the ion damage counter reads "2" and a couple tick marks, when it receives one ion damage, it will read "3" and a couple tick marks.
Interestingly, its slightly better to synchronize the Ion Blasts when you're fighting ships with lower evasion. If you're fighting ships with higher evasion, its better to stagger.
Charge Ion is unique from the other weapons in that its made to reliably stack with itself. If the enemy only has one shield, just set it to auto fire like the other ion weapons. But if the enemy has two or more shields, leave it charge up all three blasts. This can immediately remove two layers of shields and it gives you 15 seconds of ion damage from the beginning. So even if you miss a shot or two in the upcoming blasts, your ion timer won't reset. This strategy is essential for Zoltan C. If only one blast connects, charge up and try again.
To the right, you'll see a very effective set of ions paired with beam weapons.
Usually, you can safely set your ion weapons to autofire. Notable exceptions are Ion Bomb (use manually because it consumes missiles), Charge Ion (especially if the enemy has a lot of shields to be removed), and when the enemy has cloaking (you'll often want to hold your fire if the enemy is about to cloak).
Ion Stunner is a good weapon to use if you plan on damaging shields. It will keep those in the shield room stunned more than doubling the amount of time it takes them to repair the room.
Ions deal double damage to Zoltan/Super shields (one ion damage deals two damage to the shield).
Bomb
Bombs consume a missile and teleport directly to their destination to achieve their purpose, but they are blocked by Super Shields. They cannot be shot down by defense drones nor can they deal hull damage. There are several different types of bombs with vastly different uses. Several types of bombs are extremely useful to aid with boarding to disable systems, prevent crew movement, or heal your own crew (just don't completely rely on this health because bombs can be evaded by the enemy ship). Ion Bombs are very useful for removing a full two layers of the enemy shield, and they're even better when paired with a standard ion weapon.
If you're firing a bomb on your own ship, it will not miss.
Crystal
Crystal weapons act like a cross between lasers and missiles. They travel slower than lasers, and they can be shot down by defense drones, but they pierce one layer of shields. Some are substantially more powerful than others, so be sure to time them so that the most powerful ones get past shields and defense drones.
Weapon Synergy
Weapon synergy is simply how well your weapons work together. This is always something to strive for when considering what to buy and sell. Things to consider are type, damage, power usage, missile consumption, and charge time. Usually, you should try to pair weapons with similar charge times to deal the most damage as fast as possible.
You could also factor in drones with weapon synergy, but they're generally only useful when you can continually keep the shields down. Also, there's the negative of using drone parts unless you have the Drone Recovery Arm.
The Chain Vulcan either synergizes with almost everything or nothing depending on the timing. Until its fully charged, it doesn't help any weapon loadout. After the 30-40 seconds it takes to charge, it keeps the shields down enough for nearly anything else to be useful. Ions don't work well with it because the enemy shields should never be at full capacity (other than the fact that ions can prevent the shield recharge manning bonus). Missiles and bombs are very useful for hitting piloting to reduce evasion thus making the Vulcan even more powerful.
Good Synergy
Here are a couple of examples of weapons with good synergy and why (along with my preferred ordering).
Glaive Beam, Flak II - They have similar charge times, Flak II can fairly reliably take down most shields to allow the Glaive to be used to the fullest. All of the shield layers are removed at almost the same time, so the Glaive Beam can hit all rooms with its full power. Even if one or two layers of shields remain, its still a good idea to fire the Glaive because the charge times are so close. This loadout also allows for another low power supporting weapon of some sort.
Fire Beam, Ion Blast II, Heavy Laser I, Ion Blast I - Those ions working together can reliably remove shields from nearly any ship. If the ship is manned and isn't a huge threat, you can take your time and burn them out (and even send a Heavy Laser blast into their medbay to greet them if necessary). After shields are down, the Ion Blast I can be switched to piloting or cloaking. Even if its a scout, you can quickly disable the proper systems with the Heavy Laser.
Breach II, Burst Laser II, Flak I - For many earlier encounters, the flak and burst laser will be enough by itself. But when its necessary, you can use the breach to completely disable piloting for an extended duration, or shields for a one or two level reduction and a longer shield recharge time. Breach has the added benefit of supporting boarding crews and preventing auto scout systems from ever being repaired.
Flak I, Heavy Laser I, Heavy Laser I, Flak I - A personal Favorite. Most of the time the flak will remove shields allowing the lasers the opportunity to get through. After the first hit on piloting or shields, you'll be doing more than four hull damage every ten seconds with lots of fires and breaches.
The screenshot to the right has good synergy as well. The ions can reliably take down enemy shields. The Halberd Beam can deal damage, and the Fire Drone can be used when the enemy isn't a threat.
Bad Synergy
Here are some examples of weapons with fairly bad synergy.
Flak II, Heavy Laser I, Ion Blast I - The ion and laser can fire more than twice as fast as the Flak II, so there's a lot of wasted time. The ion won't be doing much in general, it will just allow one more projectile from the Flak II to connect. Basically, this loadout boils down to one Heavy Laser blast every 20 seconds.
Pike Beam, Hull Smasher Laser, Heavy Ion, Fire Bomb - The Ion can't stack with anything. The Fire Bomb will generally only be helpful with specific boarding techniques. This will only be able to handle ships with level three shields, and it will be slow and unreliable when doing so.
Chain Ion, Anti-Bio Beam, Hull Laser I, Stun Bomb - The Chain Ion is extraordinarily slow and power hungry. When you finally get their shields down to a point that you can damage, you should probably aim for piloting (to reduce evasion for the Chain Ion), forfeiting the hull damage bonus of the laser. Still, this loadout could be marginally useful if you can support it with boarding.
Hull Missile, Artemis Missile - Terrible against Zoltans. Consumes missiles far too fast to be useful.
Note: Hacking allows many loadouts that wouldn't normally have good synergy to still be very effective. Its the single best fallback plan if you're not getting the weapons you would hope for.
Beam Mechanics And Placement
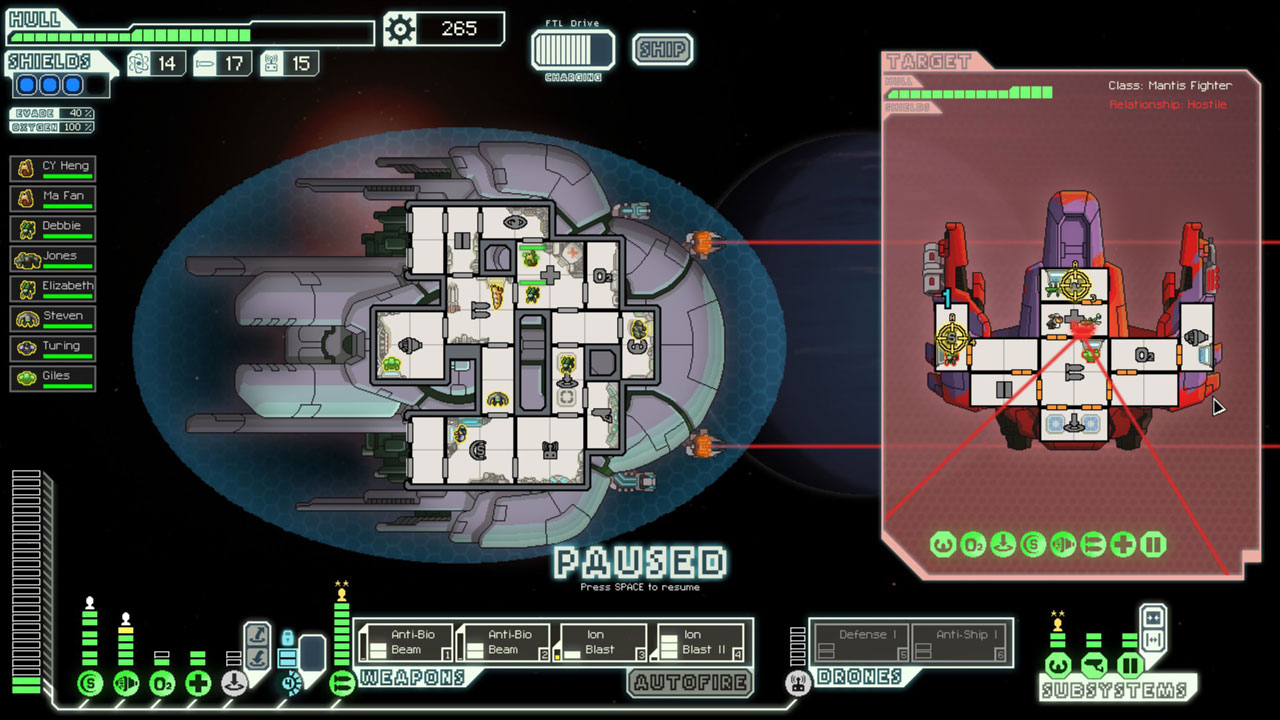

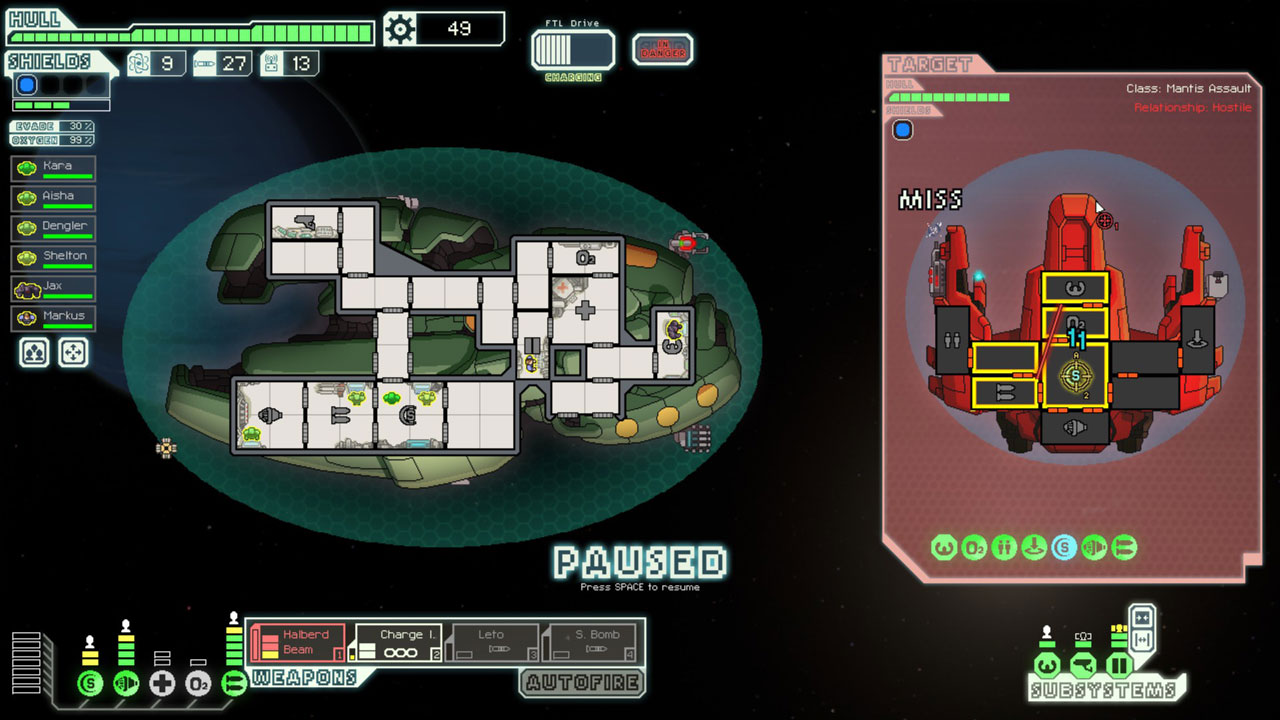
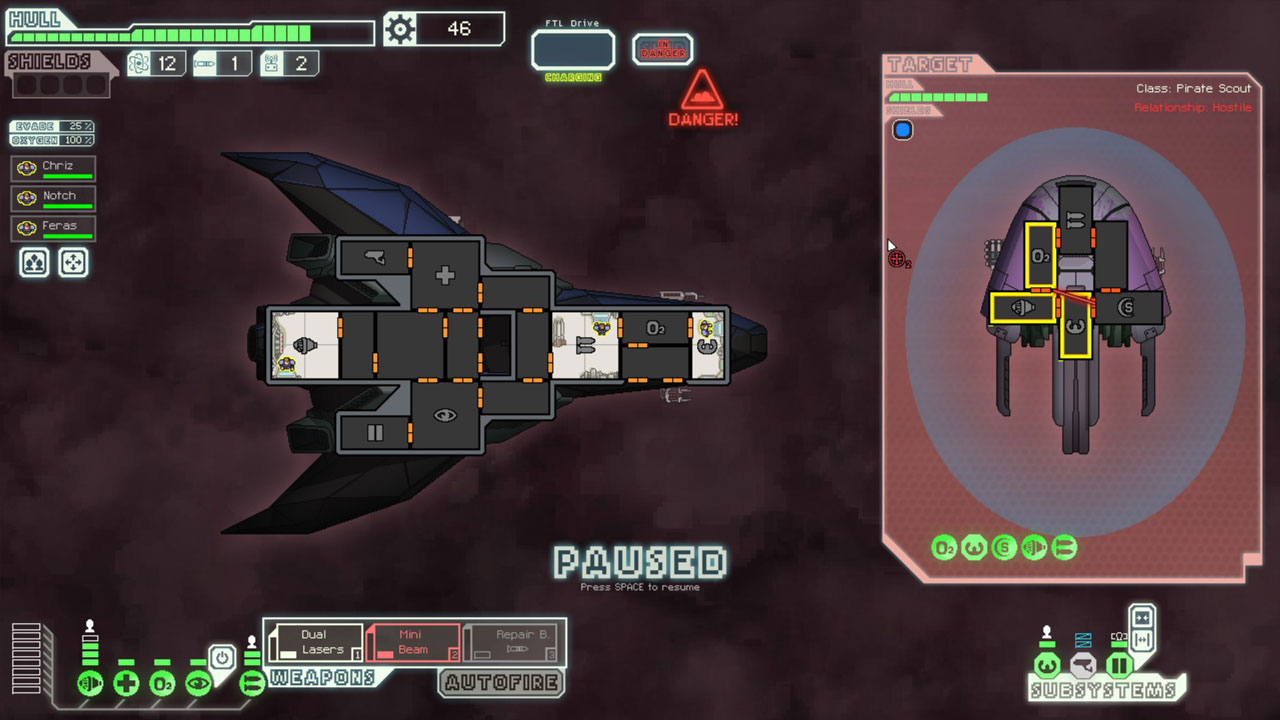
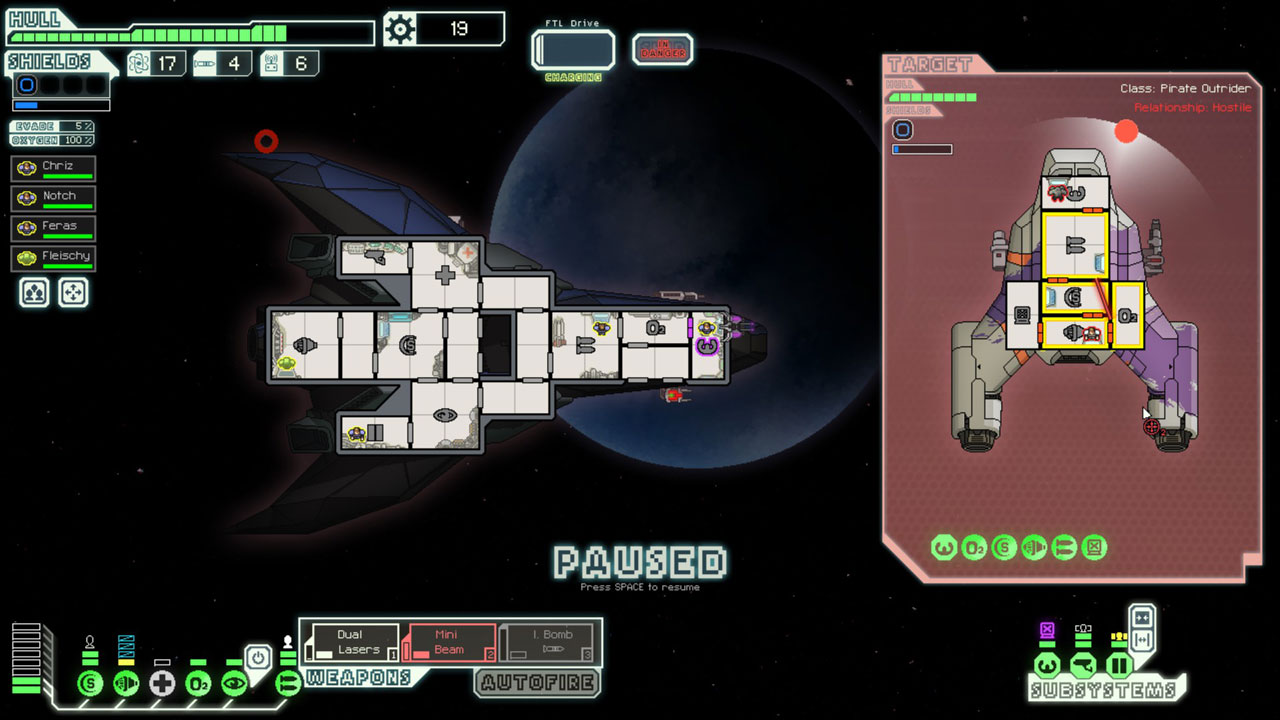

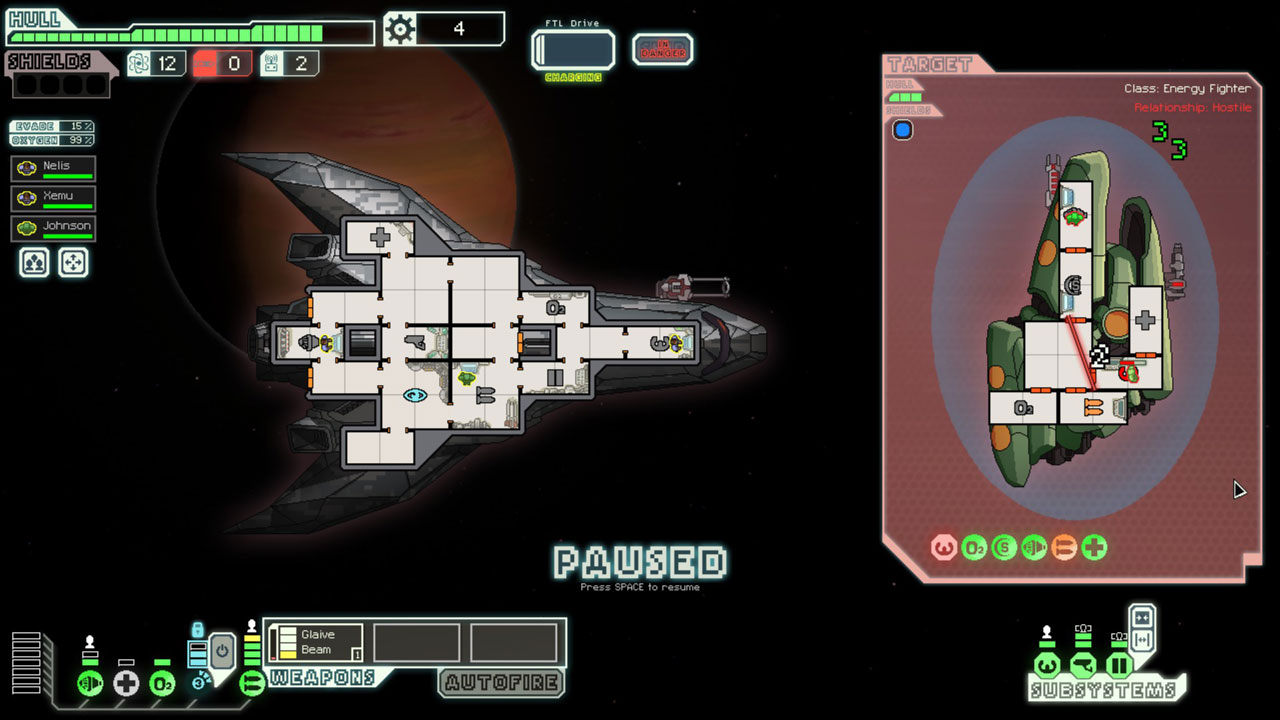
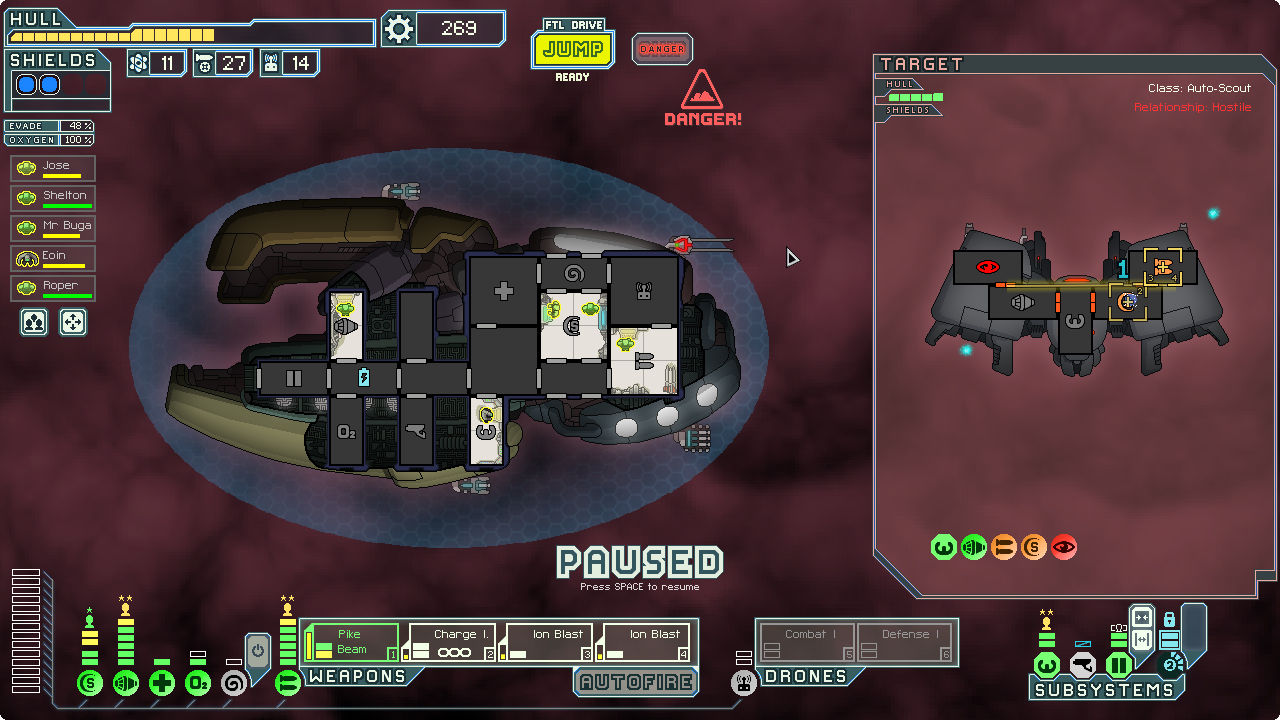
This section deals with specifics about beam weapon mechanics and placement. For basic information about beam weapons, see Weapon Types: Beam
Fire and Bio Weapons
Fire Beams and the Anti-Bio Beam should be treated differently from other beams because they deal no hull or system damage. Their effects act on the the individual tile rather than room.
With the Anti-Bio Beam, you only need to hit the tile that the crewmember is currently on to deal damage to him. Try to have a Slug crewmember, level two sensors, or at least someone manning your level one sensors to tell what you're up against. Use the Anti-Bio Beam in conjunction with other damage for the greatest effect. Since damage is done on a per-tile basis, you can actually hit an enemy crew member twice with the same beam. If they are in one tile as the beam starts, and they move into a different tile before your beam touches that tile, they'll receive double the damage. If you have two Anti-Bio Beams and a way to remove shields, you can instantly kill enemy crewmbmers that aren't Rockmen. (See screenshot)
With the Fire Beam, generally, your goal should be to hit as many rooms as possible and as many unique tiles in those rooms. You want to hit as many rooms as possible so you give the fire more chances to spread. Also, its much better to ignite larger rooms because fire has more opportunities to spread within the individual room.
For more information about the Fire Beam, and how to use it effectively, see Fire Weapons: Fire Beam
Beam Targeting
A nice feature about beam weapons is that when you're targeting, all of the rooms that will be affected will have a yellow highlight. This will allow you to pause, then precisely aim the weapon.
Note: If the room is yellow when you start highlighting right on the edge of the room and it changes when you click and drag, it will still connect with the first room even though it doesn't have a yellow highlight anymore.
Beam targeting can sometimes be tricky. Usually, you'll want to deal as much hull damage as possible while damaging as many systems as possible. The exact placement of your attack is highly dependent on the layout of the ship, and what systems are most threatening to you. If you're using a high power beam weapon like the Halberd Beam and the Glaive Beam, make sure you target the shield room early, so that it could be damaged or potentially disabled. This could allow you to deal more damage with the rest of the beam.
One fairly advanced trick you can use to your advantage is forcing specific enemy crew to repair certain systems. For example, say the enemy ship has a crew of a rock, a mantis and an engi manning piloting, engines, and weapons respectively. The crew is pulled away in the reverse order of the system manning priority (piloting, engines, weapons, shields, etc.). So if you want the mantis to repair shields so that they're down longer, damage shields as the second system you hit with the beam. The engi will repair the first system, and the mantis will take quite a long time repairing shields by himself.
Zoltan Shields block beam damage until they are gone. However, the very last maybe 5% of the beam can still cause damage. This has a few rare applications, but you'll most often be using this with Stealth B against early Zoltan ships. See below for an example on how to take advantage of this.
Beam Targeting Examples
This one starts near the shield room and connects with as many rooms as possible. If this enemy only has level one shields without an extra buffer bar for damage, every room after the shield room will take two damage rather than one.
This enemy's shields have been ioned, so even if shields are hit, he won't be losing them with this hit. This one starts in the weapon room because order doesn't matter, but it hits as many systems as possible.
This Mini Beam actually starts in the shield room. When I first targeted shields, it was highlighted, so it will still connect with all four rooms. This will be fired after one of the Dual Laser blasts connect, obviously.
Another example of a Mini Beam being able to connect with four rooms with careful placement. Hopefully, the missile launcher will go down rather than the Heavy Laser.
Here are several random examples of excellent beam placement provided by reddit user sukuro120
This is a fairly advanced beam placement tactic that I discovered. A Glaive Beam can destroy a Zoltan Shield in one blast. The last very small amount of the beam will do damage to rooms. I found that you could carefully aim a beam so that you can actually make it damage two rooms on the first shot. The below screenshot is an example of destroying the Zoltan Shield and dealing four damage on the first shot.
Here's another advanced beam placement technique which was discovered by reddit user mekloz. By placing the beam so that the path goes entirely BETWEEN two rooms of a ship, it hits both rooms. To be sure that you are hitting both rooms, you have to be sure that neither room lights up when targeting. This allows you to hit at least one extra room on many ships you encounter. Its very tricky though, so it takes practice. Screenshot also provided by mekloz.
Reddit user Masala- refined and perfected this science, and he dubbed the technique "cheeky swipes". He even found a way to consistently hit some rooms twice! Here is a link to an extremely informative post about exactly how to do it, and why it works.
A Note About the iPad Version
The iPad version is nearly identical to the PC version. But the biggest of the differences is in beam weapons. The optimal positioning of beam weapons in certain ship layouts depends on pixel-perfect beam placement. This is extremely difficult to do when you have to use your fingers to aim the beam. Most of the time, I just find myself using an inferior placement because its too time consuming to place it perfectly.
However, there's also one thing you can do on the iPad version that you absolutely can't do on the PC version. Since the beam placement can be freely moved, you can have a beam start anywhere. On the PC version, the beam has to start in a room. There's really only one practical application for this, and its extremely rare that you'll be using it. It requires a Zoltan ship, and either the Halberd Beam or the Glaive Beam to be useful at all. If you finish off a Zoltan shield with either of these weapons (as detailed above), you can move the beam around and have the very end of the beam connect with ANY room on the ship. The PC version restricts you to only be able to connect with certain rooms depending on the ship layout. I've used this trick to disable a missile launcher before it could fire with a Burst Laser II and a Halberd beam - it wouldn't have been possible on the PC version.
Fire Weapons


Thanks to reddit user MegaVolti for this section. He provided it in its entirety aside from minor editorial changes and screenshots.
Fire is a good way to get rid of enemy crew. It enables you to get all the benefits of boarding without actually having to board. It will also destroy medbays and clone bays so they don't need additional consideration. Fire can be reliably generated by Fire Bombs, the Fire Beam or a Fire Beam Drone. Both Fire Beam and Fire Beam Drone need shields to be taken down first, so a combination with ion weaponry is efficient. Since fire weapons are exceptionally strong and change the way you play the game I will explain each in more detail. The enemy AI can not repair rooms which are on fire which is especially important when fighting the flagship. A fire weapon will prevent the AI which activates after all crew have been killed from making any repairs which greatly reduces the difficulty of the flagship fight. It can also not do anything to stop fires from spreading, meaning the flagship is doomed as soon as the crew is overwhelmed and fires are started.
Fire Beam
The Fire Beam is the best stand-alone fire weapon. It generally creates enough fires so that any crew in normal enemy vessels will get overwhelmed by them, even Rockmen. They will of course not die from the fire but the fire will generally spread faster than they can put it out and eventually it will destroy their oxygen system or drain the oxygen so that they suffocate. The Fire Beam is best paired with ion weapons so that it can be fired on cooldown. (See screenshot right) Ion weapons also won't damage the enemy hull so that victory through crew annihilation is guaranteed. Ion weapons also provide the perfect basis for other damaging weapons to finish off ships that can not be killed by fire (e.g. auto scouts). Any other damage dealing weapon (preferably one using two power so that it can be activated instead of the Fire Beam without requiring additional weapon system upgrades) can be used to take out those ships. (See screenshot left) Any offensive drone will also be sufficient and drone parts should not be an issue since they won't be needed every jump. The Fire Beam can also be paired with flaks or bust lasers to take down shields. In this case they won't pair well with offensive drones any more (against targets which are immune to fire) since shields are not down permanently. Using flaks or burst lasers also often leads to some shots landing on the hull so that there is a risk of damaging the ship too much. Fires will deal one hull damage when they destroy a system. With flaks or lasers it can often break apart before all crew are dead. Overwhelming the flagship with the Fire Beam alone can be complicated due to the high number of enemy crew and the extremely fast healing in the medbay as well as the interruptions in your own weapon fire through enemy cloaking. Combining it with hacking (to keep enemies from freely moving around, making it easier for the fire to spread) or any means of taking out the medbay (so that enemies can't heal between putting out fires which will eventually inhibit them from entering burning rooms) is recommended.
Fire Drone
The Fire Drone starts fires faster than the Fire Beam but can not be controlled. This can lead to lengthy battles, especially against ships with a medbay, since enemy crew will survive much longer because the medbay can not be kept on fire / destroyed reliably. It also means the weapon system can not be kept on fire / destroyed reliably and thus the damage taken in a fight might be higher than when using the Fire Beam. The advantage is that the weapon system does not need to be upgraded past level four which is generally enough to power two ion weapons to take down any enemy shields. Having a low level weapon and a low level drone system is much cheaper than having only a high level weapon system. The scrap saved can be used for additional defences. In this case an offensive drone is useful for dealing damage to ships which can not be killed with fire since using a weapon would require additional weapon system upgrades. The Fire Drone alone is strong enough to overwhelm the flagship crew eventually, although it might take a while and having the means to take out the rocket launcher in phase one beforehand is very useful (e.g. a bomb or missile). Phases two and three will then be very easy since the fires can not be stopped by the AI.
Fire Bomb
The Fire Bomb is fundamentally different from the Fire Drone and Fire Beam. Combining them is of little use since beam and drone on their own are enough to kill any enemy which can be killed with fire, adding the bomb to this does not provide a great benefit and it does cost scrap in terms of weapon system upgrades to power it. The Fire Bomb is too weak to kill most ships with fire on its own. The fires are limited to one room and usually easily extinguished. It requires multiple bombs to eventually overwhelm the enemy crew which is generally not sustainable due to limited missile supply (even with Explosive Replicators). However, the Fire Bomb does shine as boarding support weapon when using Rockmen boarders. Setting a room on fire and teleporting the Rockmen into it will make sure the fire can not be extinguished and it will help the Rockmen kill enemy crew much faster. It will also take care of clone bays and medbays passively while boarders are fighting in them. The Fire Bomb is one of the best boarding support weapons in the game when using Rockmen boarders. However, for all other situations its usability is quite limited.
Additional Notes
Thanks again to MegaVolti for that information. Reddit user Poppis86 brought one helpful bit of information to my attention that I had neglected. Crew will almost never try to extinguish rooms that have four fires in them - they'll flee to other parts of the ship when all four tiles catch on fire. This knowledge can be very helpful in deciding which rooms to target.
Optional Systems [1]
These are systems that don't come pre-installed in all ships. Technically, shields and medbay/clone bays fall into this category, but these are essentially required unless you're doing a challenge run.
Cloaking
Cloaking is arguably the single, most useful optional system. It is helpful for any loadout in many situations. It can be used at will to add 60% to your current evasion and dodge the most significant threats. If you are attempting to dodge something, rob other systems of power, and put it in engines to make sure you're at at least 100% evasion. Some enemy weapons like Breach Missiles have a long enough charge time that every single shot can be dodged. Cloaking is also extremely useful in each phase of the flagship battle (see Flagship Battle).
The evasion bonus from Cloaking is applied instantly, so don't cloak earlier than you need to. If you're fighting an enemy that has a burst of five lasers, and you only have level three shields, wait till all of your shields have been taken down before you cloak.
Another benefit of cloaking is that enemy weapons don't charge while you're cloaked. So if the enemy has particularly powerful weapons, you can use level two or three cloak to delay their weapons even longer. Longer cloak has several benefits. If you absolutely have to flee the battle, cloak as long as possible when you evade damage. If you're fleeing the rebel fleet, and they have Anti-Ship Batteries, try to time it so that you cloak any incoming missiles (or other significant damage) and the ASB blast in the same cloak. It can also be used to give your weapons more time to build a charge while the enemy can't. This can be very important if you have weapons with a long charge time. Longer cloaks can also can be used to trap enemy boarders on your ship, so you can finish them off before they flee.
Even though weapon systems on enemy ships are stalled during cloak, Anti Ship Batteries and Power Surges aren't. This can be used to your benefit if you know the timings. For example, you can dodge the first missile volley and the first Power Surge in phase two and three of the flagship battle if you use the right cloak duration.
Generally, you won't be firing while your cloak is activated because it will substantially reduce the remaining cloak time. However, if all of your weapons are charged and you're not concerned about fleeing the battle, firing while still cloaked would be slightly beneficial. The Stealth Weapons augmentation removes the firing penalty, but its rarely a worthwhile augment to keep around.
The vast majority of the time, you'll want to stay cloaked as long as possible. You'll usually want to wait till the moment your cloak ends before firing. However, there are a few times when you may want to end your cloak early to attempt to be ready to cloak the next attack. This is only beneficial for attacks that aren't affected by your cloak timing like the Anti Ship Battery and Flagship Power Surges. To do this, simply fire weapons to force yourself out of the cloak.
Hacking
Hacking can be even more beneficial than cloaking in certain circumstances. Its an extremely flexible system that is capable of aiding almost any loadout. See the Hacking section for details about what to hack and how hacking affects each system.
Mind Control
Mind Control temporarily turns an enemy into a friendly which you can't control. Higher levels of mind control increase the duration of the effect as well as the health and damage of the target. You must be able to see the target before you can mind control him. Ways to see the target include:
Line of sight of your crew on your own ship or during boarding
Level two sensors when you're not in a nebula
Level one manned sensors when you're not in a nebula
Having a Slug crewmember
Having the Lifeform Scanner augment
Hacking a room
Bombing a room
Mind Control has several different applications. It can be used to help your weapons destroy the enemy ship, and it can be used to aid in boarding.
If you need to improve the odds of a volley connecting, fire the volley, then just before it is about to connect, mind control the pilot. This will greatly reduce their evasion and might even remove it completely if they don't have upgraded piloting. It can also be used on other crewmembers on the ship to create a diversion and remove manning bonuses on other systems.
You can also use it to help your crew fend off enemies when you are boarded. You can mind control one of the boarders to help take down the other. Doing this, you'll only have to fight one at a time.
Note: If you're mind controlling an enemy that is on your ship, it will follow the same logic that enemy AI uses on its own ship. It will start to work on the highest priority task that is not currently being handled. So if you're fighting the enemy with your own crew, he will happily leave you do that while he runs off to man the door system. If you want the mind controlled enemy to engage his friend, you need to remove all of your crew from the room the enemy is in. Then, the mind controlled enemy will see this as the highest priority task and will engage. You can then safely add your own crew to the room to aid him if you like.
Mind control is a very effective boarding aid as well. It can be used to turn the odds in your favor. If you only have a two person boarding team, you can mind control an enemy to help in the fight.
Sometimes if you have no better options, you can mind control an individual enemy in the hopes that two other enemies will engage him and kill him before the mind control wears off. Level two mind control works well for this. This is reliably accomplished on the flagship. If you mind control the crewmember manning shields, two opponents will engage him and kill him. This can be used more than once to remove several crew.
If you don't have a good boarding crew, but you have teleporters and mind control, you can still kill the enemy crew. Mind control and enemy, then use your teleporter to retrieve him. You can then fight him alone in the comfort of your own ship.
There are a couple ways to counter enemy mind control, and mitigate the damage it could do. If the mind controlled crewmember is in an essential room, send a spare crewmember to that room to suck up damage and prevent him from damaging the system. This crewmember shouldn't engage the mind controlled crewmember, but he should just run back and forth in the room as a distraction. However, if the room isn't essential and one or two system damage wouldn't be a threat, you should just leave him damage the system. If nothing else, you'll get free combat and repair skills.
If your pilot is mind controlled, try to have one of your crewmembers nearby if you're not engaging him continually. Never let him destroy the system. If the enemy is firing something that could damage you like a volley of lasers or a missile, move your other crewmember into the room to get the piloting evasion bonus.
If one of your crew is mind controlled, and the enemy then boards your ship, the boarders will attempt to join the mind controlled crew. This can usually be used to your advantage because they'll often have to break down several doors on the way. Have your combat crew follow them around you ship. They'll deal a lot of damage without receiving any.
If you have a mind control system, and one of your crew is mind controlled, you should usually use your mind control on your own crewmember to regain control. A level one mind control can counter any level of enemy mind control. But be careful! If your mind controlled crewmember is in the same room as an enemy, using mind control on that room won't necessarily give you your crewmember back - it may take the enemy instead. This is almost never desirable, so be careful who you're attempting to control.
Optional Systems [2]
Drone Control
Drone control is an extremely versatile and useful system depending on what drones you have to stock it.
The single most important drone is the lowly Defense Drone I. Its always recommended to have one of these in the first slot of your drone control. Ideally, you should try to purchase a drone control system that comes with a Defense Drone I. Normally, missiles will be your primary source of damage, but this drone will shoot down the vast majority of them. It will also help with incoming Boarding Drones, Ion Intruders, and to a certain extent Hacking Drones. Hacking Drones are much faster and aren't targeted as reliably.
The Defense Drone II is a decent alternative to the Defense Drone I. It fires faster and also targets incoming ion blasts and lasers. However, this is often a bad thing. If lasers and missiles approach your ship at the same time, the Defense Drone II will target whatever it sees first. It doesn't prioritize missiles (or at least it doesn't prioritize missiles if a laser blast leads a missile by a narrow margin), so often you'll receive damage when you wouldn't with a simple Defense Drone I. That said, it is a good option if your shields or evasion aren't quite as good as they should be. Its also nearly indispensable if you're trying for a shieldless run.
If you only have a Defense Drone II, and you see that the enemy has fired lasers and a missile at the same time, you may be able to "convince" the drone to target the missile instead of the laser. If you power it off till the laser is almost upon you then power it back on again, it may ignore the laser and shoot the missile instead.
The screenshot to the right is an example of excellent supporting drones (even though most aren't currently in use). The Defense Drone I will take care of incoming missile threats. The System Repair Drone can repair the ship while the crew is occupied (or safely hiding on the enemy ship), and all three have decent blue text events.
If you're running defense drones, you should always try to have one extra system upgrade beyond what you need as a damage buffer. There's nothing more frustrating than having your missile defense being taken offline by missiles.
If you have a defense drone as well as cloaking, you can wait till you see if the defense drone will shoot down the missile before you cloak. Just be aware of exactly when the evade/hit decision occurs: If your shields are currently up, the evade is decided when the missile crosses your shields. If your shields aren't powered up at the moment the projectile crosses that line, the evade is decided when the projectile reaches its destination.
Note: the effectiveness of defense drones depends on the size and shape of the ship. Larger ships aren't covered as well. You may want to turn the power off on your drones to put them in a better position for the next volley.
The usefulness of all other drones depend on the rest of your loadout.
If you have decent ion weapons, combat and beam drones are very effective. Sometimes Boarding Drones and Ion Intruder Drones can be effective, but they're usually not worth spending the power and drone parts to run. Shield Overcharger Drones are almost never useful. They take too much power to run, the shield takes too long to build up, and they're almost always removed by things that wouldn't have caused damage anyway. Anti-Personnel Drones should be kept around until you have a better replacement, but they are almost never needed if you can manage boarders well (See Boarding and Hand to Hand Combat). Engi B is a notable exception to this general rule - the lone engi often needs the help of its drone bodyguard. System Repair Drones are always a good choice to have around if you have a spare slot. They have several blue text events, and they help with system repairs, breaches, and fires, so you don't have to micromanage your crew as much. Hull Repair Drones are good to have around if you're taking more hull damage than you like and you have the drone parts to spare. Anti-Combat Drones target all enemy drones near your ship. This includes incoming boarding drones of both types, and all combat and beam drones. It fires an ion blast, so the drone will be disabled and possibly destroyed. Fire Drones are generally only helpful if you have a good ion loadout. If you can properly support them with ions, they'll eventually kill the enemy crew.
Most of the time you shouldn't worry about purchasing drone schematics from stores - you'll usually find one that's useful from events. If you don't have a second (or third, depending on the ship) drone to fill up the slots by sector seven, its often good to purchase an inexpensive filler drone. Good choices are System Repair or Anti-Drone.
If you have combat drones, they greatly improve the effectiveness of hacking shields. Start hacking shields just as the combat drone is about to fire to instantly remove one layer of shields. It can hit another time or two to help remove shields in record time.
Note: If you have a Hull Repair Drone and a Drone Recovery Arm, you can use the Hull Repair Drone before each jump. After it repairs two hull, jump away. It will be collected, and you will receive free repairs.
Teleporter
Very useful to have if you have the crew (and possibly weapons) to support it and the scrap to afford it. It will always pay for itself in the 10% extra scrap rewards. More importantly killing the crew grants a much higher chance of finding a random weapon, augment, drone schematic, or crewmember. For more information and how to effectively use it, see Boarding and Hand to Hand Combat.
Subsystems
Subsystems are systems that don't require power to use. They have a passive benefit, and most can be manned for a greater effect.
Piloting
Piloting is by far the most important subsystem. Always have this system manned unless its absolutely necessary for your pilot to be elsewhere or if you know you can't take damage from the enemy. Upgrading this system only improves unmanned evasion bonuses. That said, when you have the scrap, its always a good idea to upgrade this system to level two primarily to give yourself a damage buffer. Its generally not necessary to upgrade this to level three.
Level two piloting also has a blue text event for nebula, but if you have a clone bay, it produces similar results.
Sensors
Sensors are good to have if you don't have any slug crewmembers. Manning sensors grants a single level bonus to the system. They can aid in finding breaches or fires, but you should already know where those are if you're paying attention to incoming damage. Briefly manning sensors will usually give you enough information about your enemy to plan your attack. After that, you can usually track enemy movement just by watching doors open and close.
Level two sensors have one or two blue text events. If you get a quest for a hidden Federation base, you should upgrade your sensors to level two to be sure that you can claim a reward.
Doors
Doors are very useful at controlling boarders and to a lesser extent fires. Level zero doors allow enemy crews to move freely. Level one doors force boarders to take a few seconds to break down the door before entering the next room. Each higher level takes longer for boarders and fires to breach. Just like sensors, manning doors grants a single level bonus to the system. Its usually a good idea to man doors before you jump to control possible boarders. You can move that crewmember on to other more important tasks if there are no boarders.
Note: If enemies break down one of your doors, that door will remain open after it is under your control. You can tell if you control a door based on how far open it appears. If it isn't opened completely, it isn't under your control.
Backup Battery
The Backup Battery grants two or four extra power for a time before it needs to cool down. This system is inexpensive, and it can be useful depending on your loadout or planned sector path. If you're planning on visiting a lot of nebula sectors, this can be purchased as a safety net. It helps counteract the lost power in random ion storms. Its also handy if you're using a lot of systems that have long cooldown periods.
For managing how to use the power the battery provides See Power Management:Types of Power
Hacking [1]
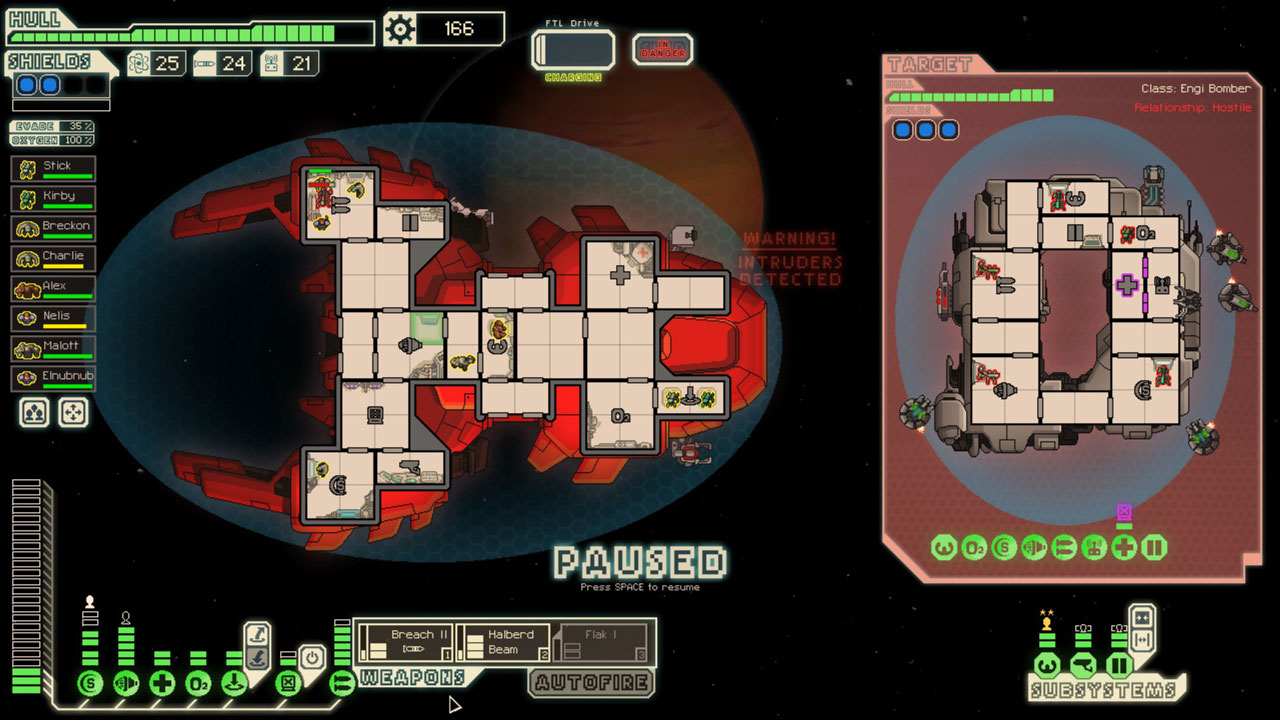
Hacking is the single most versatile system. It can be used offensively, defensively, and to help with boarding. Aside from the effects of the hack itself, it has the added benefit of restricting crew movement because you indirectly control the doors to the hacked room. Another passive benefit is substantially slowed repairs in the hacked room. The only difference in the three levels of hacking is the duration of the hack: four, seven, or ten seconds.
If the enemy hacks a non-essential system like doors, sensors, or mind control and that system is then destroyed, its usually best to leave it destroyed so it can't be used against you. On the other hand, if they hack an important system, it might be a good idea to send an engi or other free repair crew to the hacked room immediately. This way, they'll be able to start repairs immediately without breaking down a door first.
If a ship only has one defense drone, it can still be hacked. There's a decent chance that your hacking drone will make it past without any assistance. You can spam hacking drones at a ship until one connects. Only do this if you have drone parts to spare or if its absolutely necessary. Another technique is to fire a missile so that the defense drone is occupied with it rather than the hacking drone.
Note: there is a trick that can be used that allows Hacking drones to reliably get past defense drones and anti-drone drones. (See screenshot) When you send out your hacking drone, watch the defense drone(s) as soon as it fires, pause, and remove all power from the hacking system. This will freeze your hacking drone in space causing the blast to miss. Power it on very shortly after it is powered off. You can use this trick multiple times in a row if they have multiple defense drones. Try to launch the hacking drone when the defense drone(s) aren't going to be in line with the approach of the hacking drone because the defense drone will be much more likely to connect. Remember that you have to be more careful with defense drones than anti-drone drones because anti-drone drones fire ion blasts which can't destroy an unpowered drone.
Its worth noting that a hacked door always takes exactly 10 strikes from crew to break down. You can also hit it 9 times then walk away to weaken it. This can be useful for tricks that require careful timing.
I'll try to cover all the systems you can hack and what their effects are on you and your opponent.
Shields
Shields are almost always a good option to hack. Level one hacking will remove one layer of shields. Level two hacking will remove three layers of shields. Level three hacking will remove four layers of shields. If you have ions and you are hacking, send the ions first because there will be fewer layers of shields to be removed. You can also send projectiles to make the shield removal process go faster - flaks are a good candidate for this.
If you have a Fire Beam or Anti-Bio Beam, hacking will be a very good system to have.
If your shields are hacked, you should usually focus on disabling enemy weapons. If you can't mitigate the extra damage you'll be receiving from hacked shields, you may need to flee the battle.
Piloting / Engines
Hacking piloting or engines has nearly the same effect - reducing the evasion to zero. It also has the passive effect of removing the 5% bonus that manning the system would grant. Most often the one you'll want to hack depends on the layout of the ship. Hack the room that would restrict crew movement the most. If you're dealing with an auto-scout, you'll often want to hack piloting then destroy the system. It probably won't be able to repair it before you finish it off.
Whether you hack shields or piloting should depend on your weapons. If you are relying on beam weapons for damage, you'll probably want to hack shields. However, if you have things to deal with shields, you may want to hack piloting instead. A good example of where hacking piloting would be better than shields would be Flak I / Flak I / Heavy Laser I / Heavy Laser I. The flaks will easily remove the shields, and the lasers will deal significant damage. Also, if you have level three hacking and good timing, you can fire those weapons twice.
Generally if your piloting or engines are hacked, it won't have a huge effect on the battle because enemies hack and fire weapons randomly. You'll be taking a little more damage from the passive effect. Just plan around the potential increased damage and consider focusing on enemy weapons or fleeing.
Weapons / Artillery
Discharges weapons. If you have cloaking as well, you can often avoid all significant damage. For example, if they have a missile, cloak the first missile. Right before it fires the second one, use a level two hack to discharge it. By the time its charged again, your cloak will be cooled down. In standard battles, hacking weapons generally isn't as useful as hacking shields, piloting, or another system. However, hacking missiles is often useful in the Flagship fight.
If your weapons are hacked, you can usually still handle the battle without incident, but there are definitely times where you should flee. The flagship battle isn't necessarily one of those times. (See Flagship Battle for more info)
Note: If you hack weapons the moment a burst weapon starts firing, the hacking will not interrupt it - all of the projectiles will still fire.
Oxygen
Hacking oxygen quickly drains oxygen from the ship. Most of the time it isn't practical to do this to an enemy ship because they often have medbays/clone bays or upgraded oxygen systems. However, if the enemy ship isn't a threat, you can hack their oxygen system then destroy it (thanks to reddit user Kuirem for this tip). The enemy crew will have a tough time getting through the doors to repair it. You'll need to damage any medical facilities, and possibly repeat the process to kill them. This is an extremely good strategy for Slug C in early sectors.
Level two hacking can drain a ship with level one oxygen. If your level one oxygen system is hacked, end the battle quickly or damage their hacking. If you have weak offense but good defense, you could preemptively purchase level two oxygen to remove the hacking threat (especially useful in later Abandoned and Slug sectors). This also has the passive benefit of a blue text option when being hacked by an event.
Drone Control
When your drones are hacked, they're all disabled, and they all have a chance of being destroyed each time hacking is activated. Its seldom the best choice to hack enemy drone systems, and it can be very damaging to have yours hacked if they're an essential part of your loadout.
Medbay / Clone Bay
Hacking the clone bay will disable the clone bay for the duration of the hack. This is useful for boarding if you have no other way to disable the clone bay after you kill their crew. If your clone bay is hacked, you can still kill your own crewmembers and have them respawn while the hacking is cooling down.
Having your medbay hacked quickly drains health from any of your crew inside. If your crew needs health during this time, it is dangerous but still manageable. If you time it so that you break through the doors right as the hack ends, you'll be able to heal your crew quickly. Make sure that you remove them and unpower the system before the doors close again. Hacking the medbay is extremely effective if you're also boarding. After the drone is attached to their medbay, remove all power from your hacking system, teleport into their medbay, wait for a couple enemy crew to join you in the medbay, then power up the system and hack using at most level two. They'll be trapped while your crew attacks them and the medbay drains them of health.
Hacking [2]
Backup Battery
Having your backup battery hacked not only disables the system, but actually removes a couple of your primary reactor power as well. This is usually more of a minor inconvenience than something to fear.
Teleporter
Having your teleporter hacked will retrieve any crew you have on the enemy ship. If you have good timing, you can still have successful boarding runs in the interval between hacks.
Hacking their teleporter will remove their crew from your ship. This is mainly useful if you have a particularly weak crew.
Be careful of the timing - it will only remove the crew from one room at a time.
Cloaking
Hacking cloaking immediately stops the cloak effect or prevents you from beginning the cloak. This can be used on an enemy to prevent it from cloaking entirely. This is sometimes useful on the Flagship - especially if you have an ion heavy loadout and the cloak would break the effect.
Mind Control
Randomly mind controls an enemy. It also breaks mind control on your own crew members. You may need to do this if you have few/weak crew and you've been boarded. That said, its generally not beneficial to hack enemy mind control.
Door System
Inhibits crew movement during the duration of the hack. More of a nuisance than a threat. This could be used to aid your boarding crew or allow fire to catch and spread. Its generally not beneficial to hack enemy doors.
Sensors
Disables your sensors during the duration of the hack. Again, more of a nuisance than a threat. Never hack enemy sensors because they don't rely on visibility for decisions.
Ship Info And Tricky Achievements [1]
Most ships have three layouts. The first layout is unlocked either by a quest or by beating the game with the previous ship. The second layout is unlocked by completing two ship achievements, and the third layout is unlocked by reaching the last sector in the second layout.
The general ship strategies are usually only applicable early on. The weapons you find and the systems you buy will change your strategy dramatically as you progress.
Not all achievements are listed here. Only ones that may cause you trouble or that have a trick to them.
Kestrel Cruiser
Achievements:
The United Federation - To get six unique aliens, be sure to visit a variety of sectors. Each sector type is biased to give you a certain type of crew. Pirate sectors usually have the biggest variety.
Tough Little Ship - This can be achieved in a variety of ways. If you're attempting this, make sure you have a safe path to a store (or a full hull repair event) and that you have the scrap for repairs. You can use fires or enemy boarding to damage systems. You can simply receive damage from enemy ships, then jump away at the correct moment - all damage ceases during the jump. Just be sure you're counting weapon damage correctly. I don't recommend using a sun for damage. Sometimes it can cause more than one damage. However, you can use the sun to start the fires. You can also use asteroid fields to deal the damage. After the battle is over, just shut off your shields and wait! Just be ready to power them back on at the right moment - you never know when that last asteroid might hit piloting preventing the jump.
Kestrel A
The iconic ship. Very average in every respect with no real weaknesses. Good starting weapons that you can easily build on. You should essentially never sell your Burst Laser II, and the Artemis Missile is a good spare weapon to keep around for difficult engagements. If the enemy isn't a significant threat, just use the Burst Laser II on him. Even if the enemy is fairly threatening, you should only need to fire one or two missiles for the average battle - usually targeting shields or piloting. Venting is pretty good other than the cockpit, so Lanius and Rocks make the best pilots for this ship.
Kestrel B
Excellent early game gunship, but the starting weapons generally won't be useful after a few sectors. As long as you still have your starting Basic Lasers, it is one of the few times where you can safely set all your weapons to autofire. Other fast-firing lasers and Flak Is compliment the starting Basic Lasers well. This ship is good for boarding because of the starting Mantis and position of the teleporter once its purchased. The many doors, and their distribution ensure the ship has excellent venting. I prefer to put the Zoltan in engines, so I don't accidentally unpower one of my weapons.
Kestrel C
Average Advanced Edition ship. The Dual Lasers is an excellent weapon for the required power - there's a very good chance you'll want to keep this weapon around for the entire run. Make sure you focus at least some damage on their shields because firing the Ion Stunner on them will substantially slow the repair process. Since you start out with an ion weapon, getting any other ion weapon will allow ion damage to stack. The starting Lanius will give you some nice blue text events if you can visit Abandoned Sectors. I like to leave the piloting to my Lanius because venting in the front of the ship is poor. However, venting in the rest of this ship is very good. You can usually herd the enemy crew in circles with your crew taking minimal damage.
Engi CruiserUnlocked by reaching the fifth sector with any Kestrel Cruiser
Achievements:
I hardly lifted a finger - This is easily achieved if you encounter a shieldless scout or if you're fighting a ship with level one shields in an asteroid belt.
The guns... They've stopped - You can get this in Engi A with the help of any other ion weapon. Or you can simply visit a pulsar. Systems ioned by the pulsar count toward the achievement.
Engi A
An exceptionally powerful ship. The Ion Blast II is fast enough to stack with itself, so its offence can be built on with nearly any other weapon or drone. All Engi ships only have three weapon slots, so you'll generally want to keep good, high power weapons. If you plan on using drones as your primary offence, try to get a Drone Recovery Arm. You may want to purchase doors a little earlier than normal because of your fairly weak crew (the same goes for all Engi ships). Try to keep the Engi Med-Bot Dispersal around for at least a little while - it helps with boarders and has a very nice blue-text event. Venting is fairly poor, but Engis are great at putting out fires. Boarders will be a bigger problem, but you usually have the option of herding them into the medbay to fight. If you can, turn on the medbay during fights/fires/breach repairs to take advantage of the Engi Med-Bot Dispersal and minimize damage taken.
Engi B
An exceptionally weak ship. Its one starting Engi is very susceptible to boarders, so use venting combined with your Anti-Personnel Drone to take care of them. Try to time it so that the room with the boarders runs out of oxygen just after your Anti-Personnel drone arrives. I know its boring, but if you really want to succeed, you should wait for your drones to fully heal up between battles. If you're forced to fight with your Engi, make sure you use venting to funnel them into the medbay first. You should also use venting to deal with fires. Its a common mistake to keep the majority of the ship vented permanently. Don't do this! You lose control of boarders, and you're forced to deal with O2 repairs sooner. Its starting weapons can be built on fairly well, but by themselves, they're very weak. So an efficient, low power weapon should be your first purchase if available. Early game in this ship is one of the few times where purchasing crew could easily be justified - try to get something with decent combat ability though. You can safely sell one System Repair Drone and your Drone Reactor Booster at the first store for some extra scrap. Don't hesitate to have your Engi move around the ship to do repairs or man other systems - your starting engines aren't going to be doing much good, anyway. You'll need every trick in the book to win with this ship, so if you can't take damage from an early enemy, target their Oxygen system to try to suffocate them. Very often the Heavy Laser will cause a breach or start a fire to help your cause.
Engi C
A deceptively powerful ship. Dual Lasers is a good weapon to keep around for a long time. You'll probably keep it for the whole run, but don't hesitate to trade up for something more powerful because you only have three weapon slots to work with. Hacking is extremely versatile - don't forget to use it to help suffocate the enemy when they're not a threat. The Beam Drone is good, but you'll probably want to sell it once you have better weapons. Only keep it around if you can't find anything better. Keep the Defense Scrambler around as long as possible because it will make a lot of difficult situations much easier - especially if you rely on drones. Upgrading hacking is usually going to be a fairly early purchase. It will help keep shields down longer, and allow you to get another hit or two in. This ship is fairly weak against boarders, so if you're boarded, the first step should usually be to move one of your Engis to door control. Then you can use the good venting to your advantage.
Ship Info And Tricky Achievements [2]
Federation CruiserUnlocked by defeating the partially-built Flagship in the Rebel Stronghold sector. (empty beacon if you have Long-Range Scanners)
Achievements:
Artillery Mastery - Upgrade your Artillery Beam early and focus on all forms of defense.
Diplomatic Immunity - Focus on green sectors and distress beacons. If you have Long-Range Scanners, visit a lot of empty beacons. Federation A already has a great crew for this.
Federation A
Starts with the best crew for blue text options and one of the best weapons. The artillery beam pierces all shields (other than Super Shields), and is a nice supplement to any loadout, but if your other weapons are competent, you won't need to focus on it. This is a strong gunship to start out, so focus on defense if you're struggling to improve the offense. Worst-case, you can always destroy the enemy with your artillery beam - it just takes time. If you are forced to rely on your artillery for damage, be sure to upgrade it once. It doesn't even have to be powered full time, but the damage buffer will often save you. I like to use Rockmen as pilots, so I'll often change the crew positioning. I'll move the Human to engines and Mantis to weapons as well. Venting on this ship is bad, but you shouldn't have to rely on it with your strong and diverse crew.
Federation B
Not as good as layout A. The Slug makes a great pilot. Most of the ship has excellent venting, but the front of the ship is very susceptible to fire because the only way to vent it is through the medbay. If you feel it necessary, you might want to upgrade doors a little earlier than normal to make up for the weaker crew and the poor venting. The starting Leto Missile isn't great, but the Dual Lasers makes up for its weakness. You may find yourself relying on the Artillery Beam more with this ship because of its initially weaker offense - thankfully, it starts out at level 2, so it charges faster and has a damage buffer.
Federation C
A very unique ship. The Flak Artillery only appears on this ship. It is slow to fire and inaccurate, but it has the same damage as the Flak Gun II. Its not terribly useful initially because of its extremely slow firing speed, so you'll want to keep an eye out for other weapons. Early on, you'll want to use boarding as much as possible with two possible strategies - Zoltan bombs or Zoltan/Mantis boarding (If you leave both Zoltans to man the ship, you'll be wasting one power in piloting). Also, the Emergency Respirators augment allows you to easily board and destroy airless scouts. Once you have nearly any damaging weapon, you can safely sell this augment. Be careful which ships you choose to board! If you board a ship that can destroy or disable your level two Clonebay, you may be sending your crew on a one way trip. Focus on defense with this ship because one way or the other, you'll be needing a fair amount of time to deal with the enemy.
Zoltan CruiserUnlocked by spreading peace in the Zoltan Homeworlds (empty beacon if you have Long-Range Scanners)
Achievements:
Givin' her all she's got, Captain! - Having an upgraded backup battery can make this achievement much easier - you won't even need Zoltans.
Zoltan A
A good ship with a great starting weapon. Find weapons that allow you to use the Halberd Beam more effectively. In early sectors, this usually means finding a laser or ion that only takes one power. One way or the other, you'll need to upgrade your weapon system fairly early. This will give you a damage buffer and allow you to use the Leto missiles in conjunction with the Halberd Beam. Upgrade engines slightly sooner than normal with this ship to make the Zoltan Shield last longer. Also, move your pilot Zoltan to a system that requires power when you get another crewmember. Venting on this ship is fairly good, and you'll need to rely on it a lot because of your weaker crew.
Zoltan B
An exceptionally powerful ship with great starting weapons. Reorder your weapons so the pike beam is on the left. Finding another ion weapon or getting a more powerful beam weapon would be ideal early weapon upgrades, but essentially any other weapon builds on the starting weapons. Move your pilot Zoltan to a system that requires power when you get another crewmember. Don't forget to upgrade your shields because this ship starts with an unusable shield system. Venting isn't great for much of the ship, so you'll probably want some stronger crew to balance things out. If you're wondering weather you should stagger your Ion Blasts or fire them at the same time, just fire them at the same time. That said, there's some fairly complicated math that suggests that staggering them is slightly better against ships with more shields and higher evasion.
Zoltan C
Tricky to get started with, but very powerful if you can survive the early sectors. Juggling power with the backup battery and by moving Zoltans around makes the early sectors interesting. If your enemy just has one layer of shields, you can set the Charge Ion to auto-fire. If ships have two or more layers of shields, leave the Charge Ion build up all three blasts before firing, then set it to auto-fire if more than one hits. Don't activate your Battery Backup till you need to. This usually means that you need to wait till you know the enemy shields are going to be down, and you'll need the extra power for the Beam Drone. To save 2-3 seconds on your first possible damage, activate the drone at the very beginning of the battle, and leave it move closer to its initial firing position before deactivating it and waiting for the shields to go down. The Charge Ion is one of the best weapons in the game, so nearly any other weapon will compliment it. I like to move the Zoltan in shields to weapons until I get more power or crew - you don't need the power in shields for the first part of battles because of the Zoltan shield. Move your pilot Zoltan to a system that requires power when you get another crewmember. This ship is excellent for nebulas - Ion Storms aren't threatening because of your Zoltan Power and your Backup Battery. Also, Pulsars aren't very threatening because you can stack your Zoltans in your shield/weapon room to keep them up and running. Venting in the rear of the ship is very poor. Be careful you don't lose your Clone Bay!
Ship Info And Tricky Achievements [3]
Mantis CruiserUnlocked by slaying KazaaakplethKilik's crew then finding and helping survivors with advanced medical facilities in the Mantis Homeworlds. (ship beacon if you have Long-Range Scanners)
Achievements:
Battle Royale - Find a ship that's easy prey. Kill all of their crew but one, then suffocate your extra crew.
Mantis A
Very weak to airless scouts and Zoltan ships early on. You'll probably want to keep one mantis on piloting till you can find a better pilot, keep your Engi on engines, and keep your other two Mantis in the teleporter room to start out each fight. Mantis Pheremones isn't a bad augment, but it can be sold for scrap. The Small Bomb is excellent for destroy medbays/clone bays when necessary - you'll probably want to keep it for the entire run unless you happen to get a Breach Bomb II. All Mantis ships only have three weapon slots, so you'll generally want to keep boarding support weapons and good, high power weapons. Venting isn't great, but boarders won't be much of a threat on this ship.
Mantis B
One of the very best ships. The only ship to start with upgraded shields, and the only one to start with a defense drone. You'll want to keep your eye out for a boarding support weapon like a bomb and something to take down Zoltan Shields. You'll generally find crew quickly because you'll be boarding, so fill it up and have fun. If you encounter an airless scout early on, send your Boarding Drone over, and grab a sandwich as it slowly destroys the ship. You should avoid Abandoned sectors because you'll be relying on boarding ships with oxygen. You can sell your Mantis Pheremones augment when necessary. Keep your boarding drone around until you have weapons capable of handling airless scouts. Venting is decent, but you might have some problems with fires in the extremities of the ship. Try to get four crew that are best for boarding (Mantis and Rock), and have the rest of the crew be something that can actually man and repair systems.
Mantis C
Another potentially powerful boarding ship which starts with great boarding support weapons. If you can get four Lanius, they make a great boarding party, but that usually won't happen. You'll probably eventually move your starting Lanius to piloting or engines. You should probably set the starting position of your Mantis to the teleporter room, so you can board faster. You can sell your Mantis Pheremones augment when necessary. Reconstructive Teleport is extremely valuable on this ship as it will allow your crew to start battles at full health and gain experience. You may also want to look out for a DNA Backup if you're unsure of your boarding skills. You can sell one of your starting weapons at the first store because they're fairly redundant - I usually prefer to keep the Lockdown Bomb because it allows more control, and you can deal with more crew per bomb. Aside from your boarding support weapon, make sure you use your two remaining slots to keep good, high-power weapons to deal with other threats.
Slug CruiserUnlocked by showing mercy and looking for information in the Slug Home Nebula. (ship beacon if you have Long-Range Scanners)
Achievements:
Disintegration Ray - If one of the crew you're attacking is a Rock, don't forget that he'll take one extra hit with the beam.
Slug A
Excellent for early game crew kills. Dual Lasers are great at removing shields, and Breach I is great for disabling medbays. Have your second slug start on weapons, but move him to engines temporarily when you need the extra evasion. Killing the crew can take some time, so make sure you focus on defense. After you have decent defense, upgrade your weapons once, so you can use all three at the same time to better deal with their crew. After the first few sectors, this method of killing crew will become less and less useful because of the better medical facilities and more shields. You'll need to either shift to boarding or a gunship. This choice will depend almost entirely on what you find from your early crew kills. If you find a couple mantis and have scrap to spare, go with boarding. And as always, if all else fails, get hacking. Find a Flak I, or some other decent weapon, probably go with the gunship route. The Slug Repair Gel can be sold for scrap. Venting is fairly poor, but you start with upgraded doors and your starting crew should be able to deal with most threats easily.
Slug B
A misunderstood and underrated ship in my opinion. It requires good boarding technique to be useful, but obviously you should be careful because you don't have a medbay or clone bay. Make sure you distribute crew damage as much as possible and try to only use a couple missiles each battle. Don't forget that the bomb works on EVERYONE in the room, so if you need to heal five or more crew, have them walking through the room as it goes off. To save on health, suffocate boarders in the maze-like ship, and if you know a bomb or missile is about to hit a room, pause, and have your crew momentarily walk out of it. Buy your preferred medical facility early to save on missiles, I always go with the first one I encounter. Once you get a medical facility, you can sell the Healing Bomb for scrap. The Artemis Missile will make a decent supplement to other weapons until it can be replaced with something better. The Slug Repair Gel can be sold for scrap.
Slug C
A versatile ship because it starts with mind control as well as hacking. If early ships aren't a threat, you can use mind control to have the crew kill each other, then finish off the last one with lasers. Another great technique to use with this ship is hacking oxygen to kill crew: Hack oxygen and damage it right as the hack ends. You can also mind control the repairman just before oxygen comes back on line to make this technique even more effective. It will take a long time to repair, and you'll be able to repeat the process to kill the crew (See Hacking - Oxygen for more information). Once you get to sector two and enemies start having level two shields, be sure to upgrade your Hacking system to level two to remove more layers of shields. Venting on this ship is great, and it starts with upgraded doors, so you shouldn't have to worry much about fighting boarders or fires. The Slug Repair Gel can be sold for scrap.
Ship Info And Tricky Achievements [4]
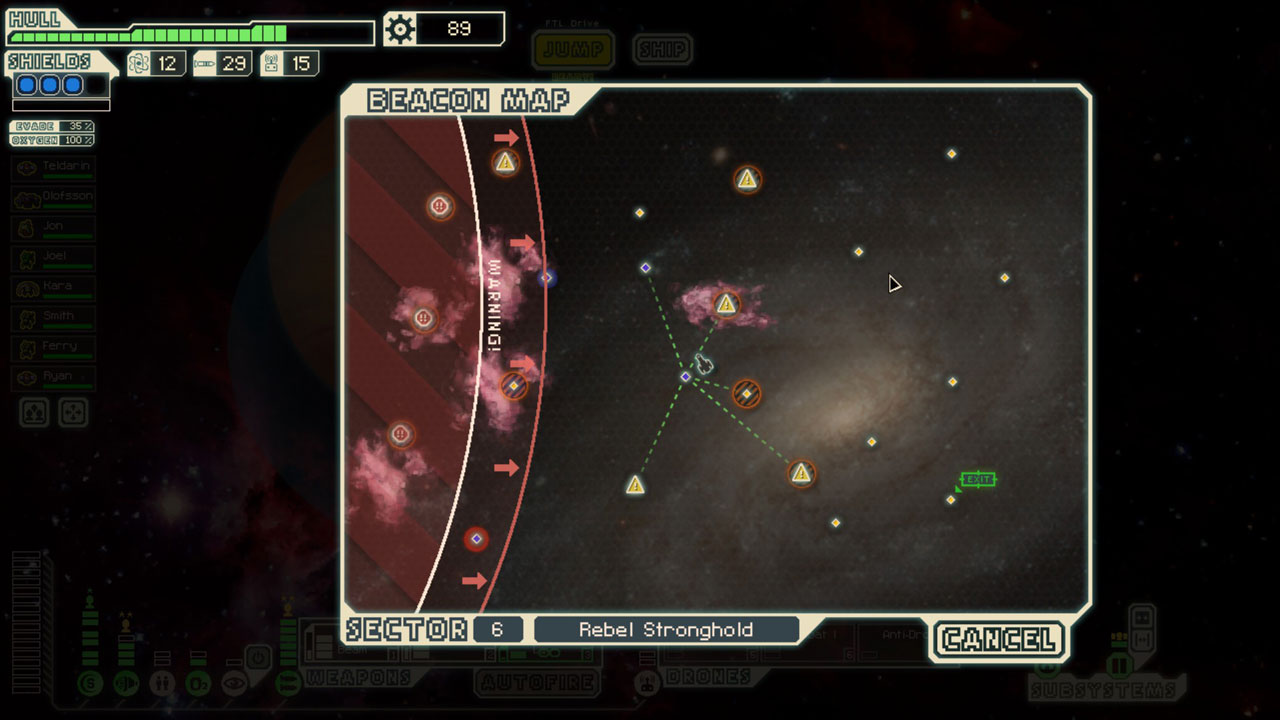
Rock CruiserUnlocked by proving your fortitude to a mighty warship in the Rock Homeworlds. (ship beacon if you have Long-Range Scanners)
Achievements:
Is it warm in here? - Easiest to get in Rock B with the Fire Bomb. Regular missiles and Heavy Lasers blasts have a decent chance of starting fires also.
Defense Drones Don't Do D'anything! - Its easiest to get this achievement in Normal or Hard mode in sector one or two. Just fire your missiles in volleys and aim for the Drone Control room first. Engi sectors have a lot of defense drones if you have that option.
Ancestry - Have great luck to get this achievement. (To help that luck along, See Ancestry and Unlocking the Crystal Cruiser)
Rock A
Personally, my least favorite ship because it relies on a fair amount of luck. If the enemy's weapons are a significant threat, you'll probably want to soften them up first. Otherwise, you should use the Artemis missile to destroy piloting, then use the Hull Missile for damage on empty rooms. If the enemy is no threat at all, and it has eight or less hull, you'll probably just want to spam Hull Missiles on empty rooms. If you encounter a Zoltan Ship before getting a non-missile weapon, you may just want to flee unless you have a lot of spare missiles. If you can get a teleporter, this becomes an excellent boarding ship - keep the Artemis missile to destroy medical facilities. Usually, you'll be scrambling to find some way to damage enemies after you run out of missiles, so you should show mercy to ships that offer you a fair amount of missiles. The Rock Plating is good to have around, but you'll often need to sell it for scrap. Don't hesitate to sell the Hull Missile if you can get a decent laser of some sort.
Rock B
If lacking other firepower, you should always get a teleporter for this ship. Rock boarding with a Fire Bomb is extremely effective. Firebomb their medbay, wait a few seconds to let it take damage while your crew isn't, then board it (See Boarding and Hand to Hand Combat: Miscellaneous Boarding Info for a more detailed boarding technique). This ship has no door system and no airlocks, so if fires get out of hand, you can always shut off oxygen to help it burn out. You shouldn't need doors with this sturdy crew, so don't worry about purchasing the system. But if you do buy doors, you can leave certain non-essential rooms breached to help venting in some circumstances. The Heavy Pierce Laser isn't a great weapon, but you'll need to keep it around till you can replace it with something better. The Rock Plating is good to have around, but you'll often need to sell it for scrap.
Rock C
Not a terribly great ship. Keep the Crystal weapon around for at least awhile because it makes a good addition to many loadouts. Swarm missiles aren't very good, but they can help take down enemy weapons or evasion if they're a threat. You'll definitely need better weapons or at least hacking very quickly to make this ship viable. It has excellent venting to help control boarders as long as you put someone in the door control room. This ship is very useful as an alternative way to unlock the Crystal Cruiser. Since you won't have a quest beacon to guide you, try to get Long-Range Scanners and find empty beacons in the Rock Homeworlds. Alternatively, you can use the exploit of naming you Crystal crew to "Ruwen" before entering the Rock Homeworlds - this will reveal the correct quest beacon. (this exploit has been patched out) The Rock Plating is good to have around, but you'll often need to sell it for scrap.
Stealth Cruiser
Unlocked by having your Engi aiding his troubled friends in the Engi Homeworlds. (empty beacon if you have Long-Range Scanners)
Achievements:
Bird of Prey - This is most easily achieved in early sectors with Stealth B.
Phase Shift - The single best place to get this on the third phase of the Flagship fight. Dodge a power surge and a volley of lasers/missiles in the same cloak cycle. The second missile volley usually lines up closely with a Power Surge.
Tactical Approach - Avoid Rock sectors because they have lots of hazards. Nebula sectors can be almost as threatening to this achievement. Sometimes, you'll be completely prevented from being able to get this achievement, so be patient. (See screenshot)
Stealth A
Very powerful little ship. Reorder the weapons so that your Dual Lasers are on the left for most encounters. These weapons are very strong and quick to fire - you'll probably want to keep them both around for quite awhile. As with all Stealth ships, you'll want to purchase shields as soon as possible. Venting on this ship isn't great, but at least the starting crew have no real weaknesses. The Titanium System Casing can be quickly sold for scrap.
Stealth B
Powerful at first glance, but very dependent on RNG to get your run started. Unlike most ships, you'll want to spend your first 50 scrap on cloaking. At the beginning of most early battles, you'll want to use your full level three cloak. This will allow you to fire first, usually ending the battle. Obviously, start the attack on or very near the enemy Shields to do the most damage. If you can find a low power ion or laser, you'll be in good shape for a long time. But hacking is almost essential for this ship unless you get other good weapons to replace or support the Glaive Beam. Hacking can sometimes be purchased before shields depending on the situation. After the first couple essential purchases and upgrades (cloaking, shields/hacking) consider upgrading weapons to give yourself a damage buffer. Don't forget to "steal" power from cloak with your Zoltan as its cooling down to increase your evasion (See Power Management), but be careful not to remove power from the Glaive in the process! The medbay is small and positioned so that you can only get two crew in at a time, so be very cautious when dealing with boarders. They can easily overwhelm your weak crew if you're not careful.
Advanced tips for Hard Mode: This is arguably the worst ship, so you need every edge you can get. Hard mode has different rules that govern enemy targeting (See Difficulty, Luck, Vocab, Etc.), so you can exploit those rules to give yourself a very small edge early on. If you keep Oxygen levels below 50%, it gives the O2 system a higher priority for being attacked. Likewise, if you're able to toggle the power of your Glaive off for a few frames when the enemy fires, it gives weapons a lower priority for being attacked (the timing on this is very precise - I don't even use this trick). Both of these together should make your weapons a significantly lower priority target.
Stealth C
This "stealth" ship unfortunately doesn't start with cloak. Some regard it as the worst ship, but its far less dependent on luck than others. I like to use the Slug or maybe Rock crewmember as the pilot. The Shield Drone is slightly better than normal Shield Drones because it requires one less power. That said, it still does very little to block incoming damage. Don't forget to use your Anti-Drone Drone to help with enemy attack drones. It has a three slot drone system, so at least you'll be able to keep a couple handy drones around. Your first upgrade should be a damage buffer on your weapon system. Next should be your Drone system. This will allow you to use both drones at the same time, or at least you'll still be able to run your Shield drone when the system is damaged. You'll definitely want to save up for shields though because those drones don't do much for preventing damage. Venting is pretty good, but boarders can still be a problem if you don't have a crew starting the battle in the door room.
Ship Info And Tricky Achievements [5]
Lanius CruiserUnlocked by unlocking four other ships.
Achievements:
Scrap Hoarder - Play conservatively. Only buy what you need.
Loss of Cabin Pressure - Beware of all hacking because it closes doors! All doors are closed if they hack the door system. If this happens, you'll need to cycle power to oxygen so you don't get over 20%. The alternative way to get this is to suffocate all of your weak, oxygen-dependent crew before your first jump.
Lanius A
A fairly average ship. It does start with hacking, so take advantage of that if you're short on weaponry. Venting is excellent with the many doors and Lanius crew. If you're boarded, make sure you fight them with Lanius in a vented room. Beef up defenses and hacking early. Also hack and damage oxygen to kill crew for greater rewards (See Hacking - Oxygen for more information). This is an excellent ship to use for boarding because it starts with two Lanius, Hacking, and even an Ion Stunner. The Stunner will allow you to sit in the shield room, having the enemy suffocate while stunned. If you don't go with boarding, its a good idea to make one of your Lanius the pilot. The Emergency Respirators are definitely useful, but they're not at all necessary, so they can be sold for scrap.
Lanius B
An exceptionally powerful and flexible ship. The two Lanius and mind control should be used for boarding. You'll want to set their default positions in the teleporter room. This is the only ship that can safely board airless scouts from the beginning. It also starts with an amazing Advanced Flak gun that charges faster, is more accurate, and uses less power than its standard counterparts. As always with the clone bay, make sure it won't be damaged or disabled if your crew are going to die. Unfortunately, your Lanius crew can't be sent to the "medical airlock", so you'll have to attempt to have them die at opportune times. If they're not taking much damage from boarding, you may just opt to upgrade your clone bay to get a higher passive health bonus each jump and to get the damage buffer. The Emergency Respirators are definitely useful, but they're not at all necessary, so they can be sold for scrap.
Crystal CruiserUnlocked by having great luck. (To help that luck along, See Ancestry and Unlocking the Crystal Ship)
Achievements:
Sweet Revenge - Take an early opponent down to one hull and wait for them to kill themselves.
Clash of the Titans - This can be a very frustrating achievement! It may take many tries to even encounter enough rock ships to have the opportunity to get the achievement. If you don't see a lot of red sectors when you hit the end of sector one, you may just want to restart. Other than Rock sectors, give preference to Pirate Sectors, then Nebula Sectors to maximize your chances.
Crystal A
A fairly average ship overall. Its absolutely massive, so good crew positioning is important. Venting is good overall. Unless you get really good weapons, you should probably get a teleporter to use with your Crystal crewmembers. If you don't get a teleporter, you should put your Crystal crew in piloting and weapons because they have more health and can lock out dangers when necessary. Obviously, you should fire the Heavy Crystal after the Burst Crystal. The crystal weapons can be supplemented with most other weapons. However, they're slow to fire, so you'll usually want to replace them with something a bit faster. You should sell the Crystal Vengeance augment for scrap.
Crystal B
Widely regarded as the most powerful ship. Its weak to airless scouts and Zoltans until it gets any sort of a weapon. You can still board scouts to take down their weapons if they're threatening. If you don't find any damage dealing weapon in the first couple stores, you might consider buying a clone bay - it will allow you to destroy auto-scouts with boarding. Four person boarding with Crystal crewmembers is extremely powerful. You have complete control over enemy movement. If the ship is a threat, board the weapon room first and destroy it - then you can kill the crew at your leisure. Crystal boarding also makes the Flagship battle trivial even on hard mode. Its Cloaking system is very useful for buying you time as you kill the crew. You should avoid Abandoned sectors because you'll be relying on boarding. You should sell the Crystal Vengeance augment for scrap. This is the definitive ship to use for scrap hoarding challenge runs.
Reddit user mekloz has discovered a method of destroying airless scouts without weapons further strengthening this awesome ship.
Ancestry And Unlocking The Crystal Ship
There are actually three ways to unlock this coveted ship:
Beating the Flagship with every A and B layout (other than Lanius)
Using Rock C and stumbling upon the correct non-ship beacon in the Rock Homeworlds (while keeping your Crystal crewmember alive)
The Crystal QuestThis section will cover the three parts of the Crystal Quest.
First Part - Finding the Damaged Stasis Pod
This event can be found in a non-ship distress beacon in any of the following sectors: Pirate, Engi Sector or Homeworlds, and Rock Sector or Homeworlds. You should search for the ship, but if you have Rock Plating, you get a blue text option for a guaranteed success.
Second Part - Finding the Zoltan Research Facility
This event can be found in a non-ship beacon in any of the following sectors: Engi Sector or Homeworlds, and Zoltan Sector or Homeworlds. They'll be able to fix the Damaged Stasis Pod, and you'll be rewarded with a Crystal Crewmember named Ruwen.
Third Part - Find the Ancient Device
You have to be in the Rock Homeworlds (which is a red sector and can occur in sector five to seven) to get this event. If you've done the previous steps in the process, there will be a quest beacon waiting for you. If you haven't done the previous steps, and you just have your Crystal crewmember from using Rock C, it will be at a non-ship beacon.
After this, you'll be in the Crystal sector. There will be a quest beacon waiting for you with your reward. Congratulations!
Maximizing Your Chances
Even while doing everything you can to maximize your chances, you may still only have the opportunity to get this ship in maybe 5% of your runs. So you want to do everything you can to increase those odds. Some things should be obvious, but others might not be so apparent.
Play on Easy - Gives you much more scrap to work with and a much higher rate of not dying.
Use Rock B - Comes with Rock Plating, Less reliant on RNG than Rock A, and you can use boarding for better rewards.
Buy Long Range Sensors - Do this to make sure you're visiting the right beacon types when you're in the sectors you need to be.
Reveal the map - Even if you do have Long Range Scanners, you should often make event choices that would reveal the map. It will allow you to plan a route through the sector that would hit the most beacons of the right type.
Buy Distraction Buoys - One extra jump could mean the difference.
Sector Choice - At the end of the first sector, make sure there are at least some green sectors early, and red sectors late. The more the better. If you don't have a path that allows this, or if there are too few of either, restart.
Slow down the fleet - When you're in a sector that you need to be in, give yourself more time. Always booby trap the cache and pay mercenaries to slow down the fleet or scout the sector.
Make the right choices - If you're asked to help, usually refuse. This will pollute the sector with quest beacons that could prevent you from finding the beacon you really want. But if someone is out of fuel, consider helping them because it could reveal the sector.
Dive - If you can get one or two extra beacons by going past the exit beacon, do it.
Know when to give up - If the opportunities have passed, don't hesitate to restart.
Be patient. You'll get it eventually. (most of the above optimizations provided by reddit user 1-800-thewolf)
Note: If you're using Rock C, and you name your Crystal crewmember "Ruwen", the quest beacon will show up in the Rock Homeworlds sector. You have to name him before entering the sector to get it to work. Most consider this cheating, but play as you like! This exploit has been patched out.
Flagship Battle [1]
Sector eight or The Last Stand should be used similar to the other sectors. Plan your route to explore as many beacons as possible in the time given. The biggest difference is that you want to try to get to the base at the same time as the Flagship. You have three jumps to deal with the Flagship when it reaches your base, but you'll want to try to make sure you have time to jump away and back in case something goes wrong. Scrap rewards are extremely high in this sector, so grinding a few extra beacons could mean victory. Its especially important to give yourself route options in this sector because beacons randomly become hostile. Don't get cornered! The Last Stand always has one store, but often you won't be able to find it before its overtaken. When you get to this sector, you'll be given more than enough fuel and your hull will be repaired by ten points. Take this into consideration in sector seven, so that you don't spend unnecessary scrap on excess hull or fuel. Use repair beacons as necessary, but they have much lower scrap rewards than your average encounter.
The goal of your entire run should be preparing for the Flagship battle. Its a challenge, but its the only battle where you'll know exactly what you're getting into beforehand, so you can prepare accordingly. Generally, you'll want to have a bare minimum of level three shields, level five engines, a couple optional systems and enough weapons to reliably penetrate level four shields (accounting for evasion) OR a reliable way to kill all the crew. If you're ever able to safely kill the crew on the flagship, that should be your goal.
The biggest threat present on every phase of the flagship fight is the missile launcher. You should try to have Cloaking or even a defense drone to help deal with this damage. If you have hacking and cloaking, you can use them so that you'll be able to cloak every volley from the missile launcher. Even if you just have cloaking, if you deal a small amount of damage to the missile launcher, it will slow down reloading enough that you can cloak every volley.
Phase One
The unique threats on this phase are cloaking, hacking, and a burst ion.
If you're playing on Easy or Normal, all of the flagship's weapon bays are detached from the main body of the ship. Boarding them is a trivial task. You should teleport two into their missile launcher, two into their ion bay, take the two out of the missile launcher for healing, then teleport them back over to the beam room. After those three rooms are completely disabled, retrieve all your crew and heal them. Leave the laser gunner alive because lasers are the smallest threat. If you kill him, and all of the other crew are dead, AI will take over the ship, and systems will start repairing themselves. After the three weapons bays are disabled, you have all the time you need to kill the crew.
On Hard mode, the missile launcher and laser bays are attached to the ship, so you won't be able to keep them down reliably. Killing the crew on Hard works the same way, but you have to have much better defenses or be able to kill them much faster.
There are many things you can do to kill crew on the flagship:
Board into their medbay and hack it.
Plenty of ions and Fire Drones or Fire Beam.
Mind control individuals in the shield room to have them take out their own one at a time (you can't kill all the crew this way, just reduce their numbers by two or three).
Mind control crew and teleport them over to your ship to deal with them one at a time.
Set the medbay on fire (using fire bomb, beam, heavy lasers, missiles, bombs, or even lasers) and board it with Rocks.
Damage crew, and as they walk into the medbay, hit them with a bomb. This kills the crewmember and damages the medbay.
If you have very strong boarding and no other way to kill crew, there is still one difficult, time consuming method you can use. You can break down a lot of doors on the ship (which stay open), and bring over multiple sets of your crew while kiting damage with the ones already there. Then put four of your crew in a large room (like shields) then set up a path of your own men between that room and the medbay. Your most damaging crewmembers should be in the path, not in the room. You'll sometimes be able to kill enemy crew on their way to get healed. Be very careful of this strategy because it is dangerous if not executed correctly. This works best with a four person teleporter.
Even if you're not able to kill the entire crew, killing any crew is better than none because they'll be boarding you in later phases. At the very least, near the end of the fight try to damage cloaking and doors to get a few crew into the wing of the ship that will be destroyed (this seems to only be the case on easy and maybe normal). Crew in those rooms will not be back.
The primary targets for your weapons should usually be the missile launcher, shields, and cloaking. Keeping the missile launcher from firing will save a lot of hull damage. Hitting shields, cloaking, and piloting will make the battle go faster.
If you have multiple defense drones, you should enable them at the beginning of the fight. Don't mix Anti-Drone Drones with defense drones - they might just temporarily disable the hacking drone, allowing it to slip by your defense drone. Hopefully, you'll be able to shoot down all of the Flagship's hacking drones. You'll almost never be able to do this with only one drone defending you at a time. It will run out of drone parts eventually. There's a trick to coerce the flagship into hacking a specific system (sensors, level two oxygen, or doors would have the least impact on the fight). If you see the hacking drone approaching the specific area of your ship you know to be associated only with that system, you can sometimes pause and disable your drones to leave it through. A more reliable way of telling where the hacking drone is approaching is to watch where your defense drone points the moment before it fires.
If weapons are hacked, don't flee by default - hacking and cloaking are nearly synced, so you'll only be losing a relatively small charge with many loadouts. In this case don't attack cloaking or hacking unless you can reliably keep them both down.
Phase Two
Phase two is the drone phase. The unique threats are a Boarding Drone, a couple attack drones, and a very deadly drone power surge.
If you have an Anti-Drone Drone, now is the time to use it. If you combine it with a defense drone, you shouldn't have to worry about their Boarding Drone. Also, note that one damage to the Drone Control room will temporarily disable the Boarding Drone. If you shoot down enough drones, you can eventually deplete the Flagship of its supply of drones. After that, it won't be able to redeploy the Boarding Drone, Combat Drone, or Beam Drone. However, the Power Surge will always bring in a wave of new drones even if the Flagship runs out of drone parts.
If you have cloak, it should either be used for dodging missiles or the Power Surge. If you only have level three shields, it should almost definitely be used for the surge. However, if you have decent evasion and level four shields, you may want to save it for missile volleys. With good timing and a higher level cloak, you can sometimes use it for both.
If you're relying on hacking for your offense, you can use a trick to get your drone past its Defense Drone I. Momentarily toggle off the power to your hacking drone when the defense drone fires (See Hacking for more details)
This is also another opportunity to kill more crew to make phase three easier. You can use all of the same techniques listed in phase one. Crew in drone control or sensors when the ship is destroyed in this phase is over won't be around for phase three.
Note: The mix of drones in the power surge is unique for every fight, but the same for every surge during the fight.
Flagship Battle [2]
Phase Three
The unique threats in this phase are a Super Shield, boarding, mind control, and a Power Surge consisting of a large volley of laser blasts.
If you have your own mind control system, you'll want to use it to counter the enemy mind control. The enemy mind control is very strong, but it can be countered with level one mind control. If you don't have mind control, you'll have to use other crewmembers to soak up damage or simply leave them damage the system (See Optional Systems:Mind Control for more detail about mitigating the damage). With this in mind, you should preemptively place your extra crew in non-essential systems like sensors, doors, oxygen, Ect. If you can keep other crew in the room with your mind controlled room for only a few seconds, he'll only have time to take down one bar of the system rather than two. I find that its usually best to figure out what positions are the best, then save those new crew positions as your default - one way or the other, you won't be needing the old ones after this battle.
Do what you can to get rid of the Super Shield as fast as possible. As with all Super Shields, ions and beam weapons do double damage. If you have offensive drones, activate them while you're not shooting down missiles or lasers. If some of your weapons have significantly higher charge times than others, don't fire those ones when the Super Shield is almost down - try to time it so that all of your weapons are ready to fire at the same time when the ship is vulnerable.
If you have cloaking, you'll either want to use it to dodge their missiles or their volley of lasers from the Power Surge. If you have level four shields and decent evasion, its a toss up, but I usually use it to doge missiles. If you only have level three shields, the Power Surge is probably a bigger threat. If you happen to have level three cloaking, you can usually dodge the first missile volley and the first power surge in the same cloak - just make sure you wait as long as possible before starting the cloak.
When you are boarded, you will need to deal with them as quickly as possible because they'll be joined shortly with several friends. If you're playing on normal or easy, you may want to board their missiles immediately if you think your other crew can handle the boarders. Otherwise, keep them around until the threat is gone.
Try to suffocate the boarders quickly or overwhelm them with numbers. After a short time, most of the crew will have boarded your ship, so that will only leave a couple on the Flagship. If you haven't used your boarding crew, now is the time to board. Just be careful of their mind control, make sure its not going to target one of your boarding crew as soon as they teleport over.
If you know you won't be able to deal with boarders and fight the Flagship at the same time, there is a trick you can use to your advantage. Wait till as many crew beam over as you can handle (probably four or six), then jump away from the Flagship to a safe beacon. You'll then be able to deal with the boarders and repair any damage. The Flagship will be missing those crew when you jump back making the battle much easier. Note that this trick won't work if the Flagship is about to destroy your base. If you think you may want to use this trick to your advantage, its best to plan ahead so you can safely jump to your base when you flee. (Thanks to reddit user Vrachos for this tip)
Each phase of the Flagship has more evasion than the last, so if your weapons were struggling to penetrate their shields before, you're going to have a hard battle. Try to do things to decrease their evasion. I usually prefer to damage the missile launcher and other systems to force the pilot to fix them. If you don't have mind control to counter theirs, that's another possible target.
This phase of the Flagship is very weak to fire after their boarding crew has been dealt with. If you can get the remaining crew to run around and extinguish fires, they won't be manning systems and repairing others.
If you take too long to destroy the ship, the flagship will use one of its Power Surges to replenish its Super Shield.
This is the last stage of the Flagship. If you destroy the ship, you win!
Good luck!
A Few Notable Augmentations
Almost always useful
Long-Range Scanners - Allows you to be prepared for hazards, and more importantly, you won't be wasting jumps on empty beacons. It also helps to search for homeworld quests. This is the only augmentation that I will always attempt to purchase. By far the best returns for the cost. Can be safely sold in late sector seven or eight.
Zoltan Shield - Excellent at blocking all damage saving you from damaged systems and using drone parts. Its much more useful when you have high evasion.
Weapon Pre-Igniter - Never a bad choice, but its far more helpful with loadouts that have a long recharge rate.
Scrap Recovery Arm - Great for scrap, and it even has a blue text event. Only sell it if you find a better replacement, otherwise keep it because rewards are very high later on. But generally speaking, you shouldn't be buying it because there are usually better things to spend your scrap on at any given point, and it takes too long to pay itself off.
Distraction Buoys - Very good augmentation for getting more scrap. It can be about as rewarding as a Scrap Recovery Arm. Also with this one, generally speaking, you shouldn't be buying it because there are better things to spend your scrap on, and it takes to long to pay itself off. Don't forget to sell it to any store in sector seven.
Situationally useful
Automated Re-loader - Almost never a bad choice, but there are often better options as well. This augmentation stacks. (See screenshot for the amazing visual of some good augmentations)
Reverse Ion Field - Good in general and very good at helping with the first phase of the Flaghip. This augmentation stacks, so if you have two, you are invulnerable to ion damage.
Backup DNA Bank - Generally a good augmentation to have on clone bay ships - especially if you board. It allows you to be far more reckless and take advantage of more boarding opportunities.
Reconstructive Teleport - Exceptional augmentation to keep around on boarding ships with a clone bay. It allows your crew to gain levels where they otherwise couldn't.
Advanced FTL Navigation - A decent augmentation to keep around if you have a spare slot. It can really help to explore beacons beyond the exit. If you pass through the exit, and there are several other beacons beyond it, you won't have to fight your way through several rebel fleet beacons just to get to the exit again. Also, this can be helpful during the Flagship battle. If you pass through a store or near a repair beacon, you could jump back to them in the middle of the Flagship battle if necessary (and if they haven't been overtaken).
FTL Jammer - Can be beneficial in some situations if you have low firepower and decent defense.
Repair Arm - A controversial augmentation. Some say that its never a good augmentation to have, and it should be sold immediately. However, there are times where it can be beneficial to keep around. If you have more hull damage than you'd like and you're in an early sector, the repairs you get from the arm will actually be cheaper than purchasing them in stores. This is the only situation that this augmentation should be kept, and it should never EVER be purchased.
Drone Recovery Arm - Excellent if you have a loadout that uses drone control. Exceptionally beneficial if you happen to have Hull Repair allowing you to get two free hull each jump.
Zoltan Shield Bypass - Good for reliably boarding ships. Especially helpful on the third phase of the Flagship which has a giant Super Shield.
Lifeform Scanner - Only useful if you need to mind control someone and you have no other means to see them. The information it provides otherwise can almost always be gleaned by paying close attention to door movement.
Tips And Advanced Techniques [1]

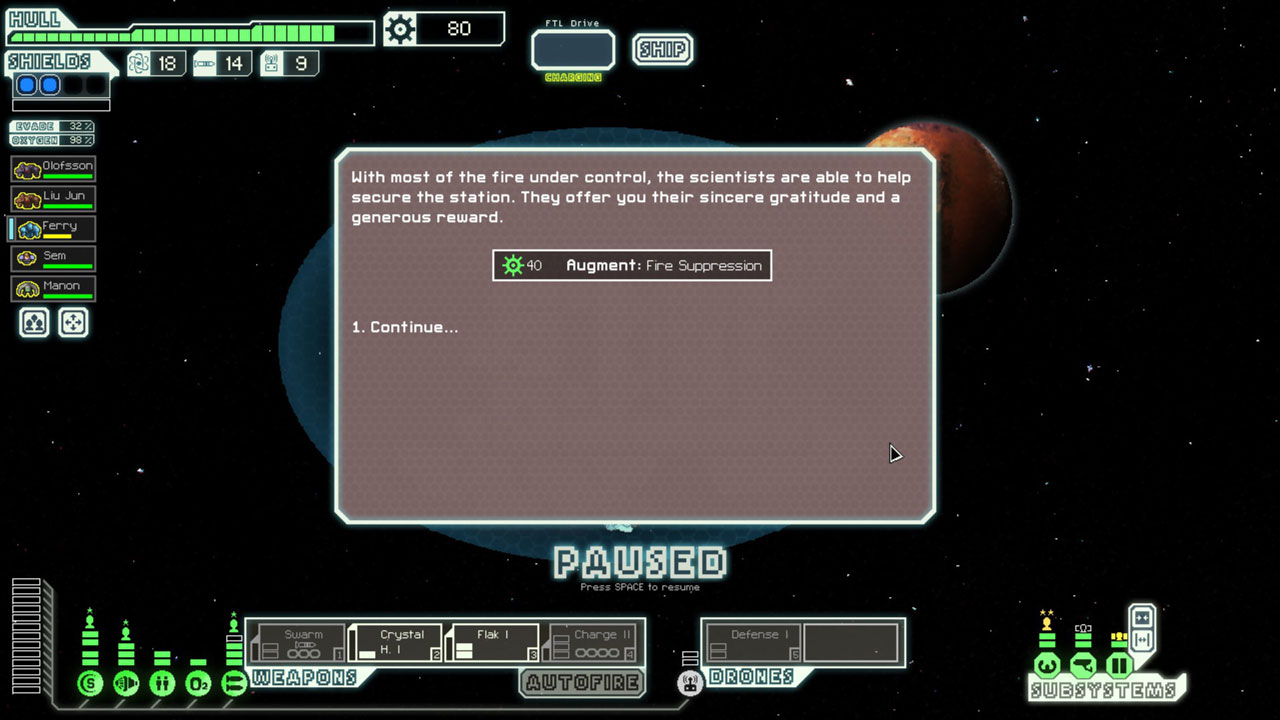
Pause often to consider your options. This is the single best thing you can do to improve your game. Because pausing is so important, I've included a screenshot of a paused battle.
All incoming projectiles will impact the exact center of a room. You can use this to your advantage to determine how to respond to a situation. You may need to move crewmembers out of a room or cloak depending on this.
Drones aim at a room before firing. Sometimes, you'll need to pay attention to what room they may be targeting. One situation this would help is when using Stealth B early on. If you're fighting a ship with a drone, don't cloak immediately. Wait till the drone is about to fire. If its going to hit a room other than weapons or cloak, you should probably wait before cloaking.
Sometimes, its best to leave a breach open. Take Federation A for example. If any of the rooms with airlocks are breached, you should leave them open because no systems can be in those rooms. Your ship will vent faster because of the breaches (Just be careful with the upper left one. If you're bringing back boarders that are almost dead, and you have people standing in the teleporter room, the boarders will beam into the oxygenless room to the left.. I may or may not have learned this the hard way). Another example is Rock B. It has no airlocks, so if one of the rooms in the lower right are breached, I usually leave it open till I have a good reason to close it. See the nearby screenshot for an ideal example of a breach purposefully left open helping to manage a boarder.
When fighting Zoltans, if you damage a room to make a Zoltan walk through the shield room, often he'll remove a power from the system causing their shields to drop a level momentarily. Take advantage of this brief opportunity to allow one extra laser through. You can also damage a room in order to force a Zoltan to walk through the shield room.
The space bar and the middle mouse button both pause the game. Use them often.
If you only have enough weapons to take down the shields of an airless auto scout, but you also have a Fire Beam, you can still destroy it. When the shields are down, attempt to light as many tiles of the shield room (and other rooms) as possible in a ship. Maybe 20% of the time the fire will burn long enough that it will damage the system allowing you to get another laser through.
Furthermore regarding Fire Beams and airless scouts, you can use the beam to reset repairs. Whenever a room starts to burn, any repair progress is immediately negated because the ship is putting out the fire. This can be used to buy yourself more time while the ship is incapacitated.
Learn your events. Figure out what options are the most beneficial. Know when you should take risks and when you should play it safe. Learn what races, augments, weapons, and drones grant the most favorable blue text events.
Crewmembers get 2-3 seconds of movement/healing/repairs/combat done during a jump. This can be used to your advantage.
Individually set weapons (like ions or Chain Vulcan) to autofire by holding Ctrl when targeting.
This isn't a tip, but here's a screenshot of some silly scientists for a chuckle.
Be flexible. if you're given a good weapon, don't hesitate to change your strategy to accommodate that weapon. If you're given some Mantis and a you have the scrap, buy a teleporter. If you have a laser build, and you're given a Halberd Beam, think about switching.
Don't buy weapons that you won't be able to use for a long time. Buy efficient ones that compliment your current loadout.
Augmentations can't be stored, so sell them if they're not very useful. Unless you have great augments, try to keep one slot open in case you find one for free.
You should only accept a surrender if the offer is very enticing because you'll always get more scrap for destroying the ship. If you need missiles or fuel and the offering is high, go for it. You'll almost always want to accept a surrender if they offer a weapon, drone, or augmentation because at the very least, they can be sold for scrap.
Slaver ships will usually offer you a slave before you destroy them, but sometimes they won't. They also have a good chance of rewarding you with a crewmember if you kill all the crew. If you have the right loadout, you can choose your reward. Damage the ship down to a couple hull (if you can take it down to one hull safely, do it). If they don't offer a reward, you can still board the ship to have better odds at finding a slave than if you destroyed it.
Generally don't buy weapons off of untrustworthy pirates.. You'll usually regret it.
If you see an Anti Ship Battery on the map in an Abandoned Sector, it is friendly. You'll want to try to go to that beacon because the fight shouldn't be difficult, and that event can have better than average rewards.
Exits on nebula beacons never have Anti Ship Batteries, so it may be advantageous to explore beyond the exit. But be careful, they'll often have ion storms.
Some enemy missile launchers look exactly like others. Sometimes, it will be important to try to tell the difference between them. You can do this based on how fast they charge. The best example of when this could be important is telling the difference between Hull Missiles and Breach Missiles. Breach Missiles take substantially more time to fire. Watch the red indicator light on the weapon to determine how charged it is, and you'll be able to tell which missile it is.
You should generally not be quite as merciful against pirate ships. If you encounter a pirate ship engaging another ship, destroying the pirate will give you rewards, and sometimes the ship you saved will also give you a reward.
Pause all the time to consider your options.
If you have enough ion power, and the enemy ship can't damage yours, you can suffocate the enemy crew. Even if they have a medbay, you can often still remove enough power from it to kill the crew. Just keep in mind that oxygen and medbays can be level two or three requiring more ion damage to take them completely offline.
Ion Pulsars hit your shields first if they're on. No shields can be very bad for the health of your ship. If you toggle your shields off when an Ion Pulsar is about to hit, they won't necessarily be taken down first. However, they may still be hit randomly taking them completely offline. To get around this, toggle your shields off, then put power back into the system, but don't leave a full level of shield build up before the pulsar hits. This way, even if your shields are randomly hit by the pulsar, you may still have a level or two of shields to work with.
You're not pausing enough. Pause more.
Tips And Advanced Techniques [2]
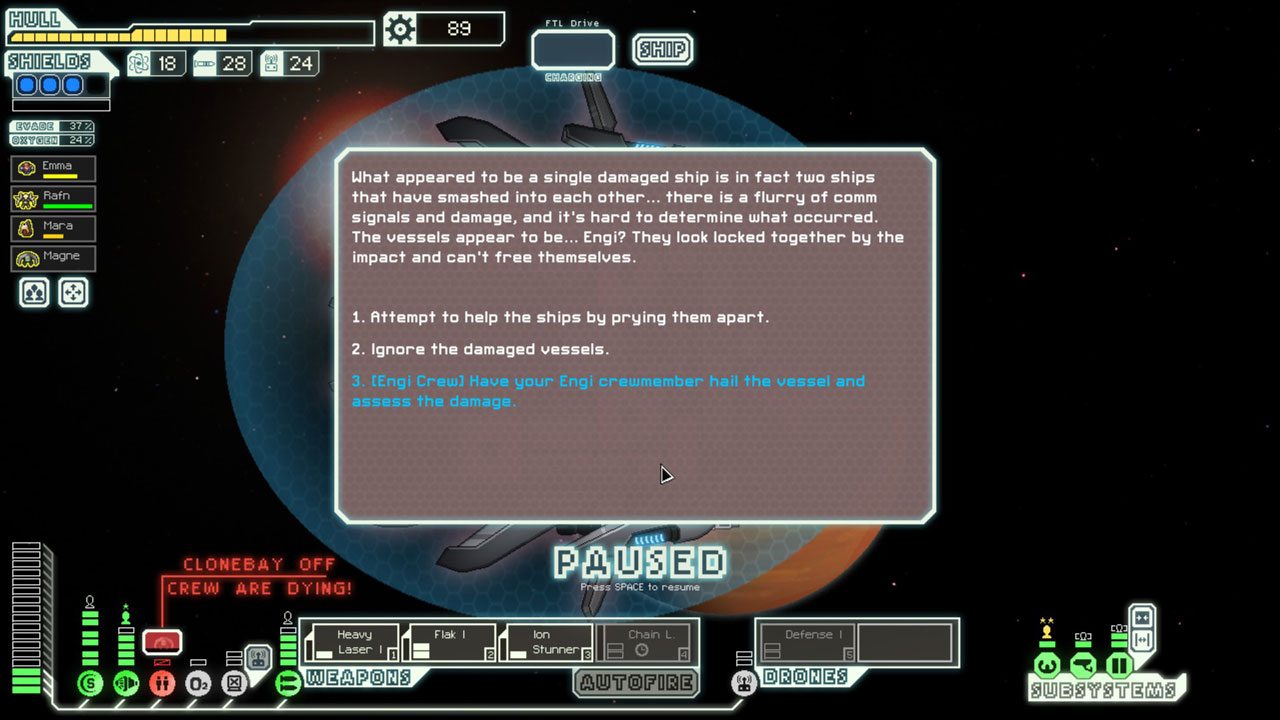
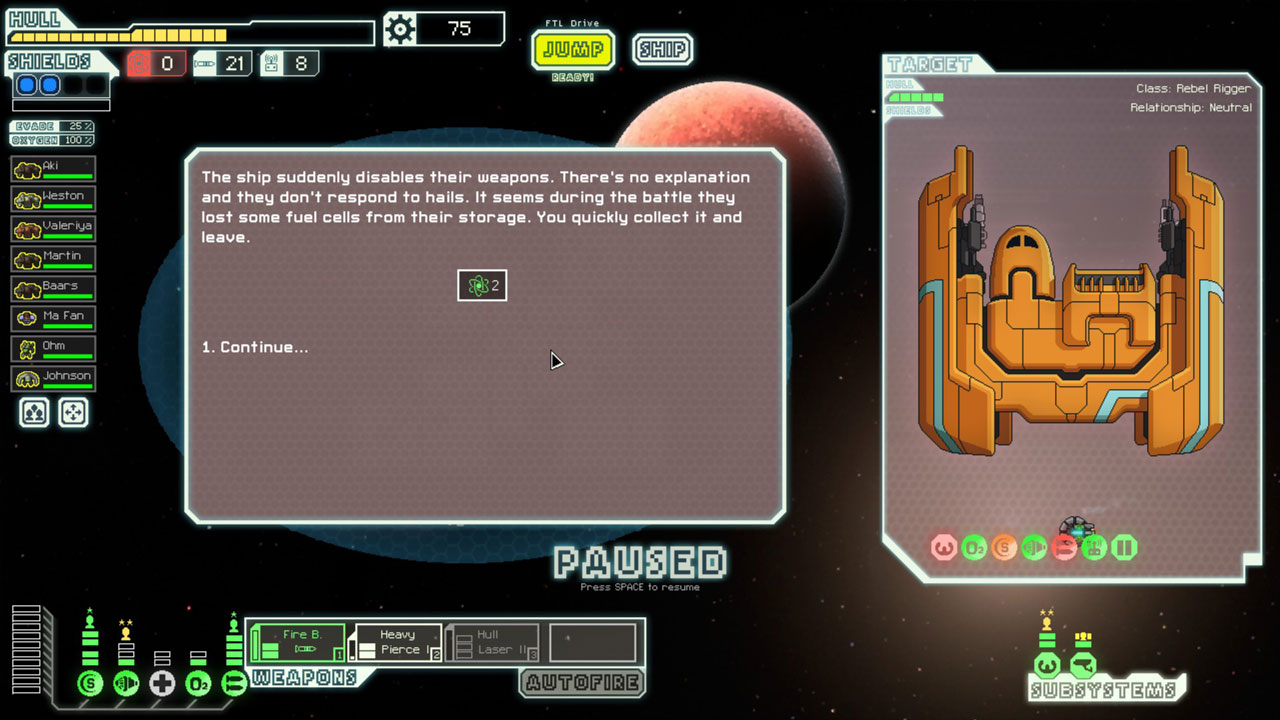
If you have been breached, you can give your repair crew more time by opening all the interior doors on the ship. You'll have several more seconds before the room loses oxygen. After the room loses oxygen, close the doors again, so you don't suffocate your entire crew.
Level two oxygen can overcome oxygen loss from a breach or Lanius (which is the equivalent of a breach). If you need repairs in an airless room, open all the interior doors (other than where there are other breaches), power up your level two oxygen, and wait for a couple seconds. The room will fill with air enough to not harm your crew while they make repairs.
Pause often enough that someone might confuse FTL with a turn-based strategy game.
Crew that are dying in a Clone Bay that's offline can still be used for events. Sometimes, you can make a couple frantic jumps hoping to use them or find a DNA Backup augmentation before they die. (See screenshot)
On a similar note, you can use this time to fix the clonebay. While you're jumping, the clonebay can be partially repaired, but no "de-cloning" progress occurs. It might take 2-3 jumps, but sometimes you can fix the clonebay, so you don't lose your crew.
If you have essential crew actively perishing in a destroyed clone bay, if you buy a medbay before they're gone, they'll be locked in a sort of stasis. They won't be alive to be used, but you'll still have them. If you repair the medbay, then later buy a clone bay, you can get them back.
All ships have a limited supply of drone parts and missiles (other than the Flagship missile launcher and drone Power Surge). Many times, it will be necessary to exhaust the enemy of missiles before rerouting power from drone control and starting your offensive. Sometimes you'll just barely have enough laser blasts to penetrate the shields of an Engi ship, and they have a Defense Drone II. If you want to win this battle, you'll have to fire until you randomly destroy all of their drone parts, then keep firing to damage the hull. This can take a very long time, but you'll usually need every advantage you can get.
If you're low on crew or power, consider purchasing Zoltans from a slaver or store. The more your reactor upgrades currently cost, and the fewer crew you currently have, the more it makes sense to purchase a Zoltan. Usually, you won't want to overload your ship with Zoltans because they're weak against boarding. They're also great for ion storms because the power they provide isn't halved like your reactor's.
With the right weapons, you can kill the crew of many ships in the early sectors without ever boarding. Heavy Lasers are great for this because they have a decent chance of starting fires and causing breaches. You'll usually want to target the O2 room when attempting this. Track the damage you're dealing to the crewmembers. Listen for breaches. Watch system damage and crew movement. If you see a system break when you know that crew is in there, then doors open, this means that the crew has given up on fighting the fire in that room. Wait it out. Usually the fire will overtake the ship, and you'll be rewarded.
If the enemy ship only has a Heavy Laser I and a Mini Beam, and you know that he has no one manning the weapon system, move one of your crew to your shield room as soon as you jump. The bonus from manning shields will usually block the first hit of the Mini Beam.
Generally, you should try to have 12-15 fuel on hand at all times. Some recommend only around 8-10 fuel, but I suggest more for a couple of reasons. Sometimes, you may not have an opportunity to visit a store for a long time. Other times, you won't have any reason to stop at a store other than fuel. If you have the fuel, these won't be a problem. Also, there are several events where other ships request fuel. You'll always want to have enough on hand to give some away. You never want to run out of fuel. Even with the distress beacon on, the encounter and reward rate is lower than being able to jump freely. If you'll be heading into a nebula or if you're early on in one, buy a little extra fuel due to the fewer ships you'll be encountering (especially if you don't have Long Range Scanners or if you're in an uncharted nebula) However, you can leave yourself run dangerously low on fuel in sector seven. The moment you jump to sector eight, you're given enough fuel for the rest of the run.
Generally, you should keep around 2/3 hull. You'll usually not want to repair beyond that because there are events that give you free repairs. There are many exceptions, though. If you want to try for a few jumps beyond the exit, give yourself a few more hull to work with. If you know you'll be going into a sector with few stores, repair more. If you know you'll be going to a hull repair quest, don't repair at all. If you know that you'll be jumping into a sector that has a higher repair cost, buy a couple extra before the price raises.
You can use an Ion Stunner autofiring on shields to easily kill enemy crew by boarding. If you autofire the Ion Stunner on shields, it will stun everyone in the shield room even if their shields are still up. The stun duration for the Ion Stunner is rather long compared to the firing speed, so crew hit in this fashion will spend a lot of time stunlocked. With very good micro, you can have your boarders in shields and carefully kite them out of the room just before the ion stunner hits the room. If you pull it off (it's easy with practice) then the enemy won't quite be out of the room whereas your boarders will be, giving you ample time to finish off stunned enemies. Even if you screw up, it's likely that everyone will end up stunned so your crew won't take extra damage. (Thanks to reddit user Paradigmist for this tip)
Small and breach bombs can be used to destroy your own systems instead of fires or boarders. This will prevent you from taking hull damage. Bombs never miss your own ship, so you don't have to worry about turning off your engines momentarily. (Thanks to reddit user Histidine for this tip)
There is a rare event that will occur under very specific circumstances. If you have no fuel, and you permanently disable the enemy ship's engines or piloting, this will prevent them from jumping away. You usually have to disable their systems by breaching and destroying piloting or engines, breaching and destroying the medbay, and damaging the crew to the point that they can't fix either. Rather than a stalemate, the enemy ship gives up and ejects fuel. (See screenshot)
You can micromanage Combat drones into directly firing at enemy Defense II drones, which is a godsend for Engi A. Just park it as it prepares to fire and wait for the target to drift into the line of fire. (Thanks to reddit user slowriderxcorps for this tip)
Weapon ordering priority on the iPad version is bottom to top rather than left to right.
Manning engines actually speeds up how fast your FTL drive charges. So if you need to jump in a hurry, make sure you have someone in there. Also, the charge bonus is greater according to the level of the crew manning the system.
Everything damages systems at the same rate. Even though Humans, Engis, Mantis, Boarding Drones, and all mind controlled enemies damage crew at very different rates, they all damage systems at the same speed. Skill level is also irrelevant to system damage.
You should be pausing more than you are.
Tips And Advanced Techniques [3]
Know how to play the odds at stores. Some things will turn up regularly, and others won't. For example, you might want to delay a purchase of an optional system such as hacking in favor of a good weapon such as a Burst Laser II. Burst Laser II's are rare, but there are a very limited number of systems, and you'll almost always have more than one chance to get them. Generally speaking, if you need a good weapon (or augment) at a store that also has a system you'd like, give priority to that weapon. (Thanks to reddit user Sixfortyfive for this tip)
All friendly lasers, missiles, ions, and drones can connect with and potentially destroy all non-friendly lasers, missiles, ions, and drones. Ions only stun drones with a chance of destroying them, but any other connection instantly destroys the projectile. This can be used to your advantage in times of need. If you see a large missile coming in toward the front of your ship, and one of your weapons is in line to hit it and ready to fire, you can time it so that the missile will be destroyed. The timing is very precise, so this will take practice.
Evasion is calculated when a projectile passes your shields if they're up. If your shields are not up or you don't have shields, evasion is calculated when the projectile would connect with the room it is about to hit. There are a few certain scenarios where its better to depower your shields to give yourself an extra moment before the evasion is calculated. One example of this is the Flagship missile volley. Sometimes the cloak timing is very close to the missile volley. If you depower your shields, it could buy you the extra half second you need to avoid the damage.
How much scrap you should keep on hand depends on a lot of factors. If you don't have great weapons, you'll want to try to keep around 80 extra scrap on hand for the next store. If you're low on hull, you'll want to keep enough around for the repair costs (accounting for how much it will cost for the sector you're in). Even if you're not saving up for anything, you'll usually want to try to keep 30-50 extra scrap on hand for cheap crew, discount system upgrades, or other random events.
If clone bay is offline and a crewmember is about to die, JUMP to buy him some health before he dies. Depending on the situation, you could possibly even upgrade the Clone Bay for a larger health bonus.
If you have enough time, you can force a drone into targeting a specific room. Do this by waiting till the drone is about to fire, seeing the direction its aiming, and guessing which room it could possibly connect with. If you see that its not going to hit a room you want, depower it right then. It will not fire and move on. One specific application of this is for getting early crew kills - especially if you have Mind Control. Use Mind Control to get the crew to low health, then use the drone to pick him off.
If a scout or rebel ship is about to jump away and double the fleet pursuit, you can simply jump away first to prevent it from happening. (Thanks to reddit user Rooonaldooo99 for this tip)
If fire or boarders are about to destroy a system, remember that your ship is invulnerable during a jump. Jump immediately before the system is destroyed - they will destroy the system during a jump, but your ship won't take hull damage.
Here's a useless tip! If a room is locked down for whatever reason, you can actually break through the locked door. It takes 6 crew almost the entire lockdown time, but you can get out before its over. If you have more crew working on the door, you can get out even faster.
Here's an exploit for you: Use the Stun Bomb on your active hacking to hack again much sooner. If you hit your hacking system just before the end of it running out, you will only get the cooldown from the five seconds of ion damage rather than the full 20 seconds. This can make hacking far more powerful at the cost of a missile or two. This can also be used on other systems with varying effects. Of those other systems, battery is most useful because it can give you even more power than the max. Thanks to reddit user mekloz for the Stun Bomb research.
This definitely falls under the category of bug, but there's a way to get double rewards for battles. If you kill the crew while there's a fire on the enemy ship, the ship will continue to burn after the fight. If its been damaged enough, it will destroy the remaining systems, and the ship will explode. Do this exploit by killing all the crew while there's a fire on board and planning ahead so that the ship will explode afterwards. You'll get rewards when you kill the crew, then let the ship explode. You can then go to the main menu, and return to your game, and you'll get rewards for destroying the ship as well. This can even be used for double rewards in specific quests - for example, you can get two Engi Virus crewmembers with this trick. Most consider this trick to be cheating because it requires you to drop out of the game to complete it. This has been fixed as of version 1.6.1!
Here's another one that's definitely a bug. Here's a way to get the single most important drone any time you buy drone control. If your store has drone control, but not a Defense Drone I, just save and reload. The game apparently doesn't save drone schematics and Defense Drone I must be one of the defaults. And again, most consider this to be cheating because it requires you to drop out of the game to complete it.
Here's another save/reload bug - it reverses the effect of crystal lockdown. Use Crystal Lockdown, then quit to the main menu. When you reload your game the visual will remain, but effect will be gone - you and enemies can walk freely between rooms. However, there's one more benefit from this. Enemies will THINK that the room is still locked down. So they won't try to enter or leave the room unless they were already on their way. You can use this to trap enemy crew in a room while you wreak havoc on the rest of their ship.
When the enemy weapon system is damaged, the weapon with the lowest charge is taken offline. This also means that if you have perfect timing, you can damage their weapon system the moment a particularly dangerous weapon begins to fire - immediately taking it offline and preventing it from firing completely (thanks to reddit user Threarah for this tip).
Tips And Advanced Techniques [4]
If you have a regular beam weapon, you can often deal damage to crew without doing hull damage to their ship. Beam weapons only deal damage when they enter a new room, but they deal damage to crew when the beam enters the tile they're standing on. So consider this example: You have a Pike Beam and a Heavy Laser, and the enemy ship has one shield. If you attack the ship with the beam weapon, wait till the beam is in the room with the crew before allowing the laser to hit the shields (therefore no hull damage). If the beam enters the tile with the crew after that, the crew will be damaged.
As of update 1.6.x, there's a new mechanic in place that prevents unpowered drones from being destroyed by ions - ever. This means that if you are in a situation that would be less dangerous if the enemy has good ion weapons, you can park one of your drones right in its path, turn off the power to the drone, and it can't do a thing about it. That means with this trick, you can completely disable the flagship's burst ion.
Another application of unpowered drones not taking ion damage. With enemy Anti-Combat Wait till the Anti-Combat drone fires, and toggle the power off for a moment until the ion blast connects. The blast will do nothing to your drone - not even stun it. The timing is tight, so you'll have to be quick.
There's an extremely severe bug with ion damage, and another one with crew deaths.. but I don't want to give details because they're both game-breaking. These are public knowledge now, check out the last section for details!
I recently discovered a bug that lets you charge up the Chain Laser from zero to fully charged instantly: Leave the weapon fully charge without firing. Pause. Target a room on the enemy ship to fire. Advance the game ONE FRAME and pause again. (The best way to do this is to try to press both pause buttons at the same time: space bar and middle mouse. If you did it right, this will increase the weapon fire count, but the charge bar will still be full) Unpower the weapon. Advance the game another frame (it doesn't have to be exactly one frame this time, but the fewer, the better) Repeat! It makes the weapon far more viable and is fairly easy to execute once you practice it.
If boarders are giving you problems, you can draw them back to their own ship by destroying three of their systems (thanks to mekloz for this tip!)
Pause. Right now. Because you're still probably not pausing enough.
Challenge Runs
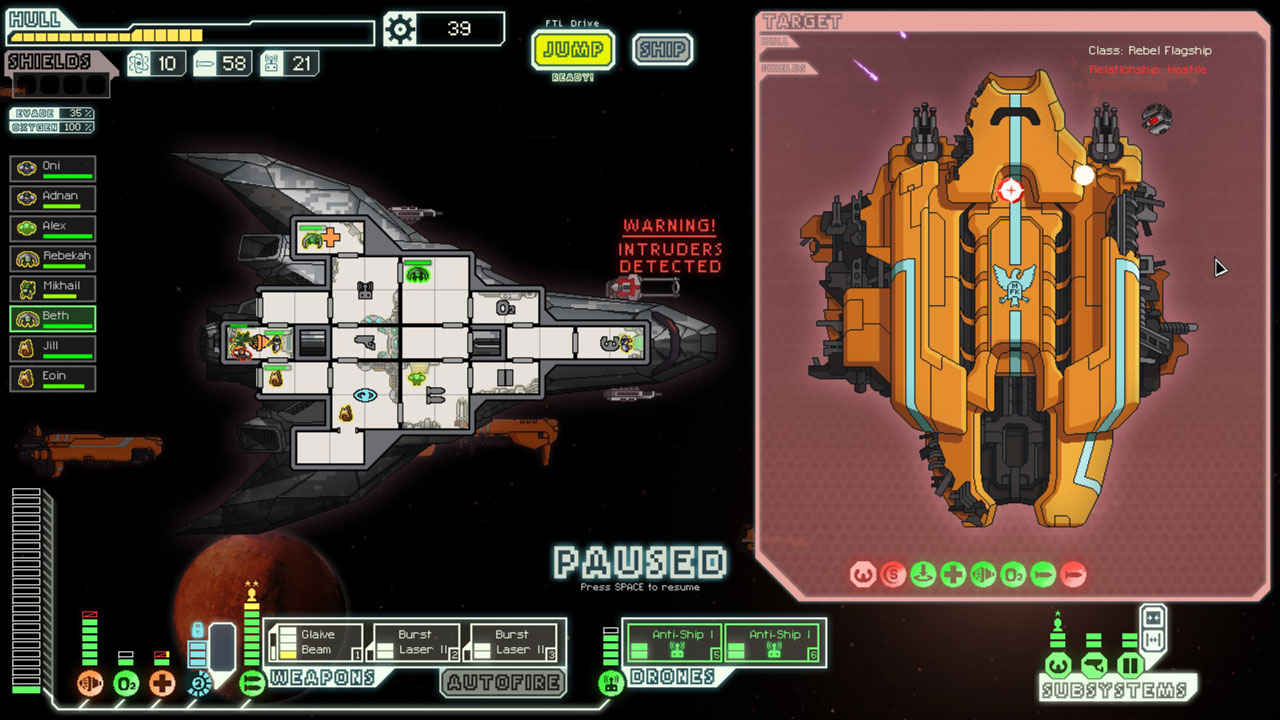
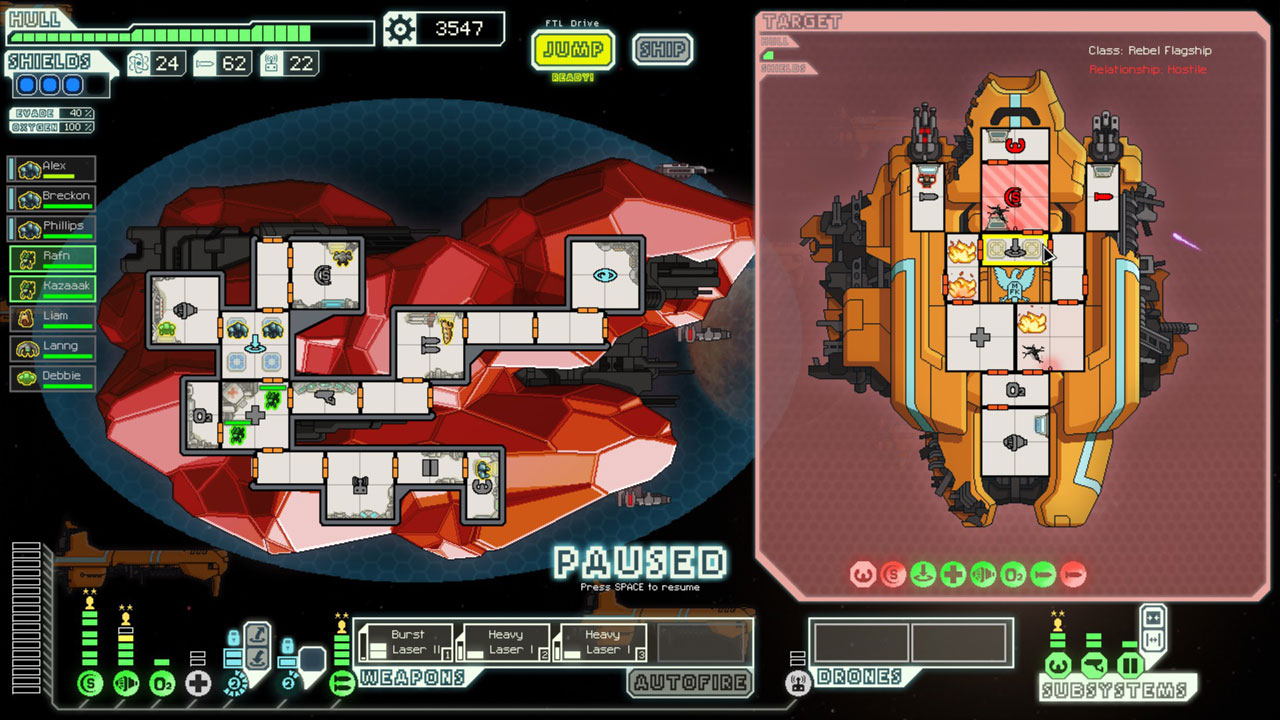
If you're winning too much and too easily, these are ways you can play to make things more difficult and interesting.
Speedruns
Play on easy, and attempt to beat the game as fast as possible. Reddit user Twinge holds the record for original FTL at 19:00[www.twitch.tv] . And ThomasPettersson keeps besting his own record in AE. The current record is 12:40[www.speedrun.com] .
Shieldless
Never buy shields. (See screenshot) You can do this challenge with any of the Stealth ships or Zoltan B. Reddit user DiscordDraconequus has done more than his fair share of these runs.
Oxygenless
Depower oxygen and vent your ship before making the first jump. Lanius crew would be considered cheating by most. Crystal ships, Lanius ships, and Engi A would be the easiest choices for this challenge, but it should be possible for any ship. Reddit user Paradigmist has even managed to do this with Slug B.
Pauseless
No pausing allowed. This is a great challenge to see how fast you can think on your feet. If pausing is second nature to you (which it should be!), you should unbind your pause key before starting. This usually doesn't allow for advanced boarding techniques because they require precise timing. Scott Onesie Wilson completed a run of all 28 ships in a row on hard.
Scraphoarding
Personally my favorite challenge. Attempt to beat the Flagship with as much unused scrap as possible. Boarding is a must. Long-Range Scanners are almost essential with some combination of Distraction Buoys and Scrap Recovery Arms. Crystal B is the favored ship for this challenge.
No Medbay / Clone Bay
Use Slug B and never buy a medical facility. You'll have to pause, moving your crew to dodge incoming missiles and bombs for this one. Here's one example.
No Death / Consecutive Wins
Play on hard, select random ships (or play the ships in order), and see how many times in a row you can win. Thomas__P recently became the new recordholder with an absolutely insane streak of 80 wins. I don't see this being broken any time in the near future because having 80 runs in a row where victory is even possible is rare to encounter.. let alone having the knowledge and skill to do it.
I recently got the longest streak of 83 wins, but I used exploits. It would have to be considered a separate category.
Powerless
Never upgrade your reactor. Backup battery and Zoltan power is a must. This challenge is generally only feasible on Zoltan ships.
No Upgrade
A harder version of Powerless - never upgrade any system including the reactor. You can buy other systems, but you can't upgrade them either. You'll have to rely on teleporters and/or hacking a lot. Probably not a challenge you'll want to try on hard.
Let me know if you are aware of any errors in these records, and I'll gladly update them.
If you know of other challenges you'd like to see listed here, please let me know.
Difficulty, Luck, Vocab, Etc.
RNG and Luck
How much of a factor does luck really play when it comes to the end victory? Not as much as you might initially believe. Obviously, the entire game is based on randomness, so some runs you'll have a really easy time, and others you may not have any opportunity to win at all. I've started out some runs on normal with the most powerful ship, and I know for a fact that there was nothing I could do to survive till the second jump (Auto-Scout in front of a sun with missiles, ion and a drone. My shields and engines were destroyed immediately, and nothing could be repaired in time to jump. It was brutal.) This is partially dependent on the chosen difficulty and your chosen ship, but even on Hard, you should be able to win the vast majority of the time with most ships.
Difficulty
The biggest difference between the difficulty levels are scrap rewards and enemy loadout. Crew priorities are slightly different, and you start with more scrap on easier difficulties as well. There's a fairly large gap in difficulty between easy and normal, but there's a smaller gap between normal and hard.
The Flagship layout is also different in hard mode making the battle much more difficult and interesting.
On easy, the Flagship only has three shield layers. Also, there are no ASB for when you want to farm sectors and let the rebels take over the exit beacon.
Its also been observed that enemies have a higher probability of hitting systems rather than empty rooms in higher difficulties. To my knowledge, there haven't been any comprehensive studies on this, but there definitely seems to be significant evidence for it. The game developer has confirmed this behavior.
Also, people have recently dived into the code, and on hard mode there's a 25% chance of the enemy targeting an "important" system. Things like: Targeting oxygen when its low, targeting the clone bay when crew are cloning, Etc. Here are the rules we currently believe to govern hard enemy targeting The devs have confirmed the following conditions for targeting important systems:
Shields: When powered (even one Zoltan power counts)
Engines/Piloting: Evasion is currently above 25%
Weapons: When powered (even one Zoltan power counts)
Drone Control: Always (assuming you have drones)
Cloaking: System is not on cooldown
Artillery: Within 4 seconds of firing
Door Control: Ship is currently on fire, or if there are intruders
Oxygen: Oxygen is below 50%
Clone Bay: Crew are currently being cloned
Hacking: Hacking in progress
Mind Control: Mind Control in progress
Teleporter: Boarders currently on enemy ship
Targeting rolls appear to happen when the weapon fires (when it turns green). Targeting for all projectiles from a burst weapon appear to be calculated at this moment as well.
Any scrap reward numbers mentioned in this guide are for hard mode. If you're playing on normal or easy, the numbers will be higher.
Vocab
Words I use that may not be 100% evident in their meaning in the context of the game. Most are commonly used by the community.
Tile - Place where a crewmember can stand (some rooms have tiles where crew can't stand). Every room is made of two or four tiles.
Stack - Referring to ion damage. For ion damage to stack, you need to deal ion damage faster than the previous damage wears off.
Loadout - Everything you have. This includes weapons, shields, engines, systems, crew, augments, drones, and anything else currently at your disposal.
Volley - Firing more than one weapon at a time to increase the effectiveness.
RNG - Randomness. Specifically "Random Number Generator", or more comically known as "Random Number God".
Grinding - Hitting as many beacons as possible for their rewards before you're forced to move on.
Run - An entire attempt at winning, start to finish.
Dive - Purposefully going beyond the exit beacon for profit. This will force you to engage the rebel fleet.
Micro - Micromanage, or precisely move crew and time weapon fire/placement to your advantage.
Engi - This isn't here because you don't know what it means, but I've seen many people that were unsure of the pronunciation. Its pronounced en-gee as in engineer.
Save Editors
Although I wholeheartedly recommend that you unlock everything for yourself, there are many reasons that you might need a save editor. Sometimes the file gets corrupted or lost. Sometimes Steam Cloud sync decides to delete it. Regardless, here's a link to one that the dev's recommend: https://sourceforge.net/projects/ftleditor/
Bugs
As perfect as this game is, the are a couple bugs. I've documented every bug that I'm aware of in the following thread. Please let me know if you encounter any others, and I'll add them!
https://www.reddit.com/r/ftlgame/comments/cgcna5/full_bug_list_version_3/
Thank you!
Thanks for reading my guide. I hope it was helpful and that you enjoyed it.
If you did enjoy it, also check out reddit user AyCarrumba's guide: From 'Oh no!' to Pro. It sets the benchmark for comprehensive guides.
Also, Twinge has a great set of informational videos: Faster Than Light Tips & Tricks
And Mike Hopley has a playlist of very advanced and useful tips.
Source: https://steamcommunity.com/sharedfiles/filedetails/?id=266502670
More FTL Faster Than Light guilds
- All Guilds
- Weapons tier list
- Installer le mod FTL : Multiverse
- Tier list FTL: Faster Than Light
- The Ten Commandments of Hard Advanced FTL
- 100% FTL: Faster Than Light
- Know Your Ship: Guide to using Stealth Class
- Optimal Crystal Cruiser Unlock Strategy (SPOILERS)
- FTL: Faster Than Light - Sector Navigation Guide
- FTL: Faster Than Light - Hard Do's and Don'ts