Goal And Prerequisites
Logistics robots have the potential to trivialize most of Factorio's puzzle-solving dilemmas with their extreme flexibility in transporting products around. With logistics robots and the proper logistics chests unlocked, we can render belts obsolete. The troublesome issue is that this requires us to carve our way pretty deep into the tech tree, and the act of getting that far in the game can make it too daunting of a task to replace a belt-based factory with a bot-based one. Fortunately, using a few tricks, we can hastily make our way to grabbing the Logistic System tech out of a relatively small starter base.
This guide assumes that the reader already understands some of the basic principles from my other guide, Before The Bus. We'll be using some newer blueprints, but we will still be running our research and manufacturing off of two-belt serpentine "mini-bus" supply lines. It is also assumed that we are capable of smelting and loading belts of iron, copper, stone bricks, and steel, using compact 24-furnace arrays. Processing oil and managing refinery outputs is also something we should be familiar with.
To accommodate the increased level of complexity, blueprints will be provided with their strings. They've been tested for function and should not require tinkering to get the job done. They may be a bit crude and the quantity of research packs they provide is not high, but they are enough to grant us the ability to beeline for the techs we want.
Research Blueprints


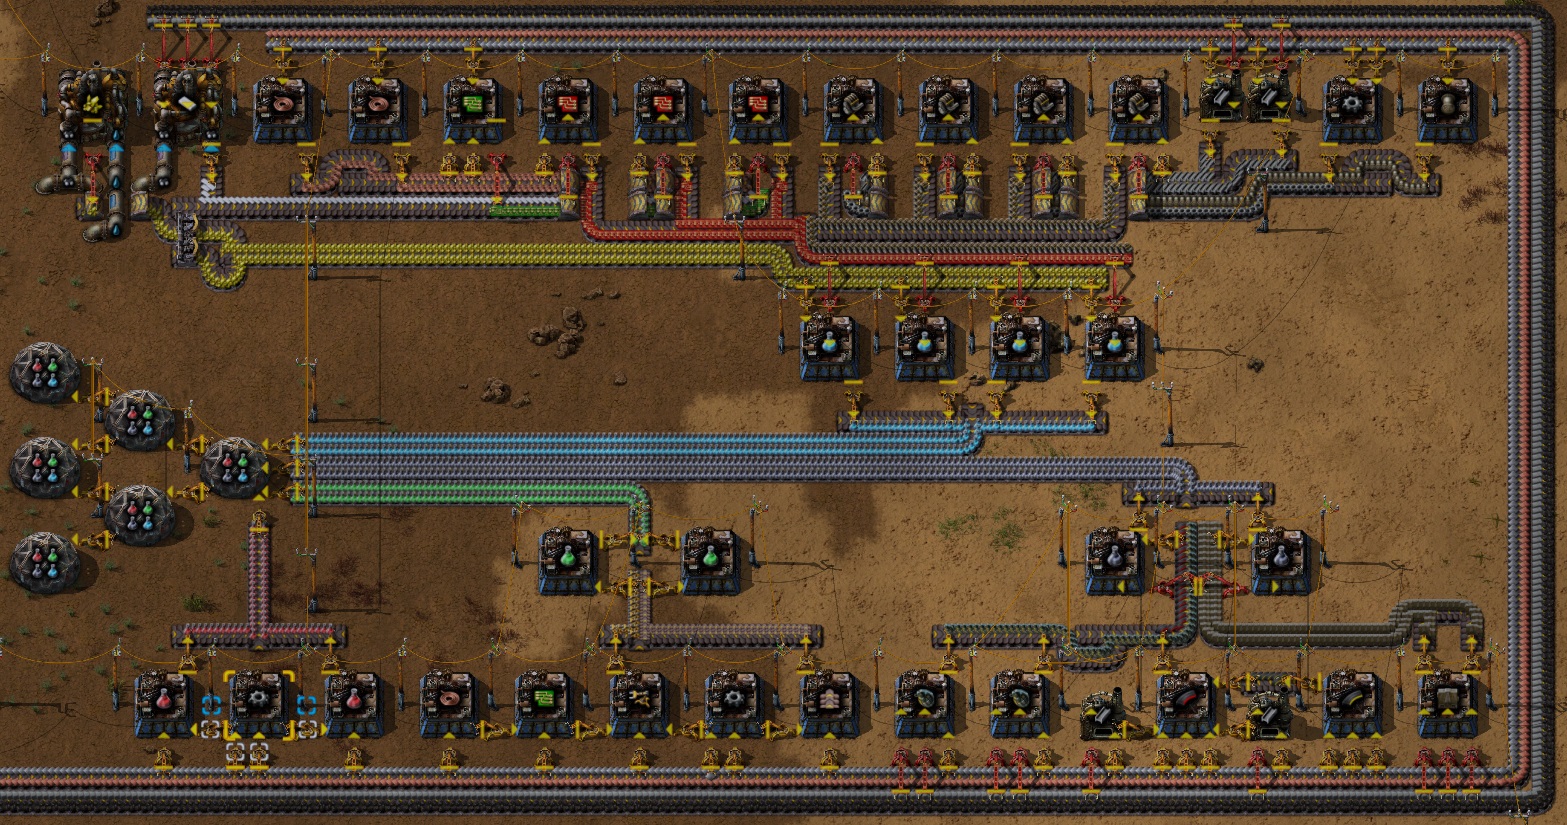
First, we will be reintroducing the all-in-one research blueprint for producing and consuming red, green, gray, and blue research packs. This design improves on the previous one by giving a better ratio so that the packs can be produced and consumed evenly. It also dispenses with the built-in refinery - it is now assumed that oil refining will take place elsewhere, and that petrol and water will simply be introduced into this blueprint from the northwest side.
String: https://controlc.com/df069e33
Also included is a demonstration of chaining research labs into each other with a minimum of moving parts. Only the first lab needs to be fed directly by belts carrying research packs, making it easy to feed the whole lab array and easily add more labs if need be.
This leaves us with the need to supply yellow research packs. Due to the change in ratios for inputs, we will need our two belts to dispense with the stone bricks and carry more copper plates. The result is an assembling array which is about as large and complex as the red/green/gray/blue array.
String: https://controlc.com/6c298821
Note that petroleum, water, and heavy oil inputs are coming in from the north side. The yellow research packs are loaded onto a belt which can be taken back to the labs in the first design.
With these two research arrays working together, we will be able to unlock every tech leading to and including Logistic System. In the process, we will have unlocked the ability to build logistic robots and roboports in addition to all logistics chests, allowing us to start building our bot bases and outposts.
Combat And Defense


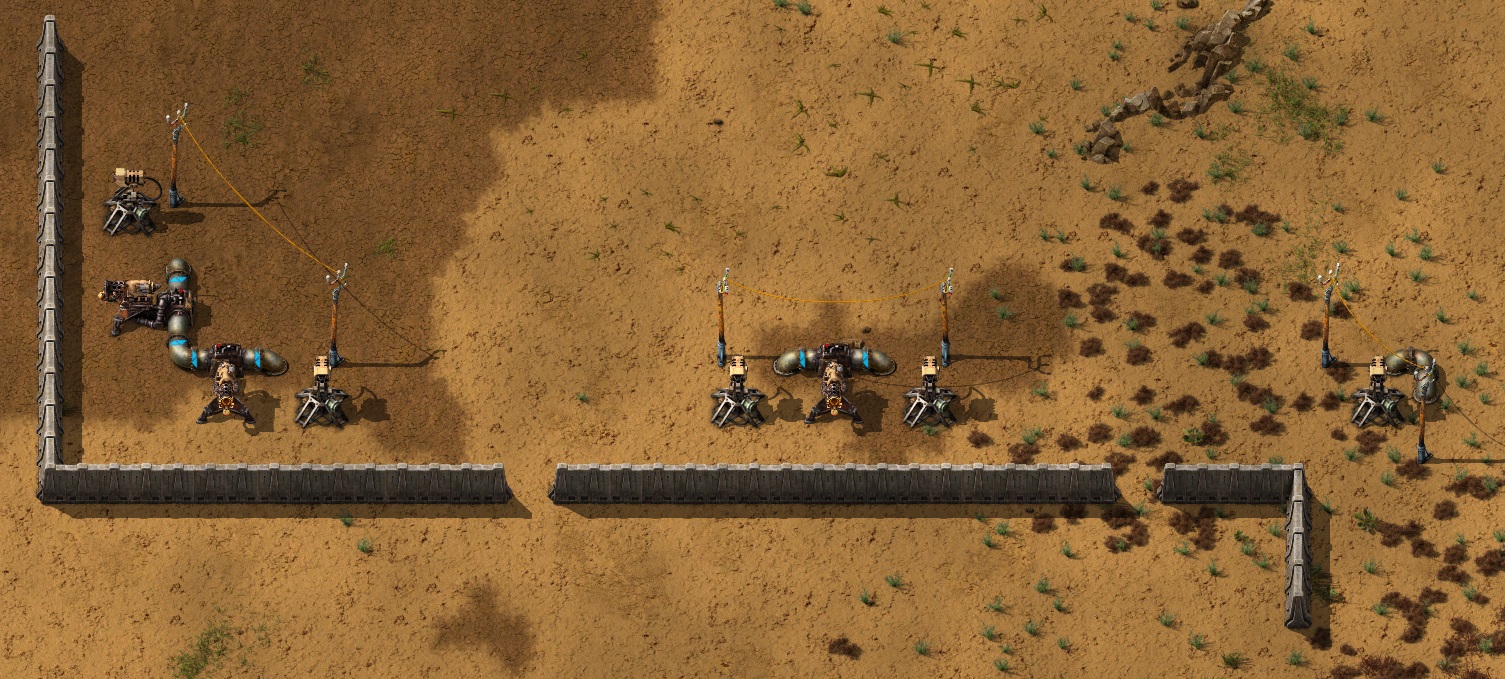
We can't expect the biters to leave us be, but resources will be tight while we are teching. To keep our starter area protected at an affordable cost, we'll need to use compact bunkers for gun turrets to prevent biter attacks from breaching our perimeter.
A ring of these bunkers, hand-loaded with 20 firearm magazines per turret, should be enough to protect the starter area or any outposts we need to build for additional mining or oil drilling. If things start getting heated, we can beef up our bunkers slightly.
Keeping ourselves stocked with gun turrets is cheap and easy. A simple two-assembler array on our production minibus will do the trick.
If we need to attack a biter base, we can use turret creeping at first, and advance to defender robots as quickly as we can afford it.
Building Defender Capsules is slightly more complex but still easy to do from a production minibus.
String: https://controlc.com/f627dbab
The bunkers are useful as a cheap means of defense against small biter attack waves, but at some point it will be necessary to grab a lot of territory and defend it with a continuous perimeter wall. Rather than supplying ammo to many gun turrets with a long belt, I suggest switching to flamethrower and laser turrets. Walls, pipes, and power poles will be trivial to build, but manufacturing these turrets is a bit tricky. Luckily, there's a blueprint to streamline the process.
String: https://controlc.com/74a2cf5c
Note that this array calls for a minibus with one lane of iron, one lane of copper, and steel on the second belt. These turrets cost a lot of steel to produce, so it is worth it to have a smelting array dedicated to providing steel for this purpose.
When building walls with laser and flamethrower turrets, I suggest blueprinting three types of sections: a straight section, a concave (inner) corner, and a convex (outer) corner. Apart, they might look something like this:
Strings: https://controlc.com/eb514969
Chaining these together is as simple as making sure the underground pipe sections are within range of each other when laying down the blueprints.
As an aside, blue research gives you the ability to unlock and produce the personal roboport. With ten construction robots, you need only bring the materials with you when laying down the blueprints for your perimeter wall. I suggest loading your modular armor with the personal roboport, three batteries, and fifteen portable solar panels. This will save time and spare you the annoyance of misclicks when building long sections of perimeter defenses.
Oil Refining


Since we are bringing in our oil products remotely, I will add a simple oil refinery blueprint to make oil easy to manage. There are more refineries and chemical plants in this blueprint than we will need initially, so we can start with a few and fill the rest in as time and resources permit.
String: https://controlc.com/dab0df04
Note that the crude oil and water are piped in from the east side of this blueprint.
Remember that the purpose of the chemical plants is to only convert excess oil products into solid fuel, so that we will always have a balance of heavy, light, and petrol. This will prevent stoppages in oil refining and it will also provide a better source of burner fuel for our power generation or smelting operations.
The green or red wires connecting the fluid pumps to their storage tanks are absolutely necessary for this to work - we need to tell each pump to only activate when its associated storage tank is almost full, so that we do not immediately consume all of our oil products making solid fuel.
When adding solid fuel to burner fuel belts, we should be careful not to displace coal where it is specifically needed in production or research recipes, such as when making grenades or plastic.
Remember that light oil is the best choice for feeding flamethrower turrets. With a refinery setup like this, it is easy to pipe excess light oil around to meet all of our defensive perimeter needs.
Conclusion
This concludes the overview of what we need to unlock robot logistics and other key techs in a bit of an early game mad dash. This will allow us to largely skip belt-based logistics outside of our starter area, which will be helpful if we don't want to reconstruct an entire mid- or late-game base to make the switch from belts to bots.
It's still a good idea to use trains for long distance transport, and to keep logistic bot networks isolated from one another so that they don't try to fly across long distances, but most production needs and construction tasks will be made much easier with an army of flying robots at our disposal.
Source: https://steamcommunity.com/sharedfiles/filedetails/?id=2517400612
More Factorio guilds
- All Guilds
- The Curse of "SIGSEGV"
- Guide to Legendary Quality
- How to use parameters in blueprints
- Factorio/Railway Design
- 1.0 / Maps with islands for 1.0
- Space Age: Fulgora | :
- How to escape
- How to remove Big rocks/Boulders (2024 UPDATED)
- Factorio Guide 1190
- Factorio Guide 1189
