
Introduction
Table Of Contents:Hey, before this guide starts, I want to mention that I want this to be a community project of sorts. I am currently going out of my way to find all counters/playstyles and logging them here, but if you find any strats that haven't been mentioned, do feel free to comment it or send me a message to discuss.
For advanced players or Storm 4 veterans, this guide may seem a little redundant as most of the strategies listed are probably already known and used by you. This guide will serve more as a beginner's guide for people looking to be better at the game. Either way, I'm hoping there's at least something here that you didn't know prior and I hope you have a good read.
Note: I actually started this guide when the game released, it's still not complete but I do plan to finish it. Schoolwork and projects have just been taking up quite a bit of my time and I ended up procrastinating this guide till now. I'm publishing this guide now just in-case anyone wants to start this game and has no idea how to play :P
Basics
↳ Combat
↳ Parrying
↳ Supports
↳ Ultimate Art
↳ Boost and Surge
Tips & Tricks
↳ Common Strats
↳ Advanced Tricks
↳ Defending
↳ Attacking
Basics: Combat
Guarding
 Note:Skill Attacks
 Throws
 Note:Light Attack
 Note:Multiple Hits1 Bar
 Heavy Attack
 Note:Skill 1 (Special) & Skill 2 (Tilt Special)
 Skill 3 (Guard Special)
 Note #1:Note #2:
 How To Combo
Miscellaneous

Everything you need to know about the combat system.
All characters essentially have the same few attacks at their disposal; light attack, (forms), heavy attack, throwing.
Also, I won't be including specific inputs for moves since some people won't have the same binds. If you for some reason don't know your inputs, go into practice mode and look at the command list.
blocks light attacks, , and Ultimate Arts.
Throwing will always ignore guards and guards can be broken by one fully charged heavy attack or continuous attacks on the shield.
Blocking drastically reduces damage from , but does not fully negate it. It also won't be able to kill you, instead put you on 1HP.
Dashing into guard brings down a quarter of the guard durability. You could incorporate these into your attack combos to dwindle down guard durability faster.
Pushback/Shoving
Using movement input while blocking will make your character shove away your opponent. You can use this technique to either get out of someone spamming your guard, or reduce the damage your shield takes.
Throwing ignores guards and guarantees ~15% of your opponent's HP.
This is very useful for fighting against passive players but we'll get to that part a bit later.
Different characters have different throw ranges. Hinokami Tanjiro and Nezuko have the long throw ranges while Rengoku and Inosuke has shorter throw ranges.
Light attacks are mainly used to extend combos and poking. In a combo, by either inputting your down movement or up movement, you can choose.
Tip: Light attacks can also interrupt follow dashes. (Right GIF)
Light attacks can end in 3 ways:
Normal (1st GIF, no direction inputs)
Upwards (2nd GIF, up direction input)
Downwards (3rd GIF, down direction input).
Use these to either continue/build combos for force a knockdown your opponent.
Attacks that do can be cancelled at the cost of of skill gauge (blue bar) by either dashing or jumping, this applies to ,
If you move while light attacking, your first light attack will be slightly slower but have a longer range.
Light attacking while holding movement input (left) vs Only light attacking (right)
Heavy attacks can be charged to do more damage, charge heavy attacks by holding the attack button. A fully charged heavy attack will instantly break a guard.
You cannot be staggered while using a heavy attack, so it's pretty useful for stopping/punishing rushes (More info later in Tips & Tricks: Defending).
Heavy attacks can be interrupted by throws and Ultimate Arts.
Not all characters have the same heavy attack, Zenitsu's heavy attack for example has great range but has a straight and narrow hitbox. Make sure to practice using heavy attacks with your character of choice.
Both of these are mainly used to also extend combos and dish damage during them.
For some characters (Shinobu, Tanjiro, and Water Breathing users to name a few), the tilt special is a ranged attack that can track, giving chances for punishing opponents if they miss a combo or spam an attack.
This attack is usually used to punish players who are overaggressive and mashing their attack button. Use this at the end of your opponent's combo as they will be open to an attack, allowing the counter to land. Try not to mash this attack as your opponent could stop attacking your shield and run away, wasting the guard special.
Missing a guard special, especially at close range, can be punished easily. Make sure that it lands and don't mash it.
Some Skill 3s should not be done after pushbacks as they will miss. Practice vs AI to gauge whether or not to pushback before using this attack for your character. For most characters, this attack can also be used to extend or finish combos.
Finishing Rengoku's combo with Skill 3.
Learning how to maximize damage with combos is incredibly important, I've found a really well-made video by Globku on how to combo correctly.
Movement (Jumping before landing)
In some cases, you are able to jump before landing to recover quicker, giving you a chance to attack or counter.
Do note that this is a little bit of a double edged sword. If your opponent is hyper-aggressive and you don't block in time, you could be put through another combo.
Movement (Sidestepping)
Certain vertical attacks can be avoided by side dashing.
Rengoku's Skill 3 for example is often used after blocking a combo string, if your opponent does this, side-dash and punish.
Character stats
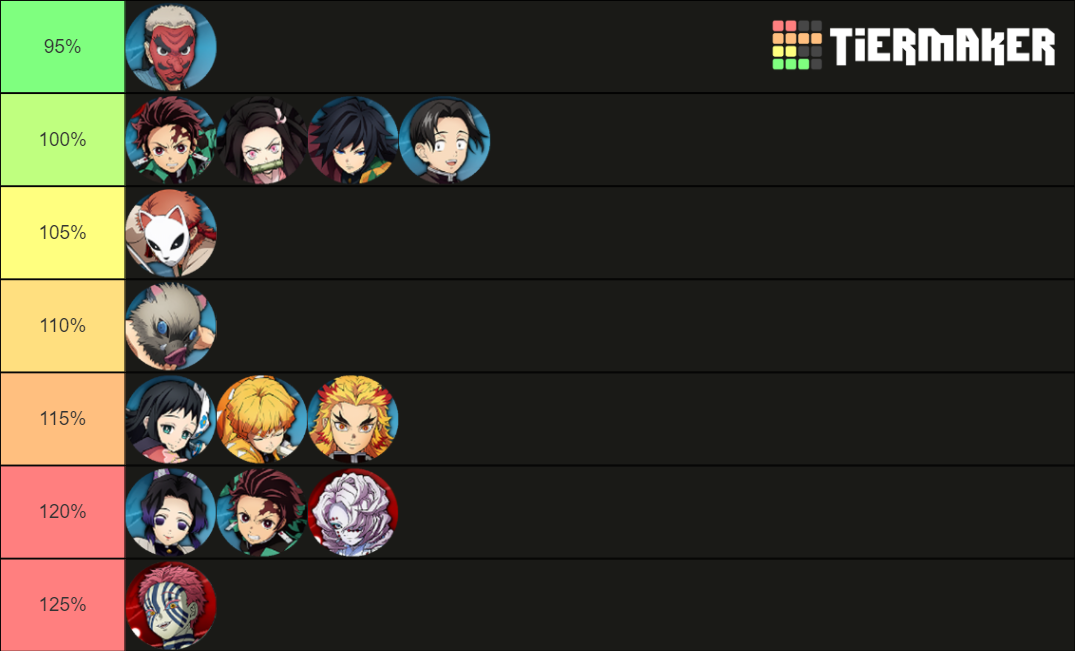
All characters have the same amount of HP (10k) but different damage multipliers.
1. Urokodaki has 95% damage multiplier
2. Water Tanjiro, Nezuko, Murata, & Giyu have 100% damage multiplier
3. Sabito has 105% damage multiplier
4. Inosuke has 110% damage multiplier
5. Makomo, Zenitsu, & Rengoku have 115% damage multiplier
6. Shinobu, Hinokami Tanjiro & Rui have 120% damage multiplier
7. Akaza has a 125% damage multiplier
This means that Urokodaki receives 5% less damage while Shinobu and Hinokami Tanjiro receives 20% extra damage.
Tier list version:
Basics: Parrying

Opponents will be staggered if you parry their attacks. You cannot parry throws and Ultimate Arts.
Parries are reliable to use against predictable rushes/rush attacks or attacks with a long wind-up. This skill is very important and will definitely take some practicing to get the timing down consistently.
Parries reward you with a blue combo timer, meaning longer combos if you manage to pull it off.
You cannot parry throws and Ultimate Arts.
Also keep in mind that the parry has quite a small window and you will be left open/vulnerable if you miss a parry.
Heavy attacks can be parried.
Although risky to pull off, you could try parrying in-between your opponents combo strings on your guard. This takes skill to do consistently but absolutely devastating if mastered.
[TBA - Parry on jas]
Basics: Support
Basics
 Note:Cannot Be Summoned While Taking Or Blocking DamageWhen To SummonSupport Strategies
 Note:AfterSupport Will Get The HitMay Drop The ComboBest Supports (Best To Good)Worst Supports (Worst To "Not The Best")
Supports are one of the most game changing aspect of Hinokami Chronicles, your usage of supports can be the difference between a win and a loss. I'll be going through the basics of supports first and then the different techniques to use your supports effectively.
Supports have many uses, the main ones being saving you from a combo, adding damage to your combo, and acting as a distraction.
If you standing still while summoning your support, they will attack with their Skill 1. If you move while summoning, they will attack with their Skill 2.
Supports .
When to use your support mostly depends on how you want to use them. If you prefer dealing more damage in a combo, summon your support during that combo. If you want to punish mashers, summon them just before they attack you.
In certain situations, it's better not to use your supports for combat at all and only use them for escape. For example, if your HP is low and your opponent's special gauge is maxed, it's smarter to save both support bars in-case you need to escape from an Ultimate Art combo.
Extra Damaga in Combo
You can summon your support during a combo to get extra damage in. Make sure to test this in practice to know what time to summon your support as some support attacks could miss or knockback your opponent and make you miss.
Mash Punish
Summon your support just before getting hit. If your opponent mashes attack, they will be hit by your support, letting you start a combo on them.
I've personally found that Shinobu works best for this strat due to her attack's wind-up time.
Support switch throw
During a combo, switch to your support character, hold block and attack (throw). This is a quick way to deal throw damage to a blocking opponent at the cost of one support bar.
Notice how the first GIF has a pause before performing the throw, allowing your opponent to attack or run away. Support switching before the throw gives your opponent no time to do anything, letting you get the throw consistently.
Support Meatshield
Summon your support before chasing, if your opponent happens to chase, they will hit your support first, leaving them open to attacks.
This also works if you summon your support you chase. You will clash with your opponent and your . However, if your support's attack knocks the opponent too far, you .
Shinobu
In my opinion, Shinobu is the best (and most annoying) support. Her attack has a considerably long wind-up time and charges immediately with tracking, making it very easy to get out of a combo if you summoned her before getting hit. Her attacks also last awhile, letting you apply good pressure with her.
Nezuko
Nezuko is also a really solid support and a very close second (a lot would put her at #1). Her attacks have more damage but a lesser wind-up than Shinobu's. Her attacks also last longer which means even greater pressure, and her stomp attack has a huge AoE.
Inosuke
Similar to Nezuko, Inosuke has really good pressure as his attacks are long. However Inosuke's attacks could launch the opponent away, making it slightly harder to combo with him.
Rengoku
Long special duration, high damage, and annoying fire that covers up half the screen.
Murata
No surprise, but he is the worst support in the game. He does relatively low damage and has no pressure at all. This is the support you choose if you want to BM.
Hinokami Tanjiro
Hinokami Tanjiro's support tracking is complete trash. He will very often just run off in the direction the enemy was at 10 seconds ago, missing completely. He is only good in combos for extra damage. Use him as support only if you side-main him.
Zenitsu
Zenitsu's support attacks—while quick, are easy to avoid. Same with Hinokami Tanjiro, unless you side-main Zenitsu and plan to switch often, you're much better off using other supports.
Basics: Ultimate Art
Raw Damage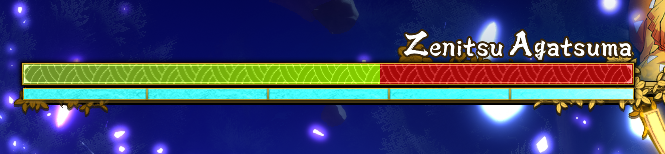

 Damage With Combos
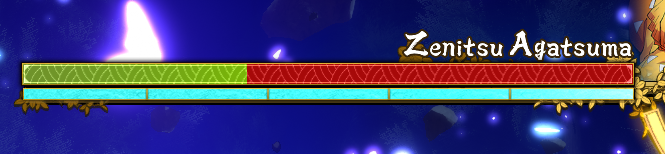
 Note:Invincibility FramesCannotCounters
First things to note; The higher your combo count, the less damage you do. This applies to all attacks including Ultimate Arts. The amount of special gauge stocks you have also affects the Ultimate Art damage.
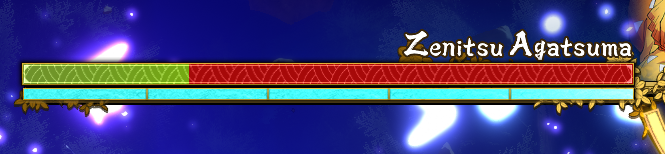
1 special gauge stock Ultimate Art damage
2 special gauge stock Ultimate Art damage
3 special gauge stock Ultimate Art damage
Doing an Ultimate Art in a combo will hit reliably as your opponent won't be able to block. However, using it at the wrong time during a combo may drop it, make sure to test in practice.
Ultimate Art damage is also affected by the combo damage scaling.
As mentioned, the higher your combo, the less damage you do. Take a look at the differences.
4 hit combo to 3 stock Ultimate Art
23 hit combo to 3 stock Ultimate Art
The scaling is pretty nuts isn't it? The takeaway is that if you want to reliably hit an Ultimate Art, either use it after doing a short combo or use it on an attack your opponent can't cancel (ranged attacks, aerials).
You should refrain from using an Ultimate Art after a long combo unless you can confirm the kill as the damage would be wasted.
Ultimate Arts have and be interrupted by throws or boosts.
Avoiding
When an Ultimate Art is used, there is a slight pause before the attack plays. You need to react by either jumping over the attack or blocking it.
Re: Ultimate Art
Basically a "no u" in Ultimate Art form. If your opponent uses Ultimate Art, you can activate your own Ultimate Art after them. This ignores your opponent's Ultimate Art hit (i-frames) and let's you land your Ultimate Art instead.
This works even if you are in an attack combo.
(From the right GIF, you can see how Ultimate Arts go through support attacks)
Basics: Boost And Surge

 When To Use
 Counters
 Congrats!
Boosts temporarily increases your speed, damage dealt, and refills your support and skill gauges (blue bar).
I've done some basic testing and it looks like damage dealt during boost is increased by ~25% and lasts for 20 seconds.
If your opponent is close and not blocking, boosting will blow your opponents away.
If you have 2 stocks in your special gauge, you are able to boost twice, entering Surge.
During Surge, your damage is increased by a further ~25% (~50% total increased damage) and lasts for 10 seconds. If you are hit while doing an attack, your character will not be staggered.
(Glow outline, indicating the attack is non-staggerable)
On top of that, your skill gauge bar will not deplete, letting you spam skill attacks.
Boosts
You should use boosts when you want to quickly refill support and skill gauges, so most likely after finishing a full combo. You can also use boosts if you need that extra bit of damage or speed when fighting aggressively.
Surge
Keep in mind that the timers for boost and surge are not shared. You can use 20 seconds of boost, then surge for another 10 seconds of surge. So if you want to make full use of boost and surge, don't spam your special gauge input to surge instantly unless your opponent is close to death (maybe around under 40% HP)
Please do not forget about your special gauges and use them. Beit for Ultimate Arts or Boost/Surges, newer players (like myself in the past) tend to forget about this powerful mechanic or are afraid of wasting it.
Using surge just before boost runs out:
(GIF was cut short due to steam's 2MB media rule :sad:)
For boosts, there is no real need for a counter as it's just pretty much the same gameplay. You could play more passively to avoid giving your opponent combos
During surge, your opponent is more likely to play aggressively to make full use of their Surge.
If you don't have an Ultimate Art at your disposal, either block as long as you can, or use your supports to save you. (You can wait for your shield to break, then use your supports to save. Your guard's durability will reset.)
You are now done with the basics! The next part will teach you about general tips and common cheese strats that you can learn for a better edge.
Tips & Tricks: Common Strats
Save Rushing Note:Costs 1 Bar Of Skill Gauge
 Throwing Tricks
Mainly beginner tips and commonly used strategies.
When you see your opponent use their support to save, immediately press your chase input and you will rush right to them again. Less experienced players will not block in time or not even expect the chase and will be open to attacks.
Warning, if your opponent has an attack with range (Water Wheels, Shinobu Skill 2), they can use it after saving and you will be hit if you charge late.
Reminder that cancelling attacks (blue bar).
Counter
The counter to save rushes is pretty simple; block. if you block as soon as your support saves, your opponent will still rush right to you but you won't be open for an attack.
Chase Throw
Chase throwing works well against players who block rushes or passive players in general. Basically, just chase your opponent and block before hitting them. Then perform a grab and your opponent will be forced to eat that grab damage.
Chase throw works much better with a support as your opponent won't have a chance to unblock or run away.
Also try practice throwing just before hitting the guard as if your opponent pushbacks, you may miss the throw.
Guard Pressure Throw
If your opponent's guard is under attack by your support, run around beside them so they can't shove you and do the throw.
This trick will not work with supports that have short attacks.
Tips & Tricks: Advanced Tricks
Grab Reset Switch-techs
 Note:Touch Of Deaths
 Note:Note #2:
Deal some grab damage after a combo by dashing canceling a jump and doing a grab as your opponent lands.
This usually works as your opponent is not expecting you to "drop" your combo. If an opponent is familiar with this reset, they may avoid it by running/jumping away.
are a good way of catching your opponent off guard. There are multiple types of switch-techs.
Heavy Attack Bait
All heavy attacks (except Shinobu's) have an attack cooldown. You can bait to "miss" your heavy attack by support switching while holding your heavy attack. Once you switch, your previous character will still perform the heavy attack, while you have switched to your other character.
This also somewhat works with Specials. (right GIF)
Special, Switch, Grab
Expanding on the previous tip, you can also use this tech to get a grab in on a guarding opponent.
Works best using characters with long specials/tilt specials (Rengoku, Urokodaki, Nezuko) and characters with fast grab animations (Inosuke).
Combo Switch
If you start a combo but are out of skill gauge, you can use your support switch to continue a basic attack combo to squeeze in some extra damage.
Basic combo string damage vs Combo Switch
Knockdown Switch
This is effective against players who stay near you when you are knocked down. When you are knocked down, some players usually stop moving in order to recover their skill gauge faster.
Switching characters let's you recover from the knockdown much faster, catching your opponent by surprise.
Use this sparingly as if your opponent notices you trying to switch, they can counter you or run away, making you waste a support gauge.
Counter
Pay attention to your opponent's support gauges, if you notice your opponent planning to switch, block, run, or use a heavy attack to defend against the switch.
TODs are more of a fun thing to attempt in practice mode. However, you may actually have a slightly reliable way to use them online.
After breaking an opponents guard, they will be stunned for long enough for you to surge, letting you do a TOD combo.
Attempting ToD after guard breaking with boost (left) and without (right).
Sorry for low FPS I am binded by the chains of Steam's 2MB image limit...
I highly suggest to attempt this only when you are boosted, as the time it takes to boost and surge gives you a very small window to get a hit in before the stun wears off. It is also dependent on how fast your first TOD attack lands, try practicing this in Practice mode before attempting in actual game.
For some reason, while testing, I found out that you actually activate your surge faster if you are moving, so make sure to move when surging.
Tips & Tricks: Defending
Defending RushesConstantly getting attacked by rushes and not sure how to play against it? Hopefully these tips will help!
Jump Dashing
This is a very passive playstyle, some will consider it annoying, but if you jump and dash in either left or right direction, chases, supports won't be able to track you (Shinobu still requires a little bit of timing to avoid).
[TBA - Jump Dash annoying]
This also gives you many opportunities to punish your opponent as they will be open while chasing.
Heavy Attack
[TBA - Heavy attack on rush]
Heavy attacking is a good way to stop aggressive players who rush a lot.
[TBA - Heavy attack dash cancel]
This will get predictable and easier to avoid if your opponent adapts to this strategy. Once that happens, you can switch it up by actually cancelling your heavy attack by dashing (at the cost of 1 skill gauge bar).
Guard spamming
Pushback spam
You should use this as much as possible to reduce the damage dealt to your guard.
Guard Special
Push back to heavy
[TBA - Pushback heavy attack]
This is a little tricky to time with the online input delay but very effective against guard spams.
Pushback to jump away/back-dash
[TBA - pushback run]
A little more risky as your opponent could use a charge attack and hit you but still an option.
Make sure to use and mix all 3 when fighting up to make yourself less readable.
Tips & Tricks: Attacking
Breaking GuardsPunishingSupportsAttack Chase Mix
This was mentioned in "Basics: Combat" but I feel it's worth repeating:
Incorporate chasing into your attack combos to dwindle down guard durability faster.
Heavy Attack with Support Pressure
For this strat, you need a support that has a long attack string like Nezuko or Inosuke.
Use your support to apply pressure to the guard and charge a full heavy attack to break the guard.
[TBA - Heavy attack support pressure]
Learning when and how to punish comes with experience, but here are some key moments to look out for:
- Full combos on guard
When your opponent
- missed Ultimate Art or throws
Useful attacking and defending support strategies in the last section of "Basics: Support", just in-case you missed it 😉
End
Guide Update Log:Thanks for reading so far, this guide was started within the first week of the game's release and I had no idea demons would play so differently. I may or may not make another shorter guide for demons once more of them come out but for now this is more for the Demon Slayer Corps.
I also may or may not add on a character specific tips section as I think that it would be a lot of help for people wanting to main certain characters. For now though, I'm publishing this so new players can have a quick start manual of tips on how to play the game.
Special thanks to Jake for putting up with my pestering to help me demonstrate most of the GIFs here. Also to KoalaPau for some GIF demonstrations.
Well, you've reached the end! I hope you've learned something from this guide and I hope that you will be able to use what you've learnt to get better at the game. Like mentioned in the intro, if there's any strats that I've missed, or anything you see wrong with the guide (be it information or tips), do just comment to let me know. Once again thanks for reading, cheers.
30/6/2022 - Updated "Introduction" and finished "Advanced Tricks" section.
4/5/2022 - Grammar.
3/5/2022 - Guide posted!
Source: https://steamcommunity.com/sharedfiles/filedetails/?id=2631300871
More Demon Slayer -Kimetsu no Yaiba- The Hinokami Chronicles guilds
- All Guilds
- demon slayer -kimetsu no yaiba- the hinokami chronicles
- [FR] Guide succs 100% (Demon Slayer)
- Kyjur Rengoku
- Tutorial Completo de Demon Slayer Hinokami Chronicles PT / BR
- 144 FPS, 60 FPS Mod | Guide To Restoring 60 FPS Mod Patch
- Giyu Tomioka
- How to play with mods (easier way)
- Demon Slayer -Kimetsu no Yaiba- The Hinokami Chronicles Guide 161
- Trke Yama-Demon Slayer -Kimetsu no Yaiba