Introduction
"XV's B4B Mega Guide V1.00"Back 4 Blood,Crossplay Version / January 13th, 2022What Is The Point Of This Guide?for 123.456 Patch
Note: If the version above of Back 4 Blood does not match yours, it does not necessarily mean that the guide will be useless to you, it rather means that the guide may not hold the most up-to-date news regarding the game or it's mechanics. If there is a new version that changes specific things that are mentioned in the guide, make sure to write a comment below, to let us know about the change and we will modify the guide to show the latest information.
The purpose of this guide is to serve as a "Mega Guide" or an Encyclopedia - a catalogue of as much information as possible about Back 4 Blood.
What can I find in this guide? A list of all Acts and individual Missions in the game;
A list of all the Corruption Cards in the game;
A list of all the Secrets and where to find them;
A mathematically/statistically "Correct" deck for each Act;
A walkthrough on how to beat Nightmare with each Character;
A walkthrough for each achievement in the game;
& more!
╭───╯Characters/"Cleaners"╰──╮________________________
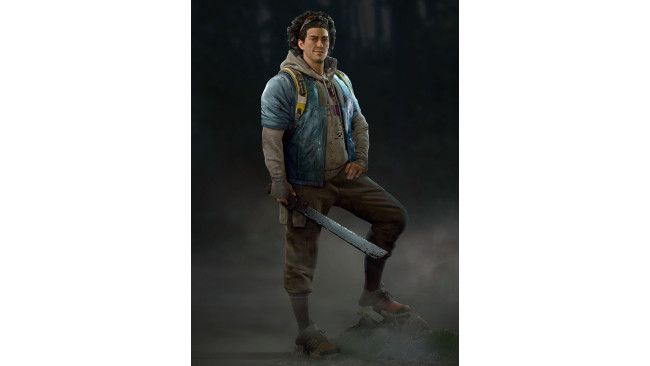
⠀⠀⠀⠀1.⠀⠀⠀⠀⠀⠀Evangelo

 Evangelo's Lore
Passive Effects: "Born Survivor": Evangelo can break out of grabs and gains 75% Breakout Speed;
"Fit": Evangelo gains 25% Stamina Regen;
"Firestarter": Evangelo starts every run with a Molotov. Team Effect: "Light Footed": The team gains 5% movement speed. Evangelo Deck Preference: Speed;
Use Speed. Evangelo Weapon Preference: SMG;
Melee.
:This is currently not a priority, so refer to Lore here: CLICKABLE LINK[back4blood.fandom.com]
Extra lore can be found in these links: Source 1, Source 2 (Source 2 contents).
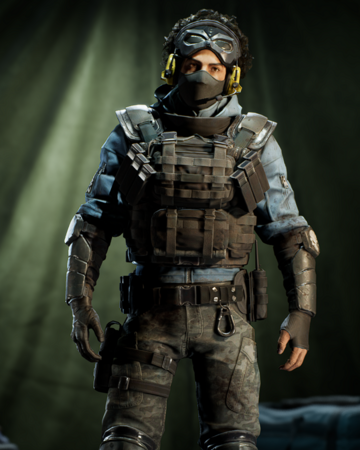
⠀⠀⠀⠀2.⠀⠀⠀⠀⠀⠀ Walker
 Walker's Lore
Passive Effects: "Military Training": Precision kills increase Walker's Accuracy by 20% for 5 seconds;
"Model Soldier": Walker gains 10% Damage;
"Equipped": Walker starts every run with a Frag Grenade. Team Effect: "Pragmatic": The team gains 10 health. Walker Deck Preference: Damage;
Offensive accessories. Walker Weapon Preference: LMG;
Assault Rifle.
:This is currently not a priority, so refer to Lore here: CLICKABLE LINK[back4blood.fandom.com]
Extra lore can be found in these links: Source 1, Source 2[screenrant.com] .
⠀⠀⠀⠀3.⠀⠀⠀⠀⠀⠀⠀Holly
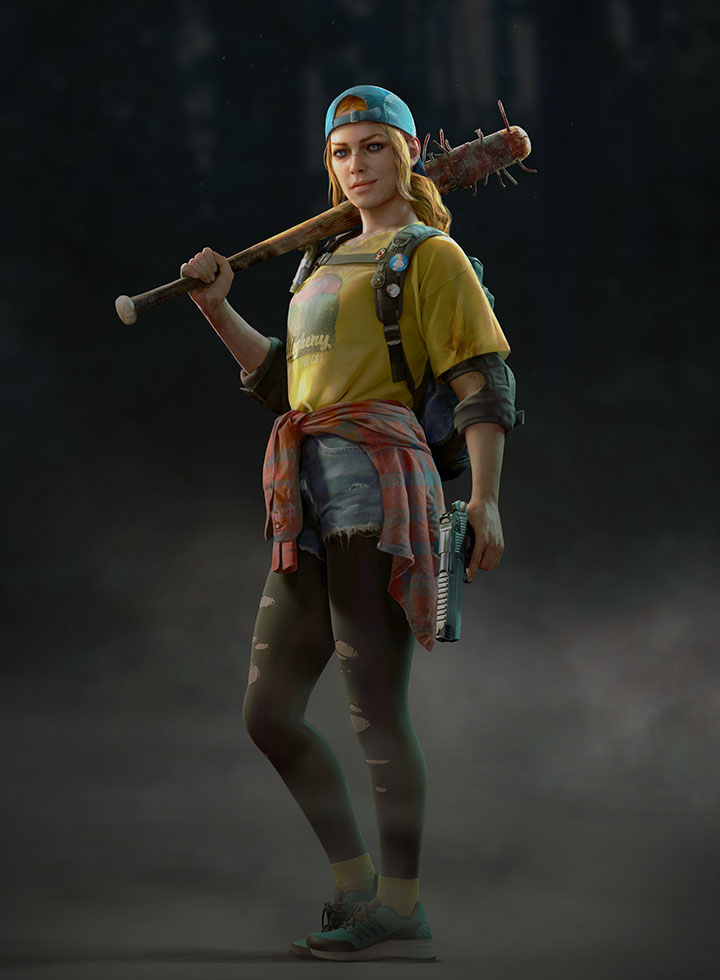
 Holly's Lore
Passive Effects: "Grand Slam": Holly recovers 10 Stamina when she kills a Ridden;
"Tough as Nails": Holly gains 10% Damage Resistance;
"Self Defense": Holly starts every run with a Stun Gun. Team Effect: "Cardio": The team gains 25 stamina. Holly Deck Preference: Tank;
Melee. Holly Weapon Preference: Melee.
:This is currently not a priority, so refer to Lore here: CLICKABLE LINK[back4blood.fandom.com]
Extra lore can be found here.
⠀⠀⠀⠀4.⠀⠀⠀⠀⠀⠀⠀Mom

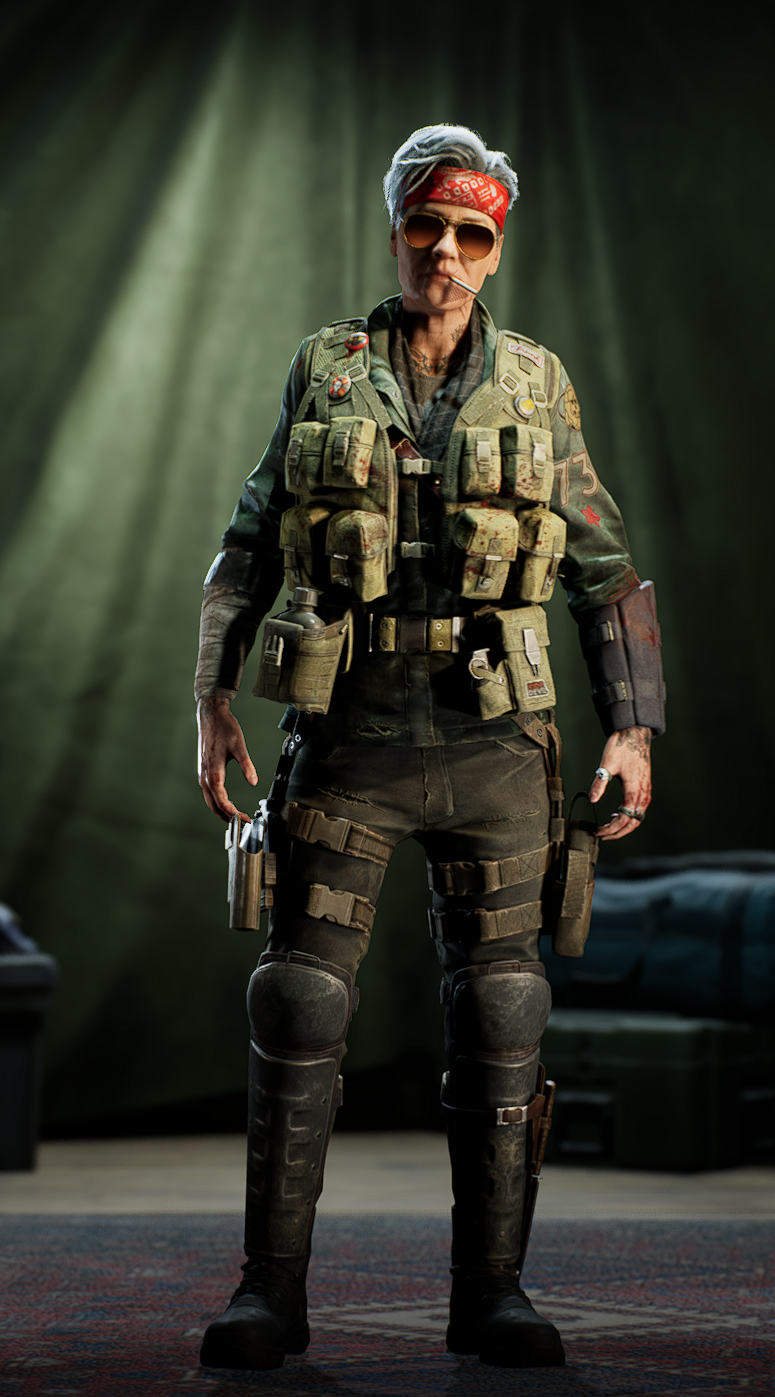 Mom's Lore
Passive Effects: "Tough Love": Mom can instantly revive an incapacitated teammate once per level;
"Den Mother": Mom gains 1 Support Inventory space;
"Kill the Pain": Mom starts every run with a Pain Meds. Team Effect: "High Expectations": The team gains 1 extra life. Mom Deck Preference: Support;
Tank. Mom Weapon Preference: Shotgun;
LMG.
:This is currently not a priority, so refer to Lore here: CLICKABLE LINK[back4blood.fandom.com]
Extra lore can be found here.
⠀⠀⠀⠀5.⠀⠀⠀⠀⠀⠀⠀ Doc
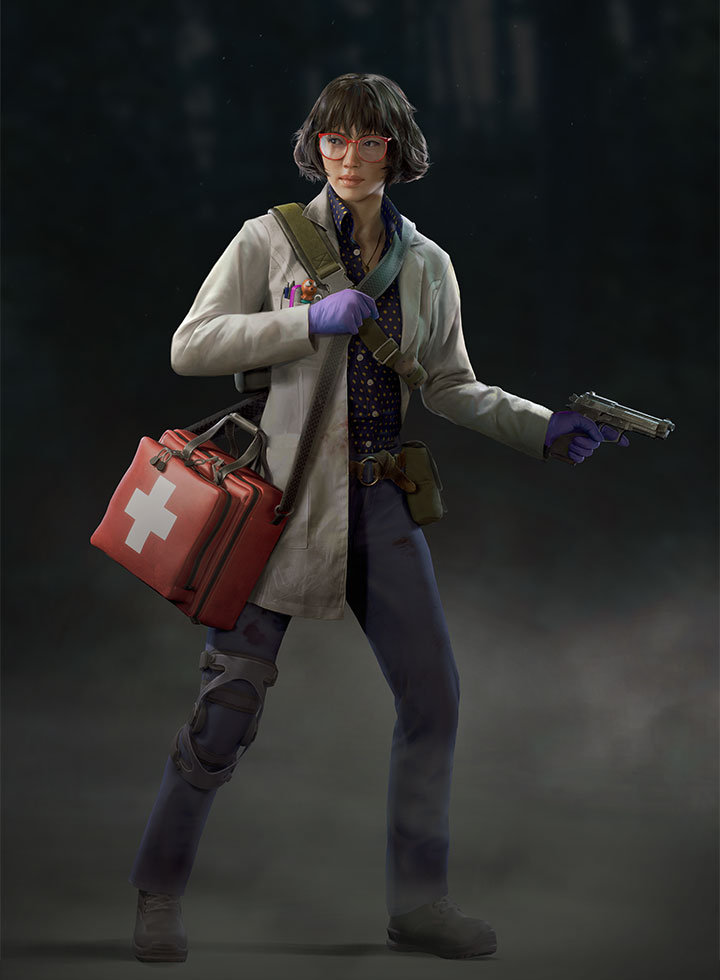
 Doc's Lore
Passive Effects: "Field Medic": Doc can apply field dressings to each teammate once per level, healing them for 25 Health;
"Skilled Physician": Doc gains 30% Healing Efficiency;
"Ready to Operate": Doc starts every run with a Bandage. Team Effect: "Triage": The team gains 25% Trauma Resistance. Doc Deck Preference: Support. Doc Weapon Preference: Shotgun;
Pistol.
:This is currently not a priority, so refer to Lore here: CLICKABLE LINK[back4blood.fandom.com]
Extra lore can be found in these links: Source 1, Source 2.
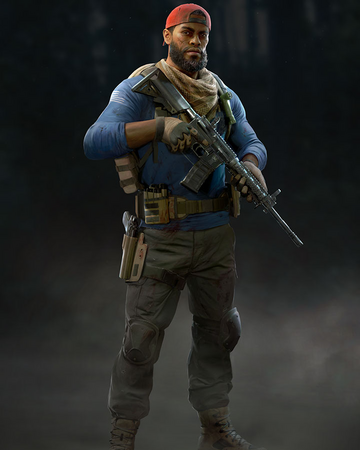
⠀⠀⠀⠀6.⠀⠀⠀⠀⠀⠀Hoffman
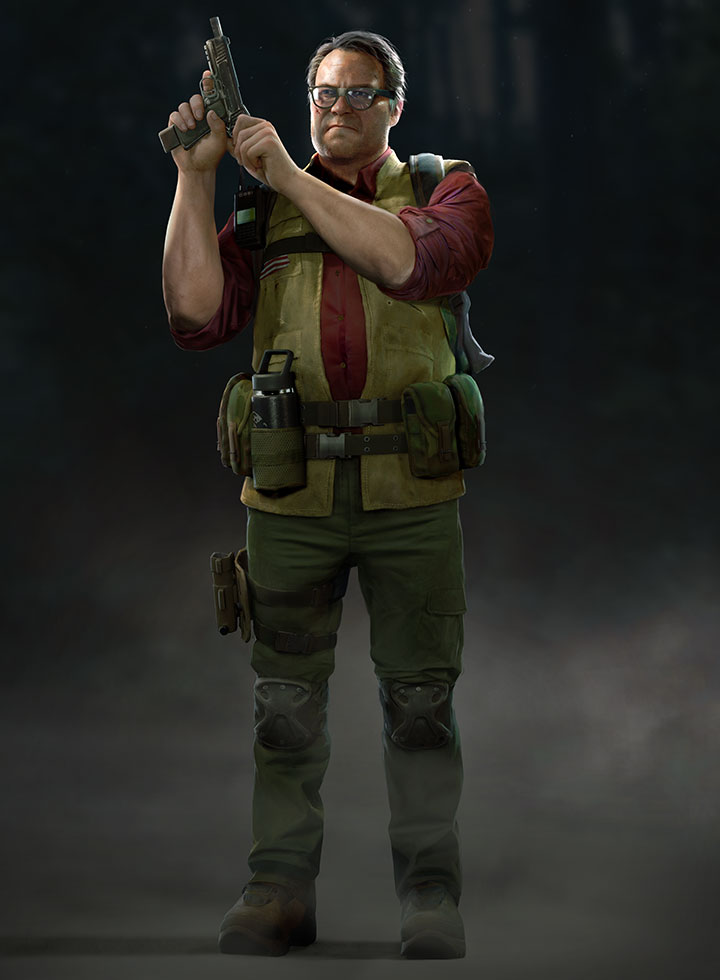
 Hoffman's Lore
Passive Effects: "Always Prepared": Hoffman has a chance to find ammo when killing Ridden;
"Ready to Rock": Hoffman gains 1 Offensive Inventory space;
"Never Without": Hoffman starts every run with a Ammo Pack. Team Effect: "Cargo Pockets": The team gains 10% Max Ammo Capacity. Hoffman Deck Preference: None (any). Hoffman Weapon Preference: None (any).
:This is currently not a priority, so refer to Lore here: CLICKABLE LINK[back4blood.fandom.com]
Extra lore can be found in these links: Source 1, Source 2.
⠀⠀⠀⠀7.⠀⠀⠀⠀⠀⠀⠀ Jim

 Jim's Lore
Passive Effects: "Clean Kill": Precision kills increase Jim's damage by 2.5%, up to 25% until he takes damage;
"Quick Aim": Jim gains 25% Aim Down Sight Speed;
"Razor Snare": Jim starts every run with a Razor Wire. Team Effect: "Seasoned Hunter": The team gains 10% Team Weakspot Damage. Jim Deck Preference: Damage. Jim Weapon Preference: Sniper;
Assault Rifle.
:This is currently not a priority, so refer to Lore here: CLICKABLE LINK[back4blood.fandom.com]
Extra lore can be found here.
⠀⠀⠀⠀8.⠀⠀⠀⠀⠀⠀ Karlee
 Karlee's Lore
Passive Effects: "Danger Sense": Karlee can sense nearby hazards;
"Bag of Tricks": Karlee gains 1 Quick Inventory space;
"Nimbled Fingered": Karlee starts every run with a Tool Kit. Team Effect: "Dexterous": The team gains 50% Use Speed. Karlee Deck Preference: Support;
Offensive;
Speed. Karlee Weapon Preference: Assault Rifle;
SMG.
:This is currently not a priority, so refer to Lore here: CLICKABLE LINK[back4blood.fandom.com]
Extra lore can be found here.
⠀⠀ The "Correct" Team Composition
Looking over all the Cleaners with their Passive and Team bonuses, here is the optimal Team Composition (a.k.a. what Characters you should have in your team for the easiest & best performance to complete the game)
The "Completion Guarantee"
Evangelo - runs through the level quickly to not only take care of load zones, but also to get to the safehouse early, as to ensure that if the rest of the team dies, the mission is still a success.Evangelo's player should be the most skilled of the team as they pretty much need to beat the map on their own - solo. Evangelo also gives the team 5% Movement Speed.
The "Team Leader"
Mom - makes sure the team gets as many chances to recover from hordes or hard game events. Mom is the team's Leader, because she can instantly revive a downed Cleaner, and if done fast enough - it can seem like the Cleaner was never downed in the first place, meaning your Team continues to fight in harmony without disruption.Mom's player should have the most map awareness, to be able to notify the team of everything that's going on - a horde being called, mutated ridden incoming & etc. Mom also gives the team 1 Extra Life.
The "Support"Doc - heals teammates, brings defibrillators and provides covering fire to make sure that the team is as strong as possible, the more power - the merrier. If anyone dies on duty, the Doc is on stand-by to bring them back to reality. Doc's player should pay more attention to their team rather than the Ridden, because they need to be confident that their team can handle everything, but their task is to handle the team. Doc can also Heal each teammate for 25 Health once per match (3 Heals total), at any time.
The "Insurance"
Karlee - clears hordes and mutated ridden like it's no problem. Slings a handful of grenades or flashbangs to make sure the team gets out of a sticky situation (or multiple) with ease. Karlee's player should be a sharpshooter, because they'll need pretty precise aim to land all those grenades. Karlee also gives the team 50% Use Speed.
╰───────────────────────╯________________________
╭──────╯Cards / Decks╰─────╮________________________
Corruption Cards - Challenges
All Challenges: Blood Samples - "Find and bring the Specimen Container to the end of the level";
Difficulties: Default (no difficulties);
Without Any Incapacitations (Elite);
Without Any Cleaners Dead (Survival);
Within the Time Limit (Expert/Timed).
Boss Mutation - "Defeat the Boss and complete the level";
Possible Variants: Breaker;
Hag;
Ogre.Difficulties: Default (no difficulties);
Ferocious;
Monstrous.
Cut The Red Wire - "Complete the level within the time limit without triggering any birds, Snitches, Car Alarms, or Alarmed doors";
Difficulties: Default (no difficulties).
Hasty Exit - "Complete the level within the time limit with all cleaners alive";
Difficulties: Default (no difficulties).
No One Left Behind - "Complete the level with all four Cleaners alive";
Difficulties: Default (no difficulties).
Safety First - "Complete the level without the cleaners being incapacitated more than 3 (or 4) times";
Difficulties: Default (no difficulties - 4 incapacitations max);
No more than 3 incapacitations;
No more than 1 incapacitation (Elite/Veteran);
No incapacitations (Flawless).
Silence is Golden - "Complete the level without triggering any birds, Snitches, Car Alarms or Alarmed doors";
Difficulties: Default (no difficulties);
With all Cleaners alive (Survival).
Speed Run - "Complete the level within the time limit to earn 500 Copper".
Difficulties: Default (no difficulties).
━━━━━━━━━━━━━━━━━━━━━━━━━━━━━━━━━━━━━━━━━━━━
Default Challenges: Blood Samples - "Find and bring the Specimen Container to the end of the level";
Reward: 500 Copper.
Boss Mutation - "Defeat the Boss and complete the level";
Rewards: Guaranteed - 500 Copper;
Occasional - 10 Supply Points.
No One Left Behind - "Complete the level with all four Cleaners alive";
Rewards: Guaranteed - 500 Copper;
Occasional - 10 Supply Points.
Safety First - "Complete the level without the cleaners being incapacitated more than 3 (or 4) times";
Rewards: Guaranteed - 500 Copper;
Occasional - 10 Supply Points.
Silence is Golden - "Complete the level without triggering any birds, Snitches, Car Alarms or Alarmed doors".
Rewards: Guaranteed - 500 Copper;
Occasional - 10 Supply Points.
━━━━━━━━━━━━━━━━━━━━━━━━━━━━━━━━━━━━━━━━━━━━
Timed Challenges / Speed Run: Blood Samples - "Find and bring the Specimen Container to the end of the level";
Rewards: Guaranteed - 500 Copper;
Occasional - 10 Supply Points.
Boss Mutation - "Defeat the Boss and complete the level within the time limit";
Rewards: Guaranteed - 500 Copper;
Occasional - 10 Supply Points.
Cut The Red Wire - "Complete the level within the time limit without triggering any birds, Snitches, Car Alarms, or Alarmed doors";
Rewards: Guaranteed - 500 Copper;
Occasional - 10 Supply Points.
Hasty Exit - "Complete the level within the time limit with all cleaners alive";
Rewards: Guaranteed - 500 Copper;
Guaranteed - 10 Supply Points.
Speed Run - "Complete the level within the time limit to earn 500 Copper".
Rewards: Guaranteed - 500 Copper;
Occasional - 10 Supply Points.
━━━━━━━━━━━━━━━━━━━━━━━━━━━━━━━━━━━━━━━━━━━━
Extra Difficulty Challenges: Blood Samples - Elite - "Find and bring the Specimen Container to the end of the level";
Rewards: Guaranteed - 500 Copper;
Guaranteed - 10 Supply Points.
Blood Samples - Survival - "Find and bring the Specimen Container to the end of the level";
Rewards: Guaranteed - 500 Copper;
Guaranteed - 10 Supply Points.
Boss Mutation - "Defeat the Boss and complete the level with all cleaners alive";
Rewards: Guaranteed - 500 Copper;
Occasional - 10 Supply Points.
Safety First - Elite - "Complete the level without the cleaners being incapacitated more than 2 times";
Rewards: Guaranteed - 500 Copper;
Occasional - 10 Supply Points.
Safety First - Flawless/Veteran - "Complete the level without the cleaners being incapacitated more than once";
Rewards: Guaranteed - 500 Copper;
Guaranteed - 10 Supply Points.
Silence is Golden - "Complete the level with all cleaners alive and without triggering any birds, Snitches, Car Alarms or Alarmed doors".
Rewards: Guaranteed - 500 Copper;
Occasional - 10 Supply Points.
Corruption Cards - Events
All Events: Biohazard - "Your health drains away quickly. But kills grant you a small reprieve";
Gloom - "Power is out in most of the area. Only emergency door alarms remain active.";
Hunted - "There are rampaging hordes in this area. It's only a matter of time before they find us";
Horde spawns every 3 minutes.
Mist - "An Unnatural fog has settled on this area";
Onslaught - "The horde is right on our heels, move fast or be overrun";
Reeker Hordes - "Huge hordes of Reekers, Retches, and Exploders will attack on a timer";
Slumber Party - "The area is infested with Sleepers, stay together and keep your eyes open";
Stinger Hordes - "Huge hordes of Stingers, Stalkers, and Hockers will attack on a timer";
Tallboy Hordes - "Huge hordes of Tallboys, Crushers, and Bruisers will attack on a timer";
Tattlers - "The mindless babbling of Snitches can be heard constantly here. Work together to avoid notice";
The Birds - "Large flocks of crows have gathered in this area to feast on the dead. Startling them could call the horde down on you";
The Dark - "The Power is out and a new Snitch mutation has emerged that will instantly call a horde when alerted. Stay quiet and you may make it through";
The Fog - "Beware of what awaits you in The Fog";
Mist level;
Hag spawn.
The Lockdown - "Entering a High Security Area. Many of the Alarmed doors are still intact. Proceed with Caution";
Timed Reeker Horde - "Reekers horde this area";
Toxic Spill - "Your health slowly rots away, but kills grant a small reprieve";
All Collectibles (Secret Statues)
[|]⠀Level 1-4⠀[|] The Devil's Return: "The Crossing"
> The Statue is on the red cargo platform next to the hole in the side of the Yacht.
[|]⠀Level 2-2⠀[|] Search and Rescue: "Book Worms"
> After entering the Hotel's base floor through the Basement, the Statue is under the table with a laptop, in the room forward and to the left.
[|]⠀Level 3-1⠀[|] The Dark Before The Dawn: "Special Delivery"
> The Statue is on the Scaffolding closest to the Safe House.
[|]⠀Level 4-2⠀[|] Blue Dog Hollow: "Hell's Bells"
> Next to the entrance of the Hag's Forest, there will be a cave in which a Loot Room can spawn. To the left of this Cave should be a small hill, with two paths on both of it's sides. On top of this hill is the Statue.
[|]⠀Level 5-1⠀[|] The Armory: "A Call To Arms"
> The Statue is inside the window of the Chicken Coop behind the Red (third) House, after exiting the Parking Lot.
[|]⠀Level 6-2⠀[|] Plan B: "Hinterland"
> The Statue is behind the Waterfall right before You pass under the Bridge.
[|]⠀Level 7-3⠀[|] Job 10:22: "Grave Danger"
> The Statue is inside a Mausoleum in the furthest corner of the East Graveyard (east after exiting the Safe House).
[|]⠀Level 8-4⠀[|] Dr. Rogers' Neighbourhood: "Garden Party"
> After reaching the stairs that lead up to the Mansion (the Safe House), go past the stairs back into the maze, the Secret Statue will be on top of... a Statue.
[|]⠀Level 9-2⠀[|] Remnants: "Making The Grade"
> After defeating The Ogre in the Gym (or running away from it), head straight until you get to the stairs that go up a bit. Turn right before the stairs and you'll see a Tent in the corner. Inside this Tent is the statue.
[|]⠀ Level 10 ⠀[|] The Abomination: "The Abomination"
> After passing by burning cars, climb on one of the long slabs of Ridden infestation, and the Statue will be right up there in a small pocket. And yes, there is truly no better way to explain this one, just refer to the screenshots below.
The "Correct" Decks (All Acts & Difficulties) Part 1/2
ACT 1 //1-14-4XV's "Correct" ACT 1 DeckSpeedUse Speed
 Card List
 Full Deck
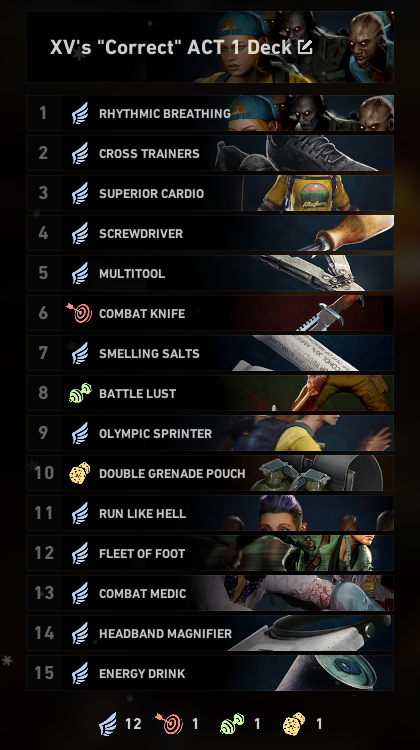 ACT 2 //5-17-3XV's "Correct" ACT 2 DeckSpeedUse Speed
 Card List
 Full Deck
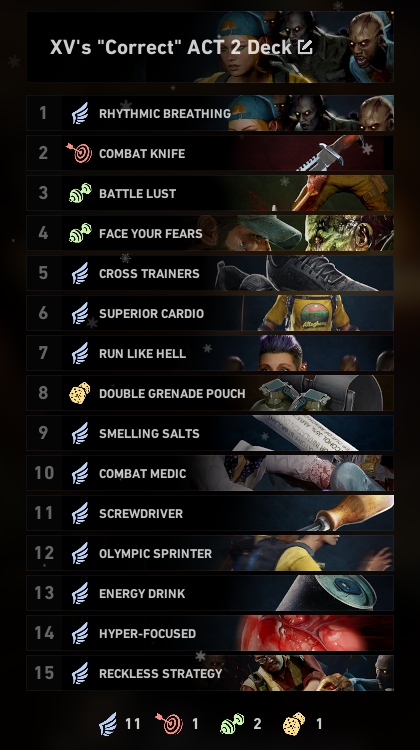
This is the Mathematically/Statistically "Correct" Deck for Act 1 in Back 4 Blood;
The purpose of this section in XV's Back 4 Blood Mega Guide is to provide the statistically highest winrate deck for each difficulty, for all acts separately.
Originally, I had combined Recruit and Veteran difficulties together as they don't really differ much from one another.
I have always thought that if Recruit, Veteran and Nightmare were called the usual difficulty names like "Easy", "Medium" and so on, Recruit would be "Story mode", Veteran would be "Medium" and Nightmare would be "Expert" / "Impossible".
But now I have combined all Recruit, Veteran and Nightmare together to make an over-all solid deck that works for all three difficulties, or rather works well for Nightmare and then works great for Recruit and Veteran.
Levels to This Act covers the scenes: "The Devil's Return",
"Search and Rescue",
"The Dark Before The Dawn",
"Blue Dog Hollow".
Deck type:
& Use : "Rhythmic Breathing"
+40% Stamina "Cross Trainers"
+20% Stamina
+20% Stamina Regen
+3% Move
+5 Health "Superior Cardio"
+20% Stamina
+20% Sprint Efficiency
+5 Health "Screwdriver"
+50% Use
+10% Stamina "Multitool"
+75% Use
-5% Damage Resistance "Combat Knife"
Turns your Bash into a Knife that counts as a Melee weapon "Smelling Salts"
+200% Revive "Battle Lust"
Melee kills heal +2 Health. "Olympic Sprinter"
+30% Sprint Efficiency
-7% Damage Resistance "Double Grenade Pouch"
+2 Offensive Inventory space
-10% Damage Dealt "Run Like Hell"
+12% Move
When injured lose -12% Move for 3 seconds "Fleet of Foot"
+8% Move
-7% Damage Resistance "Combat Medic"
+50% Use
Heals teammates for an additional +20 Health when you revive them "Headband Magnifier"
+125% Use
When injured have a chance to be blinded for 1 second "Energy Drink"
+15% Stamina
+25% Weapon Swap
+15% Move while firing
+10% Slow Resistance
When you get the Headband Magnifier and all the cards before it, you should be set to go for an easy Finale, but if you have an extra card pick, we have the 15th card "Energy Drink" that makes the whole sequence a tiny bit easier, but isn't required, as it's bonuses will be quite minimal at this point in the game.
Justification: Since Recruit and Veteran difficulties are very easy unlike Nightmare, in Act 1, pretty much all you'll need is speed, then, right at the end - on the Finale "The Sound of Thunder", you just need a good bit of Use to be able to load the Howitzer ammo as fast as possible. And also, because Nightmare is extremely hard, especially when playing solo, it is suggested to have a mix of good & Stamina, a good amount of Offensive inventory space to be able to spam Grenades or Flashbangs in cases where a lot of Tallboys swarm you.
(image):
Levels to This Act covers the scenes: "The Armory",
"Plan B",
"Job 10:22".
Deck type:
& Use : "Rhythmic Breathing"
+40% Stamina "Combat Knife"
Turns your Bash into a Knife that counts as a Melee weapon "Battle Lust"
+40% Stamina "Face Your Fears"
Gain +2 Temporary Health whenever you kill a Ridden within 2 meters. "Cross Trainers"
+20% Stamina
+20% Stamina Regen
+3% Move
+5 Health "Superior Cardio"
+20% Stamina
+20% Sprint Efficiency
+5 Health "Run Like Hell"
+12% Move
When injured lose -12% Move for 3 seconds "Double Grenade Pouch"
+2 Offensive Inventory space
-10% Damage Dealt "Smelling Salts"
+200% Revive "Combat Medic"
+50% Use
Heals teammates for an additional +20 Health when you revive them "Screwdriver"
+50% Use
+10% Stamina "Olympic Sprinter"
+30% Sprint Efficiency
-7% Damage Resistance "Energy Drink"
+15% Stamina
+25% Weapon Swap
+15% Move while firing
+10% Slow Resistance "Hyper-Focused"
+50% Weakspot Damage
-40% Move while shooting or melee attacking "Reckless Strategy"
+30% Weakspot Damage
-5% Damage Resistance
When you get "Hyper-Focused" and all the cards before it, you should be set to go for an easy Finale, but if you have an extra card pick, we have the 15th card "Reckless Strategy" that makes the whole sequence a tiny bit easier, but isn't required, as it's bonuses will be quite minimal at this point in the game.
Justification: Once again, Recruit and Veteran difficulties are very easy for Act 2, however the problem is - Nightmare. And also, because Nightmare is extremely hard, especially when playing solo, it is suggested to have a mix of good & Stamina, a good amount of Offensive inventory space to be able to spam Grenades or Flashbangs in cases where a lot of Tallboys or Common Ridden swarm you.
(image):
The "Correct" Decks (All Acts & Difficulties) Part 2/2
ACT 3 //8-19-4XV's "Correct" ACT 3 DeckSpeedUse Speed
 Card List
 Full Deck
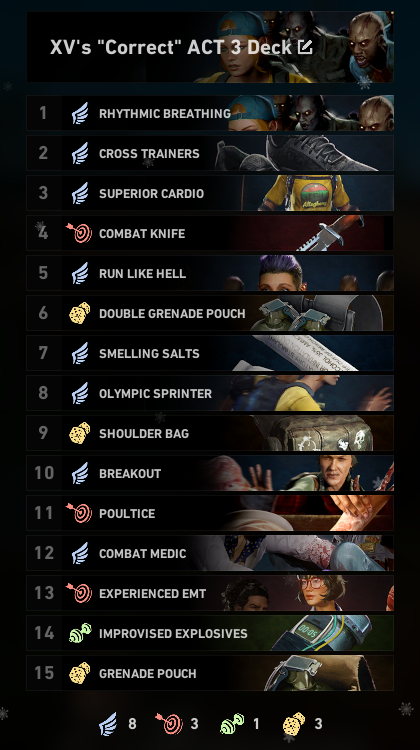 ACT 4 //10-1XV's "Correct" ACT 4 DeckDamage
 Card List
 Full Deck
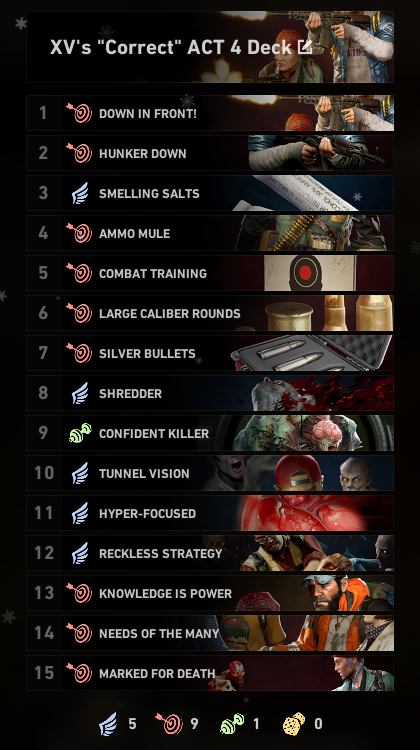
Levels to This Act covers the scenes: "Dr. Rogers' Neighbourhood",
"Remnants".
Deck type:
& Use : "Rhythmic Breathing"
+40% Stamina "Cross Trainers"
+20% Stamina
+20% Stamina Regen
+3% Move
+5 Health "Superior Cardio"
+20% Stamina
+20% Sprint Efficiency
+5 Health "Combat Knife"
Turns your Bash into a Knife that counts as a Melee weapon "Run Like Hell"
+12% Move
When injured lose -12% Move for 3 seconds "Double Grenade Pouch"
+2 Offensive Inventory space
-10% Dealt "Smelling Salts"
+200% Revive "Olympic Sprinter"
+30% Sprint Efficiency
-7% Resistance "Shoulder Bag"
+2 Support Inventory space
-10% Dealt "Breakout" - This card is not obligatory, get it only if you feel you need it!
Gain the ability to free yourself from Grabs
+50% Breakout Cooldown Reduction (Base 60 seconds) "Poultice"
When you use a Medical Accessory, the target heals for an additional 20 Health over 30 seconds "Combat Medic"
+50% Use
Heals teammates for an additional 20 Health when you revive them. "Experienced EMT"
When you use a Medical Accessory, the target gains the following stats until the end of the level:
+10% Maximum Health
+10% Maximum Stamina
+10% Stamina Regen "Improvised Explosives"
+75% Accessory
-25% Swap "Grenade Pouch"
+1 Offensive Inventory space
When you get "Improvised Explosives" and all the cards before it, you should be set to go for an... easier... Finale, but if you have an extra card pick, we have the 15th card "Grenade Pouch" that makes the whole sequence a tiny bit easier, but isn't required by any means.
Justification: This build is made mostly to have as much leeway when completing the first few missions, a.k.a. to have an easier time dealing with a bunch of the annoying events in this game, and then to build up to a very strong deck for the Finale in which You must kill Ogres.
(image):
Level This Act covers the scene: "The Abomination".
Deck type:
: "Down in Front!"
While crouching, you neither take nor deal Friendly Fire damage
+10 Health "Hunker Down"
While crouching, you gain the following stats:
+10% Resistance
+40% Accuracy "Smelling Salts"
+200% Revive "Ammo Mule"
+75% Ammo Capacity
-5% Move "Combat Training"
+5% Bullet
+1 Bullet Stumble
+5 Melee Stumble "Large Caliber Rounds"
+7.5% Bullet
+200% Bullet Penetration "Silver Bullets"
+10% Bullet
+15% Effective Bullet Range "Shredder"
Each bullet that hits the target causes them to take 1% increased damage for 3 seconds up to a maximum of 15% increased damage "Confident Killer"
When you or your team kills a Mutation gain 1% damage, up to a maximum of 15% damage, until the end of the level "Tunnel Vision"
Every 0.75 seconds you Aim Down Sights gives 5% Weakspot , up to a maximum of 15% Weakspot
+50% Aim
-5% Resistance "Hyper-Focused"
+50% Weakspot
-40% Move while firing or melee attacking "Reckless Strategy"
+30% Weakspot
-5% Resistance "Knowledge is Power"
+10% Weakspot
Allows players to see values for damage they deal and enemy health bars "Needs of the Many"
-10% Health
The Team gains +1 Extra Life "Marked for Death"
Mutations you ping are highlighted and your team deals +10% increased damage to highlighted enemies
Justification: This act is actually very easy, as long as your team takes their time and is careful when dealing with hordes or especially mutated Ridden. It is best if your teammates use Support or Tank decks while You are fully built for damage. It is heavily suggested to either use an Assault Rifle or an LMG and to get as much Magazine Size as possible.
(image):
╰───────────────────────╯________________________
╭───╯Full Acts&Missions List╰──╮________________________
-=-⠀⠀[|] -⠀[-=-]⠀ACT 1⠀[-=-]⠀- [|]⠀⠀-=-
[|[⠀1⠀]|]⠀"The Devil's Return"
"Escape Across The Evansburgh Bridge Toward Finleyville With A Horde On Your Heels."1-1 // "RESURGENCE"
/--/ Recommendations \--\Offensive inventory: Flashbang or Frag grenade
⠀⠀⠀⠀-⠀Flashbang can not only stun all infected for a couple seconds, but also kill birds;
⠀⠀⠀⠀-⠀Frag grenade can kill birds and almost always instantly kill mutated Ridden.
Support inventory: Any
Quick inventory: TOOL KIT
⠀⠀⠀⠀-⠀You can do the Bridge scene without calling a horde by using a Toolkit;
⠀⠀⠀⠀-⠀There is only one loot room location on this map, so you can always pre-plan it in your playthrough.
Best Character: Evangelo or Holly
Best Deck Type: Speed
Best Weapon Type: SMG or Shotgun
-=- Missions: -=- Escape Evansburgh.
{+|- Loot Room Locations: -|+} To the left, right after bridge section
1-2 // "TUNNEL OF BLOOD"
/--/ Recommendations \--\Offensive inventory: Flashbang or Frag grenade
⠀⠀⠀⠀-⠀Flashbang can not only stun all infected for a couple seconds, but also kill birds;
⠀⠀⠀⠀-⠀Frag grenade can kill birds and almost always instantly kill mutated Ridden.
Support inventory: Any
Quick inventory: Tool kit
⠀⠀⠀⠀-⠀There is only one loot room location on this map, so you can always pre-plan it in your playthrough.
Best Character: Evangelo or Walker
Best Deck Type: Speed
Best Weapon Type: Assault Rifle, LMG or Sniper
-=- Missions: -=- Escape Evansburgh.
{+|- Loot Room Locations: -|+} Right before second Ogre spawn location, in the red light tunnel.
1-3 // "PAIN TRAIN"
/--/ Recommendations \--\Offensive inventory: Pipe bomb or Firecrackers
⠀⠀⠀⠀-⠀Pipe bomb is extremely useful in the Grave Filler scene, as it not only takes Ridden's attention, but kills them too;
⠀⠀⠀⠀-⠀Firecrackers are basically a weaker pipe bomb - doing the same thing without the killing part.
Support inventory: Any
Quick inventory: Tool kit
⠀⠀⠀⠀-⠀Both spawn locations for the loot room are very useful as having it early can give a great boost for the upcoming swamp part, and the late spawn can give you a guaranteed med cabinet and other things like ammo, for the Grave Filler scene.
Best Character: Mom, Hoffman or Doc
Best Deck Type: Speed or Offensive &/ Quick Inventory
Best Weapon Type: SMG or LMG
-=- Missions: -=- Get back to Fort Hope.
> Find a way over the Train Car.
Continue to the Saferoom.
{+|- Loot Room Locations: -|+} Shortly after exiting the saferoom, in the house atop the hill.
Right before the gravel filler, at the bottom of the climbable thing up to the gravel filler.
1-4 // "THE CROSSING"
/--/ Recommendations \--\Offensive inventory: Pipe bomb or Flashbang
⠀⠀⠀⠀-⠀The Pipe bomb suceeds in clearing Ridden while crossing the Bridge, getting to the Explosive planting location or while planting Explosives;
⠀⠀⠀⠀-⠀The Flashbang is very useful against Crushers and other Tallboy variants as they can be especially powerful in this level, even more on the Bridge.
Support inventory: Any
Quick inventory: Stun gun
⠀⠀⠀⠀-⠀Crushers are quite common and quite powerful on this level, especially if your team has just planted explosives while you're on the ship, if a Crusher grabs you, it may be over for you, that's why a Stun gun is especially good here.
Best Character: Evangelo or Karlee
Best Deck Type: Speed, Use Speed
Best Weapon Type: SMG
-=- Missions: -=- Escape across the Bridge.
Use the Explosives to cut off the Horde.
{+|- Loot Room Locations: -|+} Right at the beginning, after going down the stairs, in the building to the right;
Right at the beginning, after going down the stairs, in the building straight ahead.
[|[⠀2⠀]|]⠀"Search And Rescue"
"Create A Distraction In The Bar So The Survivors Can Escape To Fort Hope."2-1 // "A CLEAN SWEEP"
/--/ Recommendations \--\Offensive inventory: Pipebomb or Flashbang
⠀⠀⠀⠀-⠀The Pipebomb helps clear common Ridden when going inside the Liquor Store for the first time, or if you accidentally call a Horde during the Breaker fight, it may just save your team from losing the game;
⠀⠀⠀⠀-⠀The Flashbang is very useful against the Breaker (as it not only stuns it temporarily, but also makes it more vulnerable to weapon damage for some time), all types of Tallboys and especially the Hockers in the Liquor Store.
Support inventory: Pain Meds or Medkit
Quick inventory: Tool kit
⠀⠀⠀⠀-⠀Both Loot Rooms are available after the Breaker and the second Loot Room is best used after the whole map is done. In both cases they are very helpful as you're almost guaranteed to take damage on this map.
Best Character: Evangelo or Karlee
Best Deck Type: Speed or Use Speed
Best Weapon Type: LMG, Shotgun or Sniper
-=- Missions: -=- Head into town and rescue the Survivors.
> Clear the Gas Station of Ridden.
> Defeat the Breaker.
Rescue the Survivors in the Liquor Store.
> Free the Survivors from the Cocoons.
Get to the Library Saferoom.
{+|- Loot Room Locations: -|+} In the building on the left, before the alleyway that goes behind the Liquor Store, up the stairs and then - the room on the left.
Inside the Liquor Store, the second room on the right (a.k.a. the one to the left of the tunnel that holds the first Survivor Cocoon).
2-2 // "BOOK WORMS"
/--/ Recommendations \--\Offensive inventory: Any
Support inventory: Any
Quick inventory: Any
Best Character: Evangelo
Best Deck Type: Speed
Best Weapon Type: SMG
-=- Missions: -=- Fortify the Library against the Ridden.
Rescue the remaining Survivors.
> Clear the Hotel of Ridden.
Get to the Saferoom.
{+|- Loot Room Locations: -|+} At the top of the Library, in the place where you can climb a Ladder, opposite direction of the Ladder, at the end of the hallway.
Inside the First Floor of the Ridden-infested Hotel, straight ahead when coming out of the Basement stairway.
2-3 // "BAR ROOM BLITZ"
/--/ Recommendations \--\Offensive inventory: Pipe Bomb or Molotov
Support inventory: Any
Quick inventory: Tool kit
⠀⠀⠀⠀-⠀There is only one Loot Room Location plus it is very close to the objective where almost all of your time playing this map takes place, so You have a guaranteed Medkit.
Best Character: Holly, Mom or Doc
Best Deck Type: Tank, Damage or Support
Best Weapon Type: LMG, Assault Rifle, SMG
-=- Missions: -=- Head to Keet's Bar.
Start the Jukebox to draw the Horde.
> Holdout while the first Bus is loaded.
> Holdout while the second Bus is loaded.
> Holdout while the final Bus is loaded.
Escape in the Humvee.
{+|- Loot Room Locations: -|+} To the right of the Jukebox, in the corner of the building.
[|[⠀3⠀]|]⠀"The Dark Before The Dawn"
"Reestablish Supply Lines To The Diner."3-1 // "SPECIAL DELIVERY"
/--/ Recommendations \--\FUN & VERY HELPFUL FACTOffensive inventory: Pipe Bomb
Support inventory: Any
Quick inventory: Any
In the supply searching part, keep an eye for out dropped, shining Flashlights.
These dropped Flashlights point towards the places where the dropped Supplies are.
You can actually do the supply searching part in a solo-game in less than half a minute with a speed deck.
Best Character: Evangelo
Best Deck Type: Speed
Best Weapon Type: SMG
> and in the case of a Boss Mutation Corruption Card - Sniper, Assault Rifle, LMG.
-=- Missions: -=- Head into town and search for lost supplies.
Get to the Saferoom.
{+|- Loot Room Locations: -|+} After going through the building that leads you to the supply searching part, straight ahead in the building across the street.
In the supply searching part, going to the right of the white van, up the stairs, in the second floor of the building.
3-2 // "THE DINER"
/--/ Recommendations \--\Helpful Mission Tip #1Helpful Mission Tip #2Offensive inventory: Any
Support inventory: Any
Quick inventory: Tool kit or Razor wire
⠀⠀⠀⠀-⠀There is only one Loot Room Location, it is recommended to get as much max hp (a.k.a. get rid of as much trauma damage) as possible before the Survival section.
⠀⠀⠀⠀-⠀The more Razor wire, the better. :)
It is highly suggested to take the right side of the Diner and set up a base there, right against the fence. If you place all the given Razor Wires from the corner of the building to the corner of the outer fences (basically a line of Razor Wires), your team will be almost unkillable the entire game, especially if you have a bunch of frag grenades to quickly kill mutated ridden with incase they breach defenses.
You can place the Minigun on top of the explosive barrel (if it spawns) on the right side of the Diner.
To place it: You must look towards the Diner (a.k.a. point the Minigun at the Diner);
Since the fence has a small bit of barbed wire at the top, it will block you from climbing up on the Minigun from the sides, however jumping up (facing the fence head-on), you should be able to climb up on top of the Minigun;Usually, you will be untouched for the entirety of the Survival part.
I'd suggest putting someone with an Assault Rifle, LMG or Sniper on top of the Minigun as it's hard for more than one person to stand on the Minigun.
Best Character: Mom, Walker or Jim
Best Deck Type: Damage or Quick Inventory
Best Weapon Type: LMG, Assault Rifle, SMG
-=- Missions: -=- Deliver the supplies to the Diner.
Repair the Generator.
Protect the Diner (5 minutes - timed Survival mission).
{+|- Loot Room Locations: -|+} After opening the gate that calls a Horde, instantly to the left.
[|[⠀4⠀]|]⠀"Blue Dog Hollow"
"Collapse The Mine To Cutoff The Source Of The Ridden."4-1 // "BAD SEEDS"
/--/ Recommendations \--\Offensive inventory: Pipe Bomb
⠀⠀⠀⠀-⠀Since destroying each Nest Node calls an individual Horde, using Pipe Bombs can easily help take care of those Hordes, especially the final one, so you could easily make it across the River.
Support inventory: Any
Quick inventory: Tool kit
⠀⠀⠀⠀-⠀There is only one Loot Room Location plus it is very close to the objective where almost all of your time playing this map takes place, so You have a guaranteed Medkit.
Best Character: Evangelo or Holly
Best Deck Type: Speed or Tank
Best Weapon Type: SMG or Melee
-=- Missions: -=- Travel to the tunnel checkpoint.
Investigate Holland Farm.
> Destroy the Nest Nodes.
> Destroy the final Nest Node to free the Trailer.
> Get across the river.
Continue to the Saferoom.
{+|- Loot Room Locations: -|+} In the further-most corner of the Holland Farm's main house.
4-2 // "HELL'S BELLS"
/--/ Recommendations \--\FUN & VERY HELPFUL FACTMAKE SURE TO WAIT FOR THE MISSION LIST TO UPDATE TO "CONTINUE TO THE CHURCH", BEFORE OPENING THE CHURCH DOOR, OTHERWISE YOU WILL SOFTLOCK THE GAME AND WILL HAVE TO START OVER.Offensive inventory: Pipe Bomb or Molotov
Support inventory: Any
Quick inventory: TOOL KIT
I'd be very surprised if the Devs do not yet know of this,
Take a Tool kit with you to the Trailer flipping part;
Use it to open the Minigun crate;
Place the Minigun a bit to the right of the large orange (weapon) crate where the Trailer is, do it while looking towards the Trailer to make it as easy as possible;
Start the Trailer flipping event and climb on the Minigun (easiest to do from the part where you'd sit while shooting it);
Now - the hardest part - just jump over the fence;
Climb on top of the first invisible wall (roughly the base of the Trailer);
Climb on top of the second invisible wall (to the left of the first one, then you can drop down to continue the mission.
Yep, it's that easy. You literally just jump over the fence, and climb on top of a couple invisible walls to skip the entire section. Obviously unintended, but extremely helpful for speedruns while it's unpatched. Quite a popular trick actually, I'm surprised it is yet not patched as all it takes is extending an invisible wall (or adding one if it has not been added yet).
How does this softlock the game?
Well, you complete a mission that is not yet on the mission list, and there is no second check that checks if the mission of opening the Church door has been accomplished, since the Devs did not expect you to be at the Church door before the Trailer has finished flipping.
There is no second chance to complete the mission "Continue to the Church" besides opening the Church door, and not just opening it like any other door, but holding the interact key to unlock it and starting the Fortification event.
And the game ends only when a specific mission is done, in this case - the Fortification mission, but it has not yet been unlocked, so the check for it being done is not active.
Best Character: Evangelo, Karlee, Holly
Best Deck Type: Speed, Use Speed, Tank
Best Weapon Type: SMG, Melee, Offensive Inventory
-=- Missions: -=- > Get to the Church.
Clear the Trailer from the road.
> Holdout while the Trailer is pulled upright.
Get to the Church.
> Fortify the church against the Ridden.
{+|- Loot Room Locations: -|+} To the right of the Jukebox, in the corner of the building.
4-3 // "ABANDONED"
/--/ Recommendations \--\Offensive inventory: Any
Support inventory: Any
Quick inventory: Any
Best Character: Evangelo
Best Deck Type: Speed
Best Weapon Type: SMG
-=- Missions: -=- Get to Bluedog Mine.
Destroy the Nest to proceed.
> Continue through the Blue Dog Village.
> Survive the Gauntlet.
Continue through the Blue Dog Village.
Enter the Blue Dog Mine Saferoom.
{+|- Loot Room Locations: -|+} Right after destroying the Nest, when jumping down to the Trailer/Gauntlet part, to the right, in the small shack.
After running through the Gauntlet, on the left after entering the building.
Running up the hill to the Blue Dog Mine Saferoom, to the right of the last ("blow-up-able") mineshaft, in the small utility building.
4-4 // "THE SOUND OF THUNDER" (Finale)
/--/ Recommendations \--\{+|- Loot Room Locations: -|+}Offensive inventory: Pipe Bombs (at least two are Recommended)
Support inventory: Pain meds
Quick inventory: Stun gun
⠀⠀⠀⠀-⠀The Stun gun is very, VERY useful on this mission as it can save you or your team.
Best Character: Karlee
Best Deck Type: Use Speed & Offensive Inventory
Best Weapon Type: Any, weapons don't really matter in this mission if You have Pipe bombs and a lot of Use Speed
-=- Missions: -=- Gather the team at the Howitzer.
Load the Howitzer with ammo.
> Fire the Howitzer!
Destroy the Mine.
None.
-=-⠀⠀[|] -⠀[-=-]⠀ACT 2⠀[-=-]⠀- [|]⠀⠀-=-
[|[⠀5⠀]|]⠀"The Armory"
"Gain Access To The Armory In The Police Station. The Hordes Are Increasingly Aggressive Here."5-1 // "A CALL TO ARMS"
/--/ Recommendations \--\Offensive inventory: Any
Support inventory: Any
Quick inventory: TOOL KIT
⠀⠀⠀⠀-⠀You can skip the only guaranteed Hordes (nest section) by opening the only Loot Room as it has a second floor that skips the entire parking lot part - why? I don't know. The Devs thought it was a good idea, but hey, can't complain until the Loot Room doesn't spawn there.
Best Character: Evangelo, Holly, Mom, Walker
Best Deck Type: Tank
Best Weapon Type: Assault Rifle, Melee
-=- Missions: -=- Get to the Saferoom.
{+|- Loot Room Locations (there may be more?): -|+} In the first floor of the Nest-Infested parking lot, in the same corner of the parking lot, that you'd exit from on the second floor.
In the third house (red house), on the second floor where you enter through the window, instantly to the right, behind the wall with text regarding a "no Ridden island".
5-2 // "THE HANDY MAN"
/--/ Recommendations \--\Offensive inventory: Pipe bomb
⠀⠀⠀⠀-⠀Since there are so many Nests and Hordes, a Pipe bomb might save your team.
Support inventory: Any
Quick inventory: Any
Best Character: Evangelo
Best Deck Type: Speed
Best Weapon Type: SMG
-=- Missions: -=- Look for Bob in the Police Station.
Destroy the Nests and find Bob's arm.
> Use Bob's Arm to open the Saferoom.
Get into the Saferoom.
{+|- Loot Room Locations (there may be more?): -|+} At the last Nest (the furthest one from the Scanner/Safehouse), in the furthest corner away.
[|[⠀6⠀]|]⠀"Plan B"
"Secure The Weapons Cache And Send It Back To Fort Hope."6-1 // "PIPE CLEANERS"
/--/ Recommendations \--\Offensive inventory: Pipe bomb
⠀⠀⠀⠀-⠀Since there are so many Nests and Hordes, a Pipe bomb might save your team.
Support inventory: Any
Quick inventory: Any
Best Character: Evangelo
Best Deck Type: Speed
Best Weapon Type: SMG
-=- Missions: -=- Clear the Ridden from the Sewers.
> Open the Gate.
Continue through the Sewer.
Get to the Saferoom.
{+|- Loot Room Locations (there may be more?): -|+} After opening the flood gate and then sliding down deeper into the Sewers, when finding the correct way to go, there will at one time be a Ladder that you can climb, there is only one door.
6-2 // "HINTERLAND"
/--/ Recommendations \--\Offensive inventory: Pipe bomb
⠀⠀⠀⠀-⠀Since there are so many opportunities for a Horde, a Pipe bomb is great.
Support inventory: Any
Quick inventory: Any
Best Character: Evangelo
Best Deck Type: Speed
Best Weapon Type: SMG
-=- Missions: -=- Travel to The Clog.
> Destroy the Nest to proceed.
Get to the Saferoom.
{+|- Loot Room Locations (there may be more?): -|+} After going under the bridge and entering the zone swarming with birds, in the second floor of the house You must pass through to get forward.
6-3 // "TRAILER TRASHED"
/--/ Recommendations \--\Offensive inventory: PIPE BOMB
⠀⠀⠀⠀-⠀This mission is almost entirely "get from Point A to Point B", so as long as you're fast, you'll complete it with no issue whatsoever, and for that reason, a Pipe bomb is extremely useful, as it can easily clear any Horde of Common Ridden while running.
Support inventory: Any
Quick inventory: Tool kit
⠀⠀⠀⠀-⠀Sometimes (or maybe always) there will be TWO LOOT ROOMS in this map, so taking a Tool kit can be very useful for your team as it pretty much guarantees you time to loot every trailer, as there will be at least two Med Cabinets available, so you don't have to worry about Health much.
Best Character: Evangelo, Mom
Best Deck Type: Speed
Best Weapon Type: SMG
-=- Missions: -=- Continue to The Clog.
> Cross the river.
Travel through the mobile home park.
> Search the mobile homes for supplies (optional).
Get to the Saferoom.
{+|- Loot Room Locations (there may be more?): -|+}For this map, please refer to pictures below to know Loot Room spawn locations. Inside a Trailer;
Inside a Trailer.
6-4 // "THE CLOG"
/--/ Recommendations \--\Offensive inventory: PIPE BOMB
⠀⠀⠀⠀-⠀Just like the previous level, this mission is almost entirely "get from Point A to Point B", so as long as you're fast, you'll complete it with no issue whatsoever, and for that reason, a Pipe bomb is extremely useful, as it can easily clear any Horde of Common Ridden while running.
Support inventory: Any
Quick inventory: Any
Best Character: Evangelo
Best Deck Type: Speed
Best Weapon Type: SMG
-=- Missions: -=- Cross The Clog.
Get into the Saferoom.
{+|- Loot Room Locations (there may be more?): -|+} On the second floor of The Clog (the Yacht), at the end of the hallway.
6-5 // "THE BROKEN BIRD"
/--/ Recommendations \--\Offensive inventory: PIPE BOMB OR FIRECRACKERS
⠀⠀⠀⠀-⠀Both the Pipe bomb and the Firecrackers should give you enough time to hook all four of each of the Cargo's hooks. It is recommended to have at least 3 or more Offensive Inventory space.
Support inventory: Any
Quick inventory: Stun gun
Best Character: Karlee, Mom
Best Deck Type: Use Speed
Best Weapon Type: LMG, SMG, Melee
-=- Missions: -=- Locate the cargo amongst the wreckage.
Recover the Cargo Containers.
{+|- Loot Room Locations (there may be more?): -|+} None known yet.
[|[⠀7⠀]|]⠀"Job 10:22"
"Meet With Phillips' Operative At The Church. Stay Alert, There's A New Snitch Mutation In The Area That Will Always Call The Horde When Alerted Or Killed."7-1 // "THE HERALDS OF THE WORM PART 1"
/--/ Recommendations \--\Offensive inventory: Any
Support inventory: Any
Quick inventory: Any
Best Character: Walker, Jim, Evangelo, Hoffman
Best Deck Type: Damage, Speed
Best Weapon Type: LMG, Assault Rifle, Sniper
-=- Missions: -=- Travel to the Church to meet Smithy.
> Defeat the Ogre.
Get to the Saferoom.
{+|- Loot Room Locations (there may be more?): -|+} None known yet.
7-2 // "THE HERALDS OF THE WORM PART 2"
/--/ Recommendations \--\Offensive inventory: Any (preferably Frag Grenade)
Support inventory: Any
Quick inventory: Tool kit
⠀⠀⠀⠀-⠀Med Cabinets are very powerful in this mission especially, because your team may get very injured since You have to fight two bosses, a guaranteed Med Cabinet can be the saviour of your run.
Best Character: Walker, Jim, Hoffman, Doc, Mom
Best Deck Type: Damage, Team Support
Best Weapon Type: LMG, Assault Rifle, Sniper
-=- Missions: -=- Continue to the Church to meet Smithy.
> Defeat the Ogre.
> Defeat the Breaker.
Get to the Saferoom.
{+|- Loot Room Locations (there may be more?): -|+} None known yet.
7-3 // "GRAVE DANGER" (Finale)
/--/ Recommendations \--\Offensive inventory: PIPE BOMB
⠀⠀⠀⠀-⠀There will be multiple guaranteed Hordes and later even a Breaker or two, so it's best to make sure that Common Ridden don't get in your way.
Support inventory: Any
Quick inventory: Any
Best Character: Evangelo, Walker, Jim
Best Deck Type: Speed (to clear Snitches very quickly, but beware, they always call a Horde, even on death), Damage, Offensive Inventory
Best Weapon Type: Shotgun, LMG, Sniper
-=- Missions: -=- Continue to the Church.
Find and Eliminate the Snitches.
Defeat the Breakers.
{+|- Loot Room Locations (there may be more?): -|+} None known yet.
-=-⠀⠀[|] -⠀[-=-]⠀ACT 3⠀[-=-]⠀- [|]⠀⠀-=-
[|[⠀8⠀]|]⠀"Dr. Rogers' Neighbourhood"
"Hold Back The Horde To Buy Time To Secure Roger's Research."8-1 // "FARTHER AFIELD"
/--/ Recommendations \--\Offensive inventory: Pipe Bomb or Frag Grenade
Support inventory: Any
Quick inventory: TOOL KIT
⠀⠀⠀⠀-⠀You can make the Cornfield section MUCH easier by starting the Combine with a Tool kit.
Best Character: Evangelo
Best Deck Type: Speed
Best Weapon Type: SMG
-=- Missions: -=- Travel to the Finley Estate and meet with Dr. Rogers.
> Get through the cornfield.
Get to the Saferoom.
{+|- Loot Room Locations (there may be more?): -|+} After getting through the cornfield, in the same very small building/Barn that You must go through.
8-2 // "BLAZING TRAILS"
/--/ Recommendations \--\Offensive inventory: Pipe bomb
Support inventory: Any
Quick inventory: Any
Best Character: Evangelo, Holly, Mom
Best Deck Type: Speed, Tank
Best Weapon Type: LMG, Assault Rifle, Sniper
-=- Missions: -=- Continue to the Finley Estate.
{+|- Loot Room Locations (there may be more?): -|+} In the shack at the end of the Swamp area, where the Charred Ridden Corruption Card gets played.
In the white building, behind the bathrooms.
8-3 // "CABINS BY THE LAKE"
/--/ Recommendations \--\Offensive inventory: Pipe bomb
Support inventory: Any
Quick inventory: Tool kit
⠀⠀⠀⠀-⠀You can make the Cable Ferry faster if you use a Tool kit on it, however You can also activate it and wait with your team at the start of the Lake, waiting for it to break, if You want the safest pass through the Lake.
Best Character: Evangelo
Best Deck Type: Speed
Best Weapon Type: SMG
-=- Missions: -=- Continue to the Finley Estate.
> Find a way across the Lake.
Restore power to the Gate.
Get to the Saferoom.
{+|- Loot Room Locations (there may be more?): -|+} None known yet.
8-4 // "GARDEN PARTY"
/--/ Recommendations \--\Offensive inventory: Pipe bombs
⠀⠀⠀⠀-⠀It is suggested to Speed Run this level as fast as possible, but for that You need good knowledge of where Sleepers & Birds may be, because sometimes, especially in the maze, You may be running through and suddenly alert birds, luckily that's why You have a couple Pipe bombs incase You accidentally alert birds.
Support inventory: Any
Quick inventory: Tool kit
Best Character: Mom, Holly, Hoffman, Doc
Best Deck Type: Tank, Damage, Support
Best Weapon Type: LMG, Assault Rifle, Offensive Inventory spam
-=- Missions: -=- Proceed through the greenhouses to the Mansion.
{+|- Loot Room Locations (there may be more?): -|+} One at the end of the level in the house that the Safe house is in.
8-5 // "T-5"
/--/ Recommendations \--\Offensive inventory: PIPE BOMBS
⠀⠀⠀⠀-⠀This mission takes much longer than you might expect, and it is much tougher than you might expect, so it is highly suggested that You get a bunch of pipe bombs, to be able to get hordes of Ridden away from you in dire situations.
Support inventory: PAIN MEDS
⠀⠀⠀⠀-⠀You need multiple Pain meds (it is suggested you play from the beginning of the act so You could upgrade Support items every time you can and buy Support Inventory space), they can save your run multiple times.
Quick inventory: RAZOR WIRES
⠀⠀⠀⠀-⠀You must set up multiple Razor wires, especially at the front of the house.
Best Character: Evangelo, Holly
Best Deck Type: Speed, Tank
Best Weapon Type: SMG, Melee
-=- Missions: -=- Meet with Rogers.
> Observe the Weapon test.
Gather Rogers' Research from the Mansion.
Board the Truck to escape.
{+|- Loot Room Locations (there may be more?): -|+} None known yet.
[|[⠀9⠀]|]⠀"Remnants"
"Take The Weapon To The Heart Of The Ridden Infestation."9-1 // "A FRIEND IN NEED"
/--/ Recommendations \--\Offensive inventory: Pipe bomb
⠀⠀⠀⠀-⠀Save it for the Access Card part OR getting through the Mortuary.
Support inventory: Any
Quick inventory: Tool kit
⠀⠀⠀⠀-⠀The Loot Room after the Mortuary is in a great place overall, but also gives you a hallway to camp for incoming Ridden, there is an Exit door that can't be broken and can only be opened by players from the inside, so You basically have to guard one doorway and have a secondary escape.
Best Character: Evangelo, Holly, Mom
Best Deck Type: Speed, Tank
Best Weapon Type: SMG, Melee, Shotgun
-=- Missions: -=- Travel to the CDR.
> Find the Access Card to proceed.
> Shut off the Furnaces.
Get through the Mortuary.
Continue to the CDR.
{+|- Loot Room Locations (there may be more?): -|+} Right after the Mortuary, inside the building across the street.
9-2 // "MAKING THE GRADE"
/--/ Recommendations \--\Offensive inventory: PIPE BOMBS OR FRAG GRENADES
⠀⠀⠀⠀-⠀Pipe bombs are a must for this mission, however Frag Grenades may be able to help you just enough, and they cost half the price.
Support inventory: Any
Quick inventory: Any
Best Character: Evangelo, Mom, Hoffman
Best Deck Type: Speed/Damage
Best Weapon Type: SMG, LMG, Assault Rifle, Sniper, Shotgun
-=- Missions: -=- > Find a way into the School.
Get through the School.
> Escape the Gym.
> Continue through the School.
Get to the Bus.
{+|- Loot Room Locations (there may be more?): -|+} None known yet.
9-3 // "THE ROAD TO HELL"
/--/ Recommendations \--\Offensive inventory: PIPE BOMBS
⠀⠀⠀⠀-⠀Save these for the last part of the level, where You need to open gates and run past Ridden, I recommend you only use it if you're swarmed, have no Stamina OR you're at the last gate.
Support inventory: Any
Quick inventory: Any
Best Character: Evangelo
Best Deck Type: Speed, Tank
Best Weapon Type: SMG, Assault Rifle, Pistol, Melee
-=- Missions: -=- Enter the CDR.
Get to the Research sector.
> Find the Chemicals.
Continue to the Laboratory.
{+|- Loot Room Locations (there may be more?): -|+} None known yet.
9-4 // "THE BODY DUMP" (Finale)
/--/ Recommendations \--\Offensive inventory: T5 GRENADES
Support inventory: PAIN MEDS
Quick inventory: STUN GUN
Best Character: Evangelo
Best Deck Type: Speed
Best Weapon Type: SMG
-=- Missions: -=- Test the T5 Grenade.
Destroy the Nests.
Kill the remaining Ogres.
{+|- Loot Room Locations (there may be more?): -|+} None known yet.
-=-⠀⠀[|] -⠀[-=-]⠀ACT 4⠀[-=-]⠀- [|]⠀⠀-=-
[|[ 10 ]|]⠀"The Abomination"
"Defeat The Ridden Abomination To Save Fort Hope."10-1 // "THE ABOMINATION" (Finale)
/--/ Recommendations \--\Offensive inventory: Pipe bombs or Flashbangs
Support inventory: Pain meds or Medkit
Quick inventory: Stun gun
Best Character: Walker, Jim, Hoffman, Mom, Doc
Best Deck Type: Damage, Support
Best Weapon Type: LMG, Assault Rifle, Sniper, SMG
-=- Missions: -=- Track the Abomination.
Destroy the Tentacles.
Destroy the Mouth Weakspots.
Destroy the Body Weakspots (5 minutes - timed Attack mission).
{+|- Loot Room Locations: -|+} There are none.
-=-⠀⠀[|] - [-=-]⠀THE END⠀[-=-] - [|]⠀⠀-=-
╰───────────────────────╯________________________
╭───╯Additional Information╰──╮________________________
Community Feedback
Here are a few polls that I need your - the Community's - help on, and I wish there was a built-in Steam feature for this, but I doubt they'll be adding anything like that anytime soon, unless they completely redesign the Steam foruming mechanics.
Should I make a separate "category" for the "Correct" decks, team compositions and etc.?
(link will be here)
Should I separate each "Correct" deck into it's own section for every Act?
(link will be here)
Should I re-order each Campaign Mission's displayed information panels in the following variants?
Keep as it is now: Recommendations, Missions, Loot Room Locations
Recommendations, Loot Room Locations, Missions
Missions, Loot Room Locations, Recommendations
Loot Room Locations, Missions, Recommendations(link will be here)
Should I make a video how to find each Secret Statue?
(link will be here)
Should I make a video how to complete each Act with my decks?
(link will be here)
What's Coming Soon To B4B? (TRS To-Do List)
You can see the live Trello Turtle Rock Studios To-Do List here[trello.com] .
Released Soon
Name.
Being Tested Currently
Name.
Currently Work in Progress
Name.
Soon To-Be Work in progress
Name.
Upcoming Additions To This Guide
I *PLANNED* To Add The Following:Images of all Corruption Cards for visual representation;
Add a walkthrough on how to beat Nightmare with each Character;
Add a walkthrough for getting every achievement in the game;
"Meta Decks" a.k.a. overpowered decks built around one specific mechanic like melee tank, double shotgun swap, overpowered nades & more;
Make the guide more compact & overall more visually appealing.
Changelog
New Additions:Updates:These lists will get populated after the release of v1.00
> Currently none.
/ Currently nothing changed.
- Currently nothing removed.
╰───────────────────────╯________________________
Credits
XVcaligoPerSixGuide created by "" / ""With the help of the Back 4 Blood Fandom and the Turtle Rock Studios Support Team.
Source: https://steamcommunity.com/sharedfiles/filedetails/?id=2735106587
More Back 4 Blood guilds
- All Guilds
- CAMBIAR IDIOMA DE VOCES Y TEXTOS - BACK 4 BLOOD
- Back 4 Blood Guide 873
- How to Open Back 4 Blood
- Dafoose's B4B Decks
- Coke's No Hope AA12 Guide
- Back 4 Blood Guide 834
- Advanced Medic
- Socky's Cards and Builds to Pew Pew (2024+)
- 2023 Melee Tank Build
- Back 4 Blood English Guide