TL;DR
Only put points into Grease Monkey
Make Minibike once you have 20 in Vehicle Adventures
Make Motorcycle once you have 45 in Vehicle Adventures
Buy Ferget-it-Elixir, re-spec into Daring Adventurer, then Better Barter, then gun of your choice
Speedrun Quests until you are level 50, have Tier 6 quests available and 100 in Armour crafting
Craft the Rogue Hood, buy Treasure Hunter Mod, Eye Candy and another Ferget-it-Elixir to spec into level 5 Lucky Looter
Take a Tier 6 quest in the Wasteland, go to the End Loot and loot it with all the Loot bonuses
Repeat as necessary until you have all the weapons/tools you want.
A Few Caveats Beforehand:
The 18-day timeframe assumes 100% loot and EXP, 4 quests per day counting towards progression, Survivalist or lower difficulty, and no feral sense. Making the settings harder will naturally make it take longer, and making them easier will make it quicker.
I’m sure everyone has a different definition of end-game. For the purposes of this guide, I’m talking about the point where you already have most of the items you need and are just looking to obtain tier 5-6 of what you already have (excluding some armours).
This strategy requires you to be fairly good at the game. You have to be confident you won’t die unless it’s intentional, as it will slow down your progression. You also have to be able to fight without putting any points into a specific weapon for the first few days.
POI knowledge is also incredibly important, both for questing and knowing which POIs you can fully/partially loot for easy magazines.
Days 4-16 rely heavily on buying stuff from Traders. This is perfectly do-able if you’re efficient with your buying and selling and using the bartering buffs at the right time, but knowing when is the right time comes with experience.
This guide assumes a solo world. While it will work fine in multiplayer, you will need to factor in things like other people looting all the mailboxes.
A Few Hints To Speed Up Your Progression:
With experience you’ll know when to heed and when to ignore this advice, but looting is often a waste of time. You don’t need to loot every cupboard, trash pile and crate. You don’t need to break open every Shamway and Pop’n’Pills crate. Cars take several seconds to loot yet rarely give anything good.
DO NOT waste time breaking open safes and locked chests until the late game—they are rarely worth it.
There’s a nifty little dev-approved teleport system you can use, if you’re under level 6 and the settings for dying aren’t too unforgiving. If you place a bedroll by the trader and kill yourself after completing a quest, you can choose to spawn at the bedroll by the trader, saving you some travel time. This trick is not as useful now that only 4 quests per day count towards progression.
Almost always do Infested Clears before Clears. They are more time-efficient and you get more rewards in the form of the Infested Cache, as well as more dukes from the Trader.
Holding onto magazines until you get a Nerdy Outfit is generally a good idea, but don’t take it too far and walk around encumbered all the time because you’re carrying 12 different magazines. Also things like tools are better to read straight away to increase the level and efficiency of your stone axe.
Day 1
Goals:
Complete 4 quests, and have 1 ready to hand in on Day 2
Gain exp and level up as much as possible.
Focus on obtaining Forge Ahead and Vehicle Adventure magazines.
If you get a magazine bundle as a quest reward, take it but don’t open it.
Either loot a wrench or obtain the magazines and mechanical parts needed for one.
Build a small base out in the open, consisting of a couple of storage crates and a forge.
Once you’ve done the starter challenges, put points into the following perks:
3 points into Intelligence
1 point into Grease Monkey
Your skills are going to go entirely into getting level 8 Intelligence and Level 4 Grease Monkey. This will require getting to level 10, assuming you don’t find an Intellect mod.
If you’re on hard settings, not that confident in melee or just want to make killing zombies easier, you can put a point into batons instead, at the cost of potentially delaying your progression.
For the starter reward, get the pipe baton bundle. You generally won’t put any points into batons, however levelling up intelligence will increase the headshot damage, and you’re gonna rely on this as your main way of doing damage for the time being.
For the rest of the day, do quests and feel free to double-loot if you have the time (especially if the POI has Pass-N-Gas crates). Generally you want to leave mailboxes, so you can search them when you have more points in Grease Monkey.
At the end of the day you should have 4 quests done and one either done and ready to hand in or ready to complete overnight.
Create a small base close to the trader with some storage boxes and a campfire.
Once you’re organised, go out and clear some POIs. Even without quests, the exp gain and looting are valuable. Alternatively, you can down a Megacrush and go searching for a second trader.
Day 2
Goals:
Complete 4 quests, and have 1 ready to hand in on Day 3
Gain exp and level up as much as possible.
Start looting mailboxes etc. to get Vehicle Adventures
Day 2 is similar to Day 1. Keep questing and killing to level up.
Day 3-4 - Minibike

Goals:
Make a Workbench
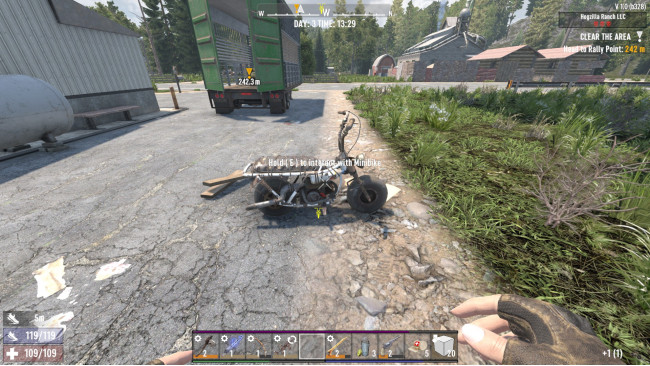
Make a Minibike
Do at least 4 quests a day
If you’ve been playing efficiently and RNG hasn’t been too unkind, by Day 3-4 you should hopefully have 3 points in Grease Monkey, with the level 20 in Vehicles and level 10 in Workstations needed to make a Minibike and a Workbench, as well as a wrench. If you don’t have the required magazines yet, travel to another town and loot all the mailboxes and cement mixers there until you do.
It may feel like a waste of time to make a Minibike when you’ll make a Motorcycle in a day or two, however Minibikes are quite cheap, and even just using it for a day is usually worth it.
Day 4-6 - Motorcycle

Goals:
Get to level 4 in Grease Monkey
Make a Motorcycle
Once you get level 4 in Grease Monkey, open up your saved Magazine Bundles. Your focus will shift from quests to getting the 45 in Vehicles needed to make the Motorcycle, and if you still don’t have enough, drive around to different towns looting all the mailboxes and POIs to get the required Vehicle Adventures magazines.
You still want to do 4 quests a day for progressing quest tiers, but aim for quick ones like fetches.
With a bit of luck, as early as the end of Day 3 you’ll already have the 45 in Vehicles needed to make a Motorbike. Then it’s just a matter of salvaging the parts. For Steel, you can wrench broken vending machines, street lights, or just buy the last few from the trader.
With this strategy, you can fairly consistently get a Motorbike by Day 4.
Day 4-9 – After Making A Motorcycle
Goals:
Power through quests (even after you’ve reached your daily limit), focusing on Infested Clears, remembering not to waste time looting things you don’t need and especially not bothering with locked end loot chests.
Buy a Ferget-it-Elixir
Buy an Intelligence Mod
Buy a Treasure-Hunter Mod
Buy Gas
Buy any Vehicle Adventures or Armour magazines available.
Buy your first proper gun
Once you have a Motorbike, you want to start pumping out quests like crazy.
The reason why you want to do quests even after the 4 which count towards progression is because you get dukes, experience and with infested clears the caches. You now have a Motorbike so travel time isn’t as much of an issue, and it’s more efficient than just clearing POIs without quests. Prioritise infested clears, and you may even want to go to another trader if you’ve ran out of infested clears to do for your current one.
Depending on your circumstances you may want to hold off on buying the Ferget-it-Elixir straight away, and if you do this put any extra skill points into Better Barter.
Once you have the Ferget-it-Elixir, you want to spec entirely out of Grease Monkey, and into Daring Adventurer. I prefer to get 3 points in Daring Adventurer and Better Barter before getting the 4th Daring Adventurer point (which requires 6 more level ups for 10 in Intelligence).
With Daring Adventurer level 3 and your being at about level 15-20 thanks to speedrunning quests, your first Pump Shotgun/AK47/SMG/Tactical Assault Rifle should start showing up at the trader on days 5-9.
The reason why I said go into Better Barter before Daring Adventurer level 4 is because you’re gonna need the dukes to buy your first proper gun, as well as selling your quest loot and buying gas, mods, and magazines as required. If you don’t have Better Barter you’re possibly not going to have enough money for one or more of these.
You should hopefully get an Intelligence Mod so you can wear a headpiece with it equipped, to bring your intelligence up to level 10 when handing in quests/bartering, but if not just use your points to get to level 10 Intelligence.
Blood Moon

Although an argument can be made for spending Blood Moon on top of a POI and waiting it out, I like to use most of my ammo and try and get as much exp as possible.
Day 6-12
Goals:
Quest, quest quest
Get level 4 Daring Adventurer, Level 5 Better Barter and start speccing into a gun
Make Tier 3 Enforcer Glasses, Nerdy Googles, Preacher Gloves, Nerdy Outfit
Get to 100 in Armour crafting.
Start buying up Learning Elixirs and Megacrush with excess dukes, to quest and level faster.
At around this stage you should see your first Pump Shotgun/SMG for sale at a trader. Which one you buy will determine whether you go for Strength/Shotguns or Agility/Handguns.
You should also be about ready to make tier 3 armour, which will allow you to do everything more efficiently. In my experience making them at tier 3 and then holding off until tier 6 seems the most efficient, while being affordable with only the resources you gain from doing quests, but feel free to try your own strategy. You may also find the suggested armours for sale at traders.
Day 10-16 – Approaching Endgame
Goals:
Quest, quest quest
Level 100 in Armour Crafting
Level 100 in Vehicles
Buy a Crucible, or kill 50 cops to get it as a reward
Get to level 50
Reach tier 6 quests
Once you have level 100 in Armour, you want make to make tier 6 armour in this order:
1st Nerdy Goggles
2nd Enforcer Sunglasses
You actually don’t need to make a lvl 6 nerdy outfit, because the only other magazines you really need to max are vehicles, and you should be able to get this by the time you can afford to build the Gyro with just 1-2 points into Grease Monkey and using a T3 Nerdy Outfit.
Therefore, your main focus is just to churn out quests so you reach tier 6, and also get to level 50. With the money you get from questing, continue to buy Exp elixirs, better weapons if you find them at the trader, gas, and things you will need like a Crucible.
Side Note: As you may have noticed, this build relies heavily on buying stuff from traders including guns, steel, magazines, ferget-it-elixirs, gas, and mods. This is perfectly do-able by being efficient with Sugar Butts, Cigar, Bartering Armour, Awesome Sauce, Better Barter, and saving up items to only sell when under these effects, but it may take a bit of time to get a feel for how to do this effectively.
Level 50
Between days 12-17 you should have unlocked Tier 6 quests. With a maximum of 4 quests per day going towards progression, the earliest you can technically get there is day 12, if you go to a new trader as soon as you’ve unlocked the next tier and do the highest tier available every day. However in practice, you’re probably gonna get there in about 14-18 days.
Remember that doing one tier 5 and two tier 3s progresses you more than doing two tier 5s, so take this into account with what quests you pick.
Once you’ve reached level 50 and have Tier 6 quests unlocked you’ve reached end-game, and here’s why:
Make a level 6 Rogue Hood
Buy Eye Candy
Buy Jailbreakers and a lockpick, or a good steel pickaxe
Use a Ferget-It-Elixir to spec into level 5 Lucky Looter
Accept a Tier 6 infested quest for a POI in the Wasteland
Once you’ve gotten all of this ready, head to the quest and start it. Go to where the end loot is and break in. Kill any zombies if need be, then break open the end loot.
Put on your rogue hood, eat your eye candy, and check your loot stage. If you’re at level 50, all of the bonuses including being in the Wasteland and a Tier 6 POI should increase your loot stage to 300 or more. This is enough for you to find the highest-quality items possible in the end loot.
Now, you want to do this multiple times until you get the weapons/tools you want. The easiest way is to exit the world without ending the quest (doesn’t matter if you’re playing single player or multiplayer). Once you re-join, the quest will be reset, although you may have to wait a bit until you can start it again. Once it’s available, re-do the above, and rinse and repeat until you have the tools/weapons you want.
Hint: The loot in the infested cache and locked chest are geared towards your perks. Although it seems a little less effective in 1.0, you can try using a ferget-it-elixir to spec into the perk for the weapon/tool you want before opening the loot, to increase the chances of receiving the item you want.
Occasionally you will get tier 6 of the lower level loot (Revolver instead of a Desert Vulture, Pickaxe instead of an Auger etc.) As far as I can tell this seems to just be RNG, so if you don’t get what you want, just try again.
If the above strategy of quitting and rejoining feels too much like an exploit for you, no problem! After getting the end-loot, simply abandon the quest by travelling out of its range. You’ll fail it, then you can go to the nearest trader to pick up a new one, and follow the same process of just getting the end loot.
End-Game

Using the above strategy, somewhere around day 16-20 (so 18 on average) you should have most of the weapons/tools you need for the rest of the game. Some of the items will only be tier 4/5, however I think it’s safe to say you’ve pretty much reached end-game at this point.
Final Words
Thank you for reading my guide. I’ve tried to make things simple and streamlined, which means I haven’t gone too in-depth about the minute details of how to play as efficiently as possible. A lot of it is POI knowledge and game sense anyway, which is very difficult to teach.
Also, there is ultimately a huge RNG element to this game, not to mention all kinds of settings you can adjust, so the timeframes can differ somewhat between playthroughs. However, the strategy I presented should be fairly consistent and easy to replicate.
Source: https://steamcommunity.com/sharedfiles/filedetails/?id=3298999784
More 7 Days to Die guilds
- All Guilds
- /7 Days to DieFood/Drug
- /7 Days to Die/armor
- [2024] 7 Days to Die 1.0 - MEILLEURS paramtres PC (Maximiser les FPS et la visibilit)
- 7 Days to Die Guide 1971
- UNDEAD LEGACY 2024
- 7 Days to Die Guide 1961
- Screamers be gone
- /7 Days to Die
- 7 Days 2 Die gameplay mechanics