A guide for making really basic static / 2D playermodels (e.g. the Initial D car, those models that are just a floating image, etc.). Requires really basic Blender knowledge. Guide uses Blender 2.79, use that if you have absolutely no clue what you're doing.
How To Make Basic Static / 2D Playermodels
The Basic Rundown

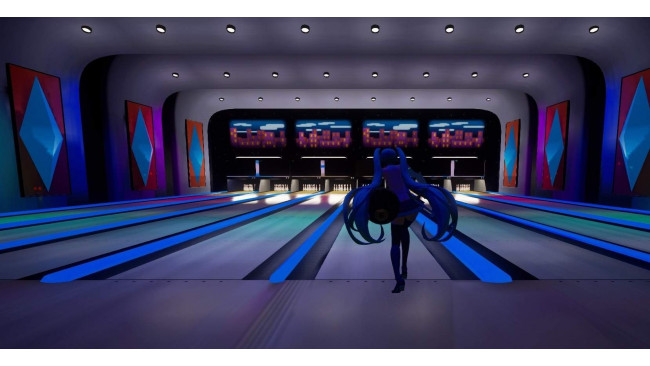
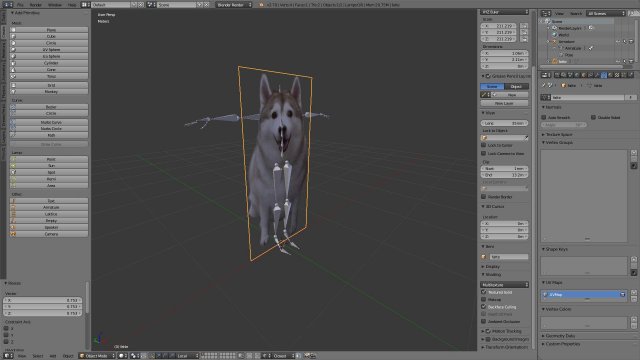
For a playermodel to function properly in Tower Unite, the model must have at least one face (per bone) weighted to at least two bones. In addition, vertexes weighted to the root bone are rotated -90 degrees back on the X-axis, so they must be rotated 90 degrees forward on the X-axis in Blender to be displayed properly, like so:
Basically, we will be weighting the model used to the root bone (not visible by default, use the Vertex Groups menu), and will also be creating a small plane that will weighted to another bone (for proper compiling).
If you want a 2D playermodel with multiple components (e.g. a sprite for the main body, but a gun in the hand) rigged to two or more bones, you can ignore the parts stating to add the extra plane, and just rig the model normally.
Static Playermodels (I Already Have A Model To Use)
Requirements:

- A model you want to use.
- The Tower Unite workshop rig .blend (found in steamapps\common\Tower Unite\Tower\Workshop\SDK).
- Some basic knowledge of Blender (how to navigate and use the interface, select objects, apply materials, etc.).
To ensure no scaling issues occur, import your model into the Workshop Rig .blend file. Otherwise, the scale for the skeleton's going to be off, and everything's going to look weird and deformed.

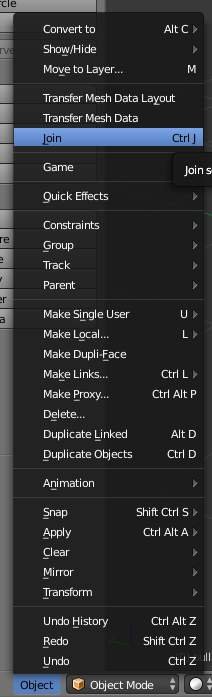
If your model has multiple parts, join them all into one object before continuing.
Adjusting Your Model
After importing, move and scale your model around so it's in the position you want it to be relative to your player's location.

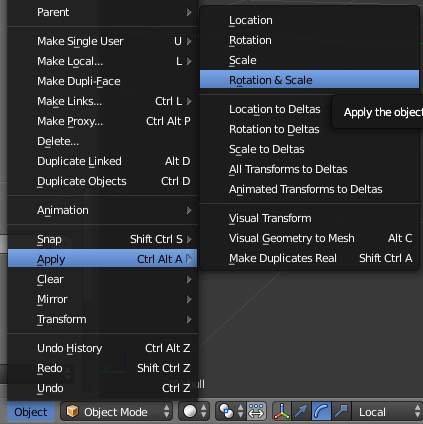
Once that's finished, set the object's origin to 0/0/0, which is most easily done by applying the object's location.
 Adding The Plane
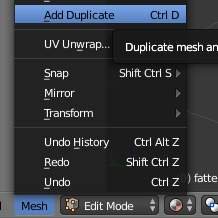
Next, add in a plane from the "Create" tab.
Here, you have two options:

1. Hide it somewhere in the model so it isn't visible. Note: even if it isn't visible, it may become visible while crouching, depending on the bone it's weighted to.
2. Give the plane a transparent texture. This makes it completely invisible, but will generally add one more material to your model.
If you move or scale the plane at all (outside of edit mode), make sure to apply its Location, Rotation, and Scale.
If using a transparent texture, apply the texture after the next step, as merging objects with different materials can potentially cause problems.
 Preparing Your Model
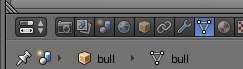
Take your model and rotate it forward 90 degrees on the X axis, then apply Rotation and Scale.
Next, select both your model and the plane, and join them together.
If you are opting to make your plane transparent, create a new material with the transparent texture and assign it to the plane at this stage.
At this point, you should only have two objects in your scene. One is the model + plane, and the other is the armature (skeleton).
Rigging The Model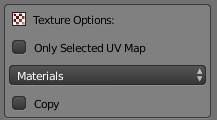
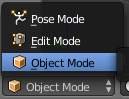
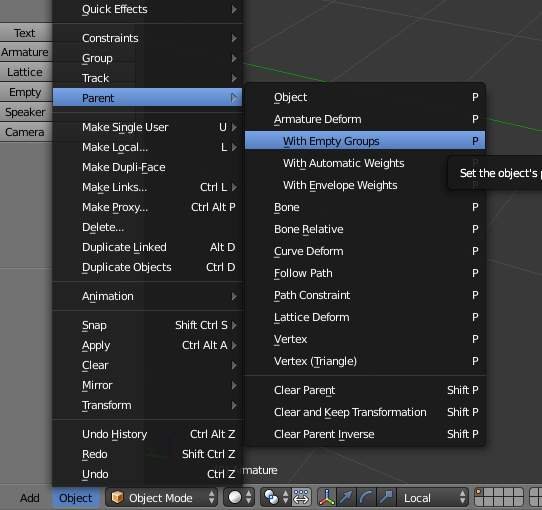
First, ensure the armature is in Object mode. To do this, select the armature, then click Object mode in the dropdown.
Next, select the model first, then select the armature second, so both objects are selected (order is important!).
Then, parent the armature to the model with Empty Groups (not Automatic Weights)
Once the parenting is complete, moving the armature in Object mode should move the model as well (just make sure you undo any movements).
Now, for the final steps, we will be rigging/weighting the model (which, for a simple playermodel like this, only takes a few clicks).
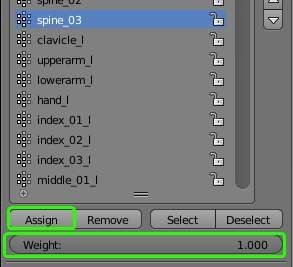
Select your model and enter Edit mode.
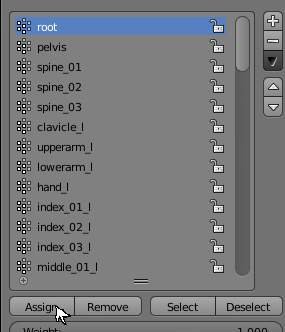
Navigate to the Vertex Groups menu:

First, select only the plane. Under the Vertex Group menu, select a bone other than root, and Assign the weights. Make sure the weight is set to 1.
It is recommended to weight bones to the Pelvis (although I weighted to Spine_03 in this example).
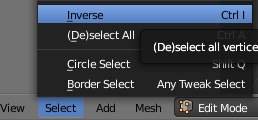
Once the plane is weighted, invert the selection to select the rest of the model:

Then, follow the same directions, but weight to the Root instead.
Exporting The Model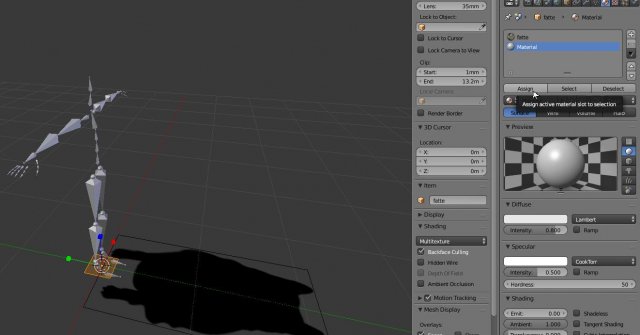
Now that the model is complete, you can export it. Export as .dae, and to ensure materials export properly, make sure "Copy" is not checked under the material export options.
For safety, it's also a good idea to Apply Rotation and Scale before exporting.
2D Playermodel (I Want To Use An Image)
Important Notes
Before continuing, make sure to read the previous section, as this section won't explain them.
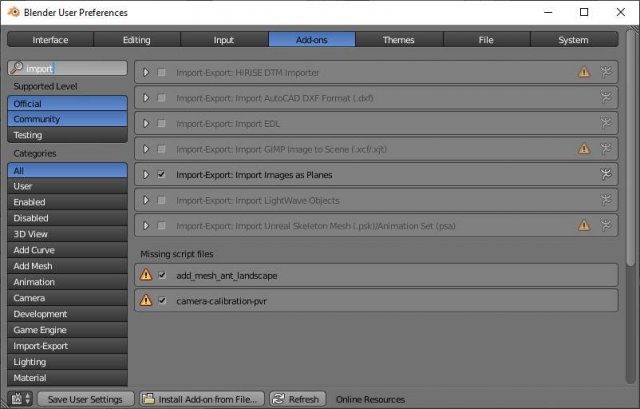
It's a good idea to enable the Import Images as Planes addon when doing this, as it automatically generates a properly-scaled plane from an image, with the material already assigned.
Also, if you want to have multiple transparent images in your model, you may notice some issues with the images "overlapping". This is a general issue with transparent materials in games in general, and can only be fixed once a "Masked" material mode is implemented into Tower Unite's workshop.
To bypass this, for less complex models, you can cut out and delete the transparent areas with the Knife tool (left click to add a vertex, enter to complete). Usage of this will not be covered in this guide.
Preparing Your ImageImport in your image, and align it as desired with your model. Once finished, apply Location, Rotation, and Scale.
Select your image plane in Edit mode. Duplicate the face, then right-click to cancel out of the movement.
While still having the duplicated face (and only the duplicated face) selected, flip its normals. This will make the image visible from both sides.
Adding The PlaneWith 2D playermodels like this, added plane has to be transparent.
Rotate your model 90 degrees forward on the X-axis and apply Rotation and Scale.
Then, add in a Plane via the "Create" Menu and join it to your model. After joining, assign the plane a transparent texture.
You should have two objects in your scene at this point (your image + plane, armature).
Rigging The Model, ExportingAs stated in the previous section, parent the armature to the model with Empty Weights, making sure to select the model first and the armature second.
Weight the plane to a bone other than root, and weight the image plane to root.
Once this is done, you can export the model as .dae.
Conclusion / Troubleshooting
All in all, this isn't a hard process to do with some knowledge of Blender, and I hope you use your experience with this to make some more complex items for the Tower Unite workshop as well.
If you're having issues, make sure these points are being followed:
- Have you applied Rotation and Scale?
- Is your model and armature's origins set to 0,0,0?
- Have you imported your model into the workshop rig .blend, and not the other way around?
Source: https://gameplay.tips/guides/6312-tower-unite.html
More Tower Unite guilds
- All Guilds
- Tower Unite - Frequently Asked Questions (Halloween Update 2019)
- Tower Unite - Easter Egg Hunt 2020 Prize Guide
- Tower Unite - Island Minigolf Guide
- Tower Unite - Kingdom Minigolf Guide (All Holes)
- Tower Unite - Halloween 2019 Character Locations
- Tower Unite - Ultimate Halloween Event Guide 2020
- Tower Unite - Obtainable Items List (Halloween 2020)
- Tower Unite - Halloween Secret Achievements (Detective & Spoils of the Dead)
- Tower Unite - How to Obtain Icebreaker Achievement (The Ice Cave)