Introduction
Welcome to the Torchlight II ultimate guide to EVERYTHING!
The purpose of this guide is to give an overview of the general game mechanics and concepts in Torchlight II, as well as offer an in-depth view into the different weapons, items, farming methods and other important aspects of the game.
EDIT: 29/07/15 - Made the damage calculation formulas a bit easier to read, cleaned up the wording in a few places, added the section about new game plus.
EDIT: 3/12/15 - Added links to class-specific skill guides.
General Concepts


Leveling
Assuming you fully explore each area, loot every dungeon, complete each quest, kill every monster (and don't repeat/farm areas), your character will reach level 50-55 by the end of the playthrough, which will take around 20 hours. Alternatively, it can take less than 8 hours to beat the game when you breeze through the main quests on a lower difficulty (your character will be around level 40 by the end).
Difficulty
Your character's chosen difficulty is only important for single player. In multiplayer, the difficulty level is determined by the player when creating the game. Any character may join a game of any difficulty. Item drop rates and quality do NOT improve in higher difficulties – only monster health and damage are affected. Enemies will also become more resistant to effects like stun and slow.
Builds
Make sure you know beforehand what build you intend to create, because there is no real stat/skill respec in unmodded Torchlight II – there is a (useless) NPC that can only respec your last three skill points. This means that you're up a creek without a paddle if you decide that you want to switch up your build midway through the game.
I can vouch for the usefulness of the following builds and guides:
Engineer: Emberquake
Embermage: Prismatic Bolt
Outlander: Glaive Throw
Berserker: Raze[forums.runicgames.com]
Spells
I’m going to be blunt here: nearly all active spells are worthless. The bonuses from buffs are just not that great and often only last for 20 seconds or less. The damaging spells are laughably weak, while the summoned minions draw virtually no attention from enemies, making them useless as meatshields. The only really worthwhile use of spell slots are the tomes a.k.a passives.
Here are a few tomes worth mentioning:
Animal Handling makes your pet and minions stronger, but doesn’t affect the pet’s summoned minions. When taught to the pet, Animal Handling makes its minions stronger, but doesn’t affect the stats of your minions (or the pet itself). Reduced town travel time applies in both cases.
Although the Barter tome has no effect when taught to the pet, the discount also applies when you send the pet back to town to sell items. Despite its description, Barter does NOT reduce the price for enchanting items.
The Armor/Weapon/etc. Expertise tomes only reduce the stat requirements on items, NOT the level requirements.
The Treasure Hunter tome also increases your gold and magic find stats when taught to the pet, although it doesn’t show up on your Arcane Statistics panel.
Other useful tomes include Concentration (+mana regen), Blocking (+% block chance) and Adventuring (+% XP/fame gain, +% potion effectiveness).
Pets
Honestly, the only real use for the pet is the extra inventory space. On higher difficulties and NG+ tiers, the pet will usually last for all of five seconds in combat. There aren’t a lot of useful items that could make the pet stronger and the fish transformations are more of a novelty than anything else. Sure, you can have the pet cast summoning and healing spells, but that’s only helpful on lower difficulties.
Transmuting
Transmuter NPCs become available in towns from Act II onwards. Unfortunately, their recipes are not especially useful. You can find the full list of recipes HERE[torchlight.wikia.com] . Feel free to experiment with the transmuter when playing through the game normally, but it’s not really worth the hassle in the long run.
Executing and Fumbling
Executing requires dual-wielding two weapons of a similar type, either dual melee weapons, dual pistols or dual wands. The class of the melee weapon doesn't have to match exactly – you can execute with a sword and axe just as well as with a pair of claws.
Executing essentially means attacking with both weapons at once. Having a high execute chance is imperative for any dual-wielding character, as it sharply increases the overall damage output. The default execute chance is 10%.
Fumbling means dealing less damage than usual, basically a kind of a reverse critical hit. The default damage penalty for fumbled attacks is 75%. The chance to fumble an attack is always 21% and can only be reduced by specific items and socketables. Fumbling only applies to auto-attacks.
New Game Plus
New game plus (NG+) can only be started after killing the Netherlord. To begin the next playthrough, talk to Felicia (an NPC in Minehead). There are multiple NG+ tiers and you will be placed into the tier that most closely matches your level:
NG+ for characters up to level 79 (enemies and loot will be scaled up to level 51-80).
NG+2 for characters between level 80-98 (enemies and loot will be scaled up to level 81-99).
NG+3 for characters between level 99-100 (enemies and loot will be scaled up to level 100-119).Completing new game plus allows you to start the next tier. If you complete NG+3, you can start again on NG+4, where enemies are scaled to level 120 at the start (your character level cap always remains at 100). Any further restarts will be listed as NG+5 (you can replay the game indefinitely). You can't switch back to a lower NG+ tier.
The important differences between NG+ and your first playthrough (aside from tougher enemies, better gold drops and higher-level loot) are as follows:
The entire world is re-rolled and all quests reset (you start the game in Echo Pass once again), although access to the Mapworks will be available right from the start.
You can only play multiplayer with other players of the same NG+ tier, although the shared stash will always be accessible to all your characters across all tiers.
Some areas have new dungeons (most notably Tarroch's Tomb in Ossean Wastes) and there are also more Netherrealm Portals and champion mobs in overworld areas.
How Do Stats Work?
Like in virtually every other ARPG, your character has four primary stats that you can improve with the help of 5 stat points per level. The stats are as follows:
Strength Increases critical damage by 0,4% per point
Increases weapon damage by 0,5% per pointAlthough the critical damage bonus caps at +400% (at 1000 Strength), the hard cap for critical damage is +500% (the base critical damage value for all characters is +50%). You need to look elsewhere (items, enchantments, socketables, etc.) if you want to hit the cap.
Dexterity Increases dodge chance by 0,2% per point, with diminishing returns
Increases critical hit chance by 0,2% per point, with diminishing returns
Increases fumble recovery by 0,3% per point, with diminishing returnsAlthough the dodge and critical hit chance bonuses cap at 50% (at about 500 Dexterity), the hard caps are 75% and 100% respectively. You need to look elsewhere (items, enchantments, socketables, etc.) if you want to hit these caps.
Maxed fumble recovery bonus (75% at 475 Dexterity) means that the total damage penalty for fumbled auto-attacks is 0%.
Focus Increases elemental damage by 0,5% per point
Increases mana by 0,5 per point
Increases execute chance by 0,2% per point, with diminishing returnsAlthough the execute chance bonus caps at 50% (at about 500 Focus), the hard cap for execute is 100%. You need to look elsewhere (items, enchantments, socketables, etc.) if you want to hit this cap.
NOTE: The damage of any damage-over-time effects on weapons (both physical and elemental) also scales with Focus.
Vitality Increases block chance by 0,2% per point, with diminishing returns
Increases health by 3,6 per point
Increases armor by 0,25% per pointAlthough the block chance bonus caps at 50% (at about 500 Vitality), the hard cap for block is 75%. This can be reached with a decent shield (all shields have +15-45% block chance) and the Blocking spell tome (up to +12% block chance).
How To Survive Torchlight II?
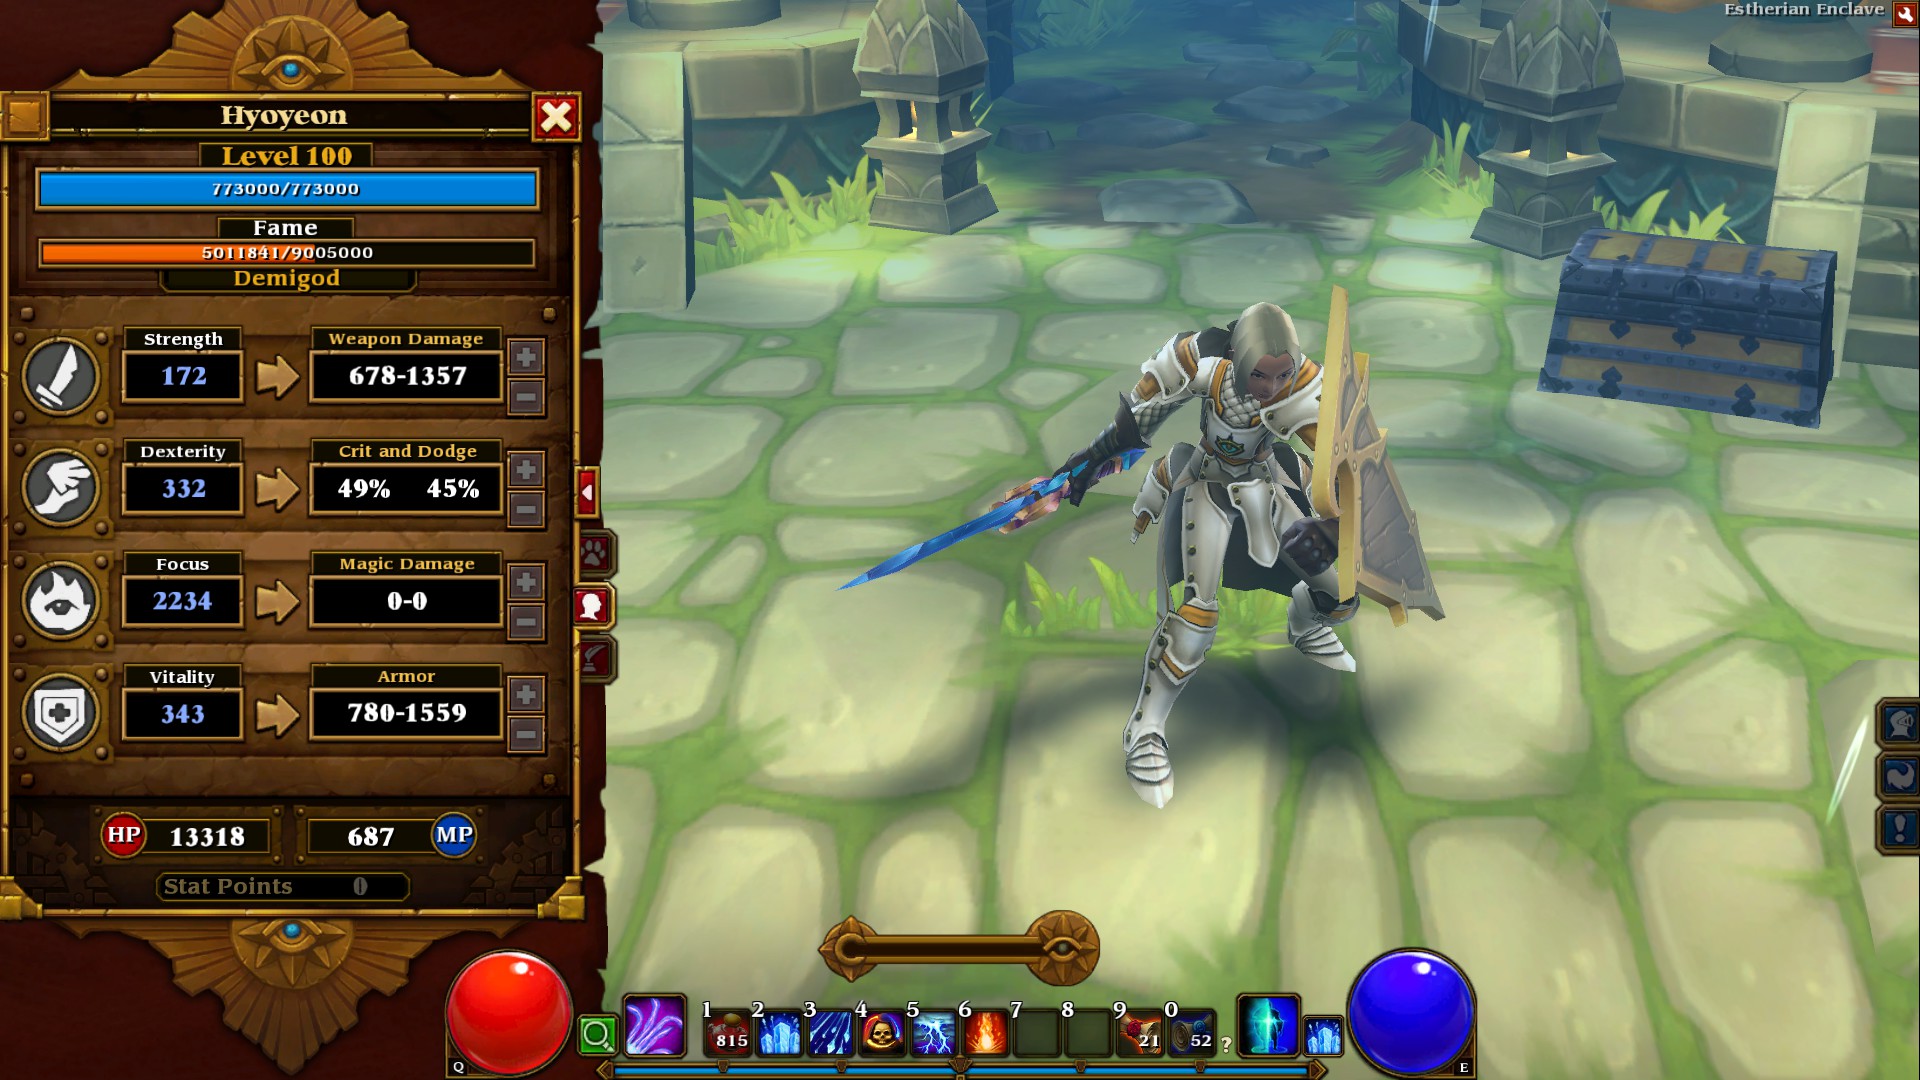
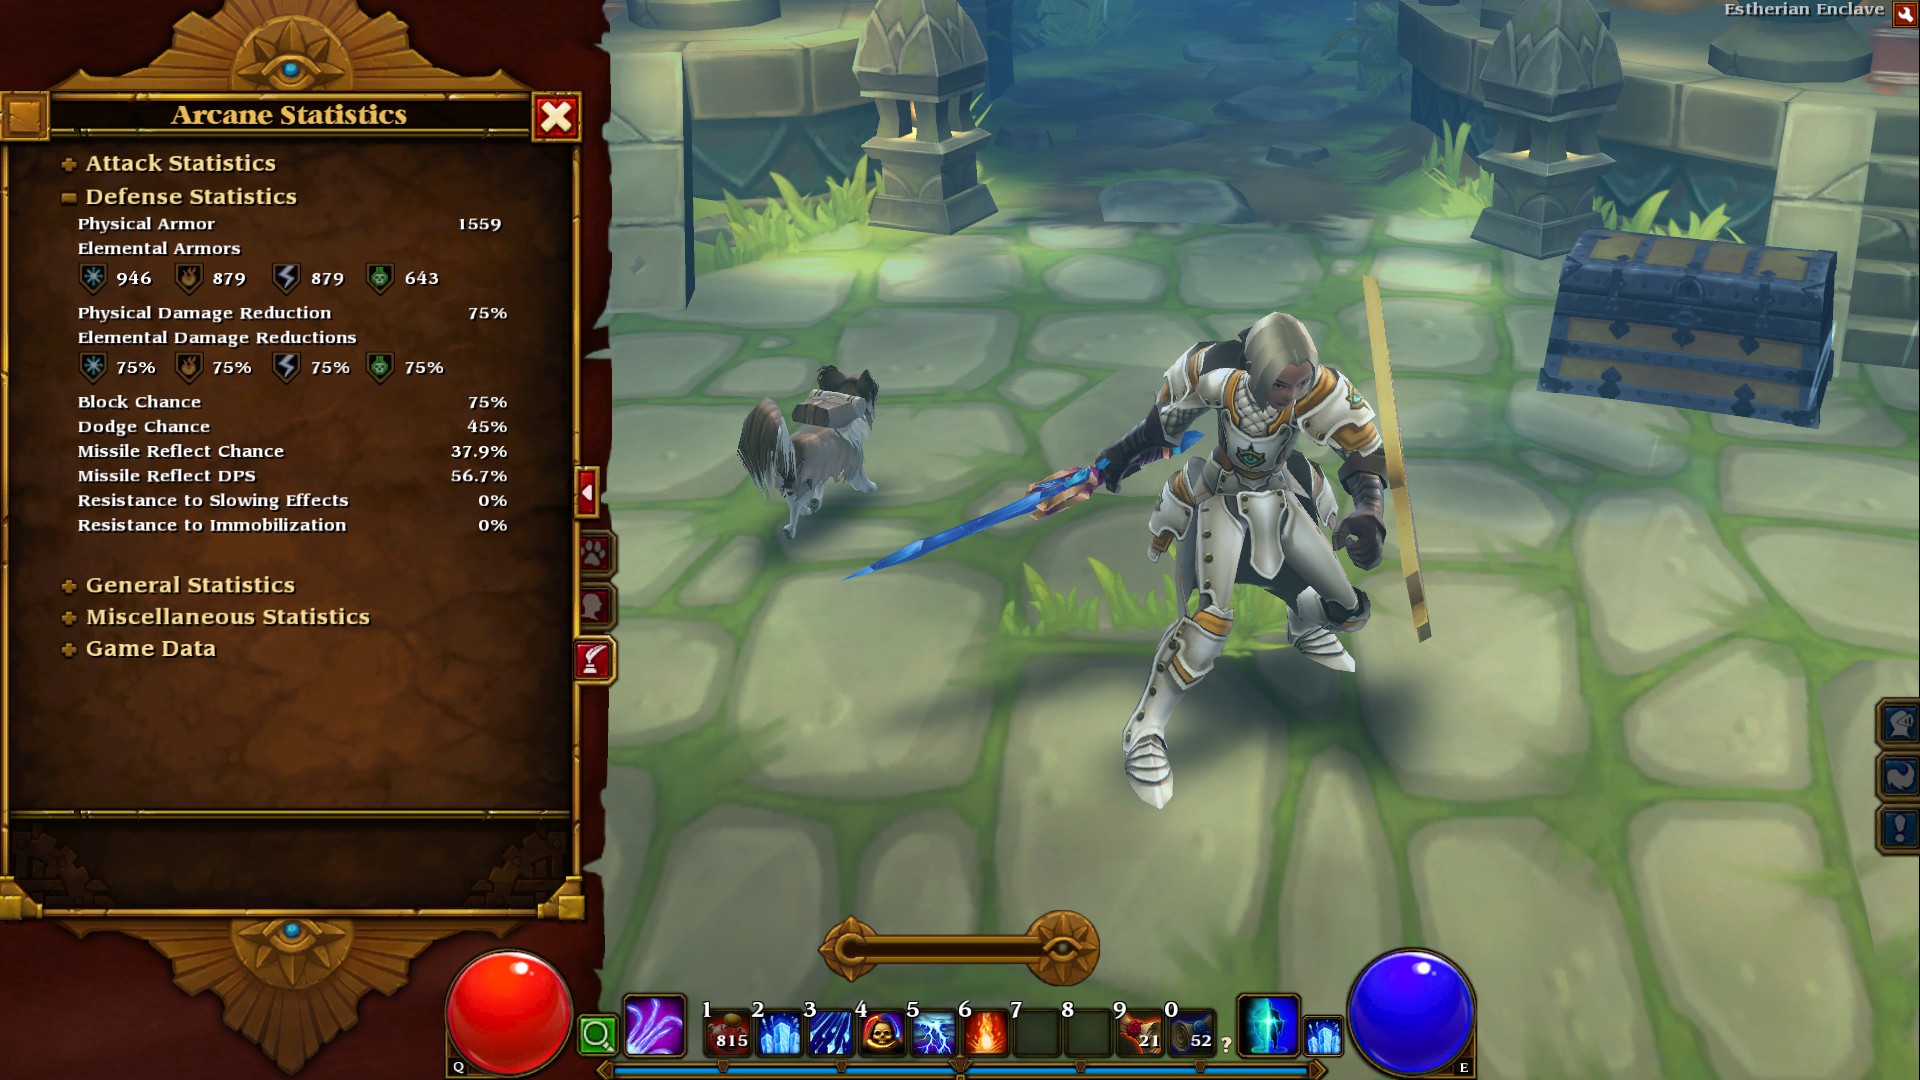
To survive on Elite and higher NG+ tiers, you need 10% luck, 20% skill, 15% concentrated power of will ... I mean 75% block, 75% damage reduction, high dodge, missile reflection, and as much health as possible. Playing smart also couldn’t hurt.
Since everyone loves lists, here’s a list of the most dangerous things in the game to watch out for.
5. Ice attacks (Mirka Frostbinder, Chillhoof, Ice Elemental). The "ice wave" attacks of these enemies have very high damage and can potentially one-shot an ill-equipped character.
4. Burning attacks (Deathcaps, Salamanders, Desiccated Archers, etc.). Since burning ignores armor, avoid any attacks that spread fire on the ground, or your health will start dropping alarmingly fast.
3. Charging attacks (Hulking Slasher, Forest Gargoyle, Tutara Skullcrusher, etc.). While it’s usually easy to see these coming, the damage is staggering if the attack should connect. Avoid!
2. Trolls. Just... Trolls.
1. Scythe Blade Trap. The number one culprit behind hardcore character deaths. These appear only in Act II dungeons (thankfully). It’s easy to miss the innocent floor trap as you’re plowing through enemies and feeling safe behind your 75% block chance and 75% damage reduction. The trap takes less than a second to trigger, deals about 3k/16k/35k damage in NG0/NG+/NG+5 on Elite and – unlike the floor spike trap – is unblockable and ignores all armor, damage reduction and even the Engineer’s Forcefield.
How To Reduce Damage Taken?
Damage reduction
This is by far the most important stat in terms of survivability on higher difficulties. The desirable "all damage taken reduced by X%" attribute can only be acquired from certain unique items and socketables, most notably the Skulls of Limoany (+5%) and Eyes of Grell (+3%). There are also several items that grant temporary damage reduction (for example, -7,5% physical damage taken for each monster within 3m).
Damage reduction caps at 75%. The Engineer and Berserker start with +25% damage reduction by default.
Armor
Armor reduces incoming damage by a fixed amount equal to 50-100% of your listed armor value. So if you have a total of 300 physical armor and a monster hits you for 5000 physical damage, you will reduce that damage by 150-300. That's it. Armor values on all items scale so horribly that it becomes a virtually useless stat later in the game – especially in NG+ and on higher difficulties, where enemy damage output far exceeds any potential armor you may have.
Damage absorption
This ability is provided only by the Engineer's Forcefield skill and Aegis of Fate passive. A fully-charged and maxed Forcefield can absorb over 60k damage. Forcefield negates all incoming damage (except damage-over-time effects) and synergizes well with damage reduction and armor, which are both applied before damage absorption.
NOTE: Damage absorption applies before block, making shields virtually useless when playing a Forcefield-using Engineer.
How To Avoid Taking Damage?
After a bit of testing (okay, a LOT of testing), I've managed to determine the relative usefulness of the three "avoid all damage" stats – dodge, block and missile reflection – and here are the results.
First off, there are about 450 different things that can damage you in Torchlight II, ranging from basic auto-attacks to special enemy skills to various environmental hazards. This is how you can avoid them:
Dodge
By far the least useful of the three. Dodge can only avoid auto-attacks, which make up barely a third of all the dangers that can kill you. Any attack that qualifies as a skill (listed under the enemy's health bar) CANNOT be dodged. Plus, you cannot dodge auto-attacks from most bosses, including Grell, Grand Regent, Manticore, War Titan, Alchemist, Netherlord, etc.
You also cannot dodge any traps, auto-attacks by brute-type enemies, Tentacles and most bear-men in Act I (Deathflingers, Warmakers, Felwalker Axethrowers, Blackclaws, etc.).
Block
Considering the sheer number of attacks that block can deal with, it's easily one of the most important abilities to focus on. In fact, the only unblockable attacks in the game are the arrow volleys of Desiccated Bowmen and Ratlin Archers, the Salamander's fire breath, the Netherlord's blue flame attack, King Pogg's ice wave push, and floor scythe traps in Act II.
NOTE: Although block can negate damage from things like Frost Breath, Chain Pull and Petrifying Gaze, their secondary effects (freeze, pull and paralyze) still apply even if the damage is blocked.
Missile Reflection
This is far more useful than dodge, because it can deal with nearly the same number of attacks as dodge. Unlike dodge, however, missile reflection can bounce back some pretty dangerous stuff, including virtually any kind of projectile, ground fissure attack, tornado and ranged auto-attack. Reflected attacks damage enemies based on your DPS and can also deal critical hits. Personally, I'd prioritize missile reflection over dodge any day.
NOTE: Missile reflection bonuses are multiplicative, not additive. Having an item with +25% missile reflection and five socketables with +5% missile reflection each will not give you +50%, but rather a +42% chance to reflect an attack.
Of course, simply stepping out of the way of an attack still remains the best method for evading damage.
Damage
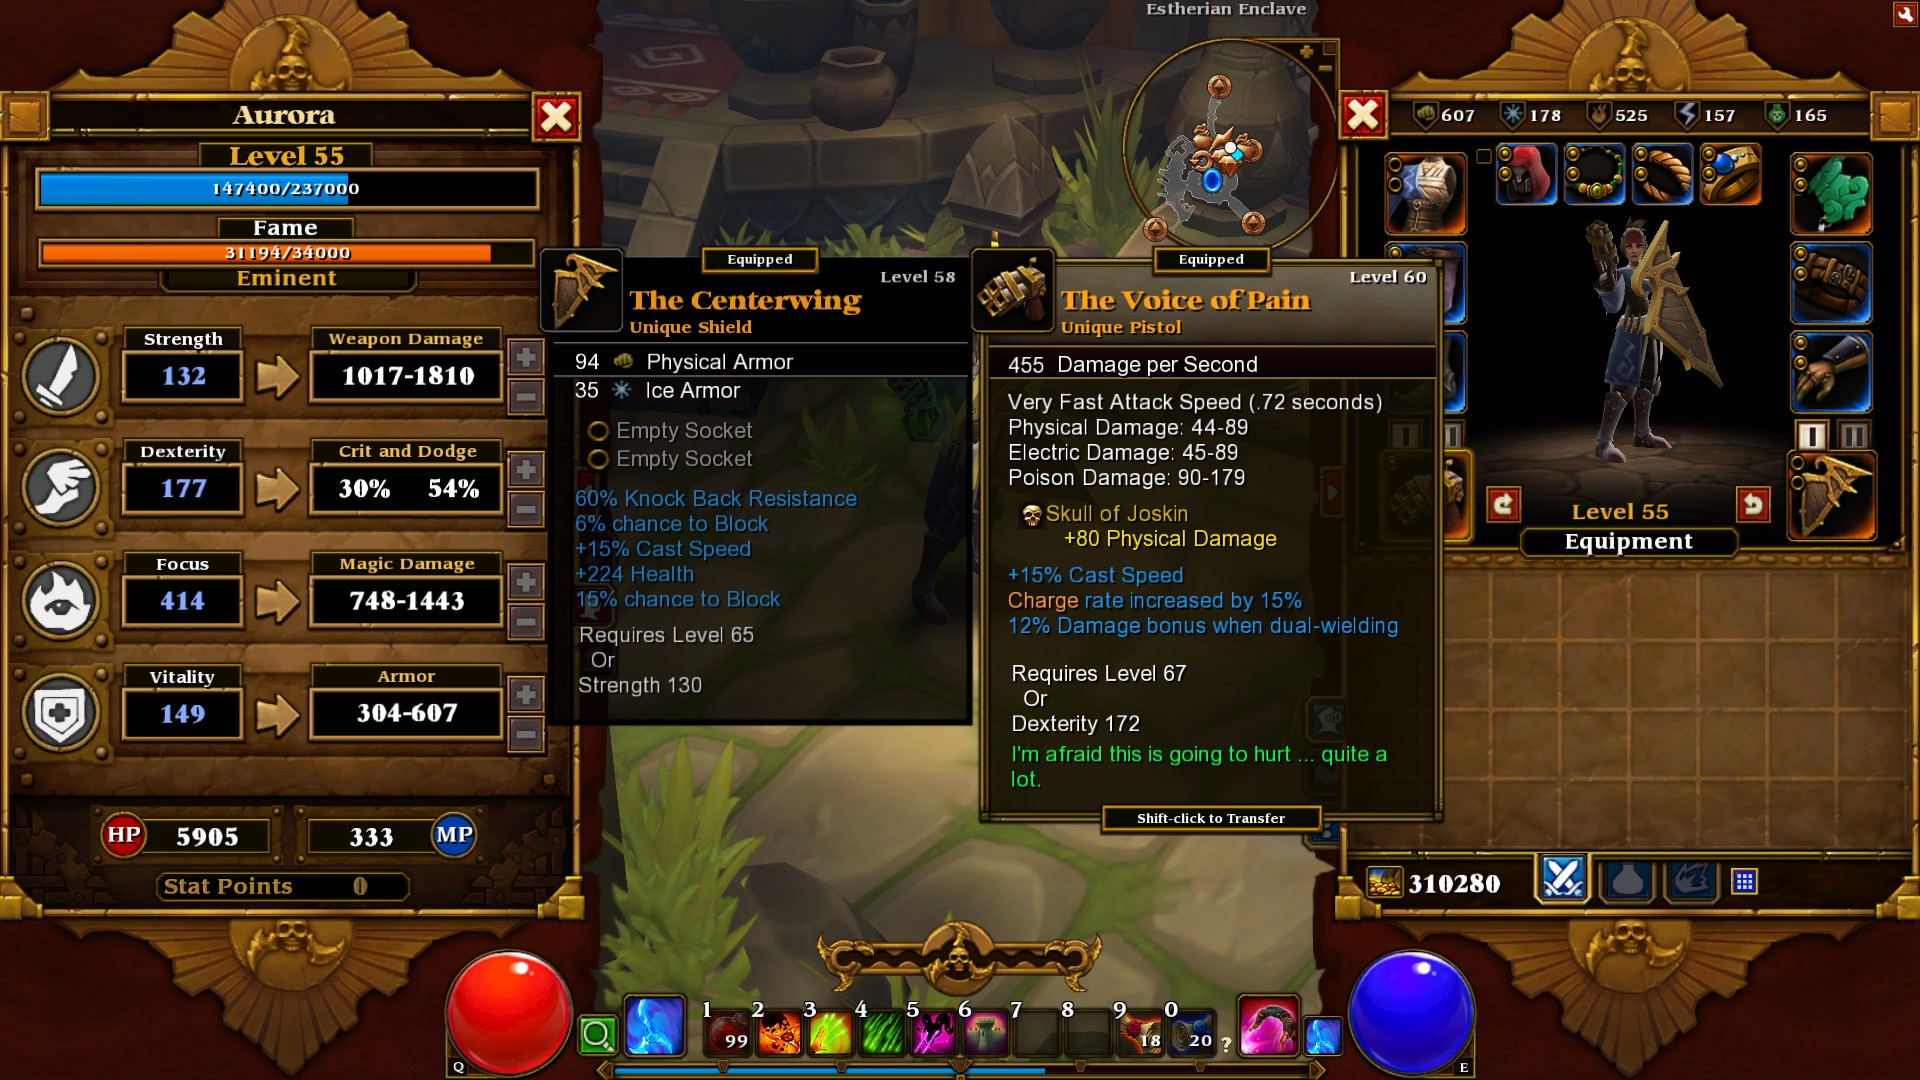
Knowing how damage bonuses stack is vital for picking your skills and prioritizing things like gear, socketables and enchantments.
In general, there are three types of attacks – auto-attacks, weapon DPS-based attacks, and elemental attacks. Only the DPS of your auto-attack is listed on the character statistics panel, so if you’re using a skill as your main left-click attack (as virtually every lategame build does), there is no way to view the exact DPS of that skill.
How to calculate DPS?
This is a lot of information to process all at once, so I suggest having at least some familiarity with the game before attempting to decipher the following text.
For auto-attacks, all damage on the weapon is added together and modified by damage bonuses.
The Strength damage bonus (+0,5% per point) is applied to all weapon damage, both physical and elemental.
The Focus damage bonus (+0,5% per point) is only applied to elemental weapon damage.
All percentage-based bonuses are additive and stack with the damage bonuses from Strength and Focus.
Flat damage bonuses (from socketables and enchantments) on weapons apply directly to weapon damage and are multiplied by Strength, Focus and other bonuses.
Flat damage bonuses (from socketables and enchantments) on armor are added to total damage, unmodified by Strength, Focus and other bonuses.
Critical hits of auto-attacks and weapon DPS-based attacks always deal maximum damage, whereas critical hits of elemental attacks don’t.
Auto-attack DPS is based on the average weapon damage.
For weapon DPS-based skills that deal % of DPS as elemental damage, all weapon damage is converted to that damage type BEFORE calculating any damage bonuses.
Weapon DPS-based skills apply some weapon effects, but not others. Although it ultimately depends on the skill, usually effects like -X armor on hit, chance to silence/stun/immobilize, chance to poison/burn/freeze/shock, chance to cast lightning/thunder/etc. are applied with skills. Damage-over-time effects are usually also applied. Notably, any health and mana steal are NOT applied.
Elemental attacks do NOT apply any on-hit weapon effects.
Sample calculation
Confusing? Not nearly confusing enough. In order to know whether to dump your points into Focus or Strength, you need to focus on the strengths of your build (ha). Here’s a breakdown on how damage calculation works, using an Outlander as an example. Get ready for some MATH!
(I tried to include as many different modifiers as possible to show how all of them interact when calculating DPS.)
+66% damage from Strength
+207% damage from Focus
+12% all damage from the Sentinel set bonus
+40% ranged damage from the two unique Labarinto armor pieces
+22% fire/ice/electric damage from Master of the Elements passive (Rank 11/15)
+44% poison damage from Master of the Elements passive (Rank 11/15)
+50% poison damage from the unique Gibson’s Ring
+30% poison damage from two socketed Eyes of Boletus Rex
+80 physical damage from socketed Skull of Joskin (in weapon)
+62 ranged weapon damage from two socketed Iron Embers (in armor)
+50% base critical damage
+53% critical damage bonus from Strength
+30% critical hit chance from Dexterity
+15% critical hit chance from the full Outlander charge bar
+6% critical hit chance from Share the Wealth passive (Rank 11/15)
+15% attack speed from the full Outlander charge bar
+6% attack speed from Share the Wealth passive (Rank 11/15)
+15% cast speed from the full Outlander charge bar
+6% cast speed from Share the Wealth passive (Rank 11/15)
+15% cast speed from The Centerwing shield
+15% cast speed from The Voice of Pain weapon
+3% cast speed from the Labarinto set bonus
Damage: Auto-attacks
NOTE: Due to an in-game rounding error, the actual elemental damage on the Voice of Pain weapon is 1 less than its listed value.
Using the above character as an example, the calculation follows thusly:
Damage per hit
* Physical Damage: (listed damage on weapon (44-89) + 80 from Skull of Joskin) * (66% Strength bonus + 12% all damage + 40% ranged damage)
Damage (min): (44 + 80) * (1 + 0,66 + 0,52) = 270
Damage (max): (89 + 80) * (1 + 0,66 + 0,52) = 368
* Electric Damage: listed damage on weapon (44-89) * (66% Strength bonus + 207% Focus bonus + 12% all damage + 40% ranged damage + 22% from MotE passive)
Damage (min): 44 * (1 + 0,66 + 2,07 + 0,74) = 197
Damage (max): 89 * (1 + 0,66 + 2,07 + 0,74) = 398
* Poison Damage: listed damage on weapon (89-179) * (66% Strength bonus + 207% Focus bonus + 12% all damage + 40% ranged damage + 44% from MotE passive + 50% from Gibson’s Ring + 30% from Eyes of Boletus Rex)
Damage (min): 89 * (1 + 0,66 + 2,07 + 1,76) = 489
Damage (max): 179 * (1 + 0,66 + 2,07 + 1,76) = 983
* Total: physical damage (270-368) + total elemental damage (686-1381) + 62 ranged damage bonus from Iron Embers
Damage per hit (min): 270 + 686 + 62 = 1018
Damage per hit (max): 368 + 1381 + 62 = 1811 (average: 1414)
Critical hit damage
(1 + critical damage bonus) * max weapon damage per hit
Crit damage: (1 + 1,03) * 1811 = 3676
Damage per second
(average damage per hit / listed weapon attack speed) * (1 + attack speed bonus)
DPS: (1414 / 0,72) * (1 + 0,21) = 2376
Damage: Elemental Attacks
NOTE: Calculations are based on a level 55 Outlander using a Rank 5/15 Glaive Throw.
Damage per hit
Listed damage (838-1173) * (207% Focus bonus + 12% all damage + 44% from MotE passive + 50% from Gibson’s Ring + 30% from Eyes of Boletus Rex)
Damage (min): 838 * (1 + 2,07 + 1,36) = 838 * 4,43 = 3712
Damage (max): 1173 * (1 + 2,07 + 1,36) = 1173 * 4,43 = 5196 (average: 4454)
Critical hit damage
(1 + critical damage bonus) * damage per hit
Crit damage (min): (1 + 1,03) * 3712 = 7535
Crit damage (max): (1 + 1,03) * 5196 = 10 548
Damage per second
Since the base cast speed of skills is not listed anywhere, it’s hard to determine exact DPS for elemental attacks. If we assume a base cast speed of .5 for the Glaive Throw (rough estimate via stopwatch), the formula is: average damage per hit / base cast speed * (1 + cast speed bonus).
In the above case, this would translate to:
DPS: 4454 / 0,5 * (1 + 0,54) = 13 817
Damage: DPS-based Skills
NOTE: Calculations are based on a level 55 Outlander using a Rank 1/15 Venomous Hail.
Damage per hit (wave)
Firstly, all weapon damage is converted to poison damage, then all damage bonuses are calculated: (Total listed damage on weapon (177-357) + 80 from Skull of Joskin) * (66% Strength bonus + 207% Focus bonus + 12% all damage + 40% ranged damage + 44% from MotE passive + 50% from Gibson’s Ring + 30% from Eyes of Boletus Rex) + 62 ranged weapon damage
Damage (min): (177 + 80) * (1 + 0,66 + 2,07 + 1,76) + 62 = (257 * 5,49) + 62 = 1472
Damage (max): (357 + 80) * (1 + 0,66 + 2,07 + 1,76) + 62 = (437 * 5,49) + 62 = 2461
Secondly, weapon DPS is calculated for the purposes of the skill: (damage per hit / listed weapon attack speed) * (1 + attack speed bonus)
WDPS (min): (1472 / 0,72) * (1 + 0,21) = 2473
WDPS (max): (2461 / 0,72) * (1 + 0,21) = 4134
Finally, the WDPS value is multiplied by the listed skill damage percentage (50% for Venomous Hail).
Damage per wave (min): 2473 * 0,50 = 1236
Damage per wave (max): 4134 * 0,50 = 2067 (average: 1651)
Critical hit damage
(1 + critical damage bonus) * max damage per wave
Crit damage (per wave): (1 + 1,03) * 2067 = 4196
Damage per second
In case of Venomous Hail, the base cast speed is equal to the cooldown (2 seconds) and the eventual damage will be multiplied by 8 (number of waves). The same formula for elemental skill DPS applies here as well: average damage per hit / base cast speed * (1 + cast speed bonus).
DPS: 1651 / 2 * (1 + 0,54) = 1271 * 8 = 10 168
Damage: Calculating True DPS
Note that none of the above DPS formulas take critical hits into account. However, your true DPS is not complete without it. If your eyes haven’t glazed over by this point, keep reading.
For elemental attacks, follow this formula:
(1 - crit chance) * base_dps + [crit chance * (1 + critical bonus) * base_dps]
In the above case (Glaive Throw), this would translate to:
(1-0,51) * 13 817 + [0,51 * (1+1,03) * 13 817] = 0,49 * 13 817 + 14 304 = 6770 + 14 304 = 21 074
For DPS-based skills, you would need to recalculate the DPS for the second base_dps variable, because all DPS-based skills deal max damage on crits.
In the above case (Venomous Hail), this would translate to:
Formula (max base_dps): 2067 / 2 * (1 + 0,54) = 1591 * 8 = 12 728
And the final formula:
(1-0,51) * 10 168 + [0,51 * (1+1,03) * 12 728] = 0,49 * 10 168 + 13 177 = 4982 + 13 177 = 18 159
For auto-attacks, you would similarly need to recalculate the DPS for the second base_dps variable. In addition, you would need to take fumbles (and possibly also executions) into account, which makes the formula way too complicated. Since virtually no endgame build uses auto-attacks anyway, I’m happy to leave it at that.
My brain is hurting, so I’m gonna go lie down now.
Equipment: Weapons
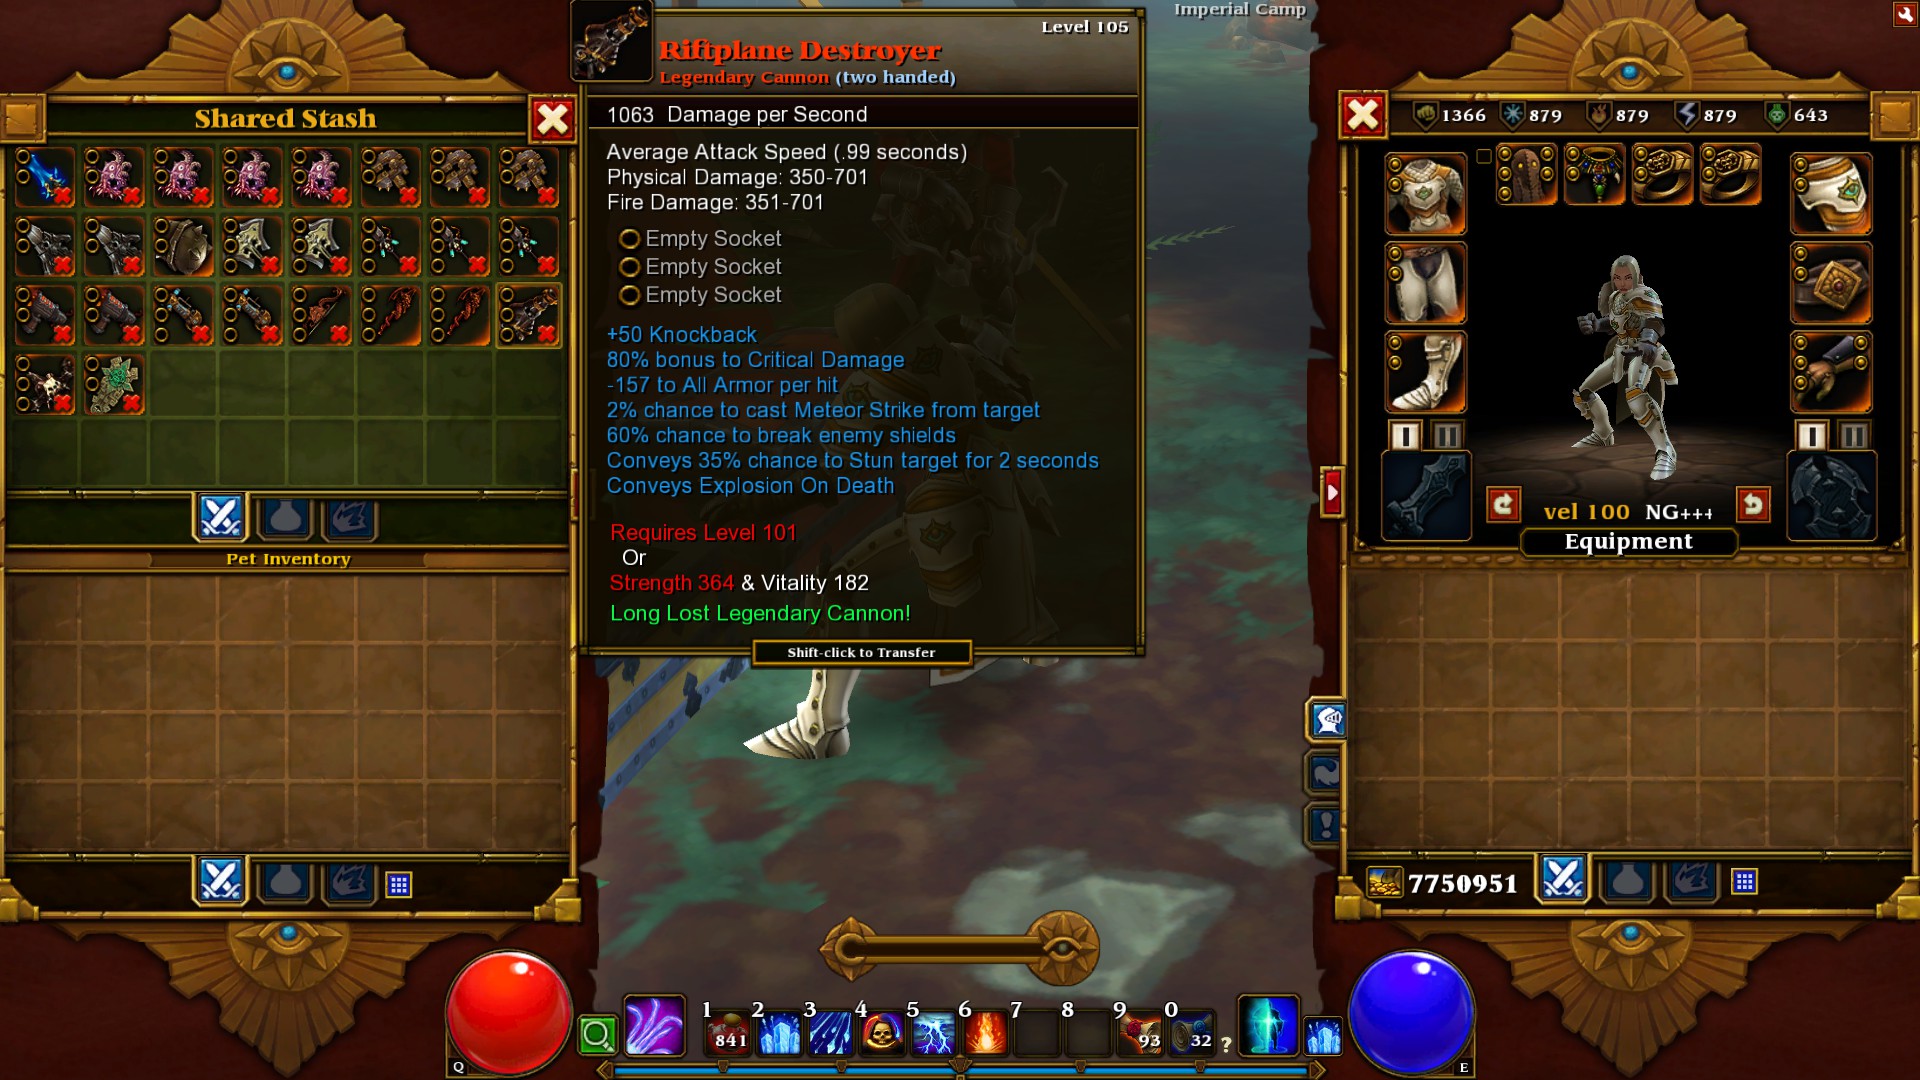
Legendary weapons
By far the best weapons in the game with the highest DPS, but also the rarest. Expect to see very few of these. Legendary weapons only drop in high-level areas (the lowest legendary weapons having an item level of 54). The most powerful legendary weapons are ilvl 105 and can only be equipped if their minimum stat requirements are met.
Netherrealm weapons
All of these are ilvl 105 items and require a level 100 character to equip. Netherrealm weapons have 4 sockets (5 for two-handed weapons), high base damage and useful proc-effects, among other bonuses. They can often be acquired by gambling in higher NG+ tiers.
Unique weapons
Pretty much all ilvl 90-100 weapons are at least passable as end-game weapons if you haven’t had any luck in finding legendaries. They drop often in all areas in NG+3 and higher.
Shields
Essentially vital when playing on Elite and in higher NG+ tiers. The best shield in the game in terms of blocking is Parma’s Coal-Burner (ilvl 98, +45% block chance). No other shield comes even close, although The Centerwing (ilvl 58) is a decent alternative with its +15% cast speed and +21% block chance.
For a full list and description of weapons in Torchlight II, check out this useful link HERE[tidbi.ru]
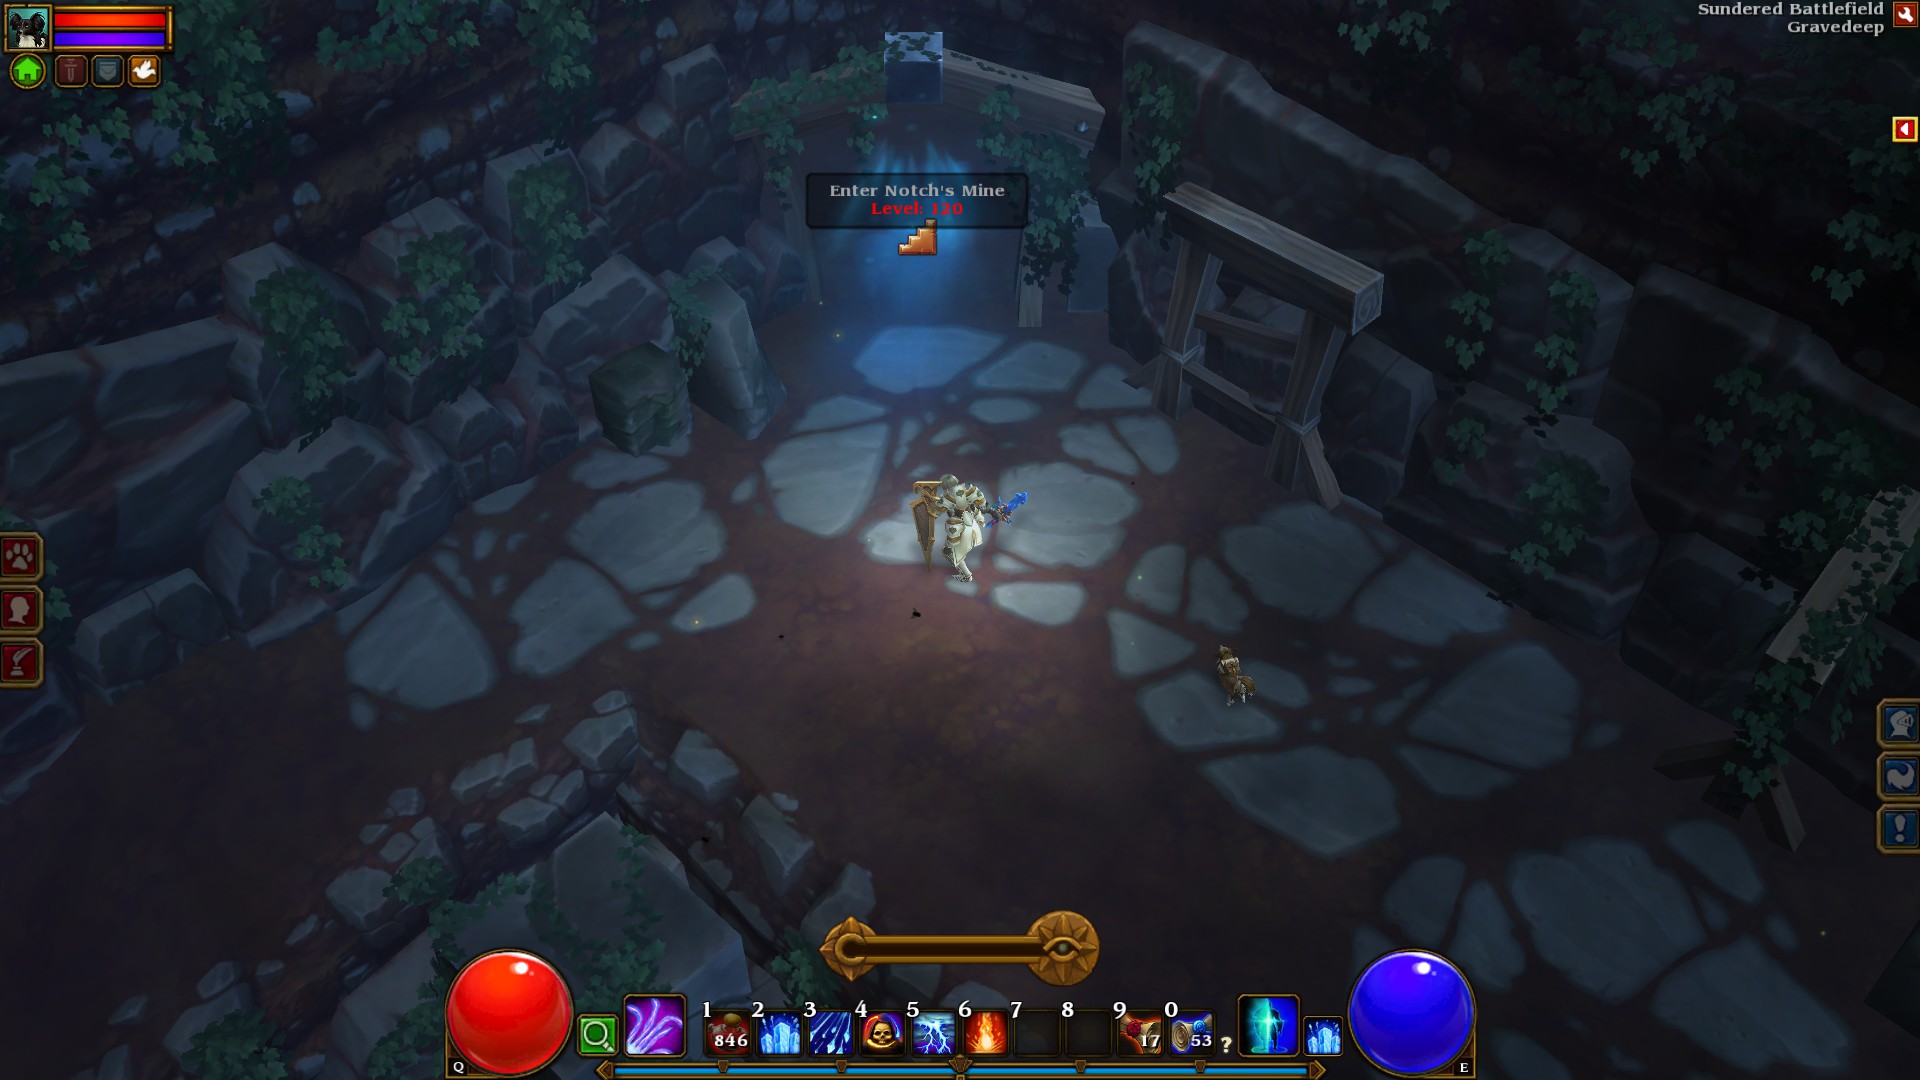
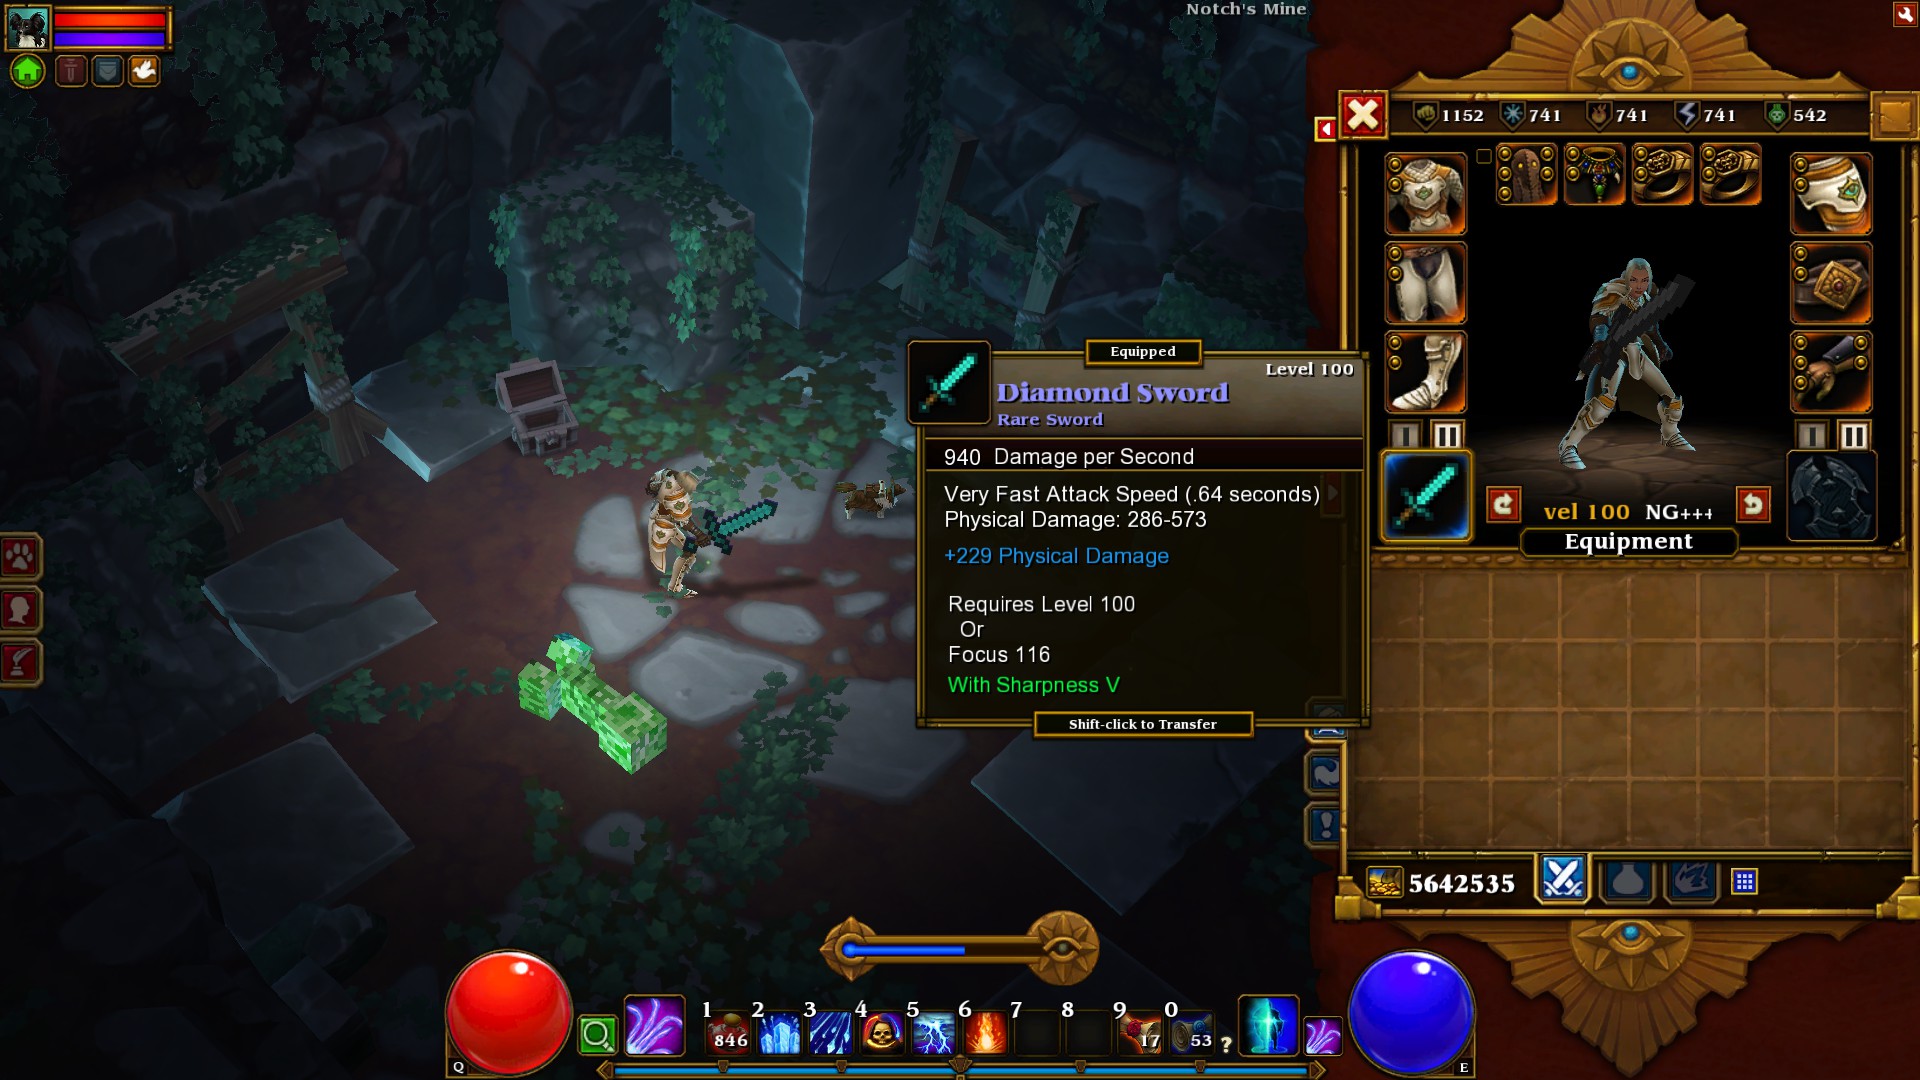
NOTE: For twinking, the swords in Notch’s Mine are likely the best choice. They have fairly low stat requirements and high damage, as well as useful bonuses. Plus, they’re easy to farm, provided you manage to find the Mine (a randomly-spawning location in the Sundered Battlefield). There are five different swords in total.
Equipment: Armor Sets
All classes
The Asphyx[tidbi.ru] (ilvl 92) – the only two armor pieces in the game with more than two sockets. That fact alone makes them viable for virtually and class and build, because high-level socketables can grant very powerful benefits.
Sentinel[tidbi.ru] (ilvl 58) – the best rare set for low-level characters entering NG+ for the first time. The set bonuses are outstanding, especially the +33% cast speed for wearing 9 set pieces. Each piece can have around +500-600 health or +35-40 to any one stat.
Aristocrat[tidbi.ru] and Inquisitor[tidbi.ru] (ilvl 91/92) – nice set bonuses (+% mana steal and +% cast speed), useful for filling the slots until you find more powerful unique set items. Each piece can have around +800-1000 health, +60-70 to any one stat, or +35-40 to any two stats.
Threaded Nut[tidbi.ru] (ilvl 55) – excellent unique rings for any mid-level melee character.
Gloomcircle[tidbi.ru] (ilvl 63) – excellent unique rings for any summoner-type character.
Engineer
Construction[tidbi.ru] (ilvl 53) – the Alhidade Amulet is worth mentioning thanks to its 10% damage reduction. Other Engineer-specific uniques with high damage reduction include Machinist Clogs (ilvl 36) and Plumb-Bob T-Square Pants (ilvl 53).
Cornerstone[tidbi.ru] (ilvl 70) – despite the misleading list of bonuses, this set only has 7 pieces. The set is decent enough for a mid-level character, although none of the individual pieces stand out.
Mondon's Vestment[tidbi.ru] (ilvl 99/105) – the ultimate end-game set for Engineers. While the set bonuses are decidedly underwhelming, several individual items themselves are pretty powerful.
Outlander
Corbucci[tidbi.ru] (ilvl 75) – great unique rings for any Outlander using DPS-based skills.
Labarinto[tidbi.ru] (ilvl 70) – decent set for a mid-level character, although mostly geared towards using DPS-based skills. Good set bonuses.
Liberation[tidbi.ru] (ilvl 53) – great mid-level set for Outlanders using the Glaive Throw as their main attack.
Lore[tidbi.ru] (ilvl 70) – the Ring of the Players and Pendant of Rejected Realities are fantastic items for any Outlander. The Pendant of the Pine (ilvl 88) is also worth a mention with its 25% missile reflection.
Unearthly[tidbi.ru] (ilvl 99/105) – the ultimate end-game set for Outlanders. Strongly geared towards DPS-based skills, with unremarkable set bonuses for Glaive Throwers. The amulet and rings are decidedly inferior to the Lore set.
Berserker
Bloodbath[tidbi.ru] (ilvl 75-77) – decent mid-level set for dual-wielders.
Savage[tidbi.ru] (ilvl 70) – many individual items have good stats for mid-level characters and the overall set bonuses are great as well.
Harbinger[tidbi.ru] (ilvl 99/105) – the ultimate end-game set for Berserkers. Excellent full set bonus (+25% crit chance), but a couple of unremarkable pieces (especially the trinkets). Most bonuses are geared towards dual-wielding characters.
Embermage
Emberweave[tidbi.ru] (ilvl 70-75) – useful bonuses for both elemental and DPS-based skills. The rings are notable for being superior to the Transcendent ones.
Transcendent[tidbi.ru] (ilvl 99/105) – the ultimate end-game set for Embermages. Great set bonuses for wearing up to 6 pieces. Useful bonuses for both elemental and DPS-based skills.
Enchanting


Enchanting is different from the first Torchlight game, as you no longer have to fear randomly losing all your enchantments. On the other hand, enchanting is still a massive money sink. It's therefore advisable to only enchant those items you intend to keep for a long time.
The cost of enchanting depends on three things – the level of the item, the rarity of the item, and the type of enchanter. The level of the character and the area where the enchanter is located are both irrelevant. The potency of the enchantments is dependent only on the item level. Also note that disenchanting removes ALL added enchantments from the item.
For a handy calculator for predicting enchanting costs, click HERE[torchlight.ingame.de]
Enchanters
Borris the Stout is the best enchanter in the game, hands down. He is a wandering enchanter who can add stat bonuses to items up to three times. Borris can add the same stat repeatedly, for example adding Dexterity three times in a row on a single item.
It's up to you how many times you want to enchant/disenchant each item to hunt for the perfect combination of stats, depending on how "cookie-cutter" you want your gear to be. You can fully enchant an entire high-level unique set for less than a million, or you can spend millions upon millions if you really want to optimize your stats. High-level items (ilvl 90+) can get about +20-40 stat bonus per enchant, with critical enchants usually being in the +55-70 range (the chance for a critical enchant is about 20%).
The second mandatory enchanter is Jurick the Socketer. With the exception of certain uniques and legendaries, each item can have up to two sockets. Since there are many powerful socketables, it's always worth it to have Jurick punch extra holes in your equipment whenever possible.
Filip the Lucky can enchant items with bonus magic find and gold find, which is extremely useful when putting together your farming gear. Note that he can no longer add critical hit chance or critical damage to weapons, however, making Borris the best enchanter for weapons as well.
The rarest enchanter – Karkozi the All-Powerful – is the only one who can add a fourth enchantment to an item. He can also disenchant items for free. However, his enchantments are frankly pitiful, often resulting in only a minuscule increase in armor, mana, elemental damage, etc. It's honestly not worth the gold (or the effort required to find him).
Omnisciurus's Patented Enchanter Trick (TM)
If you don't want a wandering enchanter to leave after using his services, hit Escape or Space after enchanting an item instead of clicking "OK" on the message screen. The screen will zoom out, the enchanted item will be returned to your inventory and the enchanter will remain in place.
Finding Enchanters
The best way to find a specific enchanter is to repeatedly re-roll the Crows' Pass area in Act I.
Crows' Pass has four possible layouts, and one of these has 100% chance of spawning a random enchanter (left). Another layout (right) also has a small chance to spawn an enchanter, but only about 10-15%.
The process is as follows:
1. Make a LAN game and tick the "re-roll world" box.
2. Travel to the Estherian Enclave and enter Crows' Pass.
3. If it's the wrong layout, quit and repeat from 1 (you will spawn back in the Enclave).
4. If the layout can spawn enchanters, visit all four possible spawn locations.
5. If you find a suitable enchanter, rejoice! If not, repeat from 1.
In 30 minutes and 36 attempts, I found two socketers and one Borris among 13 enchanters by using this method. Your mileage may vary.
HINT: If you want to re-spawn the same enchanter after using him, just visit the other two passes from Estherian Enclave (Echo Pass and Path of the Honored Dead). This will reset Crows' Pass and respawn the resident enchanter in the same location.
Socketables
Embers
First off, the common elemental embers are essentially useless in all stages of the game.
When leveling, use Iron Embers for +physical damage on weapons, Blood Embers for +health and +health regen, and Void Embers for +mana and +mana regen on armor. Later in the game, you will find other far superior socketables, making all Iron/Blood/Void embers completely obsolete.
Chaos Embers can have many useful effects on weapons, such as +critical damage, +critical chance and +cast speed. However, like with the other rare embers, there are superior socketables later in the game. Only +missile reflection and +movement speed remain as desirable stats on Chaos Embers, because they don't appear on other socketables (the chance of finding that unique skull with +25% missile reflection is about the same as having a Zod rune drop in Diablo II).
Skulls
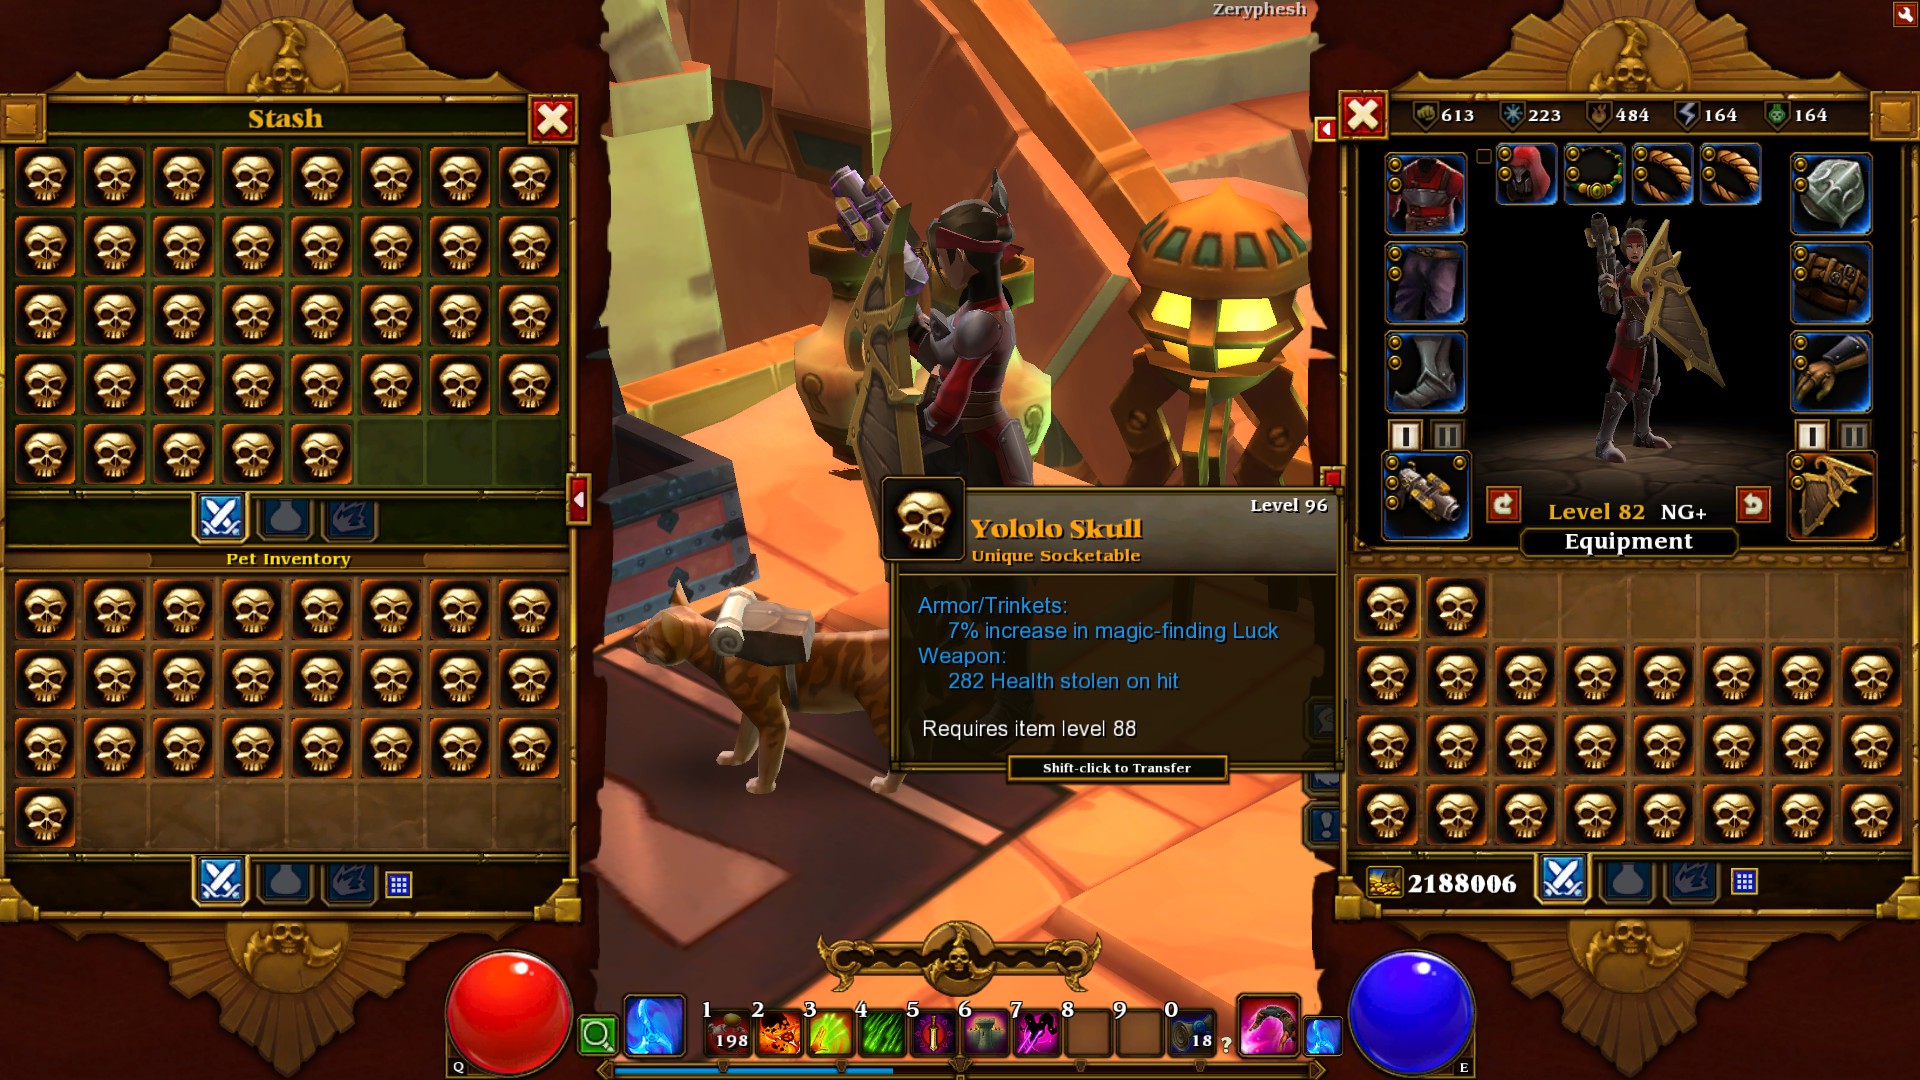
There are 50+ unique skulls in the game, but only a handful are worth using in end-game gear. Many other skulls can be very helpful when leveling, though, so feel free to use them whenever you have available sockets in your gear.
Skulls have a level range where they can drop (low-level skulls only drop in low-level areas, etc.). This is important to know when hunting for specific skulls. The drop range of a skull is basically:
Lower area cap: Skull level -2
Upper area cap: Skull level +7
For example, a Limoany Skull (ilvl 55) can only drop in level 53-62 areas. Skulls starting from ilvl 73 (Riechliu and above) have no upper cap, meaning they can drop in any area that's level 71 or higher.
Skulls for armor Skull of Limoany (ilvl 55): All damage taken reduced by 5%. Best farmed in the Protect the Crystals Phase Beast Challenge in Frosted Hills in NG+.
Lovantine Skull (ilvl 57): +40 Strength. Best farmed in the Protect the Crystals Phase Beast Challenge in Frosted Hills in NG+.
Nephanic Skull (ilvl 63): +20% increase in the amount of gold found. Best farmed in the Protect the Crystals Phase Beast Challenge in Frosted Hills in NG+.
Skull of Riechliu (ilvl 73): +1540 health. Best farmed in the Avoid the Lava Phase Beast Challenge in Sundered Battlefield (NG+ and above).
Wfuntir Skull (ilvl 90): +62 Focus. Best farmed in the Avoid the Lava Phase Beast Challenge in Sundered Battlefield (NG+2 and above).
Zardon's Mighty Skull (ilvl 99): +25% chance to reflect missiles. Best farmed by praying to RNGesus.
Skulls for weapons Rambren Skull (ilvl 75): +60% critical damage. Best farmed in the Avoid the Lava Phase Beast Challenge in Sundered Battlefield (NG+ and above).
Vellinque Skull (ilvl 87): +200 physical damage. Best farmed in the Avoid the Lava Phase Beast Challenge in Sundered Battlefield (NG+2 and above).
Skull of Whorlbarb (ilvl 88): +10% critical hit chance. Best farmed in the Avoid the Lava Phase Beast Challenge in Sundered Battlefield (NG+2 and above).
To be honest, I wish there was a way to tell them apart.
Other The Eye of Grell: All damage taken reduced by 3%. The only useful eye that's worth farming, basically a poor man's Skull of Limoany. It can be acquired from General Grell in Act I with a drop chance of 15%.
Lucky Coin/Die: +1–6% increase in gold/magic find. These can only be found in secret rooms, although the Lucky Coin can sometimes also drop from the Golden Crab that occasionally spawns at monster shrines.
Gambling
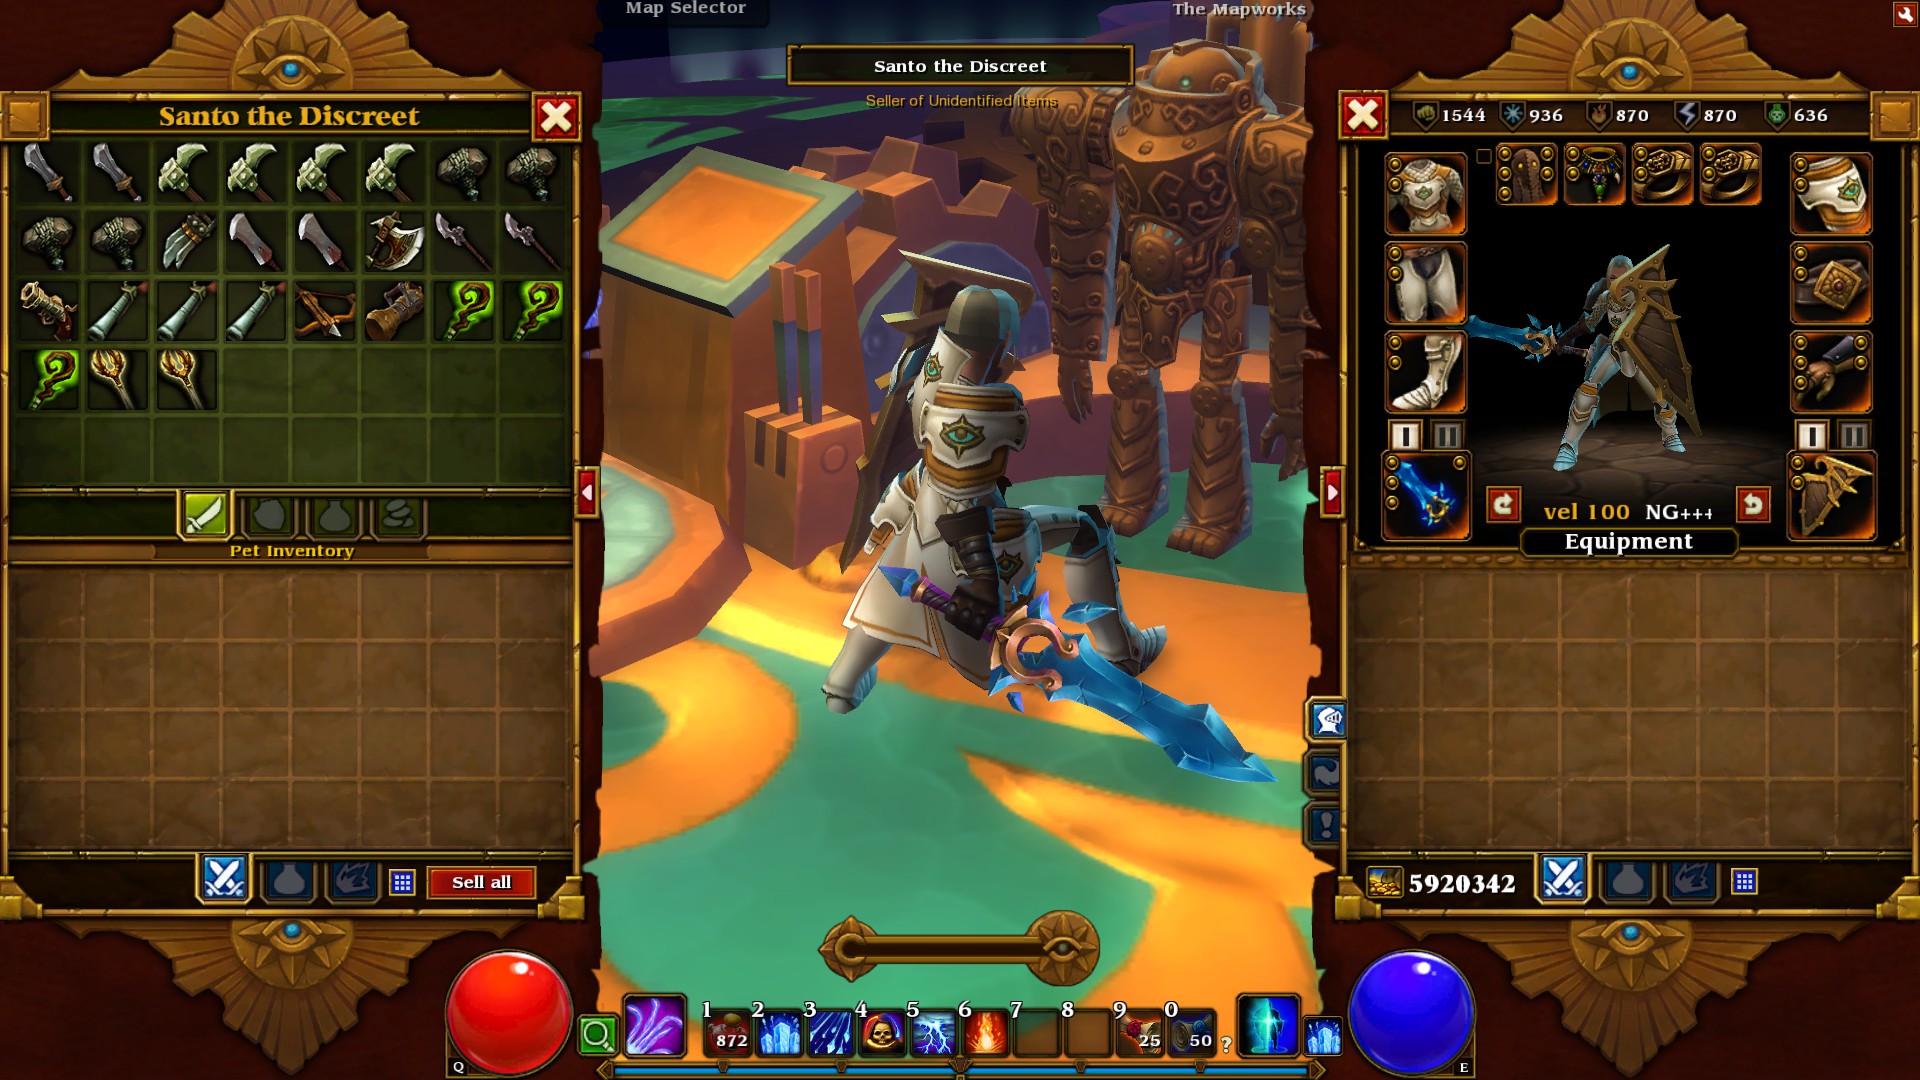

The gambler sells unidentified items and has a surprisingly high chance of providing you with uniques, making him a very viable gold sink when leveling your characters (especially if you're playing untwinked) or hunting for specific unique items.
The gambler's inventory is scaled roughly to your character's level, with the min/max item level cap determined by the town area level. To reset the inventory of a gambler, visit any other two towns and return.
Average expected results (based on personal experience and thousands of gambled items):
WeaponsUnique: 20%
Rare: 30%
Magic: 49,5%
Legendary: 0,5%
ArmorUnique: 20%
Rare: 30%
Magic: 50%
TrinketsUnique: 40%
Rare: 15%
Magic: 45%
Omnisciurus's Patented Sweet-Aide Trick (TM)
This is a crafty way to cheat the gambler by viewing his entire inventory before having to actually buy anything. Here's how it works:
1. Obtain the Sweet-Aide potion as a quest reward from Cacklespit in Act III.
2. Buy out the inventory of any gambler.
3. Check out the items and make a mental note about the relative position of the items you'd like to keep (for example, the second set of boots, third axe, fifth ring, etc.).
4. Drink the Kool-Aid... I mean Sweet-Aide.
5. Die.
6. Select the "Quit to Main Menu" option.
As you resume playing, you will spawn back in town, with all your gold and the Sweet-Aide potion still intact and the gambler inventory unbought. All the items will be the same as before, so go ahead and cherry-pick the stuff you want.
NOTE: For whatever reason, this method will not work on the gambler in Minehead.
Farming
Farming uniques & legendaries
Boss enemies from the main quests (Grell, Manticore, War Titan, etc.) are guaranteed to always drop at least one unique item upon death. The Netherlord always drops at least two and also has a small chance (about 10%) to drop a unique socketable (Kelton’s Rock), which increases magic find by 4%.
Boss dungeons (like other areas) reset after you visit other dungeons, making it possible to farm them repeatedly. However, this is one of the least efficient methods of farming uniques.
Finding legendary items is incredibly random. Legendaries only drop in high-level areas (the lowest legendary items being ilvl 54), so don’t expect to see any legendaries outside NG+ and high-level Mapworks areas.
The three most efficient methods of acquiring high-level uniques and legendaries are gambling, Boon the Collector, and a certain Phase Beast challenge, all of which are covered in the guide.
Farming: Boon The Collector
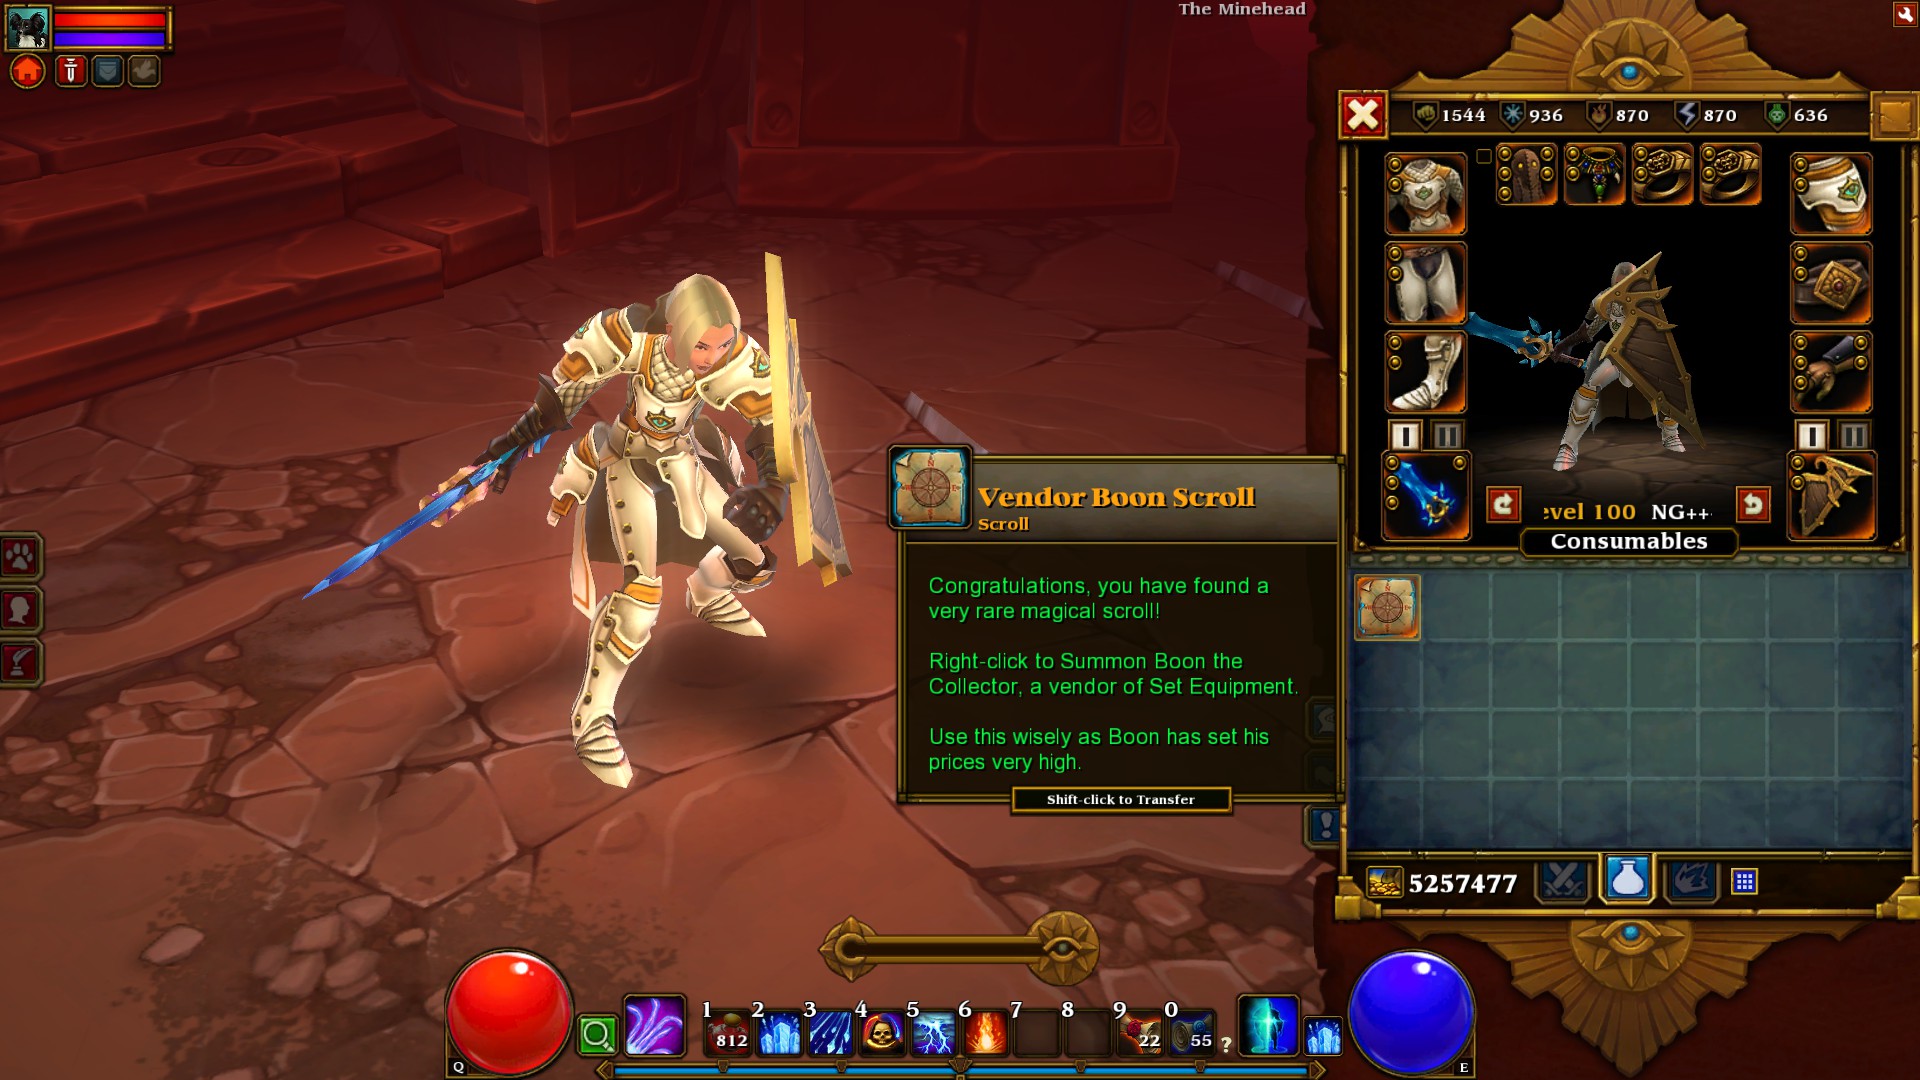
First, find the unique Vendor Boon Scroll. This is easier said than done, because it's an incredibly rare drop. I found only three in about 400 hours of playing – one from the Grand Regent, one from the Nether Brute miniboss in the Light the Braziers Phase Beast Challenge in Frosted Hills (NG+), and another from an urn at a L56-65 map at Mapworks. What I'm trying to say is that finding one is completely random, so be patient.
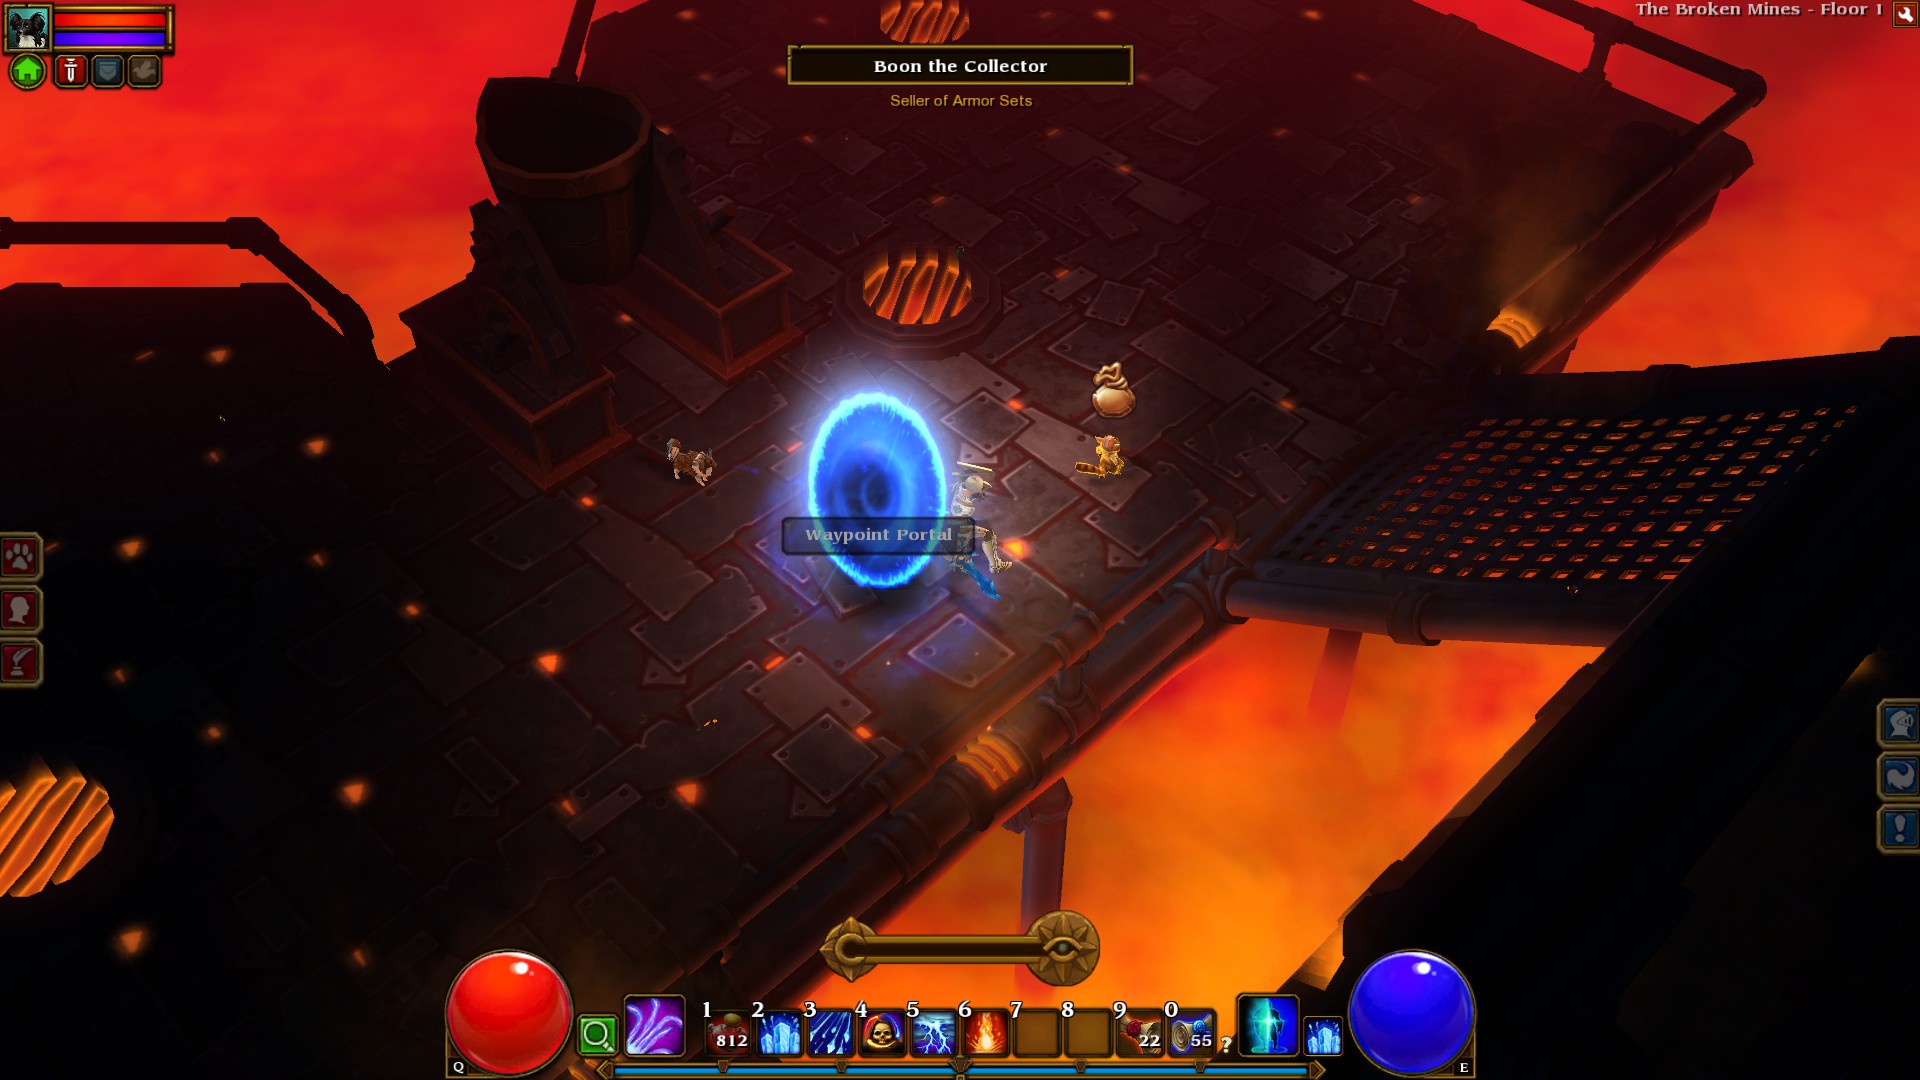
To farm Boon the Collector, enter any high-level area and clear out nearby enemies (Boon's inventory is scaled to the area level). Summon the merchant via the scroll, browse his inventory and buy EVERYTHING. Note that Boon will start walking away as soon as you leave his inventory screen (even if you don't buy anything) and eventually disappear, much like wandering enchanters after you've used their services.
Quickly put down a waypoint portal and jump in. This will "freeze" Boon in place until you return. You can leave the game, enter other areas, do whatever. As long as you have an open waypoint in the same area as Boon, the area WILL NEVER RESET.
Return through the portal and click on Boon. If you previously bought out every one of his items, Boon's inventory will now be completely restocked with all-new stuff. Selling items back to Boon will not restock his inventory after you return – you must sell the items in town.
In the highest-level areas, Boon sells items from the following sets:
RareValkyrie, Inquisitor, Aristocrat, Dragonrift, Bloodsteam
UniqueThe Grand Design, Bloodbath, Corbucci, Winter's Reach, Obscure Tools, Celestial, Bolt and Nuts, Argonaut, The Asphyx, Labarinto, Savage, Cornerstone, Emberweave, Harbinger / Draketalon, Mondon's Vestments / Outercore, Unearthly / Dominion, Transcendent / Ascendant
NOTE: Boon never stocks any belts, amulets or rings.
Item prices range from around 6-7k for rare set items, 30-35k for unique armor, 45-50k for unique weapons, 45-50k for the level 99 unique armor pieces, and 55-60k for the level 105 armor pieces. It's helpful to have the Barter tome (up to 18% price reduction) and price-reducing gear (Corpseleather Robe (10%), Ember Eye Pendant (3%), Ponya Mantle (2%), etc.).
If you have enough gold, Boon is BY FAR the quickest and easiest way to assemble the ultimate end-game armor sets. I managed to farm a single Boon scroll about 30 times and after spending all my gold (10+ million), I ended up with 150+ assorted items from the level 99/105 unique armor sets. I may have overdone it.
Farming: Tarroch's Tomb
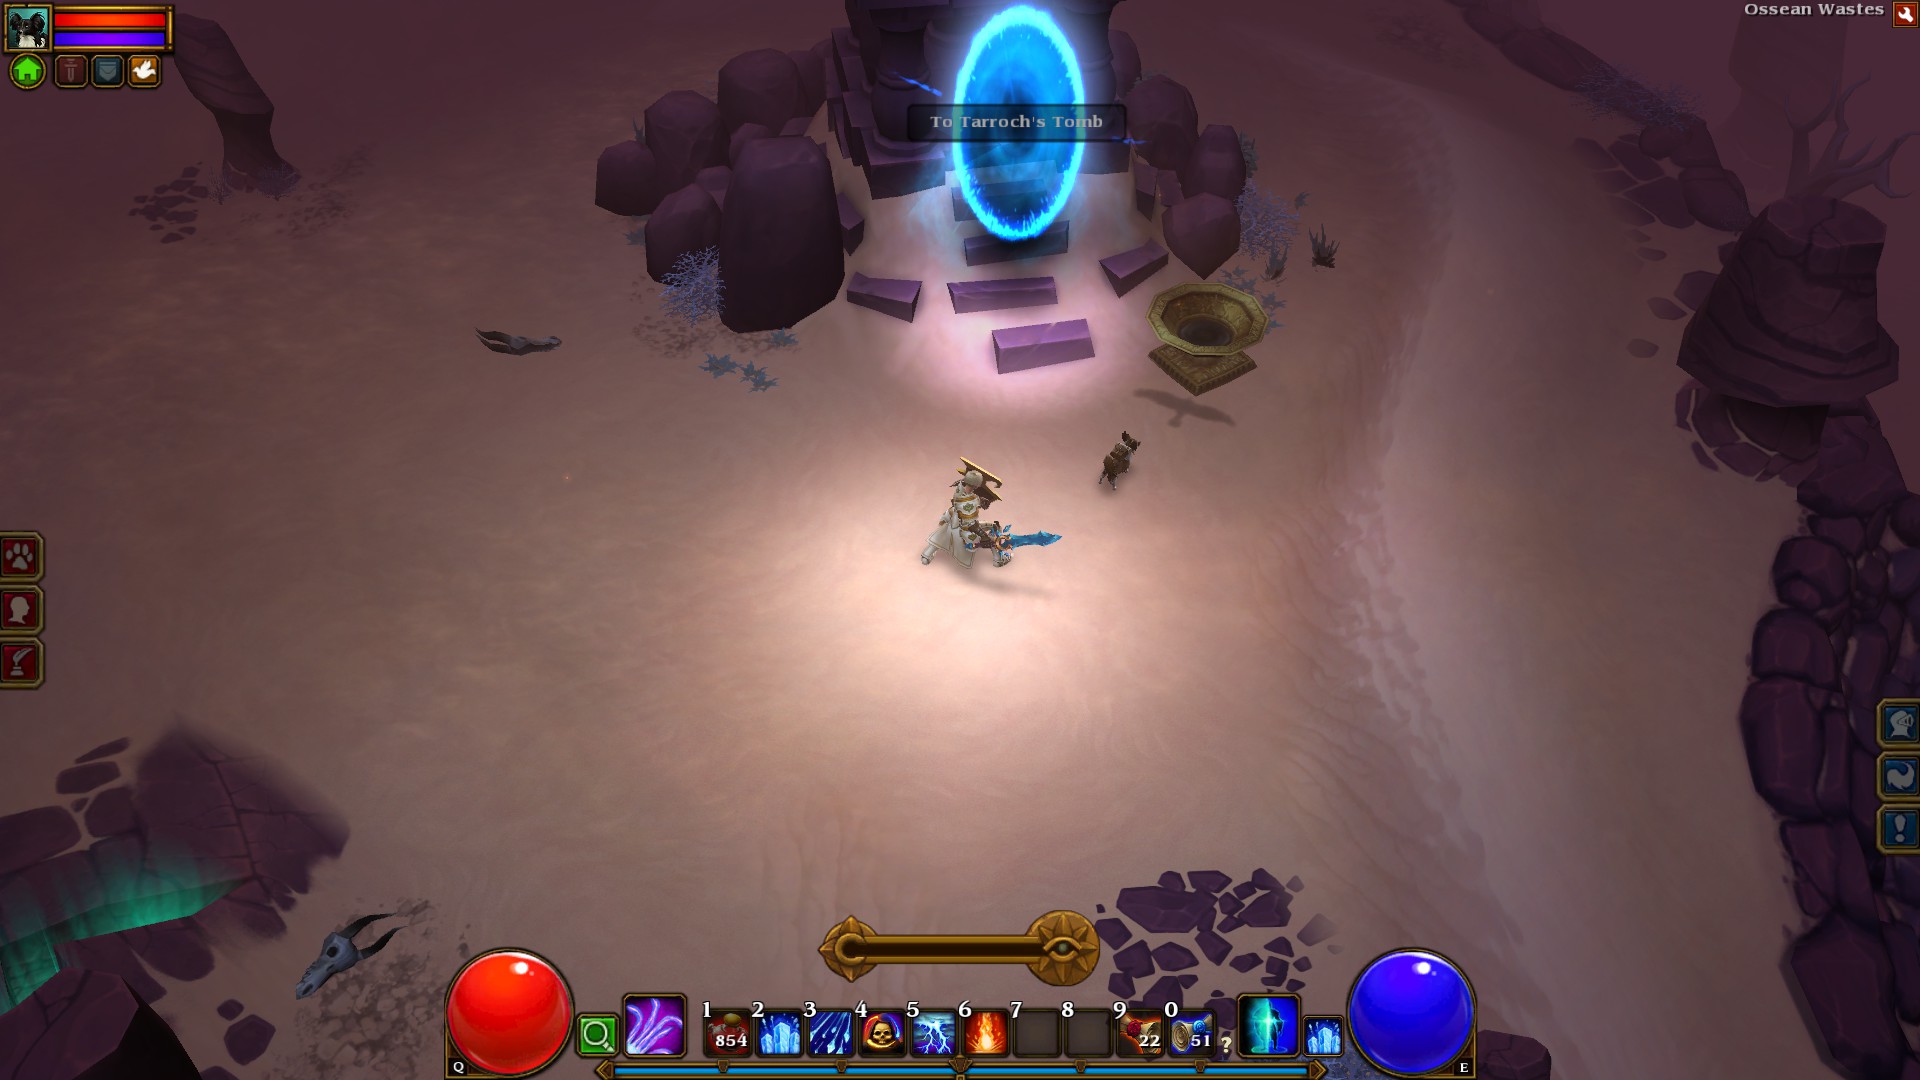

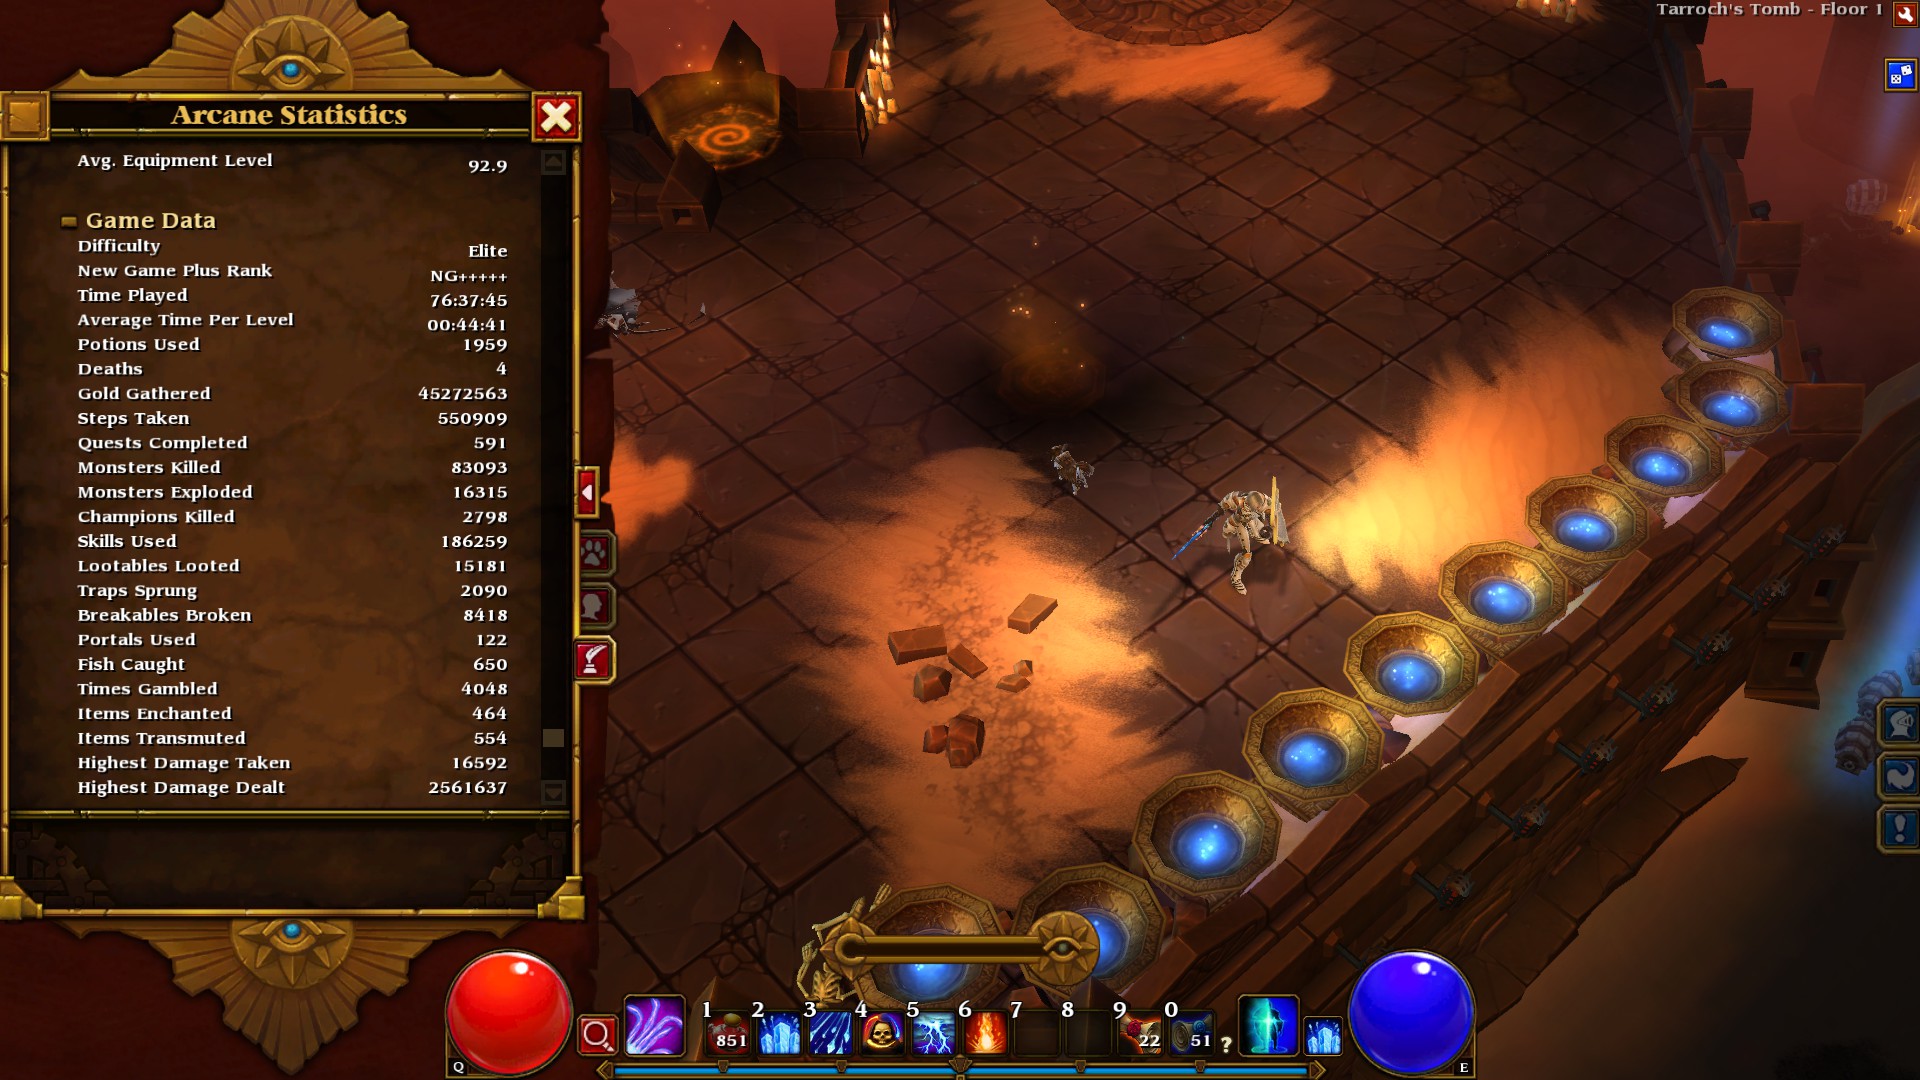
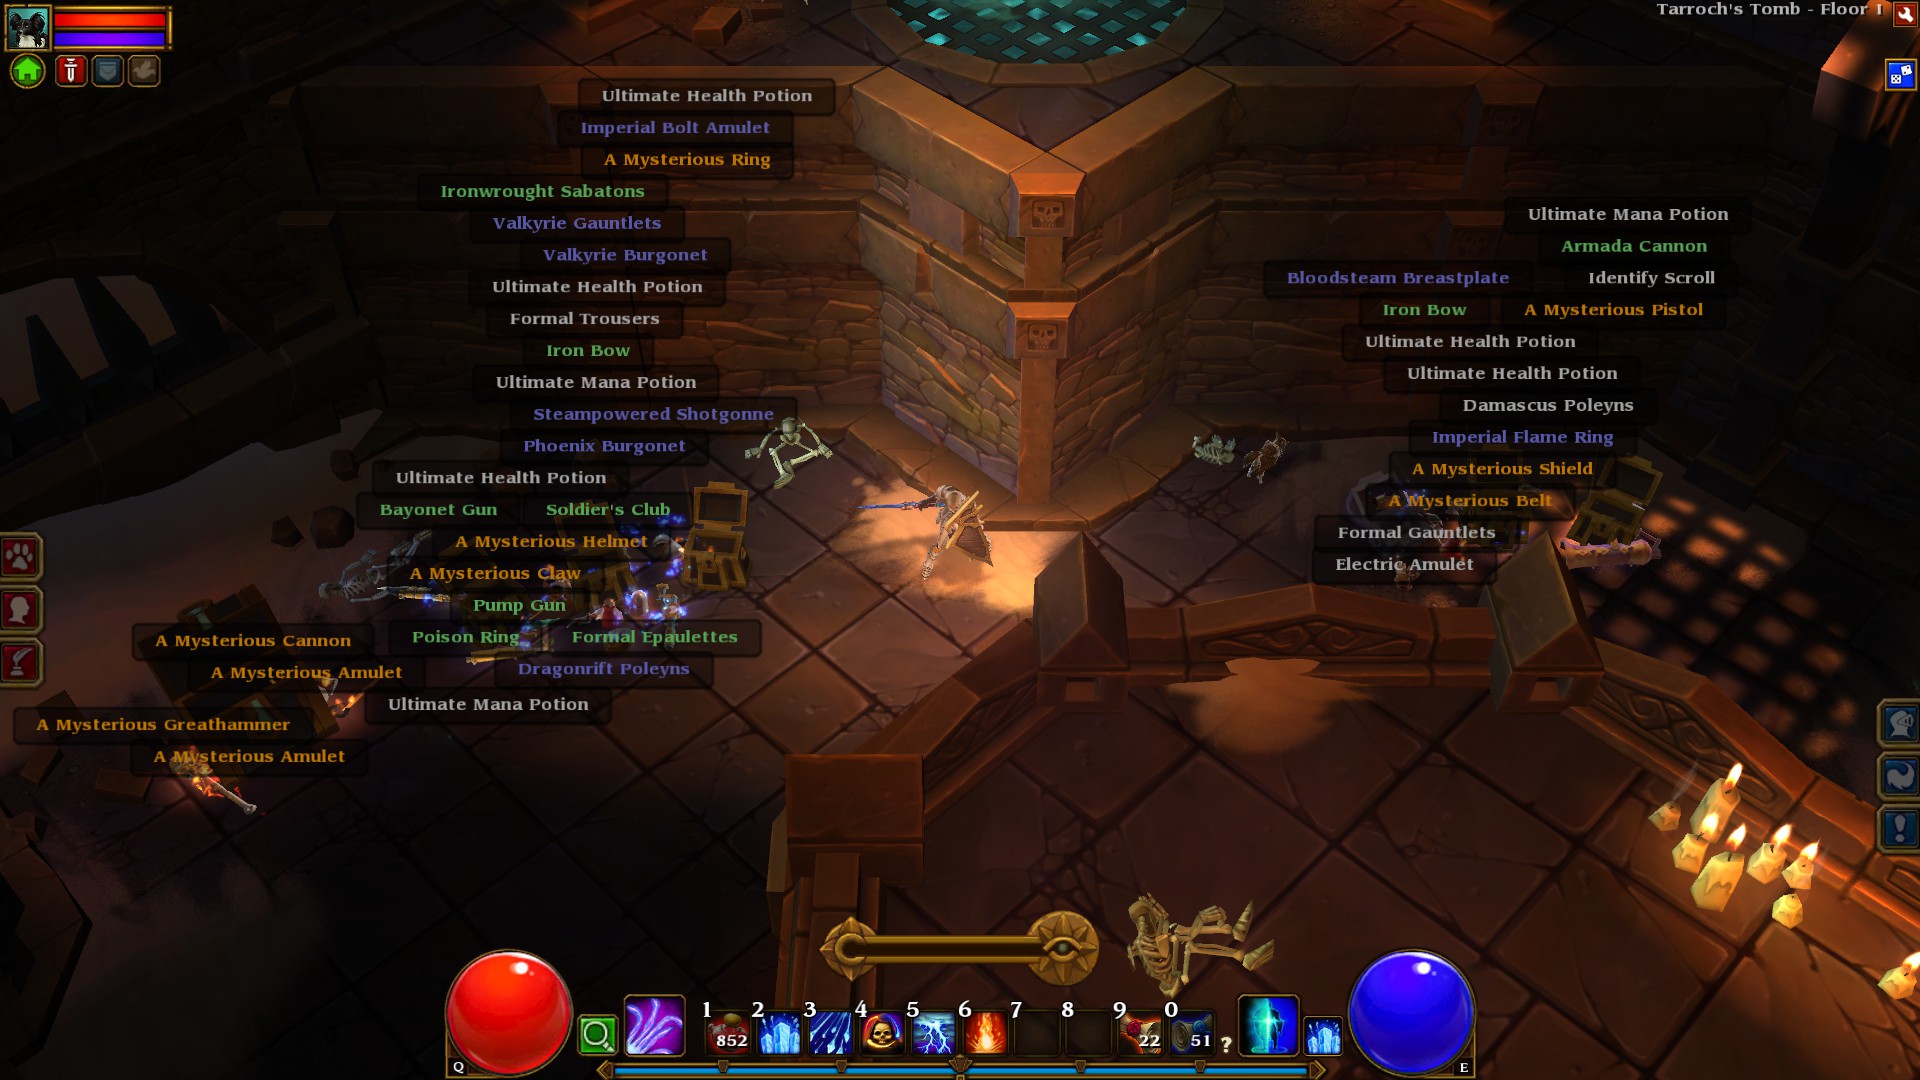
Tarroch's Tomb only appears in the Ossean Wastes in NG+ and onwards. There will be a soul basin in the Wastes that requires the unique Golem Soul item from three random champion Bone Golems in the area. Kill the Golems and bring the souls to the basin to open the portal to Tarroch's Tomb.
The Tomb is basically a wave-based arena. You can call ten waves up to ten times for a total of 100 possible waves. As you progress, chests will start spawning outside the arena for you to collect later. The further you get, the more chests will spawn. You can leave the arena at any time (even during the waves) to get your loot, but if you die in the arena, all the chests disappear.
Heads up: the enemies in the Tomb start from level 100 (regardless of your character level, difficulty or NG+ tier) and grow stronger with each wave. The composition will always be the same and includes champions and bosses (Winter Widow, War Titan, etc). The enemies in the final (100th) wave will be close to level 200. You will likely die.
If you choose to leave the arena, you can't continue where you left off, basically having to start again from the beginning. The Tomb resets as soon as you leave it via the red portal (you can't make your own waypoint inside the Tomb).
I've only mentioned Tarroch's Tomb as a farming option because of the sheer amount of uniques you can receive per run. There are other way more efficient farming methods, so this is mostly an ultimate test of your skill and character build more than anything else.
Farming: Gold
Gold farming is infinitely more important than farming for uniques or legendaries. If you have a choice of farming with either 200% gold find and 20% magic find or with 20% gold find and 200% magic find, I'd always pick the first option. Always.
With enough gold, you can use the two more efficient farming methods (gambler and Boon) to acquire uniques and legendaries. Plus, you need a hefty amount of gold for enchanting your end-game gear at Borris anyway.
What's more, the luck (magic find) stat doesn't affect your chances during gambling or enchanting, nor the drop rates of socketables such as eyes and skulls, making it even less important.
Your goldfarming set-up should consist of the following:
SpellsThe Treasure Hunter spell tome for up to +15% gold find (on both you and your pet).
SocketablesAs many Nephanic Skulls as you can get your hands on. Lucky Coins can pick up the slack until you find enough skulls.
EnchantmentsUse Filip the Lucky to give all your items extra gold find. He can give an item over +20-30% gold find if his enchants crit multiple times, but you can easily settle for +13-17% gold find per item. Also use Jurick to add a second socket to all your items for holding more skulls and/or coins.
GearAnything with extra gold find. Some notable uniques include:
Weapon: Dogbark (ilvl 50): +6% gold find
Shield: any
Boots: any
Pants: Beastling Breeks (ilvl 31): +20% gold find
Pants: Tenebris Hose (ilvl 19): +30% gold find (Embermage only)
Belt: Argonaut Belt (ilvl 22): +30% gold find
Chest: Argonaut Armor (ilvl 22): +24% gold find
Shoulders: Ponya Pauldrons (ilvl 46): +20% gold find
Shoulders: Sodalis Shoulders (ilvl 94): +30% gold find (Embermage only)
Helm: Argonaut Helm (ilvl 22): +30% gold find
Gloves: Twilight Vambraces (ilvl 63): +30% gold find
Amulet: The Xiangqi Shard (ilvl 31), The Shardifact (ilvl 26), Argonaut Amulet (ilvl 22), The Triskelion Fragment (ilvl 16): +20% gold find
Amulet: Blatand (ilvl 81): +10% gold find
Rings: Crickmer's Ring of Forever (ilvl 46): +20% gold find
Rings: Ring of Rings (ilvl 41): +30% gold find (Embermage only)
Rings: Spellfire Ring (ilvl 70): +10% gold find
NOTE: Nephanic Skulls can only be socketed in items with ilvl 55 or higher.
Farming: Phase Beasts


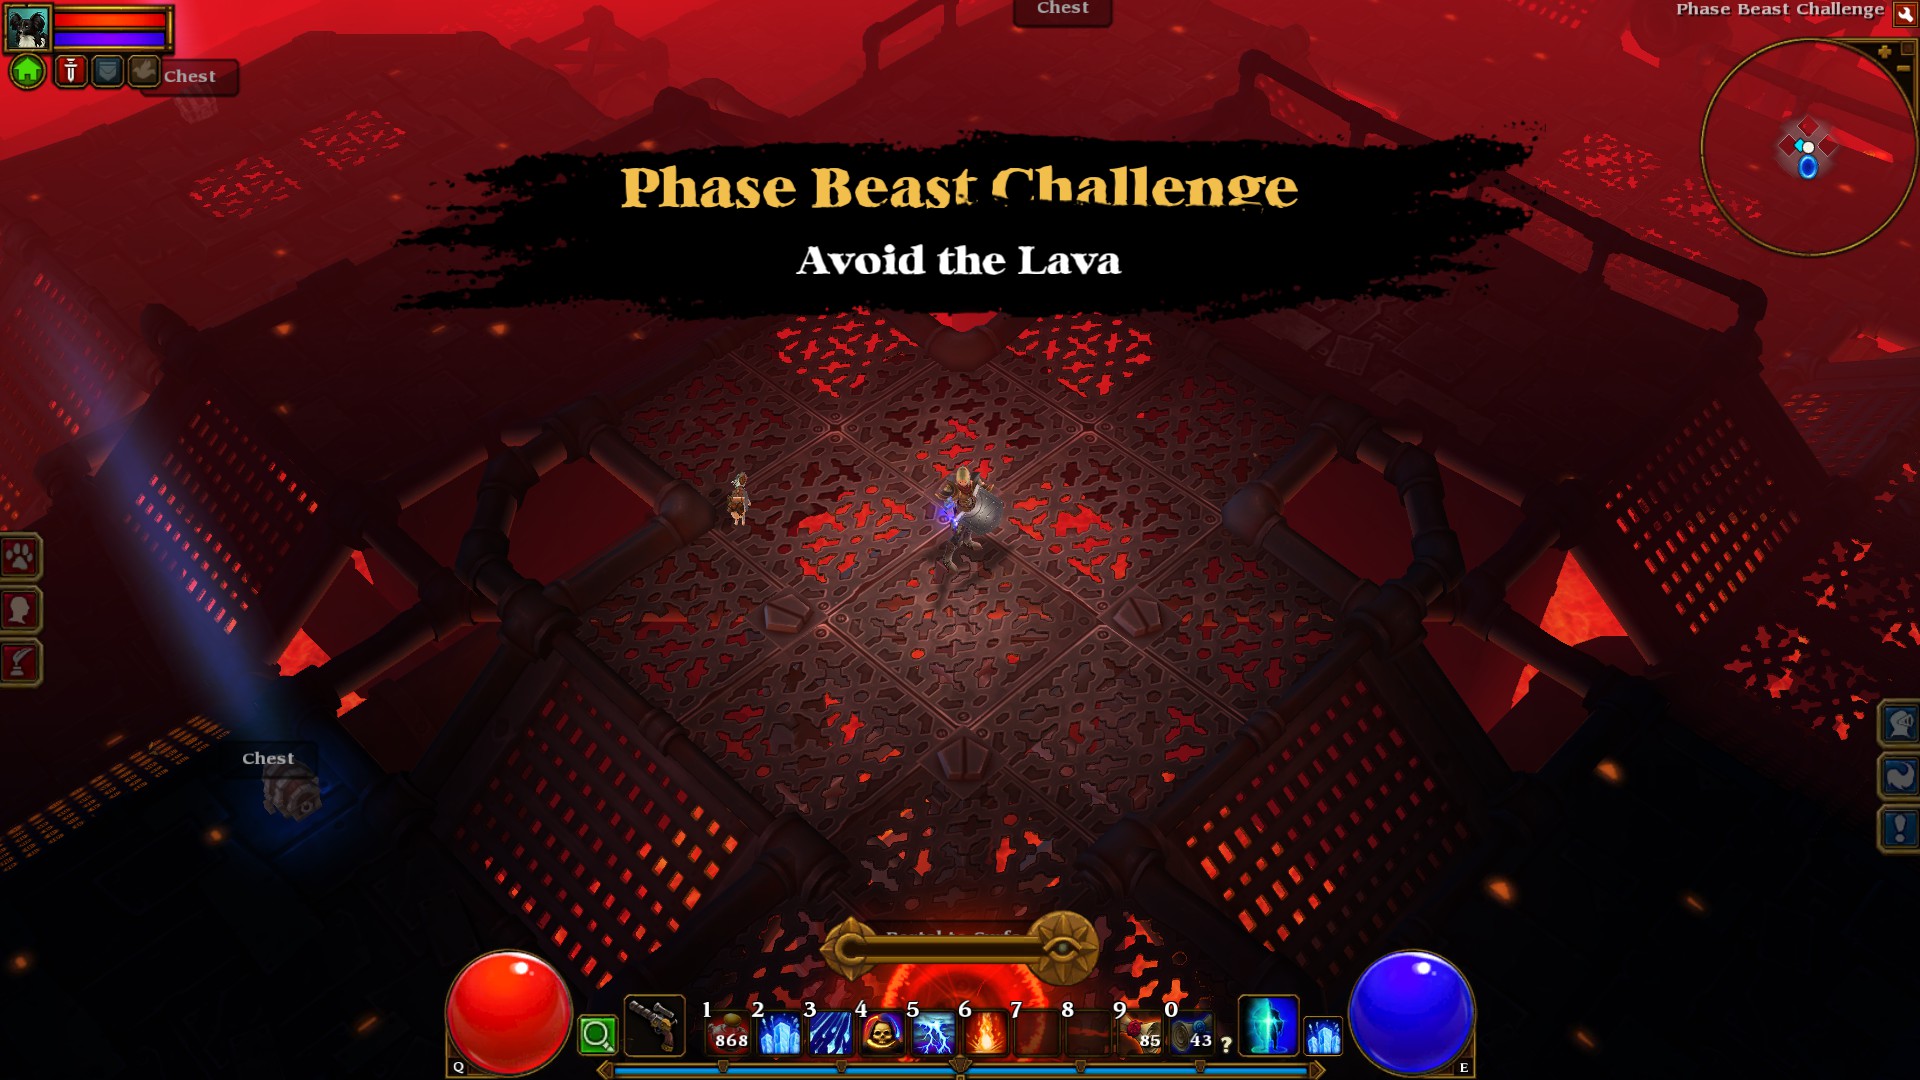

The ultimate method of farming gold and one of the best ways of collecting useful skulls, uniques and legendaries.
Your goal is to farm the "Avoid the Lava" Phase Beast challenge in Sundered Battlefield (Act III) on NG+3 or higher. Here's the rundown:
1. Hop around Sundered Battlefield until you find and kill the Phase Beast (one always spawns). If you're playing without mods, be prepared to deal with the horrible draw distance, which means that you may explore the entire area and not find the Phase Beast because it didn't "pop in" at the edge of the screen and you simply ran past it. This happens more often than you may think.
2. Hop back to town via waypoint and grab your farming gear. Make sure both your and your pet's inventories are empty, so you can bring back as much loot as possible.
3. Enter the portal and pray that the challenge will be "Avoid the Lava" (1/3 chance).
4. If you hit a different challenge, simply leave and visit any other two overworld areas to reset Sundered Battlefield and repeat from 1 (don't forget to remove the waypoint, or the area will not reset). Alternatively, you can just make a LAN game and tick the "re-roll world" box.
5. If you hit the correct challenge, rejoice! The hard part is over. There is zero combat here, so your entire gear can be outfitted for maximum farming efficiency, although an unexpected chest trap or Cursed Sword can still likely one-shot you. With some extra movement speed bonuses and the Embermage's Frost Phase skill, it takes less than a minute to finish the entire challenge.
6. Run around the area, grabbing chests and turning the hidden valves which temporarily stop the lava from rising. Don't worry, there's more than enough time to get every single chest. The lava will never cover the top platform, so feel free to check out your loot after the run. You can also send the pet back to town to sell some items if you want.
7. Simply quit and resume. The challenge will reset and you can repeat it as long as you don't leave through the red portal. Make sure you resume in single player (not LAN or online), because you will spawn back in town otherwise. If you happen to die because of lava or a trap, just quit to main menu and resume. You will lose everything you picked up during that run, so it might be best to hit Escape and manually save whenever you pick up a useful skull or item.
Here's a video that shows the optimal path through the challenge, as well as the location of all hidden valves:
https://www.youtube.com/watch?v=AvCf1MxlkcE
Full credit goes to uploader (fireball1303).
Average expected results based on 100 runs (your mileage may vary):
With 258% magic find, 107% gold find in NG+3:
Uniques: 92
Legendaries: 1
Skulls: 58
Gold: 25k per run
With 84% magic find, 656% gold find in NG+4:
Uniques: 88
Legendaries: 5
Skulls: 55
Gold: 95k per run
With 68% magic find, 797% gold find in NG+5:
Uniques: 80
Legendaries: 4
Skulls: 57
Gold: 110k per run
NOTE: You can also apply this method to the Protect the Crystals challenge in Frosted Hills (NG+) for farming Limoany and Nephanic skulls.
Conclusion
That's all, folks!
I hope this guide has helped you gain a better understanding on how stuff works in Torchlight II and what to expect when playing.
If you're looking for help with achievements, feel free to check out my Torchlight II achievement guide, found HERE.
For my class-specific skill guides, here are the links:
Outlander
Engineer
Berserker
Embermage
Good luck and have fun playing!
Source: https://steamcommunity.com/sharedfiles/filedetails/?id=484846879
More Torchlight II guilds
- All Guilds
- 20202
- TL2 El Kitab
- Torchlight II Guide 7
- My Two Handed Engineer Build for Elite
- The Torchlight II Collection
- Torchlight II Guide 6
- Dedicated Gold/Unique/Legendaries/Skulls Farming Build
- Kardfogu's Guide to Shooty Outlanders
- Secret Rooms (Torchlight 2)
