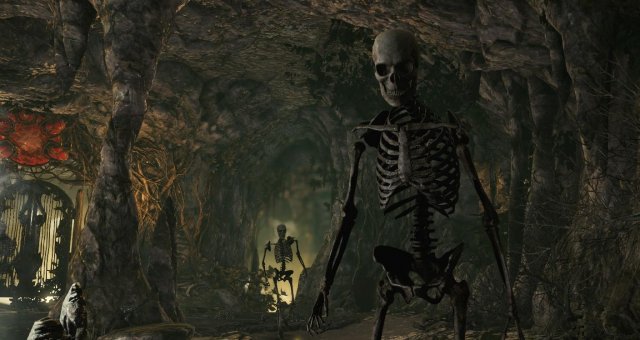
A comprehensive guide to enemies in Strange Brigade.
Other Strange Brigade Guides:- All Collectible Locations Guide (Jars, Letters, Relics and Cats).
- Hidden Valley (Level Guide).
- Harbin's Dig Site (Level Guide).
- Guide to Score Attack.
- Horde Mode Guide.
- Gameplay Tips.
Insects
Scorpions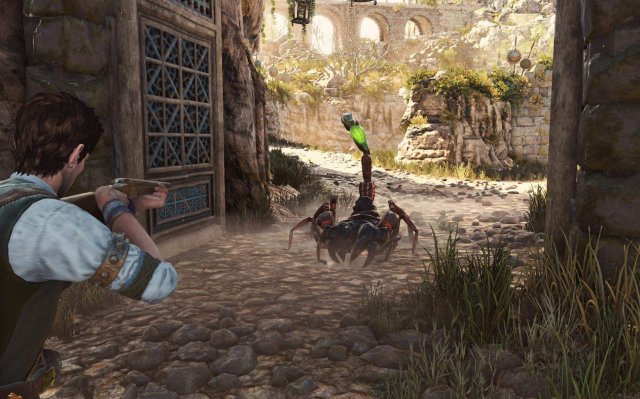
These monstrous insects are a hideous sight to behold. Their deadly pincers and ferocious stinger can prove troublesome for any Brigade member. These terrible critters can be found anywhere but more often cave openings and nesting sites.
Warnings:
- Erratic movements means they are hard to target.
- Can move very quickly when attacking.
- In close proximity can deal major damage.
Tactics:
- Shoot from a distance as they pose little threat otherwise.
- Aim for the head to execute more effectively.
- Avoid them grouping together as the combined damage can prove fatal.
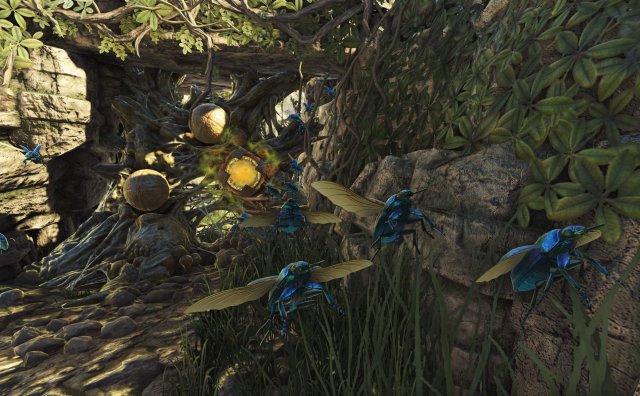
The swarm comprises of thousands of flesh eating scarab beetles, hell bent on feasting on anything they happen upon. They are usually found in caves or insectoid nesting grounds. They are fast moving and can prove to be a frustrating adversary.
Warnings:
- Fast moving.
- Hard to track in the darkness of caves.
- Deal continuous damage over time when in contact.
- Can fly as well as crawl on the ground.
Tactics:
- Use the flamethrower (if available) as it is the most effective weapon against these vermin.
- Shoot well in advance as they can overwhelm victim quickly.
- Clear the entire cave to cancel out any chance of repeat attacks.
Skeletons
Skeleton Warrior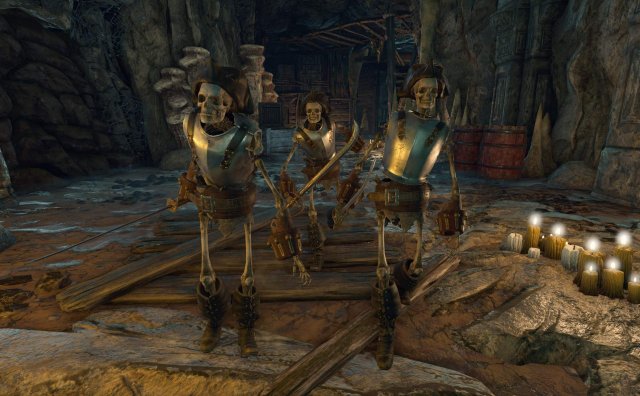
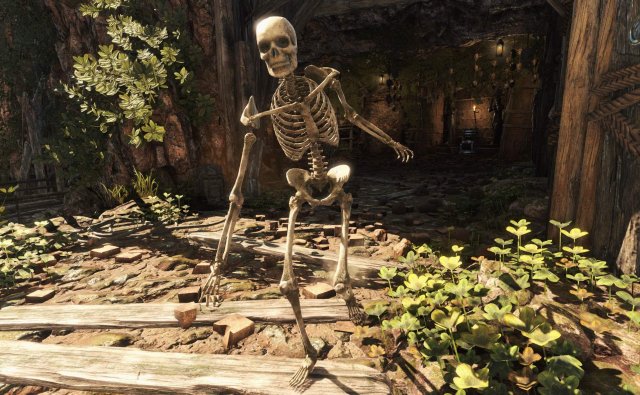
The lack of skin and muscle is still no deterrent for these undead fiends. These skeletal horrors when called upon un-bury themselves in order to savage anything in their path. They come in a few terrifying varieties, some armoured and therefore harder to kill, some with an exposed heart which provides an additional life force. They can usually be found dwelling in caves or as an added ‘bonus’ for any secret rooms you uncover.
Warnings:
- Can move surprisingly quickly and overwhelm you before you’ve got time to arm up!
- Deal ferocious damage if within adequate range, especially when banded together.
- Armoured variants are particularly durable and require focused fire to down.
Tactics:
- Aiming for the skull can lead to a much quicker dispatch of these foes.
- Shoot at any exposed hearts. The hearts will explode upon direct hits causing damage to nearby enemies. Leaving a heart will lead to resurrection!
- Consider saving your explosive weapons to deal with skeletal foes as a failure to do so can result in a swarm attack.
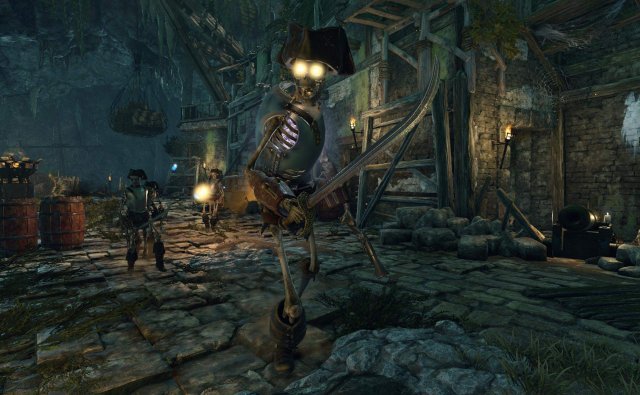
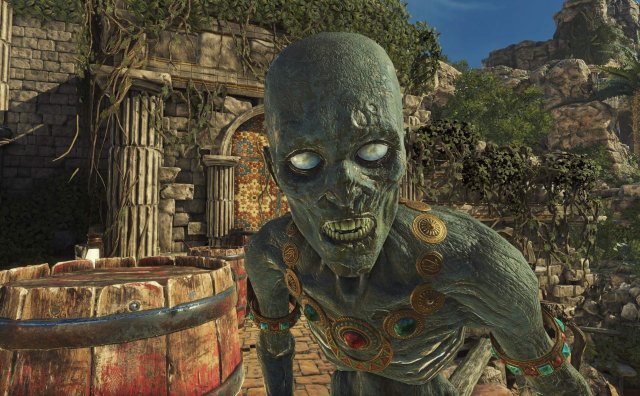 Tiberian's Crew
With Tiberian at the helm, when alive, his motley crew of vagrants and bandits savaged the high seas. No village, town or city was left unturned as they tore through in search for treasure. Anyone that stood in their way were obliterated. Now having been trapped within the Cutthroat Caverns they remain as twisted as ever, still bloodthirsty, always hideously violent.
Warnings:
- Often armoured and armed. Persistent in their thirst for murder!
- In a horde can be particularly dangerous. A group can deal out major damage.
- Can move and strike quickly within close proximity.
Tactics:
- Look to shoot at their armour in order to expose their fragile skeletal structure.
- Shoot from range to avoid close range dangerous attacks.
- Throw explosive at groups that have built up to cause mass damage.
Mummies
Cadaverous Horror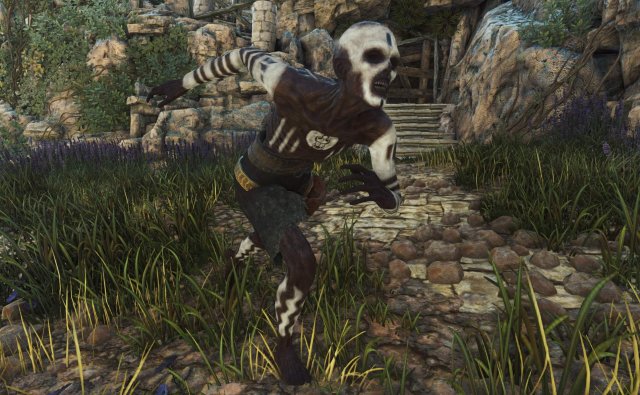
The Cadaverous Horror comes in many forms and will be your most frequent adversary during the campaign. At times they seem like a never ending plague sent by Seteki to rid the world of life. They are the remnants of a once glorious time in Egypt. They now roam tainted, under a dark magic curse. Their blood curdling shrieks will strike fear into members of the Brigade and alert you to the incoming evil.
Warnings:
- Can deal surprisingly high damage even on their own.
- In herds can overwhelm very quickly leading to a swift demise.
- Unconventional movement can mean tricky targeting.
Tactics:
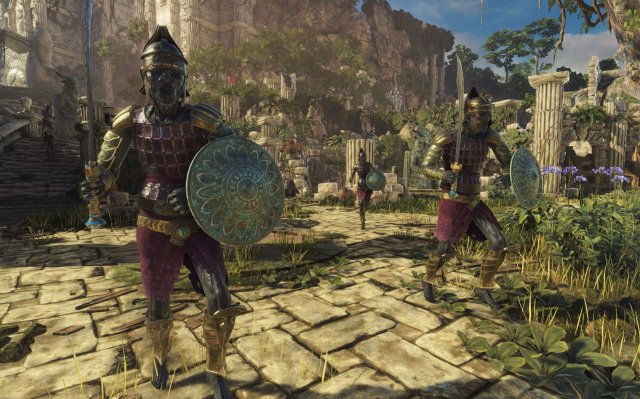
- Aim for the head to deal major damage.
- Slow movement allows for a continuous attack position
- Easy to lure into traps.
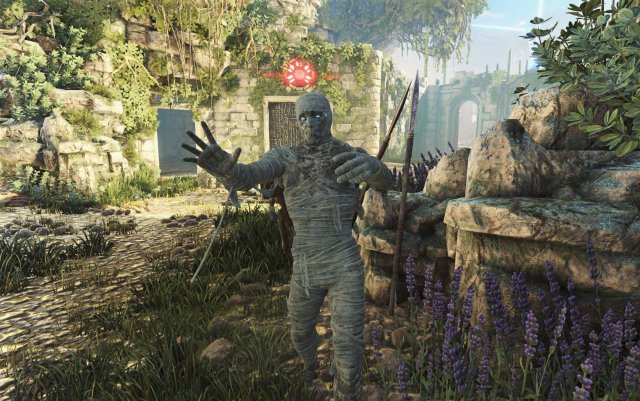
Powerful and fearsome, the Mummified Miscreant in the definitive undead commander. Its influence on other foes make it a very dangerous adversary. It can often be found within the undead horde making its way toward the Strange Brigade with terrifying effect.
Warnings:
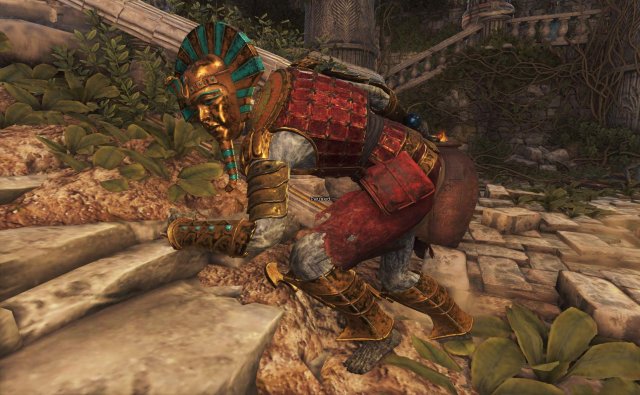
- Can command the dead to rise as additional protective henchmen, adding to the enemy swarms.
- Fires its bandages into the ground causing a particularly damaging special attack.
- Can withstand a significant amount of damage.
Tactics:
- Maintain a sustained assault on the target until dead. Focus on head to speed up this enemy’s death.
- Keep your distance in order to avoid their special attack.
- Take out any minions as soon as possible to prevent further resurrections for occurring.
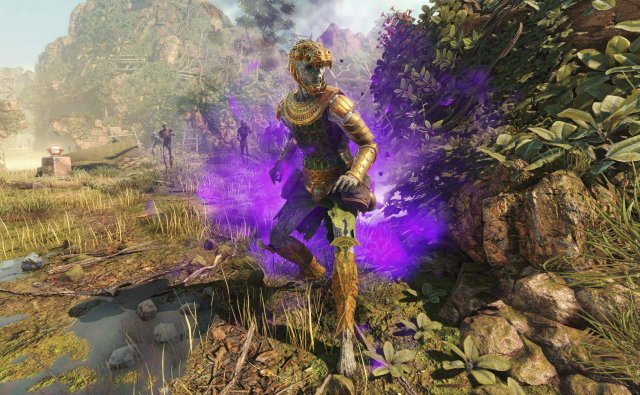
Freakishly fast moving with added magical manipulation for deadly measure. These horrific abominations are able to move through time and space making it very difficult for the Strange Brigade to defeat. Their war paint and blood curdling screams signal their sickening attack!
Warnings:
- Can teleport at inopportune moments making them very difficult to target.
- Are very quick moving and can be upon their victims within moments of their arrival.
- Deal heavy and sustained damage if not dealt with quickly.
Tactics:
- Have little to no armour, meaning easy to dispatch if effectively targeted.
- Their teleportation can be tracked by following the purple smoke they leave behind.
- Most weapons will dispatch with ease to little reliance on gun adaptation.
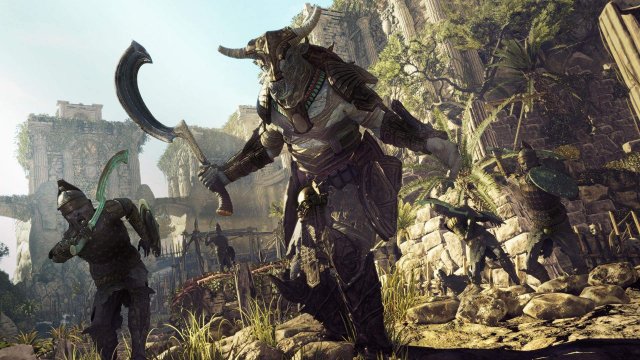 Forward Guard / Temple Guard
Once highly trained, valued members of the royal guard, they were selected for their size and stature and most importantly, their loyalty to their Queen. This loyalty is now twisted and contorted into an evil obedience as a result of the control of Seteki. They mindlessly march toward any infiltrators to the realm and will stop at nothing until any invaders are permanently stopped!
Warnings:
- Heavily armoured, making them particularly durable in a fire fight. Their shields make it very difficult to attack against.
- The spear throwing variants add significant range to their attacks making them also formidable from a distance.
- Surprise spring attacks can rain down damage upon their targets, as well as bringing them within dangerous close combat quarters!
Tactics:
- Aiming for the head will allow for more damage to be taken and for the target to be dispatched quicker.
- Continuous shots at their armour will force it off allowing for more damage to be dealt to the guard.
- Can my kited into traps that deal damage to their armour or result in them dying.
Amongst her many horrifying minions Seteki’s Revenants are some of the most deadly! Once highly trained royal protectors, they are now dark shadows of their former selves and seek nothing but death and destruction. Their loyalties to their queen are still however very much intact and will stop at nothing to prevent anyone from harming her.
Warnings:
- Quick and clinical movement makes them very difficult to target.
- Their hack/slash approach is particularly damaging to recipients.
- Significant armour makes them a durable foe!
Tactics:
- Aim for the head in order to remove the protective head gear, allowing for a more clinical kill.
- Take out from as much distance as possible to avoid taking damage.
- Consider the use of explosives to slow their approach.
 Revenant Alchemist
Once an important part of the Royal ensemble. The Alchemists were key in discovering special cures and other treatments for ailing members of the Royal circle. Some dabbled in dark magic in order to further their position in society. In doing so they forever damned their souls for eternity. Their corrupted shells now roam the landscape as evil vessels for Seteki.
Warnings:
- Throws explosive containers that cause incendiary damage.
- Can teleport to different areas of the map making it difficult to target.
- Just like Ghouls can move quickly and erratically and attack with ferocity.
Tactics:
- Track the purple trail when the Alchemist teleports then strike when it reappears.
- Lower armour allows for easier dispatch. Aiming for the head always proves successful!
- Staying out of reach of the Alchemist bombs cancels out its best attacks.
Bosses
Seteki's Grand Champion
The largest and most feared of Seteki’s champion collective. The Grand Champion wields a huge war hammer that destroys anything in its path. Once a revered champion that protected its people with honour. Now its decayed and corrupted form is now a twisted vessel for evil and death. The Grand Champion is the last enemy the Strange Brigade will face before heading into the Cutthroat Caverns.
Warnings:
- Wields a devastating war hammer that deals huge damage to anyone stood within striking range.
- Is continually flanked by the armies of the undead which force divided attention between the Champion and Seteki’s horde.
- Has a massive hammer slam mechanism that deals major area damage. The Grand Champion can spring forward delivering the huge blast to anyone in his path.
Tactics:
- The Grand Champion whilst deadly lacks speed. Continually encircling his whilst taking aim will reap damaging success.
- Aim for the glowing gems on his chest, back and head in order to bring him down.
- Do not forget to use your soul amulet once each gem is destroyed to enable to next stage of the encounter.
Dread Pirate Tiberian
A feared voyager of the high seas, Tiberian took no prisoners in his conquest for treasure. His terrifying crew were revered throughout the oceans for their sickening no-holds-barred aggression. As a leader he commanded with an iron fist and demanded complete and utter loyalty. His travels lead him to Cutthroat Caverns where his mortal existence came to an end. Now another vessel for Seteki, Tiberian roams the caves in search of his own corrupted soul and the souls of anyone unlucky to cross his path.
Warnings:
- Has significant armour making him an extremely durable opponent.
- His huge cutlass swings can deal major damage if one gets too close.
- His fire breath can deal damage from range making Tiberian a varied attacking opponent.
Tactics:
- Keep moving in order to cancel out many of the effects of Tiberians attacks. He will not stop coming toward you!
- Shoot from range. Add an explosive into the mix in order to chip away at his heavy armour.
- His resurrect ability needs addressing immediately as his minions can overwhelm quickly.
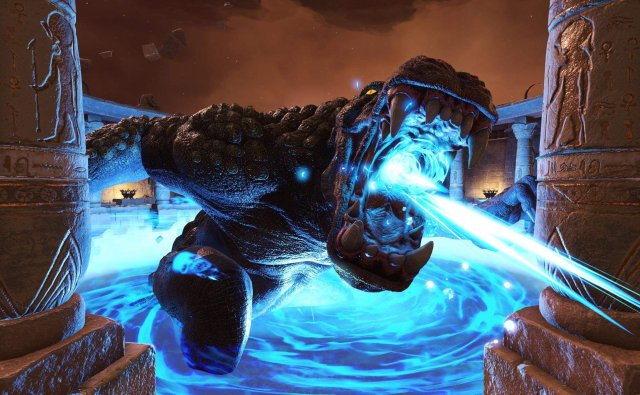
Ammit
A mythical beast of untold power and ferocity. Queen Seteki has a mysterious control over the monster and seeks to use it as an apocalyptic vessel. It dwells on an outer world waiting to be unleashed upon earth. The Strange Brigade will certainly have to drum up significant courage in order to defeat Ammit!
Warnings:
- Has a powerful arm slam that is devastating for anyone unlucky enough to be on the receiving end.
- Has intense fire breath that can cause huge area devastation and damage.
- Has an arm sweep motion that can obliterate anything in its path.
Tactics:
- Shoot at Ammit’s eyes in order to disorientate him temporarily whilst moving out of the way.
- Despite being enormously powerful, Ammit also moves quite slowly. Try reading his movement to avoid hand slams and his deadly sweeps.
- Keep moving! Standing and trading blows with this beast only leads to a very swift demise!
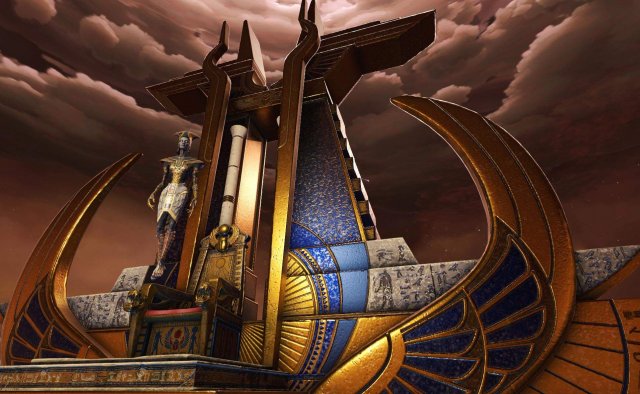
Seteki
Much of Queen Seteki’s origins are unknown. What is crystal clear is her blatant desire for death and destruction on an apocalyptic scale. Her control over the undead makes Seteki a formidable adversary. Throughout the campaign The Brigade will encounter frightening mirages of Seteki, warning anyone to halt their endeavours or suffer very permanent consequences.
Miscellaneous
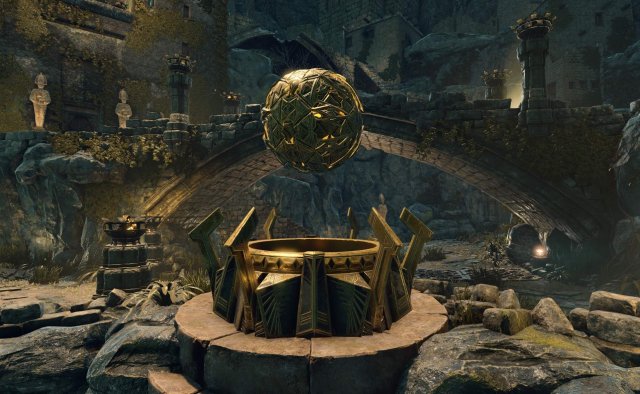
Soul Cage MagicSeteki’s golden spherical soul prisons contain the essences of the dead. They are markers for intense battles between the Strange Brigade and the undead horde. Upon their discovery Seteki calls upon her evil forces to protect them. Once certain waves of foes are dispatched the Soul Cage becomes exposed allowing team members to fire upon it, weakening its strength. To protect the souls it fires incendiary balls that can deal massive damage to whomever they come into contact with. The encounter is segmented into three stages with the final destruction of the Soul Cage allowing for the acquisition of any trapped souls and the end of the level.
Source: https://gameplay.tips/guides/2918-strange-brigade.html
More Strange Brigade guilds
- All Guilds
- Strange Brigade - Hidden Valley (Level Guide)
- Strange Brigade - Gameplay Tips
- Strange Brigade - All Collectible Locations Guide (Jars, Letters, Relics and Cats)
- Strange Brigade - Guide to Unlockable Weapons
- Strange Brigade - Horde Mode Guide
- Strange Brigade - Harbin's Dig Site (Level Guide)
- Strange Brigade - Guide to Score Attack
- Strange Brigade - Amulets and Special Weapons
- Strange Brigade - Characters: Passives and Amulets
