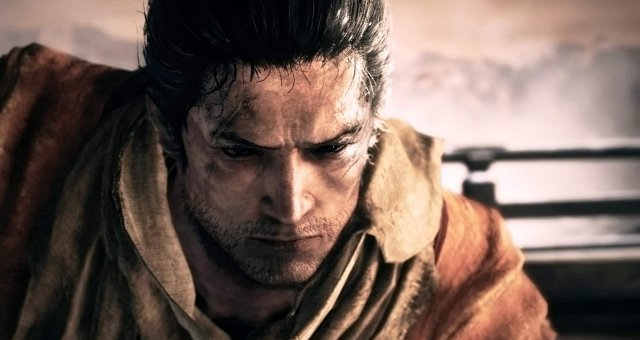
An extensive guide on which prosthetics to use with tips on how to get the most use out of each tool.
Guide To Prosthetic Tools
Overview
There are 30 Prosthetics in Sekiro and it isn't easy to figure out how to get the most out of each, this guide will rank them in their respective trees based on their effectiveness, I will explain which tools are the best and why, while listing off every combo possible. The niche situations in which certain tools can be used to greater effect will be listed as well. If you read the whole thing you get a money-back guarantee to become a based chad MLG shinobi with tricks up both your sleeves.
Shurikens
There are six shuriken-type tools in Sekiro, but they all function identically, you can throw them at enemies to interrupt their posture recovery animation or knock them out of the air if you're fighting enemies such as the Nightjar or the Glaived Monks. You can even use shurikens to close distances if you have the chasing slice skill, this alone is why shurikens should be your go-to tool against everything. The superior version in all situations is the Lazulite Shuriken since it deals the most damage while costing only one spirit emblem. The Phantom Kunai technically deals the most damage but costs two spirit emblems and since the damage is still laughable, it is not worth using over the Lazulite Shuriken or the Goughing Top. The Sen throw can be blocked unlike Lazulite, Phantom or the Goughing Top variant and as such is completely useless, since by the time you acquire it enemies will have a lot of posture AND it costs 2 emblems to use and it has terrible range.
Axes
The axe tree has four tools in it, you can use them to break shields or to spin and deal a large amount of posture damage. You can use the axe mid-air to remove the long wind-up animation, this can be used to counter sweeping attacks or to follow up a Shadowrush, you can also sneak in an unpunishable hit after a Mist Raven dodge. Each subsequent upgrade is strictly better in this tree, except Lazulite. The Sparkling Axe is ultimately the best, with its damage combined with its ability to set foes on fire, since setting enemies on fire stuns them, the Sparkling Axe deals significantly more Vitality and Posture damage than its counterparts. You can also use the axes along with your sword via the Fang and Blade skill for a nice follow-up strike.
Note: The Lazulite Axe is extremely effective against the Illusory Monk bossfight and makes illusions vanish similarly to a snap seed, in all other situations it is inferior however.
Spears
The spear type weapons have two variants, charge and cleave type. The wind-up of the cleave type leaves you vulnerable and as these two are useless, especially since situations in which you are surrounded by enemies are few and far between. The charge variant lets you rush at enemies for solid damage, draw them close or strip them of armor, you can even follow up spear stabs with a chasing slice or spear drags with a slash via the Fang and Blade skill. The Spiral Spear is uncontested as it deals the most damage and is otherwise the same as the other charge-type.
Note: The spears' drags deal massive posture and vitality damage to the Headless Ape bossfight when he is knocked to the ground after his overhead slash attack.
The Sabimaru
The Sabimaru is very straightforward, the Piercing Sabimaru is the only one in the tree which deals damage to enemies through their guard, making it strictly superior to the regular and Improved variants. The Lazulite version leaves poisonous mist behind your attacks, but since you usually use the Sabimaru to attack in quick succession, your foe will likely be poisoned either way and the Lazulite doesn't deal damage through guard, meaning the Piercing version is the winner. The end of the combo leaves you vulnerable, but once you upgrade the Sabimaru, you will be able to chain an infinite number of slices together as long as you use Kusabimaru after any slice before the 6th, making the tool much more effective.
Note: Sabimaru is extremely effective against the Okami in Fountainhead Palace.
The Umbrella
The umbrellas all function the same, one type giving you fire, the other terror resistance. Don't be fooled however, these tools are nothing more than a slightly easier way to deflect at the cost of one spirit emblem. They are a waste of your time unless you are struggling with the timing of your deflects. The purple variant is useful against the Headless, the Red against the Demon of Hatred, however you are better off sticking to your deflections and dodges, they are free and are faster. You can also use Projected Force with the umbrella, but this deals pitiful damage so don't bother.
Firecrackers
The firecrackers all stun the enemy, meaning you get free hits in. If you want to shorten the fight then they are your go-to tool, but if you want to have fun in the game I recommend you not use them at all. Viability-wise, the Long Spark is by far the best, it is a strict upgrade to the regular and Spring-Load version, since the spark lasts longer, the Purple Fume Spark makes a delayed spark but is also made obsolete for the same reason. You might as well stun immediately and with delay at the same time, instead of only with delay or only immediately. You can also follow up Firecrackers with a chasing slice, but since they require your opponent to be close and a chasing slice is overall less DPS than light attacks, this is pretty much useless.
Flame Vent
The flame vents are a bit different, the default one simply releases flame while the spring load version makes an explosion, Okinaga's Vent is strictly better since it has a flamethrower ability which the others lack. The Lazulite Flame, while incredibly effective against apparitions, doesn't set enemies on fire and as such is worse than Okinaga's in general combat. You can use Living force to apply a flaming effect to your sword, which immediately sets enemies on fire when paired with certain weapon arts, such as Spiral Cloud Passage. The Lazulite version applies the Divine Confetti effect to your sword, making it great against apparitions once again.
Note: Flames are useful against red-eyed enemies since they are stunned for an extended period.
Mist Raven
Mist Raven Feather upgrades are once again strictly better than their older versions, with Great Feather Mist Raven being the top-dog in the tree, it allows you to dodge enemy attacks even when knocked down, while setting them on fire and dealing massive vitality damage. You can teleport behind enemies to follow up with a chasing slice or above them to pair the Mist Raven with a hit from Kusabimaru if you have the Fang and Blade ability.
Divine Abduction
Do you like instantly killing enemies? Do you like lengthy animations which leave you vulnerable? I sure don't, but that is exactly which this tool does, making it the opposite of fun. You can instakill most enemies with this, allowing for a backstab to trigger your ninjutsus with, which can be fun, but you have the Vault Over skill which does the same for free. Double Abduction is a strict upgrade to the regular version, while Golden Vortex is exactly the same as Double Abduction but costs one extra emblem, it does give you extra items and sen however, which isn't completely useless if you haven't acquired everything in the game yet, it is a strict downgrade combat-wise. You can also use Living Force and Chasing slice with this tool, living force gives you the ability to trigger the effect if you missed the chasing slice, while the chasing slice itself makes you able to instantly follow up Divine Abduction's animation with the turn-around attack, getting rid of the vulnerable animation, it is a must have if you plan to use this tool.
Note: This tool instantly makes the Senpou Monks disappear.
Finger Whistle
The whistle has three variants, all of which are useless in general combat. You can lure one or more enemies with the Finger Whistle and Mountain Echo, you can also use them to turn beasts mad, which is once again generally useless but can make for fun situations in certain spots. You can also follow up the Finger Whistle with Projected Force, however, I can't for the life of me figure out what this does, it seems completely useless. The final variant, Malcontent can be used to make beasts crazy as well but it can also be used to stun demonic foes for an extended period, it falls into the same category as the Firecracers, it makes the fight shorter but is unintuitive and dull.
Personal Notes
Shurikens are your best friend and you will want to use them agains everything since they let you close the distance and keep the pressure on. The Sabimaru is a lot of fun to use and does a good chunk of damage with the poison and the piercing effect. The Loaded Axe and Spear are generally useless since you're better off swinging your sword, the Flame Vent is also useless unless you want to be fancy with Living Force, but it is a lot of fun to use the flamethrower. The umbrella is boring and bad but you look like a turtle when you walk around with it so it gets a pass. Mist raven is cool against virtually anything, use it often. The Whistle does nothing except turn some dogs on their owners and make a couple monkeys crap their pants. Divine abduction, Firecrackers and Malcontent are very lame and you're a casul if you use them.
- Use: Lazulite Shuriken, Great Feather Mist Raven and Piercing Sabimaru.
- Avoid: The other 27 prosthetic tools lmao.
Source: https://gameplay.tips/guides/7743-sekiro-shadows-die-twice.html
More Sekiro Shadows Die Twice guilds
- All Guilds
- Sekiro: Shadows Die Twice - How to Defeat Corrupted Monk (Boss Guide)
- Sekiro: Shadows Die Twice - How to Defeat Great Shinobi - Owl (Boss Guide)
- Sekiro: Shadows Die Twice - How to Defeat Guardian Ape (Boss Guide)
- Sekiro: Shadows Die Twice - World Map (Chart)
- Sekiro: Shadows Die Twice - Height of Technique XP Farm
- Sekiro: Shadows Die Twice - Early-Game Farm Guide (Hirata Estate / Estate Path)
- Sekiro: Shadows Die Twice - How to Defeat Demon of Hatred (Boss Guide)
- Sekiro: Shadows Die Twice - Gracious Gift of Tears Achievement / Trophy Guide
- Sekiro: Shadows Die Twice - How to Defeat Great Colored Carp (Boss Guide)
- Sekiro: Shadows Die Twice - How to Make Boss Fights Easy (Collection of Tips)
