Other Sekiro Guides:
- 100% Achievement / Trophy Guide.
- How to Defeat Gyoubu Masataka Oniwa (Boss Guide).
- How to Defeat Lady Butterfly (Boss Guide).
- How to Defeat Genichiro Ashina (Boss Guide).
- How to Defeat Folding Screen Monkeys (Boss Guide).
- How to Defeat Great Serpent (Boss Guide).
- How to Defeat Guardian Ape (Boss Guide).
- How to Defeat Great Shinobi - Owl (Boss Guide).
- How to Defeat Great Colored Carp (Boss Guide).
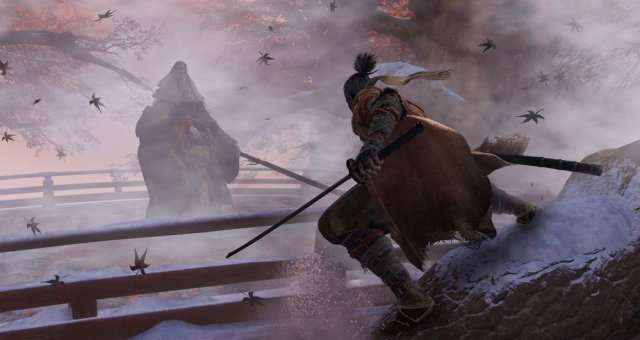
Corrupted Monk Boss Fight
This fight takes place after you reach the Fountainhead and try to move across the bridge.
The name of the game here is parrying. It'll take you a couple tries to get the rhythm of his attacks down but they aren't as bad as they seem, especially since you can Mikiri counter one of them pretty easily. However, bring some Spirit Emblems and Firecracker prosthetic with you for the cheese later.
- At the beginning, Monk will fly down onto the opposite end of the bridge as you.
You should take this time to move towards him. Be careful, though. He lets out a swipe from his blade upon him falling. It shouldn't deal any damage, but it'll stagger and you'll waste time. I'd recommend running, standing still to wait his swipe, then continue running to get a couple slices in.
Immediately following this, he will swing about five or six times. You can parry every single one of these and deal massive posture damage. Usually at the end of this combo, he'll send his weapon forward, which you can Mikiri counter for even more damage.
You'll want to do this the entire time. If you find an opening for a single slice, go ahead and take it, but you're really just looking out for those parries. He will have a slide ability that you can jump over. The animation of which is long enough for you to get two slices in.
He also has a jump and slam ability, which is also good for getting a couple slices in. But if you don't want to worry about any of that, just dodge to the best of your ability and parry when necessary. His posture bar doesn't really deplete that fast so be patient.
After First DeathblowOnce you deathblow him the first time, you can get a very easy deathblow right off the bat. Grapple to one of the above trees and watch the middle of the bridge. At some point while recovering from the last execution. He'll be sitting still. Just jump and deathblow him.
Second IterationThis is where the cheese comes in. While he's standing up from the second deathblow, position yourself behind him. Get three or four swings in then use your fireworks. Stun him to get another three or four hits in. Firework again. Continue this until his stagger bar is about max.
If you run out of Spirit Emblems, you can finish off the rest of him relatively easily but you'll want to watch out for a couple of things.
- Spit Fear: His right arm will sometimes shoot a projectile in front of him.
- Jumping Slice: He'll leap towards you, spinning his blade around rapidly.
The first one is super avoidable. The second one is blockable. When the former happens, get a few whacks in before stepping back. If the second happens, just wait until you parry one of his attacks of what for the Spit Fear for happen again.
After killing him, you'll have the achievement!
Source: https://gameplay.tips/guides/3974-sekiro-shadows-die-twice.html
More Sekiro Shadows Die Twice guilds
- All Guilds
- Sekiro: Shadows Die Twice - How to Defeat Great Shinobi - Owl (Boss Guide)
- Sekiro: Shadows Die Twice - How to Defeat Guardian Ape (Boss Guide)
- Sekiro: Shadows Die Twice - World Map (Chart)
- Sekiro: Shadows Die Twice - Height of Technique XP Farm
- Sekiro: Shadows Die Twice - Early-Game Farm Guide (Hirata Estate / Estate Path)
- Sekiro: Shadows Die Twice - How to Defeat Demon of Hatred (Boss Guide)
- Sekiro: Shadows Die Twice - Gracious Gift of Tears Achievement / Trophy Guide
- Sekiro: Shadows Die Twice - How to Defeat Great Colored Carp (Boss Guide)
- Sekiro: Shadows Die Twice - How to Make Boss Fights Easy (Collection of Tips)
