
🚔 RTC Traffic Management
Hi there, thanks for checking out my traffic management guide.
The purpose of this guide is to help you effectively manage traffic at the site of an accident.
This guide will cover the core areas, from arriving at the scene, closing the road, dealing with the incident and getting the traffic flowing.
Any feedback please leave a comment, it would be much appreciated. Thank you!
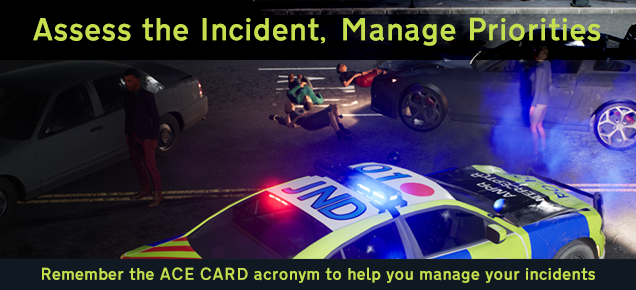
1. ACE CARD
Note: More intended for RP purposes. Feel free to skip this section if you're interested only in the mechanics of traffic management.
When arriving at the scene of an accident you have several priorities. They range from getting help through quickly to any injured parties, to clearing the carriageway, to investigating the incident itself.
Use the ACE CARD acronym to help you manage your incident priorities.
A - Approach - Approach the incident and stop traffic. Where possible you should approach the incident from the rear.
C - Caution Signs - Caution signs enable advance warning to other motorists and enable those approaching to safely navigate past the incident site. Cone tapers should be set up by police officers on scene to filter traffic through unobstructed lanes, and police officers should use their police vehicle to assist with lane closures while cone tapers are constructed.
E - Examine the Scene - Determine any hazards, determine the number of casualties, determine if additional emergency services are required (i.e. ambulance), and then plan access for those emergency services.
C - Casualties - Check early to ensure that all casualties have been located.
A - Ambulance - Ensure that free passage to the scene is maintained if an ambulance response is required.
R - Remove Obstructions - If there are any further obstructions on the scene (i.e. full road closure, casualties on the road) they should be addressed to ensure the carriageway can be opened. Note that vehicles involved in the incident should not be removed.
D - Detailed Investigation - You may now begin your detailed investigation-- interview witnesses, perform background checks and test involved parties for drugs, alcohol, etc.
2. Traffic Control - Create A Sterile Zone
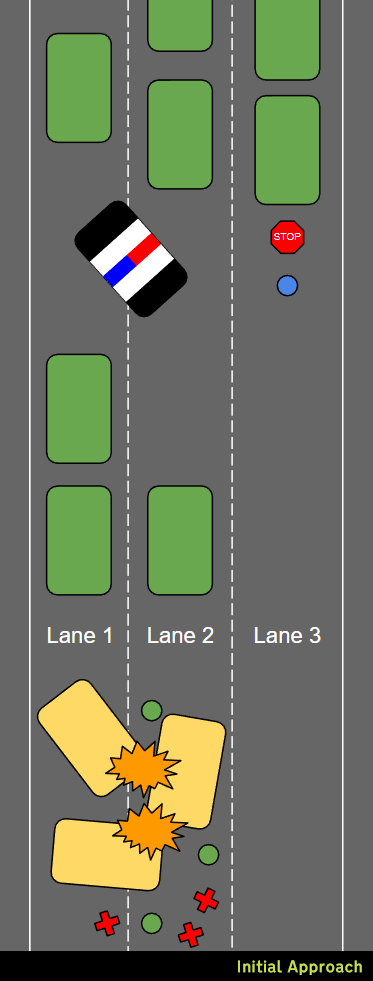
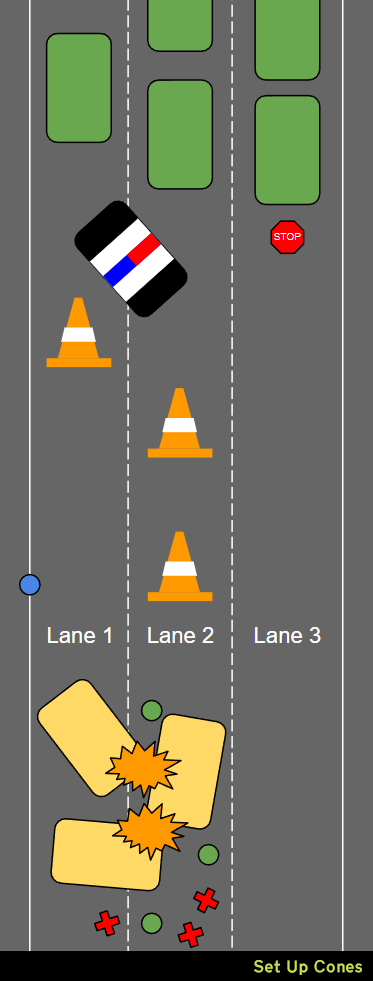
On your initial approach, you should approach the incident from the rear and look ahead to assess the incident. Your main priority here must be to close the road, either partially or entirely, to enable yourself to set up a sterile zone, where you can set up your caution signs and traffic control measures (cones to control traffic flow).
The diagram illustrates a typical RTC involving three vehicles on a three-lane carriageway. There are three casualties, as well as three drivers, totalling six involved parties.
Note how the police vehicle is positioned in the fend-off position to occupy Lane 1 and Lane 2, and how the police officer has ordered traffic in Lane 3 to come to a halt. This enables us to start setting up the perimeter of our sterile zone in which we will set up our cones. Make sure you position your police vehicle back far enough so that you have plenty of room to set up your traffic management solution.
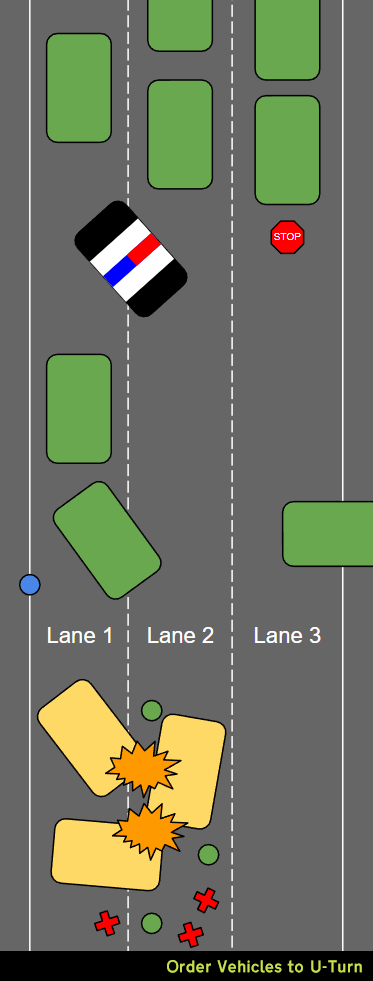
Note that some vehicles are stopped just short of the accident. Starting with the lane closest to the central reservation (Lane 2, in this case), these vehicles will need to be ordered to U-Turn out of the incident site.
3. Traffic Control - Get The Vehicles Moving
Now that you've got a sterile zone established, it's time to set up your traffic control measures.
At this point you may be wondering; what about the injured people who are laying on the road, that could very well be dying? Until you've established proper traffic control, and depending on how busy the carriageway is, effective traffic control measures may very well be the difference between whether the ambulance can reach the scene, or if it gets stuck in heavy traffic.
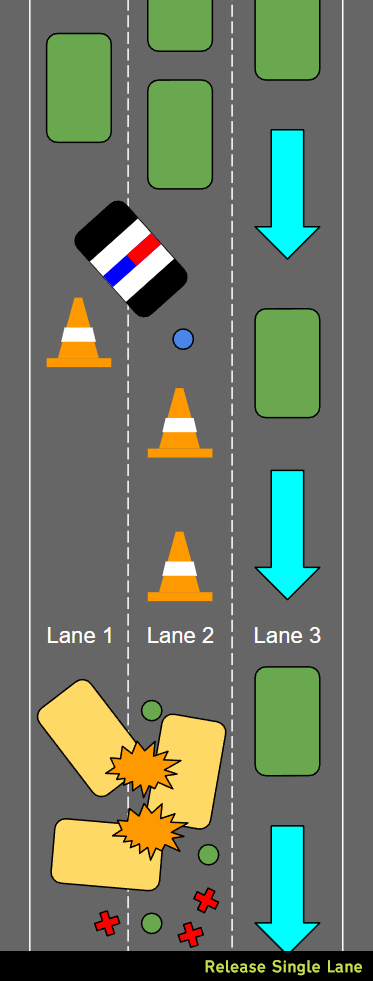
Here we set up our cone taper behind our police vehicle and keep the lane closed with additional cones. This gives us plenty of room to set down a cone without running in to placement too close to a vehicle problems. You should also angle the cones so that when a vehicle encounters it, it can easily filter from one lane over to the next, has room to drive forward and encounter the next cone, until finally reaching the flow-lane.
Once the cone taper has been set up, we release the lane of traffic that has no obstructions.
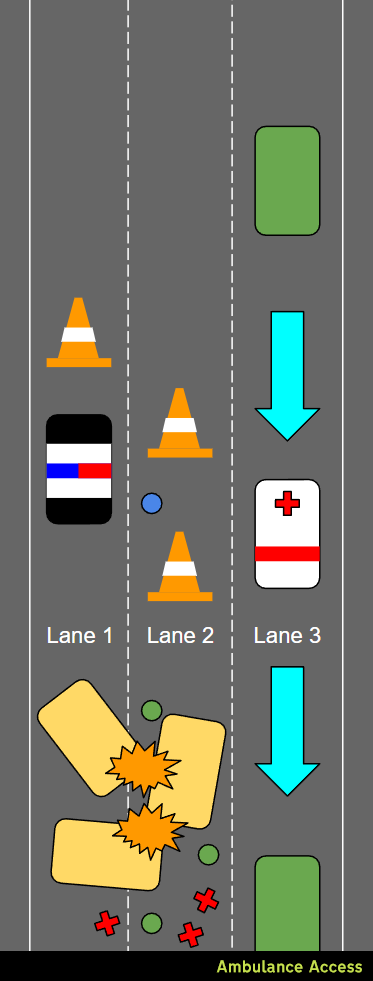
4. Traffic Control - Ambulance Attendence
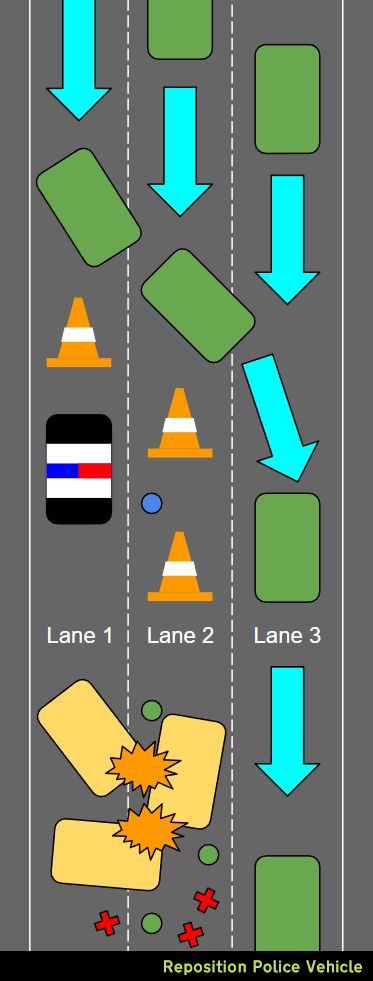
Now that we've got traffic flowing, it's time to reposition our police car inside our sterile zone, on the other side of the cone taper. This will free up the other two lanes and traffic in those two lanes will begin moving again. The traffic will naturally merge over toward the free lane as they encounter our cone taper.
Also note that our police vehicle is now positioned in-line with the road. You may choose to continue to position it in the fend-off position, however in-line positioning maximises the effect of our rear-facing lighting and positioning.
Now that the traffic is flowing, this will enable the ambulance to attend the incident without being held up in traffic.
Source: https://steamcommunity.com/sharedfiles/filedetails/?id=2844314035
More Police Simulator: Patrol Officers guilds
- All Guilds
- Police Simulator: Patrol Officers
- Police Simulator: Patrol Officers [HUN]
- Police Simulator: Patrol Officers
- Police Simulator: Patrol Officers; Handy Spreadsheet
- Infractions lies au stationnement : Guide pour Police Simulator: Patrol Officer
- Revised Frisk/Search Guide
- Player-Caused Accidents guide
- Police simulator: Patrol officers
- pistolet? paralizator?
- Accident Checklist