Example Mods And Modding Kit
Welcome to our Modding Guide!
To help you kickstart your modding career, we've put together some example mods and a Modding Kit.
Check out the Example Mods Collection in the Steam Workshop.
You should also take a look at the Modding Kit that includes:
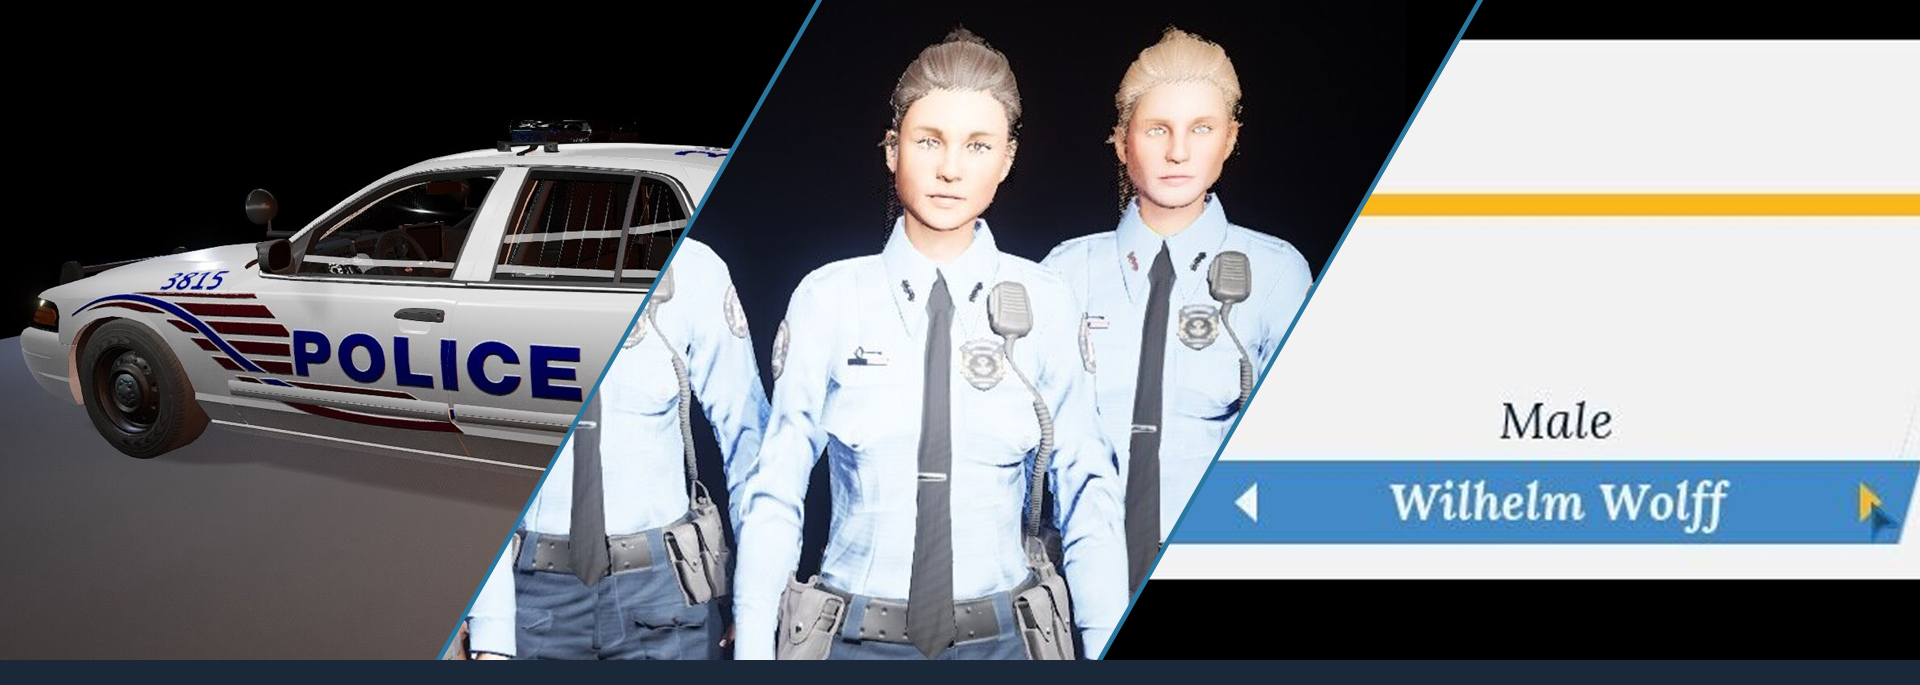
3D Models for police officer uniforms and the police cars (in FBX format)
Textures for police officer uniforms and the police carsTaking a closer look at the content of the example mods should help you in creating your own ones. After you have downloaded the mods, you can find their files here:
C:\Program Files (x86)\Steam\steamapps\workshop\content\997010
You will probably wonder what the different numbers mean when looking at the folders. Well, these are just the workshop numbers with the following content:
2780493511: Different Police Officer Uniforms
2780816249: Different Police Officer Names
2780823816: Different Patrol Car Skins
2782471905: Modding Kit
How To Create A Modpack
Your mod is ready? Now you need to create modpack! To create one, you have to provide the game with a certain file: “manifest.json”. Every modpack should be located in its own dedicated folder to avoid naming conflicts with other modpacks.
First, you have to create a dedicated mod folder (as a placeholder, we'll call it <ModDir> for now). Create a text file inside your mod folder and name it manifest.json (make sure the extension is actually a .json file and not .json.txt or the like. Enable showing file extensions[stonehearth.github.io] so you can see the actual format of the file).
Example:
<ModDir>/FancyMod/manifest.json <ModDir>/AnotherModButNotAsFancy/manifest.json
This manifest should contain metadata about the mod pack itself, like who created it, the description, the version etc. It also contains a definition of all features of the game that this mod pack wants to modify.
The folder is set up, the manifest.json has been created - now, open it with the text editor of your choice, and let's continue by filling everything in...
Let’s take a look at an example manifest.json:
{ "ModPackAuthor": "Aesir Interactive", "ModPackUrl": "https://aesir-interactive.com", "ModPackName": "Sabrina Watson Officer Pack", "ModPackDescription": "Changes the uniforms of female officers and the name of one officer.", "ModPackVersion": "1.0.0", "Overrides": [ { "OverrideKey": "FEMALE1_OFFICER_NAME", "OverrideValue": "Sabrina Watson" }, { "OverrideKey": "FEMALE_OFFICER_UNIFORM_TEX_DIFFUSE", "OverrideValue": "%MODPACK%/PoliceUniform_Female /T_PoliceOfficer_Female_PoliceUniform_D.png" }, { "OverrideKey": "FEMALE_OFFICER_UNIFORM_TEX_NORMAL", "OverrideValue": "%MODPACK%/PoliceUniform_Female /T_PoliceOfficer_Female_PoliceUniform_N.png" }, { "OverrideKey": "FEMALE_OFFICER_UNIFORM_TEX_ORM", "OverrideValue": "%MODPACK%/PoliceUniform_Female /T_PoliceOfficer_Female_PoliceUniform_ORM.png" }, ] }
The ModPackName field is mandatory. It will be used by the modding system to identify the mods defined in this pack. Try to give it a unique name that doesn’t conflict with other mod packs players might have installed.
The other fields are optional, but they provide the players using this mod with useful information.
What Are Overrides?
To create an override mod in your modpack, you first have to be aware of the things you can override in the game. All of these features will be identifyable via an “OverrideKey”. You can find a list of all available keys in the How to create Override Mods section of this guide.
Overrides always consist of a key and value. The key is used to tell the modding system what to override, the value is used to tell it what to override it with. So for example the OverrideKey "FEMALE1_OFFICER_NAME" is used to change the name of one of the officers. The
OverrideValue is replacing the default name of that officer when the mod is loaded.
Texture overrides must provide the texture as JPG/PNG/BMP file located in a subdirectory relative to the manifest.json. The OverrideValue is then used to tell the modding system where to look for that file, so it must contain the filepath relative to the manifest.json. These relative paths must always start with “%MODPACK%" as seen in the example above.
All additional files (like override textures) must be provided together with the manifest.json for other users. Just giving them the manifest.json without the referenced files will not work for them.
How To Create Override Mods
As explained above, you need to provide the game with an identifier of the feature that you want to override.
Important: Override Mods are only local and not synchronized through the network. In multiplayer, your partner will not see your overridden content!
Here is a list of all supported override keys:
Police Officer Names
OverrideKey OverrideValue Type & Example Description MALE1_OFFICER_NAME "OverrideValue": "James Ford" Replaces the name of officer Frank Miller MALE2_OFFICER_NAME "OverrideValue": "Hugo Reyes" Replaces the name of officer Danny Lopez MALE3_OFFICER_NAME "OverrideValue": "Jonathan Locke" Replaces the name of officer Noah J. Jones MALE4_OFFICER_NAME "OverrideValue": "Sin-Soo Kwon" Replaces the name of officer Aroon Saeli FEMALE1_OFFICER_NAME "OverrideValue": "Claire Littleton" Replaces the name of officer Emma Davis FEMALE2_OFFICER_NAME "OverrideValue": "Ana Cortez" Replaces the name of officer Mia Torres FEMALE3_OFFICER_NAME "OverrideValue": "Naomi Dorrit" Replaces the name of officer Olivia Smith FEMALE4_OFFICER_NAME "OverrideValue": "Sun-Hwa Kwon" Replaces the name of officer Ashley Cheng
Police Officer Uniform Textures
OverrideKey OverrideValue Type & Example Description MALE_OFFICER_UNIFORM
_TEX_DIFFUSE "OverrideValue": "%MODPACK%
/PoliceUniform_Male
/T_PoliceOfficer_Male_PoliceUniform_D.
png" Replaces the diffuse texture of all male police officer uniforms MALE_OFFICER_UNIFORM
_TEX_NORMAL "OverrideValue": "%MODPACK%
/PoliceUniform_Male
/T_PoliceOfficer_Male_PoliceUniform_N.
png" Replaces the normalmap texture of all male police officer uniforms MALE_OFFICER_UNIFORM
_TEX_ORM "OverrideValue": "%MODPACK%
/PoliceUniform_Male
/T_PoliceOfficer_Male_PoliceUniform_OR
M.png" Replaces the opacity/roughness/metallic texture of all male police officer uniforms FEMALE_OFFICER_UNIFORM
_TEX_DIFFUSE "OverrideValue": "%MODPACK%
/PoliceUniform_Female
/T_PoliceOfficer_Female_PoliceUniform_
D.png" Replaces the diffuse texture of all female police officer uniforms FEMALE_OFFICER_UNIFORM
_TEX_NORMAL "OverrideValue": "%MODPACK%
/PoliceUniform_Female
/T_PoliceOfficer_Female_PoliceUniform_
N.png" Replaces the normalmap texture of all female police officer uniforms FEMALE_OFFICER_UNIFORM
_TEX_ORM "OverrideValue": "%MODPACK%
/PoliceUniform_Female
/T_PoliceOfficer_Female_PoliceUniform_
ORM.png" Replaces the opacity/roughness/metallic texture of all female police officer uniforms OFFICER_HAT_TEX_DIFFUSE "OverrideValue": "%MODPACK%
/PoliceUniform_Hat
/T_PoliceEquipment_Hat_D.png" Replaces the diffuse texture of the police officer hat OFFICER_HAT_TEX_NORMAL "OverrideValue": "%MODPACK%
/PoliceUniform_Hat
/T_PoliceEquipment_Hat_N.png" Replaces the normalmap texture of the police officer hat OFFICER_HAT_TEX_RMA "OverrideValue": "%MODPACK%
/PoliceUniform_Hat
/T_PoliceEquipment_Hat_RMA.png" Replaces the roughness/metallic/ambient-occlusion texture of the police officer hat
Police Car Body Textures
OverrideKey OverrideValue Type & Example Description POLICE_CAR1_BODY_TEX_DIFFUSE "OverrideValue": "%MODPACK%
/PoliceCar1/T_PoliceCar1_Paint_D.png" Replaces the diffuse texture of the Cruiser POLICE_CAR1_BODY_TEX_NORMAL "OverrideValue": "%MODPACK%
/PoliceCar1/T_PoliceCar1_Paint_N.png" Replaces the normalmap texture of the Cruiser POLICE_CAR1_BODY_TEX_RMA "OverrideValue": "%MODPACK%
/PoliceCar1/T_PoliceCar1_Paint_RMA.
png" Replaces the roughness/metallic/ambient-occlusion
texture of the Cruiser POLICE_CAR2_BODY_TEX_DIFFUSE "OverrideValue": "%MODPACK%
/PoliceCar2/T_PoliceCar2_Paint_D.png" Replaces the diffuse texture of the Panther Z POLICE_CAR2_BODY_TEX_NORMAL "OverrideValue": "%MODPACK%
/PoliceCar2/T_PoliceCar2_Paint_N.png" Replaces the normalmap texture of the Panther Z POLICE_CAR2_BODY_TEX_RMA "OverrideValue": "%MODPACK%
/PoliceCar2/T_PoliceCar2_Paint_RMA.
png" Replaces the roughness/metallic/ambient-occlusion
texture of the Panther Z POLICE_CAR3_BODY_TEX_DIFFUSE "OverrideValue": "%MODPACK%
/PoliceCar3/T_PoliceCar3_Paint_D.png" Replaces the diffuse texture of the Gladiator 6 POLICE_CAR3_BODY_TEX_NORMAL "OverrideValue": "%MODPACK%
/PoliceCar3/T_PoliceCar3_Paint_N.png" Replaces the normalmap texture of the Gladiator 6 POLICE_CAR3_BODY_TEX_RMA "OverrideValue": "%MODPACK%
/PoliceCar3/T_PoliceCar3_Paint_RMA.
png" Replaces the roughness/metallic/ambient-occlusion
texture of the Gladiator 6
How To Upload Your Mods To The Steam Workshop

Step 1: Download SteamCMD
SteamCMD is the official command line tool from Valve that needs to be used to publish workshop content.
Visit https://developer.valvesoftware.com/wiki/SteamCMD#Windows and download the latest version of SteamCMD
Extract the downloaded package as described, for example in D:/SteamCMD/
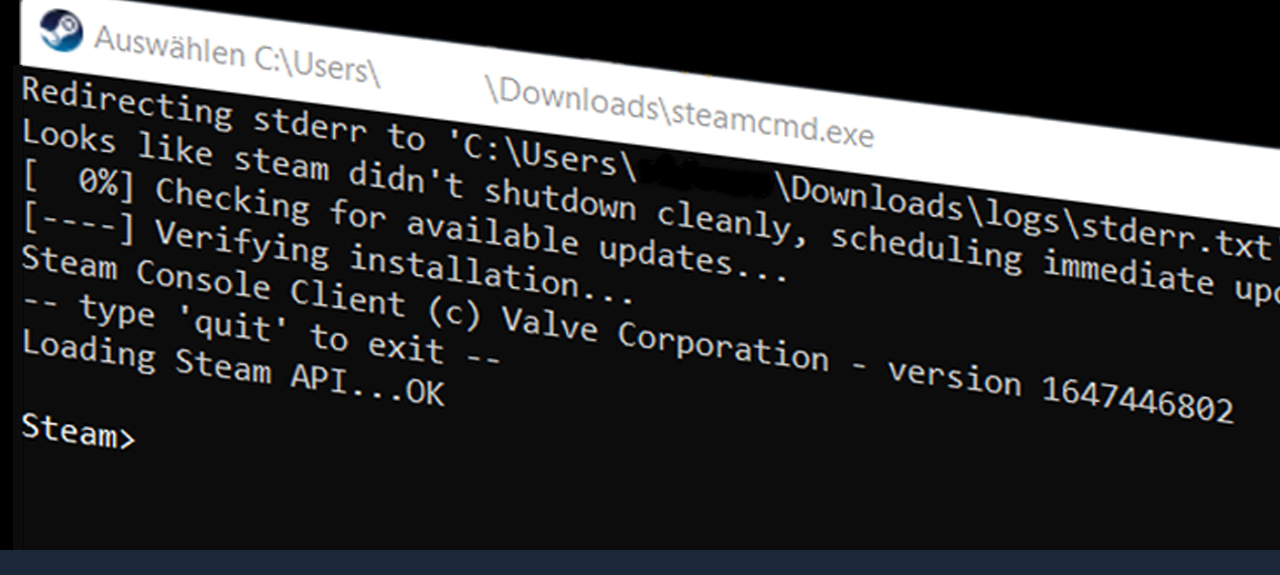
Execute the steamcmd.exe file once. This will start the auto-updater and download all required files automatically.
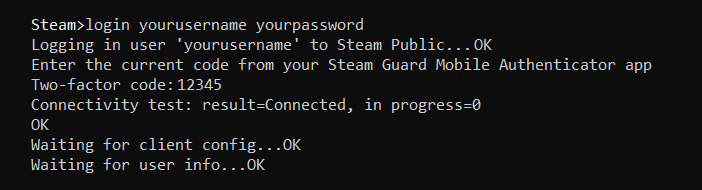
Make sure it works. Start steamcmd.exe and enter login <myLoginName> <myPassword>.
This is what the SteamCMD should tell you
If you use Steam Guard, you may need to enter your authenticator code behind the password like:
login <myLoginName> <myPassword> <authCode>
If successful, it should look like this
If you receive other errors, please consult the Known Issues section of the SteamCMD documentation or the Modding Troubleshooting section at the bottom of this guide.
Step 2: Create app_config.vdf
The app_config.vdf file is used by SteamCMD to determine which game and workshop item is being targeted when publishing a mod.
Create a new folder in your SteamCMD directory (from Step 1) called publish
Create a new text file in that directory called app_config.vdf and open that file with a text editor, for example with Notepad++
Put the following lines into your newly created file:"workshopitem" { "appid" "997010" "publishedfileid" "0" "contentfolder" "D: \\SteamCMD\\publish\\content" "previewfile" "D: \\SteamCMD\\publish\\content\\preview.jpg" "visibility" "0" "title" "The title of your mod" "description" "The description of your mod" "changenote" "1.0.0" }
A quick explanation about the stuff you need to fill in:
“appid” is the id of the game in Steam. For Police Simulator: Patrol Officers, that is 997010
“publishedfileid” is the id of the item/mod that you want to update. If you want to upload a new mod, leave this empty or use the id 0. If you already uploaded a workshop item that you want to update, you have to enter the id of that item here.
“contentfolder” is the directory whose content will be uploaded when publishing.
The remaining fields are optional and can also be modified in your Steam client:
“previewfile” is the filepath to a preview image for your workshop item. This should be a small PNG or JPG. If the image file is too big, the upload might fail. This image will be displayed on the Steam Workshop page of your mod.
“visibility” is a number that represents the visibility of your item
“0” = public
“1” = friends-only
“2” = hidden
“3” = unlisted“title” is the title of your mod
“description” is the description of your mod
“changenote” should be used to describe what your upload did. You can enter a version number or a change description for updated mods.
Step 3: Prepare Content to Publish
“Content” means the actual mod files that you want to publish. These include the manifest.json and any additional resources like textures.
Create a new folder in your SteamCMD/publish directory (from Step 2) called content. So in our example that would be D:/SteamCMD/publish/content
Put all the files your mod pack should contain into this folder. The manifest.json (see further above) should be placed directly into the content folder. Other resources can be put into subfolders. In case you reference additional resource files in your manifest.json, make sure the relative paths from the manifest to these files are still correct!
Let us summarize what a folder structure from our example could look like:
D:/SteamCMD/
steamcmd.exe
publish/
app_config.vdf
content/
manifest.json
SomeOverrideTexture.jpg
preview.jpg
Step 4: Publish Content
Publishing your content means that your content files will be uploaded to the Steam workshop and a workshop item will be created (or updated) for your Steam profile.
Important: In case this is the first time you publish to the Steam Workshop, you might have to agree to the workshop agreement.
Start the steamcmd.exe (from Step 1)
Enter the following command and replace the placeholders inside <>. You may be prompted to enter your 2FA code. Otherwise, enter the code behind your password.
login <myLoginName> <myPassword> +workshop_build_item publish /app_config.vdf +quit An alternate way would be not to put the commands all at once but step by step:
login <myLoginName> <myPassword> [enter] workshop_build_item publish/app_config.vdf [enter] quit [enter] Wait for the upload to be completed. If any error occurred, please consult the Known Issues section of the SteamCMD documentation or the Modding Troubleshooting section in this guide down below.
Step 5: Check Your Workshop
Open your Steam client, click on your user profile and check out Workshop Items
Your new item should show up here. If not, you might have to restart your Steam client or wait a few minutes
Or visit the following page: https://steamcommunity.com/sharedfiles/filedetails/?id=%3Cpublishedfileid
Your <publishedfileid> was written into the app_config.vdf file when the upload was successfulYou can change title, description, images, videos, links and visibility of the mod in there.
Download Mods From The Steam Workshop
Visit the Police Simulator: Patrol Officers Steam Workshop.
Find a mod you like and subscribe to it. Make sure your Steam client actually downloaded the files from the mod.
You can manually check if the files are present by looking into your Steam library in the explorer. Visit <PathToYourSteamLibrary>/steamapps/workshop/content/997010/. When you see sub-folders with files in there, you are good to go.
Troubleshoooting
Subscribing mods in the Steam Workshop does not download them
Make sure your game folder is named “Police Simulator Patrol Officers”. If you are one of the very early testers, your game folder might still be named “Project Bavaria”. If that is the case, delete the game folder and re-download the game through the Steam client.
You can check if workshop items were downloaded if the following folder exists and is not empty:
<PathToYourSteamLibrary>\steamapps\workshop\content\997010
Error when uploading mods to the Steam Workshop: Login FAILED (Invalid Login Auth Code)
This can happen when your Steam Guard is set up to send you verification codes through e-mail. It is recommended to use the mobile authenticator.
You can try to put the authenticator code behind your password when entering the upload command.
Error when uploading mods to the Steam Workshop: ERROR! Failed to update workshop item (Failure)
You may experience this the first time you try to publish to the Steam Workshop. In that case, you have to agree to the “Steam Workshop Agreement”. You can do that in your Steam client by visiting your profile content.
If you already agreed and still receive the error, please consult the workshop_log.txt file in your SteamCMD/logs folder for more information.
Source: https://steamcommunity.com/sharedfiles/filedetails/?id=2778896763
More Police Simulator: Patrol Officers guilds
- All Guilds
- Police Simulator: Patrol Officers
- Police Simulator: Patrol Officers [HUN]
- Police Simulator: Patrol Officers
- Police Simulator: Patrol Officers; Handy Spreadsheet
- Infractions lies au stationnement : Guide pour Police Simulator: Patrol Officer
- Revised Frisk/Search Guide
- Player-Caused Accidents guide
- Police simulator: Patrol officers
- pistolet? paralizator?
- Accident Checklist