
A full detailed, step-by-step walkthrough to accomplish the Lone Traveler achievement with Tressa.
Other Octopath Traveler Guides:- All Information (Weapons, Skills, Dungeons, Bosses and More).
- Interactive Map (Shrines, Cities, Caves, Ruins and Catacombs).
- How to Beat Managarmr Easily.
Important Notes
- Be wise and careful when using job points.
- The only job subclasses you’ll need are: Hunter, Dancer, Cleric and Scholar.
- By the end of this walkthrough, you should have visited all 4th tier towns in Orsterra, except for Wispermill, that one is not necessary at all, since people don’t talk unless you do Ophilia ch.4.
- The only ultimate skill you’ll need to learn on this journey will be Aelfric’s Auspices. To get any other would mean to spend a lot of time farming unnecessarily.
Chapter 1
Note: As you read this section, consider reading "Ch.1 important task” subsection. Keep the same for the next chapters.
Yeah, you’re Tressa Colzione, a young merchant aspirant… You start on Rippletide. That is all known already. Just move towards path of Maiya and pick up every treasure chest you find on the way. Fight every battle you start also, you’ll be level 5 before reaching Mikk and Makk, probably. Learn Tradewinds.
Ch. 1 Important Task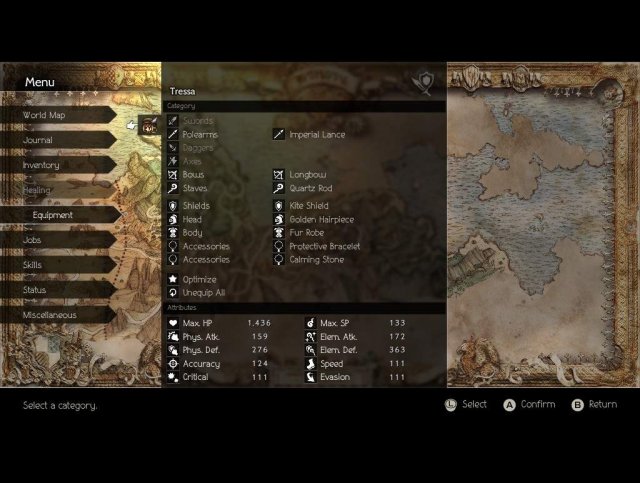
- Collect 4 to 8 soulstones. Do not use them. Save them for Chapter 2 section. There is an old woman at the south of Rippletide that sells you 4 soulstones.
Chapter 2

Note: In this part of the walkthrough you’ll start feeling that you’re playing Dark Souls. Dying will be normal and even frequently, so don’t worry. You’ll move to further places you’re not supposed to go yet. The game autosaves whenever you enter a different place, and even if so, remember to reach the save point at the middle of any route or cave. That might be a useful checkpoint if you couldn’t reach a wanted place.
Now we must head to Quarrycrest and stop Morlock and Omar’s greedy plans to take every treasure from the hard-worker people of this town. You’ll need to become level 17 at least to do fine at beating them with Tressa alone… At this point you’ll realize how hard can be to play with only one character, and even you’ll ask yourself, how can you get pass this area in no time.
First, you should try wandering around the 1st tier routes. Find and kill caits. They only have 4HP, so you only need to use 2 soulstones to finish them. 1 cait will boost many levels, so that should be enough.
Save some job points, for now. Try getting a decent armor (buy from any shop). Something like this:
(Don't pay attention to the Imperial Lance)
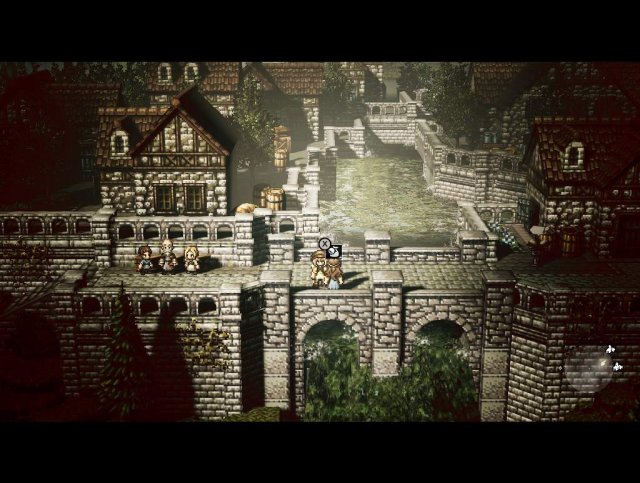
What you must do then, is to head to West Noblecourt Flats, where you’ll get the Scholar subclass. Do not fight at all. It’ll be a big waste of time and effort, as most enemies cause status changes, such as terror or sleep. Bring potions, have some luck fleeing and save at the save point in case you die before reaching the scholar shrine.
Use your previously saved job points to learn skills until you get "Evasive maneuvers” (Actually, you need only 130jp to get it. Not hard at all). With this, you’ll have it easier to reach even 4th tier places. Remember to enter in every town you reach from higher tiers, as that can provide you fast traveling to these places later. By doing things this way, you might die a couple of times, but eventually, in few minutes, you’ll be able to reach the most important place for you: Grandport.
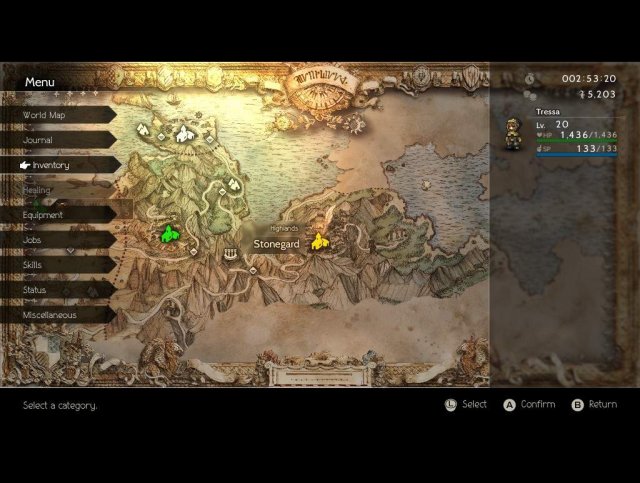
(Before heading to Goldshore, I went to Stonegard)
Now you’re where you’re supposed to finish your journey later. Here you’ll be able to get the best equipment for Tressa at the moment (and probably for the rest of the walkthrough). The first issue will be the money.
How you’ll get the necessary money in no time? Easy. You’ll have to reach for specific treasure chests that contain big amounts of money. I recommend heading to Everhold, the same way you reached Grandport. From Everhold, move to the Shrine of the Runelord. In here, you can get a chest containing 50k leaves.
(From the entrance, move to the save point, then to the right at the bottom for 50k leaves).
Right after that, move to Maw of the Ice Dragon. There you can find another chest, down the ramp near the 3rd torch from the entrance, on the right. This time, it has 30k. If 80k leaves are not enough for you, then go back to Grandport. Back at the end of the Bazaar, you can find 2 chests containing 25k + an expensive relic to sell.
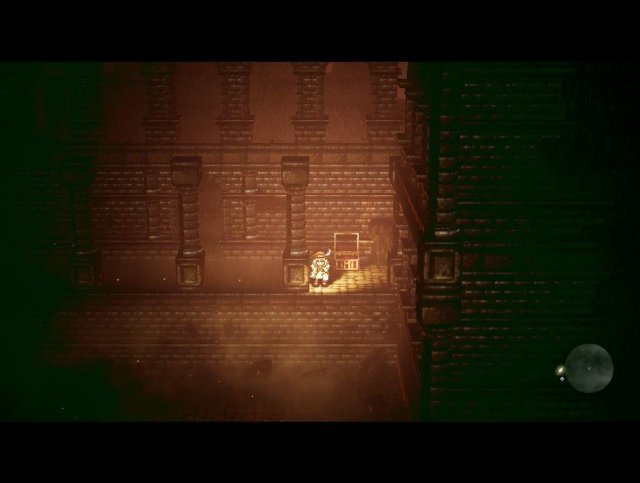
With +100k leaves now, you should be able to buy a good evasion setup for Tressa. With it you’ll be able to evade most of attacks from Omar, and from 2nd and 3rd tier area enemies, and deal very nice damage to everyone by casting elements.
On your way to fight the boss of this part, inside the manse, you can get a chest containing 6k leaves and a conscious stone. Equip it, since it might be very useful against Omar’s special move (in case it lands it successfully on you). Again, check "Ch. 2 important tasks” for further information.
 Ch. 2 Important Tasks
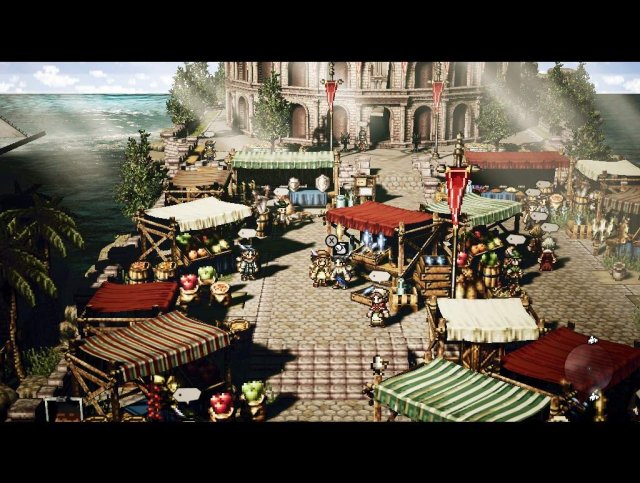
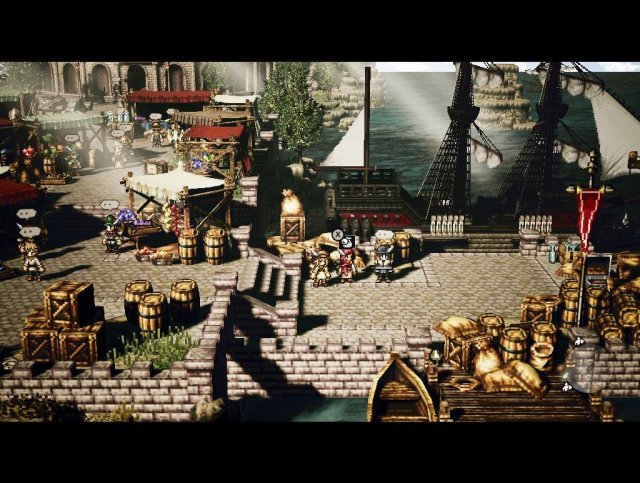
- The evasion setup for Tressa is: Rune Glaive, the only lance you'll buy in the whole journey. Not only is the most powerful lance in terms of elem. Atk, it also adds evasion. Ethereal Dancer Garb, which is the armor with biggest evasion stat of the game. These two items can be bought at Grandport's Market. Elusive shield and Silent Bandanna. Both can be bought at Saintsbridge.
(The seller of the Rune Glaive)
(The seller of the Ethereal Dancer Garb)
(The seller of the Elusive Shield. The Silent Bandanna can be bought at the armory)
- Buy Dragon's Scarf from Marina at Rippletide
- The following screenshots show up the exact treasure chests and sellers that provide you the money and the equipment, respectively
- Inside Morlock’s Manse, in the front half, you can find 2 treasures containing 6k leaves and a conscious stone. Equip the stone, since I might help you in case Omar lands you his special attack.
Chapter 3
Now on, it’ll start getting more challenging. The next foe will be the venomtooth tiger (now on VT). This damned creature had me a hard time for a moment, as I fought him depending a lot on rng.
I didn’t used hired help at all. I took another way to finish it, which can be more easily if you do it right (thing I didn’t do at that moment).
But first things first. You need to reach up certain level to deal with this beast. (Check "Training/Farming at Forbidden Grotto” section)
You’ll require to farm jp to get some fundamental skills to fight VT, and at least have Tressa with 2100HP, or more, which means to train her up to lv. 31 approximately.
Now the boss. Here is a quick preview:
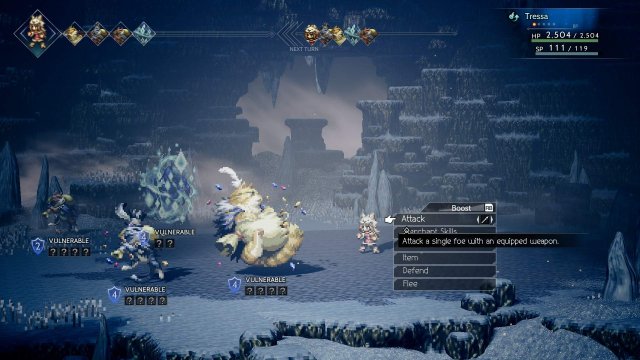
- HP: 53,661
- Weaknesses: Lance, bow, fire, light
- Shield: 6, 8 (after first break), 10 (2nd break and no more)
Skill set (recommended):
- Patience (from hunter): having two moves within a turn can be pretty useful.
- Eye for an eye (from dancer): helpful in order to get the tiger knocked faster.
- Elemental Augmentation (from scholar): A little power-up to bring higher damage to the tiger.
- Hang Tough (from merchant): You never know when VT can land you its venom fang. It is very dangerous.
Subclass: Scholar
Accessories: Antidote Stone, Dragon’s Scarf
The Strategy: Defend, to prevent VT having 4 moves in a row, load BP, do normal attack to weak his shield points, cast fire storm at maximum when KO’d. You’ll deal it about 4.5-5.5k dmg per cast, maybe more. Use healing grapes(M) to keep your life points over 1700, at least. Spare some large soulstones if you have him KO’d already, and you don’t have enough BP (via Patience). In some minutes you should finish him.
Ch. 3 Important Tasks- Equip cleric’s Evil Ward as it might save you in case you can’t escape a fight and you can get killed within one turn. It can help you more if you’re roaming in 4th tier areas. The evasion build becomes almost useless here.
- Get Thunderstorm Amulet. It is fundamental to have it equipped if you’re training in the cave area, as it can make thunder elementals useless. Thunderstorm Amulet reduces electric damage to 0.01%, which is something rad. You can find it, near Duskbarrow, in moldering ruins, almost by the end of the dungeon. I really suggest bringing Evil ward here. Check the screenshot to know which treasure chest is containing it.
(Almost at the bottom, you can find this amulet)
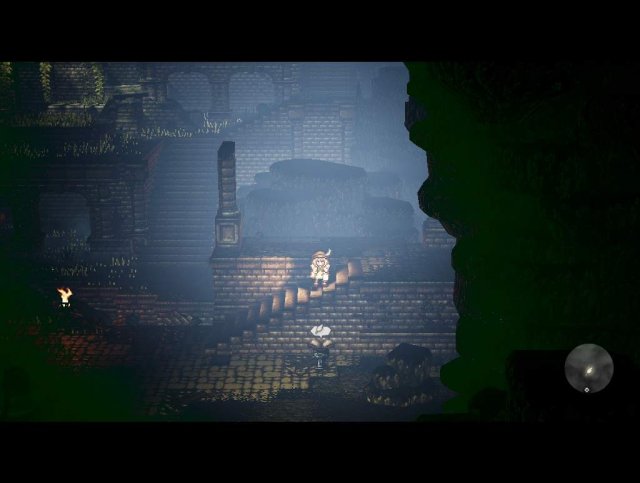
- Get Antidote Stone. You can find one near the entrance of The Hollow Throne, in West Noblecourt Flats. Just head straight to the stairs you see in the screenshot below. VT can poison you with almost any attack he does and remember that he can even do true poison which can remove you BP and SP, too. A must-get.
(Move to the right, then stairs down you should the chest containing it)
- Farm a lot of money (Remember to check the "Farming money faster” section).
- If you’re not feeling lucky against VT and he is landing you many attacks consecutively, consider finding around evasive nuts to feed Tressa.
Training / Farming At Forbidden Grotto
Note: Remember to check the "Farming money faster” section before doing this, too.
Here you can train in both forest area, or inside the cave. It’s up to you. At the beginning I suggest training in the cave, specially because you can kill vampire bats, which provide a lot of experience and jp without much effort. Stay in your scholar subclass. They don’t have much HP and only hold 1 point on defense. Kill them all with Ice. You can also find blue twin snakes. They are weak to fire.
The only issue is that in this cave you can easily find lightning elementals, which can be absolutely annoying if they don’t let you escape (as they deal 600-900 damage per each move they do, event resulting to get you killed by the turn you decide to flee). The Thunderstorm Amulet reduce that damage to almost 0, literally.
This place is nice to level up to lv. 35-38
Chapter 4
Now the VT is dead. It’s time to head for the final performance. The next challenge is: Esmeralda (the runic beauty). Sincerely, at the beginning I had no idea on how to finish her, but fortunately, some guy found the key to defeat her in which is the fastest way, I think.
First, fast travel to Grandport, change the evasion build, for armor. Equip the highest amount of armor you can. You’ll need at least over 880 armor to resist Esmeralda attacks better.
Get revitalizing jams. This will be a key item you’ll need in your final boss battle. Train to level up, get a lot of money and enough jp for the skills you'll equip. For training, I extremely recommend you move to Maw of the Ice Dragon (Check "Training/Farming at Maw of the Ice dragon” section).
Once you have 3200hp or more (reach lv. 41), you should be ready to fight.
About Esmeralda:
- HP: 96,450
- Shield: 4, 6, 8
- Weakness: has 3 sets. I won’t show them all. Not necessary. Just have lance when she has resistance of 4, and 8. Switch to bow during first KO’d turn, as she’ll deal Five Strikes technique and it can help you a lot to weaken her faster. Switch back to lance during second KO’d turn.
Skill set:
- Persistence: It will extend one turn your augmentations.
- The Show Goes On: It will extend another turn your augmentations.
- Saving Grace: To prevent Esmeralda’s heavy damage to kill you. Each blade attack, for example, will deal you +2000 damage
- Eye for an Eye: To counter attack. Very helpful to break Esmeralda’s shield to zero.
The Strategy: This can be very tricky and complicated if you don’t follow the steps correctly. I will post a video below. In summary, all I can tell you is that you should be careful to know when to use Energizing pomegranates (L), Refreshing Jams and Revitalizing Jams. Use eye for an eye to weaken the boss’ shield.
Select Cleric subclass before starting. Cast Aelfric to get 5 turns of double cast. Spam sidestep, and once you get to knock down Esmeralda and have 5 or more evades remaining; Aelfric and BP for maximum charge, cast veteran soldiers from hired help. You’ll have to do this twice while having Aelfric. Doing it thrice would be an overkill, since you do about 35k damage pest cast, so the 3rd time just cast it without cleric’s ultimate.
If you do all as seen on the video, that should be a wrap. The Lone Traveler achievement will be finally yours.
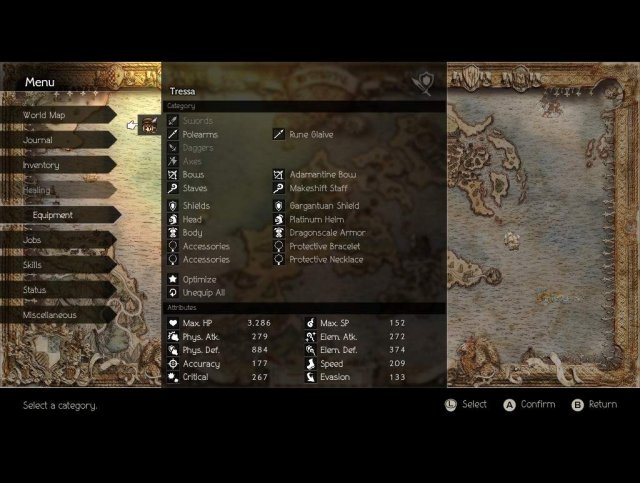
Ch. 4 Important Tasks- Get a heavy armor build, as seen on the screenshot below:
(You can try getting between a Adamantine bow, or a Yeti's longbow, anyone. If you have more money to spare, change Gargantuan shield for Forbidden shield. Forbidden shield will reduce the damage of the rune blades by 200, which can be a lifesaver)
- Retrieve at least 5 revitalizing jams, 5 refreshing jams and 5 large pomegranates. You can get revitalizing jams by buying to people or looting chests at secret job shrines and 4th tier towns.
- Have at least 90k leaves before you battle Esmeralda.
- Pick all the stat-boost nuts you can, check once more where to find them all
- Get one calming stone and equip it while training at Maw of the Ice Dragon. You can find one at Quicksand Cave.
- Get and equip at least one Protective Bracelet and one Protective Necklace. With these two accessories you have +130 def/elem. Def. You can find a bracelet in Goldshore, and a Necklace in Marsalim. Both by buying them to people.
Training / Farming At Maw Of The Ice Dragon
Note: Walk around the entrance, farm money, too. Remember that you’ll need money for last boss.
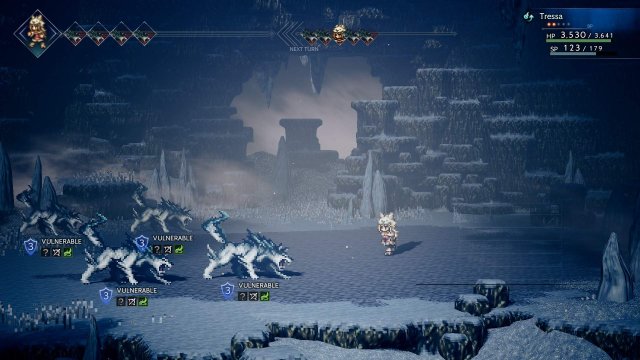
This area is very special since it commonly spams out War Wolves and Snow Leopards, and the 3 kinds of caits sometimes, too! It’s all easy to farm here, since the felines have low shield resistance and all of them can get KO’d easily by casting Arrowstorm. You’ll need to become hunter for this.
War Wolves are also weak to wind element, so one Tradewinds casted at maximum should be enough to even kill them in one turn.
Remember to bring your armor build, evil ward and Dragon’s Scarf, to prevent depending on use inspiriting plums.
Equip Calming Stone, too. War wolves can use Horrific Claw. Prevent fighting ice elementals and drakes, as they can deal powerful ice attacks. I don’t suggest replacing Dragon’s Scarf with one Ice Amulet. Just flee these fights.
Farming Money Faster
As you know, Tressa can pick up random amounts of money almost each time she visits a different place. In case you’re training at Forbidden Grotto or in Maw of the Ice Dragon, you can reset her passive each time you start a battle. Either you decide to fight and kill your enemies, or just flee, the passive will work the next time you go out of the cave. Just go out and return. In that way, in Maw of the Ice Dragon you can get between 400 up to 4300 leaves each time you move to south Northreach route. Besides, remember that you can always equip "Grows on trees” passive which can be a plus when fighting enemies. Basically, with Tressa you hardly never run out of money, so make good use of this knowledge.
"These unfortunate souls become a blessing, hehe"
Stat-boost Nuts Locations
Just like the wise Cyrus Albright says, knowledge is power and it is something to be shared among all people
I'm just passing this extra information here (see the link below). It shows with high detail where to get every Stat-booster found in the game. This can be a useful source for you to save some time and find these items to upgrade Tressa. Please note that you won't be able to get them all since you'll require the skills of the other travelers.
Open up the following link, in case you need this information.
Source: https://gameplay.tips/guides/4922-octopath-traveler.html
More Octopath Traveler guilds
- All Guilds
- Octopath Traveler Guide 10
- Octopath Traveler - All Information (Weapons, Skills, Dungeons, Bosses and More)
- Octopath Traveler - How to Beat Managarmr Easily
- Octopath Traveler - How to Unlock Protagonist (Active Party Early)
- Octopath Traveler - Collector Achievement Guide
- Octopath Traveler - How to Unlock FPS
- Octopath Traveler - Interactive Map (Shrines, Cities, Caves, Ruins and Catacombs)
- Octopath Traveler - Tips and Tricks for Getting Started
- Octopath Traveler - Unlocking Starting Character from Party (Fixed)
