
Steps To Achieve The 100%
To achieve 100% in the game you need to do the following things:
Complete all Endings
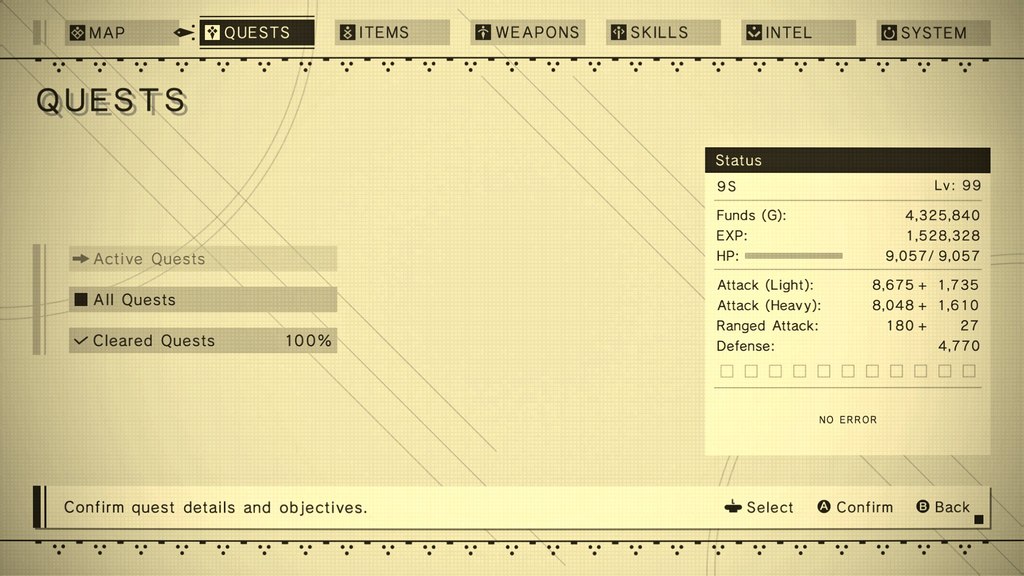
Complete all Quests
Acquire all Achievments
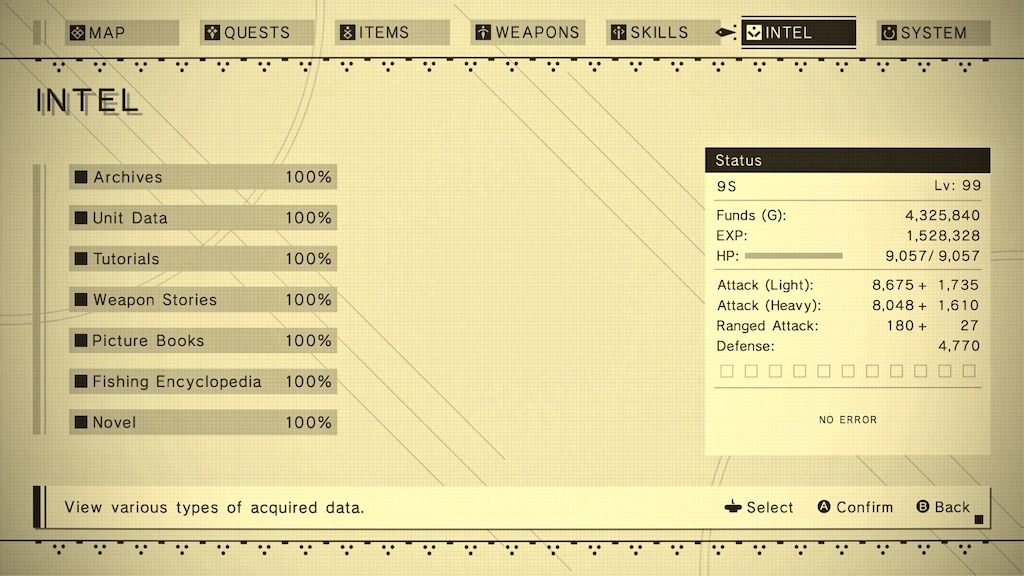
Acquire all Intel:
Meet / Destroy one of each Enemy-Types
Find all the Archives and Novels
Find all Picture Books
Catch all Fish in the Game
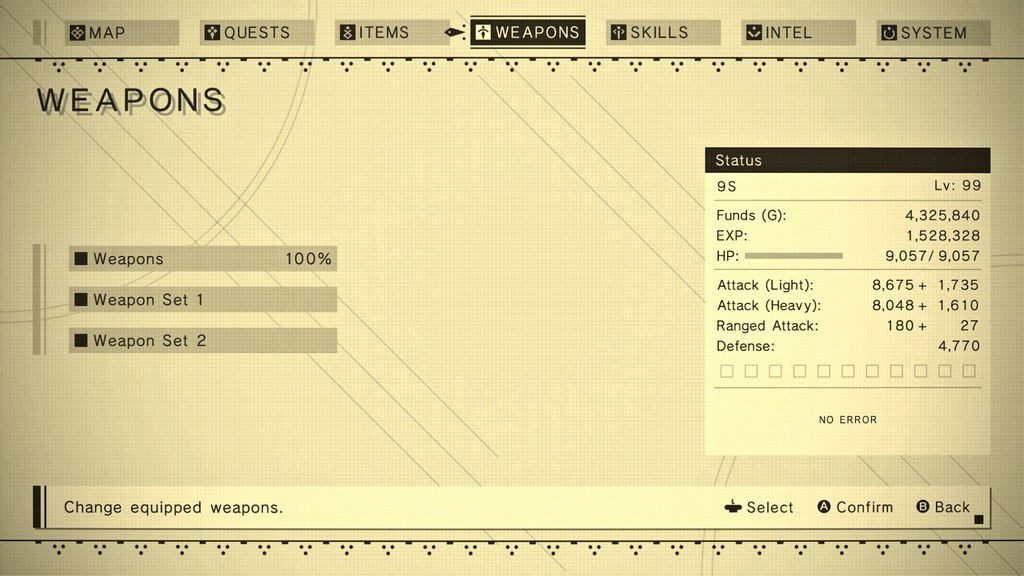
Find all Weapons and upgrade them to Level 4
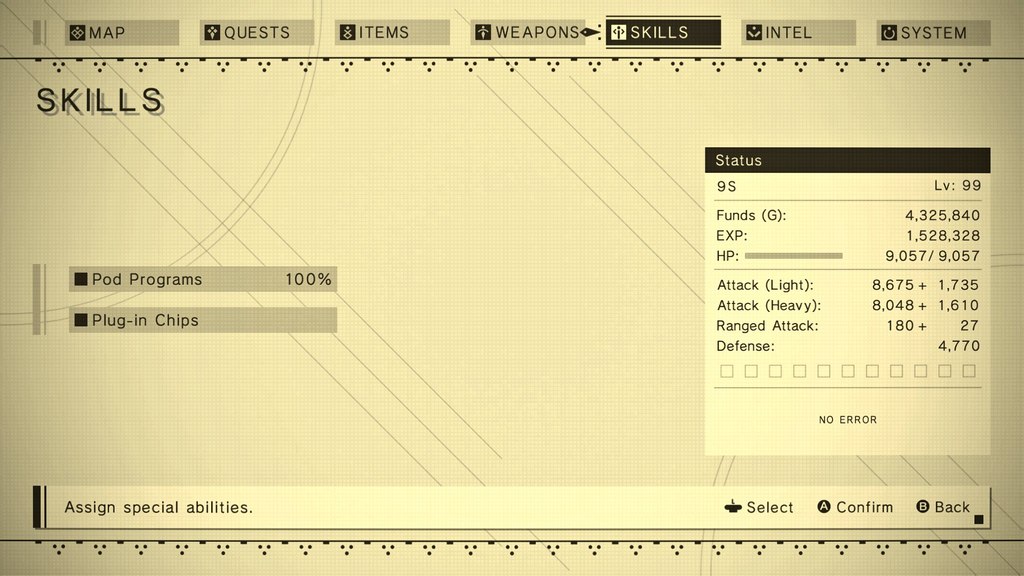
Find all Pods and upgrade them to Level 3
Find all Pod Programs
Sacrifice your Savefile (optional)
Endings
Here you can find all Endings and how to get them, use chapter select to get them the quickest way
Ending A: flowers for m[𝐀]chines
Play through the game for the first time and complete all of the Main Story Quests.
Ending B: or not to [𝐁]e
Play through the game for the second time as 9S
Ending C: meaningless [Ⅽ]ode
Play through the game for the third time and pick A2 in the final battle
Ending D: chil[𝐃]hood’s end
During the final boss battle in Ending Ⅽ, choose 9S
Ending E: the [𝐄]nd of yorha
Repeat the final boss battle from Ending Ⅽ and complete the credit minigame.
You can sacrifice your savefile here, however it will delete all of your savefiles
Before trying to achieve any of the other endings you should always save as all of the following endings put you back to the main menu screen without saving first
Ending F: mission [𝐅]ailed
[Ch. 01-03_2] After Engels knocks 9S onto his back, fail to repair your system by letting the timer run out.
Ending G: hun[𝐆]ry for knowledge
[Ch. 01-01_2] When you get control of 9S for the first time, walk to the crane and neglect the mission.
Ending H: a mountain too [𝐇]igh
[Ch. 05-02] Ignore the order to intercept the Goliath's attack on the city and abandon the mission. Taking the path from Pascal's Village to the Amusement Park easily achieves this.
Ending I: no [𝐈] in team
[Ch. 08-01_2] Defeat the boss at the Copied City, then walk away from 9S.
Ending J: bad [𝐉]udgement
[Ch. 09-01_3] When entering the factory and meeting the machines, kill any of them.
Ending K: aji wo [𝐊]utta
[Ch. 06-01] After giving your report to commander you'll receive an email titled "Jackass: Fish". Speak to her at the Desert Camp to obtain the Mackerel item, which can be found in the "Caught Fish" menu. You can also obtain this item by fishing. Eat it to earn this ending.
Ending L: [𝐋]one wolf
[Ch. 10-01_3] OR [Ch. 10-03] Either exit the Resistance Camp while it's being attacked OR abandon the entrance to Pascal's Village when the boss creature shows up.
Ending M: break ti[𝐌]e
[Ch. 14-03] Don't go to Pascal's Village when it's attacked while playing as A2. Running to the back of the Resistance Camp, Factory or Amusement Park instead should trigger this.
Ending N: [𝐍]o Man's Village
[Ch. 07-01] Destroy every machine in Pascal's village
Ending O: just y[𝐎]u and me
[Ch. 11-03] Instead of proceeding forward to the City Ruins, simply run back towards the Factory.
Ending P: corru[𝐏]tion
[Ch. 11-06] Allow 2B to die from the virus. Note: save in the City Ruins: Near Tower to achieve Ending X quicker
Ending Q: [𝐐]uestionable actions
[Ch. 11-07] Don't go to 2B's location near the commercial facility. Heading to the desert area or back towards the Resistance Camp instead will trigger this ending.
Ending R: mave[𝐑]ick
[Ch. 14-05] Attack the peaceful robots nearby Pascal.
Ending S: city e[𝐒]cape
[Ch. 17-01] When attempting to gain access to the Tower, abandon Popola and Devola after they attempt to protect you. Note: Save after hacking each of the towers to achieve Ending V a bit quicker
Ending T: fa[𝐓]al error
To earn this ending, simply remove your OS chip.
Ending U: deb[𝐔]nked
[Ch. 06-01] Self-destruct while in the Bunker.
Ending V: reckless bra[𝐕]ery
[Ch. 17-01] When attempting to gain access to the Tower, fight alongside Popola and Devola instead of hacking the Tower
Ending W: broken [𝐖]ings
[Ch. 01-01_1] In the prologue when 2B flies into the factory, let yourself get killed by the giant laser/Die during the prologue in general.
Ending X: time to rela[𝐗]
[Ch. 11-06] After reaching the commercial facility as virus-infected 2B, when the game switches you to controlling A2, run away instead of helping.
Ending Y: head[𝐘] battle
Allow Emil to self-destruct at the end of the boss fight in the quest "Emil's Determination".
WARNING: You can miss this ending if you dont let Emil self-destruct as it will finish the quest. Let Emil Self-Destruct, then fight Emil again and destroy his last clone.
Ending Z: over[𝐙]ealous
[Ch. 14-01] After leaving the desert, when you encounter and save Pascal outside the Resistance Camp, choose to kill him instead of sparing him.
Quests
You can check which sidequests you're missing by looking at the right of the chapter select screen
It shows the amount of available and finished sidequests for each character and shared quests
A full list for all sidequests can be found here[nierautomata.wiki.fextralife.com]
I suggest unlocking fast-travelling before hunting for sidequests as its way faster
Achievments


Resuscitated Body
Stare into space from the Bunker.
Vestiges of Prosperity
Arrive at the city ruins.
It's a Healthy Baby Boy!
Complete the desert area.
We Await Your Next Visit
Complete the amusement park ruins.
Creation and Insurrection
Complete the alien ship.
The Mechanical Kingdom
Complete the forest castle.
Ruler of the Deep
Complete the flooded city.
Those Who Love Humans
Complete the copied city.
Iron Soul
Complete the abandoned factory.
One Battle Ends
Achieve ending A.
A New Battle Begins
Achieve ending B.
Final Wish
Watch 2B die.
Treacherous Blade
Control A2 for the first time.
Farewell, Pascal
Grant Pascal's final request.
Justice
Stop all resource recovery units.
Crime and Punishment
Watch the final moments of Devola and Popola.
Leaving for the New World
Achieve 9S's ending.
Beautiful World
Achieve A2's ending.
The Minds That Emerged
View the final credits.
The Circle of Death
Have your body collected.
Cherish Our Resources
Have 100 bodies collected.
First Errand
Complete your first quest.
The Mercenary
80% of all quests completed.
Information Master
80% of all archives found.
Destruction is My Job
80% of all unit data unlocked.
Chip Collector
80% of all plug-in chips collected.
Weapons Maniac
All Pod programs obtained.
Tools of the Trade
Any weapon upgraded to the highest level.
Inorganic Blade
All weapons upgraded to the highest level.
Supreme Support Weapons
All Pods upgraded to the highest level.
Fighting's Not My Thing
Play your first hacking game.
A Scanner's Power
100 machine lifeforms destroyed by hacking.
Machines vs. Machines
50 machine lifeforms destroyed by remote control.
The Power of Hate
50 machine lifeforms destroyed with berserk mode.
Ruler of the Skies
255 enemies destroyed using a flight unit.
Harvest King
Materials gathered at a hidden harvest point 10 times.
Pod Hunter
All Pods found.
Desire Without Emotion
At least 100,000 G in possession.
Animal Rider
Any animal ridden for 5 kilometers.
A Round by the Pond
20 different kinds of fish caught.
Wait! Don't Kill Me!
10 friendly machine lifeforms destroyed.
What Are You Doing?
2B's secret discovered 10 times. Look under 2B's skirt 10 times
Not That I Mind...
1 hour played with 9S in a certain state. Play 1 hour while 9S pants are gone
Come Take a Look!
Emil's shop used for the first time.
Naughty Children
Emil destroyed.
Transcendent Being
All endings achieved.
Lunar Tear
The place of memories has been visited.
Intel
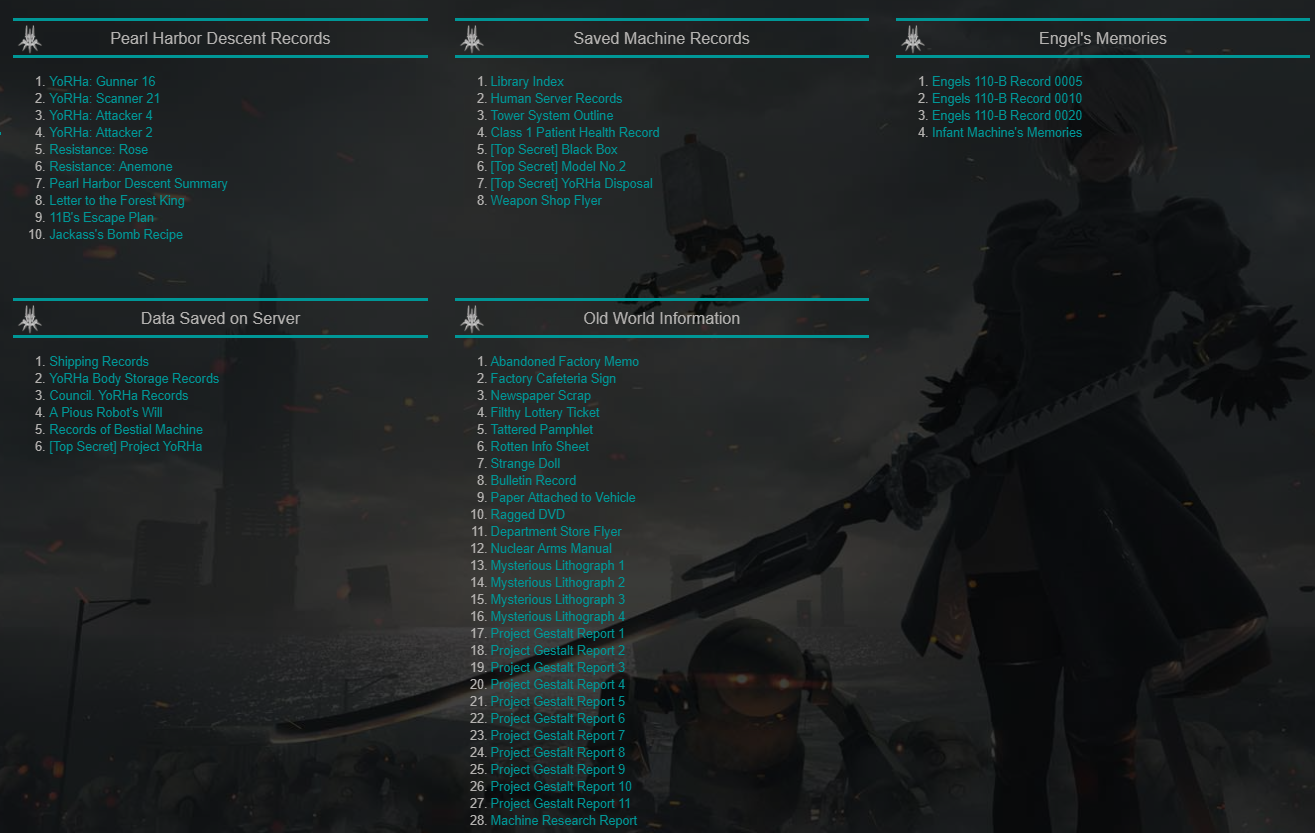
I suggest finishing all of the other tasks first and doing Intel last
Intel is split up into multiple parts:
Archives
Unit Data
Tutorials
Weapon Stories
Picture Books
Fishing Encyclopedia
Novel
¯¯¯¯¯¯¯¯¯¯¯¯¯¯¯¯¯¯¯¯¯¯¯¯¯¯¯¯¯¯¯¯¯¯¯¯¯¯¯¯¯¯¯¯¯¯¯¯¯¯¯¯¯¯¯¯¯¯¯¯¯¯¯¯¯¯¯¯¯¯¯¯¯¯¯¯¯¯¯
Archives:
A full list of all Archives and where to find them can be found here[nierautomata.wiki.fextralife.com]
¯¯¯¯¯¯¯¯¯¯¯¯¯¯¯¯¯¯¯¯¯¯¯¯¯¯¯¯¯¯¯¯¯¯¯¯¯¯¯¯¯¯¯¯¯¯¯¯¯¯¯¯¯¯¯¯¯¯¯¯¯¯¯¯¯¯¯¯¯¯¯¯¯¯¯¯¯¯¯
Unit Data:
A full list of all Units, variations and where to find them can be found here[nierautomata.wiki.fextralife.com]
Note: Some Enemies have multipe variations, you can cycle through them in the Unit Data menu by pressing the Triangle Button / Y Button. Some Enemies only need to be talked to in order to gain unit data.
¯¯¯¯¯¯¯¯¯¯¯¯¯¯¯¯¯¯¯¯¯¯¯¯¯¯¯¯¯¯¯¯¯¯¯¯¯¯¯¯¯¯¯¯¯¯¯¯¯¯¯¯¯¯¯¯¯¯¯¯¯¯¯¯¯¯¯¯¯¯¯¯¯¯¯¯¯¯¯
Tutorials:
You will obtain all of the Tutorials simply by playing the game
¯¯¯¯¯¯¯¯¯¯¯¯¯¯¯¯¯¯¯¯¯¯¯¯¯¯¯¯¯¯¯¯¯¯¯¯¯¯¯¯¯¯¯¯¯¯¯¯¯¯¯¯¯¯¯¯¯¯¯¯¯¯¯¯¯¯¯¯¯¯¯¯¯¯¯¯¯¯¯
Weapon Stories:
This basically corelates to the weapons, if you obtain all weapons you will also obtain all of the weapons stories
¯¯¯¯¯¯¯¯¯¯¯¯¯¯¯¯¯¯¯¯¯¯¯¯¯¯¯¯¯¯¯¯¯¯¯¯¯¯¯¯¯¯¯¯¯¯¯¯¯¯¯¯¯¯¯¯¯¯¯¯¯¯¯¯¯¯¯¯¯¯¯¯¯¯¯¯¯¯¯
Picture Books:
These will be obtained by playing the game
¯¯¯¯¯¯¯¯¯¯¯¯¯¯¯¯¯¯¯¯¯¯¯¯¯¯¯¯¯¯¯¯¯¯¯¯¯¯¯¯¯¯¯¯¯¯¯¯¯¯¯¯¯¯¯¯¯¯¯¯¯¯¯¯¯¯¯¯¯¯¯¯¯¯¯¯¯¯¯
Fishing Encyclopedia:
A list of all fish can be found here[nierautomata.wiki.fextralife.com]
Note: finding rare fish like the swordfish or the beetlefish may require hours of fishing
¯¯¯¯¯¯¯¯¯¯¯¯¯¯¯¯¯¯¯¯¯¯¯¯¯¯¯¯¯¯¯¯¯¯¯¯¯¯¯¯¯¯¯¯¯¯¯¯¯¯¯¯¯¯¯¯¯¯¯¯¯¯¯¯¯¯¯¯¯¯¯¯¯¯¯¯¯¯¯
Novel:
The Novels can be found here[nierautomata.wiki.fextralife.com]
Weapons
¯¯¯¯¯¯¯¯¯¯¯¯¯¯¯¯¯¯¯¯¯¯¯¯¯¯¯¯¯¯¯¯¯¯¯¯¯¯¯¯¯¯¯¯¯¯¯¯¯¯¯¯¯¯¯¯¯¯¯¯¯¯¯¯¯¯¯¯¯¯¯¯¯¯¯¯¯¯¯
Beastbane - Resistance Camp Weapons Trader
¯¯¯¯¯¯¯¯¯¯¯¯¯¯¯¯¯¯¯¯¯¯¯¯¯¯¯¯¯¯¯¯¯¯¯¯¯¯¯¯¯¯¯¯¯¯¯¯¯¯¯¯¯¯¯¯¯¯¯¯¯¯¯¯¯¯¯¯¯¯¯¯¯¯¯¯¯¯¯
Engine Blade - Abandoned Factory: Jump across the top of the crushers to get to the chest
¯¯¯¯¯¯¯¯¯¯¯¯¯¯¯¯¯¯¯¯¯¯¯¯¯¯¯¯¯¯¯¯¯¯¯¯¯¯¯¯¯¯¯¯¯¯¯¯¯¯¯¯¯¯¯¯¯¯¯¯¯¯¯¯¯¯¯¯¯¯¯¯¯¯¯¯¯¯¯
Faith - Flooded City: Resource Unit
¯¯¯¯¯¯¯¯¯¯¯¯¯¯¯¯¯¯¯¯¯¯¯¯¯¯¯¯¯¯¯¯¯¯¯¯¯¯¯¯¯¯¯¯¯¯¯¯¯¯¯¯¯¯¯¯¯¯¯¯¯¯¯¯¯¯¯¯¯¯¯¯¯¯¯¯¯¯¯
Type-4O Sword - Quest: Find a Present
¯¯¯¯¯¯¯¯¯¯¯¯¯¯¯¯¯¯¯¯¯¯¯¯¯¯¯¯¯¯¯¯¯¯¯¯¯¯¯¯¯¯¯¯¯¯¯¯¯¯¯¯¯¯¯¯¯¯¯¯¯¯¯¯¯¯¯¯¯¯¯¯¯¯¯¯¯¯¯
Type-3 Sword - Popola and Devola's Shop
¯¯¯¯¯¯¯¯¯¯¯¯¯¯¯¯¯¯¯¯¯¯¯¯¯¯¯¯¯¯¯¯¯¯¯¯¯¯¯¯¯¯¯¯¯¯¯¯¯¯¯¯¯¯¯¯¯¯¯¯¯¯¯¯¯¯¯¯¯¯¯¯¯¯¯¯¯¯¯
Ancient Overlord - Resistance Camp Weapons Trader
¯¯¯¯¯¯¯¯¯¯¯¯¯¯¯¯¯¯¯¯¯¯¯¯¯¯¯¯¯¯¯¯¯¯¯¯¯¯¯¯¯¯¯¯¯¯¯¯¯¯¯¯¯¯¯¯¯¯¯¯¯¯¯¯¯¯¯¯¯¯¯¯¯¯¯¯¯¯¯
Virtuos Contract - Default Weapon
¯¯¯¯¯¯¯¯¯¯¯¯¯¯¯¯¯¯¯¯¯¯¯¯¯¯¯¯¯¯¯¯¯¯¯¯¯¯¯¯¯¯¯¯¯¯¯¯¯¯¯¯¯¯¯¯¯¯¯¯¯¯¯¯¯¯¯¯¯¯¯¯¯¯¯¯¯¯¯
Cruel Oath - Default Weapon
¯¯¯¯¯¯¯¯¯¯¯¯¯¯¯¯¯¯¯¯¯¯¯¯¯¯¯¯¯¯¯¯¯¯¯¯¯¯¯¯¯¯¯¯¯¯¯¯¯¯¯¯¯¯¯¯¯¯¯¯¯¯¯¯¯¯¯¯¯¯¯¯¯¯¯¯¯¯¯
YoRHa-issue Blade - Quest: 11B's Memento
¯¯¯¯¯¯¯¯¯¯¯¯¯¯¯¯¯¯¯¯¯¯¯¯¯¯¯¯¯¯¯¯¯¯¯¯¯¯¯¯¯¯¯¯¯¯¯¯¯¯¯¯¯¯¯¯¯¯¯¯¯¯¯¯¯¯¯¯¯¯¯¯¯¯¯¯¯¯¯
Phoenix Dagger - In the pit of the Quest: Lord of the Valley in a chest
¯¯¯¯¯¯¯¯¯¯¯¯¯¯¯¯¯¯¯¯¯¯¯¯¯¯¯¯¯¯¯¯¯¯¯¯¯¯¯¯¯¯¯¯¯¯¯¯¯¯¯¯¯¯¯¯¯¯¯¯¯¯¯¯¯¯¯¯¯¯¯¯¯¯¯¯¯¯¯
Machine Sword - Pascal's Village Weapons Trader
¯¯¯¯¯¯¯¯¯¯¯¯¯¯¯¯¯¯¯¯¯¯¯¯¯¯¯¯¯¯¯¯¯¯¯¯¯¯¯¯¯¯¯¯¯¯¯¯¯¯¯¯¯¯¯¯¯¯¯¯¯¯¯¯¯¯¯¯¯¯¯¯¯¯¯¯¯¯¯
Iron Pipe - Fishing in the Sewer System
¯¯¯¯¯¯¯¯¯¯¯¯¯¯¯¯¯¯¯¯¯¯¯¯¯¯¯¯¯¯¯¯¯¯¯¯¯¯¯¯¯¯¯¯¯¯¯¯¯¯¯¯¯¯¯¯¯¯¯¯¯¯¯¯¯¯¯¯¯¯¯¯¯¯¯¯¯¯¯
Cypress Stick - Castle Front: on the large arches. Go up a fallen pillar and parcour to the chest that holds the Cypress Stick
¯¯¯¯¯¯¯¯¯¯¯¯¯¯¯¯¯¯¯¯¯¯¯¯¯¯¯¯¯¯¯¯¯¯¯¯¯¯¯¯¯¯¯¯¯¯¯¯¯¯¯¯¯¯¯¯¯¯¯¯¯¯¯¯¯¯¯¯¯¯¯¯¯¯¯¯¯¯¯
Iron Will - Flooded City under the bridge with the second bus. Needs to be found with the Pod Scanner or near a collapsed YoRHa soldier, depending on the Story
¯¯¯¯¯¯¯¯¯¯¯¯¯¯¯¯¯¯¯¯¯¯¯¯¯¯¯¯¯¯¯¯¯¯¯¯¯¯¯¯¯¯¯¯¯¯¯¯¯¯¯¯¯¯¯¯¯¯¯¯¯¯¯¯¯¯¯¯¯¯¯¯¯¯¯¯¯¯¯
Fang of the Twins - Desert Housing Complex: in a Chest on the top of 3 flights of stairs
¯¯¯¯¯¯¯¯¯¯¯¯¯¯¯¯¯¯¯¯¯¯¯¯¯¯¯¯¯¯¯¯¯¯¯¯¯¯¯¯¯¯¯¯¯¯¯¯¯¯¯¯¯¯¯¯¯¯¯¯¯¯¯¯¯¯¯¯¯¯¯¯¯¯¯¯¯¯¯
Beastlord - Resistance Camp Weapons Trader
¯¯¯¯¯¯¯¯¯¯¯¯¯¯¯¯¯¯¯¯¯¯¯¯¯¯¯¯¯¯¯¯¯¯¯¯¯¯¯¯¯¯¯¯¯¯¯¯¯¯¯¯¯¯¯¯¯¯¯¯¯¯¯¯¯¯¯¯¯¯¯¯¯¯¯¯¯¯¯
Phoenix Sword - Route B: After the prologue on the rooftop in a locked chest
¯¯¯¯¯¯¯¯¯¯¯¯¯¯¯¯¯¯¯¯¯¯¯¯¯¯¯¯¯¯¯¯¯¯¯¯¯¯¯¯¯¯¯¯¯¯¯¯¯¯¯¯¯¯¯¯¯¯¯¯¯¯¯¯¯¯¯¯¯¯¯¯¯¯¯¯¯¯¯
Type-4O Blade - Quest: Data Analysis Freak 2
¯¯¯¯¯¯¯¯¯¯¯¯¯¯¯¯¯¯¯¯¯¯¯¯¯¯¯¯¯¯¯¯¯¯¯¯¯¯¯¯¯¯¯¯¯¯¯¯¯¯¯¯¯¯¯¯¯¯¯¯¯¯¯¯¯¯¯¯¯¯¯¯¯¯¯¯¯¯¯
Type-3 Blade - Popola and Devola's Shop
¯¯¯¯¯¯¯¯¯¯¯¯¯¯¯¯¯¯¯¯¯¯¯¯¯¯¯¯¯¯¯¯¯¯¯¯¯¯¯¯¯¯¯¯¯¯¯¯¯¯¯¯¯¯¯¯¯¯¯¯¯¯¯¯¯¯¯¯¯¯¯¯¯¯¯¯¯¯¯
Virtuous Treaty - Route A: Abandoned Factory next to the collapsed bridge where you fought Engels
¯¯¯¯¯¯¯¯¯¯¯¯¯¯¯¯¯¯¯¯¯¯¯¯¯¯¯¯¯¯¯¯¯¯¯¯¯¯¯¯¯¯¯¯¯¯¯¯¯¯¯¯¯¯¯¯¯¯¯¯¯¯¯¯¯¯¯¯¯¯¯¯¯¯¯¯¯¯¯
Cruel Blood Oath - Route B: Underground portion of the Desert: Camp behind a locked door
¯¯¯¯¯¯¯¯¯¯¯¯¯¯¯¯¯¯¯¯¯¯¯¯¯¯¯¯¯¯¯¯¯¯¯¯¯¯¯¯¯¯¯¯¯¯¯¯¯¯¯¯¯¯¯¯¯¯¯¯¯¯¯¯¯¯¯¯¯¯¯¯¯¯¯¯¯¯¯
Machine Axe - Pascal's Village Weapons Trader
¯¯¯¯¯¯¯¯¯¯¯¯¯¯¯¯¯¯¯¯¯¯¯¯¯¯¯¯¯¯¯¯¯¯¯¯¯¯¯¯¯¯¯¯¯¯¯¯¯¯¯¯¯¯¯¯¯¯¯¯¯¯¯¯¯¯¯¯¯¯¯¯¯¯¯¯¯¯¯
Beastcurse - Forest Castle: at the very top of the library section in a locked chest
¯¯¯¯¯¯¯¯¯¯¯¯¯¯¯¯¯¯¯¯¯¯¯¯¯¯¯¯¯¯¯¯¯¯¯¯¯¯¯¯¯¯¯¯¯¯¯¯¯¯¯¯¯¯¯¯¯¯¯¯¯¯¯¯¯¯¯¯¯¯¯¯¯¯¯¯¯¯¯
Dragoon Lance - Forest Zone: in a cave near the ravine
¯¯¯¯¯¯¯¯¯¯¯¯¯¯¯¯¯¯¯¯¯¯¯¯¯¯¯¯¯¯¯¯¯¯¯¯¯¯¯¯¯¯¯¯¯¯¯¯¯¯¯¯¯¯¯¯¯¯¯¯¯¯¯¯¯¯¯¯¯¯¯¯¯¯¯¯¯¯¯
Phoenix Lance - Desert Zone: using the Pod Scanner
¯¯¯¯¯¯¯¯¯¯¯¯¯¯¯¯¯¯¯¯¯¯¯¯¯¯¯¯¯¯¯¯¯¯¯¯¯¯¯¯¯¯¯¯¯¯¯¯¯¯¯¯¯¯¯¯¯¯¯¯¯¯¯¯¯¯¯¯¯¯¯¯¯¯¯¯¯¯¯
Type-4O Lance - Quest: YoRHa Betrayers
¯¯¯¯¯¯¯¯¯¯¯¯¯¯¯¯¯¯¯¯¯¯¯¯¯¯¯¯¯¯¯¯¯¯¯¯¯¯¯¯¯¯¯¯¯¯¯¯¯¯¯¯¯¯¯¯¯¯¯¯¯¯¯¯¯¯¯¯¯¯¯¯¯¯¯¯¯¯¯
Type-3 Lance - Flooded City: ontop of a building near the waterfall - requires a long jump
¯¯¯¯¯¯¯¯¯¯¯¯¯¯¯¯¯¯¯¯¯¯¯¯¯¯¯¯¯¯¯¯¯¯¯¯¯¯¯¯¯¯¯¯¯¯¯¯¯¯¯¯¯¯¯¯¯¯¯¯¯¯¯¯¯¯¯¯¯¯¯¯¯¯¯¯¯¯¯
Spear of the Usurper - Quest: Heritage of the Past
¯¯¯¯¯¯¯¯¯¯¯¯¯¯¯¯¯¯¯¯¯¯¯¯¯¯¯¯¯¯¯¯¯¯¯¯¯¯¯¯¯¯¯¯¯¯¯¯¯¯¯¯¯¯¯¯¯¯¯¯¯¯¯¯¯¯¯¯¯¯¯¯¯¯¯¯¯¯¯
Virtuous Dignity - In the sewers next to the ladder facing the Amusement Park - walk towards the "dead end"
¯¯¯¯¯¯¯¯¯¯¯¯¯¯¯¯¯¯¯¯¯¯¯¯¯¯¯¯¯¯¯¯¯¯¯¯¯¯¯¯¯¯¯¯¯¯¯¯¯¯¯¯¯¯¯¯¯¯¯¯¯¯¯¯¯¯¯¯¯¯¯¯¯¯¯¯¯¯¯
Cruel Arrogance - Route C: Underground section of the Abandoned Factory in a locked chest
¯¯¯¯¯¯¯¯¯¯¯¯¯¯¯¯¯¯¯¯¯¯¯¯¯¯¯¯¯¯¯¯¯¯¯¯¯¯¯¯¯¯¯¯¯¯¯¯¯¯¯¯¯¯¯¯¯¯¯¯¯¯¯¯¯¯¯¯¯¯¯¯¯¯¯¯¯¯¯
Machine Spear - Pascal's Village Weapons Trader
¯¯¯¯¯¯¯¯¯¯¯¯¯¯¯¯¯¯¯¯¯¯¯¯¯¯¯¯¯¯¯¯¯¯¯¯¯¯¯¯¯¯¯¯¯¯¯¯¯¯¯¯¯¯¯¯¯¯¯¯¯¯¯¯¯¯¯¯¯¯¯¯¯¯¯¯¯¯¯
Angel's Folly - Emil's Shop
¯¯¯¯¯¯¯¯¯¯¯¯¯¯¯¯¯¯¯¯¯¯¯¯¯¯¯¯¯¯¯¯¯¯¯¯¯¯¯¯¯¯¯¯¯¯¯¯¯¯¯¯¯¯¯¯¯¯¯¯¯¯¯¯¯¯¯¯¯¯¯¯¯¯¯¯¯¯¯
Demon's Cry - Amusement Park Building: Near Game Dev Machine, in the basement
¯¯¯¯¯¯¯¯¯¯¯¯¯¯¯¯¯¯¯¯¯¯¯¯¯¯¯¯¯¯¯¯¯¯¯¯¯¯¯¯¯¯¯¯¯¯¯¯¯¯¯¯¯¯¯¯¯¯¯¯¯¯¯¯¯¯¯¯¯¯¯¯¯¯¯¯¯¯¯
Type-4O Fists - Resistance Camp: By the Acces Point in a locked Chest
¯¯¯¯¯¯¯¯¯¯¯¯¯¯¯¯¯¯¯¯¯¯¯¯¯¯¯¯¯¯¯¯¯¯¯¯¯¯¯¯¯¯¯¯¯¯¯¯¯¯¯¯¯¯¯¯¯¯¯¯¯¯¯¯¯¯¯¯¯¯¯¯¯¯¯¯¯¯¯
Type-3 Fists - Emil's Shop
¯¯¯¯¯¯¯¯¯¯¯¯¯¯¯¯¯¯¯¯¯¯¯¯¯¯¯¯¯¯¯¯¯¯¯¯¯¯¯¯¯¯¯¯¯¯¯¯¯¯¯¯¯¯¯¯¯¯¯¯¯¯¯¯¯¯¯¯¯¯¯¯¯¯¯¯¯¯¯
Virtuous Grief - Forest Zone Center: In a hollow tree with chains around it, on a high plateau in the southwest
¯¯¯¯¯¯¯¯¯¯¯¯¯¯¯¯¯¯¯¯¯¯¯¯¯¯¯¯¯¯¯¯¯¯¯¯¯¯¯¯¯¯¯¯¯¯¯¯¯¯¯¯¯¯¯¯¯¯¯¯¯¯¯¯¯¯¯¯¯¯¯¯¯¯¯¯¯¯¯
Cruel Lament - Given by Masamune
¯¯¯¯¯¯¯¯¯¯¯¯¯¯¯¯¯¯¯¯¯¯¯¯¯¯¯¯¯¯¯¯¯¯¯¯¯¯¯¯¯¯¯¯¯¯¯¯¯¯¯¯¯¯¯¯¯¯¯¯¯¯¯¯¯¯¯¯¯¯¯¯¯¯¯¯¯¯¯
Machine Heads - Pascal's Shop
¯¯¯¯¯¯¯¯¯¯¯¯¯¯¯¯¯¯¯¯¯¯¯¯¯¯¯¯¯¯¯¯¯¯¯¯¯¯¯¯¯¯¯¯¯¯¯¯¯¯¯¯¯¯¯¯¯¯¯¯¯¯¯¯¯¯¯¯¯¯¯¯¯¯¯¯¯¯¯
Emil Heads - Reward for defeating the hidden Emil Boss
¯¯¯¯¯¯¯¯¯¯¯¯¯¯¯¯¯¯¯¯¯¯¯¯¯¯¯¯¯¯¯¯¯¯¯¯¯¯¯¯¯¯¯¯¯¯¯¯¯¯¯¯¯¯¯¯¯¯¯¯¯¯¯¯¯¯¯¯¯¯¯¯¯¯¯¯¯¯¯
Pods
Location of Pod B:
Fishing in the Flooded City
Location of Pod C:
Found in the Desert Zone after event marker appears
______________________________________________________________________________
Leveling the Pods:
Pod A:
Level Materials Required for Upgrade
2 2,500G + Tree Seed x10, Mushroom x10, Pure Water x10, Natural Rubber x10,
Powerup Part S x1
3 5,000G + Plant Seed x5, Eagle Eggs x5, Tanning Agent x5, Filler Metal x5,
Powerup Part M x1
4 10,000G + Tree Sap x3, Giant Egg x3, Dye x3, Machine Oil x3, Powerup Part L x1
Pod B:
Level Materials Required for Upgrade
2 2,500G + Tree Seed x10, Torn Book x10, Natural Rubber x10, Simple Gadget x10, Powerup Part S x1
3 5,000G + Plant Seed x5, Tech Manual x5, Filler Metal x5, Elaborate Gadget x5, Powerup Part M x1
4 10,000G + Tree Sap x3, Thick Dictionary x3, Machine Oil x3, Complex Gadget x3, Powerup Part L x1
Pod C:
Level Materials Required for Upgrade
2 2,500G + Mushroom x10, Torn Book x10, Pure Water x10, Simple Gadget x10, Powerup Part S x1
3 5,000G + Eagle Eggs x5, Tech Manual x5, Tanning Agent x5, Elaborate Gadget x5, Powerup Part M x1
4 10,000G + Giant Egg x3, Thick Dictionary x3, Dye x3, Complex Gadget x3, Powerup Part L x1
______________________________________________________________________________
Obtaining all Pod Programs:
R020: Mirage - Shop
R030: Hammer - Shop
R040: Blade - Shop
R050: Spear - Shop
A060: P Shield - Shop
R070: M Shield - Shop
A080: Wave - Quest: The Wandering Couple
A090: Wire - Quest: Amnesia
A100: Decoy - Found during Route C in hte City Ruins where you land after the Prologue
A110: Slow - Quest: Data Analysis Freak 2
A120: Repair - Quest: Sorting Trouble 3
A130: Bomb - Quest: Find a Present
A140: Gravity - Quest: Retrieve the Confidental Intel
A150: Volt - Found during Route C in the Amusement Park Ruins where you fight the Tank
A160: Missile - Found during Route C in the City Ruins where you fight Marx in the prologue
A170: Scanner - Quest: Redheads
Sacrificing Your Savefile
In my opinion you should do this before you start your 100% savefile.
Just rush through the game and agree to sacrificing yourself
Note: This will delete EVERY savefile that you currently own
After this you can start your journey with this new epic main menu screen
Tips And Tricks
Leveling
If you need to level, go to the dessert are where you fight Adam, as this place is spawning infinite enemies
Now simply set the difficulty to easy, equip the auto-fire, auto-attack, auto-evade and maybe the auto-heal plug in chips
You can now go AFK until you're about level 70, after this play as 9S and head to the Amusement Park
Now go to the big bunny statue, equip the blade Pod programm and start attacking that statue
It will come to live after about 2 minutes of attacking it. After that, hack it to destroy it
This enemy drops a machine core and loads of EXP after you defeat him
Now save the game and load your savefile as this miniboss respawns everytime you reload the game
Money
You first need to unlock chapter select to do this method.
Go into chapter 7-1 as 2B (or any other Route A chapter) and head to the amusement park vendor
Buy as many Thick Dictionaries and other expensive resources as you can and save the game
Now go into any Route C chapter and sell all of the items that you just bought and save the game again
Repeat this a couple of times and you should have enough money to afford everything in the game in about 10 minutes
Optional: Buy meteorites from the half-wit inventor to make even more money
Have Fun On Your Journey
Good luck, don't give up if things don't go your way and feel free to ask me in the comments if you have any questions
Glory to Mankind
Source: https://steamcommunity.com/sharedfiles/filedetails/?id=1690393671
More NieR:Automata guilds
- All Guilds
- NieR Series Extra Content
- NieR:Automata Guide 766
- <3
- "YoRHa"
- NieR:Automata 100% []
- NieR:Automata Guide 742
- NieR:Automata Guide 741
- Nier:Automata
- All Weapons and Pods Location Guide
- How To Change Player from 2B to A2 or S9