
INTRODUCTION
Before starting, I will advise any prospecting modder to begin with a small ship. The initial cliff when modding Nebulous is quite intense and the game's requirements sometimes very peculiar. It is not unlikely that you will have to redo your first ship from scratch once all the systems start to click into place (just like I had to). While I am not convinced that you should start by implementing a cube with thrusters, starting with a huge cruiser will add an unnecessary load on your shoulders.
SHIP DESIGN
There are a few things to keep in mind when designing a ship for Nebulous:
The game does not support hollow ships. For example, if a tandem-hull catamaran ship is hit from the side on the left hull by a railgun sabot, the projectile will exit from the right hull instead of exiting the left hull then penetrating the right hull through the gap. That may or may not something that you are willing to live with, but at least you are warned.
The damage model shines when ships have mainly large uninterrupted smooth hulls sections. Any seam in the texture will also be a seam in the damage decals. Additionally, the collision model requires convex shapes. Too many concave angles will have a significant impact on performances as well as making the collision model increasingly complex to setup. Using normal maps instead of geometry to convey minute details is advised.
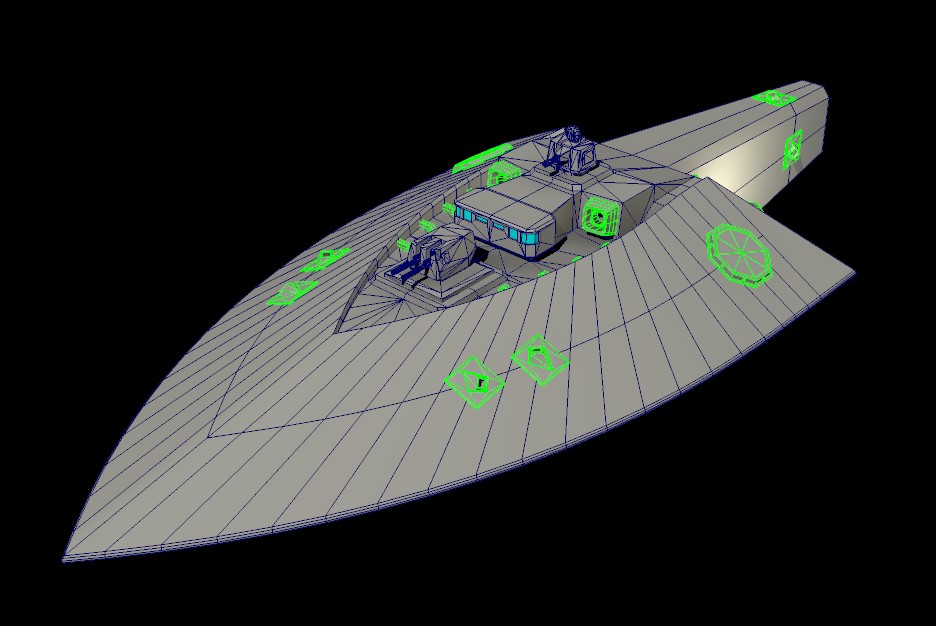
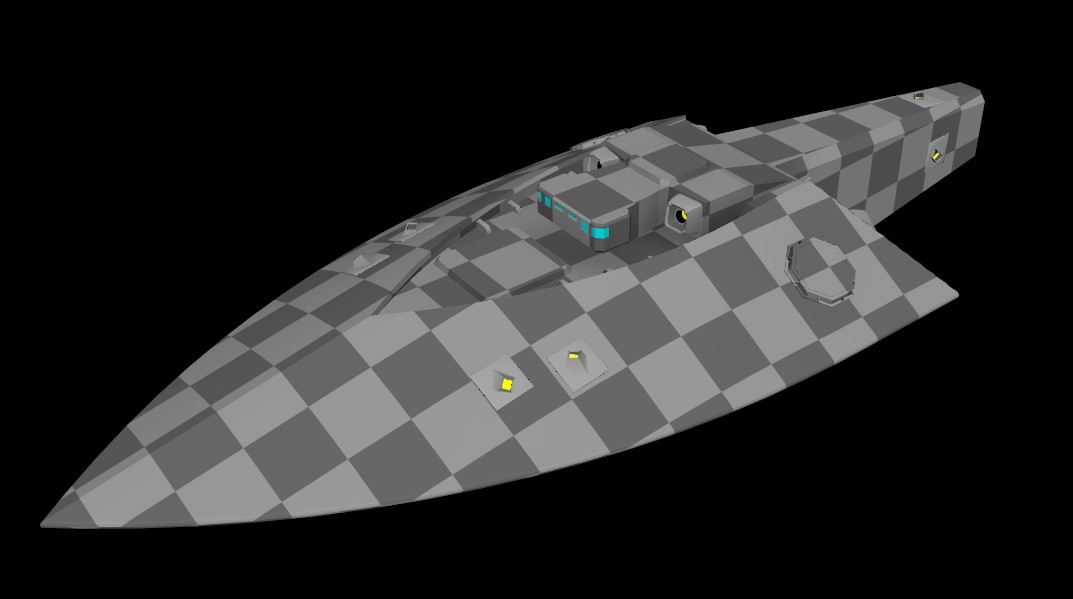
While it is not strictly required, the color of the bridge lights is used in the game to indicate a loss of power. Having an easily identifiable element to convey that information is therefore advised. It is also a convenient way to indicate the scale of the ship across hull sizes and factions.
Ships do require maneuvering thrusters for every translation and rotation axis. They can be force field technobabble mac guffins that do not have a visual effect, but the engine will require game objects to exert forces and those objects will have to show up in the DC board.
Radar panels can cover any number or "quadrant" as defined by all three of "right/left", "up/down", and "front/back" (+/-X, +/-Y, +/-Z) for a total of 8 sectors. That means you cannot have a "left, right, top, down" layout without overlaps.
MODELLING

I will try to keep this section fairly software-agnostic, but I am assuming that readers of this guide know their way around modelling, UV unfolding and texturing.
OFFICIAL GUIDE
Stephmo, the dev team member responsible for the game's models, wrote a short but very informative primer[stephmo.itch.io] about the requirement for the game when it comes to the models. The points that are of particular importance are the need to share UVs across all the LODs and the collider mesh (UV coordinates are used by the game to not only display damage, but also efficiently calculate the state of the armor at any given point) and how ship models are divided in sections to maintain texture density.
I will only cover a few things, expanding on Stephmo's guide with my own tricks that made my life easier.
For reference, you can either extract the models from the game files, or use the rough mockups I uploaded here[www.dropbox.com] .
ROUGH BLOCK
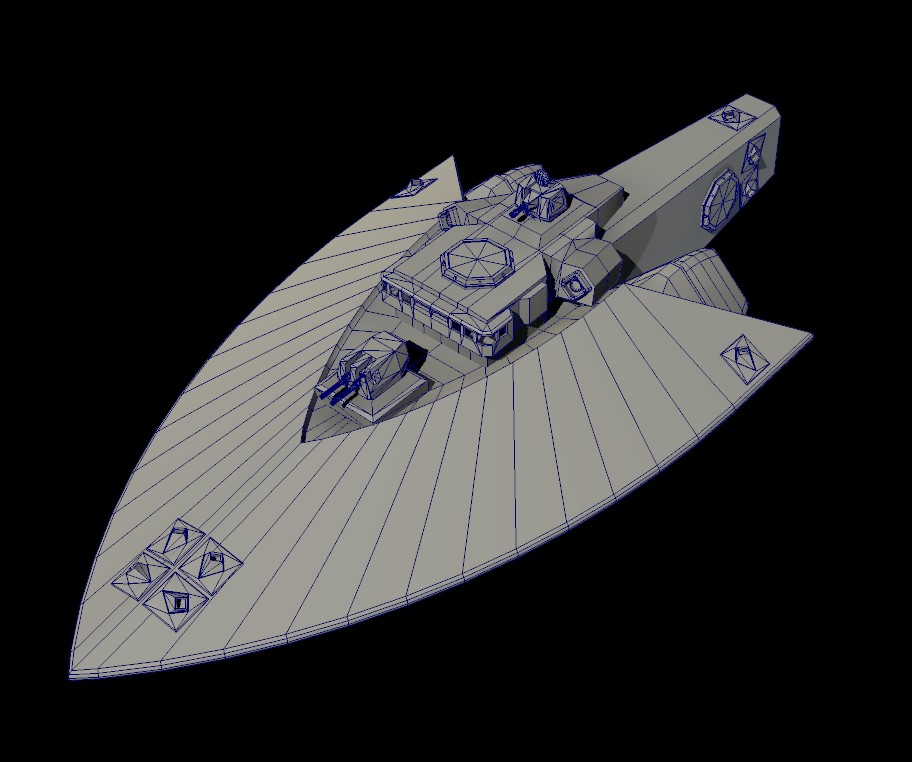
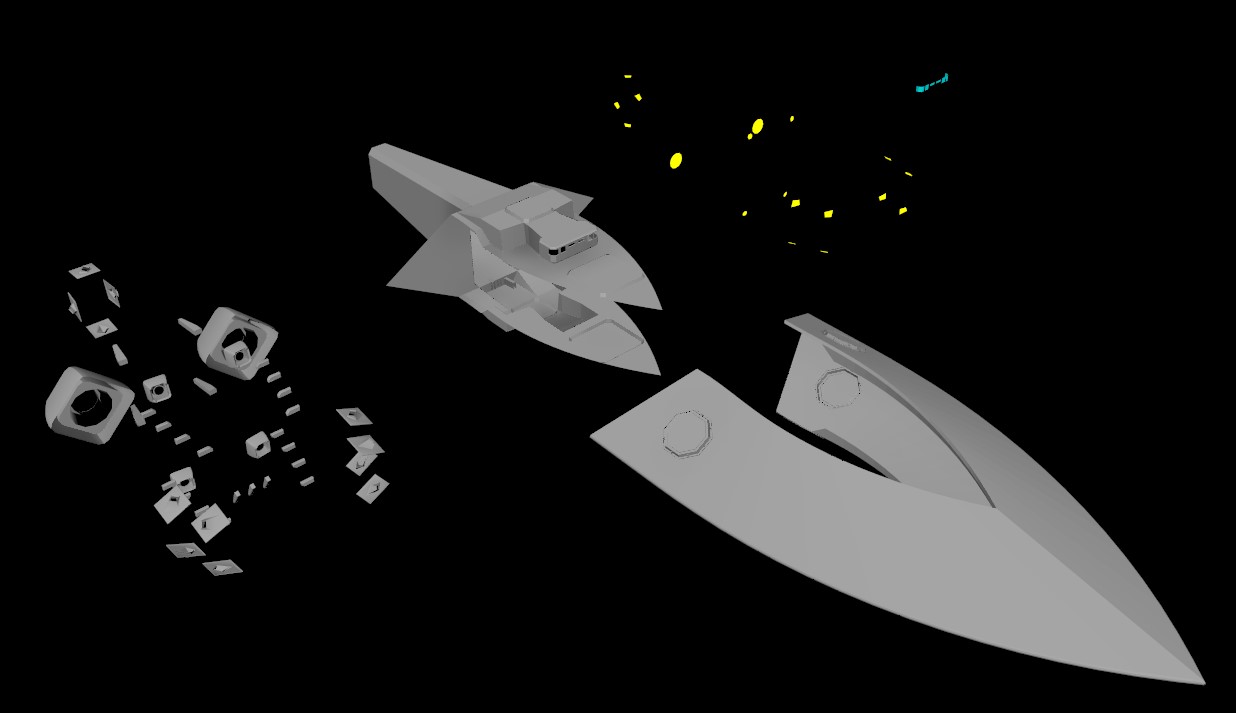
When working on a model, I always start with a rough volume blocking to plan my geometry. I heavily rely on kitbashing parts from other models to both work faster, but also to keep recurring elements across my ship lineup that help build a coherent design language.
The goal here is to quickly iterate on the overall shape to get the right proportions and flow, to define weapon emplacements, radar panels and thrusters. I can already see issues that will need refining such as this very complex geometry there that will be a nightmare to simplify for the collider.
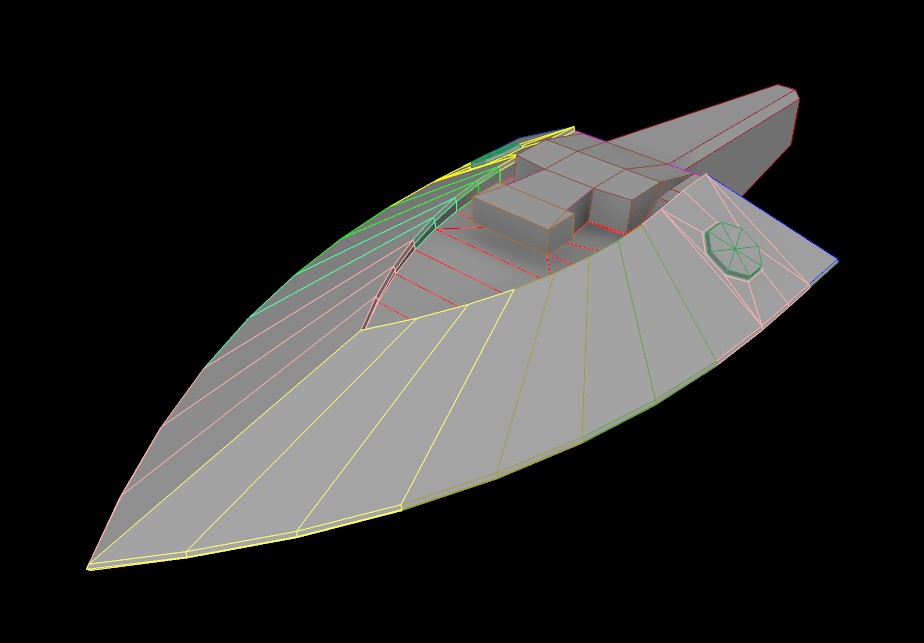
LOD 0
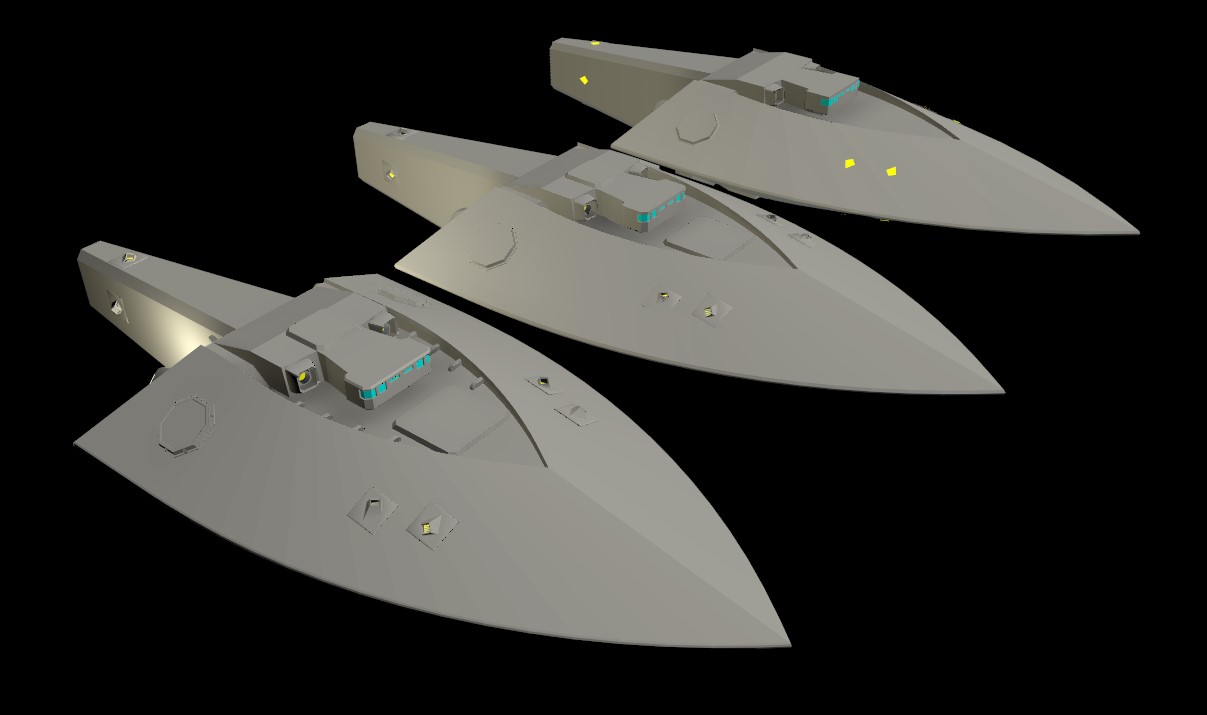
Some modeler like to start from the simplest shape and work their details up. Given the requirements reguarding the UVs consistency, I personally prefer to start with the model that will have the highest details in-game, then simplify it down as well as detailing it for normal map baking.
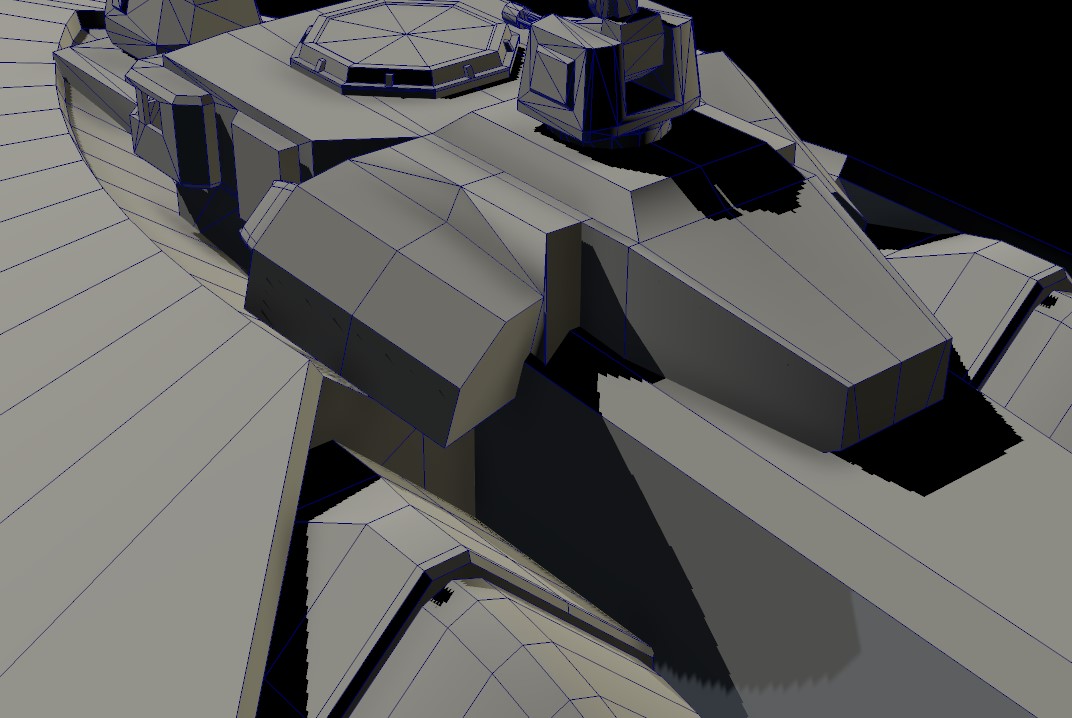
There I massively simplified the complex section of the ship down to a few angles while keeping the overall flow of the hull:
A couple of remarks:
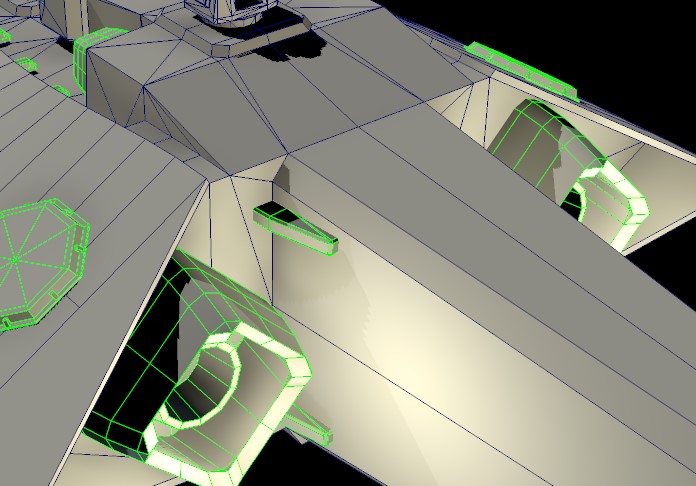
While polygon count should not be entirely ignored, the game is fairly forgiving on that front. keeping a few extra edges that will make your live easier while texturing or when placing components within Unity is not a deal breaker. For example I have some extra edges to find the center point on the weapon platforms so that I can snap the mounts on them.
On that front, the biggest contributors to poly count between LOD0 and 1 in vanilla are the attitude thrusters. Having a simpler design for those on your ship can easily shaves thousands of polys that can be reinvested elsewhere:
While you do not need to make an airtight model for this you will have to for the collision model. That is why I avoid having meshes that penetrate within others for elements that will be part of that collision model, and try instead to have everything merged properly. See this example on the vanilla frigate:
Keep in mind that you will need to splice your model into convex volumes for the collider. You'll need well placed edges to cut through across the UVs and different detail levels.
UVs and SECTIONING THE MODEL
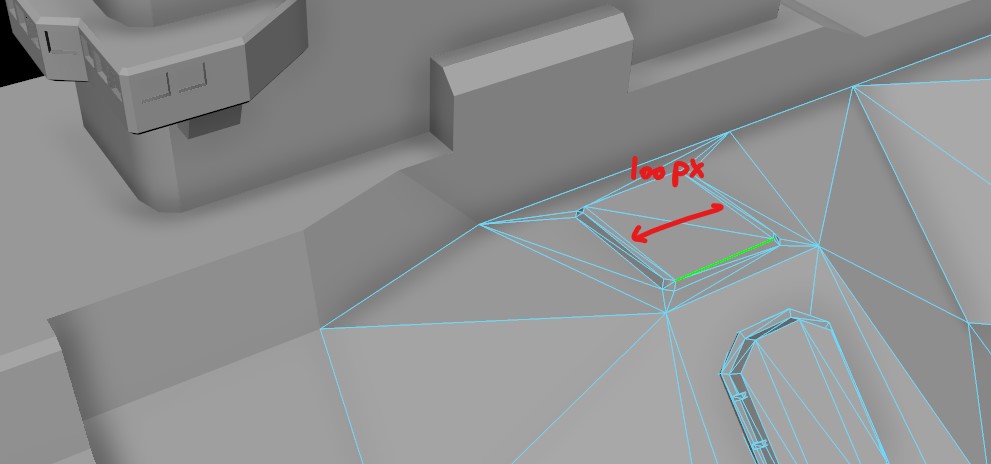
All the textures maps for ships are either 1024x1024 or 2048x2048. To maintain the pixel density across ship sizes, the models are cut into parts. From 2 for the corvette to 6 for the battleship. The engines and thrusters are always a separate part from the hull. Additionally, the glowing engines throats and windows are both their own separate objects. The texture density of vanilla ships is roughly 2 pixels per unit, which translate for example to 100 pixels for the edge of the class 1 weapon mount platform:
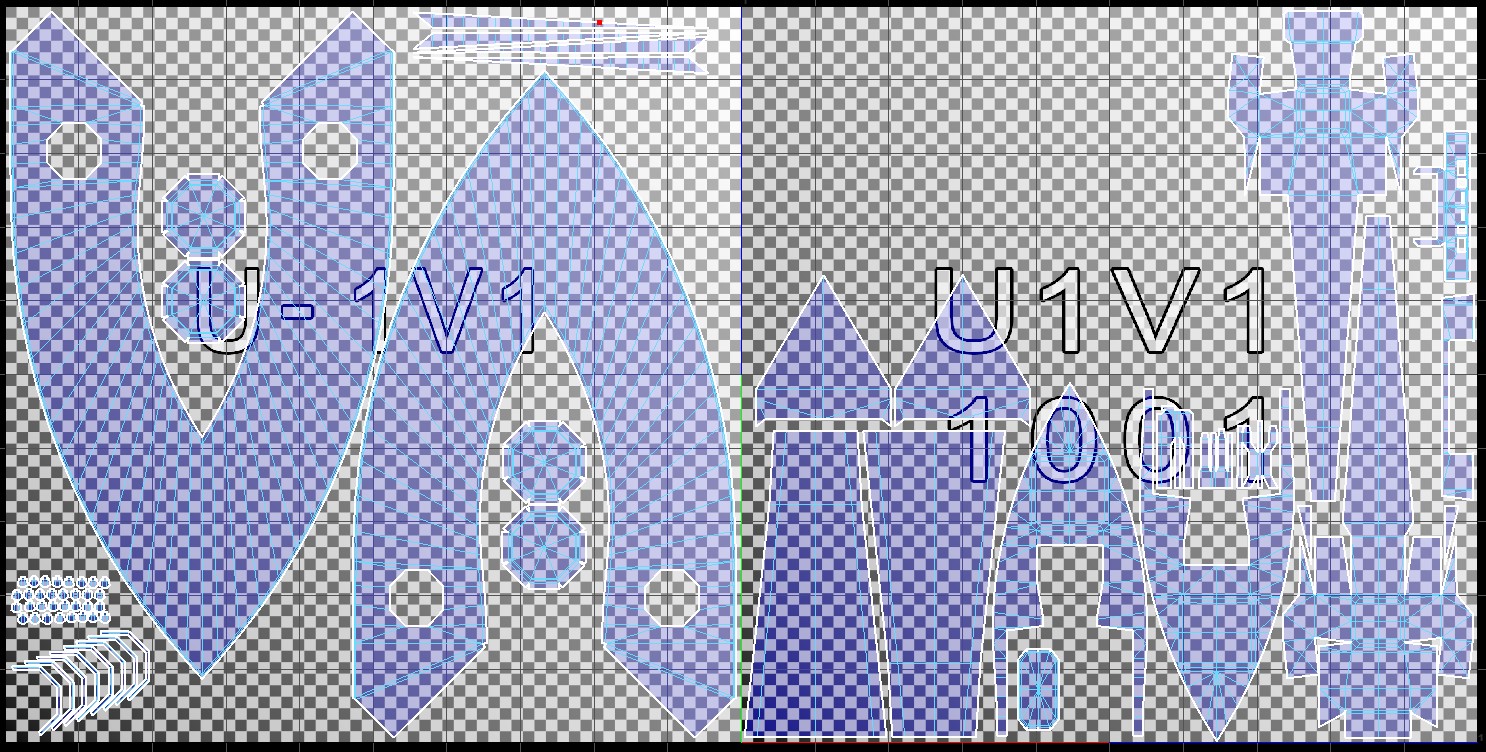
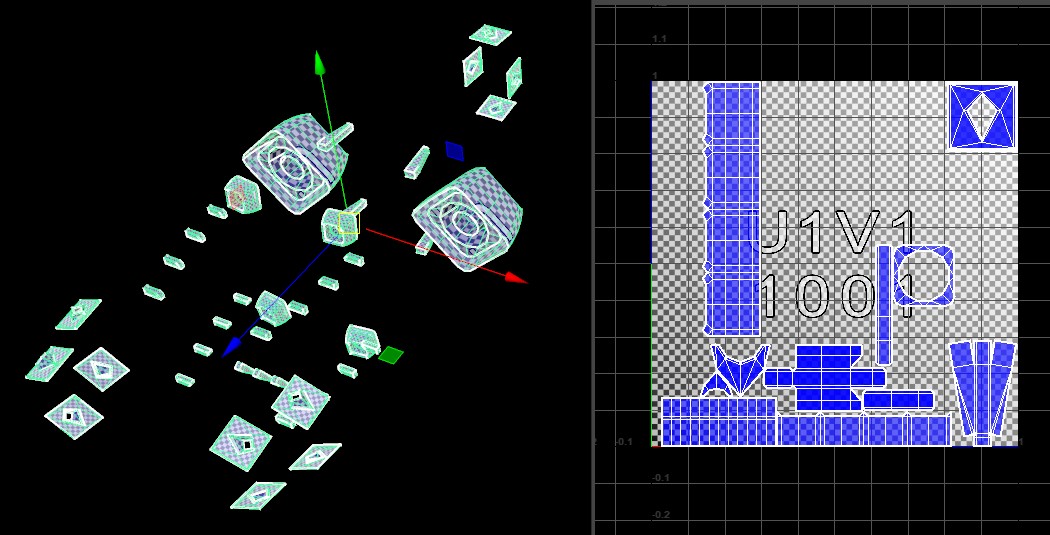
Personally, I found it most efficient to unfold the UVs and pack them before cutting the model. That way I can avoid awkward merges if I miscalculated the mapped areas, or add edges when a seam is needed:
(That big empty area in the right UV map may come in handy when I get around to make escape pods) Those familiar with my mod will notice that I gathered all the hull parts that get custom colors on a single map, meaning I only have one paint mask texture to make and to have loaded in the game.
Be mindful that since the game uses the UVs and an internal texture to model the damage received to the armor, you cannot have overlapping UVs on polys part of the same mesh that will receive damage decals. However, you can have overlapping UVs on small details that will not be part of the collision model such as antennas or small struts and trusses.
If you go even further, you can have the same texture for two halves of a symmetrical model as long as those halves are their own separate parts with each their own shader/damage model. I notably used that on my destroyer-sized ship where both sides of the armor are the same model rotated 180 degrees along the ship spine:
Given that the engines/thrusters do not receive damage decals, they can share overlapping UVs when duplicated. I used that to my advantage by having "standardized" thrusters and engines sharing a single set of texture maps across my entire faction, along some tiny repeating details such as trusses only visible on the LOD0:
Remember that the damage model work best when there are fewer cuts to the UVs.
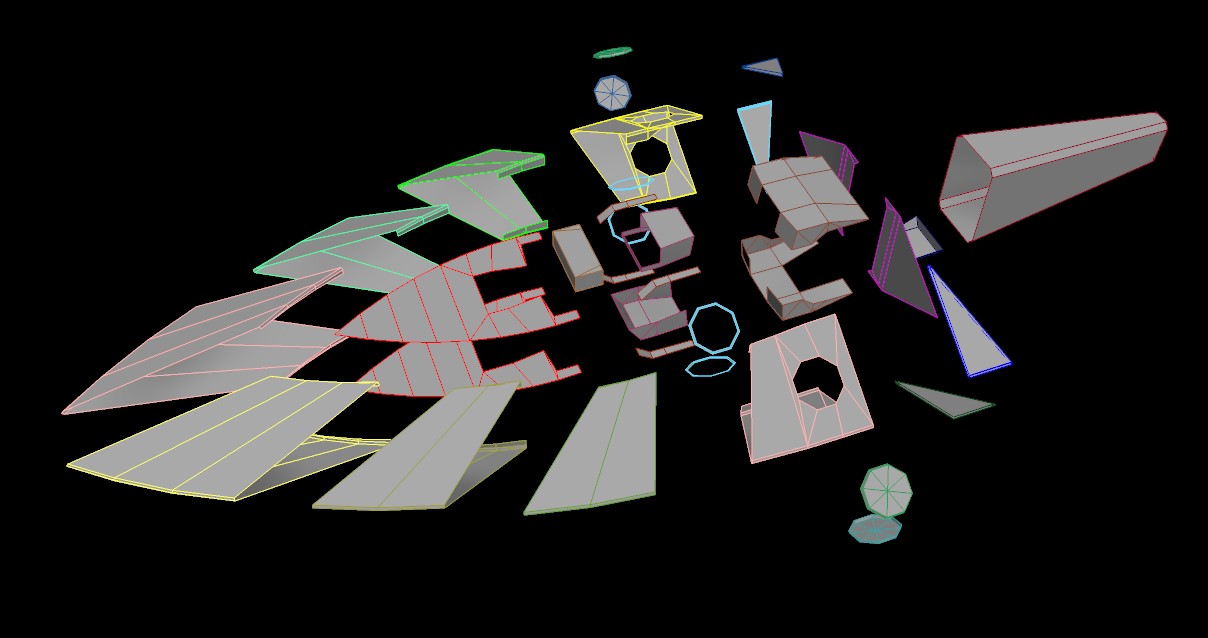
Once I'm happy with the UVs I can slice my model into the required parts: engines+thrusters, engines glow, windows, and in this instance two hull segments.
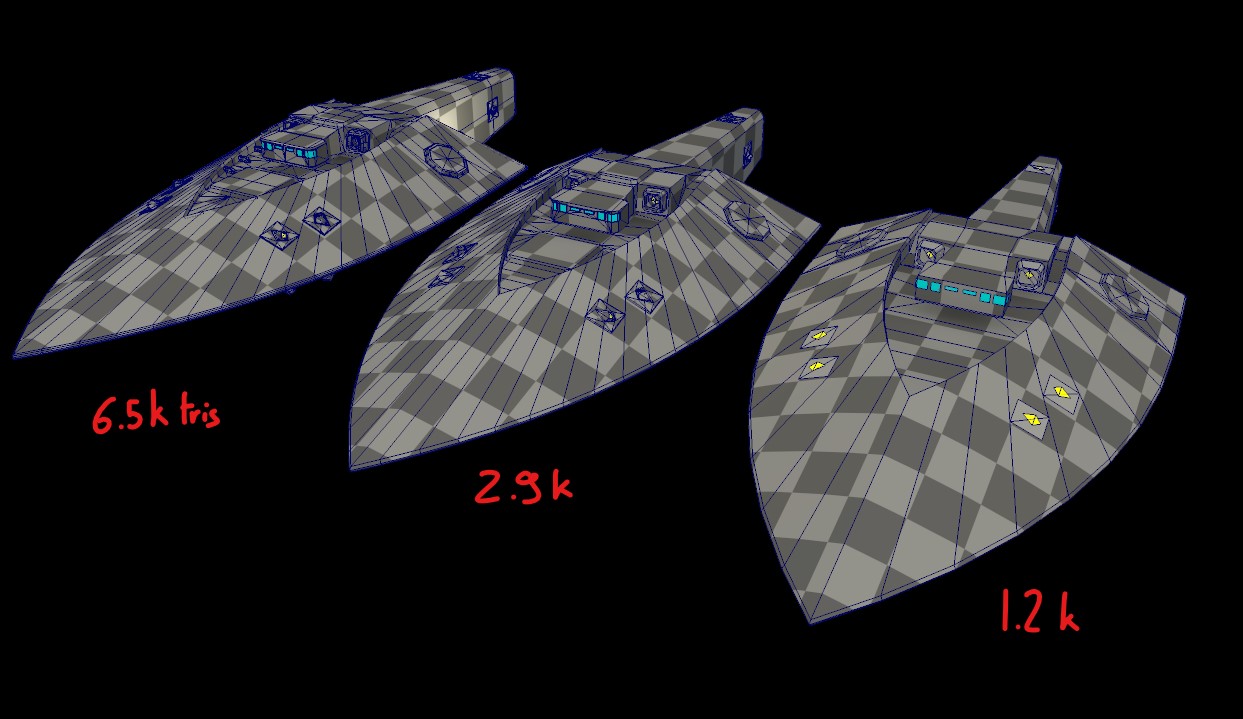
LOD 1 & 2
Since the UVs are done, simplifying the model is now fairly easy. The vanilla poly counts should be from 8-10k for the LOD0 down to about 2-3 k for the LOD1 and under 1K for the LOD2. As mentioned before, those numbers are not hard limits as the poly count for the visual models is not a bottleneck.
EXPORTING TO UNITY
There are three things to do before exporting the model:
Use this precise hierarchy and "_LODx" suffixes, that way Unity will automatically setup the levels of details upon importing the model.
Ensure all the parts and groups have no values of transformations, that they all share the same pivot placed at the center of the scene and that this pivot is at the center of mass of the model.
Triangulate everything!
Then you can export the model using a default FBX format.
COLLISION MODEL & TEXTURES
COLLISION MODEL
A few details aside, the collision model should look quite similar to your LOD2 mesh. Engines, thrusters as well as everything that does not have collisions can be removed (such as comm arrays).
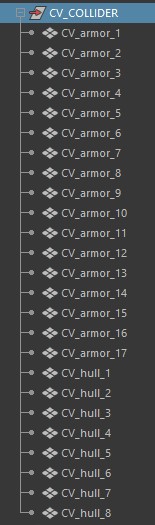
As mentioned in Stephmo's guide, you have to cut this low poly mesh in as many sections needed to isolate convex shapes.
This convex rule is not absolute, but every deviation will cause some inaccuracy in the impact detection due to Unity's "gift wrapping" of those meshes. While no specific nomenclature is required, I suggest renaming every section with a prefix indicating to which LOD1 mesh it is tied to. This will come in handy in Unity when you can have upward of 50 elements to assign to different collider scripts.
Be aware that a collision part cannot be a perfect plane. Unity will replace those by a bounding box that does not respect the shape of that part.
Make sure everything lines up with the displayed model, as well as ensuring all the pivots are placed to the center of mass like previously. A simple FBX export is then all that is left to do.
TEXTURING
Source: https://steamcommunity.com/sharedfiles/filedetails/?id=2815953082
More NEBULOUS: Fleet Command guilds
- All Guilds
- Making a Puppy Map: Handling Player Feedback
- Making a Puppy Map: The Beginning
- NEBULOUS: Fleet Command Guide 454
- Understanding the Role of MDs and Rails
- Comprehensive Craft Clobbering Compendium for Chic and Comely Captains: A guide on ACM design and usage
- How to Win As a Carrier (Intermediate Doctrine and Tactics Guide)
- A Step By Step Guide to Setting Up Your Carrier and Loading Craft
- A Step by Step Guide to Setting Up Your Craft
- The Craft Management UI and Craft UI
- Salvo size = infinity; Cruise missile Time on Target attack handbook.