
Preface

This guide frequently mentions Time-on-Target (ToT) attacks. These describe attacks wherein multiple salvos of containers arriving at a target at the same time, and their proper execution make containers extremely effective. Executing ToT attacks is elaborated on in the “Time-on-Target (ToT) attacks” section near the end of this guide. Feedback on this guide is encouraged, either here or you can find me in the Nebulous discord.
If you're just starting out with missiles, or if you're new to the game, the container liner might not be the best entry point. It's not a very forgiving ship, and successful attacks take more time and effort to pull off than with any other missile, and the length of this guide should probably scare you. However, shooting down hundreds of containers is the only joy compatible to launching them, and I want to shoot more down. So for the brave and the foolish, I want you to play a container liner, and I want you to have a fighting chance while you’re at it!
Ship Design


The container liner is a more limited hull in terms of options, but a lot will still come down to personal preference. For example,I value a faster drive to move more aggressively throughout the game, and a suspiciously large quantity of offensive S1 missiles for close-in threats. Generally speaking, I've found these extra capabilities tradeoff with fewer containers carried. When making these design choices, there are a few points to note:
Intel CenterThe container liner is possibly the only ship that's both cost competitive with and also better than an Intel Center. For the same cost as you could have an intel center, you could have 22 4pt containers that all provide spotting on ships, visual tracks, PD information, and defeat a Masquerade. An intel center can't do any of these things and you can't trade it for combat power if the game calls for it. I don't recommend an intel center on container liners.
Programming ChannelsAll else being equal, a salvo of even a hundred regular containers won't have more success penetrating Defender/Pavise point defences than a salvo of ten, Defenders are just really good. Programming channels don't increase salvo density because you're only launching from four weapons at a time no matter what, so, what's the point? What you're really buying here is margin of error in your mental timings for ToT attacks. More programming channels means a salvo will be longer, taking more time between first impact and last impact. Simultaneous container impacts are better than consecutive ones, so fewer programming channels is better than more if you can get away with it.
When I started I used a salvo size of 12, then 10, and now 8. If your issue with ToT attacks is that they just don't quite arrive together, you can compensate with more programming channels.
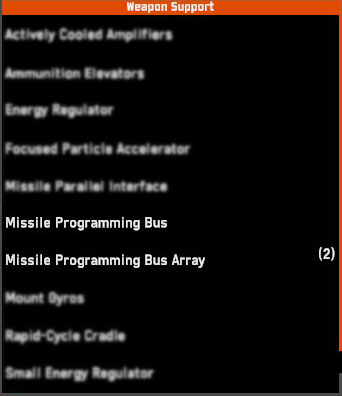
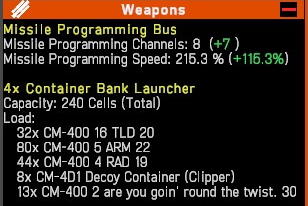
Programming TimeContainers have a 20 second programming time, and this can be reduced with Strike Planning Center (SPC) components and Missile Parallel Interface modules. Realistically you won't have space for the latter, but adding at least one SPC will cut down the extra delay you need to account for in your ToT attacks. 1 SPC reduces programming time to 12.5 seconds, 2 SPC down to 9.3 seconds, and 3 SPC down to 7.7 seconds. I use two because I'm used to it, it's nice, but if I were starting over I'd use one to save 70 points. Don't take three.
DefenceWhen considering your defence against a deliberate missile attack, the survivability onion for a container liner is two layers thick, and hollow: Don’t be there, and if you’re there don’t be seen. In my view, hard-kill point-defence just isn't worth it here. If someone wants to kill your ship (everyone wants to kill your ship) and you aren't actively moving around to prevent that, they're going to succeed. If you want to bring hard-kill PD anyway, bring AMMs. Bring a lot of chaff/flares just in case, rapid repair teams to repair all of the flanking damage, and just enough restores to get you through an otherwise winnable close range fight.
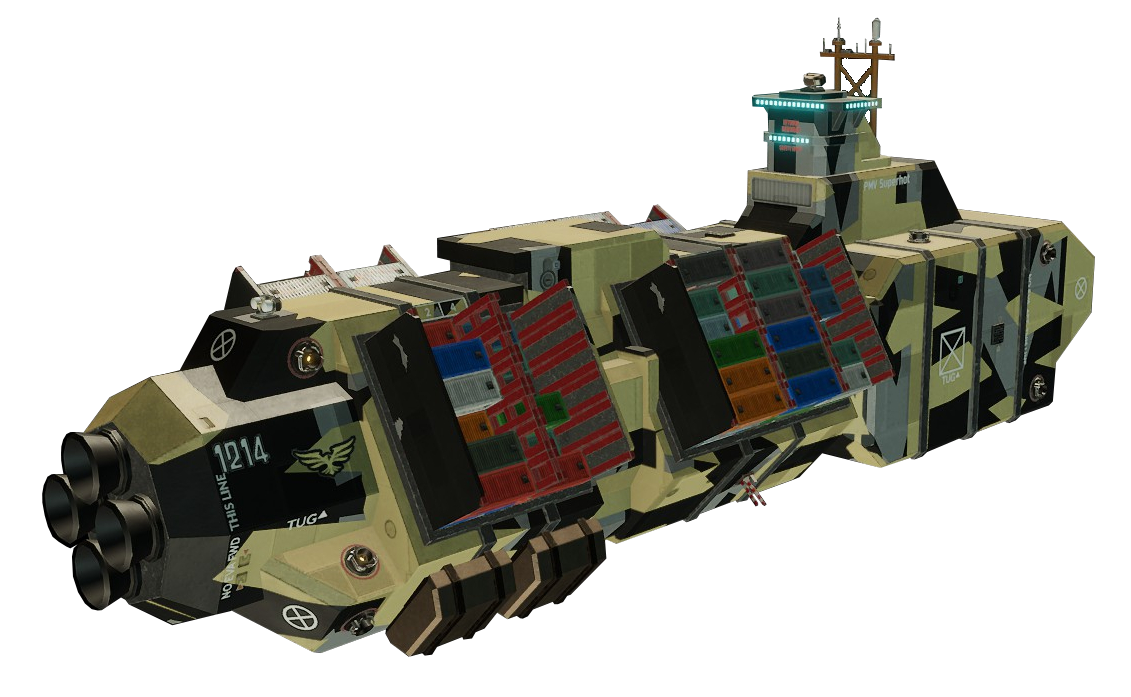
Hull GeometryUnfortunately, as cool as some of the container liner variations look, there is a best option. This BestHull™ arranges your container banks to all eject your containers in the same direction, that is upwards. It also launches them in the densest cluster compared with any other layout, which very subtly increases PD penetration. Finally, this configuration will allow you to park the underside of your ship on terrain to minimise the enemy’s ability to detect and kill you without limiting your firing arcs, and it allows your salvos to reliably launch in close proximity to the rock on which you’re attached without risking containers hitting the rock. Linked is mine, feel free to build yours on top of it if you like, just so you don't have to get lucky rolling this layout.
https://steamcommunity.com/sharedfiles/filedetails/?id=3035877153
Container Design


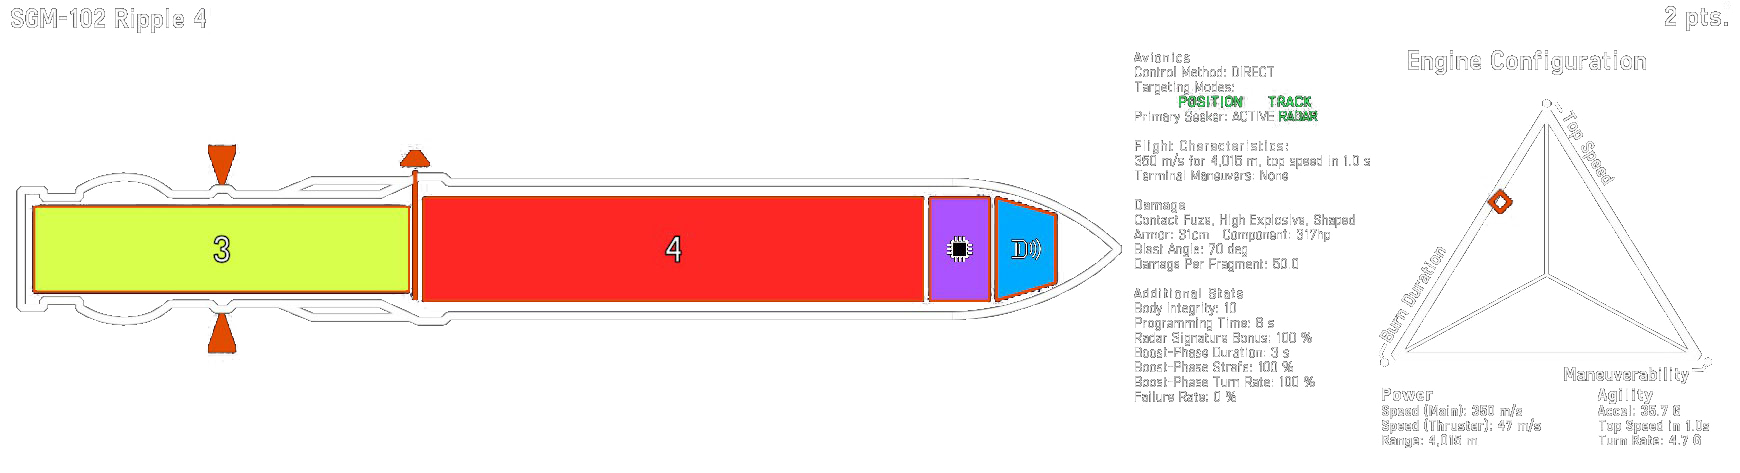
You'll need several kinds of containers to get the quantity you need to last a game. Roughly 180-200 containers is a good place to start. All of your cruise guided offensive containers should be hot launched so they don't waste time getting on the way to the target, and this will also make your ToT attacks more reliable. You should also be using Minimum Angle, not Free Approach, because containers just aren't agile enough to chase a target.
A couple other sad notes, Rocket containers are pretty bad right now, as are mine containers. Regardless of their poor stats and effects, they aren't worth it for of the steep hull cost. Please don't take either.
EO DecoyEO containers with a decoy launcher (commonly EO/Decoy, EOcoy, or EO/D) are the most expensive and reliable containers you'll carry, and these aren't optional. Even moderately defended targets effectively require this specific container to break through, or equal points spent on three times as many cheaper containers with a perfectly executed ToT attack. We use EO seekers here because any other seeker can be soft killed with chaff or jamming, and because these containers have the highest individual hit ratio, they also get the largest warhead. Even if only one or two actually get through, they'll still hurt. This makes up roughly 1/5 of my containers. We don't use the cluster decoy launcher because it's less points efficient per decoy launched, which means fewer containers carried. In games greater than 3k points you'll probably want to add more of these, even replacing other containers if the points allow.
ARAD/RADARAD/RAD containers are reasonably cheap, and make up the bulk of what I carry. They'll prefer targets with radars turned on and so are a reliable choice to split many hits between multiple targets, because as ships are hit and the power or radar fails, the containers will shift to another target if available. They're launched after the EO containers in your ToT attacks. This makes up roughly 2/5 of my containers.
RAD/[WAKE]RAD/[WAKE] containers are the fastest and cheapest of the bunch. They should accept unvalidated targets. They're trivially easy to defeat but they're the best bet for catching an errant corvette or for use in scouting. This makes up roughly 1/5 of my containers. They're very disposable but the potential for scouting offered means you shouldn't waste them.
Setup

This is the process I generally use no matter what game. You can certainly get complicated with it and mix in the points in the next section everywhere they seem applicable, but I'll only cover what's necessary every time here. Playing a container liner will often let you fall into the role of very generally assigning forces to regions they'll be most effective, as you should have the most comprehensive picture of the battlespace of anyone on your team. Obviously, not everyone appreciates this, nor is everyone good at it. But, if they do and you are, coordinate it with your team!
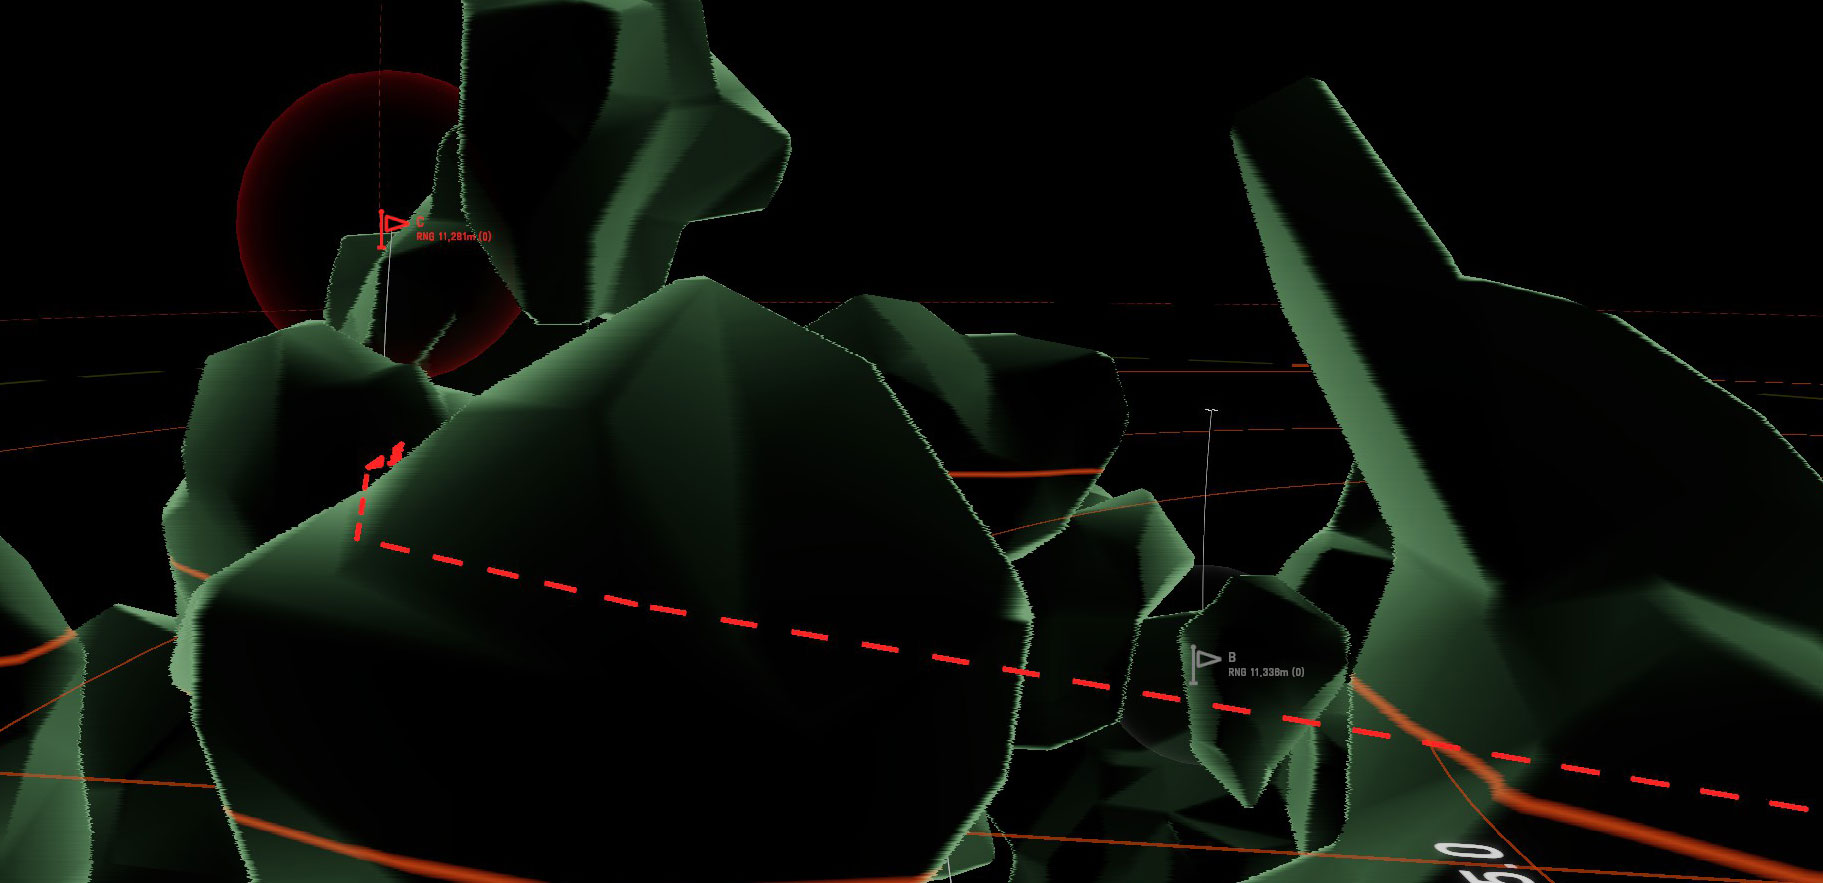
ReconAt the start of a game you should be deploying your container liner close enough to areas of interest or capture zones with respect to the range of containers. Deploy in concealment because a lone large flare seen by the enemy is a pretty safe bet to be a missile LN or a container liner, either assumption is equally bad for you. Assuming you didn't buy that Intel Center (good job), you should have a whole bunch of containers for just this purpose.
Deploy the cheapest containers you have that can reach the area you want to look at - a full salvo isn't needed, but more than one container is wise. You want to keep an eye out for any point defence (especially Sarissas), where it comes from, and in what density. Likewise note the number and rough position of distinct groups of chaff/flare countermeasures deployed, their dispersion and quantity should give you a decent idea what kind of fleet is there even if you can't visually see them and they don't shoot your containers down. Tell your team all of this information as well as your best guesses to the situation if you feel confident about that.
AssessmentOnce you have a visual track, you should be zooming in on that and scraping every detail you can. What weapons do they have, what size of missiles, more than one bank of missiles and that's a real threat, what point defence do they have and on which facings, what point defence do they have, specifically defenders - count those. Tell your team about what kind of hulls they are, in what numbers, and with what weapons.
You care about how fast they can go, and if you can break through their point defence, and perhaps some angles of approach are more vulnerable than others. A Light Cruisers for example with a S1 launcher on one side is likely to only defend that arc win one gun. Defenders are a real threat, in practice you can get past perhaps three of them with a well executed two salvo ToT attack. More salvos at the same time will do better or survive more defenders. Auroras and flak aren't a big deal, they're good at killing the decoys from your containers but except for in truly large volume can be easily ignored.
RepositioningDue to the cripplingly slow speed of containers, your distance to your targets often needs to shrink as their speed increases. Predicting the position of fast targets up to a minute and a half in the future is hard, reducing the time of flight for your strikes will increase your hit rate. Corvettes and Light Cruisers are particularly difficult targets, though you can always ask your team for help too. Mask your movements well and a container liner can travel 50km through a game while being shockingly sneaky.
SurvivalContainer liners are prime targets, they're valuable and often defenceless. You need to move away from where you deployed immediately. Ideally, you need to be constantly moving. If the situation doesn't permit that, then you can use the BestHull™ to land on a rock to limit how visible you are. Freshly launched containers have a pretty obvious pattern before they fall into a uniform line and that can often give away your position. You shouldn't be sitting still for extended periods out in open space no matter how safe it seems to be.
Attack


In an ideal situation, when both time any the enemy permit it, you'll be able to use all of what's contained here in any single attack. Keep in mind that even with all of this information, some targets simply can't be beaten. Multiple enemy fleets balled up together might just have too much hard kill PD to break through. Don't waste your potential on attacks against targets that confidently won't succeed.
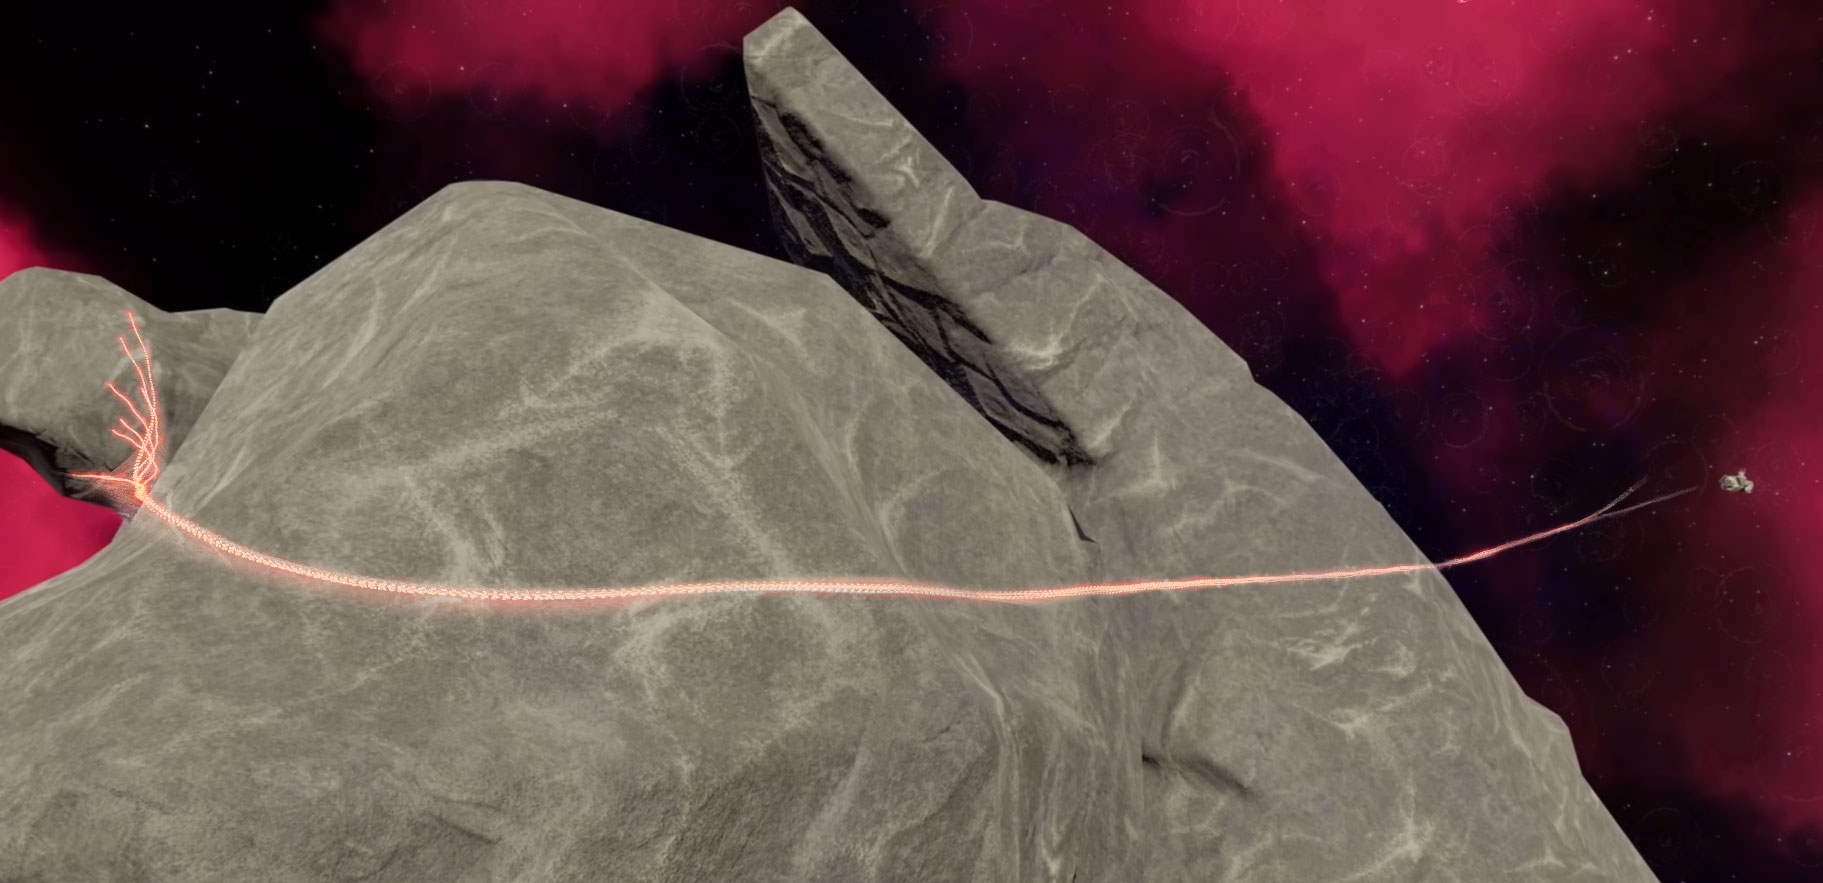
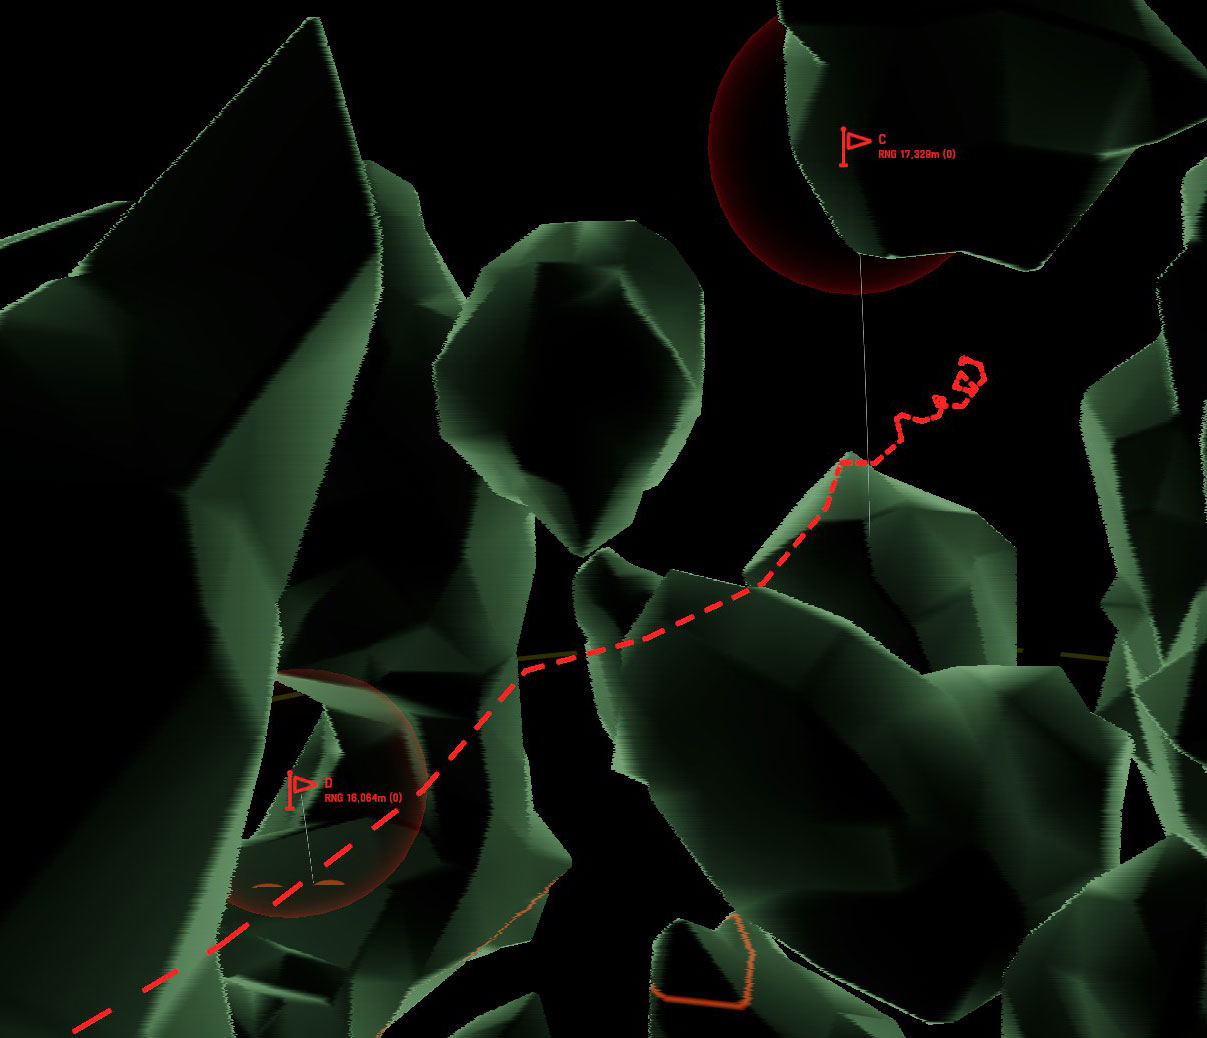
Concealing attacksWhenever possible, concealing your attacks by pathing them as close to obstacles as possible both restricts your enemy from being able to shoot down your containers in flight, and if you can conceal the attack at terminal ranges, it also limits the effective PD response from the target ships. This can also help you live a little longer by obfuscating the origin of the attack
It's a good idea to set up the first salvo of a ToT attack in this way, as you're not under time constraints from salvos already in flight
Evasive cruiseYou can path your containers on a three dimensional spiral to the target when crossing open space to dodge either or both long range and low velocity threats (sarissas and RPF, primarily). This will also have noticeable increases to survival if your containers happen to pass through the range of some defenders en route. The spiral can start out at relatively low frequency, but should increase in frequency as the distance to target closes. Some people opt for a two dimensional weave or zigzag, but spirals are best. A weave is often not enough when anticipating a threat from the direction of travel. Keep in mind that the time of flight that is shown to you when planning the waypoints works as if the missile stuck to the path exactly, there will always be some deviation. However, if your spirals are tighter than your containers can actually turn, they'll deviate significantly, and the time of flight will not be reliable.
Really, spiral frequency should scale inversely with missile speed, but containers are so outlandishly slow my spirals all look the same. This is a really easy way to improve your odds with small salvos of other missiles too.
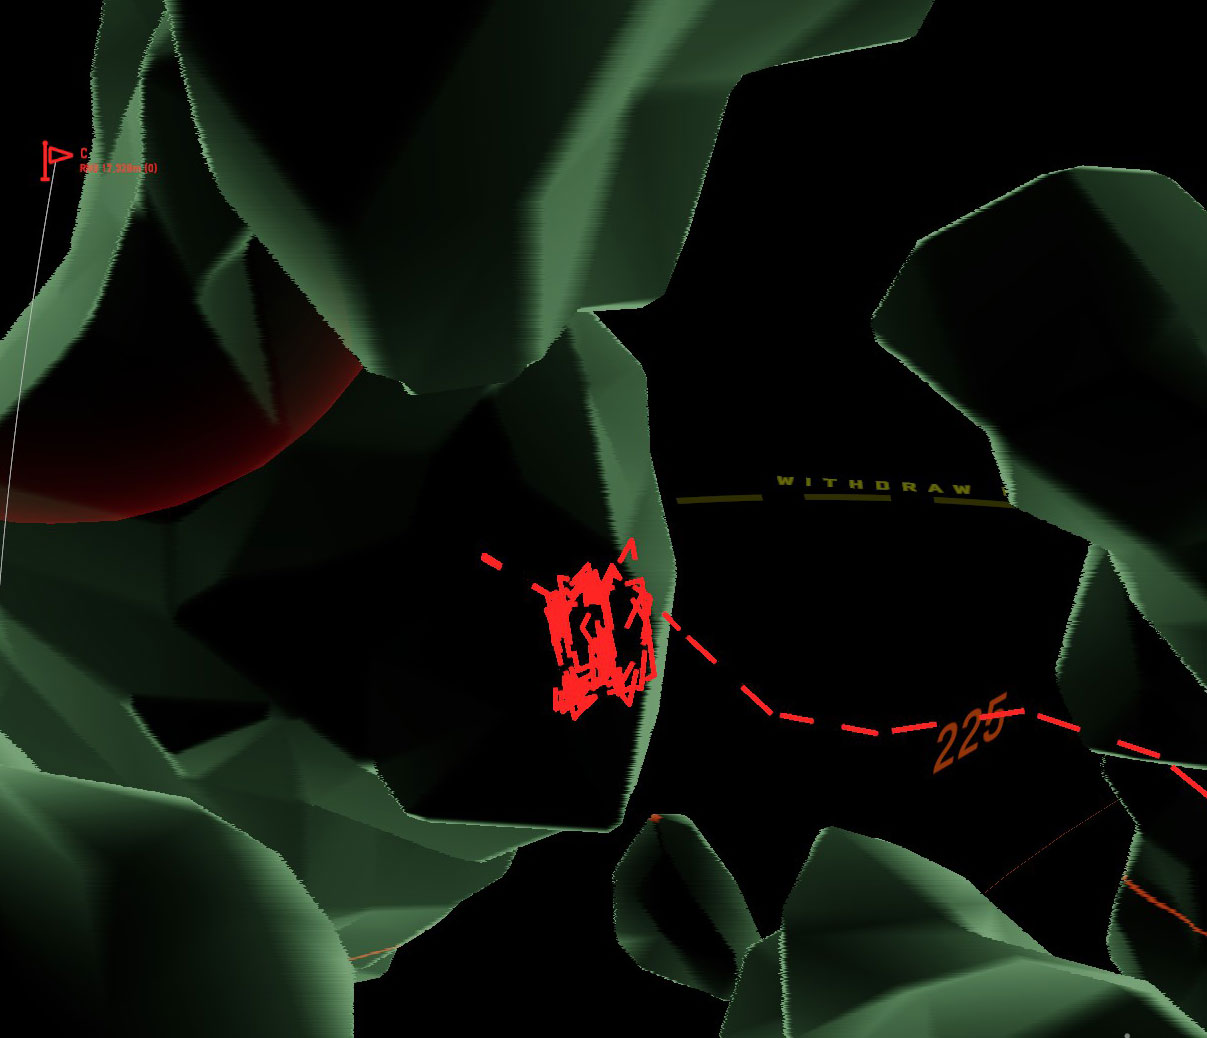
Time on Target (ToT) attacksToT attacks involve setting up multiple salvos to fire with a known delay between each one, that they arrive at a target (roughly) simultaneously. When planning out the waypoints for the first salvo, you want to include as much extra distance and thus time as is required to allow you to launch every following salvo. You can figure this out in advance if you know your programming time from back when you added a number of Strike Planning Centers, your salvo size, and the number of banks this salvo is launched from.
To use an example: Containers have a 20 second programming time. My container liner has two Strike Planning Centers, increasing the programming speed to 215.3%. My effective programming time is 20/2.153 = 9.3 seconds.
I have a salvo size of 8, and I have my "5 ARM 22" containers in four banks. Container banks have a launch interval of 1 second, so the launch time for this salvo is 8/4 rounded up = 2 seconds. My "16 TLD 20" EO containers are only stored in two banks, not four, so a salvo of those has a launch time of 4 seconds. Add either of those together with the effective programming time and that's the minimum for how much extra delay you need between total flight times for each successive salvo. For large salvos this can become relevant, but I treat my launch frequency as 12 seconds regardless of what I'm launching, and I add a few more seconds for the inaccuracies of the planner for twists and turns in flight, ending up with roughly a 15 to 20 second launch frequency depending on the distance to the target. Any additional delay that you need should be achieved with a more evasive cruise path, or performing a loop or two en route. Achieving a delay with an erratic waypoint in the path lowers the flight time accuracy significantly.
Now ideally, you'll do this live, setting up salvos to accommodate the required delay as you mentally count the time since the last launch, because, as usual, you want to be in motion to stay alive. If you're just starting on learning this process however, it may be useful to halt your ship and set your WCON to Hold while you plan out each of the salvos, and then back to Free or Tight when you're ready. Moving around while on WCON Hold will mess with the time of flight for the salvos you've already planned, and I don't recommend that. You should only set up ToT attacks in increments of full salvos. EO/Decoy containers should arrive first if not simultaneously, and followed by ARAD/RAD.
This form of attack is essential to master, and required in order to threaten even small formations or moderately defended ships. This is intimidating to set up to start with, but it'll be habit soon enough.
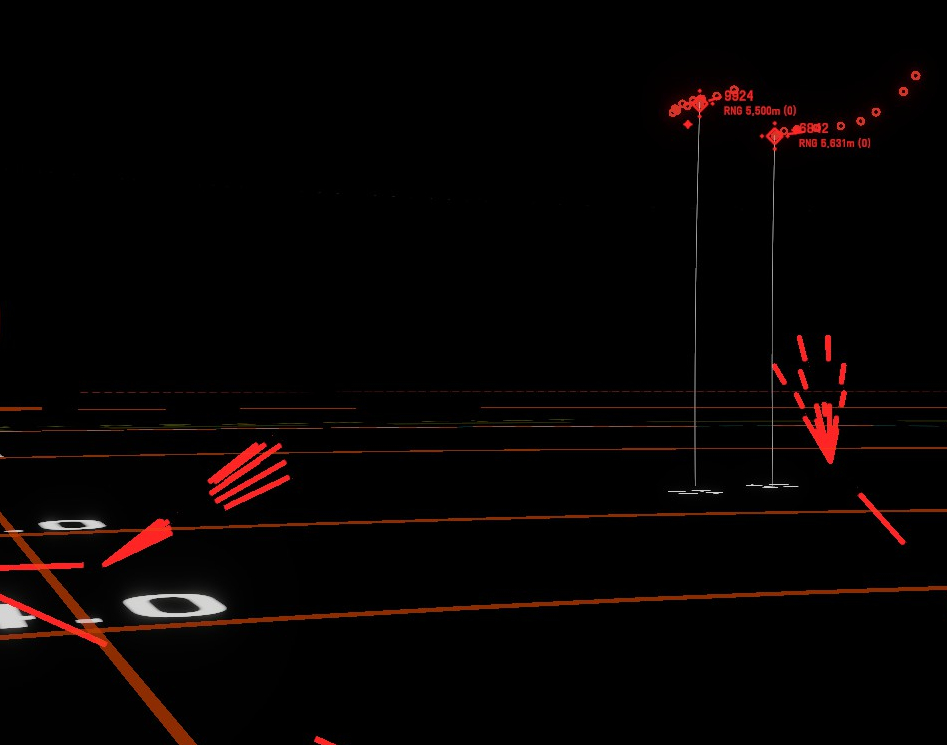
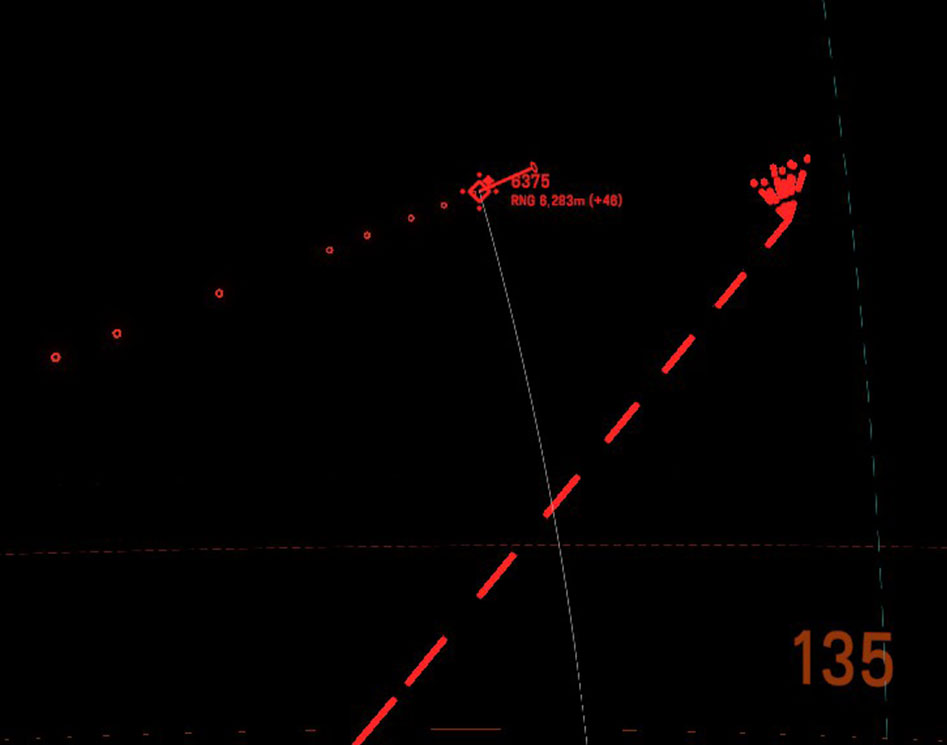
Attack profileLooking at the terminal phase of a ToT attack, the intent is to engage with as many containers as required to penetrate defences, and we want to engage as few defences as possible. You should attack from the least defended angle, if there is one. Each salvo you send should engage the same face of the target but from another angle, because we want each defensive gun to have to turn between engaging different targets, because that takes time.
Likewise even in a single salvo you don't want the containers to arrive all in a straight line, defender point defence can kill multiple targets accidentally while only targeting one of them. The final waypoint in a missile path should have the salvo spread out, in a line if the target is moving to account for you own error in predicting their speed, or in a circle against a relatively static target.
Give extra care to targets with defenders if they are moving away from the direction the containers. The extra time they have to defend from the lower relative speed means they can defeat many container strikes that would otherwise hit.
Advanced Stuff


Adding to the noiseArranging some containers to orbit a point in space is an effective method to accomplish a couple of things. In order, It'll provide targets to enemy long range point defence that are, at range, impossible to hit. This will continuously drain ammo as long as the enemy has PDZONE set to Area. Point defence will automatically take the closest targets in my experience, so, this formation when well placed will completely remove an effective automated response from offset enemy allied PD, and force them to manually target each container in any strike you're screening.
It has limited effectiveness directly against the ships you're targeting, however when kept at the limit of thier point defence range it can also drain 20mm and flak until the target changes their PDZONE to Point. If you're targeting a formation of ships, each ship in the formation that is set to PDZONE Point will not deliberately aid any other ship in the formation with point defence unless also threatened by the same strike. This can be exploited with a considered axis of attack that threatens as few ships as possible.
This is a significant time investment to set up, in the range of several minutes, where you also can't respond to other threats. Ships with auroras are real threat to this tactic, likewise if you misplace this formation or the enemy ships simply drive into it, any point defence will be able to take it down. This is most useful for a static fight or if you can set it up in advance of an expected attack. It's probably not necessary, but I carry dedicated containers for this purpose with extended range and manoeuvrability, and a warhead sized "just in case". You can cut them down to 1pt each and they'll be just as effective.
Setting this up involves a lot of waypoints at minimum range from each other. You should arrange them in squares, not triangles, to get a more accurate time of flight as to not waste time on waypoints that will never be reached. They really don't need to be perfect and it doesn't matter if you reverse the direction of travel, change the angle or anything. You just need good enough. This idea does not work if you arrange it in a line that repeatedly doubles back on itself.
Surviving ambushS1 missiles fired in bulk are an unexpected threat that can punch through defender 20mm defence. They threaten up to a light cruiser, and are very hard to intercept when hot launched. I like a S1 load split 1/4 on steerable active radar, and 3/4 on semi active, just to make up the mass. There's a lot of corvettes to kill, after all. If you only want self defence then CMD seekers are nice, if you can afford them. Use a seeker of your choice, but this missile config is what peak performance looks like.
Decoy containersDecoy (Line ship) and Decoy (Clipper) containers are really useful. They'll show you the enemy positions and capabilities when they're engaged, and they regularly pay for themselves and then some after just a couple of hybrid missiles are launched at them. I prefer the Clipper decoy due to the extra speed and they're a little cheaper. Secondarily, these decoys make for your most effective active point defence. Keep one or two in orbit of your position when in danger or send them in the direction of an enemy missile ship, these containers will cause missiles to stage early and they'll take several hits otherwise intended for you.
They are, unfortunately, extremely prone to crashing into everything. They'll hit you, neighbouring rocks, friendly ships, each other, anything at all. Launch them one at a time, not in salvos, and take note of where they're stored in your container banks. The first waypoint you give them should be in the direction they're ejected, directly away from you and not intersecting with your ship.
Source: https://steamcommunity.com/sharedfiles/filedetails/?id=3035840406
More NEBULOUS: Fleet Command guilds
- All Guilds
- The Vibes You Need For Frontline CLN (Or How to Ultrahot)
- Making a Puppy Map: Handling Player Feedback
- Making a Puppy Map: The Beginning
- NEBULOUS: Fleet Command Guide 454
- Understanding the Role of MDs and Rails
- Comprehensive Craft Clobbering Compendium for Chic and Comely Captains: A guide on ACM design and usage
- A Step By Step Guide to Setting Up Your Carrier and Loading Craft
- How to Win As a Carrier (Intermediate Doctrine and Tactics Guide)
- The Craft Management UI and Craft UI
- A Step by Step Guide to Setting Up Your Craft