
Preface
First off, THIS GUIDE CONTAINS SPOILERS.
When I started playing Lost Castle, I was surprised that there were not yet any English guides or even a wiki of some form available to check for details and information regarding various parts of the game. After a short while of playing, I fell in love with this game and I decided to put this guide together in order to help others who may be seeking such a resource as I had been early on.
A lot of the provided information may very well be superfluous, but I wanted to do my best to make the mechanics of this game as clear as possible to newcomers. Now that the game is fully released, nearly all of the spelling and grammatical errors have been corrected. When using direct quotes from the game, I will continue to leave in any errors I come across, both on the off chance that they may noticed and corrected and also so that people will be able to recognize descriptions as they are found in-game.
This guide is up to date with Lost Castle v2.01.
I have added a small number of self-recorded videos regarding the secret Nightmare Mode path near the end of this guide, and the quality is mostly okay but it does get pretty choppy at certain points. I apologize for the poor quality, but I hope that the few videos featured in the guide are bearable enough to get the point across.
The Basics


What is Lost Castle?
Lost Castle is a 2D Rogue-lite Beat 'em up developed by Hunter Studio. Lost Castle follows the story of various treasure hunters, each seeking riches beyond their wildest dreams in a castle that has been suddenly taken over by creatures of evil. As one treasure hunter falls, another begins their own journey through the five areas of the game aiming to find as much loot as possible before the Castle is reclaimed.
Lost Castle shares many similar mechanics with other rogue-lite games, such as Rampage Knights and Rogue Legacy, while bringing a lot of original concepts and ideas to the table. As the player progresses they will find many unique treasures and items to aid them in battle, as well as a ton of different weapons and armors to experiment with.
Main Menu
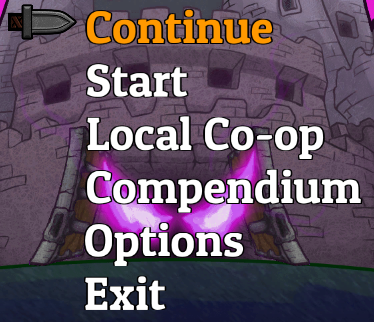
The Menu screen for Lost Castle has up to 6 options that can be selected. I will only be providing information for the less obvious options.
Continue
The Continue option only appears when you have quit a run early, and it allows you to jump back in from where you left off.
Compendium
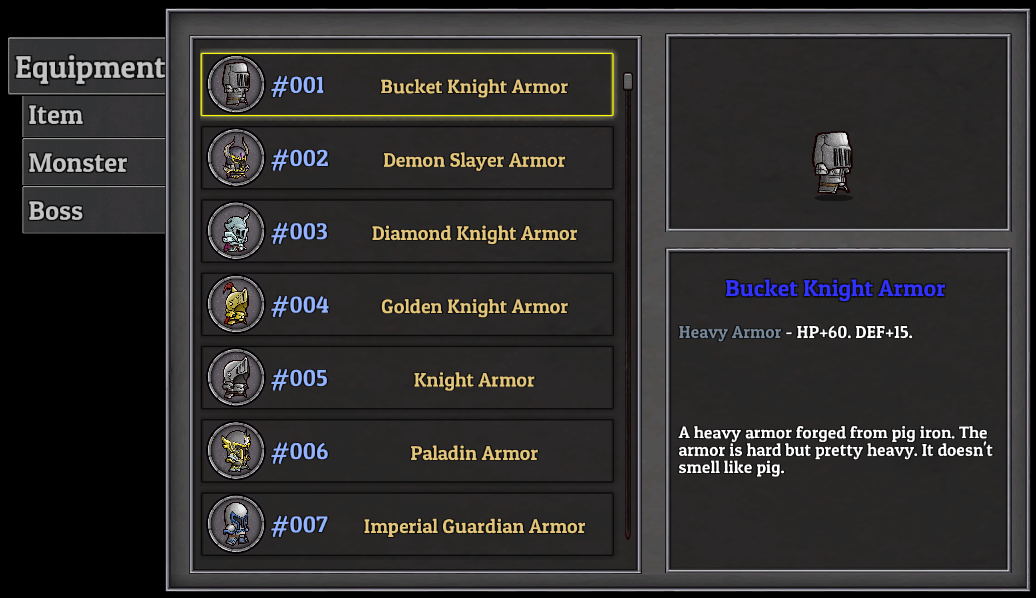
Previously referred to as the Manual, the Compendium will fill up with information as you play through the game. It has four tabs on the left side: Equipment, Item, Monster, and Boss. You can select individual listings for extra information about them. The Compendium can be accessed even when playing.
To reduce the heavy load of images while still covering all the information that I can, I have created a separate guide that contains all of the information found within the Compendium. That guide can be found here.
Note: This Compendium guide is currently out of date.
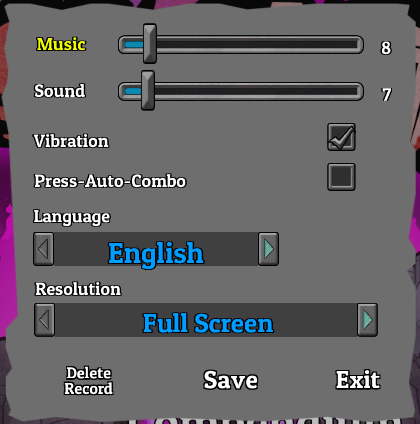
Options
When selected, a small window will pop up with another five options to select from. The first option allows you to adjust sound levels, turn controller vibrations on or off, turn auto-combo on or off, select your language, and to adjust the game resolution/screen size to your liking. There is also the option to delete your data in the bottom left corner of this screen.
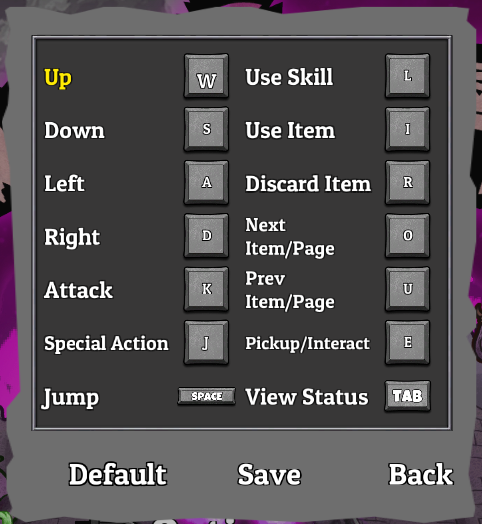
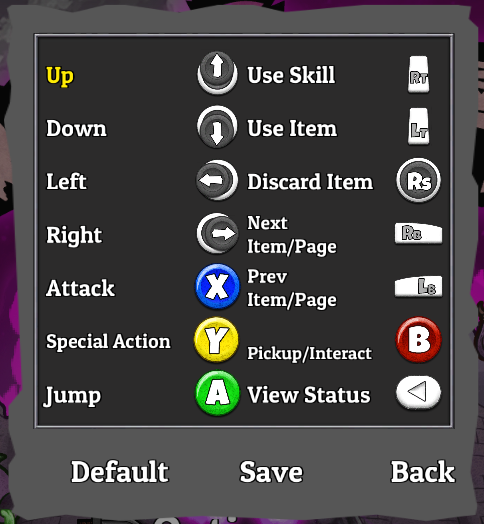
The second and third options allow you to see and edit both the control schemes of the keyboard and the controller, respectively. You also have the option to set them to their default controls schemes.
Credits
The fourth option shows you the credits for Lost Castle. And though it is probably obvious, the Exit option simply returns you to the main menu.
Character Info
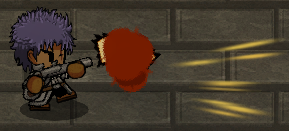
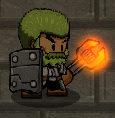
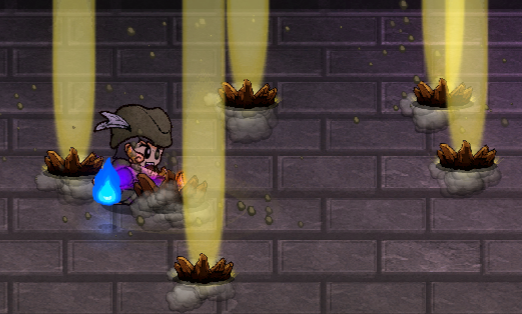
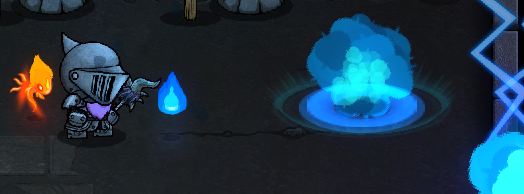
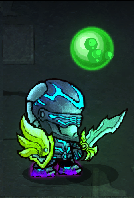
Information regarding the player's health, skill cooldown, gold, souls, and items are all located in the upper left hand corner of the screen.
The red bar indicates the player's health and will gradually empty as the player takes damage.
The smaller blue bar indicates when a skill is ready to use; after using a skill, the blue bar will slowly regenerate until it is once again full.
The amount of gold and souls collected by the player are tracked on screen. Gold can be spent on various things on the current run, while souls are used for long term upgrades after a run is finished.
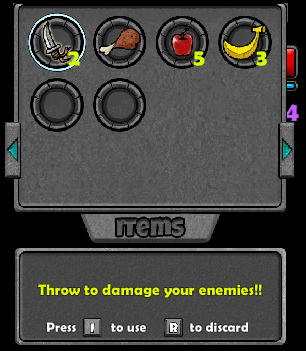
The items that the player picks up will go into the empty spaces in their inventory and they can hold up to 6 different items at once. The player can hold only 9 of the same item at a time.
Status Screens
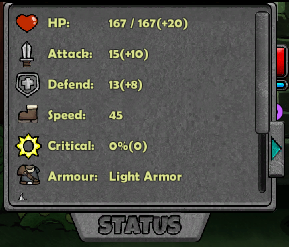
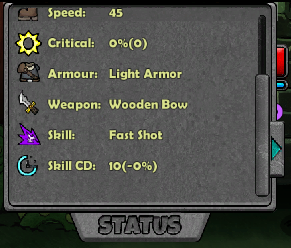
The three status screens provide information regarding your character's stats, items, and treasures.
For the character stats, the number in parenthesis indicates the total stat boost you have from the weapon and armor you are equipped with, whereas the number before the parenthesis includes your base stat as well as any stat boosts you have from other sources. As for the function of the stats, they are all very basic. Health determines your total HP, Attack determines your damage output, Defend determines the damage enemies will deal to you, Speed determines your movement speed and slightly influences your attack speed, Critical determines your chance to strike a critical hit. Skill Cooldown is somewhat different from the other skills as all boosts to it will be lowering the cooldown by a percentage. It simply shaves off the listed percentage of a Skill's base cooldown.
The item and treasure screens are pretty self-explanatory, as they simply show the gear you have picked up over the course of a run. The description for both items and treasures will pop up underneath the status screen when they are highlighted.
Environments Pt. 1


The Environments of Lost Castle
There are five main areas that the player travels through in Lost Castle. These areas are the Tower of Goblins, Bramble Courtyard, The Secret Path, Skull Dungeon, and The Main Tower. Each area houses unique enemies, bosses, breakable objects, and traps. There will be separate sections for the enemies and bosses, so this section will focus on breakable objects, traps, treasure chests, special rooms, and the various NPCs you may encounter.
As of September 28th, 2020, there is now a paid DLC update for the game: The Old Ones Awaken. This introduces two new side areas, The Ice Path and The Ruin. If you own the DLC or are playing online with someone who has it, you are now given a choice of two paths after defeating the boss of the second and third areas. Taking the upper door in the Bramble Courtyard will take you to The Ice Path instead of The Secret Path. Taking the upper door in either The Secret Path or The Ice Path will take you to The Ruin instead of Skull Dungeon.
Breakable Objects
Breakable objects are littered throughout the seven different areas of Lost Castle. They can block you when you're trying to maneuver away from enemies, but they can also block enemies that are trying to chase you down. Whether you choose to break them before or after the room is cleared of enemies, they are definitely worth breaking as they can often drop coins or food items.
Wooden Mug
Located in the Tower of Goblins.
Barrel
Located in the Tower of Goblins, The Main Tower
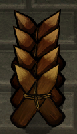
Wooden Barricade
Located in the Tower of Goblins, Skull Dungeon
Pot
Located in the Tower of Goblins, The Main Tower
Chair
Located in the Tower of Goblins
Table
Located in the Tower of Goblins
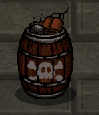
Explosive Barrel
Located in the Tower of Goblins, The Main Tower
Explodes, harming the player if they are too close to it when it is destroyed.
Bomb Box
Located in the Tower of Goblins
Explodes, harming the player if they are too close to it when it is destroyed.
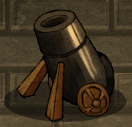
Cannon
Located in the Tower of Goblins
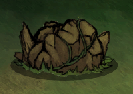
Withered Stump
Located in the Bramble Courtyard
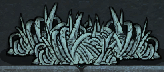
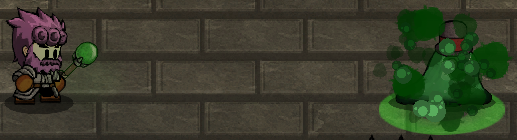
Spider Web
Located in the Bramble Courtyard
Considered an enemy (Greed Attack Skill will produce gold, Resilience Upgrade may restore HP)
Bomb Plant
Located in the Bramble Courtyard
Explodes, harming the player if they are too close to it when it is destroyed.
Considered an enemy (Greed Attack Skill will produce gold, Resilience Upgrade may restore HP)
Imprisoned NPC
Located in all areas of the game.
Contains a random NPC.
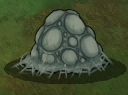
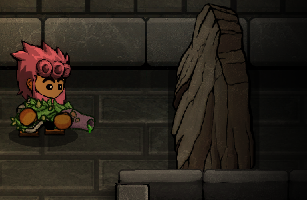
Cave Rock
Located in The Secret Path
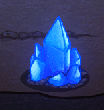
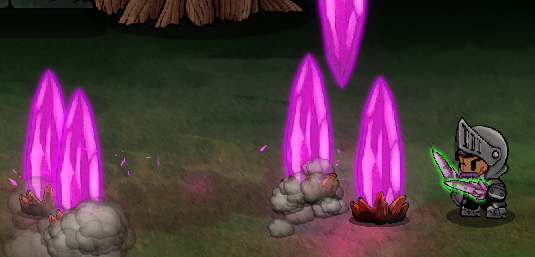
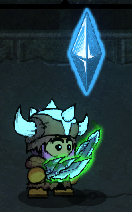
Crystal
Located in The Secret Path
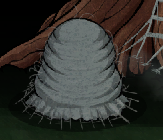
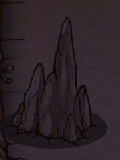
Stalagmite
Located in The Secret Path
Ice Chunks
Located in The Ice Path
Icy Rocks
Located in The Ice Path
Murloc Statue
Located in The Ice Path
Small Statue
Located in The Ice Path
Bone Piles
Located in The Secret Path, Skull Dungeon
Chained Skeleton
Located in the Skull Dungeon
Ancient Candle Stand
Located in The Ruin
Ancient Pot
Located in The Ruin
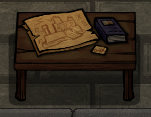
Ancient Table
Located in The Ruin
Forgotten Lord's Throne
Located in The Ruin
Rubble
Located in The Ruin
Fancy Chair
Located in The Ruin, The Main Tower
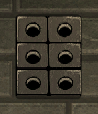
Grey Pot
Located in The Main Tower
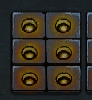
Grey Bone Pot
Located in The Main Tower
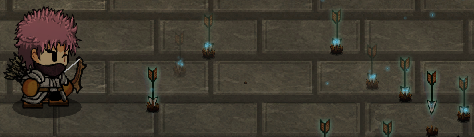
Traps
The traps in Lost Castle are mostly harmless once you understand how to avoid them, but they can be especially harmful in certain room layouts. It can be rough to juggle enemies and traps at the same time, but thankfully enemies can take damage and suffer debuffs from traps as well, though that never seems to help too much.
Spike Trap
Triggers if the player walks over it. Activates after a short delay, so you can run over them most of the time. Can also be jumped over.
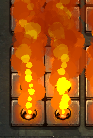
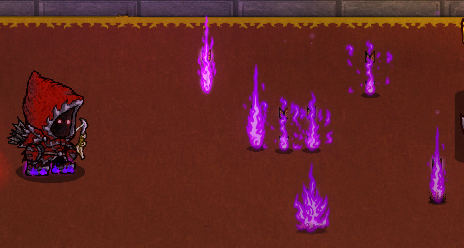
Fire Trap
Triggers every few seconds. Can inflict the burning debuff.
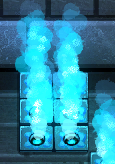
Ice Trap
Triggers every few seconds. Can inflict the freezing debuff.
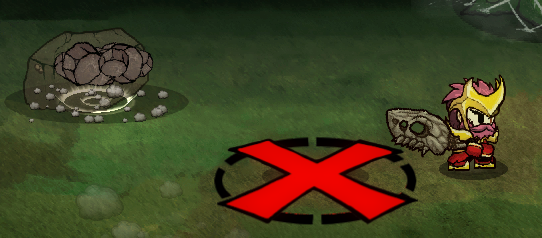
Falling Trap
Triggers if a player walks on the large shadow. A red X in a circle will appear around the shadow and shortly after an object will fall from the ceiling. Damages and knocks back anything still standing in the circle. Falling Traps sometimes do not have a shadow.
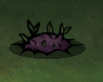
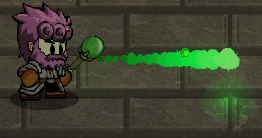
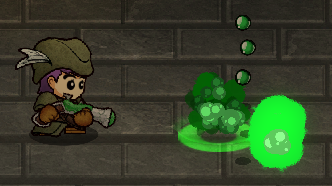
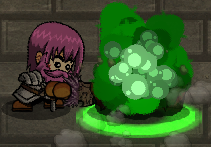
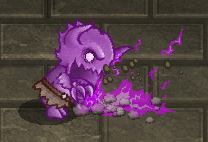
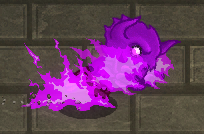
Poisonous Mushroom
Sprays out poisonous gases all around itself that will damage and poison the player if they get close. Can be destroyed, but it has 500 Health so it may be easier to just move past it when defeating enemies.
Plant Trap
Triggers if a player walks over it. Explodes after a few seconds.
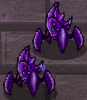
Spider Egg Sac
If not destroyed quickly, the Egg Sac will spawn two of either type of Cancerous Spiderling, OR one Demon Spiderling.
Environments Pt. 2


Treasure Chests
Treasure chests are quite common in this game, and there are six different types of them in-game. The item pool for treasure chests will differ somewhat from area to area in terms of weapons and armors, but all other items can drop in any area of the game. Rarer treasure chests tend to drop far more items than more common ones, and seem to have a better chance of dropping weapons or armor. Treasure chests will be opened if attacked.
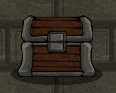
Wood Chest
The lowest quality treasure chest. These have a chance to appear after clearing a room.
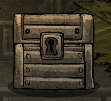
Thief's Chest
Thief's Chests only show up when you start a new run, and only when you have unlocked the proper upgrade for them. Another upgrade allows you to raise the maximum number of Thief's Chests provided per run to 3.
Silver Chest
A slightly better chest than the Wood Chest. These have a chance to appear after clearing a room.
Golden Chest
The best quality of chest that can appear after clearing a room.
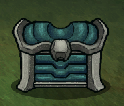
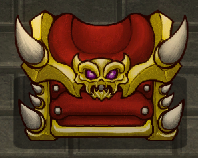
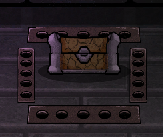
Demon's Storage Chest
These chests can rarely be found in side rooms that are attached to the main room. After all the enemies are defeated the metal bars around the Chest will lower allowing the player to open it. These always seem to contain at least one weapon, one piece of armor, or one treasure.
Great Golden Chest
Gold Chests spawn after a boss is defeated, save for the final boss. They will rarely appear in Bramble Courtyard outside of a boss fight and in siderooms in the other areas.
Removed Treasure Chests
Old Chest
Replaced by Demon's Storage Chest.
Gold Chest
Replaced by Great Golden Chest.
Side Rooms
Side rooms are often hard to come by intentionally, the reason being that there is no indication of which room is a side room and which room leads deeper into the area. This is especially painful because you can not backtrack in Lost Castle; you can only move forward or into side rooms. Thankfully, the upgrade "The Sixth Sense" grants you a chance to have an indicator show you which of two doors leads to a side room. Here are a few of the things that can be found in special rooms:
Free Item/Chest
Sometimes on the other side of traps, sometimes protected by enemies, sometimes just sitting out in the open! No matter the case, nothing beats free stuff.
Shops
Shops can vary in size, selling as few as two or three items or selling up to eight items. Armor, weapons, treasures, gem fragments, almost anything can show up in a shop.
Evil Altars
Evil Altars are generally pretty rare. They can grant permanent stat boosts (for a single run) at the cost of 50 HP. It doesn't actually take away 50 max HP, it just damages the player for 50 HP.
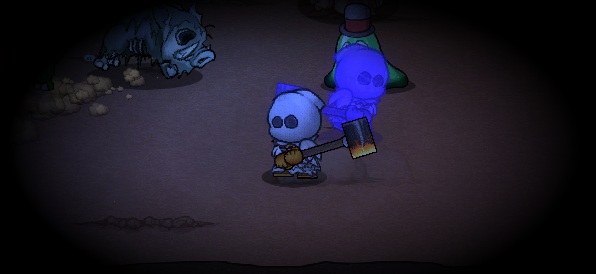
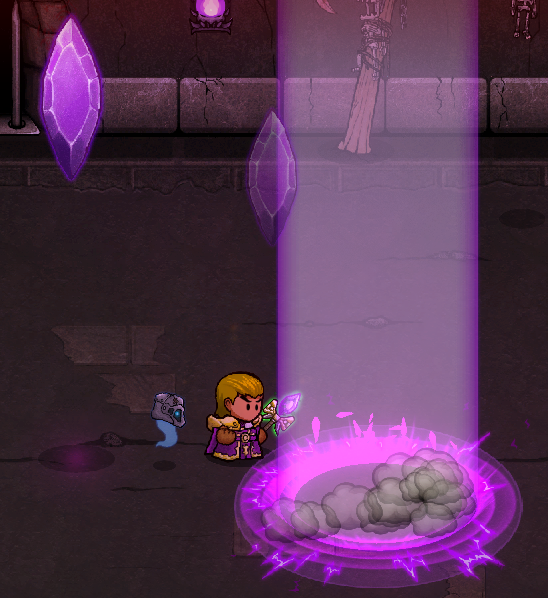
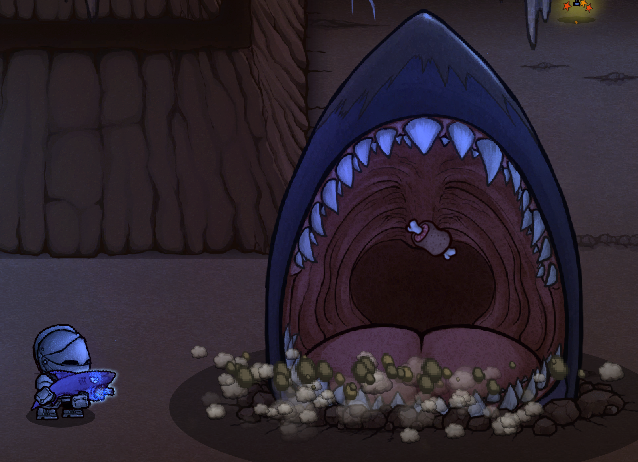
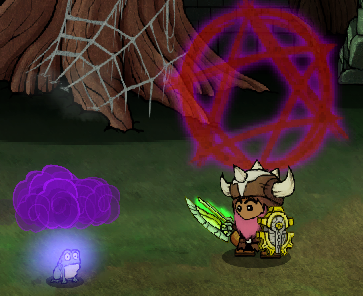
Challenge Rooms
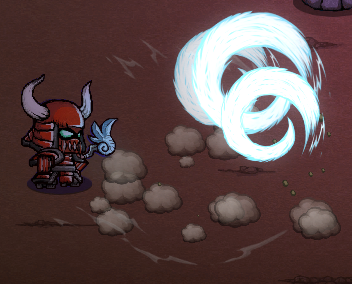
Side rooms can occasionally be filled with monsters or darkened until all enemies are cleared out, like in the above image. Darkened rooms sometimes have a shop, npcs, or items sitting out, but both of these room types will grant the player a couple of chests upon clearing it.
Attached Rooms
There are actually two specific kinds of side rooms that are attached to a main room. These rooms are obvious, but you may not always be able to enter them. These attached rooms often contain some monsters to clear out for an extra chest, a shop, or even a couple Evil Altars.
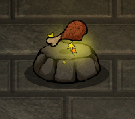
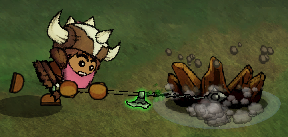
Huge Statue
In order to clear out a Huge Statue the player must throw 3 bombs at it. Although it seems like it would be a rare occurrence to have 3 bombs when running into one of these, the upgrade "Demolition Enthusiast" grants the player a free bomb for every main room they enter.
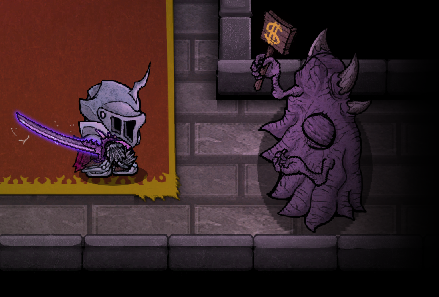
Mysterious Door
Mysterious Doors will only open if the player pays it the amount of gold that it asks for. It's prices are as follows:
8 coins in Tower of Goblins.
Does not appear in Bramble Courtyard.
16 coins in The Secret Path.
20 coins in Skull Dungeon.
24 coins in The Main Tower.
Environments Pt. 3


NPCs
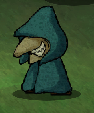
Generic NPC
There are two generic NPCs with scripted text in the tutorial, but after that you can only find generic NPCs in breakable cages. After freeing them they will do one of two things: freely give you an item, or ask you for coins or a food item and in return will grant you an item. The item quality can vary wildly.
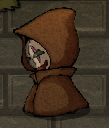
Masked Man
One of the few story centered NPCs. He is the first person you meet in the Goblin prison and opens the door for you so that you can escape and search for treasure. Meets you right before the final boss and will drop you some items if you speak to him at that time.
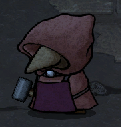
Goblin Travelling Merchant
Offers to give the player a great item for 20 coins. The item can be anything from a weapon to a single apple, so it's a bit of a gamble to purchase items from the Goblin Travelling Merchant. The price will increase by 10 coins each time you buy an item, but the price will cap out at 50 coins. Weapon and armor drops are dictated by the area the player is in.
Goblin Merchant
Appears near shops. Has a few lines, but doesn't do much else.
Goblin Bone Picker
The Goblin Bone Picker will give you a weapon from the area you find him for a certain price, and you can purchase multiple weapons. All weapons are sold at a base price that then increases for each subsequent purchase. The base prices are as follows:
Tower of Goblins: 10 coins
Bramble Courtyard: 20 coins
The Secret Path / The Ice Path: 30 coins
Skull Dungeon / The Ruin: 40 coins
The Main Tower: 50 coins
Enchanter
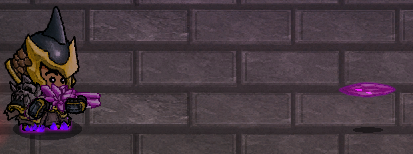
You can run into the Enchanter randomly when exploring the Skull Dungeon or The Main Tower areas, and for 20 coins he will enchant the weapon you are currently holding. The price will increase by 10 for each subsequent enchantment and has a maximum price of 60 coins. These enchantments are separate from the enchantments that randomly come with weapons or armor. You can only have one purchased enchantment at a time, but you can keep buying them for one weapon until you get one you are satisfied with. Both the yellow text enchantments and these purple text enchantments can add or subtract stat points.
Blacksmith
You can unlock the Blacksmith by purchasing the upgrade "The Key of the 1st Cell." At the beginning of each run, the Blacksmith will provide you a free random weapon. You can increase the number of weapons provided per run by purchasing the upgrade "Forge Skill," which you can do a maximum of 2 times. This leaves the player with 3 extra random weapons each run. Unlike the Thief and the Pharmacist, the Blacksmith's appearance changes on each new run.
Thief
You can unlock the Thief by purchasing the upgrade "The Key of the 2nd Cell." At the beginning of each run, there will be a Thief's Chest for you to open, provided by the Thief. You can increase the number of free chests by purchasing the upgrade "The Dodger," which you can do a maximum of 2 times. This leaves the player with 3 free Thief's Chests per run.
Pharmacist
You can unlock the Pharmacist by purchasing the upgrade "The Key of the 3rd Cell." At the beginning of each run, speaking to the Pharmacist will grant you a free potion. You can increase the number of free potions by purchasing the upgrade "Better Crucible," which you can do a maximum of 2 times. This leaves the player with 3 free potions per run. You can also purchase the upgrade "Alchemist" to guarantee that the potions that the Pharmacist gives you will never have negative effects.
Castle Trials
This gold ghostly fellow allows you to use modifiers to play through the game. The modifiers differ each day, but you are allowed to play the challenge more than once. More details on these daily challenges will be listed in a later section of the guide.
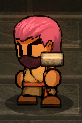
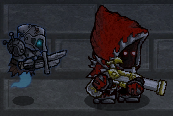
Soldiers
When you travel through The Main Tower area, you may come across caged NPCs with randomly generated armors and weaponry. If you free them before clearing a room of enemies, they will help you fight. If they are still standing when the room is cleared, you will be able to talk to them for a few short lines of dialogue and they will rarely drop their weapon for the player.
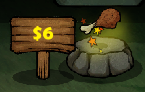
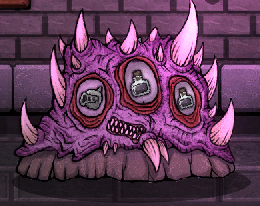
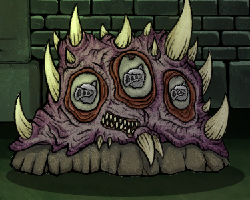
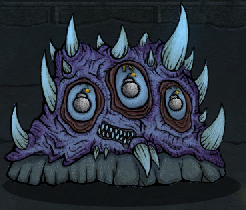
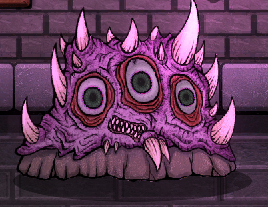
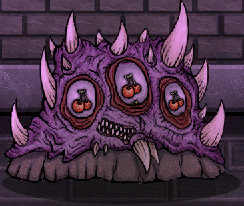
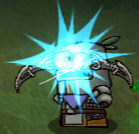
Eyes Monster
While the Eyes Monster does not converse with the player like a standard NPC, it does function as a slot machine which can pay out with various rewards. The cost for each play depends on the area in which you are playing. A corresponding achievement refers to the slot game as One-Arm Bandit. The costs are as follows:
Tower of Goblins: 4 coins
Bramble Courtyard: 6 coins
The Secret Path / The Ice Path: 8 coins
Skull Dungeon / The Ruin: 10 coins
The Main Tower: 12 coins
One-Arm Bandit Rewards
Armor
Drops a random piece of armor for the player.
Bomb
Drops a random combat item for the player.
Erosion
Drops a random Blighted weapon for the player. This is the only way to obtain Blighted weaponry.
Food
Drops a random food item for the player.
Jackpot
Drops a random treasure for the player.
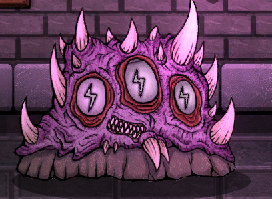
Lightning
After a few seconds, the player will be struck by lightning. The lightning bolt can be dodged, but it's sometimes tricky to avoid.
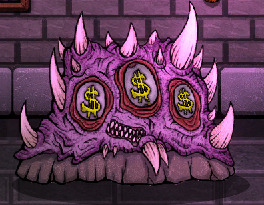
Money
Drops a number of coins for the player. The number of coins can range between 2 to about 25.
Potion
Drops a random potion for the player.
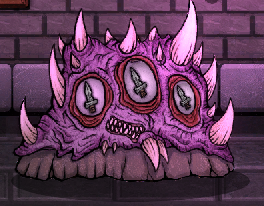
Weapon
Drops a random weapon for the player.
Equipment Overview Pt. 1


The Armors of Lost Castle
There are 3 different armor types: Light Armor, Normal Armor, and Heavy Armor. Light Armors have a base movement speed of 50, Normal Armors have a base movement speed of 45, and Heavy Armors have a base movement speed of 38. Don't let the slight difference in numbers fool you; Heavy Armors are quite noticeably slower than Light Armors. Aside from that, the only real difference between the armor types is that Light Armors tend to have low stats, Normal Armors have decent stats, and Heavy Armors have high stats. Some armors from each type will grant extra stat points to the player if they are using a specific weapon type. These boosts aren't always huge, but they are sometimes good enough to encourage a player to switch out their weapon for another one. All pieces of armor also have a chance to come with a special enchantment, which is notated in yellow text. You can also come across the Enchanter NPC while playing who will grant your weapon an enchantment for 20 coins, and this enchantment will be notated by purple text. You can have one of each type of enchantment on one weapon, as shown in the image below.
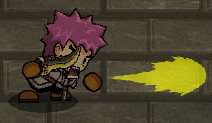
The Weapons of Lost Castle
In all, there are 7 different weapon types in Lost Castle: Bows, Dual Blades, Muskets, One-Handed (Weapons), Spears, Staffs, and Two-Handed (Weapons). Each weapon type has a normal attack, a combo attack, a jumping attack, a special action, a skill, and a running attack. Due to the large amount of variety, the combat in this game can provide the player a new, refreshing experience over the course of many different runs.
Normal attacks are quick, simple attacks that can lead into combo attacks.
Combo attacks tend to consist of 3 or 4 normal atttacks that get progressively stronger, often dazing or knocking back enemies on the final attack. However, it can be hard to dodge enemies effectively while performing a combo attack.
Jumping attacks offer the greatest mobility of all attacks and are very useful against enemies with trickier attack patterns. Though it can be difficult, you can use a jump attack before leading into a combo attack, essentially adding an additional attack to the combo.
All of the special actions are unique to their weapon type, and each adds a little extra diversity between weapons. I will go into greater detail about specific special actions later on in this section.
Skills vary greatly and will be covered in a later section of the guide.
Running attacks tend to be quicker versions of a final combo attack, with some variations.
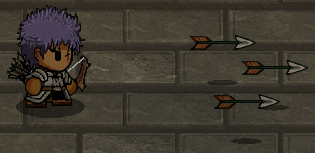
Bows
Normal Attack
The player fires a single arrow.
Combo Attack
The combo attack consists of the player performing three consecutive normal attacks. The second attack is the same as the first. On the third attack, the player fires a spread of three arrows and there is a brief delay before the player can fire again.
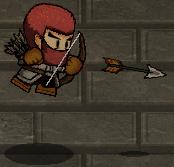
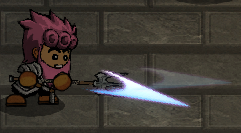
Special Action
As of v0.20, the player charges the bow very briefly and then releases a piercing arrow while sliding backwards a small distance. The piercing arrow travels slightly farther than a normal arrow, and the backwards slide can be controlled slightly, allowing the player to move up or down if they wish to.
Jump Attack
The player fires an arrow downwards while in the air.
Running Attack
If the player uses a normal attack while running, they will quickly fire a piercing arrow.
Pros and Cons
Pros:
+ Keeps you out of melee range, making the first few levels and some bosses pretty easy.
+ The special action pierces all enemies in front of the player.
+ The combo attack can prove very useful against enemies and bosses with larger hitboxes, as they may take damage from all three arrows from the spread shot.
Cons:
- Later levels have more charging enemies, which can sometimes break through piercing arrow spam.
- You have to line up nearly perfectly with some enemies and bosses in order to hit them.
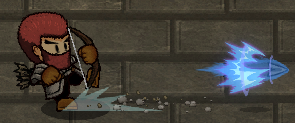
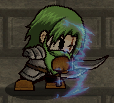
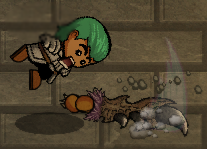
Dual Blades
Normal Attack
The player slashes twice, once with each dagger.
Combo Attack
The full combo attack consists of four normal attacks. On the second attack, the player will stab forward twice, once with each dagger.
On the third attack, the player will slice upwards with both daggers.
On the fourth attack, the player will slam their blades into the ground, hurting and knocking back enemies.
Special Action
The player will dash forward a short way.
Jump Attack
The player does a somersault, slicing with their blades as they do so.
Running Attack
The player will hop forward a short way and smash the ground like they would when finishing a combo attack.
Pros and Cons
Pros:
+ Dual Blades have the fastest attacking speed of all the weapon types.
+ You can quickly get a hit or two on bosses and run away. This is especially effective with jump attacks.
Cons:
- Dual Blades have the least attack power of all weapon types and can take a while to daze or stun most enemies, often leaving the player open to retaliation.
- The special action does not add much to the abilities of Dual Blade weapons.
Equipment Overview Pt. 2


Muskets
Normal Attack
The player shoots in a small, fan-shaped area. All enemies standing in this area will take damage.
Combo Attack
Strangely, the Musket does not seem to have anything special about its combo attack. The player can shoot three times consecutively and each shot seems to be a normal attack. The third shot will still cause a brief delay before the player can shoot again.
Special Action
The player hops backwards a short ways, potentially putting distance between themselves and enemies.
Jump Attack
The player fires at an angle, covering the same area as a normal attack.
Running Attack
The player fires off yet another normal attack if running before firing.
Pros and Cons
Pros:
+ Muskets are really good at handling large groups of enemies all at once if you can position yourself well.
+ The special action is a lot more useful than it may appear.
Cons:
- Muskets are not as effective at dazing and knocking back enemies as other weapon types.
- Muskets have the closest range of the three ranged weapon types.
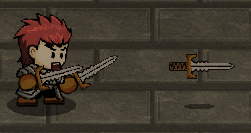
One-Handed Swords
Normal Attack
The player swipes forward with their weapon.
Combo Attack
The combo attack consists of three consecutive normal attacks. On the second normal attack, the player will again slash forward with their weapon.
On the final attack of the combo, the player will slam their weapon against the ground.
Special Action
The player will lift their shield, highly reducing incoming damage while it is lifted. The player moves somewhat slower while the shield is out.
Jump Attack
The player slashes their weapon. This is effectively an aerial normal attack.
Running Attack
The player quickly slams their weapon against the ground in a similar fasion as the final attack of the combo.
Pros and Cons
Pros:
+ The shield can take some getting used to, but it is one of the most useful special actions due to the high amount of damage reduction it can provide.
+ The sword swipes can damage all enemies in front of the player.
Cons:
- Using the shield won't do much to help you if you are getting swarmed and attacked by a large number of enemies.
- Though One-Handed weapons have a slightly larger range than Dual Blades, they still require the player to be pretty close to enemies to be effective.
Spears
Normal Attack
The player stabs forward with their spear.
Combo Attack
The combo attack consists of three normal attacks. The second normal attack is essentially identical to a normal attack. The final attack of the combo is somewhat different, as the player stabs slightly upward instead of straight forward. Most enemies hit by this attack will be knocked back or stunned.
Special Action
At some point the Spear Special Action was changed from a mid-air somersault attack into a forward dash. The dash pierces through enemies and hits multiple times.
Jump Attack
The player stabs their spear downwards.
Running Attack
The player stabs directly forward, but with a heavy impact similar to the final attack of the combo. Most enemies hit by this attack will be knocked backwards.
Pros and Cons
Pros:
+ Spear weapons have longer reach than Dual Blades and One-Handed weaponry.
+ Spear weapons are really good at keeping enemies dazed during combos.
+ Spear weapons are also great at knocking enemies backwards.
Cons:
- Spear weapons can only attack directly forward.
- Though the special action can be pretty useful, it is easier to just use jump attacks for the same effect.
Equipment Overview Pt. 3


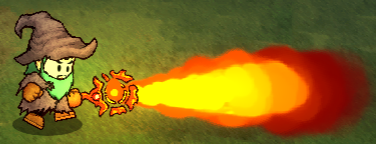
Staffs
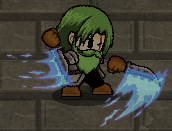
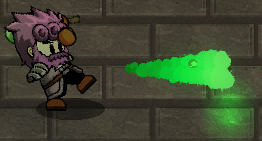
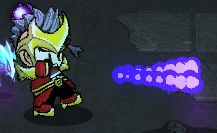
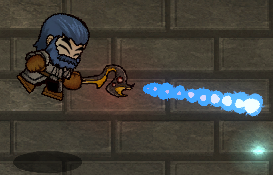
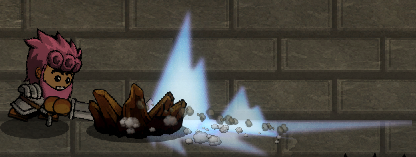
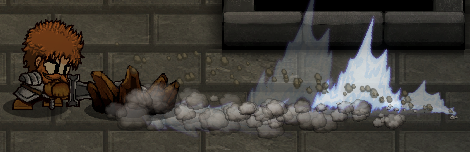
Unlike the other weapon types, Staffs have two types of their own: Elemental Staffs and Normal Staffs. Elemental Staffs fire off either fire magic, ice magic, or poison magic. Normal Staffs shoot out normal magical projectiles. Normal Staffs can fire off both light blue and dark purple magic, and used to slightly home in on enemies.
Normal Attack
The player fires a single magical projectile.
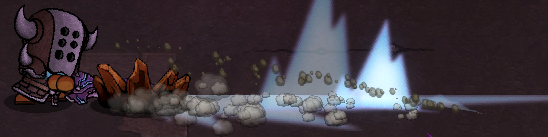
Combo Attack
The combo attack consists of 3 normal attacks. On the second normal attack, the player will fire a small spread of 2 magical projectiles.
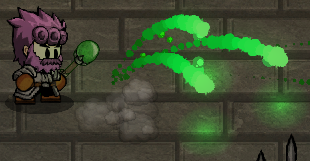
The final attack in this combo sequence varies slightly depending on which type of staff the player is using. Elemental type staffs launch a spread of 3 magical projectiles into the air that travel downwards in an arc. Homing type staffs fire off a spread of 3 magical projectiles.
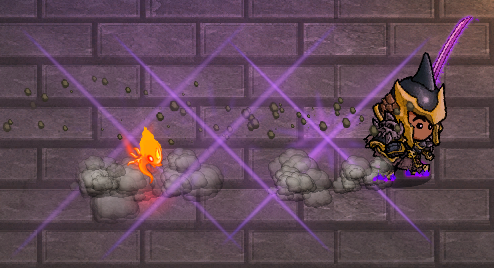
Special Action
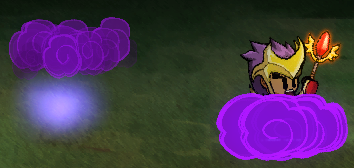
The player teleports disappears briefly while teleporting in the direction of their choosing. If no direction is chosen, the player will teleport directly forward.
Jump Attack
The player fires a magical projectile downwards while in mid-air.
Running Attack
The player fires 3 magical projectiles in the same way they would if doing a full combo attack.
Pros and Cons
Pros:
+ Staffs have a decently long range, allowing the player to keep some distance between themselves and the enemies.
+ Staffs with elemental magic can inflict debuffs on enemy monsters, though a small number of monsters may be immune.
+ Teleporting can be used to dodge attacks pretty effectively.
Cons:
- Unlike Bows and Muskets, Staffs are not guaranteed to have a piercing attack. Because of this, Staffs can have some trouble when dealing with large groups of enemies.
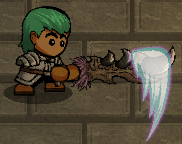
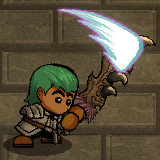
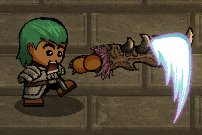
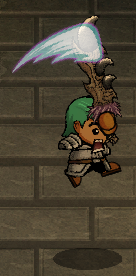
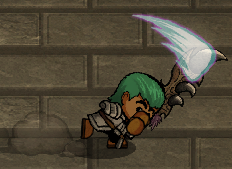
Two-Handed Swords
Normal Attack
The player slices upwards.
Combo Attack
The combo attack consists of four normal attacks. On the second normal attack, the player will slice their weapon downwards.
On the third normal attack, the player will again slice upwards with their weapon.
On the final attack of the combo, the player will smash their weapon into the ground, knocking back or dazing most enemies.
Special Action
The player must hold down the special action key/button, otherwise they will swing their sword downwards after a brief delay. If the player releases when the character's fist starts glowing, they will briefly perform a whirlwind attack, spinning in circles and hitting any nearby enemies. The player can move around during the whirlwind attack.
Jump Attack
The player swings their weapon downwards.
Running Attack
The player will perform a forward slash, knocking back any enemies hit.
Pros and Cons
Pros:
+ Two-Handed weapons cover the largest area of all melee weapon types.
+ Like most melee type weapons, Two-Handed weapons are great for dazing and knocking back enemies.
Cons:
- Two-Handed weapons are somewhat slower than other weapon types.
- The special action has limited usefulness, and the jump attack is better for mobility while attacking.
Weapon Skills Pt. 1


Overview
Though there are not quite as many skills as there are weapons, a good number of weapons do have unique skills. A lot of skills may be similar to others, but each one is different from the others in some way. There are some skills that are much more useful than others, and some can add a lot of utility to an otherwise weak weapon.
Assassination
Effect: The player thrusts forward quickly, dealing much more damage than usual to all enemies struck.
Cooldown: ~5 seconds
Assault
Effect: The player dashes forward with their weapon held out, damaging any enemies that happen to be in the way.
Cooldown: ~12 seconds
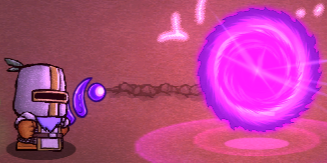
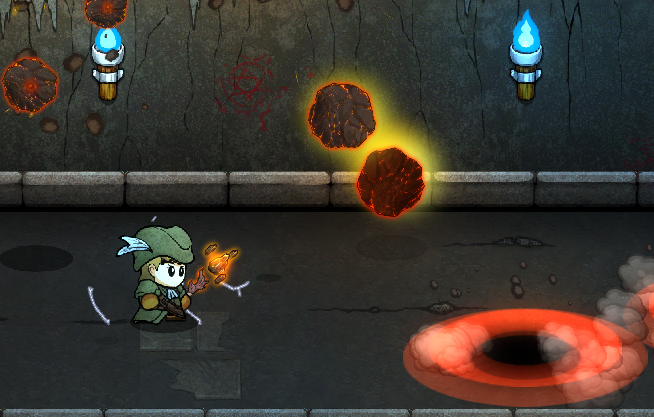
Black Hole
Effect: The player summons a black hole that travels slightly forward, sucking in all nearby enemies and damaging them multiple times. It will even suck in some bosses!
Cooldown: ~12 seconds
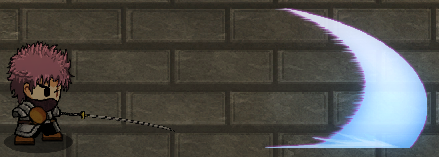
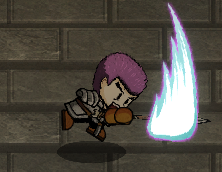
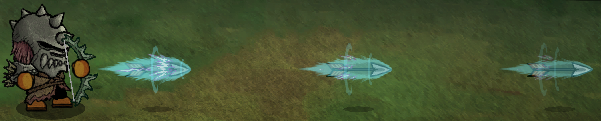
Blade Wind
Effect: The player slashes their weapon, sending forth a sharp wind that damages any enemies that touch it.
Cooldown: ~8 seconds
Blazing Charge
Effect: Imbues the weapon with fire, allowing it to inflict the burning debuff.
Cooldown: ~15 seconds
Blessing
Effect: The player raises their staff into the air, which seemingly does nothing.
NOTE: Might be bugged to use the skill of the weapon you were using when you picked it up.
Cooldown: ~15 seconds
Bloody Wolf Bullet
Effect: The player fires forward a piercing fireball. Possibly glitched as it behaves very similarly to the Dragon's Flame Bullet Skill.
Cooldown: ~15 seconds
Boomerang Blade
Effect: The player throws their blade in the direction that they are facing, hitting any enemies in its path. After traveling a certain distance, the blade will reverse its direction and travel another short distance before stopping.
Cooldown: ~5 seconds
Bug
Effect: The player summons two bugs that run up to nearby enemies before exploding. The bugs will explode on their own after a few seconds if no enemies are nearby.
Cooldown: ~10 seconds
Burst Barrel
Effect: The player reloads their gun, causing an explosion right in front of them that also deals the player low damage.
Cooldown: ~3 seconds
Burst Charge
Effect: The player rushes forward with their burning spear held out. Lingering flames burn the ground where the player dashed for a few seconds.
Cooldown: ~12 seconds
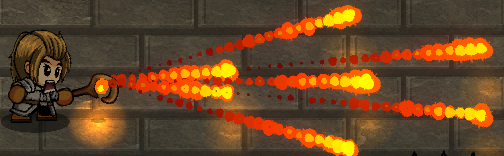
Burst Shot
Effect: The player fires four separate spreads of magical projectiles in quick succession.
Cooldown: ~8 seconds
Charge Shot
Effect: The player charges up briefly, and then let’s loose an arrow that travels much farther than normal that also deals more damage to enemies. It can also knock enemies backwards.
Cooldown: ~6 seconds
Chaos
Effect: The player fires off a great deal of icy projectiles in the direction they are facing.
Cooldown: ~10 seconds
Christmas Gift!
Effect: The player smashes their weapon into the ground, either throwing a bomb directly forward or spawning in a free food or combat related item.
Cooldown: ~12 seconds
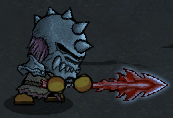
Crystal Arrow
Effect: The player fires a shard of crystal which explodes upon hitting an enemy. This deals both contact damage and explosive damage to the enemy and any enemies nearby.
Cooldown: ~10 seconds
Crystal Wall
Effect: Summons large crystals from the sky that strike the earth and remain in the ground for a short bit. They can both damage and block enemies.
Cooldown: ~15 seconds
Curse
Effect: Turns enemies into frogs when cast, rendering them unable to attack for a short while. Occasionally turns the player into a frog instead.
Cooldown: ~35 seconds
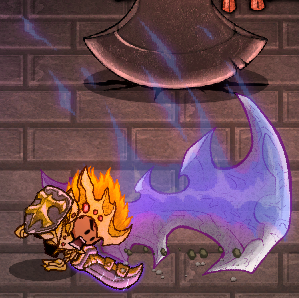
Demon Blade
Effect: The player raises their blade, summons a very large blade, and strikes downward with both their own blade and the summoned blade simultaneously.
Cooldown: ~15 seconds
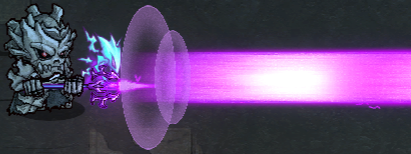
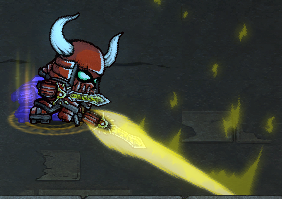
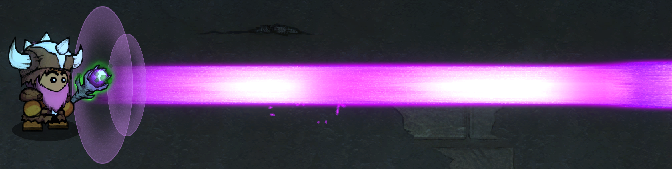
Demon Cannon
Effect: Fires a massive laser across the screen for a few seconds. This laser can and often does hit enemies many times in a row, dealing a tremendous amount of damage in a short time.
Cooldown: ~20 seconds
Demon Orb
Effect: Summons an orb for a brief time that fires magical projectiles at nearby enemies.
Cooldown: ~20 seconds
Dragon's Flame Blast
Effect: The player summons a row of flames in the direction they are facing.
Cooldown: ~17 seconds
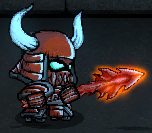
Dragon's Flame Bullet
Effect: The player fires forward a piercing fireball.
Cooldown: ~15 seconds
Dumpling Steal
Effect: Throws a chopstick forward, striking any enemies it comes into contact with. Has a chance to create a free Dumpling when it hits an enemy. Likely a bug, but Dumpling Steal can steal Dumplings from the chests that drop whenever you clear a room, even if they have already been opened.
Cooldown: ~9 seconds
Energy Release
Effect: The player releases their weapon's latent energy from its tip, firing a beam across the room.
Cooldown: ~5 seconds
Erosion
Effect: Deals damage to the player upon use and briefly summons devilish spikes that stab at enemies from beneath the ground.
Cooldown: ~7 seconds
Evil Arrows
Effect: The player fires into the air and summons forth a great number of dark arrows from the sky.
Cooldown: ~12 seconds
Evil Assault
Effect: The player charges forward while surrounded by a dark aura.
Cooldown: ~15 seconds
Evil Burst
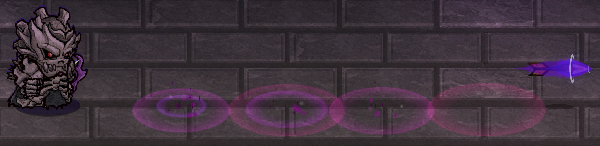
Effect: The player summons forth an orb of energy that travels slowly forward, damaging and electrifying all enemies that it passes through.
Cooldown: ~10 seconds
Weapon Skills Pt. 2


Evil Charge
Effect: The next few attacks by the player will generate a small explosion beneath the enemies that are hit.
Cooldown: ~12 seconds
Evil Crystal
Effect: Summons a crystal that attacks nearby enemies very quickly for a short period of time.
Cooldown: ~18 seconds
Evil Dash
Effect: The player charges forward while surrounded by a dark aura.
Cooldown: ~8 seconds
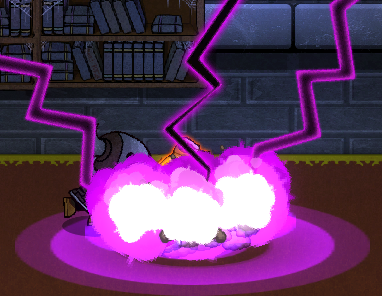
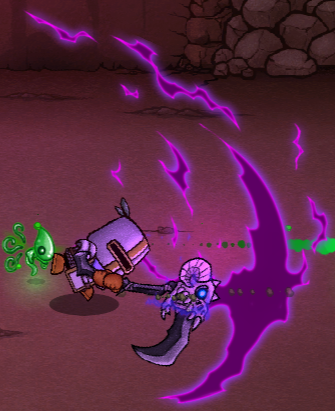
Evil Explosion
Effect: A purple circle briefly appears on the floor around the player and explodes, dealing damage to all enemies caught inside it. It then summons six smaller explosions that circle the player.
Cooldown: ~18 seconds
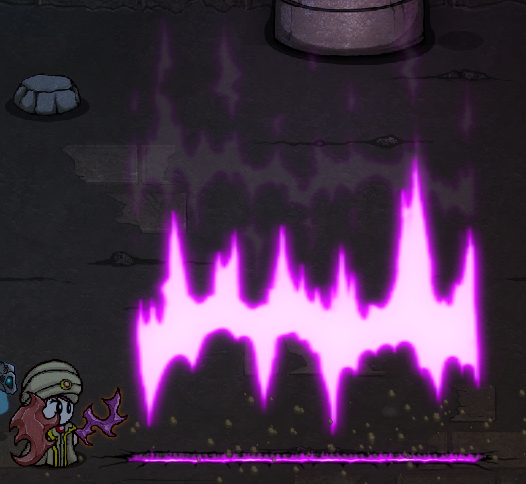
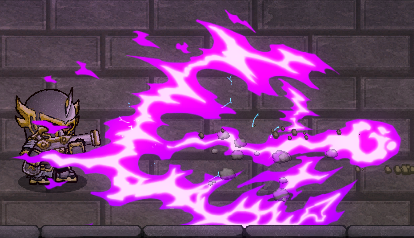
Evil Fissure
Effect: The player smashes their weapon on the ground, creating a large fissure in the earth that pulses with waves of evil energy.
Cooldown: ~15 seconds
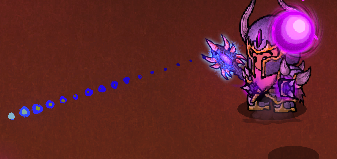
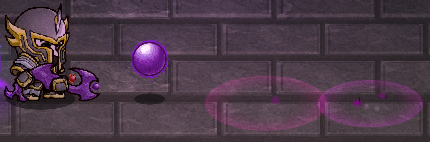
Evil Orb
Effect: The player fires a purple orb that travels a ways forward before stopping. After stopping, it then travels back to the player, causing small explosions beneath it as it returns.
Cooldown: ~8 seconds
Evil Puncture
Effect: The player fires a dark arrow which summons small explosions beneath it as it travels.
Cooldown: ~14 seconds
Evil Shock
Effect: The player uses their weapon to vault forward into the air and then smashes into the ground with their weapon. Dark lightning bolts strike the ground where the weapon strikes.
Cooldown: ~16 seconds
Evil Shot
Effect: The player fires a large shot of evil energy forward.
Cooldown: ~15 seconds
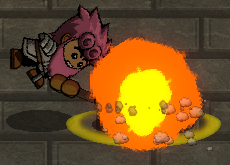
Explosive Nova
Effect: The player slams the weapon against the ground, causing a small explosion upon impact.
Cooldown: ~12 seconds
Explosive Shot
Effect: The player shoots three small explosions in a line.
Cooldown: ~12 seconds
Explosive Weapon
Effect: For a brief duration, the player’s weapon will explode upon hitting enemies, dealing much more damage than normal.
Cooldown: ~15 seconds
Fallen Arrows
Effect: Many arrows fall from the sky in front of the player.
Cooldown: ~10 seconds
Fallen Crystal
Effect: The player summons forth many powerful crystals which fall from the sky, exploding upon impact.
Cooldown: ~14 seconds
Fast Shot
Effect: The player rapidly fires 5 arrows directly in front of them.
Cooldown: ~10 seconds
Fatal Wound
Effect: Reloads the musket with three Anglerfish shots. These shots shoot much farther than normal, deal more damage than normal, and also apply a good deal of damage over time to the target that they hit. This damage over time effect does not apply to certain enemies.
Cooldown: ~23 seconds
Fire Crystal
Effect: Summons a fire crystal that shoots at nearby enemies. Can inflict the burning debuff to enemies.
Cooldown: ~20 seconds
Fire Impact
Effect: The player raises their weapon and them slams it down, firing a large fireball in the direction they are facing.
Cooldown: ~10 seconds
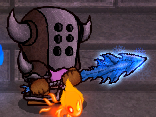
Flame Thrower
Effect: The player fires a continuous stream of flames for a few seconds that can damage and freeze enemies multiple times. The player can slowly move around while this skill is active.
Cooldown: ~10 seconds
Freeze & Blaze
Effect: Imbues the player’s weapon with both fire and ice, shifting between the two as the player attacks.
Cooldown: ~18 seconds
Freezing Charge
Effects: Imbues the weapon with ice, allowing it to inflict the freezing debuff.
Cooldown: ~15 seconds
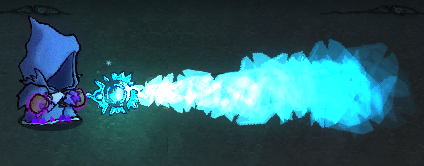
Frost Thrower
Effect: The player fires a continuous stream of ice for a few seconds that can damage and freeze enemies multiple times. The player can slowly move around while this skill is active.
Cooldown: ~15 seconds
Full Burst
Effect: The player rapidly fires the musket 5 times.
Cooldown: ~15 seconds
Full Moon
Effect: Briefly transforms the player into a werewolf or a puppy. The werewolf form can claw at enemies (normal attack) or bite them (special action) which heals the player for a small amount. The puppy can only move around slowly.
Cooldown: ~38 seconds
Weapon Skills Pt. 3


God Slash
Effect: The player slashes their sword upwards, causing multiple lightning bolts to strike the ground in front of them. The player's next attack will also electrify enemies.
Cooldown: ~22 seconds
Greed Attack
Effect: Punches in front of the player, generating a coin or two when an enemy is hit.
Cooldown: ~12 seconds
Grume Shot
Effect: The player fires three times in quick succession, firing an additional slimy projectile with each subsequent shot. These projectiles fire in an arc and explode upon hitting the floor.
Cooldown: ~10 seconds
Guardian of Justice
Effect: Summons a holy warrior to fight alongside the player. The warrior will swing its sword whenever the player attacks, dealing additional damage against close up enemies for a short period of time. This also allows the player to attack enemies from farther away due to the warrior's much larger weapon.
Cooldown: ~60 seconds
Hail of Arrows
Effect: The player fires lightning arrows into the sky and then fall to the earth to damage and stun foes in a large area.
Cooldown: ~22 seconds
Hammer
Effect: The player slams their weapon against the ground like a hammer.
Cooldown: ~10 seconds
Harvest
Effect: Generates a number of Apples upon use.
Cooldown: ~20 seconds
Hazard
Effect: Multiple red rays of light strike down from the sky in front of the player.
Cooldown: ~18 seconds
Healing Dew
Effect: The player creates a very brief healing circle at their feet that heals for about a third of their total HP.
Cooldown: ~45 seconds
Heavy Attack
Effect: The player slams their weapon into the ground.
Cooldown: ~5 seconds
Heavy Impact
Effect: The player slams their weapon down and creates a shockwave that fans out a short ways.
Cooldown: ~12 seconds
Heavy Stab
Effect: The player briefly charges up before thrusting their weapon (and themselves) forward.
Cooldown: ~5 seconds
Holy Arrows
Effect: The player shoots many arrows into the air. The arrows then fall from the sky and target any nearby enemies.
Cooldown: ~30 seconds
Holy Awaken
Effect: The player harnesses holy power and uses it to greatly extend the reach of their blades. This also changes up the Dual Blades combo attack pattern; the player will now slash, stab, slice upwards with both blades, and then slam downwards with both blades. This effect lasts for a brief amount of time.
Cooldown: ~12 seconds
Holy Burst
Effect: The player aims their musket towards the floor and fires, releasing beams of holy light from beneath the feet of nearby enemies.
Cooldown: ~16 seconds
Holy Circle
Effect: The player blesses the ground around their feet temporarily, causing it to give off a healing aura. This lasts for quite a while.
Cooldown: ~30 seconds
Holy Light
Effect: The player summons a huge ray of light around themselves. Any enemy caught in this light will be hit multiple times.
Cooldown: ~14 seconds
Hurl
Effect: The player throws their weapon forward.
Cooldown: ~2 seconds
Iaido
Effect: The player swings their sword forward, dealing damage on contact as well as slashing the air in front of the player.
Cooldown: ~8 seconds
Ice Crystal
Effect: Summons an ice crystal that shoots at nearby enemies. Can inflict the freezing debuff to enemies.
Cooldown: ~20 seconds
Ice Impact
Effect: The player summons forth many shards of ice from the ground in front of them, damaging any enemies struck.
Cooldown: ~10 seconds
Ice Shield
Effect: Enchants your sword to summon rising ice crystals forward when attacking. Only applies to the first basic attack of the combo.
Cooldown: ~20 seconds
Immortal Shield
Effect: Grants the player complete invulnerability to damage (but not knockback) for a short period of time.
Cooldown: ~35 seconds
Impact Lv. 1
Effect: The player slams the weapon against the ground, causing a shockwave that travels in the direction that the player is facing.
Cooldown: ~12 seconds
Impact Lv. 2
Effect: The player slams the weapon against the ground, causing a shockwave that travels in the direction that the player is facing.
Cooldown: ~12 seconds
Weapon Skills Pt. 4


Impact Lv. 3
Effect: The player slams the weapon against the ground, causing a shockwave that travels in the direction that the player is facing.
Cooldown: ~12 seconds
Infinite Shot
Effect: The player shoots a beam across the entire room, damaging any enemies in its path.
Cooldown: ~20 seconds
Insane
Effect: Increases the player's speed and attack speed for a short duration.
Cooldown: ~35 seconds
Invisible Blade
Effect: The player teleports quite a distance forward, attacking many times in space travelled.
Cooldown: ~10 seconds
It's Spinning!
Effect: The player briefly transforms into a creature that highly resembles the Rollingmon enemy, and spins around at a much faster speed. The player will be dizzy for a short time after this transformation.
Cooldown: ~25 seconds
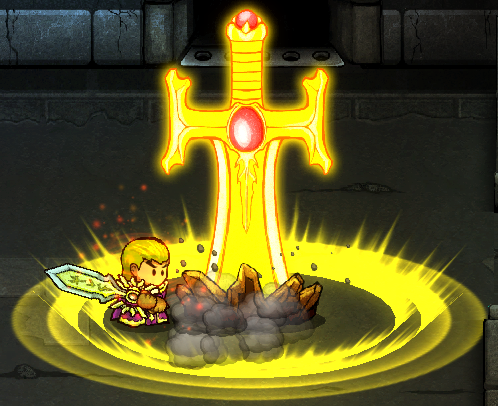
Judgement
Effect: The player summons a large sword of light from the sky which impales the earth and sends out a shockwave that harms all nearby enemies.
Cooldown: ~15 seconds
Jump Attack
Effect: The player leaps forward and slams their weapon into the ground.
Cooldown: ~5 seconds
Lightning Assault
Effect: The player strikes forward with their weapon, shooting out a lightning bolt. Can electrify enemies.
Cooldown: ~12 seconds
Magic Wings
Effect: Allows the player to fly for a brief time. The player can still perform an air attack while flying.
Cooldown: ~15 seconds
Meteor
Effect: The player summons down many meteors that crash down at an angle and explode upon hitting the ground.
Cooldown: ~15 seconds
Murloc Darts
Effect: The player shoots a poisonous dart forward.
Cooldown: ~12 seconds
Murloc Sect. Leap
Effect: The player slams their spear into the ground, vaults into the air doing a somersault, and lands while striking the ground a second time.
Cooldown: ~10 second cooldown
Murloc Sect. Punch
Effect: The player rushes forward a short ways and then bashes upward with their shield.
Cooldown: ~8 seconds
Petrifaction
Effect: The player lifts their staff, which emits a red glow. Enemies facing the player will be temporarily petrified and will be unable to move. The player may sometimes petrify themselves.
Cooldown: ~25 seconds
Power Arrow
Effect: The player charges up and then fires an arrow that flies much farther than normal and deals increased damage.
Cooldown: ~8 seconds
Power Shot
Effect: The player fires into the air, causing 4 rows of large ice chunks to fall from the sky in front of the player. The ice chunks take a while to fall, but they damage and knock back enemies that they strike.
Cooldown: ~20 seconds
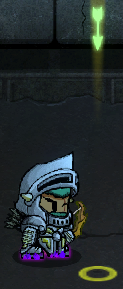
Pray
Effect: The player creates a holy spot on the ground beneath their feet. This holy spot glows green and if the player does not move after creating it, they will immediately use it up and heal some of their health. However, if the player moves away from it right after creating it, they can walk over it to heal at any point in a short duration of time.
Cooldown: ~20 seconds
Puncture
Effect: The player rapidly fires 3 piercing arrows.
Cooldown: ~15 seconds
Random
Effect: The weapon comes with a random skill.
Cooldown: Takes on the cooldown of the random skill.
Reaper
Effect: The player launches forward, spinning multiple times through the air while slicing with their weapon.
Cooldown: ~16 seconds
Reaping
Effect: At the cost of one Demon Soul, the player slices forward with their weapon and seems to deal slightly extra damage to any enemies hit.
Cooldown: ~6 seconds
Reform
Effect: The player hits their sword against their shield, combining them into a Two-Handed axe. The player immediately uses this new weapon form to smash the ground, causing a small shockwave. The player can use this skill again to turn the axe back into the One-Handed sword and shield.
Cooldown: ~3.5 seconds
Reload
Effect: Increases the damage of the player's next three Musket shots by 50%
Cooldown: ~3 seconds
Revenge Curse
Effect: The player fires a tusk forward.
Cooldown: ~12 seconds
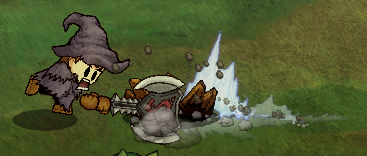
Rockfall
Effect: The player smashes their weapon into the ground, causing a large number of stone slabs to fall from the ceiling. These slabs CAN harm the player as well as enemies.
Cooldown: ~15 seconds
Rotten Curse
Effect: The player summons a poisonous cloud in front of themselves. This poisonous cloud sends enemies flying far back while poisoning them.
Cooldown: ~8 seconds
Rubble
Effect: The player smashes their weapon on the ground, causing a round lump of rock to fly into the air. The player hits the rock as it falls back to the earth, and it flies forward, damaging all enemies that it passes through.
Cooldown: ~12 seconds
Savage Shot
Effect: The player fires a spread of three arrows three times in quick succession.
Cooldown: ~8 seconds
Shadow Escape
Effect: The player transforms into a shadowy eye for a brief duration. The player cannot be harmed in this state and can move about quickly to escape dangerous situations.
Cooldown: ~25 seconds
Weapon Skills Pt. 5


Shake Shake
Effect: The player slams their sword into the ground, vaults into the air doing a somersault, and lands while striking the ground a second time.
Cooldown: ~15 seconds
Shark
Effect: The Murloc Princess' pet drops directly in front of the player, damaging nearby enemies and sending them flying backwards. The pet then leaps away.
Cooldown: ~20 seconds
Shark!!
Effect: The player throws a chunk of meat forward in an arc, and a Great Moleshark jumps out of the ground to nab it, damaging anything in its way.
Cooldown: ~12 seconds
Sheer Cold
Effect: The player fires an enchanted arrow that creates a frozen patch of ground where it lands. The frozen patch of ground inflicts a slowing debuff.
Cooldown: ~15 seconds
Shield
Effect: The player is granted a small amount of shield HP that decays slowly over a period of time. This effect can stack on itself and with other items that grant the player shield HP.
Cooldown: ~35 seconds
Shoot
Effect: The player fires their weapon as if it were a musket.
Cooldown: ~2 seconds
Skull Summon [Archers]
Effect: Summons two Skeleton Rangers to fight alongside the player.
Cooldown: ~20 seconds
Skull Summon [Soldiers]
Effect: Summons two Skeletons to fight alongside the player.
Cooldown: ~20 seconds
Slime Bomb
Effect: The player summons a slime bomb that travels quite a distance in an arc. Upon hitting the ground, it will explode and summon a friendly Slime to fight alongside the player.
Cooldown: ~15 seconds
Smasher Hammer
Effect: Similar to the Hammer skill, but the player smashes their weapon into the ground three consecutive times instead of once.
Cooldown: ~12 seconds
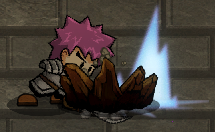
Soul Rage
Effect: Causes a large explosion around the player. Attack stat +10, Defence stat -10, Speed stat +9 until the blue flame dies out.
Cooldown: ~18 seconds
Soul Slash
Effect: The player charges up an attack in mid-air for a moment, and then unleashes a forward slashing attack.
Cooldown: ~15 seconds
Souls Eruption
Effect: The player calls forth multiple small explosions around themselves.
Cooldown: ~13 seconds
Sow
Effect: Summons a friendly Acid Shooter to aid the player in battle.
Cooldown: ~6 seconds
Spiritual Curse
Effect: A green shield surrounds the player for a few seconds. This shield seems to reduce incoming damage.
Cooldown: ~25 seconds
Stormy Stab
Effect: The player strikes forward many times for a short duration.
Cooldown: ~8 seconds
Summon Familiar
Effect: The player summons two small soul creatures. These creatures run up to nearby enemies and explode, dealing devastating damage. Enemies will even target them, making bosses a whole lot easier.
Cooldown: ~7 seconds
The Power of Slayer
Effect: Electricity courses through the player's weapon, causing all attacks to electrify enemies for a brief period of time. It will also cause random lightning bolts to hit enemies that the player is attacking.
Cooldown: ~23 seconds
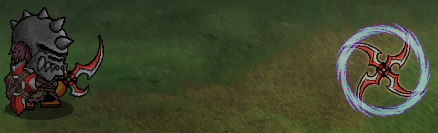
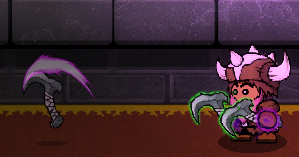
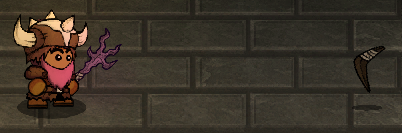
Throwing Sickle
Effect: Throws a sickle in a straight line in the direction the player is facing.
Cooldown: ~3 seconds
Thunder
Effect: The player slams their weapon on the ground, summoning a lightning bolt where the ground was struck.
Cooldown: ~6 seconds
Thunder Area
Effect: The player summons multiple thunder bolts that strike the ground randomly in front of the player.
Cooldown: ~12 seconds
Thunder arrow
Effect: The player shoots a massive bolt of electricity forward.
Cooldown: ~8 seconds
Totem
Effect: Summons one of a variety of Totems to aid the player in battle. The lightning totem summons down lightning bolts that targets nearby creatures (the player included). The healing totem will continuously heal the player and all allies within its range for 10% of their current HP. The berserker totem will temporarily buff the player and all allies' combat abilites. The defender totem will take enemy aggression off of the player, much like the Scarecrow item. Also, the defender totem does not disappear until it is used up, unlike the other totems.
Cooldown: ~25 seconds
Toxic Charge
Effect: Imbues the weapon with poison, allowing it to inflict the poisoned debuff on enemies for a short period of time.
Cooldown: ~15 seconds
Toxic Nova
Effect: The player smashes their weapon into the ground, causing a large, poisonous explosion.
Cooldown: ~12 seconds
Toxic Shot
Effect: The player shoots 5 toxic projectiles which damage and poison any enemies they hit.
Cooldown: ~8 seconds
Transform
Effect: The player either combines their Dual Blades into a Bow, or separates the Bow into a pair of Dual Blades.
Cooldown: ~4 seconds
Weapon Skills Pt. 6


Twirling Blade
Effect: The player twirls their weapon in the air multiple times and then slams it into the ground. Enemies can take damage from the weapon as it twirls.
Cooldown: ~10 seconds
Warrior Charge
Effect: The player charges forward, and multiple exploding swords crash down from the ceiling along the path where the player charged.
Cooldown: ~20 seconds
Windstorm
Effect: The player summons forth mighty winds to knock back and damage their enemies.
Cooldown: ~12 seconds
Wrath of the Lord
Effect: Causes an explosion around the player, and then summons multiple red lightning bolts down nearby. The lightning can electrify enemies.
Cooldown: ~20 seconds
Zero-Distance
Effect: The player dashes forward, holds out their weapon, and it explodes after a few moments. The explosion harms nearby enemies and propels the player slightly backwards.
Cooldown: ~8 seconds
Items Pt. 1


The Items of Lost Castle
There are many different items to be found in Lost Castle, and these items fall into a few different categories. These categories are Treasures, Collectibles, Foods, Combat Items, and Potions. Both Treasures and Potions will be covered in separate sections of the guide, so this section of the guide will be focusing on the Collectibles, Foods, and Combat Items. All of the items in this section of the guide have an entry in the Compendium, save for the Collectibles. Though these items are not listed in their proper order here, they can be found in proper order in my separate Compendium guide.
Collectibles
Coin
Each coin picked up increases the player's coin count by 1. Coins can drop from treasure chests, enemies, and breakable objects.
Coin Bag
Each Coin Bag picked up increases the player's coin count by 5. Coin Bags can drop from treasure chests and breakable objects.
Demon Soul
Demon Souls are dropped from enemies and bosses upon defeat. Smaller enemies occasionally drop Demon Souls, while larger enemies consistently drop Demon Souls. Bosses drop a much larger number of them than any enemy.
Foods
Apple
Description: Don't worry, it's not poisoned. Restore 10 HP when used.
Effect: Heals the player 10 HP upon consumption.
Banana
Description: Don't eat the peel! Restore 15 HP when used.
Effect: Heals the player 15 HP upon consumption. Drops a banana peel that can be stepped on by the player as well as by normal sized enemies, tripping them without dealing damage. This can be used to gain invincibility frames against bosses.
Drumstick
Description: Finger lickin' good. Restore 40 HP when used.
Effect: Heals the player 40 HP upon consumption.
Combat Items
Bomb
Description: BOOM!!!
Effect: Throws a bomb in front of the player. It travels a short distance before exploding. Can hurt the player as well as enemies. Bounces once.
Boomerang
Description: Throw it, then duck.
Effect: Throws the boomerang directly in front of the player. After traveling a short distance it doubles back and travels another short distance before falling to the ground.
Bramble Seed
Description: Plant a seed of evil.
Effect: Summons a friendly Venom Shooter to aid the player in battle.
Lost Pendant
Description: In the crystal of this pendant, you think you see something move. It feels powerful. Defeat the ghost sealed in this pendant and you'll get your reward.
Effect: Using this item summons an enemy Ghost. When you defeat this Ghost, a free chest falls from the ceiling. This chest can be any of the three types that will fall when the player clears out a normal room of enemies.
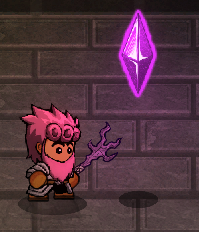
Magic Crystal
Description: This crystal contains the essence of magic, itself.
Effect: Summons a purple crystal that shoots magical projectiles at nearby enemies. Lasts for a short period of time.
Magic Crystal of Fire
Description: Summon the flame from this crystal to fry your enemies.
Effect: Summons an orange crystal that shoots fiery projectiles at nearby enemies. Lasts for a short period of time. Can burn most enemies.
Magic Crystal of Ice
Description: Fling the ice from this crystal to chill your enemies out.
Effect: Summons a light blue crystal that shoots icy projectiles at nearby enemies. Lasts for a short period of time. Can freeze most enemies.
Items Pt. 2


Mysterious Pendant X
Description: Fire a bolt of pure magic. This action will exhaust the magic power of this pendant.
Effect: Shoots a piercing ray of magic. One use.
Mysterious Pendant Y
Description: Fire a burst of magic bullets. This action will exhaust the magic power of this pendant.
Effect: The player briefly fires many magical projectiles out of their body that can hit any nearby enemies.
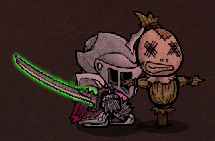
Scarecrow
Description: Little known fact: demons hate scarecrows. (It's the empty, lifeless eyes.) Put this down and demons will attack it, instead of you.
Effect: Summons a scarecrow directly in front of the player. Enemies will occasionally target the scarecrow instead of the player making them much easier to manage. Enemies may still target the player, making this somewhat unpredictable.
Slime Bomb
Description: A balloon full of slime. Users are immediately disqualified from all future water balloon fights.
Effect: Throws the bomb in an arc. Shoots out a few extra projectiles when it lands and summons a slime to assist you in battle.
Throwing Dagger
Description: You put the pointy end in the bad guys.
Effect: The player throws a dagger in the direction they are facing.
Toxic Orb
Description: Summon a toxic orb. Obviously.
Effect: The player summons a toxic orb that floats above the ground. It functions similarly to the various magic crystals, as it fires toxic projectiles at nearby enemies.
Weird Blood
Description: A bottle of blood from a werewolf. Don't drink it or get it into any open wounds... unless you really like fur coats.
Effect: Transforms the player into a Werewolf for a brief period of time. As a Werewolf, the player cannot pick up items, use items, or leave the room. Occasionally turns the player into a puppy instead, which can't do anything except run around slowly.
Weird Skull
Description: A skull full of evil magic power. Skulls are so very rarely filled with good magic power.
Effect: Summons three friendly Skeletons to fight alongside you.
Weird Spell Book
Description: A weird spell book. It may or may not be bound in human skin. You'll be careful when you try to use its power, right?
Effect: Turns enemies into frogs when used, rendering them unable to attack for a short while. Can turn the player into a frog instead of enemies.
Potions


The Potions of Lost Castle
Lost Castle has nearly 50 different potion effects, but only 17 different potion icons in total. There are 6 different colors and all but yellow comes in 3 dfferent sizes. Potion effects are hidden from the player at the beginning of each run, instead referring to it as an Unknown Potion. However, if you manage to run into 2 of the same potion in one run, you will be able to view its true name and description while playing. There is also a treasure called the Pharmacist's Eye that allows you to see the name and description of all potions you come across in a run.
Despite what it may seem, potions in Lost Castle are not truly randomized, there are just multiple potions using the same potion icon. Because of this, when you pick up a certain potion it only has a few possible effects. I will be listing all potion effects under their respective potion icon, but I will not be listing the true names and descriptions of potions here as they are very rarely seen in-game. For those who are interested, I do have all the names and descriptions of the potions listed in my Compendium guide.
Large Red Potion
- Restore 80% HP
- Restore 80% HP over 10 seconds
- Damage 30% HP over 10 seconds
Medium Red Potion
- Restore 50% HP
- Restore 50% HP over 10 seconds
- Damage 20% HP over 5 seconds
Small Red Potion
- Restore 30% HP
- Restore 30% HP over 10 seconds
- Damage 5% HP
Large Yellow Potion
- Grants the player the Insane buff, which functions the same as the skill. Increases your attack speed and movement speed temporarily.
- Turns the player into a giant for a short period of time. The player's defence, attack, and size are all increased, while their speed is decreased.
- Summons a tiny ghost that slowly saps away a lot of the player's gold.
Medium Yellow Potion
- 25% speed down, inability to run, and the player defecates everywhere. These effects last until the potion wears off.
- The player will leave a trail of fire beneath their feet for a brief period of time. This fire can harm enemies.
- Summons a tiny ghost that slowly saps away a bit of the player's gold.
- Grants the player a temporary Immortal Shield, which functions the same as the skill.
- Summons a tiny angel that slowly drops a decent amount of coins for the player.
Large Green Potion
- Max HP +15
- Badly poisoned and imbues weapon with poison magic. Temporary.
Medium Green Potion
- Grants the player the Insane buff, some cooldown reduction, and a small shield. After these effects wear off, the player is slowed for a short period of time.
- Max HP +10
- Poisons the player for a brief amount of time.
- Toxic Flatulence. Can poison both the player and enemies.
Small Green Potion
- Max HP +5
- Poisons the player for a brief duration.
Large Cyan Potion
- Turns the player into a dwarf for a short period of time. The player's defence, attack, and size are all decreased, while their speed is increased.
- Gain Shield (Large)
Medium Cyan Potion
- Slows the player for a short period of time.
- Reverses the player's controls for a short period of time while increasing the player's Crit chance by 50%.
- Inflicts the player with the freezing debuff and imbues their weapon with ice magic for a short time.
- Summons multiple lightning bolts that strike at the player and cause small explosions. Can be dodged.
Small Cyan Potion
- Hair color change
- Gain Shield (Small)
Large Blue Potion
- DEF +3
- DEF -3 and Speed +2%
Medium Blue Potion
- DEF +2
- DEF -2
- The player fires magical projectiles from their body that target nearby enemies for a brief period of time.
Small Blue Potion
- DEF +1
- DEF -1
Large Purple Potion
- ATK +3
- ATK -3
- The player temporarily turns into a Werewolf.
Medium Purple Potion
- ATK +2
- ATK -2
- Darkens all but a small area around the player. ATK + 3 for the duration of this effect.
- The screen will temporarily get wobbly. ATK + 5 for the duration of this effect.
- Every coin picked up will grant the player a Demon Soul as well. Lasts for 2 rooms.
Small Purple Potion
- ATK +1
- ATK -1
Treasures Pt. 1


The Treasures of Lost Castle
Lost Castle has a large variety of items that grant the player passive buffs and effects, and these items are referred to as Treasures. The Treasures tab in the status screen also keeps track of all picked up Crystal Fragments, which are a bit more common than Treasures and give stat increases that can stack. This list is alphabetical for ease of use, and will not list descriptions in order to conserve space. In-game passive descriptions will be left in, and full item descriptions can still be found in my Compendium guide for those interested.
Crystal Fragments
Amethyst
Description: A fragment from an ancient crystal. Passive: CRI+2%
Effect: Grants +2% Crit.
Ruby
Description: A fragment from an ancient crystal. Passive: HP+10
Effect: Grants +10 HP.
Sapphire
Description: A fragment from an ancient crystal. Passive: DEF+1
Effect: Grants +1 DEF.
Topaz
Description: A fragment from an ancient crystal. Passive: ATK+2
Effect: Grants +2 ATK.
Treasures
Ancient Troll's Talisman
Passive: Gain a shield when the wearer is knocked down.
Effect: The player is given a small amount of shield HP when they are knocked to the ground by any means. This effect seems to have a cooldown so as to not be abused.
Assassin's Dagger
Passive: A certain chance to instakill monsters whose HP are below 40%.
Effect: Grants the player a chance to insta-kill monsters that have less than 40% health.
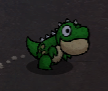
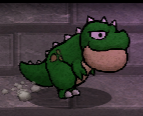
Big Egg
Passive: The egg is hatching.
Effect: Summons a baby dinosaur that follows the player. Charges at and bites enemies when present. The dinosaur will grow after 3 Chicken, increasing its damage and HP. After eating 5 more Chicken, the dinosaur will enter a third (and final) phase of growth, yet again increasing its attack and HP. If it runs out of HP, it will regain consciousness after a room is cleared of enemies.
Blood Collection Bottle
Passive: Increase Max HP by 1 each time you kill a monster. Max. of +50HP.
Effect: Allows the player to obtain an additional 50 max HP by defeating 50 enemies.
Boar King's Food
Passive: Releases toxins when the owner is injured.
Effect: After receiving some form of damage, the player has a chance to emit toxic fumes which will poison enemies.
Boar King's Nail
Passive: Launches a powerful tusk against enemies when the owner is knocked down.
Effect: A piercing tusk attack is launched when the player is knocked down.
Bone Armlet
Passive: Resist damage.
Effect: Summons bones that surround the player. Upon taking damage from any source, the player will lose one bone but the damage will be negated. A new bone is generated in each new room.
Boots of Swiftness
Passive: Move faster.
Effect: Grants the player a 10% boost to their Speed stat.
Cannibals’ Favor
Passive: Health recovery increased for meat and decreased for fruit.
Effect: Increases the healing the player receives from Drumsticks, but decreases the healing the player receives from Apples and Bananas. With the Nutrition Upgrade maxed, Apples heal 10 HP, bananas heal 12 HP, and Drumsticks heal 85 HP.
Chain of Spirit
Passive: You share damage with a nearby ally and take less damage.
Effect: A nearby ally will take some of the damage you would have taken from enemy attacks.
Claw of an Ancient Troll
Passive: Trigger ice fall when entering a new area.
Effect: Causes a few random ice chunks to fall from the ceiling whenever you enter a new room.
Demonic Pact
Passive: Transform to a demon permanently when you die.
Effect: When the player dies, they transform into a demon. This form grants you highly increased speed and attack. This is similar to the Werewolf transformation as it has its own special action, attacks, and skill. Furthermore, you can’t open chests, pick up items, or use items for the remainder of the game.
Basic Attack
The player slices forward with their claws.
Combo Attack
The combo is composed of four consecutive basic attacks. The second attack slices forward with the other arm.
The third attack punches forward with the first arm.
The fourth attack smashes the ground with the other arm.
Jump Attack
The player slices with both hands.
Special Action
The player punches forward a very short distance.
Skill
The player leaps forward a very short distance and smashes the ground.
Demon’s Foot
Passive: Deal extra damage occasionally while attacking.
Effect: Landing after a jump will cause a small explosion beneath the players feet, hurting any nearby enemies. This ability refreshes every few seconds.
Demon's Hand
Passive: Deal extra damage occasionally while attacking.
Effect: The player will periodically deal extra damage when attacking.
Discount Card
Passive: 20% off
Effect: All shop prices are cut by 20%. When approaching a shop pedestal, the icon for the Discount Card will appear over the player’s head and will display the new price of the item.
Dragon Skin
Passive: Cast a lightning ball occasionally while attacking.
Effect: The player will periodically fire an electrical projectile while attacking.
Treasures Pt. 2


Evil Dragon Claw
Passive: Monsters whose HP are more than 80% will suffer double damage!
Effect: The player will deal double damage to enemies who are still above 80% HP.
Evil Scabbard
Passive: First attack of the attack combo will be Critical.
Effect: The first attack of a combo sequence will always be a critical hit.
Eyepatch
Passive: More Crits!
Effect: The Eyepatch does not visibly raise your Crit stat. My best guess is that it adds a hidden increase to your critical strike chance.
Fallen Wings
Passive: Jump higher.
Effect: Allows the player to double jump. The second jump causes the player to float a bit.
Feather Brooch
Passive: Resurrection. This effect can activate only once.
Effect: Revives the player from death a single time. The player will revive at half of their maximum HP.
Fire Enchanting Scroll
Passive: Imbue your weapon with fire occasionally.
Effect: The player's weapon will periodically be imbued with the power of fire, burning the next monster you attack. Not every monster can be burned.
First-Aid Book
Passive: Speeds up resurrection.
Effect: Speeds up resurrection speed in co-op.
Flintstone
Passive: Casts a fireball occasionally while attacking.
Effect: The player periodically shoots out a fiery projectile while attacking.
Forgotten Pearls
Passive: Casts magic power periodically around the owner.
Effect: Summons forth various magic attacks that resemble the skills from the weapons of the Forgotten Lord. Sometimes red rays will fall from the sky, and other times magical exploding swords or red lightning bolts will strike the earth.
Four Leaf Clover
Passive: A certain chance to gain one more chest after killing all monsters.
Effect: Grants the player a chance to have a second chest fall after clearing a room of enemies.
Frost Enchanting Scroll
Passive: Imbue your weapon with ice occasionally.
Effect: The player's weapon will periodically be imbued with the power of ice, freezing the next monster you attack. Not every monster can be frozen.
Ghost Armour
Passive: Summon it to help you in battle.
Effect: A small ghost will follow around the player. If a second Ghost Armour is picked up in the same run, the ghost will push against enemies and absorb a certain amount of damage before disappearing. It will return with full health in each new room the player enters. If a third Ghost Armour is picked up in the same run, the ghost will gain a small dagger and will help the player fight enemies. (Thanks to DeceiverFever for first informing me about the third phase before I had a chance to see it for myself!)
Ghost Fire
Passive: Damages the enemies it hits.
Effect: The fire circles around the player dealing damage to any enemies that it comes in contact with.
Golem’s Eye
Passive: Generate quake wave and hurl a boulder when wearer is knocked down on the ground.
Effect: When the player hits the ground when being knocked backwards, a giant rock will be sent flying in the direction the player is facing. This effect activates even when you slip on banana peels!
Heart of Revenge
Passive: Chance to reflect damage back on the attacker equal to 300% of the damage you receive
Effect: Upon taking damage, there is a chance that the enemy will be struck by spikes that deal triple the damage that the enemy dealt to the player.
Heart of Stone
Passive: Knock back enemies when the owner is attacked.
Effect: Enemies that attack the player will be knocked backwards.
Horn of Battle
Passive: Move faster for a short time after hitting a monster!
Effect: The player gains a brief speed boost every time they strike an enemy.
Ice Blast
Passive: Cast a minty-fresh ice ball occasionally while attacking.
Effect: The player will periodically fire an icy projectile while attacking.
Iron Caligae
Passive: No need to be afraid of traps on the ground.
Effect: All floor traps now deal the player zero damage, but spike traps will still knock the player back. Fire and Ice traps will not inflict debuffs on the player.
Treasures Pt. 3


Lightning Enchanting Scroll
Passive: Imbue your weapon with lightning occasionally.
Effect: The player's weapon will periodically be imbued with the power of lightning, electrifying the next monster you attack. Not every monster can be electrified.
Luxurious Backpack
Passive: Expand the capacity of your pack.
Effect: Increases the number of different items you can carry by 4, bringing the maximum up to 10.
Mini Shooter
Passive: Casts a poison bullet occasionally while attacking.
Effect: The player will periodically shoot out a poisonous projectile when attacking.
Mirror of Uoy
Passive: Generate evil phantom.
Effect: Generates a shadow duplicate of the character which follows the player’s movements exactly with a brief delay. It does not use weapon Skills, even if the player does.
Mjolnir
Passive: Cast lightning around the holder occasionally.
Effect: A small field of electricity periodically activates around the player, electrifying and dealing damage to enemies that are caught in it. Not all enemies can be electrified.
Moonstone
Passive: Regularly leeches all the heat from the room, making it as cold as the dark side of the moon.
Effect: A cooling aura will form around the player often, damaging and freezing enemies that are very close to the player. Despite the passive description, it does not affect the entire room.
Necklace of Protection
Passive: A damage-reduction shield will be generated when the character is being attacked. The shield will hold for a while before exploding.
Effect: A black shield will periodically activate around the player when taking damage. All incoming damage is reduced while the shield persists. Over time the shield will turn red and will eventually explode, dealing damage to any enemies nearby.
Necklace of the Berserker
Passive: Critical strikes can trigger 2s cd cut-down every 5 seconds.
Effect: The player’s skill cooldown may be reduced by 2 seconds every time they strike a critical hit. This apparently can trigger every 5 seconds.
Pharmacist's Eye
Passive: An experienced pharmacist's eye, it can detect the effect of any unknown potion.
Effect: The player will be able to identify all potion types they discover for the remainder of the run.
Piggy Bank
Passive: Increase ATK by 1 every 20 gold you hold. Max. +10.
Effect: Increases the attack of the player by 1 for every 20 coins they hold. Has a maximum increase of +10 attack, capping at 200 coins.
Poison Enchanting Scroll
Passive: Imbue your weapon with poison occasionally.
Effect: The player's weapon will periodically be imbued with the power of poison, poisoning the next monster you attack. Not every monster can be poisoned.
Poisonous Brambles
Passive: Attacks occasionally deal extra poison effect.
Effect: The player will periodically inflict the poison debuff on enemies when attacking.
Potion of Pacification
Passive: Enemies hit you will be calmed.
Effect: Enemies that attack the player are inflicted with a debuff that lowers the damage they deal. This debuff seems to last forever. This effect does not seem to apply to bosses.
Proof of the Hero
Passive: +20 ATK when you at full HP.
Effect: The player's Attack increases by 20 while they are at full health.
Proof of the Zealot
Passive: +20% Critical when your HP is below 25%.
Effect: The player is granted +20% Crit. chance when they have less than 25% of their max HP remaining.
Protector
Passive: You will alive with 1 hp when you under a fatal hit. The effect can activate only once in a short time.
Effect: When you take a fatal hit, you will be brought down to 1 HP and gain a temporary red shield that reduces all incoming damage to 0, though you can still be knocked back. This effect seems to apply only once per room.
Ring of the Berserker
Passive: Critical strikes can trigger 2 hp gain every 5 seconds.
Effect: Landing a critical hit on an enemy may heal the player 2 HP. This apparently can trigger every 5 seconds.
Treasures Pt. 4


Shield Necklace
Passive: Provides a shield when you enter a new area.
Effect: Every new room that the player enters will grant them a small amount of shield HP.
Small Magic Scabbard - Fire
Passive: Daggers are enchanted with fire.
Effect: All player thrown daggers are enchanted with fire.
Small Magic Scabbard - Ice
Passive: Daggers are enchanted with ice.
Effect: Player thrown daggers are enchanted with ice.
Small Magic Scabbard - Lightning
Passive: Daggers are enchanted with lightning.
Effect: Player thrown daggers are enchanted with lightning.
Small Magic Scabbard - Poison
Passive: Daggers are enchanted with poison.
Effect: Player thrown daggers are enchanted with poison.
Soul Collection Bottle
Passive: Generate a crystal every 30 souls collected.
Effect: Generates the item “Souls Crystal” every time the player collects 30 Demon Souls.
Souls Crystals are consumables that, when used, grant the player a random stat boost. Some of the possible effects are Max HP +3-10, ATK +1-3, DEF +1-3, Crit +1-3%.
Source of Flame
Passive: Resistance to burning debuff.
Effect: The player becomes immune to the burning debuff.
Source of Frost
Passive: Resistance to freezing debuff.
Effect: The player becomes immune to the freezing debuff.
Source of Poison
Passive: Resistance to poisoning debuff.
Effect: The player becomes immune to the poisoned debuff.
Spirit of Evil
Passive: Frequently shoots a bolt of pure evil.
Effect: Frequently fires an evil projectile that explodes upon hitting an enemy.
Spirit of Flame
Passive: Frequently shoots a fire ball.
Effect: The spirit follows behind the player and frequently shoots a fiery projectile in the direction the player is facing.
Spirit of Frost
Passive: Frequently shoots a ball of ice.
Effect: The spirit follows behind the player and frequently shoots an icy projectile in the direction the player is facing.
Spirit of Health
Passive: Cure its master.
Effect: The spirit follows behind the player and periodically heals them for a small amount.
Spirit of Lightning
Passive: Frequently shoot a ball of electricity.
Effect: The spirit follows behind the player and frequently shoots an electric projectile in the direction the player is facing.
Spirit of Venom
Passive: Frequently shoots poison balls.
Effect: The spirit follows behind the player and frequently shoots a poisonous projectile in the direction the player is facing.
Sunstone
Passive: Flash fries everything in the room at regular intervals.
Effect: The player will radiate heat around themselves every so often, damaging and burning any enemies that are standing close to the player. Despite what the passive description states, this does not affect the entire room.
The Mad King's Ring
Passive: Slaying enemies can occasionally trigger Soul Absorbing, increasing Attack and Speed but redusing Defence.
Effect: Grants a chance to increase Attack and Speed stats while slightly lowering the Defence stat whenever an enemy is defeated.
Thief's Ring
Passive: Grants coins occasionally when attacking a monster.
Effect: Enemies occasionally drop coins when attacked.
Toxic Grume
Passive: A certain chance to eject grumes when receiving damage.
Effect: Grants the player a chance to have four green orbs drop from them when hit by an enemy. The four orbs hit the ground and explode, damaging nearby enemies.
Tumbler
Passive: Get up faster after being knocked down.
Effect: The player will now get up a whole lot faster after being knocked to the ground.
Vampire's Tooth
Passive: Heal after killing an enemy.
Effect: The player regenerates a small amount of health for every enemy defeated.
Weird Carapace
Passive: Resist some damage from behind.
Effect: If the player is facing away from an enemy’s attack, the damage received will be reduced.
Weird Tentacle
Passive: The wearer can release Erosion with the cost of HP.
Effect: The Erosion Skill will sometimes activate when the player takes damage.
Wood Scripture
Passive: Randomly creates a vine to restrict an enemy.
Effect: Will periodically tangle a nearby enemy in vines for a short period of time.
Wooden Crown
Passive: Get help from slimes when entering a new area.
Effect: A friendly slime will appear in each new room that the player enters.
Enemies (Tower Of Goblins)
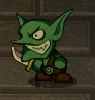


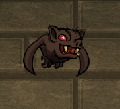
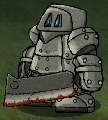
The Enemies of Lost Castle
According to the Compendium, there are 66 unique enemies you must fight your way through in Lost Castle. However, the Enemy tab in the Compendium includes four NPCs and two enemies that are only counted when defeating the Impregnable boss fight. Because of this, I will only be listing enemies that the player can fight normally in these sections of the guide.
Many of the enemies function similarly to others, but a large deal of them actually have unique attack patterns and mechanics. Enemies will occassionally drop loot such as potions and gem fragments, and the larger enemies can sometimes even drop weapons and armors. Enemy names have been taken straight from the in-game Compendium. This section of the guide will detail each enemy's health, their attack patterns, and which area(s) in the game they appear. All health values are approximate and may be outdated.
Goblin Rogue
Locations: Tower of Goblins, Bramble Courtyard
Health: ~130
Attacks:
- Slowly stabs at player if in melee range.
Goblin Ranger
Locations: Tower of Goblins, Bramble Courtyard
Health: ~100
Attacks:
- Shoots an arrow at the player from a distance.
Goblin Mage
Locations: Tower of Goblins, Bramble Courtyard
Health: ~80
Attacks:
- Fires a magical projectile at the player from a distance.
Goblin Warrior
Locations: Tower of Goblins, Bramble Courtyard
Health: ~125
Attacks:
- Slices at player twice if in melee range.
- Throws an axe at the player from a distance.
Goblin Berserker
Locations: Tower of Goblins, Bramble Courtyard
Health: ~150
Attacks:
- Charges the player from across the screen and leaps at them when close.
- If in melee range they will swipe at the player with their daggers 3 consecutive times.
Goblin Artillery
Locations: Tower of Goblins
Health: ~70
Attacks:
- Loads bombs into nearby cannons, which fire in an arc at the player.
- Pick up bombs from bomb boxes and throw them at the player by hand.
- Punches the player if in melee range and not holding a bomb.
Goblin Drummer
Locations: Tower of Goblins, Bramble Courtyard
Health: ~120
Attacks:
- Boosts the attack speed and movement speed of all nearby Goblin enemies.
- Does not directly attack the player.
Goblin Giant
Locations: Tower of Goblins
Health: ~350
Attacks:
- Attempts to smash their club into the player if within melee range.
- Swings its arms back and forth before leaping toward the player.
Bat
Locations: Tower of Goblins, The Secret Path, The Ice Path, Skull Dungeon, The Main Tower
Health:
- Tower of Goblins: ~50
- The Secret Path: ~100
- Skull Dungeon: ~100
- The Main Tower: ~150
Attacks:
- Dives at the player from a short distance away.
Butcher Armor
Locations: Tower of Goblins, Bramble Courtyard, The Secret Path
Health: ~250
Attacks:
- Slowly slashes at the player if in melee range.
Enemies (Bramble Courtyard)
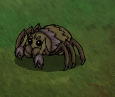
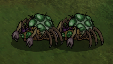


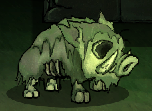

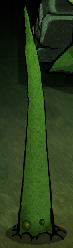

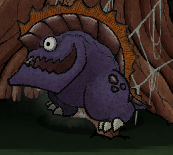
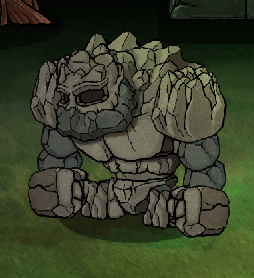
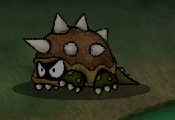
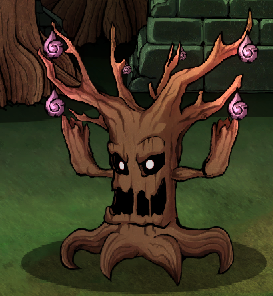
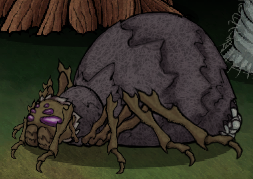
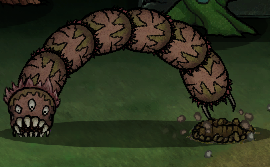

Demon Spiderling
Locations: Bramble Courtyard, The Secret Path, The Ruin
Health: ~100
Attacks:
- Tries to slice at the player if in melee range.
- Tends to skitter around the player instead of approaching in a direct path.
Cancerous Spiderling [Poison]
Locations: Bramble Courtyard, The Secret Path, The Ruin
Health: ~100
Attacks:
- Charges at the player and blows up if close, dealing damage and a short term poison effect.
Cancerous Spiderling [Web]
Locations: Bramble Courtyard, The Secret Path, The Ruin
Health: ~100
Attacks:
-Charges at the player and blows up if close, trapping them in spider webs. For keyboards you must press A and D rapidly to break free of webbing. For controllers you must tilt the control stick left and right rapidly to break free.
Venom Hunter
Locations: Bramble Courtyard, The Secret Path, The Ruin
Health: ~200
Attacks:
- Stabs at the player if in melee range.
- Shoots a poisonous projectile at the player.
Zombie Boar
Locations: Bramble Courtyard, The Secret Path, Skull Dungeon
Health: ~350
Attacks:
- Charges the player from far distances.
- Always uses a headbutt attack over the charging attack if in melee range.
Acid Shooter
Locations: Bramble Courtyard
Health: ~100
Attacks:
- Shoots a poisonous projectile at the player.
Spike Root
Locations: Bramble Courtyard
Health: ~50
Attacks:
- When the player approaches a Spike Root, it sways violently in the players direction, causing a trail of spikes to jut out of the ground in a path toward the player.
Note: The Spike Root is not found anywhere in the Manual, but I am not sure that it would be better classified as a trap as it actively tries to attack the player.
Slime
Locations: Tower of Goblins, Bramble Courtyard, The Secret Path
Health: ~100
Attacks:
- Jumps feebly at the player if in melee range.
Rollingmon
Locations: Bramble Courtyard, The Secret Path, The Ice Path
Health: ~300
Attacks:
- Rolls back and forth aiming at the player until the creature gets dizzy.
- Bounces four times aiming at the player's location before it gets dizzy.
Granite Golem
Locations: Bramble Courtyard, The Secret Path, The Ice Path
Health: ~500
Attacks:
- Punches at the player if in melee range
- Sometimes throws two punches in a row, one punch from each arm.
- Digs up large rocks and throw them at the player in an arc if out of melee range.
Missile Tortoise
Locations: Bramble Courtyard, The Secret Path
Health: ~200
Attacks:
- Shoots spikes at the player from a distance.
- Retreats into its shell when at low health, causing it to take significantly less damage while rendering it unable to attack.
Ghost Tree
Locations: Bramble Courtyard
Health: ~400
Attacks:
- Throws bombs in an arc at the player across far distances.
- Swings a branch at the player if they are within melee range.
Mother Spider
Locations: Bramble Courtyard, The Ruin
Health: ~500
Attacks:
- Weaves an Egg Sac trap which will spawn 2 of either type of Cancerous Spiderling or one Spider if not destroyed quickly.
- Seems to always die after traveling a certain distance.
Demon Worm
Locations: Bramble Courtyard, The Secret Path
Health: ~150
Attacks:
- Tunnels up at the player periodically, travelling briefly in an arc before digging back into the ground.
Sapling
Locations: Bramble Courtyard
Health: ~350
Attacks:
- Swipes twice at the player in quick succession.
- Summons a pair of brambles beneath the player that can trap them for a short time. Deals a small amount of damage when the player is freed.
Enemies (The Secret Path)


Caveman Warrior
Locations: The Secret Path, The Ice Path
HP: ~250
Attacks:
- Bashes player with club if in melee range.
- Leaps a short distance to smash the player with their club .
Caveman Firecarrier
Locations: The Secret Path, The Ice Path
HP: ~225
Attacks:
- Shoots three arcing fiery projectiles in a cone.
- Stabs with torch if in melee range.
Caveman Rock Slinger
Locations: The Secret Path, The Ice Path
HP: ~250
Attacks:
- Does not attack if in melee range, but backs away from the player.
- Throws a crystal or a stone slab at the player from a distance (can hit other enemies).
Caveman Hunter
Locations: The Secret Path, The Ice Path
HP: ~200
Attacks:
- Throws boomerangs at the player.
- Smacks the player three consecutive times with a boomerang if in melee range.
Giant Salamander
Location: The Secret Path, The Ice Path
HP: ~400
Attacks:
- Shoots an arcing, slimy projectile at the player from a short distance; if the player is hit by the slime, their movements will be strange for a period of time.
- Belly flops at the player if in melee range.
Mole Shark
Location: The Secret Path, The Ice Path
HP: ~350
Attacks:
- Burrows underground, leaving only its fin visible; chases down the player and then chomps upward towards them.
- Leaps a short distance at the player if in melee range.
Caveman Elder
Location: The Secret Path
HP: ~450
Attacks:
- Blocks the player's movement.
- Moves around a large boulder, smashing it into the player if in melee range.
- Quickly pushes the boulder in the direction of the player.
Caveman Roller
HP: ~200
Attacks
- Blocks the player's movement.
- Moves around a large boulder, smashing it into the player if in melee range.
- Quickly pushes the boulder in the direction of the player.
- Basically the exact same as the Caveman Elder, but much, much tinier.
Location: The Secret Path
Enemies (The Ice Path)


Ice Rock
Locations: The Ice Path
HP: ~250
Attacks:
- Summons chunks of ice in a line toward the player.
- Punches twice if the player is in melee range.
Murloc Soldier
Locations: The Ice Path
HP: ~250
Attacks:
- Partially blocks incoming damage with their shield.
- Swings sickle at the player if in melee range.
Murloc Hunter
Locations: The Ice Path
HP: ~200
Attacks:
- Jumps backwards to make space between themselves and the player.
- Throws one or two poisoned darts at the player from afar.
Murloc Shaman
Locations: The Ice Path
HP: ~ 250
Attacks:
- Dashes toward the player.
- Slowly slams their axe at the player if in melee range.
- Can temporarily buff themselves and all other nearby Murlocs.
Enemies (Skull Dungeon)


Skeleton
Locations: All Areas
Health: ~150
Attacks:
- Punches at the player in melee range.
- Swings its sword at the player if in melee range.
Skeleton Scout
Locations: The Secret Path, Skull Dungeon, The Main Tower
Health: ~200
Attacks:
- Swings its sword at the player if in melee range.
- Raises its sword for a second, and then swings at the player.
Skeleton Ranger
Locations: Bramble Courtyard, The Secret Path, Skull Dungeon, The Main Tower
Health: ~300
Attacks:
- Shoots arrows at the player from a distance.
- Smacks the player with their bow if in melee range.
Skeleton Mage
Locations: Bramble Courtyard, The Secret Path, Skull Dungeon, The Main Tower
Health: ~300
Attacks:
- Shoots magical projectiles from a distance:
-- Red Skeleton Mages shoot fiery projectiles.
-- Green Skeleton Mages shoot poisonous projectiles.
-- Blue Skeleton Mages shoot icy projectiles.
-- Purple Skeleton Mages shoot homing projectiles.
Skeleton Soldier
Locations: Skull Dungeon, The Main Tower
Health: ~350
Attacks:
- Dashes at the player and leaps at them at a certain range.
- Soldiers with swords swing their sword at the player if in melee range.
- Soldiers with axes swing their axe at the player two consecutive times if in melee range.
Skeleton Rider
Locations: Skull Dungeon
Health: ~300
Attacks:
- Swings their morning-star like weapon at the player if in melee range.
Boar Rider
Locations: Skull Dungeon
Health:
- Boar: ~350
- Skull Punisher: ~300
Attacks:
- Charges the player from across the screen if not in melee range.
- The rider swings their morning-star like weapon at the player if in melee range.
- Turns into a regular Skeleton Rider once the Zombie Boar is defeated.
Skeleton Iron Guard
Locations: Skull Dungeon, The Main Tower
Health: ~500
Attacks:
- Damage resistance until the shield breaks.
- Slices at the player with its weapon when in melee range.
- Moves faster without the shield.
Ghost
Locations: The Secret Path, Skull Dungeon, The Main Tower
Health: ~250
Attacks:
- Teleports around.
- Shoots three blue fires at the player in quick succession.
Skeleton Dragon
Location: Skull Dungeon, The Main Tower
HP: ~500
Attacks:
- Does a somersault in mid-air before charging down the player. Both the somersault and the charge can damage the player.
Enemies (The Ruin)


Ancient Berserker
Locations: The Ruin
HP: ~400
Attacks:
- Jumps and strikes at the player.
Ancient Butcher
Locations: The Ruin
HP: ~200
Attacks:
- Chops at the player if in melee range.
- Can also chop three times in quick succession.
Ancient Butler
Locations: The Ruin
HP: ~400
Attacks:
- Opens a chasm of dark energy beneath the player, which bursts upward after a brief delay.
- Summons multiple dark lightning bolts, some of which will not target the player directly.
Ancient Maid
Locations: The Ruin
HP: ~200
Attacks:
- Stabs at the player if in melee range.
Ancient Priest
Locations: The Ruin
HP: ~400
Attacks:
- Fires 1 - 3 fireballs forward.
- Slightly charges up a bigger fireball, and then casts it at the player, causing a small explosion where it lands.
Ancient Ranger
Locations: The Ruin
HP: ~350
Attacks:
- Shoots a single arrow at the player from afar.
Ancient Rogue
Locations: The Ruin
HP: ~250
Attacks:
- Strikes at the player if in melee range.
- Can also strike four times in quick succession.
Ancient Scholar
Locations: The Ruin
HP: ~350
Attacks:
- Summons four blue explosions in a diamond shape near the player.
- Fires multiple icy projectiles at the player.
Ancient Soldier
Locations: The Ruin
HP: ~400
Attacks:
- Strikes at the player if in melee range.
Ancient Warrior
Locations: The Ruin
HP: ~600
Attacks:
- Reduces incoming damage until shield breaks.
- Strikes at the player if in melee range.
- Can dash at the player before striking after their shield is broken.
Freaky Giant
Locations: The Ruin
HP: ~700
Attacks:
- Jumps slightly forward and strikes with its sword.
- Shouts at the player if in melee range; the shout causes multiple low damaging shockwaves to form.
- Swings at the player if in melee range.
- Can also slash twice in quick succession.
Mystery Knight
Locations: The Ruin
HP: ~350
Attacks:
- Sidesteps quickly toward the player.
- When in melee range, leaps into the air and strikes at the player.
- Can also poke the player if in melee range.
Orthrus Slave
Locations: The Ruin
HP: ~300
Attacks:
- Bites at the player if in melee range.
Demon Orthrus
Locations: The Ruin
HP: ~500
Attacks:
- Runs toward the player.
- Bites at the player if in melee range.
- Can also do a triple bite attack.
- Fires a purple, magical projectile at the player.
Ancient Gladiator
Location - The Ruin
HP: ~650
Attacks:
- Reduces incoming damage until shield breaks.
- Strikes at the player if in melee range.
Enemies (The Main Tower)


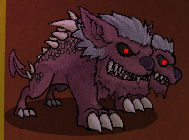
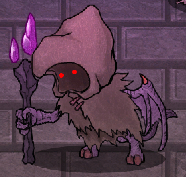
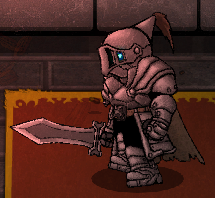
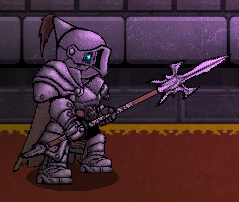
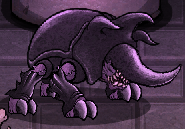
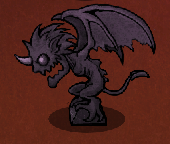
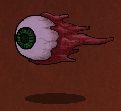

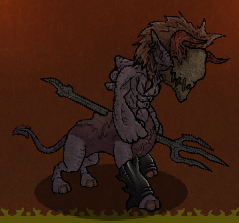

Demon Soldier
Locations: The Main Tower
Health: ~400
Attacks:
- Charges at the player from across the screen, stabbing with the pitchfork when in melee range.
- Stabs with the pitchfork when in melee range, quickly following up with an upward swing.
- Charges up briefly (indicated by the Demon Soldier glowing purple) and thrusts forward at the player.
Demon Warlock
Locations: The Main Tower
Health: ~300
Attacks:
- Briefly charges up and fires two large magical projectiles forward.
- Briefly charges up and causes an explosion around itself.
- Slashes at the player twice with its claws if in melee range.
Demon Dwarf
Locations: The Main Tower
Health: ~300
Attacks:
- Charges up and fires a magical projectile forward.
- Charges up and causes an explosion around itself, similar to the Blindfold Demon.
- Summons small purple circles underneath the players feet which explode after a short time.
Demon Imp
Locations: The Main Tower
Health: ~200
Attacks:
- Briefly charges up and shoots a single magical projectile forward.
Demon Dog
Locations: Bramble Courtyard, The Main Tower
Health: ~225
Attacks:
- Leaps a short distance and bites at the player.
- If a Demon Dwarf dies near a Demon Dog, it will transform into an Orthrus.
Orthrus
Locations: Bramble Courtyard, The Main Tower
Health: ~ 450
Attacks:
- Leaps at the player multiple times in a row.
- Briefly charges and shoots a large fiery projectile forward.
- Jumps forward and bites at the player if in melee range.
Demon Elder
Locations: The Main Tower
Health: ~400
Attacks:
- Summons Demon Dogs and Demon Imps periodically.
- Charges up and smashes their staff into the ground if the player is within melee range, causing an explosion around the Summoner.
Ghost Armor [Sword]
Locations: Skull Dungeon, The Main Tower
Health: ~1000
Attacks:
- Combo of sword slash, stomp, and sword slash if in melee range.
- Single stab if in melee range.
- Single slash if in melee range.
Ghost Armor [Spear]
Locations: Skull Dungeon, The Main Tower
Health: ~1000
Attacks:
- Charges the player with its spear held out.
- Thrusts forward three consecutive times with its spear if in melee range.
Demon Beetle
Locations: Skull Dungeon, The Main Tower
Health: ~500
Attacks:
- Charges at the player.
- Lowers its head and then stabs forward at the player instead of charging if in melee range.
Gargoyle
Locations: The Main Tower
Health: ~300
Attacks:
- Flies around.
- Gargoyles will smash down when flying over the player. After smashing down they will remain vulnerable on the ground for a brief period of time.
Evil Eye
Locations: Skull Dungeon, The Main Tower
Health: ~300
Attacks:
- Shoots a laser across the screen that persists for many seconds, potentially damaging the player multiple times. This laser can hurt other enemies. An Evil Eye cannot turn around when shooting a laser.
Succubus
Locations: The Main Tower
Health: ~500
Attacks:
- Fires a pink magical projectile forward that charms the player if they are hit. If a player is charmed then their directional controls will be reversed for a brief period of time.
- Stabs at the player with a dagger if in melee range.
Demon Centaur
Locations: The Main Tower
Health: ~550
Attacks:
- Charges the player from across the screen and stabs with it’s pitchfork once in melee range.
- Stab at the player with a follow up slash if in melee range.
Black Mage
Locations: The Main Tower
Health: ~400
Attacks:
- Teleports.
- Fires a spread of three magical projectiles often.
Black Assassin
Locations: The Main Tower
Health: ~400
Attacks:
- Teleports.
- Dashes quickly at the player if nearby, stabbing with their dagger.
Werewolf
Locations: Skull Dungeon, The Main Tower
Health: ~600
Attacks:
- Chases the player down and claws at them.
- Bites at the player if in melee range, healing 100 health if successful.
- Very briefly charges and then claws at the player if in melee range.
- Claws at the player three times in quick succession if in melee range.
The Werewolf is the only non-boss enemy in the game that unlocks items.
Boss Fights (Tower Of Goblins)
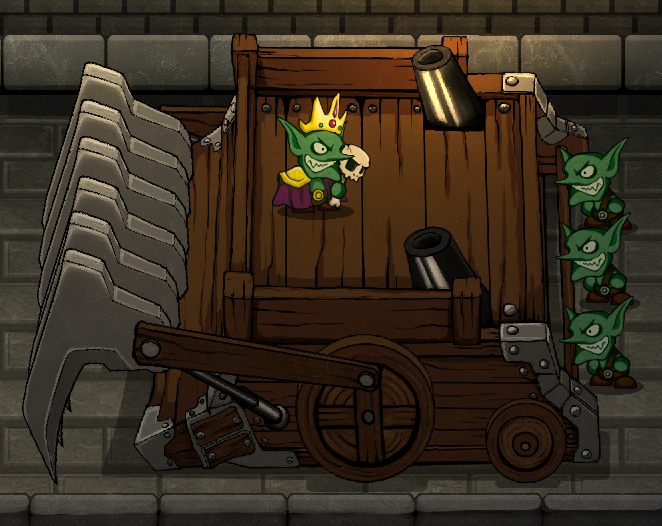
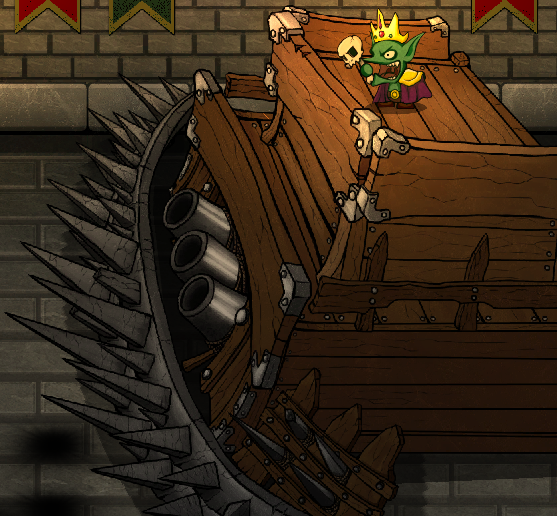

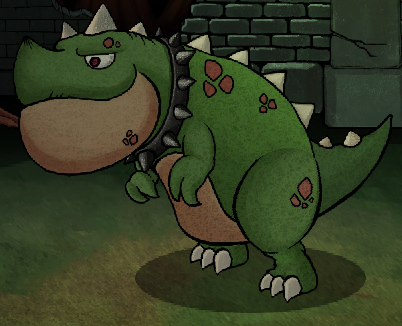


The Bosses of Lost Castle
Lost Castle has a wide variety of bosses, each of which have very unique attack patterns. Most bosses are pretty brutal, often requiring you to use a great deal of your food just to have a shot at beating them. Defeating a boss for the first time will unlock an assortment of items that can then be found when playing Lost Castle on that savefile. Also, some bosses can show up in multiple areas and may have a different amount of Health as a result. When you defeat most bosses, you will get a free weapon or piece of armor that they unlock next to the Great Golden Chest.
Health: ~1500
Attacks:
- The Invincible moves from the right of the screen to the left, forcing the player to run and avoid obstacles. Explosive barrels will be blow up after a few seconds of showing up on screen, so be wary!
- If the player touches the blades, they will be launched backwards and the Invincible will come to a stop. If the player runs from the Invincible long enough, it will come to a stop on its own.
- Roughly 5 goblins of various types will spawn at the left side of the screen when the machine stops.
- After a few seconds of stopping, it will start firing cannonballs in an arc at the player.
- It will start moving again after shooting quite a few cannonballs.
Tips:
- The Invincible's cannonballs can hit itself if the player stands close enough to it.
- The spawning goblins can be a huge pain, but sometimes it may be advantageous to ignore them. They will be mowed down as the Invincible continues chasing you.
Health: ~800
Attacks:
- The fight starts with a large number of goblins standing to the left side of the screen. More goblins will spawn throughout the fight.
- The Impregnable fires three consecutive bombs at the player.
- The Impregnable takes reduced damage until the barricade is destroyed.
Tips:
- Clear out the starting goblins to make your life a lot easier, as the spawning ones take quite some time to appear. Without the goblin hordes, this boss is one of the easiest in the game.
- The Goblin Artillery will drop bombs for the player, and they are really effective at tearing apart the barricade.
Unlocks:
Health: ~1000
Attacks:
- Charges at the player, crashing to the ground regardless of whether the player is hit or not.
- Swipes its tail at the player if standing near it.
- Chomps at the player if in melee range.
- Stands around wanting chicken.
Tips:
- The Puppy tends to charge a lot, so try to leave plenty of room for horizontal movement to sidestep the charge attack.
- You can get a few good hits in when The Puppy does its biting animation, but it backs up before charging, making it much easier to hit you.
- The Puppy occasionally stands around expressing a desire for chicken. This is a good opportunity to get some free hits in.
Unlocks:
Health: ~1000
Attacks:
- Slams the ground lightly, throwing out a large number of green orbs. Each orb explodes upon hitting the ground and may spawn a Slime.
- Slams the ground heavily, hitting the player if in melee range. Four consecutive giant rocks will fall above the player, similar to any other Falling Trap.
Tips:
- Boss Slime and the regular Slimes can be hit by the falling rocks.
- The Slimes aren't much of a problem but can certainly become one. If they begin to overwhelm you, try to focus on clearing them out instead of attacking the boss.
Unlocks:
Boss Fights (Bramble Courtyard)

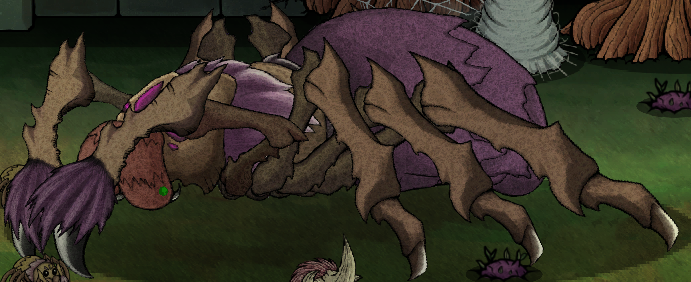

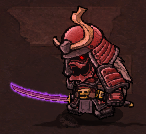
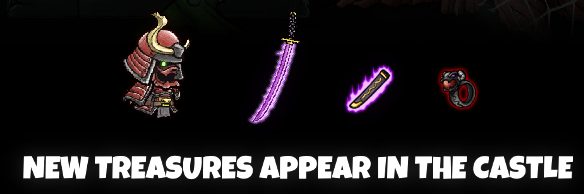
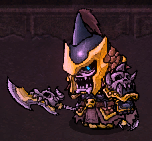
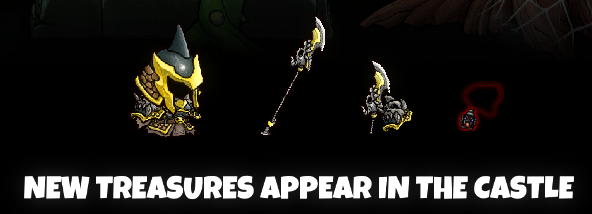


Health: ~1000
Attacks:
- Big Head sits at the right side of the screen and cannot move.
- It often shoots out many purple, explosive orbs that can be a pain to dodge.
- Regularly summons Acid Shooters and Spike Roots.
Tips:
- The Spike Roots have very low HP, so they should only take one or two hits to clear out.
- The Acid Shooters cannot shoot down the middle of the boss arena and they only spawn on either side of Big Head.
- You can sidestep the Spike Root attacks while attacking Big Head, though it can be somewhat tricky to dodge the purple explosives at the same time.
- Be careful not to let the enemies build up and overwhelm you; if you are having trouble getting hits in and dodging, take some time to back up out of Big Head's range and take out the smaller enemies.
- Due to Big Head's relatively low HP and lack of mobility, I tend to try tanking it if I have enough food.
Unlocks:
Health: ~1200
Attacks:
- Demon Spider moves back and forth across the map very quickly.
- Rises up on its back legs and slams its front legs down.
- Rises up on its back legs and fires out a large number of poisonous projectiles in various directions.
- Rises up on its back lengs and lays three Eggsacs.
- Swipes at the player if in melee range.
Tips:
- There are often some spiders or Eggsacs in the area before the battle begins, so try clearing them quickly.
- Destroy any Eggsacs the Demon Spider spawns; they usually only take a few attacks.
- The Demon Spider often has trouble hitting you if you are standing in the middle of it or slightly near the back end of it. The slam attack still hits you and it repositions a lot, but this strategy seems to work really well most of the time.
- The Demon Spider is so large that it can be hit from the front, not just the right and left sides.
Unlocks:
Health: ~1000
Attacks:
- Runs toward the player, often dashing at them when close and following up with a sword slash or two.
- Strikes at the player multiple times in melee range.
- Jumps backwards, sometimes multiple times in a row.
- Breathes fire at the player from a distance.
Tips:
- Weapon skills with long range are really helpful against Yaksha. Ranged weapons (Muskets especially) often require you to be close enough for Yaksha to clear the distance between you and start a combo attack. Even with a great weapon skill, you may have to spend a lot of time running around waiting for your skill to come off cooldown in order to get a single safe attack in.
- As always, the strategy of waiting for the enemy to begin a combo or attack animation in order to hit it once or twice from behind is probably best for this boss.
- In my opinion, Yaksha is perhaps the most difficult boss in the game if you do not have a weapon or skill that is incredibly effective against him. I have fought Yaksha multiple times and even now I have a ton of trouble finding ways of dodging his attacks successfully while also getting hits in.
Unlocks:
Health: ~1000
Attacks:
- Slams spear into the ground if in melee range.
- Jumps backwards, sometimes multiple times in a row.
- Twirls spear around in the air while running at the player. The twirling spear can hit the player. Jumps at the player if they are close and slams the spear against the ground.
- Runs at the player, potentially jumping at them and slamming the spear into the ground.
- Charges up briefly and then spins in circles while chasing the player, potentially hitting the player multiple times if they get caught in it.
- Breathes ice at the player.
Tips:
- I find Rakshasa to be an easier fight than Yaksha, perhaps mostly due to the lack of Yaksha's crazy ability to close the gap between himself and the player.
- If I remember right, Ranged weaponry fares a lot better against Rakshasa than Yaksha, so it may be more manageable to get a shot or two in on him when he charges.
- Again, attacking from behind when he is stuck in a combo or attack animation is generally the best strategy.
Unlocks:
Health: ~1500
Attacks:
- Fires a toxic projectile that will make a temporary poison pool on the floor; the poisonous pool will damage the player if they walk over it.
- Summons a bunch of maggots that will do a small leap attack at the player if they are in melee range. Each maggot has about 100 Health.
- Swipes at the player if in melee range.
- Sometimes swipes two times in quick succession.
- Glides at the player and slams the ground, causing a small shockwave that will knock the player backwards.
Tips:
- The poison pools deal damage even if you jump over them, so try to avoid them entirely.
- The maggots aren't much of a threat so try focusing solely on dealing damage to the boss.
Unlocks:
Health: ~2000
Attacks:
- Fires off a large number of poison projectiles around itself.
- Smashes its hammer if the player is in melee range.
- Summons a lot of brambles around itself to snag the player, similar to the ones summoned by the Sapling enemy.
- Summons two healing pools at low health which will gradually heal the Wood Knight over time. The healing pools have about 100 HP each, and the Wood Knight is firing off a few poison projectiles at random while the pools are up. After taking out the healing pools, the Wood Knight will be briefly stunned.
Tips:
- This boss moves fairly slowly compared to other bosses, and the only attack that's particularly tricky to dodge is the hammer smash, since it can be difficult to avoid even when moving diagonally.
- The brambles and poison projectiles can be easily dodged by just keeping your distance until they are gone.
- The healing pools can happen more than once, but they are pretty easy to take out and you can easily dish out damage on Wood Knight while he is stunned afterwards to make up the Health he healed.
Unlocks:
Boss Fights (The Secret Path)


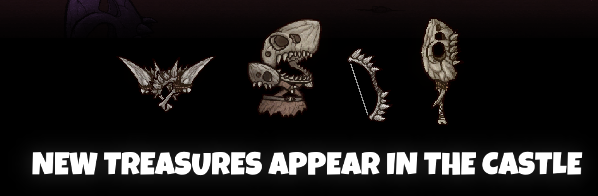
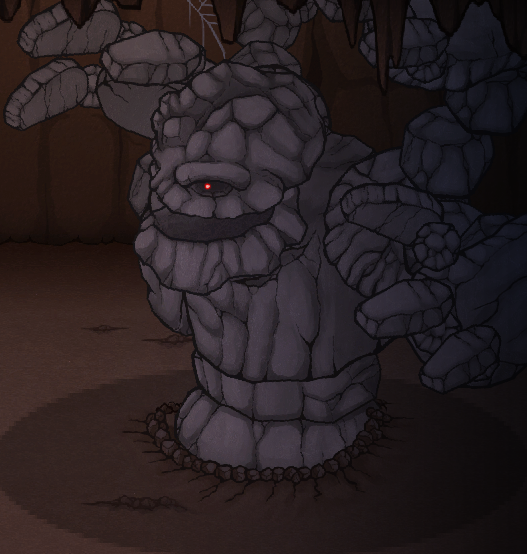
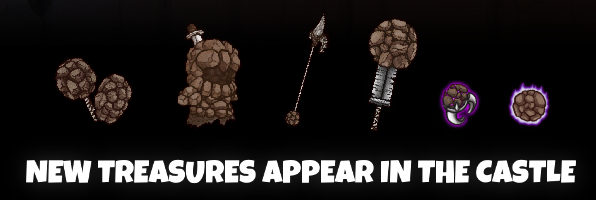

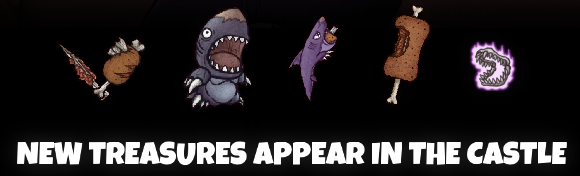


HP: ~1800
Attacks:
- Jumps at the player from a distance and smashes his weapon into the ground.
- Punches at the player if in melee range.
- Stomps the ground, summoning various Caveman enemies and falling rocks. The stomps also create a small shockwave that harm the player if in melee range.
- Swings club at player if in melee range.
Tips:
- I always tend to avoid focusing on the additional enemies that are summoned and focus mainly on him. A lot of the time, the falling rocks will hurt the enemies and you'll be running around avoiding attacks so they won't be too much trouble.
- I find this boss to be an easy target of the "jump attack and run away" repeatedly strategy.
Unlocks:
HP: ~1800
Attacks:
- Slams the ground, causing a large number of rocks to fall from the ceiling.
- Throws multiple rocks at the player.
- Punches forward three times, moving from his initial position; moves back after the punches.
- Charges up his fist before releasing up to six consecutive punches.
- Slams the ground around himself with all four arms.
- Punches with all four arms directly in front of himself.
Tips:
- This boss is fairly simple compared to the others of this area. It often gives you ample time to dodge attacks as they charge up, even if you are standing right up next to it and attacking.
- When it uses the triple punch attack where it moves forward, if you hug the bottom of the area you will not take damage from the attacks.
- Take some time to recognize its patterns and this boss should be one of the easiest to dodge in the game.
Unlocks:
HP: ~1800
Attacks:
- Burrows underground, hurting the player if they are in melee range.
- After burrowing it leaves its fin visible and chases down the player, hides its fin, and then chomps upwards from beneath the player’s feet. It chomps upwards four times, one after another.
- Chases the player similarly to The Puppy, but can damage the player multiple times if it touches them.
Tips:
- It cannot be hurt when chomping upwards, but can be hurt when only its fin is visible.
- Keep running diagonally to consistently dodge its upward chomps.
- Even though you can easily dodge the upward chomps, the other two attacks it uses can be a bit annoying to dodge at times, as neither give the player much time to react beforehand.
- From Steam user Shotouw: "You can completely avoid taking damage by the Shark Boss, if you bait him to appear in the upper half of the chamber, then go beneath him and hit him from there. He will push you downwards but you can easily get in 10-20 hits in that time, every time!"
Unlocks:
Health: ~2500
Attacks:
- Stabs with his spear.
- Chomps at the player if in melee range.
- Does a flurry stabbing attack which hits the player multiple times. This attack has a longer reach than it appears so it can be easy to get caught by it.
- Punches the player, sending them flying backwards.
- Jumps into the air and stabs the ground with his spear, and then jumps toward the player and slams his spear flat on the ground.
Tips:
- This boss has longer range than he appears, so it can be difficult to sneak in hits even after he misses an attack without getting smacked in return.
- He has very few long range attacks, so if you have a ranged weapon or a skill with a long reach, they should come in handy here.
- The bow special action (piercing shot that pushes you back) is especially good at taking down this boss.
Unlocks:
Health (Blue): ~1000
Health (Pink): ~1000
Health (Red): ~800
Attacks (Blue):
- Has a shield that reduces incoming damage.
- Stabs forward if the player is in melee range.
- Can also perform a four attack combo.
- Jumps and smashes its weapon on the ground.
Attacks (Pink):
- Occasionally heals any of the Gumballs, including itself.
- Provides some sort of buff on any of the Gumballs, likely reduces incoming damage.
- Smashes at the player with its staff if in melee range.
Attacks (Red):
- Fires two shots from afar.
- Blasts at the player if in melee range.
- Fires a huge number of bullets at once in a narrow area outlined in red.
- Puts a red eye over the player, likely increasing the damage they take for as long as it lasts.
- Fires multiple homing missiles into the air that target the player one at a time.
Tips:
- Pink's heals can be annoying, but it's not too difficult to out damage the heals if you focus on one enemy at a time.
- Red has the lowest HP of the three and is also the only one that really limits your movements, so I would advise trying to take Red out first and then focusing on Pink.
- They are all fairly simple enemies, so whichever you leave for last will likely not be much of a threat.
- Despite the large number of things going on at once, you can pretty safely avoid damage from all three of them and learn their attack patterns before fighting them properly.
Unlocks:
(NOTE: There is also a gun weapon that is associated with the Red Gumball, though it isn't listed in the unlocks here.)
Boss Fights (The Ice Path)


Health: ~2000
Attacks:
- Summons multiple icy projectiles that scatter across the arena after a brief delay.
- Throws ice chunks at the player. Some of these ice chunks have enemies in them that will then attack the player as well.
- Fires a laser beam down the middle of the arena that hits multiple times.
- After the laser attack, summons multiple explosions that cover the top and bottom part of the arena. These explosions slowly make their way all the way to the back of the room.
- Throws 6 punches with alternating arms when the player is in melee range.
- Also smacks the ground twice if the player is in melee range.
Tips:
- Try to hang back and bait out the laser attack. After avoiding it, get in close and do some damage while the explosions cover the top and bottom parts of the arena.
- You can hang back to try and clear out the smaller enemies, though the laser attack can also deal them a lot of damage if they get caught in it.
- You can sneak in a few free hits while Ancient Trolls is throwing ice chunks.
Unlocks:
Health: ~1500
Attacks:
- Smashes its giant ice club down.
- Jumps and smashes the ice club down, causing ice chunks to burst forward out of the ground.
- Stomps the ground, causing ice chunks to fall from the ceiling.
- Will sometimes jump after stomping, causing a shockwave around itself.
- Punches the player if in melee range.
Tips:
- The safest time to attack is after it attacks with its club.
- Be ready to move away from it when it causes ice chunks to fall from the ceiling just in case it follows up with the shockwave attack.
Unlocks:
Health (Murloc Princess): ~1000
Health (Pet): ~1500
Attacks (Murloc Princess):
- Commands her pet to leap at the player and attack.
- Does a somersault before smashing the ground with her weapon.
- Sweeps her weapon around herself if the player is in melee range.
- Smashes the ground with her weapon, causing multiple ice chunks to fall from the ceiling.
Attacks (Pet):
- Leaps at the player and slides a long distance.
- Chomps at the player if in melee range.
Tips:
- Both the Murloc Princess and her pet will attack you simultaneously, but both of their movesets are quite simple.
- Since the pet has fewer attacks and can get close quickly with its slide attack, it might be safer to take out the pet first despite it having more HP.
- Regardless of which enemy you defeat first, the other doesn't seem to react at all making the rest of the fight pretty straightforward.
Unlocks:
Boss Fights (Skull Dungeon)
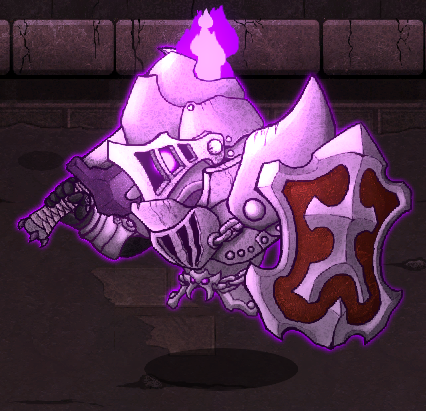


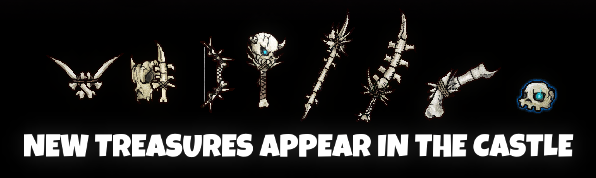
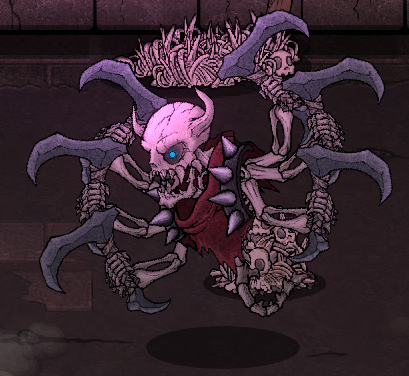
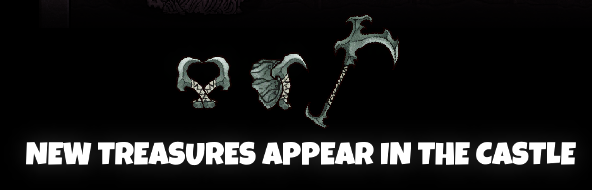
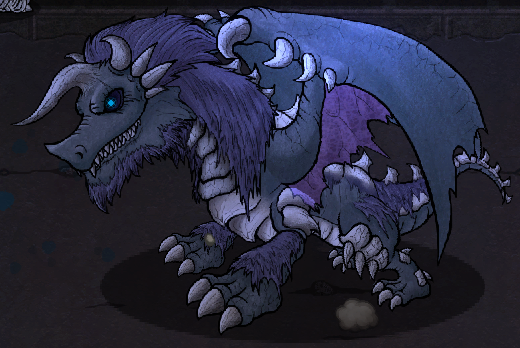
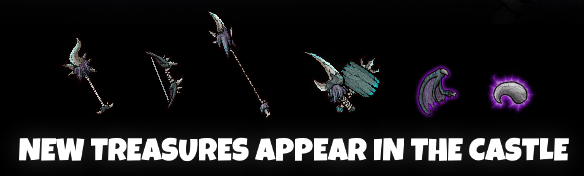


Health: ~2000
Attacks:
- Charges at the player with shield held out.
- Attacks the player with a nasty, three attack combo if in melee range.
- Holds up shield, reducing incoming damage. Quickly starts a two attack combo if the player is in melee range while the shield is held up.
- Smashes sword into the ground after holding it in the air briefly, causing the ground to crash upwards in the corresponding direction.
Tips:
- You can get him to start his three attack combo by running in front of him in melee range, giving you a free hit or two on him from behind if you are quick.
- Get far away from him when he lifts his shield, because his two attack combo is incredibly difficult to dodge.
Unlocks:
Health: ~2000
Attacks:
- Throws spinning scythes at the player that move back and forth. They seem to follow the player when they reverse direction, though that may just be part of their confusing attack pattern.
- Holds his scythe to the ground, and then charges the player, raking them with the scythe and striking with the scythe when he is finished traveling.
- Raises up his scythe and then swings it down at the player if in melee range.
Tips:
- The scythe charging attack is a huge pain, and he seems to use it a lot.
- Try to keep an eye on any scythes spinning around if you are going in for a couple hits on him.
- If he starts to charge his melee attack, you can get a few good hits on him from behind.
Unlocks:
Health:
- Phase One: ~1000
- Phase Two: ~1000
Attacks:
- Phase One:
-- Death Asura throws scythes around the arena that function similarly to the scythes Death Lord uses.
-- If in melee range, Death Asura may briefly light up his arms and then strike down with his scythes, damaging an area around himself.
- Phase Two:
-- Death Asura's arms separate from his body, and all six of them now target the player separately.
-- The six arms have about 200 HP each, and when the player is in melee range they will lift into the air and then strike downwards after a brief period of time. Easy to dodge alone, but somewhat tricky with six of them floating about.
-- Death Asura himself will attempt to headbutt the player if they are in melee range. This headbutt is very easy to dodge and Death Asura tends to back up and hang back a bit after attempting it.
Tips:
- If you dodge around the scythes in the first phase as he throws them, you can get a few hits in before they reverse direction and, hopefully, before Death Asura attempts his melee attack.
- Focus on the stray arms in the second phase; once they are all gone, Death Asura is basically defeated.
Unlocks:
Health: ~2000
Attacks:
- The Fallen Dragon will bite forward at the player if in melee range.
- Briefly charges lightning and slams horn down, sending a line of lightning bolts striking down in the direction it is facing.
- Breathes lightning at the player.
- Flies across the room, summoning lightning strikes behind it as it flies.
- Unlike other bosses, if the Fallen Dragon is temporarily stunned and knocked to the ground, after a few seconds it will do a somersault and potentially harm the player if they are in melee range.
- At around half HP, the Fallen Dragon will start to use an attack where it flaps its wings at the player while summoning a great number of small explosions. The player must dodge the explosions while dealing with the wind pushing them slightly back.
Tips:
- Like the Demon Spider, the Fallen Dragon can actually be pretty simple to attack from spots where it cannot reach the player. Because of this, it can actually be advantageous to stay close to the Fallen Dragon throughout the fight.
- Almost all of the Fallen Dragon's attacks have a tell that appears as they are charging.
Unlocks:
Health: ~3200
Attacks:
- Slashes with his sword if in melee range.
- Raises his staff into the air and then slams it down, causing an explosion at his feet.
- He can also raise his staff and summon multiple explosions to track the player's movements.
- Goes invulnerable at half health, after which he becomes much faster and has new attacks.
- Can jump and bring his sword down, spawning multiple small explosions in the area.
- Can raise his staff causing an explosions at his feet again, but with multiple smaller explosions around him as well.
- He summons small explosions around himself whenever he summons explosions that target the player.
- He now slashes with his sword twice in quick succession, and then follows it up with a wide sweep of his sword.
- He also can hang in the air briefly, after which he recovers a decent amount of health.
Tips:
- His melee swipe has longer range than it appears, so getting away from it after dealing damage can be tricky.
- Try not to circle back when avoiding his delayed explosions, as they linger for a brief moment before dissipating.
- The follow up sweep attack can aim at the opposite direction of his two slashes, so be careful when maneuvering around him.
Unlocks:
Boss Fights (The Ruin)


Health: ~3000
Attacks:
- Jumps toward the player and strikes three times in quick succession.
- Runs toward the player and strikes the ground, summoning four lightning bolts around itself.
- Can also dash-strike the player from a short distance.
- Breathes lightning at the player.
- Can jump backwards from the player to create distance, firing forward multiple bursts of lightning while doing so.
Tips:
- Jump diagonally through him while doing an air attack to hurt him while dodging most of his attacks. - Dodging the lightning stuns can be pretty difficult, and he usually follows up with a free attack on you if you get caught in it.
- You can circle around him fairly effectively if your speed stat is high.
Unlocks:
Health: ~3500
Attacks:
- Stabs the ceiling, causing rocks to fall near the player.
- Summons a red orb that will draw in the player if they are near it. The player will take consistent damage while pulled in by the orb.
- Jumps into the air, fires a large magical projectile at the player, and then leaps back to his starting position.
- Smacks the ground with the hilt of his sword, causing a red shockwave to fly forward.
- Summons a large number of red swords around himself that will fall to the ground and explode.
- Jumps backward and summons multiple chasms of dark energy in front of himself, which will burst upwards after a brief delay.
- Swipes at the player with his hand if the player is in melee range.
Tips:
- You can fight the enemies that spawn with the boss before drawing the attention of the Forgotten Lord himself if you carefully move toward the right side of the screen and then move back to the left when the enemies notice you.
- Try to stay above or below his line of sight to avoid a few of his forward attacks.
- He has a lot of different attacks, but the usual tricks of going in for a few hits after he misses an attack and then retreating to a safe distance should still work here as with most bosses.
Unlocks:
Health: ~3500
Attacks:
- Most of Gibil's attacks release small clouds of poison nearby.
- Jumps at the player.
- Jumps up briefly and then crashes down toward the player.
- Leaps into the air and crashes down multiple times, causing a small shockwave around itself when it lands.
Tips:
- Whenever Gibil leaps into the air, run or jump diagonally to avoid both the slam and the poison clouds.
- The poison in this fight can deal up to 10 damage (possibly more) each time it hurts you, so don't take it lightly.
- Doing air attacks combined with diagonal jumps should make this fight pretty straightforward since the boss has so few attacks.
Unlocks:
Health: ~3500
Attacks:
- Fires a tooth at the player.
- Smacks the player with its chin, which sends out a whirlwind that hits the player even outside of melee range.
- Charges slowly through the room, slamming the ground with its belly every now and then. This charge attack doesn't stop when it hits the player; it can continually hit the player until the attack ends.
- Jumps and smacks the player with its chin, then slams the ground with its belly.
Tips:
- Nusku only has one ranged attack and it's fairly easy to dodge, so if you have a staff, bow, or a weapon with a long range Skill, you can kite Nusku around the arena rather easily while scoring free hits here and there.
- Make sure to stay far away from Nusku when it starts doing the charge attack as it can deal a lot of damage quickly if you get caught in it just wrong.
Unlocks:
Boss Fights (The Main Tower)


Health (Atlas): ~2000
Health (Herclues): ~2000
Attacks (Atlas):
- Nightmare Guard can leap quite large distances and slam its weapon into the player.
- Charges up briefly and smashes the ground with its weapon, creating a shockwave that fans out slightly in the direction it is facing.
- In melee range, Nightmare Guard can do a devastating triple attack combo.
- If the player is out of melee range, this boss can charge across the field, crashing into the player and flinging them backwards.
- Under a certain amount of HP, the Nightmare Guard can summon small explosions in a diamond around itself and will continuously summon small explosions near the player.
Attacks (Hercules):
- Stabs three times in quick succession.
- Charges the player from far distances and flings them backwards if they make contact.
- Strikes forward, sending out dark shockwaves.
- Under a certain amount of HP, the Nightmare Guard can summon small explosions in a diamond around itself and will continuously summon small explosions near the player.
Tips:
- You will only be fighting one of the two Nightmare Guards under normal circumstances. Both versions of this boss are pretty similar, though.
- You can stay pretty safe if you position yourself around its feet, though it will try to reposition itself to land its combo melee attack on you.
- This boss is particularly easy to bait into long attacks, providing you plenty of opportunities to strike it from behind.
Unlocks: None
Health: ~3000
Attacks:
- Summons mulitple falling rocks from the ceiling.
- Leaps forward while biting at the player.
- Breathes flames while moving.
- Flies into the air and then breathes fire at the ground while flying forward.
- Raises its head to the sky, and then unleashes a massive fireball forward.
- Gets knocked down at half health and is invulnerable until it gets back to its feet; multiple fiery explosions radiate from the dragon as he recuperates.
- Can charge at the player before biting at them.
- Flies into the air and beats its wings at the player, pushing them backwards while firing meteors around the arena.
Tips:
- You can get in a few hits with bows and staves when the dragon is breathing fire while walking backwards.
Unlocks:
Health: ~1500
Attacks:
- The fight starts with two Demon Guards and one Blindfold Demon standing on the far side of the arena. The Evil Tyrant will face the player himself once these enemies are defeated.
- The Evil Tyrant starts out flying and will land periodically. He can begin flying again after being on the ground for a time.
- (In the air) Shoots magical bolts into the floor, causing a large number of explosions that the player must dodge.
- (In the air) Shoots a magical beam as he flies through the air, often after he summons all of the explosions.
- (On the ground) Shoots consecutive magical projectiles that are homing. It is possible (but not likely) for all of these projectiles (roughly 6) to hit the player if they are struck by the first one.
- (On the ground) Shoots a magical beam in the direction he is facing without much charge up.
Tips:
- When small explosions are summoned, there are sometimes areas that have plenty of room to move in; head for these just in case the Evil Tyrant tries to corner you with the laser beam.
- When he lands, try to get him to begin attacks and then run behind him to attack. Yup, works even in the final boss fight!
- Be very careful to stay away from the homing magic.
- The first phase of the fight has much trickier attacks than the second phase, so don't worry if your food supply is running low.
Health: ~2500
Attacks:
- The Evil Tyrant stays in place at the very right side of the room.
- Purple fire has filled most of the arena, leaving only the carpet safe to walk on. Standing in the fire deals the player small amounts of damage every couple seconds.
- Smashes the ground with his arm, summoning random small explosions along the carpet.
- Shoots a laser from his forehead that travels down the length of the carpet. Small explosions will follow behind it, covering 3/4ths of the entire carpet in total.
- Either arm can shoot a beam in a straight line.
- If in melee range (and a little farther away), the Evil Tyrant will try to smash the player with his arm.
Tips:
- There is very little the Evil Tyrant can do while you are standing far away from him in this phase, so you can (fairly) safely take some time to stand back and learn some of his patterns if you wish to do so.
- The attacks are all much easier to dodge in this phase, although the arm smash can sometimes catch you if you are overzealous about getting hits in.
- I find this phase of the boss fight to be far easier than the first phase, but this fight is a total breeze if you have a ranged weapon. If you memorize the forehead laser pattern and the small explosion pattern you can tear away at his health without him getting a scratch on you!
Unlocks:
Upgrades (Info/Top Path)
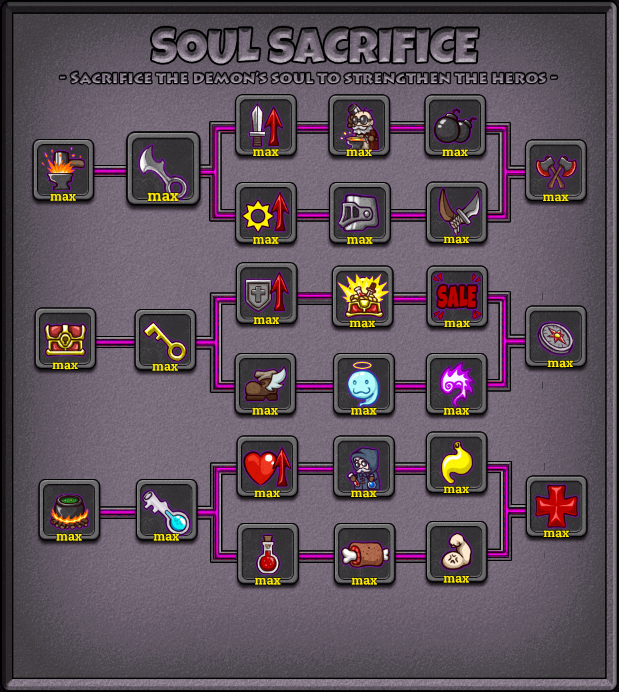


The Upgrade System of Lost Castle
As mentioned briefly in the second section of this guide, the Upgrade system in Lost Castle bears a strong resemblance to the Upgrade system in Rogue Legacy. As you progress through the game and defeat enemies and bosses alike you will pick up many Demon Souls. These Demon Souls serve no purpose while adventuring, but after you have either died or finished a run you can spend them on various helpful Upgrades that will remain through all subsequent playthroughs. The cost of all Upgrades will increase when you purchase any of them, so costs can get pretty high the longer you play. The highest level you can reach is 110, and this number increases by 1 with every upgrade you purchase.
There are three separate Upgrade paths in Lost Castle, but they are all fairly straightforward. The fully revealed Upgrade screen is as follows:
Top Path
The Key to the 1st Cell
Description: Open the first cell in the Goblin Tower.
Effect: Releases the Blacksmith, allowing the player to receive additional random weapons at the start of each new run.
Max Level: 1
Master Craftsman
Description: The blacksmith will provide more weapons next time.
Effect: Each level increases the number of weapons provided by the blacksmith at the start of each new run by +1.
Max Level: 2
Increase Attack Damage
Description: Sacrifice demon souls to improve your strength!
Effect: Each level increases your base attack stat by +1.
Max Level: 10
Legendary Blacksmith
Description: The blacksmith may provide better weapon every round.
Effect: Seems to increase the quality of weapons provided by the blacksmith, or at least expands the weapon pool to include better quality items on occasion.
Max Level: 1
Demolition Enthusiast
Description: Entering a new area gives you the chance to acquire some bombs.
Effect: Every new main room you enter gives you a free bomb.
Max Level: 1
Experienced
Description: Experienced warriors will always find the weak points in an enemy!
Effect: Each level increases your base Crit stat by +1%.
Max Level: 10
Heavy Armor Specialist
Description: Wearing heavy armor won't slow you down so much.
Effect: Heavy Armors will become only slightly slower than Normal Armors.
Max Level: 1
Tool Master
Description: You will be more skillful in your item use. The attack power of items which cause damage increases.
Effect: Each level increases the damage done by combat items by +10%.
Max Level: 5
Berserker
Description: Once per floor, you have a chance to go berserk when your HP drops below a certain level.
Effect: Once per room, if your HP lowers to a certain point you will temporarily gain the Insane buff. Each level increases the duration of this buff by 5 seconds, maxing out at 15 seconds.
Max Level: 3
Upgrades (Middle Path)


The Key to the 2nd Cell
Description: Open the second cell in the Goblin Tower.
Effect: Releases the Thief, providing free chests to the player at the start of each new run.
Max Level: 1
Artful Dodger
Description: The thief will steal more chests next time.
Effect: Each level increases the number of chests provided by the thief at the start of a run by +1.
Max Level: 2
Increase Defence
Description: Sacrifice demon souls to improve your defence!
Effect: Each level increases your base defence stat by +1.
Max Level: 10
Scrounger
Description: You can find more things in chests.
Effect: Increases the loot provided by chests. It seems to apply to more than just the Thief’s Chests, despite the other 2 upgrade paths containing a third upgrade that applies only to their respective NPC.
Max Level: 1
Devil's Dine-and-Dash Spell
Description: The spell carved on treasure hunters. The intimidated goblin merchants will give the first merchandise to those who with the spell for free. Passive: The first merchandise bought in goblin stores is free. The effect takes place only once in one game.
Effect: The player is allowed to purchase any single item from a goblin merchant for free. This effect only applies on the first item purchased in a run.
Max Level: 1
Sprinter
Description: Every thief needs to be able to disappear quickly.
Effect: Each level increases your movement speed stat by +1%.
Max Level: 10
Legacy
Description: You can keep some of your collected demon souls after each sacrifice.
Effect: Allows you to carry over some Demon Souls each run. Starts at +6% and increases by +6% for every subsequent level. Each level also adds a minimum retention of +10. When maxed, you will carry over 30% of your Demon Souls or a minimum of 50.
Max Level: 5
Soul Reaper
Description: You can consume more of the bosses' souls.
Effect: The first three levels increase the number of Demon Souls that bosses drop by +10%. The last two levels increase the number of Demon Souls that bosses drop by +20%. This will provide a 70% boost when maxed out.
Max Level: 5
The Sixth Sense
Description: You see dead people. Sometimes, they show you where to go next.
Effect: Grants you a chance to have a glowing footprint show you where the side rooms are. The chance increases by +15% for the first two levels, and by +20% for the final level. This will provide a 50% chance for the indicator to appear per applicable room when maxed.
Max Level: 3
Upgrades (Bottom Path)


The Key to the Third Cell
Description: Open the third cell in the Goblin Tower.
Effect: Releases the Pharmacist, providing free potions to the player at the start of each new run.
Max Level: 1
Better Crucible
Description: The pharmacist will provide more potions next time.
Effect: Each level increases the number of potions provided by the Pharmacist at the start of a run by +1.
Max Level: 2
Increase Health
Description: Sacrifice demon souls to increase your hit points!
Effect: Each level increases your base HP stat by +5.
Max Level: 10
Expert Alchemist
Description: The pharmacist won't give you negative potions anymore.
Effect: Prevents the Pharmacist from giving you potions with negative effects.
Max Level: 1
Iron Stomach
Description: You have a 40% probability to resist the negative effects of any potions.
Effect: Grants the player a 40% chance to resist negative potion effects.
Max Level: 1
Vigor Potion
Description: Drinking this fills you with energy, and decreases your recovery time.
Effect: Each level decreases the base cooldown of weapon skills by -1%.
Max Level: 10
Dietician
Description: You will restore more health when eating food.
Effect: Each level increases the HP regained from eating foods by +1. At max level, Apples heal 15 HP, Bananas heal 20 HP, and Drumsticks heal 45 HP.
Max Level: 5
Vampiric Kiss
Description: Each time you kill a monster, you have a chance to restore a portion of your health.
Effect: Grants you a chance to restore HP after defeating an enemy. The first level grants a 10% chance, and each subsequent level adds +5%. When maxed, you will have a 30% chance to regain 2% HP per enemy defeated.
Max Level: 5
Elixir of Life
Description: Once per floor, you have a chance to heal 2% HP per second when your health drops too low.
Effect: Once per room, if your HP lowers to a certain point you will temporarily restore 2% HP per second. The first level grants 5 seconds of restoration, the second level grants 7 seconds of restoration, and the third level grants 10 seconds of restoration.
Max Level: 3
Co-op
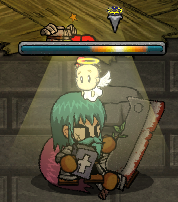

Though Lost Castle used to only support local co-op, it now supports up to 4-player online co-op as well! There are not many differences between solo and co-op gameplay, but I feel that the few distinctions between the two modes are worth mentioning.
Combat
The enemies and bosses seem to have increased HP, making them a lot more difficult to take down swiftly. This, of course, makes large groups of dangerous enemies all the more deadly. The worst part of co-op combat is that enemies may choose to sometimes target your ally instead of you, which is only really bad because that means enemies may decide to charge right through you to reach your ally when you are in melee range.
Resurrection
With the ability to revive your ally, the co-op combat is actually not so bad as it sounds! The closer to the white line you revive them at, the more HP they revive with, though a player cannot revive with more than half of their maximum HP. Players can use revival in place of healing items if they plan carefully, and this can be especially useful for conserving precious food items for boss fights.
Skill Synergies
In co-op you have access to two separate weapon skills, one for each player. Because of this, you can have one person deal all the damage while the other hangs back and casts Harvest or Curse when possible. There are a lot of ways to mix and match skills as well as weapon types, and it can be really fun to try new combinations!
Treasure Duplicates
Unlike in solo runs through Lost Castle, there is a chance for you to run into the same Treasure a second time (not including Ghost Armour, which already can appear multiple times). In some cases this can be rather helpful, especially if you run into two Evil Scabbards or two of any similarly powerful Treasure.
A True Nightmare
Aside from reviving fallen allies, there is only one other major change in Co-op mode that I can recall, and it can be seriously tough. When playing co-op, both of the Nightmare Guards will be waiting for you before the final boss fight! This fight can be really hectic and brutal, especially since they can target the other player with a leap attack even if one of the two of the players are in melee range.
Trials Of The Castle


When speaking to the golden ghostly figure in the starting area, you can take on the shifting modifiers of the daily run. Some of the modifiers make the game a lot more difficult, while others make the game a lot easier. There are often multiple modifiers at once to add to the insanity.
If you manage to complete one of the daily runs, you will actually unlock a couple armor pieces, which makes this the only non-enemy related way of unlocking items that I can recall.
Modifiers
Bloodthirsty Curse
Description: A curse decreases your life but doubles your attack power.
Effect: Your maximum HP is much lower, but your damage is doubled. Seems to cut your total Health in half, and also halves all further sources of increased maxiumum Health.
Darkness Falling
Description: Your range of sight is decreased.
Effect: All rooms have a darkness effect that limits the player's vision. The darkness lets up when all enemies are defeated in each room.
Double Attack
Description: Double the attack power of Treasure Hunters... and monsters!
Effect: Doubles the damage your deal and receive.
Family Heirloom
Description: Gain a rare weapon or other equipment at the start, but cannot be switched or took off during the entire game.
Effect: You are given an extremely powerful piece of equipment that you would normally get from the fourth or fifth area, but you cannot switch it out for something else for the entire run.
Family Treasure
Description: Gain three passive items at the beginning of your run, but all monsters' health and attack power increases 20%.
Effect: Starts the player with three Treasures, but buffs the Health and Attack of all monsters by 20% for the run. This can be used to obtain missing Compendium entries.
Foison
Description: All the active items and potions change to supplyments.
Effect: All combat items and potions are now food items. The maximum you can carry of each food item is now 99. Potions still seem to appear under certain circumstances, though this is likely unintended.
Incurable Disease
Description: If your health bar is higher than 50%, it will slowly decrease to 50%.
Effect: Health very slowly decreases down to 50% of the player's maximum for the entire run.
Kind Merchant
Description: The merchant in the castle charges a premium on your first purchase, but the price increases no more.
Effect: The Goblin Travelling Merchant will charge 30 coins for the first purchase, and all subsequent purchases will also be 30 coins.
Life Curse
Description: Your health total will decrease by 15% when leaving a room, and increase by 120% after defeating a boss.
Effect: Your maximum Health decreases by 15% for each room you clear, but it increases by 120% for each Area you clear. This treats a certain secret area in Nightmare Mode as a different area even though there is no map transition.
Predator
Description: Chicken drumsticks restore double the normal amount, but apples and bananas restore 50% the normal amount.
Effect: The base healing received from Drumsticks is doubled, and the base healing from Apples and Bananas are cut in half.
Price Flutuation
Description: 50% chance off or increase of the item prices sold in store.
Effect: All items in stores are either twice as expensive, or are half off.
Sacrifice
Description: Gain 2% attack damage along with per 1% health lost.
Effect: Your damage increases by 2% for every 1% of your Health that you are currently missing. Strangely, the damage increase seems to take a while to kick in sometimes when you enter a new room.
Vegetarian
Description: Apples and bananas restore double the normal amount, but chicken drumsticks restore 50% the normal amount.
Effect: Basically the opposite of the Predator Modifier; doubles the base healing of Apples and Bananas, while cutting in half the base healing of Drumsticks.
Weapon Master
Description: Gain a new but non-switchable weapon when entering a new room.
Effect: Your weapon changes each room. Seems to give you weapons that match the zone you are in. I believe weapons you hold while playing through this mode get added to your Compendium, though it's just as random as getting them as drops so it may be a less viable method of filling the Compendium than just playing normally.
Seasonal Changes


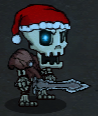
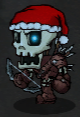
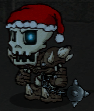
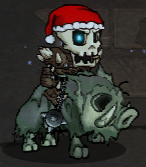


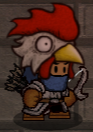


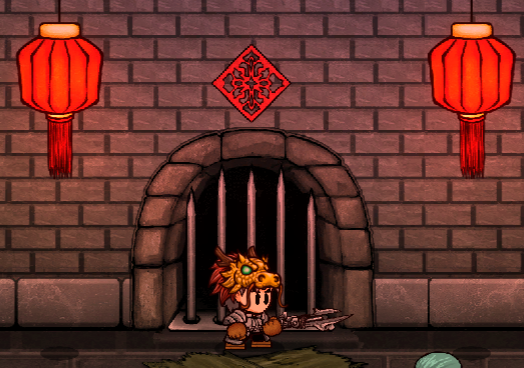


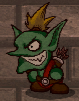


Christmas
Whenever the Christmas season rolls around, a few enemies and areas in Lost Castle begin to show their festive side! There aren't a great deal of changes overall, but I'll be listing what I've come across in this section.
Festive Treasure Hunters
Each new treasure hunter the player controlled started out wearing a Santa hat. In reality, the Santa hat was actually tied to the Light Armor that all new Treasure Hunters start with, and could be seen attached to it when switched out for other pieces of armor. Because of this, the Santa hat was removed whenever the player switched away from their base armor. The player will not always start with this Santa hat currently, as they will sometimes start the game with a different set of base armor.
The Christmas Tree
The Goblin Prison was even decorated to celebrate, as there was a decked out Christmas Tree near the area where the Blacksmith set out their extra weapons. When interacted with, this tree would drop the player a lot of stuff, including some items, a bunch of coins, and a free Treasure. The tree's description read out "Merry Christmas! Check out what Santa's got for you!"
Festive Monsters
Even some of the monsters were feeling particularly festive, as they were donning some Santa hats of their own! As with the treasure hunter's Santa hat, it was merely a cosmetic change and didn't add any new attacks to the monsters.
Goblin Mage
Goblin Artillery
Caveman Warrior
Caveman Rock Slinger
Skeleton Scout
Skeleton Ranger
Skeleton Rider
Boar Rider
Cyclops Boss Changes
HP: ~1500
Attacks:
- Stomps the ground, summoning rocks and various Caveman enemies.
- Caveman Rock Slingers have presents, which drop either active bombs or smaller items when they hit something.
- Smacks forward with his sword, tossing out an active bomb in the direction of his attack.
- Punches the ground if the player is in melee range.
- Leaps and smashes down his Christmas tree, throwing out an active bomb forward.
Tips:
- The Caveman Throwers can spawn in combat related items and even food sometimes, so you can make use of these against the boss.
- Other than the bombs and the random items from presents, this fight goes mostly the same as the usual Cyclops boss fight.
Unlocks:
Note: The regular unlocks are listed here even if you've already unlocked them outside of the Christmas Seasonal event.
Chinese New Year (Spring Festival)
These aesthetic changes began on v1.32 (January 26th, 2017). There is no equivalent to the Christmas Tree in this seasonal update, but there are still a few new things to show off.
Festive Treasure Hunters
For this event, there are two armors the Treasure Hunter can start with: Dragon Light Armor and Rooster Light Armor. There doesn't seem to be any set pattern as to which you start with at the beginning of a run.
Festive Items
For the Spring Festival, Red Envelopes have replaced Coin Bags, Dumplings have replaced the old Drumsticks, Firecrackers have replaced the Bombs! These are mostly aesthetic changes, but the Firecrackers explode many times in a small area instead of once as Bombs do.
Red Envelopes
Dumplings
Firecrackers
Decorations
This event has brought a few decorations to both the Goblin Prison and the Tower of Goblins! No other areas have been decorated, but no other areas have enemies as festive as the Goblins!
Festive Enemies
This time around, only the goblins seem to be in a celebratory mood. Their outfits are now colored red instead of brown, and even their king is wearing red instead of his regular purple!
Goblin Rogue
Goblin Ranger
Goblin Warrior
Goblin Mage
Goblin Berserker
Goblin Drummer
Goblin Artillery
Goblin King
Notes
- Side rooms in the Tower of Goblins are NOT decorated.
- Firecrackers are still called Bombs and have the same description.
- Dumplings have nearly the same description as Drumsticks: "Delicious dumplings! Recover 40 HP."
- You will still need to use 3 Firecrackers to destroy Huge Stone Walls despite them blowing up multiple times each.
Second Playthrough
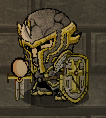
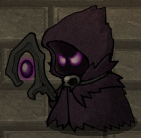
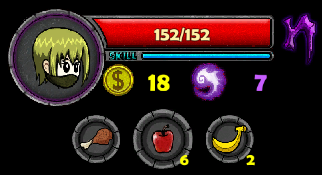
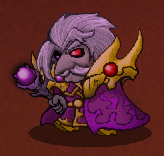
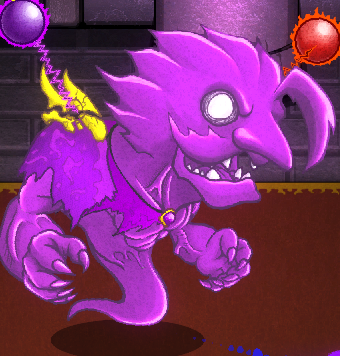

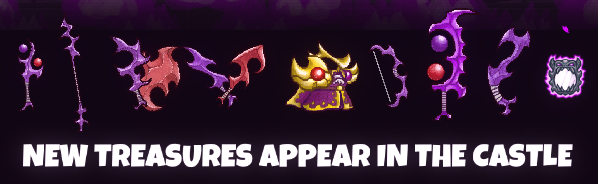
You've beaten the game! Now what?
After defeating the Evil Tyrant and getting the ending cutscene, there is actually a bit more to see and do in Lost Castle. Completing the game for the first time will unlock a "second playthrough," which continues the story of the first playthrough while retaining all of the Upgrades you have unlocked. This section will detail all of the differences, including the new NPCs, the challenging new gamemode, and the new final boss.
Imperial Knight
This man takes the place of the Masked Man from the first playthrough, though instead of wishing good luck, he instead begs the player at the beginning of the game to free the castle of its new ruler. He even meets the player outside the final boss fight, granting them a small variety of items to aid them in battle in the same way that the Masked Man did.
Dark Magician
A friendly Dark Magician, who seems to have turned away from the forces of evil, has joined the motley crew awaiting the player at the beginning of each run. He tells the player that he is using his power to weaken the forces of evil, knowing that it is probably too much to handle. If the player so wishes, however, he is willing to let them face the castle at full power in Nightmare Mode.
Nightmare Mode
If Nightmare Mode is active, the character's icon will have a purple lining, and a purple "N" will appear after the HP bar. When Nightmare Mode is active, all enemies will have increased movements speed as well as increased attack speed, which makes the game a lot harder than it may sound. Not to mention, less food items will drop from breakable objects.
Lord Harwood
The man who brought the demon's over in the first place has finally found the power he seeks! He used the eager treasure hunters as the Masked Man so that they would clear the path for him, and now like-minded treasure hunters have taken up the task of clearing him out of the castle.
Health: ~2000
Attacks:
- Crystal summon. The crystal shoots at the player periodically. Lord Harwood only uses one active crystal at a time.
- Shoots a spread of 5 magical projectiles at the player.
- Teleports, causing explosions in a circle around where he teleported from, and in a circle where he is teleporting to.
Tips:
- Keep an eye out for his crystals; they can be a huge pain if you aren't careful.
- Try to attack him from behind after he starts shooting the spread of bullets.
- He tends to teleport quite a bit, so be ready to leap away from the explosions he causes (if in melee range).
Health: ~2000
Attacks:
- The two orbs attached to his shoulders will fire periodically at the player, often out of sync with one another.
- Fires out a spread of 5 large magical projectiles in the player's direction.
- Charges up both his hands behind his back and then fires a laser in the player's direction. He moves slightly vertically as he fires the laser.
- Briefly charges up one fist and then punches the ground in the player's direction, hitting the player if in melee range and sending shockwaves through the floor in a fan shape.
- Charges both his hands high up in the air and smashes them down, hitting the player if in melee range and knocking them back. After smashing the floor, a large number of small explosions will appear on the floor.
Tips:
- Really, really keep the orbs in mind; the fire one is particularly bad unless you have burning resistance.
- When he smashes the ground with both arms, look for a safe spot among the explosions with some room to move around; I've been hit a good number of times by the projectiles the orbs fire while standing in a small, non-exploding area.
- The laser beam and the magic spread attacks tend to be good opportunities for a hit or two from behind.
- Remember, wait for him to begin an attack before running behind him or he may flip around to face you when he fires off an attack!
Health: ~800
Attacks:
- As with the final form of the Evil Tyrant, all but the carpet is filled with purple flames, damaging the player if they stand in them.
- Lord Harwood fires constant purple missiles out of his mouth, though they seem to fly about haphazardly.
- Small explosions are constantly going off throughout the carpet.
Tips:
- This part of the fight is incredibly simple compared to the first two and you can dodge everything without too much trouble.
- Stay in melee range of Lord Harwood and his purple bullets will pretty much never hit you.
Unlocks:
Third Playthrough
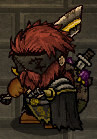
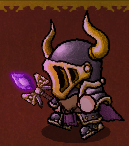
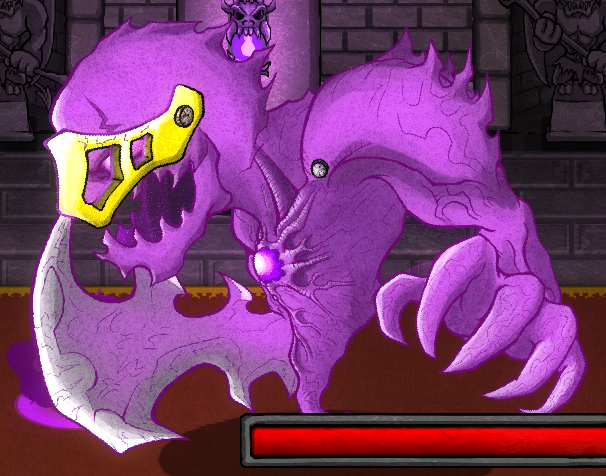
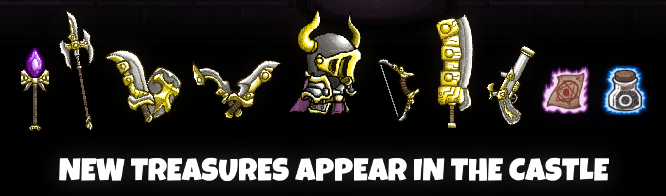
Now you've really beaten the game!... Right?
After defeating Lord Harwood and getting the second ending cutscene, there is a third playthrough to complete. As with before, all Upgrades are retained, and Nightmare Mode is still around. There is another new story NPC (which doesn't offer much), and yet another final boss to face. This short section will cover the third playthrough... and beyond!
President of the Treasure Hunters' Union
Same as the Imperial Knight before him, the President of the Treasure Hunters' Union takes on the role of freeing the player from prison and offering them items before reaching the final boss. He tells the player about how Harwood was supposedly defeated, despite the fact that monsters are still swarming the castle.
That's right! The Treasure Hunter you completed the second playthrough with is the final boss this time around, and this fight can be pretty crazy.
HP: ~3000
Attacks:
- Summons a large number of small explosions with random gaps between them.
- Summons small explosions around itself that move quickly outwards a short distance.
- Smashes the ground with their weapon and creates a quickly spreading cone of small explosions forward.
- Teleports around like Lord Harwood, summoning explosions from where they teleported and where they are teleporting to.
- Throws dagger items and bomb items similar to the ones that the player has access to. Funnily enough, there are situations where the Fallen Treasure Hunter can be hurt by their own bombs.
- The Fallen Treasure Hunter’s weapon changes throughout the fight, and the attack patterns differ greatly depending on which weapon they are using.
-Bow:
-- Uses the Bow combo attack that the player can use with a slight variation; the second shot fires out two arrows similarly to the Staff combo attack.
-- Shoots three piercing arrows forward in quick succession.
-- Shoots a large number of arrows into the sky that fall for a while in the area in front of them.
-Dual Blade:
-- Charges the player.
-- Uses the Dual Blade combo attack that the player uses.
-Musket:
-- Uses the Musket combo attack the player uses.
-- Shoots a large electrical projectile forward.
-One-Handed:
-- Charges the player.
-- Summons a large weapon, and then smashes it down at the player.
--Bashes forward with their shield.
-Spear:
-- Charges the player.
-- Charges a very short way while surrounded by a purple aura if in melee range.
-- Stabs forward at the player and knocks them backwards if hit.
-- Uses the Spear special action that the player uses, but causes an explosion upon landing.
-Staff:
-- Fires the Staff combo attack of the player.
-- Summons crystals from the sky that explode upon hitting the ground.
-- Uses the Staff combo attack that the player uses.
-Two-Handed:
-- Charges the player.
-- Uses the whirlwind-like special action that the player has access to.
-- Uses the Two-Handed combo that the player uses.
Tips:
- This isn't a tip, but there are probably more attacks than I listed.
- It can be very dangerous to attempt a combo attack at any point in this fight. I recommend aiming for quick jump attacks and then running, which is a slow but effective tactic.
- The Fallen Treasure Hunter is especially scary when wielding a melee weapon. I prefer attacking when they have a ranged weapon of some kind out, though it may be an equally poor decision to avoid them until they switch weapons.
- Good luck.
HP: ~3000
Attacks:
- Summons small explosions at random.
- Shoots many magic projectiles out of its mouth.
- Slashes with both arms many times in one combo while moving forward.
- Smashes the ground with its weapon, causing a cone shaped shockwave in front of itself.
- Smashes the ground with its weapon, summoning many explosions around itself that quickly move outward like in the first phase.
- Shoots a laser beam forward out of its hand.
- Smashes its weapon downward twice in quick succession, and follows up by slicing forward with its weapon, knocking the player back if hit.
Tips:
- 3000 HP down, just 3000 HP left to go! Honestly, this part of the fight tends to be easier than the first.
- Jump attacks followed by running away still work pretty well here, but it seems like there are more opportunities for combo attacks/partial combo attacks.
- Be very wary of the random small explosions; they are pretty much constant and can catch you by surprise a lot of the time.
- Try to keep your distance until the Fallen Treasure Hunter attacks, and then launch a counterattack.
- It seems to not be too difficult to sneak behind them when they begin an attack animation, allowing for some free attacks from the back.
Unlocks:
Fourth Playthrough
Some of the best weapons in the game are unlocked by defeating the Fallen Treasure Hunter, and both of the passive items are very unique! However... the story no longer changes due to your most recent treasure hunter taking the place of the final boss. Each subsequent completed playthrough will increase the "Game Round" count on that savefile, but that is the extent of the changes after completing the final variant of the final boss. I believe that each time you face the Fallen Treasure Hunter they will appear as the character you used to defeat the previous one, but all else remains the same.
Nightmare Mode


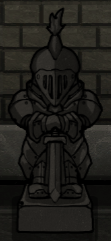
Overview
With the v1.30 patch, Nightmare Mode makes some pretty cool changes to the original gameplay, besides just increasing enemy stats. It also seems to be a bit easier than in earlier patches, hopefully making the new features more accessible to everyone. One of the most obvious additions are Mutated enemies, which are more powerful versions of existing enemies that have a new trick or two up their sleeve. Furthermore, bosses that summon enemies can also summon their Mutated forms in Nightmare Mode.
With the addition of the Trials of the Castle mode, you are able to attempt both Nightmare Mode and the daily modifiers run simultaneously. Some modifiers may actually make Nightmare Mode a bit easier to complete, but some of them would definitely make it harder. In any case, there is no extra reward for completing a daily run in Nightmare Mode.
It should also be noted that the DLC areas, The Ice Path and The Ruin, don't have any enemies with a mutated form. That being said, enemies with mutated forms from other areas will still be present in the DLC areas.
Mutated Enemies
Mutated Goblin Rogue
Changes: Charges at the player very quickly.
Mutated Goblin Berserker
Changes: Spins axes while charging at the player; charges more often.
Mutated Slime
Changes: The leap attack causes multiple small explosions nearby.
Mutated Zombie Boar
Changes: Turns around after charging past the player, and continues charging from the opposite direction.
Mutated Venom Hunter
Changes: Leaps at the player from a short ways away.
Mutated Caveman Warrior
Changes: The short ranged leap attack causes a small shockwave.
Mutated Skeleton Soldier (Sword)
Changes: The sword swing part of the charge attack slashes the air, much like the Iaido Skill.
Mutated Skeleton Soldier (Axe)
Changes: The axe swing part of the charge atack causes a fan-shaped shockwave.
Mutated Demon Soldier
Changes: The stab attack causes an evil shockwave.
Mutated Demon Warlock
Changes: Fires off three large magical projectiles at once instead of two; summons small many small explosions around itself after using its large explosion attack.
Nightmare Guards
The only other real change in the standard gameplay from normal mode is found in the fight against the Nightmare Guard. Instead of facing one of the two of them, you now face both of them at once. This is the case regardless of whether you are playing on co-op mode or not, so if you're playing solo you're on your own this time! This battle can be a huge pain; it's much harder to take advantage of one of them when stunned, and the small explosions can be very hard to keep track of alongside everything else. This fight is made quite a bit easier when you have them both in melee range of you, but that can be pretty tricky to pull off and you are still very likely to get hit.
A Strange Gem
After the brutal, tag-team boss battle, you will reach the room where the President of the Treasure Hunters' Union is waiting to give you some free food and combat items. Although there is almost no indication of this, you can keep talking to him to unearth some new dialogue that I believe is only available in Nightmare Mode. After talking to him multiple times, he will drop you a very special Treasure. You can pass up on this treasure if you'd like, as it makes the fight against the Fallen Treasure Hunter a bit more difficult, but things get pretty interesting if you hang onto it.
Soul Gem
Description: Refined from billions of miserable lost souls. Passive: Enhances attack, but you lose HP continuously while attacking.
Effect: Grants the player ATK +10. Slowly drains away the player's health while they are attacking.
NOTE: I'm unsure what happens if you manage to get this far before reaching the 3rd playthrough, though it is technically possible to meet the Imperial Knight here instead of the President of the Treasure Hunters' Union. I certainly wouldn't recommend playing through Nightmare Mode before beating Lord Harwood and the Fallen Treasure Hunter once, though, as most of their unlocks are pretty good. Not to mention you'd probably be fairly low leveled, making things all the more difficult. In any case, you may be able to get the Soul Gem from the Imperial Knight, but I'm not sure one way or the other.
Breaking the Cycle
After defeating the Fallen Treasure Hunter, things continue to play out as normal and the normal ending cutscene will start to play. However, when holding the Soul Gem, the player will resist possession and will be able to grab their weapon once more, and this will remove the Soul Gem from your inventory. The ever-present Death Spirit challenges the player to meet them at the top of the tower, and then the player is free to explore the room where the demons were first summoned by Lord Harwood.
Though there isn't much to it, this is the first and only time the player can attack barehanded. There is no Weapon Skill or Special when attacking barehanded.
Normal Attack
The player punches with one hand.
Combo Attack
The combo attack consists of three consecutive normal attacks. The second normal attack has the player punching with their other hand.
The third and final attack of the combo has the player bringing their hands together into the air and slamming them down.
Jump Attack
The player slightly punches forward.
There are also a few new breakable objects that can only be found in this room. These can still drop gold and food items.
Demonic Book
Demonic Book Pile
Demonic Table
Statue
Hidden Exit
The player is unable to exit the way they came in, but after exploring a little bit you can find that there is a breakable statue to the very right of the room. Once broken, it causes a nearby bookcase to move to the side, revealing a secret door. Entering this door will take the player to a secret, final area of the game.
The Final Area
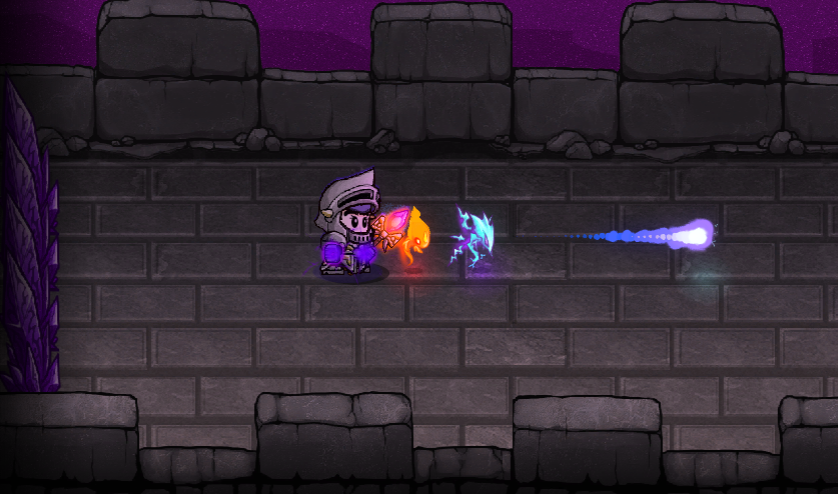


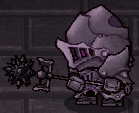
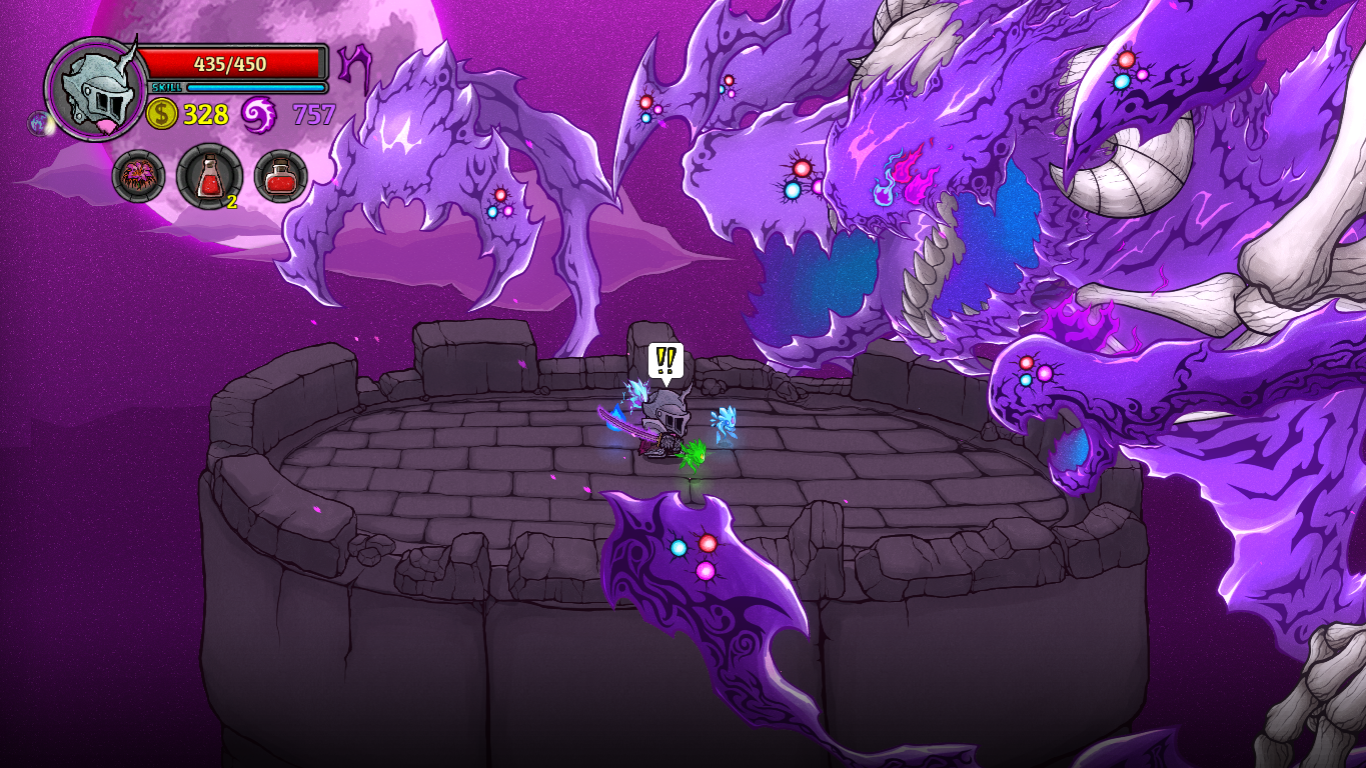
The Castle Walls
Though the area is nameless and has no map transition, it contains a couple completely new enemies, as well as a bunch of familiar Mutated ones. Clearing rooms still drops a chest, and enemies can still drop coins and items. After clearing a few rooms, the player will be nabbed by a Soul Beast upon entering a new room and will be taken to the top of the tower.
Soul Beast
HP: ~600
Attacks: Rolls an explosive sphere toward the player and flies around somewhat similarly to a Gargoyle. Drops a sphere upon death, causing a small explosion.
Location: The Castle Walls
Soul Residues
HP: ~450
Attacks: Cannot move; Charges briefly and then causes a large circular explosion around itself. Causes a similar explosion upon dying.
Location: The Castle Walls
Demon Archer
HP: ~900
Attacks:
- Smacks the player with their enormous bow if in melee range.
- Shoots massive arrows at the player from a distance.
- After defeat, damages the player and knocks them back if touched.
Location: The Castle Walls
Corrupt NPCs
HP: Varies
Attacks: Uses attacks, combos, and skills like the player would if they were using their weapon. They can also deal quite a bit of damage (100+ at times, though not common).
Location: The Castle Walls
Note: Corrupt NPCs function similarly to the caged NPCs in The Main Tower, though these ones target the player. They don't have an entry in the Compendium.
Top of the Tower
The cutscene continues after the player is dropped off, and there is a short discussion between the player character and the Death Spirit. After the brief cutscene ends, the final boss battle of the game begins.
Health: ~4000
Attacks:
- Slashes at the player with his scythe, causing an Iaido type effect.
- Summons small explosions along the floor of the tower.
- Lifts into the air and summons multiple lightning strikes along the top of the tower; these can barely be predicted by a small purple shadow where they are about to strike.
- Summons two orbs that shoot out small magical projectiles at random.
Tips:
- Try to avoid the lightning, as it will stun your character for a brief time and can chain stun you.
- Get behind Death Spirit as he strikes with his scythe to get a couple hits on him.
- This fight isn't actually too terrible, but there can sometimes be a lot of projectiles all at once. This part of the fight seems to be easier than taking on both phases of the Fallen Treasure Hunter.
- Save some healing items, because what comes next is a real doozy...
Health: ~Either 4000 or 5000
Attacks:
- Bottom appendage shoots out columns of explosions along the tower floor.
- Summons lightning bolts like in the first phase.
- Stabs at the player with the leftmost appendage and with another on his head.
- Smacks at the player with his skeletal hand if they get too close.
- Shoots out an electrical shockwave with the appendage slightly above the skeletal hand.
- Shoots a laser beam out of his mouth.
- Shoots out small magical projectiles at the player with one of the appendages to the left of his heads.
- There are possibly more attacks, as it was hard to keep track of everything at once.
Tips:
- This boss will take damage no matter what part of him you hit, but sometimes there may not be any appendages nearby to damage. Try to attack whenever you get a chance.
- Dodging during this boss fight is a complete nightmare, but try to pay attention to the appendages. They all seem to slightly indicate when they are going to come into play.
- Definitely try to avoid the lightning bolts if you can as multiple in a row can hit you and you don't want to get chain stunned during this fight.
- When the head lowers to fire a laser beam you can get a lot of hits in, though be careful of the appendage that shoots out electrical shockwaves from the left and the skeletal hand.
- Though not really specific to this fight, try to have all 6 inventory spaces used for healing items if possible. It's unlikely you'll have that many healing items by this point, but you will take plenty of damage in this fight.
(Unfortunately, the video quality gets a little choppy at points during the first phase and then really choppy at points in the second phase; hopefully it is still bearable enough to get the point across.)
Unlocks:
The End
With the Death Spirit defeated, the game is officially complete. There is a neat death animation for the Death Spirit, and then you are taken to the game Credits. There is no official ending cutscene after completing this fight.
Now that you have beaten the game, there's now some new treasures to go out and find! Though if you've had your fill of treasuring hunting by this point, go ahead and take a rest. You've certainly earned it!
Achievements Pt. 1


The Achievements of Lost Castle
Lost Castle has a total of 91 achievements that can be unlocked. The vast majority of them are quite simple, but a few of them take quite a bit of dedication and luck. Most of the descriptions for the achievements are very straightforward regarding how to unlock them, but I will be listing their unlock conditions for extra clarity. There are a number of achievements that require the player to drink a specific potion, and this can actually be fairly easily accomplished by maxing out the number of potions the Pharmacist gives you at the beginning of a run and repeatedly drinking the potions and restarting.
Achievements
A Little Cute
Description: Pick up the Spirit.
Unlock: Pick up one of the four Spirit Treasures.
Another me in the mirror
Description: Pick up Evil mirror and generate another self.
Unlock: Pick up the Mirror of Uoy treasure. The Mirror of Uoy is unlocked by defeating Lord Harwood.
A Private Coffer
Description: Collect 500 gold.
Unlock: Collect 500 gold in total.
Answer the Call of Nature
Description: Drink Cathartic Potion, and poo everywhere.
Unlock: Drink the corresponding potion.
Armed and dangerous
Description: Defeat Death Asura WITHOUT breaking any of its hands.
Unlock: Defeat the second phase of the Death Asura boss fight without destroying any of the six arms. Death Asura is found in Skull Dungeon.
As firm as a rock
Description: Defeat Great Golem.
Unlock: Defeat the Great Golem boss in The Secret Path.
Assassin
Description: Kill 500 monsters with dual blade.
Unlock: Kill 500 monsters with Dual Blade type weaponry.
Asura
Description: Defeat Death Asura.
Unlock: Defeat the Death Asura boss in the Skull Dungeon.
Banker
Description: Collect 3000 gold.
Unlock: Collect 3000 gold in total.
Beware of sharks!!
Description: Defeat Great Mole Shark.
Unlock: Defeat the Great Mole Shark boss in The Secret Path.
Biologist
Description: Record over 85 kinds of monsters in the castle.
Unlock: No longer requires you to completely fill the Monster tab in the Compendium; I'd imagine that this includes enemies in the Monster and Boss tabs, as there weren't 85 entries in the Monster tab before The Old Ones Awaken DLC update.
Blacksmith's Gratitude
Description: Rescue blacksmith.
Unlock: Purchase the upgrade "The Key of the 1st Cell."
Blasphemer
Description: Defeat Adad.
Unlock: Defeat Adad in The Ruin. This requires access to The Old Ones Awaken DLC areas.
Blaster
Description: Destroy Goblin king's fortress ONLY with bombs.
Unlock: Defeat the Impregnable boss using only bombs. Goblin Artillery will spawn during the fight and will drop bombs when defeated.
Blood Oath
Description: Use 5 blood altars.
Unlock: Use 5 blood altars in total.
Burned Out
Description: Defeat Nusku.
Unlock: Defeat Nusku in The Ruin. This requires access to The Old Ones Awaken DLC areas.
Collector
Description: Record over 250 kinds of weapons and armor.
Unlock: No longer requires you to completely fill in the Equipment tab in the Compendium; this should be quite a bit easier if you have access to The Old Ones Awaken DLC as there's a ton of extra equipment pieces added with the new bosses.
Cornucopia
Description: Open 100 chests.
Unlock: Open 100 chests in total.
Crisis of Dinosaur
Description: Defeat The Puppy.
Unlock: Defeat The Puppy in either the Tower of Goblins or Bramble Courtyard.
Cursed katana
Description: Defeat Yaksha.
Unlock: Defeat Yaksha in either the Bramble Courtyard or the Skull Dungeon.
Did you see my little dino ?
Description: Hatch a baby dinosaur.
Unlock: Pick up the Big Egg treasure. The Big Egg is unlocked by defeating The Puppy.
Dragon Slayer
Description: Defeat Fallen Dreagon.
Unlock: Defeat the Fallen Dragon boss in the Skull Dungeon.
Dwarfism
Description: Drink Dwarf Potion.
Unlock: Drink the corresponding potion.
Embodiment of Justice
Description: Kill 1000 enemies.
Unlock: Kill 1000 enemies in total.
Eroded
Description: Cast erosion skill.
Unlock: Play One-Arm Bandit until you receive an Erosion weapon, and use the Erosion skill.
Expel the Wood Ghost
Description: Defeat Wood Knight.
Unlock: Defeat the Wood Knight in the Bramble Courtyard.
Fart Knight Rises
Description: Drink Fart Potion, and fart everywhere.
Unlock: Drink the corresponding potion.
Fearless of Death
Description: Die 30 times.
Unlock: Die 30 times in total.
Forgotten Castle
Description: Defeat Forgotten Lord.
Unlock: Defeat the Forgotten Lord in The Ruin. This requires access to The Old Ones Awaken DLC areas.
Full Moon
Description: Turns into a werewolf.
Unlock: Either drink the potion or use the skill that transforms your player into a werewolf.
Gambler
Description: Play one-arm bandit 100 times.
Unlock: Play One-Arm Bandit 100 times in total.
Achievements Pt. 2


Gardener
Description: Defeat Big Head.
Unlock: Defeat the Big Head boss in Bramble Courtyard.
Ghost from the East
Description: Defeat Rakshasa.
Unlock: Defeat Rakshasa in either the Bramble Courtyard or the Skull Dungeon.
Ghost Guardian
Description: Accomplish final evolution of Ghost Armor.
Unlock: Pick up 3 Ghost Armour Treasures in one run. Unless you are very lucky, this achievement may take a very long time.
Ghost Servant
Description: Pick up the Ghost Armor.
Unlock: Pick up a single Ghost Armour.
Great Champion
Description: Defeat Dragon.
Unlock: Defeat the Dragon in The Main Tower, located directly before the final boss fight.
Grume EVERYWHERE!!
Description: Defeat Boss Slime.
Unlock: Defeat the Boss Slime in either the Tower of Goblins or Bramble Courtyard.
Gigantism
Description: Drink Giant Potion.
Unlock: Drink the corresponding potion.
Give Me A Coat
Description: Get freezing debuff 100 times.
Unlock: Get the freezing debuff 100 times in total. The easiest way to do this is to repeatedly get hit by Freeze traps.
Give Me the Money Back
Description: Drink Potion of Impoverishment.
Unlock: Drink the corresponding potion.
Guardian
Description: Kill 500 monsters with a single-handed sword.
Unlock: Kill 500 monsters with Single-Handed type weaponry.
Ice Rock Leader
Description: Defeat Ice Giant.
Unlock: Defeat the Ice Giant in The Ice Caves. This requires access to The Old Ones Awaken DLC areas.
I'll Come Back
Description: Die 5 times.
Unlock: Die 5 times in total.
Incendiary
Description: Drink Ignition Potion, and set fire to everywhere.
Unlock: Drink the corresponding potion.
It eat up ALL of my meat !!
Description: Feed the baby dinosaur to become adult.
Unlock: Pick up the Big Egg treasure, and then feed the baby dinosaur that appears 9 Drumsticks in total. The Big Egg is unlocked by defeating The Puppy, which can be found in both The Tower of Goblins and Bramble Courtyard.
It's time for dinner !!
Description: Give The Puppy a meat.
Unlock: When fighting The Puppy, the player can drop a Drumstick for it to eat. If you do not have a Drumstick, sometimes the breakable objects in the room can drop one. Getting The Puppy to eat a Drumstick isn't as easy as just dropping it on the floor, though. You have to drop it near your character and back off as The Puppy tries to chomp you.
King Slayer
Description: Defeat King of Goblins.
Unlock: As there is now a new, separate achievement for defeating the Impregnable (the fortress), this achievement may only trigger when you defeat the Invincible (the moving machine).
Kung Fu Murloc
Description: Defeat Monk Murloc.
Unlock: Defeat the Monk Murloc in The Secret Path or The Ice Path (requires The Old Ones Awaken DLC).
Lancer
Description: Kill 500 monsters with a spear.
Unlock: Kill 500 monsters with Spear type weaponry.
Leader of the fools
Description: Defeat Cyclops.
Unlock: Defeat the Cyclops boss in The Secret Path.
Life or Death
Description: Be saved by Protector of Life.
Unlock: Pick up the Protector of Life item in a run, and get hit a fatal blow. You will survive with 1 HP and unlock this achievement.
Lost in The Castle
Description: Be caught into castle by goblins.
Unlock: Complete the Tutorial.
Lucky Angel
Description: Drink Potion of Fortune.
Unlock: Drink the corresponding potion.
Magician
Description: Kill 500 monsters with a staff.
Unlock: Kill 500 monsters with Staff type weaponry.
Master of spirits
Description: 3 spirits follow you at the same time.
Unlock: Have 3 of the 4 spirit followers at the same time.
Master Treasure Hunter
Description: Reach level 110.
Unlock: Purchase all 110 upgrades with Demon Souls on one savefile.
Nightmare Crasher
Description: Defeat Nightmare Guardian.
Unlock: Defeat the Nightmare Guard boss.
One More Drink?
Description: Get drunk.
Unlock: Drink the potion that grants the Drunk effect.
Pharmacist's Gratitude
Description: Rescue pharmacist.
Unlock: Purchase the upgrade "The Key of the 3rd Cell."
Pitch Dark
Description: Drink Blind Potion.
Unlock: Drink the corresponding potion.
Poisonous
Description: Get poisoned debuff 100 times.
Unlock: Get the poisoned debuff 100 times in total. This achievement is far easier to get than its freezing and burning variants, mostly due to the monsters of the Bramble Courtyard in my experiences.
Achievements Pt. 3


Potion Addict
Description: Drink 100 potions.
Unlock: Drink 100 potions in total.
Pray
Description: Save other player successfully.
Unlock: In Local Co-op, resurrect a fallen player.
Princess Rescue?
Description: Defeat Murloc Princess.
Unlock: Defeat the Murloc Princess in The Ice Caves. This requires access to The Old Ones Awaken DLC areas.
Professional Treasure Hunter
Description: Reach level 80.
Unlock: Purchase a total of 80 upgrades with Demon Souls on one savefile.
Purification of Evil
Description: Kill 100 enemies.
Unlock: Kill 100 enemies in total.
Raise Dead
Description: Be revived by Badge of Rebirth.
Unlock: Pick up the treasure Badge of Rebirth and die. You will be revived a single time and this achievement will be unocked.
Ranger
Description: Kill 500 monsters with a bow.
Unlock: Kill 500 monsters in total with Bow type weaponry.
Rescue Expert
Description: Save others 50 times.
Unlock: In Local Co-op, resurrect a fallen player 50 times.
Rifleman
Description: Kill 500 monsters with a musket.
Unlock: Kill 500 monsters in total with Musket type weaponry.
Rookie Treasure Hunter
Description: Reach level 10.
Unlock: Purchase a total of 10 upgrades with Demon Souls on one savefile.
Rotten God
Description: Defeat Gibil.
Unlock: Defeat Gibil in The Ruin. This requires access to The Old Ones Awaken DLC areas.
Royal treasury
Description: Record over 145 kinds of items and treasures.
Unlock: No longer requires you to completely fill the Item section of the Compendium, assuming that the updated description allows for The Old Ones Awaken DLC boss Treasures.
See me fly !!
Description: Pick up Fallen Wings.
Unlock: Pick up the Fallen Wings treasure (You may have to actually use the double jump for the achievement to unlock). This treasure is unlocked by defeating the Fallen Dragon boss in Skull Dungeon.
Senior Treasure Hunter
Description: Reach level 30.
Unlock: Purchase a total of 30 upgrades with Demon Souls on one savefile.
Siege
Description: Defeat King of Goblins(fortress).
Unlock: Defeat the Impregnable boss in the Tower of Goblins.
Silver Conquerer
Description: Defeat General.
Unlock: Defeat the General boss in the Skull Dungeon.
Skull Servants
Description: Summon skull servants.
Unlock: Using either the Weird Skull or a weapon with Skull Summon, summon skeletons to fight alongside you.
Smell of Treasure
Description: Open 30 chests.
Unlock: Open 30 chests in total.
Soul Reaper
Description: Collect 3000 evil souls.
Unlock: Collect 3000 Demon Souls in total. There is no real way to grind Demon Souls, so it will take a number of playthroughs to achieve.
Spider Killer
Description: Defeat Demon Spider.
Unlock: Defeat the Demon Spider boss in the Bramble Courtyard.
The Conquerer of Death
Description: Defeat Death Lord.
Unlock: Defeat the Death Lord boss in the Skull Dungeon.
The Regicides
Description: Defeat Evil Tyrant.
Unlock: Defeat both phases of the Evil Tyrant boss.
The Secret Chamber
Description: Enter earl's secret chamber, and accomplish the first playthrough.
Unlock: Move to the final room after defeating the Evil Tyrant.
The Terminator
Description: Defeat Death Spirit.
Unlock: Speak to the President of the Treasure Hunters' Union before fighting the Fallen Treasure Hunter in Nightmare Mode to get the Soul Gem treasure. This treasure allows you to access the hidden final area of the game, where you can face off with the Death Spirit at long last. Defeat him to unlock this achievement.
Thief's Gratitude
Description: Rescue thief.
Unlock: Purchase the upgrade "The Key of the 2nd Cell."
Too Darn Hot
Description: Get burning debuff 100 times.
Unlock: Get the burning debuff 100 times. Similarly to the freezing debuff achievement, you can repeatedly get burned by Fire Traps to make this easier to achieve.
Troll Slayer
Description: Defeat Ancient Troll.
Unlock: Defeat the Ancient Trolls boss in The Ice Caves. This requires access to The Old Ones Awaken DLC areas.
Uncover inside story
Description: Defeat Lord Harwood.
Unlock: Defeat Lord Harwood, the final boss of the second playthrough.
Victory over self
Description: Defeat Fallen Treasure Hunter.
Unlock: Defeat the Fallen Treasure Hunter, the final boss of the third playthrough (and beyond).
Warrior
Description: Kill 500 monsters with a two-handed sword.
Unlock: Kill 500 monsters in total with Two-Handed type weaponry.
Badges


Though this feature is out of game, I figured it would be worth mentioning. By turning in the 5 Steam cards you can obtain for Lost Castle, you can upgrade your Badge to a maximum of level 5. The Foil Badge requires purchasing the much rarer foil version of the 5 Steam cards, which are consequently much more expensive. There is no benefit to doing this, aside from wanting to show off the badges you have obtained on your Steam Profile.
In any case, the Badge that is displayed will be the highest level you've reached, and the Foil Badge takes precedence over all the others. The Badges are as follows:
Level 1 - Goblin Rogue
Level 2 - Venom Shooter
Level 3 - Skull Soldier
Level 4 - Demon Guard
Level 5 - Treasure Hunter
Foil - Legendary Treasure Hunter
Source: https://steamcommunity.com/sharedfiles/filedetails/?id=677353113
More Lost Castle guilds
- All Guilds
- Lost Castle Guide 10
- Lost Castle
- Lost Castle
- Guide 7
- Guide 5
- Lost Castle
- Lost Castle -
- Compendium Guide (v2.01)
- Lost Castle