
Campaign


First Mission: ARIZONA
Brave New World Complete the first Story Location
This map has no difficulty, just complete it. You can obtain 3 misc achievement if you do it manually instead of create a task for your guards:
Count Backwards from 5, 4, 3... Manually Tranquillise a Dinosaur or reptile
That Wasn't Luck Hit a dinosaur or reptile with a tranquiliser dart from a distance of at least 125m
You can save before try the 125m shoot, so you can test the distance. I recommend reach the max altitude you can with helicopter.
What do we Have Here? Manually Scan a Dinosaur or reptile
Second Mission: WASHINGTON
Washington Complete Complete the second Story Location
Like map 1, fast and easy map.
Third Mission: PENNSYLVANIA
Pennsylvania Done Complete the third Story Location
In this map we are able to research and build Paleomedical facility. So we will obtain:
Down in the Laboratory Complete a Research Task
And if we control the MVU team manually:
I'm a Doctor Manually cure a Dinosaur or reptile of a disease
Fourth Mission: OREGON
Oregon Out Complete the fourth Story Location
In this map, you are going to be introduced with the aviary, so in this map you will release your first dinosaur if you didn't played any other gamemodes before. So you will get this achievements:
Life Finds a Way Release a dinosaur
Flapped Release a Pteranodon
Fifth Mission: CALIFORNIA
Entered a New Era Complete the fifth Story Location
The campaign just require follow orders, so i can't add nothing more. Follow the steps, know the mechanics and then you can focus on your achievements in the next maps.
Chaos Theory


JURASSIC PARK
Hold Onto Your Butts Complete Jurassic Park (Chaos Theory)
This is the first map where you will be able to build and manage a park. It is very easy to get the 5 stars, so just follow the quest chain. The last mission requires to release a T-Rex and after that you will get a sabotage event where random gates will be opened, when you reboot them you will beat the map. If you didn't get the five stars, i recommend go for it, while you do the other achievements described in the last section of this guide.
So Many Teeth Release a T. rex
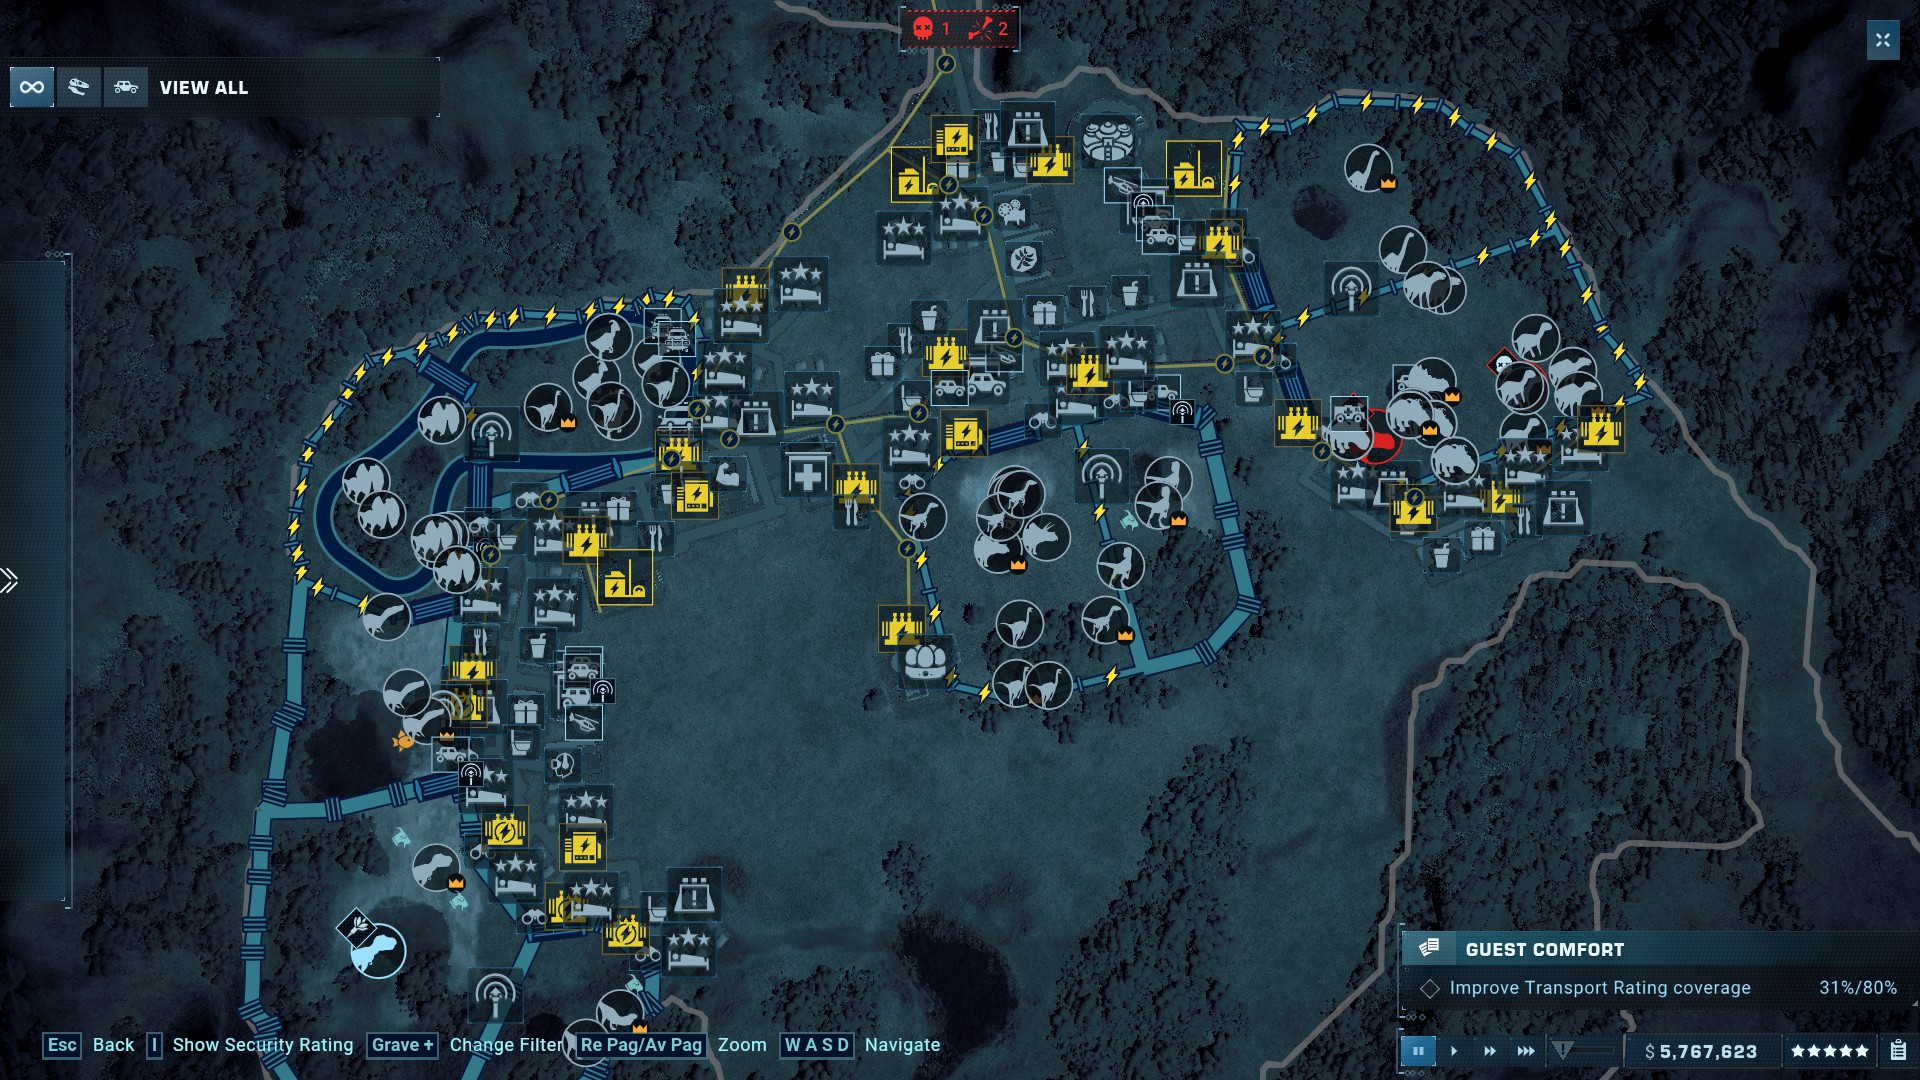
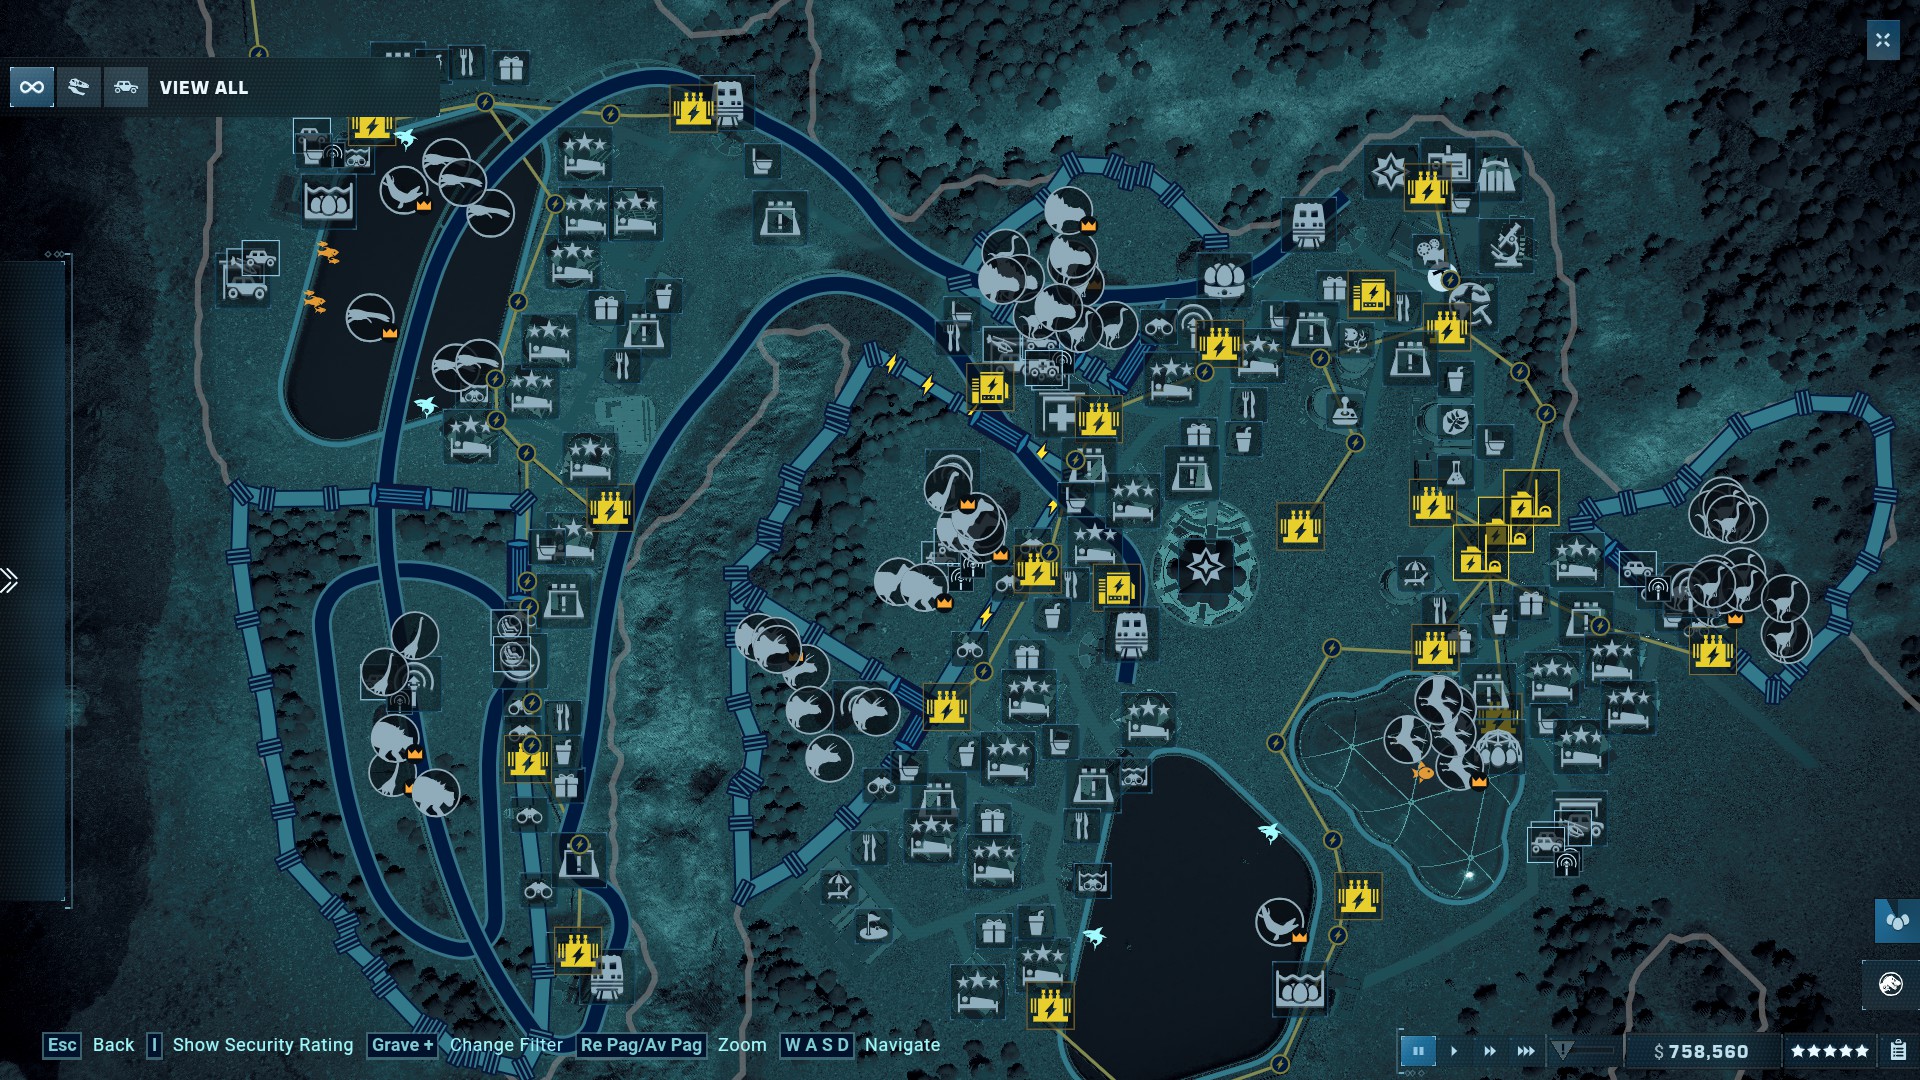
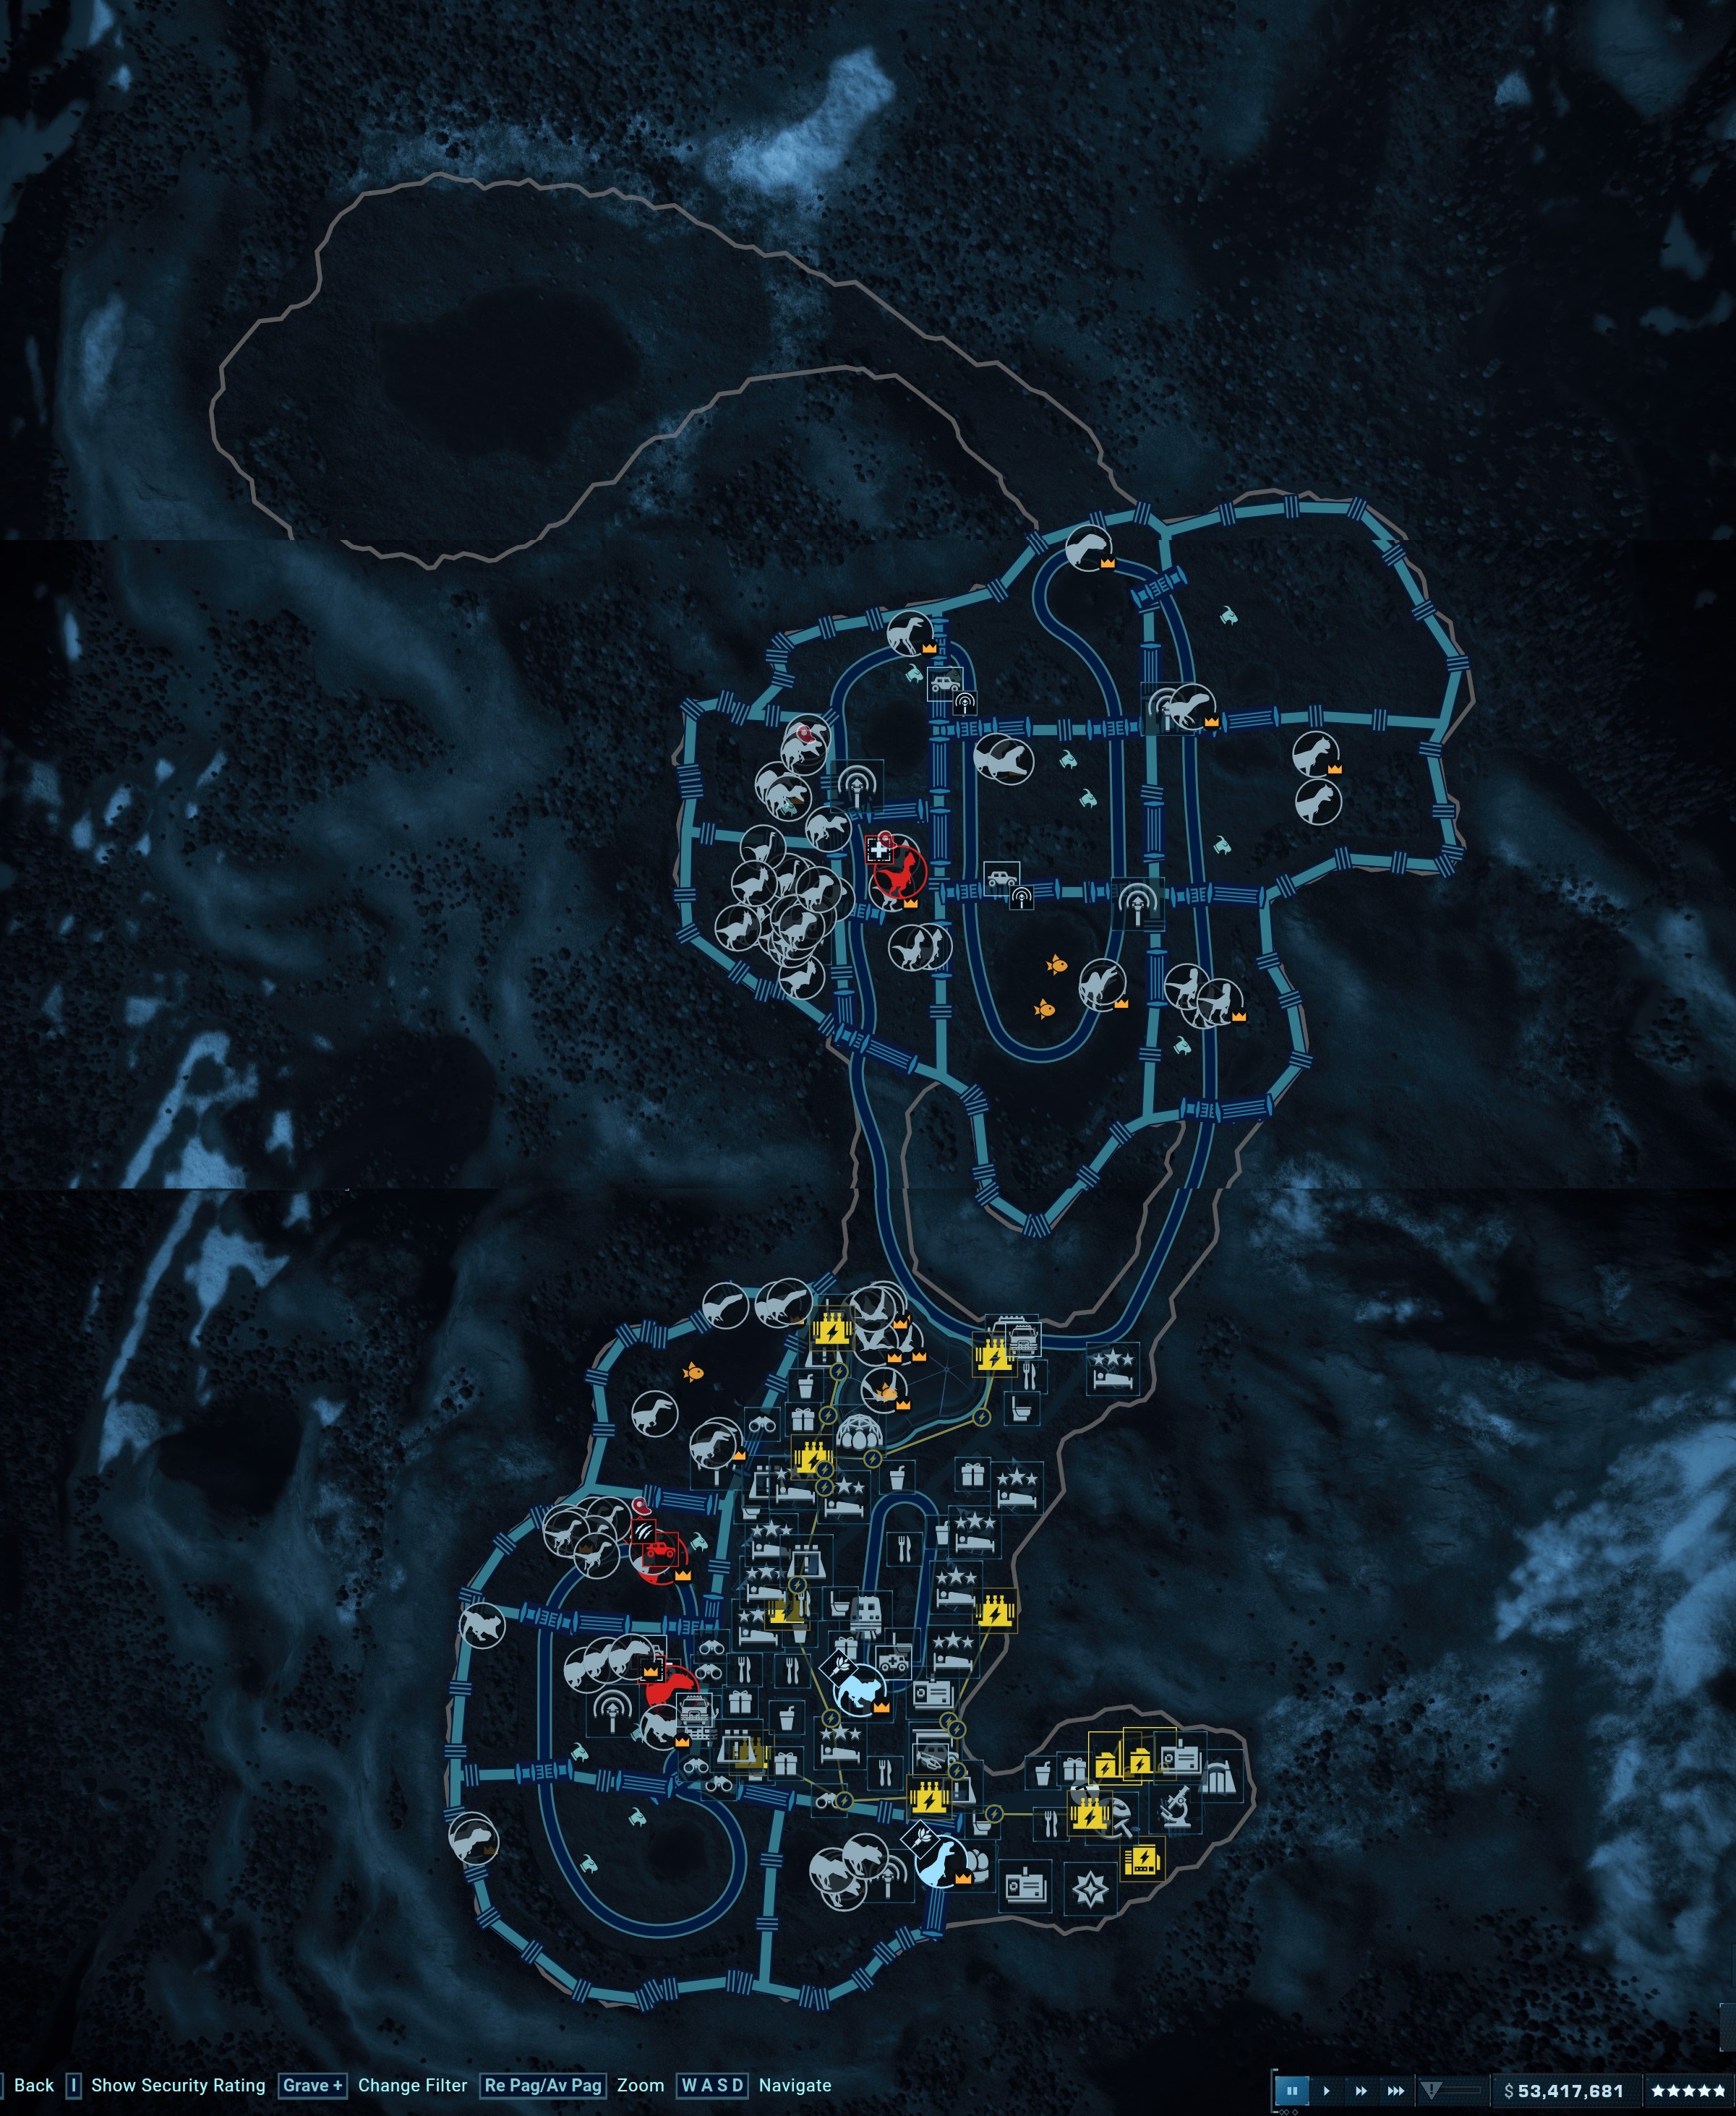
Here is how my park looks after reaching the 5 stars:
JURASSIC PARK: SAN DIEGO
Not Making the Same Mistakes Again Complete Jurassic Park: San Diego (Chaos Theory)
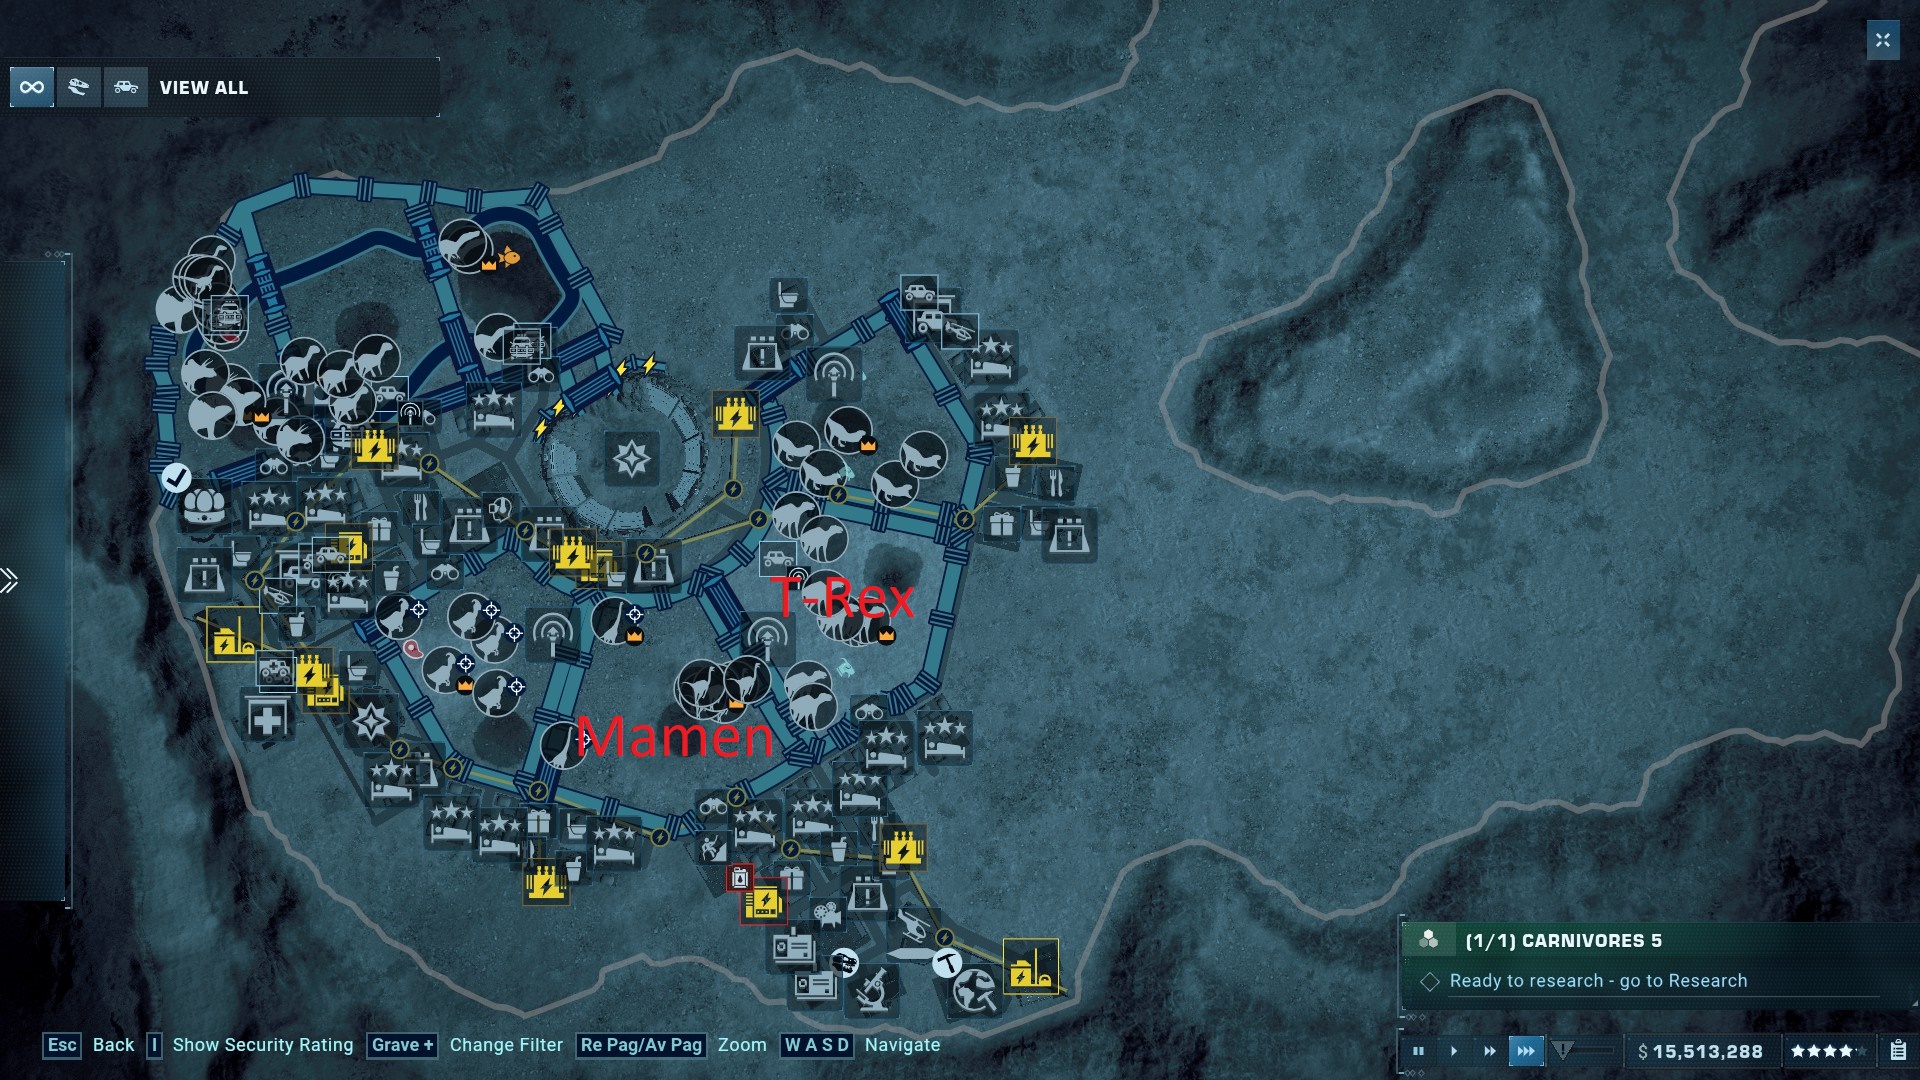
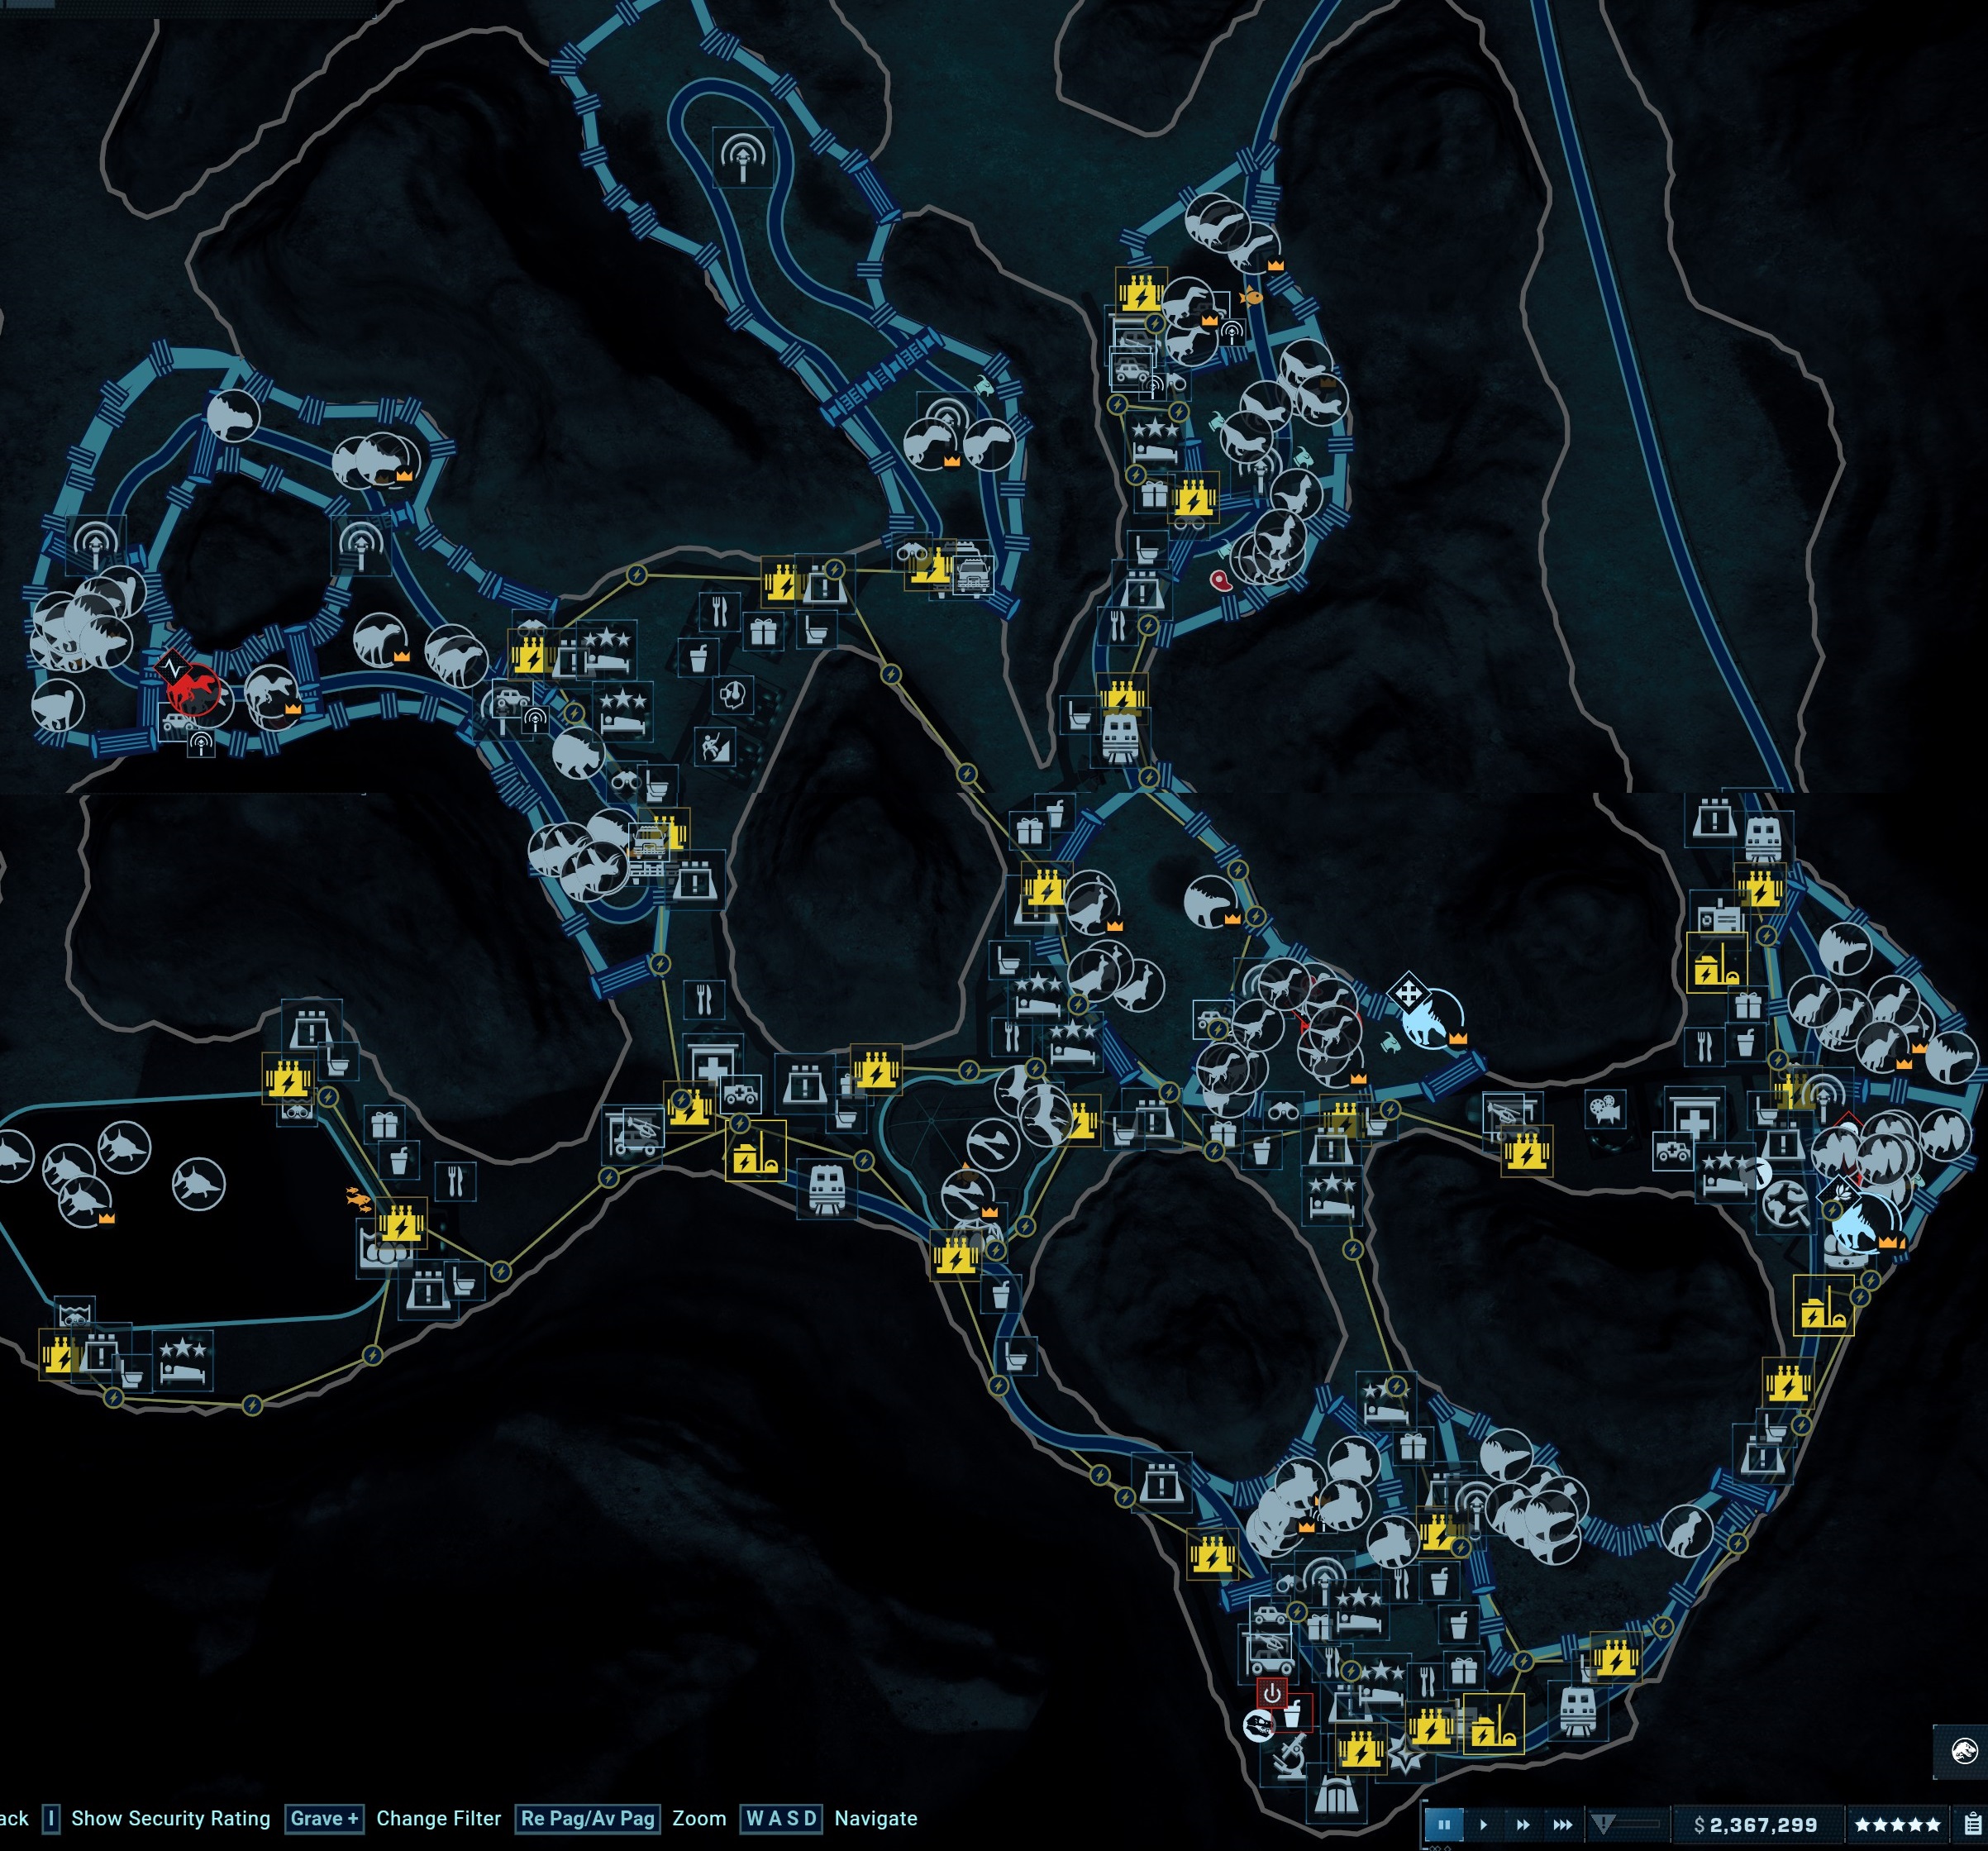
To beat this map, you need to follow the chain quest too. The last one requires 4 stars (750k income per minute), 40 dinosaurs and 10 different species. At the begining, they will give you some free dinosaurs to put in some enclosures, T-Rex is one of them. You can put in the initial unfinished enclosure, he will get the exact space he needs. Same for Mamenchisaurus. I put in RED the enclosures i put that dinos in the pic of my park after finished the map:
I see lot of people (me included) that didn't expand enought his dinosaurs when the T-Rex died by age. You can lose around 20-40% of your park appeal with this dino, so it can make you go to negative income. In my case, i released 3 Suchominus that they give more Appeal than the T-Rex so i came back to my numbers.
ISLA SORNA: SITE B
Where's the Phone? Complete Isla Sorna: Site B (Chaos Theory)
Not so much to add. This map is like the campaign missions, you need to look for some wild dinos, make a enclosure for them, heal if they have some diseases and then send out of map.
JURASSIC WORLD
Open Paddock 9! Complete Jurassic World (Chaos Theory)
Another map where you have to build and manage a park following some quest. They will ask you to release a Mosasaurus, Velociraptor (x4) and a Indominus Rex as last quest. If you have a T-Rex in the park too, you will get all these achievements by completing the chain quest:
That's No Tadpole Release a Mosasaurus
This is a Modern Prehistoric Marvel Bioengineer either of the following Hybrids: Indominus Rex, Indoraptor
Jurassic Showdown Release the following dinosaurs on a single map: Raptor, T. rex, Indominus Rex
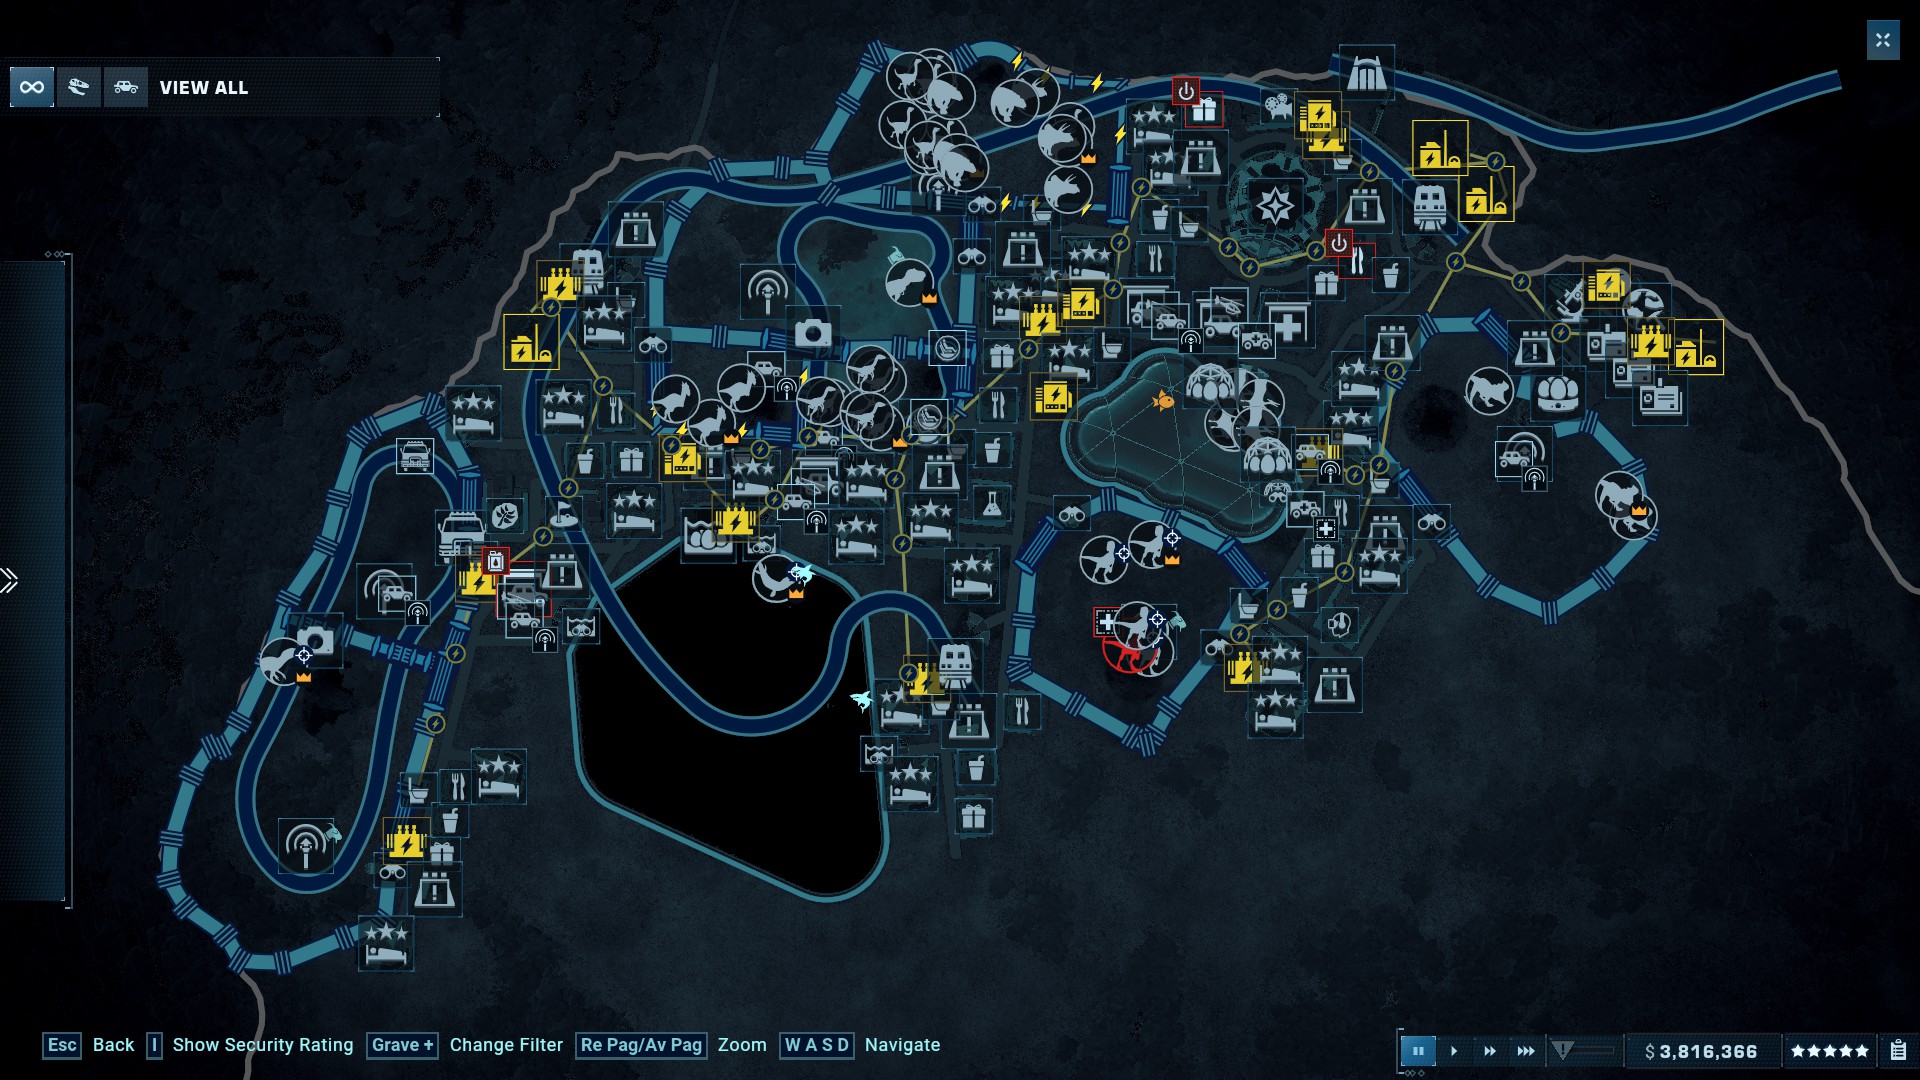
Like San Diego, you get a T-Rex at the begining of the map, get care if he dies by age and you didn't release enought dinosaurs to keep growing your income. Anyway, you have a lot of space to build in this map, and a lot of dinosaurs to release, so you shouldn't have any problem managing it. Here is how my park looks after completing all the quest:
RETURN TO ISLA NUBLAR
Blue is alive! Complete Return to Isla Nublar (Chaos Theory)
Another map where you don't have to manage a park. You just have to follow the chain quests. There are 4 wild Allosaurius at the begining, if you don't make them confortable and repair their enclosure fast, they can kill any of the 3 wild Brachiosaurus. If this happen, you can get stuck in the quest where you have to ensure the 3 Brachiosaurius have 90% comfort.
Challenge (general Guidelines/tips)
This game mode gives you a real challenge to build a park under some conditions. Jurassic Difficulty makes this mode requiring a good strategy from start, a good knowledge about dinosaurs and their enclosure requirements, and a good scientist management. You will see you have a new negative income: Income Tax. It will be very low at start, but it will increase a lot when you reach 3 or 4 stars.
To obtain the achievements you don't need to complete under the par time, so if you are not going to try a speedrun, i recommend to follow this guidelines:
Don't build excesive power plants (every small plant increase the power fees 50,400$) i finished every challenge without building more than 2-3 small and a big power plant. For this point i highly recommend to research the top tier fences (heavy fences), because they don't requires power.
Manage properly your scientist: I started focusing on 1 or 2 scientist with logistics stats so i can research everything. I looked for one scientist with logistics skill and the other with cheaper research, then 2 more scientist, one for genetics and another for welfare.
Now you will do some phases before trying to reach the 5 stars. You will unlock new researchs at 1'5 stars, 2'5 stars and 3'5 stars (and in some challenge maps, 4 or 4'5 stars to unlock some dig sites) so you just need to build your park and increase the stars to that stages and stop when you get a good income, and research everything. When you reach 3'5 stars, you can fire your scientist with cheaper research skill and recruit a scientist with cheaper expeditions, so now, you can send to high tier dig sites your scientist teaming with the scientist with logistics skill. You can extract 100% genome of every dinosaur or just focus on the dinosaurs you are going to use in your park (i will list below the dinos i used on every challenge) and then fire all your logistics scientist. So now, you can recruit scientist with cheaper syntesis and/or incubation.
Only upgrade the stats of your scientist if you need that stats points, and only recruit the scientist you need. Increasing their stats without needing, or having a lot of scientist, can decrease a lot your park income. If you do it good, you can reach 4 stars having 200,000$ more per minute than having a full mixed scientist team.
Open emergency shelter during storms. If you don't do that, you will lose all your stars for getting 0% in incident prevention. It can make you lose lot of money until you recover the stars you got before the storm.
Look for dinosaurs with humble trait. This gene modification makes that your dinos require 30% less area in their enclosures. Doing the math, if you release 3 dinosaurs with this gen, you can release a fourth dinosaur requiring the same area.
Skip the intro scene, check your initial scientist and fire them if their cost per minute is too high.
Make regular saves: It's is easy you start to build a new enclosure and then you want to put in 3 dinosaurs and they don't have enought area. Or maybe you syntetize an expensive dinosaur and get lot of negative traits. It is good to save before and reload if you don't like what you syntetize. You can have very bad luck with some consecutive random events... If you have a save where you can try to do it better without losing too much progress, is a good way to secure your growth.
Take photos of your dinos frecuently: When you are just waiting to make some money, or finishing any task. You can drive manually an helicopter and take photos of all your dinos. Try to get 2 or 3 species per shoot so you get a good combo. You will get an extra income to help you with the most expensive synthesis, incubations, expeditions or researchs.
Challenge: Jurassic Difficulty Maps 1, 2 & 3


Challenge 1: CANADA
Quite the Challenge Complete Challenge 1 (Any difficulty)
That, that was a Challenge Complete Challenge 1 (Jurassic difficulty)
Jurassic difficulty Conditions:
Starting Cash: 4,000,000$
Wild Dinosaurs
Research cost: High
Staff salary: High
Scientist rest: LongIn-game Challenge Conditions:
Research task cost 75% more
Staff salary increased by 100%Win Conditions:
Income needed to reach 5 stars: 1,200,000$
Appeal required: 6000
Species Target: 11
The start is easy compared with other challenges, but too difficult than the previous game modes. So just focus on release your first pack of Struthiomimus and make your incomes go positive, and then you can start growing your park slowly. If you follow the general guidelines for challenges of this guide, you will be able to manage a good income during the challenge.
As reference, you can use my park to know what i needed to reach the 5 stars:
Enclosures:
-x7 Dilophosaurus
-x2 Torosaurus, x5 Struthiomimus, x2 Amargasaurus
-x3 Ceratosaurus
-x6 Gallimimus, x3 Nodosaurus, x3 Nasutoceratops
-x4 Carnotaurus
-x9 Deinonychus
-x5 Parasaurolophus, x2 Polacanthus, x2 Camarasaurus (this enclosure holded the wild Brachiosaurus before Camarasaurus)
-x3 Sauropelta, x4 Olorotitan, x4 Muttaburrasaurus
-x7 Velociraptor
-x3 Baryonyx
-4 Aviary Dome: x6 Dimorphodon, x4 Pteranodon
-3 Lagoon Section: x2 Plesiosaurus
As you can see this park is a tutorial on how not to build a park. I didn't research fences, i growed up so fast (i reached 4'2stars at 5-6 hours of gameplay) then i got stuck. It was impossible to get more than 20-50k$ profit per minute, so i just upgraded my park doing photos and it was really slowly.
Challenge 2: GERMANYGood Job Complete Challenge 2 (Any difficulty)
You've Done Well Complete Challenge 2 (Jurassic difficulty)
Jurassic difficulty Conditions:
Starting Cash: 4,000,000$
Nature and luxury guests only
No carnivores
Genomes unlock at 100%
Genome modifications: Disabled
Disease risk: Severe
Max 1 staff center
Max 10 speciesIn-game Challenge Conditions:
No general guests
No adventure guests
No carnivores
Genomes unlock at 100%
Genome modifications: Disabled
Max staff center: 1
Max species: 10Win Conditions:
Income needed to reach 5 stars: 1,750,000$
Appeal required: 10500
Species Target: 10
For this challenge, the easy way is to reach 100% mosasaurus genome, and release 2 of them (it makes too easy to manage the park, because you don't need to heal or replace dead dinosaurs by age). To improve your lagoons, you need to know that a Mosasaurus without the Needy Trait, requires 5 lagoon sections. If you put 2 mosasaurus together, they will need 15 lagoon sections. so you need to do 2 lagoons. if Mosa get the Needy trait, you will need 6 lagoon sections or you can discard that egg. Be prepared to do big enclosures, so you can put lot of dinosaurs of the same specie.
when i reached 5 stars, my park have this enclosures:
-x9 Archaeornithomimus, x5 Euoplocephalus
-x15 Archaeornithomimus
-x7 Triceratops
-x6 Edmontosaurus, x1 Polacantus, x1 Apatosaurus
-x3 Mamenchisaurus, x2 Polacantus
-5 Aviary dome: x9 Pteranodon
-5 Lagoon Section: x1 Mosasaurus
-6 Lagoon Section: x1 Mosasaurus, x6 Plesiosaurus
Challenge 3: UNITED KINGDOMYou Did That? Complete Challenge 3 (Any difficulty)
Was That Tough? Complete Challenge 3 (Jurassic difficulty)
Jurassic difficulty Conditions:
Starting Cash: 0$
Wild Dinosaurs
Scientist skills: Unskilled
Sabotage risk: High
Terrain editing costs: High
Storm risk: Severe
Max 2 staff centersIn-game Challenge Conditions:
Terrain editing costs 50% more
Research tasks cost 20% more
Tasks takes 35% longer
Max staff centers: 2
Sabotage risk: HighWin Conditions:
Income needed to reach 5 stars: 1,100,000$
Appeal required: 7500
Species Target: 13
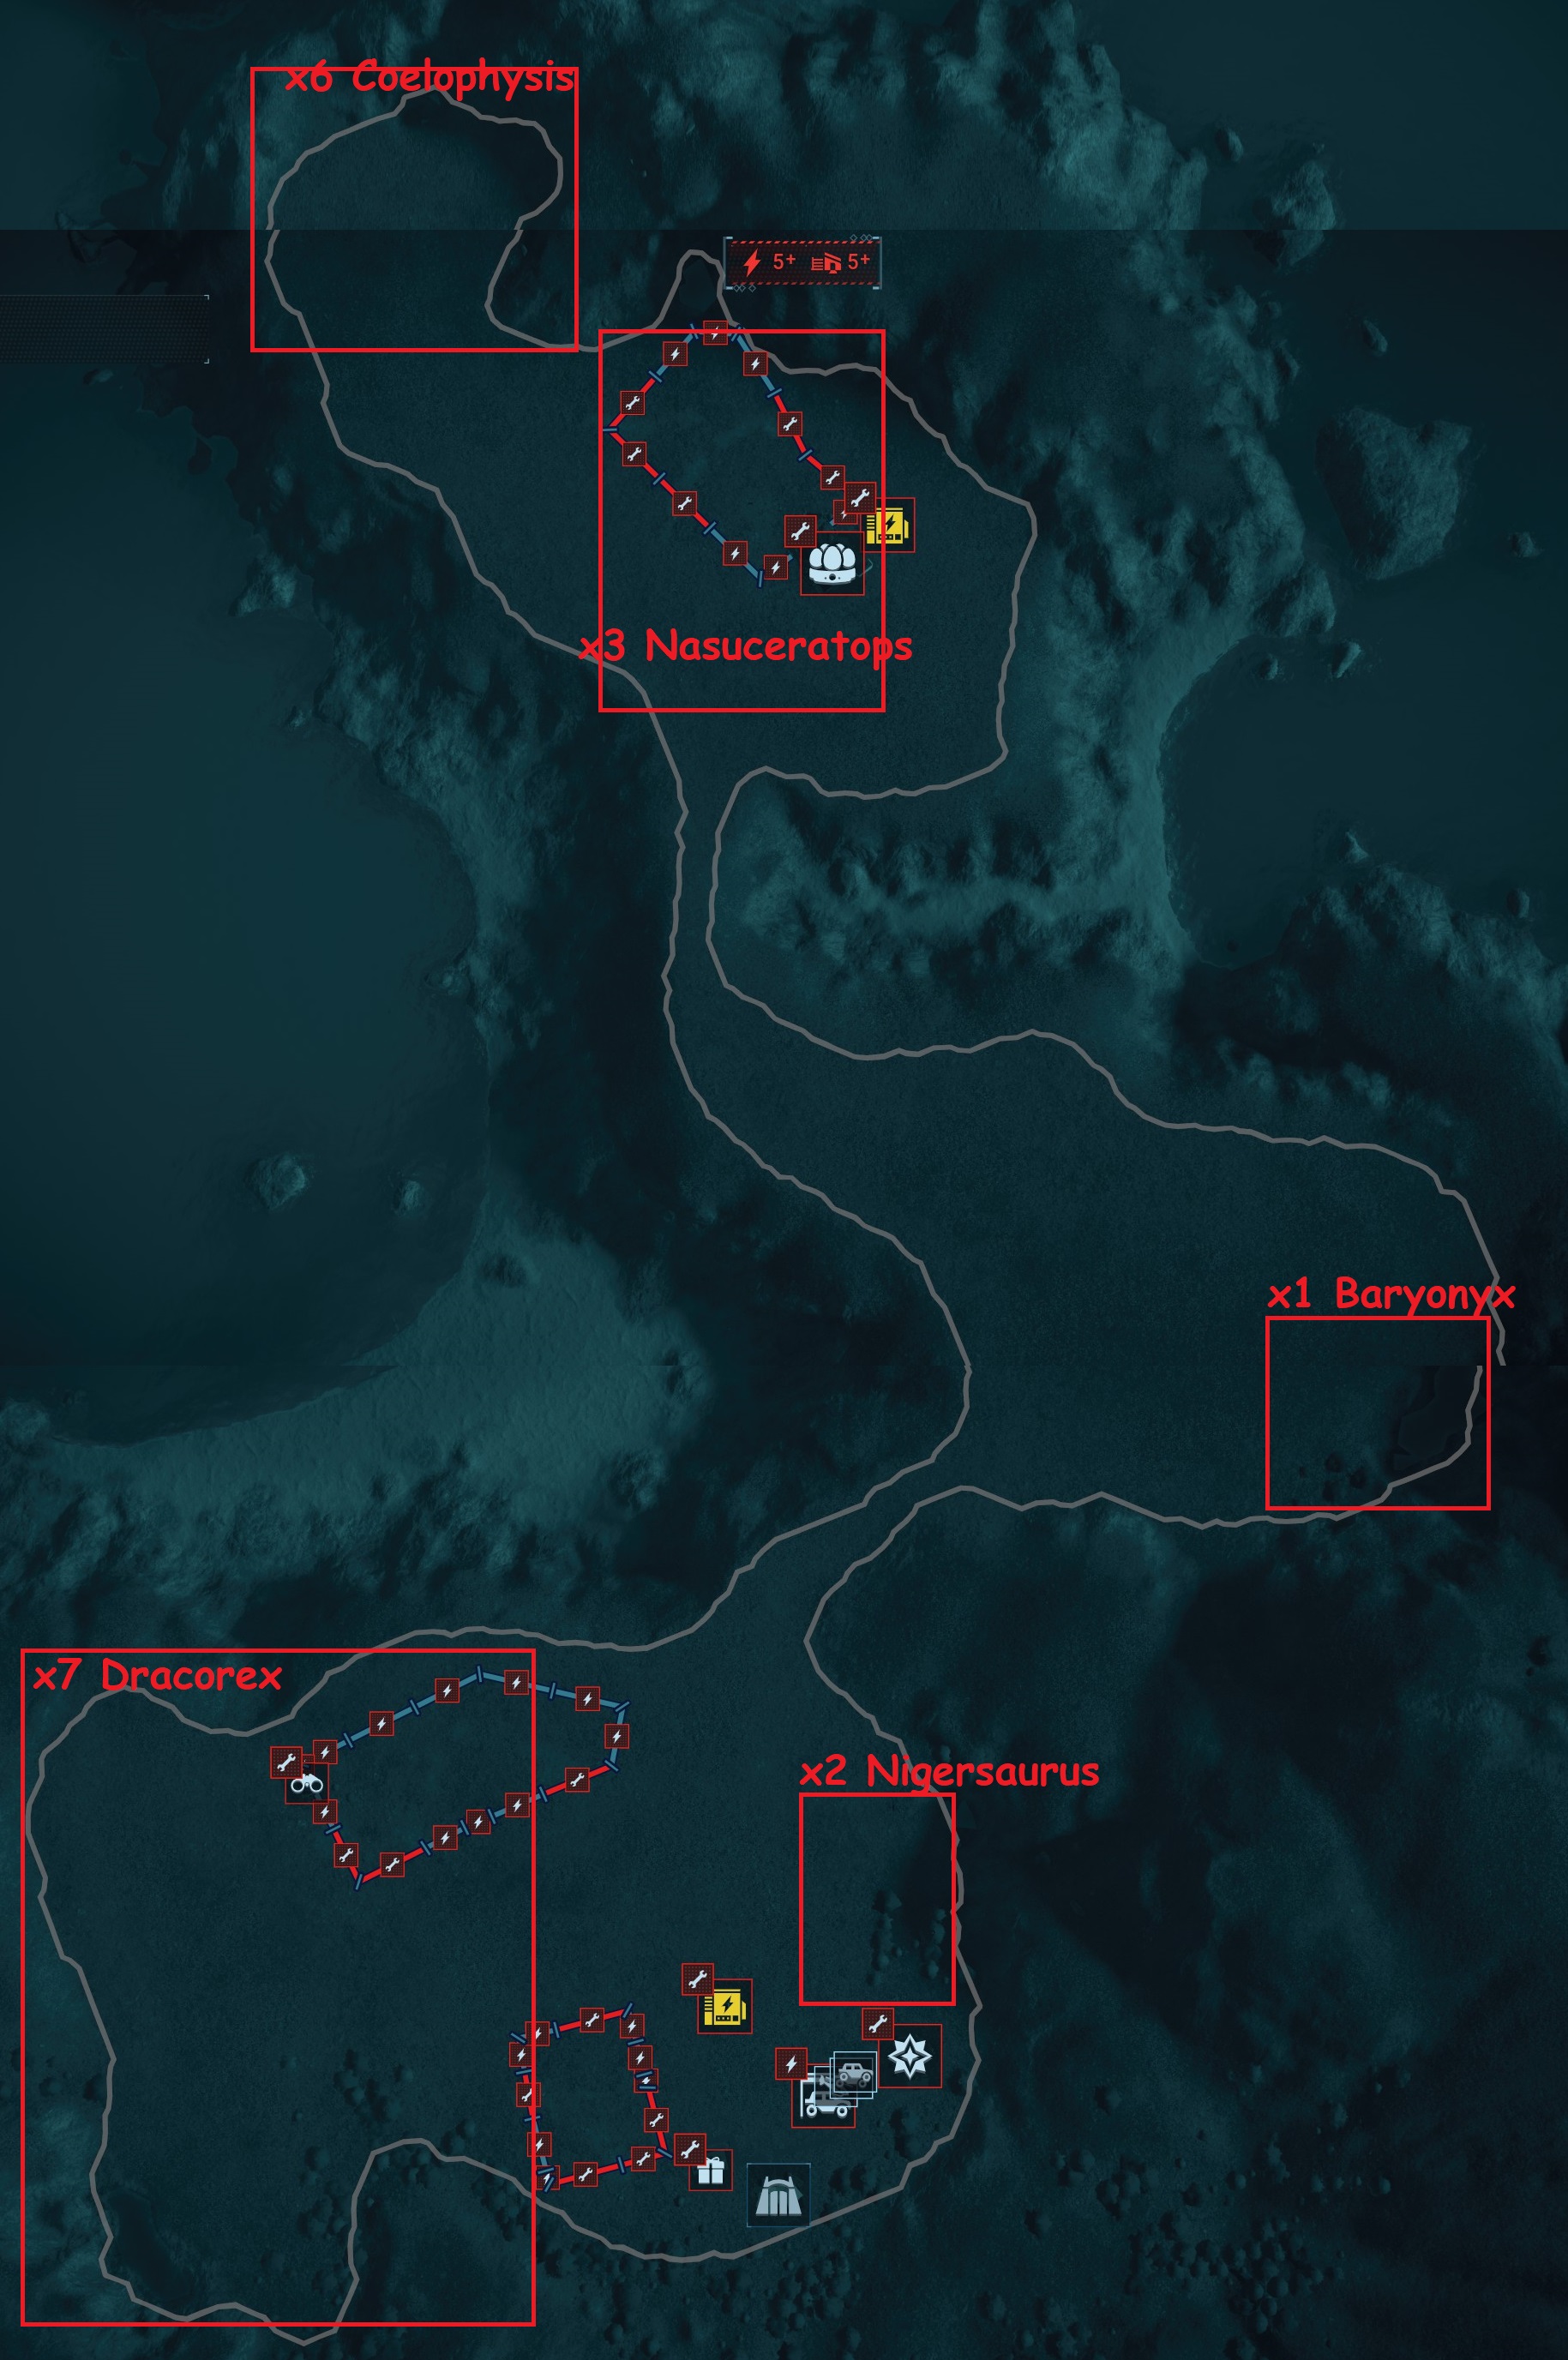
Maybe this challenge has the hardest start. Yo have no money, and you will have negative profit cause you have scientist that you can't fire until you repair the Control Center. So your first step is to take direct control of Capture Team (Helicopter) and take 2 or 3 photos of every pack of dinos. look for the best angle and try to capture all dinosaurs of each specie in every pic. Do this route: Nigersaurus->Baryonyx->Nasutoceratops->Coelophysis. When you finish the last photo, leave fast the Helicopter and take direct control of the car and repair the Control Center (open the scientist menu and fire all staff members), Backup Generator, the fences of the smallest enclosure and the Viewing Gallery. Now maybe you have no money, so you can go with the car to take photos of the Dracorexes. Move the Viewing Gallery to the enclosure repaired and tranquilize 5 Dracorex, to put them into. After that, you will have some profit and you will be able to start building your park.
This challenge has high ratio of sabotage so this will be tedious, but i found a little trick to skip sabotages:
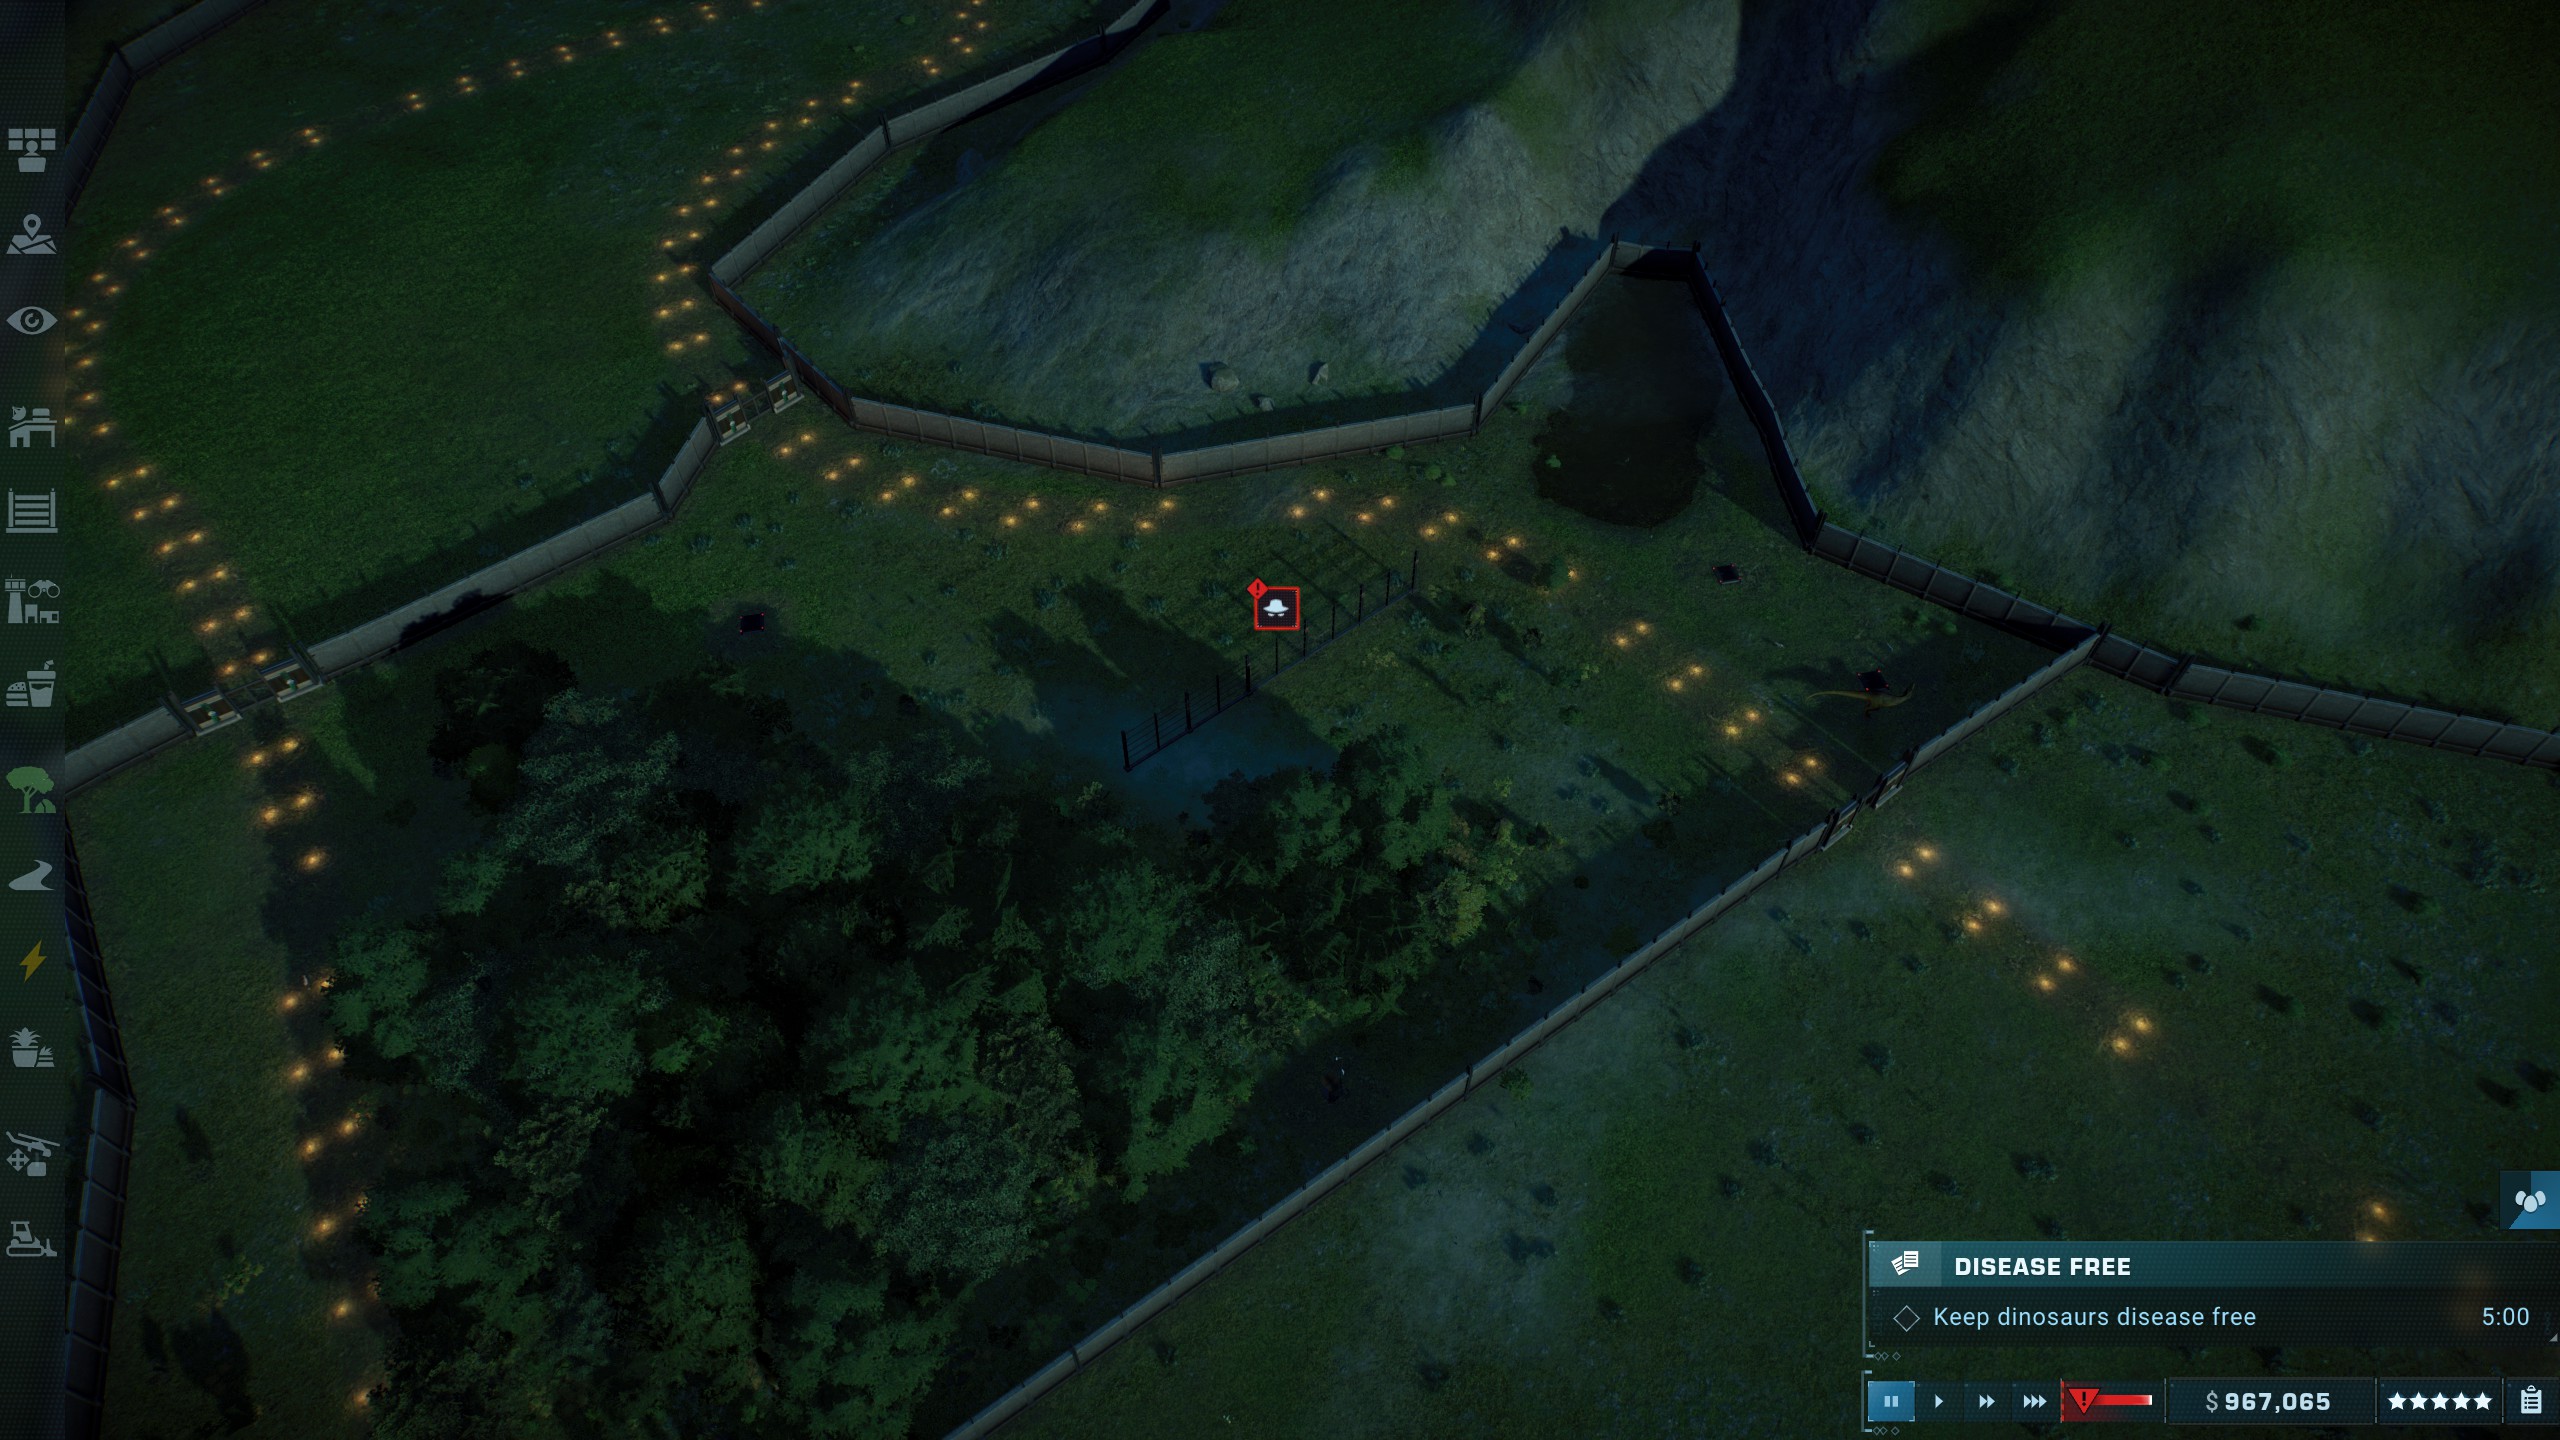
If you have a sabotage active, you can't get another sabotage event. So keep the farthest starting fences abandoned, and at any time, a sabotage event will sabotage them. So just leave that fence until the finish of the map and you will not get more sabotages.
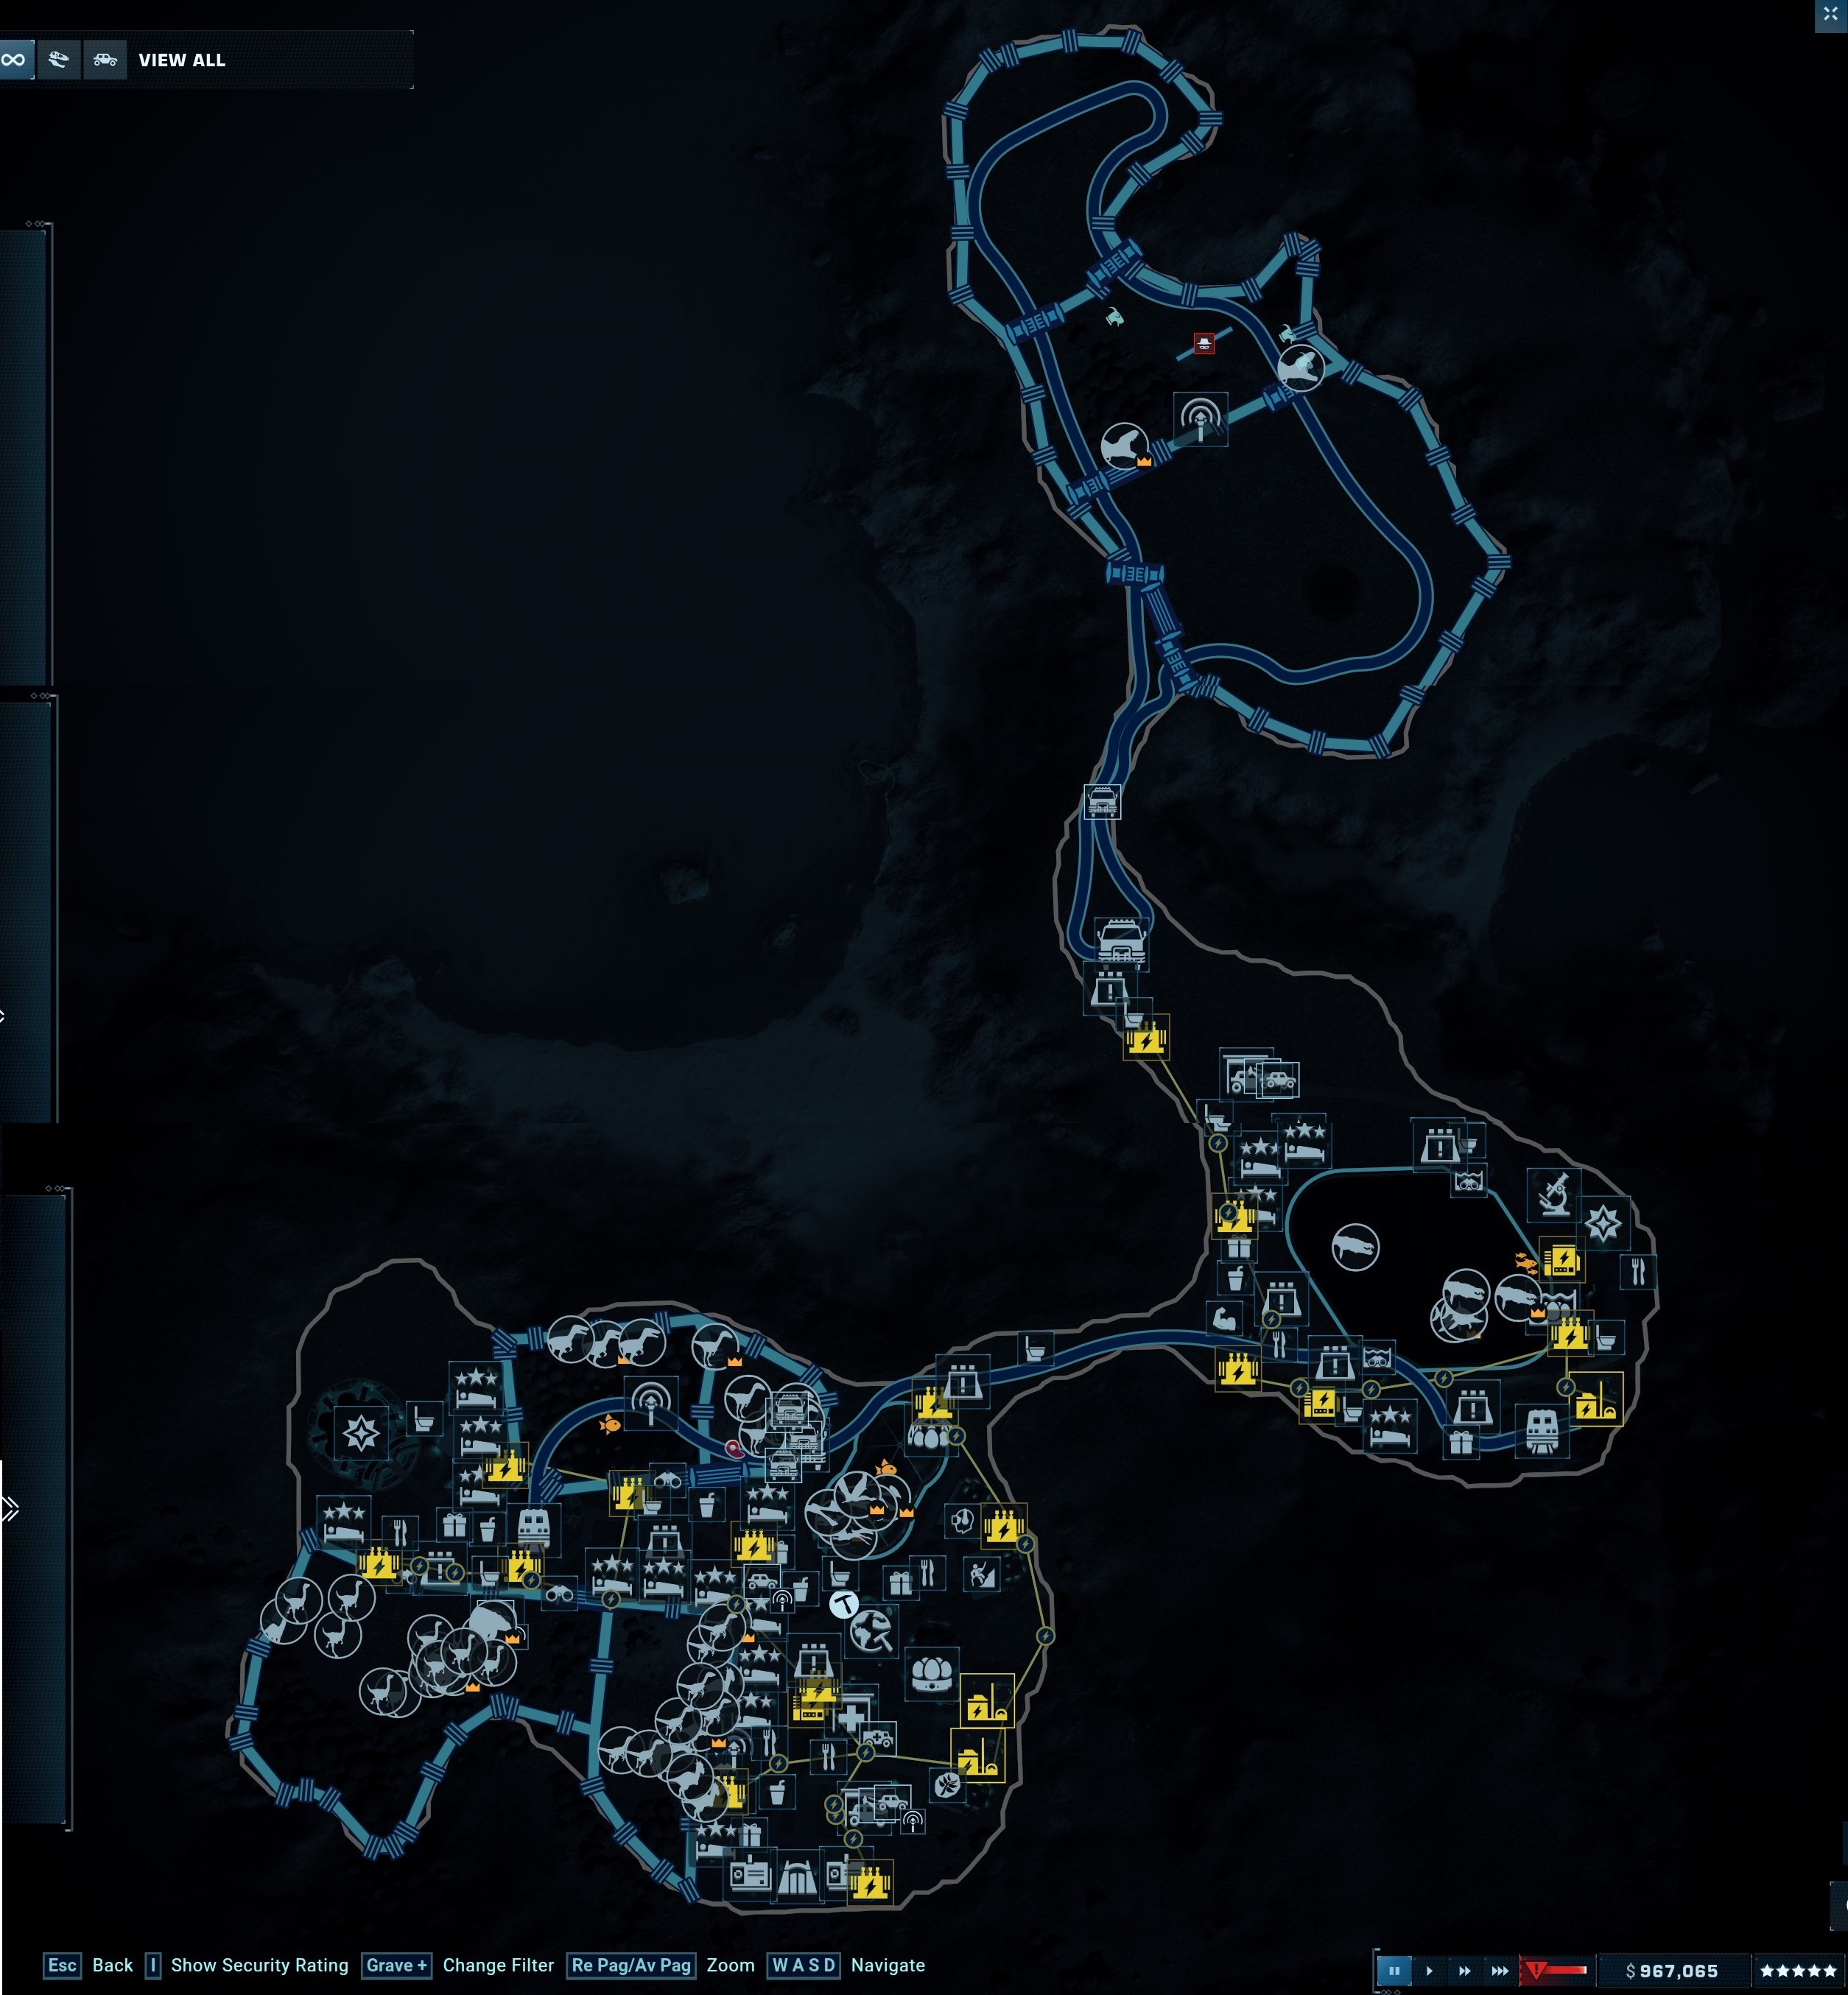
when i reached 5 stars, my park have this enclosures:
-x15 Gallimimus, x2 Nodosaurus, x3 Apatosaurus
-x8 Compsognathus, x2 Nigersaurus, x4 Dracorex
-x3 Baryonyx
-x6 Coelophysis
-x2 Giganotosaurus
-2 Aviary dome: x3 Tropeognathus, x3 Cearadactylus, x1 Maaradactylus
-4 Lagoon Section: x4 Liopleurodon, x2 Ichthyosaurus
Challenge: Jurassic Difficulty Maps 4 & 5


Challenge 4: NORTHWEST USA
All Done Complete Challenge 4 (Any difficulty)
Challenge Your Limits Complete Challenge 4 (Jurassic difficulty)
Jurassic difficulty Conditions:
Starting Cash: 4,500,000$
Standard and Adrenaline guests only
Limited herbivores (Small)
Feeders unlocked at: 2.5 stars
Max 5 emergency sheltersIn-game Challenge Conditions:
No nature guests
No luxury guests
Max 5 emergency shelters
Limited herbivores (Small)
Feeders unlocked at: 2.5 starsWin Conditions:
Income needed to reach 5 stars: 2,250,000$
Appeal required: 16500
Species Target: 20
This challenge can be divided in two phases: first phase is before reach 2.5 stars (when you have the feeders locked) and the second phase is when you have feeders and you need to grow up your park.
First Steps/phase: As always, setup a small enclosure with some Struthiomimus. So you start with a positive profit. Then you can go for Ceratosaurus. After some hours (4~), i did 3 enclosures: ceratosaurus (x8), Carnotaurus (x7) and Dilophosoaurus (x6) You will need to release constantly Struthiomimus to feed your carnivores. (As reference, i released 290 Struthiomimus at the end of the map). If you can't reach 2.5 stars with this setup, you can release some Allosaurus in the Ceratosaurus enclosure, or Albertosaurus in the Carnotaurus enclosure (they can cohabitate, but eventually, they will fight to dead, anyway, you will have time enough to reach 2.5 stars before one specie extinc the other).
Phase 2: You have unlocked feeders, you can stop spaming Struthiomimus. Now the challenge looks easy? Yeah, but you are able to build only 5 Emergency Shelters. So you can't expand your park with buildings or you will lose lot of guest comfort. For this second part, i did a small park with big enclosures. The second area of the map i did only enclosures and the visibility earned only with a jurassic tour (don't forget to setup on 10 vehicle capacity). With this strategy, the appeal will fluctuate a lot (based on the dinosaurs that tour's vehicles are seing) but you will have a reduced area dedicated for the guests comfort. You will have no problems with money. Lot of guests and small maintenance costs. So now, grow your species park until reach the 5 stars.
When i reached 5 stars, my park have this enclosures:
-x3 Ceratosaurus, x4 Allosaurus
-x2 Tyrannosaurus Rex
-x5 Qianzhousaurus
-x3 Metriacanthosaurus, x8 Compsognathus
-x5 Deinonychus
-x5 Dracorex, x3 Struthiomimus, x10 Homalocephale
-x6 Troodon
-x1 Indorraptor
-x2 Spinosaurus
-x2 Giganotosaurus
-x1 Indominus Rex
-x1 Acrocanthosaurus
-x3 Velociraptor
-3 Aviary dome: x3 Dimorphodon, x1 Geosternbergia, x1 Maaradactylus, x2 Tapejara
Challenge 5: SOUTHWEST USAGlad That's Over Complete Challenge 5 (Any difficulty)
You Call That a Challenge? Complete Challenge 5 (Jurassic difficulty)
Jurassic difficulty Conditions:
Starting Cash: 3,000,000$
Wild dinosaurs
Negative physical traits greatly reduce dinosaur lifespan
Terrain editing cost: Extreme
Max 6 Power sources
No building upgradesIn-game Challenge Conditions:
Terrain editing costs 500% more
Max 6 Power sources
No building upgrades
Lifespan -90% for dinosaurs with negative health traits
Lifespan -90% for dinosaurs with negative combat traitsWin Conditions:
Income needed to reach 5 stars: 2,000,000$
Appeal required: 11000
Species Target: 30
This is the final challenge, it requires a lot of different species and you have a really divided terrain to build your park, the scientist are really expensive to maintain. This will be your first handicap, you need to keep an eye on the staff members to recruit allways looking for the cheapest scientist who gives you the bests skills. You will recruit and fire them lot of times depending on your research requirements.
The other handicap is the negative traits, you can't release dinosaurs with negative traits or they will die in some minutes. (you will need to reach 100% genome to fix that or save and reload before buying the syntesis until you obtain the dinosaur without negative traits).
About max 6 Power sources i can say that i only needed 4, so i don't see problem with that, and another good new is that this map has no forest, so it is easy to make enclosures with different species.
The start of this challenge is pretty easy, fire initial scientist, you can do photos to the wild dinosaurs, build some enclosures and put them into and you will have positive profit. There are nothing much to say, just grow up your park slowly having good profit, research all you can, unlock as much as possible dinosaur genome, and then go for the 5 stars.
I can only give the tip to not spam lot of shops, this building only increase the profit (and the stars rating, as it is based on the income per minute) don't affect to the guests appeal. But during storms, you will lose lot of money because during storms they don't give you profit but they have high upkeep costs and also they add an extra upkeep to the income tax. So i just put some shops in the starting part of the park, and i growed up my park without shops until i reached the 100% appeal requirement, then i setup shops to make the 100% amenity coverage, and i reached the 5 stars.
As other maps, i give you my park map and the enclosures i builded:
-x4 Chasmosaurus, x3 Nodosaurus
-x4 Gigantspinosaurus, x5 Pachycephalosaurus
-x9 Dilophosaurus
-x6 Corythosaurus, x3 Kentrosaurus, x3 Amargasuarus
-x2 Carnotaurus, x11 Compsognathus
-x5 Tsintaosaurus, x1 Huyangosaurus
-x5 Deinonychus
-x5 Majungasaurus
-x2 Baryonyx, x3 Suchomimus
-x2 Allosaurus
-x5 Pentacerops, x2 Polacantus
-x4 Maiasauria, x4 Stegosaurus
-x2 Triceratops, x2 Euoplocephalus
-x5 Troodon
-x6 Muttaburrasaurus, x3 Chungkingosaurus
-3 Aviary dome: x3 Pteranodon, x2 Tropeognathus
-6 Lagoon Section: x5 Ichthyosaurus (i was preparing to release a Mosasaurus)
Other Achievements


Insurance Claim Destroy a Ranger 4x4 through reckless driving
Self explanatory achievement, you can destroy the car by crashing with buildings, or you can go into a big carnivores enclosure and let them destroy you.
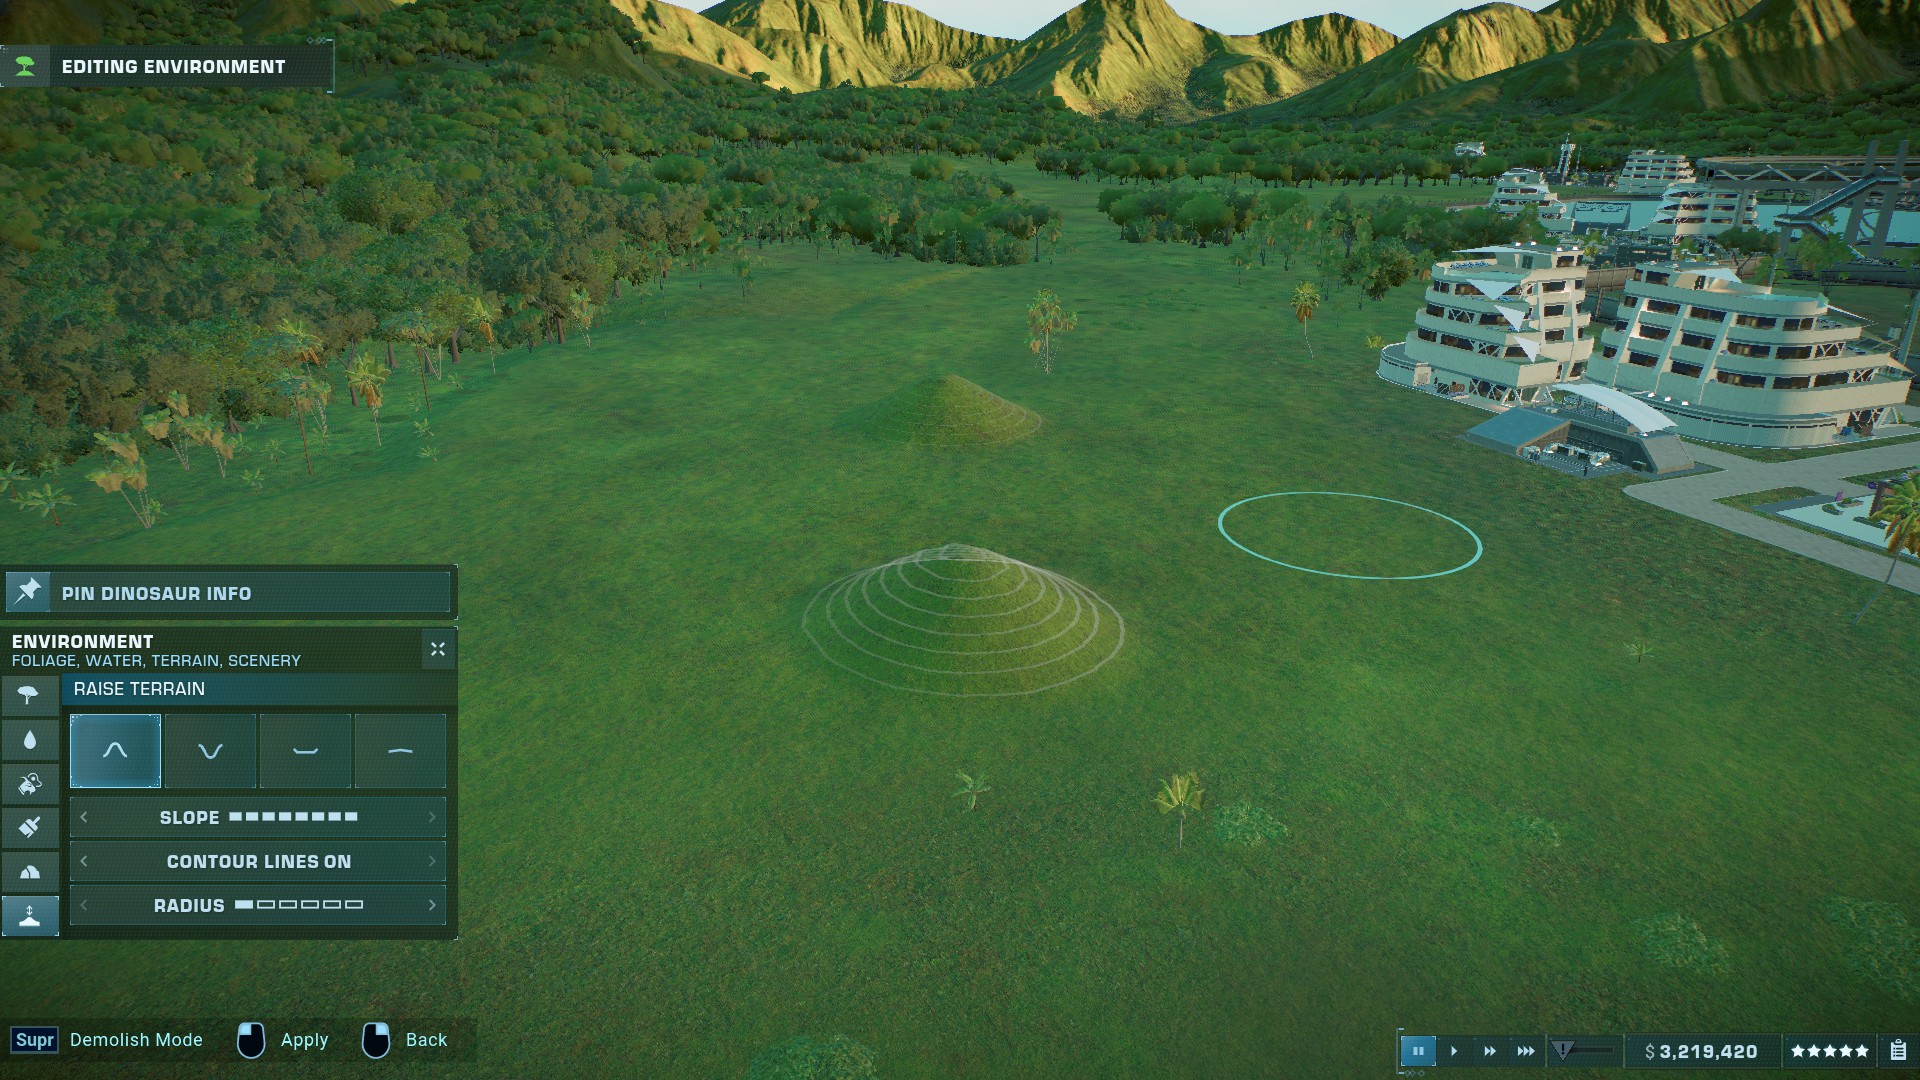
As Light as a Feather Get 5 seconds of air time with a ground vehicle (within a 20-second window)
Modify the terrain to make a flat area and put 2 mountains with the smallest possible radius and maximum slope. Then drive the car through the 2 mountains and you should get the achievement. keep repeating until achievement comes out.
This One is Special Release a genetically modified dinosaur (excluding cosmetics)
Another self explanatory achievement, you will release lot of dinosaurs with modified genes during your gameplay, so don't worry about this achievement.
Prehistoric Perfection Complete any genome to 100%
If you want to make good dinos with good dinosaur traits, you are going to need the 100% genome unlocked, so you will get this achievement too.
Engineer 1st Class Reach Logistics level 10 with a staff member
PHD in the Field Reach Genetics level 10 with a staff member
Veterinary Wonder Reach Welfare level 10 with a staff member
There are skill 3 scientists that can make a scientist to reach level 10 on one stat: Logistics specialist, Genetics Specialist and Welfare Specialist. Recruit scientists with this skills and train them to reach level 10.
That's a lot of Dinosaurs House at least 50 live dinosaurs on a single map
You should obtain just playing the different game modes, but if you want to obtain fast and easy, you can spam Struthiomimus.
On the Road to Success Have at least 2000 guests in a park
You need to build some hotels and reach a good level of appeal in your park, but you can obtain it on every map too. In last challenge, for example, i got 3'8k guests.
Good Aim Manually Tranquillise an escaped Flying Reptile
The first time I had to get this achievement was in Chaos Theory: Jurassic Park. It may seem difficult, but once a flying dinosaur escapes from the aviary, it usually lands on the ground or some building being a stationary target.
One More for the Sticker Book Release at least one of every dinosaur genus in the game
If you release every dinosaur of the game at least once (requirement to obtain the 100% data base achievement) you will receive this achievement too. If not, you can check the list in the next section on this guide
DataBase Achievements


Starting a Collection Complete 50% of the Jurassic World Database
I Can See Everything Complete 100% of the Jurassic World Database
These achievements are easy to obtain. They don't require making "hidden" actions like photos or having specific dinosaurs fight. You should unlock all the entrances simply by playing the campaign maps and chaos theory. Sending expedition to each excavation site once a least. Researching each genome modification or dinosaur disease. If you are missing any entry, it says where you can get it. Only the dinosaurs entries are totally hidden (you can guess them from the shadow image), so I am going to list all the dinosaurs and the maps where you can release them:
*acronym:
CT JW - Chaos Theory: Jurassic Park
CT SD - Chaos Theory: San Diego
CT JW - Chaos Theory: Jurassic World
C1 - Challenge 1: Canada
C2 - Challenge 2: Germany
C3 - Challenge 3: United Kingdom
C4 - Challenge 4: Southwest EE.UU.
C5 - Challenge 5: West EE.UU.
Acrocanthosaurus: C4
Albertosaurus: C4
Allosaurus: CT JW, C4, C5
Amargasuarus: C1, C2, C5
Ankylosaurus: CT JW, C2, C3, C5
Apatosaurus: CT JP, CT SD, CT JW, C1, C2, C3
Archaeornithomimus: CT JP, CT JW, C2, C5
Attenborosaurus (Deluxe DLC): CT JW, C1, C4
Baryonyx: CT JW, C1, C3, C4, C5
Brachiosaurus: CT JP, CT SD, CT JW, C1, C2
Camarasaurus: CT JP, CT SD, C1, C2
Carcharodontosaurus: C4, C5
Carnotaurus: CT SD, CT JW, C1, C3, C4, C5
Cearadactylus: C1, C3, C5
Ceratosaurus: CT JW, C1, C3, C4
Chasmosaurus: CT SD, C1, C2, C5
Chungkingosaurus: CT JP, CT SD, C1, C3, C5
Coelophysis: CT JP, CT SD, C3, C4
Compsognathus: CT JP, CT SD, CT JW, C3, C4, C5
Corythosaurus: C5
Crichtonsaurus: CT SD, C1, C2, C3, C5
Cryolophosaurus: C4, C5
Deinonychus: C1, C4, C5
Dilophosaurus: CT JP, CT SD, C1, C4, C5
Dimorphodon: CT JW, C1, C2, C4
Diplodocus: CT JP, C2, C3
Dracorex: CT JW, C1, C2, C3, C4
Dreadnoughtus: CT JW, C2
Dryosaurus: CT JP, CT SD, C1, C2, C5
Edmontosaurus: CT JW, C1, C2, C5
Elasmosaurus: CT JW, C1, C2, C4
Euoplocephalus: CT JP, C2, C5
Gallimimus: CT JP, CT SD, CT JW, C1, C2, C3
Geosternbergia (Deluxe DLC): CT JW, C1, C2, C4
Giganotosaurus: CT JW, C1, C3, C4
Gigantspinosaurus: CT JP, CT SD, C1, C3, C5
Herrerasaurus: C1, C3, C4
Homalocephale: C1, C2, C3, C4, C5
Huyangosaurus (Deluxe DLC): CT JP, CT SD, CT JW, C1, C5
Ichthyosaurus: CT JW, C1, C3, C5
Iguanodon: CT JP, C1, C3
Indominus Rex: CT JW, C4
Indoraptor: C4
Kentrosaurus: C1, C3, C5
Liopleurodon: C1, C3, C5
Maaradactylus: C1, C3, C4, C5
Maiasaura: CT JP, CT SD, C1, C2, C5
Majungasaurus: CT JP, CT SD, CT JW, C4, C5
Mamenchisaurus: CT SD, C1, C2
Megalosaurus (Deluxe DLC): CT JP, CT SD, CT JW, C4, C5
Metriacanthosaurus: CT JP, CT JW, C1, C4
Mosasaurus: CT JW, C1, C2, C5
Muttaburrasaurus: C1, C2, C5
Nasutoceratops: CT JW, C1, C2, C3
Nigersaurus: C3
Nodosaurus: C1, C2, C3, C5
Olorotitan: CT JW, C1, C3, C5
Ouranosaurus: C1, C3
Pachycephalosaurus: CT SD, CT JW, C1, C2, C5
Pachyrhinosaurus (Deluxe DLC): CT JP, CT SD, CT JW, C2, C3
Parasaurolophus: CT JP, CT SD, CT JW, C1, C3
Pentaceratops: C1, C2, C3, C5
Plesiosaurus: CT JW, C1, C2, C4
Polachanthus: C1, C2, C5
Proceratosaurus: CT JP, C1, C4
Pteranodon: CT JW, C1, C2, C4, C5
Qianzhousaurus: C1, C4
Sauropelta: C1, C3
Sinoceratops: CT JW, C2
Spinosaurus: C1, C4, C5
Stegosaurus: CT JP, CT SD, CT JW, C1, C5
Struthiomimus: CT JP, CT SD, C1, C2, C4
Stygimoloch: C1, C2
Styracosaurus: CT JP, C2, C3
Suchomimus: CT JP, CT SD, C1, C4, C5
Tapejara: CT JW, C1, C2, C4
Torosaurus: C1, C2
Triceratops: CT JP, CT SD, CT JW, C1, C2, C5
Troodon: CT SD, C4, C5
Tropeognathus: CT JW, C1, C3, C4, C5
Tsintaosaurus: C5
Tylosaurus: C1, C2, C3, C4, C5
Tyrannosaurus Rex: CT JP, CT SD, CT JW, C1, C3, C4
Velociraptor: CT JP, CT SD, CT JW, C1, C3, C4
Source: https://steamcommunity.com/sharedfiles/filedetails/?id=2652440517
More Jurassic World Evolution 2 guilds
- All Guilds
- Best Park to exist
- How to mod JWE2
- Dinosaurs by Era
- Cute dinosaurs
- pls add these things
- Jurassic Park Operation Genesis
- Jurassic Park Operation Genesis ()
- How to become Dennis Nedry
- Changing Voice-Over Audio to any available languages
- how to HONK HONK