0. Introduction
Hi I'm Jhin and I've been playing and following NGU Industries since the release in april
(Just as a reference of how "experienced" I am with the game)
In this guide I'll tell you everything I know about optimizing your layouts with beacons using a specific website
-> https://plasma119.github.io/NGU-INDUSTRIES-optimizer/
That's your way to go to, you're welcome :)
-the end
Just kidding..., okay anyways - using that website you can idle even more and not have to worry about beacons anymore, EVER
You will still have to save layouts of course or use a script that auto-places the layouts for you
(Which I'll get to after explaining the website)
1. Layout Of The Optimizer


You might get overwhelmed by the optimizer at first but don't worry, I'll explain it step-by-step,
If you still don't understand something after "reading" the guide feel free to leave a comment.
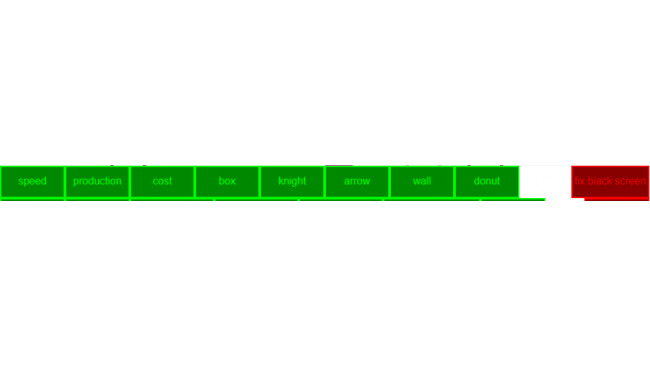
First row -
Speed - production - cost are just the "types" of beacons which you would want to use for your specific layout.
Remove speed if your buildings are already speed capped or close to being speed capped.
I would never use cost ones only, because sure you can get some buildings to only 1% recipe cost but they will barely produce anything if you don't allign production beacons with them.
If you need a lab layout remove production AND cost, since labs only care about speed.
After that comes "types of beacons", depending on which ones you have unlocked or not.
"Fix black screen" is what I'd assume just a bug fix since I have never had to use it yet.
Second row -
This row is very self-explainatory, the only button I use on this row is the "Copy to clipboard" one which is needed for the auto-place script
Third row -
This is where we get to the good stuff - I've been always keeping the "base production" at 1 but you can play around with it if you feel like it.
"Max speed" and "Max prod" are not really used anymore since they added the option to completely disable a certain type of beacon to the website. I'd put the "min. cost" to 0.3-0.4 to have a balanced layout for a handful of tiles which are used for high priority buildings, I'd only keep it at 0 if I wanted to make loads of a specific item which requires loads of different materials.
The rounding mode and round cost options don't really do much but as I said, you can still play around with them if you really want to.
Fourth row -
First comes the button which does all the magic after you have adjusted the previous settings
Keep strategy at sum unless you want the optimizer to get crazy
The other two settings are just for visuals and the small buttons on the bottom right are nothing to worry about either.
After pressing the optimizing button I'd let the optimizer run in the background for a couple minutes until it has figured out the perfect layout for your specific settings
That's all about the layout for now, next comes the auto-placing beacon script that will save you a ton of time.
2. Auto-placing Beacon Script
https://github.com/NotThat/NGU-AHK
They basically have a guide on their own on the website so go read that YA DUNGUS
3. Suggestions
Let me know in the comments if you want me to add anything else to the guide
Keep idling :)
Source: https://steamcommunity.com/sharedfiles/filedetails/?id=2540072939
More NGU INDUSTRIES guilds
- All Guilds
- To Infinity
- A Newbie's Guide to Beacons
- Guide 11
- how to place things down
- Guide 9
- Achievement guide
- how to make nuber go up
- Basic Beacons
- NGU Industries Basics
