
Prep Work:
To start off I highly suggest that you play the game through on normal at least once before you tackle hard difficulty. This is a Hard guide why would we play through on Normal first? Well there are several reasons all of which are best worked through on normal difficulty. That being said you can do all the prep work on Hard difficulty it will just take a bit longer and more than likely several restarts.
Keep in mind that this guide is not going to be a step by step outline of how to beat the game. What I aim to provide is some insight on how to develop your own path to success and give you a few tools to make it easier.
1. Learn the systems:
There are many good guides that can help you develop a thorough understanding of the mechanics of the game but they still require practice to take full advantage of. For instance we could go over how to build/upgrade ships or use tactical missiles but until you get some experience with those systems it will be difficult to get the most out of the ships provided for this guide. As the game will be different on each run building your own knowledge base will help you leverage the information provided in situations that are far too numerous for me to go into detail about.
2. Learn the ships:
More detail will be provided within the individual ship descriptions later on for each but for now what needs to be understood is that there will be 2 main categories for your fleet. First are your combat ships which like the name suggests you will be taking head first into a fight. Second are your support ships that should never enter an actual battle but can greatly impact the outcome despite not being physically present.
The combat ships can be easily tested without much commitment as there is a Test feature within the ship builder which can greatly speed up your practice as you can restart as many times as you want and it will not hinder your progress as opposed to testing in campaign. I have done a lot of my testing in campaign so take this with a grain of salt but just so you know it comes at great cost should you make a mistake or have to make major changes to design on the fly.
Your support ships are really best tested in campaign as the test feature only has options for a straight up fight or landing which makes testing some aspects impossible. Both of these options are incredibly useful so don't underestimate the value they provide we just don't have a good way to acclimate to the other features outside campaign. This is partially why we want to have a normal run of the game because it will be more forgiving and provide some solid practice to hone your skills before we get to the real challenge. Testing these ships happens primarily via the campaign map by learning tactical positioning/movement, weapon/ship ranges, and information warfare.
The game provides vanilla designs for ships in both of these groups and I also started by using them before going into the ship builder and making my own creations. I highly suggest starting with them as well because you don't have to overwhelm yourself with learning everything at once as each ship has a defined role established and you can just jump right in.
3. Figure out your play-style and how to balance it:
While I'm providing what I have had success with you can by all means go about your campaign differently and be successful. Knowing what you like and adjusting to that is what its all about because you can be really creative to meet the challenges you face in each campaign you start. If you want to go in headstrong and fight everything or only want to use strike craft and air support you have the tools to achieve either.
4. Increase your starting funds:
This occurs as you progress through any campaign in each save slot and will increase based on amount of completion/combat. Just push as far as you can and do as much as you can, the more funds you build up the more options you will have for the start of the hard campaign.
Starting Fleet For Hard:
I have prepared two groups based upon what player preferences may be. The first will be used for those that have done the aforementioned prep work and the second group will be for those that want to jump right into hard mode.
Note: For those that want to go a more vanilla route and use the Sevestapol the Jericho is of similar cost and can be swapped out if you so choose. Each ship can also be edited to remove many of the components if that is the route you want to go and replace them from the default parts on the Sevestapol at the start. This can free up a lot of funds if you just plan on refitting it as you play but again go about things in a way that will be fun for you.
Starting fleet composition:
Ship (Role) Amount (NG) Amount (B) Jericho (Flagship) *1(NG) *1(B) Shortbow (Carrier) *1(NG) *0(B) Lightning MK2-AB (Fast Attack) *3(NG) *2(B) Kempf (Tactical Missile Platform) *2(NG) *1(B) Skylark-L/Skylark-H (Tanker) *2(NG) *2(B) Chernov MK2 (Scout) *2(NG) *1(B) *(NG) = New game + / (B) = Base funds
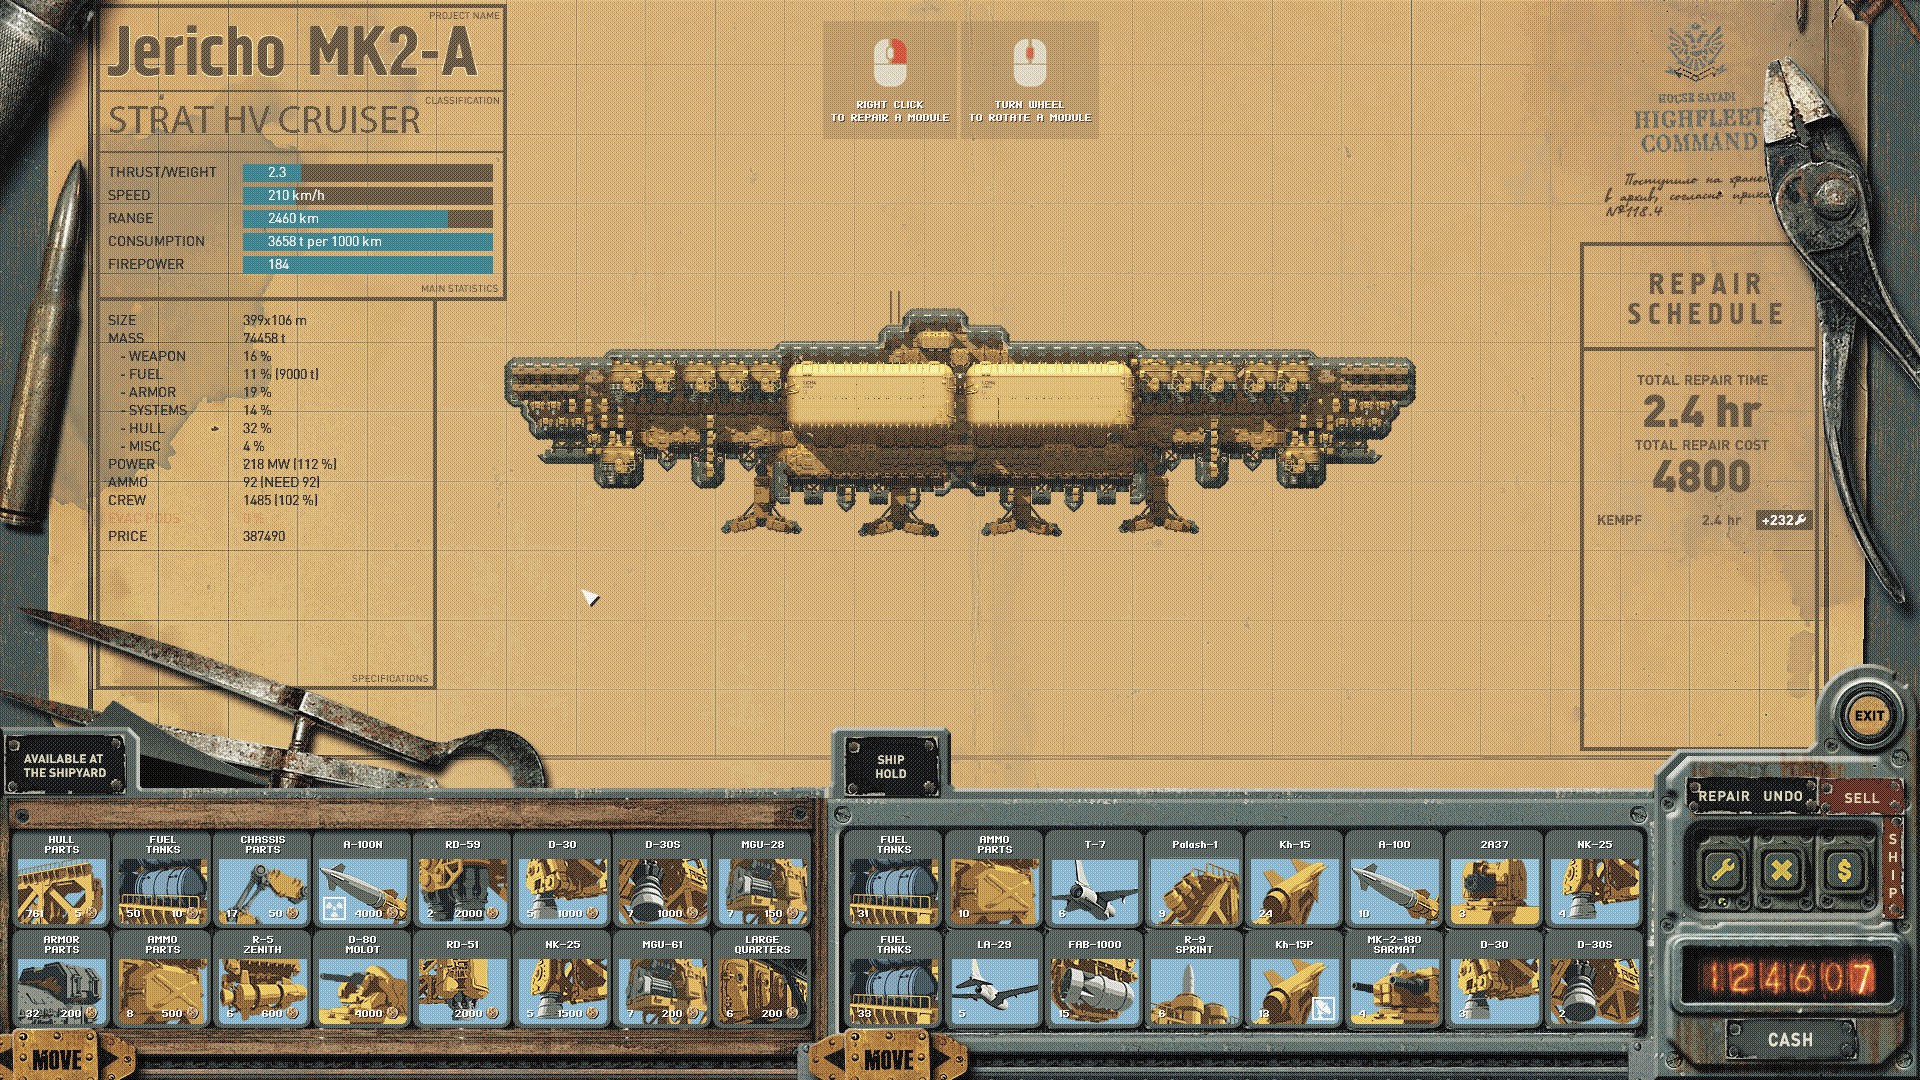
(If by chance you are feeling particularly spicy swap out to the Jericho MK2 for your flagship.)
Ships:
This section has to parts for each ship included for the starting fleet. The first of each will be background story that I came up with to add some flavor (and I kind of enjoyed it), and the second will go into more detail on the usefulness of each during the campaign.
Jericho:
-Story--Gameplay-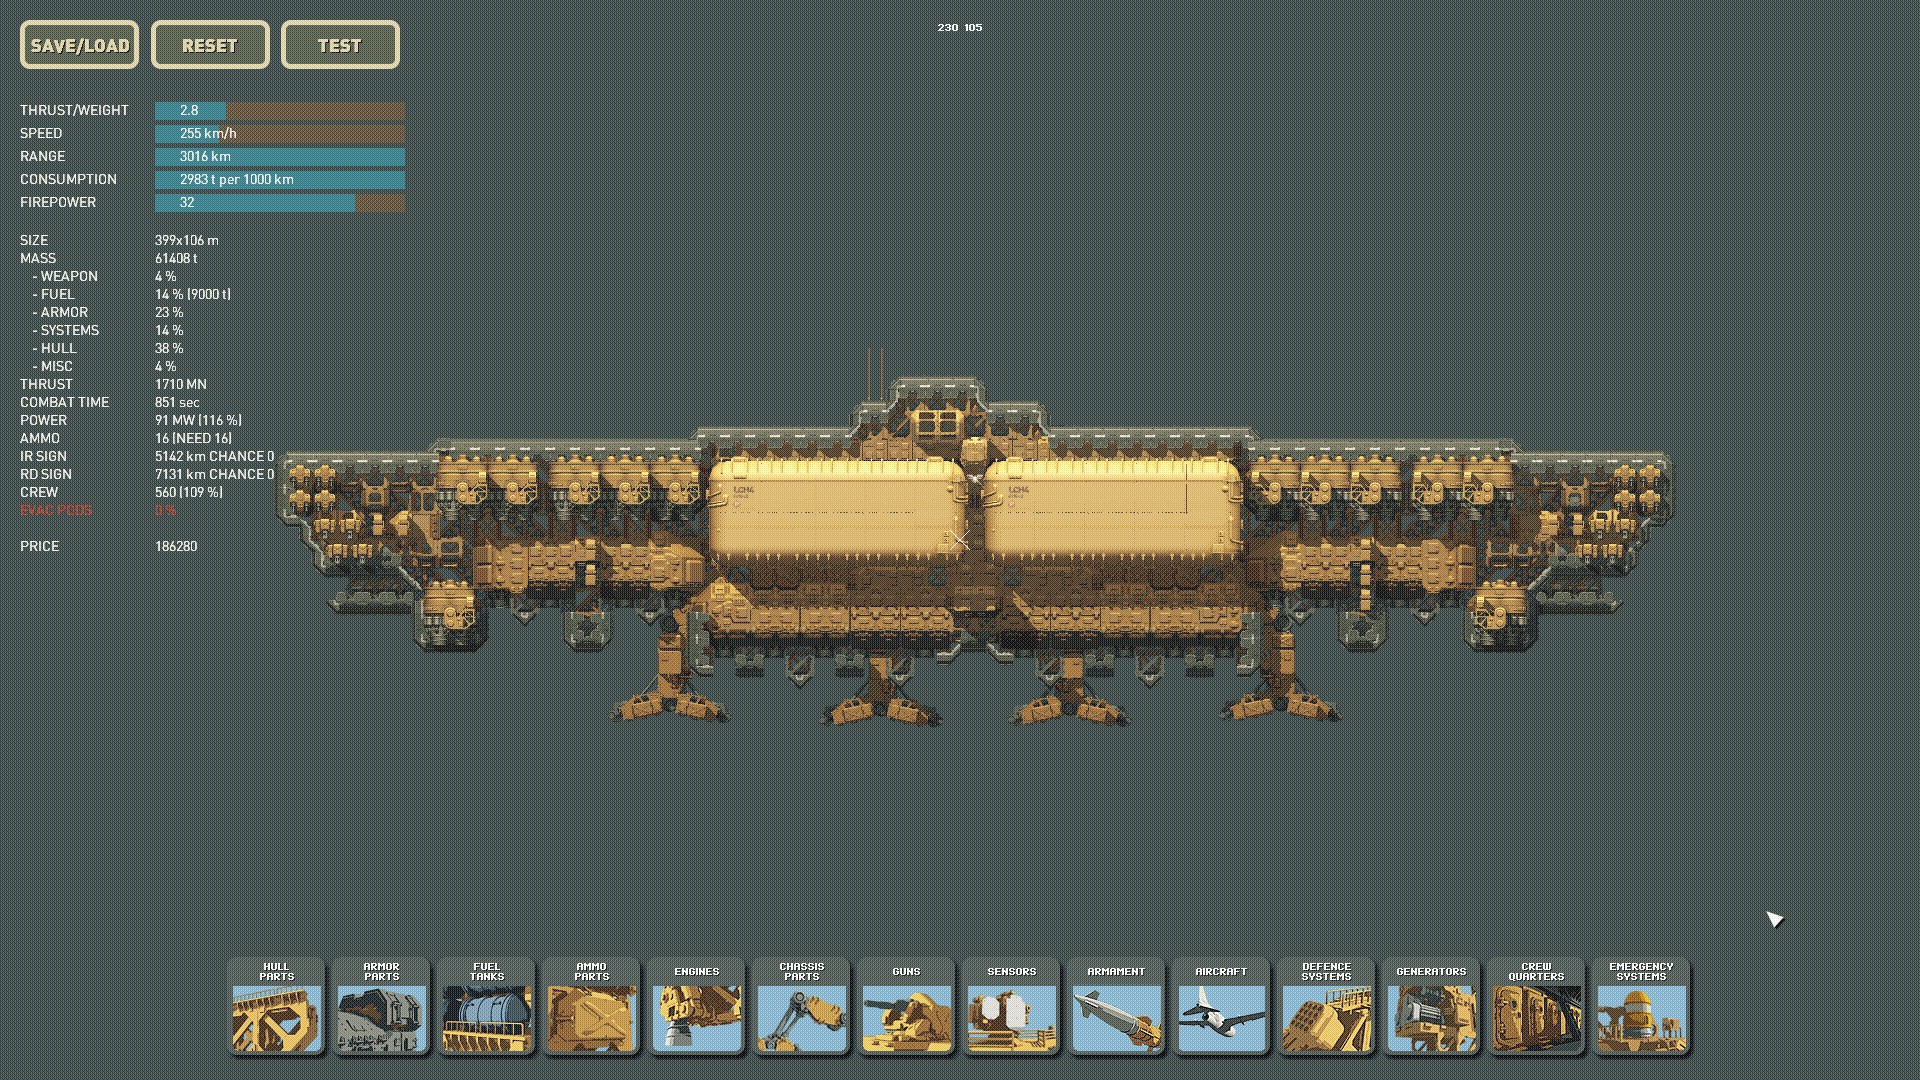
The Jericho was intended to be the main battleship of the Romani fleet and once completed the ship would have fielded a 6 MK-6-180 Squall turrets, a full compliment of support weapons, a full electronic warfare suite, and several tactical missiles. After the attack on the capital the fleet engineers knew this would be impossible as many of the systems had yet to be delivered so a massive refit was started in order to get the ship into the fight. The ship yard had one thing in abundance, metal, this assured that even though the Jericho would not have the full weapons capability that was intended it would at least be thoroughly armored.
Many other ships were in the process of construction but none were as close to completion, so the engineering teams started re-purposing smaller caliber cannons for use on the Jericho. While they were not the intended systems the shier number that could potentially be affixed in addition to the turrets that had been delivered would make it a formidable weapons platform.
To aid in getting the ship battle ready construction crews focused primarily on making it structurally sound, leaving several gaps internally that would otherwise have been filled by rooms for various support systems. While many of the systems would not be installed due to the hasty launch, the ship would be able to fit all intended systems should the fleet have time to spare for repairs during field operations.
In addition to the main cannons the design of the Jericho included lateral facing silos that carried A-100 tactical missiles to aid in short range engagements, one front facing to even the odds in a fight and another reversed to deter any would be pursuers should the ship need to withdraw. There were plans to include additional dorsal launch bays for long range strikes but the external mount points were covered with armor as the focus was getting the ship in the fight as soon as possible and the launch bays had not even begun to be constructed.
Pros: Plenty of room for upgrades depending on your play-style, decent range and speed, great mid/late game, 360 fire arc
Cons: Limited base weapons, low chance to sudden strike (but not impossible), limited use early game for high cost
How to use: This ship will be your main brawler for when the strike ships just won't cut it. I have personally taken the Jericho through several hard campaigns successfully and these versions are updated to fit my experiences. Throughout the campaign you will want to salvage as many weapons from wrecks as you can to attach or sell for ones you want. (To see the final potential reference Jericho MK2 (At Khiva)) You save with this design by not having to constantly update the entire ship when you want to add something but early on it will not be super useful in a tough fight. The ends of the ships are designed in a way to provide full coverage for any guns placed there and the top 6x2 section can be substituted for large weapons without adjusting the height of the surrounding blocks. Keep in mind I made it to be effective for any combination of weapons you are comfortable with and is intended to be upgraded significantly with both offensive and defensive systems as your campaign resources allow.
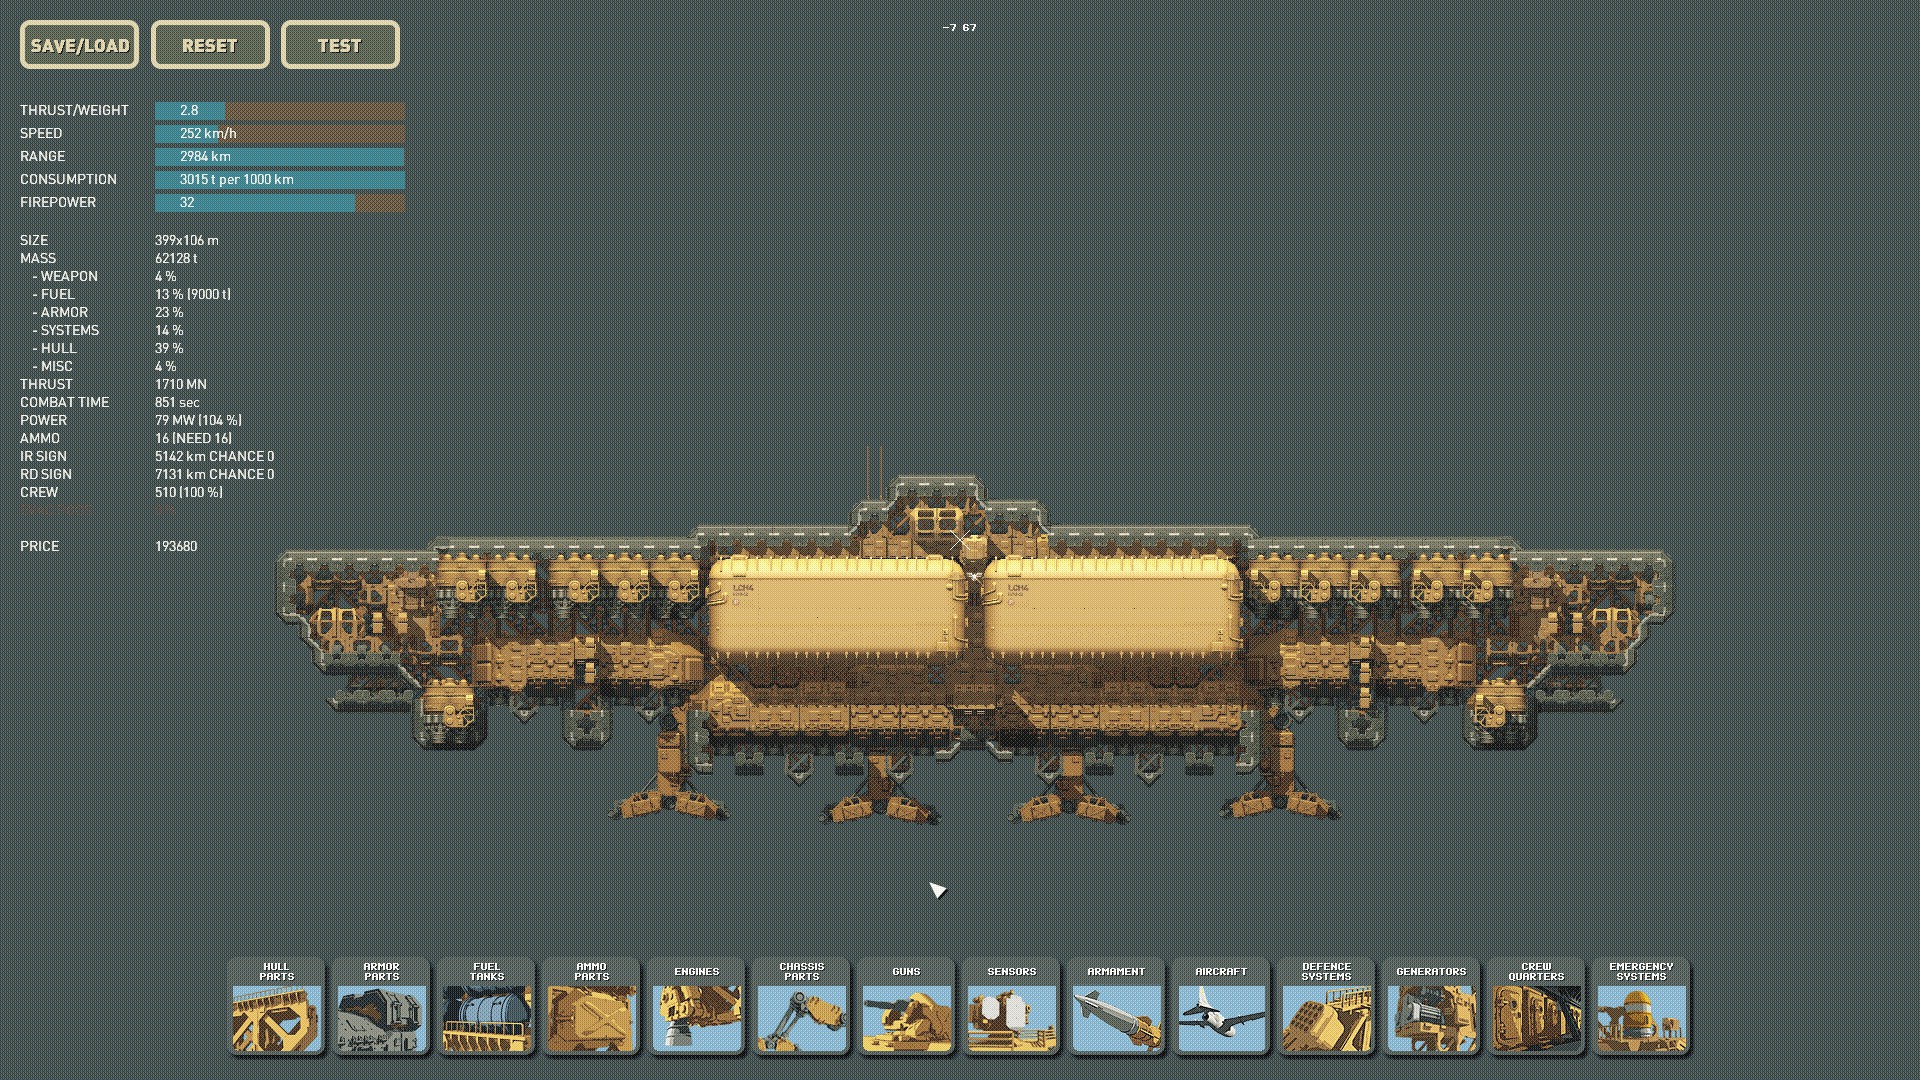
Jericho
Jericho MK2
Jericho MK2 (At Khiva)
Shortbow:
-Story- -Gameplay-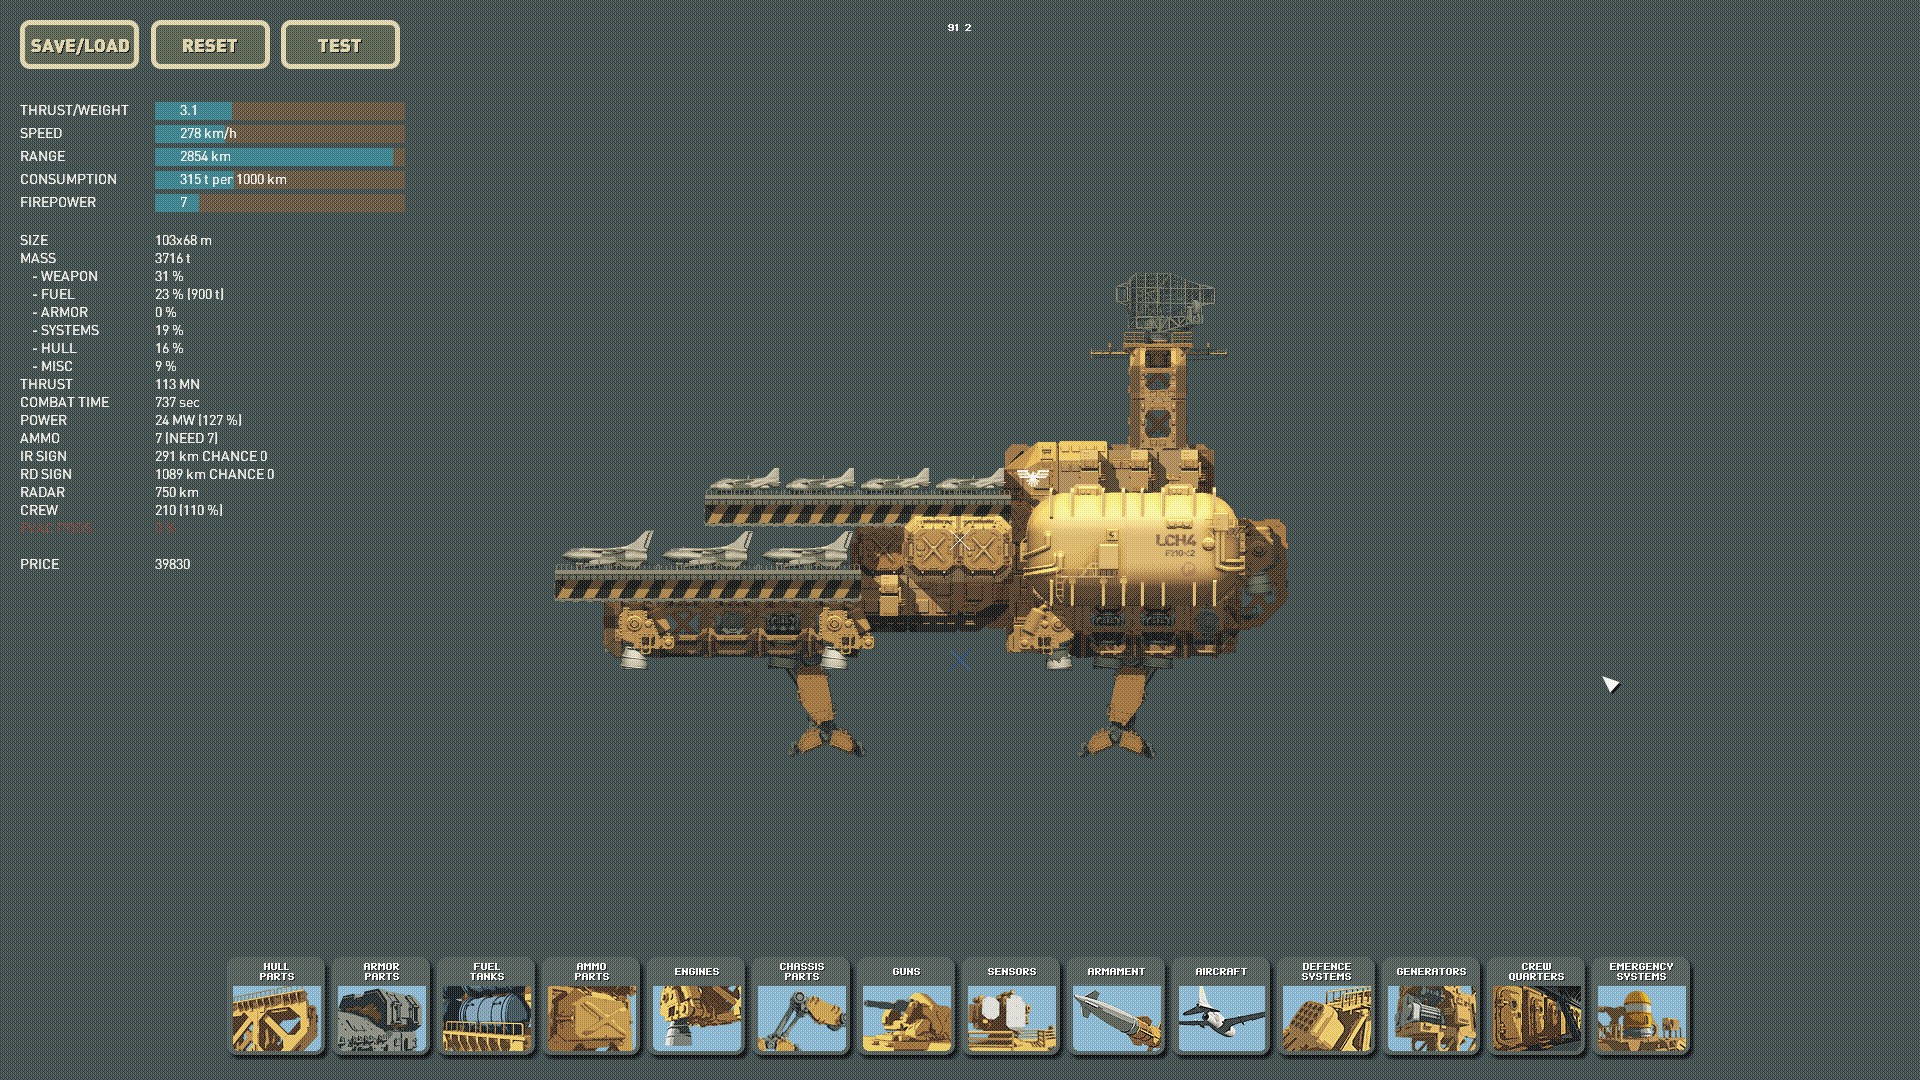
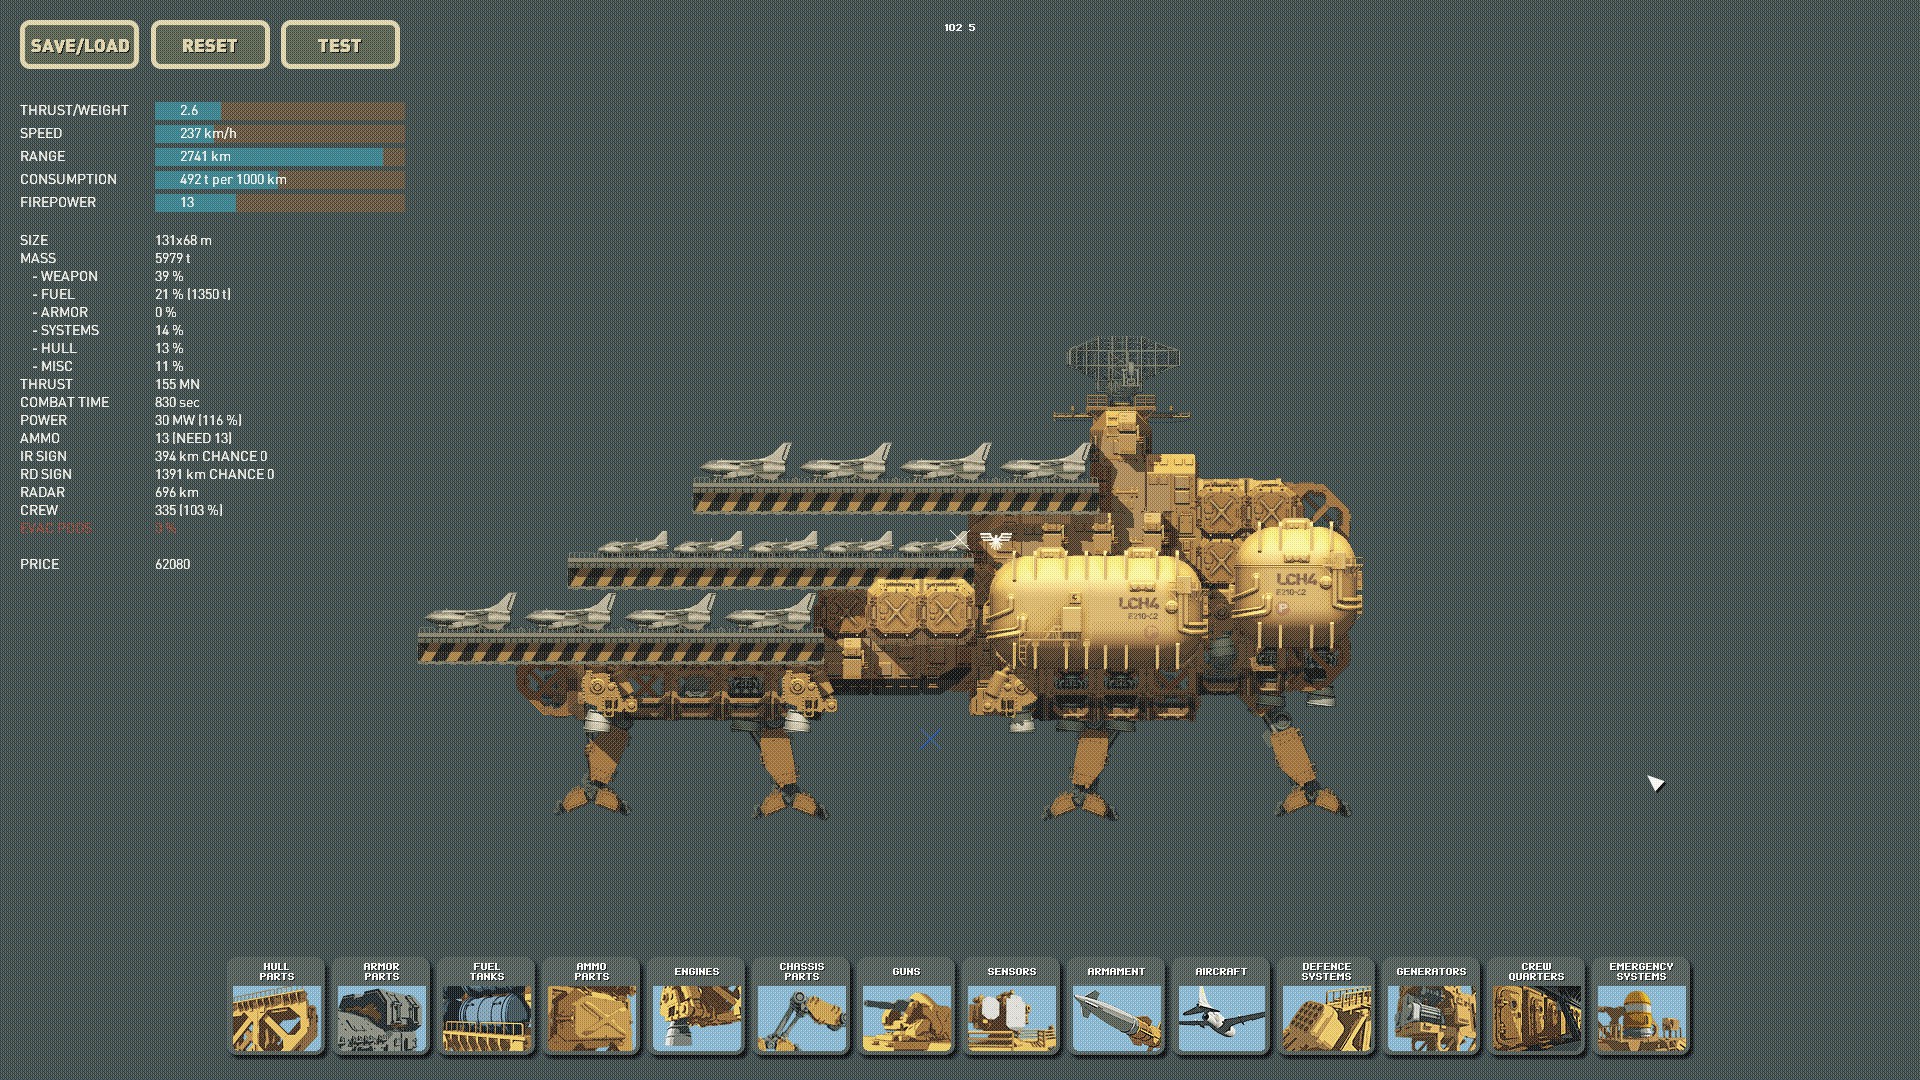
Much like its name suggests the Shortbow was created as a sister ship to the Longbow. There was a need for a lighter carrier platform with sufficient range. The Shortbow fit this need by foregoing much of the armor and weapons other ships of the class included and instead focused on sufficient space for strike-craft and a fast repositioning potential through high fuel capacity and additional engines.
Many crews that saw extended tours on the Shortbow started to enhance the ship profile to allow longer and even an additional runway. This elongation of the initial design also required more landing gear and engines to maintain its capabilities but was a very effective force multiplier should there be time to make the adjustments.
Pros:Somewhat cheap, good base to add upgrades, good range
Cons:Cant fight, no weapon systems, requires planes/special ammo to be effective
How to use: This will be your primary carrier and you will want to upgrade it as you go to provide more space for active planes. The main focus will be either to strike out with an air wing or use it as a defensive shield. Using the planes as a shield is very useful as it will save you quite a bit in repairs if you intercept enemy missiles/planes before they reach your fleet. The 2 decks can be extended and I eventually attach a third deck just above the control room. The back of the ship can also be extended to add more components and fuel as you need them. (See Shortbow-F or Shortbow (At Khiva))
Shortbow
Shortbow-F
Shortbow (At Khiva)
Lightning MK2-AB: (Vanilla Ship Redesign)
-Story--Gameplay-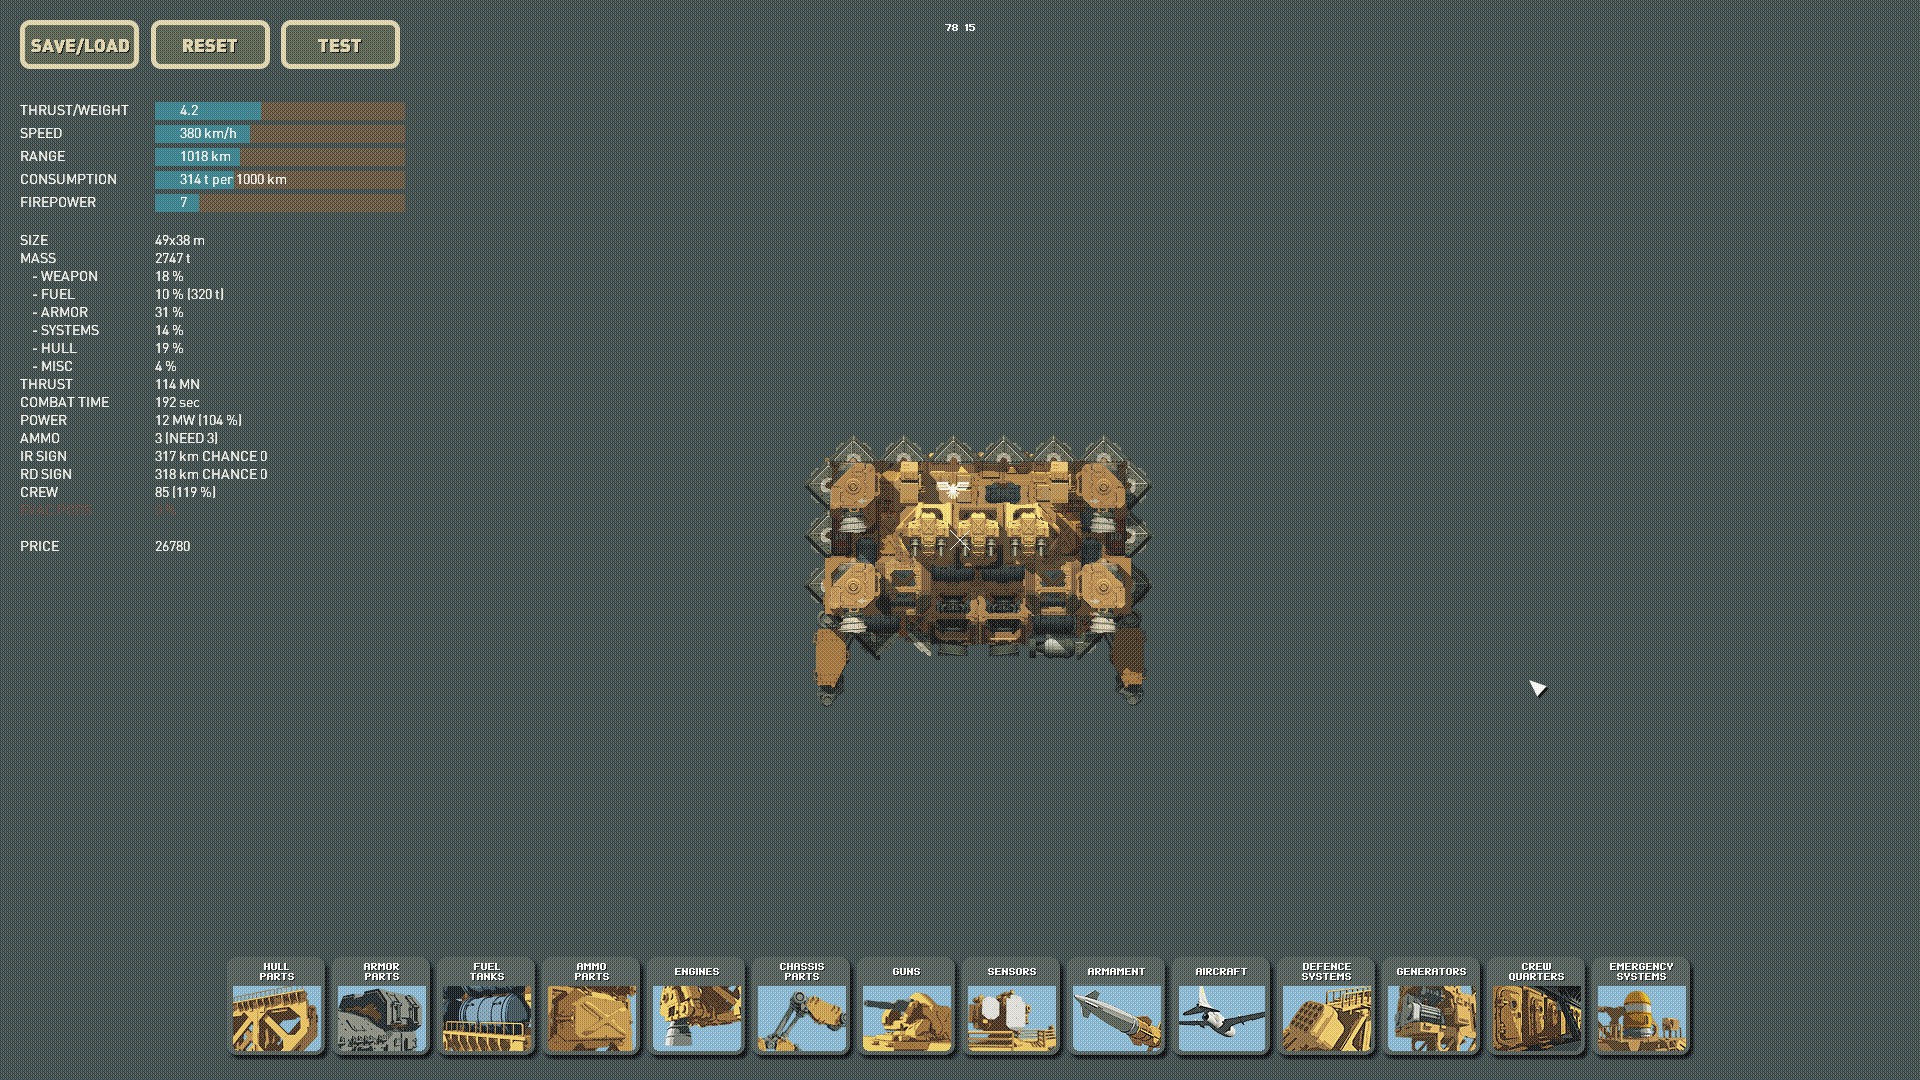
This variation of the Lightning came about through extensive battle experience from the ships crew. The original design excelled in quick attacks but quite often found itself in situations where the battle became much more than could be handled. This was remedied by one crew by restructuring the internal systems allowing for a more compact design that allowed for another main gun to be added along with a 1000kg FAB-1000 bomb. Additionally light armor was added to provide some protection from the flak that managed to hit its mark and 2 Palash-1 defense systems to help protect the unarmored portions of the vessels underbelly and attached bomb.
Pros:reliable, fast/maneuverable,
Cons:medium/low range, armor does not block all damage
How to use: This will be the spearhead of your fleet and will allow you get a sudden strike on most garrisons so long as there are no radar carrying ships present. Its high maneuverability is key in combat, keep your distance and the few shots that you don't dodge will normally just damage the armor. When getting a sudden strike the bottom mounted Palash's will protect you from some cannon fire allowing you to quickly descend and unleash a salvo at point blank range.
Typically you want to position yourself where there is no armor and keep firing until you get through the unprotected components. I normally don't use the bomb and just keep it attached as it had been pointed out by some other players that it seems to provide extra time by keeping ships grounded longer. I also use the default HE ammo to save money for most of the campaign but as the fights get harder Proximity shells become a very useful force multiplier for this ship.
Lightning MK2-AB
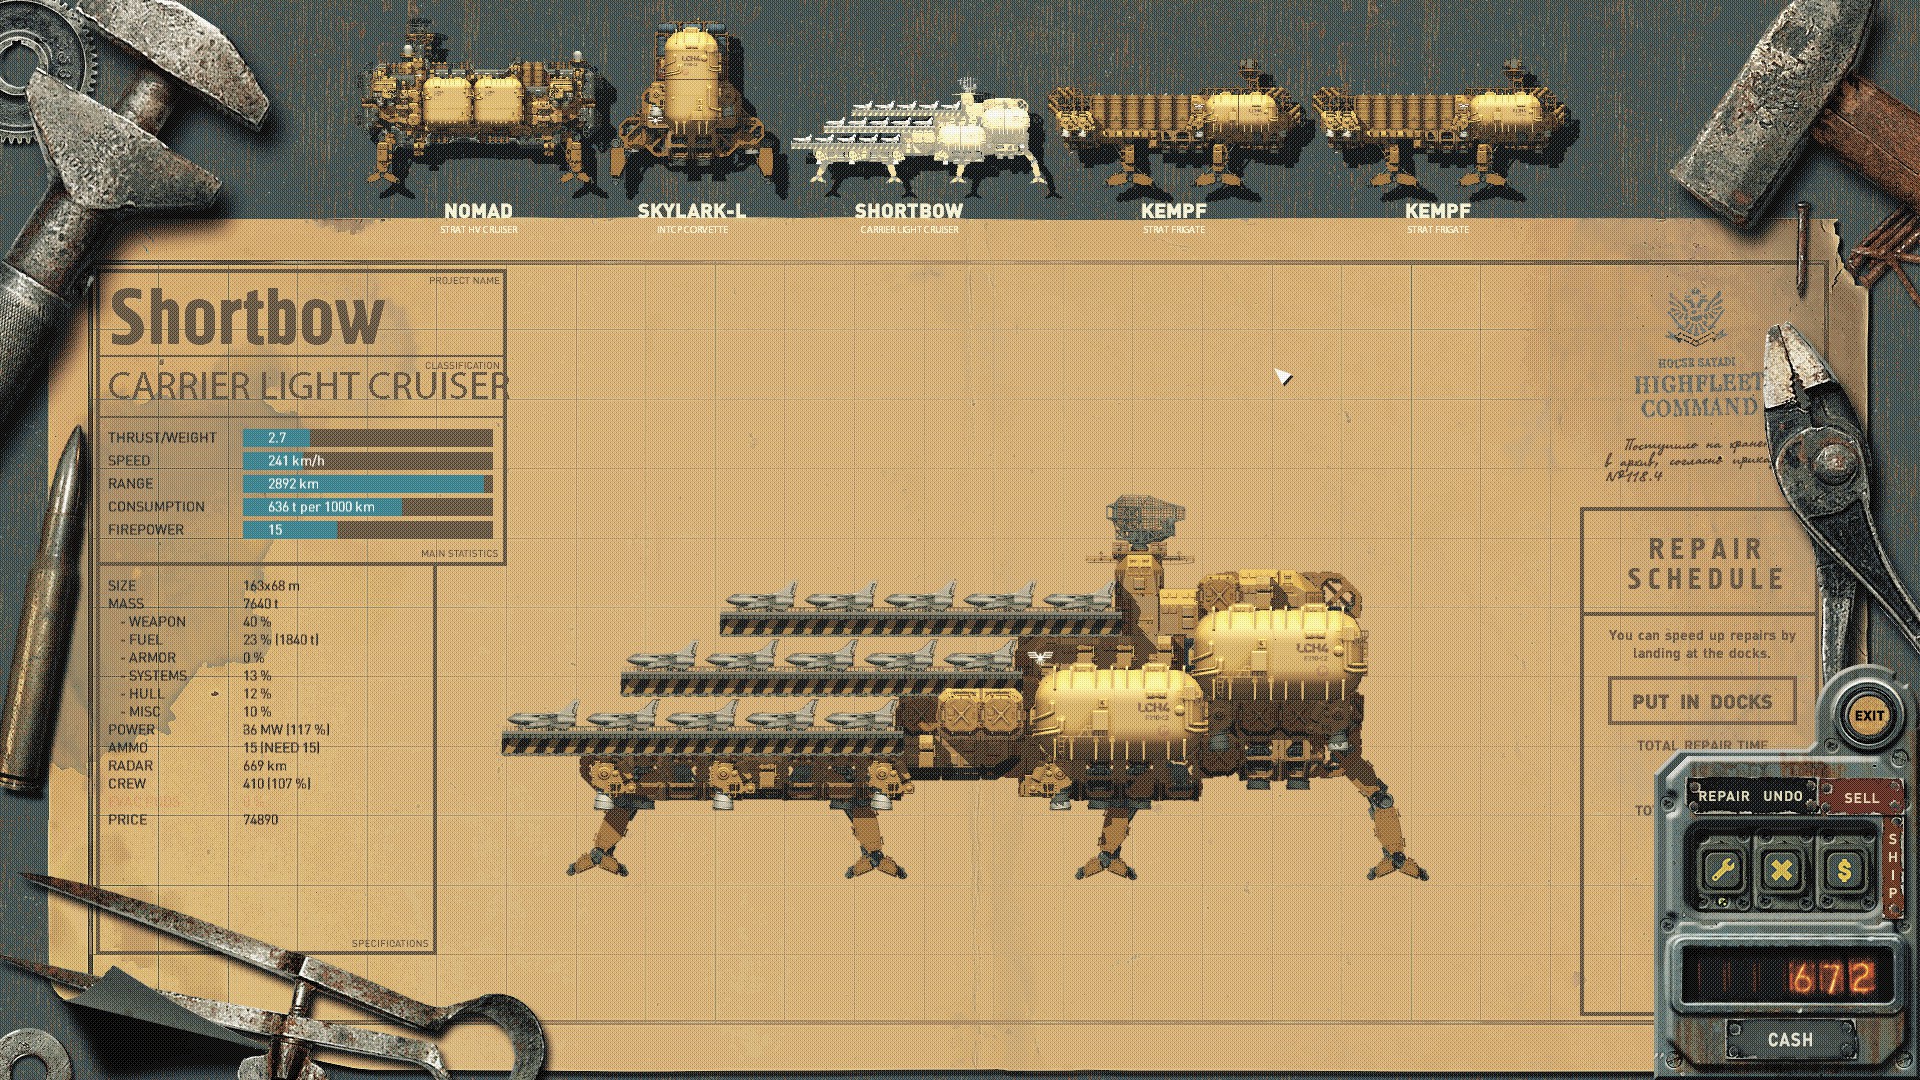
Kempf:
-Story-
The role of the Kempf was twofold in a fleet as it served as a strategic launch platform as well as strategic missile defense. It boasts 6 launch bays capable of housing any type of strategic missile and generally functioned with a compliment of 8 R-9 Sprint launchers.
The main benefit to the Kempf was the ability to quickly position and fire off multiple missiles before the enemy fleet could react and send a counter strike. Normally such an asset would be heavily armored and bear some conventional weaponry but this model proved to be much more cost effective and saw frequent use during the conflict.
-Gameplay-
Pros: can rapidly deploy and defend against strategic missiles and aircraft
Cons: initially has no strategic missiles,
How to use: The reason this comes empty is to save some money and you will have several opportunities to get missiles for free or purchase. You will want to decide what missiles you prefer but you can quickly load and position to strike with this ship. It doubles as a defensive ship against any planes or strategic missiles that make it to the main fleet.
Kempf
Skylark-L: (Vanilla Ship Redesign)
-Story-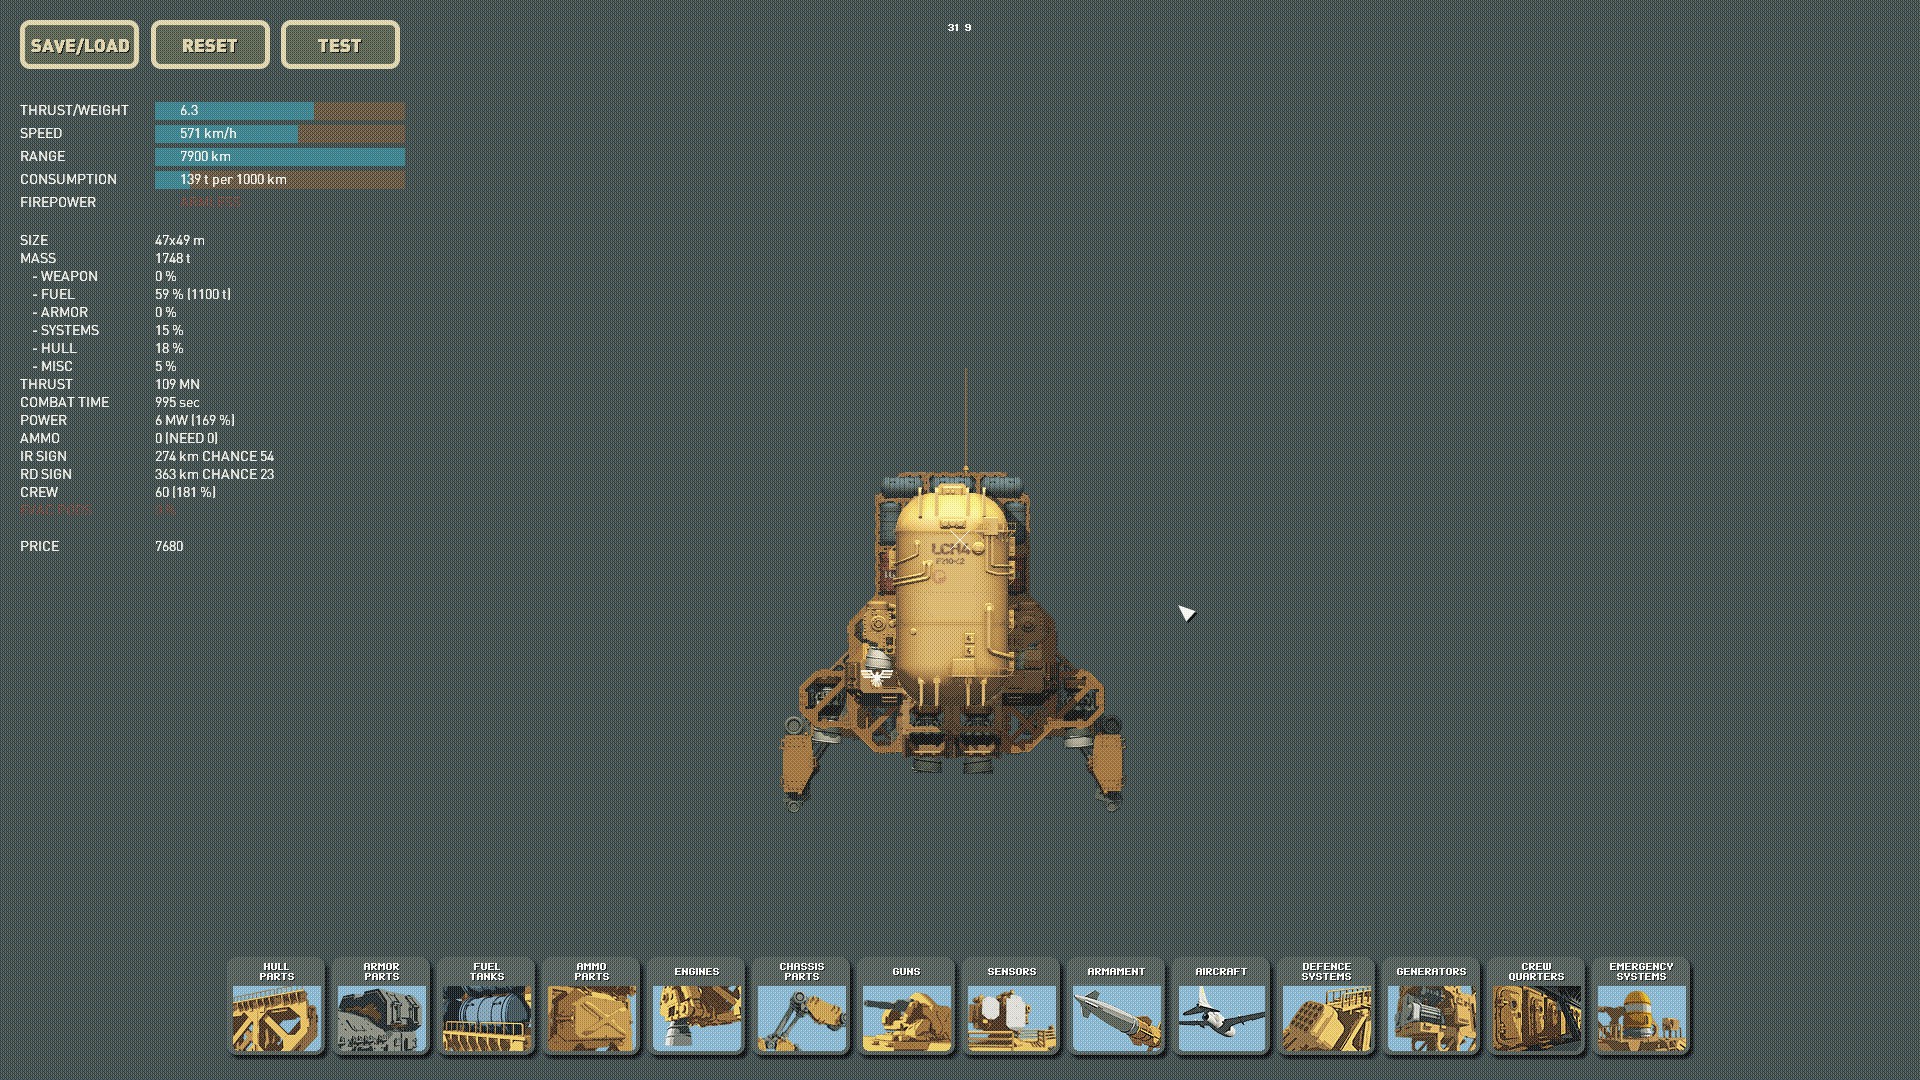
The Skylark was a tried and true refuling platform but nessessity called for more to be delivered so this version skipped the electronic warfare systems. This aided greatly in making production faster and opted for a few additional fuel tanks to further aid in resupply missions without reducing the original speed.
-Gameplay-
Pros:Cheap, good range, fast,
Cons:only real use is fuel capacity
How to use: These will be used as range extenders for your quick strike groups. The cities from my experience are not always reachable with just a rapid strike ship and grouping up with one allows for other avenues of attack to open up. They are incredibly efficient at refueling fleets so its good to park your fleet somewhere near by out of the city and just ferry fuel over to limit time that you may get spotted.
Skylark-L
Skylark-H: (Vanilla Ship Redesign)
-Story-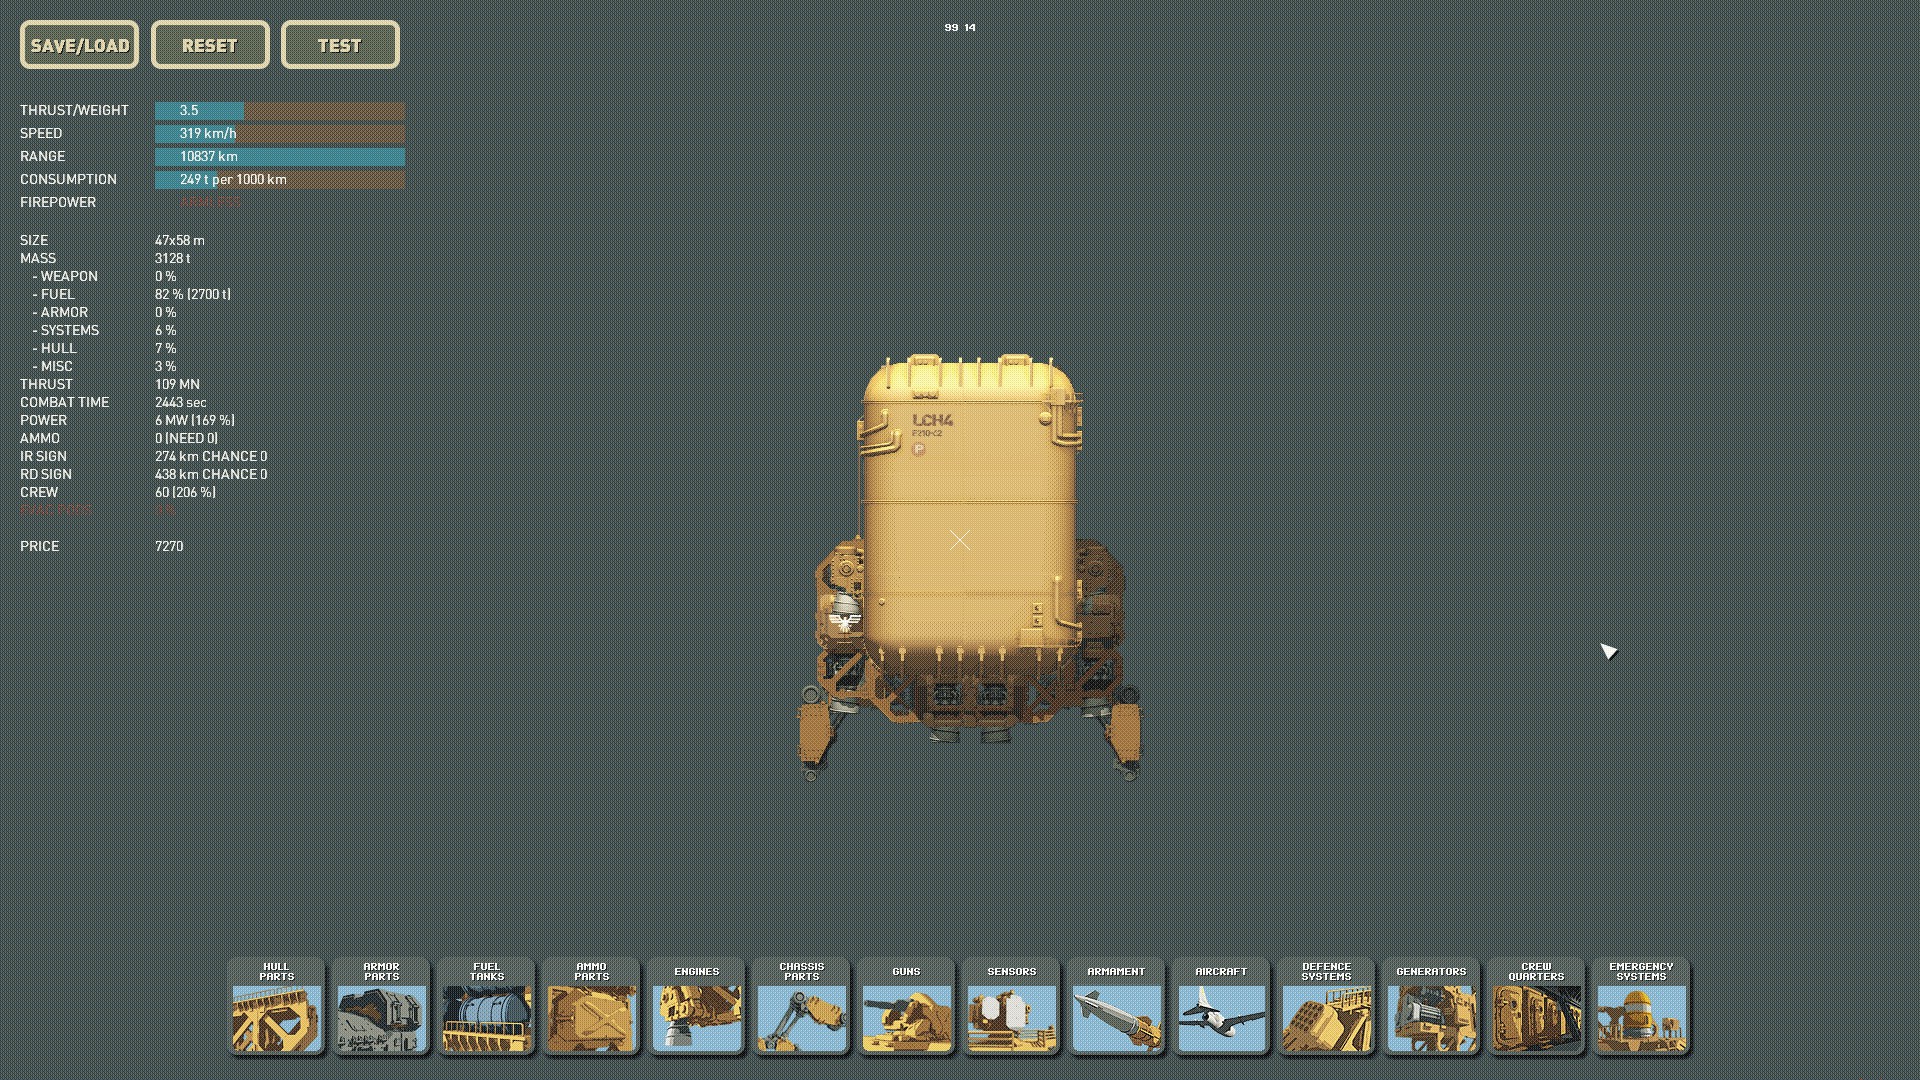
Another of the many variations that saw widespread use during the conflict was the Skylark-H. The type H boasted an increased fuel capacity and slightly redesigned hull structure. While not as fast as the other Skylark models it was unsurpassed in terms of refueling operations and given it was typically tasked with slower moving fleets this drawback was often overlooked.
-Gameplay-
Pros: Cheap, great range,
Cons: only real use is fuel capacity
How to use: This variation will be most useful for you when you intend to keep your fleet together most of the time. Its a little slower than the L version but holds much more fuel. Both Skylark redesigns have enough fuel to add additional components should you want to use them as additional sensor platforms as you progress through the campaign.
Skylark-H:Skylark-H:
Chernov MK2:
-Story--Gameplay-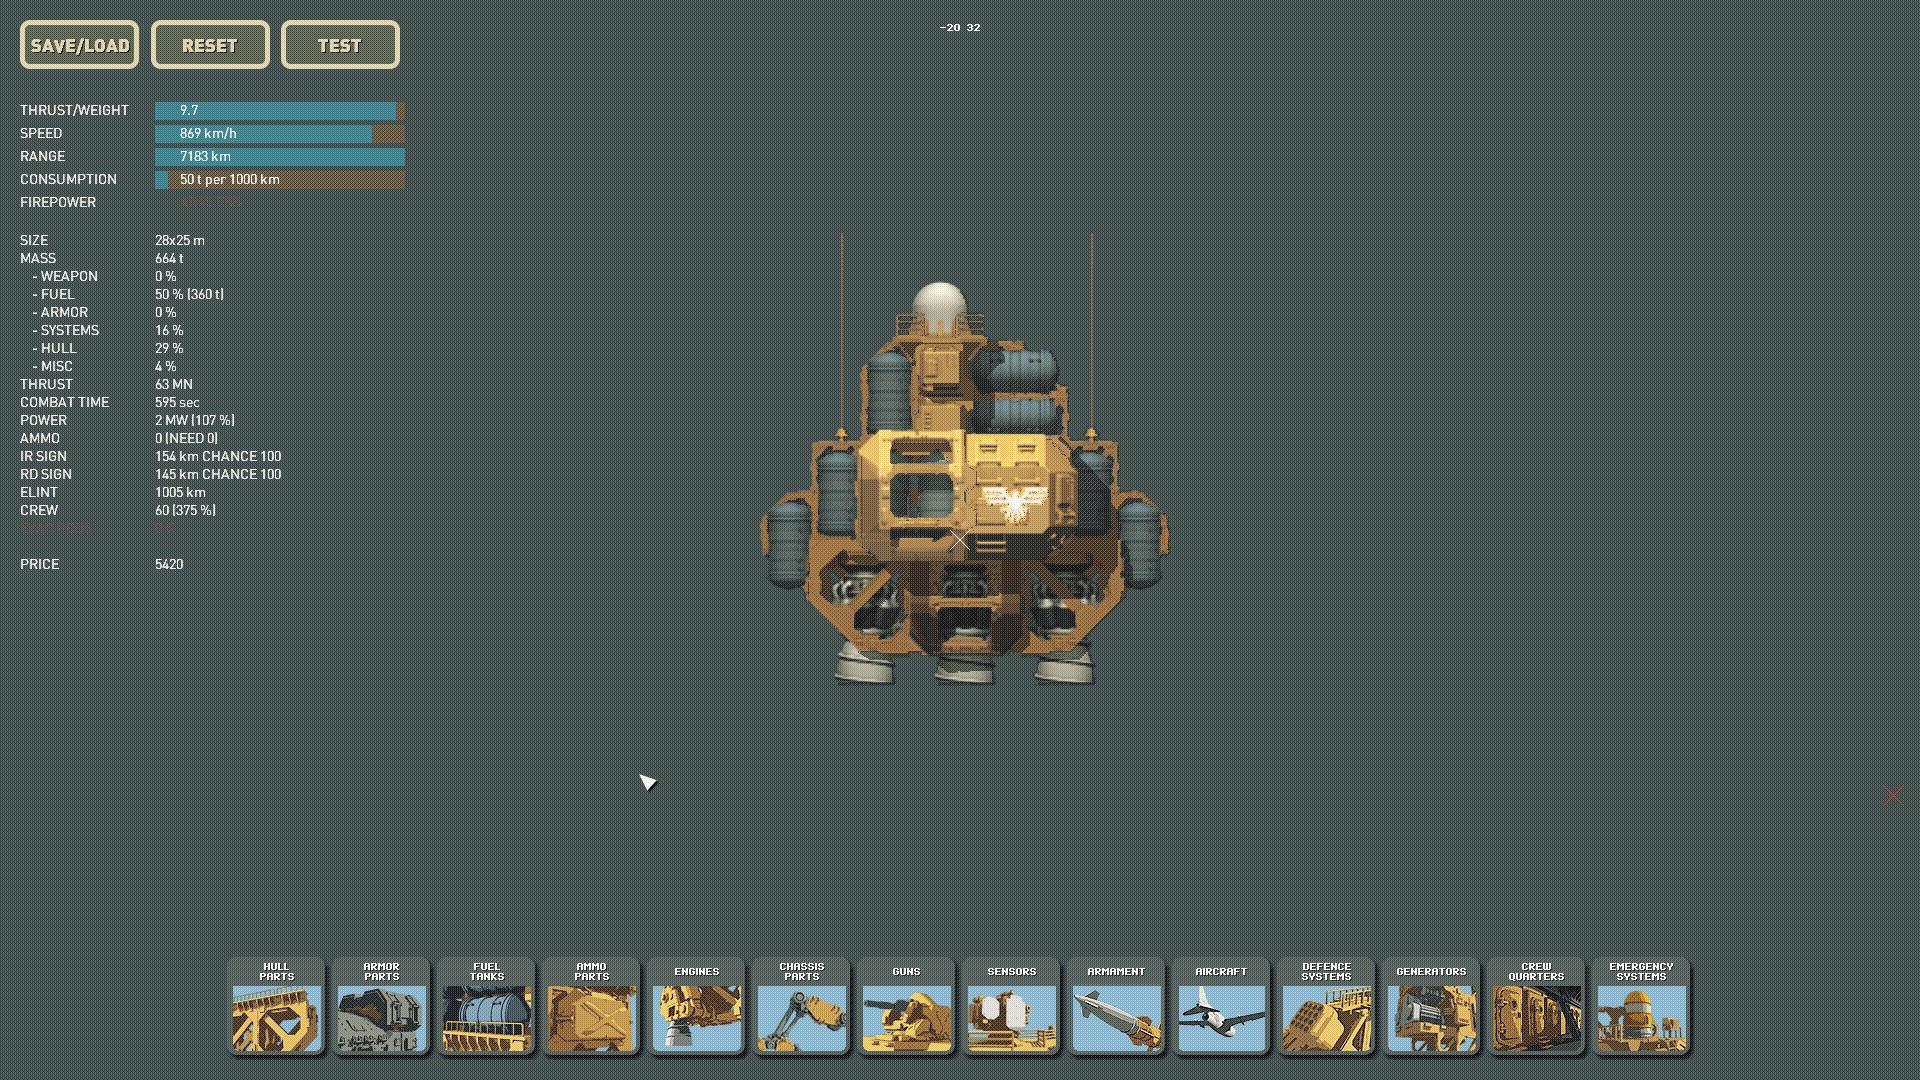
Designed as a scout ship that could be quickly built and deployed. It boasts incredible travel speed and range to allow for accurate visual confirmation of fleet movements and includes a MP-21 sensor system to assist in tracking enemy fleets should they be using any electronic warfare systems.
While being known as the fastest ship in the Romani fleet it also boasted the worst safety record. The ship operated like a rocket and had no landing gear so after launch refueling had to be performed by docking mid flight. Setting down, while incredibly difficult, was still possible by resting on the main flight engines. Expert pilots could perform this maneuver with sufficient practice but just as many crews were known to be lost to landing accidents as enemy fire.
Pros: very fast, huge range
Cons: can be destroyed by ........ anything
How to use: This ship is used for quick recon, finding hidden cities, and ferrying parts up to your fleet as you need them. Initially I keep them with the rapid strike groups to provide some ELINT coverage but eventually they split off and move on their own to position in areas where they can provide the best intel depending on how my fleet is progressing. This ship is useful for locating hidden cities/purchasing parts because its so fast and fuel efficient. Parts don't have a weight when not installed as far as I can tell so you can load up as much as you want and bring it to anywhere the fleet is repairing in the blink of an eye.
Chernov MK2
Map Progression:
1. City's
Normal city's will have their own unique purpose from fuel, repairs, weapon dealers, intel. Use each for their respective purposes but I would suggest only staying in the fuel and repair stations for limited amount of time early on to keep them safe until you can defend your fleet if/when strike groups get word of your arrival.
Save cities should not be landed in unless you are ready to make your save for the respective slot. These are only manual load saves being created and will not override your auto-save that happens naturally. I try to save before making a big push or if I'm getting ready to recruit a group of Tarkhans. Of note you can fight the garrison and complete rescue on the city just don't officially "land" (enter the city) until you are ready to save.
Hidden city's are another group that you don't want to "land" in right away. They are very useful and you get a reward of some fleet morale and weapons for each one you find. They also act as a safe harbor from normal enemy fleet movements. Be warned though if you send out missiles/planes from one or recall ships directly to one you may be tracked and engaged. I try to find them early and leave them until I need the morale as you can run through it quickly if things start to go bad.
2. Fighting
Your biggest advantage is to control the flow of information which will help set up fights when you are ready to have them and possibly waste some enemy resources at the same time. You can do this by limiting your use of systems like radar until you are already identified and having several scouts with ELINT systems to track the tougher groups as they navigate from city to city. You can even go the opposite route and create some fast ships with radar and jammers to drag the enemy fleets around on a while goose chase.
Initiating a surprise strike on cities will be your best friend. Sending in a quick ship will not only start combat with the enemy grounded but prevent enemy fleets from getting an alert of your location which will extend the amount of time you have to prepare for the tougher fights.
Combined or Tactical strikes can be very useful if you are heading into a fight that you don't have enough combat ships to win outright. Softening up the enemy garrison or fleet with some aircraft or tactical missiles can make a huge difference. Aircraft can also be deployed to escort ships and intercept enemy tactical missiles making your life a lot easier if you happen to be in range of several fleets at once. Its very useful to position your attack to come in opposite of the location of your main fleet or the direction you are progressing. Doing this for attacks/withdrawals will help direct any retaliation the enemy sends out in the wrong direction saving you from potential damage or wasting more fuel and Sprints defending and then relocating.
Lastly my personal favorite a full on brawl, heavy armor and guns dukeing it out. Empty shells and shrapnel raining down from the sky in a blaze of glory as chunks of armor are ripped off from high explosive shells colliding with the ships hull. This outcome is somewhat of an expected event as at some point your luck will run out and you will come toe to toe with an enemy fleet that will have no qualms with diving right at you with zealous fervor so you might as well enjoy the challenge.
Bonus: RETREAT!!! Don't be afraid to withdraw from a fight, saving a ship from a fight that it can't win or pulling out a damaged ship before you take significant damage is a lot cheaper than buying and refitting a new one to fit your needs.
3. Events
Many times when you land in cities you will trigger events that have consequences but can provide great boons for your fleet. If you are so inclined there are guides that walk through each one so I'm going to skip the details on this but I like to run with a specific theme to spice things up. Keep in mind though that each event can largely impact your current play-through in a positive or negative way and sometimes simultaneously.
Recruiting Tarkhans speed run style! There are already high quality guides covering this so I'm just going to go over a few minor things as a supplement. Search crew quarters in wrecks as often as you can, the gifts are very useful and you can even complete a recruitment using only gifts if you so choose for certain characters. Pick the world views you want to level up and focus on them in each conversation, using gifts in tandem will allow you to add points to a stat that the specific Tarkhan may not agree with and continue/max out the earned stars.
4. Endgame
There are two paths you may take, either you are a completionist like me and liberate every city, or you rush to Khiva only stopping to get Tarkhans and refuel.
The completionist route is the one I would suggest as it sets you up the best for the final fight. Should you get to that point you will have decent and well upgraded fleet. The major drawback of this path is that you will have to win a lot of fights so preparation is key. With that in mind be aware that you will inevitably take losses so be sure to have some money saved up at all time or at least some items you can sell. I get a lot of money by selling the nuclear weapons you receive throughout the campaign as I don't use them. You can but be warned it will trigger Nuclear War, which means enemy fleets will start launching nukes instead of regular tactical missiles and take a lot more to stop from damaging your fleet. This will also set you up well for any surprises that may pop up.
For those going for the rush strategy I would suggest at least grabbing up as many of the Tarkhans as you can. They offer a lot of help and you will need all the advantages you can get since you are limiting the potential for loot as you bypass most of the conflict. The final conflict will also be a little more difficult but not impossible.
Final Thoughts:
Should you take this advice in stride and practice that victory against the veteran fleets of your enemy's will surely be within your grasp. Not everything is going to work out as you think/hope so be prepared for setbacks. You will lose ships, you will lose fights, you will have to sell the loot you find just to make it to the next city. Don't be afraid of being imperfect just have fun and keep pushing forward and just like I did you'll get there.
Supplemental:
Other Ships:Alexandra (flagship Carrier)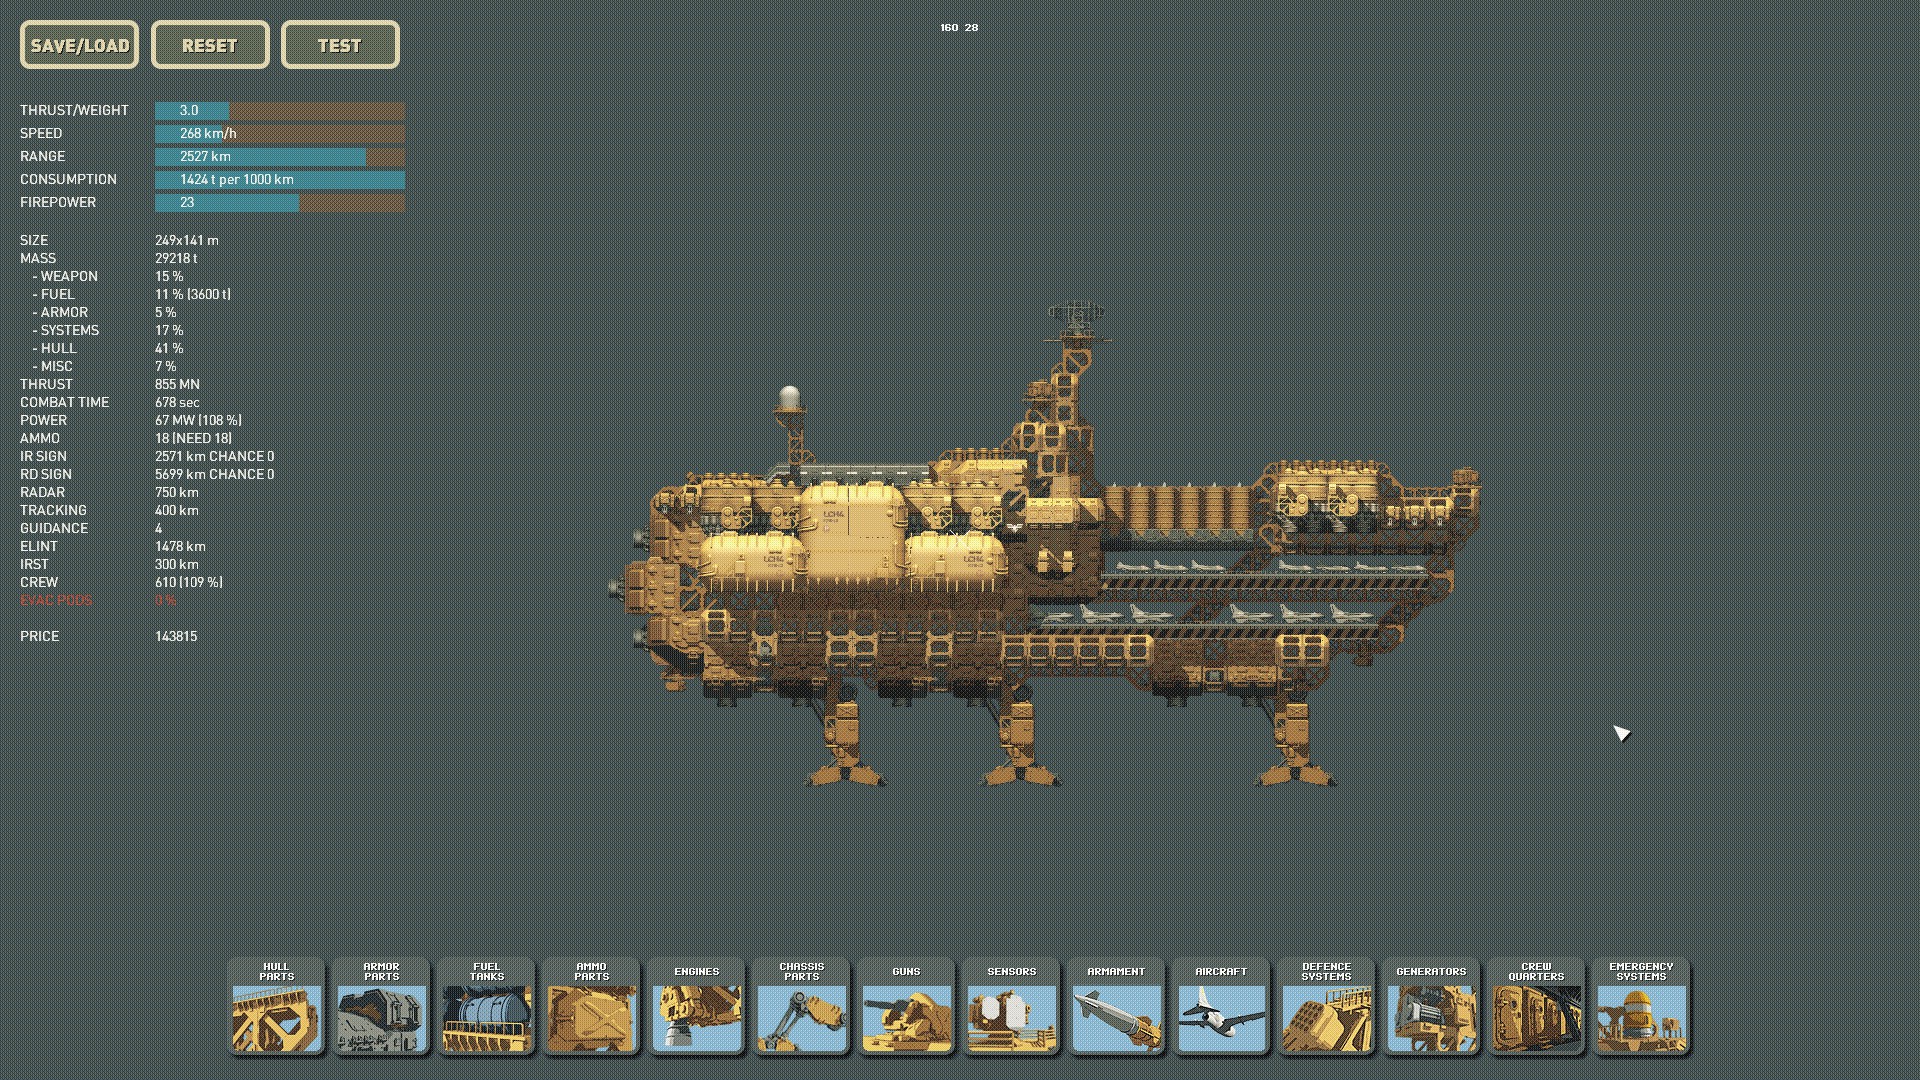 Galatea (flagship Carrier)
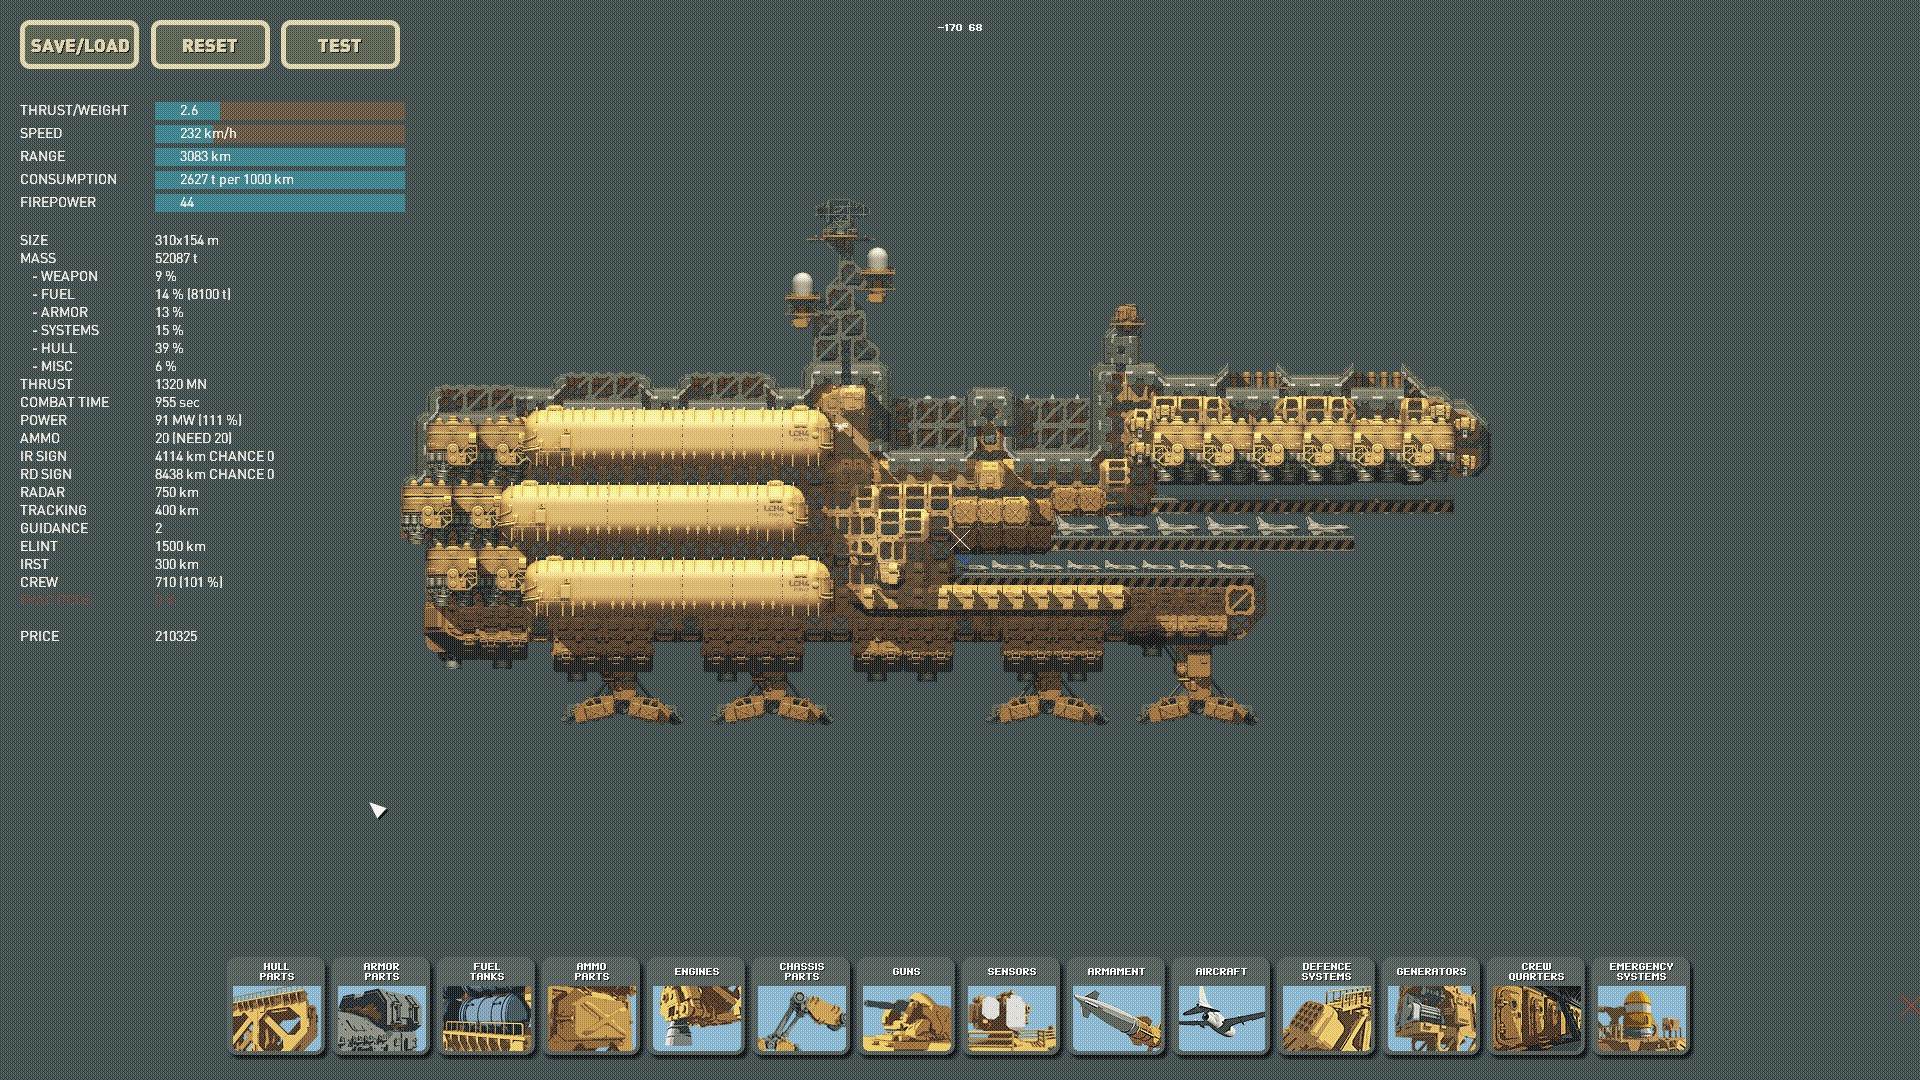 Striker (ship To Ship Missile Platform)
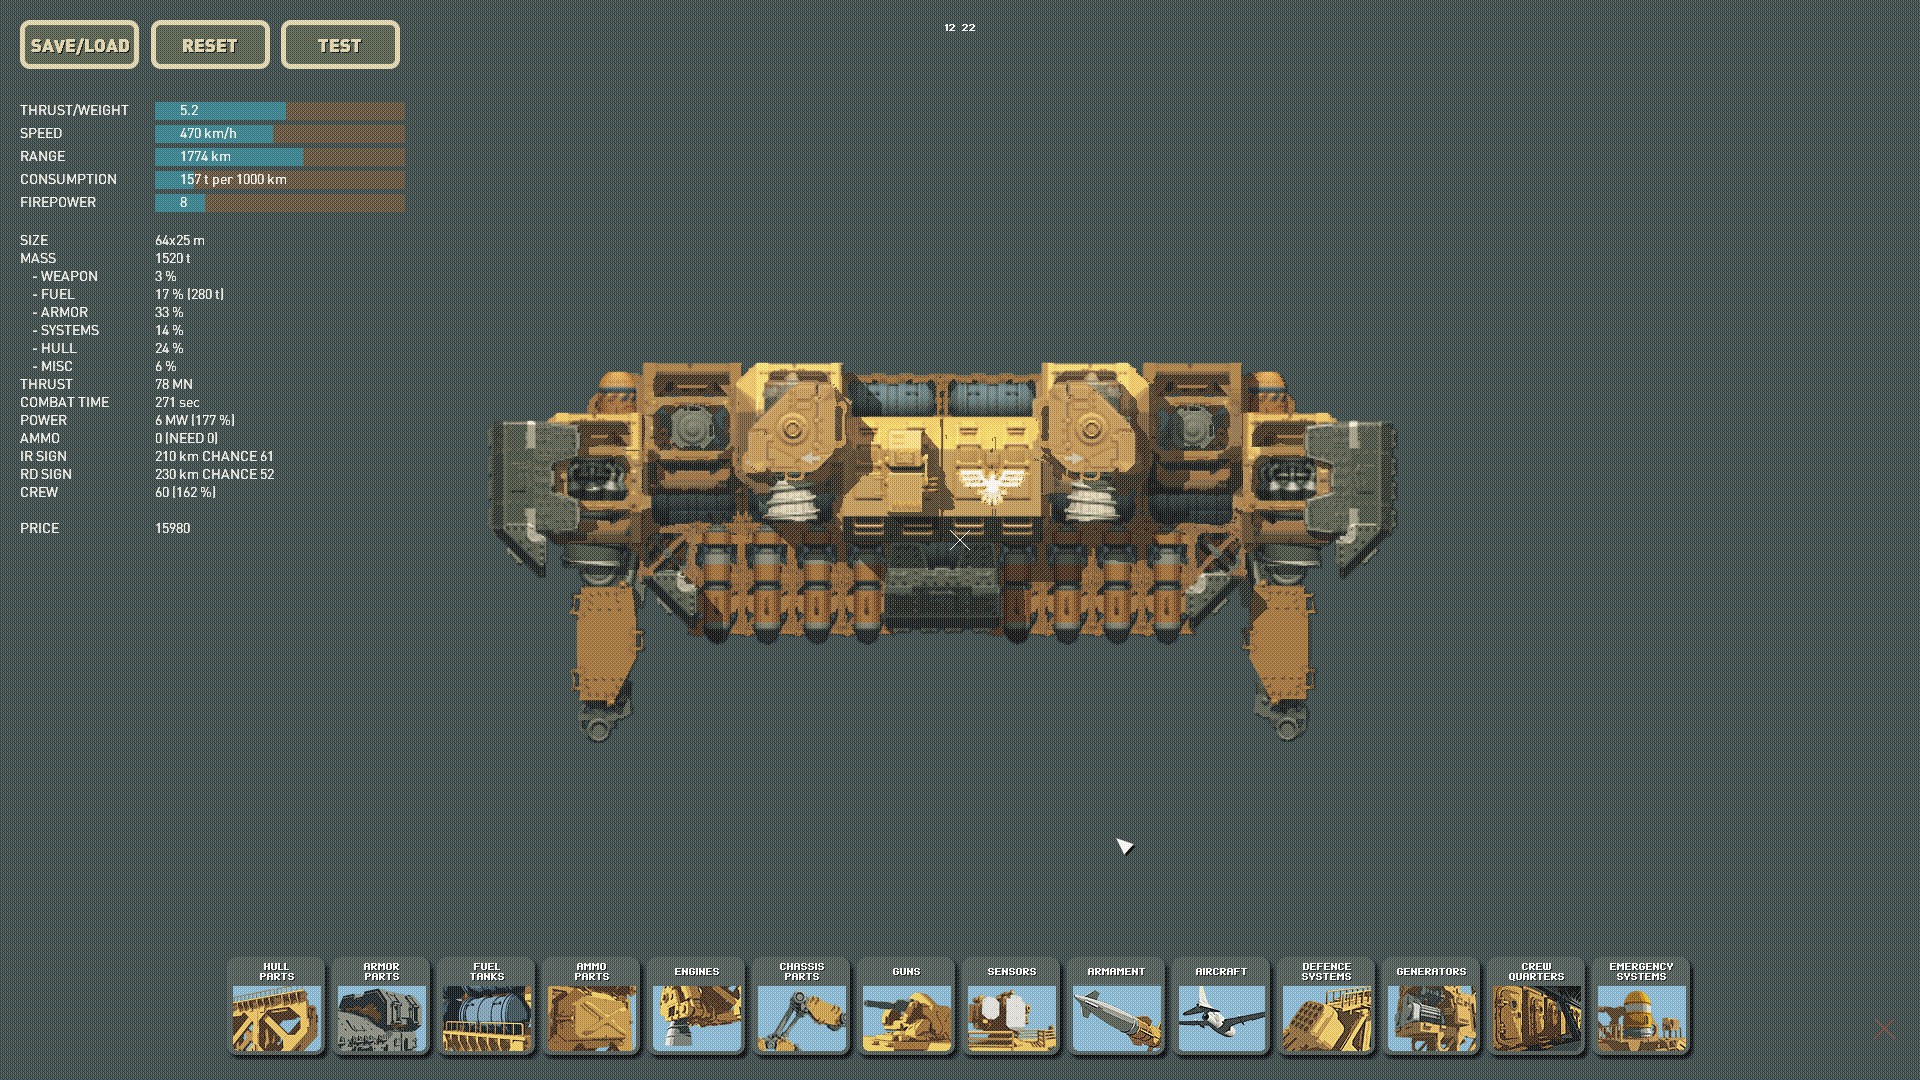 Gladiator MK3 (brawler/Vanilla Ship Redesign)
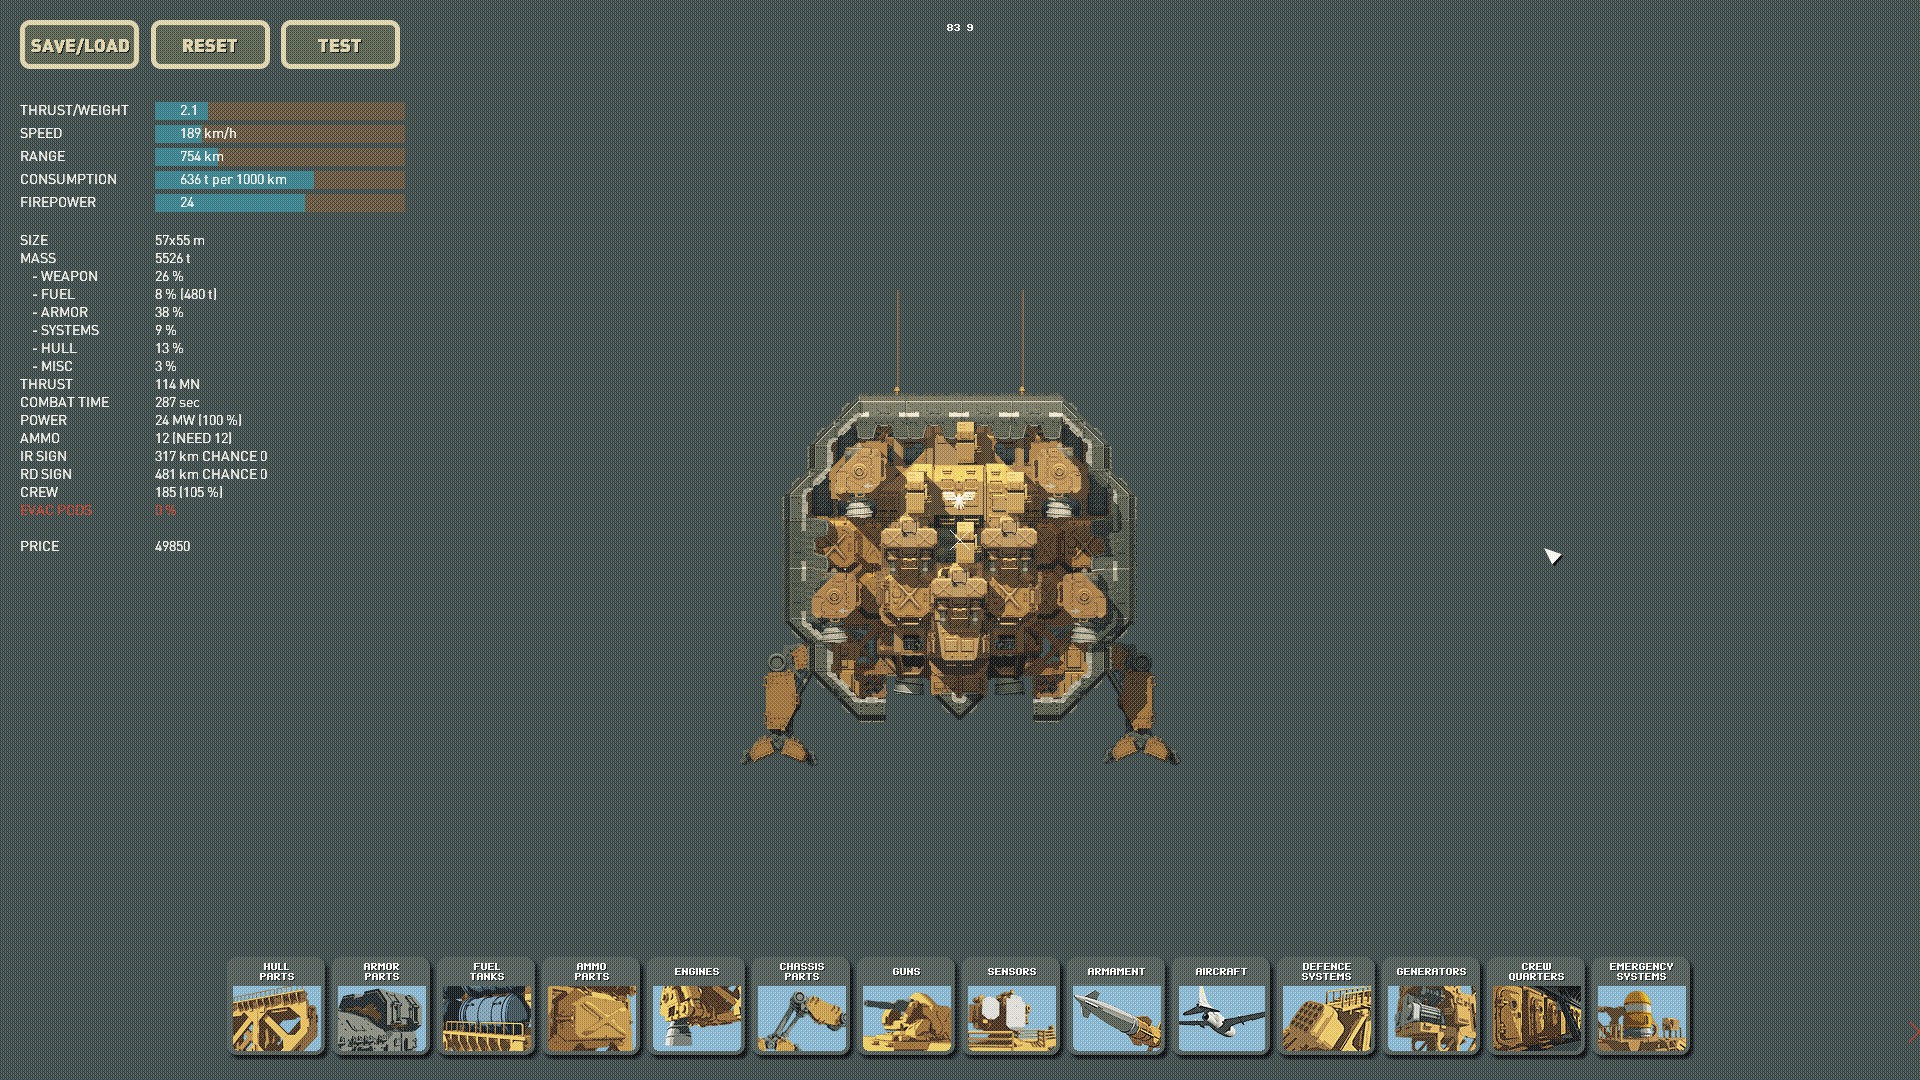 Phoenix (brawler)
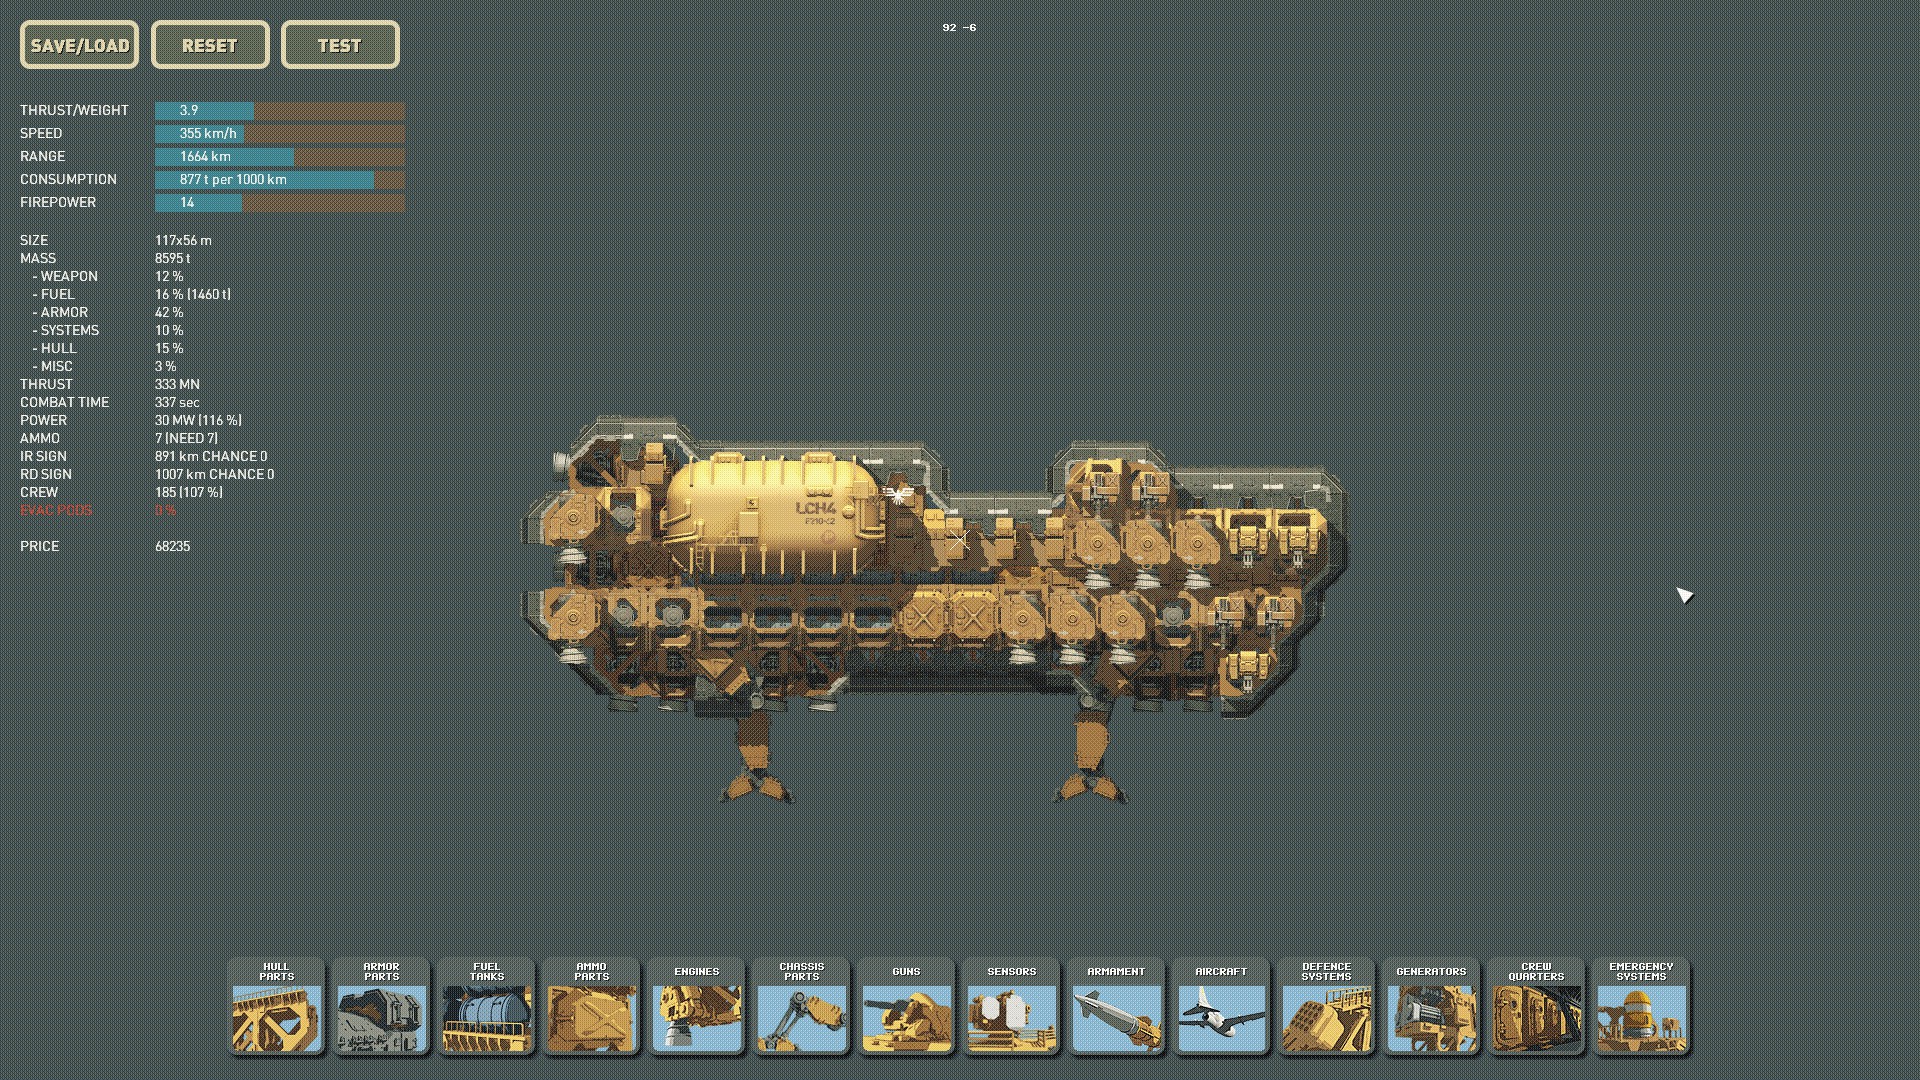
Disclaimer I have yet too go into serious testing on these but they could have major potential if used right and pushed more toward balance. Keep in mind that like my other designs some features are functional and some are aesthetic so nothing is as efficient as it could be. For the time being under each I'm just including a brief explanation but I may come back at some point for a story snippet.
Potential replacement for those that want a carrier as their flag ship. Word of warning though don't launch the planes in combat, only on the map in its current configuration. Its design is largely aesthetic and the planes will crash into the ship if the supports are not removed first.
Alexandra
Another potential carrier flagship but this design allows for the potential of being directly involved in a fight. There are additional places for guns on the front and decent dorsal armor. Included are ship to ship missile pods and sprints for counter missile play.
Galatea
Designed to be a quick strike craft or for hit and run operations. It only carries ship to ship missiles so It can't last long in a fight but has some protection from ground fire should the ships get off a few shots before you unload all of the missiles.
Striker
An upgrade to the vanilla ship with higher quality guns and slightly increased defensive capabilities.
Gladiator MK3
A faster but also more expensive brawler designed to be able to achieve a sudden strike on tougher garrisons and offers greater mobility in a fight.
Phoenix
Useful Links:
Wiki[highfleet.fandom.com] - Has a well put together outline of game mechanics.
Ship files[drive.google.com] - Contains ship files to import for use in-game.
Source: https://steamcommunity.com/sharedfiles/filedetails/?id=2833097179
More HighFleet guilds
- All Guilds
- Building a raiding party
- How to replace a ship in HighFleet V. 1.163 + Flagship
- HighFleet Guide 560
- HighFleet Guide 550
- Making Wheels Available in Ship Editor
- highfleetMOD
- HighFleet Guide 520
- HighFleet Guide 510
- Create more Save Slots
- Complete Fleet Design & Doctrine Guide 1.16 [WIP]