
To master boarding and combat, you must understand the ships your board, the guards on those ships, and how to use pausable combat to your advantage.
Other Heat Signature Guides:- 100% Achievement Guide (How to Unlock All).
- How to Beat Every Single Difficult Assassination Mission.
- How to Kill Armour / Shield Guards with Starter Gear.
- Stations and Mission Selection.
- Mission Details.
- Guard Kits.
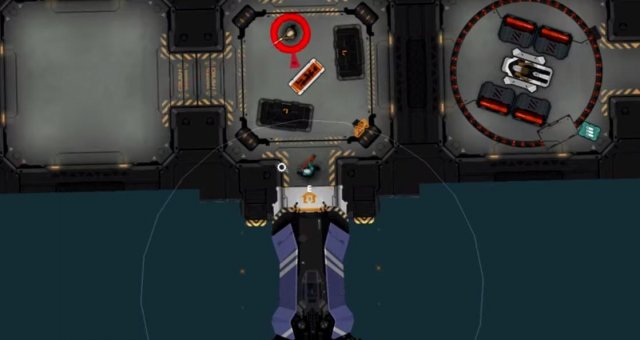
Ships
Ships are the focus of every mission, and also fly around on ambient missions of their own. Equipment, number of guards and key doors, and so on depends on the faction that pilots the ship as well as the difficulty of the mission or the size of the ship.
Ships can be flown like the breaching pod, but they are different in two very important ways. First, ships do not have brakes, so you will need to get used to Newtonian thrust if you want to navigate with any precision. Second, ships can shoot missiles (default: RMB) which can blow apart the rooms and engines or other ships. This can be useful to kill an assassination target or a pilot without boarding the ship.
Ships are separated into sections, with each section blocked off by a key door. Each section always has at least one guard group, with group size dependent on mission difficulty. In missions with turrets, there will usually be at least one turret per section as well, usually in or nearby the guard room.
Guards And You
Guards are the primary obstacle you will face when pulled off elaborate heists and assassinations. Dumb as bricks but frequently possessing much better tech than you, figuring out how to deal with (or evade) guards is the majority of Heat Signature's challenge.
Guards spawn in groups, with one group per section. Each group is composed of any number of guards, and one boss. At periodic intervals, one of the guards in a section will wander away from the group to visit a terminal that doesn't require passing through any doors. This is usually your opportunity to strike; just remember to dispose of the body.
Guards have only a few very predictable AI states, and these states can be freely exploited to win. Even if you get spotted, your mission isn't over (unless you're doing a stealth mission, in which case sorry about the awful payout).
- Idle: Guard is hanging out with his pals, doing nothing at all.
- Job: Guard seeks out a random terminal within their section, stays there for a few seconds, then returns to the group.
- Panicked: Represented by a ?. Guard was teleported, attacked, or otherwise lost track of what they perceive to be a threat. Will rapidly do 180 turns on the spot until they see something suspicious or are harmed.
- Seen: Represented by a !. Guard saw you, and will investigate your last known location.
- Alert: Represented by "INTRUDER". Guard has seen you, and yelled out an alarm. If the pilot is active, this will trigger the alarm countdown; otherwise, it only alerts nearby enemies. Any guard which has seen you like this will be a "living witness".
If a guard knocks you out, they will grab your body and throw you out the nearest airlock. You can't do much while you are being carried, and when you are thrown out of an airlock, you will have limited time to remote control your pod to pick up your adrift body.
If you were knocked out by a lethal weapon, you will bleed, which reduces the amount of time until you die the next time you are knocked out by a lethal weapon. If you are knocked out by a non-lethal, there's no penalty; you must simply reach yourself before your oxygen runs out.
Pausing Basics
Heat Signature uses a pausable, real-time combat engine. Mastering Heat Signature's pausing is absolutely essential if you intend to get better. For missions with short time limits or punishing alarms, it's the only way to succeed, and is frequently necessary for missions with large guard groups.
While paused, you can do the following:
- Select Equipment: You can swap out which equipment is mapped to which mouse button here. Since items have separate cooldowns, juggling which items you are currently using is vital for combat. If you carry six guns, for example, you can line up six shots to instantly obliterate a guard group.
- Use Items: Use a mouse button to use the item you have bound to that button. Will only fire off once the button is released (except for automatic weapons, which always fire immediately), so you have plenty of time to line up a shot.
- Pick Up/Teleport Loose Items: Picks up nearby items. If the item is not nearby, teleports it to you with a 0.3s cooldown, from anywhere on the ship. Immensely useful, not in the least because you can kill a guard, immediately take their gun, and turn it against the other guards.
- Kill Guards: Unconscious guards that have seen you count as living witnesses, so if you want to maintain an enigma clause, you'll have to slit their throat.
- Remote Pilot Your Pod: If you've been knocked out and throw out the ship, or you just want to make a cool exit, you'll need to remote control your pod. Operates just like you're in the pilot seat, but your body is obviously still vulnerable. Only use when you are guaranteed to be safe.
- Miscellaneous: Pick up guards, open crates, detonate remote-controlled grenades, and so on. All self-explanatory.
Pausing also shows the statistics for your character (not on a mission) or your current mission (on a mission), and a nice little tip. Using the pause screen to see if you left any living witnesses is vital for enigma missions, so get used to reading those stats!
Source: https://gameplay.tips/guides/1294-heat-signature.html
More Heat Signature guilds
- All Guilds
- Heat Signature - Stations and Mission Selection
- Heat Signature - 100% Achievement Guide (How to Unlock All)
- Heat Signature - How to Kill Armour / Shield Guards with Starter Gear
- Heat Signature - Fastest Way to Liberate Stations
- Heat Signature - Item Attributes
- Heat Signature - Ship Objects
- Heat Signature - Guard Kits
- Heat Signature - Mission Details
- Heat Signature - How to Snipe Ships and Beat Any Mission