
Introduction
Welcome to GRIME. GRIME is a metroidvania soulslike, which has you traveling through a dying world as Akhlan, the endbringer, borne from the death of a Creator. The game is challenging and beautiful, and I wholly recommend exploring the game on your own first without worrying too much about missing achievements. There are no missable achievements really, just don't start a NG+ cycle before you're ready.
Due to the nature of GRIME, the maps are expansive and riddled with hidden areas, breakable walls, and secrets. Creating detailed maps and explaining precise locations is difficult. I heavily relied on maps created by Demajen to create this guide. You can see the maps HERE[www.demajen.co.uk] , and I highly recommend using them as a supplement to this guide in your journey to fully complete GRIME.
Now, GRIME is an entertaining game, but I've noticed that the information for it online is lacking in many aspects, and the wiki is incomplete. There is no real one-stop guide for completing everything, so that's what this is meant to be. Without any further ado, let's get into it!
Imprint
Activate a Surrogate
Surrogates are your "bonfires" for GRIME, where you can increase your stats and where you respawn when you inevitably end up dying. You will encounter your first Surrogate when you enter the Weeping Cavity in the beginning of the game.
Taste
Discover a Trait
Traits are your skills in GRIME. To gain a trait, you must defeat various enemies throughout the game using your Absorb ability. When you defeat an enemy by absorbing it, a pop-up will appear telling you how many of that enemy you need to absorb before the "prey hunt" is unlocked, granting you a trait.
Your first trait that you unlock will most likely be from the Crawlers found around the Weeping Cavity, which grant you a slow-walking trait for moving without collapsing unstable platforms.
The Hunt

Acquire a Hunt Point
Hunt Points are your skill points, which are spent to grant you the traits that you've unlocked from absorbing prey. Many traits have multiple tiers, which cost increasingly more Hunt Points for each level.
There are two main methods for acquiring Hunt Points. The first is by defeating specific, large prey that you will encounter through the game. The ones that will drop a Hunt Point upon death are the ones that have a Hunt Point icon next to their health bars. It is not necessary to absorb the prey to gain its Hunt Point. You will encounter the first of these enemies, a Frantic, in the Weeping Cavity a bit past the map beacon.
The second method is by finding an item called Crimson Ichor, which can be found in some hidden areas throughout the map or given by NPCs. Crimson Ichor can be crushed to grant a Hunt Point. The first Crimson Ichor that can be found in the game is hidden above where you get the Maul Axe weapon in the Weeping Cavity. Head left and up from where you get it and jump up to a hidden ledge. Kill the boulderhead at the end of the ledge and use its head to jump up into another hidden area, where the Crimson Ichor is located.
Ravenous

Reach 100 Ardor
Ardor is the big number you see in the top-left next to your health and force bars. Ardor affects the amount of Mass you get when you kill an enemy (50 Ardor means +50% Mass per kill).
When you kill an enemy, you gain 3 Ardor. When you successfully Absorb an attack, you gain 2 Ardor. Whenever you get hit, you lose 2 Ardor. If you die, you lose all of your Ardor. A vessel containing half of your lost Ardor is left near the point which you died, which can be destroyed to regain it.
Once you reach 100 Ardor, the number turns into an infinity symbol ∞, but will still go down to 98 if you get hit.
The Weeping Cavity is a good place to quickly acquire Ardor, as the enemies are both weak and plentiful, and Ardor gains only care about the number of enemies you slay, not their strength. There are also items that can grant you some free Ardor, like the Broken Husk or Whole Husk.
Weeper

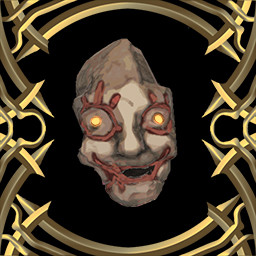
Defeat Amalgam
Amalgam is the first major boss you will encounter in the game, located at the exit of the Weeping Cavity. It can be found inside of a massive statue of a head, crying.
The Amalgam boss fight is an exercise of your parrying and dodging ability, as well as your ability to track multiple things happening at once on the screen. Remember that red attacks cannot be parried, only the normal attacks can be. If it brings down a shield on one of its sides, you should switch to the other side because the shield will soon become a battering ram.
Devourer
Absorb 100 Prey
This achievement should be earned naturally as you progress through the game. Absorbing prey is one of the core mechanics of the game, so do not rely on just your weapons to handle all of the enemies.
Silenced Whispers

Defeat the Whispering Mothers
The Whispering Mothers are the second major boss you will encounter in GRIME, appearing at the exit of Lithic. The matriarchs of the Rockhead people, the Whispering Mothers are a pair of sentient plants that will do anything to defend their "children." There are two phases to this fight, where whichever Mother you hit to finish off the first health bar will die, and the other one will go into an enraged state with a refilled health bar. Most of their projectiles can be reflected back at them, granting you invincibility frames while you do so. Beware of when they are twirling, as that usually means an attack that you will have to dodge is coming. In the second phase, the enraged mother uses lots of melee attacks that can be parried to quickly take her health down.
Harmless

Defeat the Harmless Rockgiant
The Harmless Rock Giant is an optional boss that can be found in Lithic, in a large chamber north of the Whispering Mothers boss fight, and to the right of the map beacon for Lithic. The boss is not hostile, and will be seen hunched over a rockhead sibling, fawning over how wonderful it is. Attacking either the giant or its sibling will commence the fight.
The harmless rock giant has a weakspot on its head, but since air attacks do less damage, it's up to you whether you want to aim for its head or its legs. There are lots of shockwaves in this fight, so pay attention to which moves you'll need to react to with a jump.
Yank
Pull down Prey
Once you defeat the Whispering Mothers, you gain the Pull ability, which will soon become a staple for combat. The game doesn't do a great job of telling you about this wonderful ability outside of platforming, but you'll start to notice enemy attacks that are yellow instead of red. When an enemy glows yellow, they are open to being pulled. Practice pulling, because it will make a lot of the upcoming boss fights much more manageable.
Sharpened Vessel
Reach Level 30
This is another achievement you should easily get as you progress through the game. As you kill enemies or use various consumable items you find, you will accumulate Mass, which can be seen in the bottom-right of your screen. Your Mass does not deplete upon death, so it should never go down unless you're spending it.
Whenever you are in a Surrogate, you can choose the Grow option, where you can spend your Mass to increase one of your five stats: Health, Force, Strength, Dexterity, and Resonance. Any time you level up one of these stats, your total level will increase, and the Mass cost for your next stat will also increase.
Feast

Defeat Vulture
Vulture is the third major boss fight in the game, and can be found in the Feaster's Lair. Shidra in the Worldpillar will send you to this boss to retrieve an artifact for him, and the Vulture will be found chewing on the map beacon in the area.
Vulture is considered to be the first hard boss encounter in the game. The fight features two phases. In the first phase, you should target the sharpened skull on the vulture's head whenever you can, and be prepared to repel, pull, and dodge the attacks as they come. The second phase starts once you drain the first health bar, and the skull you've been hitting shatters. In this phase, the vulture will spew out snake-like enemies, who you should target. There will be four snakes in total to kill, all while the vulture continues its barrage of attacks. Keep your distance, and once all of the snakes are killed, the vulture will collapse, waiting for you to come and deal the final blow.
Jawcrab

Defeat the Jawcrab
The Jawcrab is a boss that can be found in a chamber beneath the Vulture in the Feaster's Lair. The Jawcrab boasts impenetrable armor on its two massive claws that will deflect any melee attacks against them. But if you manage to parry a claw attack, then the claws will be shattered, opening the crab up for hits on that side. Once a claw is shattered it will not regenerate.
Jawstag

Defeat the Jawstag
The Jawstag is an optional boss located in the Gloomnest, beneath the Unformed Desert. The Jawstag has a habit of charging, spewing projectiles, burrowing through the ground like a shark, and donkey-kicking you if you stand behind it. The Jawstag attacks quickly, so be prepared to react to its movements.
Shapely

Defeat Shapely Fidus
Shapely Fidus is a boss found at the top of the Carven Palace, and grants you the Self-Pull ability you will need to progress further into the game. Shapely Fidus is a tough fight with three phases. In the first phase you will be able to repel most of its attacks. The second phase requires more precise dodging and only one attack that can be parried. The third phase is a survival phase, where you have to dodge the flailing hand until it explodes.
In the first two phases, if you repel an attack, Shapely Fidus will quickly follow up with another attack that you can also parry. If you repel this second attack, Shapely Fidus will be opened up for a pull. This pattern is consistent every time you parry this boss.
Watcher

Defeat the Desert Watcher
The Desert Watcher is an optional boss above the eastern Surrogate in the Unformed Desert. You can access this boss fight by heading right from the Surrogate and pulling the platform in the ground up. The Desert Watcher is a buffed-up version of a regular enemy called the Carven Disciple. There's nothing notable about the fight, and just takes a little practice to handle.
Unwrap The Gift
Unlock the Barrier Door
This is a story-based achievement, so you don't need to go out of your way to unlock this one. The Barrier Door is the large door that lies to the east of the Carven Palace and resembles a pair of hands covering a face.
To open the door, you need the Unsealer, which is given to you by Shidra after you've retrieved the two main artifacts he requests from you.
Predator
Discover all Prey
There are many types of prey to be found in GRIME. You can see a list of all the prey you've killed in the pause menu (separated into three tabs). Here is a list of all the prey that can be found:
Regular Prey
Boulderhead
Frail Arm
Crawler
Ancient Limb
Frantic
Spikehead
Wretch
Root Puppet
Volatile Unformed
Clawhound
Sentry
Nacre Runner
Eyebrute
Rockhead
Leaper
Ravenous Rock
Madrock
Cluster
Creep
Piercer
Root Walker
Nerveye
Craver
Lurker
Acid Lurker
Flower Fighter
Head Lurker
Spinesnake
Shell Lurker
Tonguebrute
Yr Spear Warrior
Fledgling Yr
Servant
Apprentice
Armored Servant
Disciple
Follower
Rabideye
Volatile Wretch
Garden Yr
Floret
Bondling
Basher
Whisperer
Flowerhead
Rockbed
Gardeneye
Garden Walker
Joltlegs
Yon
Skewer
The Vases
Yr Sword Warrior
Captured Rockgiant
Mini-Bosses
Jawcrab
Artisan of Flesh
Desert Watcher
Jawstag
Rockgiant
Grieving Rockgiant
Main Bosses
Amalgam
Whispering Mothers
Flowerheart
Vulture
Shapely Fidus
Surrogate Vulture
Giant of Eyes
The Final Performance
Shidra of the Worldpillar
Misbegotten Amalgam
Dreamborn Terror
It has been confirmed that not every prey is required for this achievement to be earned, but it's not known what the exact criteria are.
Breathsmith
Fully Upgrade a Weapon
Weapons can be upgraded using Bloodmetal Splinters, Shards, and Chunks, which can be found all throughout the map and dropped by specific enemies. You should gather more than enough materials as you progress.
To upgrade a weapon, you need to speak with Shidra in the Worldpillar (unless you've gained the ability to upgrade weapons at Surrogates after defeating The Final Performance). A weapon's name changes as it's upgraded to indicate the number of times it's been improved (+1, +2, etc.). A weapon is considered to be fully upgraded once it reaches +6.
Proportions
Have the Final Interaction with Yon
Yon is the talkative little Rockhead that you meet in the Weeping Cavity that immediately starts worshiping your humanoid form. You will encounter Yon numerous times over the course of the game, culminating in the hallway right before the Barrier Door in the Carven Palace.
Yon is encountered in the following locations:
Weeping Cavity (multiple times)
Lithic (entrance and after the Whispering Mothers)
Worldpillar (above the Surrogate)
Servant's Path (entrance and after being sculpted)
Barrier Door hallway
Once you encounter Yon for the final time in the Barrier Door hallway, you should earn this achievement.
Celebration

Witness the Final Performance
The Final Performance is the second-to-last boss fight in the game, found at the top of the Cenotaph City. The Coda, who inhabit the city, have excitedly been awaiting your arrival and impending destruction, and have prepared an entertaining spectacle to make of the whole ordeal.
The Final Performance is a flashy fight made of four unique phases. In the first phase, you ride the elevator up, dodging charging dancers from either side. In the second phase, the performer brandishes a lethal scythe in a dance of death. In the third phase, the performer brings in a spike-covered dancer to join his own dance. And in the fourth phase the performer retreats momentarily to allow another wave of dancers to flow across the stage.
The phase transitions in this fight are all time-based, not damage-based. You can use the elevator's momentum to get some extra hits in on the performer in the first phase. The dancer in the third phase telegraphs the direction she is going to fly off in with wind particles, and she can be repelled away.
Inevitable

Defeat Shidra
Shidra is the final boss of the game, and will confront you between the Pale Sky and the Peak of Creation, imploring you to stop your armageddon. If you refuse to do so, Shidra will begin his final fight against you, desperate to postpone the end of the world as long as he can.
The Shidra fight has five phases. The first and third phase are identical, with Shidra unleashing attack after attack. It will take some time for you to recognize each attack and prepare to avoid them. In the second phase, Shidra will summon some minions and step back to heal himself. Don't rush the second phase, Shidra does not heal himself very quickly. The fourth phase is purely platforming, and the fifth phase consists of four parry checks.
Assimilation
Discover all Traits
There are a total of 29 Traits in Grime to be earned from prey, and it's believed that this achievement also tracks the collected abilities from defeating bosses and the breath increases from mini-bosses. It is also believed that not every Trait is required to gain this achievement.
Traits
Boulderhead: Reduces [25%] of incoming damage after failing to Absorb an attack.
Frail Arm: Restores [25%] of your total Force on a successful Absorb or Repel.
Crawler: Can now press [Left Alt] to walk, slowly.
Ancient Limb: Repelling an attack damages the attacker. [40%] benefit from Resonance.
Frantic: Gently pulls on nearby vulnerable surfaces, revealing hidden paths.
Wretch: Damage done is increased by [15%/25%/30%] while at or above [60%/80%/100%] Ardor.
Clawhound: Dashing leaves behind an echo for a short time. You restore [15%] of total Force if the echo is damaged.
Eyebrute: Deal [25%] more damage with Reflected projectiles.
Rockhead: Increase maximum Health by [10%].
Leaper: Increases Force regeneration speed by [15%]
Ravenous Rock: Increases Ardor gained from all sources by [1].
Madrock: Increases the Absorb parry duration by [10%], making it easier to Absorb, Repel, or Reflect attacks.
Creep: Hitting the backs of prey deals [15%] more damage.
Piercer: Pulling an exposed enemy restores [25%] of total Force.
Root Walker: Holding [E] will charge to instantly heal for [150%] of the original value.
Craver: When prey are destroyed not by Absorb, they drop [a small cloud of Breath].
Lurker: Heals for [4%] of maximum Health on a successful Absorb. Repelling will let you heal from weapon damage for the same percentage for a duration.
Flower Fighter: Increases your maximum Force by [10%].
Spinesnake: Force regeneration never pauses while the Breath Consumption heal is active.
Shell Lurker: Destroying your previous Vessel will now return ALL lost Ardor.
Tonguebrute: Increases all damage done by [20%] for 3 seconds after pulling an enemy.
Fledgling Yr: Increases damage done by [10%] for 15 seconds after Repelling an attack. Can stack up to 3 times, but buff is lost upon taking damage.
Servant: Healing done using Breath is increased by [15%].
Apprentice: Deal [25%] more damage while below 20% health.
Bondling: Drop [2] healing shards on taking damage. The shards heal for 10% of the damage taken on pick up.
Rockbed: Gaining Breath beyond maximum capacity releases [1] Vessel Wisp at nearby enemies. Damage scales with Health.
Garden Walker: Pulling an exposed enemy deals Absorb damage to it and drains [a bit of Breath]. Protected segments are dealt damage, [benefits] from Resonance.
Skewer: Dashing leaves behind a distortion for a short time, dealing damage when enemies attack it. 30% benefit from Resonance.
The Vases: Prevent death by sacrificing filled Breath bars. Revive with 10% HP per Breath bar.
Mini-Boss Breath Drops
Jawcrab
Artisan of Flesh
Desert Watcher
Jawstag
Harmless Rockgiant
Grieving Rockgiant
Boss Abilities
Amalgam: Gain the ability to build up Ardor.
Whispering Mothers: Gain the ability to Pull objects and prey.
Flower Heart: Gain the ability to Sprint.
Vulture: Gain the ability to Dash mid-air.
Shapely Fidus: Gain the ability to be Pulled towards objects.
Surrogate Vulture: Gain the ability to Hover.
Giant of Eyes: Gain the ability to Warp.
The Final Performance: Gain the ability to Double Jump & Upgrade weapons in Surrogates.
Misbegotten Amalgam: Gain the ability to Pull items.
Artisan

Defeat the Artisan of Flesh
The Artisan of Flesh is an optional boss that can be found on the second-from-the-top floor of the Carven Palace, sitting in a throne on the east end of the Palace. When spoken to, the Artisan will dismiss you, but if you insist and follow him to the large room to the west, you can attack him to commence the fight.
The Artisan mostly throws stuff at you, but will occasionally teleport beside you to take a swipe. If he does impale you with a flaming spear, quickly dash around to dislodge the spear before it explodes and takes you out with it.
Kinship
Get the Kinship Ending
There are two endings in GRIME, depending on which choice you make when trapped and confronted by Shidra. If you resist his attempts to destroy you and break free, you will get into the final boss fight against Shidra. After winning and climbing to the top of the Peak of Creation, you can interact with the vortex to complete the game and earn the Kinship ending.
It is recommended that you get the Weakness ending first (see the corresponding section), as you can still get the Kinship ending following the Weakness ending, but not vice versa.
Hunt Down

Defeat Misbegotten Amalgam
Remember Amalgam, the first boss you defeated in the game as you exited the Weeping Cavity? As it turns out, it isn't dead, and has brought its weeping down to a hidden area in the western Feaster's Lair. The Misbegotten Amalgam is a harder version of the fight, with hands flailing in every direction.
When one of its arms glows red, you have to switch to the other side before the floor beneath you is destroyed. Keep parrying its fists when possible, pulling when it's open, and climbing up to hit its eye when you get the chance. This is one of the hardest bosses in the game, so be ready to die a few times.
Hush

Defeat the Grieving Rockgiant
The Grieving Rockgiant is located in south-west Lithic, but won't appear there immediately. To unlock this boss fight, you must first locate the rockgiant that's trapped in the wall between Gloomnest and Lithic (right past the shifting barrier in western Lithic that doesn't go away until the Whispering Mothers are destroyed). Speak with the rockgiant in the wall, then enter any Surrogate. Once you exit the Surrogate, the Grieving Rockgiant will appear in its chamber in Lithic, beneath the Lower Lithic Surrogate.
The Grieving Rockgiant is a tougher version of the Harmless Rockgiant, featuring similar attacks that produce lots of shockwaves. It has a weak spot on its head, and the rocks that fall from the ceiling can be reflected into the rockgiant.
Passage

Unlock all Nervepasses
Nervepasses serve as fast-travel points in the game (before unlocking the ability to Warp between Surrogates). There are a total of 8 Nervepasses to be unlocked. You can tell that a Nervepass is nearby from its fleshy pinkish tendrils that surround it. Some Nervepasses will be guarded by a Root Puppet enemy, which will warn you ominously before attacking.
List of Nervepasses
Worldpillar
Lithic
Unformed Desert
Gloomnest
Feaster's Lair
Garden
Carven Palace
Cenotaph City
All-Seeing
Activate all Beacons
There are 16 Beacons on the map, one for each major region you can explore. Activating a Beacon enables the map in the region, and will often be a primary target for you to locate whenever you enter a new area. Beacons indicate their nearby presence with purple wisps that move around in the background in the direction of the Beacon. Activating every beacon will make exploration much easier in general, so it is highly recommended.
List of Beacons
Weeping Cavity
Unformed Desert
Yr Den
Gloomnest
Lithic
Worldpillar
Nerveroot
Feaster's Lair
Servant's Path
Carven Palace
Garden
Childbed
Beyond the Barrier
Cenotaph City
Pale Sky
Abandoned Opus
Scion

Defeat the Flower Heart
The Flower Heart is a boss found east of the Surrogate in Nerveroot, behind an electric barrier. The barrier can be brought down by destroying the electric node north-west of the Surrogate. This boss was added to the game with the Colors of Rot DLC, and will grant you the sprint-dash ability upon its defeat.
To start with, only the Flower will be exposed. When you attack it, it will retreat, and a big Charger will dig itself out of the ground to protect it. The Flower will stay underground for most of the fight, but takes much more damage than the Charger if you can hit it when it pops up. The Charger and the Flower share a health bar. When the health bar reaches 50%, a second Charger will appear to harass you, which also shares the same health bar.
Breath
Reach Max Breath Capacity
The six mini-bosses in the game drop Breath capacity upgrades upon defeat. If you gather all of these upgrades, you will reach your Max Breath Capacity.
Mini-Bosses
Jawcrab
Jawstag
Harmless Rockgiant
Grieving Rockgiant
Artisan of Flesh
Desert Watcher
Glare

Defeat the Giant of Eyes
The Giant of Eyes can be found in the north-west Childbed, right below the northern-most Surrogate. It was added to the game in the Colors of Rot DLC, and grants you the ability to warp between Surrogates upon defeat.
The Giant of Eyes fight has two phases. The first is slightly similar to the other rockgiant fights, with a weak spot on its head. But once the second phase starts, the Giant pulls out a massive sword and the fight picks up in difficulty. Its attacks are deliberately slow to bait out your parries, so be prepared to learn the timings.
Host
Defeat Surrogate Vulture
Surrogate Vulture can be found in the eastern Childbed, and is considered to be one of the hardest boss fights in the entire game. This boss was added to the game in the Colors of Rot DLC, and grants the Hover ability upon defeat. You will likely encounter this boss when retrieving the second artifact for Shidra's quests.
The Surrogate Vulture fight has two distinct phases. The first phase is similar to the regular Vulture fight, with a weak spot on the Vulture's head. In the second phase, the Vulture's weak spot moves to its chest. The second phase follows a pretty predictable pattern: One of two possible 3-attack barrages, a slow attack that can be parried, and a barrage of smoke particles that need to be dodged.
The two 3-attack phases that can happen are described in the description of the attached video, and if you memorize them you can begin to predict what moves the Surrogate Vulture will make next, vastly increasing your chances of winning the fight.
Weakness
Get the Weakness Ending
GRIME has two endings, depending on which choice you make when confronted by Shidra at the top of the Worldpillar. If you choose to allow Shidra to restrain and destroy you, you will be given the Weakness ending.
It is recommended to get this ending first, as following this ending, you will respawn at the Surrogate below Shidra, and you can climb back up to be confronted by Shidra again, where you can proceed to get the Kinship ending instead.
Bloodhunter
Acquire all Hunt Points
As mentioned in the The Hunt achievement, you can collect Hunt Points from either specific prey in the game, or by consuming Crimson Ichors from the inventory. The achievement does require Hunt Points from both Prey and from Crimson Ichors, but does have a buffer of a few Hunt Points that can be missed. Note that you must consume the Crimson Ichors in your inventory for them to count towards this achievement.
It is believed that the achievement is given at 40 Hunt Points. You can check the maps to locate any prey or Crimson Ichors you may have missed along the way, but you will encounter the vast majority of these points through natural gameplay progression and exploration. There is also an Owl located near the Feaster's Lair Nervepass that sells Hunt Points, which can be used to boost up closer to the 40 Hunt Point requirement.
Dream
Commune with the Child
The Child is the swirling Thoughts located in the south-west corner of the Childbed. There are a total of 5 Thoughts that must be interacted with (all in the vicinity). Once all 5 have been found and spoken to, return to the one in the center of the chamber and speak with it. It will suddenly become aware of your presence, and you will see a cutscene of a humanoid-being floating in the void in the fetal position. Once the cutscene ends, you will be given a Fetal Pearl and the Dream achievement.
There have been some reports that the central Thought will not acknowledge your presence, even after speaking with all 5 Thoughts. If this happens, it is recommended to find and defeat the 3 Colors of Rot bosses (Flower Heart, Giant of Eyes, Surrogate Vulture) and then return to the Child in the Childbed.
Generous
Accept all of the Coda's Gifts
The Coda are the people of Cenotaph City that have been eagerly awaiting your foretold arrival. The people of the city have all prepared something for you, and you will have to find (and destroy) all of them for this achievement. (Don't worry, they like it.)
This achievement can still be attained following the Final Performance (in fact, one of the Crimson Ichors to collect requires the Double-Jump ability to reach). Check out the area maps to see more clearly the locations of the gifts.
Generous Checklist
Coda Secretmaker Crimson Ichor: Located below the floor right below the Coda Convomaker at the entrance of the city.
Coda Secret Maker Crimson Ichor #2: Located at the top-left of the large room west of the Cenotaph City Surrogate, above the Coda Housemaker.
Crimson Ichor #3: Above Ichor #2, there's a Self-Pull + Double Jump shortcut in the ceiling on the far left side, which leads to a hallway with the Ichor at the end.
Surrealistmaker's Art: The Surrealistmaker is hidden in a room on the ladder to the left of the Surrogate, and will beg your forgiveness for his poor attempts at art. Destroy his paintings to calm his worries.
Paintmaker's Art: The Paintmaker is at the end of the hallway if you keep heading straight from the entrance to the city.
Carvemaker's Statue: Right above the Paintmaker
Crushmaker's Gifts: The Crushmaker is to the right of the Final Performance, and has 7 items all lined up for you to collect. Simply take all 7, and watch his reactions to your crushing grip.
Kin

Commune with Kin
The Kin are purple spiral projections located in the Peak of Creation following the Shidra boss arena. The Kin won't appear until all of the map beacons have been activated (See the All-Seeing achievement for more details).
There are 4 Kin spirals in the Peak of Creation, all on the right-side of the map as you climb higher. Once you speak with all 4, you should be granted the achievement.
Skinmaker
Acquire all Outfits
Every set of armor in the game has three pieces: gloves, body, and legs. There are 27 sets of armor that you need to collect for the achievement. (There is also a 28th granted in NG+ that is not required for the achievement.)
Adept Embroider Set: Found in Carven Palace, in the area above the Captured Rockgiant. Head west in the elevator shaft when traveling from the entrance floor to the floor above, and keep going until you find the platform you have to use Pull to move through the area. The alcove is hidden in the ceiling above the platform.
Blooming Set: Found in the Childbed west of the Giant of Eyes
Bonebird Set: Sold by the Owl near the Nervepass in the Feaster's Lair.
Boulderplate Set: Found in the Unformed Desert, in the tunnels under the Head Shell Surrogate.
Celebration Set: In the Carven Palace, in the area under the primary elevator lift (accessible after defeating Shapely Fidus).
Drained Shell Set: East of the Gloomnest Surrogate
First Yr Set: Near the entrance to the Yr Den from Gloomnest.
Formal Coda Set: In the caves below the first floor of the Carven Palace on the right side.
Friendly Imposter Set: Located between the Weeping Cavity and the Unformed Desert. It requires the Item Pull ability from the Misbegotten Amalgam to collect.
Goldgrowth Set: Sold by the Assistant in the Worldpillar, above the Surrogate.
Hollowroot Set: In Nerveroot, a bit of the ways up from the Surrogate, near the Craver enemy.
Horned Traveler Set: Above the Child in the Childbed.
Huskroot Set: Secret area in south-east Servant's Path, requires the Slow-Walk Trait.
Hyaline Set: Bought from the Art Trader in Lithic for the Lithic Poem, Lithic Portrait, and Lithic Effigy (all of which can be found in Lithic). Once the Whispering Mothers are defeated, the trader moves down to the Childbed, near the Giant of Eyes.
Jawplate Set: Feaster's Lair, east of the Vulture's room.
Lithichusk Set: Platforming challenge in high north-west Lithic. Requires double-jump + hover.
Marrow Set: Northwest Childbed, must enter from the Feaster's Lair.
Otherwhere Phlox Set: Hidden breakable wall to the left of where the entire game starts.
Pearlplate Set: Childbed, southwest of the Thoughts.
Petalgem Set: Garden, north-west of the Thirsting Trees Surrogate across a platforming section spanning the area above.
Petalstone Set: Lithic, near the Grieving Rockgiant boss arena.
Pointed Traveler Set: Platforming challenge in high north-east Lithic, behind the Vases' giant door. Requires hover + double jump.
Prickly Weeper Set: Weeping Cavity, below the Amalgam boss arena.
Sickleback Set: Off the Worldpillar elevator shaft in the Childbed. Accessible from the Dream Fog Surrogate and platforming across the top of the chamber from right to left.
Wakebone Set: Very high north in Nerveroot, accessible from the north-western Worldpillar.
Waneblood Set: Head west from the Worldpillar elevator beneath Shidra's shop towards Nerveroot, and notice a hidden passage on the right side of the first pit with red lightning that leads to the armor. Is possible without Hover, but Hover makes this much easier.
Weathered Stitcher Set: Servant's Path, around the area where Yon was waiting in line.
Instruments
Acquire all Weapons
There are 43 total weapons in GRIME, but not every weapon is required for this achievement to be granted. The NG+-only weapons are not required. Check out the maps for more specific location information for each weapon if needed.
Weapons
Attuning Lantern: Purchased from the Assistant in the Worldpillar.
Bellow Mace: Above the Tearfalls Surrogate in the Weeping Cavity.
Bloodmetal Scythe: Purchased from the Owl.
Bone Grinder: Worldpillar, in an alcove above the lower elevator, in the chamber west of the Beacon.
Bowaxes: Purchased from Heod. After defeating the final boss, Heod's stock is transferred to Shidra's Assistant above the Worldpillar Surrogate.
Bowdaggers: Found in two places (picking it up for a second time gives Bloodmetal supplies). Either in Nerveroot under the Flower Heart arena, or in south-east Gloomnest, near the Drained Shell Armor set.
Bownails: North of the tunnel between the Weeping Cavity and the Unformed Desert. Requires most of the movement abilities (self-pull, air dash, double-jump) to acquire.
Broken Yr Sword: Found in the Yr Den. Easily accessible by heading west from the Unformed Desert's Mountainside Surrogate.
Burst Lantern: Right below the eastern-most entrance into Gloomnest from the Unformed Desert.
Carapace Spear: Purchased from the Owl in NG+.
Carven Greatsword: In Nerveroot, through a hidden passage in the floor east of the Servants and north-east of the Surrogate.
Centipede Whip: South-east corner of Childbed, beneath where the Stand of the Child was acquired.
Chisel Nails: Carven Palace, in a pit to the east of the 2nd floor elevator stop.
Claw: Purchased from Heod. After defeating the final boss, Heod's stock is transferred to Shidra's Assistant above the Worldpillar Surrogate.
Coda Scythesword: At the end of the platforming challenge in Abandoned Opus. See the Discarded Memento achievement for more information.
Crossblades: Purchased from the Owl in NG+.
Curved Glaive: Yr Den, at the bottom of the large room to the east of the Beacon.
Discarded Device: Purchased from the Assistant in the Worldpillar.
Face Slasher: West of the Gloomnest Surrogate, past a breakable wall above the Jawstag arena.
Finger Blade: Dropped by a Rockhead in the Weeping Cavity behind a secret passage to the west of the Depths Surrogate.
Fossil Fist: In the Unformed Desert, among the pots below the first large falling rock.
Jaw Axe: Feaster's Lair, west of the Sunken Bones Surrogate (dash through the wall, don't go down). Behind a breakable wall, the weapon will be in a teeth trap. Use Pull to pull a giant tooth out to prevent the teeth from chomping you when you try to grab the weapon.
Maul Axe: First weapon found in the game, given by Yon in the Weeping Cavity.
Maul Sword: Across the collapsing platform east of the Weeping Cavity Depths Surrogate. Requires the Crawler's slow-walking Trait.
Motley Swords: West side of the Garden, near the Worldpillar entrance.
Nail Scythe: Purchased from the Assistant in the Worldpillar.
Obelisk Fist: South-west corner of Lithic, accessible from a hidden passage to the north.
Pillar Slab: Found at the top of the climbing section in central northern Lithic.
Pincer Glaive: Feaster's Lair, in the south-east corner of the room before the Misbegotten Amalgam.
Prying Sickles: Bottom of the Carven Palace, only accessible from the Garden.
Rawblade: Nerveroot, south of the entrance from the Worldpillar and near the electrical node.
Searing Sickle: North-east corner of the Carven Palace.
Servant Needle: Given away by a Servant near the entrance of the Servant's Path.
Shapely Greatsword: Above the Pathkeeper in the Servant's Path, in the room after the gate Shidra had opened for you.
Shaper: North-east corner of Nerveroot, in an alcove that leads to the Worldpillar.
Spineaxe: In the Childbed, to the west of the Dream Fog Surrogate. Platform along the top of the Surrogate Vulture arena from right to left.
Spinesword: In the Childbed, right above the Beacon.
Tooth Fist: South-east corner of the Feaster's Lair, in the long hidden tunnel that leads to the Childbed.
Tooth Hammer: In an acid pit above the Owl in the Feaster's Lair. If you don't have Item Pull, prepare to take some damage.
Twin Fangs: Weeping Cavity, to the east, in the area below the Amalgam's boss arena.
Unformed Slab: Hidden in a broken statue in the Unformed Desert, right before the entrance to Lithic.
Wisp Lantern: South-west Nerveroot, above the entrance to the Feaster's Lair.
Yr Glaive: Guarded by the Yr Spear Warrior in Yr Den right below the location of the Broken Yr Sword.
Listen

Consume the Listener
The Listener is the Rockhead you met when you first entered the Unformed Desert, bemoaning the fact that it can no longer hear the cries of the Amalgam. You will encounter the Listener numerous times as he works his way from the desert, through Gloomnest, and into the Feaster's Lair, where it is following the cries of the Misbegotten Amalgam.
Once you defeat the Misbegotten Amalgam, the Listener will lose it. He will retreat to numerous locations throughout the Weeping Cavity, Unformed Desert, Gloomnest, Lithic, and Nerveroot, appearing as just a pair of glowing eyes in the background. Any time you encounter him, he will attempt to blow you up with some explosives buried in the ground around him.
You must track him down 4 times (the order doesn't matter). After the fourth encounter, the Listener will blow himself up, allowing you to Consume him.
Zygote
Obtain all Fetal Pearls
Fetal Pearls are single-use healing items that replenish whenever you enter a Surrogate. There are a total of 4 Fetal Pearls (excluding NG+) that you need for the achievement. 1 of the Fetal Pearls is given by the Child (see the Dream achievement for more information). The remaining 3 Fetal Pearls are given by combining Thin Nacre, gained from killing Nacre Runners. There are 9 total Nacre Runners, each granting a single Thin Nacre upon death. 3 Thin Nacres will automatically combine into a single Fetal Pearl.
When you chase a Nacre Runner, they will start to move in a direction before teleporting. The direction the Runner moves in before teleporting is almost always a hint towards its next location. Hitting the Nacre Runner before it teleports will not kill it. It will run and teleport numerous times before coming to a stop, allowing you to kill it. Hitting the runner before it teleports is difficult, and won't prevent the Runner from teleporting away.
If you lose track of a runner, you can enter and exit a Surrogate to reset its position.
Nacre Runner Locations
Feaster's Lair: Next to the Acid Weeper Surrogate, descending down through the room before the Misbegotten Amalgam.
Garden: In a chamber south-east of the Hair Strands Surrogate, hidden in a secret passage. Near the Carven Palace entrance for the Prying Sickles.
Gloomnest: Just west of the Jawstag arena, heading towards the Yr Den.
Lithic: East of the Upper Lithic Surrogate, heading towards the Lithic Nervepass.
Nerveroot: In the tunnel above the Surrogate which had the electric node, head west until you find a hidden passage in the ceiling.
Servant's Path 1: On a platform just west of the Surrogate.
Servant's Path 2: Next to the beacon, heading west into an ambush.
Unformed Desert: South of the Head Shell Surrogate in the tunnels leading to Gloomnest.
Worldpillar: West of the lower Worldpillar elevator.
Intensify

Upgrade a Trait 3 times with Sanguine Ichor
This achievement can only be attained in NG+. Sanguine Ichor is dropped upon defeating bosses in NG+ that would normally grant you a new ability in the base game, so you will need to defeat 3 of these bosses to obtain the 3 Sanguine Ichor.
There are a few Traits that can be upgraded beyond their limit using Sanguine Ichor. You must first fully upgrade the Trait using Hunt Points before Sanguine Ichor can be used. I upgraded my Flower Fighter Trait to earn this achievement. Not every Trait can be upgraded using Sanguine Ichor.
Enrich
Upgrade a weapon 3 times with a Breatheart
This achievement can only be attained in NG+. Breathearts are awarded whenever you defeat a boss that would increase your Maximum Breath Capacity when you're already at the limit. Breathearts allow you to upgrade your weapons past +6 to +9. It will take more than 3 Breathearts to reach +9, so be prepared to track down more of the mini-bosses in NG+.
The Nightmare

Defeat the Dreamborn Terror
This achievement can only be attained in NG+. The Dreamborn Terror was a NG+-exclusive boss that was added with the Tinge of Terror DLC. To access this boss fight, you must meet the criteria of the Dream achievement and speak with the Child in the Childbed. The criteria are having defeated the Colors of Rot DLC bosses (Giant of Eyes, Flower Heart, Surrogate Vulture) in this or a previous NG cycle, and having spoken to all 5 Thoughts of the Child in this or a previous NG cycle.
Upon speaking to the center Thought, you will be teleported to an arena where to can challenge the Dreamborn Terror, a monstrous being brought to life by the Child's nightmares of... well, you. Dying to the Dreamborn Terror will respawn you right in the arena.
The fight is composed of 6 phases, where the first 3 and second 3 are very similar. In phases 1 and 4, the Terror will fight with its glaive in very rapid and hard-hitting combos. In 2 and 5, the Terror will throw its glaive around the arena and actively try to avoid you. In 3 and 6, the Terror will launch high into the air, and you will have to platform up, avoiding attacks, and hit the Terror at the top.
Unlike all other bosses in the game, you cannot fight the Dreamborn Terror through the Prey Gauntlet, and instead must start a new NG+ cycle to challenge it again. Each time you defeat the Dreamborn Terror, you receive a new color for the Dreamborn Verdigris Armor (up to like 10-ish cycles).
Touch Of Otherwhere

Finish an NG Cycle
This one is pretty self-explanatory. When you Reality Shift in a Surrogate, you will reset the world of GRIME and start back over in the Weeping Cavity. This time, however, you retain all of your equipment and abilities, allowing you to explore the map in whatever order you wish. To complete the NG cycle, you must still retrieve the artifacts from the Vulture and the Childbed, bring them to Heod in the Worldpillar for the Unsealer, witness the Final Performance, and encounter Shidra at the top of the Worldpillar.
If you choose to get the Weakness ending instead of fighting Shidra, you will still be granted this achievement.
Discarded Memento
Obtain the Scythesword
The Coda Scythesword is a weapon that was added in the Parting Shade DLC, and can be found at the end of the Abandoned Opus platforming challenge. The Abandoned Opus can be found above the Weeping Cavity, and requires all of the movement abilities to traverse. Good luck!
Spiral Heart

Get all Achievements
This one is self-explanatory. Get all of the other achievements and this one will pop off too. Congratulations on completing GRIME!
Conclusion
Congratulations, Endbringer. You've completed GRIME (twice, at least, for 100%). I hope you enjoyed the experience and found this guide to be helpful in your journey.
If you have any further questions, or any additional information that might be useful to others for this guide, please let me know!
Source: https://steamcommunity.com/sharedfiles/filedetails/?id=3162975051
More GRIME guilds
- All Guilds
- GRIME
- Grime
- 100% Video Walkthrough [All achievements]
- The Listener, Yon, Coda Gifts
- Parting Shade Guide
- GRIME ! -!
- DLCParting Shade
- GRIME 100% RUS
- GRIME Guide 25