Intro


now working on layout, Limit Breaks, Group setup trough the game.
Version 3.0 some minor bug changes and finished the tables so far.
Version 2.0 some minor bug changes and some layout.
Version 1.0 Guide´s basic structure completet
1: Mako Industrial Complex
Items: Potion x3, Phoenix Down, Restore Materia
After watching the intro you will be in the game. Jump off the train and follow Barret and the Avalanche resistance team. You are raiding the Shinra Mako Reactor 1 and are attempting to blow it up. The Avalanche are a team that is currently fighting Shinra Electric Power Company because they are misusing Mako energy by sucking it out of the planet trough industrial machines.
Make sure to check each of the downed guards and you will get Potions. In most of the early battles you´ll probably only use your characters normal attacks so don´t worry about using magic right now.
You will meet up with everyone at a gate. Biggs will ask for your name. Name CLOUD
(In this guide I will call the characters by their default name)
The Avalanche will open the gate. Follow them. Barret will stop you and say that he doesn´t trust you.
You now get to name Barret. His gun is a 'long range weapon' meaning he does the same damage from the back row as he does in the front row, so you should move him in the back, as he receives less damage this way. You can do this in the menu by clicking on 'Order" and selecting Barret twice. Follow all of the Avalanche to the security gate. Talk to Biggs, and he will open the gate. Follow Jesse to the elevator. Biggs will tell you how to maneuver around the complex. Talk to him if you need help. You will find yourself in the core level of the complex shortly. Cloud will set the bomb at the reactor. This will trigger the first boss fight, GUARD SCORPION
Boss Strategy - Guard Scorpion
Concentrate on regular attacks and Lightning magic.
When the scorpion´s tail is raised, he will counter attack if you attack him. However. when he counter attacks, your limit meter will rise, making you unleash some great attacks if you want.
If you need healing, use some potions. You start out with 10 and you sometimes win a few in battles.(This isn´t too hard, and it should be a short fight.)
Throughout the battle, the Guard Scorpion raises its tail and begins to shake. When this happens, don´t attack it. If you attack at this point, it will use it's laser weapon that deals about 75 hit points damage to both Cloud and Barret. Just concentrate on keeping character´s hit points over 100 and you should win with normal attacks. The Boss also uses a 'search scope' attack which will identify his next target. If you select 'defend' on that character you can halve the damage of his next attack, but it will obviously cut into your offensive ability and shouldn't really be neccesary.
After the battle, you have 10 minutes to escape the complex (including battles and time spent in the menu). Keep running out and make sure you save Jessie where you left her. If you don´t rescue her you won´t be able to open the security doors above, thus requiring you to go back and get her. When you reach the top level talk to Biggs and Jessie again and they´ll release the locks. Run out of the area and you will see the destruction of the reactor.
2: Avalanche Headquarters
Items: All Materia, Ether
The team escapes from the reactor and proceeds to go back to their hideout. Barret wants the team to meet at the Section 8 train station. Avalanche splits off in different directions. Follow Barret off screen.
You will run into a flower girl on your way. When you talk to her, tell her that you would like a flower for 1 Gil.
By doing this, you will unlock a special sequence in the bar later. Proceed trough the Area 8 City. You will have a choice whether to confront the guards or not. It is good decision to fight them because they give good EXP. You will eventually escape with another cutscene. You will be informed of Avalanche´s involvement on the train. You will jump off of the train and get to Sector 7.
Go to the bar and meet Barret´s daughter, Marlene. Here you will get to name Tifa. Go towards the exit, and Barret will come barging in. After the dialouge, you can follow Avalanche under the bar through the use of the pinball machine to the right. Cloud tells Barret that he's not interested in Shinra or Avalanche. Barret and Tifa will urge him to join Avalanche. Be prepared for a flashback sequence. Cloud made a promise with Tifa long ago to help her in a time of need. Barret will come in with Cloud´s pay. And because of Cloud´s promise, Cloud accepts the next mission for an increase in pay. You'll awaken in the hideout up against some boxes. Attempt to exit the bar. Barret will ask about Materia.
Explain to him how it works if you want a tutorial and stock up on items in town after. Don't forget getting an 'all' materia from the guy above the store. You also might want to consider buying a couple of grenades. they cost 80 gil a piece, but they do around 150 damage with is a lot more than the 50 or so a character will do at this point. very handy when fighting a big group or a boss. I also recommend you try and save up for 2 more lightning materias as those will come in handy later on when you have to fight a couple of bosses weak to that element. Now you're off to the Sector 5 Mako Industrial complex.
3: Sector 5
Items: Phoenix Down, Hi Potion, Ether x2, Potion
You will be on the train again. Due to the newly installed ID checkpoints, you need to run from car to car in less than 15 seconds. You can get a few items by talking to guys along your way, and one guy will pickpocket an item from you, but by running back and speaking with him, and telling him, 'That's Right', you can get the stolen item back. Hurry along through the cars and you will reach the final car. After a short dialogue, Cloud, Barret, and Tifa leap from the train. The direction you want to go in the tunnel is away from the camera. You will find a small hole leading to Sector 5. Go in and be ready for battle. The enemies here are a little stronger than before. You'll run into Wedge, Biggs, and Jesse throughout this back entrance into the reactor. Jesse confides that it was her fault for the fiasco on the train due to Cloud's fake ID being, 'special'. After sliding down the pipe, you'll recognize that the reactor's layout is exactly the same as the first reactor. Battle your way through to reach the reactor. A flashback will hit Cloud. You'll proceed to plant the bomb, but this time there is no alarm. (As you head back up, try to keep two of the three team member's Limit Break full. This will come in handy soon.) Travel back up to the elevator and follow Tifa into the controls center. The team has to press the buttons simultaneously in order to open the door. Keep trying until you get it, because you have unlimited time. The door will open allowing you to escape the reactor. Once outside, you are surrounded by guards on the bridge, and you meet the president of Shinra. IT'S A TRAP! You will have to fight a boss now.
Boss Strategy - Air Buster
Limit Break attacks do the most damage. (You can beat him in one turn if you have two Limit Breaks ready.)
Hitting Air Buster in the back will increase the damage done by a lot (7 times). Try to keep your best attacks hitting him in the back.
Lightning magic also works well here.
Make sure someone has the Restore-All combination of materia
After you beat him, you get a Titan Bangle.
Upon beating the Air Buster, it explodes causing the bridge to break. Cloud is caught in the explosion but manages to grab hold of the edge. After a short dialouge, the vibrations from the exploding reactor causes Cloud to fall into the city below. Barret and Tifa are able to escape.
4: Meeting Aeris
Items: 5 Gil, Ether, Cover Materia, Poison, Phoenix Down
Cloud regains consciousness in a church. He is awoken by the flower girl from before. Tell her that you remember her. You get to name her now. A red-headed man enters the church. Upon seeing him, Aeris requests that you be her bodyguard, and that you get a date with her later as a reward. Walk towards the man to continue, then speak with Aeris again. Cloud recognizes the man's uniform. Apparently, the man is there to take Aeris. To avoid a fight Aeris tells Cloud that they have to escape, so he follows her to the back. Head up the stairs and Cloud will jump across the gap. Aeris hesistates and falls due to gunfire from her pursuers. Run up to the scaffolding. Tell Aeris to hold on each time she asks. The order for pushing the barrels is: the left most in the back, the far right barrel in the back, then the far right barrel in the front, and the remaining barrel.
You will escape with Aeris through the roof. Go northeast to Aeris´s house. Cloud says he need to go to Sector 7. Aeris' mother tells her to go make the bed. Talk to Aeris' mother and she will ask you to leave her behind. Go upstairs and rest. Cloud decides he will leave without Aeris. Walk slowly across the floor next to the stair railing to avoid detection and you will be on your way. Leave Sector 5 slums and head left. Aeris will be waiting for you at the entrance towards Sector 6. You will see a sequence of Cloud and Aeris at a playground. At the end, a caravan comes out of the gate with Tifa in tow. Aeris takes off running after. Follow Aeris into the Wall Market.
5: The Slums
Items: Ether x2, Hyper, Phoenix Down, Sewers - Potion, Steal Materia, Hi Potion, Echo Screen
Buy any items that you need here. Go southeast to the Honey Bee Inn and talk to the manager.
Ask him if he knows where Tifa is. He will tell you to visit the mansion to the north. Go to the mansion and talk to the security guard. Only females can enter the mansion. Head for the clothing shop to the west side of town. The owners son will tell you to go to the bar. Go there and talk to his father. He will eventually make a dress for you. You get to decide from 3 dresses. To get the best dress, say that you want "Something that feels Soft" and "Something that shimers". Go to the clothing shop again and the owner will have made your dress.
A WIG Go to the gym below the weapon shop. The woman will give you the wig if you face her brother in a fitness match.
Press Square to kneel, X to stand up, and Circle to band over. (If you never changed the config at the beginning, the order would be, DELETE, C, X.) You have to keep constant timing to win. You will get a wig even if you lose. Winning the competition will get you the Blonde wig, however losing will award you the regular Wig. Go to the clothing store again. Go to the dressing room and change your clothes.
Note: Here you have some choices to get some more items for Cloud. The more you get, the better the chances are of Corneo picking him.
SEXY COLOGNE Go to the bar and talk to the lady in the bathroom. She is sick, and you will have to get some medicine for her. Go to the local restaurant and buy any meal. you will get a coupon after eating (he will ask you how the taste was, answer with the second option).
Take this coupon to the Pharmacy and exchange it for the Digestive. Take the Digestive to the lady in the toliet and she will give you the Sexy Cologne.
TIARA Go to the Materia shop. The man asks Cloud for a favor. Listen to it, and head to the Inn. When staying the night, pay for the most expensive item (200 Gil). Take this item back to the Materia shop owner and if you bought the most expensive item, he will give you the Diamond Tiara. If you bought the 100 Gil item, he will give you the Ruby Tiara. If you bought the 50 Gil item, he will give you the Glass Tiara
UNDERGARMENT AND MAKEUP Head back to the southeat side of town, there is a heavy-set man in a light blue shirt. Talk to him, and he will give you the members card so you can get into the Honey Bee Inn. You can only take one of two rooms to do your "activities". You can get the Bikini Briefs if you choose the Group Room, or the Lingerie if you choose the #$%& room. It doesn´t matter which one you choose (Pick the right one, you don´t want the group room believe me xD).
(If you choose to get the Lingerie, you will have to chase down Mukki on his way out to continue the dialogue, and in turn the Honey Bee assistant. If you fail to catch him, you will not get the lingerie.)
Talk trough everything, and you will get the item you need. After you are done getting this item, go into the north room, and ask the girl to the far left to put makeup on you.
Cloud now has everything he needs to get chosen by Don Corneo.
Go to the mansion. You will be allowed in. Go up the stairs and to the doorway to the far left. Head downstairs and find Tifa. Aeris introduces herself and tells her about Cloud. Tifa will explain why she is there. The man from the front desk will tell you to go to Corneo´s room. Corneo will choose one of your members to be his women. He will choose the members according to what dress you have. You will cut to Corneo´s bedroom and he will try to engage in extra-curricular activies with Cloud. Aeris and Tifa will appear just in time to save Cloud. After grilling Corneo for information, he pulls a trap door which drops your effeminate team into the sewers. You will cut to a Shinra sequence which confirms what Corneo said. Right when you land, you have to fight a boss, Aps
Boss Strategy - Aps
Fire Magic does the most DMG here.
Aps´s attack Sewer Tsunami does DMG to everything including the Boss himself.
Limit Breaks are a good way for Burst DMG
The fight shouldn't be too hard. Aeris' limit break should keep you healthy enough so just keep pummeling him. using grenades can make the fight go much quicker still.
After you beat Aps, you will have to go through the sewers. Make sure your allies are all healed. Fighting here for a while can get you some good EXP, so you can gain some levels here. After fighting for a while, make sure to grab the Steal Materia, and equip it on someone, preferably Tifa. After you exit the sewers you´ll be at the Train Graveyard. Getting the items laying on top of the trains and in the barrels are beneficial. Stealing from the enemies here is a very good idea, as you can get ethers which you can sell for a whopping 750 gil a piece, which is very helpful this early in the game. "Ghost hand" is an item you can *only* steal from the ghosts here, and nowhere else in the entire game. Make your way up the first large train, jump to the bottom, and go around to the middle passageway. Go inside the train, and exit out the other end. Go up towards the other part of the graveyard. In this area, there is an enemy named Eligor (some strange guy on an vehicle), and by stealing from him, you can get the Striking Staff, a great for Aeris in this point of the game, as you otherwise can't get it until you reach Junon. Make sure to do this, as it will help Aeris do much more damage, rivaling even Cloud. You must make your own path to the exit of the graveyard by moving the bottom engine twice and the top engine once. Go over the bridge you created and into the next area. Be careful though as this area will be blocked forever just be walking 2 screens to the left, so if you want to grind for some more ethers do so now.
6: Battling In Sector 7
Items: Sense Materia, Turbo Ether, Ether
Upon arriving at the pillar you will see a group of people gathered at the fence.
You see Barret and the rest of Avalanche engaged in the defense of the Pillar. Wedge falls from the top and lands next the group. There he utters his last words to Cloud. Tifa asks Aeris to get Marlene to a safe place. You can talk to the man with gray hair for an items shop. Go through to the pillar and you will find dispatched members of Avalanche. Ultimately, what you say to them doesn't matter, but for the best reactions you tell Biggs, 'You're wounded..." and to Jesse, 'Is that so?'
You reach Barret already fighting off a helicopter. The game gives you a chance to equip before you are forced into a boss fight.
You will now have to fight Reno.
Boss Strategy - Reno
Be careful, as Reno´s magic will sometimes stun your allies. To get them unstunned, you must attack them or wait it out.
Fire and Ice magic work well here, as do your character´s Limit Breaks. Use grenades to really make short work of him.
Reno will run away after enough damage.
Reno´s Electro-mag Rod can stun a victim. You can´t really do much to help a stunned victim so heal them until they recover.
Reno´s Pyramdi attack creates a golden pyramid that also stuns the player. You can destroy the pyramid by having one of your crew fighting the pyramid itself.
After the fight, and Reno escapes, a helicopter will appear with Aeris on board. She was captured by the Turks in the confusion. She does manage to tell Tifa that, "She is safe." The helicopter will escape and you can´t save Sector 7. You will see a sequence and Sector 7 will be destroyed. Barret goes ballistic because of the loss of Biggs, Wedge, Jesse, and Marlene. However, reflecting on the events, Tifa realizes that Aeris was trying to tell her that Marlene is alive. Go to Aeris´s house and hear the rest of the story.
7: Shrina Headquarters
Items: Elixir, Potion x4, Enemy Skill Materia
You will find Aeris´s mother and she will explain to you why Aeris was captured. Go upstairs to Barret and Marlene. Marlene will tell Cloud that Aeris was asking all these questions about him, implying that she likes Cloud. You get to accept the decision or not. Sleep and go back downstairs. Cloud has made the decision to chase after Aeris. Barret and Tifa acknowledge this should be the team's next course of action. You now need to head to Wall Market. - While in town, stop by the weapons shop and talk to the old man to the left. Buy the batteries, you'll need them.
Head north and you'll see a group of children running off screen. Follow them. Climb the wire, and use the batteries you have bought to proceed to the top. You will arrive at Shinra HQ. You are given the option of whether or not to go through the front door or go up the stairs. Both paths are very different but lead you to the same place in the end.
If you take the stairs, you'll have to run for a while. You have to go up nine sets of stairs but there are no enemies here (Which means no EXP). However, there is an Elixir on the fitth set of stairs. If you take the stairs you will arrive on level 59.
If you go through the front you will have to fight the guards at the entrance. There is an Item Shop near the front of the place here. You can´t open the two chest´s in the back of this area until further into the game. The enemies here are very easy, so when you´re ready take the elevator to the 59th floor.
59th floorThere isn´t anything here really except the keycard for the 60th floor. You have to defeat the group of guards near the stairs to get it. You can now always use the elevator here to reach other levels of the place if you have the keycard for those levels.
60th floor
Run into the room of the left and you can break in. You have to fight four guards here but they are all simple. The guards follow a certain path, and you can avoid them, but it doesn´t really matter cause they´re all fairly simple. Use the large stairway to get to the 61st floor.
61st floor
Talk to the man near the stairs and he´ll give you the keycard for the 62nd floor.
There is nothing else to do here so head there.
62nd floor
Visit Mayor Domino on the left room. You need to figure out a password before he´ll give you the 63rd,64th, and 65th keycard. A guy named Hart is willing to sell you hints, but each hint costs more than it lasts, but it is the easiest way to figure out the password. If you get the password on the first guess you receive Element all Materia. Hart´s hints Are:
There are four research libraries on the floor with four different sections of the complex
Parts of the password are hidden in each
There is one file in each library mixed in from another library
There´s a number at the beginning of each file that is important
You have to match the number with the letters in the title of the file
The password is random so I can´t directly tell you what it is, but you should be able to find it out with these clues. go to the staircases and go to floor 63,
63rd floor
You actually don´t even have to come to this floor but some of the items here are nice. Go to the computer and it will give you access to the security doors, but you can only open three doors. You have to open certain doors to get all of the items here.
If you get three coupons you can turn them in for a Star Pendant, Four Slot, and All Materia. When ready head up to the 64th floor.
64th floor
This is a big recreational complex, and there is a save point here. Save your game. Visit the locker room and you can get a few items from the lockers. You will see a Megaphone here but you wont´take it cause you can´t use it. This is a hint into getting Cait Sith´s future ultimate weapon, but you can´t get it here until much later in the game. When ready go up to the 65th floor.
65th floor
There is a large model of Midgar in the center of the room, but pieces are missing from it. In the locked chests around the rooms lie the pieces for it. You can only get one piece at a time, and placing that piece opens another door to get the other pieces. So complete the model of Midgar and you will be able to get the keycard to floor 66
66th floor
Go into the bathroom here and go up the duct, and you will be able to move towards the Shinra meeting room. You´ll learn something about where Aeris is and what Shinra is doing. When ready move out of the duct and follow the Shinra members to the 67th floor.
67th floor
Hojo will move towards the room here and you are able to look at a specimen here. The specimen is labeled "Jenova". Cloud starts to act nervous and intimidated here. Move towards the back of the area to the save point, and you can also get a Poison Materia from here.
Also make sure to fight some enemies here because you can steal Carbon Bangles from the Moth Slashed and a Hardedge from Soldiers. They are both useful items for this point in the game. Head up the stairs to the 68th floor when ready.
68th floor
You will see Aeris here enclosed in a plastic cylinder, and Hojo is about to do some experiments on her. Cloud frees Aeris but Hojo calls for help. You will meet Red XIII here and he will offer his help into defeating Hojo´s experiment. You have to choose one character to send to stay with Aeris cause you´ll want with Barret's long range attack for the boss. I recomend giving one person an Elemental and Poisen Materia, because it allows you some resistance from the boss here.
Boss Strategy - Sample: HO512
The boss can resurrect the fallen drones
He is weak to bolt magic, but he absorbs poison damage.
Only focus the boss; ignore the small enemies in front.
After you defeat the boss you can get the Enemy Skill Materia near the tank. Get the keycard to the next floor. Go down to the 66th floor so you can get into the elevators. Tseng and Rude will capture you though. After the President is done gloating you'll be taken to the prisons on the 67th floor. Go to the door so you can talk to the others. Take a nap and you´ll notice your cell door is open when you wake up.
Head out and look at the dead guard. Wake up Tifa and you can free the rest of the characters. Head south and you will notice that all the lab technicians have been sliced and Jenova is not in the same place anymore. The enemies that attack you are pretty powerful but many are weak to the cure spell, which makes short work of them. Follow all of the blood to President Shinra´s office. Sephiroth´s sword is sticking into the
dead president, but he isn´t here. You can go out to the roof where Rufus lands on a helicopter. You will now have to fight two bosses back to back.
Boss Strategy - Hundred Gunner / Heli Gunner
It takes the boss two turns for the special attack
Weak to Bolt Magic
You MUST use long range attacks
Physical Limit Breaks work well
Receive a Mythrill Armlet for winning
Now Cloud and Rufus have a conversation and you will have to fight him with cloud alone. Equip Cloud with Restore Materia and All Materia, and its also a good idea to put Elemental and Bolt Magic on his Armor so you can resist some of Rufus´s attacks.
Boss Strategy - Rufus
Kill his sidekick first because it has a powerful magic
Use many Limit Breaks, Fire/Ice Magic
Grenades ignore the barrier spell.
8: Bike Race And Flashback
When you start the the bike race you get the option to pick your team and rearrange materia. Be sure to do so as right after this part you must fight another boss who can be a moderate challenge if you haven't set any materia to your team. he is weak to lightining so best use those. During the bike race part just keep all of the guys away from your bike by using your sword if they come too close. The boss is pretty easy if you're prepared but he does always get a back attack. press ]page up] and [page down] for a moment to turn around and you should be able to defeat him with simple magic and limit breaks. After you kill him you can exit midgar. Save on the overwold and make sure someone has the 'enemy skill' materia. fight the enemies around midgar untill you find the bikers who use 'matra magic' be sure to learn that skill as it's cheap and does very good damage to all enemies which will be useful for a good while. go to Kalm and enter the inn where you'll find the rest of the team, and Cloud will have a flashback.
Cloud, Sephiroth and some Shinra are traveling to Nibelheim. Cloud describes how they were there to investigate a Mako reactor there. Sephiroth notes how his mother, Jenova, died shortly after giving birth to him as you arrive. go to Cloud and Tifa´s homes and you more about their backstories. If you play on Tifa's piano (in her room) now this will give you the chance to get another elemental materia later in the game. When you're done go to the hotel and tell sephiroth you want to go to sleep. In the morning the group wakes up and Tifa acts as a guide to the mountain for Cloud and Sephiroth. Before embarking a guy takes a picture of the party.
You will now have to cross Mount Nibel to get to the Reactor. While on the bridge, it collapses and you must make your way trough the caves. Go farther and Sephiroth will go inside the Reactor. Sephiroth here finds out that he is a result of an experiment by Hojo. The sequence will shift to the Shinra hidden door in the bedroom that connects to a spiraling staircase. Head down here into a library area. You will now find Sephiroth here. Sephiroth is outraged about his past and says that he is going to find his mother. Sephiroth destroys Nibelheim in rage and slaughters the villagers, including Cloud and Tifa´s parents. As the sequence shifts to the reactor once again, Cloud tells a story of how he approached Sephiroth there and tried, but he doesn´t remember what happened next, and wonders why Sephiroth didn´t kill him.
The flashback is now over. when you head downstairs you will recieve the PHS, which allows you to change party members on the world map. You can go through Kalm now and buy new weapons/armor. I recommend you get 2 more steal materias here as you can't buy them anywhere else and having 3 characters with steal makes getting stuff from enemies much easier. Explore the town and pick up some supplies. You´ll find out that several people here mention they´ve seen a man with a black cape and an long sword, and say he headed east. When ready leave the town and head east to the Chocobo Ranch.
9: Chocobos!
Items: Ether, Tent, Long Range Materia, Mind Source, Elexier, Hi Potion
Talk to the Chocobo in the front and if you choose the top option, he will give you the Mog and chocobo summon Materia. Go to the stairs and talk to all of the guys. Buy a chocobo Lure Materia so you can find them on the footprints on the world map.
Go to the Mines. You have to ride a chocobo past the snake. Don´t go here without a chocobo, or you will die. To catch a chocobo, go to the footprints close the barn and fight until a chocobo comes. Don´t attack the chocobo. Kill the other enemys and you get the chocobo. Ride it past the snake. You will across a Midgar Zolom being impaled on a huge sword. Head in the mines.
The mines are fairly straightforward and there really isn´t anywhere you can get lost. You will have to climb a vine here to get the long Range Materia. As you get to the exit, you will run into Rude,Elena, and Tseng the Turks. Elena will mention that Sephiroth is headed for Junon Harbor, and the Turks will leave. Follow them out and you will come across Fort Condor.
10: The Golden Bird And The Beach
You see a tower with a bird on the top. Go into the tower. Practice on the game, becouse you have to win it later in the game. It´s a fun strategy game that takes a while to get used to but is pretty fun and definitely a great mini game. You just have to kill the guys that are going up the mountain using different units. (Its most like a Tower Defense Game)
You won´t be able to buy items here untill you´ve aagreed to help save the condors, and you´ll have to talk to the man in the middle of the fort to do so.
When ready, save your game and get supplies and head to the Narval Base at Junon Harbor. At this point you can get Yuffie in your party Start fighting in the forest and you may run into a girl in battle. She´s not too tough in battle, and when you defeat her, the game will switch to a small map. don´t be distracted by the save point here, run up and talk to Yuffie. she will say a series of thinks to Cloud, and you have to respond a certain way. After each awnser, you have to talk to her again. Here is what you have to say to her statements:
"you- spikey-headed jerk! One more time, let´s go on one more time!"
Answer: Not Interested.
"You´re pretty scared of me, huh?!"
Answer: ...petrified.
"I´m really gonna leave! REALLY!"
Answer: Wait a second!
"You want me to go with you?"
Answer: .... That´s right.
"All right! I´ll go with you!"
Answer :.... Let´s hurry on.
Head to Junon. It´s against the ocean, very large, and has a large cannon coming out of it. You really can´t do much here, but talk to the people and learn about the area. I recommend equiping Cloud with your Long Range Materia here, becouse it will be usefull for the upcoming boss. Also make sure that you have Barrett in your party. Head down to the Junon beach and you will find a girl, Priscilla. She asks you to leave, but a monster sudden attacks, and you will have to fight it.
Boss Strategy - Bottomswell
Can´t attack unless you have a long range attack.
Has two powerful attacks.
Short range characters should use magic.
Bottomswell has two powerful attacks. One, Water Bubble, stuns a character and leaves them inactive. it´s other attack, Big wave, hits the entire party with a water attack that deals about 100 hit points to all. This is also its desperation attack, so make sure you won´t die when it does at the end of the fight.
Priscilla is hurt and isn´t breathintg, Cloud will have to preform cardiopulmonary resuscitation (CPR) on her. Pressing the Circle button allows Cloud to fill his lungs with air. When the small meter reaches the top press Circle again and Cloud will give her air. You have to get your timing right but isn´t that tough.
After saving Priscilla, the woman near the town entrance is thankful and offers you a night of rest in her home, so take the Offer. Cloud heres a mysterious voice telling him to ask Tifa about Nibelheim. You will now get to walk around the town again. Make sure to run into Priscilla again and she will give you the Shiva Materia. Priscilla tells you that Shinra is throwing a ceremony for Rufus, but you can´t directly get there becouse the soldiers are blocking off the path. However, Priscilla shows Cloud that her dolphin friend can help. get on its nose and he will leap high into the air. You will have to place him at the right spot and you can land on the bar above. You will now get to Junon.
11: Shinra Military
Items: 1/35th Soldier x2, Mind Source, Luck Source, Power Source, Guard Source, Enemy Skill Materia, Speed Source
Climp the pole and you will see a unique sequence of the airship taking off. Go west and go to the door below. Soldiers are hyped here for Rufus´s arrival at the base. Once of the soldiers sees Cloud and assumes he´s one of the soldiers, and brings him to the locker room and dresses him in a uniform. He will teach you the right moves for the reception committee, which you will have to join.
you will now have to ju8mp out and join the large parade. Make sure to take your place behind the commander and fill in the back. Raise the gun when the other soldiers do as well. You can win different items depending on the ratings you get.
1-29: Grenade
30-39: Potion x6
40-49: Ether x6
50-100: 5000 Gil
Now you will have to do the different moves in front of Heidegger and Rufus. Just push the button that Heidegger calls out. Depending on how good you do here, you tock up on gear and when ready head to the boat.
12: Relaxation And Surfers!
Items: Shinra Boat - Ether, All Materia, Wind Slash, Ifrit MateriaItems: Costa Del Sol - Motor Dive, Fire Ring, Power Source
You will learn that all of your characters have snuck unboard in disguises. Go to the front of the boat to see Barrett spying on Rufus and Heidegger. The alarm sounds now, something is wrong with this ship. Get your party members together and head to the cargo hold. You will find that most of the crew is dead, and the shinra officercs are going after anyone not in Shinra, and they will spot on you. You´ll have to fight a few guards but they are laughable.
Approach the standing guard at the bottom of the cargo bay and you´ll find Sephiroth. He will leave abruptly and Jenova - Birth will distract you while he makes his getaway.
Boss Strategy - Jenova-Birth
Casts stop on characters.
Can do Tail Laser, a 200 HP to akk attack
It´s time to break out your Summon Materia. Shiva and Chocobo/Mog both do major damage there, so unleash hell. Also Fire attacks will do a good ammount of damage. She has some powerful attacks but should go down if you keep up consistant summons.
After defeating Jenova-Birth, make sure to grab the Ifrit Summon Materia left behind.
You will arrive at the beach in costa Del Sol. Talk to all the people and then walk down to the beach. Don´t talk to the Shinra guy yet, talk to the girls. There isn´t much to do at all other than gaze at the unique sights and watch Rufus and Heidegger land. Note that President Shinra´s beach house is being sold for 300,000 Gil. Keep that in mind for the future.
If you go down to the beach you will find Hojo talking to some women. If you talk to him all he suggests is that you head to Mount Corel. Stock up on supplies here and head onward to the Corel Mountains. I especially recomment grabbing Softs for the upcoming area.
13: Everyone Hates Barret

Items: Mount Corel - Wizard Staff, Star Pendant, W Machine Gun, Turbo Ether, Transform Materia, Phoenix Down x10, Power Source, Mind Source, Tent
Items: Golden saucer - Ramuh Materia, Ranch Materia
Items: Corel Prison - Silver Armlet
Keep battling down trough the train tracks. You will find a ledge with a great view of a Mako Reactor at the bottom of the canyon. You will fall down on some of the broken parts. Grab all of the items down there. Go across all of the tracks and talk to all of your party members. Go into the booth and hit the switch and keep following the track to the city. At the end of the area, you enter an area where you can hear some birds chirping. If you climb up the wall in that area you will find a few birds. you can choose to take 10 Phoenix Downs, but if you do you´ll have to fight a Cokatolis. Exit the train area and head towards North corel.
North corel was a coal mining town but now is burned up and very junky. Barrett grew up here.
Barrett also receives a bad reception becouse of his past. Buy new weapons and armor and head to the Golden Saucer Ropeway, which is to the west. Before you depart on the ropeway tough, Barrett will tell you the entire story of North Corel. Basically what happened is there was an explotion at the Mako Reactor in Corel and Shinra blamed the citizens living in North Corel, saying that is was a terrorist attack, so they burned the whole place down, killing most of the people and making Barrett an outcast.
Go up to the Gold Saucer. Buy a lifetime pass if you can, becouse you can do many things here later. Choose a Character to come with you, and enter the Square. You will find Cait Sith here. Name him and he will join you after you talk to him a few times for no real reason xD
Play some games enter the battle square. Some guards are dead and it looks like Barretts´s work, becouse of the bullet holes in all of the people. One of the daying men says it was also a guy with a gun grafted into his arm. Dio, the golden Saucer owner, throws you out of the Gold Saucer and into the prison below the Gold Saucer area.
The place is completely surrounded by quiclsand and you quickly learn that you won´t be able to get out of the prison is any normal way. Also some bandits living here can steal your items. If you get info a battle and an enemy steals an items and then runs away, you can´t get it back, but if you quickly kill them you can. Barrett is also here and pissed, but follow him off the screen to the open area. You will learn a bit about his past and how he got his gun grafted into his arm. he tells the story of Dyne and how Barrett and Dyne were attacked by Scarlet. Dyne hung off the ledge as Barrett cought him. The Shinra soldiers shoot at Barrett and Dyne, causing them to lose their arms.
Go back to the area where you entered, and there will be yet another dead guy killed in the same way the people in the Golden Saucer were. Go trough the east gate and you will run into Dyne. Dyne is very bitter about what happened four years ago, and is intend on destroying everything. He will get mad and you will have to fight him with Barrett alone.
Boss Strategy - Dyne
Trade normal attacks while keeping your hp up
He doesn´t have much variety in attacks
You´ll win Silver Armelt for killing him
Dyne can use an attack called S-Mine that is basically the same as a normal attack, but he uses it right after a normal attack. Don´t let you HP drop under 350 or so becouse he can deal that much damage in two shots. Also, Dyne´s desperation attack is molotov Cocktail, which does 150 or so damage. Keep hacking away with attacks and he´ll be dead.
After defeating Dyne, he is still alive but wounded. Barrett attempts to help Dyne, but Dyne just gives him a pendant to give to Barret´s daughter and plummets to his death, jumping off the cliff.
You will get to rest up and the next morning you will meet the chocobo racer. apparently you will be able to win you way out of the prison if you can win the chocobo race in the Golden Saucer. You will meet Ester, the manager of the races, and she tells you how to race. She´ll also loan cloud her Chocobo to race with. Make sure to grab the Ramuh Summon Materia in the room.
The actual race really isn´t hard at all one you get the hang on it. Use Manual controll and increase your speed at the start of the raceso you don´t waste as much stamina as the other racers. Once you win, you will get out of the jail. If you fail, you can keep trying as many times as neccasary until you win.
Dio apologizes for the mixup. He´ll allow you acces to his Buggy so you can leave the desert. Heading trough a rift in the water, you will reach the gongaga area.
14: Gongaga

Items: Titan Materia, deathblow Materia, X-Potion, White M-phone, Fairy Tale
Take all-terrain vehicle across the river back to the Gongaga area. Cross the shallow place in the river. Follow past the destroyed Mako reactor and enter Gongaga.
Upon entering, you will run into the Turks. Elena runs off and leaves Reno and rude to attack you.
Boss Strategy - Reno and Rude
Equip Elemental-Fire in armor
Kill Rude first
Use Summons and Magic more than normal attacks
Winning gets you an X-Potion and Fairy Tale
This is an extremely easy boss fight. Do your best to pummel Rude early becouse he can heal both himself and Reno. Unleash summon materia and you should be able to cruise trough this fight.
Follow the path that Elena took to the Mako Reactor that has been destroyed. You will see a small sequence in which Scarlet and Tseng show up and are looking for something called a "Huge Materia". They can´t find anything, so they leave. Check the area Scarlet was searching for the Titan Materia. This is a useful summon. Go trough the other path on the crossroads and pick up the Deathblow Materia on the way. You will come across a very small village and several people talk about Zack, a guy that left the town for Soldier. Aeris remembers that name as her old boybrienf.
When done buying items or resting up, take the buggy to Cosmo Canyon.
15: Cosmo Canyon
Items: Added Effect Materia, Black M-phone, Ether, Fairy Ring, X-Potion, Turbo Ether, Gravity Materia
Cosmo Canyon is as its name suggests, located in a Canyon near Gongaga. Cross the river to the south of the village and follow the path into the canyon. The Buggy will break down right in front of Cosmo Canyon.
Cosmo Canyon is Red XIII´s hometown, where he is called Nanaki. You will see a man in the middle of town that will offer to fix the buggy for you if you study. Follow Red XIII up to meet his grandfather, Bugenhagen. Talking to Barrett here will teach you about some Avalanche history. He says that he once planned to bring the entire Avalanche group here one day.
Buganhagen has an observatory at the top of Cosmo Canyon and tells you about the planet´s lifestream. Ge´ll say the lifestream consists of a path oder energy of souls roaming arounf the planet. He´ll tell (and show) you about what is happening to the planet becouse of Shinra. Talk to him another time and he´ll bring you to the very center of the town. After talking to the rest of your party, talk to Red XIII and he will tell you a bit about his family. RedXIII asks you to create a party including himself, so you have to take him for the upcoming dungeon. go up to where Bugenhagen is an he will open a path to the Cave of Gi.
In the cave there are actually quite a few secret paths and areas where you could get lost, butit´s really not very long. The Gi Spectors here use Death Sentence on your characters so bring some Phoenix Downs. Also touching the gold liquid will cause you to slip so try to stay away from it. In the small maze area with twisting paths is an Added Effect Materia on the bottom left. You will get to a point where there are 5 caves you can enter to proceed.
First Tunnel - goes to the fith tunnel
Second Tunnel - leads to a fight with stingers
Third Tunnel - Dead end
Fourth Tunnel - leads to a fight with Stingers, and an Item
Fifth Tunnel - connects with first tunnel
You must take the second tunnel to get by, it´s really the only path you need to take, but taking the fourth tunnel gets you an item after fighting the Stingers.
Equiping items that resist fire is a good idea for the next boss. Also make sure each character has a powerful summon materia. Approach the face in the wall at the end od the cave and you´ll encounter Gi Nattak.
Boss Strategy - Gi Nattak
Can be killed instantly by using a Pheonix Down (May miss sometimes)
Can use attacks to steal HP/MP
Has a lot of fire based attacks
Get a wizer staff and Phoenix Down for winning
Nothing too terribly hard here. If you have fire resistance here will be pretty easy. Consistantly summon Shiva and Ramuh and he will go down fast. If you don´t have summons use ice based magic.
After you defeat the boss, Bugenhagen will show you the statue of RedXIII´s father, Seto. RedXIII will realize that his father was a hero that saved the village. After talking about what happened, Bugenhagen asks RedXIII to continnue with Cloud becouse he can help the world. When leaving town RedXIII will run down and join you again. Leave Cosmo Canyon and head southwest, to Nibelheim, cloud´s hometown.
16: Nibelheim
Items: Nibelheim - Luck Source x2, Elixier, Platinum Fist, Turbo Ether
Items: Shinra Mansion - Silver M-phone, Enemy Launcher, Magic Source, Twin Viper, Odin Materia, Cosmo Memory
Items: Mount Nibel - Rune Blade, Plus Barrette, Powersoul, Elixier, Counter Attack Materia, Sniper CR, Elemental Materia, All Materia
According to Cloud´s memories Nibelheim completely burned down but as you enter you find out it looks like nothing happened at all. Go around trough the homes and you´ll find small guys wearing capes. They tell you that nothing ever happened here and Nibelheim never burned down. After talking to them, most of them give you an item.
You can go to Tifa´s piano but you won't be able to get her Ultimate Limit Break until disk 2. It's important to note here that if you play the piano anyways and complete the first line, you'll receive Tifa's hidden savings, which amounts to an amazing 1 gil.
You also don't have to repeat it when you come back on disk 2, just play it once before the second line. If it isn't working try repeating it again, as its hard to tell if it worked properly until Tifa comes out and mentions she remembers the song. You will need Tifa in your party when you do this otherwise it won't work. There will be a reminder to pick this up later in this guide when this becomes available to you, but here is the button sequence for the song:
[cancel] [switch] [menu] [page up]+[menu] [page up]+[switch] repeated twice
[cancel] [switch] [menu] [page up]+[cancel] [OK] [cancel] [switch] [cancel]
When ready, head to the Shinra Mansion to the north.
Explore all the rooms and gain some levels here. read the notes on the floor. The first note suggests someone is trapped in the basement. The second not says something about a safe, and says you have 20 seconds to open it. There are hints telling you what the combination is hidden within the rooms.
So the code for the safe is:
L=Left R= Right
R36, L10, R59, R97.
You have to fight a boss to get the prize. (Which is a powerful Summon Materia and Vincent a new member for your party)
Boss Strategy - Lost Number
Unleash your summons
Get Odin Materia for winning
If you defeat the purple side first, the red side will begin using strong magic. If you defeat the red side first, the purple side will use physical attacks. Once you have defeated on Side it won´t be as tough trough. Also, if yo´re using Aeris here her seal Evil Limit Break can paralyze it for most of the fight. This makes the battle incredibly easy.
You get the Odin Materia after defeating it. Also you choose to open the safe, you will recieve the Basement Key. This allows you to unlock a locked door below. When ready, head down to the masement that you saw in the flashback scene trough the hidden passage. Unlock the door to the east. When you go up to the coffin in the room, you´ll meet a man named Vincent. ask him about Sephiroth and he´ll just go back in to his coffin. Talk again to him an he´ll tell you his name. He´ll ask you if you´ve seen a woman named Lucretia, who he says is Sephiroth´s mother. Then he´ll go back into his coffin again. Don´t worry about this, he´ll join you later.
Head into the library here. Surprisingly Sephiroth is here waiting for you!
he´ll ask Cloud about the "Reunion", and Cloud has no idea what he is talking about, and asks Cloud to go to Mount Nibel, where they had been 5 years ago. He´ll throw a destruct Materia at you as he bolts out.
When heading out, Vincent will join your party for good. Head back to Nibelheim, this time taking the north path to head to Mount Nibel. It´s a very short walk away between the mountains. The path is linear but long, and there quite a lot of enemyss on the way so don´t go trough too fast. This will seem familiar as this is the same place Cloud and Sephiroth climbed 5 years ago. After crossing the bridge, you will find a place where you can jump infto 5 different chutes. But don´t jump down just yet, go down the ladder and push the folding ladder down so you can come back at the top after you´ve taken a chute.
Chute 1 - Leads right in front of the scorpion- like creature
Chute 2 - Leads to a ledge with the powersoul for Tifa
Chute 3 - Just takes to the second level
Chute 4 - Drops you near a chest with an All Materia
Chute 5 - Just takes you to the second level
When ready, take the path to the south next to the creature, and you will get to the place near where Cloud fell 5 years ago. The cave is very small. After passing the Nibel Reactor, take the door behind it and you will have to fight another boss.
Boss Strategy - Materia Keeper
weak to Bolt and Ice Magic
Uses Trine which you can learn as an Enemy Skill
Get Jem Ring for defeating it
Materia Keeper is one of the toughest bosses in the game in my opinion, but still not too bad. Make sure not to use your gravity magic on it becouse it absorbs it. It´s Trine attack is very powerful, as it can hit your entire party for about 500 DMG. It also has several other attacks that do about 200-350- DMG each. Focus on kill it quickly with Bolt 2 and Ice 2 Spells.
Make sure to grab the Counter Magic Materia that the Materia Keeper droped, and equip it as it´s a very good ability to have. When ready you can exit Mount Nibel and head towards Rocket Town. It´s easy to spot as there´s a rocket sticking out of the ground.
A Note From Mr.Self
I actually found that this boss is entirely skippable, the only boss I know of in the game you can do that with. When you take the south path through the cave it leads to the reactor, and where the story needs to go. It appears you can take the other path right past it and continue with the story. Hasn't been completely verified but seems to work fine
17: Rocket Man And Yuffie´s Story

Items: Rocket Town - Power Source, Yoshiyuki, Drill Arm
Items: Wutai - Dragon Lance, Hairpin, Elixir, Swift Bolt, MP Absorb Materia, HP Absorb Materia, Leviathan Materia, Steal-as-Well Materia, Oritsuru
Explore the town and talk to everyone. You will learn about the Shinra´s space program and how something terribly went wrong so it never entered space. There are some nice shops here with new weapons and armor so make sure you stock up. also, talk to the man outside the item shop and choose to look at the rocket with him, an he´ll give you a weapon, the Yoshiyuki. you will find that the captain is a man name Cid, but he´s not at his house right now. You can see his plane here trough, the Tiny Bronco. Cid´s assistant tells you that Rufus is coming to town and Cid hopes he plans to reinstate the space program. When ready, climb the top of the rocket and talk to Cid. He´ll tell you about he was supposed to get into space but a disaster happened and the rocket never lifted off. If you ask him about using his Tiny Bronco, he´ll get pissed and basically say no way. ;)
Head back to Cid´s home. Shera will tell you all about the day of the suposed lunch, and then Rufus will arrive. Go back and tank to Cid again. Rufus says he´s not going to restart the space program but wants to borrow the Tiny Bronco becouse Sephiroth has already crossed the sea. Cid gets pissed becouse he thought he might be going into space again. Palmer, a shinra flunkie, tries to steal the Tiny Bronco anyway. Go to the back of Cid´s house and stop him.
Boss Strategy - Palmer
This fight is basicaly a joke, he´s not really even a real boss. You can paralyze him right away with chocobo/Mog Materia or Aeris´s Seal Evil limit Break. For defeating him, you´ll recieve a Edincoat.
Also Palmer is weak to sleep.
After you defeatet Palmer, the plane is already moving so the team jumps onto it, including Cid. Rufus gets very mad. The plane goes out of control and eventually crashes into shallow water. You are now able to head to Yuffie´s hometown, Wutai, if you´d like, but it´s an optional part of the story. If you don´t want to do this side quest, don´t head north becouse you can´t get out of the side quest if you start it.
If you don´t want to do the Wutai quest, skip to chapter 18 and head for Gongaga Village again.
As you head north, go trough the mountains pass and Yuffie will tell you this is her hometown. as you check your materia, you realize it is all gone and Yuffie has stolen it. You´ll also run into some very easy shinra guards to fight here. Follow Yuffie trough the town and try to catch her. Also note that if you aquire any Materia in Wutai, Yuffie will run by and steal it. You´ll learn from the people Yuffie ran towards Lord Godo´s house, to the north of Wutai. Godo will be sleeping in his house, and after speaking to him multiple times Yuffie will run by and Godo chases Yuffie out of the house. There is a secret room in Godo´s bedroom which allows you to head trough a fake wall to get a Hairpin for RedXIII. Go down to the house near the beginning of wutai and you´ll see Yuffie hiding behind the screen to the left. Find her, and she´ll run off. Now search the jar in the front of Turtle´s Paradise and you will have her surrounded. She´ll say she gives up and will take you to her basement. She tells you to pull the left switch to get the Materia. No matter which switch you pull, it´s a trap and a huge cage comes down on top of you. Free the characters and start chasing her again. Head to the north part of wutai and ring the gong. It will open a secret door into the mountains.
You will find that Don Corneo is back, and he´s kidnapping Yuffie and Elena. Follow him quickly and you´ll find out that the turks are here. Reno and Rude won´t fight you but they will suggest that corneo ran up the mountain. Follow him there and you´ll find Corneo with both Yuffie and Elena hanging on the mountain. You will have to fight a boss here.
Boss Strategy - Rapps
Have many Hi-Potions/Phoenix Downs ready
Use a barrage of normal attacks and magic items
This fight is especially annoying becouse you don´t have any of your Materia. Use any magic items you can becouse they´ll do a lot of damage. Otherwise use normal attacks and use your items to heal. Rapps can do an attack called Aero 3 that can do about 1,500 DMG to one person, so make sure you use Hi-Potions after this attack. Having Barrett use Mind Blow limit break to drain his MP is a good idea, as is having Vincent transforming into on of his beast forms. Physical limit breaks will help a lot here. When you win this fight, yiu will get a Peace Ring.
The Turks will come and agre to leave you without a fight as you helped each other out here. Yuffie will apologize for stealing you Materia and you will get it back. You can now do a Pagoda sidequest to get Leviathan Materia and Yuffie´s ultimate limit break here. Save up and head to the Pagoda to the north, and Yuffie will undergo a trial. Give her your best Summons and Magic Materia.
First Fight - Gorki
Give Yuffie Elemental/Gravity Materia combination to resist his Gravity attacks. Also make sure she has Cure Materia. His attacks will be useless if you have this materia combination. You´ll receive an X-Potion for defeating it.
Second Fight - Shake
Give Yuffie a Barrier Materia. Shake´s Rage Bomber can do 600 DMG but Barrier will block half of the DMG. Chocobo/Mog Summon can stun Shake well. Use summons and you shouldn´t have trouble here.
Third Fight - Chekhov
Equiping the fairly newly acuired Jem Ring helps a lot becouse you can negate his paralyze attack. Use Barrier again ti absorb half of the damage of his attacks. Also use Haste becouse he is very slow.
Fourth Fight - Staniv
He mainly uses normal attacks, so use Barrier again. Normal attacks can do the job here, especially when Hasted. If you have Barrier up this fight won´t be tough at all.
Fith Fight - Godo
This one is pretty tough. He uses Beast Sword and Trine, two very powerful attacks. The gold face can also use Cure 2, and the white face uses offensive spells like Bio and Demi 3. You won´t win this fight if you don´t havethe right Materia on Yuffie. Make sure she has Cure, Time and Barrier at least. Cast Barrier right away and try to keep up a constant attack while healing with Cure. You´ll get the Leviathan Materia and Yuffie´s ultimate Limit Break, "All Creation" for winning. When ready, head back to the gongaga area, to a house alone near a penisula. There is a weapon seller here. He tells you about the Temple of the Ancients and how there is an item Called a "Keystone" that unlocks that temple that he sold to Dio, the Golden Saucer owner.
Go back to the Golden Saucer trough the North Rocel ropeway. Go to the Battle Arena again, and to a side room, and the keystone will be displayed upon a pedestal. Dio will show up and Cloud will ask to borrow it. Dio says he´ll allow Cloud to use the keystone if he will fight in the Battle Arena. It doesn´t matter if you win here, as long as you try. If you defeat all eight opponents you´ll receive a Choco Feather and Protect Vest trough.
18: Quest For The Keystone
Go to the Battle Quare and go into the showroom. The Keystone is in the center room on the pillar. When you try to take it, Dio comes in and says he will let you borrow it if Cloud will fight in the Battle Arena. Agree and enter the arena. You will have to chose a random item from a slotmachine device that will help of hurt your efforts. You will get the Keystone after the battle.
You have to spend the night at the hotel, since the transport is out of order. Cait Sith will come with you. You will find out that Sephiroth is trying to find the Black Materia. Aeris will ask you on a date. you can take the rides in the Golden saucer for free with her. When you enter the theater area, the announcer will say you are the 100th couple to enter, so you have to be in a play. The play is one of the most humoous parts of the game. You are given several options on response during the play. You can either make the play great or a disaster. It´s really pretty entertaining if you intentionally try to screw it up.
Aeris will ask to ride the condola next. You will see another Sequence. Aeris will ask you if you want to go on another date with her. (I of course, said yes!) The sequence is very cool here. As you are leaving, you will see now that Cait Sith has stolen the keystone and is heading to the chocobo Racing part of the Golden Saucer. Chase him and you will learn that he works for the Shinra and was a spy the whole time. He will throw the keystone to Tseng and he will get away with it. The party gets pissed at Cait Sith but allows him to rejoin the party becouse he gives you information about the Temple of the Ancients. You will gather in the lobby, and you decide to go to the Ruins and get the Balck Materia before Sephiroth. Chose who you want and go to the Temple of Ancients, which is located in the middle of a jungle.
19: Temple Of The Ancients
Items: Trident, Mind Source, Silver Rifle, Rocket Punch, Turbo Ether, Luck Plus Materia, Morph Materia, Nail Bat, Work Glove, Ribbon, Princess Guard, Bahamut Materia, Trumpet Shell, Megaelixier
As you arrive, in the first room, you will find a man clad in black, saying something about a Black Materia. Go farther inside and you will see Tseng of the Turks lying on the ground, wounded badly. He will give you the Keystone and tell you to place it on the altar. Do so and it will open a passage into the temple.
The main part of the temple is basically a maze. However, a lot of the ledges and areas that you see can´t even travel on, it´s just there to throw you off. Make sure to get all of the treasures here, a lot of the items are very useful, You will eventually see a small purple guy. Rest in his house anytime you need to. This will allow you easy access to all the treasures in the area becouse you can just rest again if you are hurt.
Go trough the second part of the maze and you´ll see another purple guy run into a door. Follow him into a room with boulders falling across the path. It´s pretty easy to get past, just run trough and make sure yo´re in the indentations so you don´t get hurt. You´ll soon come across a trap that shurts itself on you and bring you to a big light beam. You´ll also see a flashback, which is what happened right before you entered the temple.
You will now come to a large circular room that is laid out like a clock. You can spin the handy of the clock so that the hour/minute handy form a bridge to walk across into different areas.
Room 1: Trap (Boss)
Room 2: Blocked Path
Room 3: Trap
Room 4: Prince Guard Item
Room 5: Path and a Treasure
Room 6: Chase the Dwarf puzzle
Room 7: Weapon for Cait Sith
Room 8 : Elixier
Room 9: Blocked Path
Room 10: Starting Point
Room 11: Blocked Path
Room 12: Boss and the Exit
After you go trough door 6, you will have to follow his pattern running trough different doors. Each of the doors here is connected to another door in the maze. You have to figure out which door he will come out next so you can catch him. You can jump down levels by pressing the Circle button. When you cath him he will unlock the door for you so you can get past. Save and rest at the save point.
Again, you´ll see another flashback from earlier. Sephiroth is talking about the Ancients and how he plans to become the planet itself. Cloud again begins to have a mental trauma. Sephiroth will leave, but give you a Red Dragon to play with.
Boss Strategy - Red Dragon
very weak to Ice based Magic
Absorbs Fire
Bio spells are very useful
Start the fight by poisoning him with Bio. Regenning your characters will help also becouse he does various attacks that do around 700 DMG to your party. Make sure to summon Shiva often. Casting Barrier on your party can also negate some of the physical attacks. Keep pummeling him with ice based stuff and he´ll go down.
After you win, collect the Bahamut Materia he left behind. Go into the room on the right and you will find the black Materia Tseng was talking about on the altar. The thing is, the Black Materia can not simply be taken becouse it is the temple itself. Cait Sith will volunteer to stay behind a sacrifice himself for the cause of getting the Materia. Have the main team go back into the clock room and go to room 12. You will have to fight another boss, Demon´s Gate.
Boss Strategy - Demon´s Gate
Slow spells work
He can petrify your characters
He is immune to Gravity and Poison
Get the gigas Armelt for Winning
Launch a barrage of of Bahamut, Kjata, and Ifrit summons. He can petrify your characters so be ready to use softs on them to make them active. Most of his special atacks are physical, so if you need to, make use of Barrier spells.
Cait Sith calls out Cloud from the outside, saying he will take the Black Materia and sacrafice himself now. As he does, the entire Temple implodes and becomes the Materia, and as you are walking towards it, Sephiroth will come. Cloud is overtaken by mental strain yet again, and Cloud inadvertently hands the Black Materia over to Sephiroth.
Cloud passes out and has a dream about how Aeris explains she is going to fight Sephiroth by herself. As you wake up, Aeris has already left and you´re in the Gongaga Inn. Leave for the northern continent of the world with the Tiny Bronco. Go up the coastline.
20: The Ancients
Items: Bone Village - Lunar Harp, Mop, Buntline
Items: Sleeping Forest - Kjata Materia, Water Ring
Items: City of the Ancients - Guard Source, Elixier, Enemy Skill Materia, Magic Source, Aurora Armlet, Comet Materia
enter Bone Village, it´s on the northern continent. Enter the village and talk to the boss by the door. He will tell his team to try and find the Lunar Harp if you pay him.
Basically what happens is in this area, three of the diggers can be placed and when initiated, they will look the way of the harp. Line yourself up to where all of the diggers are pointed and search and you will find the Lunar Harp.
After getting the Lunar Harp, you can go trough the Sleepinf Forest. Go trough the forest and get the Materia here before it disappears. There is also a Water Ring in a chest along the way to the City of the Ancients.
When you arrive at the City of the Ancients, there are tree roads. don´t go up the middle untill you´ve gone trough the side areas to rest up and get the treasures here. While resting in the small house, Cloud awakens becouse be hears Aeris´s voice. Take the team trough the center path, but be sure to get the Comet Materia on the top of the house first. This Materia lets you learn the powerful comet Magic series.
As you go trough the middle you will come across a surreal crystalline city. Head up and you will find Aeris in prayer.
You will find on of the game´s most memorable sequences...
Yep folks, the big dramatic scene. Sephiroth, stabbing a sword downwards, falls straight down on Aeris as she prays and she is killed. Sephiroth smirks as he pulls his sword out of her body. Aeris´s White Materia bounces down the pedestals in the room. Now you will get enraged with Sephiroth, but he will leave this area quickly and force you to fight Jenova.
Boss Strategy - Jenova Live
Uses water based attacks
Very weak to earth spells
Casts reflect, you can use DeBarrier to destroy it
Equip the newly accuired Water Ring on someone
Get a Wizard Bracelet after winning
Powerful summons and Quake Magic do the trick here. For added insurance you can cast MBarrier at the beginning of the fight, but doing so will make your healing magic less powerful. If you need, cast Regen so you get extra hit points each round.
Sephiroth has already left for the promised land. Cloud, saddened by the party´s loss, vows to never forgive Sephiroth for what he has done. In a very well done sequence, Cloud lays Aeris to rest in the water surrounding the city.
-------------------------------------------Disc 1 Finished (YAY)----------------------------------------------------
21: The Search For Sephirorth
Items: Corral Valley Cave - Viper Halberd, Bolt Armlet, HypnoCrown, MP Materia, Power Source, Megaelixier
Items: Great Clacier - Mind Source, Poison, Safety Bit, all Materia, Elixier, Alexander Materia
Cloud says that Sephiroth told him to "Head North...pas the snow fields..." Climb the large conch shell type stairs and around to a high ledge. You can get several treasures cimbing up this way so don´t miss them. Go to the Clacier Lounge near the mountain tops.
Explore the town and enter the house on the eastern edge of town. Lookt at the map of the wall. Take the map and talk to the man on the north end of the town and tell him you want down the hill. You will be stopped by the shinra. Elena tries to punch you. dodge to the left and you will laugh at her falling down the mountain. The town has now been placed under Shinra guards. Go in the little house in the center of the town and talk to the boy.
He will give you a snowboard. You can now snowboard down the hill. This part is pretty long, but in my opinion one of the funnest parts in the game. You can do tricks by doing different combinations of the buttons off of jumps. Collect as many items as you can. When you get to the bottom, get your map and go to the red spot on it.
Touch the streaming lakes and there is Materia here. You will eventually pass out. Talk to the old man and he will tell you how to climb the cliff. Sleep and then climb. Make sure your body temperature is higher than 25 Degrees, or you will have to start all over. If you press the Square button, Cloud will run in place and you will generate body heat.
You can also find Alexander summon Materia in one of the caves here. It´s hard to spot but if you look long enough you will find the cave that has it. You will eventually find another cave. Go into it. Push the first rock to reveal a path. Go in it. Follow the passage and you must break the four icicles. (In Combat) A bridge will appear in the room below if you do it. Equip everyone with fire and Iced based resistance Materia and go out and fight the boss.
Boss Strategy - Shizo
Right side is fire based
Left side is ice based
Get a Dragon Fang for winning
This battle is quite easy if you know what to do. Decide which side you want to take out first and do it fast. Use spells like Ice 3 and Shiva on the right side, and Fire 3 and Ifrit on the left. Casting Mbarrier is a good way to keep up your defences, becouse they cast elemental magic on you as well, in addition to Quake 3, which is quite annoying if you don´t have Mbarrier up.
Each head casts a desperation attack that does about 900 DMG when killed, so make sure to keep your hit points above that when you win.
When you reach the top of the mountain, climb the cliff up to a huge crater.
22: Meteor And The Shinra
Items: The Crater - Neo Bahamut Materia, Hi-Potion, Ether, MP Turbo Materia, Kaiser Knuckle, Poison Ring
As you work your way up the crater, make sure you get the Neo Bahamut Materia from the ground. When partially trough the area, Rufus, Scarlet, Hojo and Heidegger show up. Ignore them and keep working your way on. In the area where wind is blowing hard don´t move trough, but wait for it to calm down to run again. If you try to head trough the blowing wind you will be forced into a fight. At the top you will run into Sephiroth, and he´s killing a few of the black caped guys you saw before in Nibelheim. He´ll leave you abruptly with Jenova-Death to fight.
Boss Strategy - Jenova-Death
Her attacks are Fire based
Equip Fire resistance Materi
Get a Reflection ring for winning
MBarrier works wonders here, as Jenova only uses magic. Make sure to also use slow on her, as it sticks and will make it dramatically easier to win. Jenova uses Silence spells on the team as well, so make sure you have Echo Screens ready. Unleash bahamut, Neo Bahamut, and Kjata here and you shouldn´t have too much trouble. Acutally, Jenova-Death isn´t even very tough for a boss at all for this part of the game.
Sephiroth has moved even deeper into the crater. Cloud has taken the Black Materia, but he decides to give it to a party member becouse of what happened last time, and he doesn´t want to subconsciously give it away again. Choose RedXIII and move on. Grab the MP Turbo Materia and save just ahead. As enter the next area you will have to do the same manuevers trough the wind as you did before, and also lightning that strikes the path. It´s not too tough if you time it right.
You will find Sephiroth yet again, and he will show you a flashback of the party entering Nibelheim
again, but slightly different. Cloud isn´t with him instead there is a spikey black haired man with Sephiroth. sephiroth claims that Cloud was never at Nibelheim with him then, and that he is a Jenova filled creation of hojojust like all of the others. Also, Sephiroth shows the picture that was taken that day. Cloud is nowhere in the picture, instead is the spikey black haired guy. Tifa seems a bis disturbed by these images. Cloud realizes that he doesn´t remember parts of his journey, but he doesn´t let it overcome him.
You will find the Shinra inside the crater. No matter who you gave the Black Materia to, Tifa will tell that person to bring it to the center of the crater. You´ll discover that Tifa was actually Sephiroth in disguise. The person that yiu have gave the Black Materia will give it to Cloud, and Cloud will give it to the real Sephiroth, who is in a crystalline state here. As he does, the Weapons awake from their slumber be left with a cool sequence.
When you awake seven days later, you will be in control of Tifa. She is trapped in a lab with Barrett, and that the Weapons that were released are terrorizing the world. Sephiroth summoned the power of Meteor, which is to strike the planet soon if no one can do anything about it.
Rufus will decide that Barrett and Tifa are to be executed to raise the Shinra morale becouse of they are part of the Avalanche resistance team. They are both taken to a gas chamber, and Rufus plans to broadcast their deaths to everyone. Tifa is strapped into a chair, but as the guard exits he accidently drops the key nearby.
Before they pull the switch on executing Tifa trough, a Weapon begins to approach Junon Harbor. Shinra is going to fire the huge cannon connected to Junon to try to stop it. While confused, Cait Sith in disguise frees Barrett from the chamber, and try to get into the air chamber to save Tifa. Look for the control room. Scarlet locks the press room so you can´t get by that way. You will come across a reporter who is actually Yuffie in disguise. Equip them becouse you´ll have todo some fights here.
You are now in control of Tifa and have to attempt to escape. Pressing certain buttons in combination allows Tifa to move certain body parts in attempt to reach the key. Use Tifa´s legs twice first pull the key over, and then use her head to make her sit up. Now press Circle to unlock and Triangle together to get the key in her mouth, and then press Circle to unlock the cudds. Hit the switch on the left of the chair to stop the gas. The door is locker but you will receive a bit of help. ;)
The Shinra will shoot the cannon at Weapon but it seems to do little good. Weapon cuts a huge hole in the wall. You are able to climb trough the hole and climb the edge of the area. Run all the way down the huge cannon to the end, and you´ll find scarlet. You will now have to fight her in a slapping match. Just keep pressing the Slap button continously and you will win. As you see Barrett in the Airship, Tifa will run towards the end, and jump off and climbing the ladder. The party has taken over the Highwind, which you will have for the rest of the game. However, Cloud is still nowhere to be found and the party thinks you should find him quick.
You now have some freedom once you get the airship. If you haven´t done so anyway, you can to the Wutai Pagoda Quest with Yuffie to get the Leviathan Materia and her Ultimate Limit Break, All Creation if you want. Just head to Mideel when you´re ready, it´s easy to spot as it´s in the middle of a forest area.
23: The Search For Cloud
Items: Elixier, contain Materia
as you enter Mideel, you will find a dog in the very center of town. As Tifa pets it, you will overhear a conversation about a spikey haired guy that washed up on shore and is living here. Go into the hospital and sure enough, Cloud is there. He´s undergone big mental trauma again and is in a state of coma. He has apparentlycontracted Mako poisoning. Tifa will volunteer to stay here with Cloud tor the time being.
When done shoping in Mideel, head back to the airship. As you enter it Cait Sith will give you inside information on the Shinra. He says that they plan to collect several special Materia called Huge Materia to combine for their huge cannon at Midgar. He suggests that you head to the North Corel Reactor.
24: The Shinra Train
As you enter the North Corel area, go down the tracks that you saw before to get to the reactor area. You will find out that you´re just a moment too late, as Shinra is driving a train away with the Huge Materia. Cid decides to hijack a train from here and chase after it. To catch up with the train you will have to alternate the train´s levels as fast as possible. The two buttons you have to alternate are up and Triangle to speed it up. Work your timing as you can build up speed.
As you catch up your party will jump onto the train. You will be given 10 Minutes to stop the train before it crashes. You will have to undergo several fights as you make your way to the front of the train.
Fight 1: Gas Ducter
Very easy, doesn´t really take stratwegy at all. Pelt it with Magic and normal attacks, but he absorbs Bio Magic.
Fight 2: Gas Ducter x2
Same thing but two of them.
Fight 3: Wolfmeister
He is very weak to Water type magic. Leviathan summon will help you out if you need it, but this fight isn´t very hard either.
Fight 4: Eagle Gun
Very weak to Bolt type magic. Hit him with Bolt spells and normal attacks.
Fight 5: Attack Squad
This is actually probably the easiest battle, these guys are very weak and will be killed easily with normal attacks.
Jump into the front of the train and you will have to stop it. Keep moving both levers up and down to stop it. You´ll have to alternate back and forth until the trains brakes kick in. You´ll see a beoutiful sequence in which the train is stopped. You will also have the first Huge Materia in your posession now. The people of North Corel will be very thankful that you stopped the train and give you an Ultima Materia. If you didn´t manage to stop the train in time, you won´t be able to get this Huge Materia. Also you can´t get the Ultima Materia for free, you will have to pay 50,000 Gil for it if you want it.
When ready, head back to Fort condor for the Second Huge Materia.
25: Return To Condor
Talk to the guard outside and tell him you will assist him. Talk to everyone inside and gather all of the info. You have to destroy the army going up the hill. Make sure to have a lot of Gil so you can fun the troops here becouse you´ll definitely want to win. I recomment put on the Catapults and stone Throwtowers near the top of the hill and the Defenders, Attackers and Fighters near the bottom so they can be backed up by added projectile power. If you let enemies up the middle, youll be forced to fight with the commander.
After the battle, the condor at the top of the fort is killed, but its egg cracks and the baby lives. The people are here are greatful that you´ve saved their fort. Go up to the top and you´ll find the Pheonix Materia near the baby. The man downstairs will now give you the Huge Materia if you talk to him.
After you´re done at Fort Condor, Cid suggests that you go back and check on Cloud in Mideel.
26: Cloud´s Mind And The Final Search
As you enter Mideel, you´ll find that he´s still in a coma and Tifa is very worried. You´ll hear an earthqucka going on outside and the party runs out to check out what it is. You´ll see one of the huge Weapons crash down into the village, and you´ll have to fight it.
Boss Strategy - Ultimate Weapon
Use MBarrier immediately
Make sure you are high on hit points before you attack
You don´t need to win here, you just have to survive. His spells are very powerful and can knock off up to 1700 hit points or so on everyone. Make sure you immediately MBarrier up and keep people healed. As you get hit your characters will work up Limit Breaks very fast, so unleash them as you get them. Also use your most powerful summon materia as well.
As Ultimate Weapon leaves, he destroyes Mideel and the livestream burts trough the ground. You will awaken as Tifa, who is in the dark and confused. She will eventually awaken in an area with 3 different Clouds.
Work your way trough the different sequences that represents Cloud´s life. this sequence explains who Cloud really is as he discovers what actually happened to him within the last few years.
(If you don´t want to be spiled read the next paragraph)
You will see the scene that Sephiroth showed you before, in which Cloud never was in Nibelheim but instead the spikey black haired guy is with him. tifa explains to Cloud that she really wasn´t there, and that she has kept a secret from Cloud becouse she didn´t want to confuse him. However, tifa still thinks she can prove that Cloud is not just a clone. She asks Cloud to try to remember a memory about her. He remembers that he tried to join soldier to prove that he was strong to Tifa. He also recals the time in which Tifa´s mother died and how Cloud was blamed for almost killing Tifa. Cloud says that that made him want to be stronger and become like Sepiroth. tifa remebers this as well.
Basically what happens is Cloud searches his iner self trough many flashbacks to find out who he really is. Sephiroth´s picture and story eat away at him becouse he isn´t sure he was really at Nibelheim withim years ago. After talking to tifa, he finds out that altrough he was at Nibelheim with him then, he wasn´t as close to Sephiroth as he thought. The guy that you saw in the flashbacks with Sephiroth was actually Zack, who was in Soldier. Cloud realizes that when he confronted Sephiroth at the reactor in Nibelheim, he was actually one of the guards that accompanied Sephiroth and Zack. Sephiroth wounded Tifa, then Zack at the reactor that day. Zack muttered in his last words "cloud...Kill Sephiroth..." cloud takes Zack´s sword from him, and ran up and slashes Sepiroth, killing him. Cloud had the Shinra uniform the whole time. cloud realizes now that this is what actually happened and is able to pull himself together and snap out of the coma.
as Cloud recovers, the team suggests to quickly collect the other two Huge Materia. When you are ready, head to Junon Village, where you can access the underwater reactor there which is holding the Huge Materia.
27: Junon Underwater Reactor
Items: Battle Trumpet, Scimitar, Leviathan Scales
You can pay 10 Gil to ride the elevator up to the reactor that you couldn´t access before that was blocked off. As you run trough the area you will have to fight enemys so be careful here and make sure everyone is equipped. As you run trough cloud will notice that something is missing from Junon. Also as you run trough, you will run into many Shinra Soldiers that you can easily defeat. As you make your way trough the reactor, you will find an alarm in the hall. I´ve both tripped the alarm here and not tripped the alarm and it doesn´t seem to make a difference. You´ll take another elevator down to the ocean floor, and continue to follow the long walkway. You arrive just as the Huge Materia is being loaded into a submarine. Run to the submarine bay and your team attempts to intercept it. You will run into Reno here, and he leaves you with a boss to fight.
Boss Strategy - Carry Armor
Watch out for the Lapis Laser
Arms can hold your characters rendering them inactive
Receive a God´s Hand for winning
This is not a difficult boss at all for this late in the game. He is extremely weak to Bolt spells, so Ramuh summond and Bold 3 will do the job jere. MBarrier and Haste will help but you probably won´t even need them. Make sure to take out the legs and arms first. Its Lapis Laser attack can do about 1300 DMG but it shouldn´t hurt you too badly at this point. He can also pick up one of your characters and will hold that character, and you can´t use that character in battle. You can either kill the character being held and cast a Life spell or a Pheonix Down on that character, or you can destroy the arm holding the character.
Keep in mind that if some characters get knocked out he can still pick up the last member of your party and its game over. Make sure you keep everyone alive if possible, its just that much harder if he decides to grab you.
A Note From Mr.Self
I hated this boss more than anything. He would knock out one member, grab another, and leave the last with low hp. Haste and regen were helpful but make sure at least one of your restore materia is supported with an all materia, makes life much easier. I would also suggest saving after you beat the 3 "fluff" battles with the guards beforehand, since they sit in that annoying spot between the boss and your save point.
After you defeat the Carry Armor, the submarine with the Huge Materia will already have left the bay. Hijack the other submarine and you can chase it down, but grab the chests in the area first. Getting the Leviathan Scales allows you to put out flames in the Wutai fire caves and the Scimitar is a useful weapon. fight your way to the bridge of the submarine and you get a choice to fight them or keep the hostage. It doesn´t matter what you decide, but you can steal a nice Shinra Alpha Armor from the captain if you fight them.
Now you will get to play the submarine battle minigame.
You´ll have to chase down the enemy sub that has the Huge Materia, but you can´t get go over 10 minutes doing it. The sub in the red is the one that has the Huge Materia loaded, so stay near it. The yellow subs will be firing torpedos all over the place at you, so try to make them out too if possible, but try to make sure you´re behind the red sub first. Try to avoid the small polygons near the towers becouse they´re mines. If you use sonar you should be able to find the Red Submarine again.
After winning the battle you will get to keep the submarine. With it you can explore the ocean floor. On the radio you receive a signal from the Shinra saying that the last Huge Materia is being shipped from Junon airport. dock the submarine near Junon and close in on it! Just as you arrive you will see the plane taking off with the Huge Materia. When ready, head back to rocket Town, where your team tries to intercept it.
On a side note, this is an excellent time to side quest yourself silly now that Cloud is back. Tifa's Ultimate Limit, as well as Vincent's and Cid's can be gained now. You can also start training a gold chocobo rather quickly from here, as well as the downed plane beneath the ocean (Cid's limit is here too).
28: The Quest Of Space
Head to rocket Town and you will find that the Shinra intend to repair the rocket and launch it. Go back to the rocket area and you´ll meet Rude. He will engage you in attack with his attack squad.
Boss Strategy - Rude and Attack Squad
Kill attack squad first
Have Cid equiped before fight
Rude uses Bolt Magic
Lightning resistance helps
Put an end to the attack squad first becouse they can use Sleep spells on the party. Just summon Neo Bahamut and Bahamut to deal with them all at once. When Rude is left alive, he´ll start casting Cure 2, but if you cast Reflect on him before it, will bounce off of him and heal you. Also, try to steal a Ziedrich off of him if you can. After defeating Rude, you will enter the cockpit and find out that it is just about to be launched. It is set to collide with Meteor in attempts to stop it from hitting the planet. Cid decides tha he´s going to pilot the rocket into space and fullfill the dream he once had. You will see a spectacular sequence of the rocket taking off into space. Cid shows you where the Huge Materia is kept. However, you will find that it´s locked into the core of the rocket and you have to input a password. Cid will give you several clues to what the password is, but if you want to get straight to buisness, enter:
ok - switch - cancel - cancel
entering this combination will unlock the Huge Materia. If you don´t suceed in entering the combination in time, it remains there and you have no chance of getting it again. After you get the Materia, head back to the engine room and you will find an escape pod you can leave on. Cid now realizes that Shera has done a good job. After you´ve escaped, you will see the rocket collide with Meteor. Altrough it begins to shatter Meteor, it quickly pieces itself together and continues to head for the planet.
After you regroup, head to Bugenhagen´s laboratory in Cosmo Canyon after buying needed supplies.
29: There Is Hope
Talk to bugengagen about what Sephiroth and Meteor. Buganhagen explains that you should return to the Ancient City. You can now store all of the Huge Materia you´ve gotten in his lab. Get near the blue Huge Materia, and if you have acquired both the Bahamut and Neo Bahamut Summon Materia, you will recieve Bahamut Zero summon Materia.
These Huge Materia allow you to get Master Command, Master Magic, and Master Summon Materia, return here and touch on of the Huge Materia and it will give you the Master Materia. For instance, if you´ve gotten every summon Materia orb, which gives you every single summon in the game in on Materia.
Go back on the Highwind and head back to the Ancient City on the north continent. Take the left path and Bugenhagen will tell you about the white Materia and how it is said to be a key. He gives you a clue that sunlight can´t rech it, so it is most likely in underground somewhere. Launch the submarine from the harbor and head near the south, but watch out for Emerald Weapon, which is one of the Weapons siming around down here. This is a very hard boss and you won´t be able to take it out now. Head north until you find an underwater cave. Inside it you will find the key of the Ancients on the floor.
Also, while you´re here, participate in a small side quest involving Vincent. Guide the ship along the west wall to the south until you find another opening. Head trough here, take the narrow passage and a left into an underwater cave. Surface when you hit the big tunnel type area and you´ll be near a waterfall. Land the sub here, and make sure Vincent is in the party. When you enter, Vincent will find Lucretia and you´ll learn a great deal more about Vincent´s past and Sephiroth.
When ready, bring the key of the Ancients back to Bugenhagen who is waiting patiently at the Ancients City. When he puts the key into the center, you will find that Aeris was praying for Holy, which is an essence that would allow Meteor to be stopped. However Sephiroth´s power is keeping Holy from being summoned, so you must destroy Sephiroth, or the planet will surely be destroyed by Meteor soon.
30: Back To Midgar

Items: Midgar System - Elixier x2, Megaelixier, Starlight Phone, Aegis Armelt, Max Ray
Items: Midgar Tunnels: - Power Source, Guard Source, Mind Source, Magic Source, W-Item Materia
Items: Shinra Headquarters - Pile Banger, Master Fist, Glow Lance, HP Shou Materia
Items: Sister Ray - Elixier, Mystile, Missing Score
As you leave the area, Cait Sith tells you that Junon Cannon has been attached to Midgar and that they are planning on shooting it at Sephiroth to stop Meteor. You will find out that Cait Sith is being controlled by Reeve at the Shinra Headquarters. as the team goes toward the Highwind, the earth will shatter and you will see that a Weapon is on the move towards Midgar. Fly back to Midgar and land the Highwind. Wait for the Weapon to arrive and you must fight it.
Boss Strategy - Diamond Weapon
Unleash Ultima/Bahamut Zero
Haste helps a lot
Make sure to have someone dedicated to healing
Beware of its special attacks
Now is the time to unleash you best summon and Magic. Ultima, Comet, Bahamut Zero, and Neo Bahamut all work wonders on Diamond Weapon. Don´t attempt to use physical attacks however, becouse Diamond Weapon is very resistent to them. Diamond Weapon also has a special attack, its Diamond Flash. This is an attack that it will take several turns to prepare for, but when it uses it it will do around 2500 DMG to the entire party. Make sure you immediately Cure afterward. Diamond Weapon will eventually go down if you keep pelting it with you best Magic.
After the battle, Diamond Weapon is studdered by your attacks. The Sister Ray, the huge gun that is about to be fired, is ready. Diamond Weapon fires several shots all over Midgar, and Rufus is killed in the Shinra presidental office. (Spoiler)As you can see in FF7 Advent Children he survives
As the Sister Ray is used, it cuts trough Weapon, destroying it, and also opens up the crater where Sephiroth is.
Hop on the Highwind again, as you move north you will see that the crater has been opened and you can head for Sephiroth. Cait Sith tells you that the Sister Ray is overloading becouse Shinra attempts to fire another shot at the crater. He says that Hojo is attempting to fire it again to destroy Weapon, but it will likely malfunction if it is fired again. So your objective is to head into Midgar and stop Hojo.
When yo´re ready, head to Midgar and as you are over it, you are able to chose your party before you descend. When you are ready, your team will parachute down into Midgar in another awesome sequence. Follow Cait Sith into the alleys where the party is. You are now able to form a group here. If you want to get Barrett´s Ultimate weapon Missing Score, you have to have him in your party here.
When ready, collect the items at the end of the ramp and go to the ladder near the platform. As you enter the next area of ladders and chutes, there are many items arround and someare tough to get to, but a lof of these items are some of the best in the game. so make sure to get them. When ready, go up the stairs to the save point. Save here and head into the next area.
Here you will get into the Midgar tunnel system, that connects to the Sister Ray. There are two paths, a north and a south path. The sister Ray lies to the north, but there are many items and a cool part of the story to the south. After you´ve gotten the treasures from the south, head to the north area. Save at the save points here, and proceed down the hall and you´ll meet up with the Turks yet again, and this time all three of them are together. You can either fight them or not, but i definiately recomment you do becouse they each have an awesome item you can steal.
Boss Strategy - Reno, Rude, Elena
Steal from each of them for a special item
Take out Elena first, and Rude next
Stealing from Rude gets you a Ziedrich
Stealing from Reno gets you a Tough Ring
Stealing from Elena gets you a Minerva Band
Elena uses Confusion attacks on the party so try to take her out first. Use your most powerful sumons for this battle. After you take out Elena, concentrate on Rude becouse he uses normal attacks, and he can get critical attacks that do up to 3000 DMG. Reno uses the same sort of Lightning magic he did before and won´t pose a very big tread. Haste and Barrier also help in this battle.
After you win, return to the save point and save yet again, then head north again. I recommend that you take the second left here so you can head into the Shinra Headquarters and get Cait Sith´s Ultimate weapon in the floor 54 locker. You can also get the Glow Lance from a door that was previously locked here, as well as visit the gift shop. When you´re ready, go back into the tunnels and take that first left turn, which takes you to and outdoor area near the base of the Sister Ray, where you will find Scarlet and Heidegger, who leaves you with another boss to fight.
Boss Strategy - Proud Cloud
Two party, armor and body
Take out the armor first
He casts Reflect on your characters
Recieve Ragnarok for winning
This is actually a very easy boss. Take out the armor first so you can do more damage to the body after it´s gone. Its guns can do about 1000 damage to a single character and the Beam Cannon can do 1000 to everyone, but shouldnt be enough to keep you down. Most every type of magic in addition to physical attacks and limit breaks work well here, and you can cast DeBarrier on the party members that have the reflect spell cast upon them so you can heal them.
Head onwards and you will find flights of stairs leading up to the Sister Ray controls. If you have Barrett in your party here, there will be a chest on the stairs for him that contains his Ultimate Weapon, Missing Score.
At the top, you will find Hojo overloading the Sister Ray and planning to fire it very soon. You will learn that his son is Sephiroth, and he intends to firethe canon as a way of feeding power to him. You will also learn that he has injected himself with the Jenova Cells, and he will fight you.
Boss Strategy - Hojo
First form:
This is his easiest form. Use your normal attacks and leave his friends alone, becouse they just come back if you kill them. Normal attacks should dispatch hojo in no time.
Second form:
Make sure to get rid of his right arm and quickly becouse it has the strongest attack. Even trough it can regenerate it should be taken out for this reason. Use Ultima and Comet Magic on him, as well as your best summons.
third form:
Hojo´s hardest form, he is very fast and uses a lot of status ailments to hurt the party. Make sure to have spells or items ready to use on characters that have been inflicted with the status changes. Again, Ultima/Comet and Bahamut Zero/Knights of the Round/Neo Bahamut work wonders.
After you´ve defeated Hojo, Shinra will basically be destroyed and you can take out Sephiroth. You will board the Highwind again. Cloud will explain to the party who he really is and what his past was, and tell them why he wants to defeat Sephiroth.
Cloud will say that since there are 7 days left till Meteor hits the planet that each member of the party should take a break and discover what they are fighting for. You will see a sequence with Cloud and Tifa sitting near the airship, and you will wait untill it´s time to leave. Everyone will return and state their reasons for fighting.
-------------------------------------------Disc 2 Finished (YAY)----------------------------------------------------
31: Side Quests
There are many things to do before you face Sephiroth. Go to the eastern continent and you will find that the Ultimate Weapon has made a nest out of a mountain north of Junon where he is holding Cloud´s Ultimate sword. You have to fight him a number of times. If you win the first battle, the Ultimate Weapon will fly off. Find him and ram the Highwind into him again and again, until hes tumbles down and you get Cloud´s Ultimate Weapon.
You can go back to the underground waterfall and get the new items. There is an extremely difficult boss down here that you can fight, Emerald Weapon. This is a very hard battle. He will give you a secret item if you win. You can go to the Golden Saucer and beat the Red Scorpion boss (Ruby Weapon) that´s moving around in the sand down below. He is extremely hard as well. If you beat him he will give you the Desert Rose.
You can also collect everyone´s Ultimate limit breaks. Don´t take on the two weapons if you don´t have them all, becouse they are really important. Some are harder to get than others. If you need to know where they are, check the limit break section.
There are four special caves located around the world that have very nice Materia in them. The first is located on a small pennisula near Wutai. You must have a Green Chocobo, Black Chocobo or Gold Chocobo to enter. You will recieve a Mime Materia, inside, which is very useful for certain battles.
The next special cave is located north of North Corel village in a desert. You can only enter this one with a Black Chocobo or Gold Chocobo. Inside is a chest containing the HP<->MP Materia.
The third cave is nea Mideel, and you´ll need a Black, Blue, or gold Chocobo to enter. Inside is a Quadra Magic Materia.
Also, if you manage to breed a Gold Chocobo, take it to the last special Materia cave, which is an island in the notheast corner of the map that holds the best summon Materia in the game, Knights of the Round.
There is a key you can find to enter Midgar again, near the sector 5 slums. To get this key, first head to Midgar on Disc 2 after you´ve gotten Cloud in your party again, and talk to the man right outside the door. He´ll tell you that there is known to be a key to enter the door. Then, head to Bone Village, and choose to dig for "good treasure" Placing workers, they shoud all point near a jagged piece of metal extruding the ground near the entrance. It´s right across from the door that is locked. Search here and you´ll get the key to Sector 5. There´s really not much to do in Midgar, but you can see Aeri´s ghost if you enter the church. You can also get Tifa´s Premium Heart at vending machine.
You can also find the crashed Gelnika ship under the ocean in an alcove west of the reactor underwater. I recommend going here becouse some of the items here are awesome.
Items: Crashed Celnika - Heaven´s Cloud, Escort Guard, conformer, Double Cut Materia, Outsider, Spirit Lance, Megalixier x2, Highwind, Hades Materia
Some of the enemies down here are very hard. There is a savepoint near the beginning so make sure to save and maybe gain a few levels before tackling the depths of the ship. In the cargo bay area you will run into Reno and Rude depending on when you go here. If you do this before the final battle with the turks they will be here and you will fight them. I definitely recommend coming here becouse there are a lot of very good items down here.
Make sure you take out Ultimate Weapon in Disc 3. It´s a flying Weapon that starts out hovering over a round area of water near Junon. Engage it there and you´ll have to fight it. It really isn´t a very hard fight, but you will have to fight it a few times becouse it keeps flying away. After you´ve knocked off enough hit points the first time, it will fly towards Nibelheim, Midgar, or cosmo Canyon. Keep folowing it and engage it untill it goes to Cosmo Canyon, where the last fight will take place. After you defeat it there you will recieve Ultimate Weapon, Cloud´s best sword. It will also open the way to the Ancients Forest.
You can also head to the Ancients Forest just to the east of Cosmo Canyon if you´ve defeated Ultima Weapon or gotten a Gold Chocobo. When you kill the Ultimate Weapon it will create a huge crater in the ground which allows you to enter. It´s a unique dungeon type area in which you have to use various plants and insects to get trough.
Items: Ancients Forest - Spring Gun Clip, Supershot ST, Typhoon Materia, Apocalypse, Elixier
Some of the puzzles here are kind of difficult but it´s more fun to figure out yourself. At the end of the cave is the typhoon summon Materia. One thing that is kind of pointless is the fact that Apocalypse sword for cloud is here as well becouse you probably already have his Ultimate weapon. ;)
Turtle´s Paradise Flyer Locations:
1: Sector 5 Slum, in a house to the east, in a boy´s room
2: In the Shinra Headquarters at the back of the lobby
3: Ghost Hotel at the Gold Saucer, near the item shop
4: Tiger Lily Arms Shop in Cosmo Canyon near the owner
5: Cosmo Canyon Inn
6: Near Turtle´s Paradise in Yuffies basement near the trap room
Winninf the Turtle Paradise contest gets you a Power Source, Guard Source, Magic Source, Mind Source, Speed Source, Luck Source, and Megalixier if you get all the flayers and talk to the owner of Turtle´s Paradise in Wutai.
Also you can find a very cool sequence having to do with the game´s story if you go back to the Nibelheim Shinra mansion again. Go down trough the spirialing stairs near where you found Vincent and Saw Sephiroth, and into the library. You will find out exactly what happened to Zack and it explains how Cloud ended in Midgar with Zack´s sword and clothing.
If you go the Leviathan Scales from the Shinra´s Underwater Reactor, you can get trough the Wutai Fire Cave in the side of Da-Chao. The fires here used to block your way, but if you have the Leviathan Scales you can pass. Here you will find the Oritsuru Weapon for Yuffie as well as a Steal as Well Materia.
If you want to shell out 300,000 Gil you can buy the Costa Del Sol Shinra vacation home. However, all you can really do here is rest for free and get some minor items in the basement.
Also make sure you got the Master Materia from Cosmo Canyon observatory if you´ve collected all of a certain type of Materia. These Materia are totally powerful and will make the end of the game a hell of a lot easier.
32: The Final Confrontation
Items: Mystile, Elixer x2, Speed Source x2, Tetra Elemental, Megalixer x2, Luck Source,
Turbo Ether x2, Mega-All Materia, X-Potion x2, Vaccine x2, Remedy, Magic Source,
Shield Materia, Imperial Guard, Hero Medicine, Counter Materia, W-Magic Materia
If you want, head down into the pit and you will fight Sephiroth and get the ending
to the game. It's a long way through the left path but the right path is really short
and easy. I recommend taking the left path because there are more items to get.
Just battle your way down all of the cliffs. There are many very nice items here, so
make sure you look around a bit, as they can be helpful for the final battle against
Sephiroth. Power up your characters in the swamps, cause they are fairly easy and you
get good experience for them. As you enter one area in the crater, your team will
split into two different groups. Make sure you send your best characters down with
Cloud because only they will be able to rejoin him.
When you get to the very bottom of the cave, talk to your characters and they'll hand
you items they found down those paths. Also, if you got the Save Crystal from the first
chest in the pit, put that down here and save. As you make your way to the very center
you will have to fight Jenova again.
Boss Strategy - Jenova-Synthesis
It has three parts so have attacks that do damage to all
Watch for the countdown Ultima Attack
This is perhaps the easiest Jenova in the game. It's really not too
hard if all of your characters have powerful attacks that hit all
enemies, which they shoudl at this point. Attacks like Slash-All and
Bahahmut Zero summon do wonders here. However, it does have a powerful
attack, Ultima, which causes a lot of damage to the entire party, and
there will be a countdown for it, but it shouldn't stop you too long
from pummeling it.
After defeating Jenova again, the team enters into the core of the crater where they
find Sephiorth. You'll get to choose whether to switch your party between 1, 2, or 3
different groups. Make sure the parties are balanced enough, and yet your first group
is still the most powerful. Doing this will ensure that your best team goes up against
Sephiorth, and your second group will still be strong. You will now go into the final
battle against Sephiorth.
When you engage Sephiroth, you finally getto hear "One Winged Angel", the latin end
boss theme.
Boss Strategy - Sephiroth
Bizarro-Sephiroth:
Sephiroth is composed of five different parts. The Head, Torso, Left
Magic, Right Magic, and Core. The Head, Left Magic, and Right Magic
have very little hit points but Sephiroth can regenerate them infinite
times in battle. If you destroy the Torso however, it goes down. The
Core is what heals the Torso. The Core is very powerful and unless the
Left Magic and Right Magic are destroyed, it can't be hurt at all. So
make sure you do that and take out the Core, then go for the Torso.
He uses a barage of powerful attacks that hit the entire party. He also
uses a lot of negative status ailments on the party (confusion, poison,
darkness). If you have some characters eqiupped with Restore Materia it
will help a lot. Cloud's Omnislash Limit Break and Knights of the Round
Summon are your best bet in this fight.
If you picked to have two teams or three teams, you'll have to divide
the fight into the different parties. It's a good idea to switch the
teams often because each time they come back into the fight, they have
full hit points and magic points, even if they got drained earlier in
the fight. However, one team is probably the easiest way to win this
battle. After you defeat Bizarro-Sephiroth you'll have to fight his
second form, Safer Sephiroth.
Safer Sephiroth:
This is going to be a tough fight if your characters are of low levels.
Hasting all your characters will help greatly in this fight. He has a
variety of very strong attacks.
Pale Horse: This attack does negative status ailments in addition to
some damage to a single character.
Shadow Flare: Hits a single character for about 6500 damage.
Deen: An attack that does aboug 1500 damage to a single character.
Super Nova: This is Sephiroth's summon. It will do a large amount
of damage (4000-5000) to all characters, so make sure you follow it up
with a Megalixir or a barrage of Cure 3 spells.
Make healing your top priority, then attack. Spells like Ultima, Comet 2,
and your best summons (Knights of the Round, Bahamut Zero, Neo Bahamut)
should take care of him. If Cloud gets his Omnislash Limit Break in this
battle it also does about the same as a Knights of the Round.
After you defeat the actual Sephiroth, Cloud and Sephiroth will have a one on one
showdown. You will automatically be in limit break status so just unleash Omnislash
and he's done for. It's kind of a story battle. The real end fight was against the
first version of Sephiroth.
Limit Breaks
There are 4 levels of limit breaks for everyone(except Cait Sith), and most characters have 2 limit breaks a level, but all of them have one at the end of level 4 that can be considered the ultimate limit for that character. Learning the level 4 limit breaks are more difficult. You have to first learn all of the previous limit breaks on that character and obtain the item of the same name that teaches it.
Cloud
Level Limit 1 Limit 2 1 BraverUse Braver 8 times 2 Slay 120 enemies with CloudUse Blade Beam 7 times 3 Slay another 200 enemies with CloudUse Meteorain 6 Times
Tifa
Level Limit 1 Limit 2 1 Beat RushUse Beat Rush 9 times, still counts if you miss 2 Slay 96 enemies with TifaUse Waterkick 7 times, still counts if you miss 3 Slay another 96 enemies with TifaUse Dolphin Blow 6 times, still counts if you miss
Barret
Level Limit 1 Limit 2 1 Big ShotUse Big Shot 9 times 2 Slay 80 enemies with BarretUse Grenade Bomb 8 times 3 Slay another 80 enemies with BarretUse Satellite 6 times
Red XIII
Level Limit 1 Limit 2 1 Sled FangUse Sled Fang 9 times 2 Slay 72 enemies with Red XIIIUse Blood Fang 7 times 3 Slay another 72 enemies with Red XIIIUse Howling Moon 6 times
Aeris
Level Limit 1 Limit 2 1 Healing WindUse Healing Wind 8 times 2 Slay 80 enemies with AerisUse Breath of the Earth 6 times 3 Slay another 80 enemies with AerisUse Planet Protector 5 times
Yuffie
Level Limit 1 Limit 2 1 Greased LightningUse Greased Lightning 8 times 2 Slay 64 enemies with YuffieUse Landscaper 7 times 3 Slay another 64 enemies with YuffieUse Gauntlet 6 times
Cid
Level Limit 1 Limit 2 1 Boost JumpUse Boost Jump 7 times 2 Slay 60 enemies with CidUse Hyper Jump 6 times 3 Slay another 76 enemies with CidUse Dragon Dive 5 times
Vincent
Instead of a powerful attack, each level of Vincent's limit break allows him to transform, depending on the set level. He starts with "Galian Beast", 40 kills gets you "Death Gigas" and another 56 kills will unlock "Hellmasker". After that, you're free to unlock his level 4 as soon as you find the item for it.
Cait Sith
Starts out with "Dice", which rolls a certain number of dice depending on Cait Sith's level and does 100x the outcome. After 40 kills you unlock "Slots", his final limit break. It spins a Cait Sith themed slot similar to what Tifa uses, however the effects can be somewhat random, both good and bad, mostly good.
Ultimate Limit Break Locations
Cloud Cloud's ultimate is called "Omnislash" and can be found in the Battle Arena at the Gold Saucer. On the second or third disk it'll cost you 32000 points in a single visit, trying it on the first disk will cost you double
Barrett After the train ride in Disc 2, there is a lady in a hat in a building in the North corel, she will give it to you.[/td]
[/tr]
[/table]
Aeris Speak to the sleeping man to the east of Junon when you´ve fought a number of battles in which the last two digits of the number are the same number, abd he´ll give you a piece of Mythril that you can exchange for Aeris´s Great Gospel Limit Break in the box. [/td]
[/tr]
[/table]
Tifa You must play the song on Tifa´s Piano (See chapter 16)[/td]
[/tr]
[/table]
Red XIII In Sephiroth´s house is a safe, use the combo to unlock it. (See chapter 16)[/td]
[/tr]
[/table]
Yuffie After you beat her mini quest, go back to Wutai. Go to the Pagoda and defeat Godo. You will get it now.[/td]
[/tr]
[/table]
Vincent Either the submarine or a Blue, Black or gold Chocobo is needed. Go to the waterfall in the middle of the western continent. Vincent must be with you. You have to enter the left side of the waterfall.
(Note: You must visit the waterfall twice. Once on disc 2, and once on disc 3)[/td]
[/tr]
[/table]
Cid Use the submarine and search for the plane wreck where you found the Hades Materia, on the southpart of the map. The sunken plane is between the easter ans western continents. Inside the plane is a chest holding it.[/td]
[/tr]
[/table]
Ultimate Weapons


Each character has his or her own Ultimate Weapon. These weapons are very powerful, many times better than the second best weapons, and most of them also have special abilities or characteristics when equiped.
Cloud - Ultimate Weapon
Location: Before you start the final assault on Sephiroth in disc 3, go to the world map and kill the wandering Dragon, Ultima Weapon.
Power Up: This Weapon´s damage is dependent on Cloud´s HP level. The more Hp´s he has, the more damage it does.
Barrett - Missing Score
Location: In your quest to stop the Mako overload at Midgar at the end of Disc 2 there is a chest holding the Missing Score on the staircases just before you reach Hojo. Barrett has to be a member of your party to find this weapon.
Power Up: Attach Materia to this weapon. Damage is dictated by the AP of that Materia.
Tifa - Premium Heart
Location: In Disc 2 or 3 go to Midgar City, head to Wall Market and examine the computer in the room market "item".
Power Up: Every time she has a Limit Break, but misses with atleast 1 spinning wheel, the Premium Heart power up.
Aeris - Princess Guard
Location: While engaged in the moving clock game, obtain it from the Ancient´s Temple.
Power Up: Aeris's ultimate weapon powers up whenever someone in your party is knocked out, going extremely powerful when two companions are KO'd.
RedXIII - Limited Moon
Location: In Disc 2, after the monster attacks Midgar, visit Bugenhagen and he will give it to you.
Power Up: Like Cloud´s weapon, but the MPs matter. So if you have high MPs, it will do high damge.
Yuffie - Conformer
Location: In Disc 2 or 3, check around the wrecked plane.
Power Up: Damage depends on the experience points of an enemy. If it is high it power up.
Cait Sith - HP Shout
Location: In Disc 2, during the raid on Midgar, search the lockers on the 64th floor of the Shinra building.
Power Up: It is the same as the Ultima Weapon that Cloud gets.
Vincent - Death Penalty
Location: When you get his Limit Break manual, you also get his Death Penalty.
Power Up: The Death Penalty gains power as more enemies are killed.
Cid - Venus Gospel
Location: In Disc 1 or 2, the man who gave Cloud a sword in Disc 1 will stand outside a house by the rocket pad. Talk to him 3 times. This can only be done after the rocket has been destroyed.
Power Up: Same as Cait Sith´s and RedXIII´s weapons.
Useful Materia Combinations
The game contains hundreds of Materia, but you're left with choices of
how to pair your Materia up late in the game. I've listed some of the
best Materia combinations I've come up with here.
Added Effect + Poison (Weapon)
This combination is valuable because each time you hit a creature, you
have a chance to poison it. This even works on some bosses and can do a
pretty hefty amount of damage in the long run.
Added Effect + Time (Weapon)
Another similar combination that has a chance of slowing or stopping the
creature you attacked.
Added Effect + Destruct (Weapon)
When you have this combination in a weapon, you have a chance of killing
your enemy on the spot in a single hit.
Megal-All + Steal
A useful combination that lets you steal from all enemies at once.
Counter + Mime
This is another very powerful one that allows you to Mimic what the last
party member did after you've been attacked. It's a bit unpredictable and
sometimes not helpful, but when you're able to counter attack using a
Knights of the Round summon, it's very useful.
Sneak Attack + Knights of the Round
At the beginning of each battle you have a chance of pre-emptively casting
Knights of the Round.
W-Summon + Knights of the Round
The only way in the game you can summon Knights of the Round two times in
a row with the same character. Even more powerful is if characters that
attack next Mime it, so you can do literally millions of damage in a very
short period of time.
Quad Magic + Most Summon Materia
This allows you to do four consecutive summon spells. However, this does
not work with Knights of the Round, but you can W-Summon that instead.
Quad Magic + Most Spells
Another similar that allows you cast any spell four times in a row.
Final Attack + Revive
One of the most valuable combinations in the game. You'll certainly need
this combo if you attempt to go after Emerald Weapon and Ruby Weapon. If
you have this combination equipped, each time that character dies he will
be instantly healed.
Final Attack + Phoenix Summon
Another one similar to Final Attack + Revive, but all party members come
back from the dead because of what Phoenix Summon does. Also, it damages
the enemy as well.
Knights of the Round Summon + MP Absorb
Coupled the best Summon Materia in the game with MP Absorb gives you the ability to spam it right away and never get OOM (Out of Mana)
Summon Materia Locations
Out of all of the Materia in FF7, the Red Materia is the most powerful for your
offense. Here is a quick rundown of where all of the summon materia is.
Chocobo and Mog - Disc 1 (Wind Elemental)
Just visit the Chocobo farm and talk to the fenced in Chocobo.
Shiva - Disc 1 (Ice Elemental)
After you have successfully given CPR to Pricila in Junon Town, she will give
you this if you go up
to her house and talk to her.
Ifrit - Disc 1 (Fire Elemental)
On the Shinra boat, beat Jenova Birth.
Titan - Disc 1 (Earth Elemental)
There is a village in the woods named Gongaga that is before Cosmo Canyon. Wait
for the Turksto leave and search the decrepit machinery.
Ramuh - Disc 1 (Lightning Elemental)
In the Gold Saucer, check the alcove in the Chocobo jockey's room.
Odin - Disc 1 (Strength Elemental)
Defeat the boss in the mansion at Nibelheim and open the safe.
Leviathan - Disc 1 (Water Elemental)
You get this after you beat the boss on top of Pagoda in Wutai.
Kjata - Disc 1 (Tetra Elemental)
In the endless forest continent go north, and you will find this floating on the
second screen as you enter the forest.
Bahamut - Disc 1 (Fire/Flare Elemental)
After you meet Sephiroth you will battle a dragon in a temple. Beat the dragon
and wait for the temple to shake.
Alexander - Disc 2 (Holy Elemental)
On the north continent there is an old man's shack. Below the shack is an icy
wasteland. Go east through snow and find a cave. It's in there.
Neo Bahamut - Disc 2 (Fire/Flare Elemental)
This is lying on a path that leads to the first barrier on the crater inside the
frozen mountain.
Phoenix - Disc 2 (Fire/Life Elemental)
Just win the mini-battle at Condor Fort. You will get this after the egg
hatches.
Hades - Disc 2 (Poison/Status Elemental)
Use the submarine to find the defunct Shinra airplane. You will find it next to
the brokenhelicopter inside the sunken airplane.
Bahamut Zero - Disc 2-3 (Fire/Flare Elemental)
Go to the old man in Cosmo Canyon after you have collected all of the Huge
Materia and Neo Bahamut, and Bahamut. Touch the blue Huge Materia in the galaxy
holodeck and you get it.
Knights of the Round Table - Disc 2-3 (???)
This is very difficult to reach, since you need to breed a Gold Chocobo. (See
Part 5) Once you have it, use it to visit a strange island towards the northeast
corner of the map. Find the cave and you have found the Materia.
Master Summon - Disc 3
After you have collected all of the Summon Materia, go to the galaxy holodeck
and touch the red Huge Materia.
Enemy Skill List
This Enemy Skills list shows you where you can get the Enemy Skill, the MP
needed, the Effect, and what it does.
Name Learn Frog Song From the green frogs in the forests around Gongaga village.
(Disc 1, 2, or 3) Level 4 Suicide Squirrel enemies located near the Chocobo Farm.
(Disc 1, 2, or 3) Magic Hammer Plant monsters that are located on the very end of the
Westernmost Continent in the dark green area. (Disc 1, 2, or 3) White Wind The white cactus monsters that appear around the
grassy area by Junon Town (Disc 1, 2, or 3), or from the winged
serpents you fight if you're hit by a barrier at the Great Glacier.
(Disc 2) Big Guard From the spike shelled creatures with green tentacles
that live on the coast near Gongaga Town. (Disc 1, 2, or 3) Angel Whisper From the women in the yellow suits that
you meet in the Makou Pit if you take the right path the first
time you meet your friends. (Disc 3) Dragon Force From the dragons you meet when going through
the Makou Pit. (Disc 3) Death Force The turtles by the shoreline of the Westernmost continent.
(Disc 1, 2, or 3)
You can only gain this skill if you Manipulate. When
you do, choose the bottom option to cast this spell on
yourself. Flame Thrower You can also learn it from the
flying monsters in the Mythril Mine (Disc 1, 2, or 3) Laser From the dragons that appear during the trip into the
Makou Pit. (Disc 3) Mantra Magic The mech enemies named Sweeper Custom around
Kalm Town. (Disc 1, 2, or 3)
Star 12: Bad Breath
Magic Points Needed: 58
Effect: Gives the enemy status abnormalities including
Shrink, Frog, Confusion, Sleep, Poison, and Mute.
Learn: From the Mobol creatures, which are green and have large mouths
living on the outside ledges in the Frozen Mountain.
(Disc 2) You can also meet them in the Makou Pit, considering
that you take the right path the first time you run into your friends.
(Disc 3)
----------------------------------------------------------------------------
Star 13: Beta
Magic Points Needed: 35
Effect: All targets are hit by a circling red and white motion.
Learn: By the big snake by the Chocobo farm that was too hard to
beat earlier in the game. (Disc 1, 2, or 3)
----------------------------------------------------------------------------
Star 14: Aqua Breath
Magic Points Needed: 34
Effect: Large bubbles attack enemies for water/ice damage.
Learn: From the boss of the Ancient City (Disc 1), the winged chimera
in the plains surrounding the Gold Saucer (Disc 1, 2, or 3), or from
the floating sea-dragon creature in the ship Gelinka. (Disc 2,3)
---------------------------------------------------------------------------
Star 15: Trine
Magic Points Needed: 20
Effect: A triangle encases an enemy and hits them for lightning
damage.
Learn: The boss on top of the pagoda, Godo, in Wutai.
(Disc 1, 2, or 3) Also from the red spider/crab-like creature
living inside the Frozen Mountain (Disc 2), or the boss of Mt.
Nibel, Materia keeper. (Disc 1).
--------------------------------------------------------------------------
Star 16: Magic Breath
Magic Points Needed: 75
Effect: Balls hit enemies for ice, fire, and lightning damage.
Learn: From the red crab-like creatures living inside
the Frozen Mountain. (Disc 2) Also from the blue
enemies, Parasite, in the Makou Pit. (Disc 3)
--------------------------------------------------------------------------
Star 17: ????
Magic Points Needed: 3
Effect: A weight drops onto the enemy. The damage is the amount of
damage done to the caster this turn.
Learn: From the scale creatures in Nivelheim. (Disc 1, 2, or 3)
Also from Behemoth that you encounter when
raiding Midgar. (Disc 2)
-------------------------------------------------------------------------
Star 18: Goblin Punch
Magic Points Needed: 0
Effect: One enemy is hit for strength damage. The damage done is much
more severe if that enemy has the same level as you do.
Learn: The goblins wearing boxing gloves found on the
forested island in the northeast area of the map. (Disc
2 or 3)
Enemy Skill List
Star 19: Chocobuckle
Magic Points Needed: 3
Effect: A Chocobo falls on one enemy. The damage increases if you
run away from more battles.
Learn: Go to the Chocobo Farm. Talk to the man in the barn and choose
to buy items. The 5th item from the top costs 1500 Gil, and you
should buy 3 or them. Go to the Chocobo tracks on the
Southern continent near the forest. Equip yourself with a
Chocobo Lure materia. When you find a Chocobo, kill off
all but one of the other enemies and use the item you bought 3
of on the Chocobo. The Chocobo will peck at the ground. When
the Chocobo stops pecking, use Level 4 Suicide Enemy Skill on
the Chocobo and he will use Chocobuckle on you.
(Disc 2 or 3)
--------------------------------------------------------------------------
Star 20: Level 5 Death
Magic Points Needed: 22
Effect: Enemies with levels multiple to 5 will be killed instantly.
Learn: From the blue leeches, Parasites, in the Makou Pit.
(Disc 3)
--------------------------------------------------------------------------
Star 21: Death Sentence
Magic Points Needed: 10
Effect: One enemy is condemned and will die when the counter on top
or them reaches zero.
Learn: From the yellow spikey enemies that are in front of and
in the area behind the Ancient City. (Disc 1, 2, or 3)
---------------------------------------------------------------------------
Star 22: Roulette
Magic Points Needed: 6
Effect: One random friend or enemy is instantly killed.
Learn: From the Death Dealers that look like Jesters in the Makou Pit
when you take the right path the first time you meet up.
(Disc 3)
---------------------------------------------------------------------------
Star 23: Shadow Flare
Magic Points Needed: 100
Effect: A black fire hits one enemy.
Learn: From the Ultimate Weapon hovering over the world map.
Or also the Dragon Zombies in the Makou Pit. (Disc 3)
---------------------------------------------------------------------------
Star 24: Pandora's Box
Magic Points Needed: 110
Effect: Stars and a question point appear and hit all enemies for
strength damage.
Learn: From the large Dragon Zombies locating in
the Makou Pit if you take the right path the first time you
meet your friends. (Disc 3)
-----------------------------------------------------------------------------
To learn all of the enemy skills, a person must first be equipped with
an Enemy Skill Materia. There are 24 Enemy Skills in all, and each takes
up a star in the materia menu. If that spell hits you in battle; even if it
misses you or kills you, you will gain the Enemy Skill. However, if your
party dies, you do not learn that Enemy Skill. Enemy Skills that are casted
upon teammates will not give that person the Enemy Skill, because they
must have that spell casted on them by monsters only. I have found many
Enemy Skills to be useful, especially some that use a low amount of MP
to do a high amount of damage.
Weapons Cloud
Cloud Attack Power Attack % Unlinked Materia Slots Linked Materia Slots Growth [/tr]
Buster Sword 18 96 0 2 Normal Hardedge 32 98 2 2 Normal Mythril Saber 23 98 1 2 Normal Force Stealer 36 100 3 0 Double Butterfly Edge 39 100 0 4 Normal Rune Blade 40 108 4 0 Double Yoshiyuki 56 100 2 0 Normal Murasame 51 100 1 4 Normal Nail Bat 70 100 0 0 0 Organics 62 103 2 4 Normal Enhance 43 107 0 8 Normal Crystal Sword 76 105 0 6 Normal Heaven's Cloud 93 100 6 0 Normal Apocalypse 88 110 3 0 Triple Ragnarok 97 105 0 6 Normal Ultima Weapon 100 110 0 8 0
Weapons Aeris
Aeris Attack Power Attack % Unlinked Materia Slots Linked Materia Slots GrowthGuard Stick129910Normal Striking Staff3210022Normal Mythril Rod1610002Normal Full Metal Staff2210012Normal Wizard Staff2810030Double Fairy Tale3710370Normal Prism Staff4010504Normal Wizer Staff3310040Double Aurora Rod5111014Normal Prinzess Guard5211116Normal Umbrella58118000
Weapons Barret
Barret Attack Power Attack % Unlinked Materia Slots Linked Materia Slots Growth [/tr]
Gattling Gun 14 97 1 0 Normal Assault Gun 17 98 0 2 Normal Atomic Scissors 32 99 2 2 Normal Cannon Ball 23 98 1 2 Normal W Machine Gun 30 100 3 0 Double Heavy Vulcan 39 100 0 4 Normal Enemy Launcher 35 100 3 2 Normal Drill Arm 37 97 4 0 Double Chainsaw 52 100 1 4 Normal Rocket Punch 62 110 0 0 0 Microlaser 63 101 2 4 Normal AM Cannon 77 103 0 6 Normal Solid Bazooka 61 100 0 8 0 Max Ray 97 98 0 6 0 Missing Score 98 108 0 8 0
Weapons Tifa
Tifa Attack Power Attack % Unlinked Materia Slots Linked Materia Slots GrowthLeather Glove139910Normal Metal Knuckle1810202Normal Mythril Claw2410612Normal Grand Glove3111022Normal Motor Drive2710630Double Tiger Fang3811004Normal Platinum Fist3010840Double Diamond Knuckle5111214Double Work Glove68114000 Dragon Claw6211424Normal Kaiser Knuckle4411062Normal Crystal Glove7511506Normal God´s Hand8625504Normal Premium Heart99112080
Weapons Yuffie
Yuffie Attack Power Attack % Unlinked Materia Slots Linked Materia Slots Growth [/tr]
4-Point Shuriken 23 100 2 1 Normal Boomerang 30 101 2 2 Normal Wind Slash 30 103 3 0 Normal Pinwheel 37 104 0 4 Normal Twin Viper 36 108 4 0 Double Razor Ring 49 105 4 1 Normal Hawkeye 61 107 4 2 Normal Crystal Cross 74 110 0 6 Normal Super Ball 68 120 0 0 0 Oritsuru 90 116 4 4 Normal Magic Shuriken 68 110 2 6 Normal Conformer 96 112 0 8 0
Weapons Red XIII
Red XIII Attack Power Attack % Unlinked Materia Slots Linked Materia Slots GrowthMythril Clip2410012Normal Magic Comb3710030Double Diamond Pin3310222Normal Silver Barrette4011040Normal Seraph Comb6811040Normal Plus Barrette3910440Double Hairpin57120000 Gold Barrette5010414Normal Adaman Clip6010606Normal crystal Comb7610806Normal Spring Gun Clip8710006Normal Centclip 58 108 8 0 0 Limited Moon 93 114 0 8 0
Weapons Vincent
Vincent Attack Power Attack % Unlinked Materia Linked Materia Growth [/tr]
Quicksilver 38 110 2 2 Normal Peacemaker 38 118 1 2 0 Sniper CR 42 255 0 4 Normal Shotgun 48 112 0 4 Normal Shortbarrel 51 118 1 4 Normal Silver Rifle 62 120 0 0 0 Lariat 64 120 2 4 Normal Winchester 73 120 0 6 Normal Outsider 80 120 4 4 Normal Supershot ST 97 120 0 6 0 Buntline 48 124 0 4 0 Long Barrel R 66 255 0 8 0 Death Penalty 99 115 0 8 0
Weapons Cait Sith
Cait Sith Attack Power Attack % Unlinked Materia Slots Linked Materia Slots GrowthYellow M-Phone3610022Normal White M-Phone3510230Double Green M-Phone4110004Normal Black M-Phone3110440Double Silver M-Phone2810680Normal Blue M-Phone4810014Normal Trumpet Shell68118000 Red M-Phone6010024Normal Crystal M-Phone7410006Normal Gold M-Phone58103080 Battle Trumpet959506Normal Starlight Phone88102080 HP Shout95110080
Weapons Cid
Cid Attack Power Attack % Unlinked Materia Slots Linked Materia Slots Growth Spear 44 97 0 4 Normal Slash Lance 56 98 1 4 Normal Trident 60 105 6 0 Normal Viper Hailberd 58 102 4 0 Double Mast Ax 64 99 2 4 Normal Javelin 62 104 1 4 Double Scimitar 86 102 0 2 Triple Dragon Lance 66 100 8 0 Normal Mop 68 118 0 0 0 The Flayer 100 100 6 0 Normal Venus Gospel 97 103 0 8 0
Armor
Name Defense Defense %Magic DefenseMagic Defense %Unlinked Materia SlotsLinked Materia SlotsMagic Growth Bronze Bangle 8 0 0 0 000 Iron Bangle 10 0 2 0 101 Titan Bangle 14 2 4 0 201 Mythril Armelt 18 3 6 0 021 Carbon Bangle 27 3 8 0 121 Four Slots 12 0 10 0 081 Shinra Beta 30 0 0 0 221 Platinum Bangle 20 0 12 0 201 Silver Armlet 34 4 14 0 221 Gold Armlet 46 4 22 0 041 Edincoat 50 0 33 0 801 Diamond Bangle 57 6 37 0 141 Rune Armelt 43 5 24 0 402 Dragon Armlet 58 3 0 7 061 Gigas Armlet 59 0 0 0 100 Aurora Armlet 76 8 54 3 041 Wizard Bracelet 6 3/td]
85 3 081 [/tr]
Bolt Armlet 74 8 55 3 041 Fire Armlet 72 8 52 3 041 Crystal Bangle 70 8 45 1 061 Warriors Bangle 96 0 21 0 041 Shinra Alpha 77 0 34 0 061 Ziedrich 100 15 98 18 000 Escort Guard 62 5 55 0 061 Aegis Bracelet 55 15 86 50 041 Imperial Guard 82 0 74 0 0601 Minerva Band 60 8 57 0 061 Mystile 65 50 72 60 061 Chocobracelet 35 10 38 10 401 [/table]
Accessories
Name Function Found Amulet Luck +10 Mideel Store Bolt Ring Protects against Bolt Magic Mideel Store Cat´s Bell Heals HP as you walk Chocobo Races Champion Belt Power +10, Strength +10 16,000 Battle Points Choco Feather Dexterity +10 Wutai Store Earrings Magic +10 Rocket Town Store Fairy Ring Protects against Poison/Darkness Gi Cave Fury Ring Makes your character berserk Gongaga Store Fire Ring Protects against Fire attacks Costa Del Sol House Headband Negates Sleep Junon Store Hypno Crown Increases Manipulations Corral Valley Cave Ice Ring Protects against Ice attacks Mideel Store Jem ring Negates Paralyze/Petrify/Slow/Numb Defeat Materia Keeper Peace Ring Negates Berserk/Fury/Sadness Defeat Rapps Poison Ring Absorbs Poison attacks/td]
Defeat Motorball [/tr]
Power Wrist Power +10 Defeat Bottonswell Protect Vest Vitality +10 Defeat Rufus Reflect Ring Automatically reflects magic Defeat Jenova-Death Ribbon Negates all status effects Cetra Shrine Door 5 Safety Bit Negates Sudden Death/Petrify/Slow/Numb Great Glacier Silver Glasses Negates Darkness Junon Store Sneak Glove Increases stealing percentage Sector 6 Slum Store Star Pendant Protects against Poison attacks Coupon B - Shinra HQ Talisman Spirit +10 Defeat HO512 Tetra Elemental Absorbs Fire/Ice/Bolt/Earth magic Final Dungeon Tough Ring Vitality +50, Spirit +50 Stolen from Reno Water Bracelet Absorbs Water magic corral Valley White Cape Negates Frog/Small Defeat Jenova-Birth [/table]
Items
Name FunctionNameFunctionNameFunctionNameFunction Potion Restores 100 HPHi- PotionRestores 500 HPX-PotionRestores all HPEtherRestores 100 MP Turbo Ether Restores all MPElixierRestores all HP/MPMegalixierRestores partys HP/MPPhenonix DownRevives a character Tent restores the HP/MP of the partyLuck SourceRaises Luck of one characterSpeed SourceRaises Speed of one characterMind SourceRaises Spirit of one character Magic Source Raises Magic Power of one characterGuard SourceRaises Vitality of one characterPower SourceRaises Strength of one characterGrenadeExplode DMG on a single enemy Shrapnel Explode DMG on all enemiesRight ArmExplode DMG on all enemiesDream PowderUses Sleep on all enemiesMute MaskUses Silence War Gong Uses Berserk on all opponentsLoco WeedUses confusion on all opponentsFire FangUses Fire 2 on all opponentsFire VeilUses Fire 3 on all opponents Antarctic Wind Uses Ice 2 on all opponentsIce CrystalUses Ice 3 on all opponentsBolt PlumeUses Bolt 2 on all opponentsSwift BoltUses Bolt 3 on all opponents Earth Drum Uses Quake 2 on all opponentsDeadly WasteUses Bio 2 on all opponentsM-TentaclesUses Bio 3 on all opponentsStardustUses Comet 2 on all opponents Holy Touch Uses Despell on all opponentsInkUses Darkness on all opponentsVampire FangDrains HP from the enemyGhost HandDrains MP from the enemy Dragon Scales Water DMG on all enemiesImpalerMakes on enemy a frogShrivelMakes one enemy smallMolotovFire DMG on all enemies S-Mine Explosive DMG on one enemy8-Inch CannonExplosive DMG on one enemyGraviballUses Demi on one enemyT/S BombUses Demi 2 on one enemy Dazers Paralyzes one enemyDragon FangLightning DMG on all enemiesSpider WebUses Slow on all enemiesBird WingWind DMG on all enemies Light Barrier Uses Barrier on all charactersHyperCures SadnessTranquilizerCures BerserkVaccineProtects against transformation Eye Drop Cures DarknessHero DrinkRaises ability in battleSpeed DrinkCasts Haste on one characterSmoke BombAutomatically run from battle Remedy Cures any status alimentEcho ScreenCures SilenceCornucopiaCures SmallMaiden´s KissCures Frog Soft Cures PetrifyAntidoteCures PoisonSylkis GreensChocobo ItemReagan GreensChocobo item Mimett Greens Chocobo itemCuriel GreensChocobo itemPahsana GreensChocobo itemKrakka GreensChocobo item Zeio Nut Chocobo breeding itemCarob NutChocobo breeding itemProov NutChocobo breeding itemPram NutChocobo breeding item Lasan Nut Chocobo breeding itemSaraha NutChocobo breeding itemLuchile NutChocobo breeding itemPepio NutChocobo breeding item Tissue ?1/35th SoldierShinra soldiers, 12 in a setSave CrystalAllows you to save in North CraterSuper SweeperMachine to protect reactor
Key Items
Name Function Name Function Pharmacy Coupon Wall Market Item Cotton Dress Wall Market Item Satin Dress Wall Market Item Silk Dress Wall Market Item Wig Wall Market Item Blonde Wig Wall Market Item Dyed Wig Wall Market Item Disinfection Wall Market Item Deodorant Wall Market Item Digestive Wall Market Item Cologne Wall Market Item Flower Cologne Wall Market Item Sexy Cologne Wall Market Item Glass Tiara Wall Market Item Ruby Tiara Wall Market Item Diamond tiara Wall Market Item Member´s Card Golden Saucer Membership Keycard 60 Key for the Shinra HQ Level 60 Keycard 62 Key for the Shinra HQ Level 62 Keycard 65 Key for the Shinra HQ Level 65 Keycard 66 Key for the Shinra HQ Level 66 Keycard 68 Key for the Shinra HQ Level 68 Midgar Parts Pieces of Midgar Model PHS Changes characters on open world Basement Key Key to the Basement of Shinra Mansion Keystone Opens the Temple of the Ancients Leviathan Scales Scales of the Water Dragon Black Materia Powerful black force Glacier Map Map of the Great Glacier Snowboard Allows to Snowboard on Great Glacier Mythril Hardest Metal available Huge Materia Key Materia Piece Huge Materia Key Materia Piece Huge Materia Key Materia Piece Huge Materia Key Materia Piece Key to Ancients Key to the Cetra
Gold Chocobo Breeding
Chocobo breeding is one of FF7's more important side quests. Some of the game's best materia can only be found by completing this. There are only a few things required; time, some luck and a massive amount of gil. Expect to spend upwards of 250k gil by the time you're done depending on how many greens you use. (As luck would have it, most mastered materia sells for 1 million or more. "All" works nicely around 1.4 million)
Getting StartedTo start, you'll need to buy room in the stables at the chocobo farm you passed in disk 1. There are 6 stalls, each costing 10 000 gil, so 60k for all of them. You can also have up to 4 caught chocobos waiting in the pasture. Using the chocobo lure, you'll want to start catching chocobos in specific locations.
There are types of chocobo you're looking for, you'll need 2 "good" chocobos, one male and one female, as well as 2 "great" chocobos, again one of each gender. To figure out what each one is, you first need to catch them and send them back to the stables. You'll be able to see them in the pasture but still you won't know what it is until you ask Billy to bring them into a stable, at which point he'll tell you "this is a great chocobo" or "this chocobo is pretty good" when you bring them up for selection. What he says should match up with the speed you see it running at in the picture, better chocobos of course look like they're running faster.
Good chocobos can usually be found at the tracks on the coast near the Golden Saucer. They only appear with 2 enemies called "spirals", you'll notice most if not all the others you catch there will not be what you need. Great chocobo's can be found outside of Mideel, once again, not all that you find there will be the one you need. I've also found some of the necessary chocobo's outside of Rocket Town as well but it seems to be uncommon.
Make sure you save before putting your new chocobos into the stables. The reason for this being that you can tell the quality of chocobo before selecting, but the gender will NOT be revealed until its in your stable. When you have found a few already it can be very frustrating getting the same gender when you don't need it, but there is hope. If you don't get the one you want, quit the game and reload your save to just before you entered. Now before you try again, enter and exit the farm a few times as this resets the random seed generator. It's still random chance but it will certainly save you from going out and catching another one.
When you do bring them into the stables, give them names like "GoodF" or "GreatM" (M for male F for female of course). This will help immensely when you start breeding since they dont look different from one another in the stables.
Nuts and GreensTraining your chocobos is as simple as buying greens and feeding them, but the nuts you need won't usually be found in shops. Lets start with greens.
Make a trip to see the Chocobo Sage. If you haven't yet, he's located close to the north crater, close to the town you snowboarded from. His cottage is surrounded by mountains, but has a small grassland spot to land the Highwind. He has the best greens (as well as the most expensive, 5000 each for Sylkis green). You'll need about 10-15 per chocobo you've caught, that should get them strong enough to race without too much trouble.
Before you head back to the farm and feed all those greens, stop on the southern tip of the North Continent, its close to the chocobo tracks in the snow, but you'll want to walk on the grass part. Make sure you have steal equipped and look for an encounter here. The island to the south also works, but what we're looking for is a red dragon-like creature with tons of HP. Stealing from this beastie will get you a carob nut, and you'll need 3 of them to do most of your breeding.
For the gold chocobo you'll need a different nut. The Zeio nut can be found on the small island in the top right side of the world map, its called Goblin Island (you can check in the menu screen) and what a surprise, you'll find goblins here. Not only can you steal the nuts from them but they will also drop on their own occasionally. You only need one though, after this you should have everything you need to start racing.
RacingRacing is pretty much required for breeding, as it will increase your chances for getting the rare chocobos you need, and is especially necessary for getting the gold chocobo. Racing is done at the Golden Saucer's chocobo betting area. Talk to Ester, the girl who taught you how to race in disk 1 when they forced you to, she organizes the rest for you, just choose the chocobo you want to race with.
All chocobos start at rank C and it'll take 3 wins to move up each rank. You want all your chocobos at rank A. As far as odds go, you've got little to no chance of getting green or blue chocobos from breeding rank C parents, about 5%, maybe less, where as 2 rank A's can easily get it right on the first try. There is also loads of GP to be gained from these races which you can use for useful things later. Megalixir for example is worth 300GP, so its up to you if you want to keep the item or exchange it. After everyone is advanced to rank A its back to the farm for breeding, there will still be more racing to do later.
BreedingBy now you should have 4 rank A chocobos, and what we are looking to get are a blue chocobo and green chocobo of opposite genders. Once again I urge everyone to save before breeding, as this will allow you to try again by entering and exiting the farm to reset the random seed, giving you another chance to get what you want.
Note that by doing this you may not even get the same color of chocobo, it might even be just a plain one, but if they are high rank your odds of getting a rare colour is good. I've had it first try more than once. I have seen both green and blue from EITHER of the combinations that follow, but it seems one is more likely than the other. Combinations are as follows:
"great" male + "good" female bred with carob nut
"great" female + "good" male bred with carob nut
When all is said and done, you should have a green chocobo and a blue, one male and the other female. At this point you will no longer need the 4 yellow chocobos you caught and they take up the other 4 stables so they can be released as you will need the space.
Black ChocoboThe black chocobo is simple enough. All you have to do is breed your blue chocobo with your green one using the last carob nut you have, but first you'll want to buy more greens for them and race both green and blue to rank A just like before. I'm unsure of the odds without doing so, but they need a few in game hours of time before you can breed them after creating them anyway, so race away. After you have your black chocobo you're almost there, just a few more familiar steps.
The Gold ChocoboYour legendary friend is almost within grasp now. There is one more chocobo you need to catch, its on the northern continent on the west coastline in the snow, not far from the town you got the snowboard from. Find a chocobo with 2 bunnies and catch it (you'll have to kill the bunnies but don't worry, they're evil, you can tell :P)
When you take it back and talk to Billy about putting it in the stable he should say "This... is a wonderful chocobo!". You'll want this one to be the opposite gender of your black chocobo. Once again, please save before you put it in the stables just in case its the wrong gender, save and reset like before as needed, but all we need here is the right gender so its 50/50. Race both your black chocobo and your new "wonderful" chocobo to rank A as with all the others and head back to the farm.
Again, save before breeding these two. Breed your black chocobo with the wonderful using the zeio nut. You should now have a new gold chocobo, congratulations :)
Emerald, Ruby Weapon Strategies
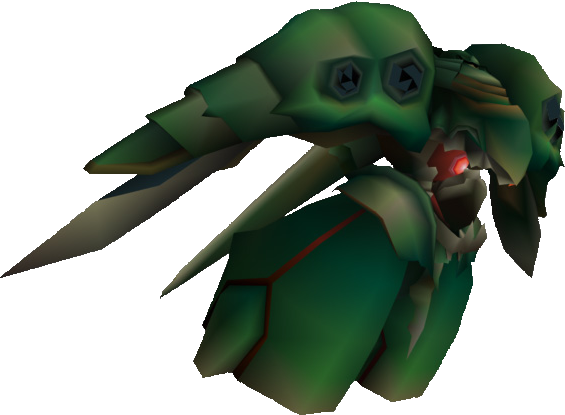
Not finished Yet, gets updated soon
Boss Stratergy - Emerald Weapon
Make sure to have Final Attack/Revive Materia Combo
Healing is priority
Phoenix Summon is invaluable
Underwater Materia almost neccesary
Find Emerald Weapon along the ocean floor. It roams around in the area
and can only be engaged on the submarine.
Your characters will probably definitely have to be level 99 to have a
good chance at defeating it. He has quite the barrage of attacks, which
includes a normal attack that does about 6500 damage, four seperate
lazer attacks that can do about 3500 damage each, another four lazers
that can drain about 350 magic points from a single character, and a
special attack that does 9999 damage to each character.
Because of this you'll definately have to have the Underwater Materia
from the Kalm Traveler. If you don't have this Materia, it's very hard
to win the fight because you have a 20 minute time limit. This seems
like a lot of time, but when you are casting long summon spells and
taking attacks it really isn't that long. Also, the Materia has to be
equipped on a character. You'll also need as many Master Materias as
possible, especially Master Magic and Master Summon. Using W-Summon
with Knights of the Round can do over 150,000 damage each time. Also,
if you have the other characters use Mime you can do keep doing this
until you need to heal. Final Attack/Revive Materia combination is
neccesary to keep you alive from the special attack that does 9999 to
all as well. Final Attack/Phoenix will also work well. You might need
to also expend some Elixers, Megalixers, and Turbo Ethers because of
the strong attacks and MP drain attacks. Emerald Weapon has 1,000,000
hit points.
Winning this battle nets you an Earth Harp, which you can bring to the
Kalm Traveler for a Master Magic, Master Summon, and Master Command
Materia.
Boss Strategy - Ruby Weapon
Hades Summon absolutely neccesary
Final Attack/Revive or Final Attack/Phoenix also important
Can only be hurt when its claws are buried in the sand
Uses powerful barrage of attacks including Ultima
Ruby Weapon is swimming around in the sand surrounding the Golden
Saucer. You'll have to engage it by flying head on with the airship.
You can't hurt Ruby Weapon when its hands are above the sand, because
its torso will be invulnerable at this time. If you attack when the
arms are above the sand, he'll counterattack with a quicksand attack
that kills a member of the party in one fell swoop. You'll want to
use your most powerful summons here as well, including using the very
valuable Hades/Quad Magic here so it gets inflicted with many status
ailments. He has 1,000,000 hit points just like Emerald Weapon, so it
takes quite a lot of chipping away to kill him as well. One thing you
don't want to do here is summon Knights of the Round because he'll
counterattack with Ultima.
For defeating Ruby Weapon, you'll receive a Desert Rose, which you can
bring to the Kalm Traveler to get a Gold Chocobo.
Grind Spots For Gil AP And EXP
coming soon
Steal/Morph Guide
Source: https://steamcommunity.com/sharedfiles/filedetails/?id=157703613
More FINAL FANTASY VII guilds
- All Guilds
- [DE] 7th Heaven 2.0 - Alles rund um 7th Heaven !!!
- Cria de chocobos
- AHK scripts for w-item dupe and super dunk, added tifas piano
- INFINITE STAMINA IN YOUR CHOCOBO
- MAP Overview
- Jak powikszy swoj materi!
- Final Fantasy VII - Walkthrough (ITA - PS1 version)
- Gold Chocobo Guide (No Racing!)
- FINAL FANTASY VII Guide 470
- Useful Materia Combos