Intro
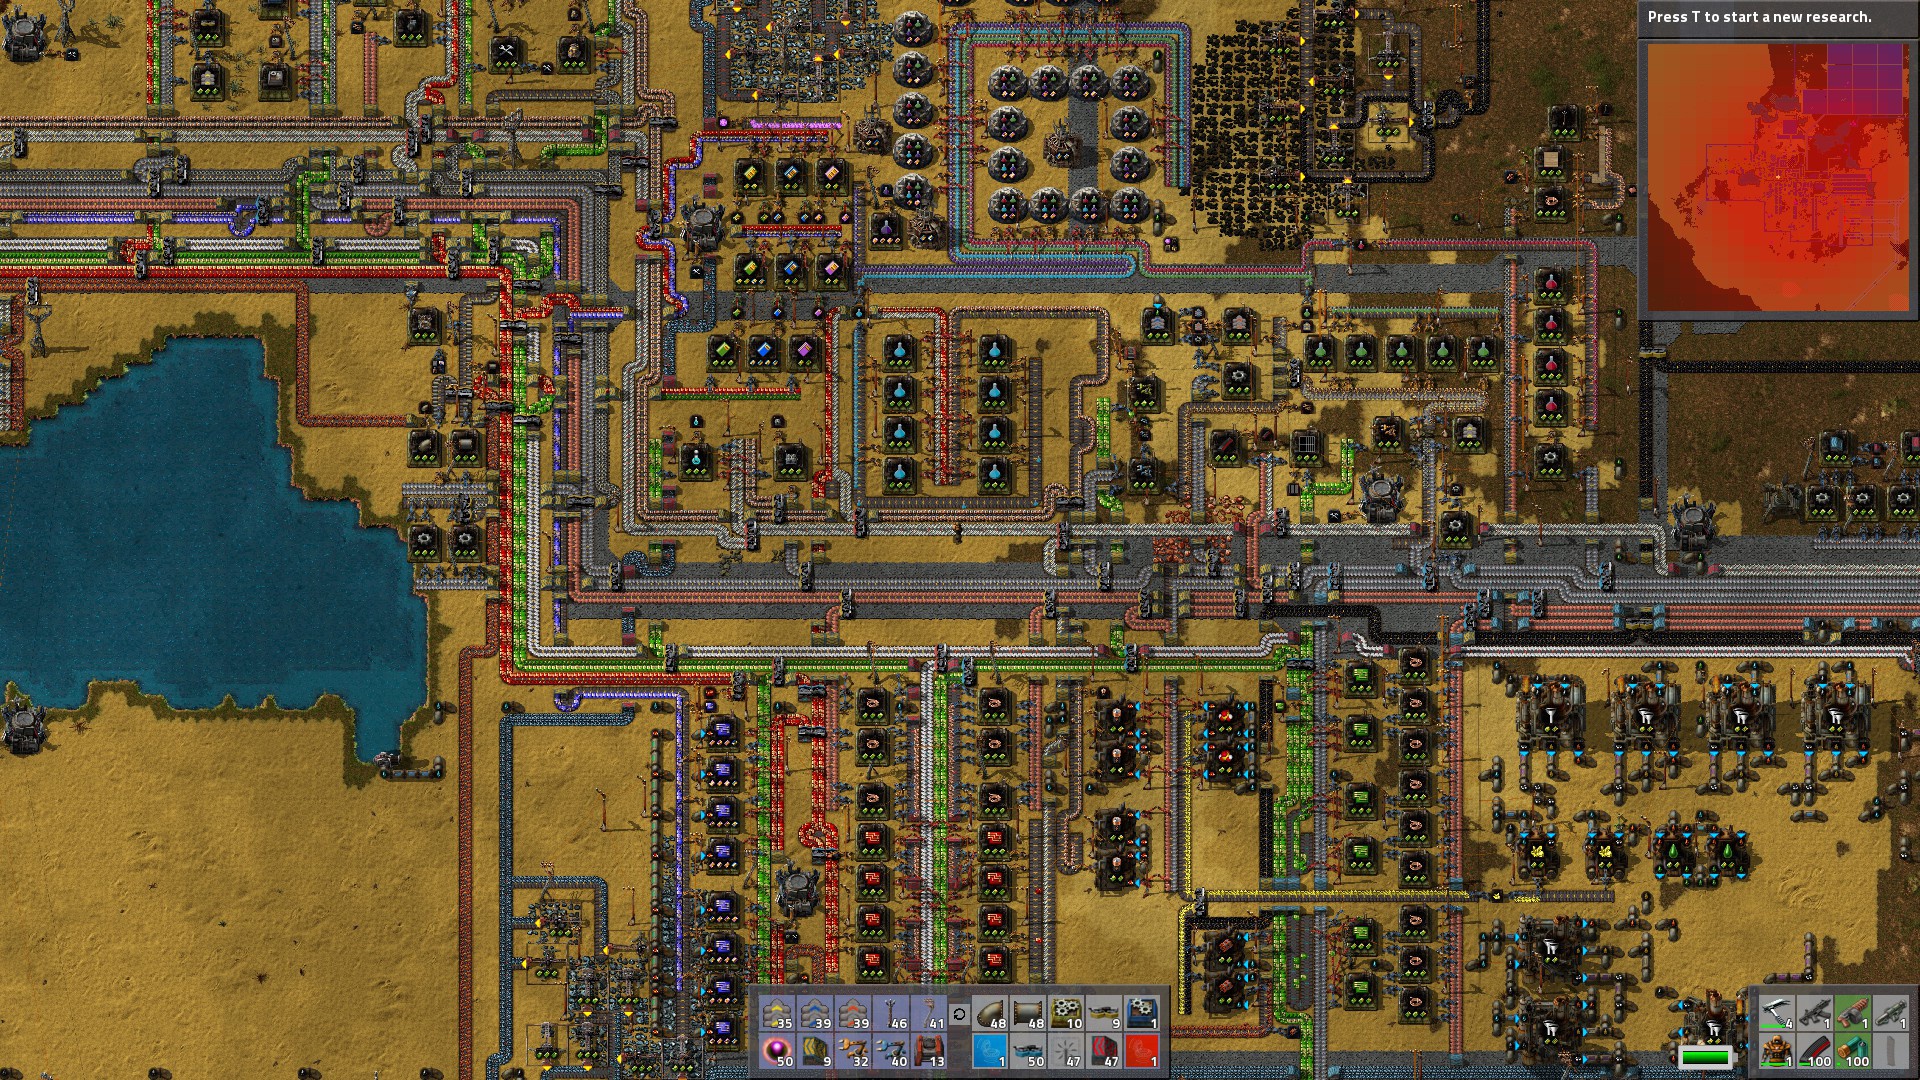
IMPORTANT!!! I won't be updating this guide until 1.0! There are continual changes with each major update, and it takes a lot of time to incorporate them into the guide. Please be patient as I try to find time to get everything updated!
Factorio is one of my favorite games! I absolutely adore watching all the pretty-colored products moving along the conveyor belts.... (ooooooh.... conveyor belts!)
Every time I play, I learn something new. Through playing, reading forums, and watching others' videos, I've gained a lot of knowledge, which I figured I might as well gather in one place! Hopefully you'll find some valuable nuggets in this guide that will improve your game :-)
On with the conveyor belts!!!!
Map Generation
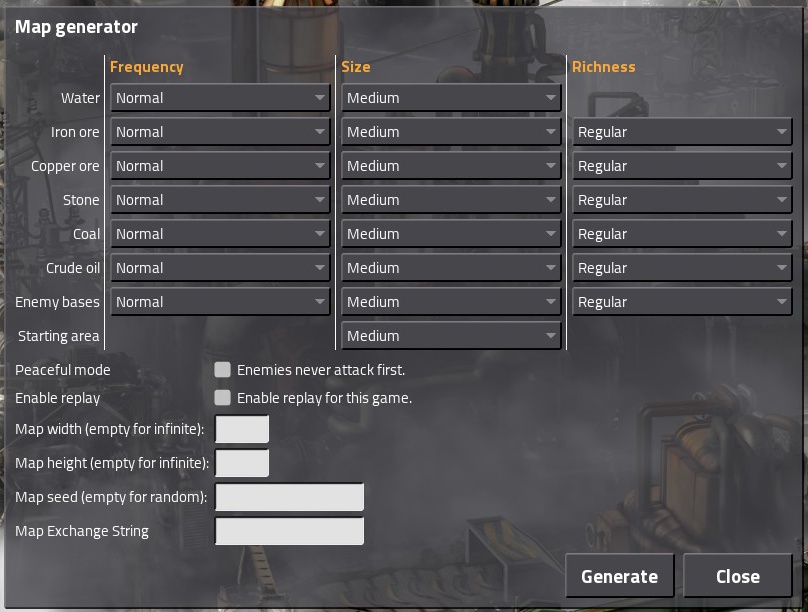
After completing the tutorials, (marked as "Campaign") to get down the basics, you'll want to start a new game. Factorio allows you to choose many of the starting parameters, which result in manifold worlds!
The Options Water: How large the lakes are. If you select "In Starting Area Only", you will confine yourself to only that area for water supply... possibly a drawback for massive factories. (End-game issue)
Iron Ore, Copper Ore, Stone, Coal, Crude Oil:
Frequency refers to how often you will see these deposits on a landscape.
Size is how much square area on the map they will cover, per deposit.
Richness is how much ore each individual square will contain.
Frequency and Size have an algorithmic relationship, so don't expect huge ore patches if you choose High frequency and Very Big size. For more on this, see the wiki[wiki.factorio.com] .
Examples: If you want to keep on the move, select Low Frequency, Size, and Richness, which will force you to build train lines frequently to get at the more distant ore sources. If you're more of a home-body, increase those parameters to High.
My favorite combination is Low Frequency, Very Big Size, and Very Good Richness: this gives me the impetus to build trains to distant outposts while not forcing me to move the miners constantly when the deposits are depleted.
Enemy Bases: Similar to the way resource deposits work, the only difference is in the Richness variable, at present Richness seems to have no effect in game. (Reference: http://steamcommunity.com/app/427520/discussions/0/144512526676002237/?tscn=1483626609)
Starting Area: This is the alien-free zone that surrounds your start position. A larger area means that biter conflicts will be much further off, and your pollution cloud can take up a huge amount of space before it ever hits a single alien settlement.
Peaceful Mode: Enabling this will allow you to walk among the biters in peace. They will only attack you if you attack them first.
Map Width & Height: allow you to specify a fixed map size if desired. Putting in a value for one and leaving the other blank will result in a long strip of land, aka a "Ribbon World."
Map Exchange String: allows you to share maps with other people.
To find the string for your map:
Go to the Load Game dialogue.
Select the game whose string you want, then click the Map Exchange String button in the lower left corner.
When the string pops up, highlight it with your mouse and press Ctrl+C to copy it. You can paste it in the map generator or send it to a friend.
MiscA lot of people ask on the forums: is the map infinite?
Functionally, yes. The map stretches about 2 million tiles in any direction. It will take you a LONG time to get to any edge.
Having played a significant amount of hours myself, I can say that the world is HUGE -- you will never run out of space.
Resources & Mining
In Factorio, everything is created from but a very few natural resources:
Iron - you can never have enough!
Copper - the second most-needed resource
Coal - Used for power in early-game, later on for several products (plastic, explosives, etc.)
Stone - Used early-game for furnaces, later on for railroads, and is your primary source of biter blocking -- walls!
Oil - Middle-end game. Infinite resource that drops to a fraction of productivity after a time.
A large patch of copper, Iron above it, as well as one patch of Oil. Stone is in the lower left. These resources are also color-coded on the Map and Minimap.
Uranium - Green and glowy, used for mid-end-game power & weaponry.
Trees (wood) - Little used -- only for wooden chests, power poles, etc.
Water - Needed for steam engines, & several oil processes including cracking of one oil type to another.
Burner Mining & Inserters At the beginning of the game, you'll need to use Burner Mining Drills & Burner Inserters because you'll have no electricity. These are powered by Coal, (or other fuel types), which you can hand-deliver to them, or transport via conveyor belt.
In this setup, make sure the inserter is on the square NEXT TO the output of the drill. (Make sure you don't block the output). This self-feeding system will last as long as there is coal under the drill.
Press Alt to turn on detailed view -- you can see the output arrow of the miner. Press R to rotate machines.
Power-wise, they are much less efficient than electrical, so you almost always want to transition over to regular inserters as soon as you are able.
Burner Inserters feed themselves off of a coal line, so there's no need for additional "feeding" once they are connected.
The only time you may not want to switch to electrical inserters is on the Burner Inserters feeding your Boilers -- as long as there is coal, they will continue to operate. If the power fails, electrical inserters will go very slowly or shut off entirely, thereby crippling your power network.
Burner Inserters feeding Boilers.
Burner structures, (including furnaces), will run off of all fuel types in the game, including:
Wood - Least amount of energy/burns quickly
Coal - Most common/decent amount of energy
Solid Fuel - Very high energy per unit
Rocket Fuel - Yes, you can technically have a rocket-fuel powered train, boiler, furnace, etc.!
Note that Burner Mining drills ONLY drill the land over which they are directly placed. (Electric Mining Drills have a 5x5 influence square).
Electric Mining As mentioned above, Electric Mining Drills have a 5x5 influence square. Thus, you can place them with 2 squares in-between -- handy for power poles or a substation.
Placing electric mining drills immediately adjacent to each other will only cause the deposit to be mined at a faster rate -- it won't actually produce more ore from the deposit.
Coverage of a single Electric Mining Drill.
Electrical Grid


Electricity powers your base, and keeping it producing is key to productivity in your factory.
Note: Power will ONLY be produced when connected to energy-consumung structures! The game auto-adjusts power production so that you don't waste fuel when there is no demand for electricity.
Structures will flash the electrical plug symbol when they are not connected to electricity.
(Somewhat confusingly), Steam Engines & Solar Panels will flash the same symbol when they are not connected to power poles, (and cannot deliver their produced electricity).
Power Distribution Structures: Small Poles - most commonly used, cover the smalled area.
Medium Poles - good for covering inserters longer distances away, train station chests, or creating (simple) solar grids.
Large Poles (pylons) - Tiny coverage, but longest lines -- used for linking long distances. (A central power core through your base, outposts linked by rails, etc.)
Substation - best coverage. Ideal for complicated solar fields and reducing power poles generally. (Personally, I don't utilize them for general usage because the building is too tall and blocks movement -- mostly an aesthetic choice).
Electric Pole/Substation Types.
Power Switch - Allows you to isolate areas of your factory to turn the power off.
Steam Engines
The correct ratio is:
1/20/40 = 1 Water Pump, 20 Boilers, 40 Steam Engines
Make sure you have an electrical pole covering each engine to make use of its power. If there are no consumer buildings (assemblers, inserters, etc.) connect, the steam engines will continue to blink.
Connect the water to either long side of the boilers. The boilers convert the water to steam, which comes out of the side of the machine. This needs to be connected to the steam engines.
Electricity PriorityFactorio automatically adjusts power production to your needs. It will make use of power in the following order:
Solar Panels
Steam Engines/Steam Turbines
Accumulators.
If you want to prioritize Accumulators (at night), please see the Usages of the Logic System for an easy way to connect them to the circuit network.
Simple Solar SetupIn early game, you may not have access to all of the technology yet; these are decently efficient structures to build initially:
Use 8 Solar Panels around a Medium Electric Pole
Use 48 Accumulators around a Substation
Both of these setups are tilable to make into larger fields. Make sure to connect them up to your main power lines. (You'll know your accumulators are charging when they emit a buzzing sound and electric arcs during the day).
More Efficient Power UsageTo maximize your power ratios, it is recommended to use the specific ratio of accumulators/solar panels of 0.84. The calculations have been done by the creator of this post, and all credit goes to that person: https://forums.factorio.com/viewtopic.php?f=5&t=5594
Here's the setup:
Zoom in and pop out the picture for a detailed look at the components.
Size: 48x48 (2304 tiles)
Solar Panels: 180
Accumulators: 151
Substations: 16
Roboport: 1
Tilable for both the Logistics & Electric Networks with 1-2 tiles between structures if desired.
I highly recommend building the structure and then Blueprinting it. I surround my structures with concrete for faster running to build more tiles... :-)
How to Build a Solar Array:
Nuclear Setup & Ratios
Reading the Power GraphThis confused me for a long time before I discovered a simple way to interpret the data.
Click on a power pole to access the Power Graph.
You can select the time-frame to see longer time periods, which can help you diagnose any power problems.
The primary bars you want to look at are in the upper left hand corner: Consumption and Production.
This is what it looks like when you have not enough power for your machinery:
It shows that Production capacity is full, and that the consumers are getting a fraction of the energy they need.
------------------------------------------------------------------------------------------------
In this example, there is too much power for the machines that are running on it. This is not generally a problem since Steam Engines will adjust their output of power, and shut off if necessary.
------------------------------------------------------------------------------------------------
Of course, a normal solar network has oscillating periods of production. At night, no electricity is generated, so accumulators have to step in.
Here, Normal Power Levels are shown as the center line, (also noted in red). At night, the Accumulators also produce that same amount of electricity.
During Morning and Evening, there is less light, and solar panels cannot function to their fullest capacity, thus, the accumulators are needed at these points as well. (Note the simultaneous increase of accumulator power and decrease of solar power).
During the Day, Solar Panel electricity production jumps as high as possible in order to charge the accumulators.
In the picture above, observe how the power levels go back to Normal in the early part of the Day phase... I clearly have too much production!
Combat - Defense
Radar Place Radars around the map to spot new biter bases as they crop up, and monitor how far your pollution cloud spreads.
To cover a continuous area:
Place a radar, (and hook it up to power).
Move directly in a cardinal direction. (North, South, East, or West).
Watch the main map, (M key), and move to a point where your illuminated square is one "square" away from the current radar area. (I.e. there should be a one square gap).
Place the new radar, and it will cover all the gaps.
Correct placement of the next Radar station for continuous coverage. (Note the previously-explored area is fading away on the adjacnt left squares). Radar should be placed where my name is: KatherineOfSky.
For far-flung radar systems, use solar panels for power. Place turrets if they are in biter-infested areas.
An efficient use of space for placement of far-away radar units.
On the map, a Radar station will illuminate a large square surrounding it that will show you exactly what's going on all the time. They also scan MUCH further out, but this data is updated only sporadically. (You can see what the Radar is scanning currently by looking for highlighted squares on the map).
Do note that solar-powered Radars will shut off during the night time.
Walls & Automated DefencesUnless you've chosen Peaceful mode, (where aliens won't automatically attack you), you'll need to defend your base.
Walls are an excellent barrier to biters, especially when fortified by turrets and laser turrets.
In early game, walls aren't really necessary, (unless map generation puts biters all over the place). Protect your base with a few turrets.
Mid-game, build at least a one-tile thickness of walls on areas opposite biter nests, with turrets clustered at especially sensitive areas.
Late-game, you'll generally want to wall-off your entire base with a double-thick wall, placing turrets regularly around the perimeter.
Post-end-game, for an impenetrable wall, use a 2-tile-thick wall with 2 layers of laser turrets behind, tiled continuously.
Note that biters can reach over walls to damage turrets & machinery, etc. beyond the first layer of wallls, so you might want to space things back with at least a 1 tile gap.
(Research) and build Gates to allow entry and egress from your base. They can be as long as you want, and open when you move near them. (They auto-open for vehicles as well).
A large parking lot with equally long gate for the car, (which needs space to maneuver).
Gates can be placed on train lines as well, on straight sections of track.
Have Construction Bots (from your Roboports) repair your walls by supplying them with repair kits. Make sure all walls are within the green construction area.
(Regular) Turrets require ammo to function. You can split stacks of ammo (or anything else) by right-clicking on it, adding extra by continuing to right-click.
You can build a self-feeding ammo system with conveyor belts and inserters.
Laser Turrets don't require ammo, but instead a significant amount of power. Make sure your electrical grid can handle it.
Example of a double-thick (2-tile) wall with laser turrets.
Flamethrower turrets produce a deadly blast of flames, but note their firing arc -- use regular or laser turrets on either side to clear out any biters that get past the AOE of the flamethrower turret.
Different Oil types produce diffferent damage multipliers -- Crude Oil being the least damage, Heavy Oil more, and Light Oil the most. However, because of the energy utilized in refining, it is recommended to use Crude Oil with Flamethrower Turrets. Feed the turret with pipes.
Range of the Flamethrower turret. Note the regular turrets placed to take out biters that get by.
Biters lit on fire will stay on fire, running around until they die.
Eliminating Biter NestsA very good defensive tactic is to attack biter nests to reduce the frequency of attacks on your base. Target ones in range of your pollution cloud first.
See the next section for preparing your offensive techniques.
Combat - Offense
General Tips You always want to have some kind of armor on.
Standard armor cannot be repaired, per se. However, multiple units of the same type will stack. In later-game, power armor shields will recharge themselves without the need for "repair".
Before attacking a biter base, it's always good practice to save your game.
Keep moving -- otherwise, the mobs will overwhelm you and decimate your armor/shields.
Energy Shields have a fuchsia bar.... if it goes green, it means your health is getting damaged! Run away!
Fish can be eaten to restore a small amount of health.
As soon as possible, upgrade your pistol to a machine gun, and your regular ammo to armor-piercing ammo.
As soon as possible, arm yourself with a Flamethrower & ammo (End-game armament).
Loading your tank with essentials can extend your biter-killing forays much longer than if you just went with personal inventory limitations.
You can carry 2 (or more) flamethrowers at once if desired. (Works with any type of gun -- use this trick to carry more ammo without using up precious storage space or if there are guns that you do not prefer to use.)
Capsules Poison Capsules: Excellent at killing worms. Deploying 2 or so on a group of worms will kill them in a short amount of time. They appear to have very little impact on spawner/houses though. (Note that it takes several seconds for the poison capsules to seal the worms' doom).
Poison capsule at work. When the green clears, the waiting is over! (Note: you can fire several capsules at once to double the damage on more resilient enemies).
Slow-down Capsules: These slow down enemies within a specific targeted area. Not used much, if at all, by most players.
Slowed enemies have a debuff symbol.
Combat Bots/CapsulesThese little robots can be relatively effective, however, they only last a matter of seconds before self-destruction.
Defender: the lowest level of bots, they do little damage, but are better than nothing. Follow you around.
Distractor: a mid-range bot, each use deploys 3 bots. More health then Defenders, and very decent damage output. Also, they are stationary, unlike Defenders and Destroyers, which follow you around. These can be extremely effective when you can deploy them in the middle of a biter base and they will shoot everything around them. Considered a more cost-efficient bot than destroyers.
Destroyer: the ultimate combat bot, each use deploys 5 bots, providing a formidable arsenal to assist you in defeating the aliens. Each deployment lasts significantly longer than the other types of bots, and the damage done is much greater as well.
Destroyer bots vanquishing an alien settlement. Alien artifacts dot the area.
Make sure you research the appropriate technologies to strengthen your attacks: Robot Follower Count gives you the ability to have many more bots active at one time, and Combat Robot Damage significantly increases bots' killing power.
StrategiesThe Strategy you use when dealing with biters and their bases depends on what level of technology you have. I will endeavour to present various solutions to this problem, in hopes that you'll find something that will work at your current tech level.
Flamethrower: The most OP weapon in the game, you may not even need to use the strategies below. Simply fire a burst of flame at the aliens, spawners, and worms, run away, and they will soon die. Note: burning biters can set fire to forests! Use grenades to create a fire break. Your character can also be damaged by fire -- watch out! ... so can buildings & bots.
A flamethrower brings death and destruction!
Turret Creep: This is best for those fleet of fingers & mouse movements. Out of alien base range, set up two turrets, quickly fill with a small amount of ammo. Next, move forward several squares, and place another two turrets with ammo. Keep creeping forward, deconstructing back turrets as you go, leaving 4 up at any one time. Go until you reach the alien base, and the turrets can wipe out the mobs & structures.
Car Hit & Run: If you have good control of the car, this may work for you. Drive by the alien village, targeting spawners and worms as you pass. When you get out of range, kill the mobs of biters trailing you. Repair your car and repeat the process until the base is decimated. Note that the car is significantly more fragile than the tank and should not be used to ram objects.
Ram with the Tank: I preferred this strategy for a very long time until I discovered power suits. Using the machine gun on the tank, target biters with Grenades as you ram into the spawners and the worms. Note that ramming will slow the speed of the tank, and you are in danger of getting bogged down -- try not to hit more than a couple per pass, or you are in danger of dying.
Snipe with the Tank: You can snipe worms with the tank by carefully staying out of their range, and using the cannon to fire long-ranged shots.
Combat Bots + Tank: Add Combat Bots to your favorite tank strategy to increase your firepower. Use Poison Capsules to destroy clumps of worms.
Turret Creep with Lasers: Use construction bots with your personal roboport to plonk down laser turrets & a power pole blueprint, advancing on alien bases. Very effective & doesn't burn down forests!
Combat Bots + Power Suit: For End-game, I highly recommend a Mark 2 Power Suit, outfitted with 2 Portable Fusion Reactors, 2 Mk2 Batteries, and at least 9 Shields. (See the rest of my comment below). Batteries allow your shields to recharge quickly if damaged, and a double dose of power also helps recharge shields quickly.
Use a Combat Shotgun with Armor-Piercing Shotgun Shells, and Destroyer Bots, and you'll be nearly invincible! (Do note that using the Combat Shotgun in your base will damage structures: be careful!) Poison Capsules definitely help with large clumps of worms.
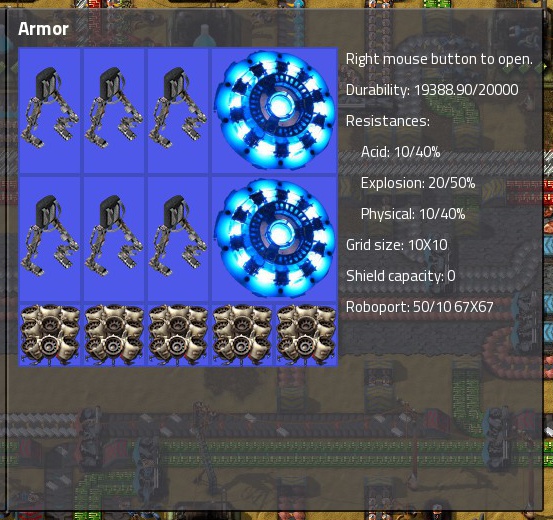
End-game armor. I prefer more exoskeletons for speed, (as well as general maintenance at my base). However, those can be replaced with shields and/or night-vision goggles if desired. See Combat - Armor Section for setup
Combat - Armor
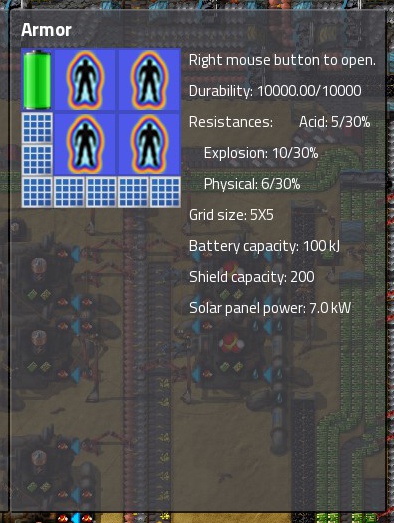

Early-gameEarly-game armor is very simple, and is destroyed once all of its hit points are lost. It mitigates damage from enemies. It stacks in the right hand corner, but only if it's the same type. Regular armor cannot be repaired -- it is simply "used up", like pickaxes.
Modular/Power ArmorBasic Modular Armor is a completely different item. It has more intrinsic HP, but it's primary advantage is that it has a self-repair mechanism via energy shields.
When you equip your modular/power armor, right click the icon on the lower left, and it will open up the armor screen. Place items from your inventory into the grid.
Power armor also increases your inventory space, each type with more slots than the lower technology. If your inventory is full and you take off your power armor, you'll experience an "item bomb", where all the items you no longer have room for explode on the ground.
To avoid this, grab the new armor from your inventory, and replace it on your character for a seamless transition. (A good option when changing from a Combat Suit to a Building/Running Suit).
Components of Modular/Power Armor Power Source: Solar Panels, (only work during the day), or Portable Fusion Reactors. These have limitations on how many items they can power.
Energy Shields: Protect you from damage, and need a power source to charge. When charging, you will see a purple bar above the toolbelt. Higher level shields are more effective (e.g. mark 2 vs. mark 1).
Batteries: Charge up via your power source. Instantly transfer power to shields when they are low. Higher level batteries are more effective (e.g. mark 2 vs. mark 1).
Exoskeleton: Increases run speed. Bonuses stack, so additional "legs" will help you run MUCH faster.
Personal Roboport: Allows automated construction. (See Personal Roboport section further on).
There are several items which are take-it-ot-leave-it, depending on your play style.
Night VIsion -- turns nighttime green.
Personal Laser Defense -- auto-shoots at biters, but at a very slow rate.
Discharge Defense -- widely considered the most useless item in the game -- completely discharges ALL your shields for a tiny burst of damage around your position.
Setting up Modular/Power ArmorEach armor grid is a different size depending on the technology of the item. (Higher tier gives you a larger grid in which to place components.)
Mid-game, when you get Basic Modular Armor, you might want to use a setup like this:
Shields: the max number -- 4 in this case.
Battery: 1 for emergency backup
Solar Panels: 7 for power
At end-game, you'll have access to improved items. Upgrade your shields and batteries, and build a couple of portable reactors for power.
Here's what I usually use for end-game armor. It is a decent hybrid for building/exploring, and has more than enough shields for combat.
Portable Reactors: 2. The shields will recharge even as you are fighting!
Mark 2 Shields: 5.
Mark 2 Batteries: 2 for emergency backup.
Exoskeletons: 3 for decent run speed. (Important if you are using Destroyer Drones).
Personal Roboport: 5 for laser turret creep, repairing things/emergency. Supports 50 construction bots. (Bring extras, since they may get destroyed).
Builder/Running ArmorSurprisingly, few people think about building armor specialized for construction, however, I find it absolutely essential for efficiency and building large structures.
Here's what I use:
Portable Reactors: 2. Needed for the exoskeletons & roboports.
Exoskeletons: 6 for run speed.
Personal Roboport: 5. Supports 50 construction bots.
Tips & Tricks Build TWO or more suits of Mk2 Power Armor, and have each kitted out. (I like to have a Combat Suit and a Construction Suit). You can switch the armor over if biters run and attack you while you are building.
Shielding holds its charge even if you take the suit off and put it in your inventory. Remember to charge up depleted shields before taking armor off. (Note, if you take the components out of the suit, they will discharge -- that's why it's important to have multiple suits.)
You can reuse most components of your basic modular armor to create upgraded versions, (batteries, shields, etc.) Remove them from your armor by clicking on them, and moving to your inventory.
If your shields drop too low in combat, the power source will prioritize charging them, and therefore your exoskeletons may not work for a while. (Be prepared for a drop in run speed).
Pollution/Biters
Pollution directly affects the evolution of the aliens on the planet. At first, you will see Small Biters, later, Medium ones, then Spitters, Worms, and finally the Behemoths!
Alien Types Biters: Standard Aliens which run after you and bite at your ankles... and tanks.
Spitters: Begin to spawn after some time and pollution. They run after you, but keep their distance, spitting at range. In large numbers they are extremely dangerous
Worms: A core component of alien settlements, they are immobile, but can launch projectiles at long range.
Spawners/Houses: Spawn Biters and Spitters but otherwise do not attack. Destruction yields Alien Artifacts.
PollutionAt each level of evolution, Biters, Spitters, & Worms get more and more dangerous, and require more firepower to kill. These levels of evolution are designed by the "sizing" when you mouse-over an alien, e.g. "Small Biter", "Medium-", "Big-", "Behemoth-".
Luckily, if you keep your pollution low, and aliens out of the range of your pollution cloud, they will be less inclined to attack you, and will not evolve as quickly.
Machines, furnaces, boilers, etc. create pollution even when they are not working. (Some of these also consume power -- check the "Drain" number when mousing over an Assembler). If you have huge numbers of superfluous machines (like mining drills), they may be doing you more harm than good -- consider removing them, as pollution will cause the biters to evolve faster.
The landscape can consume part of the pollution generated, so don't pave the world! This link[wiki.factorio.com] has a table of pollution production & reducers. Trees & bodies of water are particularly good at reducing pollution.
EvolutionCheck the biter evolution factor by typing into the console:
/evolution
Inserters & Chests

Inserters
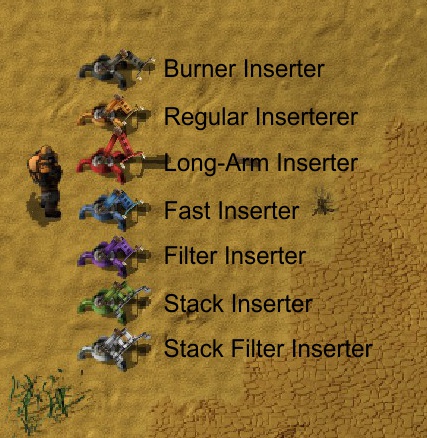
Burner Inserters (gray): Used mostly in early-game. Fueled by a solid fuel source (coal, wood, solid fuel, etc.)
Inserters (yellow): Standard inserter at standard speed. Runs on electricity (as do the rest listed below).
Long-arm Inserters (red): Standard speed. Reaches over multiple belts/spaces to grab items in further locations than other inserters can grab. Reaches the same distance; does not "fold". (See pic).
Top shows the move distance of a regular inserter. The second down shows that the long-arm inserter reaches PAST the chest. The third shows the correct distance of a chest to receive inputs from the copper plate belt. The last long-arm is able to put copper plates into the assembler because the assembling machine covers 3 squares width.
Fast Inserters (blue): High speed inserter. The standard for mid- and late-game.
Filter Inserters (purple): High speed. Can be programmed within the logistics system or a local logic network to limit production. (For setup/uses, see the Usages of the Logic System section). You can also use them for sorting systems if you have mixed products on the line, or unloading from train cars.
You can Copy & Paste settings from Filter Inserter to Filter Inserter:
Copy: Shift + Right Click.
Paste: Shift + Left Click.
This trick also works on Assemblers, chests, trains, etc.
Stack Inserters (green): High Speed. These grab up to 12 items from the belt before swinging around to drop them at their destination. Number of items stacked depends on research. Note that they are best used on single-item pickups, as they can only grab one type of item at a time, and will not overfill assemblers to grab something else. Best used at train stations.
Stack Filter Inserters (white): High Speed. Like the Stack Inserters, they grab up to 12 items, but these can filter items, similar to the regular filter inserter. Best used at a train station or for sorting mixed belts.
Inserter PlacementsWhen building an inserter along a straight track of belt, it's easy to predict where the inserter will drop the item -- always on the far side relative to their position.
When placing on a corner or a reversed belt, the result can be unexpected:
Placing items on corners of belts, etc.
ChestsStandard
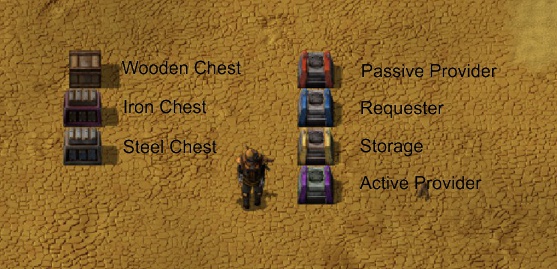
Wooden Chest: Cap. 16 Stacks
Iron Chest: Cap. 32 Stacks
Steel Chest: Cap. 48 Stacks
Logistics Network
All of these are built out of the Smart Chest and can therefore transmit their storage data through the Logisitics and Logic networks.
Passive Provider Chest (red): The most commonly used chest. Stores output of assemblers, etc. Logistics robots can pick up items from these chests.
Requester Chest (blue): Requests items from the Logistics network.
Storage Chest (yellow): Essentially a "dumping" chest, where robots can put everything that is deconstructed or trashed through character Trash slots.
Active Provider Chest (purple): Actively empties itself. Unless items dumped in the chest have a specific Requester chest, they will be ferried into Storage chests. Good for situations of having a temporary chest that you need to empty quickly.
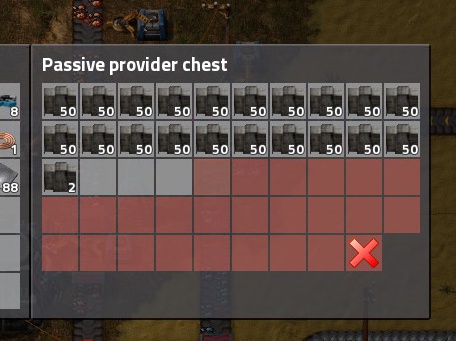
Tip: Limit number of stacks in chests by clicking the X in the lower right corner, then moving your cursor upward, and clicking again to set. Inserters will fill only the grey squares, NOT the red ones. This can be handy when you want to limit production of certain items. (Note, this works on full stacks only -- you do need to wire an inserter if you want to choose very specific quantities).
Limiting number of stacks in a chest.
Use the Copy & Paste trick (as with Smart Inserters) to transfer limits from one chest to others.
Assemblers & Conveyor Belts
Conveyor Belts
Conveyor belt types:
Standard (yellow): base speed
Fast (red): faster than the Standard belt
Express (blue): faster than the Fast belt
Belt Balancing
When items come out from Assembing Machines, inserters always put them on the far side of the belt. To balance this out, (and fill your belts), use these simple belt balancing techniques. Each works by using a splitter to split the input, and shove half on one side, half on the other side, where they meet on a central piece of belt:
Belt balancing for a straight section.
Belt balancing for right and left corners. (Different belts used for contrast).
Belt BraidingSince each Underground Belt must have a matching exit, you can "braid" underground belts on a single row, carrying up to 3 different lines.
Belt Braiding: useful for VERY tight spaces. You can do this with 2 or a max of 3 different colors of belts.
Dual Shipping
Sometimes you will want to place two types of products on a line. Essentially you will be doing something similar to the balancing above -- you will dump one product on one side of a central line, and another on the other side.
When you spill items to one side of the belt (and not through a corner), it forces them to stay on THAT side, and allows for an even flow of inputs.
Construction of a dual input belt.
Implementation of two dual input belts. (One faces up, the other right).
See these very excellent guides for more belt magic:
Belt & Inserter Mechanics[guide.factorio.com]
More Uses for underground belts[wiki.factorio.com]
AssemblersAssemblers make your world work! They create everything from the most simple to the most complicated items. Note that lower-level machines can only create things with limited numbers of inputs, while higher-tech machines create the most complicated items.
Over time, you will want to upgrade to the highest-level assemblers possible because of the increased crafting speed, and their ability to hold more modules. As is the essence of Factorio, lower level machines can be recycled into higher-level ones.
(Note that manual crafting speed is 1).
ItemColorCrafting Speed# of InputsModule SlotsAssembling Machine 1grey0.520Assembling Machine 2blue0.7542Assembling Machine 3yellow1.2564
You can Copy & Paste production types from assembler to assembler:
Copy: Shift + Right Click.
Paste: Shift + Left Click.
This trick also works on Smart Inserters.
Crafting TimesAssemblers produce products at different rates, because (ostensibly) some items are more time-intensive to create. You therefore want to base your product ratios around those times.
Assemblers will load to DOUBLE of what 1 product cycle takes (in terms of materials), so that it can immediately start another production cycle once the first has finished. Note that if an Assembler has no where to unload its product, it will shut down.
If your product depends on materials that are being produced in smaller quantities, you will definitely want to balance this system.
You can find the crafting time when you mouse over a product in either the crafting menu, or the assembler production menu:
Crafting time is indicated by the number next to the clock face: in number of seconds. (Yellow arrow). In this case, Advanced Circuits take 8 seconds to make.
Now, for a more practical example:
Circuits produce every 0.5 seconds, and require 3 Copper Cables.
Copper Cable Assemblers produce 2 Copper Cables every 0.5 seconds.
Therefore, you need 3 Copper Cable Assemblers per 2 Circuit Assemblers.
Space-Efficient setup for dedicated Circuit production.
See the System Setup Guides section later in this guide for more example stups.
Science/Research
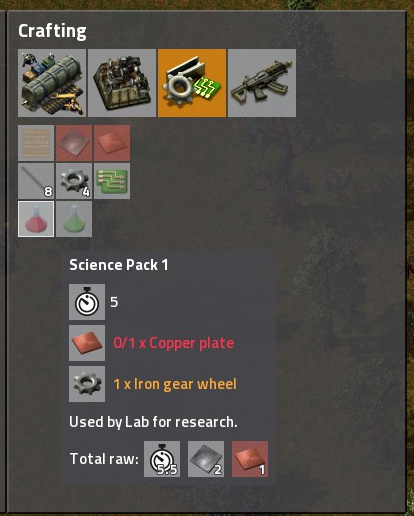
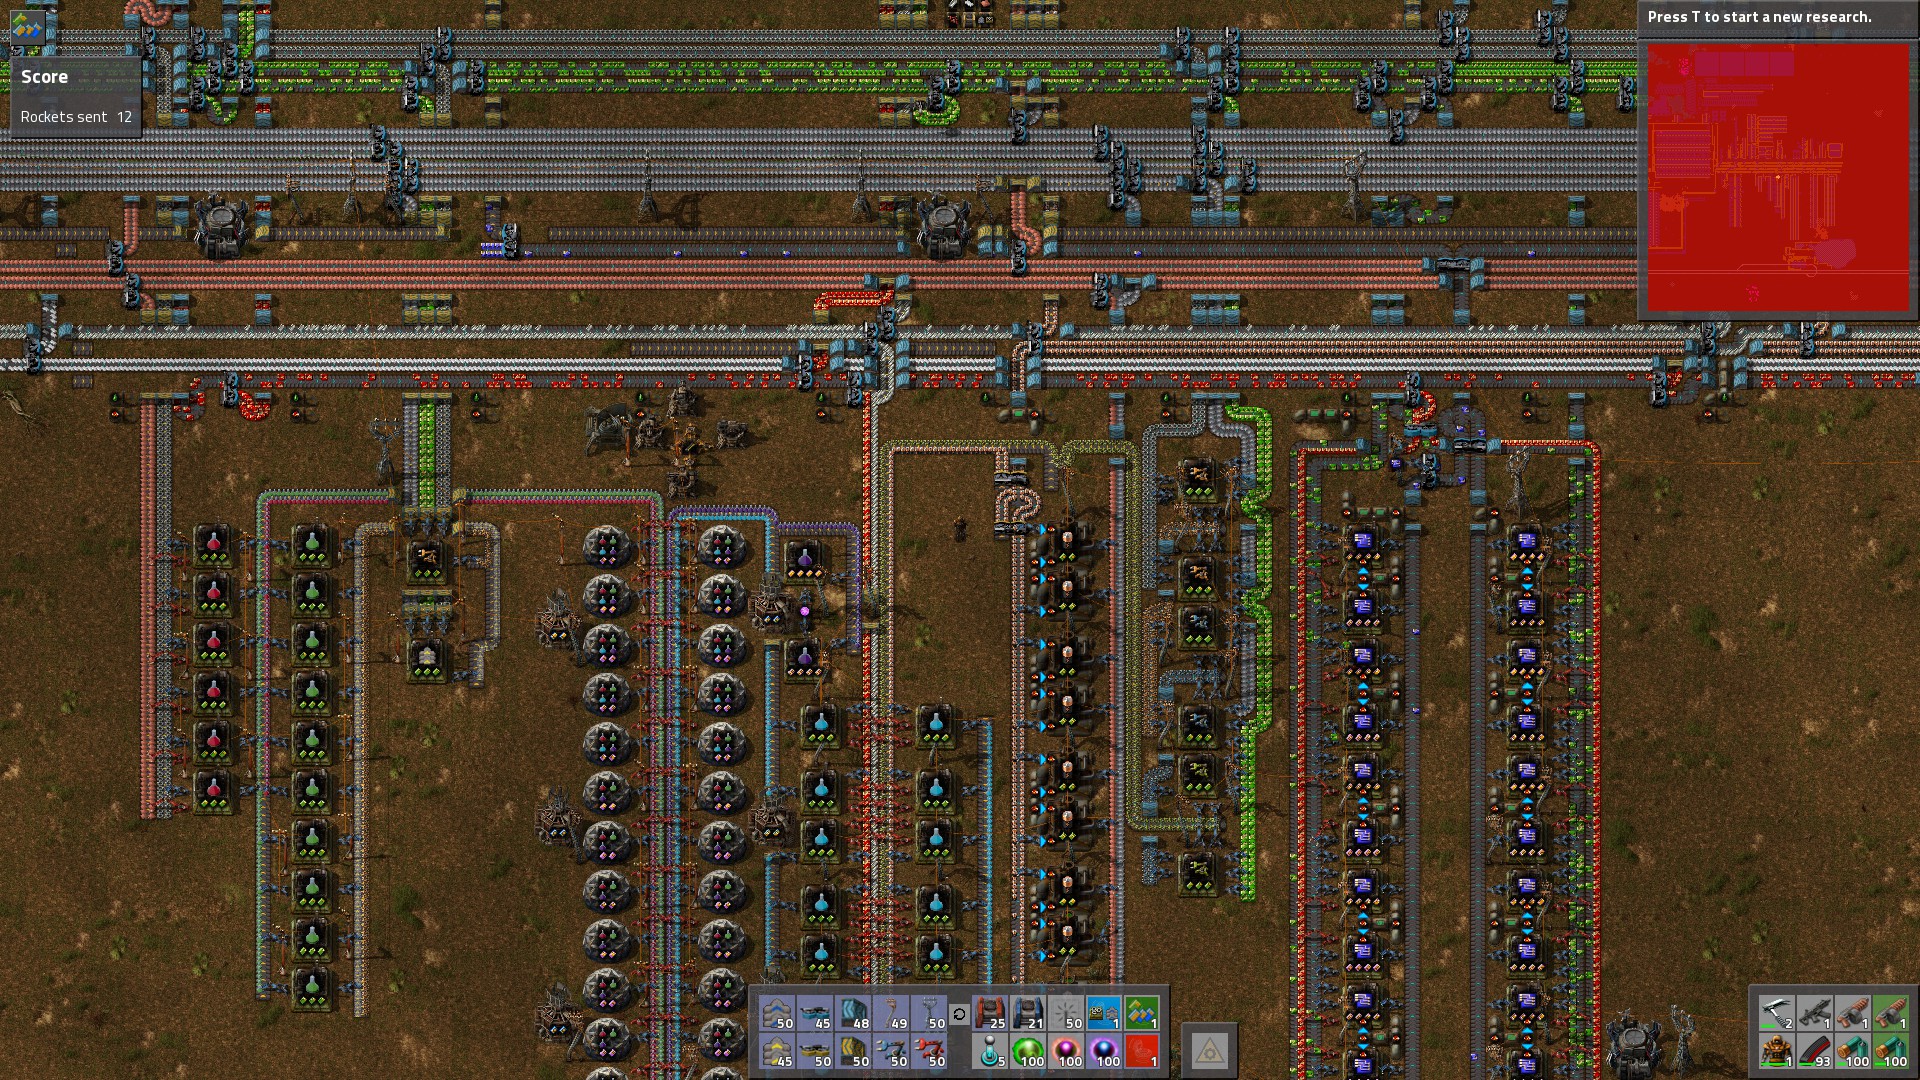
Research is done by producing Science Packs to be consumed by Labs.
There are four types of science packs: red, green, blue, and purple. Each of them, (except purple), takes an increasing complexity of items to produce, and these act as gateways to more complicated research.
How Research WorksOpen up the research screen with T (default key). Here, you will be able to select a wide variety of research topics, ranging from essentials of factory building (assemblers, underground belts & splitters, inserters), to military items, to quality of life improvements (robots, exoskeletons, etc.)
Research is chosen by clicking on items on the left side of the screen. Yellow items are available currently, Red items are those you need more prerequisites for, and Green are items that you have already researched.
On the right is displayed:
Cost: Time to research, and number & type of science packs required. (See example below for breakdown).
The Tech Tree shows where the item is relative to other research -- prerequisites, and other research that this topic unlocks.
Effects: Shows the items and/or benefits gained from researching these topics.
Example Research:
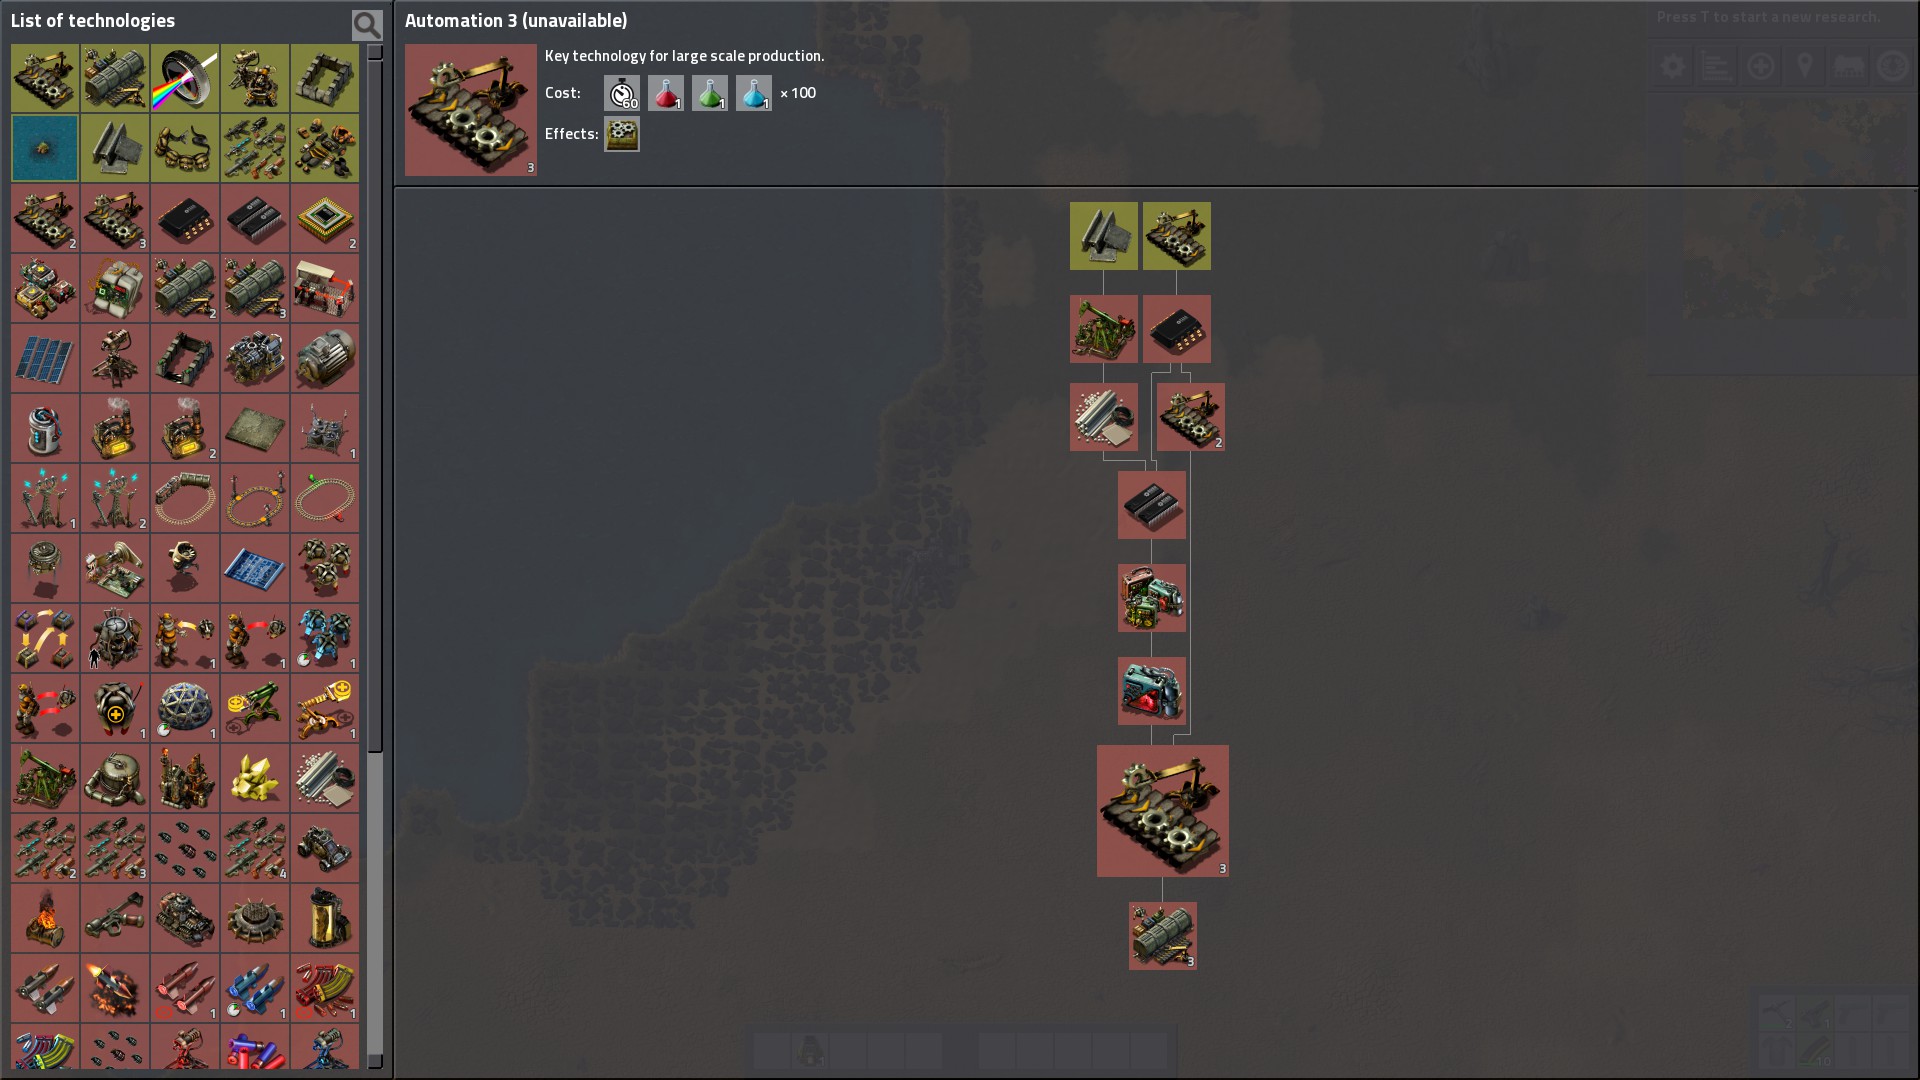
In this example:
Cost: you will need to fill a lab with 1x Red, 1x Green, and 1x Blue science packs. It will take the lab 60 seconds to process this combination. Then, you need to do this a total of 100 times. (Hint: have multiple labs!)
When the research is complete, you will gain access to Logistics 3 (research).
Upon completion, you will now be able to build Assembling Machines 3.
Research Tips Research will ONLY start processing science packs if all the required ones are in the Lab.
Multiple labs speed research. Be careful of building too many though; your factory needs to be robust enough to supply the materials.
Beginning to mid-game 10 labs should be enough. Late game I often go to 20-40 or so, (or up to around 60 if I want to finish quickly).
If you are struggling with production of science packs, you can put productivity modules in both the assemblers and the labs! Place a speed beacon near labs to hurry them.
Purple science, (created from Alien Artifacts), can be an annoyance to some players, so don't forget to put productivity modules in those assemblers.
Mousing over items yields valuable tooltips.
Starting ScienceWhen you first begin the game, you will want to pick Automation as your first research. This will allow you to build Assmblers -- the machines that make everything for you, and truly start the factory process. (Logistics should be your second pick, since it allows splitters, underground belts, and fast inserters).
Because you have no machines that can manufacture science, you'll need to craft them in your inventory.
Note the ingredients needed. Craft 10 Red Science packs, and a lab (or two). Place your lab(s) down. (Remember: labs need electricity to run). Then, place the Red Science packs in your lab(s), splitting the packs between them.. Your lab(s) will process these, and when Automation research is compelted, you'll be able to create Assemblers!
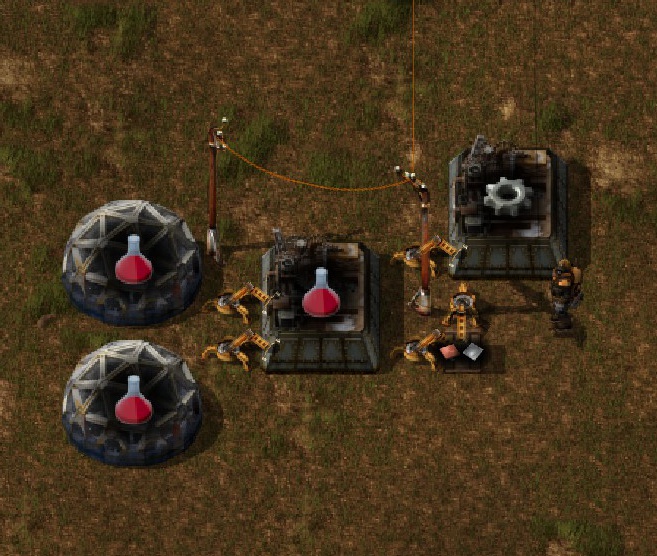
A good early-game Red Science setup is to place two assemblers, a chest which both can reach, and two labs, inserters connecting them.
In the chest, you'll need to add twice as much iron as copper plates because of the ratios involved.
Note: this setup is a placeholder: once you want to begin real research, you need to set up proper conveyor belt systems to have items automatically delivered to your assemblers.
Serious about ScienceHere are a few examples of science setups:
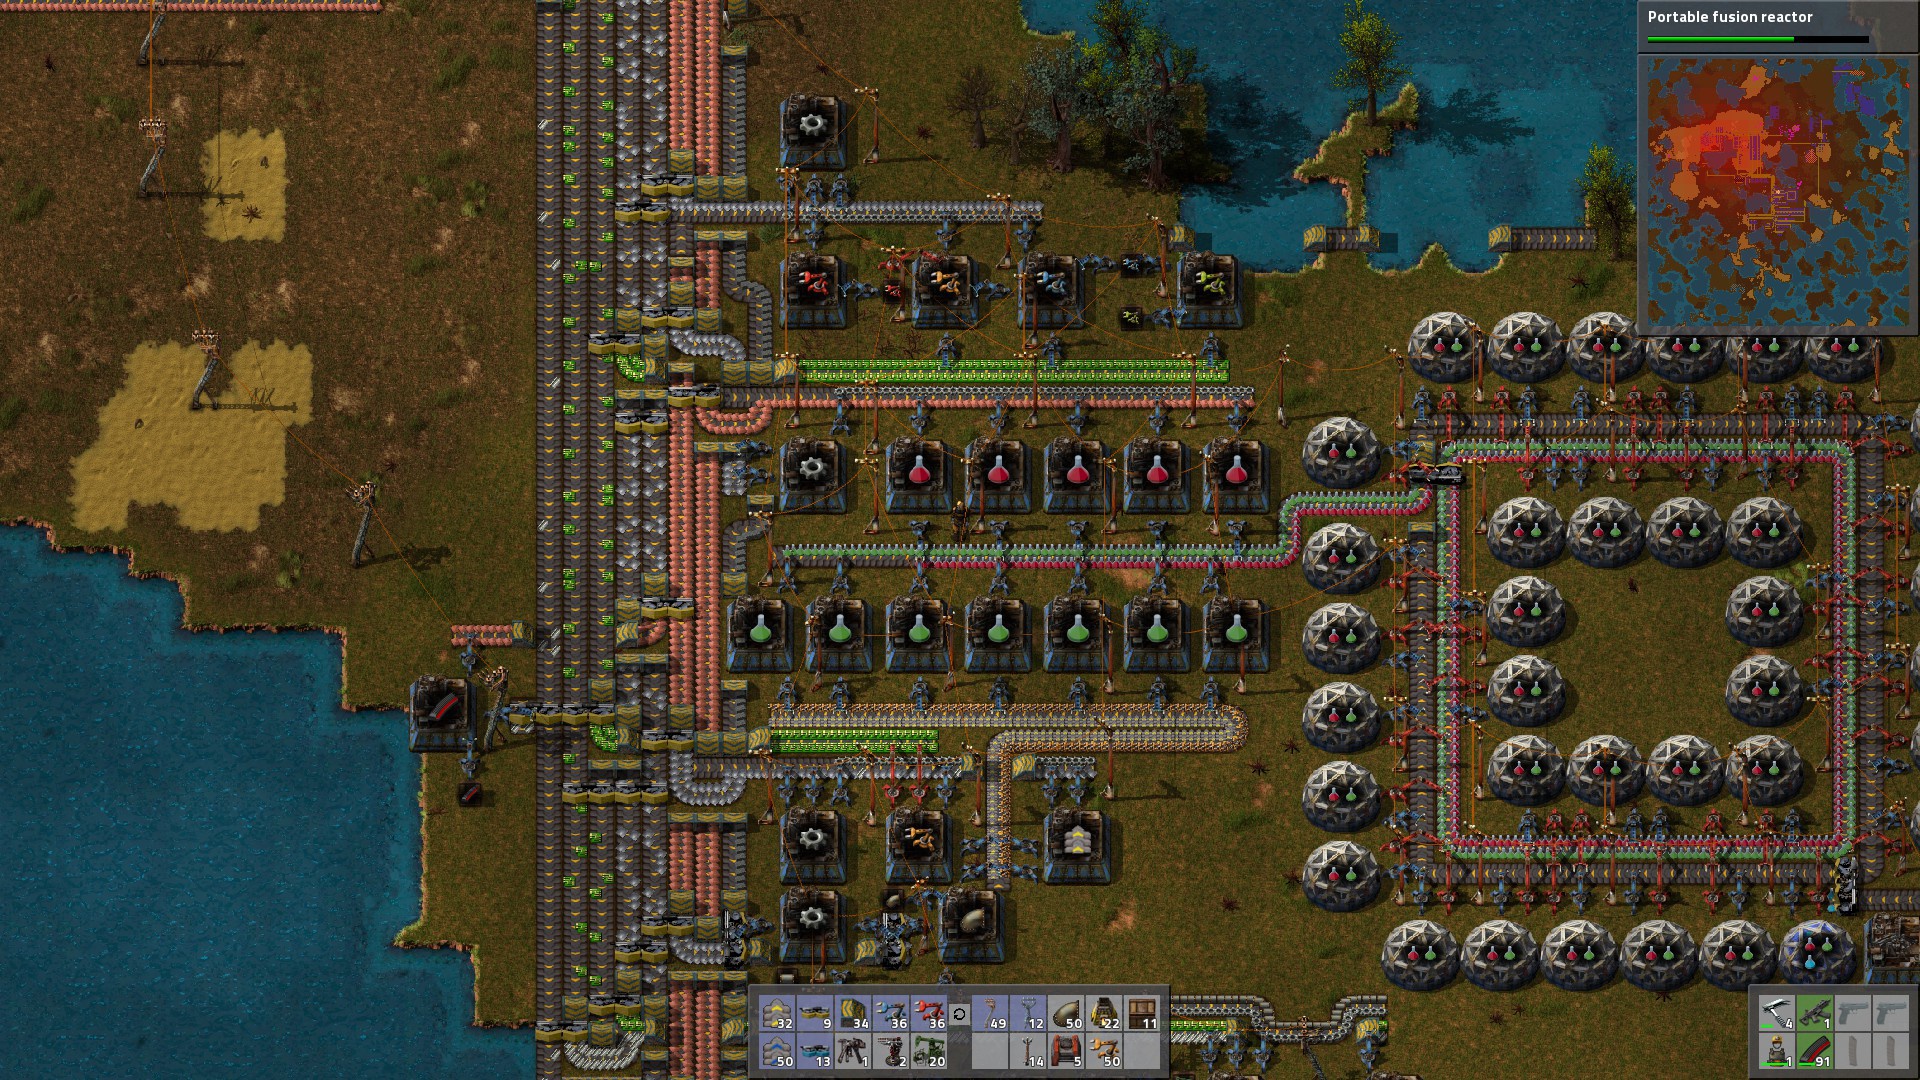
This example uses iron to make gears locally. Red and Green Science conveniently share a belt, leading to the labs. Note, this setup uses a looping science system.
This example uses gears that are supplied on the main bus. Again, the two sciences share a belt. Underground belts feeding the inserter and belt assemblers save a bit of space.
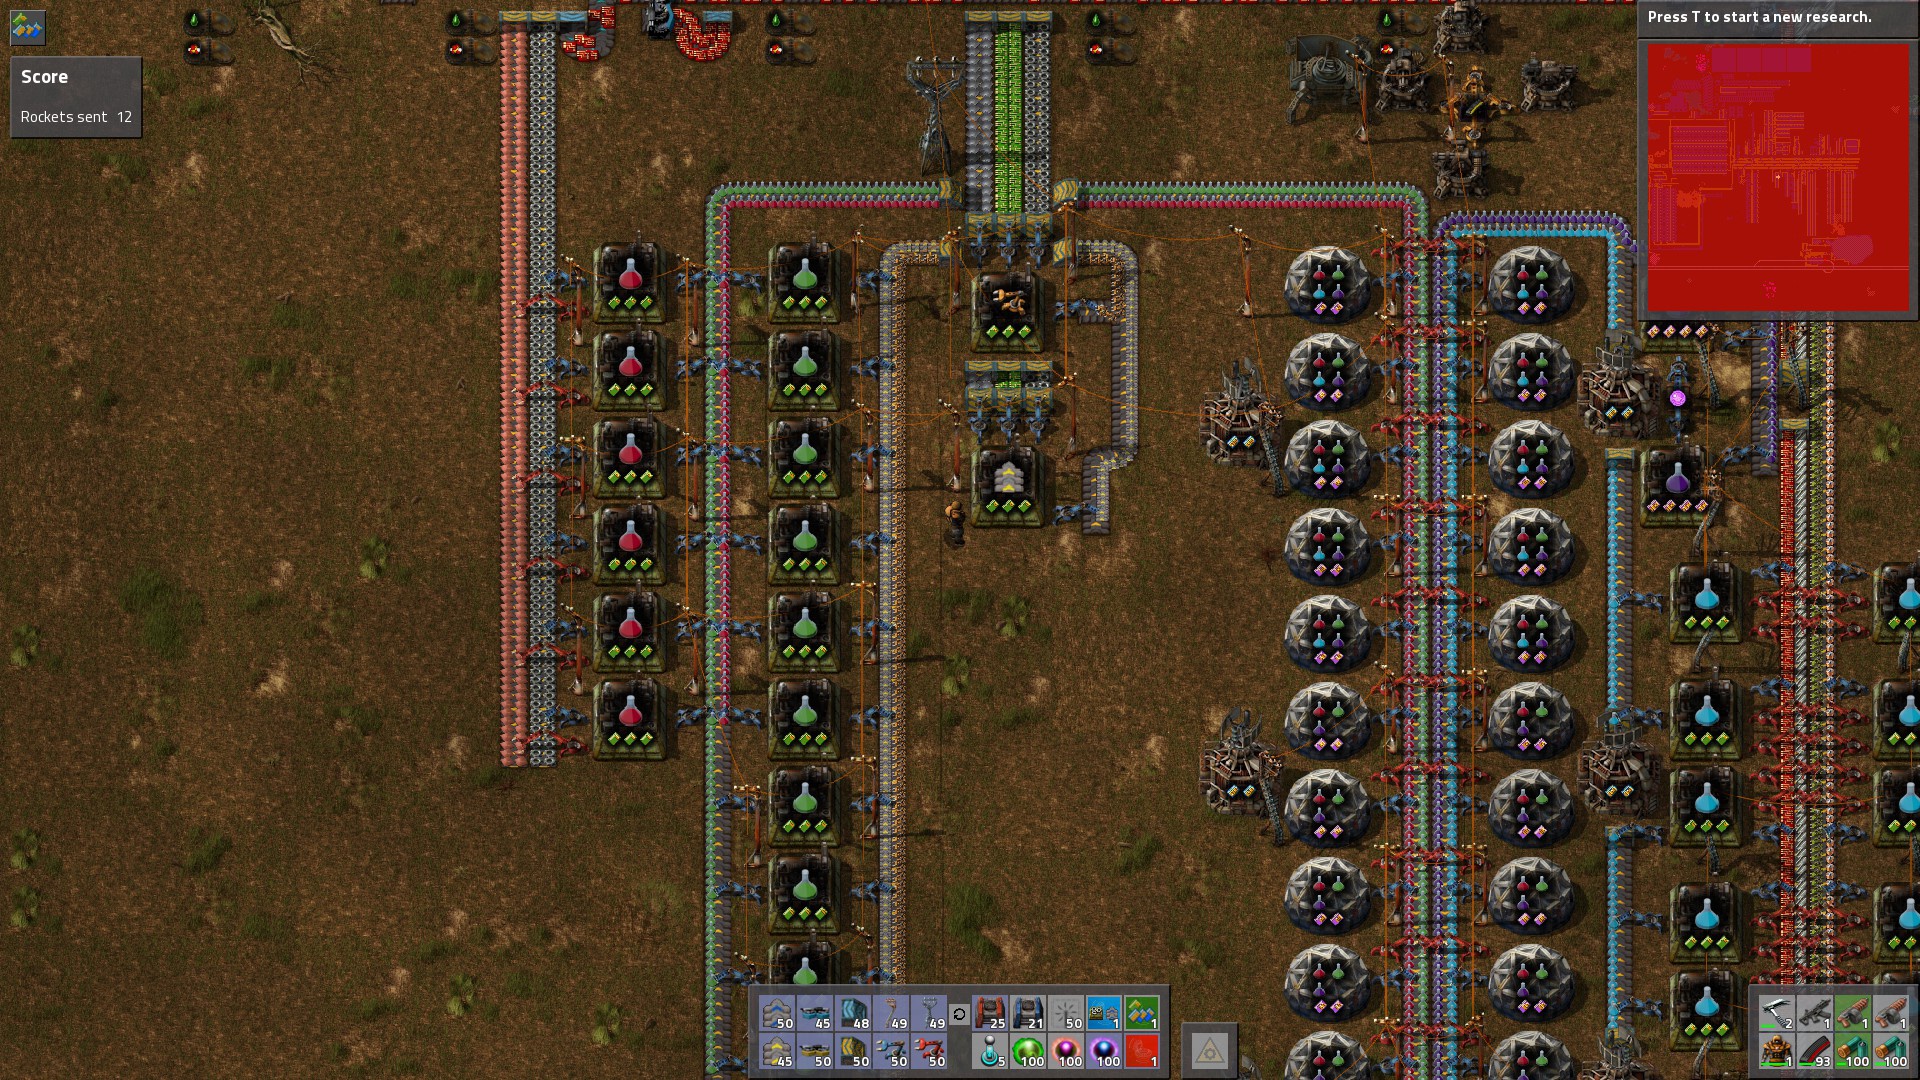
This example shows a very large science assembly, taking nearly all materials from the main bus. Science labs have productivity modules, and are in range of speed-boosting beacons. Purple science is filled with productivity modules.
Science Tips You'll never need to have full belts of any one type of science, so use half-belts instead. Make sure your labs have access to both belts, using long-armed inserters for the far away ones.
In a beginning red/green setup, I usually place 5 Red Science Assemblers & 6 Green to feed 10 Labs.
You can add buffer chests to stack up a few science packs. Limit production, though....
science packs stack 200 in a slot!
You can choose to loop science conveyor belts, or not. I've personally tried both ways. The benefit to looping is that labs along the whole length of the line will have access to packs going around, and they won't just build up at the end of the line. However, I find this benefit to be miniscule, to say the least. If your factory is running up to speed, it shouldn't be needed.
I also find that the long extra belts that form the opposite side of the loop can lead to over-production in different setups. So, it's up to you whether to loop or not!
I prefer to use a main bus design to feed my assemblers with their various required materials. As you can see in the screenshots above, it leads to a nice, clean, scalable design.
Trains
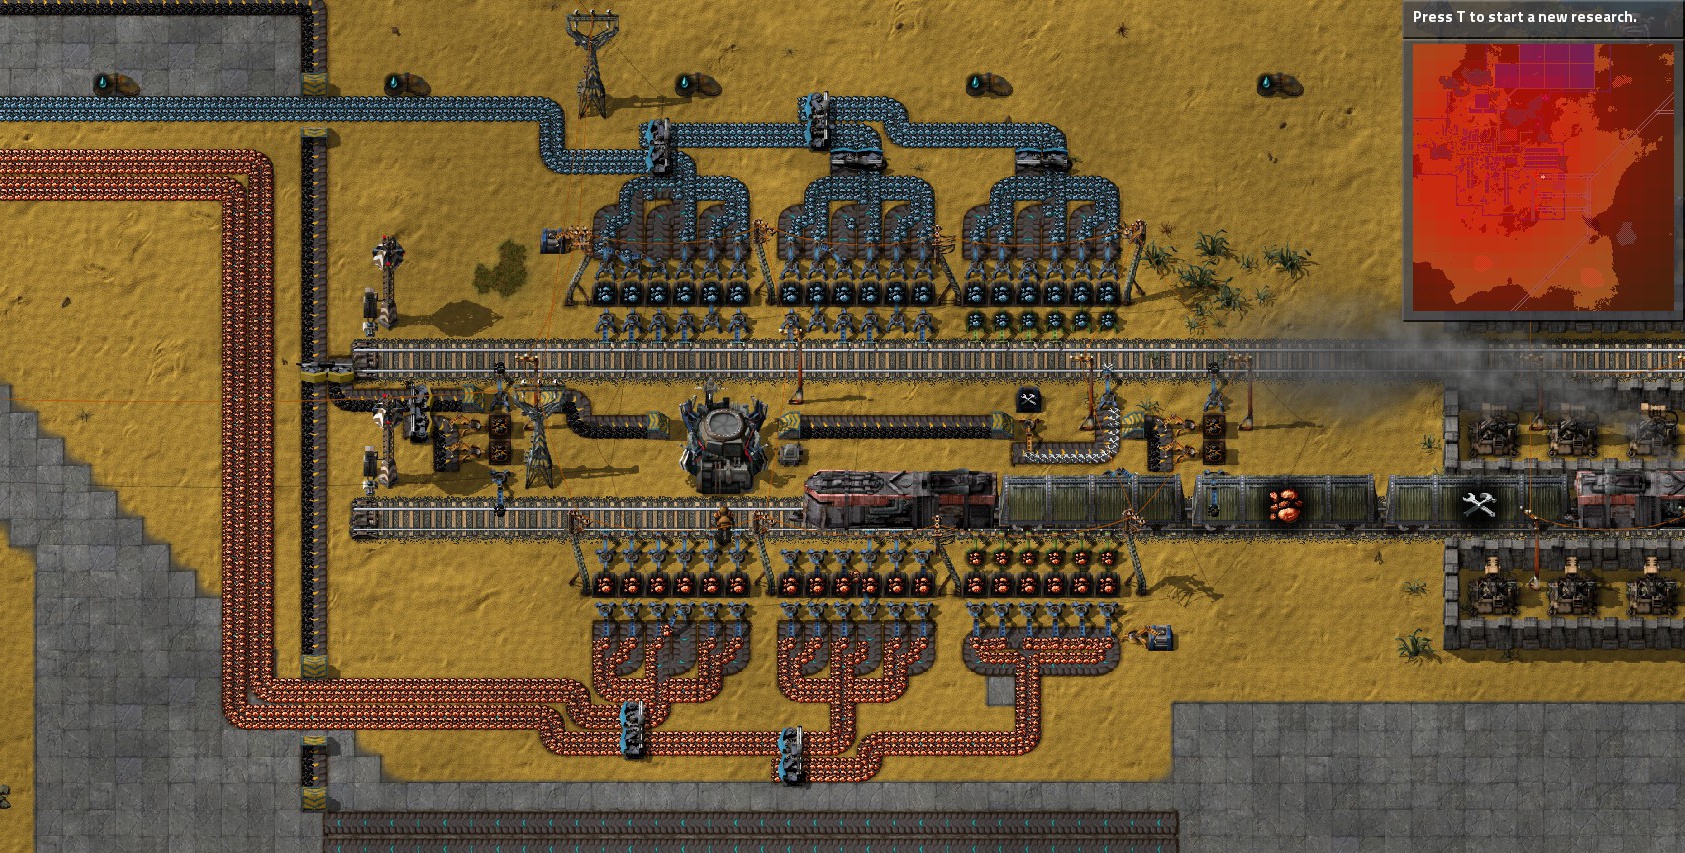
Note: my Train Guide is currently being revamped!
Oil
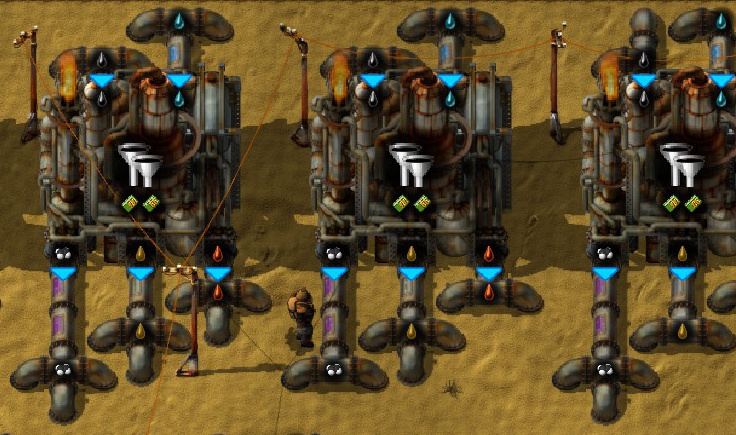
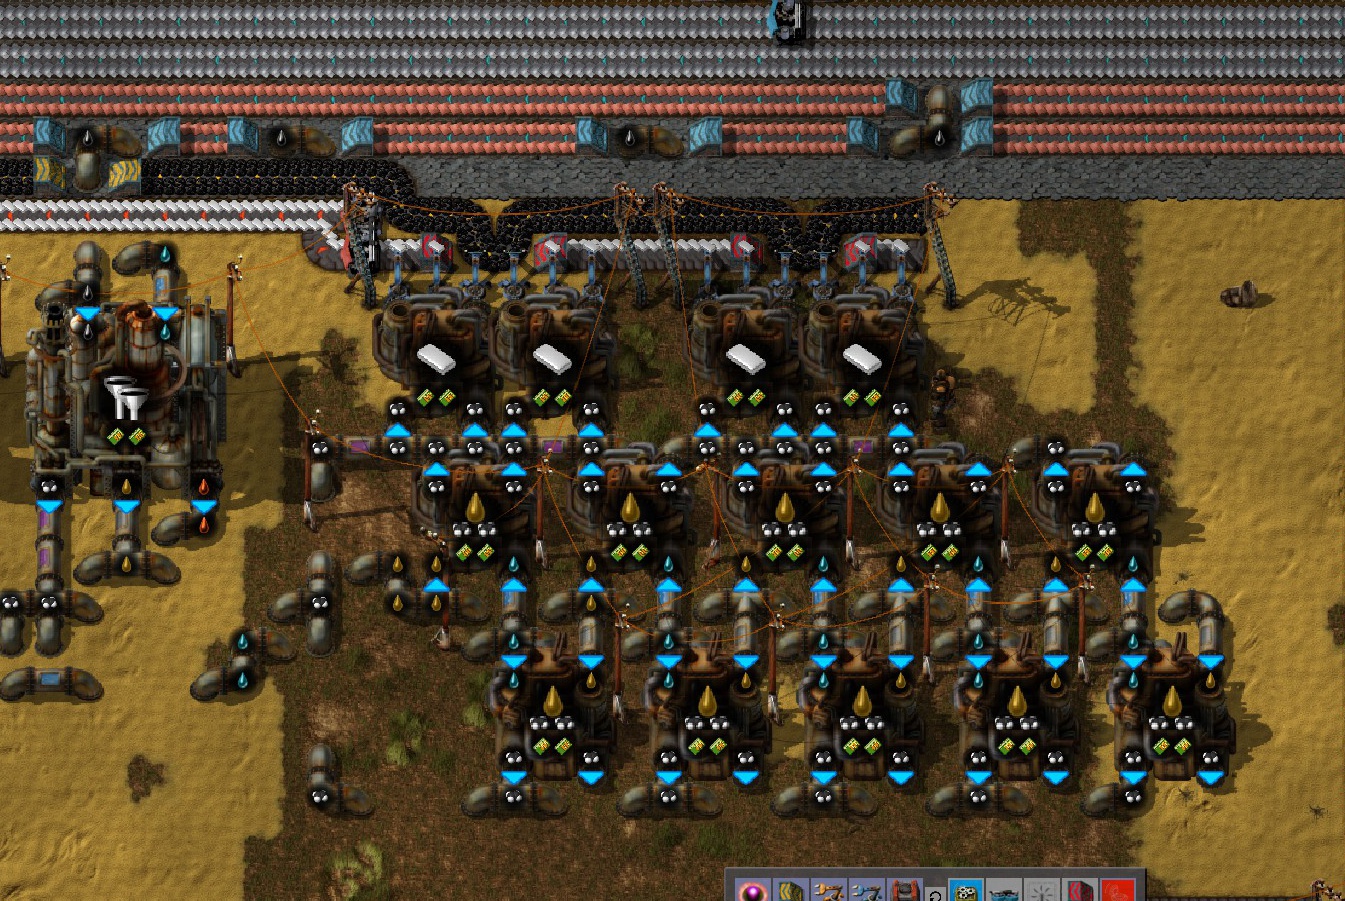
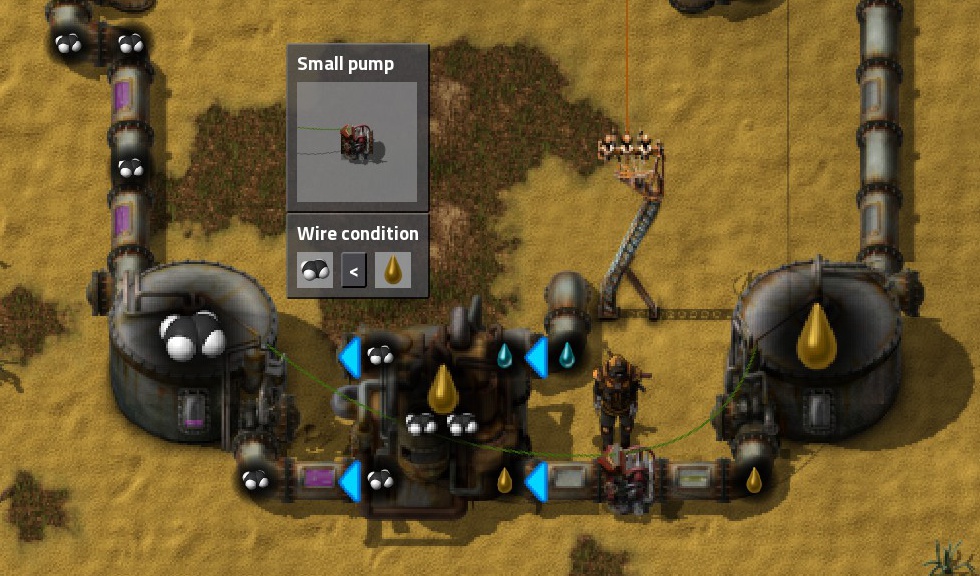
Setting up Oil ProductionThe first thing you are going to want to do is find a nice LARGE space for your refining area.
Refineries & Chemical plants use pipes to transport liquids, however, adjacent pipes auto-snap together, so you need LOTS of room to make sure that they don't interact. (If they do, wrong fluids will immediately zap through your system and the entire system will need to be deconstructed and rebuilt...)
I highly recommend building assemblers for both Pipes & Underground Pipes. (Undergrounds take ages to craft in your inventory).
The easiest way to limit flow is to use LOTS of underground pipes, since they only connect in one direction. You'll notice these in my example pictures.
Be sure you also have access to water -- it is essential in many Chemical Plant operations.
RefineriesAfter choosing a large open space, you should place your Refineries. I like to put mine in a row with the following piping configuation, which is infinitely expandable:
Extensive underground pipe usage helps prevent liquids mixing. Make sure you place Refineries at least 1 space apart to use this configuation.
Setup
Initially, all you have is access to Basic Oil Processing, which gives you a relatively high percentage of Heavy and Light Oil compared to Petroleum. (I HIGHLY recommend researching Advanced Oil Processing ASAP to get more Petroleum Gas production).
In order for Oil Processing to work, [color=#FF9900]ALL products must leave the Refinery[/color], otherwise the refinery will shut down, and the resulting product will build up, preventing more refining taking place.
I do recommend that you have at least 1 tank for each type of oil, specifically so you can do some cracking balancing with logic circuits later on.
Before you research Advanced Oil Processing, however, tanks will serve to store the excess products that you cannot yet use.
(Do note that ultimately tank storage is a TEMPORARY solution. Eventually they fill up, and products clog production once more).
Chemical PlantsChemical Plants make a large number of products, all of which require liquid in some form, and many require regular products. (The additional products can be shipped via conveyor belts and loaded with Inserters.)
Trying to manage all of these and sort out the logistics can be something of a challenge when you are new to building. Make sure you leave plenty of space all around.
You can often build systems together by shifting tiles just slightly.
"Braiding" pipes together to take advantage of shared inputs. Also note the significant number of underground pipes around the area.
If the Chemical Plant inputs & produces liquids, I generally build it in my Refining area. If it requires mostly solid products, I move it into the general production line and then just pipe in the required chemical/water. You can do either, depending on your proclivities.
Managing ProductionYou will often need to use cracking to transform Heavy & Light Oil into (eventually) Petroleum in order to make most of the products your factory needs, (and to keep these products from building up and shutting down your refining process!)
Oil balancing can be very tedious -- turning off and on cracking plants -- if you don't automate it by using logic circuits.
Please see the "Usages of the Logic System" section further in this guide for specific settings and how exactly to set it up.
Example of a closed oil balancing system. See the "Usages of the Logic System" section for setup.
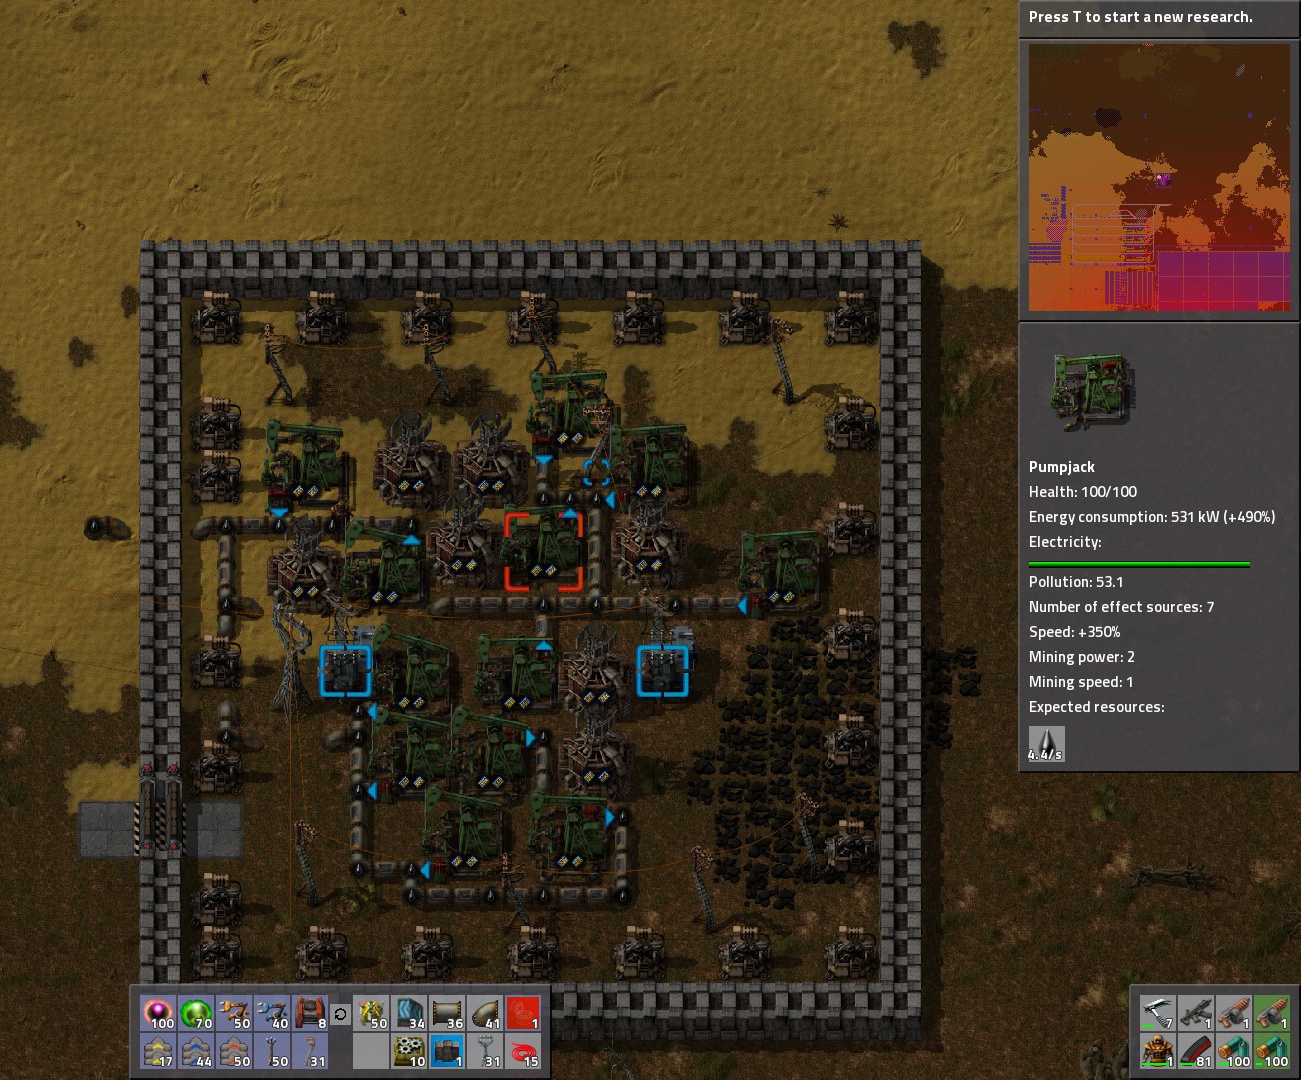
PumpjacksPumpjacks are the "miners" of oil deposits. Each Pumpjack fits over one oil patch. You'll need to arrange them so that they can connect to each other, with a pipe out so they can connect to your refinery area.
Over time, Pumpjacks will reduce their output to a fractional amount. However, the deposits are infinite, (unlike ore). The most effective way of increasing their depleted state is to add Level 3 Speed Modules, with the same in Beacons placed around them. (Note: I only put a Becaon if it can affect 2 or more Pumpjacks).
A small oilfield, with Level 3 Speed Modules + Beacons to increase production. The centeral Pumpjack has a speed bonus of +350%.
Pumpjacks need power so be sure to run Large Power Poles out to them in the field. Connect them to your refinery area with pipes. (You can hold left-click and drag to place underground pipes the same way you can with power poles.) If the field is particularly distant, you can ship oil by train.
Train-sporting OilUntil the devs add Liquid wagons to trains (hopefully in 0.15!), you'll need to barrel your oil in an Assembler.
Get your Pumpjacks sorted out.
Run a rail line near the Pumpjacks.
Create a station with a Filter Inserter (or Stack Filter Inserter) unloading Empty Barrels into a chest, and a regular inserter to load Crude Oil Barrels from a chest into the wagon.
Place your Assembler in range of the chests and connect with inserters. Because of the very short processing time, the barrels can actually be processed while your train waits for a few seconds.
Remember to create a reciprocal processing station on your main base's side to unload the crude oil -- a similar transfer system, but this time, using Filter Inserters to unload Crude Oil Barrels from the wagon.
Main base unloading station, showing this simple and effective setup. Stack Filter Inserters are used.
Craft several barrels, depending on what your needs are (at least 10), and feed them into the system.
Set up your train cargo wagon to have AT LEAST one slot for Crude Oil Barrels, and one for Empty ones. (I usually do half and half). If you have many barrels in your system, it is conceivable that the wagon could be filled completely full and be unable to pick up Filled Barrels.
Reserve space for both filled and empty barrels.
Tips Use underground pipes as much as possible! They prevent liquid mixing by having only one side of output, the don't impede movement as much as over-ground pipes, they don't prevent native biter movements, and they look much cleaner.
Lay out your chemical plants in expandable designs -- you'll need TONS of cracking plants and may even need to expand things like plastic, lubricant, and sulfur production when your factory grows very large. You'll also eventually need to add more refineries, so plan for those as well.
Use Pumps to prevent liquid mixing. Remember that Pumps need electricity to function.
Oil Refinery in end-game. Always budget LOTS of space!!
How to Set Up Oil Production:
Tapping Oil Deposits
Modules
Modules are one of the most important aspects of the game, since they can radically change your experience in the Factorio World. At mid-game, when they can be researched, they seem incredibly "expensive" to produce.... but they are well-worth the effort.
Types: Efficiency (green): Significantly reduces energy usage, (and therefore pollution); max of 80% reduction
Speed (blue): Increases speed at the cost of increased energy usage
Productivity (purple): Increases productivity at the cost of increased energy usage, and slower speed. (Not usable on end-products).
Efficiency ModulesOne nearly always uses Efficiency modules for everything, (unless you are at post-end-game and doing specialty builds).
For machines with 3-4 module slots, like Mining Drills, Assemblers, etc. Use 3 Level 1 Efficiency Modules to get the max 80% reduction bonus. (You'll run over by 10%, but it is still much cheaper to produce than two level 2 modules).
For machines with 2 module slots, like Chemical Plants, Electric Furnaces, Refineries, etc. Use 2 Level 2 Efficiency Modules to get the max 80% reduction bonus.
Priority-wise, especially when Modules are in short supply, you should place them in machines that are running all the time, and/or have high energy usage. Top picks are chemical plants, furnaces, mining drills, refineries, etc.
Other Module UsageThere are several places where I prefer Productivity or Speed Modules, specifically rare/resource-intensive products and Labs. Early on, use level 1 modules, and replace with level 3s when possible. Since these buildings are few and far-between, using these electricity-heavy modules doesn't have a huge impact on the electrical grid.
Purple Science -- I put 4 Level 3 Productivity Modules to maximize returns. (Add a second Purple Science Assembler to increase production).
Labs -- 2 Level 3 Productivity Modules. Place labs around a Beacon, which holds 2 Level 3 Speed Modules to keep up the speed.
Productivity-enhanced Labs in range of Speed-Boosting Beacons
Processing Units (blue chips) -- These are very resource intensive to make, you can use use 3 Level 3 Productivity Modules and 1 Level 3 Speed Module.
Increasing production of Processing Units.
Level 1 Speed Module Assembler -- use 4 Level 3 Speed Modules, since demand for these is high.
Pumpjacks -- 2 Level 3 Speed Modules, boosted by Beacons with Level 3 Speed Modules. This increases production in wells that have dipped to their fractional production levels. (Note: never use productivity modules in pumpjacks -- they result in lower output than no modules at all! Only use Speed).
(Cracking) Chemical Plants & Refineries -- You can put in Productivity Modules to boost oil production. Be aware of the pollution and power increase, however.
Using Speed Modules in Pumpjacks and the Beacons that surround them results in huge production bonuses.
Rocket! I always use 4 level 3 productivity modules in each rocket silo... this reduces the need for materials by 40%! (Surround the rocket by beacons with speed modules to speed up processing.)
Vehicles
Make sure to load both your tank/car with fuel and ammo. Both go into the top area of the vehicle window.
Fuel for vehicles: wood, coal, solid fuel, etc. (No liquids, e.g. oil).
Enter your vehicle by walking near and pressing Enter. Same with egress.
Controls: W - forward, S - Backward, A - turn left, D - turn right. Each vehicle has a different threshold. IMO the tank is far easier to control, especially in tight spaces. However, the car has faster speed.
Tanks are excellent at clearing trees, especially building a rail line: Hold the track piece behind you as you barrel forward toward the trees!
Carry extra stuff in the trunk, (storage space) of your tank/car. BE AWARE: If you tank/car gets destroyed, all of these things will be lost!!! However, it is very useful when building remote outposts where you need lots of different materials -- walls, tracks, signals, etc.
What I take in my car: outpost building supplies: rails, walls, train stuff, turrets, etc.
Take care when auto-loading your vehicle with inserters -- it will fill the entire trunk!
A better option is to have a requester chest in your "parking lot" that requests ammo, repair kits, capsules, rail supplies, etc., and you transfer stacks manually.
A Requester Chest gets all the stuff I need to load my tank. The secondary chest holds blueprints for train stations, etc.
Repair your vehicle with repair kits when damaged. Or, let bots do it! Having a Personal Roboport in your modular armor + a few construction bots & Repair Kits in inventory will allow the bots to repair your vehicle automatically, (even during battle!)
Armor-piercing Ammo is far superior to regular Ammo -- completely switch over from regular ammo once researched.
Be careful when you drive -- running into your own structures WILL damage them.
You must exit your vehicle in order to use a Repair Kit.
Roboports - The Basics
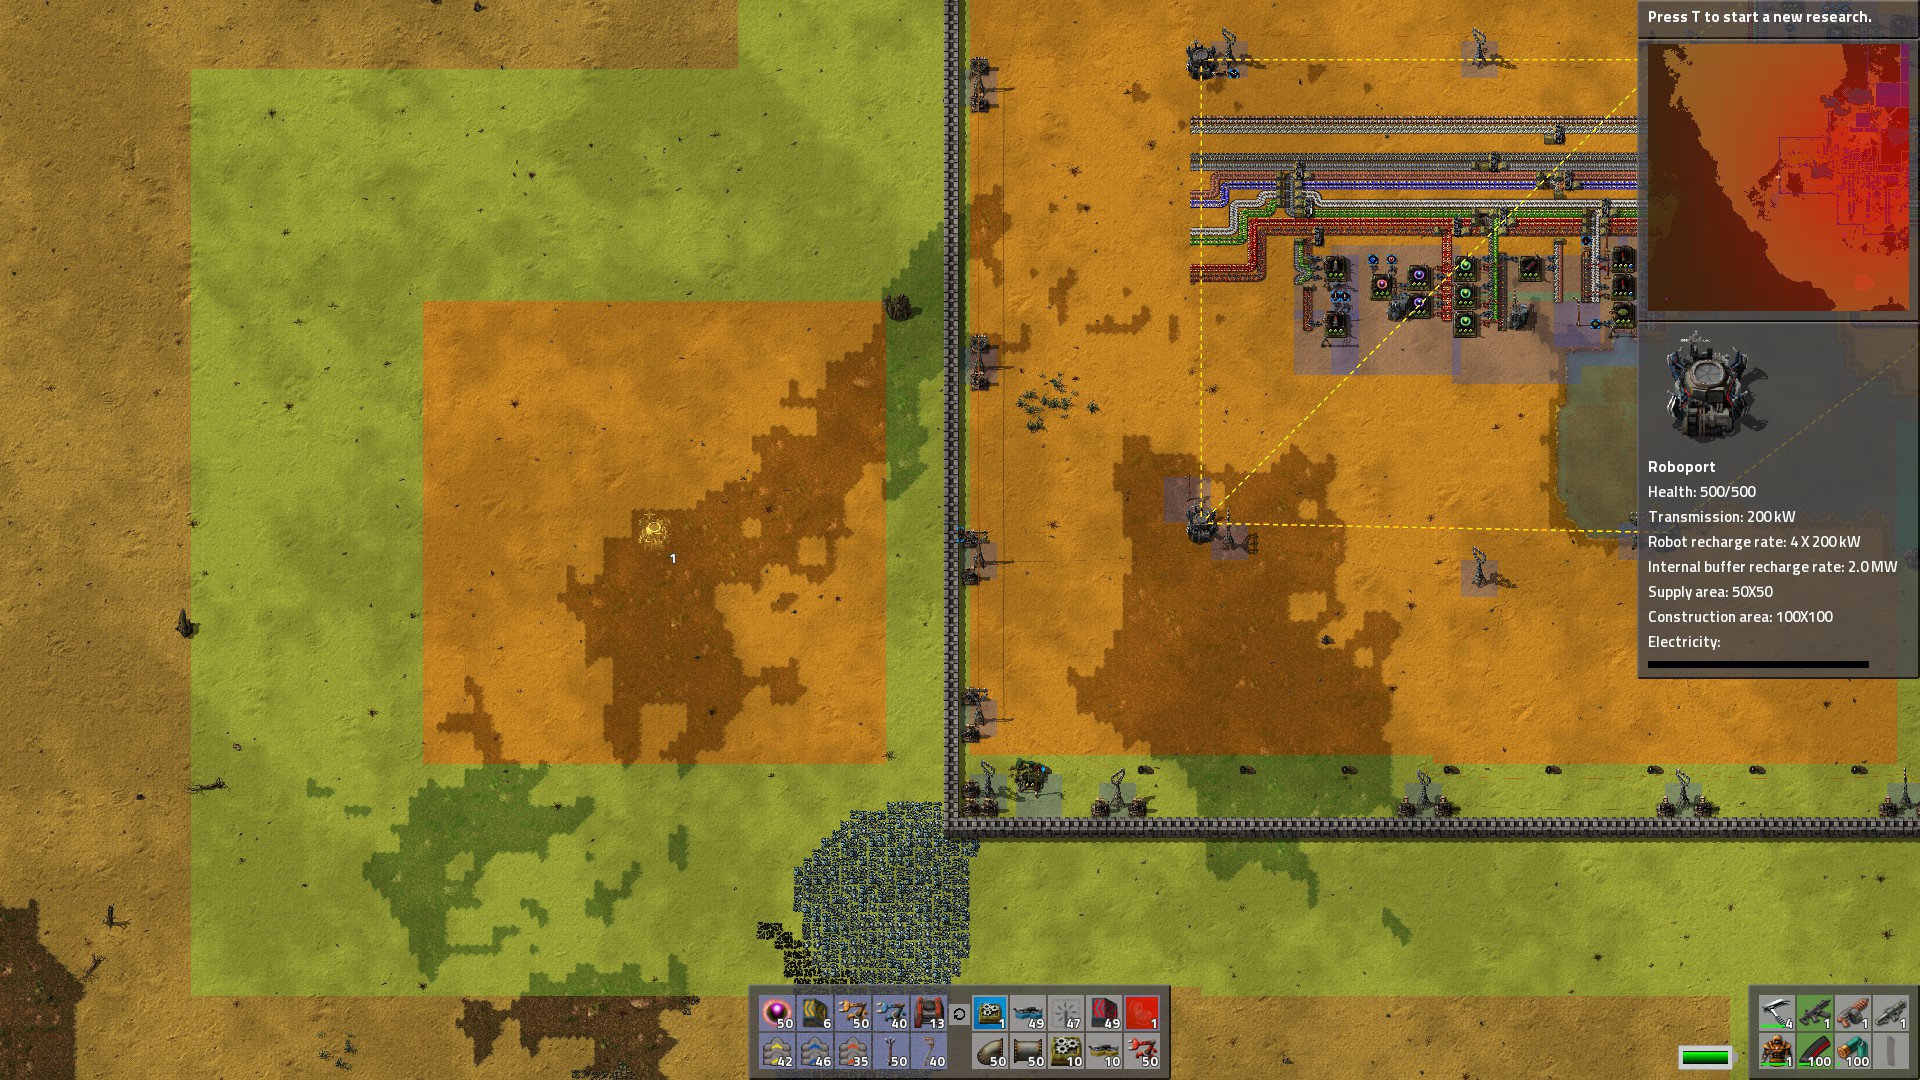

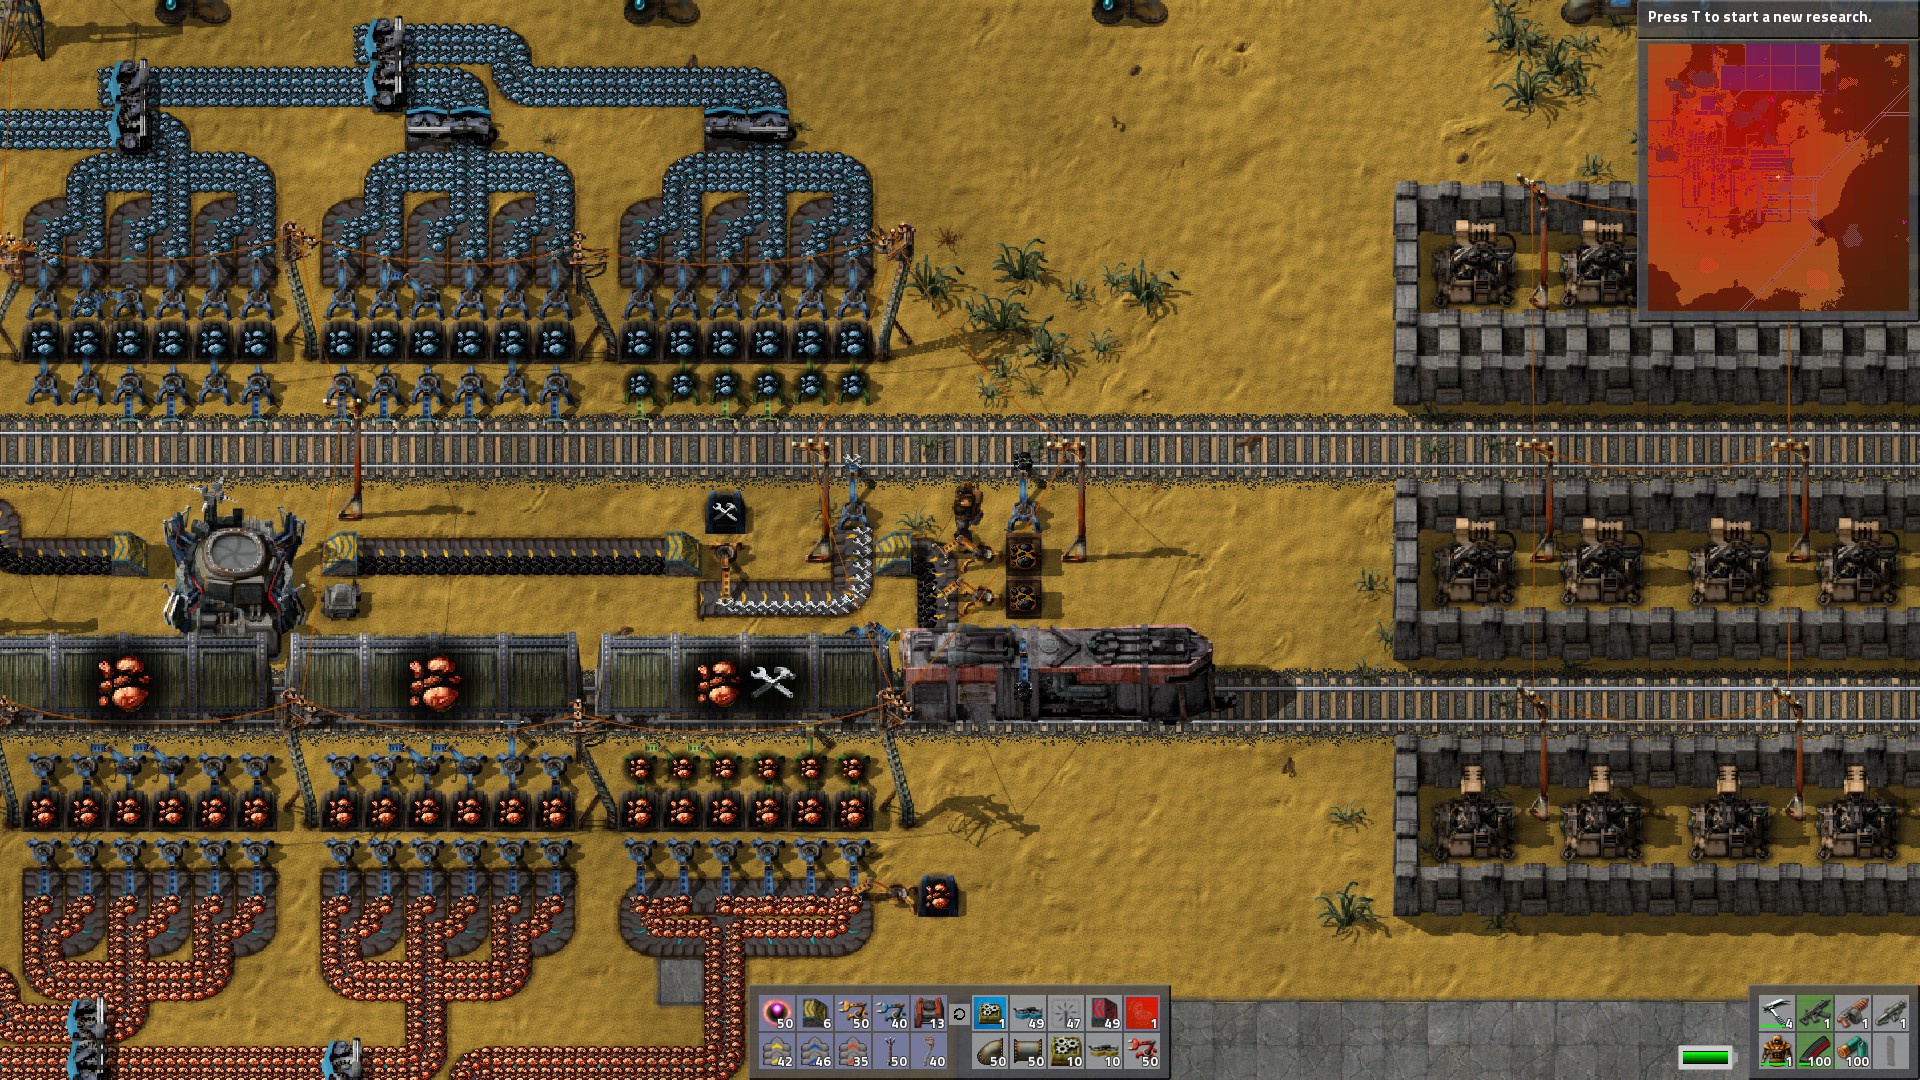
The Logistics Network can help you automate your factory in ways you never thought possible! Flying robots can construct new buildings, deliver materials, repair defenses, and more! As you grow your factory, these conveniences become almost a necessity, but be careful of usages that can break your factory!
BasicsThe first thing you are going to want to do is setup production for Robots (or at least Flying Robot Frames, which you can then make into different types of bots). Flying Robot frames are very useful to have automated since they take a looooong time to craft.
Place a Roboport on the ground:
The Orange Square in the center is the Logistics coverage. Everything in Logistics chests can be accessed here. (If a chest is NOT in the Orange zone, it will be out of the network, and inaccessible to bots).
The Green Square is the Construction zone. Your bots can construct and repair items within this coverage area. (Note: always keep your outer walls within the green zone).
Walls should always lie within the green construction zone.
To connect another Roboport, (having a continuous Logistics system), place the next Roboport close enough that the borders of the Orange area touch.
You will see a dotted line between all buildings that are connected.
You can create a complete network most easily by using a grid-like pattern. Also, make sure your Roboports are powered!
The new Roboport (left) needs to be moved closer to the other Roboports in order to connect to the Logistics system. A dotted yellow line between them denotes a connection.
Do note that Roboports use a SIGNIFICANT amount of power, and can be a great drain on your power system.
Disconnected 'PortsSometimes, you'll want to have logistics systems separate from each other. This has the advantage of robots staying at their home port for supplies & maintenance instead of traveling across the map to grab a Repair Kit.
The most effective example is of a distant ore outpost:
This very large outpost needs two Roboports to cover its walls.
All walls are covered, and trains receive regular shipments of Repair Kits. (Because I didn't want to resupply the outpost with Logistics Bots, I have a conveyor belt taking them to the 'port.)
Construction Robots will repair any walls/turrets that are damaged by biters.
Train at the main base fed with Repair Kits. Note that Smart Inserters are programmed to take out ONLY ore... otherwise, the repair kits would end up on the belts.
Robots & The Logistics Network
LogisticsBots can be great at moving cargo around. Here are the types of chests we have access to:
Chest Types Passive Provider Chest (red): The most commonly used chest. Stores output of assemblers, etc. Logistics robots can pick up items from these chests to supply to you and any Requester Chests.
Requester Chest (blue): Requests items from the Logistics network.
Storage Chest (yellow): Essentially a "dumping" chest, where robots can put everything that is deconstructed or trashed through character Trash slots.
Active Provider Chest (purple): Actively empties itself. Unless items dumped in the chest have a specific Requester chest, they will be ferried into Storage chests. Good for situations of having a temporary chest that you need to empty quickly.
Note that Active Provider chests can absolutely break your factory. I rarely use them at all, since they require SOMEPLACE ELSE to store things. Robots currently do not store like materials in Passive Provider Chests... so Active Provider Chests dump themselves into Storage, (or into Requester chests, but only the amount requested).
Chest UsageI HIGHLY recommend that you put some of pretty much EVERYTHING into a Passive Provider chest, just in case you may need it further down the line... or indeed if you stop using lines all together.
From very early game, I put down chests that siphon off the main line in order to resupply on critical materials like Iron & Copper Plate, Steel, etc. for manual crafting. When logistics reasearch is done, I just plonk a Passive Provider on each of the old chests and Boom! instant every-material!
Chests siphoning off the line for Steel. Limits on these chests prevent overproduction. Be sure to not grab directly from a splitter -- the inserter can reach and grab both sides!
Chest PriorityBots follow a priority list when they need an item, and check the chests in this order:
Active provider chests
Storage chests
Passive provider chests
ProductionSometimes you'll want to produce items that have many- or hard-to-reach components. Requester chests are perfect for these occasions!
To set up production:
Build your Assember.
Put a Requester Chest one tile away and place an inserter.
To automatically set a Requester Chest to request the same materials as are needed in an assembler, Copy & Paste, just as you would if you were copying production:
Select production in the Assembler.
Shift + Right Click on the Assembler to Copy.
Shift + Left Click on the Requester Chest to Paste.Note that materials will be requested for only double of the inputs to make one item. Raise the sliders to request more materials, (and provide a larger buffer).
Done! Your robots will now ferry items from Passive Provider and Storage Chests into the Requester Chest.
A Requester Chest has logistics slots where you can choose items needed for production from your network.
Research TechsYou'll want to make these research topics a priority to improve your logistics system:
Worker Robot Speed: allows bots to travel faster.
Worker Robot Cargo Size: allows bots to carry more cargo per trip.
Character Logistics Slots: allows you to request items to be delivered directly to you.
Character Logistics Trash Slots: allows you to dispose of unneeded items by having bots take them away to Storage Chests.
Auto-Trash: Allows you to automatically set items for removal from your person whenever they are picked up. (Great for wood, ores, etc.)
Tips It is HIGHLY recommended that you use bots only for medium distance low throughput OR low distance medium throughput. Ferrying huge amounts of stuff around your base, (like basic ores, plates, etc.) is not economical, and belts are superior for those applications.
Make sure you have enough bots to carry items around your factory! Remember: Logistics Bots carry materials between chests and yourself... Construction bots repair items and build constructions. Create the ones you need.
Mouse-over a Roboport to see how many bots are in the system as well as how many are used/available.
To see the Logistics/Construction areas, just pick up a Blueprint or Deconstruction Planner from your inventory.
Use Logistics slots (in your Inventory) to order specific items to be delivered to you. You can set quantities with the slider bars (or type in specific amounts). To resupply, you MUST be within your network's orange zone. (If you are in a disconnected zone, you'll only receive products stored in that zone).
Shift + Click to send items from your inventory into the Logistics Trash Slots.
Both Logistics & Trash slots can be researched to increase number of slots available.
Logistics slots are very handy for basic resupply, ordering items that you place often, like assemblers, inserters, chests, power poles, etc.
Automating Adding Robots into Your System:
Robots & Construction
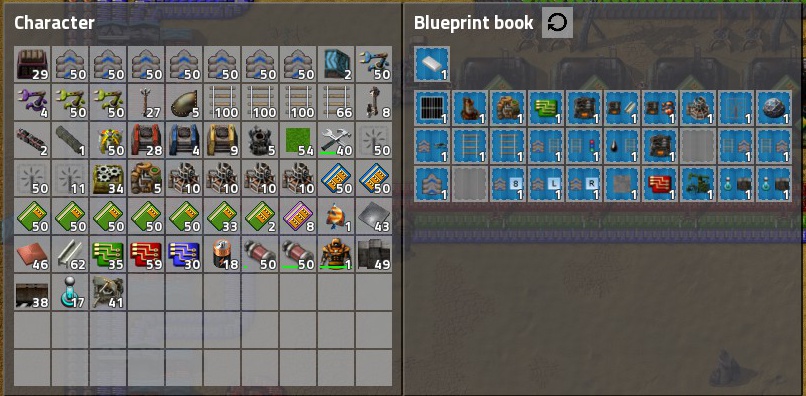
Constructions with bots can make your life much easer.
Construction is accomplished with two different items:
Blueprint (Blue Square item)
Deconstruction Planner (Red Square item)
The BlueprintUsing Blueprints allows you to create designs and copy them to different parts of your factory. Blueprints are reusable... they can be cleared with Shift + Right-Click.
Placed blueprints can be used as many times as you want, and you can keep an inventory of different designs that you would want to re-use.
To Create a Blueprint:
Select the Blueprint. ("Hold" it).
From one corner of the area you want blueprinted, click and drag over the area.
As you drag, green highlighted items will be selected. A tooltip at the cursor tells you exactly how many of which items are included.
When you're done selecting release the mouse button. Another window pops up asking if you would like to confirm the blueprint. If you missed anything, just click the red X and do it again. Otherwise, confirm the design.
Selecting an area for blueprinting
To Use a Blueprint:
Select the Blueprint. ("Hold" it).
Move your cursor to where you want to place the structure -- a ghost image shows you exactly where it will go.
Left-click to place.
Your Construction bots will soon come swarming in to place the items! (Make sure you have enough in storage!)
The Blueprint BookA Blueprint Book allows you to store blueprints kind of like a little chest you can keep in your inventory. You can have multiple books and rename them accordingly using the circle symbol to the right of the name.
Place blueprints in your specified order, and they will stay that way even when you scroll through them. (Hold the blueprint book and Shift + Scroll Wheel to scroll).
I organize my BP book by assembly structures, train things, and belt structure, etc.
Editing a BlueprintEdit a blueprint by right clicking on it.
You can:
Change the name
Remove entities from the blueprint by right-clicking
Cancel removal by left-clicking
Remove all floor tiles from the BP
Change the icons associated with the blueprint
Confirm the new BP or cancel the changes
Delete the BP with the crossed O.
Tips Something in the way? A normal click will prevent you from placing the blueprint. However, if you Shift+Left Click, it will allow you to place the blueprint. Structure underneath will be kept; however, trees will be deconstructed automatically. (This is great for building in forest areas... or for large solar arrays that have perhaps a tiny lake in the middle).
Any item that you deem superflous can be cancelled by Right-Clicking on the "shadow" of the item.
You can place the blueprint over the area again to renew the items that were missed. (Make sure the rotation is correct!)
Uses:
Repeatable production lines, (see the System Setup Guides section later in the guide).
Train stations & loading areas.
Complicated (or simple) solar panel/accumulator grids.
Wall turret defense lines.
Laser turret creep tactics.
Belt balancers, and complicated belt lines.
Diagonal train track, complete track curves, or junctions/roundabouts..
A situation where you don't have the item on you, but want to add it. Example: a hole in your outer walls -- blueprint a single wall nearby, then place as many as you want! Also works with flooring!
The Deconstruction PlannerUsing the Deconstruction Planner is by FAR the fastest way to remove items from their positions. Now trees can be removed with ease, all the wood handily landing in your inventory. Whole areas of the factory can be moved... by even one square if desired!
To Use the Deconstruction Planner:
Select the Deconstruction Planner. ("Hold" it).
From one corner of the area you want deconstructed, click and drag over the area.
As you drag, red highlighted items will be selected. A tooltip at the cursor tells you exactly how many of which items are included.
When you're done selecting release the mouse button. Done! Bots will take remove things from the map and place (most) of them in your inventory. The rest will go to Storage Chests.
If you have made a mistake in selection you can quickly cancel by Shift + Selecting with the Deconstruction Planner. (This is very useful if you've decided that you don't need the ENTIRE forest cut down.... :-)
Note that the Deconstruction Planner only works within a green construction zone.
Tips You only ever need ONE Deconstruction Planner -- it is endlessly reusable.
Frequent use of both items goes like this: ore processing is too crowded -- it needs to move to another part of the factory. Blueprint a repeating section of the furnaces, deconstruct the entire area. In the new area, place the blueprint several times -- no hassle!
To make maximum use of construction, have ALL items made in your factory and in Passive Provider Chests -- furnaces, assemblers, power poles (all types), conveyor belts, inserters, etc.
If you're creating a new area to be blueprinted, make sure to set all assemblers, chests, modules, and Filter Inserters -- all their settings info will be carried with the blueprint!
If you're deconstructing something massive... or at the very edge of range of your construction bots, place a Storage Chest to make the bots' trips shorter.
You should wait for big construction jobs to finish before asking your bots to start another large construction job.
To place a construction order without using a blueprint, (single items only), hold the item in your hand, then press Shift to place.
If there is a "mess-up" in the middle of a large impassable area, (such as a solar panel field), you can use the deconstruct planner to select items to get rid of, and a blueprint to replace it. (And no need to get near enough to walk up to the errant area).
You can use the Deconstruction Planner to get your bots to pick up Alien Artifacts. (Especially useful for islands!)
The Deconstruction Planner is particularly useful for removing long-click-time items like walls, trees, and long stretches of conveyor belts.
Personal Roboport & Diagnosing Network Problems

Personal RoboportA Personal Roboport, (a module inserted into a Power Suit), will allow you your own green square construction area, enabling you to easily construct things outside your main network.
All you need to do is insert the module in your Power Suit, and then keep a stack of Construction Robots in your inventory. (Note: you never need to have Logistics bots in your inventory -- deliveries/trash will be taken care of by the robots from the standard Roboports).
Standard size of one personal roboport.
A single roboport allows you a green construction area of 30x30 tiles, centered around you. Adding more roboports increases this size by a square root factor, (not an additive one). For example, a power suit with 11 Personal Roboports gives you a range of 99x99... nearly as big as a standard Roboport at 100x100.
Each Personal Roboport allows you 10 robots to be flying around you at any one time. These numbers stack with additional Personal Roboports.
Each Personal Roboport also allows you 2 charging stations at which your bots can recharge themselves. (Make sure you have enough reactors to power these!)
Eleven Personal Roboports allows for a massive construction area!
The clear benefit of Personal Roboports is the ability to construct things outside your main network. This is absolutely great on outpost locations.... even if you only have the standard construction area, you can move your green square along to make sure everything gets in the zone to be placed. (Make sure you have enough items in your inventory).
Personal roboports also have the advantage of allowing you to repair your tank/car while out in the field. Be careful not to leave your robots behind, though! If they run out of charge, they will come limping back to you (or home) at a fractional speed.
Problems in the Network
You'll get beeping messages if you have insufficient items in storage -- hovering over the warning signal at the bottom of the UI will show you exactly what's missing -- whether it's bots or items that are not available.
If bots are hanging in the air, not moving, the area Roboport may have lost power -- reconnect to get them moving.
Alternatively, if they are already near the Roboport, they may be waiting for a charging station.
If the bots are hovering around chests, they may be waiting for an empty storage space. Build more storage to solve this. Note that having any Active Provider Chests will exacerbate this situation, as they demand to be emptied immediately.
If you build large constructions frequently, make sure you have enough bots in the system to place items efficiently.
Bots can be attacked by biters, etc. so keep them out of harm's way, and replace when they are destroyed
Movement Speed
You can increase your movement speed in various ways:
You can run much faster if you pave the ground with Stone Bricks, (created with Stone from a Stone Furnace (or higher)). Later, Concrete gives an additional boost.
Creating walkways boosts speed.
Paving the ground with Stone Blocks or Concrete can be done in both large & small quantities. Change the "brush size" with the numpad + and - keys.
Run on your conveyor belts to move faster. Be aware that ones going in the opposite direction will slow you down! (The speed boost stacks with the pavement bonus.)
Use vehicles to traverse the terrain -- the car & tank both travel faster than regular run speed. (Press Enter to hop in or get out of vehicles).
Trains will get you to outposts super quick! Hop in the engine or wagons.
Building Exoskeletons for your Power Suit will dramatically increase your run speed. Their bonuses stack, so feel free to use more than one in your suit! (For my all-purpose suit, I use three... and run faster than a tank!)
Three exoskeletons provide a HUGE run-speed increase!
Usages Of The Logic System


Here, I will focus on simple fixes for quality-of-life issues, and leave the more complicated things for (a possible) future guide.
General Craft wires (red, green, etc.) to connect items together.
If items aren't in range, you can bridge the gaps by connecting the wires to power poles.
Be aware that red/green are their own networks, and only count items that the specific colors are connected to. (I.e. a mix of red/green wires will not result in a continuous line. Also beware of inadvertently "adding" two networks together by using the same color of wires).
Nearly every item can be connected to the circuit network including belts, chests, tanks, inserters, roboports, etc.
Some entities, like Accumulators & Roboports, can send special signals denoting charge level (in percentage), and total robots in the system, etc.
Limiting Production, Part 1: I Want This Many
You may want to limit production to specific number of items, especially if those items are very resource-intensive to produce. Such might include Roboports, Modules, Train engines, etc., where the stack size may be too much for your base to handle.
In this example, we want to limit the production of Roboports to 3 units. (Less than the stack size of 5).
Next to the Roboport assembler, place an inserter (any type) and a chest.
Now, craft a Red or Green Wire and connect the inserter directly to the chest. (Hold the Wire in your hand, and click on the chest & inserter).
Click on the inserter, and look at the Circuit Network Condition line.
In the empty square, select Roboports. Then (if needed) change the symbol to < ("less than"). Click the number box, and type in 3.
Done! Once there are 3 Roboports in the chest, the machine will continue to produce only what it is able to hold in its own inventory (for Roboports, 2 units), but no more can be emptied into the chest, and thus production is finished until some are taken out of the chest.
Limiting Production, Part 2: Only More Than
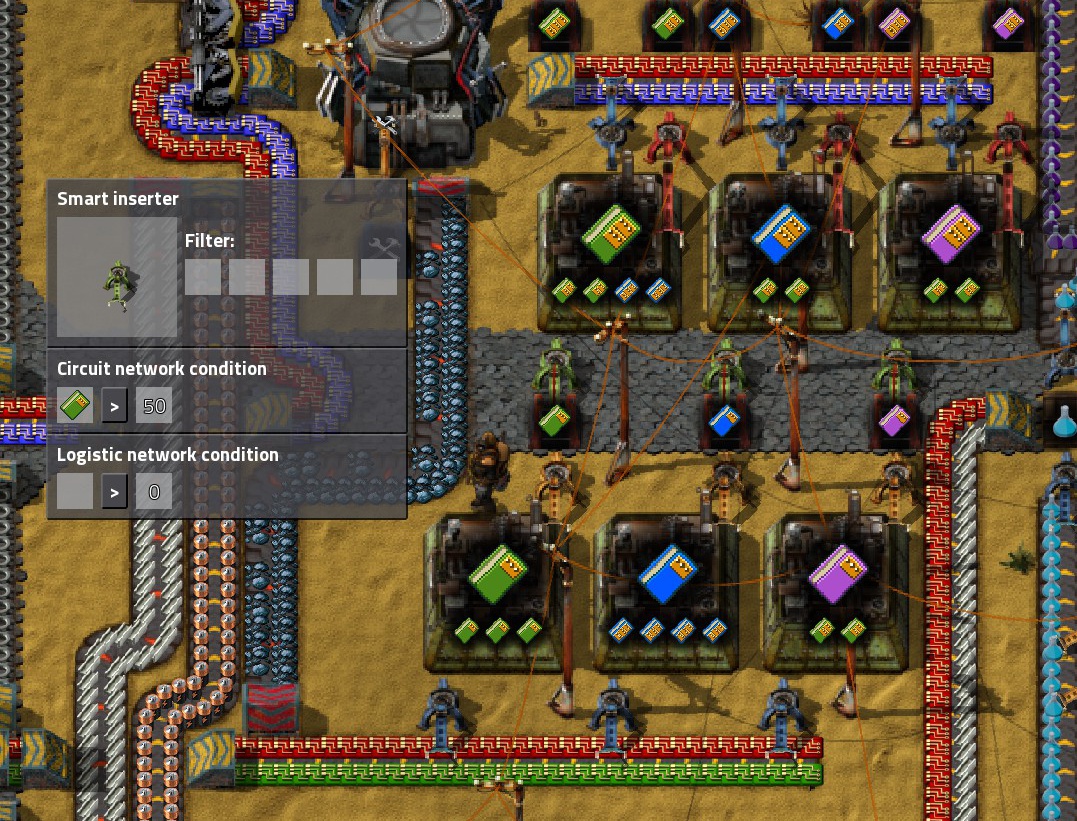
Now, to take this a bit further, lets move to another, (very useful), example. This one involves Modules.
The premise for this example is that we want AT LEAST 50 Level 1 Green Modules in the chest BEFORE the Level 2 maker takes them out. But we also want up to 100 to be stored.
Already, I've mentioned the ability to limit stack size through chests by using the red X on the corner.
(Limiting production through a simple chest).
In the picture below, we have the Level 1 Module Assemblers (bottom of picture), an inserter empties their production into a chest above them. Above the chest, an inserter conveys these modules to the Level 2 Assembler.
To set up our conditions, (and limit the production of modules), I've limited the chest to a 2 stack size, so that there can be at least 50 modules for pickup, (but it won't go over 100 total units).
I've connected the inserter to the chest with a Red Wire.
Then, I've set the inserter to activate ONLY when there are MORE than 50 Level 1 Modules in the chest.
With this setup, I will be sure to have plenty of Level 1 Green Modules to put into various machines, and still be able to produce Level 2 Modules when there is an "overflow", without having to monitor it myself!
Only Activate When....Balancing oil fractions can be tedious at times, and often one can experience a buildup of one or another.
In this example, you'll need at least one tank for each of Petroleum and Light Oil, then a pump. Connect the each oil tank to the pump with wires. (Green in the pic below).
We want the Chemical Plant to start cracking operations ONLY when Petroleum dips. Therefore, we can connect the Pump to both the Light Oil Tank and the Petroleum Tank.
Set the variable to activate when: Petroleum < Light Oil.
For this to work, The tank should be connected (with pipe) to the Refineries, and ALL pipes carrying Light Oil to subsequent Chemical Plants MUST connect PAST the pump. This will allow you to control your flow with some security that no more Light Oil than needed will be processed into Petroleum.
(This is most useful on Heavy to Light Oil, since Heavy Oil is made into Lubricant, and one does not want to fall short on supply).
Limiting oil cracking.
Alternatively, if your system is setup in a more homogenous way, you can connect pumps to the oil input of each individual cracking plant, wire those to the tanks, and copy the settings between them.
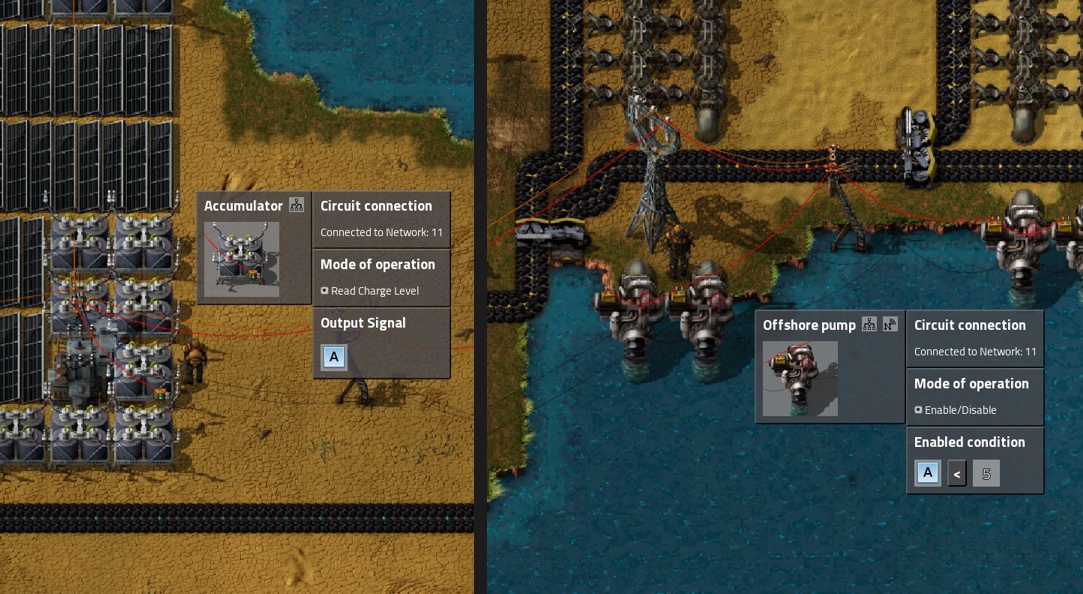
Accumulator PriorityIf you prefer to use Accumulator power at night instead of Steam Engines turning on, use them as a backup source with this setup:
Connect ONE accumulator to an Offshore Pump via red or green wire.
Set the Accumulator to Read Charge Level, and note the Symbol it sends; here it is "A". (You can change this if you wish).
Set the condition on the Offshore Pump to A < 5. This means that the pumps will only pump water (and activate steam engines) if the charge of the accumulator (A) is less than 5%. You can change this value as you see fit.
Copy this setting to all Offshore Pumps pumping for steam engines. (And make sure to connect them with wire!)
Note: there is no need to connect all accumulators since they discharge at the same rate.
Logic: More Advanced (now With Combinators!)
If this AND this is True... You can use the logic circuit pathways to make all kinds of mini "programs" within your system.
This is a practical example in-game where I found that my Heavy Oil was being cracked into Light OIl when the Lubricant Chemical Plants were full. Normally this would be OK, however, I decided to make a massive factory which required thousands upon thousands of express belts. I therefore desired that an entire storage tank would be filled with lubricant as a buffer against waves of belt creation/building.
Thus, I decided that Heavy Oil should ONLY be cracked into Light Oil when two different conditions were reached...
Setup:
Decider on the right: Input connected to Light Oil and Heavy Oil Tanks (green), Output connected to the Decider on the far left (red). Conditions: Heavy Oil > Light Oil. If true, Output is Yellow Square.
Decider in the middle: Input connected to Heavy Oil Tank (green), Output connected to the Decider on the far left (red). Conditions: Heavy Oil > 1000. If true, Output is Yellow Square.
Decider on the left: Input connected to both Deciders on the right. Output connected to the Pump on the Heavy Oil tank (green). Conditions: if Yellow Square = 2. If true, Output is Green Square.
Pump: Input connected to the Decider on the left. Condition: Green Square > 0.
Here's the way it works:
First, I placed a Constant Combinator: Basically a Constant Combinator is a TESTING MODULE. It is used for testing your logic networks or otherwise artificially changing the product numbers.
I connected the Constant Combinator output to the Inputs of the right and middle Deciders to test and see if my conditions would work.
I set the values on the Constant Combinator to Heavy Oil = 2k, and Light Oil = 500, thereby making conditions of both of the middle & right deciders to be true.
The right and middle Deciders, having decided that their condition was met, both output a Yellow Square signal... for a total of two Yellow Square signals being output.
The Decider on the left receives both Yellow Square signals, and checks... yes! There are 2! Therefore, it outputs a Green Square signal.
The pump receives this signal, and since a value of 1 Green Signal is greater than 0, it turns on! (Therefore allowing Heavy Oil to go to the isolated cracking plants).
[color=#FF9900]After testing, I REMOVE the Constant Combinator so that my real network is accurately monitored.[/color]
Note: You can change the values in the Constant Combinator to test one condition or another, etc. Mouse-over the Decider Combinators to see what input they are receiving, and if it satisfies their conditions.
SignalsThe Yellow and Green Square signals were chosen arbitrarily. There are many signals to choose from -- you can even choose products, etc. There are number signals as well, however, note that they are SIGNALS, NOT numbers.
For example, if I had chosen output on the deciders to be a "2 signal", a single signal would NOT activate the left decider, it would need two 2s.
Personally, it helps me to choose abstract signals so I don't inadvertently add them together in my mind.
You can choose any signal you want: all you need to do is make sure that your signals match up between combinators.
There are tons of signals in in game. All product icons can also be used as signals.
More ConditionsIf you want X or Y to be true, plus Z or A to be true, put in intermediate combinators to check these conditions, and THEN pass the signal to the next combinator. Breaking things down into smaller parts can help work out the most complicated problems.
System Setup Tips
Belts Leave plenty of space around machinery for inserters, belts, and the expansion of systems. (It may be needed in future!)
As you gain experience in the game, you'll figure out which components you need most of and be able to plan better for it.
Never mix items in belts unless they are in two separate columns. Mixed belts never turn out well...
Use a separate belt for each type of product if possible. Dual-product belts are good for assemblers that need multiple ingredients.
Upgrade belts to move products more swiftly -- assemblers will shut down if they can't unload their products.
Logistics bots may seem like a great way to transport stuff, but that convenience comes at a cost -- massive power usage. I advise using logistics bots sparingly.
A number of items used to build the factory, (assemblers, lamps, inserters, etc.) use the same products -- check their requirements to see if you can build them on the same supply lines.
If you have mixed ore coming from some of your mining drills, use Filter Inserters to separate it into separate belts to avoid mixing.
Factory Design Using a Main Bus design is one of the most successful ways of building a factory -- most common intermediate products are available to all items down the line. Use Splitters and Underground belts to "peel off" belt lines.
The Main Bus in this factory snakes around, providing products for everything down the line.
On a Ribbon World, I chose to use a much narrower bus because of space considerations. This is a basic design you are looking to start out with.
This wide bus serves a very large factory. Multiple lanes of copper & iron are split back together to supply as much product as a line needs
The Main Bus should (at a minimum) contain Copper, Iron, and Steel Plate, Circuits, Plastic, Advanced Circuits, Processing Units, Batteries. (After much testing, I've concluded that Gears should definitely be made on-site).
One of the easiest ways to build a Main Bus is to have four conveyor belts, 2 spaces, 4 conveyor belts, 2 spaces, etc. The spaces allow you to very easily maneuver with splitters, and also leave room for connecting underground belts.
You can also create many products with NO belts... or at least very few of them. For items that require dedicated machines, (like the tons of Copper Wire required for Circuits), Fast Inserters can transfer them directly to the machinery. (See the Circuit Setup in the next section).
Chests placed between assemblers, (with Inserters linking them), can become Passive Providers in mid-/late-game, allowing you to stock your inventory with things like conveyor belts, splitters, various inserters, etc.
Here, each Splitter (and Assembler) requires the previous type to craft. These are moved through chests & inserters without the need to belt intermediate products.
Consider placing siphoning chests on main lines with a (regular) Inserter feeding them. Limit it to ~5 stacks in early game, more in late. These will allow you to resupply yourself easily when crafting on-the-fly. Recommended: Iron & Copper & Steel Plate, Circuits, Advanced Circuits, Processing Units, Gears. Later, you can turn these chests into Passive Providers and get items delivered to you automatically.
If you intend to use 'bots to deliver a lot of materials, place your siphon chests to take from tiny split from the main -- that way your regular production will be guaranteed to get some materials, otherwise, they may be vaccuumed up by the chest.
Do not let OCD overwhelm you! I think this game appeals to people who like order and putting things in their "proper place". ... However, sometimes the simplest solution is to give a little...
Speaking of... Sometimes you will have situations where you want to put a belt right through the middle of something. In repeatable systems, merely skip a couple of spaces, and let it through!
In this example, I have Explosives, Iron Ore, and a pipeline of Sulfuric Acid that needed to get past my Advanced Circuit setup. I skipped 2 spaces, and then continued the system, with minimal interruption.
Create "dumping chests" that will recycle your materials. These work best with low-level materials, like ore & wood. When deconstructing belts, (and trees), you'll find that you have random bits of stuff in your inventory. Use the Logistics Trash slots on your character to get bots to take it away.... and have Requester Chests to put things back into the system.
Requester Chest for Iron Ore to get the ore back into the system.
When things get overloaded, near or post end-game, consider 2 (or more) belts for iron & copper, or perhaps ship in circuits, etc. from other locations. Territory in Factorio is cheap, use land to your benefit!
Pipes Making a maximum use of available space, braid pipes together as in this Light Oil Cracking Design:
See more in the Oil section above.
System Setup Guides
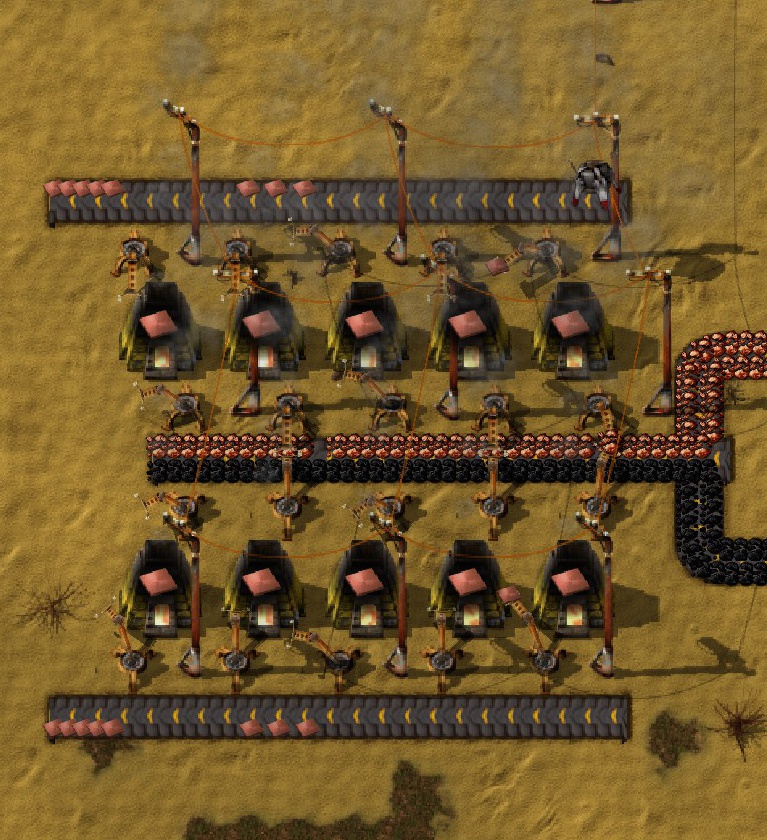
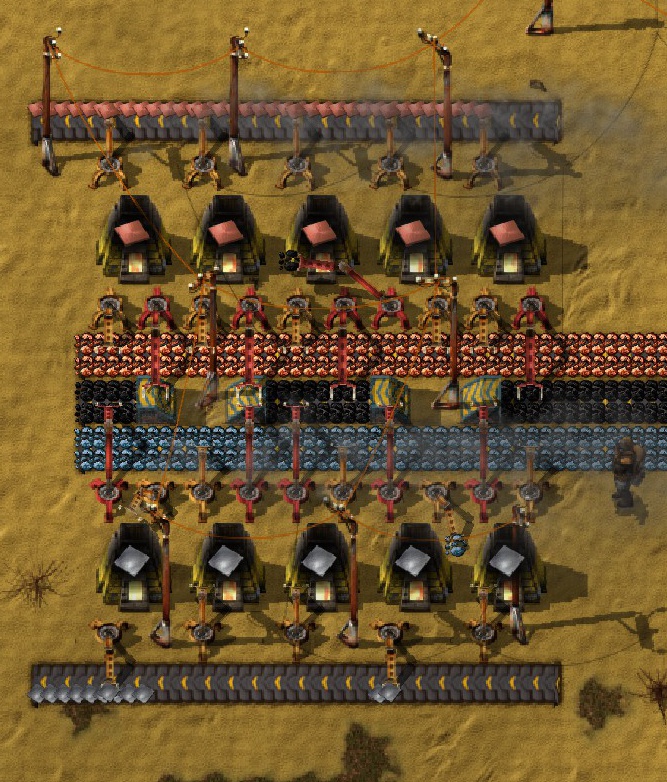
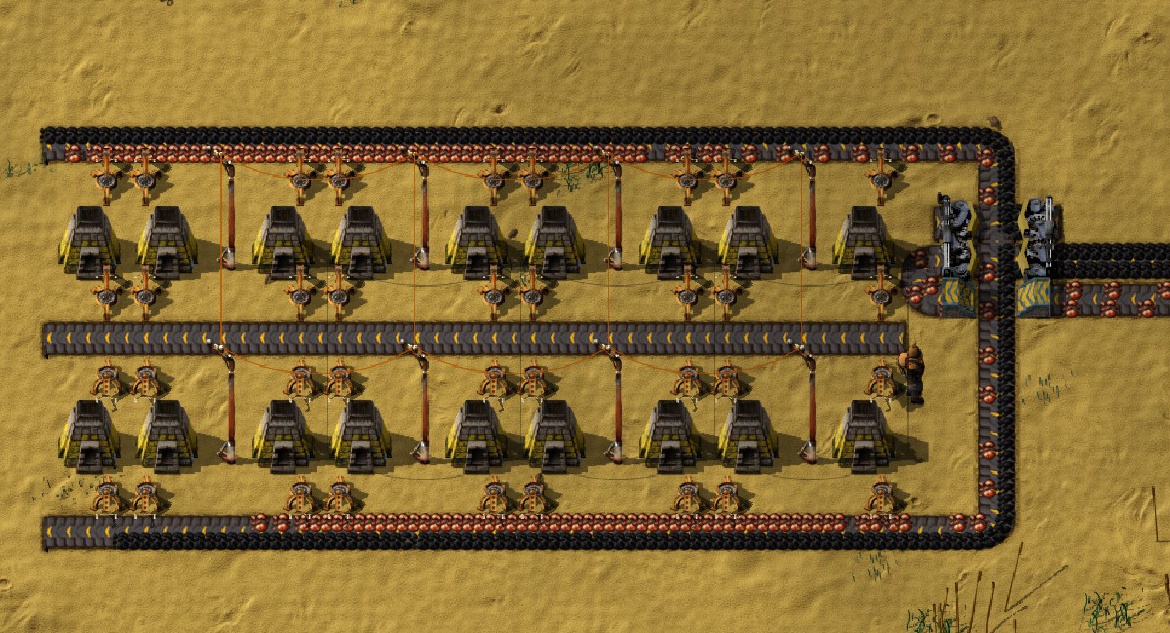
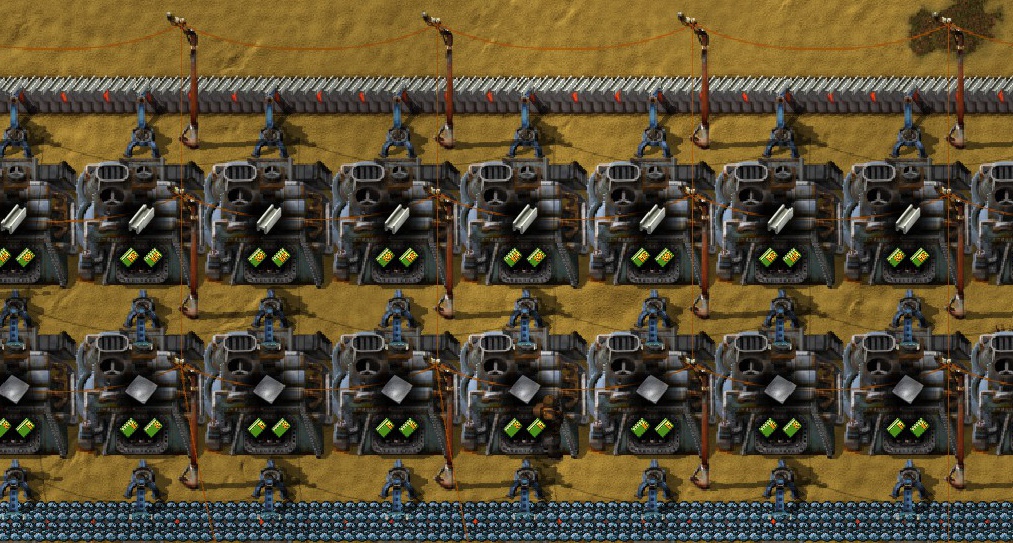
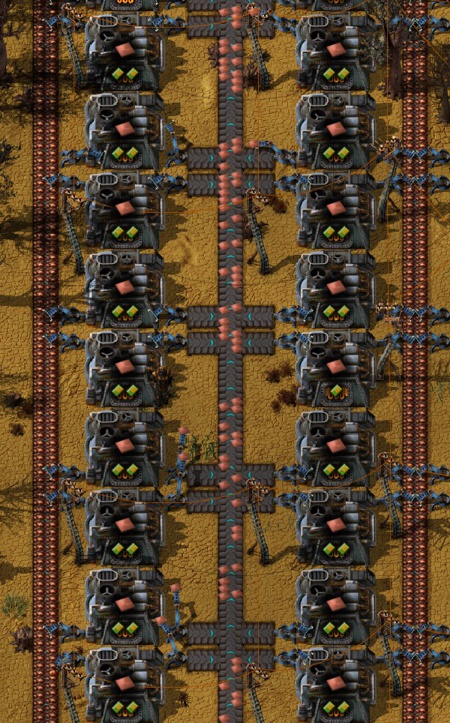
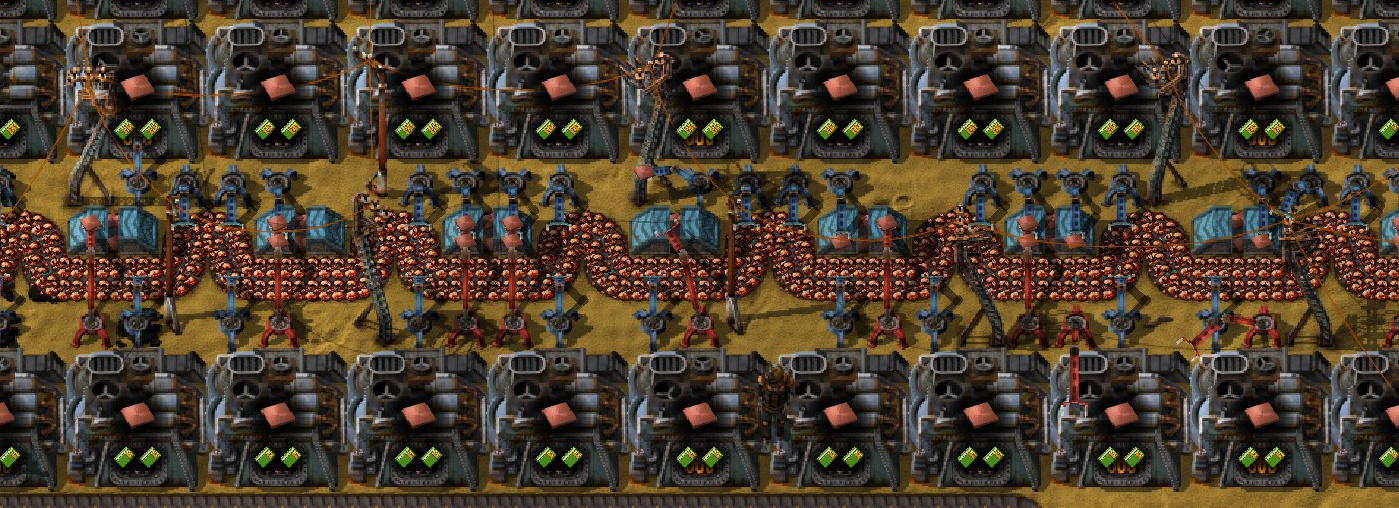
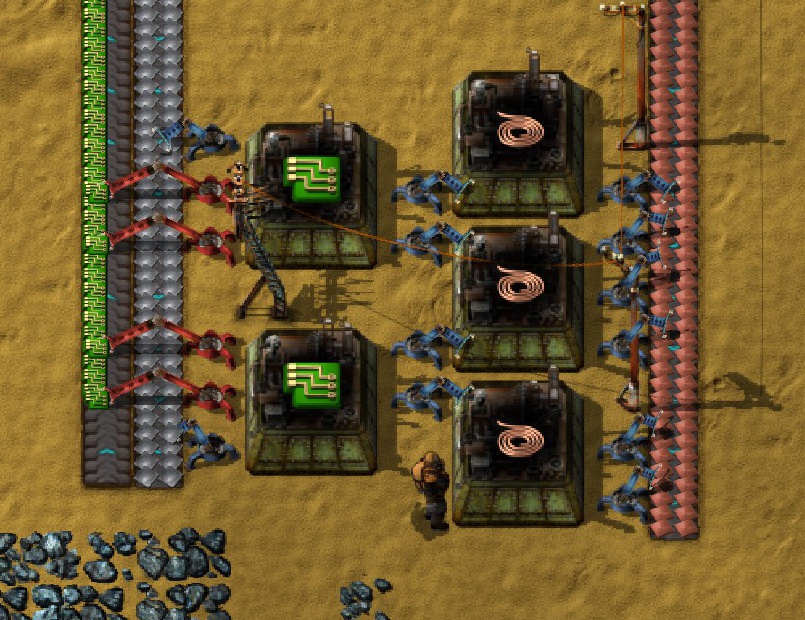
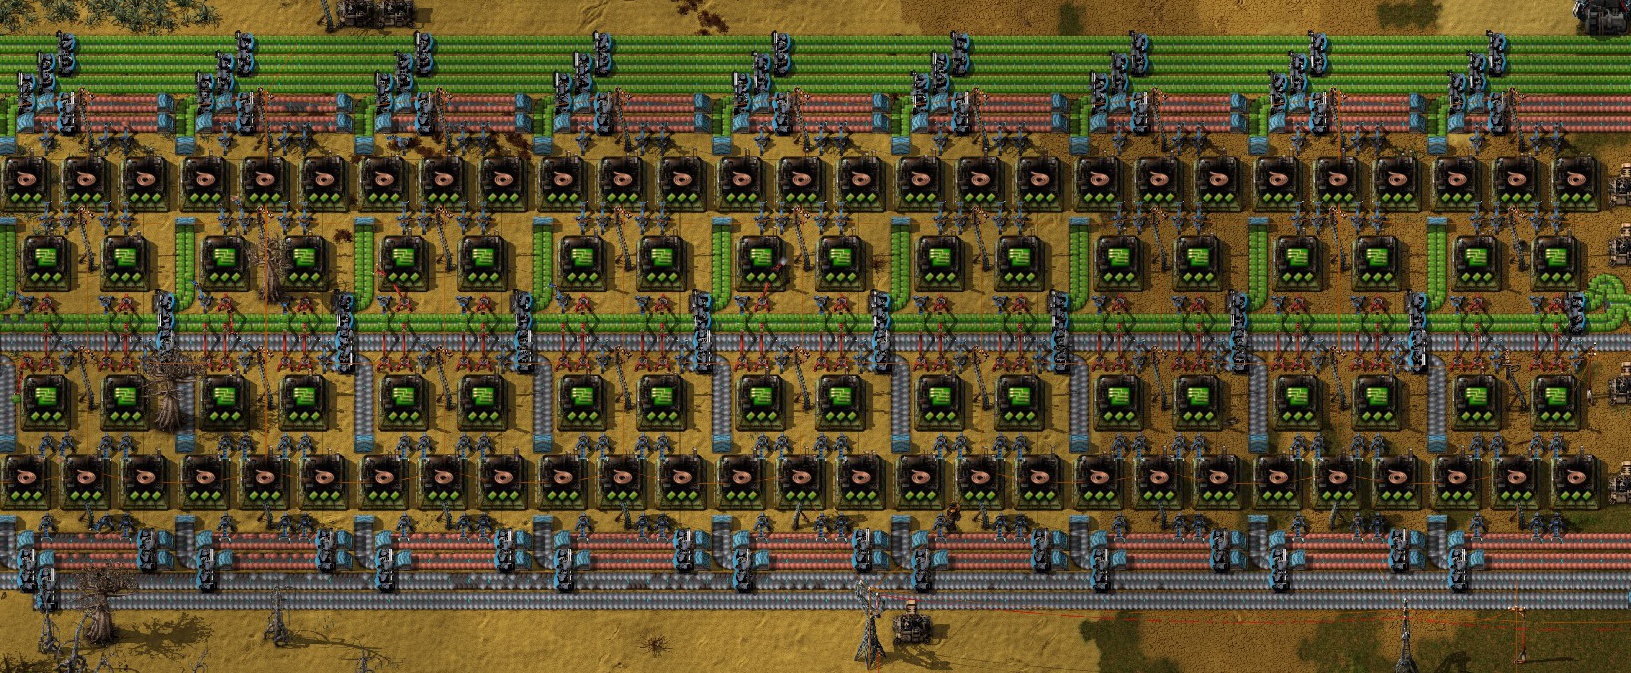


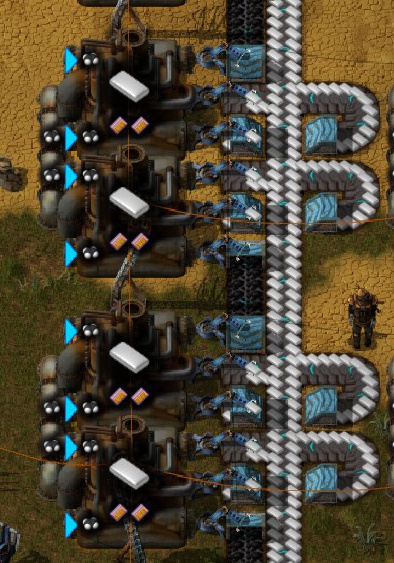
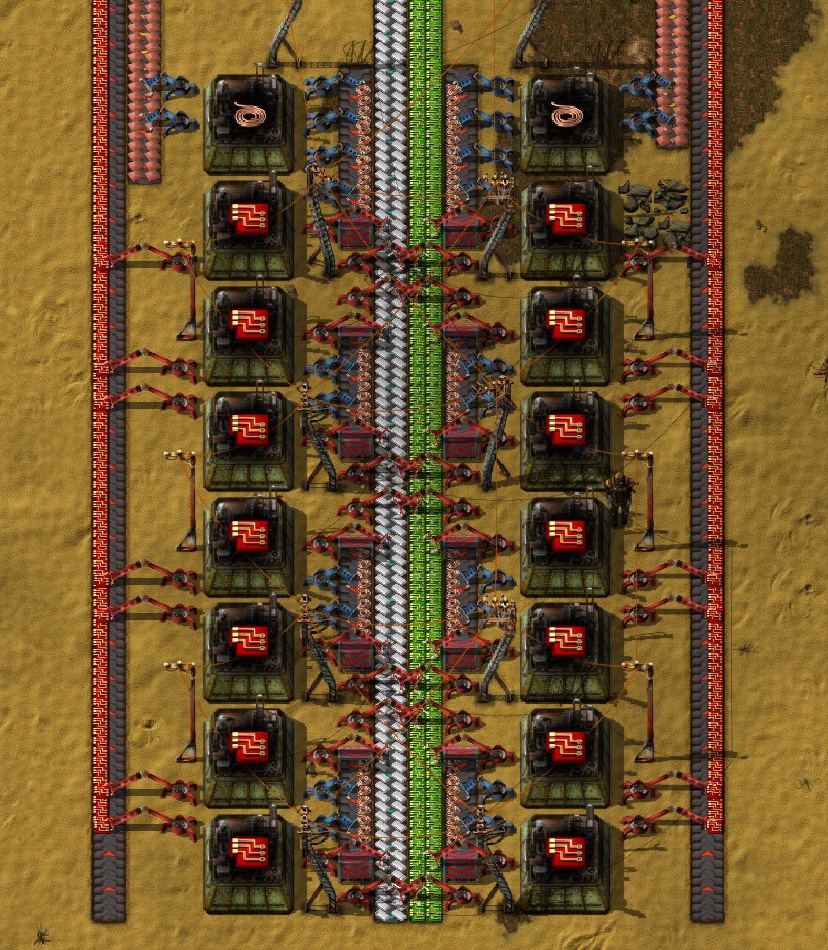
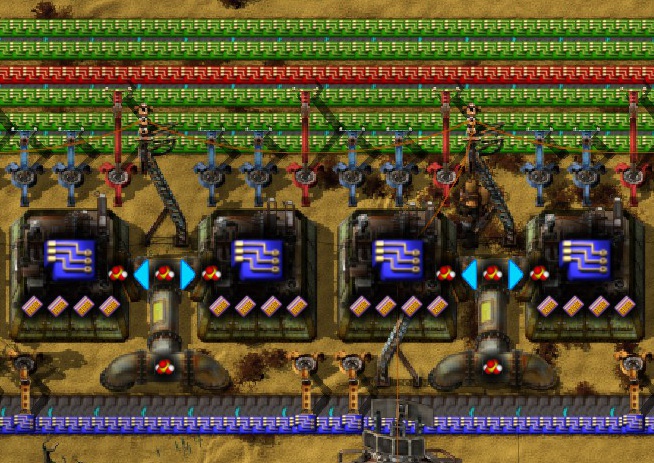
In this section, I will show specific setup guides for various highly-utilized systems, using specific ratios that are most effective for the production involved. They are repeatable, meaing that they can be endlessly expanded to suit the needs of your factory.
Because of this, BLUEPRINT them! Blueprints + the Magic of Construction Bots makes construction so much easier...
(Do note that SIGNIFICANT expansion in a single direction may overwhelm your belts, so always use Express ones, and add additional lines if necessary).
Always upgrade your assemblers to the highest level possible for maximum efficiency.
Early Game: Basic Ore Processing
Once you get enough materials to craft a few furnaces, I HIGHLY recommend automatic fueling... there's nothing more annoying than having to manually refuel a furnace.
This design uses the most basic of technologies. Combine both ore and coal onto one line using the Dual Line technique described in the Assemblers & Conveyor Belts section of this guide.
Regular (or even Burner) Inserters will load the furnaces for you, allowing Plate to be ferried off onto the other side.
Early-Game: Basic Ore Processing, Design 2This setup requires a little more technology -- Underground Belts and Long-Arm Inserters, however, you can utilize the same Coal line for production of both Copper and Iron Plates.
Note that Long-Arm Inserters CANNOT grab coal from underground... however, they can grab it from the "hood" of the underground belt structure, so place your inserters accordingly.
The power poles in the middle power all the inserters on the center line.
Early-Game: Basic Ore Processing, Design 3My favorite design to use, this ones uses splitters to cleverly combine ore & coal each on a half side of the belt, while plates ride down the center path. I add a space between furnaces to conserve power poles, which cover both sides of the furnace. If I am not mistaken, a design by JG Games.
SteelBecause Steel takes 5 times as long to process as Iron Plates, you can have Iron Plate production feeding directly into Steel production Furnaces with inserters -- no need for belts!
Mirror on the opposite side if you need more production, therefore using both sides of the output belt.
Electric Smelting, now with Side-Loading!Because side-loading can now create fully-compressed belts, there's no need for complicated splitter & underground concoctions any longer!
I created this simplified design for end-game smelting.
Space-Saver Ore ProductionI came up with this design after a lot of tweaking. It uses prodigious use of underground belts to save space and provide maximal use of Fast Inserters.
You can run approximately 22 pairs of Furnaces, (44 in two lines), off of the central blue belts without shutdown due to lack of ore or space.
The only drawback is that it isn't easily repeatable in-line because the "wave" sections are 4 squares, and furnaces are 3 squares wide. Blueprint-wise, I recommend making a couple tiny blueprints to create the main structure, (wave belts/underground belts by themselves), and then add in the power poles and inserters manually. Then, you can blueprint the entire long structure for construction of additional rows.
(Why Fast Inserters? Regular inserters are too slow to reliably grab off of the very fast blue belts).
Circuits (Green Chips)
This design uses 3 Copper Wire Assemblers that feed directly into 2 Circuit Assemblers.
Make sure the Iron & Cooper plate belts are closest to the assemblers to make best use of Fast Inserters. Double Long-Arm Inserters place completed Circuits on the line.
If desired, substations can be used for power between repeats, right above/below the Circuit assembler.
Green Circuits - Leaf Vein DesignIt seems like there's always a shortage of green circuits! I created this massive end-game design to facilitate having very long columns of green circuit production. (It makes 4 fully-compressed belts).
Iron & Copper move left, circuits go to the right. Because the out-going circuits feed to the outward lanes, it leaves room for the machines at the beginning of the column to drop their produce.
Belts+ ArrayI love this design for a belts array. It allows a very efficient distribution of materials, while making each stage of belt production accessible.
The chests between each assembler start out as iron, then can be upgraded to Passive Providers, and finally Requesters, as you phase out the lower tiers of belts.
Use 6 to 9 gear assemblers, depending on how quickly you need to replenish your belt supply.
Plastic ProductionI love this design -- both because it creates nice, compressed belts using side-loading, and also because it resembles beautiful picot lace! Plenty of space for inserters to drop off product as well as pick up coal.
Close-up view:
Advanced Circuits (Red Chips)
This design of Bentham's uses a beautiful wavy arrangement of inserters to connect assemblers to all materials. Because of the production speed, Long-Arms are plenty fast enough to deal with the traffic. Underground belts shuffle materials out of the way.
One Copper Wire Assembler will feed 8 Advanced Circuit Assemblers according to the math, but I use 7 to prevent under-production.
To continue this onward, extend the copper lines downward and stamp another blueprint!
Processing Units (Blue Chips)Processing Units require a HUGE amount of Circuits to craft, so make sure your Circuit belt is nearest to the Assembler to use Fast Inserters. Long-Arms grab from the belt of half Advanced Circuits, half greens.
Sulfuric Acid Flows between the buildings, and even with an underground pipe in either direction, (to connect new production), there is room for an inserter to off-load.
System Setup Guides 2
Inserter ProductionI have two assemblies for inserter production: one that makes all inserters, and a simpler version that makes only the most commonly used types, (with the expectation that you will craft the filtered versions via handcrafting).
Simple Version:
Start with grabbing green & red circuits off the Main Bus on one belt, then iron & gears on another belt. (I prefer to make gears on-site, so iron comes in on half a belt and gears are placed opposite by the inserter arms).
Next to the gear factory, place an assembler for Red (long-handed) Inserters, skip 3 spaces, then yellow Inserter assembler, skip 3 spaces, etc. until you have assemblers for red, yellow, blue, and green inserters.
In the 3 space gap, place a chest, connected by inserters to the further assemblies. Limit the chest to the number of assemblers you want to produce, either with the rex X on the box, or with a wired condition.
Add inserter arms to grab the needed materials -- gears, red & green circuits, etc.
Note: obviously the gear factory does not produce enough gears to have this running constantly, but it is efficient when you can pick up a stack of 100 inserters, go build, and then they will be refilled by the time you get back.
Basic Inserters Setup
All Inserter Version:
Like the other version, start with grabbing green & red circuits off the Main Bus on one belt, then iron & gears on another belt. (I prefer to make gears on-site, so iron comes in on half a belt and gears are placed opposite by the inserter arms).
Next to the gear factory, place an assembler for Red (long-handed) Inserters. I've economized on this version a bit -- having a chest between yellow and reds, but feeding directly from yellow to blues. You can do it either way you like, keeping a small stockpile for where you want it to go.
The main difference between the two setups is in the Blue inserters -- because they have 2 different destinations, I put them on a belt on the other side of the assemblies, so both purple (filter) inserters and green stack inserters can take them.
White stack filter inserters grab from the box of green stack inserters.
Having ALL inserters avialable ensures that blueprinted designs will not go lacking for components!
All Inserters Setup
System Setup Videos
Hotbar, Hotkeys, And Keyboard Tricks
Hotbar & Hotkeys Assign spots on your hotbar for specific items by middle clicking. (To clear the space, use Ctrl + Middle Click to unassign.) This is handy for when you resupply -- items picked from chests will go straight into their assigned slot.
Numbers 1-5 select the top LEFT row of items in your hotbar. Shift + 1-5 selects the top RIGHT row.
Clicking the circle-arrow symbol in the center of the hotbar (or pressing X) will transpose the top and bottom bars.
Q will remove all items from your hands (and put them back in the slot you took them from).
R rotates items. Clear your hand (with Q) to rotate items already on the ground. Note that you can also change the direction of underground belts with R.
Press Spacebar to shoot (at enemies), and Q to cycle through weapons.
Drop things on the floor (or belt) with Z.
When taking items from a chest or inventory, Shift-Click will take the entire stack. Alt+Click will take ALL of that Type. Extremely useful for example, when you want to empty all wood from your inventory.
Without opening the building info box, you can take materials from a building (output slot) with Ctrl + Left Click. Ctrl + Right Click will take only half of what's there.
Empty your entire inventory to a chest by Ctrl + Left Click on an empty inventory square. Empty the chest back into your inventory by doing the same. (Handy if you are going out to kill biters and don't want to lose materials...)
Use the same combo for filling assemblers with items they need. E.g. if you make an unconnected assembler, and you've already gathered all the components.
You can Copy & Paste production/pickup/request/limit types for various machines including assemblers and Smart Inserters, chests:
Copy: Shift + Right Click.
Paste: Shift + Left Click.
Use your hotbar to split stacks. When put in inventory, all items will combine into the fewest stacks possible, but they don't do so on the hot bar. Example: you want to put 25 ammo in 4 different turrets. You have a stack of 100 in your inventory. Right-click on the stack, splitting it into two 50s. Put 50 into the turret, and right-click on it to split that stack. Place the 25 on your hotbar for the next turret. Repeat & save time :-)
Keyboard Tricks Are rocks blocking your pathway to greatness? Shoot them with your gun! Move your mouse pointer over the rock, and press C to fire. (Running over rocks with a tank works well too! The car will get damaged more significantly when hitting a rock).
C will fire your currently selected weapon, even if there are no enemies present.
To quickly load coal or other materials to buildings, select the item, then press Ctrl + Left Click on the building. It will load a full stack, consuming from your inventory on each building until you run out. (This also works with assigning modules -- very handy to mass-assign all slots to, for example, Efficiency Modules in mid-game.)
You can collect fish from water by "mining" them with the Right Mouse Button. (They are the dark things that move around in lakes). Once "caught", they can be consumed by placing on your hotbar and pressing the corresponding key. They restore a small portion of health when eaten.
Additional Tips
Tree Removal Chop with your pickaxe.
Shoot with your submachine gun (AP ammo is best).
Use a Poison Capsule.
Grenades.
Ram with Tank.
Deconstruct with Roboport bots. (Including those from your Personal Roboport.
Strafe with Shotgun to clear trees in a wide line.
You can strafe with your Combat Shotgun to efficiently clear trees, (a wide enough path for a railroad.)
Use the flamethrower. Be careful, since it will light entire forests on fire. Create a firebreak by using grenades or shooting trees with your SMG.
Forest on fire at night
MultiplayerAsked on the forums: How many people can be in a multiplayer game?
Answer: >400 players at the same time, and 65,535 distinct players in the save file.
Source: https://forums.factorio.com/viewtopic.php?f=11&t=21771#p138313 & MMO YouTube Event.
Since version 0.13.x., there is no need to Port Forward. Use the MP lobby in-game, or invite through Steam.
Editing Your Game
[color=#FF0000]Note: other than changing your player color or looking at evolution, use of console commands WILL DISABLE ACHIEVEMENTS. The game will warn you of this and ask you to repeat the command you want. Be aware.[/color]
Note: Open the Console by pressing the tilde key: ~
Press Enter to execute the command.
Change Player ColorUseful for MP games. Also changes the color of the turrets. (Server color is used.)
/color red
You can use standard colors like: red, green, cyan, blue, yellow, white, etc.
Use:
/help color
to see a list of standard colors.
Players OnlineIn a multiplayer game, you can check the number of players online currently by using:
/p o c
Change the Game SpeedUseful especially when in the first stages of a map -- checking your borders and seeing if you like the terrain, or if you need to take a screenshot at a particular time of day.
Console Code: /c game.speed = Add a number behind it to adjust game speed. 1 is normal speed.
To slow the game, use numbers LESS than 1. E.g. 0.5 for half speed, 0.75 for three-quarters speed. Note that the FPS will drop as well.
Numbers GREATER than 1 speed up the game. 2 is double speed, 3 is triple, etc.
Daylight Always OnThis is really useful for when you want to take a screenshot to share.
Console Code: /c game.surfaces[1].always_day=true
Use "false" at the end to turn Always-On to Off, and resume the normal cycle.
Creating ResourcesAt end-game, especially when your factory grows to monstrous proportions, it can be a full-time occupation just hunting new ore deposits, building train lines, etc. Thus, creating an extremely rich deposit can be a huge annoyance reducer.
(Note: Personally, I only use these at extreme end-game, and place them FAR from my base, using trains for transport).
This command will generate a 21x21 tile area of copper ore with 75k ore per tile.
Console Code: /c local surface = game.player.surface; for y=-10,10 do for x=-10,10 do surface.create_entity({name="copper-ore", amount=75000, position={game.player.position.x+x, game.player.position.y+y}}) end end
"copper-ore" can be replaced with:
iron-ore
stone
coal
crude-oil
The ore field is generated at the player's position.
For extra fun and amusement, you can actually STACK ore fields.... making the extraction & sorting all the more fun. Here are three types of resources generated on top of each other. Note the mining drill's Expected Resources data.
Oil is a bit of a different matter, since it will create an entire field of deposits, and they cannot be easily used because of the size of pumpjacks. It is therefore recommended that you use 0 for the x and y to place a single tile at a time.
Thanks to zytukin for posting this ore spawning command on the forums.
Changing Peaceful Mode Mid-gameIf you started off on Peaceful Mode but decide that your bloodlust isn't being satisfied, you can change this mid-game with the following commands:
To turn peaceful off, use this command:
/c game.player.surface.peaceful_mode = false
To turn peaceful on, use this command:
/c game.player.surface.peaceful_mode = true
After you've done this, use:
/c game.forces["enemy"].kill_all_units()...to kill, and reset all the biters. New ones will spawn right away with their new priorities.
Source:
https://wiki.factorio.com/index.php?title=Console
Change the Evolution FactorEvolution factor dictates what kinds of biters/spitters, etc. will be spawned -- the higher the value, the more dangerous the bases will be.
To check what the current evolution factor is:
/evolution
To set the evolution factor:
/c game.evolution_factor = 0.2
The evolution factor can be between 0 and 1. It starts at 0 and increases over time as pollution and biter nests are destroyed. When it reaches 1 then the highest-level aliens will appear.
Thanks to Moderator daniel0674 for posting this on the forums!
Zooming out of Normal BoundsCaution! Zooming out too far will cause performace slowdown
/c game.player.zoom = 0.1
You can zoom back in slowly using the mouse wheel. To zoom further, change the value above.
Rocket ScoreIf you no longer want to see the rocket score in the UI (after launching a rocket), use the following console code:
/c game.player.gui.left.rocket_score.destroy()
More Console Commands
More console commands are on the wiki[wiki.factorio.com] .
Fun Stuff
If you've reached post-end-game, there are always new amusements to be had!
Create a pipe Maze for friends to traverse.
Maximize production by using Speed Modules in everything -- see if your ore trains can keep up!
Create programming marvels with the logic/circuit system.
Signs! All the signs! Create lettering with flooring that "can be seen from space!" TM
Giant words created from Stone Brick and Concrete flooring -- regular view.
Giant words created from flooring -- overview map.
Build an amusement park! Thrill your friends with curly conveyor constructions, spinning radar, sparkling accumulators, flashing lights; all next to a busy train station for added fun and danger!
More to come!
Watch!
If you'd like to see some of my playthrough on Factorio, please check out my Youtube Channel:
KatherineOfSky Gaming
Tutorial Playlist:
https://www.youtube.com/watch?v=yA21zrqMMq0&list=PL4o6UvJIdPNpm9szThfI-2y3Bv0c3rPlB
Also check out my my Google Drive for BluePrint Strings[drive.google.com] .
Resources
Additional referece for all that is Factorio:
My How to Build a Main Bus Guide -- how to start out, what to the bus, how to put on and take off, etc.
The Factorio Game Forums[forums.factorio.com] - The officical game forums. Good place to find discussions & mods.
Factorio Wiki[wiki.factorio.com] -- LOTS of helpful information here. Official game site.
Factorio Game Guide[guide.factorio.com] -- Great tutorials, again, an official source.
Factorio Cheat Sheets[docs.google.com] -- Very clear illustrated guide to ratios, items/per second, etc.
Factorio Data[factorio.rotol.me] -- Excellent place for finding which components go into what. Also look up ratios for nearly everything in their Factoratio section.
Thank Yous
I want to thank the Factorio Community for sharing their observations on the forums, through YouTube, etc.
I've given credit where I've remembered where I observed specific structures first, but I also want to thank the Factorio Devs[www.factorio.com] ! Since I was a tiny child, I've been waiting for a game like this! Oooooh the conveyor belts!
Source: https://steamcommunity.com/sharedfiles/filedetails/?id=661582295
More Factorio guilds
- All Guilds
- Before The Bus
- Factorio Compact Designs
- Space Age:
- Sandbox mode in 2.0
- How to speed up "Loading Sprites" when game boots up
- Seamless Space-Saving Blueprints (18x18 tiles)
- Rails Signaling for Dummies
- Factorio: How to Build a Main Bus
- Factorio Guide 1061
