
Class
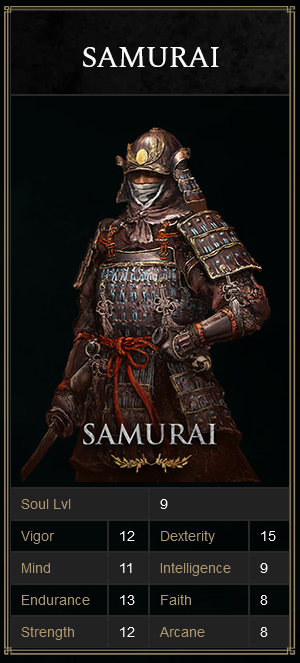
As a very common pick for both beginner AND experienced players, Samurai will be the a great choice to start off with.
He starts off with a;
Longbow
Uchigatana (great weapons even in late game)
and a Red Thorn Roundshield
We are mainly using him for his great stat displacement in
Vigor
Endurance
Strength
and Dexterity (everything required for such an early start)
First Move
Right off of starting, do the standard die to the Scion, run through the beginner area and hit the site of grace - First Step.
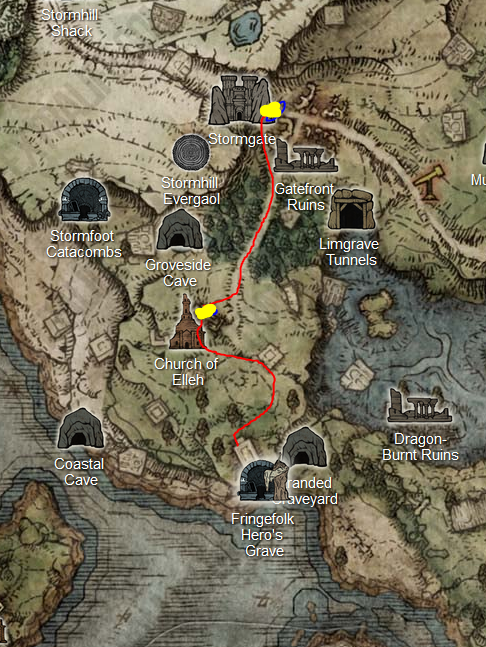
Straight away, sprint past the nightmare inducing horse man and head into the church in front of you, gently fondling the grace. After that you will want to head on a path North-East until you get to Gatefront Ruins. North of the ruins is another site of grace, upon RESTING at the grace you will be visited by waifu maiden, exhausting her dialogue she will give you a item used to summon Chad Horse.
If you are brand new I would suggest using the ruins as a way to learn the mechanics of dodging, light/heavy/charged attacks, also throw a few levels up as well, which preferably spec into Vigor (health).
Loot (optional But Recommended)
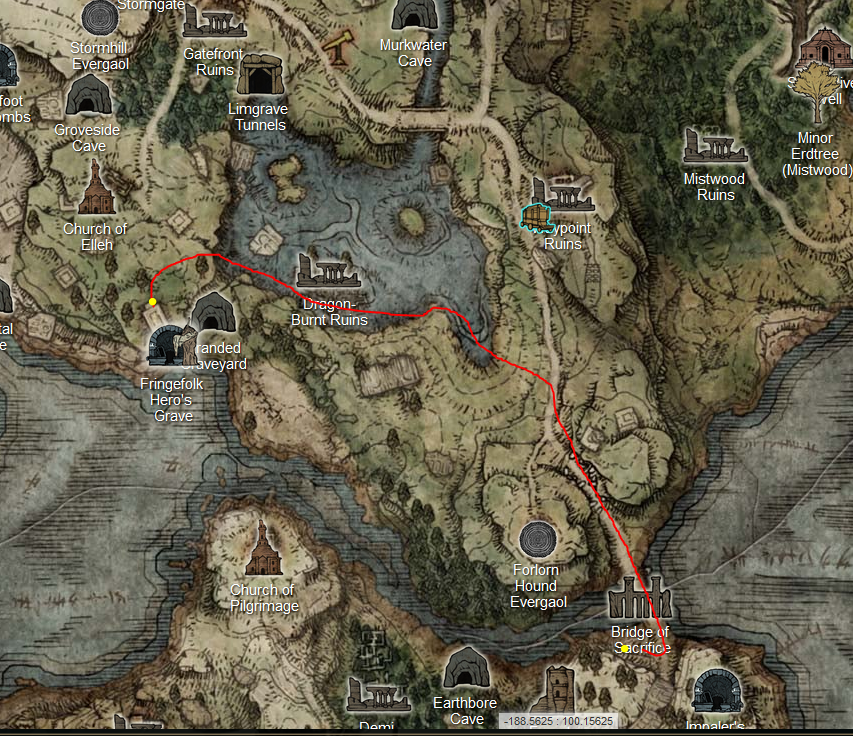
From the North Sit of Grace at the Gatefront Ruins, head up the hill (avoiding the flying bigboi) and follow this path (see imagine bellow). This will take you to Deathtouch Catacombs for ANOTHER Uchigatana, allowing you to powerstance the Katana.
When entering the Catacombs, touch some grass, then the grace, and head down into the depths, you will find a door that is locked, heading LEFT down some more stairs you will find some Skeletons (when you kill them, smack their cheeks one more time so they dont come back) after the second set of stairs, you will be trudging in some mud, make a 180 turn and look for the OVERHANG under the stairs, walking into that and making a left will show you a secret path, following that and hugging left will bring you a corpse no husband hanging over a ledge, the body contains an Uchigatana. Either pull the leaver close by and fight the boss or dont, the talisman he drops isnt vital.
Loot (Required For Both Story AND Progression)
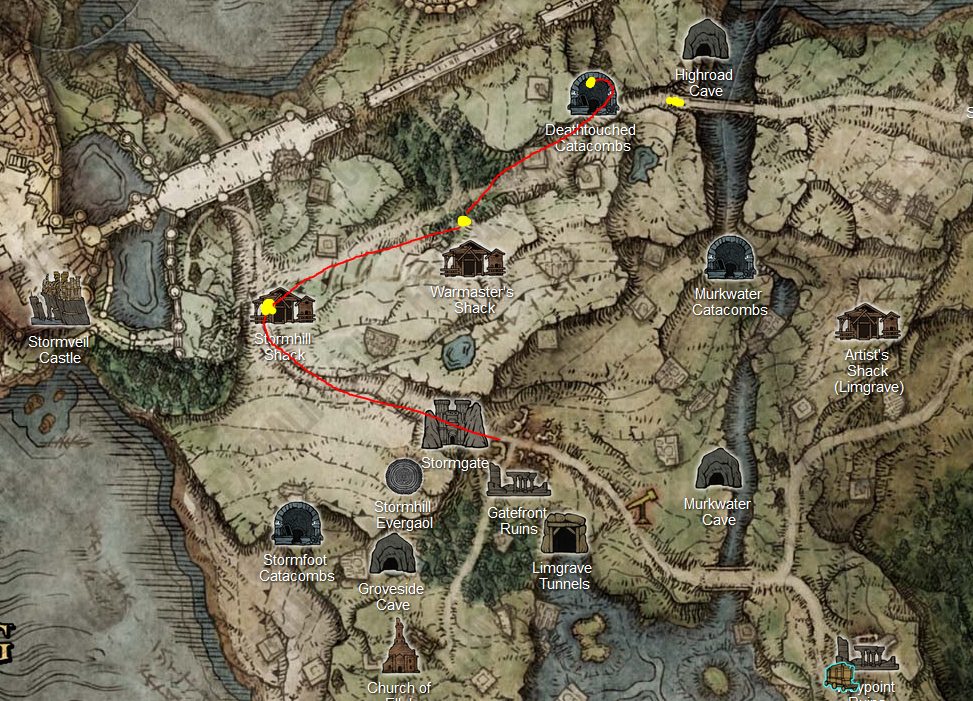
heading back to the Site of Grace at the first Ruins you found, following the path directly South you will cross a bridge and find a convoy being pulled by 2 giants a seemingly an army right behind him. Heading up the hill on the left of the giants will lead you to Waypoint Ruins (Optional bossfight - Mad Pumpkin head) to the East of the Ruins will bring you to a Spirit Spring just behind a Red Scarab, using Torrent jump INTO the Spirit Spring from atop the cliff side to fall into the forest bellow safely, continue near directly South and you will find a path, following it to the right will bring you to Fort Haight.
Make sure to get the site of grace just to the right before the barracks of the Fort.
Progressing through the Fort, head to the left up some stairs upon entering up a couple flight of stairs, killing the leader and acquiring the Bloody Slash ashes of war. You will want this for later. after muffling the flames of this lowlife, climb a set of ladders and open the chest at the top, giving you have of a medallion.
This part is semi-optional, great for rune farming doesnt need to be completed if you dont want to cheese too much
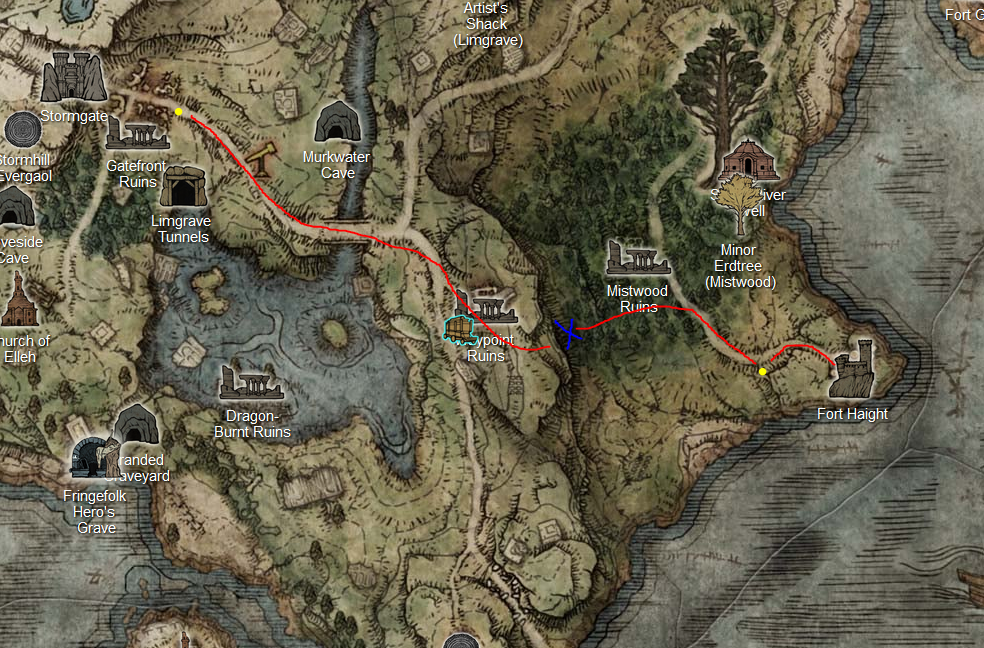
Heading back out the front of the Fort (or fast travelling to the closest Grace you should of touched) follow the path North for some time until you come across an opening, a little further a head will be the Third Church of Marika. Pick up the Sacred Tear and the NEW PHYSICK FLASK! used for applying buffs (Will look at that later) to behind the Church should be a little body of water, following that water into some foliage will bring you to a way gate. Touching this waygate will teleport you to somewhere completely new and too high levelled for you.
Before leaving, turn around and open the doors to the Clergy Man, touching his grace you are safe to set off and find the BEST early Rune farm. I would recommed watching a video for this so heres that
Heading into the Fort and avoiding enemies, climbing some ladders will bring you to a chest containing the second half of the medallion.
Stat Displacement
early game you want to be focusing on that BLEED damage.
A Hemorrhage builds up slowly, causing great damage once the threshold is reached. The damage is equal to a percentage of the target's Max HP.
Hemorrhage inflicts 15% of a normal enemy's max HP and 7% of a boss's HP, plus 100 or 200 damage depending on the weapon used.
By level 100 (easily achieveable by farming the dragon, your stats should look similar to this
I would recommending investing purely into 45 Arcane right away then work up the rest as thats what scales your bleed damage.
Keep in mind that
Vigor
Mind
Strength
Dexterity
all softcap at level 60, while
intellect
Faith
Arcane
softcap at 80
so its preferably to invest higher into those as they supply better performance over time compared to the rest that stop showing results sooner.
Post-100 Farming And Items
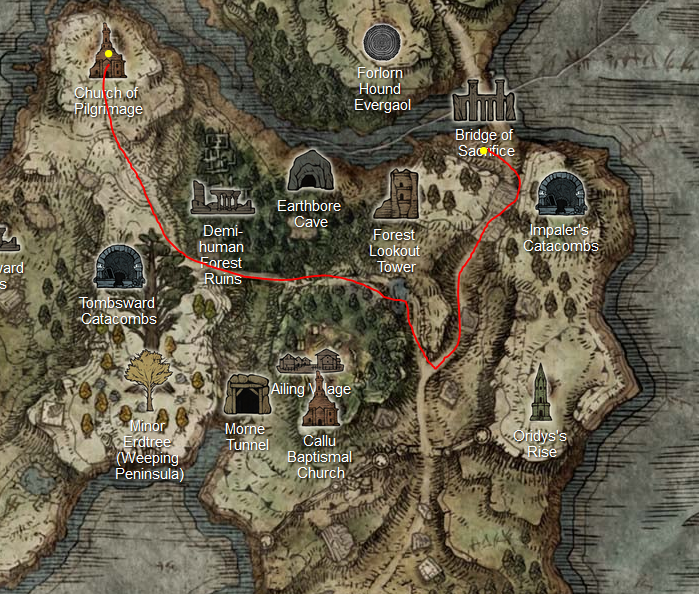
ok good, assuming you killed the big guy from Fort Haight and got bloody blade, you will want to head South to the bottom of the starting area until you find the Bridge of Sacrifice|
After that following this path you will come across a church with a Grave site of the North, in the Grave will be 3 enemies, 1 is holding 2 swords, killing him (making sure to double tap for true death) he has a 2-3% chance to drop his swords. These scale PERFECTLY with arc and are insane for bleed builds.
After getting the swords, head so the South for a merchant thats selling Lost Ashes of War to duplicate the Bloody Slash, required 3000 runes for the Lost Ashes
after buying the Lost Ashes, head to the Roundtable and duplicate bloody slash at the blacksmith, applying to both of the curved swords using blood affinity.
you get your second Talisman slot after killing Godrick: The Grafted
third at handing in a second Remembrance to the Roundtable
and the fourth and final after killing Morgott (later game)
so to prepare for this, these are the 4 talisman you want to be equipped with and when you should unlock them and what replaces them as story progresses
Radagons Soreseal[eldenring.wiki.fextralife.com] Unlocked at the dragon farm
Winged Sword Insignia[eldenring.wiki.fextralife.com] Can be unlocked at start of game, but preferred to get after levelling a little, replaces Radagons Soreseal. And later replaced by Rotten Winged Sword Insignia if continued with Millicents quest[eldenring.wiki.fextralife.com]
Second Slot
Claw Talisman[eldenring.wiki.fextralife.com] unlocked after killing Margit, found in castle, seek youtube for location
Third slot
Lord of Blood's Exaltation[eldenring.wiki.fextralife.com]
found after entering Capital and before killing Morgott (unlocking 4th slot)
Fourth Slot
Getting on later game, depending on which quest you completed or stopped early (By mercy killings, ofc) will change HOW the build is, this build CAN NOT be 100% completed on the first run OR without trading/muling items
so in the final slot you got some options
Warrior Jar Shard(if killed Alexander early/pre-azula)[eldenring.wiki.fextralife.com]
Shard of Alexander(if completed his quest and killed him in Azula)[eldenring.wiki.fextralife.com]
or Millicent's Prothesis[eldenring.wiki.fextralife.com]
(if killed before Azula and helping her by defending against invaders. Can be obtained as early as giving her the Prothesis arm and located in Dominula Windmill Village)
End Result
Slot 1
Radagons Soreseal>Winged Sword Insignia>Rotten Winged Sword Insignia
Slot 2
Claw Talisman
Slot 3
Lord of Bloods Exaltation
Slot 4
Warrior Jar Shard>Shard of Alexander
or Millicents Prothesis
AMOR
This one is Easy
White Mask[eldenring.wiki.fextralife.com]
and
Raptor's Black Feathers[eldenring.wiki.fextralife.com]
Arms and Legs can either be cosmetic or useful, keep within Med. Equipload
IMPORTANT
Make sure to pick up the Scavengers Curved Sword[eldenring.wiki.fextralife.com] on Mnt. Gelmir, either integrate this early OR save it for NG+ where the build is complete
Late Game Levelling
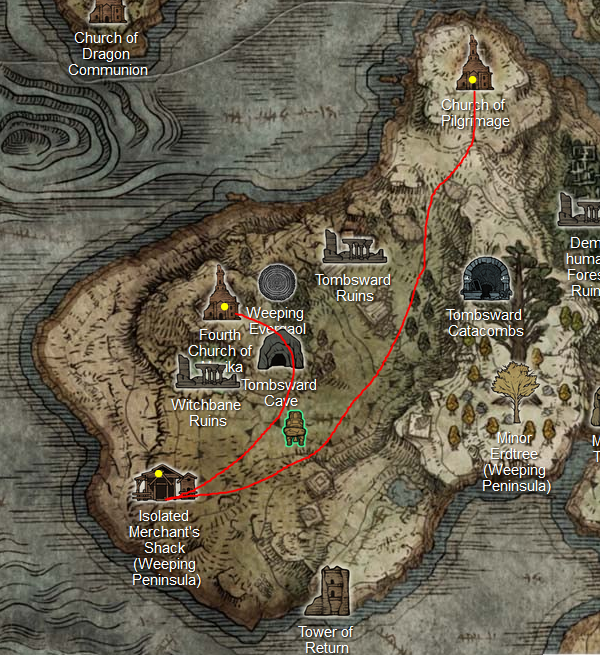
Use this tutorial to get to the Mohgwyn Palace for this late game rune farming
upon reach level 200 your stats would want to look something like this, focusing mainly arcane and splitting the rest between End/Vig
NG+ Loot
Use this to collect the upgraded version of Winged Sword Insignia OR grab the Millicents Prothesis, you want both of these equipped for best effect and bleed dmg.
Also grab the second Scavengers Curved Sword. With this now, find the Seppuku[eldenring.wiki.fextralife.com] Ashes of War and apply this to both swords. With this final step complete so is your build. Go remove HP for me.
MUST READ ~ BUILD EXPLAINED
Curved Swords work best when dual wielding jump attacking, hitting up to 4 times in 1 attack, stacking lots of bleed dmg on the enemy.
When applying Seppuku, make sure to apply WITH Occult affinity
Source: https://steamcommunity.com/sharedfiles/filedetails/?id=2834150274
More ELDEN RING guilds
- All Guilds
- ELDEN RING Guide 2338
- ELDEN RING Guide 2336
- How to stop playing Elden Ring
- ; ( )
- Tip on Malenia's waterfowl dance
- Basic tutorial on how to play
- ELDEN RING Guide 2326
- How to rizz up malenia
- How to obtain an accord
- ELDEN RING Guide 2323