
Introduction
This guide will introduce you vaguely to modding DF then provide a small but dense cheatsheet of the stuff involved in RAWs for graphics.
This guide also assumes you are ADDING creatures, not changing original ones. Editing vanilla creatures has extra steps involved related to CUT and SELECT tokens that you can learn about elsewhere.
If you want to know the whole process of creating a mod this guide does not provide that; it is simply a reference for those trying to navigate the files needed to create their work.
The second section is more or less a cheat sheet rather than a walkthrough per se. Once you look at the raws Dwarf Fortress has you'll pick up on what you need to copy and paste and the images taken are of files that are completely in working order to produce the mod I created here.
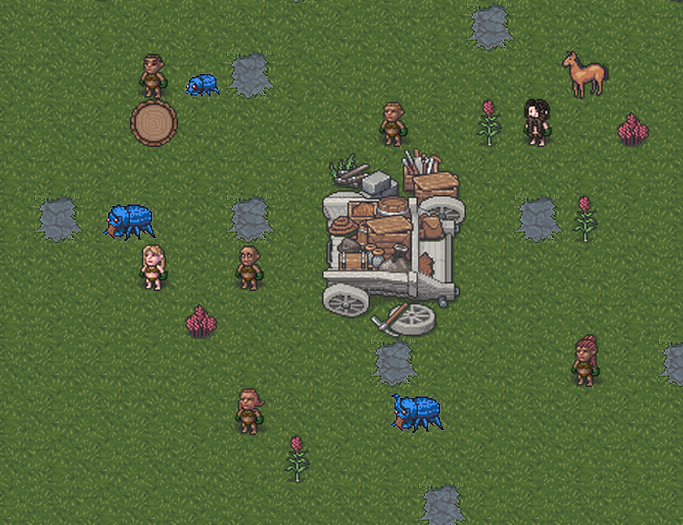
The creature RAWs that I used for the Horn Beetle are credit to Squamous and Kruggsmash, I just made the pixelart.
I don't generally make guides but I have been single minded on this game lately. Just let me know in the comments if there's improvements I can make to the guide (be they merely language adjustments or formatting changes or further information..)
Getting Started

First thing you have to do is find your Dwarf Fortress folder in the Steam directory.
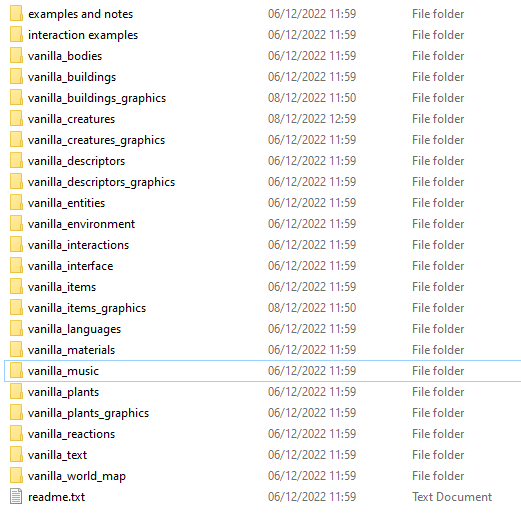
yoursteamfolders... >> \SteamLibrary\steamapps\common\Dwarf Fortress\data\vanilla contains the 'RAWS' as people call them. These are light .txt files that contain classification information for creatures, materials, language, etc. It makes DF very moddable and modular but can be overwhelming.
Non-steam DF has all the txt files laid out in one folder, but for steam version they segregated them into sub folders which carry an info.txt that makes them into distinct 'Mods' when playing the game.
Figure 01 The Vanilla Subfolders as seen in the data\Vanilla folder
There is an installed mods folder where steam workshop mods are downloaded to. SteamLibrary\steamapps\common\Dwarf Fortress\data\installed_mods\Mod_Title
What I did because I'm lazy was download something random off the steam workshop and just the replace the files that are inside of it with what I wanted to work with, making it my own sandbox for modding, and the game recognises it when in world creation.
Figure 02 Inside the folder of your mod should follow the same structure as inside any of the vanilla subfolders, which means putting in an 'objects' and/or 'graphics' folder, and having an info.txt
/objects/ are basically every .txt raw except for ones directly related to graphics.
In the /graphics/ folder you create an /images/ subfolder, within which you place your pixelart as a transparent .png—with resolution divisible ideally by 32 pixels into there.
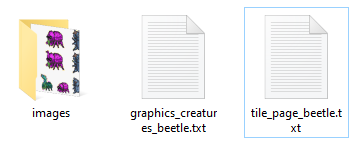
Figure 03 How the inside of /graphics/ looks by the end of this. A graphics_creatures_x txt, a tile_page_x txt, and a graphics_creatures_x png in the /images/ folder.
IMPORTANT: The titles of these files MUST start with graphics_creatures_ and tile_page_.
Additionally, the 4th file--the creature raws--is contained in the objects folder. Creating creature raws is a different project however and this file will only be skimmed for whats important here. (Fortunately, only one thing.)
Cheat Sheet
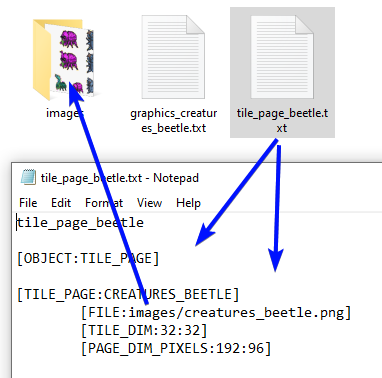

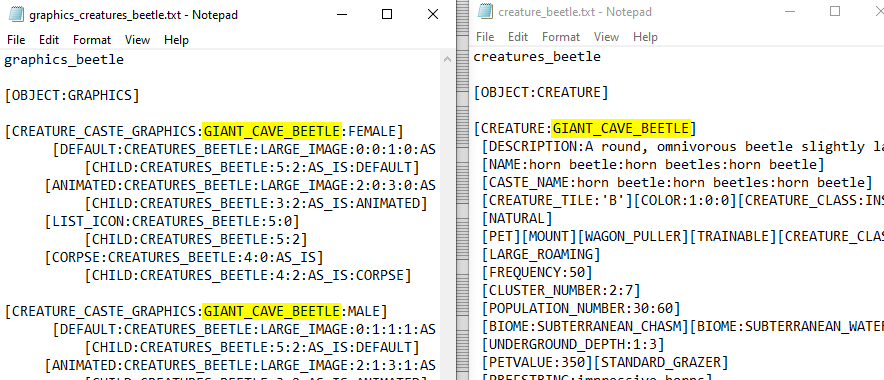
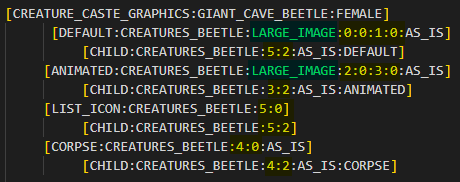
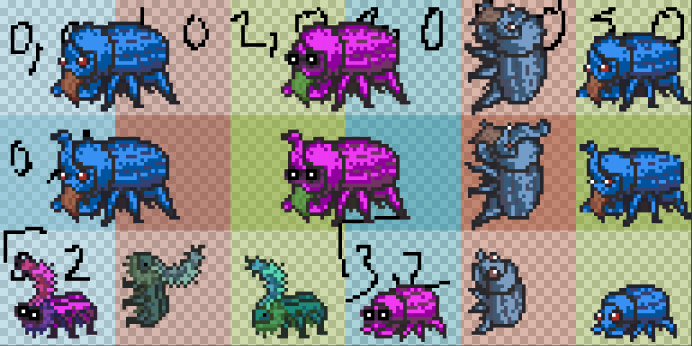
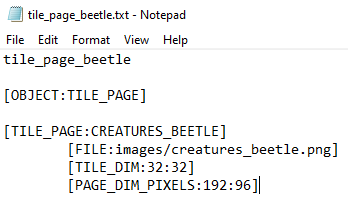
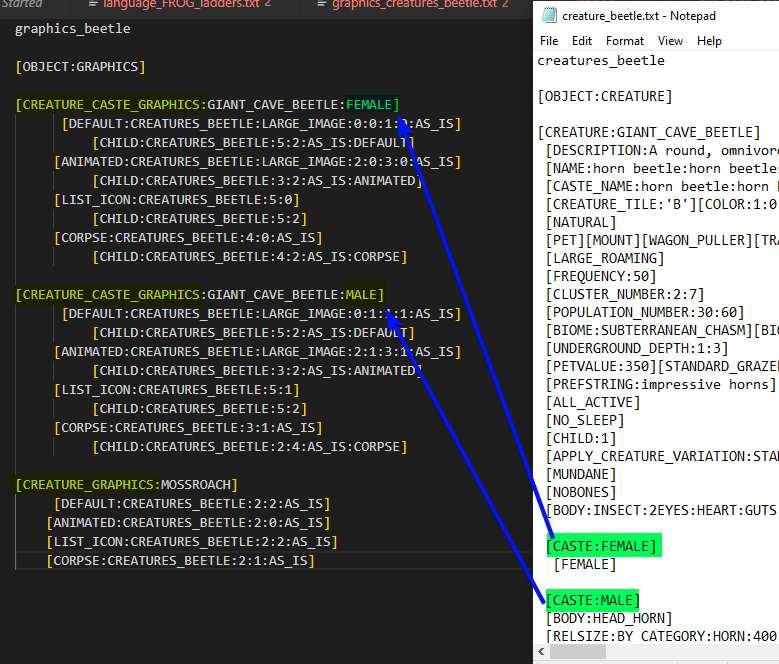
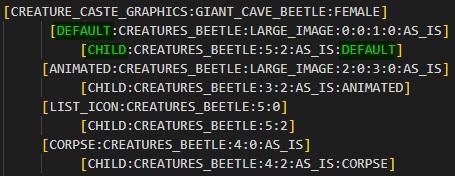
Figure A: Inside the tile_page_x.txt there must be a TILE_PAGE: token with a FILE: subtoken. You put images/graphics_creatures_x.png inside of here.
You can also see [OBJECT:TILE_PAGE] at the top. It's important to have the OBJECT token in your files so their purpose can be identified by the game.
Figure B: The title in the tile_page_x.txt (in this case CREATURES_BEETLE) is the token that will be referenced in the graphics_creatures_x.txt.
Figure C: The title token when defining the graphics is referring to the title token of the original raws of the creature (the creatures_beetle.txt in this case)
Figure D: LARGE_IMAGE token is followed by four numbers (eg 1:2:3:4), and indicates referencing a multi-tile sprite, with the first two numbers being the coordinates (x [horizontal], y [vertical]) of the top left corner and the second two being the coordinates of the bottom right corner.
Note: coordinates start at 0, not 1. Coordinates are defined by a tile-by-tile segregation of the referred .png.
Note that you can use LARGE_IMAGE references and single tile references on the same .png. You can also reference the same tile multiple times without any errors.
Figure E: The creatures_beetle.png. The original is 192x96 pixels, distributed into 32x32 tiles. Note the highlighted numbers in Figure 6 and compare to this image. Top left, female horn beetle, takes up tiles 0,0 to 1,0. In token terms, LARGE_IMAGE:0:0:1:0.
Figure F: Tile size are established in the tile_page_x.txt’s [TILE_DIM:x:y] x:y being the ratio of pixels (eg 32x32 or 24x24 pixels). 32 is the default.
In the title_page_x.txt the PAGE_DIM_PIXELS must match the proportions of the .png, 192:96 in the reference image meaning the image is 192 pixels wide and 96 pixels tall. Also make sure your png is exported correctly, correct dimensions etc.
Figure G: You can use CREATURE_CASTE_GRAPHICS token to start your coordinating of tiles for your critter, if you want to reference different tiles depending on the caste of the critter. The most common Caste distinction you will see will be MALE and FEMALE, but other examples exist (eg ant people have drones, workers, queen). Otherwise, you just use CREATURE_GRAPHICS
Figure H: In the case of Children there is a hardcode instead of Caste. You make a line starting with the Child token, as seen here. Make sure that you put the condition token with the Child definer (DEFAULT, ANIMATED, CORPSE, LIST_ICON)
I have no idea what the :AS_IS: does, but it seems to be necessary on DEFAULT, ANIMATED, and CORPSE graphics, and without it things seem to break.
Thanks For Reading!
Source: https://steamcommunity.com/sharedfiles/filedetails/?id=2899316573
More Dwarf Fortress guilds
- All Guilds
- How to make an adventurer survive in adventure mode.
- Translate into other languages
- [PT-BR] ADVENTURE MODE - GUIA COMPLETO
- DFHack
- DFHack is not running
- Force Militia to Equip Boots+Gauntlets
- Infinite Steel (Leggings Exploit)
- Turn Obsidian into Sand
- How to Create Squads
- Making Artificial Volcanoes and Magma Landmines