Introduction
Creating above ground constructions in Dwarf Fortress is something that a lot of new players can struggle with as it differs from many other colony building games. This guide aims to ease new players in and help you get to grips with the construction system in game.
As an example for this guide we will look to make a simple 2 story house. When building above ground constructions it is usually easier to build 1 layer at a time, which is the method I will be using in this guide. Of course once you get more confident you can build as you like!
Step 1 - Building Materials


Before we begin our above ground construction we need to acquire our materials. You can construct walls/floors out of 5 materials:
Wood
Stone
Metal
Ceramic
GlassEach 'item' will be enough to produce one tiles worth of wall, ramp or floor (or half a constructed staircase spanning 2 floors). So to create a wall 4 tiles long we would need 4 wood logs. As you can see we would need a lot of logs to create a whole log tower!
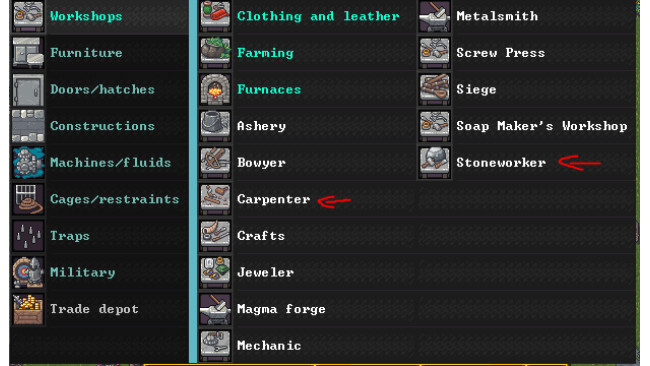
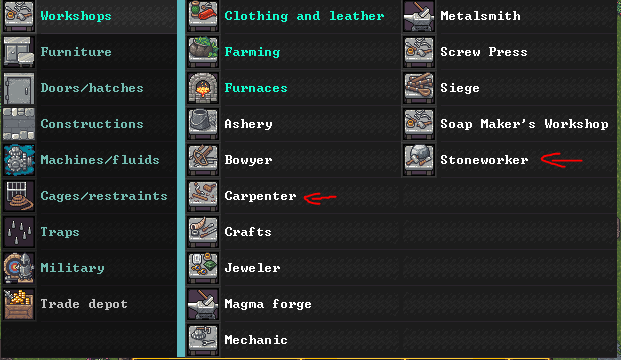
However there is a workaround which will allow us to quadruple our construction supplies for wood and stone, we can turn those materials into blocks! Each 1 stone boulder/wood log can be turned into 4 blocks. You can do this from the carpenters/stoneworkers workshop.
Once you have built the workshop you can either create a work order to produce as many blocks as you want, or put them job as 'repeat forever' in the workshop. Work orders are probably better for this. In order to this go to the work orders screen and search for 'Rock Block' or 'Wooden Block' (as required) and select it.
From there we need to select the material we want to use, otherwise our dwarves will just use whatever materials they want. Click on the magnifying glass and find the material you want. In my case I have a lot of apricot wood so I will be using that.
If you have selected the correct material you should see the work order changed on the left.
Each time a dwarf creates a wooden block it produces 4, so in my orders case it will produce 40 apricot wood blocks. Wooden blocks can be stored in wooden bins (logs and stones can't) so they are easier to store. Creating a stockpile nearby your construction area is a good idea to limit travel time.
Step 2 - Building Walls (Ground Floor)
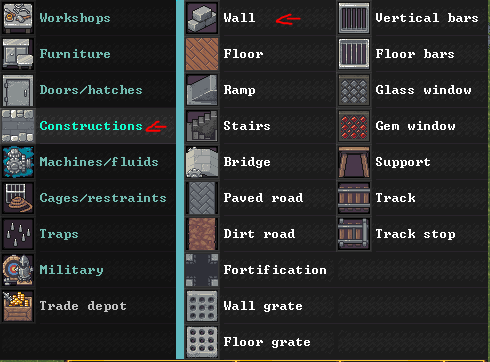
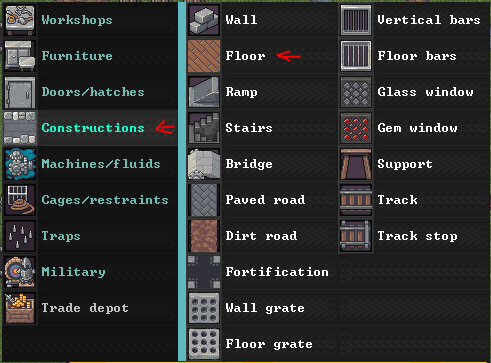
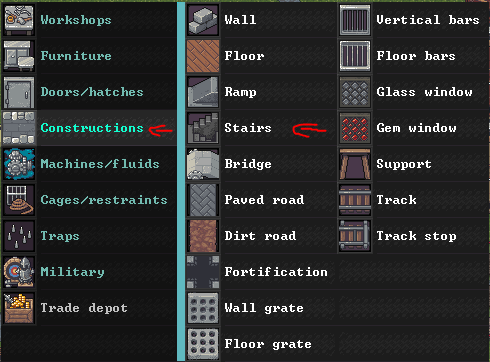
Every building needs some walls so lets get started. You can build walls from the construction menu.
Make sure you have 'select material after placement' selected so you can tell your dwarves what materials to use, as well as keep building after placement if you want to build more than just a line.
Start by creating a line (not a square) and then clicking the material you want to use by clicking ALL. Once that is done you should see a ghost outline on the map. Feel free to keep building, leaving a gap for your door. You can leave a bigger gap if you like (useful if you want merchant carts to come in), the upper floors wont collapse as long as 1 wall tile remains connected on the lower floor.
There is something to keep in mind when designating wall orders. In order to build walls dwarves need to be able to access the tile the wall is to be built on from the north, south, east or west. This means they cannot build the wall if the only way to access it is DIAGONALLY.
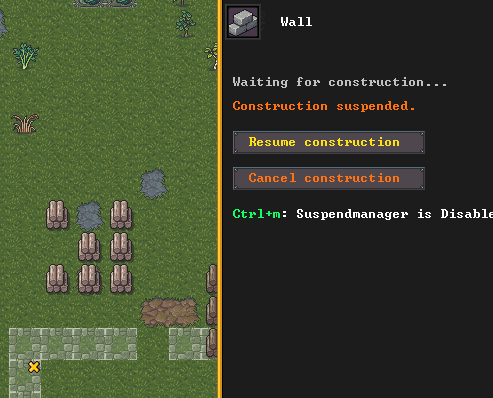
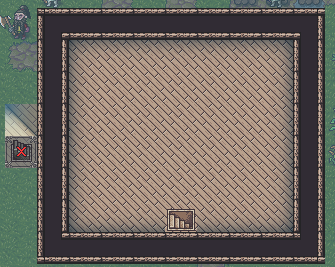
In my example this isnt a problem because it is on the ground level and the dwarves can access either side. However, if I was building the next floor up the dwarves might not be able to build the corner pieces if they build the adjacent walls first. In order to stop this we can suspect construction on the walls nextdoor, by clicking on the ghost outline and suspending construction.
You can see in the above the 'x' showing it is suspended. We can resume construction in the same way when we are ready.
This menu also allows you to remove ghost construction as well. Currently you cannot 'mass' remove constructions so its best to not mess up unless you fancy doing a lot of clicking!
In the below we can see my dwarves have built all the walls apart from the suspend one. Jobs (almost) done!
Troubleshooting Walls need to be built on top of a floor (ie the tile below it cannot be open air). If you cant build a wall on a tile build a floor first.
Be careful about walling/cutting dwarves off. If they get stuck they can be a real pain to get out, especially if they are high up!
Step 3 - Building Floors (Ground Floor)

Building floors on the ground floor is really easy, as chances are you are just building them over the earth. Lets cover them off quickly.
Walls use the same materials as before and are designated in the same way walls.
Just drag the floors all over where you want them built on the ground floor. If you want to have the entrance as a floor tile designate that as well.
Floors cannot be built if furniture or doors are on the tile so if you want to put floors under furniture that already exists you will need to remove it from the tile. Click on the furniture in question and click on the deconstruct icon. Dont worry this wont destroy the furniture and once the floor is done you can put it back in its place.
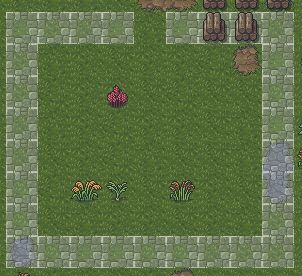
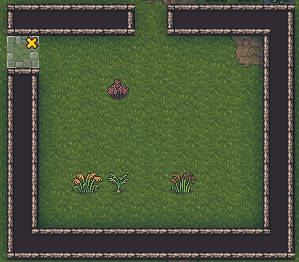
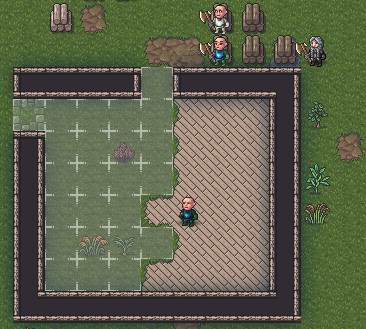
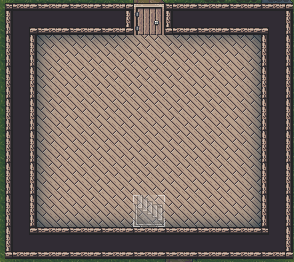
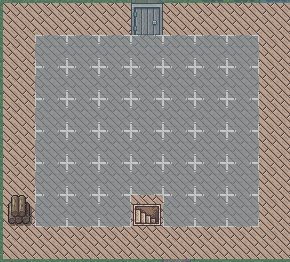
Here is my construction midway through. All the plants will be removed as part of the process with no further input required.
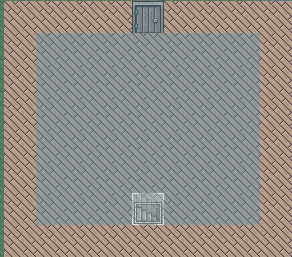
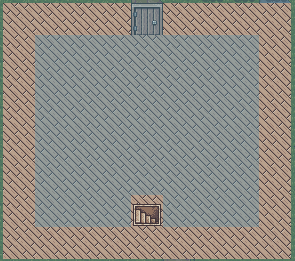
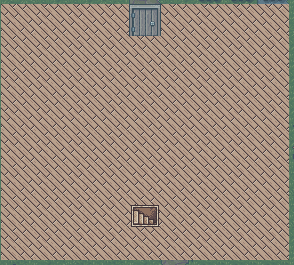
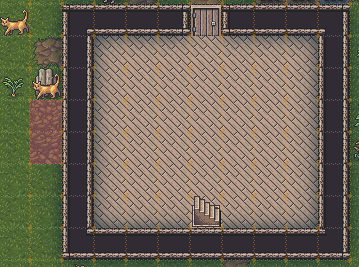
And here is the first floor construction finished! Of course, this building has no roof so any dwarf inside is going to be getting pretty wet. We will sort this out in due course.
Step 4 - Building Stairs (Going Up!)
Up to now things have been pretty easy but its time to go up and build higher!
In order to build the next floor we need to get our dwarves up a 'z' level. Z levels are the vertical plane levels. We have 2 options to get our dwarves up a level, ramps or stairs. Ramps on a tile allow a Dwarf to move diagonally up or down a 'z' level while stairs allow a dwarf to move up down a z level vertically (in the same tile). As I want to build another floor lets focus on stairs.
Constructed stairs are different to the stairs you will have dug out of the earth in the past. They have a few differences:
Constructed stairs cannot be built on tiles without a floor (this is more crucial if you are trying to replace dug out stairs, as dug out stairs remove the floor on the z level they are on.
Constructed stairs cannot be built down into the unknown (dug out stairs can).Constructed stairs can be found in the construction menu under stairs.
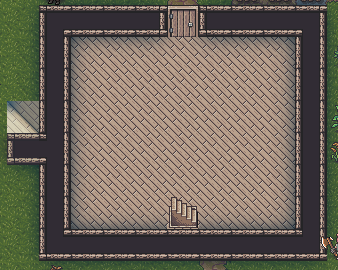
To build the stairs start on the z level you want the stairs to start (ground floor in this case) and scroll up to the next z level. You should see a ghost stairs on both z levels.
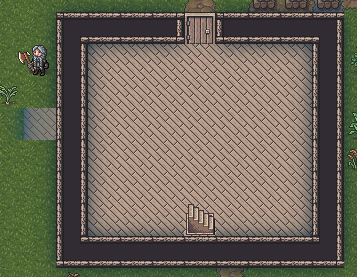
If you are an eagle eyed Urist you might spot that the walls we built in step 1 have created 'floors' above them. Dwarves can walk on walls as they are floors on the z level above.
With the stairs built the dwarves can now access the next floor and in my case can walk on the walls if they so wish. Dont worry if you built your stairs away from the walls, you can still build out from the stairs as they act as a sort of 'walk through floor' on the z level they are on.
Step 5 - Building The Next Level
Lets get the this floor of our building sorted! The good news is that both walls and floors can be built on any tile as long as they have north/south/east/west connection with a wall/floor on on a neighbouring tile. So yes that means we can build our floor tiles above thin air as long as they are connected!
Start off by designating all your floor tiles to be constructed. This shouldnt get any of your dwarvs stuck but you may get the odd suspended floor construction if they try and construct in a weird order. Unpause these as and when they can access the tile.
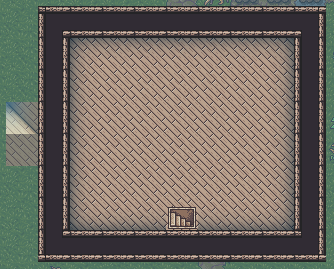
At this point you might have figured it out but its worth stating - in Dwarf Fortress you do not build roofs as such, you instead build floors on a higher z level which act as a roof to the lower z level. With these floors built our ground floor is now safe from rain.
Once all the floors are built we can build the walls for this floor. Remember that your dwarves cannot access the outside of the building on this z level, so be careful of stuck dwarves and your corner wall pieces. Suspect constructions as required to get the job done safely. You can also build a wall on this z level even if the below tile doesnt have a floor, as long as they are connected to the floor by another tile. This means I can build a wall over my door even though that tile doesnt have a floor.
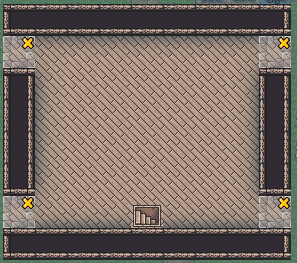
In the above picture note my suspended wall constructions, in order to allow the corner walls to be constructed without issue.
With this done the floor has been constructed. We could keep going up and up but instead lets finish this building off by constructing a 'roof'.
Step 6 - Building The Roof (with Ramps!)

As I previously stated you do not build 'roofs' in Dwarf Fortress you build floors on the z level above. Doing this can be tricky. We could continue our indoor staircase up but we would then have a hole if we deconstruct the staircase (not to mention a dwarf stuck on the roof!).
Originally posted by Future Slippy: Future Slippy here - Id like to point out that you could (and probably should) just build a constructed staircase from the ground going up alongside the building to where you want to build the roof. Once the 'roof' is built, deconstruct the staircase bit by bit starting at the top. Its faster then the ramp method, but ill leave the ramp method below to explain what ramps are and what you could use them for.
In cases like these it can be useful to think about real life. In real life what do builders do to access high up places? They build scaffolding! We can do something similar in Dwarf Fortress by using ramps.
Ramps are a bit like stairs but instead of dwarf going up to the next z level directly they go diagonally up. The tile with a hex in it is 'half filled'. Ramps are already all over the world but we can construct our own, and most importantly they can be deconstructed without having a dwarf stuck on the roof.
Go back to the ground floor and open the construction menu and click on ramp.
Now select a tile next to a ground floor wall tile and double click (no scrolling!). This will build a ramp on this z level going up to the next. Material doesn't matter, we are going to remove these when we are done.
With the ramp built, on the same z level build a wall next to it to act as our 'scaffolding'
Now scroll up z level and build another ramp on the wall we just built, in the same way we built the previous ramp. This will build a ramp on this layer.
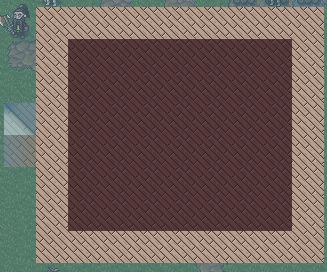
You now should have access to the top of the building! Designate the empty areas for floor construction. Remember you have a wall on the outer of the building so you wont need to put a floor on them, but you can do if you want to change the colour. Below is my finished roof (with different colour to prove I filled it in!)
In theory we could keep going up and up if we wanted to using this method
With the roof filled in we can deconstruct the the scaffolding piece by piece in the REVERSE order to how we built it.
Step 7 - Deconstruction

No matter how well you build you might want to make changes, remove flooring and in (our case) remove scaffolding. To do this we need to use the 'deconstruct tool' under the mining/digging orders.
Simply select the things you want deconstructed and your dwarves will get to work. In the case of removing scaffolding do it top down piece by piece to ensure no dwarves get stuck. Remember the final ramp was the z level just below the roof, if you are on the roof z level the deconstruct tool wont work. Note in the image below I am only deconstructing the final ramp we built.
Here is the final image with all the scaffolding taken down. Note the 2 'dirt' floors that have been created. While unsightly for now grass or loam will 'grow' over the top of it causing it to blend in just fine in time.
Summary
And there you have it! You have constructed a simple house with multiple stories and a roof, all without getting any dwarves stuck on the roof or in the walls (hopefully).
There is plenty more you can do with outdoor building but that goes beyond the scope of this guide. Let your imagination run wild. Don't forget with the skills you have learnt here you can build walls, ramps and floors underground as well!
Unsolicited Advertising SectionWhile you are here - let me take a moment to plug my other relevant guide. If you are creating a lot of blocks you are going to need a lot of stone and wood. Why not use a quantum stockpile to neatly store your wood and stone in a fraction of the space? Click below if you would like to know more.
https://steamcommunity.com/sharedfiles/filedetails/?id=3044882095
Source: https://steamcommunity.com/sharedfiles/filedetails/?id=3107123230
More Dwarf Fortress guilds
- All Guilds
- Finding Lairs [Adventure mode]
- Kosten effizienter Start [v0.1]
- Default Oldschool World Options
- World Map Key/Legend
- A humble guide - how to bury your dwarves.
- Bringing the Old Music Back to Dwarf Fortress
- Soap tutorial
- Dwarf Fortress - Orchard Guide
- Dwarf Fortress Location Guide
- glass industry