
A guide to find all 9 Entropic Shards to unlock your Stasis aspects.
What You'll Need
- Salvation's Grip
- Ammo for Salvation's Grip
- the "Aspect of Control" quest
- Boots for Walkin'
- Guns for Shootin'
Remember, these shards have to be shot with salvation's grip in order to correctly count. You will know if it works because you will gain an amount of xp that will pop up as an overlay at the bottom of your screen.
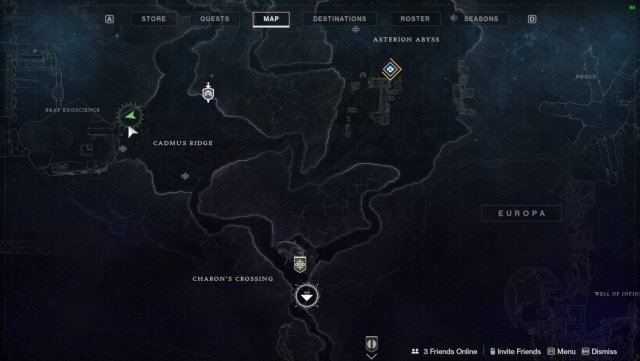
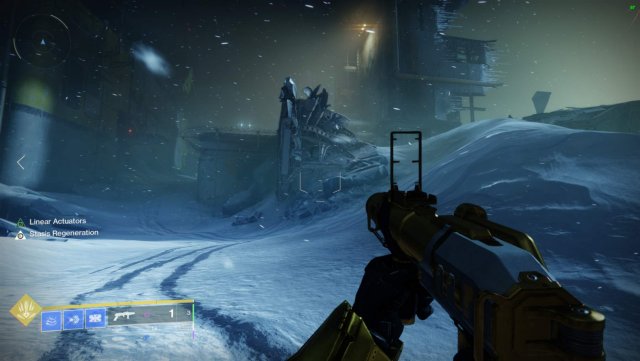
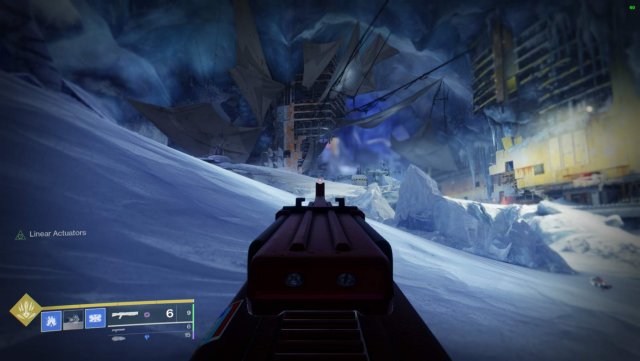
Entropic Shard #1: Cadmus Ridge
This one's the most straightforward of the bunch. Travel from Charon's Crossing to Cadmus Ridge, then sparrow over to the entrance of Bray Exoscience. To the right of the entrance should be a ledge. Under that ledge to the right will be your first Entropic Shard.
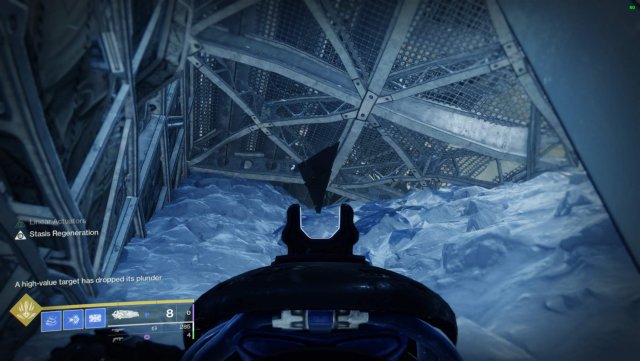
Entropic Shard #2: Creation
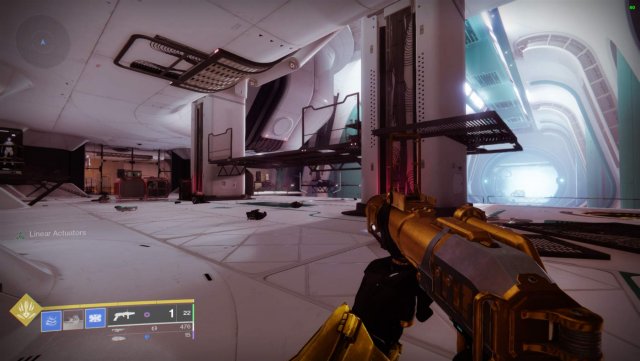
For this one, you'll want to enter Bray Exoscience and go towards Creation, the area that was unlocked after the raid was first completed. The path is very linear, and you don't have to worry about looking for anything until you reach the large room with the bridges.
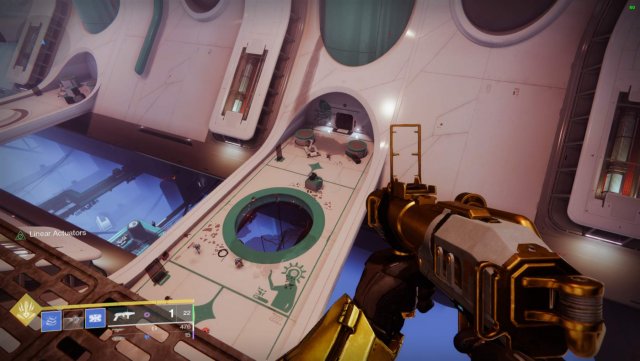
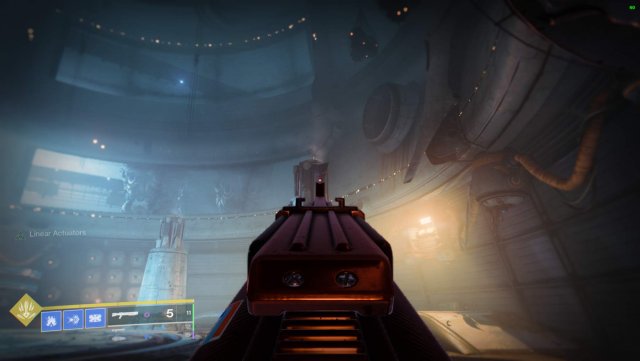
You'll want to go towards the catwalk my reticle is on and jump down onto the bridge.
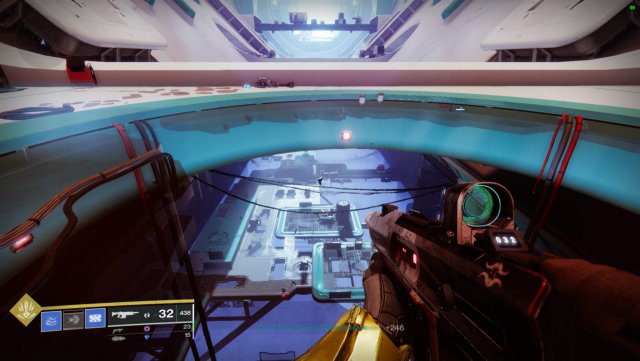
For this last one, you don't have to jump down to get it, I recommend just fully charging salvation's grip and using the little target to mark the shard. It's floating in the air below the bridge. Although the resolution is a bit... terrible, my reticle is directly on the shard.
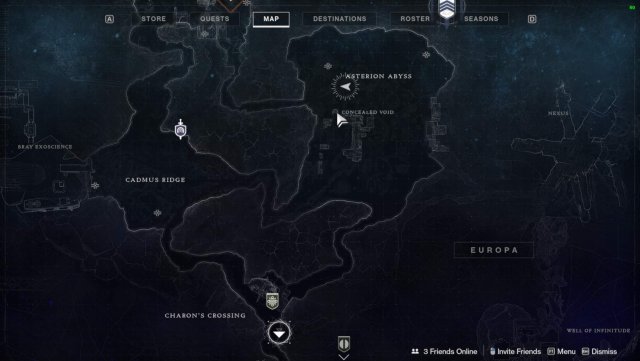
Entropic Shard #3: Asterion Abyss
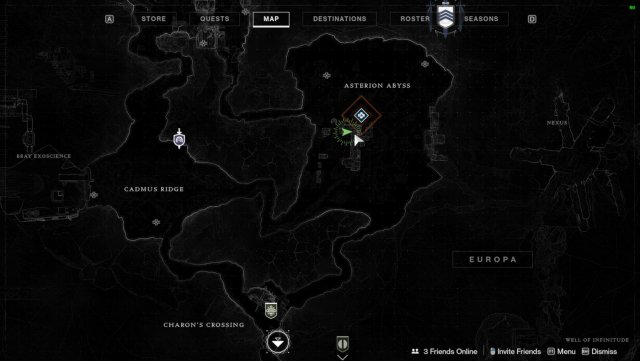
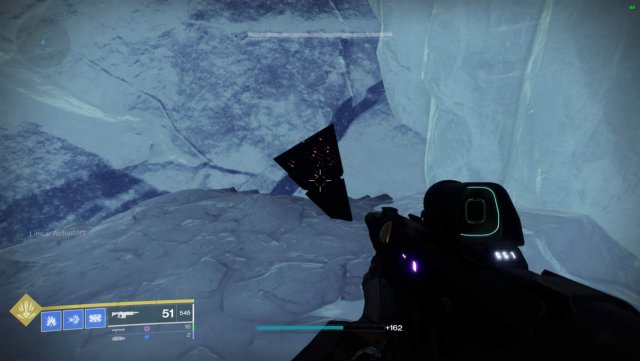
For your second shard, make your way over to Asterion Abyss. There should be a giant vex structure in the middle of the section. Climb up it using the ramp-like platform to the east, then jump up onto a ledge. There should be a small box-like wall, and around the corner to your right (if you're facing west) should be the second Entropic Shard.
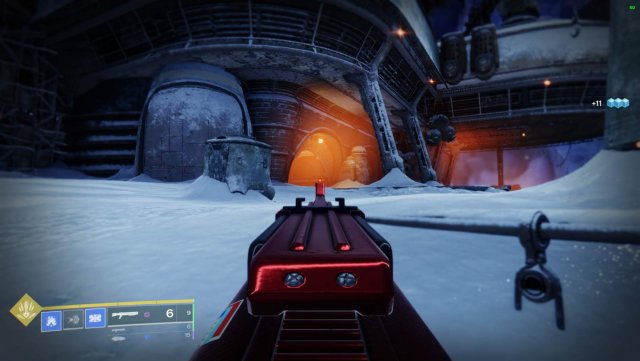
Entropic Shard #4: Concealed Void
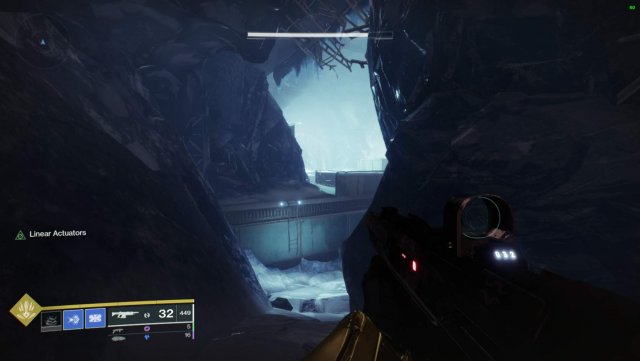
For this one, you're going to want to enter the lost sector Concealed Void. It can be found underneath the giant vex structure you were just at for the second one, so there is no need to fast travel anywhere. The entrance to the lost sector is signified by a tunnel with a reddish-orange glow emanating frrom it.
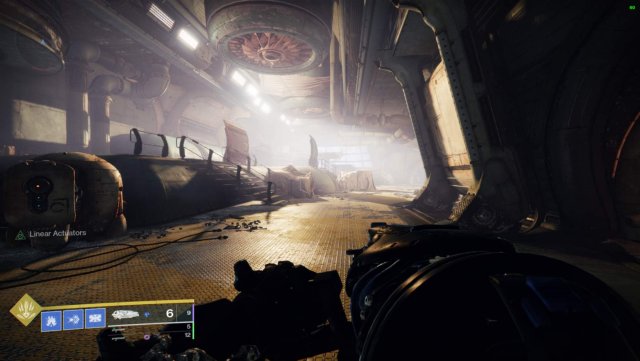
When you enter the lost sector, clear it as you would normally. In fact, you don't have to look for anything until you reach the boss room. It is my personal recommendation that you clear all the adds and kill the boss before you get it to prevent a flinch miss on your last shot (not that it happened to me or anything) but if you are on a time crunch, clearing the boss is NOT required to get this.
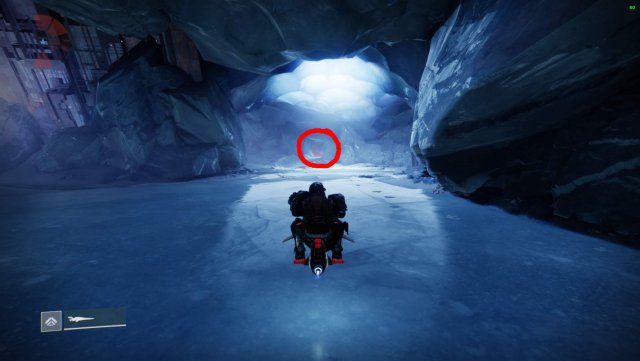
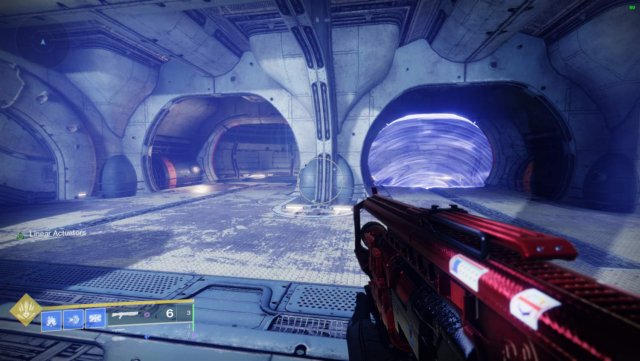
In the center of the boss room, you should see a floating cube surrounded by some pillars. Go up to it and look up, and the third Entropic Shard should be floating in the orange light.
After getting this one, you can go ahead and fast travel to Charon's Crossing, because our next destination is RIIS-Reborn.
Entropic Shard #5: Eventide Ruins
This one is fairly straightforward as well, though it is best to enter Eventide Ruins from Asterion Abyss, as the shard is fairly close to that entrance.

You should see a little mangled mess of steel foundation when you first enter. Approach it.
The 5th Entropic Shard should be nestled up in there.
Up next, the lost sector Bunker E15.
Entropic Shard #6: Bunker E15
Enter the Lost Sector Bunker E15 and clear it as normal until you reach the room where the cyclops spawns.
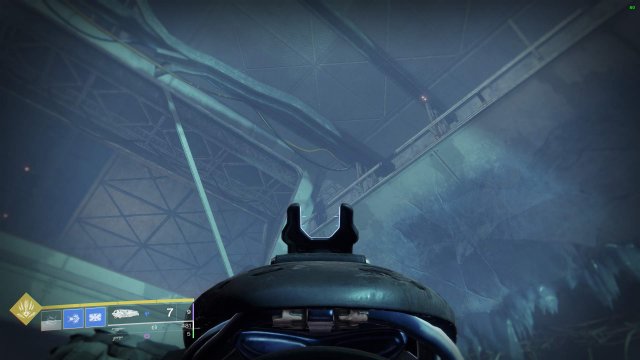
Jump on the catwalk spanning the width of the room, and look back towards where you came, and up into the top right of the room.
The 6th Entropic Shard should be nestled behind some of the steel foundation. It can be a little hard to spot, but in the screenshot my crosshair is directly on it.
After this one, you'll want to make your way towards RIIS-Reborn for the next 3 shards.
Entropic Shard #7: RIIS-Reborn
I honestly didn't pull a map screenshot for this location because if you have Salvation's Grip, you've been to RIIS-Reborn quite a few times. However, if you need it, I do have some directions.
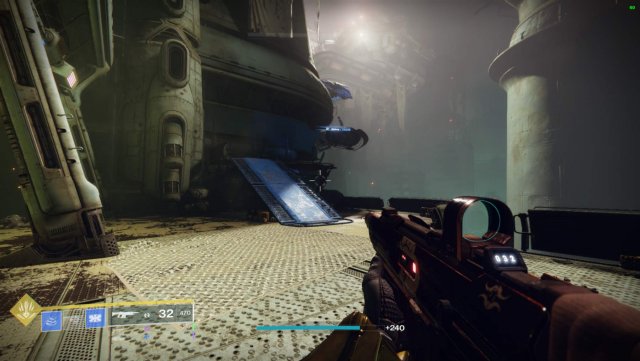
When you first sparrow in, hang right to where my reticle is.
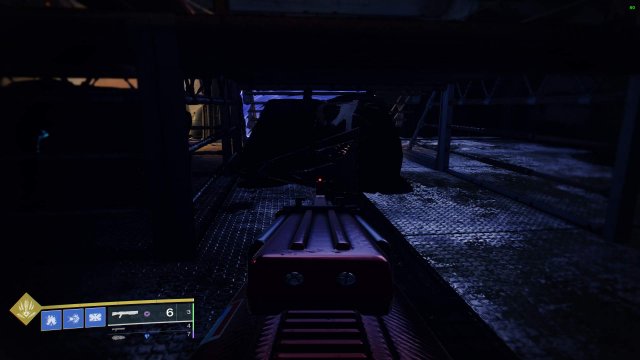
You'll see another glowy orange entrance. Go up the vacuum tube and proceed as normal, as the path is absolutely linear.
When you enter this room, take the door on the right. It should go down rather than up, and should lead you to another set of vacuum tubes. Take these up.
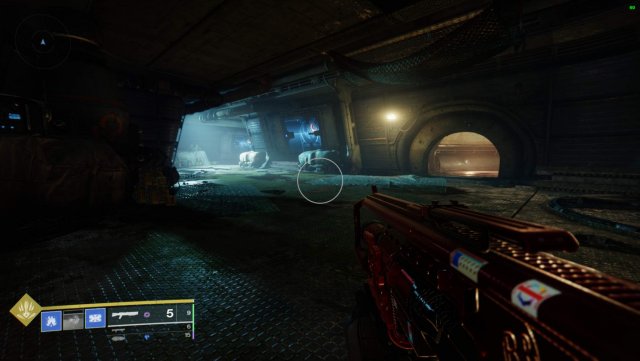
Once you reach the top, don't climb the stairs, but rather walk around the back of them. The 4th Entropic Shard should be right under the stairwell. Important note!! Be sure not to fast travel after getting this shard. You are already on the path to get the fifth one.
I do apologize for the low brightness in the screenshot, but you shouldn't miss it if you just walk around the set of stairs.
Entropic Shard #8: Technocrat's Iron
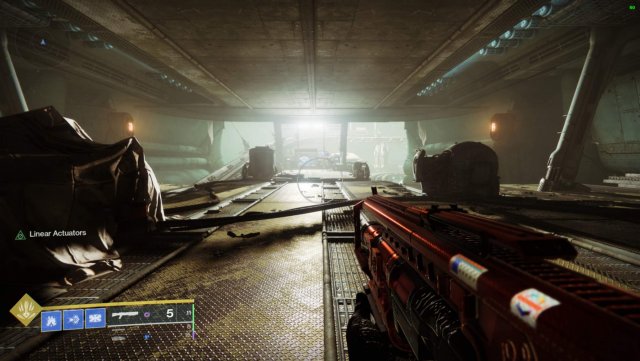
After you get the 4th Entropic Shard, climb the stairs and enter the teleporter, which will lead you to the last one, which is in Technocrat's Iron. As with RIIS-Reborn, this path is fairly linear, but I still have some pictures that may help.
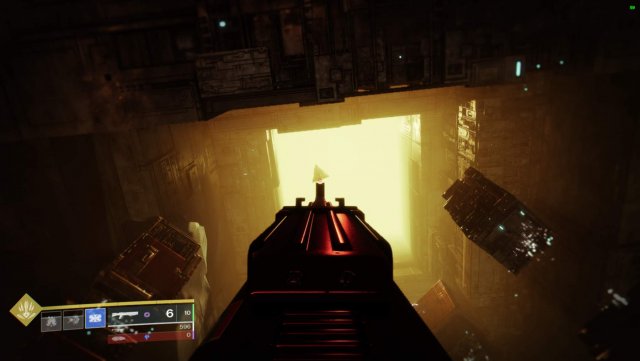
After you enter the teleporter, keep on truckin' until you reach this room.

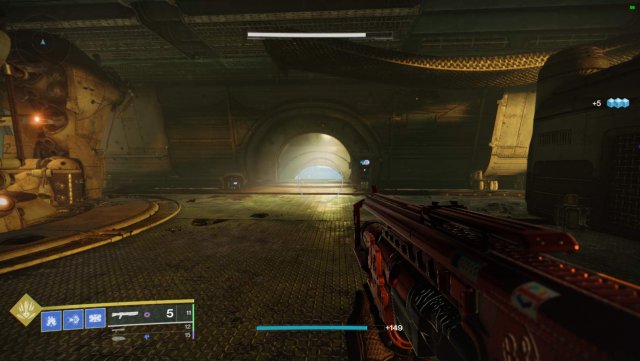
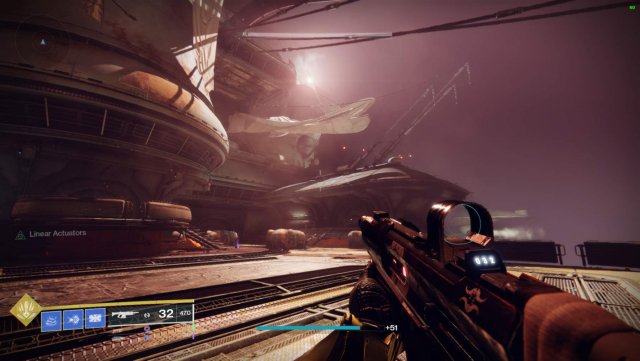
Here, you'll want to hang a left and keep moving. You'll go outside and cross some cables, and then go back into another building.
If you reach this section with the rails, you're on the right track. And you'll also want to take the right track. It isn't necessary, but it will lead you directly to where you need to go without much hassle.
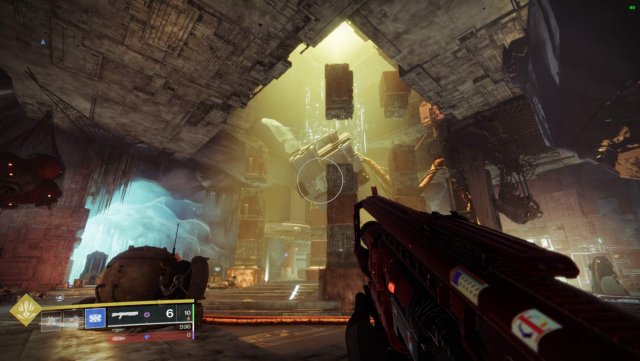
Once you reach the end of the track, you should see this door leading down into the big circular room where you fought a Brig. Enter it, and stop dead in your tracks.
Look up and to the right, close to the top of the pillar. The 5th Entropic Shard should be there.
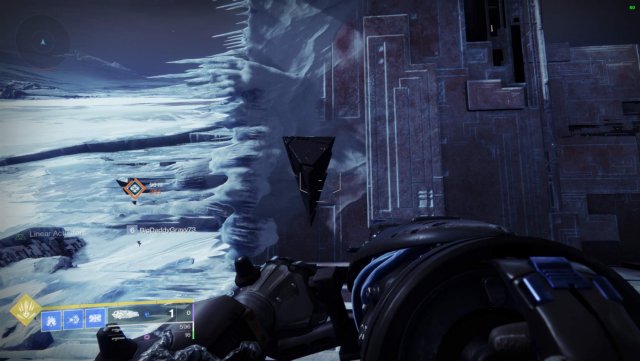
Entropic Shard #9: Kell's Rising
After getting the Shard in Technocrat's Iron, backtrack to the split in the paths. This time, take the one on the right.
You're going to want to follow that path past where you collected the three arc charges from the captains and around the dark city skyline.
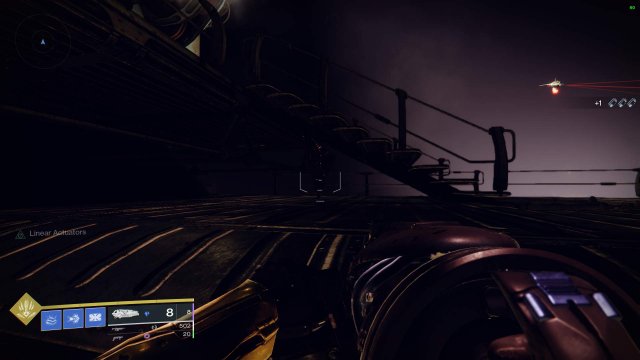
You will eventually reach the area where you fought the Spider Tank, and you'll want to jump up onto the ledge to the right of that area.
Your last Entropic Shard should be right under the first small set of stairs.
(Once again, apologies for the low brightness).
Source: https://gameplay.tips/guides/8892-destiny-2.html
More Destiny 2 guilds
- All Guilds
- Destiny 2 How To Find Halo Weapons December 2021
- Destiny 2 - Prophecy Dungeon Guide
- Destiny 2 - Leviathan Raid Guide (for New Light Players)
- Destiny 2 - How to Reach the Softcap in Beyond Light Fast
- Destiny 2 - Deep Stone Crypt Raid Guide (Beyond Light)
- Destiny 2 - How to Farm a Boss with Nightmare Adds (Fast Method)
- Destiny 2 - Warmind Cell Hunter Build
- Destiny 2 - Where is Xur / Location and Inventory (February 26, 2021)
- Destiny 2 - Where is Xur / Location and Inventory (February 19, 2021)